Embed Size (px)
Citation preview

PK3194_10_06
USER'S GUIDEKaba Lodging Systems
PK3194_11_06 Cover 11/29/06 12:11 PM Page 2
A Publication of:
Kaba Lodging Systems7301 Decarie Blvd.Montreal, QuebecCanada H4P 2G7www.kabalodging.comPrinted in Canada, October 2006
© Kaba Ilco Inc., 2006All rights reserved
No part of this book may be reproduced or transmitted in any form or byany means, electronic or mechanical, including photocopying, recording, or by any information storage and retrieval system, without prior writtenpermission from the publisher.
The information contained in this publication is accurate to the best of Kaba Ilco’s knowledge.
Specifications are subject to change without notice.
PK3194/10/06
Kaba Lodging Systems User’s Guide
PK3194_10_06 11/23/06 10:36 AM Page i

Kaba Lodging Systems
American User’s information – FCC compliance statement
WarningChanges or modifications not expressly approved by the party responsiblefor compliance could void the user’s authority to operate this equipment.
NoteThis equipment has been tested and found to comply with the limits for a Class A digital device, pursuant to part 15 of the FCC Rules. These limits are designed to provide reasonable protection against harmful interference when the equipment is operated in a commercialenvironment. This equipment generates, uses and can radiate radio frequency energy and, if not installed and used in accordance with the instruction manual, may cause harmful interference to radio communications. Operation of this equipment in a residential area is likely to cause harmful interference in which case the user will berequired to correct the interference at his own expense.
This device complies with part 15 of the FCC Rules. Operation is subject to the following two conditions: (1) This device may not cause harmfulinterference, and (2) this device must accept any interference received,including interference that may cause undesired operation.
The user may find the following booklet prepared by the federalCommunications Commission helpful: “How to Identify and Resolve Radio-TV Interference Problems.” This booklet is available from theGovernment Printing Office, Washington, DC, 20402. Stock # 004-000-00345-4.
European User’s information – Declaration of ConformityThis device complies with the EMC Directive 89/336/EEC (amended by92/31/EEC and 93/68/EEC) for a class A digital device. It has been tested and found to comply with EN50081-2: 1993 (EN55011:1991) and EN50082-2:1995 (EN61000-4-2:1995 & ENV50140:1993).
PK3194_10_06 11/23/06 10:36 AM Page ii

User’s Guide iii
1. Introduction
2. The Front Desk Unit
3. Keycard Technology
4. Making Guest Level Keycards
5. Verifying Guest Level Keycards
6. Canceling Guest Level Keycards
7. Special Keycards
8. Property Management System Interface
9. Lock Programming
10. RAC Programming & Reset
11. Auditing Lock & FDU
12. Preventative Maintenance & FDU MenuChart
Table of Contentsat a glance
PK3194_10_06 11/23/06 10:36 AM Page iii
Kaba Lodging Systemsiv
Table of Contents
Introduction
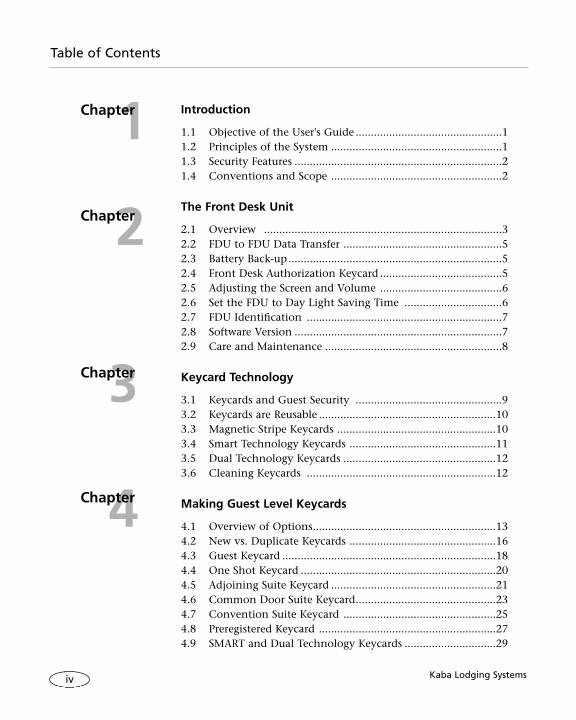
1.1 Objective of the User's Guide ................................................11.2 Principles of the System ........................................................11.3 Security Features ....................................................................21.4 Conventions and Scope ........................................................2
The Front Desk Unit
2.1 Overview ..............................................................................32.2 FDU to FDU Data Transfer ....................................................52.3 Battery Back-up ......................................................................52.4 Front Desk Authorization Keycard ........................................52.5 Adjusting the Screen and Volume ........................................62.6 Set the FDU to Day Light Saving Time ................................62.7 FDU Identification ................................................................72.8 Software Version ....................................................................72.9 Care and Maintenance ..........................................................8
Keycard Technology
3.1 Keycards and Guest Security ................................................93.2 Keycards are Reusable ..........................................................103.3 Magnetic Stripe Keycards ....................................................103.4 Smart Technology Keycards ................................................113.5 Dual Technology Keycards ..................................................123.6 Cleaning Keycards ..............................................................12
Making Guest Level Keycards
4.1 Overview of Options............................................................134.2 New vs. Duplicate Keycards ................................................164.3 Guest Keycard ......................................................................184.4 One Shot Keycard ................................................................204.5 Adjoining Suite Keycard ......................................................214.6 Common Door Suite Keycard..............................................234.7 Convention Suite Keycard ..................................................254.8 Preregistered Keycard ..........................................................274.9 SMART and Dual Technology Keycards ..............................29
1Chapter
2Chapter
3Chapter
4Chapter
PK3194_10_06 11/23/06 10:36 AM Page iv

User’s Guide v
Table of Contents
Verifying Guest Level Keycards
5.1 Using Keycards in Solitaire Locks........................................315.2 Troubleshooting ..................................................................325.3 Reading a Guest Level Keycard............................................335.4 Guest Folio Check................................................................34
Canceling Guest Level Keycards
6.1 Lost or Stolen Keycards ......................................................376.2 Guest Level Reset Keycards..................................................38
Special Keycards
7.1 Bellman's Master Keycard ....................................................417.2 Passage Reset Keycard ..........................................................427.3 Making Special Purpose Keycard ........................................437.4 Making Authorization Keycard ..........................................437.5 Making Lockout Keycard ....................................................447.6 Making Group Lockout Keycard ........................................457.7 Making Passage Keycard ......................................................467.8 Making Staff Keycard ..........................................................477.9 Verifying Staff Keycard ........................................................497.10 Canceling Staff Keycard ......................................................497.11 Lock Battery Test Keycard....................................................51
Property Management System Interface
8.1 Overview ..............................................................................538.2 Entering and Exiting the PMS Interface..............................548.3 Making Guest Level Keycards using the PMS Interface ......568.4 RoomWatch Interface ..........................................................57
5Chapter
6Chapter
7Chapter
8Chapter
PK3194_10_06 11/23/06 10:36 AM Page v
Kaba Lodging Systems
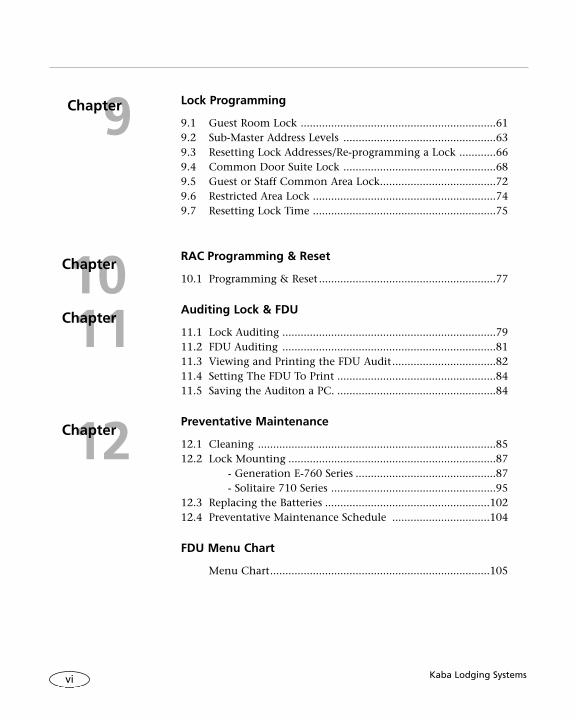
Lock Programming
9.1 Guest Room Lock ................................................................619.2 Sub-Master Address Levels ..................................................639.3 Resetting Lock Addresses/Re-programming a Lock ............669.4 Common Door Suite Lock ..................................................689.5 Guest or Staff Common Area Lock......................................729.6 Restricted Area Lock ............................................................749.7 Resetting Lock Time ............................................................75
RAC Programming & Reset
10.1 Programming & Reset ..........................................................77
Auditing Lock & FDU
11.1 Lock Auditing ......................................................................7911.2 FDU Auditing ......................................................................8111.3 Viewing and Printing the FDU Audit..................................8211.4 Setting The FDU To Print ....................................................8411.5 Saving the Auditon a PC. ....................................................84
Preventative Maintenance
12.1 Cleaning ..............................................................................8512.2 Lock Mounting ....................................................................87
- Generation E-760 Series ..............................................87- Solitaire 710 Series ......................................................95
12.3 Replacing the Batteries ......................................................10212.4 Preventative Maintenance Schedule ................................104
FDU Menu Chart
Menu Chart........................................................................105
vi
10Chapter
11Chapter
12Chapter
9Chapter
PK3194_10_06 11/23/06 10:36 AM Page vi
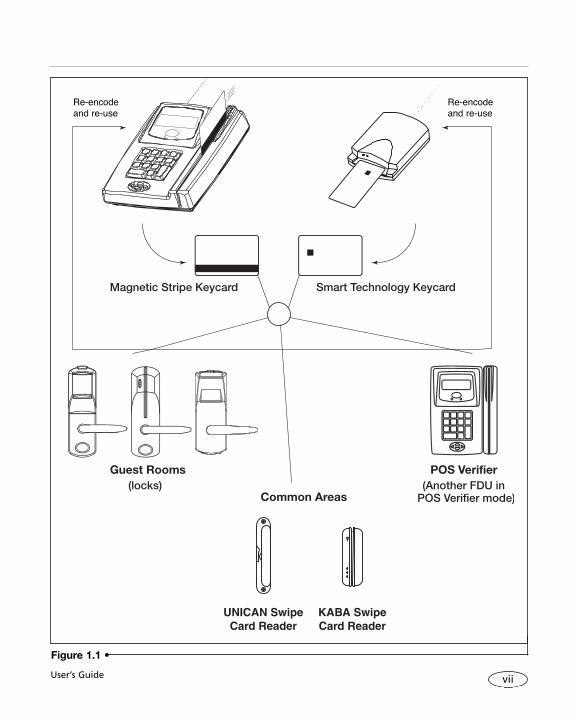
Magnetic Stripe Keycard Smart Technology Keycard
Figure 1.1 •
Re-encodeand re-use
Re-encodeand re-use
User’s Guide vii
PK3194_10_06 11/23/06 10:36 AM Page vii

Kaba Lodging Systemsviii
PK3194_10_06 11/23/06 10:36 AM Page viii

User’s Guide
1.1 Objective of theUser's Guide
This guide is designed to provideclear explanations and easy to follow,step-by-step instructions for allfunctions of the system that arecarried out by Guest ServiceAttendants, Housekeeping;maintenance; managers.
This guide is meant to complementour on-site training program andthe Kaba Ilco Lodging AccessControl System Reference Manual.We hope you find it helpful andeasy to use. Your comments arewelcome.
1.2 Principles of theSystem
The Kaba Ilco Lodging AccessControl System (also called “thesystem” in this booklet) useselectronic locks that work withkeycards instead of keys.
The Front Desk Unit (FDU) is thetool that is used to make keycardsfor guests when they register. TheFDU is a dedicated computerconsole with its own software formanaging the system.
From the point of view of theguests, keycards work just like keys,
giving them secure access to theirroom when they insert them in thelok. In addition, keycards can becustomized when they are made, togive guests access to other areassuch as a spa, parking and so on, orto add special functions on thekeycard such as the Folio Number,Salesman’s Lockout or theDisability Option. Because of theflexibility of the system, the guestonly needs to carry one keycard foraccess to all of these doors andfeatures.
For the Guest Service Attendants,using the system means that,instead of handing the guest ametal key from a rack, they makea new keycard for each guest whoregisters, with the options that theguest is entitled to use. The newkeycard contains a unique,encrypted code which opens onlythe locks which the guest isauthorized to access.
There are three types of keycards inthe Solitaire system:
(i) magnetic stripe; (ii) Smart Technology (or
SMARTKeycards); and (iii) dual technology, with both
a magnetic stripe and a Smart Technology chip.
1
Introduction1Chapter
PK3194_10_06 11/23/06 10:36 AM Page 1

Kaba Lodging Systems
You can read more aboutSMARTKeycards in section 3.4.
All keycards are made using theFront Desk Unit. There is a built-inmagnetic stripe encoder in theFDU, but an external Smart Tech-nology encoder is required to makeSMARTKeycards or dual technologykeycards.
Figure 1.1 (opposite) illustrates howa keycard made using the FDU canbe used in the guest room door,Guest Common Area doors andother FDUs operating as Point-Of-Sale (POS) verfiers in boutiques,restaurants, and so on. The samekeycard is re-encoded and re-usedfor another guest (in any room)after it is returned. (SMARTKeycardscan only be used in SolitaireSMARTlocks and card readers, but mag-netic stripe and dual technologykeycards can be used in any lock orcard reader in the system).
1.3 Security FeaturesAs soon as the keycard is used inthe lock by the guest, all previousGuest level keycards are cancelled,which leads to a high level ofsecurity (the equivalent ofchanging the lock for every guest).
In addition, every use of the FDUor a lock is audited, and can beprinted out as proof of who entereda room, and who made the keycardthat let them in. Each employeemust swipe a valid Authorizationkeycard in the FDU before they can
make or read a keycard, and thisinformation goes into the audittrail. The audit trail reveals the dateand time, the identity of the user,the identity of the issuer of theirkeycard, and the operationsperformed.
NEVER lend your Front DeskAuthorization keycard to anyone,and never make inappropriate useof any FDU, lock or keycard.
ALWAYS log off the FDU after youfinish using it, so that no one elsecan make keycards using yourauthorization.
1.4 Conventionsand Scope
The abbreviation for "Front Desk Unit"used in this guide is FDU.
The abbreviation for “Guest ServiceAttendant” is GSA.
Symbols shown inside < > representkeys on the FDU keypad. For example,< ↵ > represents the enter key atthe bottom right of the keypad.
This guide covers version 6.5 of theFDU software. Some functions ormenu choices may differ on oldersystems.
2
PK3194_10_06 11/23/06 10:36 AM Page 2

2
User’s Guide 3
TheFront Desk Unit
Chapter
1. FDU - Front Desk Unit
2. LCD Screen
3. Magnetic Stripe Encoder
4. Magnetic Stripe Keycard
5. Status LEDs
6. Keypad
7. Cursor Keys
8. Serial Ports
9. Parallel Port
10. 9 VDC Jack
11. SMARTKeycard
12. External SMART Encoder andStand
13. Power Supply for FDU
14. Power Supply for SMARTEncoder
13
14
8 9 10
1
2
3
412
11
Rear View
A B
Figure 2 •
FDU 780 and Accessories
5
6
7
PK3194_10_06 11/23/06 10:36 AM Page 3

Kaba Lodging Systems
2.1 OverviewThe FDU (Front Desk Unit) is a self-contained computer designedspecifically to run the system. TheFDU console includes an LCD screen,a keypad, and a magnetic stripe key-card encoder. For use with SolitaireSMART locks, an external SmartTechnology encoder can beconnected to Serial Port A at the backof the FDU. The FDU operates on9VDC supplied by the power packprovided by Kaba Ilco.
The menus available to the user aredisplayed on the FDU screen.
To scroll through the menus, pressthe direction keys <����> at thebottom of the keypad.
To make a menu selection or enterinformation in the FDU, use thenumber keys and the enter key < ↵ >.The <C> key is used to cancel anoperation or move backward throughthe menus, and the <F> key is usedto access special functions.
There may be more than one FDU ina hotel, in which case all FDUs areequivalent, and any FDU can beused to register a guest.
The FDU can operate in ManualMode, in PMS (Property Manage-ment System) Interface Mode, or inPOS (Point of Sale) Verifier Mode.With the exception of Chapter 8dealing with PMS Interface Mode,the instructions in this guide referto the FDU's Manual Mode.
4
Figure 2.1 •
FDU features available to Guest Service Attendants and management.
Encode Guest level keycards
Verify or read back Guest level keycards
Encode Reset keycards and Battery Test keycards
Management level functions:• encode Staff level Entry and Reset
keycards• encode authorization keycards• choose FDU settings• view or print the audit
PK3194_10_06 11/23/06 10:36 AM Page 4

User’s Guide
2.2 FDU to FDU DataTransfer
Connect the DB9 cable to:
<A> on Transmitter
<B> on Receiver
Transmitter Unit
Swipe a Grand Master Authorizationkeycard throughthe FDU.
Press 4 then <ENTER>
Press 2 then <ENTER>
Press 2 then <ENTER>
Press <ENTER> again.
All FDU's must always besynchronized (same time & date) @least once a year.
Receiver Unit
Swipe a Grand Master Authorizationkeycard throughthe FDU.
Press 4 then <ENTER>
Press 2 then <ENTER>
Press 1 then <ENTER>
Press <ENTER> again.
2.3 Battery Back-upThe FDU can operate for up to 8hours without external power, usingits internal rechargeable batteryback-up. The FDU switches to thebattery back-up automatically whenexternal power is interrupted. Whenthe battery back-up is low, an alarmsounds to alert you that the FDUwill shut itself off. The alarm
continues to sound once everyminute, until the FDU shuts off.
When the battery back-up alarmsounds, stop using the FDU andconnect the FDU to its externalpower supply immediately.
When running on external power,the green indicator LED on the FDUdisplay will be lit. When runningon internal batteries, the red LEDwill be lit.
2.4 Front DeskAuthorizationKeycard
The FDU will not operate until anAuthorization keycard is swipedthrough the magnetic stripe encoder.The FDU will then offer menu choicesfor making keycards, etc.
Using a Front Desk Authorizationkeycard, GSAs can make a Guestlevel keycard or carry out the otherprocedures in this guide, on any FDUin the facility.
IMPORTANT: For security purposes,all transactions on the FDU areaudited, showing the authorizationkeycard used, the transactiondetails, date and time.
DO NOT lend your Authorizationkeycard to anyone.
DO NOT leave your Authorizationkeycard unattended anywhere.
DO NOT leave the FDU unattendedor allow another person to use it,
5
PK3194_10_06 11/23/06 10:36 AM Page 5

Kaba Lodging Systems
without first logging off yourauthorization by pressing <C> untilyou see the message "InsertAuthorization".
All magnetic stripe keycards,including Guest level keycards andAuthorization keycards, can beerased by strong magnetic fields.
2.5 Adjusting theScreen andVolume
Adjusting the Contrast
1. Press any key to activate theFront Desk Unit.
2. To adjust the contrast, press < >, then repeatedly press< ▲ > or < ▼ > within 5 secondintervals until you reach thecontrast you want.
3. To end the contrast adjustment,press < ↵ > or wait 5 seconds.
5. To set the contrast to its default,press < >, then press <2>within 5 seconds.
Turning the BacklightON/OFF
1. Press any key to activate theFront Desk Unit.
2. To turn the backlight ON, press< >, then press <1> within5 seconds.
3. To turn the backlight OFF, press< >, then press <0> within5 seconds.
Turning the Sound ON/OFF
1. Press any key to activate theFront Desk Unit.
2. To turn the sound ON, press<F>, followed by < >, thenpress <1> within 5 seconds.
3. To turn the sound OFF, press <F>,followed by < >, then press<0> within 5 seconds.
Adjusting the Volume
1. Ensure the sound has beenturned on.
2. Press any key to activate theFront Desk Unit.
3. To adjust the volume, press <F>,followed by < >, thenrepeatedly press < ▲ > or < ▼ > within 5 second intervalsuntil you reach the volume youwant.
4. To end the volume adjustment,press < ↵ > or wait 5 seconds.
2.6 Set the FDU toDay Light SavingTime
CURRENT TIME
1. Swipe a Grand MasterAuthorization keycard throughthe FDU.
2. Press 5 and ENTER.
3. Press 1 and ENTER.
4. Press 10 and ENTER
5. Use the right Arrow key to movethe cursor to adjust the hoursand ENTER
6
PK3194_10_06 11/23/06 10:36 AM Page 6
User’s Guide
6. Press “C” twice
7. Press 1 to save the changes
Note: You can verify if theTime has changed byPressing from MainMenu “F” then 1. Noticethe presence of theAsterisk after theminutes.
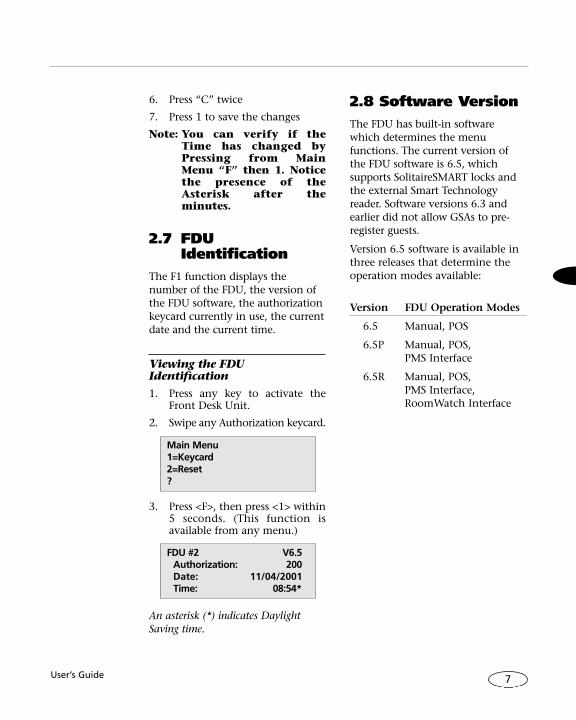
2.7 FDUIdentification
The F1 function displays thenumber of the FDU, the version ofthe FDU software, the authorizationkeycard currently in use, the currentdate and the current time.
Viewing the FDUIdentification
1. Press any key to activate theFront Desk Unit.
2. Swipe any Authorization keycard.
3. Press <F>, then press <1> within5 seconds. (This function isavailable from any menu.)
An asterisk (*) indicates DaylightSaving time.
2.8 Software VersionThe FDU has built-in softwarewhich determines the menufunctions. The current version ofthe FDU software is 6.5, whichsupports SolitaireSMART locks andthe external Smart Technologyreader. Software versions 6.3 andearlier did not allow GSAs to pre-register guests.
Version 6.5 software is available inthree releases that determine theoperation modes available:
Version FDU Operation Modes
6.5 Manual, POS
6.5P Manual, POS, PMS Interface
6.5R Manual, POS, PMS Interface, RoomWatch Interface
FDU #2 V6.5 Authorization: 200Date: 11/04/2001Time: 08:54*
Main Menu1=Keycard2=Reset?
7
PK3194_10_06 11/23/06 10:36 AM Page 7
Kaba Lodging Systems
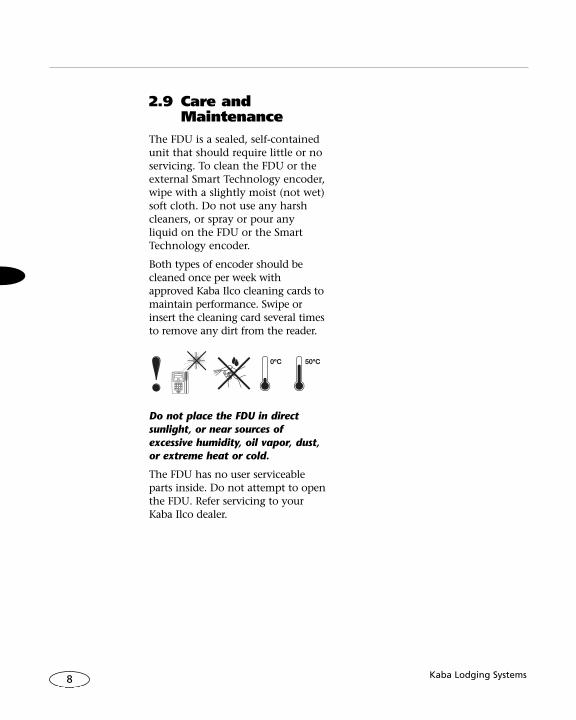
2.9 Care andMaintenance
The FDU is a sealed, self-containedunit that should require little or noservicing. To clean the FDU or theexternal Smart Technology encoder,wipe with a slightly moist (not wet)soft cloth. Do not use any harshcleaners, or spray or pour anyliquid on the FDU or the SmartTechnology encoder.
Both types of encoder should becleaned once per week withapproved Kaba Ilco cleaning cards tomaintain performance. Swipe orinsert the cleaning card several timesto remove any dirt from the reader.
Do not place the FDU in directsunlight, or near sources ofexcessive humidity, oil vapor, dust,or extreme heat or cold.
The FDU has no user serviceableparts inside. Do not attempt to openthe FDU. Refer servicing to yourKaba Ilco dealer.
8
PK3194_10_06 11/23/06 10:36 AM Page 8
3
User’s Guide
3.1 Keycards andGuest Security
Guests who are curious about thesecurity of the system should beinformed of the following securityprinciples:
• The information on the keycardis encrypted so that their roomnumber cannot be determinedfrom their card. A would-beintruder would have no reason toassociate their card with theirroom, unless the keycard is left inthe lock or dropped in an obviouslocation.
NEVER identify a keycard bywriting the room number that itopens on the card.
• Guests should treat their keycardas they would any key, keeping itsecure at all times.
• When a new Guest level keycardis used in the guest room lock, allprevious Guest level keycards areautomatically cancelled. In otherwords, as soon as a new guestchecks in and opens the door totheir room, previous guests cannotreturn to the room, and the newguest holds the only circulatingGuest level keycard. The keycard isdate and time stamped to make thispossible.
If a guest room or suite has morethan one door, new guests MUSTswipe their keycard in each lockthat leads to their room, to cancelthe previous keycard in all locks.
• Kaba Ilco electronic locks cannotbe "picked" in the traditionalsense, and offer the highest qualityof locking hardware, providingguests with added security fromunauthorized entry to their room.
9
KeycardTechnology
Chapter
Note for GSAs: When more thanone guest is occupying a room,you should encode all thekeycards needed by the guests atthe same time (request thenumber of copies required beforeyou encode). Otherwise, if thekeycards are encoded in separatetransactions of the FDU, the mostrecently encoded one will cancelthe older ones in the lock.
If you wish to make an additionalkeycard for the current guests,make a duplicate keycard thatwill not cancel the other validGuest level keycards they alreadyhold for the lock. For moreinformation, see section 4.2“New vs. Duplicate Keycards”.
PK3194_10_06 11/23/06 10:36 AM Page 9
Kaba Lodging Systems
3.2 Keycards areReusable
Both magnetic stripe and SmartTechnology keycards are designed tobe used over and over again. Wearand tear on a keycard from a singleguest's stay should be minimal.
Both types of keycard should becleaned if dirty with approvedKaba Ilco cleaning supplies, and re-used.
Badly damaged or bent keycardswhich may not insert smoothly inthe lock, or whose informationcarrying system (magnetic stripe orSmart Technology contacts) is tooworn, should be discarded.
Always destroy discarded keycardsto prevent unauthorized use.
3.3 Magnetic StripeKeycards
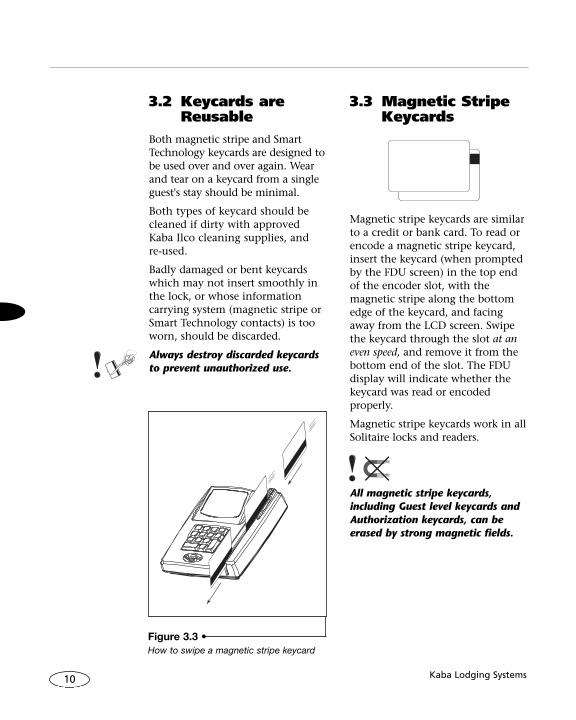
Magnetic stripe keycards are similarto a credit or bank card. To read orencode a magnetic stripe keycard,insert the keycard (when promptedby the FDU screen) in the top endof the encoder slot, with themagnetic stripe along the bottomedge of the keycard, and facingaway from the LCD screen. Swipethe keycard through the slot at aneven speed, and remove it from thebottom end of the slot. The FDUdisplay will indicate whether thekeycard was read or encodedproperly.
Magnetic stripe keycards work in allSolitaire locks and readers.
All magnetic stripe keycards,including Guest level keycards andAuthorization keycards, can beerased by strong magnetic fields.
10
Figure 3.3 •How to swipe a magnetic stripe keycard
PK3194_10_06 11/23/06 10:36 AM Page 10

User’s Guide 11
3.4 Smart TechnologyKeycards
Smart Technology keycards (or"SMARTKeycards") contain amemory chip, which is read andwritten by the external SmartTechnology encoder, or aSolitaireSMART lock. SMARTKeycardsare a very secure technology, whichis virtually impossible to tamper orduplicate, and provide the addedpotential to carry customer paymentinformation or other data when theappropriate equipment becomesavailable in the future.
Version 6.4 or higher of the FDUsoftware is required to encodeSMARTKeycards. The FDU auto-matically detects the presence of theexternal Smart Technology encoder,and will only prompt the user toinsert the SMARTKeycard if theencoder is connected to Serial Port Aat the back of the FDU. (The encodermust be connected before attemptingto make a SMARTKeycard or dualtechnology keycard.)
SMARTKeycards have the sameapplications, Authorization keycardrequirements, expiry and options asdescribed for the correspondingmagnetic stripe keycards in sections4.3 to 4.8. SMARTKeycards are
encoded similarly to the proceduresfor magnetic stripe keycards, withonly minor differences.
To read or encode a SMARTKeycard,insert it in the external SmartTechnology encoder, with thecontacts facing up. The card willsnap gently in place. Remove thecard when prompted by the FDU.
SMARTKeycards work inSolitaireSMART locks andreaders only. If the keycardmust also work in magneticstripe locks and card readers,encode a dual technologykeycard (see section 3.5).
SMARTKeycards may notfunction correctly when wet. Donot insert a wet SMARTKeycardin a lock or reader.
Figure 3.4 •How to insert a SMARTKeycard in the external Smart Technology encoder
PK3194_10_06 11/23/06 10:36 AM Page 11
Kaba Lodging Systems12
3.5 Dual TechnologyKeycards
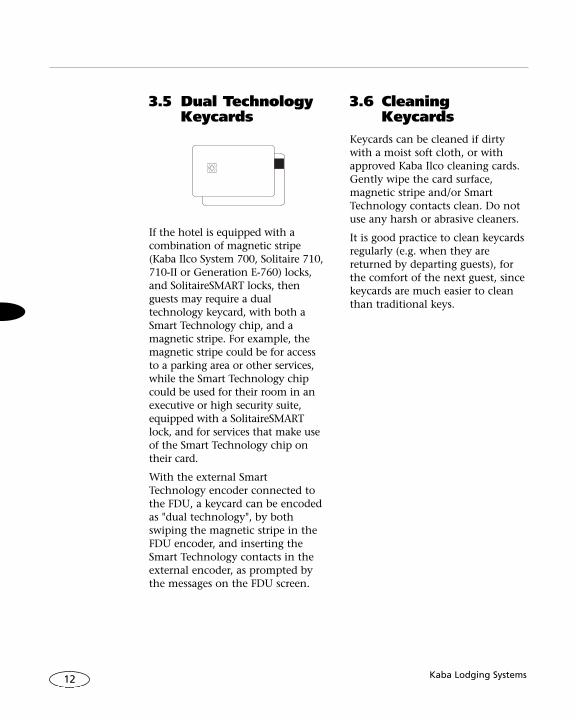
If the hotel is equipped with acombination of magnetic stripe(Kaba Ilco System 700, Solitaire 710,710-II or Generation E-760) locks,and SolitaireSMART locks, thenguests may require a dualtechnology keycard, with both aSmart Technology chip, and amagnetic stripe. For example, themagnetic stripe could be for accessto a parking area or other services,while the Smart Technology chipcould be used for their room in anexecutive or high security suite,equipped with a SolitaireSMARTlock, and for services that make useof the Smart Technology chip ontheir card.
With the external SmartTechnology encoder connected tothe FDU, a keycard can be encodedas "dual technology", by bothswiping the magnetic stripe in theFDU encoder, and inserting theSmart Technology contacts in theexternal encoder, as prompted bythe messages on the FDU screen.
3.6 CleaningKeycards
Keycards can be cleaned if dirtywith a moist soft cloth, or withapproved Kaba Ilco cleaning cards.Gently wipe the card surface,magnetic stripe and/or SmartTechnology contacts clean. Do notuse any harsh or abrasive cleaners.
It is good practice to clean keycardsregularly (e.g. when they arereturned by departing guests), forthe comfort of the next guest, sincekeycards are much easier to cleanthan traditional keys.
PK3194_10_06 11/23/06 10:36 AM Page 12

4
User’s Guide
4.1 Overview ofOptions
The information encoded on thekeycard includes the room or suitenumber, the time it was created, thetime it will expire, and a variety ofoptions explained below. Theseoptions are available when encodinga Guest level keycard, except for OneShot keycards (i.e. available forGuest, Adjoining Suite, CommonDoor Suite and Convention Suite).
Each option must be enabled by theSolitaire System Administrator,using a Grand Master levelAuthorization keycard. If the optionis not enabled, it will not appear onthe FDU screen while keycards arebeing made, and the default valuefor that feature as selected by thesystem administrator will auto-matically be encoded on the keycard.
Keycard Expiry
The expiry date and time is encodedon each Guest level keycard. Key-cards are valid until the expiry time,or until cancelled by a more recentGuest level keycard or theappropriate Reset keycard (seeChapter 6. “Canceling Guest LevelKeycards”).
Selectable Expiry
As part of the FDU setup, theSystem Administrator specifies thedefault expiry of each type ofkeycard.
Variable Expiry
If the System Administrator hasenabled the Variable Expiry feature,the following screen appears, andyou can use the default expiry, orenter a custom expiry.
The time on the right (12:00 in theexample) is the default check-outtime set by the SystemAdministrator.
You can change the number ofnights and/or the check-out time ifdesired. Type the new number ofnights and the check-out time.(Use the direction keys to moveleft and right. )
For a stay of less than 24 hours,type 0 nights, and enter a check-out time that is later than the cur-rent time (e.g. 18:00).
Expiry 1 nights 12:00
Selected expiry:03/15/2002
13
Making GuestLevel Keycards
Section
PK3194_10_06 11/23/06 10:36 AM Page 13

Kaba Lodging Systems14
The date at the bottom left(03/15/2002 in the example) is thedate on which the keycard willexpire, at the check-out time asentered.
Press < ↵ > when done to con-tinue.
Guest Common Areas
The System Administrator canassign up to 8 Guest CommonAreas, such as a pool, parking,elevators, etc. These are lowsecurity zones that may includeservices for which the guest haspaid an extra fee.
Each Guest Common Area is set toYES, NO or Auto by the SystemAdministrator. When it is set toYES, the FDU will ask whether toinclude the common area beforemaking a Guest level keycard. Forexample:
Press 1 to add the Guest CommonArea to the keycard, or 0 to skipthe Guest Common Area.
Do not press < ↵ > .
Salesman's Lockout
The Salesman's Lockout featureoffers increased protection for theguest's privacy and valuables.When added to the guest's keycard,the guest can control staff access totheir room by locking out all buttheir own keycard and theemergency keycard when they areaway from their room.
Note: Not available on GenerationE-760 locks. This option can beencoded on the keycard, but will haveno effect if the guest room door has aGeneration E-760 lock.
To activate the Salesman's lockoutfunction, a guest simply leavestheir room and closes the door,then swipes their keycard withoutturning the handle. (Only if thekeycard has the feature on it).
The Salesman's Lockout is like anelectronic deadbolt, and is anexample of a feature made possibleby using keycards instead oftraditional keys.
The Salesman's Lockout feature isset to YES, NO or Auto by theSystem Administrator. When it isset to YES, the FDU will give thefollowing prompt before making aGuest level keycard:
Common Area #11=YES0=NO?
PK3194_10_06 11/23/06 10:36 AM Page 14

Press 1 to add the Saleman’sLockout to the keycard, or 0 toskip this feature.
Do not press < ↵ > .
Guest Folio Number
Some hotels use a folio number totrack guest preferences, or to postcharges from Point-of-Sale locationssuch as restaurants, bars, casinos orother paying services to the correctguest account. If folio numbers areenabled by the SystemAdministrator, enter the guest'sfolio number of up to 9 digits (upto 19 digits for the FDU 780-2)when making each Guest levelkeycard:
Type the folio number (max. 19digits, depending on the FDUmodel) if desired.
Press < ↵ > to continue.
Disability Option
New in Version 6.5 and availableon Generation E-760 locks only,the Disability Option changes thetime delay during which the doorcan be opened after a valid Guestkeycard is swiped from 4 seconds to15 seconds, to assist guests whomay have difficulty turning thehandle.
This option not only applies toelderly or disabled patrons, but canalso potentially be of assistance tofamilies with young children, orguests who frequently have theirhands full when returning to theirroom.
If enabled by the System Admin-istrator, you can add the Disabilityoption (15 second delay to opendoor) to the keycard as follows:
Press 1 to add the DisabilityOption to the keycard, or 0 to skipthis feature.
Do not press < ↵ > .
The Disability Option has no effectwhen the keycard is used in locks otherthan the Generation E-760 and relatedmodels.
Disability Option1=YES0=NO?
Folio Number?120719303412
Salesman lockout1=YES0=NO?
User’s Guide 15
PK3194_10_06 11/23/06 10:36 AM Page 15
Kaba Lodging Systems16
4.2 New vs. DuplicateKeycards
The FDU can make New orDuplicate keycards. When making aGuest level keycard, the followingprompt will always appear on theFDU screen after the room or suitenumber has been chosen:
Select 1 to make New keycards or0 to make Duplicate keycards.
Do not press < ↵ > .
New Keycards
New keycards cancel all previousGuest level keycards when used inthe guest room lock. The lockchecks the creation date and timeof the keycard, and remembers themost recent keycard only.
When a guest registers, thenumber of keycards needed by theguest's party are encoded together,so that they are all identical Newkeycards. (For example, a couplestaying in a double room wouldreceive two identcial New keycardsfor the door to the room).
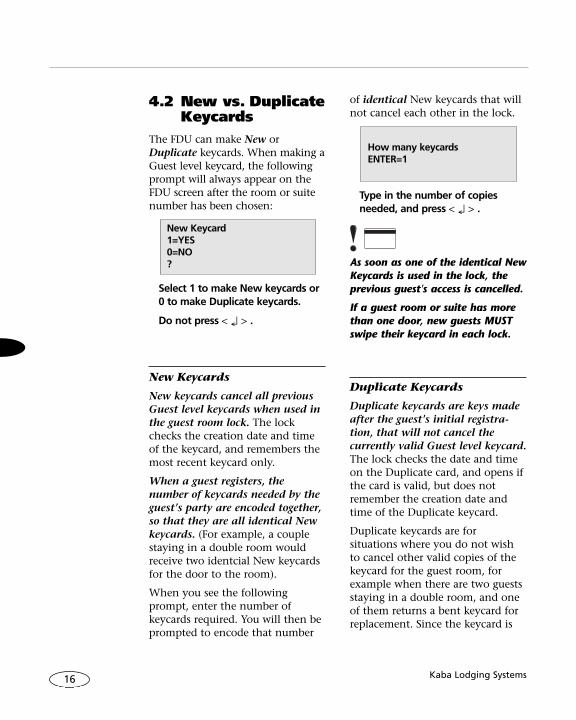
When you see the followingprompt, enter the number ofkeycards required. You will then beprompted to encode that number
of identical New keycards that willnot cancel each other in the lock.
Type in the number of copiesneeded, and press < ↵ > .
As soon as one of the identical NewKeycards is used in the lock, theprevious guest's access is cancelled.
If a guest room or suite has morethan one door, new guests MUSTswipe their keycard in each lock.
Duplicate Keycards
Duplicate keycards are keys madeafter the guest's initial registra-tion, that will not cancel thecurrently valid Guest level keycard.The lock checks the date and timeon the Duplicate card, and opens ifthe card is valid, but does notremember the creation date andtime of the Duplicate keycard.
Duplicate keycards are forsituations where you do not wishto cancel other valid copies of thekeycard for the guest room, forexample when there are two guestsstaying in a double room, and oneof them returns a bent keycard forreplacement. Since the keycard is
How many keycardsENTER=1
New Keycard1=YES0=NO?
PK3194_10_06 11/23/06 10:36 AM Page 16

User’s Guide 17
not lost, it can be destroyed andreplaced with a duplicate keycardthat will not cancel the otherguest's access.
Similarly, if an additional guestneeds to be added to an existingregistration for which Guest levelkeycards are already prepared, forexample to a Convention Suite,this can be accomplished issuing aduplicate keycard that does notcancel other users' access.
Another example is if one of agroup of guests who hold keycardsfor a room or suite needs anadjustment to the options on theirkeycard. (E.g. adding or removingGuest Common Areas, expandingan Adjoining Suite to include more
rooms for certain guests only, etc.)Instead of recalling and re-encodingall of the circulating keycards forthe room or suite, simply retrievethe affected guest’s keycard and re-encode it as a duplicate for theappropriate room(s), with thedesired options.
Some of the situations in whichNew or Duplicate keycards areappropriate are listed in Table 4.2below.
Situation
New guest registrationStolen keycard*Lost keycard*Replacement keycard
Add guests to an existingregistration
Change options for one guestwhen other guests hold validkeycards for the same room orsuite
Keycards to Issue
NEWNEWNEWDUPLICATE
DUPLICATE
DUPLICATE
Table 4.2: When to use New and Duplicate Keycards
* For specific information on lost or stolen keycards, refer to section 6.1
PK3194_10_06 11/23/06 10:36 AM Page 17

Kaba Lodging Systems18
4.3 Guest Keycard
Application:
Opens the lock on the door or doorsthat lead to an area that is normallyrented as a single unit (room, suiteor apartment).
Example:
(A) Single room with a single door(B) Single room with multiple doors
Expiry:
From 1 hour to 2730 nights
Options:
Variable Expiry, Guest CommonAreas, Salesman's Lockout, FolioNumber, Disability Option
Scenario:
Make two identical New Guestkeycards for guest room #1101.
Step-by-Step Instructions:
1. Press any key to activate theFront Desk Unit.
2. Swipe a Front Desk Author-ization keycard through theFront Desk Unit.
3. Enter 1 to select the Keycardmenu, then press < ↵ >.
Main Menu:1 = Keycard2 = Reset?
102 103 104 105 106 107
108
109
110
111112113114115117
116
118
119
120
121
122
123 101
PK3194_10_06 11/23/06 10:36 AM Page 18

User’s Guide
4. Enter 1 to select the Guestoption, then press < ↵ >.
5. Enter the room number (e.g.1101), then press < ↵ >.
6. Enter 1 to select the NewKeycard option.
A series of option menus mayappear. Make the changes, if necessary (see sections 4.1 and4.2).
Example: Accept the defaultexpiry, and add Guest CommonArea #1 to the keycard:
To accept the default expiry,press < ↵ >. (OR, to change thenumber of nights and the check-out time, use the direction keysand the number keys. Changethe desired information, thenpress < ↵ >.)
Press 1 to add GCA #1 to thekeycard.
7. When all of the other optionshave been entered, the follow-ing screen appears:
Enter 2 (if you want two key-cards), then press < ↵ >.
8. Swipe a blank keycard throughthe Front Desk Unit encoder.
9. Swipe a second blank keycardthrough the Front Desk Unitencoder.
You now have two identical, newGuest keycards for room #1101.
ENCODING SUCCESSFUL
Guest Key #1101Insert blankKeycard #2
Guest Key #1101Insert blankKeycard #1
How many keycardsENTER = 1
Common Area #11=YES0=NO?
Expiry 1 nights 12:00
Selected expiry:03/15/2002
New keycard1 = YESØ = NO?
Room number?
Keycard:1 = Guest2 = One Shot?
19
PK3194_10_06 11/23/06 10:36 AM Page 19
Kaba Lodging Systems
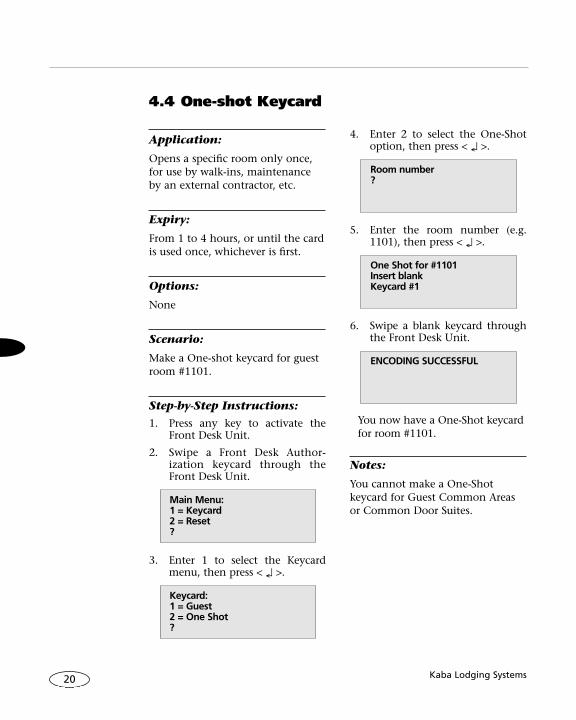
4.4 One-shot Keycard
Application:
Opens a specific room only once,for use by walk-ins, maintenanceby an external contractor, etc.
Expiry:
From 1 to 4 hours, or until the cardis used once, whichever is first.
Options:
None
Scenario:
Make a One-shot keycard for guestroom #1101.
Step-by-Step Instructions:
1. Press any key to activate theFront Desk Unit.
2. Swipe a Front Desk Author-ization keycard through theFront Desk Unit.
3. Enter 1 to select the Keycardmenu, then press < ↵ >.
4. Enter 2 to select the One-Shotoption, then press < ↵ >.
5. Enter the room number (e.g.1101), then press < ↵ >.
6. Swipe a blank keycard throughthe Front Desk Unit.
You now have a One-Shot keycardfor room #1101.
Notes:
You cannot make a One-Shotkeycard for Guest Common Areasor Common Door Suites.
ENCODING SUCCESSFUL
One Shot for #1101Insert blankKeycard #1
Room number?
Keycard:1 = Guest2 = One Shot?
Main Menu:1 = Keycard2 = Reset?
20
PK3194_10_06 11/23/06 10:36 AM Page 20
User’s Guide
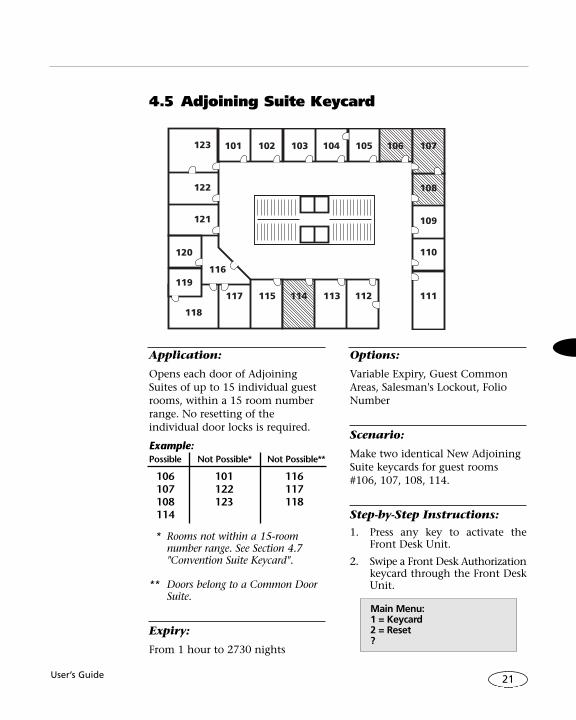
Application:
Opens each door of AdjoiningSuites of up to 15 individual guestrooms, within a 15 room numberrange. No resetting of theindividual door locks is required.
Example:Possible Not Possible* Not Possible**
106 101 116107 122 117108 123 118114
* Rooms not within a 15-roomnumber range. See Section 4.7"Convention Suite Keycard".
** Doors belong to a Common Door Suite.
Expiry:
From 1 hour to 2730 nights
Options:
Variable Expiry, Guest CommonAreas, Salesman's Lockout, FolioNumber
Scenario:
Make two identical New AdjoiningSuite keycards for guest rooms#106, 107, 108, 114.
Step-by-Step Instructions:
1. Press any key to activate theFront Desk Unit.
2. Swipe a Front Desk Authorizationkeycard through the Front DeskUnit.
Main Menu:1 = Keycard2 = Reset?
21
101 102 103 104 105 106 107
108
109
110
111112113114115117
116
118
119
120
121
122
123
4.5 Adjoining Suite Keycard
PK3194_10_06 11/23/06 10:36 AM Page 21

Kaba Lodging Systems
3. Enter 1 to select the Keycardmenu, then press < ↵ >.
4. Enter 3 to select the AdjoiningSuite option, then press < ↵ >.
5. Enter the first room number(e.g. 106), then press < ↵ >. (Youmust start with the lowest roomnumber.)
6. Enter the remaining roomnumbers (e.g. 107, 108, 114),and press < ↵ > after each one.
7. Press < ↵ > after the last room #.
8. Enter 1 to select the NewKeycard option.
A series of option menus mayappear. Make the changes, if
necessary (see sections 4.1 and4.2).
9. Enter 2, then press < ↵ >.
10. Swipe a blank keycard throughthe Front Desk Unit.
11. Swipe a second blank keycardthrough the Front Desk Unit.
You now have two identical NewAdjoining Suite keycards.
Notes:
You must start with the lowestroom number. The remaining roomnumbers can then be entered inany order. After entering the lastroom number, press < ↵ >.
Cannot include doors of aCommon Door Suite.
ENCODING SUCCESSFUL
Adjoining SuiteInsert blankKeycard #2
Adjoining SuiteInsert blankKeycard #1
How many keycardsENTER = 1?
New keycard1 = YESØ = NO?
Rooms of adj. SuiteNext Room?
Rooms of adj. SuiteNext Room?
Starting Room?
Keycard:1 = Guest2 = One Shot?
22
PK3194_10_06 11/23/06 10:36 AM Page 22

User’s Guide
Application:
Opens the common door and thecorrect inner doors that apply to aguest occupying a Common DoorSuite. Access to the inner doors canbe configured as desired by theguest(s). (Each guest's keycard canopen some or all of the doorsinside the suite.)
Example:
Guest 1 Guest 2 All to same Guest
116 116 116117 120 117118 118119 119
120
Expiry:
From 1 hour to 2730 nights
Options:
Variable Expiry, Guest Common Areas,Salesman's Lockout, Folio Number
Scenario:
Make a Common Door Suite keycardfor outer door #116 and inner door#120.
Step-by-Step Instructions:
1. Press any key to activate theFront Desk Unit.
2. Swipe a Front Desk Authorizationkeycard through the FDU.
Main Menu:1 = Keycard2 = Reset?
23
101 102 103 104 105 106 107
108
109
110
111112113114115117
116
118
119
120
121
122
123
4.6 Common Door Suite Keycard
PK3194_10_06 11/23/06 10:36 AM Page 23

Kaba Lodging Systems
3. Enter 1 to select the Keycardmenu, then press < ↵ >.
4. Enter 4 to select the CommonDoor Suite option, then press < ↵ >.
The Front Desk Unit asks for the suite number (or for theinner doors directly, dependingon the features selected by theSystem administrator, see section4.6.13 in the Reference Manual).
5. Enter the suite number (e.g.116), then press < ↵ >.
6. Enter the inner door number(e.g. 120), then press < ↵ >.
Since you want a keycard foronly one inner door, press < ↵ >.
(OR, To make a keycard for sev-eral inner doors, enter the num-ber of each door, then press < ↵ >.)
7. Enter 1 to select the NewKeycard option.
A series of option menus mayappear. Make the changes, if necessary, (see sections 4.1 and4.2).
8. Enter 1, then press < ↵ >.
9. Swipe a blank keycard throughthe Front Desk Unit.
You now have a Common DoorSuite keycard for doors 116 (outerdoor) and 120 (inner door).
Notes:
When making Common Door Suitekeycards, the FDU will only acceptroom numbers that are part of aCommon Door Suite. (Asprogrammed at the factory.)
ENCODING SUCCESSFUL
Common Door SuiteInsert blankKeycard #1
How manykeycardsENTER = 1?
New keycard1 = YESØ = NO?
Inner DoorsInner Door #?
Inner DoorsInner Door #?
Suite number?
Keycard:1 = Guest2 = One Shot?
24
PK3194_10_06 11/23/06 10:36 AM Page 24

User’s Guide
Application:
Opens each door of a ConventionSuite. Convention suites are usedwhen the rooms to be keyed alikedo not fit within a 15 room numberrange (see section 4.5 "AdjoiningSuite Keycard"). The lock on eachdoor of the convention suite mustbe assigned a convention numberusing a Convention Suite Resetkeycard (prepared with a minimumof a Master Authorization keycard).After use of a door as part of aConvention Suite, the next validGuest level keycard (other than aConvention Suite keycard) usedcancels the convention number inthe lock and returns it to normaloperation.
Example: 101, 122, 123. (Cannotbe in an Adjoining Suite becausethey span more than 15 numbers.)
Expiry:
From 1 hour to 2730 nights
Options:
Variable Expiry, Guest CommonAreas, Salesman's Lockout, FolioNumber
Scenario:
Make a Convention Suite keycardfor rooms 101, 122, 123, previouslyincluded in Convention Suite #1using a Convention Suite Resetkeycard.
Step-by-Step Instructions:
1. Press any key to activate theFront Desk Unit.
2. Swipe a Front Desk Authorizationkeycard through the FDU.
25
102 103 104 105 106 107
108
109
110
111112113114115117
116
118
119
120
121
122
123 101
4.7 Convention Suite Keycard
PK3194_10_06 11/23/06 10:36 AM Page 25
Kaba Lodging Systems
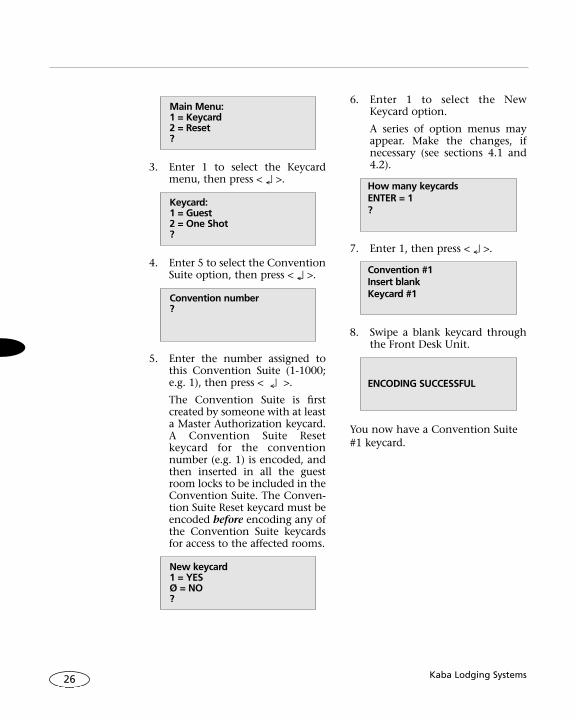
3. Enter 1 to select the Keycardmenu, then press < ↵ >.
4. Enter 5 to select the ConventionSuite option, then press < ↵ >.
5. Enter the number assigned tothis Convention Suite (1-1000;e.g. 1), then press < ↵ >.
The Convention Suite is firstcreated by someone with at leasta Master Authorization keycard.A Convention Suite Resetkeycard for the conventionnumber (e.g. 1) is encoded, andthen inserted in all the guestroom locks to be included in theConvention Suite. The Conven-tion Suite Reset keycard must beencoded before encoding any ofthe Convention Suite keycardsfor access to the affected rooms.
6. Enter 1 to select the NewKeycard option.
A series of option menus mayappear. Make the changes, if necessary (see sections 4.1 and4.2).
7. Enter 1, then press < ↵ >.
8. Swipe a blank keycard throughthe Front Desk Unit.
You now have a Convention Suite#1 keycard.
ENCODING SUCCESSFUL
Convention #1Insert blankKeycard #1
How many keycardsENTER = 1?
New keycard1 = YESØ = NO?
Convention number?
Keycard:1 = Guest2 = One Shot?
Main Menu:1 = Keycard2 = Reset?
26
PK3194_10_06 11/23/06 10:36 AM Page 26
User’s Guide
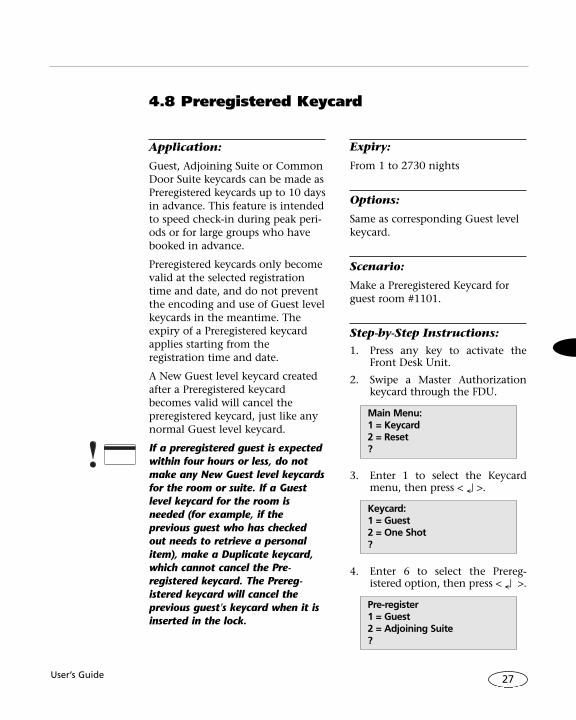
Application:
Guest, Adjoining Suite or CommonDoor Suite keycards can be made asPreregistered keycards up to 10 daysin advance. This feature is intendedto speed check-in during peak peri-ods or for large groups who havebooked in advance.
Preregistered keycards only becomevalid at the selected registrationtime and date, and do not preventthe encoding and use of Guest levelkeycards in the meantime. Theexpiry of a Preregistered keycardapplies starting from theregistration time and date.
A New Guest level keycard createdafter a Preregistered keycardbecomes valid will cancel thepreregistered keycard, just like anynormal Guest level keycard.
If a preregistered guest is expectedwithin four hours or less, do notmake any New Guest level keycardsfor the room or suite. If a Guestlevel keycard for the room isneeded (for example, if theprevious guest who has checkedout needs to retrieve a personalitem), make a Duplicate keycard,which cannot cancel the Pre-registered keycard. The Prereg-istered keycard will cancel theprevious guest's keycard when it isinserted in the lock.
Expiry:
From 1 to 2730 nights
Options:
Same as corresponding Guest levelkeycard.
Scenario:
Make a Preregistered Keycard forguest room #1101.
Step-by-Step Instructions:
1. Press any key to activate theFront Desk Unit.
2. Swipe a Master Authorizationkeycard through the FDU.
3. Enter 1 to select the Keycardmenu, then press < ↵ >.
4. Enter 6 to select the Prereg-istered option, then press < ↵ >.
Pre-register1 = Guest2 = Adjoining Suite?
Keycard:1 = Guest2 = One Shot?
Main Menu:1 = Keycard2 = Reset?
27
4.8 Preregistered Keycard
PK3194_10_06 11/23/06 10:36 AM Page 27

Kaba Lodging Systems
5. Enter 1 to select the Guestoption, then press < ↵ >.
6. Enter the room number (e.g.1101), then press < ↵ >.
7. Enter 1 to select the NewKeycard option.
The Default registration date is the current time + 24 hours.
8. Enter the registration date andtime, then press < ↵ >.
A series of option menus mayappear. Make the changes, if necessary (see sections 4.1 and4.2).
9. Enter 1, then press < ↵ >.
10. Swipe the keycard through theFront Desk Unit reader.
You now have a Preregistered keycard for room #1101.
ENCODING SUCCESSFUL
Guest Key #1101Insert blankKeycard #1
How many keycardsENTER = 1?
Registration date?MM/DD/YYYY02/21/2002
New keycard1 = YESØ = NO?
Room number?
28
PK3194_10_06 11/23/06 10:36 AM Page 28
User’s Guide
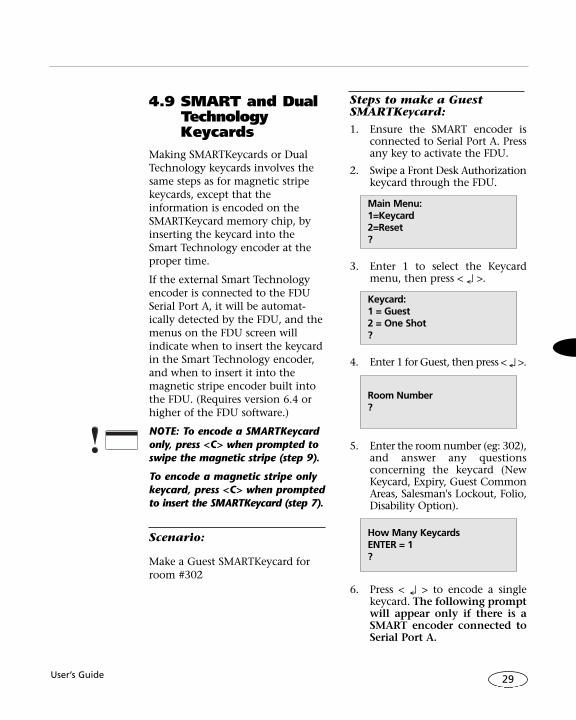
4.9 SMART and DualTechnologyKeycards
Making SMARTKeycards or DualTechnology keycards involves thesame steps as for magnetic stripekeycards, except that theinformation is encoded on theSMARTKeycard memory chip, byinserting the keycard into theSmart Technology encoder at theproper time.
If the external Smart Technologyencoder is connected to the FDUSerial Port A, it will be automat-ically detected by the FDU, and themenus on the FDU screen willindicate when to insert the keycardin the Smart Technology encoder,and when to insert it into themagnetic stripe encoder built intothe FDU. (Requires version 6.4 orhigher of the FDU software.)
NOTE: To encode a SMARTKeycardonly, press <C> when prompted toswipe the magnetic stripe (step 9).
To encode a magnetic stripe onlykeycard, press <C> when promptedto insert the SMARTKeycard (step 7).
Scenario:
Make a Guest SMARTKeycard forroom #302
Steps to make a GuestSMARTKeycard:
1. Ensure the SMART encoder isconnected to Serial Port A. Pressany key to activate the FDU.
2. Swipe a Front Desk Authorizationkeycard through the FDU.
3. Enter 1 to select the Keycardmenu, then press < ↵ >.
4. Enter 1 for Guest, then press < ↵ >.
5. Enter the room number (eg: 302),and answer any questionsconcerning the keycard (NewKeycard, Expiry, Guest CommonAreas, Salesman's Lockout, Folio,Disability Option).
6. Press < ↵ > to encode a singlekeycard. The following promptwill appear only if there is aSMART encoder connected toSerial Port A.
How Many KeycardsENTER = 1?
Room Number?
Keycard:1 = Guest2 = One Shot?
Main Menu:1=Keycard2=Reset?
29
PK3194_10_06 11/23/06 10:36 AM Page 29
Kaba Lodging Systems
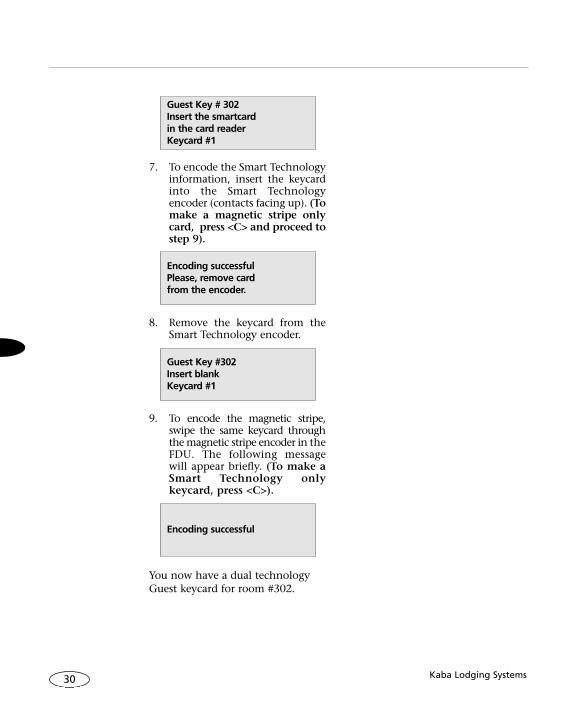
7. To encode the Smart Technologyinformation, insert the keycardinto the Smart Technologyencoder (contacts facing up). (Tomake a magnetic stripe onlycard, press <C> and proceed tostep 9).
8. Remove the keycard from theSmart Technology encoder.
9. To encode the magnetic stripe,swipe the same keycard throughthe magnetic stripe encoder in theFDU. The following messagewill appear briefly. (To make aSmart Technology onlykeycard, press <C>).
You now have a dual technologyGuest keycard for room #302.
Encoding successful
Guest Key #302Insert blankKeycard #1
Encoding successfulPlease, remove card from the encoder.
Guest Key # 302Insert the smartcard in the card readerKeycard #1
30
PK3194_10_06 11/23/06 10:36 AM Page 30

5
User’s Guide
5.1 Using Keycardsin Solitaire Locks
To enter their room, guests swipetheir magnetic stripe keycardthrough the lock reader, or inserttheir Smart Technology keycard inthe reader (Solitaire SMART only).
Swipe Locks:
Magnetic stripe keycards should beswiped evenly through the lock. Awide range of speeds is acceptable,but a misread may result fromswiping the keycard too slowly ortoo quickly. (See Figure 5.1 A)
SolitaireSMART Locks:
Smart Technology keycards (or"SMARTKeycards") are compatibleonly with SolitaireSMART locks,which contain both a magneticstripe reader, and a Smart Tech-nology reader.
To read either a SMARTKeycard or amagnetic stripe keycard in theselocks, the keycard should beinserted as shown in Figure 5.1,until it stops, then withdrawnsmoothly. When reading magneticstripe keycards in this way, there isa wide acceptable speed range, but
a misread may result from swipingthe keycard too slowly or too quickly.
31
Verifying GuestLevel Keycards
Chapter
Figure 5.1 •How to insert keycards in Kaba Ilco LodgingAccess Control System locks
PK3194_10_06 11/23/06 10:36 AM Page 31

Kaba Lodging Systems
5.2 Troubleshooting
Lock Responses to Keycards:
The lock's response to a Guest levelkeycard is indicated by two LEDs. Ifthe lock will not grant access to aguest's card, use the followingtrouble shooting chart.
* A single red indicates either that theroom is locked for privacy using theinside thumbturn (e.g. by anotherguest occupying the same room), orthat the room has been locked out byhotel management. Consult asupervisor to open a locked-out room.
** If the keycard will not work in thelock, the information encoded on thekeycard can be verified by followingthe instructions in section 5.2. Checkthat the room number and expiry onthe keycard are correct. (Note: If thekeycard was Preregistered, ensure thecurrent time is after the registrationtime on the card, at which the keycard
becomes valid.) If the keycard can beread by the FDU, but will not work inthe lock, it may have been accidentallycancelled by housekeeping staff usinga Group Lockout keycard, or by a morerecently created Guest level keycard.When issuing a copy of a keycard,ensure that the Duplicate option, andnot the New Keycard option, is used(see Section 4.2), in order to preventaccidentally cancelling valid Guestlevel keycards.
Damaged Keycards:
If a magnetic stripe keycard is bentor severely scratched, or worksinconsistently in the lock, discard itand encode a new one. If aSMARTKeycard is functioningintermittently, it may be possible torestore full performance by cleaningthe contacts with the recommendedKaba Ilco cleaning supplies. If theproblem is not fixed easily bycleaning, or if the SMARTKeycard isseverely scratched or bent, discard itand encode a new one.
Always destroy discarded keycardsto prevent unauthorized use.
Intermittent Lock Operation:
A lock that works inconsistently ornot at all with a new keycard, orany other problem relating to lockoperation, should be reportedimmediately to maintenance staff.
32
Indicator Light Condition and ActionRequired
Flashing Green Access granted... Turn handle to open door.
Single Red Keycard valid but lockedout... Unlock the deadboltfrom inside the room, or remove security lockout.*
No light Invalid keycard or misread...Verify the keycard.**
PK3194_10_06 11/23/06 10:36 AM Page 32
User’s Guide
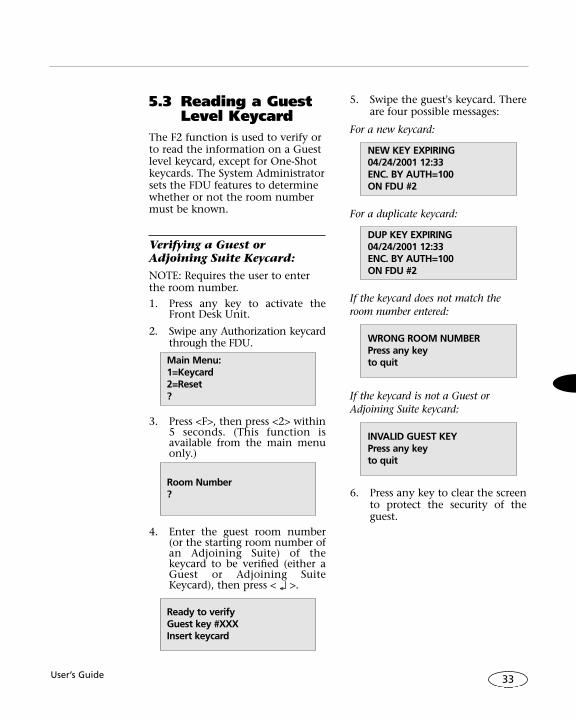
5.3 Reading a GuestLevel Keycard
The F2 function is used to verify orto read the information on a Guestlevel keycard, except for One-Shotkeycards. The System Administratorsets the FDU features to determinewhether or not the room numbermust be known.
Verifying a Guest orAdjoining Suite Keycard:
NOTE: Requires the user to enterthe room number.
1. Press any key to activate theFront Desk Unit.
2. Swipe any Authorization keycardthrough the FDU.
3. Press <F>, then press <2> within5 seconds. (This function isavailable from the main menuonly.)
4. Enter the guest room number(or the starting room number ofan Adjoining Suite) of thekeycard to be verified (either aGuest or Adjoining SuiteKeycard), then press < ↵ >.
5. Swipe the guest's keycard. Thereare four possible messages:
For a new keycard:
For a duplicate keycard:
If the keycard does not match theroom number entered:
If the keycard is not a Guest orAdjoining Suite keycard:
6. Press any key to clear the screento protect the security of theguest.
INVALID GUEST KEYPress any keyto quit
WRONG ROOM NUMBERPress any keyto quit
DUP KEY EXPIRING04/24/2001 12:33ENC. BY AUTH=100ON FDU #2
NEW KEY EXPIRING04/24/2001 12:33ENC. BY AUTH=100ON FDU #2
Ready to verifyGuest key #XXXInsert keycard
Room Number?
Main Menu:1=Keycard2=Reset?
33
PK3194_10_06 11/23/06 10:36 AM Page 33

Kaba Lodging Systems
Reading a Guest, AdjoiningSuite, Common Door Suite orConvention Suite Keycard:
In order to read a guest's keycardwithout knowing their roomnumber, the Read Card optionmust be enabled by the SystemAdministrator.
1. Press any key to activate theFront Desk Unit.
2. Swipe any Authorization keycardthrough the FDU.
3. Press <F>, then press <2> within5 seconds. (This function isavailable from the main menuonly.)
4. Swipe the Guest level keycard(Guest, Adjoining Suite,Common Door Suite, orConvention Suite). If the card isreadable, the FDU will displaythe keycard type, roomnumber, whether the keycardwas encoded as New or aDuplicate, the authorizationkeycard used, the expiry andthe folio number. Example:
5. Press any key to clear the screento protect the security of theguest.
5.4 Guest Folio Check The F3 function is used to checkthe folio number encoded on akeycard. (Available from the mainmenu only.)
Checking the Folio Numberon a Guest's Keycard1. Press any key to activate the
Front Desk Unit.
2. Swipe any Authorization keycard.
3. Press <F>, then press <3> within 5seconds. (This function is availablefrom the main menu only.)
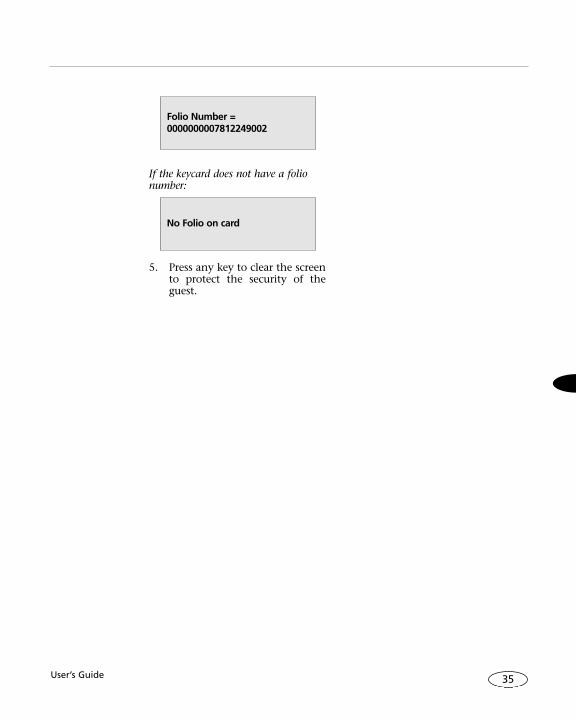
4. Swipe the Guest level keycard(Guest, Adjoining Suite,Common Door Suite, orConvention Suite). There aretwo possible messages.
If the keycard has a folio number:
Ready to verifyFolio NumberInsert keycard
Main Menu1=Keycard2=Reset?
GUEST#201 NEW AUT #100KEY EXP. 04/24/2001No Folio on card
Ready to verifyGuest KeycardInsert keycard
Main Menu1=Keycard2=Reset?
34
PK3194_10_06 11/23/06 10:36 AM Page 34
User’s Guide
If the keycard does not have a folionumber:
5. Press any key to clear the screento protect the security of theguest.
No Folio on card
Folio Number = 0000000007812249002
35
PK3194_10_06 11/23/06 10:36 AM Page 35

Kaba Lodging Systems36
PK3194_10_06 11/23/06 10:36 AM Page 36

6
User’s Guide
6.1 Lost or StolenKeycards
If a guest's keycard has been lostor stolen, you should actimmediately to cancel the lostkeycard and provide all guestsstaying in the room or suite witha new keycard.
If the guest needs to return totheir room or suite:
Issue NEW Guest level keycards forthe room or suite, and ensure thatone is inserted in ALL the locksthat lead to the room or suite.(Includes multiple doors to thesame room, all doors of anadjoining suite, and all applicableinner doors and outer doors of aCommon Door Suite.)
If the guest is absent (forexample, on a day trip), if theGuest is checking out, or tocancel a One-Shot keycard:
In this situation, there should notbe a circulating Guest level keycardthat can give access to the room.Issue a Reset keycard for the roomor suite (Guest Reset, One-ShotReset, Adjoining Suite Reset, or
Common Door Suite Reset), andensure it is inserted in ALL thelocks that lead to the room or suite.(Includes multiple doors to thesame room, all doors of anadjoining suite, and all applicableinner doors and outer doors of aCommon Door Suite.)
When the guests return or newguests register, issue NEW Guestlevel keycards.
If the lost keycard is aConvention Suite keycard:
If the convention is over:
A door that has been included in aConvention Suite will return tonormal operation the next time aGuest level keycard (other than aConvention Suite keycard) isinserted in the lock. All previousGuest level keycards, including thelost Convention Suite keycard, willbe cancelled. There is no need forspecial action.
If the convention is ongoing:
Inform a manager immediately.
37
Canceling GuestLevel Keycards
Chapter
PK3194_10_06 11/23/06 10:36 AM Page 37

Kaba Lodging Systems
6.2 Guest Level ResetKeycards
Application:
Reset keycards invalidate circulatingkeycards for a specific room orsuite, when inserted in the locksaffected. GSAs with a Front DeskAuthorization keycard have theauthority to cancel Guest, One-Shot, Adjoining Suite, or CommonDoor Suite keycards by making thecorresponding Reset keycard, andensuring it is swiped in all affectedlocks.
Making a Reset keycard is similar tomaking an Entry keycard.
Expiry:
From 1 to 24 hours, set by thesystem administrator
Options:
None
Making Guest Reset and One-Shot Reset Keycards:
1. Press any key to activate theFront Desk Unit.
2. Swipe a Front Desk Author-ization keycard through theFDU.
3. Enter 2 to select the Reset menu,then press < ↵ >.
4. Enter 1 for Guest or 2 for One-Shot, then press < ↵ >.
5. Enter the room number (e.g.1101), then press < ↵ >.
6. Press < ↵ >.
7. Swipe a blank keycard throughthe FDU encoder
You now have a Guest Reset or One-Shot Reset keycard for room 1101.Swipe the Reset keycard immediatelyin ALL locks leading to the room.
ENCODING SUCCESSFUL
One-Shot ResetInsert blankKeycard #1
Guest ResetInsert blankKeycard #1
How many keycardsENTER = 1?
Room Number?
Reset:1=Guest2=One-Shot?
Main Menu1=Keycard2=Reset?
38
PK3194_10_06 11/23/06 10:36 AM Page 38

User’s Guide
Making Adjoining Suite Resetkeycards:
1. Press any key to activate theFront Desk Unit.
2. Swipe a Front Desk Authorizationkeycard through the FDU.
3. Enter 2 to select the Reset menu,then press < ↵ >.
4. Enter 3 for Adjoining Suite, thenpress < ↵ >.
5. Enter the first room number(e.g. 1121), then press < ↵ >.
6. Enter the remaining roomnumbers of the adjoining suite(e.g. 1122, 1123), pressing < ↵ >after each one.
7. Press < ↵ >.
8. Press < ↵ >.
9. Swipe a blank keycard throughthe FDU encoder
You now have an Adjoining SuiteReset keycard for rooms 1121,1122, and 1123. Swipe the Resetkeycard immediately in ALL locksleading to those rooms.
ENCODING SUCCESSFUL
Adj. Suite ResetInsert blankKeycard #1
How many keycardsENTER = 1?
Rooms of adj. suiteNext Room?
Rooms of adj. suiteNext Room?
Starting Room?
Reset:1=Guest2=One-Shot?
Main Menu1=Keycard2=Reset?
39
PK3194_10_06 11/23/06 10:36 AM Page 39

Kaba Lodging Systems
Making Common Door SuiteReset keycards:
1. Press any key to activate theFront Desk Unit.
2. Swipe a Front Desk Authorizationkeycard through the FDU.
3. Enter 2 to select the Reset menu,then press < ↵ >.
4. Enter 4 for Common Door Suite,then press < ↵ >.
5. Enter the suite number (e.g.151), then press < ↵ >.
6. Enter the room numbers of eachinner door that needs to be reset(e.g. 152, 154), pressing < ↵ >after each one.
9. Press < ↵ >.
7. Press < ↵ >.
8. Swipe a blank keycard throughthe FDU encoder.
You now have an Common DoorSuite Reset keycard for suite 151and inner doors 152 and 154.Swipe the Reset keycard immed-iately in ALL locks leading to thoserooms.
ENCODING SUCCESSFUL
Common Suite ResetInsert blankKeycard #1
How many keycardsENTER = 1?
Inner DoorsInner Door #?
Inner DoorsInner Door #?
Suite number?
Reset:1=Guest2=One-Shot?
Main Menu1=Keycard2=Reset?
40
PK3194_10_06 11/23/06 10:36 AM Page 40
7
User’s Guide
7.1 Bellman's MasterKeycard
A bellman with a Bellman'sAuthorization keycard can make hisor her own Bellman's Masterkeycard using the FDU.
Application:
Opens any guest room (exceptwhen deadbolted or when theSalesman's Lockout is activated) asmany times as required. Intendedfor use by bellmen and valets.
Expiry:
From 1 to 24 hours.
Options:
None
Step-by-Step Instructions:
1. Press any key to activate theFront Desk Unit.
2. Swipe a Bellman's MasterAuthorization keycard throughthe FDU.
3. Swipe a blank keycard throughthe FDU encoder
A full audit trail is retained in theFDU of each Bellman's Masterkeycard made, and the Bellman'sAuthorization keycard used.
ENCODING SUCCESSFUL
Bellman's AccessInsert blankKeycard #1
41
Special KeycardsChapter
PK3194_10_06 11/23/06 10:36 AM Page 41

Kaba Lodging Systems42
7.2 Passage Reset Keycard
Passage keycards are used to turnPassage Mode ON or OFF forspecific doors such as doors toGuest Common Areas, storage areasor conference rooms. In PassageMode, no keycard is required foraccess to the room. The lock openswhenever the handle is turned.
Application:
The Passage Reset keycard is used toinvalidate any circulating Passagekeycards for a specific door. ThePassage setting is not changed bythe use of the Passage Reset keycard.
Expiry:
From 1 to 2730 nights
Options:
None
Step-by-Step Instructions:
1. Press any key to activate theFront Desk Unit.
2. Swipe a Front Desk Authorizationkeycard through the FDU.
3. Enter 2 to select the Reset menu,then press < ↵ >.
Reset:
4. Enter 25 for Passage, then press< ↵ >.
5. Enter a digit from 1 to 4 to selectthe type of room (e.g. 1 for aGuest Common Area), thenpress < ↵ >.
6. Enter the Room, Common Areaor Restricted Area number (e.g. 2),then press < ↵ >.
7. Press < ↵ >.
Reset Area Pass.Insert blankKeycard #1
How many keycardsENTER = 1?
Guest Common Area #?
Passage mode for:1=Door2=Guest Common Area3=Staff Common Area4=Restricted Area?
1=Guest2=One-Shot?
Main Menu1=Keycard2=Reset?
PK3194_10_06 11/23/06 10:36 AM Page 42

User’s Guide
8. Swipe a blank keycard throughthe FDU encoder
7.3 Making SpecialPurpose Keycards
Initialization Keycard
1. Swipe a programming, Master orGrand Master Authorizationkeycard through the FDU.
2. Press 1 and ENTER.
3. Press 28 and ENTER.
4. Press 1 and ENTER.
5. Press the amount of keys neededand then Enter.
6. Swipe a blank key.
Programming Keycard
1. Swipe a programming, Master orGrand Master Authorizationkeycard through the FDU.
2. Press 1 and ENTER.
3. Press 24 and ENTER.
4. Press 1 and ENTER.
5. Press the amount of keys neededand then Enter.
6. Swipe a blank key.
7.4 Making Authorization Keycards
Front Desk Authorization(FDA)
1. Swipe a Master or GrandMaster Authorization keycardthrough the FDU.
2. Press 1 and ENTER.
3. Press 16 and ENTER.
4. Press the Authorization # and < ENTER >.
5. Each FDA keycard should haveits own authorization number.Use # between 1-100 for (FDA).
6. Swipe a blank key.
Bellman's Authorization (BA)
1. Swipe a Grand MasterAuthorization keycard throughthe FDU.
2. Press 1 and ENTER,
3. Press 17 and ENTER,
4. Press the Authorization # and< ENTER >.
5. Each BA keycard should have itsown authorization number.Use # between 121-160 for (BA).
6. Swipe a blank key.
ENCODING SUCCESSFUL
43
PK3194_10_06 11/23/06 10:36 AM Page 43

Kaba Lodging Systems
7.4 Making Authorization Keycards Continued
Programming Authorization(PA)
1. Swipe a Grand MasterAuthorization keycard throughthe FDU.
2. Press 1 and ENTER,
3. Press 18 and ENTER,
4. Press 2 and ENTER,
5. Press the Authorization # and <ENTER >.
6. Each PA keycard should have itsown Authorization number.Use # between 101-120 for (PA)
7. Swipe a blank key.
Master Authorization (MA)
1. Swipe a Grand MasterAuthorization keycard throughthe FDU.
2. Press 1 and ENTER.
3. Press 18 and ENTER.
4. Press the Authorization # and < ENTER >.
5. Each MA keycard should haveits own authorization number.Use # between 161-180 for the(MA).
6. Swipe a blank key.
Grand Master Authorization(GMA)
1. Swipe a Grand MasterAuthorization keycard throughthe FDU.
2. Press 1 and ENTER.
3. Press 19 and ENTER.
4. Press the Authorization # and<ENTER >.
5. Each GMA keycard shouldhave its own authorizationnumber. Use # between 181-200for the (MA).
6. Swipe a blank key.
7.5 Making LockoutKeycards
Hotel Lockout Keycard
1. Swipe a Grand MasterAuthorization keycard throughthe FDU.
2. Press 1 and ENTER,
3. Press 20 and ENTER,
4. Press 1 and ENTER,
5. Enter the number of key neededand < ENTER >.
6. Swipe a blank key
44
PK3194_10_06 11/23/06 10:36 AM Page 44
User’s Guide
7.5 Making LockoutKeycards Continued
Hotel Unlockout Keycard
1. Swipe a Grand MasterAuthorization keycard throughthe FDU.
2. Press 1 and ENTER,
3. Press 20 and ENTER,
4. Press 2 and ENTER,
5. Enter the number of key neededand < ENTER >.
6. Swipe a blank key.
Room Lockout Keycard
1. Swipe a Grand MasterAuthorization keycard throughthe FDU.
2. Press 1 and ENTER,
3. Press 21 and ENTER,
4. Press 1 and ENTER,
5. Enter the Room number andthen ENTER.
6. Enter the number of key neededand < ENTER >.
7. Swipe a blank key.
Room Unockout Keycard
1. Swipe a Grand MasterAuthorization keycard throughthe FDU.
2. Press 1 and ENTER,
3. Press 21 and ENTER,
4. Press 2 and ENTER,
5. Enter the Room number andthen ENTER.
6. Enter the number of key neededand < ENTER >.
7. Swipe a blank key.
7.6 Making GroupLockout Keycards
Hotel Lockout Keycard
1. Swipe a Grand MasterAuthorization keycard throughthe FDU.
2. Press 1 and ENTER,
3. Press 22 and ENTER,
4. Enter the Group Number andENTER,
5. Enter the number of key neededand < ENTER >.
6. Swipe a blank key.
Note: In order for The Group lockoutto function. The Group Numberentered in step 4 should be pro-grammed in the lock.
45
PK3194_10_06 11/23/06 10:36 AM Page 45
Kaba Lodging Systems
7.7 Making PassageKeycards
Guest Passage
1. Swipe a Master or GrandMaster authorization keycardthrough the FDU.
2. Press 25 and ENTER.
3. Press 1 and ENTER.
4. Enter the Room Number andthen press ENTER.
5. Press < 0> for duplicate. Onlymake <NEW> if all keycardsmust be replaced.
6. Press 1 to confirm DuplicateKeycards
7. Press the number of keyneeded and then ENTER,
8. Swipe a blank key.
Guest Common Door Passage
1. Swipe a Master or GrandMaster authorization keycardthrough the FDU.
2. Press 25 and ENTER.
3. Press 2 and ENTER.
4. Press the Guest Commonnumber (between 1 & 8) andthen press ENTER.
5. Press < 0> for duplicate. Onlymake <NEW> if all keycardsmust be replaced.
6. Press 1 to confirm DuplicateKeycards
7. Press the number of keyneeded and then ENTER.
8. Swipe a blank key.
Staff Common Door Passage
1. Swipe a Master or GrandMaster authorization keycardthrough the FDU.
2. Press 25 and ENTER.
3. Press 3 and ENTER.
4. Press the Guest Commonnumber (between 1 & 16) andthen press ENTER.
5. Press < 0> for duplicate. Onlymake <NEW> if all keycardsmust be replaced.
6. Press 1 to confirm DuplicateKeycards
7. Press the number of keyneeded and then ENTER.
8. Swipe a blank key.
Restricted Area Passage
1. Swipe a Master or GrandMaster authorization keycardthrough the FDU.
2. Press 25 and ENTER.
3. Press 4 and ENTER.
4. Enter the Restricted AreaNumber and then press ENTER.Number(between 1-200)
5. Press < 0> for duplicate. Onlymake <NEW> if all keycardsmust be replaced.
6. Press 1 to confirm DuplicateKeycards
7. Press the number of keyneeded and then ENTER,
8. Swipe a blank key.
46
PK3194_10_06 11/23/06 10:36 AM Page 46
User’s Guide
7.8 Making StaffKeycards
Section Keycard
1. Swipe a Grand Master or aMaster Authorization keycardthrough the FDU.
2. Press 1 and ENTER.
3. Press 8 and ENTER.
4. Enter the SECTION Number andpress Enter. Number (between 1- 255)
5. Press < 0> for duplicate. Onlymake <NEW> if all keycardsmust be replaced.
6. Press the number of keyneeded and then ENTER.
7. Swipe a blank key.
Note: The “Section” Number enteredin step 4 has to be programmed intothe lock
Floor Keycard
1. Swipe a Grand Master or aMaster Authorization keycardthrough the FDU.
2. Press 1 and ENTER.
3. Press 9 and ENTER.
4. Enter the FLOOR Number andpress Enter. Number (between 1- 255)
5. Press < 0> for duplicate. Onlymake <NEW> if all keycardsmust be replaced.
6. Press the number of keyneeded and then ENTER.
7. Swipe a blank key.
Note: The 'Floor' Number entered instep 4 has to be programmed into thelock
Group Keycard
1. Swipe a Grand Master or aMaster Authorization keycardthrough the FDU.
2. Press 1 and ENTER.
3. Press 10 and ENTER.
4. Enter the GROUP Number andpress Enter. Number (between 1- 255)
5. Press <0> for duplicate. Onlymake <NEW> if all keycardsmust be replaced.
6. Press the number of keyneeded and then ENTER.
7. Swipe a blank key.
Note: The GROUP Number entered instep 4 has to be programmed into thelock
47
PK3194_10_06 11/23/06 10:36 AM Page 47

Kaba Lodging Systems
7.8 Making StaffKeycards Continued
Zone Keycard
1. Swipe a Grand Master or aMaster Authorization keycardthrough the FDU.
2. Press 1 and ENTER.
3. Press 11 and ENTER.
4. Enter the ZONE Number andpress Enter. Number (between 1- 255)
5. Press < 0> for duplicate. Onlymake <NEW> if all keycardsmust be replaced.
6. Press the number of keyneeded and then ENTER.
7. Swipe a blank key.
Note: The ZONE Number entered instep 4 has to be programmed into thelock
Area Keycard
1. Swipe a Grand Master or aMaster Authorization keycardthrough the FDU.
2. Press 1 and ENTER.
3. Press 12 and ENTER.
4. Enter the AREA Number andpress Enter. Number (between 1- 255)
5. Press < 0> for duplicate. Onlymake <NEW> if all keycardsmust be replaced.
6. Press the number of keyneeded and then ENTER.
7. Swipe a blank key.
Note: The AREA Number entered instep 4 has to be programmed into thelock
Grand Master Keycard
1. Swipe a Grand Master or aMaster Authorization keycardthrough the FDU.
2. Press 1 and ENTER.
3. Press 14 and ENTER.
4. Press the number of keyneeded and then ENTER.
5. Swipe a blank key.
Emergency Keycard
1. Swipe a Grand Master or aMaster Authorization keycardthrough the FDU.
2. Press 1 and ENTER.
3. Press 15 and ENTER.
4. Press the number of keyneeded and then ENTER.
5. Swipe a blank key.
48
PK3194_10_06 11/23/06 10:36 AM Page 48
User’s Guide
7.9 Verifying StaffKeycard
1. To verify staff keys swipe aMaster or Grand MasterAuthorization
2. At "MAIN MENU"
3. Press Function <F>
4. Then press 4
5. Swipe the staff keycard you wantto verify through the FDUencoder
Note: You cannot verify Grand Master& Emergency Keycard under this func-tion. An Error message will appear
7.10 Canceling StaffKeycard
Section Reset Keycard
1. Swipe a Grand Master or aMaster Authorization keycardthrough the FDU.
2. Press 2 and ENTER.
3. Press 8 and ENTER.
4. Enter the SECTION number andpress Enter. Number (between 1- 255)
5. Press the number of keyneeded and then ENTER.
6. Swipe a blank key.
7. Swipe RESET SECTION key inevery electronic lock.
Note: The AREA Number entered instep 4 has to be programmed into thelock
Floor Reset Keycard
1. Swipe a Grand Master or aMaster Authorization keycardthrough the FDU.
2. Press 2 and ENTER.
3. Press 9 and ENTER.
4. Enter the SECTION number andpress Enter. Number (between 1- 255)
5. Press the number of keyneeded and then ENTER.
6. Swipe a blank key.
7. Swipe RESET FLOOR key inevery electronic lock.
Note: The AREA Number entered instep 4 has to be programmed into thelock
Group Reset Keycard
1. Swipe a Grand Master or aMaster Authorization keycardthrough the FDU.
2. Press 2 and ENTER.
3. Press 10 and ENTER.
4. Enter the SECTION number andpress Enter. Number (between 1- 255)
5. Press the number of keyneeded and then ENTER.
6. Swipe a blank key.
7. Swipe RESET GROUP key inevery electronic lock.
Note: The AREA Number entered instep 4 has to be programmed into thelock
49
PK3194_10_06 11/23/06 10:36 AM Page 49
Kaba Lodging Systems
7.10 Canceling StaffKeycard Continued
Zone Reset Keycard
1. Swipe a Grand Master or aMaster Authorization keycardthrough the FDU.
2. Press 2 and ENTER.
3. Press 11 and ENTER.
4. Enter the SECTION number andpress Enter. Number (between 1- 255)
5. Press the number of keyneeded and then ENTER.
6. Swipe a blank key.
7. Swipe RESET ZONE key in everyelectronic lock.
Note: The AREA Number entered instep 4 has to be programmed into thelock
Area Reset Keycard
1. Swipe a Grand Master or aMaster Authorization keycardthrough the FDU.
2. Press 2 and ENTER.
3. Press 12 and ENTER.
4. Enter the SECTION number andpress Enter. Number (between 1- 255)
5. Press the number of keyneeded and then ENTER.
6. Swipe a blank(s) key.
7. Swipe RESET AREA key in everyelectronic lock.
Note: The AREA Number entered instep 4 has to be programmed into thelock
Grand Master Reset Keycard
1. Swipe a Master or a GrandMaster Authorization keycardthrough the FDU.
2. Press 2 and ENTER.
3. Press 14 and ENTER.
4. Press the number of keyneeded and then ENTER.
5. Swipe a blank(s) key.
6. Swipe RESET GRAND MASTERkey in every electronic lock.
Emergency Reset Keycard
1. Swipe a Master or a GrandMaster Authorization keycardthrough the FDU.
2. Press 2 and ENTER.
3. Press 15 and ENTER.
4. Press the number of keyneeded and then ENTER.
5. Swipe a blank(s) key.
6. Swipe RESET EMERGENCY keyin every electronic lock.
50
PK3194_10_06 11/23/06 10:36 AM Page 50

User’s Guide
7.11 Lock BatteryTest Keycard
Application:
Used for checking the batteryvoltage in an electronic lock.
When the Battery Test keycard isinserted in a lock, the low batterycondition is indicated by both redand green LEDs flashing together. Asingle green flash indicates anacceptable battery.
Expiry:
From 1 to 2730 nights
Options:
None
Step-by-Step Instructions:
1. Press any key to activate theFront Desk Unit.
2. Swipe a Front Desk Authorizationkeycard through the FDU.
3. Enter 1 to select the Keycardmenu, then press < ↵ >.
4. Enter 23 for Battery Test, thenpress < ↵ >.
5. Press < ↵ >.
6. Swipe a blank keycard throughthe FDU encoder
ENCODING SUCCESSFUL
Test BatteriesInsert blankKeycard #1
How many keycardsENTER = 1?
Keycard:1=Guest2=One-Shot?
Main Menu1=Keycard2=Reset?
51
PK3194_10_06 11/23/06 10:36 AM Page 51

Kaba Lodging Systems52
PK3194_10_06 11/23/06 10:36 AM Page 52

8
User’s Guide
8.1 Overview In PMS mode, the hotel's PropertyManagement System feedsinformation on the guest's keycardrequirements directly to the FDU.PMS mode requires FDU softwarerelease 6.5P or 6.5R.
The operator first uses the PMScomputer to register the guest. Byusing the PMS, the operator isassured that the rooms requestedare available, and is able to makeuse of all the functions such asbilling and record keeping that arepart of the PMS.
When all information is entered inthe PMS, the operator simply swipestheir Authorization keycard in theFDU, and follows the instructionson the screen to make the requestednumber of keycards. There is nodata entry on the FDU keypad inPMS mode, which prevents humanerror and saves time.
The PMS connects to the Serial PortB at the back of the FDU.
Table 8.1
* If supported by the PMS software.The guest name is especially usefulwhen an FDU is shared by more thanone PMS terminal, avoiding anyconfusion as to which keycard is beingencoded.
** Including all necessary doors forAdjoining Suites or Common DoorSuites, if supported.
*** If supported by the PMS softwareand also if enabled by the SolitaireSystem Administrator.
**** If supported by the PMS software.When available, eliminates the needto authorize the FDU to encode Guestlevel keycards.
53
Property ManagementSystem Interface
Chapter
Information Providedto the FDU by the PMS
• Guest Name*
• Room Number**
• New Keycard or Duplicate Keycard
• Check-out date and time
• Guest Common Areas***
• Salesman's Lockout***
• Folio Number***
• Number of Keycards
• Authorization Number ****
PK3194_10_06 11/23/06 10:36 AM Page 53

Kaba Lodging Systems54
8.2 Entering andExiting the PMSInterface
When the FDU is in Manual Mode,the welcome screen that isdisplayed when a key is pressed is:
To enter PMS Mode:
1. Press any key to activate theFront Desk Unit.
2. Swipe a Front Desk Authorizationkeycard through the FDU.
3. Enter 7 for PMS Interface, thenpress < ↵ >.
The FDU is now in PMS mode, andwill accept data from the hotel'sPMS software.
Giving an AuthorizationWhile in PMS Interface Mode:
Before a keycard can be encoded, aFront Desk Authorization keycardor higher must be swiped, unlessthe PMS sends the Authorizationnumber to the FDU. (TheAuthorization can be given beforeor after sending data to the FDUfrom the PMS, but must be givenbefore blank keycards can beencoded.)
When an Authorization keycardhas been swiped, the welcomescreen will change to thefollowing:
You do not need to swipe theAuthorization keycard in theFDU if the authorization numberis supported by the PMS.
This screen indicates that the lastauthorization swiped is still valid.The authorization can be cancelledby logging off, or by waiting for thetime out period to expire.
Do not leave the FDU unattendedwhile your authorization is stillvalid, as the FDU can be used tomake keycards by the nextperson logged on to the PMSstation.
PMS INTERFACE MODEStrike <C>to quit interface
PMS INTERFACE MODEInsert Authorization
Main Menu1=Keycard2=Reset?
SOLITAIREInsert
Authorization
PK3194_10_06 11/23/06 10:36 AM Page 54

User’s Guide
Logging off YourAuthorization WithoutExiting from the PMSInterface:
1. Press <C>.
2. Enter 2 to log off your author-ization without exiting the PMSinterface, then press < ↵ >.
The FDU is still communicatingwith the PMS, and waiting for avalid Authorization before key-cards can be encoded.
Returning to Manual Mode:
If you need to perform otheroperations, such as making Resetkeycards, or if the PMS link is notfunctioning, then enter 1 in step 2above to exit the PMS interface andlog off your authorization at thesame time.
You will see the following messagebriefly, then the FDU will return tothe Manual Mode welcome screen:
SOLITAIREInsert
Authorization
END COMMUNICATIONFDU <-> PMS!
PMS INTERFACE MODEInsert Authorization
Do you want to exit the Interface Mode?1=YES 2=LogOff0=NO?
55
PK3194_10_06 11/23/06 10:36 AM Page 55
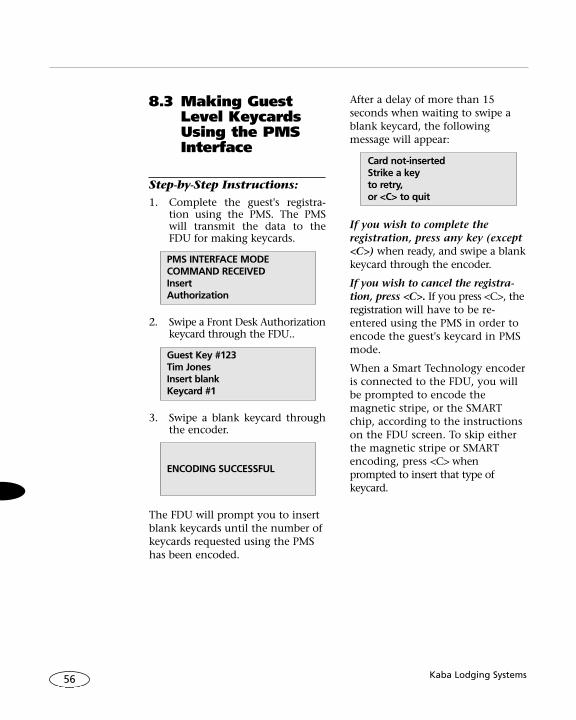
Kaba Lodging Systems
8.3 Making GuestLevel KeycardsUsing the PMSInterface
Step-by-Step Instructions:
1. Complete the guest's registra-tion using the PMS. The PMSwill transmit the data to theFDU for making keycards.
2. Swipe a Front Desk Authorizationkeycard through the FDU..
3. Swipe a blank keycard throughthe encoder.
The FDU will prompt you to insertblank keycards until the number ofkeycards requested using the PMShas been encoded.
After a delay of more than 15seconds when waiting to swipe ablank keycard, the followingmessage will appear:
If you wish to complete theregistration, press any key (except<C>) when ready, and swipe a blankkeycard through the encoder.
If you wish to cancel the registra-tion, press <C>. If you press <C>, theregistration will have to be re-entered using the PMS in order toencode the guest's keycard in PMSmode.
When a Smart Technology encoderis connected to the FDU, you willbe prompted to encode themagnetic stripe, or the SMARTchip, according to the instructionson the FDU screen. To skip eitherthe magnetic stripe or SMARTencoding, press <C> whenprompted to insert that type ofkeycard.
Card not-insertedStrike a key to retry,or <C> to quit
ENCODING SUCCESSFUL
Guest Key #123Tim JonesInsert blankKeycard #1
PMS INTERFACE MODECOMMAND RECEIVEDInsertAuthorization
56
PK3194_10_06 11/23/06 10:36 AM Page 56
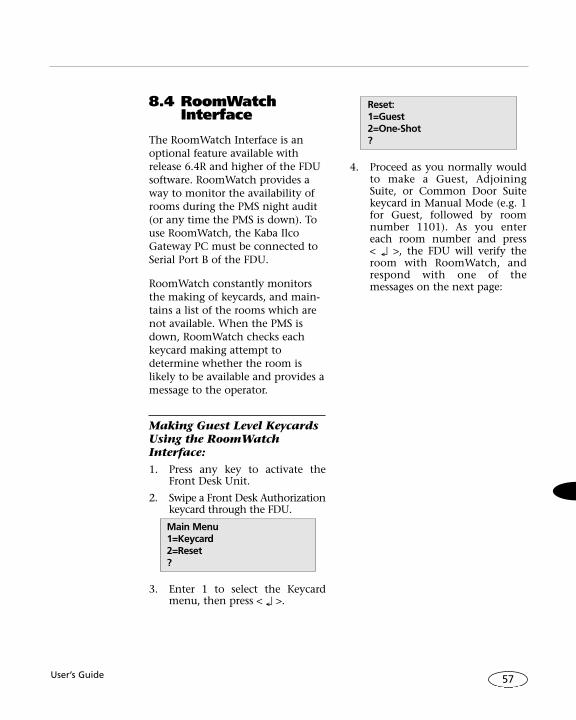
User’s Guide
8.4 RoomWatchInterface
The RoomWatch Interface is anoptional feature available withrelease 6.4R and higher of the FDUsoftware. RoomWatch provides away to monitor the availability ofrooms during the PMS night audit(or any time the PMS is down). Touse RoomWatch, the Kaba IlcoGateway PC must be connected toSerial Port B of the FDU.
RoomWatch constantly monitorsthe making of keycards, and main-tains a list of the rooms which arenot available. When the PMS isdown, RoomWatch checks eachkeycard making attempt todetermine whether the room islikely to be available and provides amessage to the operator.
Making Guest Level KeycardsUsing the RoomWatchInterface:1. Press any key to activate the
Front Desk Unit.
2. Swipe a Front Desk Authorizationkeycard through the FDU.
3. Enter 1 to select the Keycardmenu, then press < ↵ >.
4. Proceed as you normally wouldto make a Guest, AdjoiningSuite, or Common Door Suitekeycard in Manual Mode (e.g. 1for Guest, followed by roomnumber 1101). As you entereach room number and press< ↵ >, the FDU will verify theroom with RoomWatch, andrespond with one of themessages on the next page:
Reset:1=Guest2=One-Shot?
Main Menu1=Keycard2=Reset?
57
PK3194_10_06 11/23/06 10:36 AM Page 57

Kaba Lodging Systems58
Message Operator response
The room can be sold with no riskof double-selling.
Proceed.
There is a circulating Guest Entry keycard for the room that has not expired. The room is probably occupied since the keycard was made the same day.
If registering a new guest, exit and select a different room.
If making a duplicate keycard or replacing a defective, lost or stolen keycard, proceed.
There is a circulating Guest Entrykeycard for the room that expires at the indicated time, and/or there is a preregistered keycard in circulation that becomes valid at the time indicated.
If registering a new guest, proceed only if the previous guest has checked out, and the new guest's registration willend before the preregisteredkeycard becomes valid.If not,exit and select a different room.
If making a duplicate keycard or replacing a defective, lost or stolen keycard, proceed.
Another operator is already sellingthe same room.
Quit and select another room.
The room #1101 is FREE!
Room sold in last 24hours by FDU# XPress a key to cont.or <C> to exit
Room occupied untilXXXXXXXXXXPress a key to cont.or <C> to exit
Room occupied fromXXXXXXXXXXPress a key to cont.or <C> to exit
Free from XXXXXXXuntil XXXXXXXPress a key to cont.or <C> to exit
Room is reserved byFDU #XPress any key to quit
PK3194_10_06 11/23/06 10:36 AM Page 58

User’s Guide
5. If there is a communicationfailure with the PC, the operatorwill see the following message:
The cable is disconnected, the PC isnot ON, or there is another prob-lem. Correct the problem and pressany key to try again, or press <C>to proceed manually. If the keycardis made without the PC link, Room-Watch will be unable to preventdouble selling of the room duringthis transaction, or during the nexttransaction involving this room.
6. After entering all the roomnumbers that apply, you will seethe following screen:
7. Enter 1 to select the New Keycardoption. A series of option menusmay appear to select the Expiry,Guest Common Areas, Salesman'sLockout, Folio Number andDisability Option. You will seethe following prompt:
8. Press < ↵ >.
9. Swipe a blank keycard throughthe encoder. One of the following3 screens will be displayed:
The keycard was properly encodedand recorded by RoomWatch sothat it will not be double sold dur-ing the remainder of the nightaudit.
The delay between entering theroom number and encoding thekeycard was longer than 5 min-utes, making it possible that theroom was sold at the same timeon another FDU. Quit and tryagain.
The cable is disconnected, the PC isnot ON, or there is another prob-lem. Correct the problem and pressany key to try again, or press <C>to proceed manually. If the keycardis made without the PC link, Room-Watch will be unable to preventdouble selling of the room duringthis transaction, or during the nexttransaction involving this room.
PC LINK FAILURE!Press any key to retry or <C> tocontinue (OFF-LINE)
Room occupancy isnot checked.Press any key to quit
ENCODING SUCCESSFUL
Guest Key #1101Insert blankKeycard #1
How many keycardsENTER=1?
New Keycard1=YES2=NO?
PC LINK FAILURE!Press any key toretry or <C> tocontinue (OFF-LINE)
59
PK3194_10_06 11/23/06 10:36 AM Page 59
Kaba Lodging Systems
Performing Other OperationsWhile Using the RoomWatchInterface:
The RoomWatch Interface is part ofthe manual mode of the FDU. Thereis no need to exit the RoomWatchInterface to make Reset keycards orperform other tasks. Simply followthe normal menus on the FDU screen.
60
PK3194_10_06 11/23/06 10:36 AM Page 60
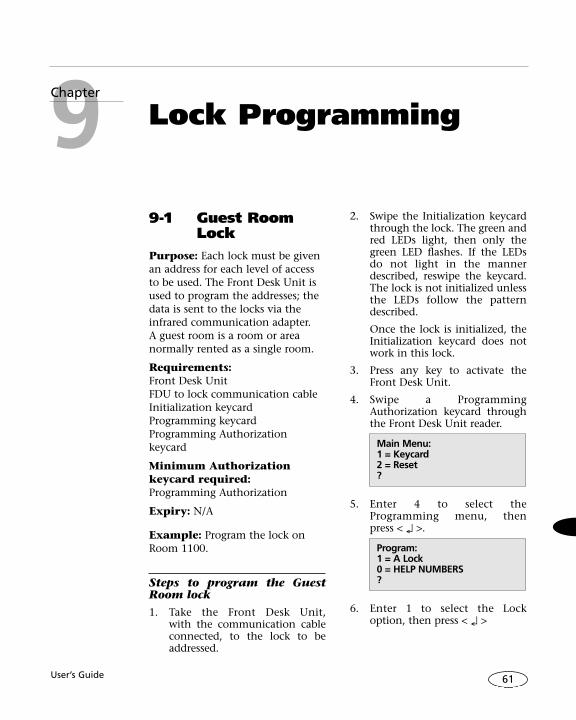
User’s Guide 61
9-1 Guest Room Lock
Purpose: Each lock must be givenan address for each level of accessto be used. The Front Desk Unit isused to program the addresses; thedata is sent to the locks via theinfrared communication adapter. A guest room is a room or area normally rented as a single room.
Requirements:Front Desk Unit FDU to lock communication cableInitialization keycardProgramming keycard Programming Authorization keycard
Minimum Authorization keycard required:Programming Authorization
Expiry: N/A
Example: Program the lock onRoom 1100.
Steps to program the GuestRoom lock
1. Take the Front Desk Unit, with the communication cableconnected, to the lock to beaddressed.
2. Swipe the Initialization keycardthrough the lock. The green andred LEDs light, then only thegreen LED flashes. If the LEDsdo not light in the mannerdescribed, reswipe the keycard.The lock is not initialized unlessthe LEDs follow the patterndescribed.
Once the lock is initialized, theInitialization keycard does notwork in this lock.
3. Press any key to activate theFront Desk Unit.
4. Swipe a ProgrammingAuthorization keycard throughthe Front Desk Unit reader.
5. Enter 4 to select theProgramming menu, then press < ↵ >.
6. Enter 1 to select the Lockoption, then press < ↵ >
Program:1 = A Lock0 = HELP NUMBERS?
Main Menu:1 = Keycard2 = Reset?
9 Lock ProgrammingChapter
PK3194_10_06 11/23/06 10:36 AM Page 61

Kaba Lodging Systems62
7. Enter 1 to select the ProgramAddresses option, then press < ↵ >.
8. Enter 1 to select the Guestoption, then press < ↵ >.
9. For this example,,,,,,, enter1100, for Room #1100, thenpress < ↵ >.
If you want to assign addressesto the Sub-Master levels, refer tothe instructions in Section H-2,Sub-Master Address Levels.
10. Press < C > when you have completed the input.
11. Swipe the Programming keycardthrough the lock. Make sure that
the solid green LED is lit.
12. Insert the communication cableinto the lock reader while thegreen LED is lit.
13. Press any key on the Front DeskUnit to send the programmingto the lock.
An address is now assigned tothe lock.
14. Remove the infrared communication adapter fromthe card slot.
COMMUNICATION SUCCESSFULPress any key to continue
Ready to sendNew configurationStrike a key,or C to quit
Change (C = DONE)1 = Guest 11002 = Section 0?
Room number?
Change (C = DONE)1 = Guest 02 = Section 0?
Enter Function:1 = Program Addresses2 = Reset Addresses?
PK3194_10_06 11/23/06 10:36 AM Page 62
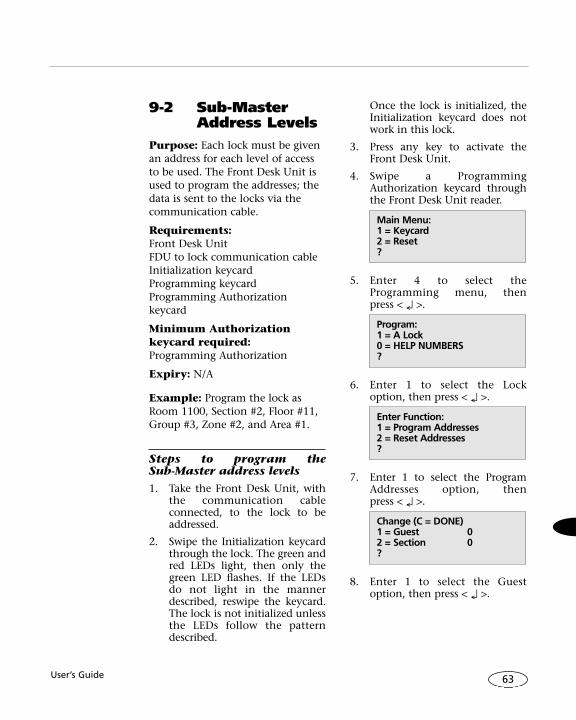
User’s Guide 63
9-2 Sub-Master Address Levels
Purpose: Each lock must be givenan address for each level of accessto be used. The Front Desk Unit isused to program the addresses; thedata is sent to the locks via thecommunication cable.
Requirements:Front Desk UnitFDU to lock communication cableInitialization keycard Programming keycard Programming Authorization keycard
Minimum Authorization keycard required:Programming Authorization
Expiry: N/A
Example: Program the lock asRoom 1100, Section #2, Floor #11,Group #3, Zone #2, and Area #1.
Steps to program the Sub-Master address levels
1. Take the Front Desk Unit, withthe communication cable connected, to the lock to beaddressed.
2. Swipe the Initialization keycardthrough the lock. The green andred LEDs light, then only thegreen LED flashes. If the LEDsdo not light in the mannerdescribed, reswipe the keycard.The lock is not initialized unlessthe LEDs follow the patterndescribed.
Once the lock is initialized, theInitialization keycard does notwork in this lock.
3. Press any key to activate theFront Desk Unit.
4. Swipe a ProgrammingAuthorization keycard throughthe Front Desk Unit reader.
5. Enter 4 to select theProgramming menu, then press < ↵ >.
6. Enter 1 to select the Lockoption, then press < ↵ >.
7. Enter 1 to select the ProgramAddresses option, then press < ↵ >.
8. Enter 1 to select the Guestoption, then press < ↵ >.
Change (C = DONE)1 = Guest 02 = Section 0?
Enter Function:1 = Program Addresses2 = Reset Addresses?
Program:1 = A Lock0 = HELP NUMBERS?
Main Menu:1 = Keycard2 = Reset?
PK3194_10_06 11/23/06 10:36 AM Page 63

Kaba Lodging Systems64
Steps 9 through 19 show Room,Section, Floor, Group, Zone, andArea numbers For this example,.Enter your own numbers whenactually programming a lock.
9. Enter 1100, for Room #1100,then press < ↵ >.
10. Enter 2 to select the Sectionoption, then press < ↵ >.
11. Enter 2, for Section #2, thenpress < ↵ >.
12. Enter 3 to select the Flooroption, then press < ↵ >.
13. Enter 11, for Floor #11, thenpress < ↵ >.
Change (C = DONE)1 = Guest 11002 = Section 2?
FLOOR number?
Change (C = DONE)1 = Guest 11002 = Section 2?
SECTION number?
Change (C = DONE)1 = Guest 11002 = Section 0?
Room number?
PK3194_10_06 11/23/06 10:36 AM Page 64

User’s Guide 65
14. Enter 4 to select the Groupoption, then press < ↵ >.
15. Enter 3, for Group #3, then press < ↵ >.
16. Enter 5 to the select the Zoneoption, then press < ↵ >.
17. Enter 2, for Zone #2, then press < ↵ >.
18. Enter 6 to select the Area option,then press < ↵ >.
19. Enter 1, for Area #1, then press < ↵ >.
20. Press < C > when you have completed the input.
21. Swipe the Programming keycardthrough the lock. Make sure thatthe solid green LED is lit.
22. Insert the communication cableinto the lock reader while thegreen LED is lit.
23. Press any key on the Front DeskUnit to send the programmingto the lock.
The Sub-Master addresses arenow assigned to the lock.
24. Remove the communicationcable from the card slot.
COMMUNICATION SUCCESSFULPress any key to continue
Ready to sendNew configurationStrike a key,or C to quit
Change (C = DONE)1 = Guest 11002 = Section 2?
AREA number?
Change (C = DONE)1 = Guest 11002 = Section 2?
ZONE number?
Change (C = DONE)1 = Guest 11002 = Section 2?
GROUP number?
PK3194_10_06 11/23/06 10:36 AM Page 65
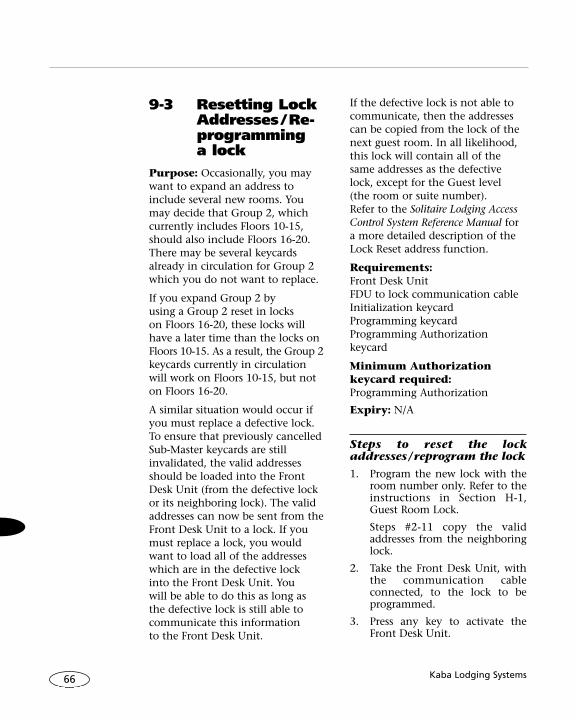
Kaba Lodging Systems66
9-3 Resetting Lock Addresses /Re-programming a lock
Purpose: Occasionally, you maywant to expand an address toinclude several new rooms. Youmay decide that Group 2, whichcurrently includes Floors 10-15,should also include Floors 16-20.There may be several keycardsalready in circulation for Group 2which you do not want to replace.
If you expand Group 2 by using a Group 2 reset in locks on Floors 16-20, these locks willhave a later time than the locks onFloors 10-15. As a result, the Group 2keycards currently in circulationwill work on Floors 10-15, but noton Floors 16-20.
A similar situation would occur ifyou must replace a defective lock.To ensure that previously cancelledSub-Master keycards are still invalidated, the valid addressesshould be loaded into the FrontDesk Unit (from the defective lockor its neighboring lock). The validaddresses can now be sent from theFront Desk Unit to a lock. If youmust replace a lock, you wouldwant to load all of the addresseswhich are in the defective lock into the Front Desk Unit. You will be able to do this as long as the defective lock is still able to communicate this information to the Front Desk Unit.
If the defective lock is not able tocommunicate, then the addressescan be copied from the lock of thenext guest room. In all likelihood,this lock will contain all of thesame addresses as the defectivelock, except for the Guest level (the room or suite number). Refer to the Solitaire Lodging AccessControl System Reference Manual fora more detailed description of theLock Reset address function.
Requirements:Front Desk UnitFDU to lock communication cableInitialization keycard Programming keycard Programming Authorization keycard
Minimum Authorization keycard required:Programming Authorization
Expiry: N/A
Steps to reset the lockaddresses /reprogram the lock
1. Program the new lock with theroom number only. Refer to theinstructions in Section H-1,Guest Room Lock.
Steps #2-11 copy the validaddresses from the neighboringlock.
2. Take the Front Desk Unit, withthe communication cable connected, to the lock to be programmed.
3. Press any key to activate theFront Desk Unit.
PK3194_10_06 11/23/06 10:36 AM Page 66

User’s Guide 67
4. Swipe a ProgrammingAuthorization keycard throughthe Front Desk Unit reader.
5. Enter 4 to select theProgramming menu, then press < ↵ >.
6. Enter 1 to select the Lockoption, then press < ↵ >.
7. Enter 2 to select the ResetAddresses option, then press < ↵ >.
8. Swipe the Programming keycardthrough the lock. Make sure thatthe solid green LED is lit.
9. Insert the communication cableinto the reader of the door lockwhile the green LED is lit.
10. Press any key on the Front Desk Unit to receive the programming from the lock.
11. Remove the communicationcable from the reader.
12. Take the Front Desk Unit to thenew lock, which has been programmed with a room number.
Steps #13-17 send the validaddresses to the new lock.
13. Press any key.
Sub-master address levels indicated with an asterisk (*)will be transferred to the newlock. You can deselect sub-master address levels bypressing the correspondingnumber key. You can reselect thesub-master level by pressing thecorresponding number key again.
14. Press < C >.
15. Swipe the Programming keycardthrough the lock. Make sure thatthe solid green LED is lit.
16. Insert the communication cableinto the reader of the door lockwhile the green LED is lit.
Ready to sendvalid addressesStrike a key,or C to quit
Select (C = DONE)*1 = Section 2*2 = Floor 3?
COMMUNICATION SUCCESSFULPress any key to continue
Ready to receivevalid addressesStrike a key,or C to quit
Enter Function:1 = Program Addresses2 = Reset Addresses?
Program:1 = A Lock0 = HELP NUMBERS?
Main Menu:1 = Keycard2 = Reset?
PK3194_10_06 11/23/06 10:36 AM Page 67

Kaba Lodging Systems68
17. Press any key on the Front DeskUnit to send the programmingto the lock.
The new lock has received the validaddresses from the neighboring lock.
9-4 Common Door Suite Lock
Purpose: The Common Door Suiteis a multi-room configuration witha common door and several innerdoors (a maximum of eight). If the inner doors are to be rented separately, and are fitted with electronic locks, the common door requires a special program.
The common door and the innerdoors of a Common Door Suitearrangement are programmed differently than regular doors. The outer door, or common door,must know and remember all theroom numbers of the inner doorsin order to allow these guests toSwipe through.
A common door and inner doorscannot be part of an AdjoiningSuite. The common door and innerdoors must be programmed with allother Sub-Master addresses whichare to be used.
Requirements:Front Desk Unit FDU to lock communication cableInitialization keycard Programming keycard Programming Authorization keycard
Minimum Authorization keycard required:Programming Authorization
Expiry: N/A
COMMUNICATION SUCCESSFULPress any key to continue
PK3194_10_06 11/23/06 10:36 AM Page 68

User’s Guide 69
Example: Program the commondoor for Suite #250 (Section 2) andthe inner door #251.
Steps to program the CommonDoor Suite lock
1. Take the Front Desk Unit, withthe communication cable connected, to the lock to be programmed.
2. Swipe the Initialization keycardthrough the lock of the common door. The green andred LEDs light, then only thegreen LED flashes. If the LEDsdo not light in the mannerdescribed, reswipe the keycard.The lock is not initialized unlessthe LEDs follow the patterndescribed.
Once the lock is initialized, theInitialization keycard does notwork in this lock.
3. Press any key to activate theFront Desk Unit.
4. Swipe a ProgrammingAuthorization keycard throughthe Front Desk Unit reader.
5. Enter 4 to select theProgramming menu, then press < ↵ >.
6. Enter 1 to select the Lockoption, then press < ↵ >.
7. Enter 3 to select the ProgramCommon Suites option, thenpress < ↵ >.
Steps #8-15 program the common door of the suite.
8. Enter 1 to select the CommonDoor option, then press < ↵ >.
9. Enter 1 to select the CommonDoor option, then press < ↵ >.
10. For the example, enter 250, forSuite #250, then press < ↵ >.
11. Enter 2 to select the Sectionoption, then press < ↵ >.
Change (C = DONE)1 = Common Door 2502 = Section 0?
Suite number?
Change (C = DONE)1 = Common Door 02 = Section 0?
Enter Function:1 = Common Door2 = Inner Door?
Enter Function:1 = Program Addresses2 = Reset Addresses?
Program:1 = A Lock0 = HELP NUMBERS?
Main Menu:1 = Keycard2 = Reset?
PK3194_10_06 11/23/06 10:36 AM Page 69

Kaba Lodging Systems70
12. For this example,, enter 2, forSection 2, then press < ↵ >.
Continue in this manner toassign addresses to the Floor,Group, Zone, and Area options.Use < ▼ > to scroll to eachoption.
13. Press < C > when you have completed the input.
14. Swipe the Programming keycardthrough the lock of the common door. Make sure thesolid green LED is lit.
15. Insert the communication cableinto the reader of the commondoor lock while the green LED is lit.
16. Press any key on the Front DeskUnit to send the programmingto the lock.
Once the addresses have beensent to the lock on the commondoor the following screenreturns.
Steps #17-30 program the innerdoors of the suite.
17. Swipe the Initialization keycardthrough the lock of the innerdoor. The green and red LEDslight, then only the green LEDflashes. If the LEDs do not lightin this manner, reswipe the keycard. The lock is not initialized unless the LEDs follow the pattern described.
Once the lock is initialized, theInitialization keycard does notwork in this lock.
18. Press any key to activate theFront Desk Unit.
19. Swipe a ProgrammingAuthorization keycard throughthe Front Desk Unit.
20. Enter 4 to select theProgramming menu, then press < ↵ >.
21. Enter 1 to select the Lockoption, then press < ↵ >.
Program:1 = A Lock0 = HELP NUMBERS?
Enter Function:1 = Common Door2 = Inner Door?
COMMUNICATION SUCCESSFULPress any key to continue
Ready to sendnew configurationStrike a key,or C to quit
Change (C = DONE)1 = Common Door 2502 = Section 2?
SECTION number?
PK3194_10_06 11/23/06 10:36 AM Page 70

User’s Guide 71
22. Enter 3 to select the ProgramCommon Suites option, thenpress < ↵ >.
23. Enter 2 to select the Inner Dooroption, then press < ↵ >.
The Front Desk Unit will notprompt for the Common Doornumber unless you selected thatoption - see Section I.13,Common Door Enable.
24. Enter 2 to select the Inner Dooroption, then press < ↵ >.
25. For this example,, enter 251, forRoom #251, then press < ↵ >.
26. Press < C > when you have completed all the sub-masterlevels necessary.
27. Swipe the Programming keycardthrough the lock of the innerdoor. Make sure that the solidgreen LED is lit.
28. Insert the communication cableinto the reader of the inner doorlock while the green LED is lit.
29. Press any key on the Front DeskUnit to send the programmingto the lock.
30. If there is more than one innerdoor, repeat Steps #20-30 to program all the doors.
The addresses are now assigned tothe lock(s).
COMMUNICATION SUCCESSFULPress any key to continue
Ready to sendNew configurationStrike a key,or C to quit
Change (C = DONE)1 = Common Door 02 = Inner Door 251?
Inner Door #?
Change (C = DONE)1 = Common Door 02 = Inner Door 0?
Enter Function:1 = Common Door2 = Inner Door?
Enter Function:1 = Program Addresses0 = Reset Addresses?
PK3194_10_06 11/23/06 10:36 AM Page 71

Kaba Lodging Systems72
9-5 Guest or Staff Common Area Lock
Purpose: Guest or Staff CommonArea locks have a special programwhich allows access to a large num-ber of users in the hotel. The locksare programmed with a singleaddress or a multiple address. Therecan be up to eight guest commonareas or up to sixteen staff commonareas programmed into a single lock.
Requirements:Front Desk UnitFDU to lock communication cable Initialization keycard Programming keycard Programming Authorization keycard.
Minimum Authorization keycard required:Programming Authorization
Expiry: N/A
Steps to program the Guest orStaff Common Area lock
1. Take the Front Desk Unit, withthe communication cable connected, to the lock to be programmed.
2. Swipe the Initialization keycardthrough the lock. The green andred LEDs light, then only thegreen LED flashes. If the LEDsdo not light in the mannerdescribed, reswipe the keycard.
The lock is not initialized unlessthe LEDs follow the patterndescribed.
Once the lock is initialized, theInitialization keycard does notwork in this lock.
3. Press any key to activate theFront Desk Unit.
4. Swipe a ProgrammingAuthorization keycard throughthe Front Desk Unit.
5. Enter 4 to select theProgramming menu, then press < ↵ >.
6. Enter 1 to select the Lockoption, then press < ↵ >.
7. Enter 4 to select the ProgramCommon Areas option, thenpress < ↵ >.
Program:1 = Guest Comm. Areas2 = Staff Comm. Areas ?
Enter Function:1 = Program Addresses2 = Reset Addresses?
Program:1 = A Lock0 = HELP NUMBERS?
Main Menu:1 = Keycard2 = Reset?
PK3194_10_06 11/23/06 10:36 AM Page 72
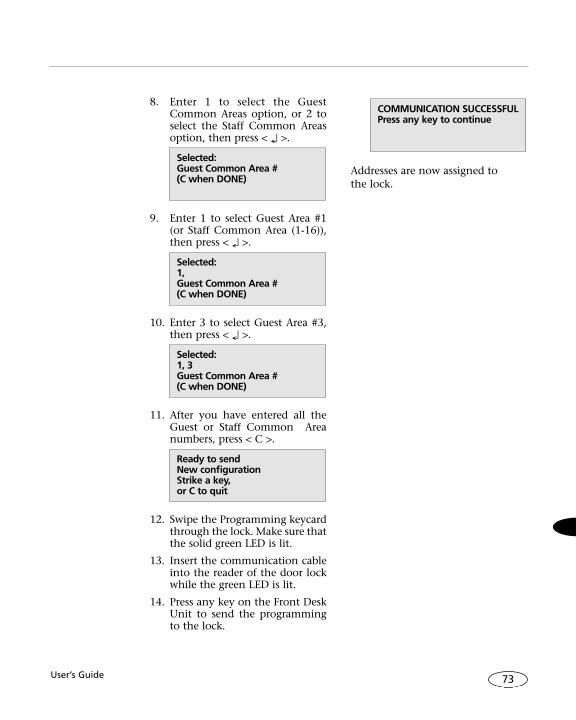
User’s Guide 73
8. Enter 1 to select the GuestCommon Areas option, or 2 toselect the Staff Common Areasoption, then press < ↵ >.
9. Enter 1 to select Guest Area #1(or Staff Common Area (1-16)),then press < ↵ >.
10. Enter 3 to select Guest Area #3,then press < ↵ >.
11. After you have entered all theGuest or Staff Common Areanumbers, press < C >.
12. Swipe the Programming keycardthrough the lock. Make sure thatthe solid green LED is lit.
13. Insert the communication cableinto the reader of the door lockwhile the green LED is lit.
14. Press any key on the Front DeskUnit to send the programmingto the lock.
Addresses are now assigned to the lock.
COMMUNICATION SUCCESSFULPress any key to continue
Ready to sendNew configurationStrike a key,or C to quit
Selected:1, 3Guest Common Area #(C when DONE)
Selected:1,Guest Common Area #(C when DONE)
Selected:Guest Common Area #(C when DONE)
PK3194_10_06 11/23/06 10:36 AM Page 73

Kaba Lodging Systems74
9-6 Restricted AreaLock
Purpose: The Restricted Area level is used for offices, privateapartments, or storage areas whereit is necessary to strictly controlaccess. Access to Restricted areas islimited to holders of Restricted Areaand Emergency keycards.
There are 200 restricted areaaddresses available that must benumbered from 1 to 200. These 200 numbers can be assigned to the hotel in advance using theProgramming Log Sheet and programmed into the lock later.Programming is simple - you assign one of the 200 numbers andprogram this number into the lock.
Requirements:Front Desk Unit FDU to lock communication cableInitialization keycardProgramming keycardProgramming Authorization keycard
Minimum keycard required:Programming Authorization
Expiry: N/A
Steps to program theRestricted Area lock
1. Take the Front Desk Unit, withthe communication cable connected, to the lock to be programmed.
2. Swipe the Initialization keycardthrough the lock. The green
and red LEDs light, then onlythe green LED flashes. If theLEDs do not light in the mannerdescribed, reswipe the keycard.The lock is not initialized unlessthe LEDs follow the patterndescribed.
Once the lock is initialized, theInitialization keycard does notwork in this lock.
3. Press any key to activate theFront Desk Unit.
4. Swipe a ProgrammingAuthorization keycard throughthe Front Desk Unit reader.
5. Enter 4 to select theProgramming menu, then press < ↵ >.
6. Enter 1 to select the Lockoption, then press < ↵ >.
7. Enter 5 to select the ProgramRestricted Areas option, thenpress < ↵ >.
Enter Function:1 = Program Addresses2 = Reset Addresses?
Program:1 = A Lock0 = HELP NUMBERS?
Main Menu:1 = Keycard2 = Reset?
PK3194_10_06 11/23/06 10:36 AM Page 74

User’s Guide 75
8. Enter 1 to select the RestrictedArea option, then press < ↵ >.
9. Enter 1 for Restricted Area #1,then press < ↵ >.
10. Press < C >.
11. Swipe the Programming keycardthrough the lock. Make sure thatthe solid green LED is lit.
12. Insert the communication cableinto the reader of the door lockwhile the green LED is lit.
13. Press any key on the Front DeskUnit to send the programmingto the lock.
Addresses are now assigned to the lock.
9-7 Resetting Lock Time
Purpose: All locks and the FrontDesk Unit keep time. The FrontDesk Unit can download time tothe locks as required. The FrontDesk Unit will give the lock its owntime in encrypted fashion. It is notnecessary to tell the Front DeskUnit current local time for thismenu. It is necessary to reset thelock time twice a year to eliminatethe drift between the time clocks ofthe locks and the Front Desk Unit.
Time must also be reset wheneverbatteries are changed. Expected battery life is 2-3 years, dependingon use. Any lock which is taken off battery power for more than a few seconds will stop countingtime and cease to function even when the batteries are replaced.This is a security feature whichforces the maintenance staff toreset time after any interruption in battery power.
Requirements:Front Desk Unit FDU to lock communication cable Initialization keycard (if lock haslost power) Programming keycard Programming Authorization keycard
Minimum Authorization keycard required:Programming Authorization
Expiry: N/A
COMMUNICATION SUCCESSFULPress any key to continue
Ready to sendnew configurationStrike a key,or C to quit
Change (C = DONE)1 = Restr. Area 10 = HELP NUMBERS?
Restricted Area #?
Change (C = DONE)1 = Restr. Area 00 = HELP NUMBERS?
PK3194_10_06 11/23/06 10:36 AM Page 75
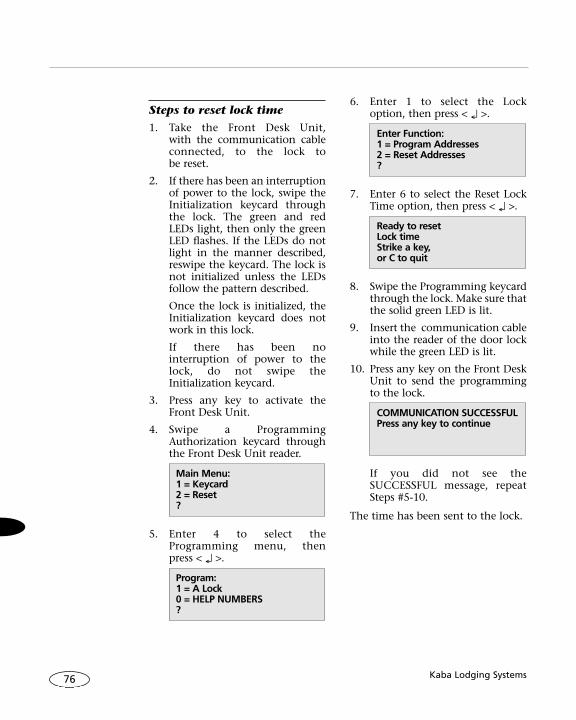
Kaba Lodging Systems76
Steps to reset lock time
1. Take the Front Desk Unit, with the communication cableconnected, to the lock to be reset.
2. If there has been an interruptionof power to the lock, swipe theInitialization keycard throughthe lock. The green and redLEDs light, then only the greenLED flashes. If the LEDs do notlight in the manner described,reswipe the keycard. The lock isnot initialized unless the LEDsfollow the pattern described.
Once the lock is initialized, theInitialization keycard does notwork in this lock.
If there has been no interruption of power to thelock, do not swipe theInitialization keycard.
3. Press any key to activate theFront Desk Unit.
4. Swipe a ProgrammingAuthorization keycard throughthe Front Desk Unit reader.
5. Enter 4 to select theProgramming menu, then press < ↵ >.
6. Enter 1 to select the Lockoption, then press < ↵ >.
7. Enter 6 to select the Reset LockTime option, then press < ↵ >.
8. Swipe the Programming keycardthrough the lock. Make sure thatthe solid green LED is lit.
9. Insert the communication cableinto the reader of the door lockwhile the green LED is lit.
10. Press any key on the Front DeskUnit to send the programmingto the lock.
If you did not see the SUCCESSFUL message, repeatSteps #5-10.
The time has been sent to the lock.
COMMUNICATION SUCCESSFULPress any key to continue
Ready to resetLock timeStrike a key,or C to quit
Enter Function:1 = Program Addresses2 = Reset Addresses?
Program:1 = A Lock0 = HELP NUMBERS?
Main Menu:1 = Keycard2 = Reset?
PK3194_10_06 11/23/06 10:36 AM Page 76
User’s Guide 77
10 RAC Programming &Reset
Chapter
1. Put all four little DIP switches inup position (delay dip switches)"S2"
2. Push "S1" once and wait 10 sec.
3. Put all DIP switches back down"S2".
4. Swipe the INITIALIZATION keycard in the swipe reader (Thegreen LED (D18) will come on ifproperly initialized).
5. Program the reader as a GUESTCOMMON AREA, use your DB-9communication cable to com-municate with the board.
P.S. This reader can ONLY be programmed as a GUEST COMMON AREA.
You do not need the program-ming keycard for this cardreader.
To program unit: at the main menu
Press 4 then ENTER
Press 1 then ENTER
Press 4 then ENTER
Press 1 then ENTER
Enter common area number
Then Press Enter
Then Press Clear or "C"
Connect the DB9 cable to circuit-
board. Then press Enter.
Unit should say communicationsuccesful.
PK3194_10_06 11/23/06 10:36 AM Page 77

Kaba Lodging Systems78
PK3194_10_06 11/23/06 10:36 AM Page 78
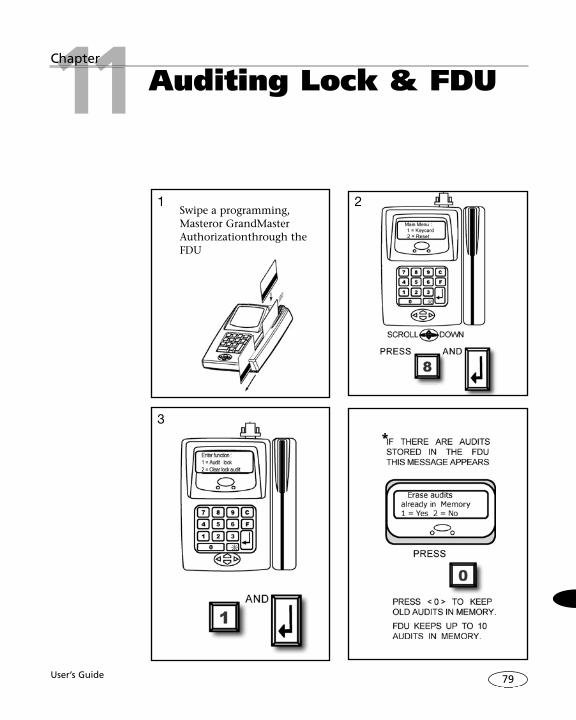
User’s Guide 79
11 Auditing Lock & FDUChapter
Swipe a programming,Masteror GrandMasterAuthorizationthrough theFDU
21
3
PK3194_10_06 11/23/06 10:36 AM Page 79

Kaba Lodging Systems80
At the insert authorization promptswipe a programming,master orGrand master Authorizationthrough the FDU
At "Main Menu"to view the audit
Press 8 and < ↵ >
Then press 3 and < ↵ >
At the insert authorization promptswipe a programming,master orGrand master Authorizationthrough the FDU
At "Main Menu"to view the audit
Press 8 and < ↵ >
Then press 4 and < ↵ >
54
6
PK3194_10_06 11/23/06 10:36 AM Page 80
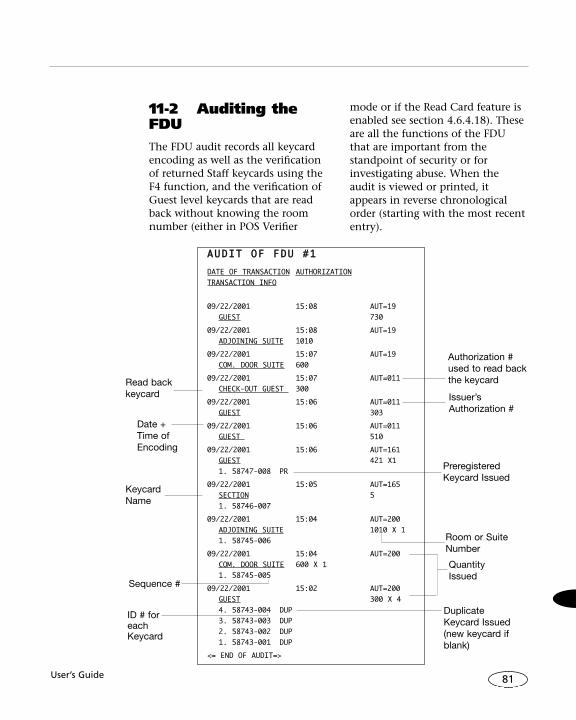
User’s Guide 81
11-2 Auditing theFDUThe FDU audit records all keycardencoding as well as the verificationof returned Staff keycards using theF4 function, and the verification ofGuest level keycards that are readback without knowing the roomnumber (either in POS Verifier
mode or if the Read Card feature isenabled see section 4.6.4.18). Theseare all the functions of the FDUthat are important from thestandpoint of security or forinvestigating abuse. When theaudit is viewed or printed, itappears in reverse chronologicalorder (starting with the most recententry).
AAUUDDIITT OOFF FFDDUU ##11DATE OF TRANSACTION AUTHORIZATIONTRANSACTION INFO
09/22/2001 15:08 AUT=19GUEST 730
09/22/2001 15:08 AUT=19ADJOINING SUITE 1010
09/22/2001 15:07 AUT=19COM. DOOR SUITE 600
09/22/2001 15:07 AUT=011CHECK-OUT GUEST 300
09/22/2001 15:06 AUT=011GUEST 303
09/22/2001 15:06 AUT=011GUEST 510
09/22/2001 15:06 AUT=161GUEST 421 X1 1. 58747-008 PR
09/22/2001 15:05 AUT=165SECTION 5 1. 58746-007
09/22/2001 15:04 AUT=200ADJOINING SUITE 1010 X 11. 58745-006
09/22/2001 15:04 AUT=200COM. DOOR SUITE 600 X 11. 58745-005
09/22/2001 15:02 AUT=200GUEST 300 X 4 4. 58743-004 DUP 3. 58743-003 DUP 2. 58743-002 DUP 1. 58743-001 DUP
<= END OF AUDIT=>
Date +Time ofEncoding
KeycardName
ID # for each Keycard
Issuer’sAuthorization #
PreregisteredKeycard Issued
Quantity Issued
Room or SuiteNumber
DuplicateKeycard Issued(new keycard ifblank)
Read backkeycard
Sequence #
Authorization #used to read backthe keycard
PK3194_10_06 11/23/06 10:36 AM Page 81

Kaba Lodging Systems82
The Front Desk Unit audit can alsobe verified on the Front Desk Unitdisplay in abbreviated form.
11.3 Viewing andPrinting the FDUAudit
Purpose: The Front Desk Unit auditcan be displayed or printed inmuch the same way as a lock audit.The audit can be filtered accordingto:
- Sequence of entries (all, previous100, etc.)
- Authorization number- Type of keycard- Room number- Logged-off Staff cards- Audited checkouts
Logged-off Staff cards refers to Staffcards read using the F4 function(see section 3.10.4).
Audited Checkouts refers to Guestcards read using the F2 function(no room number required, seesection 3.10.2). The F2 function,which requires the room number tobe entered before information onthe keycard can be verified, is notaudited (see section 3.10.1).
Minimum keycard required:Grand Master Authorization
Steps to view or print the Front
Desk Unit audit entries:
1. Press any key to activate theFront Desk Unit.
2. Swipe a Grand MasterAuthorization keycard throughthe FDU.
Main Menu:1 = Keycard2 = Reset?
Keycard NameRoom Number
Quantity of KeycardsEncoded
Room Number
Issuer's Authorization#Duplicate KeycardIssuedCheck Out
Guest472 X 2 Aut=190
Area Reset1 X 1 Aut=190 Dup
Guest1000 X 1 Aut=200CK
PK3194_10_06 11/23/06 10:36 AM Page 82

User’s Guide
3. Enter 6 to select the Front DeskUnit Audit menu, then press < ø>.
4. Select option 1 to view, or 2 toprint. In order to print, a serial
or parallel printer must beconnected to the FDU andproperly configured (see section4.6.17).
The following options for filteringthe Audit records are available from the View or Print menu whichappears:
Enter Function:1 = View audit2 = Print audit?
83
Selection Result
1 = All the Audit The entire audit is displayed in reverse chronological order, from the newest record to the oldest.
2 = A certain Number Only the most recent records will be displayed, up to the specified number of entries.
3 = By Keycard Type The following sub-menu appears, allowing the user to select the keycard type (eg: 1 for keycard, followed by 3 for Adjoining Suite). All records for the selected type of keycard will be displayed.
Card Type Type of keycard1= Keycard ---(1)---> (1-30)?2= Reset?
4 = By Authorization Specify the Authorization number. All keycards encoded or other operations using the specified Authorization will be displayed.
5 = By Room Number Specify the room number. All records for the room will be displayed.
6 = Verify Staff Cards A list of all the log-offs of Staff cards is displayed
7 = Audited Checkouts A list of all the audited guest check-outs is displayed
PK3194_10_06 11/23/06 10:36 AM Page 83

Kaba Lodging Systems
When viewing the audit onthe FDU screen, use the <�>and <�> keys to scroll throughthe list of records.
11.4 Setting The FDUTo Print
SETTING THE FDU TO PRINT WITHA PARALLEL PRINTER
1. PASS A PROGRAMMING,MASTER OR GRANDMASTER AUTHORIZATIONKEY THROUGH THE FDUAND THEN,
• PRESS < 5 > AND < ENTER >,
• PRESS < 1 > AND < ENTER >,
• PRESS < 17> AND PRESS <ENTER >,
• PRESS < 0 > DO NOT PRESS <ENTER >,
• PRESS < 2 > THEN,
• PRESS < 1 > THEN, AT “ SELECTFEATURE” MENU,
2. PRESS < C > AND THEN,
3. PRESS < 1 > TO SAVE THECHANGES. GO BACK TO“MAIN MENU”, NOW THEFDU IS READY TO PRINT
➞ TO PRINT THE FDU AUDITPRESS < 6 > AND < ENTER >,THEN < 2 > AND < ENTER >.
➞ TO PRINT A LOCK AUDITPRESS < 8 > AND < ENTER >,THEN < 4 > AND < ENTER >.
11.5 Saving the Auditon a PC.
The audit data can be saved asa file on a PC. For more infor-mation, contact Kaba.
84
PK3194_10_06 11/23/06 10:36 AM Page 84
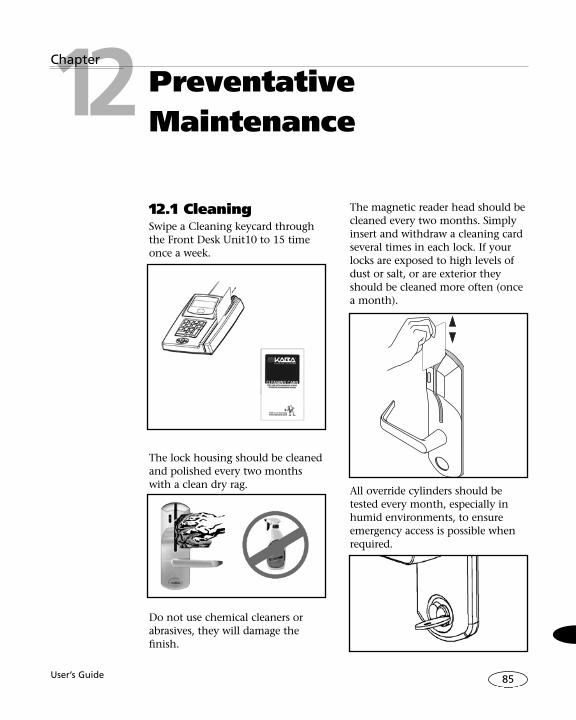
12.1 CleaningSwipe a Cleaning keycard throughthe Front Desk Unit10 to 15 timeonce a week.
The lock housing should be cleanedand polished every two monthswith a clean dry rag.
Do not use chemical cleaners orabrasives, they will damage thefinish.
The magnetic reader head should becleaned every two months. Simplyinsert and withdraw a cleaning cardseveral times in each lock. If yourlocks are exposed to high levels ofdust or salt, or are exterior theyshould be cleaned more often (oncea month).
All override cylinders should betested every month, especially inhumid environments, to ensureemergency access is possible whenrequired.
12 PreventativeMaintenance
Chapter
User’s Guide 85
PK3194_10_06 11/23/06 10:36 AM Page 85
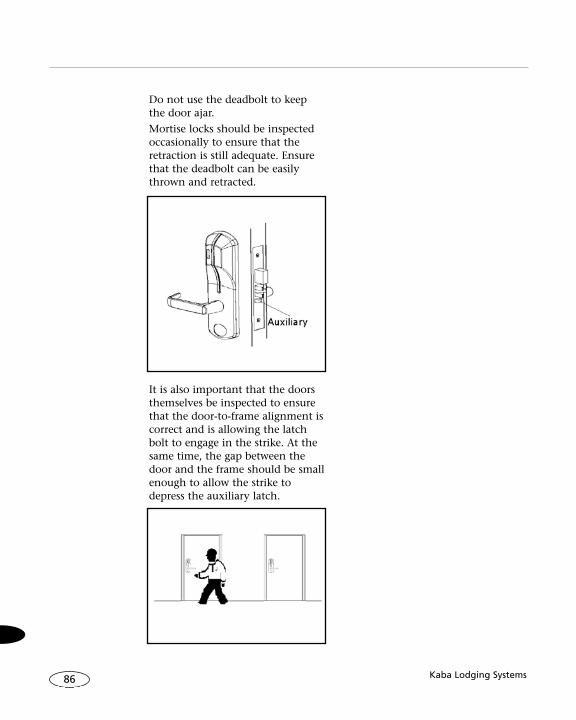
Kaba Lodging Systems86
Do not use the deadbolt to keepthe door ajar.
Mortise locks should be inspectedoccasionally to ensure that theretraction is still adequate. Ensurethat the deadbolt can be easilythrown and retracted.
It is also important that the doorsthemselves be inspected to ensurethat the door-to-frame alignment iscorrect and is allowing the latchbolt to engage in the strike. At thesame time, the gap between thedoor and the frame should be smallenough to allow the strike todepress the auxiliary latch.
PK3194_10_06 11/23/06 10:36 AM Page 86
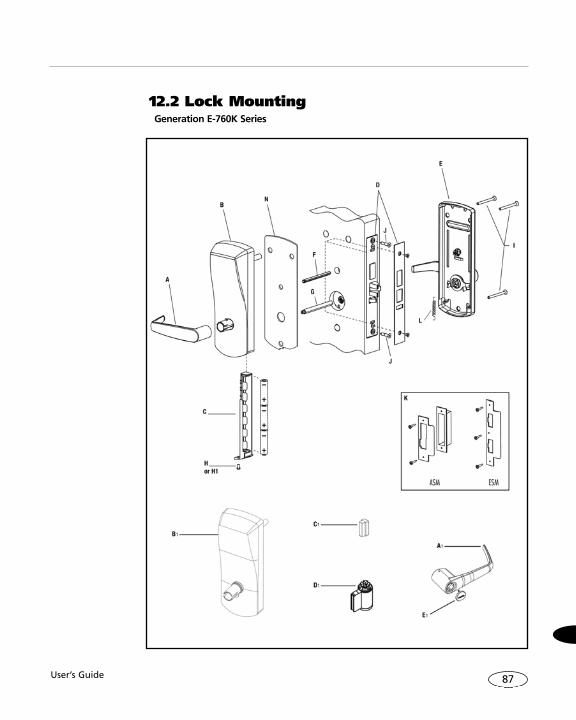
User’s Guide 87
12.2 Lock MountingGeneration E-760K Series
PK3194_10_06 11/23/06 10:36 AM Page 87

Kaba Lodging Systems88
Generation E-760K Series
Insert the cylinder (D) orequivalent tool into theoverride shaft and turn it 90ºclockwise so that the twosmall indents on the cross arenow vertically in line.
A = The small indents onthe cross of the overrideshaft in line horizontally
C = The lever catch in theout position
Push in the lever catch firmly
1 2
3
PK3194_10_06 11/23/06 10:36 AM Page 88

User’s Guide 89
Generation E-760K Series
Insert the cylinder into thelever handle
Put the cylinder plug into thelever
Make sure that the cylinderplug does not fall out, insertthe key into the cylinder. Thekey will be horizontal
4
5
6
Insert the cylinder into thelever handle
7
Put the cylinder plug into thelever
8
CAUTION:
IF THE LEVER IS NOT ASSEMBLEDWITH THE KEY IN THE POSITIONSHOWN IN FIG. 8 & FIG., THEINSIDE MECHANISM OF THELOCK COULD BE DAMAGED IFTHE LEVER IS ROTATED ANDFORCED.
PK3194_10_06 11/23/06 10:36 AM Page 89

Kaba Lodging Systems90
Generation E-760K Series
9
Fit the lever handle onto thedrive tube. It should restapproximately 1/16” from thebody of the housing.
If it can’t be pushed that closeto the housing, the lever catchis probably not pushed in.Push it in.
If the lever catch is stuck, theoverride shaft is in the wrongposition. The two smallindents on the cross of theoverride shaft must bevertically aligned.
10
Press the lever firmly againstthe housing while turning thekey counterclockwise (thisapplies to both right-handedand left-handed locks) until itis in the horizontal position.
Troubleshooting Tip:
If you have assembled the leverand housing with the key in thewrong position, the key will getstuck. To remove the key, turn itso that it is in the verticalposition and insert a small flatscrewdriver less than 1/8” intothe hole under the lever handleto push Lever Catch in (seeFig.3). Remove key. If it is stillstuck, turn the key 90º clockwiseto the horizontal position andpush the Lever Catch in againwith the small screwdriver.Remove key.
PK3194_10_06 11/23/06 10:36 AM Page 90

User’s Guide 91
Generation E-760K Series
The cap has a small groove onone edge (to allow ease ofremoval) this should be facingdown. Insert bottom snap ofcap “I” in handle hole belowthe cylinder. With a smallscrewdriver, push top snap ofcap down while pushing thecap into place to cover thekeyhole
13
11
To remove the cap, insert asmall flat screwdriver into thisgroove and gently pry the capoff, being careful not todamage it. (You may want tocover the bottom of the leverto protect the finish frombeing scratched through theprocess of removing the cap).
12
- Remove the cap from thelever handle (see Fig. 14)
- Insert key
- Turn the key clockwise untilit stops.
- Release key.
- Use a small flat screwdriverto push in the lever catchthrough the small holeunderneath the lever handle
- Pull the lever off the lock (becareful not to lose thecylinder plug).
PK3194_10_06 11/23/06 10:36 AM Page 91

Kaba Lodging Systems92
12.2 Lock MountingGeneration E-760 Series
PK3194_10_06 11/23/06 10:36 AM Page 92

User’s Guide 93
Generation E-760 Series
If installing the lock withmortise outdoors, install thegasket on the outside housingprior to assembly, aligning thenotch in the gasket with thebattery compartment.
1. Insert the slotted end ofthe square spindle (G)into the outside leverhub until it locks, at anangle of 45º. (Thespindle can be removedby pulling on it, iforiented incorrectly.)
2. Insert the grooved endof the thumbturnspindle (F) in the upperhub of the outsidehousing. (It will clip inplace.)
3. Place the outsidehousing on the door sothat the spindlesengage the hubs on themortise
On the inside trim assemblyturn the lever to the correcthorizontal rest position for thehanding of the door. Installthe tension spring (L) betweenthe handle (H) and the post(P).
1 2
3
PK3194_10_06 11/23/06 10:36 AM Page 93

Kaba Lodging Systems94
Generation E-760 Series
Assemble the lever on theoutside housing, in thehorizontal rest positionappropriate to the handing ofthe door. Simply push thelever onto the tube until itclicks in place. If more force isrequired, use a rubber mallet.Test the attachment of thehandle by pulling smartly onit.
5
Put the thumbturn (T) in avertical position and place theinside trim assembly on thedoor so that the upper andlower spindles (F) and (G)engage the thumbturn andthe inside lever. Fasten to theoutside housing using thethree 1/8” hex drive mountingscrews (I).
4
The lever is field reversible. Ifthe handing is incorrect,insert a small pick or flatscrewdriver in the hole in thehub as shown. Gently pryback the spring clip inside thehub, and remove the handle.
7
Three AA batteries shouldalready be installed in thebattery holder (C). Insert thebattery holder into the outsidehousing and secure it usingthe 6-32 x 5/16” (7.9mm) Torxdrive screw (H) for E-760Series or Spannerdrive screw(H1) for exterior application.
6
PK3194_10_06 11/23/06 10:36 AM Page 94

User’s Guide 95
Solitaire 710-II Series
Remove the battery cover anddisconnect the battery pack.
2
Remove the medallion andopen the door with
5/64”ALLEN Key
5/64”ALLEN Key
1
1. Disconnect the outsidehousing.
2. Disconnect the mortisecable.
4
Remove the four mountingscrews.
3
PK3194_10_06 11/23/06 10:36 AM Page 95
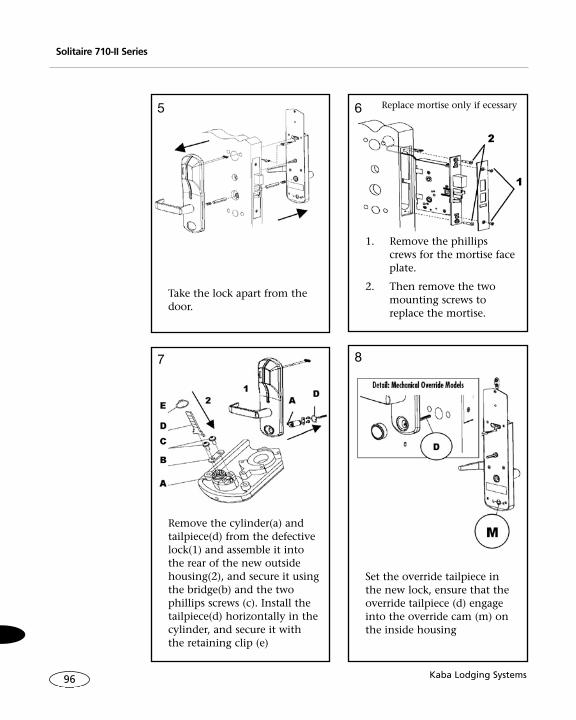
Kaba Lodging Systems96
Solitaire 710-II Series
1. Remove the phillipscrews for the mortise faceplate.
2. Then remove the twomounting screws toreplace the mortise.
6
Take the lock apart from thedoor.
Replace mortise only if ecessary5
Set the override tailpiece inthe new lock, ensure that theoverride tailpiece (d) engageinto the override cam (m) onthe inside housing
8
Remove the cylinder(a) andtailpiece(d) from the defectivelock(1) and assemble it intothe rear of the new outsidehousing(2), and secure it usingthe bridge(b) and the twophillips screws (c). Install thetailpiece(d) horizontally in thecylinder, and secure it withthe retaining clip (e)
7
PK3194_10_06 11/23/06 10:36 AM Page 96

User’s Guide 97
Solitaire 710-II Series
Insert one compressionsprings(s) into each of theinside and outside handles.Then insert one squarespindle(p) into the inside andoutside housing.
10
On the new inside housingrotate the override cam(m)using a flat head screwdriver,until the indicator markcorresponds with thehandingof the door.
(L= left, r= right hand)
9
Secure both housings to thedoor using the four moutingscrews. Turn the inside handleto ensure that the bolts retrats.
12
1. Connect the outside andinside Housing.
2. Connect the mortisecable.
11
1/8 ”ALLEN Key
PK3194_10_06 11/23/06 10:36 AM Page 97

Kaba Lodging Systems98
Solitaire 710 Series
Remove the two screws at thebottom end cap anddisconnect the battery pack.
2
Remove the medallion andopen the door with the entrykey
5/64”ALLEN Key
5/64”ALLEN Key
1
Use a phillips screwdriver toremove the two long screwson the top and the, two shortones at the bottom.
4
Remove the cover plate. Popout the bottom corner first.
3
Solitaire 710 Series
PK3194_10_06 11/23/06 10:36 AM Page 98

User’s Guide 99
Solitaire 710 Series
Befofe installing the new lockon the door use a flatscrewdriver to rotate theoverride cam (oc) on the 710Inside housing Counterclockwise, until it stops. Thenreturn it to the horizontalposition.
6
Remove the outside and theinside housing from the door.
5
Mount the outside housing onthe door and connect thereader (r) cable to theinsidehousing.
8
Set the latch hub ( b ) to theproper position for thehanding of the lock and thespindle.
7
PK3194_10_06 11/23/06 10:36 AM Page 99
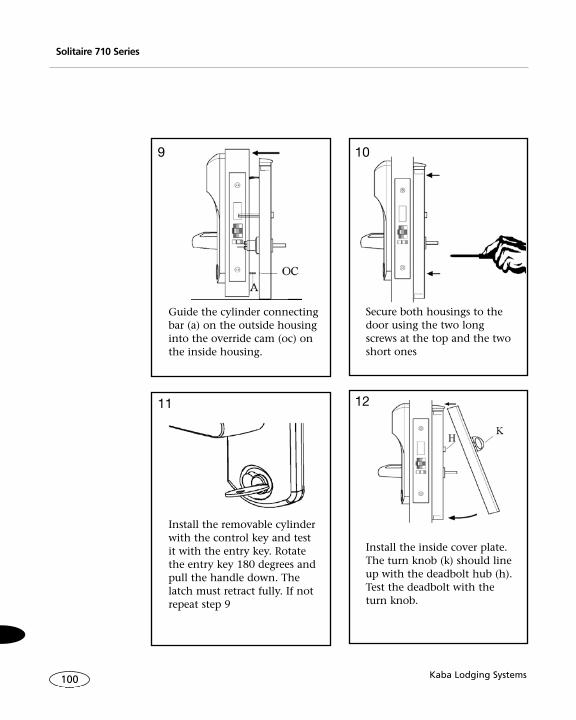
Kaba Lodging Systems100
Solitaire 710 Series
Secure both housings to thedoor using the two longscrews at the top and the twoshort ones
10
Guide the cylinder connectingbar (a) on the outside housinginto the override cam (oc) onthe inside housing.
9
Install the inside cover plate.The turn knob (k) should lineup with the deadbolt hub (h).Test the deadbolt with theturn knob.
12
Install the removable cylinderwith the control key and testit with the entry key. Rotatethe entry key 180 degrees andpull the handle down. Thelatch must retract fully. If notrepeat step 9
11
PK3194_10_06 11/23/06 10:36 AM Page 100

User’s Guide 101
Solitaire 710 Series
Connect the battery pack atthe bottom of the iinsidehousing and secure it with thetwo scews. Now the lock isready to be programmed.
14
Install the handle and test it.If the lever feels too tight themortise should be centered(steps 15 -16). If the latchDoesn’t retract repeat step 7.
13
Remove the two mortisescrews, then tighten the fourmounting screws into theinside housing. Test thehandles and secure themortise and the plate.
16
To center the mortise firstloosen the four mountingscrews on the inside housing,then remove the two screwsfrom the mortise plate.
15
5/64 ”ALLEN Key
5/64 ”ALLEN Key
PK3194_10_06 11/23/06 10:36 AM Page 101

Kaba Lodging Systems102
12.3 Replacing the Batteries
Remove The 2 Screws ThatHolding The Battery BackLocated At The Bottom Of TheInside Housing Using The5/64 Allen Key
Remove the battery cover crewwith a 1/16” allen key, thendisconnect the battery cable
System 700 System 710
System 710-II E-760 Series
Remove the 6-32 x 5/16”(7.9Mm) torx screw (h) for e-760 series using a torx t15screw driver.
Remove the battery cover anddisconnect the battery pack.
5/64 ”ALLEN Key
PK3194_10_06 11/23/06 10:36 AM Page 102
User’s Guide 103
After Changing Batteries
1.Swipe an initialization keycard onthe lock, green and red led’s flash,then the green flashes once.
2.Pass a programming, master orgrand master authorizationthrough the FDU and then,
• Press < 4 > and < enter >,
• Press < 1 > and < enter >,
• Press < 6 > and < enter >,
3.Insert the programming key intothe lock, a solid green led lightsup.
4.Connect the programming cableinto the lock,
5.Press < enter > on the FDU tosend the new configuration.
Tips on Installing theBatteries
Make sure when replacing thebatteries that the batteries areinstalled the proper way. Thepositive of the battery toward thepositive connector.
What Type of Batteries to use
- Do not mix old and new batteriestogether.
- Do not use rechargeable batteries.
- Do not use heavy duty alkalinebatteries use regular alkalinebatteries
Tips on Installing theBatteries
Make sure when replacing thebatteries to verify if the batterycable is not pinched or damage.
PK3194_10_06 11/23/06 10:36 AM Page 103
Kaba Lodging Systems104
12.4 PreventativeManitenanceSchedule
Monthly Maintenance:
• All LocksEnsure all locks, are properlycleaned using Kaba CleaningCards** 10-15 swipes per unit,including Guest/Staff commonareas, ie: Pools, Gyms, Elevator,etc...To clean EXTERIOR of locks usecloth with mild soapy water, thenwipe dry. Do not use abrasive orharsh cleaning products as thiswill damage finish.
• All FDU’sEnsure all FDU’s are properlycleaned using Kaba CleaningCards**10-15 swipes per unit.
Each 6 Months:
• Do same task as scheduledforMonthly Maintenance
+• FDU Data Transfer
if you have more than 1 FDUSeeFDU To FDU Transfer on reverseside
+• Reset Lock Time
procedure to ensure that the locksand FDU’s are on the same time(see reverse side)
Once a Year:
• Do same task as scheduledforMonthly & 6 MonthSchedule
+• Test each Lock with mechanical
override key (if applicable)
+• Create a Battery Test Keycard**
Swipe through each lock to testbattery level (see reverse side)
* You can download a new Maintenance Schedule @ http://connect.kabalodging.com**These products are available at 1-877-468-3555 or online www.keycard.com
PK3194_10_06 11/23/06 10:36 AM Page 104

User’s Guide 105
FDU Menu Chart
Front Desk Authorization FunctionsVersion 6.5
1 - Keycard
– ● 1 - Guest– ● 2 - One Shot– ● 3 - Adjoining Suite– ● 4 - Common Door Suite– ● 5 - Convention Suite– ● 6 - Pre-Registered
– ● 1 - Guest– ● 2 - Adjoining Suite– ● 3 - Common Door Suite
– ★ 13 - Bellman’s Master– ● 23 - Battery Test
2 - Reset
– ● 1 - Guest– ● 2 - One Shot– ● 3 - Adjoining Suite– ● 4 - Common Door Suite– ● 25 - Passage Keycard– ● 30 - POS Authorization
7 - PMS Interface*
* If equipped with PMS Interface Mode.
NOTE: If the ProgrammingAuthorization level is notenabled, then addresses 1-120 are available forFront Desk Authorizationkeycards.
Legend
● Front Desk Authorization (1-100)
★ Bellman’s Master Authorization (121-160)
PK3194_10_06 11/23/06 10:36 AM Page 105

PK3194_10_06 11/23/06 10:36 AM Page 106


Kaba Lodging Systems7301 Boul. Décarie Montréal (QC) H4P 2G7
Technical Support:1.800.906.4526
Customer Service:
T: 1.877.468.3555
F: 514.735.6589
General Information:
www.kabalodging.com
Online Consumable Orders:
www.keycard.com
To access all of our easy steps,please visit our Support Website:
http://connect.kabalodging.com PK
319
4_1
0_0
6 P
rin
ted
in
Can
ada
PK3194_11_06 Cover 11/29/06 12:11 PM Page 1