Embed Size (px)
Citation preview
User's Guide
0931991
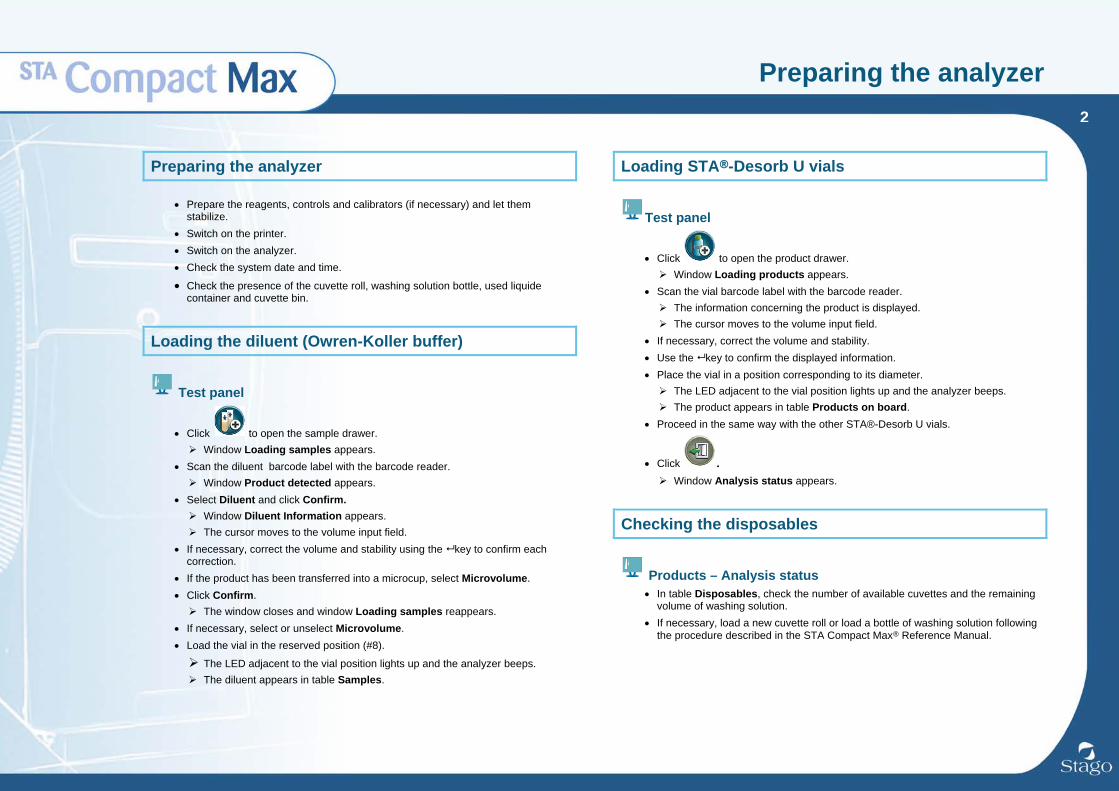
Preparing the analyzer
2
Preparing the analyzer
• Prepare the reagents, controls and calibrators (if necessary) and let them stabilize.
• Switch on the printer. • Switch on the analyzer. • Check the system date and time.
• Check the presence of the cuvette roll, washing solution bottle, used liquide container and cuvette bin.
Loading the diluent (Owren-Koller buffer)
Test panel
• Click to open the sample drawer. Window Loading samples appears.
• Scan the diluent barcode label with the barcode reader. Window Product detected appears.
• Select Diluent and click Confirm. Window Diluent Information appears. The cursor moves to the volume input field.
• If necessary, correct the volume and stability using the key to confirm each correction.
• If the product has been transferred into a microcup, select Microvolume. • Click Confirm.
The window closes and window Loading samples reappears. • If necessary, select or unselect Microvolume. • Load the vial in the reserved position (#8).
The LED adjacent to the vial position lights up and the analyzer beeps. The diluent appears in table Samples.
Loading STA -Desorb U vials
Test panel
• Click to open the product drawer. Window Loading products appears.
• Scan the vial barcode label with the barcode reader. The information concerning the product is displayed. The cursor moves to the volume input field.
• If necessary, correct the volume and stability. • Use the key to confirm the displayed information. • Place the vial in a position corresponding to its diameter.
The LED adjacent to the vial position lights up and the analyzer beeps. The product appears in table Products on board.
• Proceed in the same way with the other STA®-Desorb U vials.
• Click . Window Analysis status appears.
Checking the disposables
Products – Analysis status • In table Disposables, check the number of available cuvettes and the remaining
volume of washing solution. • If necessary, load a new cuvette roll or load a bottle of washing solution following
the procedure described in the STA Compact Max Reference Manual.
Product loading
3
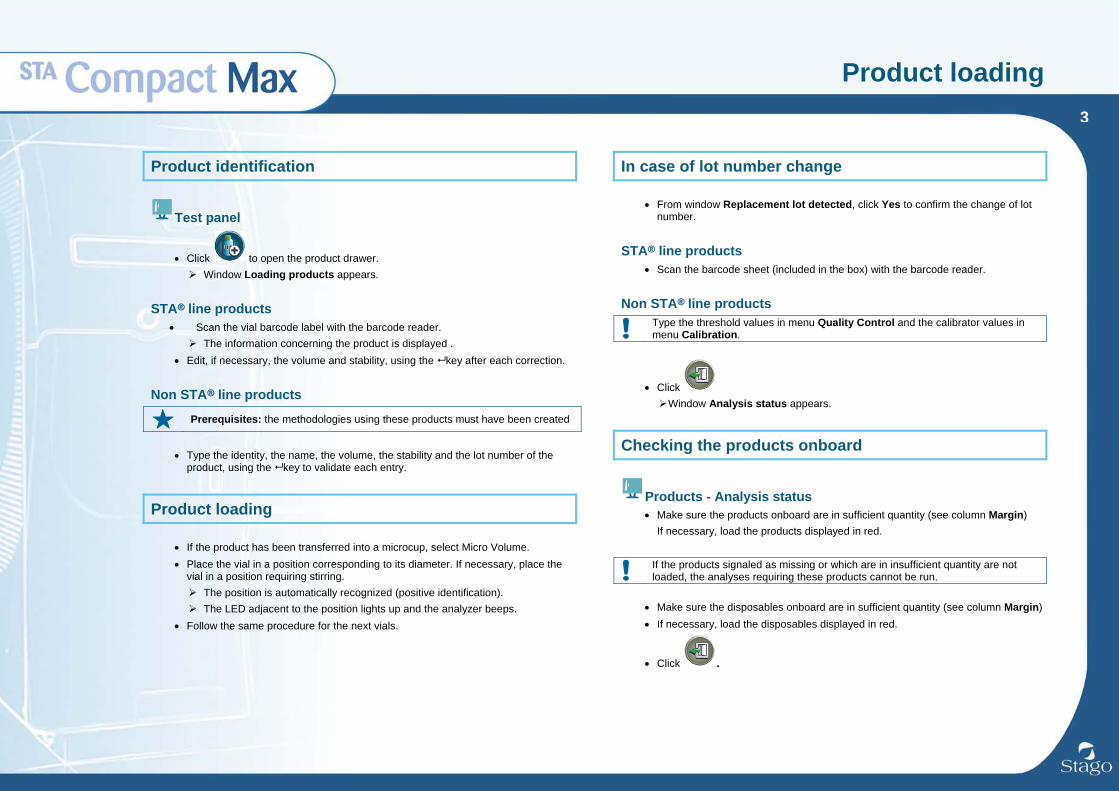
Product identification
Test panel
• Click to open the product drawer. Window Loading products appears.
STA line products • Scan the vial barcode label with the barcode reader.
The information concerning the product is displayed . • Edit, if necessary, the volume and stability, using the key after each correction.
Non STA line products
Prerequisites: the methodologies using these products must have been created
• Type the identity, the name, the volume, the stability and the lot number of the
product, using the key to validate each entry.
Product loading
• If the product has been transferred into a microcup, select Micro Volume. • Place the vial in a position corresponding to its diameter. If necessary, place the
vial in a position requiring stirring. The position is automatically recognized (positive identification). The LED adjacent to the position lights up and the analyzer beeps.
• Follow the same procedure for the next vials.
In case of lot number change
• From window Replacement lot detected, click Yes to confirm the change of lot number.
STA line products • Scan the barcode sheet (included in the box) with the barcode reader.
Non STA line products
Type the threshold values in menu Quality Control and the calibrator values in menu Calibration.
• Click Window Analysis status appears.
Checking the products onboard
Products - Analysis status • Make sure the products onboard are in sufficient quantity (see column Margin)
If necessary, load the products displayed in red.
If the products signaled as missing or which are in insufficient quantity are not loaded, the analyses requiring these products cannot be run.
• Make sure the disposables onboard are in sufficient quantity (see column Margin) • If necessary, load the disposables displayed in red.
• Click .
Sample loading
4
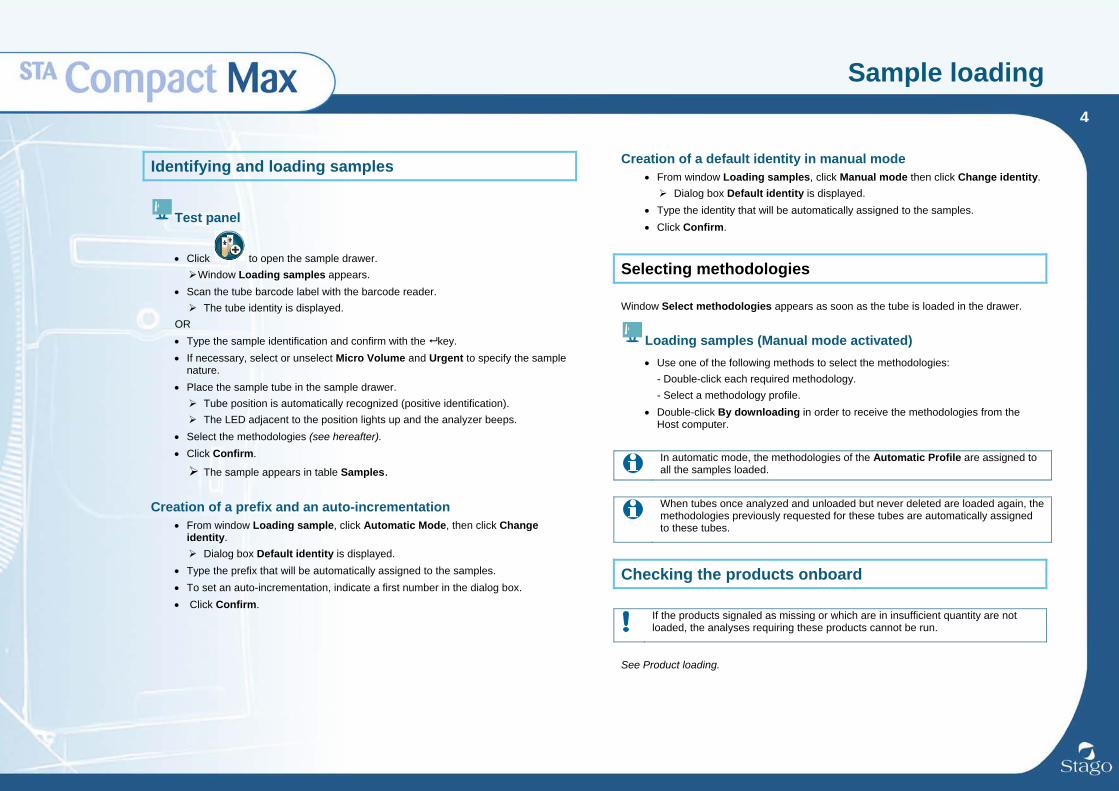
Identifying and loading samples
Test panel
• Click to open the sample drawer. Window Loading samples appears.
• Scan the tube barcode label with the barcode reader. The tube identity is displayed.
OR • Type the sample identification and confirm with the key. • If necessary, select or unselect Micro Volume and Urgent to specify the sample
nature. • Place the sample tube in the sample drawer.
Tube position is automatically recognized (positive identification). The LED adjacent to the position lights up and the analyzer beeps.
• Select the methodologies (see hereafter). • Click Confirm.
The sample appears in table Samples.
Creation of a prefix and an auto-incrementation • From window Loading sample, click Automatic Mode, then click Change
identity. Dialog box Default identity is displayed.
• Type the prefix that will be automatically assigned to the samples. • To set an auto-incrementation, indicate a first number in the dialog box. • Click Confirm.
Creation of a default identity in manual mode • From window Loading samples, click Manual mode then click Change identity.
Dialog box Default identity is displayed. • Type the identity that will be automatically assigned to the samples. • Click Confirm.
Selecting methodologies Window Select methodologies appears as soon as the tube is loaded in the drawer.
Loading samples (Manual mode activated) • Use one of the following methods to select the methodologies:
- Double-click each required methodology. - Select a methodology profile.
• Double-click By downloading in order to receive the methodologies from the Host computer.
In automatic mode, the methodologies of the Automatic Profile are assigned to all the samples loaded.
When tubes once analyzed and unloaded but never deleted are loaded again, the methodologies previously requested for these tubes are automatically assigned to these tubes.
Checking the products onboard
If the products signaled as missing or which are in insufficient quantity are not loaded, the analyses requiring these products cannot be run.
See Product loading.
Calibrations
5
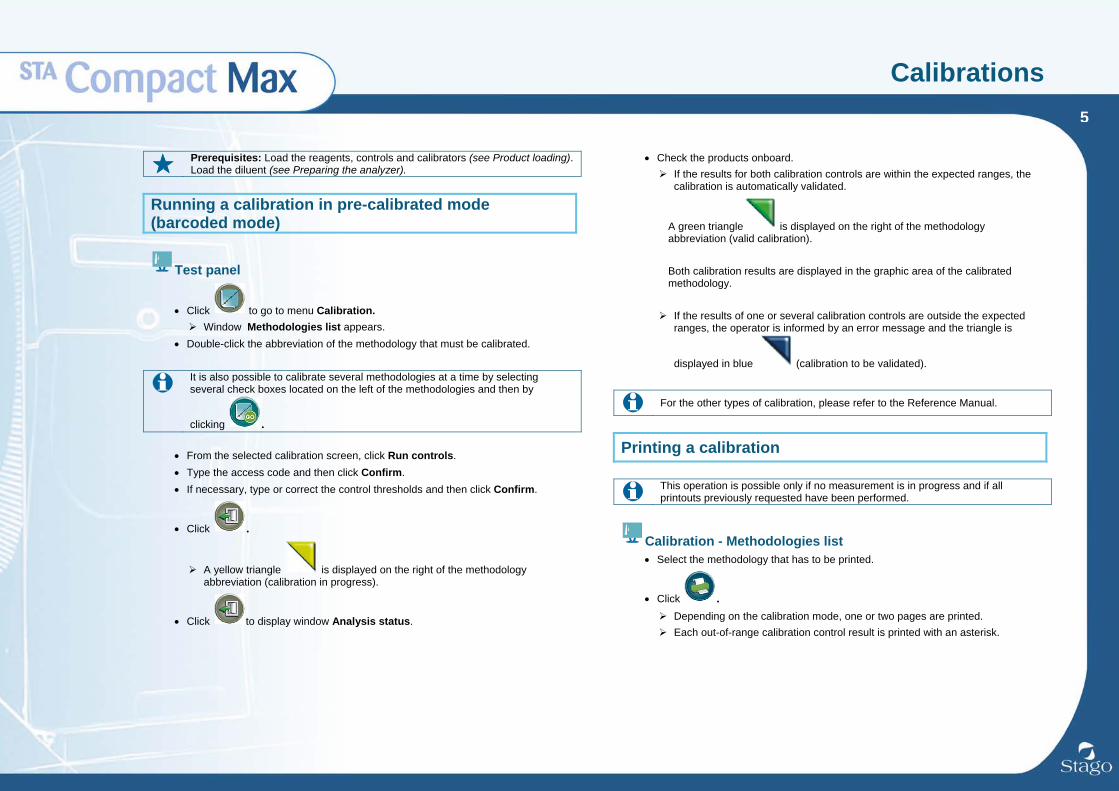
Prerequisites: Load the reagents, controls and calibrators (see Product loading). Load the diluent (see Preparing the analyzer).
Running a calibration in pre-calibrated mode (barcoded mode)
Test panel
• Click to go to menu Calibration. Window Methodologies list appears.
• Double-click the abbreviation of the methodology that must be calibrated.
It is also possible to calibrate several methodologies at a time by selecting several check boxes located on the left of the methodologies and then by
clicking .
• From the selected calibration screen, click Run controls. • Type the access code and then click Confirm. • If necessary, type or correct the control thresholds and then click Confirm.
• Click .
A yellow triangle is displayed on the right of the methodology abbreviation (calibration in progress).
• Click to display window Analysis status.
• Check the products onboard. If the results for both calibration controls are within the expected ranges, the
calibration is automatically validated.
A green triangle is displayed on the right of the methodology abbreviation (valid calibration).
Both calibration results are displayed in the graphic area of the calibrated methodology. If the results of one or several calibration controls are outside the expected
ranges, the operator is informed by an error message and the triangle is
displayed in blue (calibration to be validated).
For the other types of calibration, please refer to the Reference Manual.
Printing a calibration
This operation is possible only if no measurement is in progress and if all printouts previously requested have been performed.
Calibration - Methodologies list • Select the methodology that has to be printed.
• Click . Depending on the calibration mode, one or two pages are printed. Each out-of-range calibration control result is printed with an asterisk.
Quality controls (QC)
6
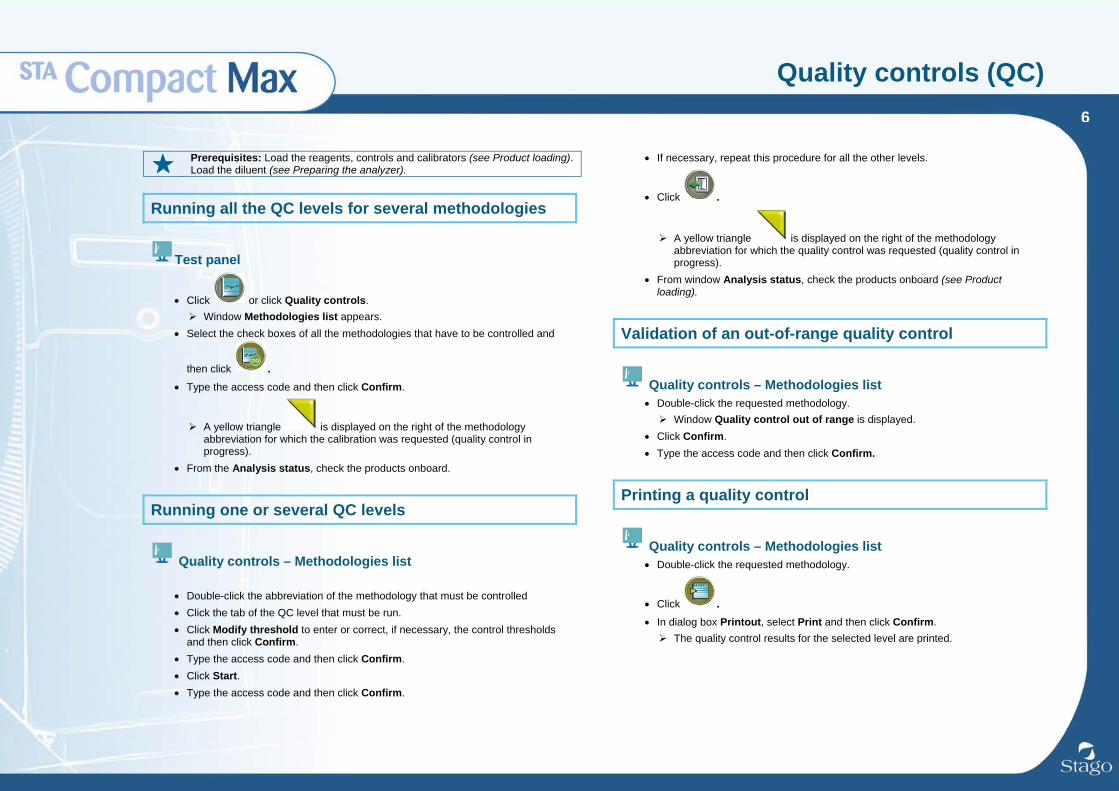
Prerequisites: Load the reagents, controls and calibrators (see Product loading). Load the diluent (see Preparing the analyzer).
Running all the QC levels for several methodologies
Test panel
• Click or click Quality controls. Window Methodologies list appears.
• Select the check boxes of all the methodologies that have to be controlled and
then click . • Type the access code and then click Confirm.
A yellow triangle is displayed on the right of the methodology abbreviation for which the calibration was requested (quality control in progress).
• From the Analysis status, check the products onboard.
Running one or several QC levels
Quality controls – Methodologies list
• Double-click the abbreviation of the methodology that must be controlled • Click the tab of the QC level that must be run. • Click Modify threshold to enter or correct, if necessary, the control thresholds
and then click Confirm. • Type the access code and then click Confirm. • Click Start. • Type the access code and then click Confirm.
• If necessary, repeat this procedure for all the other levels.
• Click .
A yellow triangle is displayed on the right of the methodology abbreviation for which the quality control was requested (quality control in progress).
• From window Analysis status, check the products onboard (see Product loading).
Validation of an out-of-range quality control
Quality controls – Methodologies list • Double-click the requested methodology.
Window Quality control out of range is displayed. • Click Confirm. • Type the access code and then click Confirm.
Printing a quality control
Quality controls – Methodologies list • Double-click the requested methodology.
• Click . • In dialog box Printout, select Print and then click Confirm.
The quality control results for the selected level are printed.
Quality controls (QC)
7
Deleting a quality control result
Quality controls – Methodologies list • Double-click the requested methodology.
• Click to access the results in table format. • From the Daily controls area, select the check box of the result that has to be
deleted and then click Delete. • Type the access code and then click Confirm.
The result is deleted.
From the graphic format result window, the Delete points option allows the deletion of all the values for the selected level of QC.
Running analyses and managing urgent files
8
Running analyses
Loading samples or Loading products
• Click to close the drawer. The sample pipetting starts (again) and window Analysis status is displayed
when all the conditions are met for all the reagents and products: - Quality controls and calibrations are correct. - No stability is overdue. - All the volumes are sufficient.
If one of these conditions is not met, the sample pipetting is blocked and window Analysis status appears along with the blocked Sample Pipetting
symbol .
In case of blocked sample pipetting • Depending on the situation:
- Load the missing products. - Replace the products which volumes are insufficient or which stability is almost overdue. - Validate or run the required calibrations and quality controls. - Change the threshold values of the non STA line controls and calibrators.
• From window Loading samples or Loading products, click . • When the message suggesting to reactivate analyses appears, click Yes.
The pipettings are automatically unblocked if all the required products are onboard.
Urgent samples Urgent samples are processed as a priority by the analyzer. Results are displayed in real time in the Test panel. The urgent sample loading procedure is the same as the routine loading procedure. Urgent samples may be loaded at any time.
Loading an urgent sample
Loading samples • Follow the usual sample loading procedure, making sure that option Urgent is
selected.
The sample appears in table Samples with the symbol .
Applying status Urgent to a sample onboard
Test panel • Double-click the requested file.
The patient report form appears. • In section File information, select Urgent.
The symbol appears in the file.
• Click to save the modification.
The sample appears in the Test panel with the symbol .
File management
9
To access a patient report form, double-click the required file in the Test panel. To access a patient file from the Test panel, click Patient analyses and then Patient files .
Transmitting files to the host computer
• From the patient file, click .
Printing a file
• From the patient report form, click .
To print several patient files, please refer to the reference Manual. The file is automatically printed as soon as all the requested analyses are completed, provided that option Online printing is activated in menu System.
Validating an analysis
• From the patient report form, click Confirm.
• Click to save the modification. The status of the analysis is now Confirmed.
Rerunning and deleting analyses
Test panel • Click menu Patient analyses and then click Rerun/Delete analyses.
Window Rerun/Delete analyses appears. • Select the requested methodologies. • From table File selection, click Select.
The Test panel appears. • Identify the first file of the selection by double-clicking it. • Identify the last file of the selection by double-clicking it.
Window Rerun/Delete analyses reappears. • Click Rerun to rerun the analyses or Delete to delete the analyses.
Deleting a file
Patient files • Select the files that have to be deleted, using the filter options available on the left
part of the window (see Reference Manual for more information).
• Click . Window Delete files appears.
• To delete only the selected files, select Selected files. • To delete all the files, select All files. • Click Delete.
Maintenance and end of day
10
Maintenance The complete user maintenance is described in the Reference Manual.
Daily maintenance
• Clean the piercing needle (analyzers with piercing option).
Weekly maintenance • Proceed to the routine maintenance of the analyzer:
- Dry the product drawer. - Clean the product and sample drawers. - Clean the measurement plate and the suction tip. - Check the Peltier reservoir.
• Proceed to the cleaning of the washing wells and to the needle purge. • Proceed to a prolonged cleaning of the piercing needle (analyzers with piercing
option). • Proceed to the data backup. • Put the clamping electrovalve tubing back in place (analyzers with piercing
option). • Proceed to the cleaning of the air filters. • Shut down then restart the analyzer.
Monthly maintenance • Replace the syringe Teflon® tip and o-ring.
Quarterly maintenance • Replace the air filters.
Every 100,000 piercings (analyzers with piercing option) • Replace the piercing needle.
End of day
Unloading samples or products with positive identification
• From the Test panel, click to open the sample drawer. • Unload the tubes that have already been analyzed.
• Click to open the product drawer. • Unload the products with insufficient volume or with stability overdue (displayed in
red).
The tubes and vials that have to be unloaded are signaled with a blinking LED.
The LED adjacent to the tube (vial) lights off. The identification of the tube (vial) disappears from the list of onboard samples
(products).
• Click . Window Analysis status appears.
It is recommended to keep the analyzer on. This allows storage of the products onboard and management of their stability.
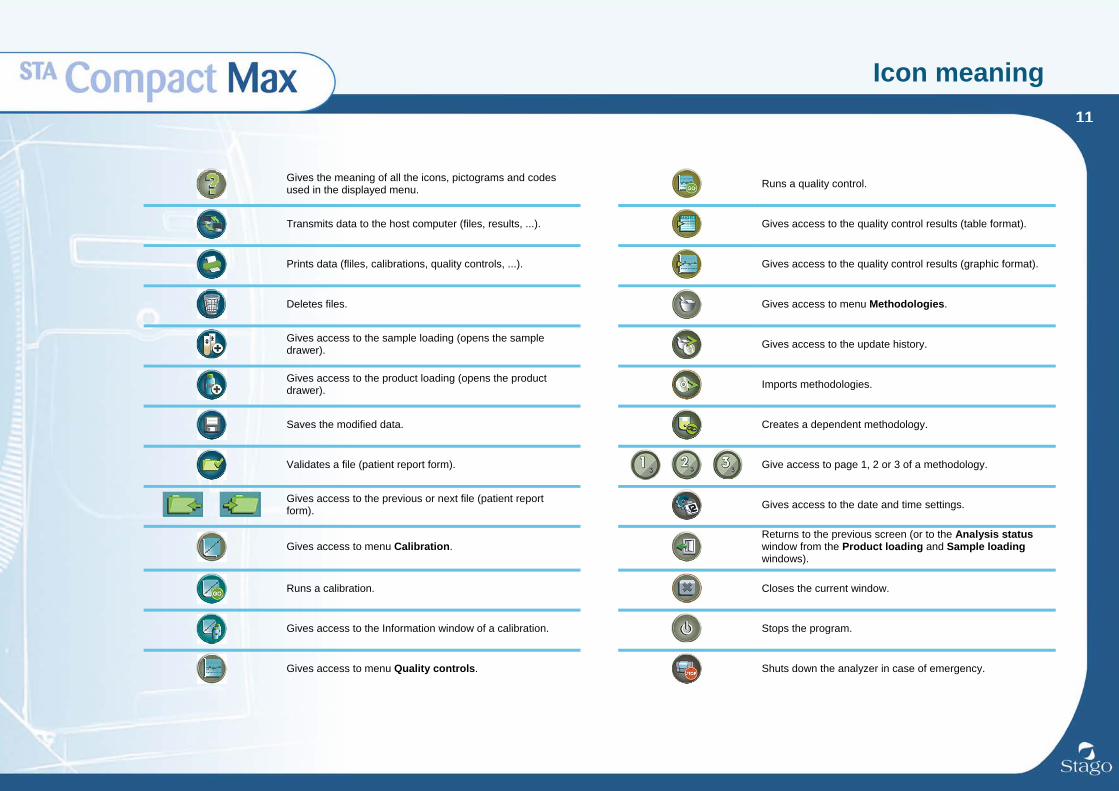
Icon meaning
11
Gives the meaning of all the icons, pictograms and codes used in the displayed menu.
Runs a quality control.
Transmits data to the host computer (files, results, ...).
Gives access to the quality control results (table format).
Prints data (fliles, calibrations, quality controls, ...).
Gives access to the quality control results (graphic format).
Deletes files.
Gives access to menu Methodologies.
Gives access to the sample loading (opens the sample drawer).
Gives access to the update history.
Gives access to the product loading (opens the product drawer).
Imports methodologies.
Saves the modified data.
Creates a dependent methodology.
Validates a file (patient report form).
Give access to page 1, 2 or 3 of a methodology.
Gives access to the previous or next file (patient report form).
Gives access to the date and time settings.
Gives access to menu Calibration.
Returns to the previous screen (or to the Analysis status window from the Product loading and Sample loading windows).
Runs a calibration.
Closes the current window.
Gives access to the Information window of a calibration.
Stops the program.
Gives access to menu Quality controls.
Shuts down the analyzer in case of emergency.
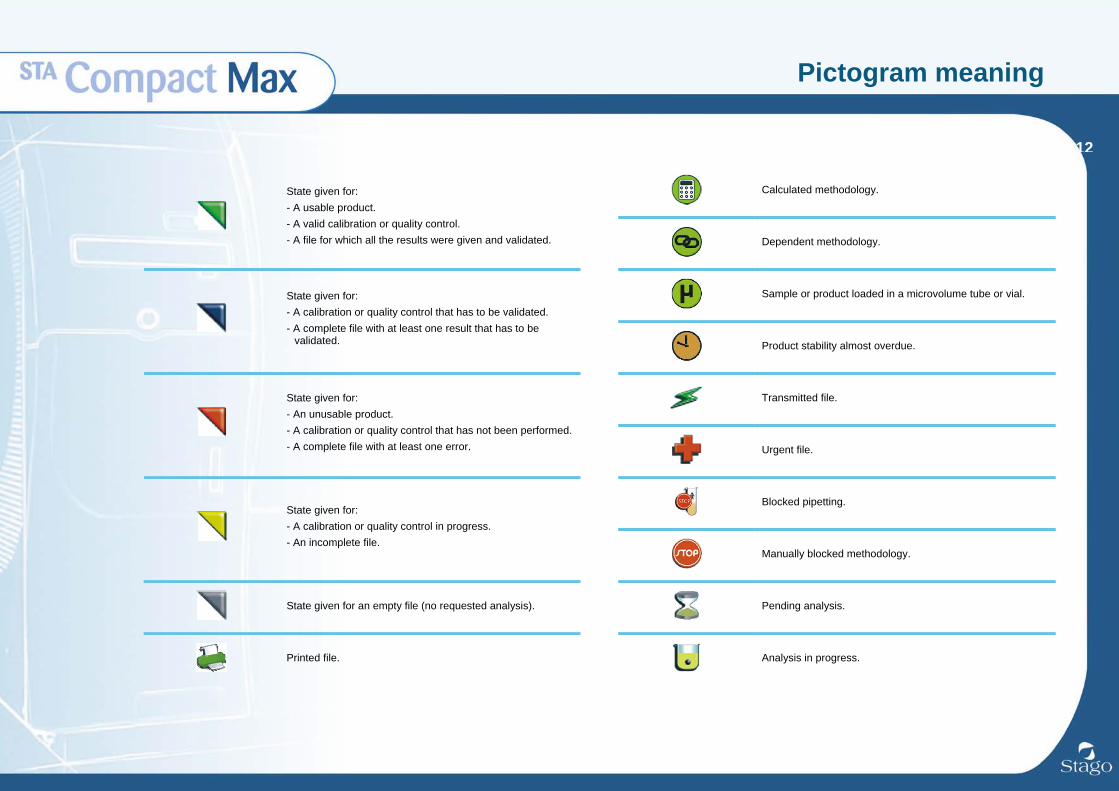
Pictogram meaning
12
Calculated methodology.
State given for: - A usable product. - A valid calibration or quality control. - A file for which all the results were given and validated.
Dependent methodology.
Sample or product loaded in a microvolume tube or vial.
State given for: - A calibration or quality control that has to be validated. - A complete file with at least one result that has to be
validated.
Product stability almost overdue.
Transmitted file.
State given for: - An unusable product. - A calibration or quality control that has not been performed. - A complete file with at least one error.
Urgent file.
Blocked pipetting.
State given for: - A calibration or quality control in progress. - An incomplete file.
Manually blocked methodology.
State given for an empty file (no requested analysis).
Pending analysis.
Printed file.
Analysis in progress.
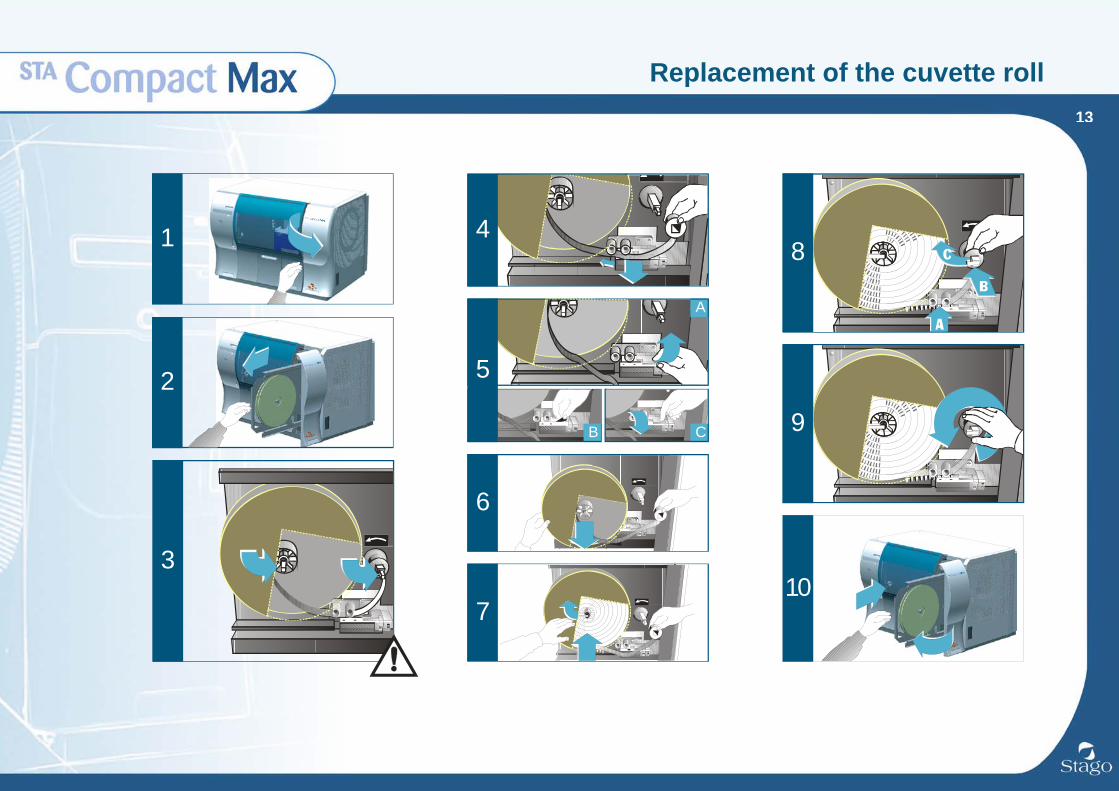
Replacement of the cuvette roll
13
2
3
6
9
8
C
A
B
5
4
7
1
10
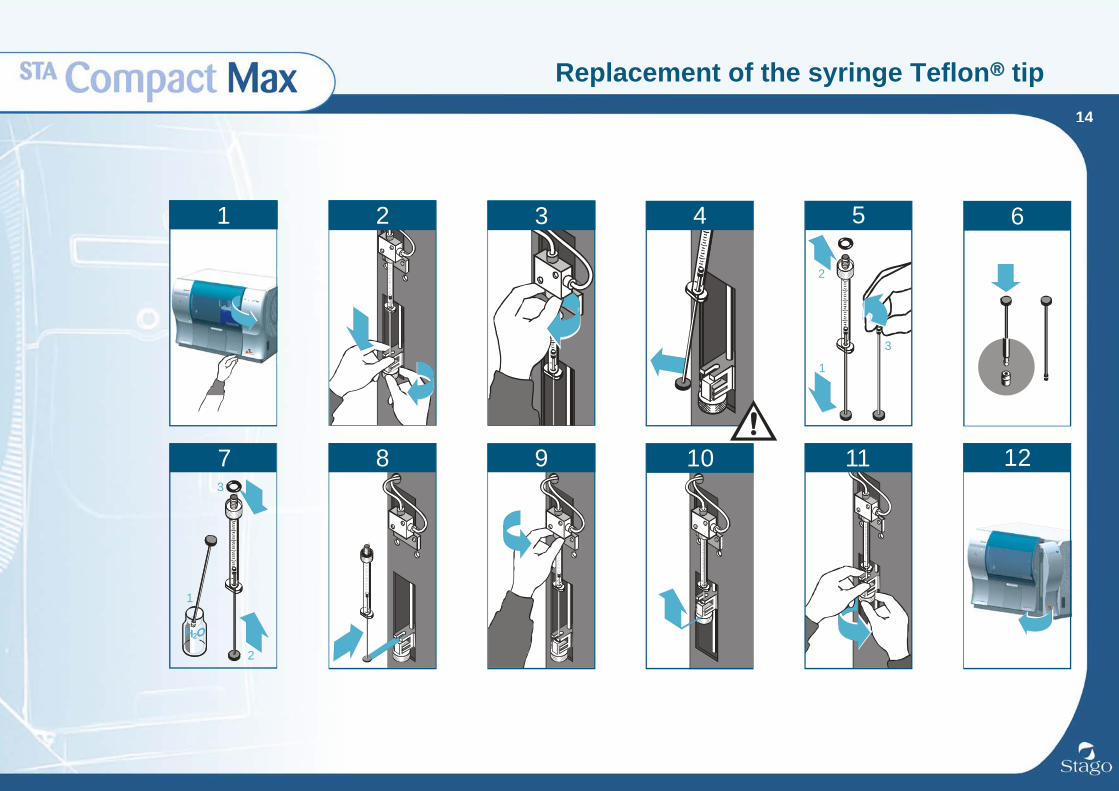
Replacement of the syringe Teflon tip
14
2
8
1
2
3
5
11
6
123
2
H2O
1
7 9
3 4
10
1
Recommendations
15
This User’s Guide is an informative document which can be used as a help for the use of the system. In order to ensure the correct operation of the system, it is imperative to acknowledge and to comply with any and all of the information, warnings, instructions and procedures contained in the Reference Manual, and in particular to respect the recommendations contained in chapter Symbols and warnings.
Information contained in this document, in particular data, pictures, information, trademarks and logos are protected by copyrights and other intellectual property rights. © 2012, Diagnostica Stago, all rights reserved - 09/2012 Consequently, all representation and/or reproduction, whether in part or in full, is forbidden and would be considered a violation of Diagnostica Stago's copyrights and other intellectual property rights. Visual representations (diagrams, pictures, icons, pictograms, screenshots, spare parts, ...) are not contractual.