Embed Size (px)
Citation preview

217Clinical Procedures Manual
7. M
uscu
losk
elet
al s
yste
m
Broken bones — simple and compound fractures ......................................... 218Assessing and managing possible fractures .............................................. 218Fracture types ............................................................................................ 221
Bandaging ...................................................................................................... 224Slings .............................................................................................................. 227Splinting ......................................................................................................... 229Plaster of Paris (POP) slabs ............................................................................ 234
Types of slabs ............................................................................................ 236Taking off a cast .............................................................................................. 240Using crutches ................................................................................................ 242Reducing dislocated or pulled joints .............................................................. 244
Dislocated shoulder ................................................................................... 244Pulled elbow (dislocated radial head) in small child .................................. 246Dislocated elbow in adult .......................................................................... 247Dislocated finger (interphalangeal joint) ................................................... 247Lateral dislocation of kneecap (patella) ..................................................... 248
Joint aspirations and injections ...................................................................... 249Knee injection/aspiration — medial and superolateral approach ............ 251Steroid injection ........................................................................................ 254Joint fluid analysis...................................................................................... 255
Stiff neck ........................................................................................................ 257Feet ................................................................................................................ 259
Foot examination ....................................................................................... 259Diabetic foot ............................................................................................. 259Other foot conditions ............................................................................... 263
7 Musculoskeletal system

218 Musculoskeletal system
Broken bones — simple and compound fractures
• For joint injuries — see Reducing dislocated or pulled joints (p244), Joint sprains (CARPA STM p373)
Assessing and managing possible fracturesRemember — Assessing trauma — primary and secondary survey (p35).
Ask• Pain — when it started, is it getting worse• Swelling and disability• How did it happen, were there any witnesses• What caused the break
◦ High speed (eg car accident) — could be more serious compound fracture ◦ Low speed (eg simple fall) — could be underlying pathological cause
(eg osteoporosis) ◦ Repetitive movement causes pain (eg running) — could be stress fracture
CheckCompartment syndrome• Surgical emergency• Diagnosed using the Ps
◦ Pain keeps getting worse even after pain relief, worse than expected for injury
◦ Poor circulation (cool skin) — Pallor (hands, feet) and Pricking skin are late signs
◦ Passive movements make pain worse, especially bending toes or fingers back (extension)
◦ Paresthesia (tingling) and Progressive Paralysis follow ◦ Do not wait for loss of Peripheral Pulses — F 7.1. Too late to save limb
• Signs of fracture/dislocation ◦ Swelling
▪ Most injuries swell. Keep checking to see how much swelling there is — very important if bandages, splints, casts or slabs used
▪ If swelling happens very quickly — consider fracture, dislocation, ligament/tendon rupture
◦ Skin — compound fracture will have break in skin ◦ Bones — at wrong angle (deformity), tender when palpated on any side
▪ Gently feel bones that may be broken

219Clinical Procedures Manual
Broken bones — simple and compound fractures
▶
7. M
uscu
losk
elet
al s
yste
m
▪ Do not palpate obviously broken bone — causes pain
▪ Do not try to produce bone grating (crepitus) — causes pain
◦ Joints ▪ On either side of injury (proximal and distal) ▪ Abnormal shape (deformity) or movement ▪ Movement — may be limited
• Signs of problems caused by fracture/dislocation ◦ Cool or cold limbs — may mean arterial injury ◦ Sensation — reduced or altered feeling may mean
nerve injury ◦ Peripheral pulses — F 7.1. Weak or none may mean
damage to artery ◦ Worsening pain or muscle group feeling tense and firm — may mean
compartment syndrome (p218)• Related injuries and complications — internal bleeding, organ damage,
nerve damage• Allergies or adverse reactions that will affect choice of analgesia, dressings,
antibiotics• Age
◦ Children — consider greenstick fractures, growth plate injuries, physical abuse
◦ Elderly ▪ Bones weakened by disease (eg osteoporosis, cancer) can break with
very little force (pathological fractures) ▪ Injury may be caused by existing medical condition — fall due to
dizziness, sepsis, arrhythmia, stroke, internal bleeding, medicines
Do not• Do not use the following (HARM) in first 2 days (48 hours) — will make
associated soft tissue injuries worse ◦ H eat ◦ A lcohol, aspirin, anti-inflammatory medicines ◦ R unning, strong exercise ◦ M assage
Do• If signs of nerve or circulation problems (cool, pulseless limbs) —
◦ Gently straighten limb, apply firm traction until pulse returns ◦ Medical consult
• Give pain relief — medicines (analgesics), splints• Take off any jewellery, watches, rings. Keep them somewhere safe
7.1
Carotid
Radial
Femoral
Popliteal
Dorsalis pedis
Brachial
Posterior tibial

220
Broken bones — simple and compound fractures
Musculoskeletal system
• If you suspect compartment syndrome — ◦ Loosen bandages/slabs/splints ◦ Keep limb level with heart ◦ Medical consult
• Treat with RICE — relieves pain and swelling ◦ R est — immobilise broken limb using sling, splint/slab ◦ I ce — apply ice or frozen peas for 15–20 minutes every 1–2 hours,
then gradually less often over next 24 hours. Do not put frozen material directly on skin
◦ C ompression — apply compression bandage over splint/slab to reduce swelling, give support, immobilise. Bandage should be firm but not tight enough to cause pain. Put on during and after ice
◦ E levation — lift (elevate) in sling or with pillows after putting on splint/slab, to prevent swelling. Lower limb fracture should be higher than pelvis
• See Bandaging (p224), Splinting (p229), Slings (p227), Plaster of Paris slabs (p234)
• See Fracture types (p221)
• Keep checking ◦ End of limb for signs of poor blood supply (circulation) — see
Compartment syndrome (p218) ◦ How much swelling — are bandages too tight
Compound fracturesIf bone exposed to outside environment — compound or open fracture.• Bone does not always poke through skin, may just be small skin puncture• Treat all wounds near broken bone as compound fracture• When skin broken — high risk of infection of tissues and bone• Treat facial fractures involving sinuses as compound fractures
Check• Look for exposed bone• Feel for distal pulse and sensation• Tetanus status, see Australian Immunisation Handbook
Do not• Do not poke or probe wound• Do not suture wound, except for bleeding (haemorrhage) control, if there
could be fracture underneath• Do not let person eat or drink anything — will need operation
Do• Control any bleeding — realign broken bone, apply pressure, suture if
needed (p292)• Clean and wash out wound with normal saline in syringe

221Clinical Procedures Manual
Broken bones — simple and compound fractures
▶
7. M
uscu
losk
elet
al s
yste
m
• Cover wound with sterile, saline-soaked dressing• Put on back slab or splint, depending on site of wound• Medical consult about IV antibiotics (CARPA STM p81) and fluids
Fracture typesFractured skull• See Skull fracture (CARPA STM p79)
Fractured nose• If nose broken and still crooked after 1 week or can't breathe through 1 side
— may need to be straightened. Medical consult about surgery ◦ Broken nose usually sets by 2 weeks, so need to decide before then
Fractured jaw• See Broken jaw (CARPA STM p342)
Fractured collarbone (clavicle)• See Splinting collarbone (p229)
Fractured hand/arm• See Splinting (p230), Plaster of Paris slabs (p234)
Fractured fingers/toes• See Splinting single finger/toe (p231)
Fractured ribs• See Fractured ribs (CARPA STM p71), Flail chest (CARPA STM p70)
Fractured pelvisFracture at front of the pelvis (pubic rami) may present with no deformity or visible bruising, but tenderness and pain on standing and walking (weight bearing).
• It takes a lot of force to fracture pelvis• If high impact trauma — often bladder and/or abdominal injuries as wellCheck• Signs of internal bleeding (haemorrhage) — fast heart rate, low BP, poor
blood circulation (perfusion). Can be immediately life threatening — work out REWS (CARPA STM p6)
• Posture — rotation/shortening of lower limb• Pain around hips when moving• Palpate for localised (focal) tenderness• Blood coming from urethra, scrotal/perineal bruising• U/A for blood

222
Broken bones — simple and compound fractures
Musculoskeletal system
Do not• Do not spring pelvis• Do not let person eat or drink anything — may need operation
Do• If multi-trauma (eg chest or head injury, signs of shock [p39]) — give
oxygen to target O2 sats 94–98% OR if moderate/severe COPD 88–92% ◦ Non-rebreather mask 10–15L/min
• Splint (p231)• Put in 2 IV cannula (p84), largest possible. Start IV fluids to maintain
hydration and blood volume• Medical consult• Consider indwelling urinary catheter – female (WBM p281), male (p205)
Fractured knee, ankle or footCheck• Use Ottawa rules to help assess injury
◦ If x-ray not needed — see Joint sprains (CARPA STM p373)
Ottawa knee rules• Knee x-ray only needed if any of
◦ Under 18 or over 55 years ◦ Tenderness of knee cap (patella) only — no bone tenderness in other
parts of knee ◦ Tenderness at head of fibula ◦ Unable to bend knee to 90° ◦ Not able to bear weight straight after injury or when examined in clinic
▪ Takes 4 steps — can't bear weight twice on each leg even when limping
Ottawa ankle rules — F 7.2• Ankle x-ray only needed if pain in malleolar zone AND any of
◦ Bone tenderness at A — posterior edge (6cm) or tip of lateral malleolus ◦ Bone tenderness at B — posterior edge (6cm) or tip of medial malleolus ◦ Not able to bear weight straight after injury or when examined in clinic
▪ Takes 4 steps — can't bear weight twice on each leg even when limping
Ottawa foot rules — F 7.2• Foot x-ray only needed if pain in mid-foot zone AND any of
◦ Bone tenderness at C — base of 5th metatarsal ◦ Bone tenderness at D — navicular ◦ Not able to bear weight straight after injury or when examined in clinic
▪ Takes 4 steps — can't bear weight twice on each leg even when limping

223Clinical Procedures Manual
Broken bones — simple and compound fractures
7. M
uscu
losk
elet
al s
yste
m
Do• If fracture likely — see Splinting (p229), Plaster of Paris slabs (p234)
7.2
Posterior edge or tip of lateral malleolus – 6cm
A
Malleolus zone
Mid-foot zone
Lateral view Medial view
BPosterior edge or tip of medial malleolus – 6cm
Base of fifth metatarsalC NavicularD

224 Musculoskeletal system
Bandaging
AttentionRemember — Assessing trauma — primary and secondary survey (p35).
Circulation and sensation — after bandaging check hands/fingers, feet/toes for colour, warmth, sensation, movement, peripheral pulses — F 7.1 (p219). If any not normal — take off bandage.
• Ask person if bandage is too tight or too loose• Remember, the bigger the limb, the bigger the bandage• Start bandaging from inside of limb, wind bandage on so you cover a bit
more than half the bandage you have just laid down
What you need• Bandages for size of limb• Tape to secure bandage
Bandaging a headSimple way to cover head wound using a triangular bandage — F 7.3, F 7.4
Bandaging an arm• Wrap end of bandage around wrist
twice — F 7.5• Move up arm, finish at elbow or top
of arm — F 7.6• Check circulation and sensation
(above)
Bandaging a hand• Wrap end of bandage around wrist
twice• Cross bandage over back of hand to
between thumb and index finger — F 7.7
• Go around knuckles once — F 7.8• Go over hand again, crossing from little finger to wrist — F 7.8• Repeat until hand covered — F 7.9• Can use sling to rest hand after bandaging• Triangular bandage can be used — good to control bleeding palm
◦ Make hand into fist while holding combine or non-adherent dressing ◦ Cover whole hand with triangular bandage, tie at wrist
• Check circulation and sensation (above)
7.67.5
7.47.3

225Clinical Procedures Manual
Bandaging
▶
7. M
uscu
losk
elet
al s
yste
m
Bandaging a finger/toe• Use stretchy tubular bandage• Cut length 4 times longer than finger• Flatten tube, cut along length with scissors to about halfway down• Put uncut end over finger, twist strip at fingertip — F 7.10• Bring cut ends back over finger and tie around palm and wrist — F 7.11• Make sure ends around wrist are wide. More comfortable, less risk of
cutting off circulation• Check circulation and sensation (p224)
Bandaging elbow or knee joint• Have person bend elbow/knee slightly. Put pillow under thigh to help lift knee• Wrap bandage around arm/leg below elbow/knee twice — F 7.12• Go over inside of elbow/knee and around arm/leg above joint — F 7.13• Go over inside of elbow/knee and around arm/leg below joint again — F 7.14• Check circulation and sensation (p224)
7.117.10
7.147.137.12
7.97.87.7

226
Bandaging
Musculoskeletal system
Bandaging a leg• Wrap end of bandage
around foot twice — F 7.15• Bandage ankle — F 7.16• Go up leg — F 7.17• Check circulation and
sensation (p224)
Bandaging a foot• Wrap end of bandage
around ankle twice• Cross bandage over top of
foot to little toe, then wrap around foot — F 7.18
• Come from under foot near big toe and cross over top of foot to ankle — F 7.19. Repeat — F 7.20
• Check circulation and sensation (p224)
Bandaging wounds with protruding objects• Do not take object (eg knife, spear, glass) out of wound• Do not poke around in (probe) wound• Put rolled bandage on each side of object to support it firmly — F 7.21• Use figure of 8 technique and 2 more bandages to bandage around the 2
support rolls until object held firmly — F 7.22, F 7.23• Check circulation and sensation
(p224)
7.237.227.21
7.207.197.18
7.177.167.15

227Clinical Procedures Manual▶
7. M
uscu
losk
elet
al s
yste
m
Slings
Used to support or lift up (elevate) arm after injury to arm or shoulder. Also for elevation to decrease bleeding and swelling.
Attention• Support injured arm throughout procedure• When tying sling around neck
◦ Use reef knot so knot lies flat ◦ Knot to one side just above collar bone so no pressure on neck
• 5 minutes after putting on sling, check it hasn't come loose, stretched, dropped down, changed position
• If you don't have proper sling — use whatever you can find ◦ Can use towels, sheets, bandages etc, but watch for stretching
Circulation and sensationAfter putting on sling check hands/fingers for colour, warmth, sensation, movement, capillary refill, peripheral pulses — F 7.1 (p219). If any not normal — take off sling.
Simple slingWhat you need• Triangular bandage• Safety pin or tape
What you do• Open out bandage and put under injured
arm, pointed edge near elbow and long edge at middle of fingers so tips visible — F 7.24
• Tie ends of sling together at neck on same side as injured arm ◦ Hand slightly higher than elbow —
F 7.25• Bring point of bandage around elbow
and pin/tape down
7.25
7.24

228
Slings
Musculoskeletal system
Collar and cuff slingWhat you need• Triangular bandage
What you do• Fold pointed edge of triangular
bandage to long edge 3 times to make narrow bandage
• Make clove hitch (figure of 8) with 2 large loops, ends of bandage in the middle, one end pointing up and the other end pointing down — F 7.26
• Slide forearm of injured arm through loops with ends to the front — F 7.27
• Lift lower end up across the front of bandage, bring both ends up around person's neck
• Tie bandage on either side of neck, for best support or comfort ◦ Hand close to opposite shoulder — F 7.28
Elevation slingWhat you need• Triangular bandage• Safety pin or tape
What you do• Bend elbow on injured side
so fingers point to opposite shoulder — F 7.29
• Lay triangular bandage over arm with pointed edge (B) near elbow and hand covered — F 7.29
• Bring lower long end (C) under arm — F 7.30 then around to uninjured shoulder
• Gently wrap long edge around injured arm and twist top end (A) around fingers — F 7.30
• Tie ends (A and C) together on uninjured side — F 7.31• Fold point (B) and any loose fabric along injured arm under
sling — F 7.31• Safety pin/tape securely at elbow
7.31
7.307.29
7.28
7.27
7.26

229Clinical Procedures Manual▶
7. M
uscu
losk
elet
al s
yste
m
Splinting
Used to support and immobilise bone you suspect is broken, or for painful tissue damage.
AttentionRemember — Assessing trauma - primary and secondary survey (p35).
Circulation and sensationAfter putting on splint check hands/fingers, feet/toes for colour, warmth, sensation, movement, capillary refill, peripheral pulses — F 7.1 (p219). If any not normal — take off splint.
• Padding — use combines, shirts, jumpers, towels, blankets, cushions etc• Splints — best if made for the job, but you can use any rigid or firm material
◦ Can use thick folded blankets, sticks, cardboard boxes, rolled up newspapers• Bandages for splinting — thick, strong triangular bandages used for slings
are best, but ordinary bandages will do• Splint needs to cover and immobilise joints on either side of injury/fracture
to prevent movement• Tie all knots away from injured area• Check bandages are not too tight or
uncomfortable — ask person, check circulation
Remember: Offer pain relief before splinting (CARPA STM p377), check distal circulation before and after splinting (above).
Splinting collarboneWhat you need• Padding• 2 triangular or ordinary bandages
What you do• Offer pain relief (CARPA STM p377)• Person sits in comfortable chair• Put padding under armpit on side of injury — F 7.32• Tie first bandage around upper arm and chest — F 7.33• Put on elevation sling (p228) — F 7.34 or collar and cuff
sling (p228) to take weight of arm• Check circulation and sensation in hand (above) 7.34
7.337.32

230
Splinting
Musculoskeletal system
Splinting upper arm — break not close to elbowWhat you need• Padding• 3 triangular or ordinary bandages
What you do• Offer pain relief (CARPA STM p377)• Person sits on comfortable chair• Put on a collar and cuff sling (p228) — F 7.35• Put padding between arm and chest• Tie one bandage around arm and chest below break,
another above break — F 7.36• Check circulation and sensation in hand (p229)
Splinting wrist or forearmAttention• Splint needs to go from elbow to fingertips
What you need• Splint• 4 triangular bandages
What you do• Offer pain relief (CARPA STM p377)• Person sits in comfortable chair• Put forearm and hand on splint, palm downward —
F 7.37• Tie 1st bandage around arm and splint, between elbow
and the break — F 7.38• Tie 2nd bandage around arm and splint, between hand
and the break — F 7.38• Tie 3rd bandage around hand and splint — F 7.38• Use 4th bandage to make simple
sling (p227) — F 7.39• Check circulation and sensation in
hand (p229)
7.36
7.35
7.397.38
7.37

231Clinical Procedures Manual
Splinting
▶
7. M
uscu
losk
elet
al s
yste
m
Splinting hand or finger/sWhat you need• Padding• Splint• 2 ordinary bandages• 1 triangular bandage• Tape or pin for bandage
What you do• Offer pain relief (CARPA STM p377)• Person sits in comfortable chair• Put injured hand on padded splint, palm down —
F 7.40• Put rolled bandage under palm to support it — F 7.40• Bandage hand and forearm to splint, starting at tips of fingers and going up
to elbow — F 7.41• Put on elevation sling (p228) or simple sling (p227) to raise (elevate)
hand/fingers• Check circulation and sensation in fingers (p229)
Splinting single finger/toeWhat you need• 2 clean gauze swabs• Splint — aluminium foam splint, 2 tongue depressors, sticks• Paper dressing tape
What you do• Offer pain relief (CARPA STM p377)• Tape broken finger/toe to next finger/toe — F 7.42 OR
ones on either side if middle finger/toe (‘buddy splint’). This will act as natural splint ◦ Put strip of gauze between fingers/toes to protect skin if needed
• OR put splints on both sides of straightened finger/toe, tape around splint and finger/toe
• Check circulation and sensation in fingers/toes (p229)
Pelvic sheetingPreferred option for stabilising pelvic fracture. Used for rotationally unstable pelvic fractures.
What you need• Bed sheet or towel• Helpers
7.42
7.41
7.40

232
Splinting
Musculoskeletal system
What you do• Offer pain relief (CARPA STM p377)• Log-roll person with helpers (p68). Put folded sheet/towel under their
buttocks — between top of hip bones and buttock crease• Roll person back onto folded sheet/towel, pull through so equal amount on
each side — F 7.43• Cross sheet/towel over hip bones, pull firmly in both directions so it tightly
fits around and stabilises pelvis — F 7.44• With helpers holding it in position, clamp sheet/towel at 4 points — F 7.45• If no clamps available — use large safety pins or tie sheet to stretcher• Check circulation and sensation in feet (p229)
Splinting pelvisUse this method or pelvic sheeting (preferred) (p231).
What you need• Padding• 2 triangular or ordinary bandages
What you do• Offer pain relief (CARPA STM p377)• Person lies on stretcher or
immobilisation board, knees bent slightly and supported by folded blanket — F 7.46
• Put some padding under small of back (lumbar area)• Put soft padding between knees, legs, ankles• Tie triangular bandage around feet and ankles in figure of 8• Tie broad bandage around knees• Support pelvis on either side with rolled up blankets• Check circulation and sensation in feet (p229)
7.46
7.457.447.43

233Clinical Procedures Manual
Splinting
7. M
uscu
losk
elet
al s
yste
m
Splinting lower legWhat you need• Padding or pillow• 5 triangular or ordinary bandages
What you do• Offer pain relief (CARPA STM p377)• Support fractured area with pillow
◦ OR put folded padding between thighs and lower legs• Tie ankles and feet together using figure of 8 bandage• Tie 2nd bandage around both thighs• Tie 3rd bandage around both knees• Tie 4th bandage around both legs, above broken bone• Tie 5th bandage around both legs, below broken bone — F 7.47• Check circulation and sensation in feet (p229)
Splinting upper legWhat you need• Padding• 4 triangular or ordinary bandages
What you do• Offer pain relief (CARPA STM p377)• Put folded padding between thighs
and lower legs• Tie ankles and feet together using a figure of 8 bandage• Tie 2nd bandage around both legs, above broken bone• Tie 3rd bandage around both legs, below broken bone• Tie 4th bandage around both knees — F 7.48• Check circulation and sensation in feet (p229)
7.47
7.48

234 Musculoskeletal system
Plaster of Paris (POP) slabs
• Used to immobilise injured limb or suspected fracture during transport, while waiting for x-ray, until swelling lessens
• Can be used as main support for soft tissue injuries
Attention• Examine carefully (p218) to accurately
diagnose injury and need for immobilisation• Give pain relief if needed before positioning
limb, putting on plaster (CARPA STM p377)• Slabs need to be wide enough to fit around
curve of limb like a shallow bowl, but not cover more than ⅔ of limb circumference — F 7.49
• Circulation and sensation — after putting on plaster check hands/fingers, feet/toes for colour, warmth, sensation, movement, capillary refill, peripheral pulses — F 7.1 (p219). If any not normal — take slab off straight away
• If person returns to clinic complaining of pain and/or fingers/toes show signs of poor blood or nerve sensation — take slab off straight away
What you need• A helper• Plastic aprons — messy procedure, protect person's and your clothing • Blueys or plastic covers• Wide bowl or bucket deep enough for plaster bandage to be fully
submerged in water — line with plastic bag• Cool or slightly warm (tepid) water
◦ Do not use hot water — plaster will set too fast, may cause thermal burns ◦ Do not use very cold water — plaster will set too slowly
• Cotton or wool underlay (also called plaster wool)• Crepe bandages (size depends on size of limb), tape• Strong scissors or plaster shears
• Plaster rolls ◦ 5cm for hands, 7.5cm for lower arms, 10cm for upper arms and legs ◦ Need 5–10 layers of plaster depending on age and size — provide
support but keep light
7.49

235Clinical Procedures Manual
Plaster of Paris (POP) slabs
▶
7. M
uscu
losk
elet
al s
yste
m
What you do• Cover area around work site with blueys/plastic,
put water nearby• Put on protective aprons
Protect skin• Put on wool or cotton underlay
◦ Lay gently around limb — F 7.50. Do not pull tight, make creases or ridges
◦ Each layer should overlap previous by about half. Usually 2 layers for arm, 3–4 layers for leg
◦ Tear to shape around joints ◦ Use 2 extra layers to protect joints or prominent areas ◦ Bandage 5cm further than area plaster will cover, to fold back over rough
ends
Position limb• Make sure limb in right position before you start to plaster• Keep limb in right position until plaster dries to avoid making creases that
can damage skin, cause pressure areas• Assistant can be used to help support end of limb (distally), if needed
Measure and cut slab• Measure length of slab with crepe bandage or
tape measure — F 7.51 ◦ Measure uninjured limb if injury very painful ◦ Allow extra 10% as plaster bandage shrinks
when wet• Lay dry plaster bandage on flat surface to
measured length, layer backward and forward until right number of layers (usually 5–10) — F 7.52
• If plaster bandage not wide enough for limb — layers can be fanned out to widen slab — F 7.53 ◦ Fanning layers weakens slab, so use extra layers
but no more than 20 — more than 20 can cause burns
• Hold slab by edges to stop damage to plaster• Fold plaster (p237) or cut plaster (p237) to
accommodate thumb if needed• Hold slab against limb to check size before putting
in water
7.50
7.52
7.51
7.53

236
Plaster of Paris (POP) slabs
Musculoskeletal system
Wet the slab• Lift slab by holding one end, lower into water until whole
slab wet — F 7.54• OR hold long slabs (eg full arm) in concertina shape so they
fit in water bowl — F 7.55• Hold under water until bubbles stop• Lift slab out by holding upright — F 7.56• Run 2 fingers down length to squeeze out excess water
Apply slab• Handle plaster bandage with care, wet or dry, or it
will be damaged and weak• Check position of limb, fingers/toes. Ask helper to
hold, if needed• Lay slab. Start at knuckles/wrist/toes (extremities)
and go toward body — F 7.57• Use flat of your hands to shape around joints and smooth
as you go. Smooth from fingers/hands or toes/feet toward body ◦ Do not use your fingers — can make dents in plaster that
press into person's flesh• Warn person slab will feel quite hot as it dries• Fold ends of underlay back over ends of slab to protect skin• Bandage around slab and limb with crepe bandage to keep
slab firmly in place ◦ Bandage from end of limb/slab toward body
• Hold limb in correct position for 3–5 minutes. Plaster will reach full strength in 24–48 hours
• Put arm in sling or keep leg lifted (eg on pillows)
• Clear away equipment ◦ Never tip POP waste down drain ◦ Empty used water on garden, throw
away POP waste in bottom of bag lining water bowl/bucket
• Check circulation and sensation (p234)• Organise specialist review
Types of slabs• All plaster slabs are applied on the side with the break — to support and
immobilise• Make room for the thumb in arm slabs — see
◦ Folding slab to accommodate thumb (p237) ◦ OR Cutting slab to accommodate thumb (p237)
7.57
7.56
7.54
7.55

237Clinical Procedures Manual
Plaster of Paris (POP) slabs
▶
7. M
uscu
losk
elet
al s
yste
m
Folding slab to accommodate thumb• Measure and layer plaster to make slab• Fold down corner of slab — F 7.58• Hold fold in place while lowering plaster into water
— F 7.59• Lay plaster on arm starting at knuckles with folded
side on the thumb side — F 7.58• Smooth plaster around thumb and across knuckles
◦ For Colles or distal forearm fractures — thumb joint should move freely ▪ Thumb and middle finger can meet — F 7.60
◦ For scaphoid bone or first metacarpal fracture — apply plaster around joint at base of thumb so it doesn't move but middle joint is free and can bend
Cutting slab to accommodate thumbLower arm slab — radial or universalUsed for Colles or distal forearm fractures.• Put on underlay — from middle of fingers to middle
of elbow ◦ Put 2 extra layers around wrist and thumb
• Measure from base of knuckle joints to 3 finger widths below elbow crease — elbow joint must move freely
• Make slab and cut to accommodate thumb — F 7.61 or F 7.62
• Position arm, hand, fingers straight• Lay slab on back of forearm from base of knuckles
to 3 finger widths below elbow crease• With slab applied
◦ Thumb joint should be able to move freely, thumb and little finger able to touch — F 7.60
◦ All fingers should also be able to bend
Lower arm slab — scaphoidUsed for fracture of scaphoid bone or first metacarpal that hasn't moved out of alignment (not displaced). Also for soft tissue injury to/around thumb.• Put on underlay — around thumb, across palm to middle of elbow
◦ Put 2 extra layers around thumb• Measure inside of arm from centre of palm to 3 finger widths below crease
of elbow ◦ Elbow joint must move freely
7.60
7.62
7.61
7.59
7.58

238
Plaster of Paris (POP) slabs
Musculoskeletal system
• Make slab and cut to fit around thumb and clear knuckles — F 7.63• Put arm and hand/fingers straight, flex wrist 20° — ask person to hold
bandage as shown — F 7.64• Joint at base of thumb shouldn't move but middle joint is free• Thumb and 3rd finger should just meet — F 7.65
Full arm slabUsed for fracture of middle and proximal thirds of radius or ulnar or lower humerus that hasn't moved out of alignment (not displaced).• Person sits in comfortable chair• Get helper to hold person's elbow at
90°, fingers in air — F 7.66• Put on underlay — from fingers to
3 finger widths below armpit, and another layer from tips of fingers to elbow ◦ Put extra layer around elbow ◦ Put 2 extra layers around wrist
• Measure from centre of palm, around outside of elbow, to 3 finger widths below armpit — F 7.67
• Make slab ◦ Fold — F 7.58 or cut — F 7.61, F 7.62 to accommodate thumb, if needed
• Check limb in correct position
Lower leg slab — F 7.68Used for fracture of distal tibia, fibula, tarsus or proximal metatarsals that hasn't moved out of alignment (not displaced). Also used for soft tissue injuries to lower leg or foot.• Person lies on bed on stomach with knee and
ankle flexed (bent) to 90° — F 7.69• OR person sits up or lies back with injured foot
over edge of bed and ankle flexed to 90°. Use rolled towel to flex knee slightly (15–20°) on injured side — F 7.70
7.68
7.677.66
7.63 7.64
7.65

239Clinical Procedures Manual
7. M
uscu
losk
elet
al s
yste
m
• Put on cotton or wool underlay — from tip of toes to middle of knee ◦ Put 2 extra layers around ankle
• Measure back of leg from base of toes to 3 finger widths below base of knee — F 7.71
• Make slab. Fan plaster if legs large, or only narrow plaster rolls available — but do not use more than 20 layers
• Check ankle at 90° and hold in position for several minutes until plaster sets — F 7.68 7.71
7.707.69

240 Musculoskeletal system
Taking off a cast
• Take off Plaster of Paris (POP) casts with ◦ Plaster saw (best) ◦ OR plaster cutters (harder) ◦ OR soak cast for 10–20 minutes, tear it apart bit by bit, soaking as you go
(much harder)• Fibreglass casts can only be taken off with plaster saw
Attention• If using saw — always steady (brace) hand holding saw against plaster cast
and/or work surface• Saw blade can cut person or give a burning sensation on skin, so go carefully
◦ Avoid areas where bones stick out (protrude) such as ankle and wrist joints
• Do outside or in well-ventilated area — makes a lot of noise, dust, mess
What you need• Plaster saw or plaster cutters• Cold wet towel — soak in bowl of ice cubes• Plaster spreaders or very strong wrists• PEP for you and person
◦ Hearing protection (ear muffs or plugs) ◦ Goggles and masks — to protect eyes and lungs from dust particles
What you do• For plaster make 1 cut down back of limb• For fibreglass make 2 cuts, one down either side of limb (bivalve) (eg radial
and ulna borders)
Using plaster saw• Brace saw by resting knuckles on cast — F 7.72• Cut plaster in short movements going down then up, then forward• Do not push or drag blade — increases friction
and heats saw blade more• Saw blade gets very hot, can burn person. Stop
every few minutes, cool blade with cold, wet towel
• Monitor cutting process by asking person if they feel any heat at cutting site
• Stop when you feel a slight give in plaster and plaster wool can be seen
• Split whole length of cast with saw7.72

241Clinical Procedures Manual
Taking off a cast
7. M
uscu
losk
elet
al s
yste
m
Using plaster cutters• Start cutting from hand/foot end of cast, take care not to bruise skin and
bone underneath
When cast split• Open up cast using plaster spreaders — or a lot of wrist strength. You can
also soak plaster to loosen it• Cut through plaster wool with blunt-ended scissors and gently take off cast• Check limb for bruises, lesions• Wash with soap and water to remove dead skin or dirt
Tight castIf cast too tight but new one can't be put on in your clinic —• Saw down 1 side, open cast with spreaders but leave in place around limb• Cut plaster wool with blunt-ended scissors• Pad between cut edges of plaster with cork, wads of gauze etc to stop it
closing again, bandage• Send for replastering and review

242 Musculoskeletal system
Using crutchesCrutches are used to help stop person putting weight on injured limb, and/or Plaster of Paris cast or slab, especially before it has set.
Attention• Crutches should fit comfortably and cause no pain or tingling in arms or
shoulders• Crutches that are too long put pressure on armpit, can damage large
network of nerves running from neck to arm (brachial plexus) causing drop hands (crutch palsy)
• Check crutches have all nuts, bolts, screws firmly in place and have good non-slip rubber tips
• Person needs shoes with good grip• Practise procedures yourself before teaching to others
What you doFit crutches• With person standing upright on their good leg, make sure tops of crutches
fit properly under their arms ◦ Top of crutches should be 2–3 finger widths below armpit when standing
straight ◦ Person should not stoop down or lift shoulders up to make them fit
• Change height by moving position of bolt and nut on lower peg of wooden crutches, or using the push pins on aluminium crutches
• Hand grips should be level with top of hip• Elbows should be a bit bent (15°) when holding hand grips
Demonstrate• Shoulders should be slightly forward when using crutches• Keep top of crutches tightly against sides using upper arms• Take weight through hands, not under arms• Don't rest armpits on top of crutches• Sitting to standing
◦ Good foot on ground close to edge of seat, bad foot just in front ◦ Hold both crutches in 1 hand, use other hand to push up from chair ◦ Lean forward and stand up ◦ Put 1 crutch under each arm and stand up straight
• Standing ◦ Hold crutches slightly to side of and just in front of feet
• Walking ◦ Look ahead to where you are walking, don't look at feet ◦ Put both crutches forward and bring bad foot level with crutches ◦ Swing good foot just past crutches ◦ Do this again — this is walking

243Clinical Procedures Manual
Using crutches
7. M
uscu
losk
elet
al s
yste
m
• Standing to sitting ◦ Make sure good leg is right back against edge of seat ◦ Take crutches from under arms, hold in 1 hand ◦ Bend hips and knees, reach down to seat with other hand, keep bad foot
slightly forward ◦ Lower bottom onto seat ◦ Keep crutches nearby, do not put weight on injured limb
• Going upstairs ◦ Get as close to first step as you can, put good foot up onto first step ◦ Lift crutches and bad foot up onto same step
▪ If hand rail — put both crutches in 1 hand, hold rail with other ◦ Do this again — one step at a time
• Going downstairs ◦ Get as close to first step as you can, put crutches and bad foot down onto
first step ◦ Put good leg down onto same step ◦ Do this again — one step at a time

244 Musculoskeletal system
Reducing dislocated or pulled joints
Used to put back (reduce) a joint knocked or pulled out of its proper place.
Attention• Medical consult before attempting reduction of dislocated joints• Need person to be relaxed and comfortable. Speak calmly, move slowly to
reassure them. Give sedation if needed• Always consider possibility of fracture• Always check and document circulation and sensation (neurovascular) status
before trying any manipulation/reductionCirculation and sensationWhen finished, always check hands/feet (peripheries) for colour, warmth, sensation, movement, swelling, capillary refill, peripheral pulse — F 7.1 (p219) to make sure no damage to nerves, arteries, veins.
Dislocated shoulderMostly seen in younger people following sports injury or fall.
Attention• Always suspect fracture, especially in older people• Longer the shoulder left dislocated, more the limb will swell, muscle will
spasm, making it harder to reduce• Person will need sedation unless dislocation has just happened, or is
recurrent. If so, first try gently without sedation• Do not try if you suspect a fracture — x-ray first• If attempted reduction doesn't work, or posterior dislocation suspected
(eg from fall caused by seizure in epileptic person) — refer for x-ray, specialist treatment
Stimson manoeuvre and scapular manipulationWhat you need• Firm, high, narrow examination couch, stretcher, or bench top• 2.5–5kg weight — sandbag, plastic bottle full of water• If person sedated — may need sheet to tie them to couch
What you do• Lie person face down on couch so injured shoulder right on edge, arm
hanging straight down — F 7.73

245Clinical Procedures Manual
Reducing dislocated or pulled joints
▶
7. M
uscu
losk
elet
al s
yste
m
• If person sedated — tie sheet around them and couch to make sure they don't roll off
• Strap/tie weight to wrist of injured arm• Wait 20–30 minutes to see if traction weight reduces
dislocation• Reduction may be helped by trying following steps
in order — F 7.731. Apply gentle traction down on arm2. Turn arm outward (externally) until joint has
‘clunked’ back into position3. Turn arm inward (internally)
• If this doesn't work, try scapular manipulation ◦ Leave weight in place ◦ Support (stabilise) upper part of shoulder blade
(scapula) with one hand and push bottom tip of shoulder blade straight across toward spine (medially) as far as it will go — F 7.74 ▪ Can use thumb of supporting hand to help with
push — F 7.75Note: May be hard to tell when joint has gone back into position, as movement in arm and shoulder is very small. Ask person if it has worked.• Check circulation and sensation (p244)• After reduction, strap arm with elevation sling (p228)• Specialist review for follow-up, physiotherapy referral
External rotationWhat you need• Firm, high examination couch or stretcher
What you do• Person lies on back, arm close to side, elbow bent (flexed) to 90°• Stand facing person on same side as the dislocation• Grip elbow with one hand keeping it close to person's side. Hold wrist with
other hand — F 7.76 ◦ Ask person to SLOWLY let arm
fall to the side (externally rotate). Guide movement with hand at wrist — F 7.77
◦ Tell person to stop if pain or spasm, support weight of arm for them until pain settles and muscles relax, then have them start movement again
7.74
7.75
7.777.76
7.73

246
Reducing dislocated or pulled joints
Musculoskeletal system
◦ Full external rotation can take 5–10 minutes ◦ Shoulder may pop back into place without usual ‘clunk’ ◦ Unless it is clear that the shoulder is back in place, continue until arm fully
externally rotated• If shoulder back in position — put arm across person's body, with hand on
opposite shoulder. Strap in place with elevation sling (p228) ◦ Check circulation and sensation (p244) ◦ Specialist review for follow-up, physiotherapy referral
• If shoulder not back in position — see Milch technique (below). Person remains in same position
Milch techniqueAttention• Use immediately after unsuccessful attempt to
reduce shoulder with external rotation
What you do• Person remains on back with arm fully
externally rotated — F 7.77• Use your hands at elbow and wrist to move
arm out to the side and toward overhead position. Keep elbow bent at all times— F 7.78
• When shoulder is at 90° move your hand from elbow to axilla (under arm) and use your thumb or fingers to push head of humerus up and into position — F 7.79
• If shoulder back in position — put arm across person's body, with hand on opposite shoulder. Strap in place with elevation sling (p228) ◦ Check circulation and sensation (p244) ◦ Specialist review for follow-up, physiotherapy referral
• If shoulder not back in position — medical consult
Pulled elbow (dislocated radial head) in small childAttention• Often caused by adult lifting child from ground while holding them below
elbow (eg forearm, wrist, hand)• Only do if clear story about how injury happened, otherwise send for x-ray• Warn child's parents/carer that procedure may cause brief pain
What you do• When child calm
◦ Hold elbow, press your thumb on head of radius — F 7.80
7.79
7.78

247Clinical Procedures Manual
Reducing dislocated or pulled joints
▶
7. M
uscu
losk
elet
al s
yste
m
◦ With your other hand, hold wrist, then quickly and firmly twist arm from palm down to palm up (supination) — F 7.81 while keeping constant pressure on radial head
• Check circulation and sensation (p244)
• If still painful — put sling on to rest arm. Take sling off after 24 hours
• Check if child needs specialist review
Dislocated elbow in adultAttention• Always do x-ray first• If no wrist (distal) pulse — medical consult, send to hospital straight away
◦ Get advice. May need to do reduction without x-ray
• Always check for fractures of radius bone
What you do• Lie person on comfortable couch or flat surface off the
floor so arm can hang over the side — F 7.82• Check for wrist pulse — see Attention (above)• Check movement and feeling in elbow, lower arm and
hand. If poor — might be nerve damage• Hold wrist, pull down slowly and continuously along line
of forearm — 7.82 until relaxed. May take a while• When forearm muscles relaxed, use thumb and forefinger
of your other hand to move tip of elbow joint (olecranon) down and toward middle (medially). Should put joint back into position — F 7.83 ◦ If joint not back in position — medical consult
• Check circulation and sensation (p244)• Put arm in collar and cuff sling (p228), elbow
needs to be kept bent at 90° for at least 1 week• Specialist review for follow-up, physiotherapy
referral
Dislocated finger (interphalangeal joint)What you need• Rough paper tape/plaster
7.82
7.80 7.81
7.83
Push down
Push to middle Pull down
on wrist

248
Reducing dislocated or pulled joints
Musculoskeletal system
What you do• Wrap paper tape around dislocated finger so you can
get a good grip — F 7.84 • Stand facing person, firmly hold end of taped finger
or ends of tape• Ask person to lean backward while you hold finger or
tape — F 7.85. Dislocated joint should slip back into position ◦ If joint not back in position — medical consult
• Check circulation and sensation (p244)• Splint injured finger (p231) to finger beside• Check if person needs specialist review
Lateral dislocation of kneecap (patella)Most common in young people playing sports or from direct blow to knee.
Attention• If seen in elderly person — suspect fracture• Only use this procedure if kneecap dislocated to outside of knee (laterally).
Other dislocations very rare, need x-ray and specialist care• Best to straighten leg quickly, as lessens pain and nervousness. If done
slowly — person will tense leg muscles
What you need• Examination couch• Splint
◦ Plaster of Paris and plaster wool for slab ◦ Special knee immobiliser
What you do• Sit person comfortably on couch, pillows
supporting their back. Knee will be slightly bent from injury
• Hold kneecap — F 7.86• With other hand — push down on lower leg, just below knee (to quickly
straighten leg)• At the same time push kneecap toward middle (medially) — F 7.86• Kneecap should slide back into place over head of femur
◦ If kneecap not back in position — medical consult• Check circulation and sensation (p244)• Splint leg in straightened position, using knee immobiliser or plaster slab• Specialist review for follow-up, physiotherapy referral
7.85
7.84
7.86
Push down on leg
Push kneecap in at same time

249Clinical Procedures Manual▶
7. M
uscu
losk
elet
al s
yste
m
Joint aspirations and injections
Attention• Do not do unless you have been trained. Medical consult prior to procedure• Most common joints to be injected/aspirated are knees, shoulders• Principles for joint injection and aspiration the same• Be aware of risk of introducing infection — always use aseptic technique• Before aspirating for diagnostic reasons — see Joint fluid analysis (p255)• If aspirating for healing (therapeutic) reasons — remove most of the fluid• Local anaesthetic not always needed. Depends on size of needle used• Always put needle in parallel to joint surfaces to prevent damage to cartilage• Use ultrasound guidance for shoulder injection if availableNote: Leave a bit of air in preloaded syringe. Air can easily be injected into joint but not tissue (strong resistance), helps you know if you are in joint
Circulation and sensation — when finished always check hands/feet (peripheries) for colour, warmth, sensation, movement, swelling, capillary refill, peripheral pulses — F 7.1 (p219), to make sure no damage to nerves, arteries or veins.
Syringes and needle sizes• Needle size depends on
◦ Diagnostic or healing (therapeutic) aspiration ◦ How much fluid and how thick ◦ Size of joint
• Always use smallest needle size possible ◦ For aspiration usually 21G ◦ For injection usually 23G
• Needle length ◦ Long — 32mm for shoulders or knees, 38mm for obese patients
• Needle and syringe size ◦ Aspiration of toe/finger — 25G needle and 3mL syringe ◦ Aspiration of knee/shoulder
▪ 21G OR 18G needle/cannula if you expect thick or bloody fluid ▪ 5mL syringe for diagnostic ▪ 10–20mL syringe for healing (therapeutic) aspiration
Do not• Do not do joint aspirations if
◦ Bacteraemia present ◦ Skin infection or severe dermatitis over joint
250
Joint aspirations and injections
Musculoskeletal system
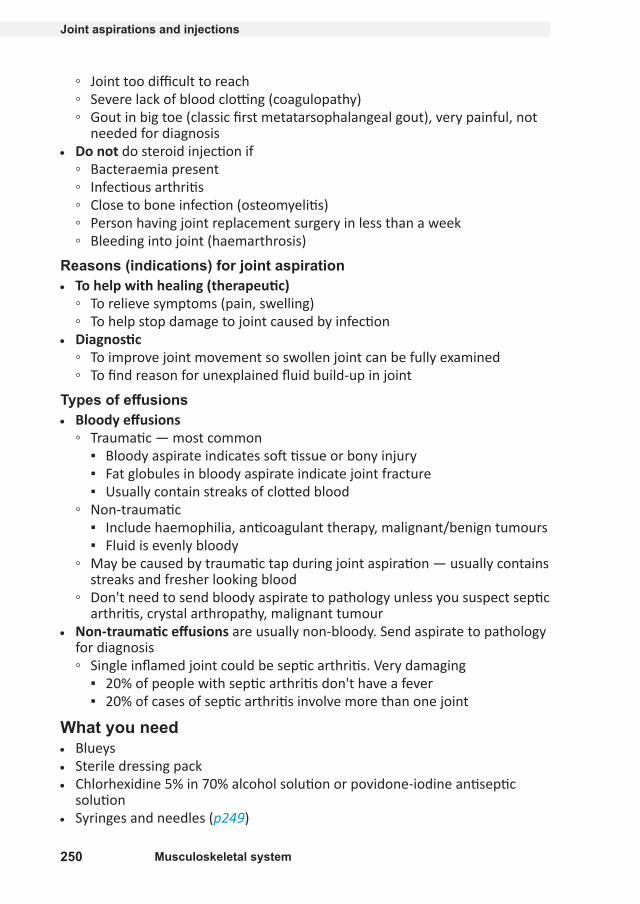
◦ Joint too difficult to reach ◦ Severe lack of blood clotting (coagulopathy) ◦ Gout in big toe (classic first metatarsophalangeal gout), very painful, not
needed for diagnosis• Do not do steroid injection if
◦ Bacteraemia present ◦ Infectious arthritis ◦ Close to bone infection (osteomyelitis) ◦ Person having joint replacement surgery in less than a week ◦ Bleeding into joint (haemarthrosis)
Reasons (indications) for joint aspiration• To help with healing (therapeutic)
◦ To relieve symptoms (pain, swelling) ◦ To help stop damage to joint caused by infection
• Diagnostic ◦ To improve joint movement so swollen joint can be fully examined ◦ To find reason for unexplained fluid build-up in joint
Types of effusions• Bloody effusions
◦ Traumatic — most common ▪ Bloody aspirate indicates soft tissue or bony injury ▪ Fat globules in bloody aspirate indicate joint fracture ▪ Usually contain streaks of clotted blood
◦ Non-traumatic ▪ Include haemophilia, anticoagulant therapy, malignant/benign tumours ▪ Fluid is evenly bloody
◦ May be caused by traumatic tap during joint aspiration — usually contains streaks and fresher looking blood
◦ Don't need to send bloody aspirate to pathology unless you suspect septic arthritis, crystal arthropathy, malignant tumour
• Non-traumatic effusions are usually non-bloody. Send aspirate to pathology for diagnosis ◦ Single inflamed joint could be septic arthritis. Very damaging
▪ 20% of people with septic arthritis don't have a fever ▪ 20% of cases of septic arthritis involve more than one joint
What you need• Blueys• Sterile dressing pack• Chlorhexidine 5% in 70% alcohol solution or povidone-iodine antiseptic
solution• Syringes and needles (p249)

251Clinical Procedures Manual
Joint aspirations and injections
▶
7. M
uscu
losk
elet
al s
yste
m
• Sterile needle holder or haemostat clamp (to keep needle still when changing syringes)
• Small sticking plaster• Compression bandageMay need• Large pillow• 3mL syringe preloaded with local anaesthetic and/or steroid for injection• Yellow cap sterile specimen container for aspirate• Crutches
Knee injection/aspiration — medial and superolateral approach
Attention• Usually
◦ Medial approach for injections and small (diagnostic) aspirations ◦ Superolateral approach for large (healing/diagnostic) aspirations
• Use method you are most comfortable with
What you doMedial approach• Lie person on back with knee bent 45–90° over bluey-covered large pillow• Find site for aspiration/injection — F 7.87• Mark injection site by making indentation
with tip of syringe• Lay out dressing pack and equipment• Wash hands and put on sterile gloves• Disinfect site and drape with sterile towels• Put needle
◦ Into triangular space made by edge of femoral condyle, tibial plateau (make sure you can palpate edge of tibial plateau) and patellar tendon, 1cm medial to patellar tendon — F 7.87
◦ Behind patella, aiming for femoral notch. Direct inward and slightly backward toward person's thigh for 2–3cm
Superolateral approach• Lie person on back with leg straight• Insert needle 1–2cm above (superior) and 1–2cm to
outside (lateral) of upper outer aspect of patella at 45° angle, and at 45° to skin surface — F 7.88
7.87
Patellar ligament
Femoral condyle
Tibial plateau
7.88

Joint aspirations and injections
252 Musculoskeletal system
For both medial and superolateral approaches• If aspirating
◦ Connect aspirating needle and syringe ◦ Put spare hand (or have helper put their hand) on thigh above knee, press
distally to milk effusion into joint. Take care to keep area sterile ◦ Insert needle, pushing in slowly while aspirating until you see fluid, then
aspirate ◦ Don't aspirate while needle being withdrawn through the skin. Can
contaminate aspirate• If injecting
◦ Inject skin and deeper tissues at needle insertion site with local anaesthetic
◦ Use sterile needle holder/forceps (with non-dominant hand in pencil grip) to hold needle in joint, disconnect syringe, attach steroid/lidocaine (lignocaine) syringe
◦ Put needle gently into centre of insertion site, push in slowly while aspirating until you see fluid or hit bone. If bone hit — pull back slightly
◦ Inject• If aspirating and injecting
◦ Do aspiration ◦ Use sterile needle holder/forceps (with non-dominant hand in pencil
grip) to hold needle in joint, disconnect aspiration syringe, attach steroid/lidocaine (lignocaine) syringe
◦ Inject
Now• Take out needle, put firm pressure over site with thumb to stop any bleeding• Put on sticking-plaster dressing• If blood aspirated — put on firm bandage (p225), arrange crutches (p242)• Put aspirate into specimen jar, store and transport under refrigeration• Check circulation and sensation (p249)
Shoulder joint injection/aspiration — lateral approachWhat you do• Sit person comfortably on chair or couch facing you, arm hanging loosely by
side, palm turned forward• To find site
◦ Gently turn shoulder around from inside to outside to feel head of humerus
◦ Find groove between head of humerus and glenoid rim ◦ Needle entry site is in groove 1cm below and just lateral to coracoid
process — F 7.89• Mark site by indenting skin with tip of syringe

Joint aspirations and injections
▶
7. M
uscu
losk
elet
al s
yste
m
Clinical Procedures Manual 253
• Lay out dressing pack and equipment• Wash hands and put on sterile gloves• Clean front of shoulder• Inject local anaesthetic into skin, if using• Connect syringe to needle. If injecting
only — remember to start procedure with smaller needle
• Put needle gently into shoulder at identified site. If you hit bone — pull back slightly
• Aspirate fluid• Use sterile needle holder/forceps (with
non-dominant hand in pencil grip) to hold needle in joint, disconnect aspiration syringe, attach steroid/lidocaine (lignocaine) syringe
• Inject• Take out needle, put firm pressure over site with thumb to stop any bleeding• Put on sticking-plaster dressing• Put aspirate in specimen jar, store and transport under refrigeration• Check circulation and sensation (p249)
Shoulder joint — subacromial bursa injectionAttention• Aiming to inject into soft tissue that lines non-cartilaginous surfaces
(subacromial bursa)• Do not inject into tendon. If needle enters tendon (gritty resistance) — pull
out straight away• If injection in right place — pain will be quickly relieved
What you need• Sterile dressing pack• Chlorhexidine 5% in 70% alcohol solution or povidone-iodine antiseptic
solution• Local anaesthetic and equipment (if using)• 3mL syringe preloaded with lidocaine (lignocaine) 1% and 1mL of steroid for
injection• Long 23G or 25G needle• Small sticking-plaster dressing
What you do• Ask person to put affected arm behind their back, with backs of fingers
touching far waistline• Palpate acromial margin laterally or posterolaterally
◦ Injection is below acromial margin, laterally, directed upward under acromion — aim for coracoid process
7.89
Needle entry site 1cm below
and just lateral to coracoid
process
Gently turn shoulder outwards
Glenoid rim (cap) Coracoid
process
Head of humerus

254
Joint aspirations and injections
Musculoskeletal system
• Mark injection site by indenting with end of syringe
• Lay out dressing pack and equipment• Wash hands and put on sterile gloves• Clean site and drape with sterile
towels• Inject local anaesthetic into skin, if
using• Connect preloaded syringe and
needle• Guide needle tip into site, beneath acromion, angled slightly upward and
parallel to acromial under surface — F 7.90• Inject air you have left in syringe to see if you are in joint. If no resistance
felt — inject lidocaine (lignocaine) and steroid• Take out needle, put firm pressure over site with thumb to stop any bleeding• Put on sticking-plaster dressing• Check circulation and sensation (p249)
Steroid injection• Steroid injections give pain relief• Adding lidocaine (lignocaine) to steroid injection
◦ Relieves pain at target site ◦ Helps you work out if medicine has reached its target ◦ Allows area to be re-examined while joint under anaesthesia ◦ Helps to tell difference between local and referred pain ◦ Gives volume to injection fluid ◦ Distributes corticosteroid in large joints
Lidocaine (lignocaine) concentration• More concentrated (eg 2%) for small joints needing smaller volume• Less concentrated (eg 1%) for large joints needing larger volume
Attention• Infection after injection rare. Prevented by making sure person knows how
to keep site clean• Post-injection flare (2–5%). Painful condition, starts 6–12 hours after
injection, lasts 2–3 days. Easily confused with infection. Prevented by ◦ Avoiding weight-bearing and vigorous activity with injected joint for 48
hours post-injection ◦ Applying ice ◦ NSAIDs — if no contraindications (CARPA STM p381)
7.90
Subacromial bursa
Rotator cuff tendons
Coracoid process
Acromion

255Clinical Procedures Manual
Joint aspirations and injections
▶
7. M
uscu
losk
elet
al s
yste
m
• Steroid dose ◦ Reduce dose for young people, the elderly, those in poor health ◦ Be careful with short-acting steroids in people with diabetes. Risk of
increased blood glucose levels for up to 3 weeks after injection
What you need• See What you need (p250)AND• 1mL betamethasone mixed with 3–5mL of lidocaine (lignocaine) 1%• OR 1mL methylprednisolone mixed with 3–5mL of lidocaine (lignocaine) 1%• 3mL syringe preloaded with lidocaine (lignocaine) and steroid• Small joints (eg wrists, ankle) — consider stronger steroids in smaller
volumes
What you do• See What you do — knees (p251) or What you do — shoulders (p252)
Joint fluid analysis• Send non-bloody fluid to pathology for cell count, gram stain, bacterial
culture and, if needed, special tests such as crystals, fluid-protein, fluid-glucose and fluid-LD levels
• Do cultures on all synovial fluids. Bacterial infections can look like or be present along with joint disease
Collection• Need a minimum of 2mL aspirate in sterile yellow container for gram stain,
culture, WBC, crystals• For diagnosis
◦ If enough fluid, put 1–2.5mL in EDTA tube (purple lid) — gives more accurate analysis of WBC. Important if delay in transport
◦ If septic arthritis suspected and enough joint fluid — put 2.5mL in blood culture bottle (aseptic technique)
Transport• Best within 4 hours, but no later than 48 hours. Refrigerate if delay• Use blood culture bottle
ResultsJoint fluid analysis will fall into one of 3 categories, see Table 7.1.• Non-inflammatory
◦ Degenerative (eg osteoarthritis, overuse syndrome) ◦ Trauma, if no blood in fluid
• Septic (eg infective mono-arthritis) ◦ Non-gonococcal bacterial arthritis ◦ Gonococcal bacterial arthritis

256
Joint aspirations and injections
Musculoskeletal system
• Inflammatory ◦ Acute crystal arthropathy (eg gout, pseudogout) ◦ Any type of arthritis
Synovial fluid findingsTable 7.1: Microscopic findings
MC&S Normal Non- inflammatory
Inflammatory Septic
WBC per mm3 Less than 200 200–2,000 2,000–150,000 (likely less than 75,000)
15,000–200,000 (likely more than 100,000)
PMN Less than 10–25%
Less than 25% Often more than 50%
More than 75%
Gram stain – – – +Culture – – – +Crystals – – + PossibleChemicals (eg protein, glucose, LD) not routinely requested, need an extra 0.5mL aspirate.

257Clinical Procedures Manual▶
7. M
uscu
losk
elet
al s
yste
m
Stiff neckAttentionAlways consider meningitis (CARPA STM p101) in people complaining of a stiff neck.
• Exclude more serious neck injury• Acute wry neck (torticollis) — sudden onset of severe neck pain with spasm
of neck muscles. Causes person to bend or twist neck and head away from painful side
• May be caused by holding awkward position, often from day before (eg long distance driving)
• Usually occurs on one side of neck, resolves by itself• Common in young people — 12–30 years• Do not drive when suffering from this condition• Keep posture as normal as possible• Keep moving neck as much as pain will allow — gentle exercise will speed up
recovery
Active movement and manual tractionAttention• If person has pins and needles or numbness during procedure — medical
consult
What you need• Hot pack or ice pack — use what person tolerates best
What you do• Lie person down in comfortable position with pillow supporting head• Put hot/ice pack under neck• Have person turn head toward painful side as
far as comfortable, then toward non-painful side
• If no improvement — apply gentle manual traction to head ◦ Hold back of skull with one hand and under
chin with other hand — F 7.91 ◦ Pull gently and evenly for 20 seconds ◦ If feels the same or better — repeat
• Advise simple pain relief (eg paracetamol) (CARPA STM p380)
If this procedure does not relieve symptoms — try hold–relax procedure (p258).
7.91

258
Stiff neck
Musculoskeletal system
Hold–relaxAttention• Can be taught to person to do at home• Turn head toward or away from painful side,
depending on which hurts less ◦ Turning toward pain described, but technique
the same for both
What you do• Person sits in comfortable chair• Turn head slowly and gently toward painful side until it starts to become
uncomfortable, then stop• Put one hand against side of head opposite to painful side• Use other hand to steady neck — F 7.92• Ask person to turn head against pressure of your hand — not push sideways• Keep even, firm pressure against head so that they just can't turn their neck,
not so hard that you move their head• At the same time, ask person to take a deep breath and hold it, look upward
to side where your hand rests• Count 10 seconds then ask person to relax and breathe out• Person should now be able to turn their head a little more toward painful
side without your help• Do this again 3–5 times in a row — there should be a great improvement in
tension and pain• Physiotherapy referral may be useful
7.92

259Clinical Procedures Manual▶
7. M
uscu
losk
elet
al s
yste
m
Feet
Foot examinationWhat you need• 10g monofilament
◦ If not available — tissue/cotton wool
What you do• Compare lower legs for size, shape, muscle wasting,
swelling (oedema) — F 7.93• Check both feet for skin colour, sores, ulcers, blisters,
corns, bunions, moles, rashes, scars, swollen (varicose) veins, deformities
• Check toes and nails for ulcers, dead tissue (necrosis), blackened areas — F 7.94
• Feel both feet, check if they can move in all normal directions. Can they bend (flex) and straighten (extend) ankles and toes
• Check touch and pain sensation in toes and feet using monofilament OR cotton wool or tissue
• Feel for foot pulses (p260)
Diabetic foot• Regular self-care can prevent diabetic foot problems — ulceration, infection,
amputation• Risk of foot problems
◦ Increased by poor diabetes control, length of time person has had diabetes, smoking, foot deformities, inadequate footwear
◦ Decreased with regular foot checks and management• Refer to podiatrist
Foot checksAttention• All health practitioners should be able to screen diabetic feet• Screen feet at least once a year, more often if problems found
What you need• Foot screening checklist, if used by your health service• 10g monofilamentNote: If no monofilament available — use cotton wool or tissue for rough assessment. Compare sensation in feet to arms
7.93
7.94

260
Feet
Musculoskeletal system
What you do• Ask about
◦ Signs of nerve damage — pins and needles, tingling, numbness, weakness, burning
◦ Pain• Feel for foot pulses in both feet — should be 2
pulses in each foot ◦ One on top of foot — F 7.95 ◦ One behind medial malleolus (inner ankle) —
F 7.96• Check sensation using 10g monofilament
◦ Sit person with legs out straight, feet level, eyes closed
◦ Test 3 sites on each foot (avoid hard skin and wounds) — F 7.97 ▪ Hold filament at 90° to skin, press hard enough
to bend filament — F 7.98, then remove. Takes about 2 seconds
▪ Ask person if they can feel touch and which foot you are touching
◦ Touch each site 3 times with filament ▪ Protective sensation present at site if person
feels touch at least 2 times• Look for anomalies — any of
◦ Calluses, corns, hard skin, thick nails, cracks or fissures
◦ Wounds, infection ◦ Deformities — crooked toes, bunions, bony
prominences ◦ Scars on sole of foot ◦ Amputations
• Look and ask about self-care practices ◦ Are shoes worn, what type ◦ Can person care for their feet
▪ Consider level of understanding, vision, can they reach their feetHigh risk footMay be one or both feet• 1 or both pulses missing• Protective sensation missing at 1 or more sites• Anomalies present• Person doesn't know how or can't care for own feet
7.98
7.97
7.96
7.95

261Clinical Procedures Manual
Feet
▶
7. M
uscu
losk
elet
al s
yste
m
Foot management• People with feet at high risk need
◦ Management plan ◦ To be taught daily foot care (p262) ◦ 3 monthly foot checks
• People with feet at low risk (especially if new diagnosis of diabetes) need ◦ To be taught daily foot care (p262) ◦ Yearly foot checks
What you may need• Soap and water• Scalpel blade and handle• Nail clippers, single use best• Single use nail file• If active lesion — sterile blunt end probe
What you do• If you can't feel all pulses — refer for vascular studies, or use hand-held
Doppler ultrasound to check arterial blood flow to foot• If sensation poor and person can't feel monofilament —
◦ Record area of nerve damage (peripheral neuropathy) ◦ Remind person they need to check and feel their feet every day ◦ Refer to podiatrist for pressure reduction (offloading) and appropriate
footwear ◦ Review diabetes management
Treat active foot lesions• Remove thick hard skin with scalpel (debride) to relieve pressure, prevent
ulcers forming• Use nail clippers and file to reduce long, thick toenails. Can damage other
toes or form ulcers under nail• Debride ulcers, especially on sole of foot, to encourage healing• If person dark skinned and area of thick skin has become darker in colour —
area is inflamed and/or stressed, needs attention straight away ◦ Rest area from weight bearing by debriding calluses (p263), using
protective padding, wearing shoes ◦ Refer to podiatrist
• Wounds ◦ Painless wounds are sign of peripheral neuropathy ◦ Painful wounds may be infected or have reduced blood flow (ischaemic) ◦ Probe wound with sterile blunt end probe to check whether bone involved ◦ If wound chronic or could involve bone — send for x-ray
• Refer to podiatrist. Consider high-risk foot clinic referral/consult• Infections need antibiotics (CARPA STM p262)

262
Feet
Musculoskeletal system
Follow-up• Teach daily foot care. Make sure person understands activities and
importance• Monitor person's foot care practices whenever you can — during clinic and
home visits, when doing other health checks• Encourage person to wear comfortable, soft-soled shoes to cushion and
protect feet
Teaching daily foot careAttention• Talk about and show people as part of routine health checks
◦ Daily foot care needs to be done daily ◦ Wash hands before doing foot care ◦ Take care not to injure skin. Do not use sharp
instruments (eg scissors, razor blades, graters)• Advise to come to clinic if any wounds on feet
What you need• Soap, liquid soap• Clean cloth• Bucket• Non-abrasive kitchen scourer• Clean towel• Sorbolene-based cream or simple moisturiser• Nail clippers, single use best• Single use nail file• Clean socks and comfortable, soft-soled shoes
What you doShow person how to• Wash feet well with soap and cloth — F 7.99
◦ Safer to do this seated with feet in bucket, not in shower
• Use scourer with soap and water to reduce thick skin. Do not use sharp instruments
• Gently dry all skin surfaces with towel — F 7.100• Look at and feel both feet all over including between
toes. Check for blisters, cracks, injuries, changes in skin colour, temperature, texture
• Rub sorbolene-based cream or hand cream into dry skin — F 7.101
• Trim toenails straight across or follow natural curve — F 7.102. Do not cut down sides
7.102
7.101
7.100
7.99
263Clinical Procedures Manual
Feet
▶
7. M
uscu
losk
elet
al s
yste
m
• Use file to smooth edges, lessen thickness of nail• Clean and cover small skin sores (blisters, scratches, cracks) with simple
dressing or sticking plaster to keep dirt out ◦ If sores get smelly or sticky (infected) — go to clinic straight away
Tell person• To care for their feet they need to
◦ Do foot care every day ◦ Have feet checked regularly by health team ◦ Control their diabetes — keep as active as possible, eat healthy food, take
their medicines• Protect feet by wearing socks and shoes. Thongs better than bare feet
◦ Shake rubbish (eg sand, seeds, stones) out of shoes before putting on
Other foot conditionsCalluses and cornsAttention• Caused by increased mechanical stress on foot, always at pressure area• Can be painful, cause underlying necrosis• Increased risk when on diabetic foot with nerve damage• Often misdiagnosed as warts• Need to be removed (debrided)
What you need• Size 10 scalpel blade and handle• Well-fitting gloves• Emery board
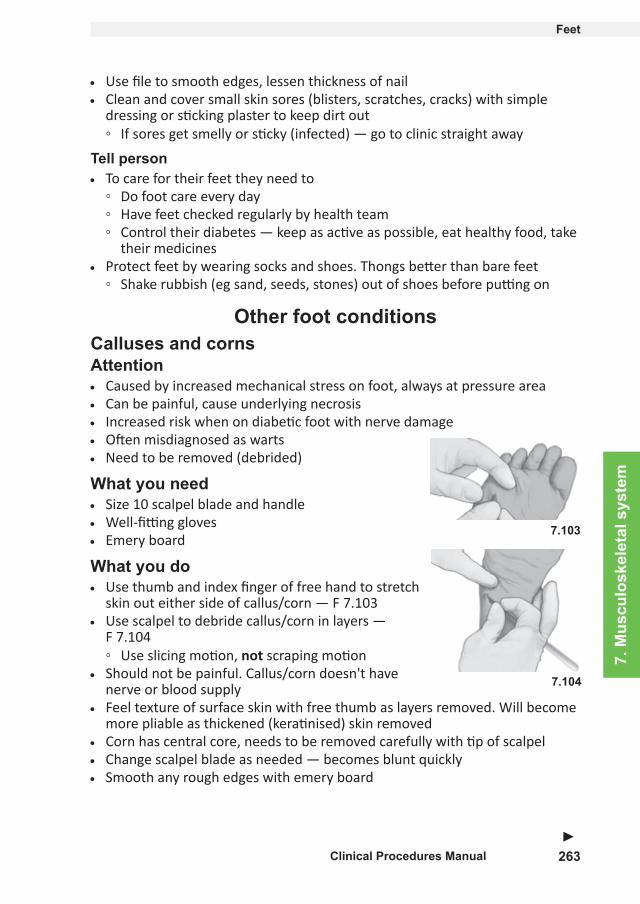
What you do• Use thumb and index finger of free hand to stretch
skin out either side of callus/corn — F 7.103• Use scalpel to debride callus/corn in layers —
F 7.104 ◦ Use slicing motion, not scraping motion
• Should not be painful. Callus/corn doesn't have nerve or blood supply
• Feel texture of surface skin with free thumb as layers removed. Will become more pliable as thickened (keratinised) skin removed
• Corn has central core, needs to be removed carefully with tip of scalpel• Change scalpel blade as needed — becomes blunt quickly• Smooth any rough edges with emery board
7.104
7.103

264
Feet
Musculoskeletal system
Plantar wartsAttention• Caused by Human Papillomavirus
◦ Disturbs skin cells, produces thickened surrounding skin that protects virus from topical applications
• Not caused by mechanical stress, can be anywhere on bottom (plantar surface) of foot
• Often confused with corns and calluses• Never penetrate into dermal layers of skin• If small and not painful — can be left• If large or complex — refer for surgical removal
What you need• Size 10 scalpel blade and handle• Well-fitting gloves• Topical application (commercial salicylic acid solution)• Occlusive tape (eg zinc oxide, sports tape). Blocks air and water
What you do• Use thumb and index finger of free hand to stretch skin out either side of
callus/corn — F 7.103• Use scalpel to debride wart in layers — F 7.104
◦ Use slicing motion, not scraping motion• Can contain capillary loops, will often bleed as layers of skin removed
◦ Stop debriding as soon as bleeding seen• Apply topical solution as per instructions or use cyrotherapy (eg liquid
nitrogen) on base of wart• Apply occlusive tape that will soften (macerate) wart tissue• Debride weekly until all wart tissue removed