Embed Size (px)
Citation preview

RTAS Plug-In for Pro Tools®
OWNER’S MANUAL
by

SurCode for Dolby Pro Logic II Owner’s Manual
Table of Contents1 Overview...............................................................12 Mac Installation....................................................33 Windows Installation...........................................44 Inserting the SurCode Plug-in............................5
4.1 Interleaved soundfiles ............................................ 54.2 Mono Soundfiles.................................................... 74.3 Encoding 5.0 Surround Recordings ..................... 154.4 Monitoring Lt/Rt recordings................................ 154.5 Automation .......................................................... 18
5 The Main Screen ................................................195.1 Encoding/Monitoring........................................... 205.2 Limiter button ...................................................... 205.3 Overload Indicator ............................................... 215.4 Input Trims .......................................................... 225.5 Gang Faders button.............................................. 235.6 Gain Trim Reset button........................................ 235.7 Decoder Mode...................................................... 245.8 Channel Configuration......................................... 265.9 Decoder Output Scale .......................................... 275.10 Information window .......................................... 28
i


OWNER’S MANUAL
1 OverviewSurCode for Dolby Pro Logic II converts your 5.1 surround soundfiles to the Dolby Pro Logic II format by matrix-encoding the Center, Sur-round, and LFE tracks into the Left and Right tracks. The L and R tracks then become Lt/Rt, which stands for Left total/Right total - meaning that Lt/Rt tracks also contain the matrix-encoded Center, Surround as well as LFE tracks. These Lt/Rt tracks can be distributed and played in stereo, and also decoded by a Dolby Surround/Pro Logic/Pro Logic II decoder and played back in surround.This SurCode plug-in accepts a 6-channel surround sound input. Sur-Code outputs an Lt/Rt encoded stereo stream that can be recorded and used in any stereo transmission medium. Please note: since SurCode for Dolby Pro Logic II requires a 6-channel input, it requires Pro Tools HD. It will not work with Pro Tools LE.
Audio files encoded by Surcode for Dolby Pro Logic II are fully com-patible with all branded Dolby Surround, Pro Logic, and Pro Logic II decoders, either in software or hardware format.
SurCode for Dolby Pro Logic II contains a decoder, which is essential for properly setting the encode parameters. Also, the encoder/decoder in SurCode can work in real-time, enabling you to monitor the results of encoding and decoding.
Note: Dolby Pro Logic II matrix encoding is a creative process, unlike Dolby Digital (AC-3) or other discrete-channel digital data compression (lossy) encoding. Because the matrix encoder combines the center, LFE, and surround elements into the Lt/Rt channels by changing level, phase, and other parameters, the channel gain trim settings are quite important in assuring proper stereo and surround compatibility. When compared to AC-3-encoded soundfiles, matrix-encoded soundfiles are not as discrete in their surround decoding capability; however, Dolby Pro Logic II is the best way to distribute encoded surround mixes or elements within an existing stereo transmission medium, whether broadcast, cable, games,
1

CDs, DVDs, or videotapes. Matrix-encoded soundfiles take up no extra space, and use no extra computer CPU resources.
2

2 Mac InstallationThe installation CD contains two folders - - pt69_mac and pt72_mac. If you are using Pro Tools 6.9, you will use the installation in the pt69_mac folder. If you are using Pro Tools 7.2 or later, you will use the installation in the pt72_mac folder.
The installation file in each folder is the file that ends in “.dmg”. Dou-ble-click on this file. It will create a new file with a “.pkg” extension. Double click on the “.pkg” file to start installation, and follow the instructions on the screen.
3

3 Windows InstallationThe installation CD contains two folders - - pt69_win and pt72_win. If you are using Pro Tools 6.9, you will use the installation in the pt69_win folder. If you are using Pro Tools 7.2 or later, you will use the installa-tion in the pt72_win folder.
The installation file is “setup.exe”. Double-click on this file, and the installation will begin.
4

4 Inserting the SurCode Plug-in4.1 Interleaved soundfiles
If your source is an interleaved .wav or .aiff file, then inserting the Sur-Code plug-in is simple.
When you import a 6-channel interleaved soundfile into Pro Tools, it creates a 6-channel track. Before importing the soundfile, make sure that you have a 5.1 channels path (i.e.6 channels including the Lf chan-nel) set up in your I/O Setup, and that it is selected.
The imported interleaved soundfile will make a single 6-channel track on the waveform display (see Figure 4-1).
Figure 4-1 One 6-channel interleaved file imported into Pro Tools.
5
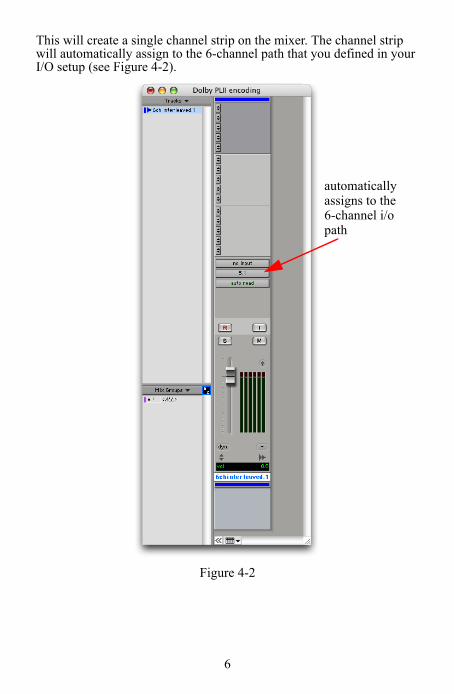
This will create a single channel strip on the mixer. The channel strip will automatically assign to the 6-channel path that you defined in your I/O setup (see Figure 4-2).
Figure 4-2
automaticallyassigns to the6-channel i/opath
6
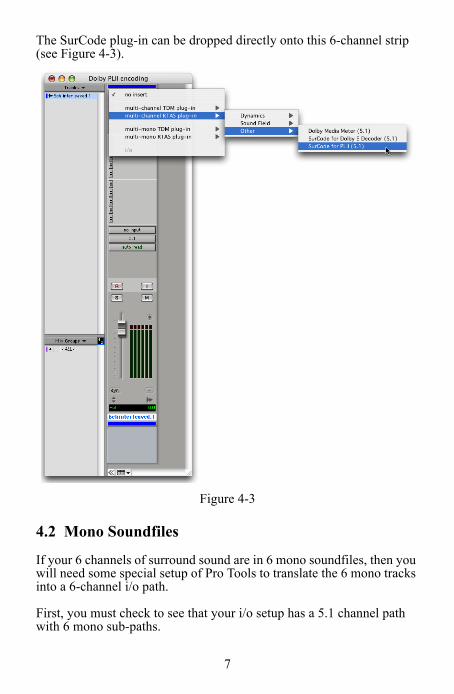
The SurCode plug-in can be dropped directly onto this 6-channel strip (see Figure 4-3).
Figure 4-3
4.2 Mono Soundfiles
If your 6 channels of surround sound are in 6 mono soundfiles, then you will need some special setup of Pro Tools to translate the 6 mono tracks into a 6-channel i/o path.
First, you must check to see that your i/o setup has a 5.1 channel path with 6 mono sub-paths.
7
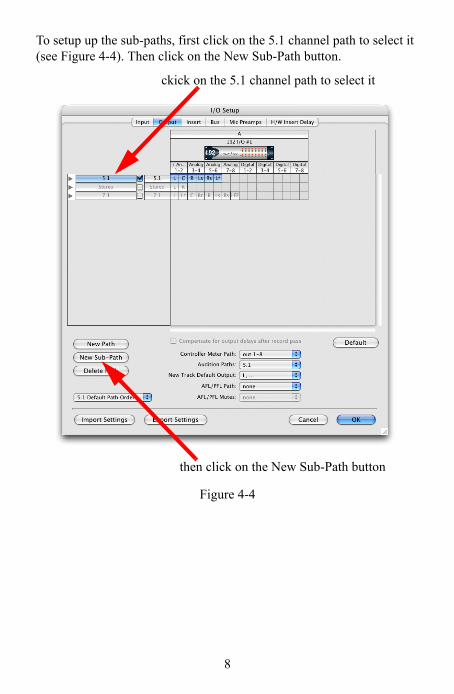
To setup up the sub-paths, first click on the 5.1 channel path to select it (see Figure 4-4). Then click on the New Sub-Path button.
Figure 4-4
ckick on the 5.1 channel path to select it
then click on the New Sub-Path button
8
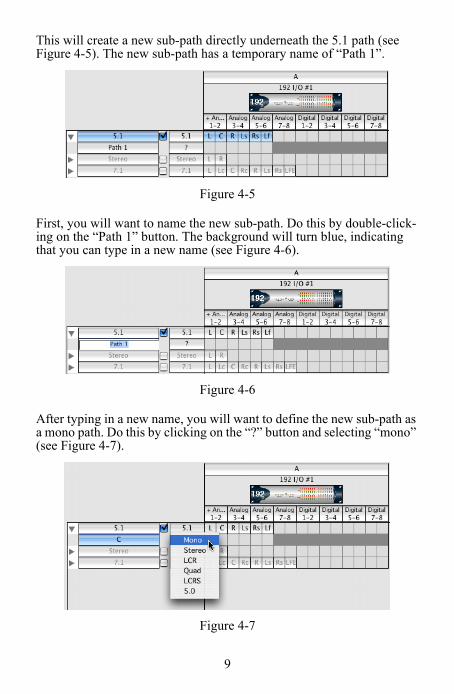
This will create a new sub-path directly underneath the 5.1 path (see Figure 4-5). The new sub-path has a temporary name of “Path 1”.
Figure 4-5
First, you will want to name the new sub-path. Do this by double-click-ing on the “Path 1” button. The background will turn blue, indicating that you can type in a new name (see Figure 4-6).
Figure 4-6
After typing in a new name, you will want to define the new sub-path as a mono path. Do this by clicking on the “?” button and selecting “mono” (see Figure 4-7).
Figure 4-7
9
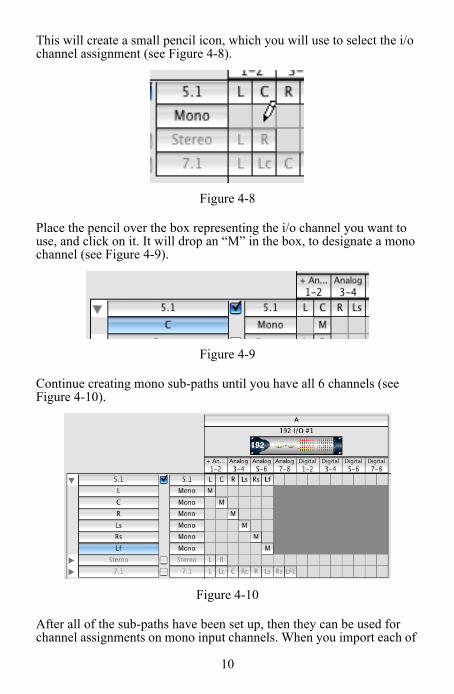
This will create a small pencil icon, which you will use to select the i/o channel assignment (see Figure 4-8).
Figure 4-8
Place the pencil over the box representing the i/o channel you want to use, and click on it. It will drop an “M” in the box, to designate a mono channel (see Figure 4-9).
Figure 4-9
Continue creating mono sub-paths until you have all 6 channels (see Figure 4-10).
Figure 4-10
After all of the sub-paths have been set up, then they can be used for channel assignments on mono input channels. When you import each of
10
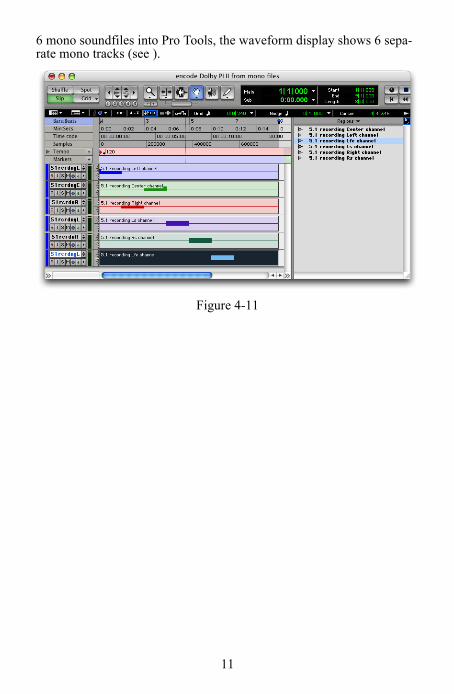
6 mono soundfiles into Pro Tools, the waveform display shows 6 sepa-rate mono tracks (see ).
Figure 4-11
11
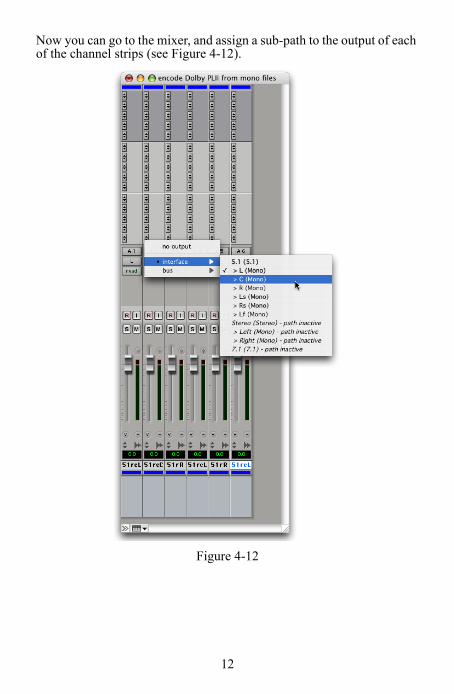
Now you can go to the mixer, and assign a sub-path to the output of each of the channel strips (see Figure 4-12).
Figure 4-12
12
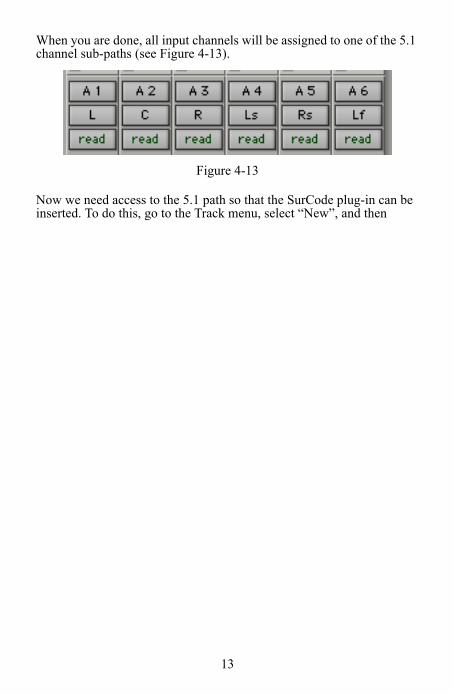
When you are done, all input channels will be assigned to one of the 5.1 channel sub-paths (see Figure 4-13).
Figure 4-13
Now we need access to the 5.1 path so that the SurCode plug-in can be inserted. To do this, go to the Track menu, select “New”, and then
13
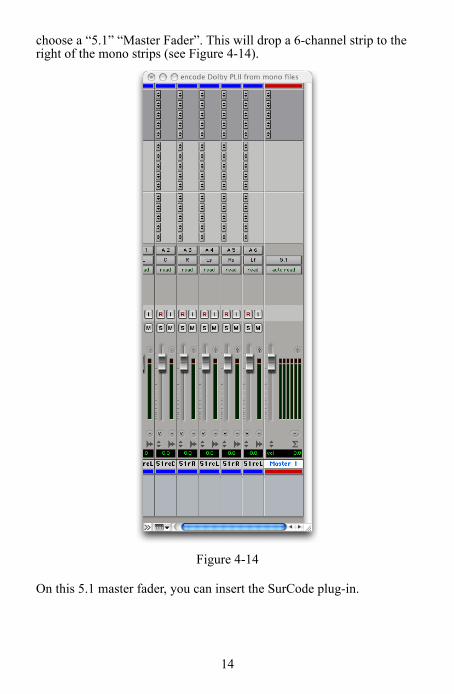
choose a “5.1” “Master Fader”. This will drop a 6-channel strip to the right of the mono strips (see Figure 4-14).
Figure 4-14
On this 5.1 master fader, you can insert the SurCode plug-in.
14
4.3 Encoding 5.0 Surround RecordingsIn addition to 5.1-channel recordings (as in the above examples), the SurCode for Dolby Pro Logic II plug-in can also work with 5.0 record-ings (recordings with no LFE channel). You will need to create a 5.0 path in the i/o setup.
4.4 Monitoring Lt/Rt recordings
You can also use the SurCode for Dolby Pro Logic II plug-in to monitor Pro Logic II-encoded soundfiles. For this, you must configure Pro Tools to play an interleaved stereo soundfile, and to send the Left and Right channels of the stereo soundfile to the Left and Right channel inputs of the plug-in.
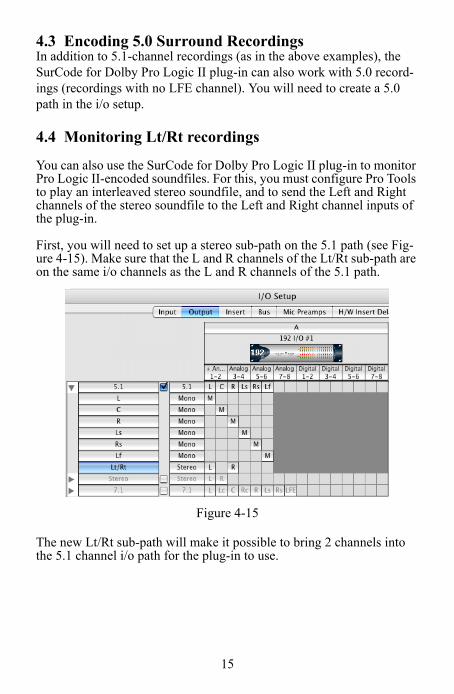
First, you will need to set up a stereo sub-path on the 5.1 path (see Fig-ure 4-15). Make sure that the L and R channels of the Lt/Rt sub-path are on the same i/o channels as the L and R channels of the 5.1 path.
Figure 4-15
The new Lt/Rt sub-path will make it possible to bring 2 channels into the 5.1 channel i/o path for the plug-in to use.
15
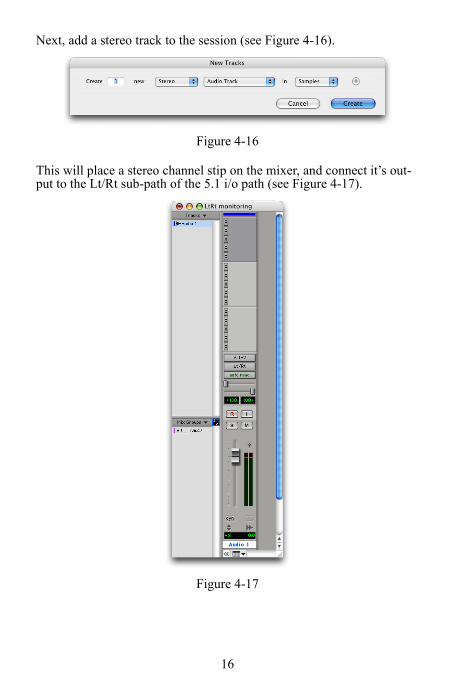
Next, add a stereo track to the session (see Figure 4-16).
Figure 4-16
This will place a stereo channel stip on the mixer, and connect it’s out-put to the Lt/Rt sub-path of the 5.1 i/o path (see Figure 4-17).
Figure 4-17
16
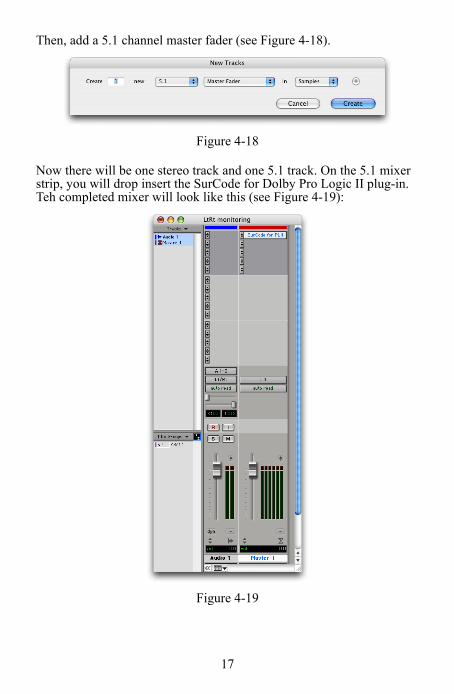
Then, add a 5.1 channel master fader (see Figure 4-18).
Figure 4-18
Now there will be one stereo track and one 5.1 track. On the 5.1 mixer strip, you will drop insert the SurCode for Dolby Pro Logic II plug-in. Teh completed mixer will look like this (see Figure 4-19):
Figure 4-19
17

To use the Lt/Rt decoder, place the encdoded soundfile on the stereo track, set the plug-in to “Decode” and play the soundfile. The plug-in will decode the stereo soundfile, and play the decoded 5.1 surround sound out the 6 i/o channels of the 5.1 path.
4.5 Automation
The Input Trims, and all of the Routing controls (except for Gang Fad-ers and Reset Faders) can be automated under ProTools. The Decoder controls cannot be automated.
18
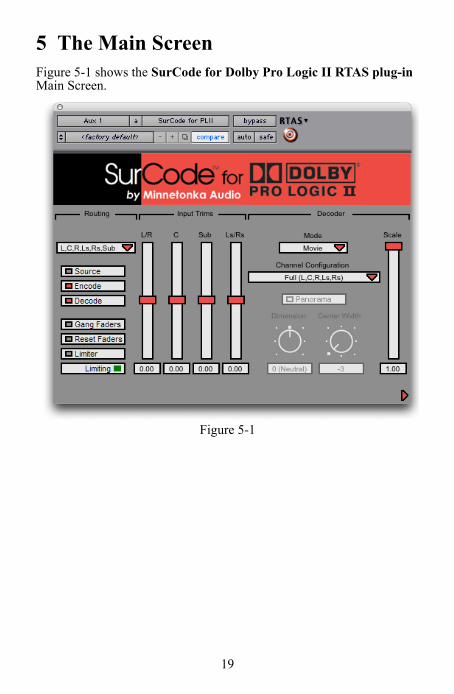
5 The Main ScreenFigure 5-1 shows the SurCode for Dolby Pro Logic II RTAS plug-in Main Screen.
Figure 5-1
19

5.1 Encoding/Monitoring
The three buttons in the upper left corner set the modes for encoding and for monitoring (see Figure 5-2).
Figure 5-2
When the Source button is selected, the Pro Logic II encoder is turned off, and the inputs are connected directly to the outputs.
When the Encode button is selected, the Pro Logic II encoder is turned on, and the encoded stereo signal is sent to the first two channels of your Pro Tools output bus, typically L and R. The other four outputs are muted.
When the Encode button and Decode button are both selected, the Pro Logic II encoder is turned on, and the decoder is also turned on, so that you can hear what the end listener will hear in their home through their decoder (i.e. 6 channels of decoded audio). This is especially useful in tuning up the input levels for best encoding (see section 5.4, Input Trims).
5.2 Limiter button
This button engages the Limiter function (see Figure 5-3).
Figure 5-3
The Limiter function is useful if the Overload Indicator (see section 5.3, Overload Indicator) is only showing a few overloads for the entire
20
track. Instead of reducing the overall gain even further, the Limiter can catch the few peaks before they overload the matrix encoder.
The Limiter function is actually six ganged channel limiters that are active only if the matrix encoder has indicated an overload (“Satura-tion”). The block of audio that caused the overload is then re-encoded at a lower gain level for the duration of the overload condition, which makes it an effective peak limiter.
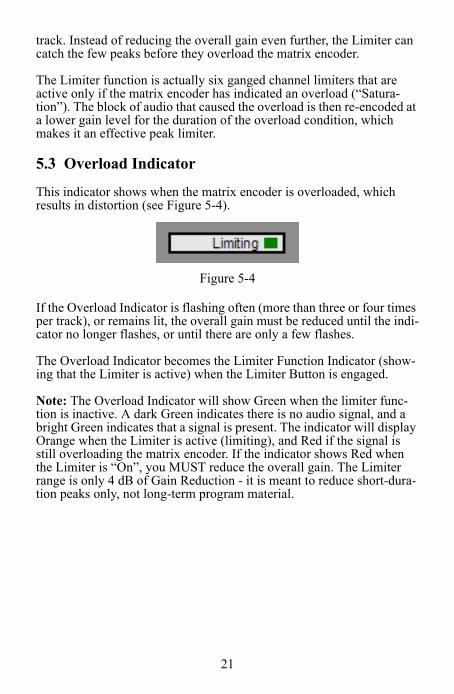
5.3 Overload Indicator
This indicator shows when the matrix encoder is overloaded, which results in distortion (see Figure 5-4).
Figure 5-4
If the Overload Indicator is flashing often (more than three or four times per track), or remains lit, the overall gain must be reduced until the indi-cator no longer flashes, or until there are only a few flashes.
The Overload Indicator becomes the Limiter Function Indicator (show-ing that the Limiter is active) when the Limiter Button is engaged.
Note: The Overload Indicator will show Green when the limiter func-tion is inactive. A dark Green indicates there is no audio signal, and a bright Green indicates that a signal is present. The indicator will display Orange when the Limiter is active (limiting), and Red if the signal is still overloading the matrix encoder. If the indicator shows Red when the Limiter is “On”, you MUST reduce the overall gain. The Limiter range is only 4 dB of Gain Reduction - it is meant to reduce short-dura-tion peaks only, not long-term program material.
21
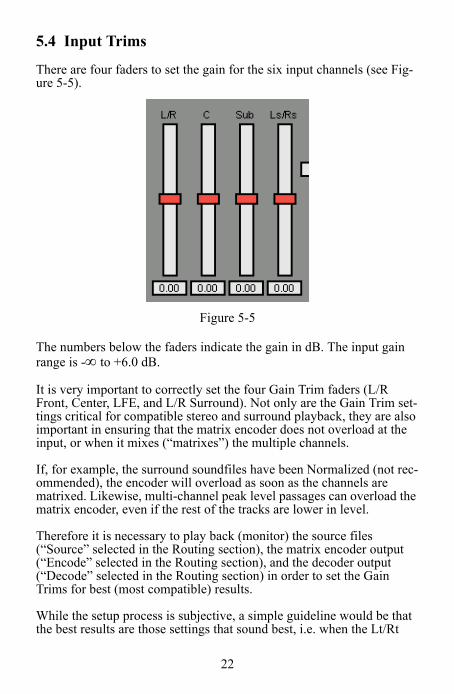
5.4 Input Trims
There are four faders to set the gain for the six input channels (see Fig-ure 5-5).
Figure 5-5
The numbers below the faders indicate the gain in dB. The input gain range is -∞ to +6.0 dB.
It is very important to correctly set the four Gain Trim faders (L/R Front, Center, LFE, and L/R Surround). Not only are the Gain Trim set-tings critical for compatible stereo and surround playback, they are also important in ensuring that the matrix encoder does not overload at the input, or when it mixes (“matrixes”) the multiple channels.
If, for example, the surround soundfiles have been Normalized (not rec-ommended), the encoder will overload as soon as the channels are matrixed. Likewise, multi-channel peak level passages can overload the matrix encoder, even if the rest of the tracks are lower in level.
Therefore it is necessary to play back (monitor) the source files (“Source” selected in the Routing section), the matrix encoder output (“Encode” selected in the Routing section), and the decoder output (“Decode” selected in the Routing section) in order to set the Gain Trims for best (most compatible) results.
While the setup process is subjective, a simple guideline would be that the best results are those settings that sound best, i.e. when the Lt/Rt
22
sounds like the Center, Surround, and LFE tracks are present but not too loud, and the Decoded Lt/Rt sounds most like the Source playback.
We recommend that you read the Dolby Publication “Mixing with Dolby Pro Logic II Technology” that is included on the install disc in PDF format. You may also access it on the internet at: http://www.dolby.com/assets/pdf/tech_library/214_Mixing_with_Dolby_Pro_Logic_II_Technology.pdf
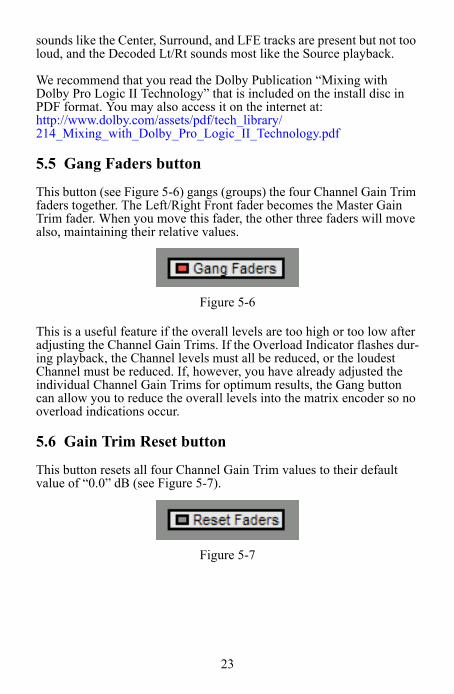
5.5 Gang Faders button
This button (see Figure 5-6) gangs (groups) the four Channel Gain Trim faders together. The Left/Right Front fader becomes the Master Gain Trim fader. When you move this fader, the other three faders will move also, maintaining their relative values.
Figure 5-6
This is a useful feature if the overall levels are too high or too low after adjusting the Channel Gain Trims. If the Overload Indicator flashes dur-ing playback, the Channel levels must all be reduced, or the loudest Channel must be reduced. If, however, you have already adjusted the individual Channel Gain Trims for optimum results, the Gang button can allow you to reduce the overall levels into the matrix encoder so no overload indications occur.
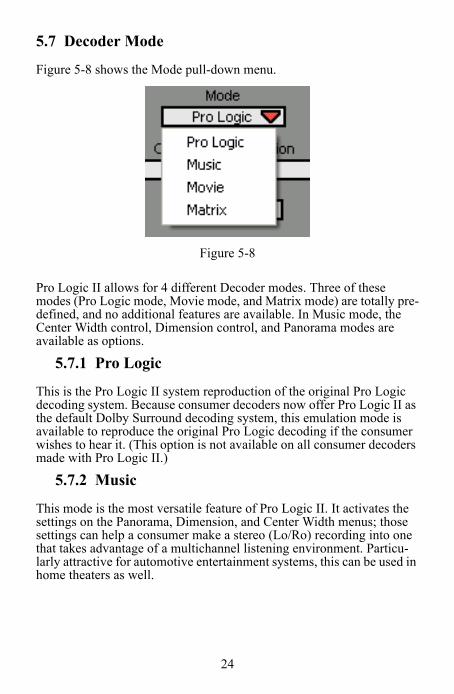
5.6 Gain Trim Reset button
This button resets all four Channel Gain Trim values to their default value of “0.0” dB (see Figure 5-7).
Figure 5-7
23
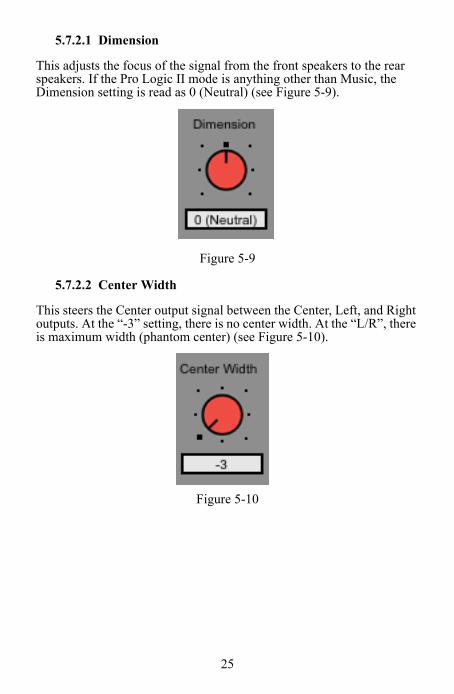
5.7 Decoder Mode
Figure 5-8 shows the Mode pull-down menu.
Figure 5-8
Pro Logic II allows for 4 different Decoder modes. Three of these modes (Pro Logic mode, Movie mode, and Matrix mode) are totally pre-defined, and no additional features are available. In Music mode, the Center Width control, Dimension control, and Panorama modes are available as options.
5.7.1 Pro Logic
This is the Pro Logic II system reproduction of the original Pro Logic decoding system. Because consumer decoders now offer Pro Logic II as the default Dolby Surround decoding system, this emulation mode is available to reproduce the original Pro Logic decoding if the consumer wishes to hear it. (This option is not available on all consumer decoders made with Pro Logic II.)
5.7.2 Music
This mode is the most versatile feature of Pro Logic II. It activates the settings on the Panorama, Dimension, and Center Width menus; those settings can help a consumer make a stereo (Lo/Ro) recording into one that takes advantage of a multichannel listening environment. Particu-larly attractive for automotive entertainment systems, this can be used in home theaters as well.
24
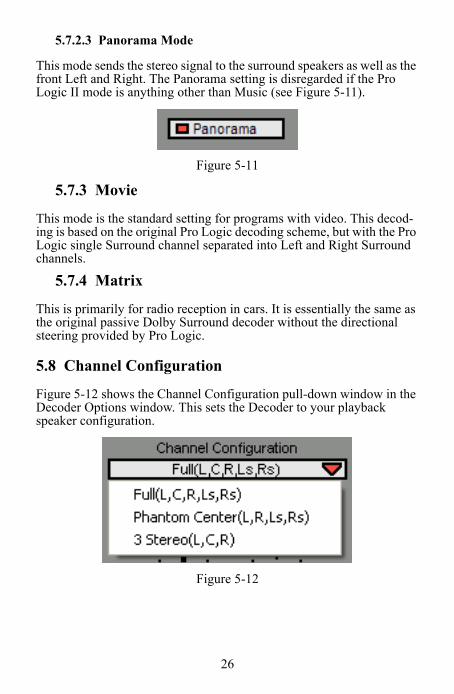
5.7.2.1 Dimension
This adjusts the focus of the signal from the front speakers to the rear speakers. If the Pro Logic II mode is anything other than Music, the Dimension setting is read as 0 (Neutral) (see Figure 5-9).
Figure 5-9
5.7.2.2 Center Width
This steers the Center output signal between the Center, Left, and Right outputs. At the “-3” setting, there is no center width. At the “L/R”, there is maximum width (phantom center) (see Figure 5-10).
Figure 5-10
25
5.7.2.3 Panorama Mode
This mode sends the stereo signal to the surround speakers as well as the front Left and Right. The Panorama setting is disregarded if the Pro Logic II mode is anything other than Music (see Figure 5-11).
Figure 5-11
5.7.3 Movie
This mode is the standard setting for programs with video. This decod-ing is based on the original Pro Logic decoding scheme, but with the Pro Logic single Surround channel separated into Left and Right Surround channels.
5.7.4 Matrix
This is primarily for radio reception in cars. It is essentially the same as the original passive Dolby Surround decoder without the directional steering provided by Pro Logic.
5.8 Channel Configuration
Figure 5-12 shows the Channel Configuration pull-down window in the Decoder Options window. This sets the Decoder to your playback speaker configuration.
Figure 5-12
26
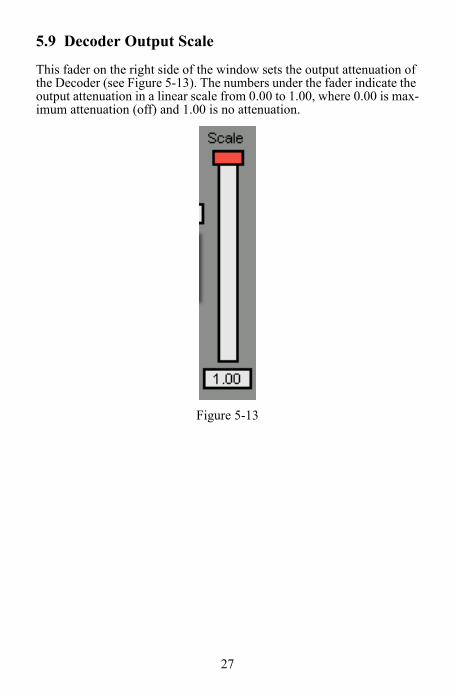
5.9 Decoder Output Scale
This fader on the right side of the window sets the output attenuation of the Decoder (see Figure 5-13). The numbers under the fader indicate the output attenuation in a linear scale from 0.00 to 1.00, where 0.00 is max-imum attenuation (off) and 1.00 is no attenuation.
Figure 5-13
27
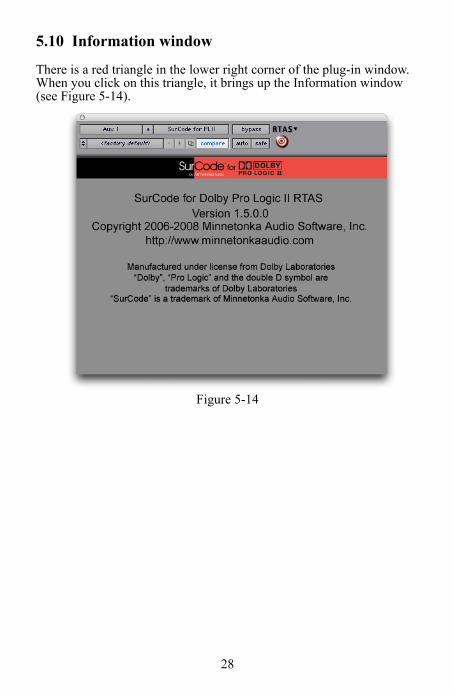
5.10 Information window
There is a red triangle in the lower right corner of the plug-in window. When you click on this triangle, it brings up the Information window (see Figure 5-14).
Figure 5-14
28
Manufactured under license from Dolby Laboratories.
“Dolby”, “Pro Logic”, and the double-D symbol are trademarks of Dolby Laboratories.
“SurCode” is a trademark of Minnetonka Audio Software, Inc.
“Pro Tools” and “RTAS” are trademarks of Digidesign, Inc.
Copyright 2005-2008 Minnetonka Audio Software, Inc. All rights reserved.
29