Embed Size (px)
Citation preview

Mercedes-Benz Actros MP4
Driver familiarisation1 September 2020
1800 851 281
Introduction
2
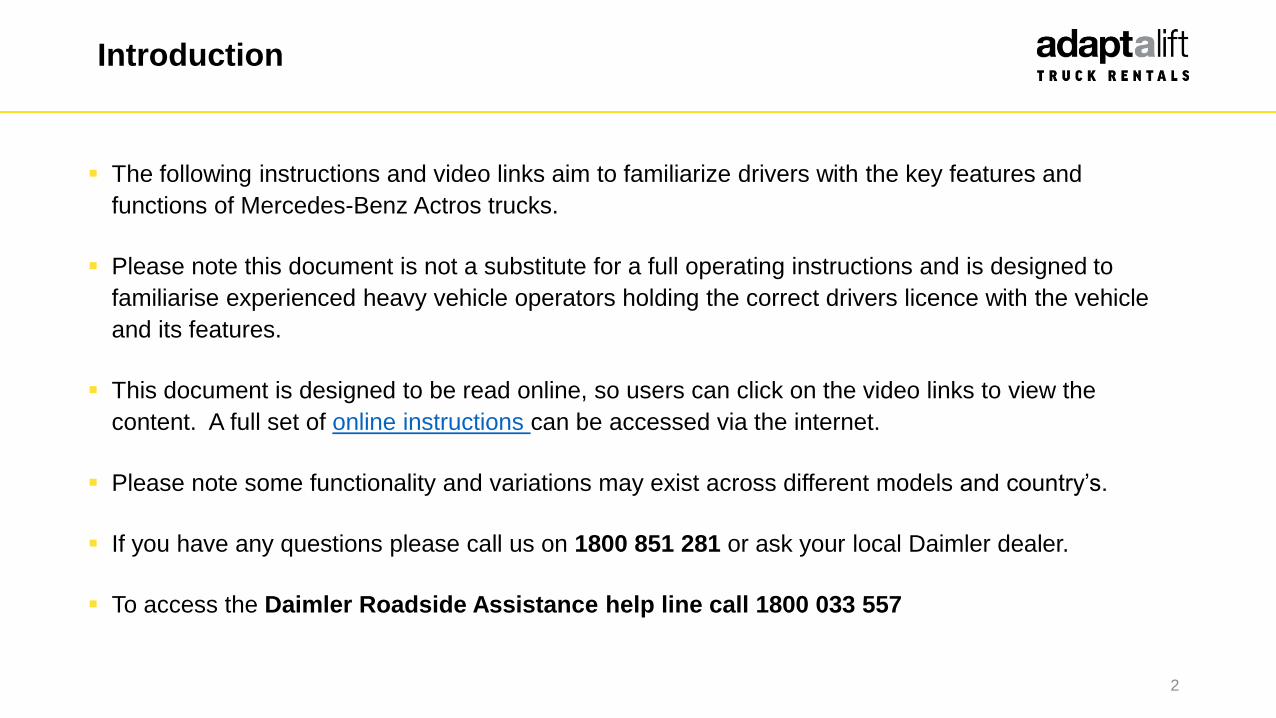
The following instructions and video links aim to familiarize drivers with the key features and
functions of Mercedes-Benz Actros trucks.
Please note this document is not a substitute for a full operating instructions and is designed to
familiarise experienced heavy vehicle operators holding the correct drivers licence with the vehicle
and its features.
This document is designed to be read online, so users can click on the video links to view the
content. A full set of online instructions can be accessed via the internet.
Please note some functionality and variations may exist across different models and country’s.
If you have any questions please call us on 1800 851 281 or ask your local Daimler dealer.
To access the Daimler Roadside Assistance help line call 1800 033 557
Contents
3
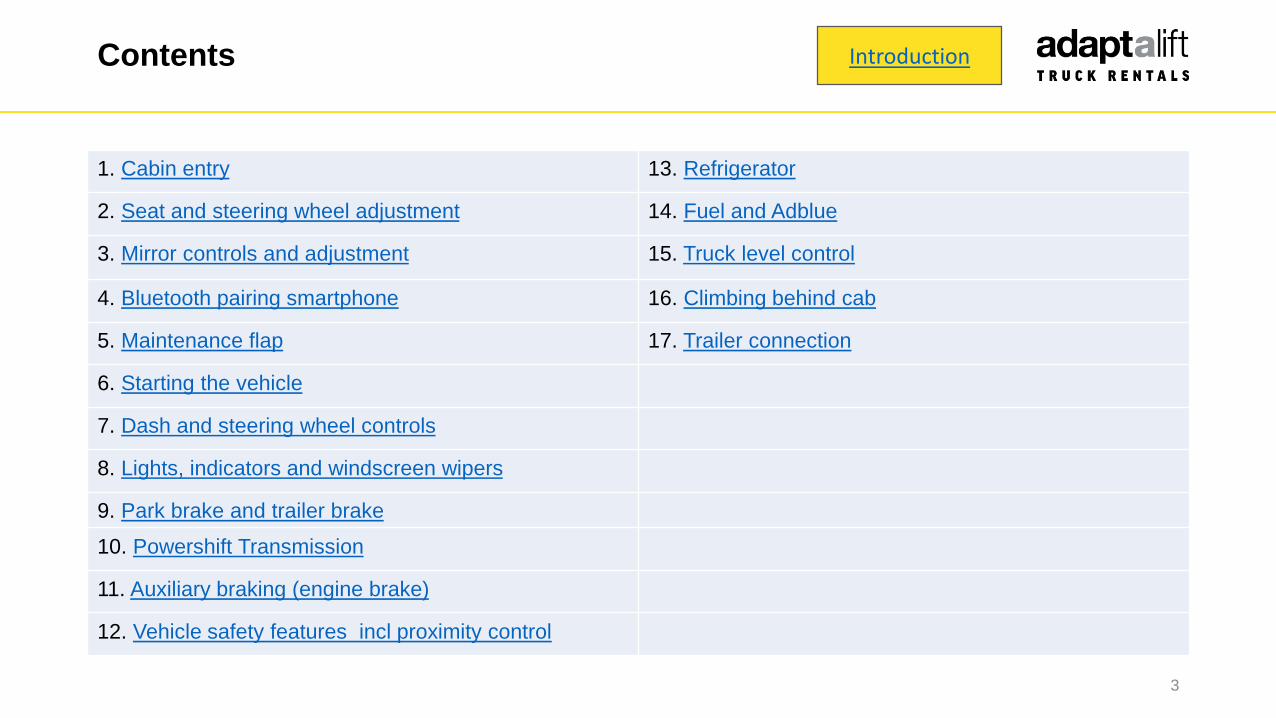
1. Cabin entry 13. Refrigerator
2. Seat and steering wheel adjustment 14. Fuel and Adblue
3. Mirror controls and adjustment 15. Truck level control
4. Bluetooth pairing smartphone 16. Climbing behind cab
5. Maintenance flap 17. Trailer connection
6. Starting the vehicle
7. Dash and steering wheel controls
8. Lights, indicators and windscreen wipers
9. Park brake and trailer brake
10. Powershift Transmission
11. Auxiliary braking (engine brake)
12. Vehicle safety features incl proximity control
Introduction
1. Cabin entry and exit
4
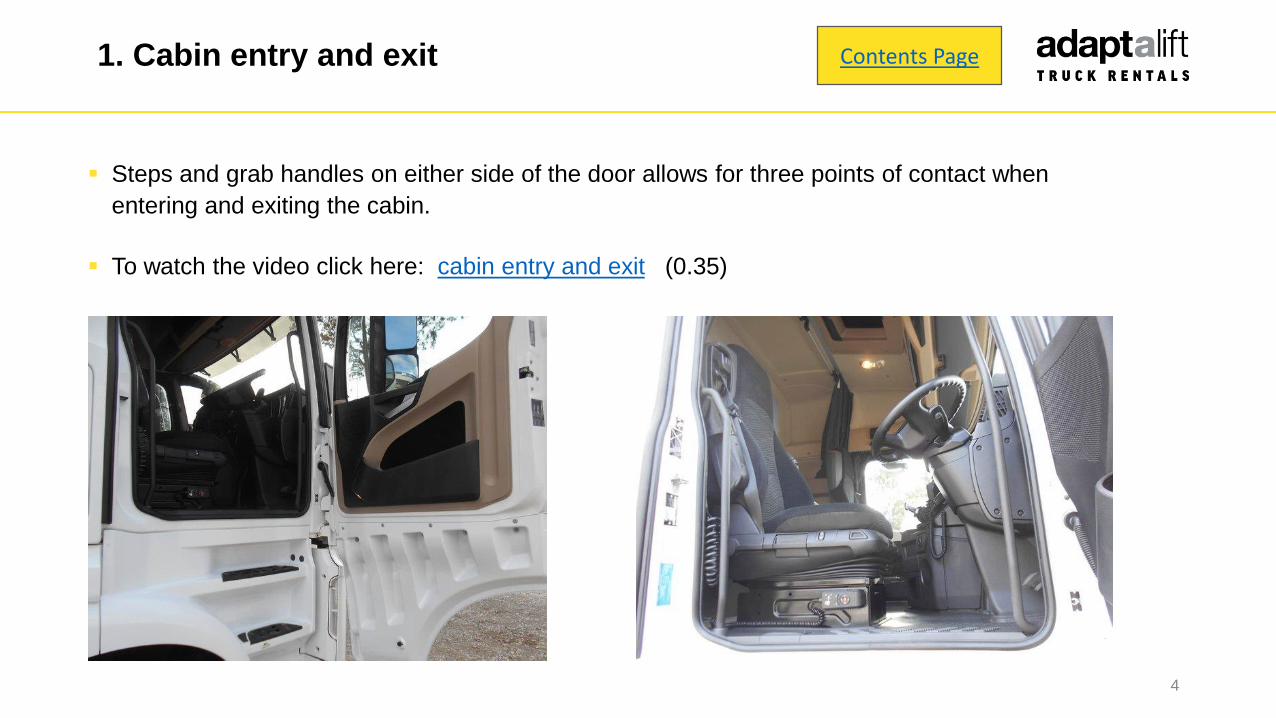
Steps and grab handles on either side of the door allows for three points of contact when
entering and exiting the cabin.
To watch the video click here: cabin entry and exit (0.35)
Contents Page
2. Seat and steering wheel adjustment
5
The Actros offers a wide range of seat adjustments including options to slide the seat forwards and
back, raise and lower seat height, adjust the seat incline angle and shoulder area, as well as adjust
the lumber support and seatbelt.
At 0.50 the video covers the adjustment of the multi-function steering wheel to move the steering
wheel into the ideal driving position. This adjustment is made by pressing the foot operated switch
with your left leg allowing the steering wheel to move towards or away from the driver as well as the
telescopic extension of the steering wheel by pulling or pushing the wheel up or down as required.
To watch the video click here: seat and steering wheel adjustment (1.39)
Contents Page

3. Mirror controls and adjustment
6
Mirror adjustment controls are located on the right hand door.
1. Press the top rocker button to select the required mirror and adjust using the multi-directional button to
suit.
2. A maneuvering mirror on the near (passenger) side offers functionality to move the mirror out
approximately 10 degrees for a wider view. This can be useful when reversing to the near side and can
be activated by pressing the lower rocker switch to initiate the adjustment. The function self-ends after 2
minutes or the vehicle moving forward at a speed exceeding 10km/h. It can also be cancelled by pressing
the button again.
To watch the video click here: mirror controls and adjustment (1.39)
Contents Page
4. Bluetooth pairing
7
To pair your smartphone to the multi-media centre:
1. Set your phone to pairing mode and ensure it’s showing as discoverable.
2. Then on the truck multi-media centre press the green phone button on the bottom right hand side of the
unit.
3. Press the connection button on the touch screen followed by the pairing button.
4. Enter the pin code displayed into your phone to complete the pairing process. The systems will then
acknowledge the success pairing of the devices.
To watch the video click here: bluetooth pairing (1.00)
Contents Page
5. Maintenance flap (fluid top up and filters)
8
To open the exterior maintenance flap go to the front of the vehicle and release the locking levers
located behind the outer edge of the grill about half way half way up by moving in an inwards
direction. The flap will then swing upwards. Located behind the grill is access to the following items
for top up and cleaning as required.
• Coolant expansion tank
• Engine Oil
• Windscreen washer fluid
• Pollen filter, and
• Bug screen
NB: a dash display will notify the driver if engine oil needs toping up
To watch the video click here: maintenance flap (2.21)
Contents Page
6. Starting the vehicle
9
Remote control key can be used to:
lock and unlock the vehicle
activate the lights to enable the driver to do a pre-start inspection
manually open the doors if the battery fails
To start the vehicle:
Insert the key in the slot located to the left of the dash next to the start/stop button
Pressing the start/stop button once will activate the electronics, Pressing a second time will activate the
ignition, and Pressing a third time will start the truck.
Alternatively pressing the button as far as it will go will start the truck.
To turn off the engine, press the button as far as it will go.
To watch the video click here: starting the vehicle (2.48)
Contents Page
7. Dash and steering wheel controls
10
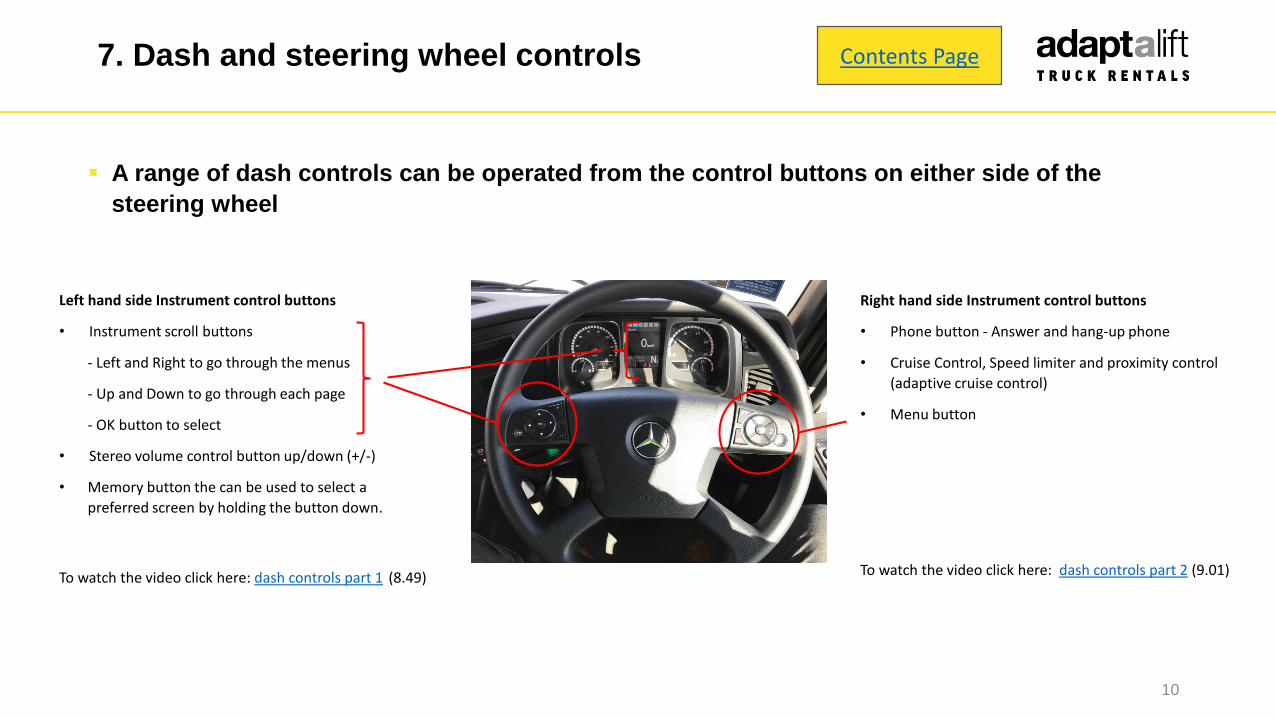
A range of dash controls can be operated from the control buttons on either side of the
steering wheel
Left hand side Instrument control buttons
• Instrument scroll buttons
- Left and Right to go through the menus
- Up and Down to go through each page
- OK button to select
• Stereo volume control button up/down (+/-)
• Memory button the can be used to select a
preferred screen by holding the button down.
To watch the video click here: dash controls part 1 (8.49)
Right hand side Instrument control buttons
• Phone button - Answer and hang-up phone
• Cruise Control, Speed limiter and proximity control
(adaptive cruise control)
• Menu button
To watch the video click here: dash controls part 2 (9.01)
Contents Page
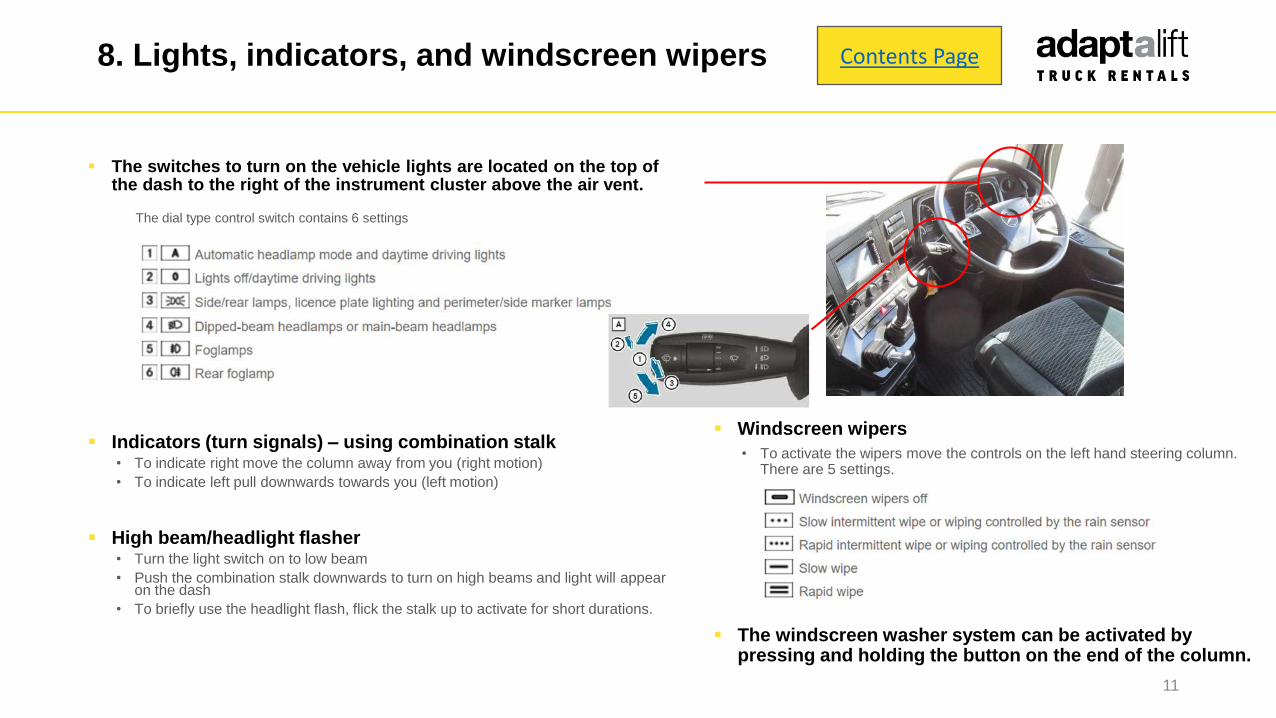
Windscreen wipers
• To activate the wipers move the controls on the left hand steering column. There are 5 settings.
The windscreen washer system can be activated by pressing and holding the button on the end of the column.
8. Lights, indicators, and windscreen wipers
11
The switches to turn on the vehicle lights are located on the top of the dash to the right of the instrument cluster above the air vent.
The dial type control switch contains 6 settings
Indicators (turn signals) – using combination stalk• To indicate right move the column away from you (right motion)
• To indicate left pull downwards towards you (left motion)
High beam/headlight flasher• Turn the light switch on to low beam
• Push the combination stalk downwards to turn on high beams and light will appear on the dash
• To briefly use the headlight flash, flick the stalk up to activate for short durations.
Contents Page
9. Park brake and trailer brake
12
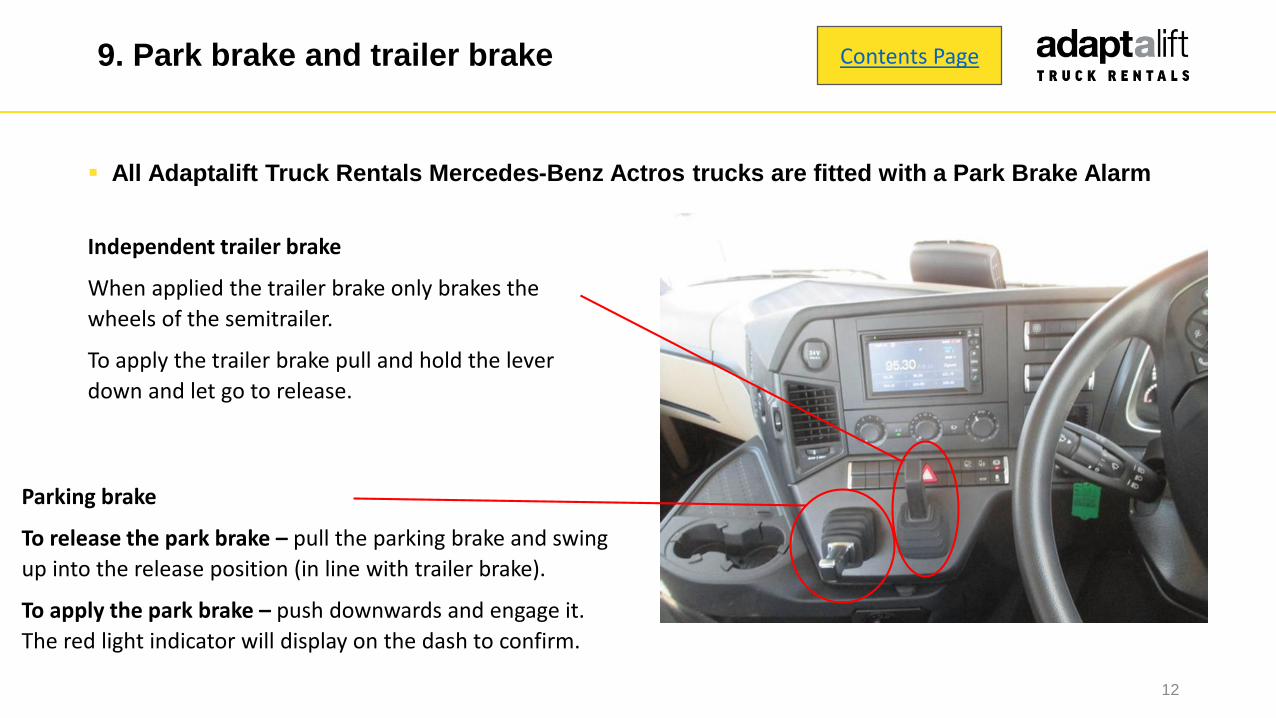
All Adaptalift Truck Rentals Mercedes-Benz Actros trucks are fitted with a Park Brake Alarm
Parking brake
To release the park brake – pull the parking brake and swing
up into the release position (in line with trailer brake).
To apply the park brake – push downwards and engage it.
The red light indicator will display on the dash to confirm.
Independent trailer brake
When applied the trailer brake only brakes the
wheels of the semitrailer.
To apply the trailer brake pull and hold the lever
down and let go to release.
Contents Page
10. Powershift transmission
13
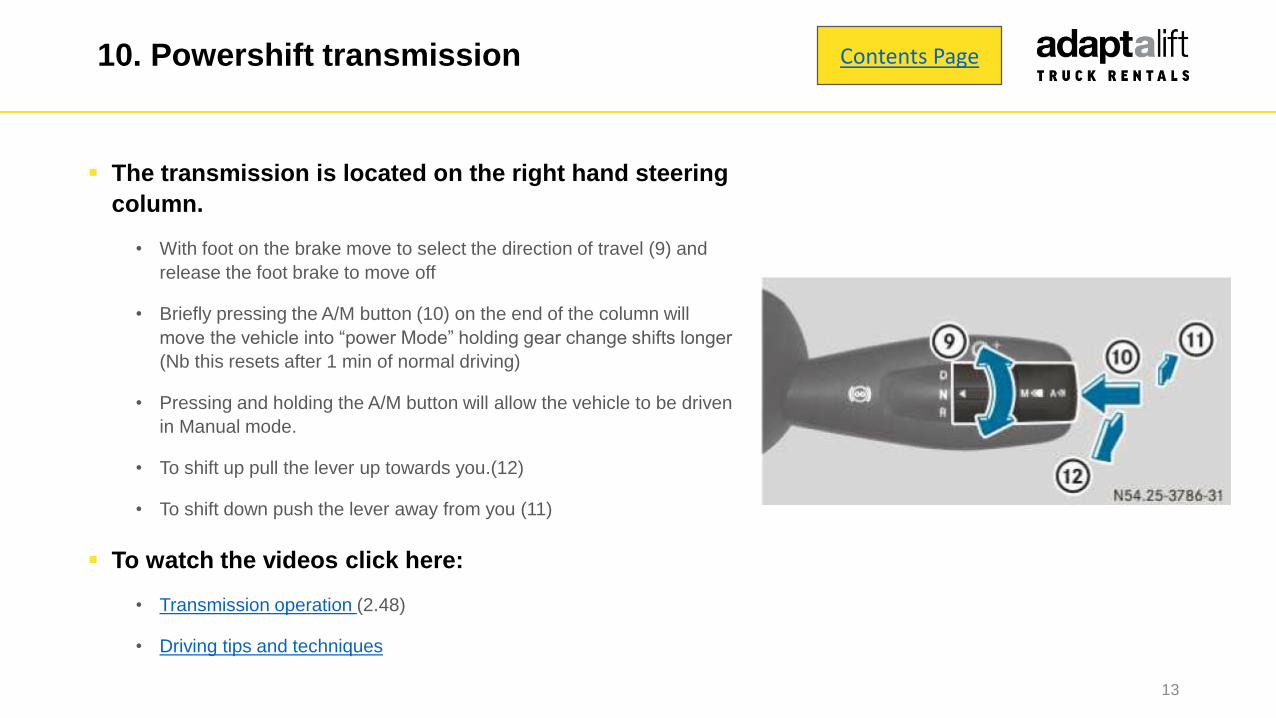
The transmission is located on the right hand steering
column.
• With foot on the brake move to select the direction of travel (9) and
release the foot brake to move off
• Briefly pressing the A/M button (10) on the end of the column will
move the vehicle into “power Mode” holding gear change shifts longer
(Nb this resets after 1 min of normal driving)
• Pressing and holding the A/M button will allow the vehicle to be driven
in Manual mode.
• To shift up pull the lever up towards you.(12)
• To shift down push the lever away from you (11)
To watch the videos click here:
• Transmission operation (2.48)
• Driving tips and techniques
Contents Page
11. Auxiliary brake (engine brake)
14
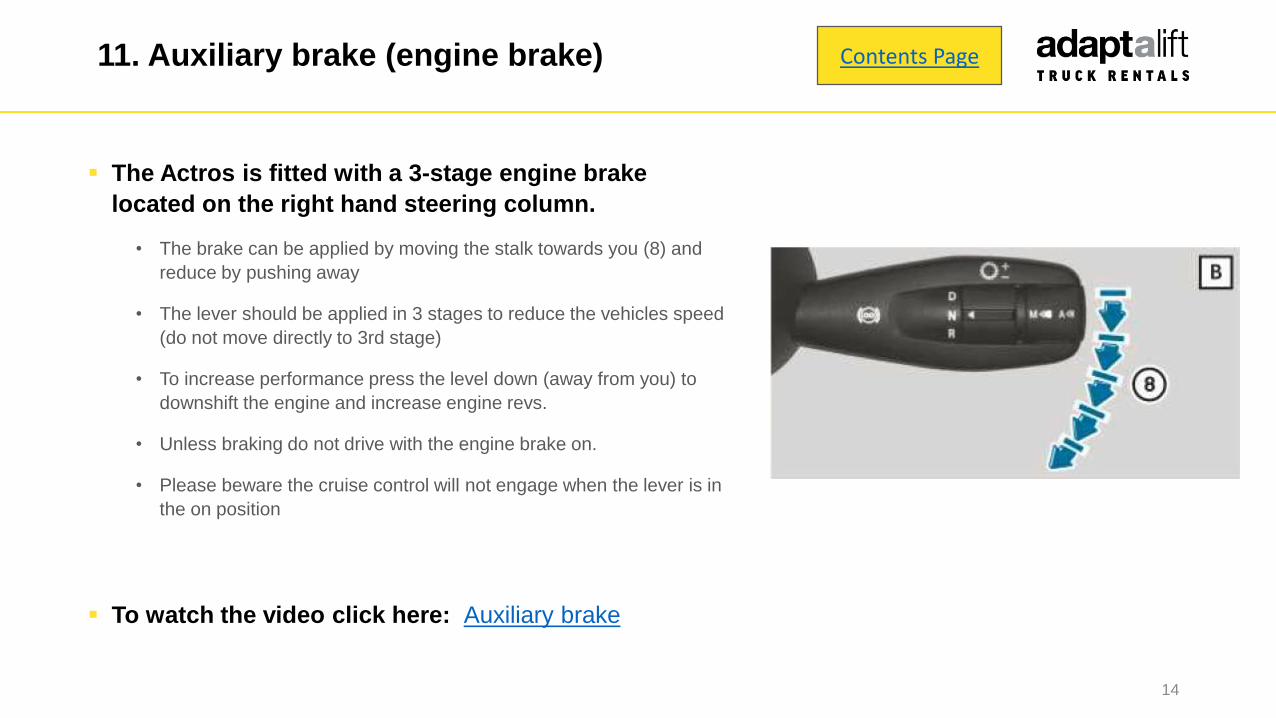
The Actros is fitted with a 3-stage engine brake
located on the right hand steering column.
• The brake can be applied by moving the stalk towards you (8) and
reduce by pushing away
• The lever should be applied in 3 stages to reduce the vehicles speed
(do not move directly to 3rd stage)
• To increase performance press the level down (away from you) to
downshift the engine and increase engine revs.
• Unless braking do not drive with the engine brake on.
• Please beware the cruise control will not engage when the lever is in
the on position
To watch the video click here: Auxiliary brake
Contents Page
12. Vehicle safety features
15
Mercedes-Benz trucks come with a range of advanced
safety features. To understand more about these
systems please click on the following links
• Active Brake Assist 4
• Stability Control Assist
• Proximity Control Assist (adaptive cruise control). Please note:
• Proximity control will not engage when the engine brake is in
the on position
• You can apply the engine brake to interrupt the cruise control
and start braking the truck. Once the engine brake is turned off
the cruise control will resume.
• Lane Keeping Assist (not available on 2646 or 2653 Pure models)
• Attention Assist (not available on 2646 or 2653 Pure models)
Contents Page
13. Refrigerator
16
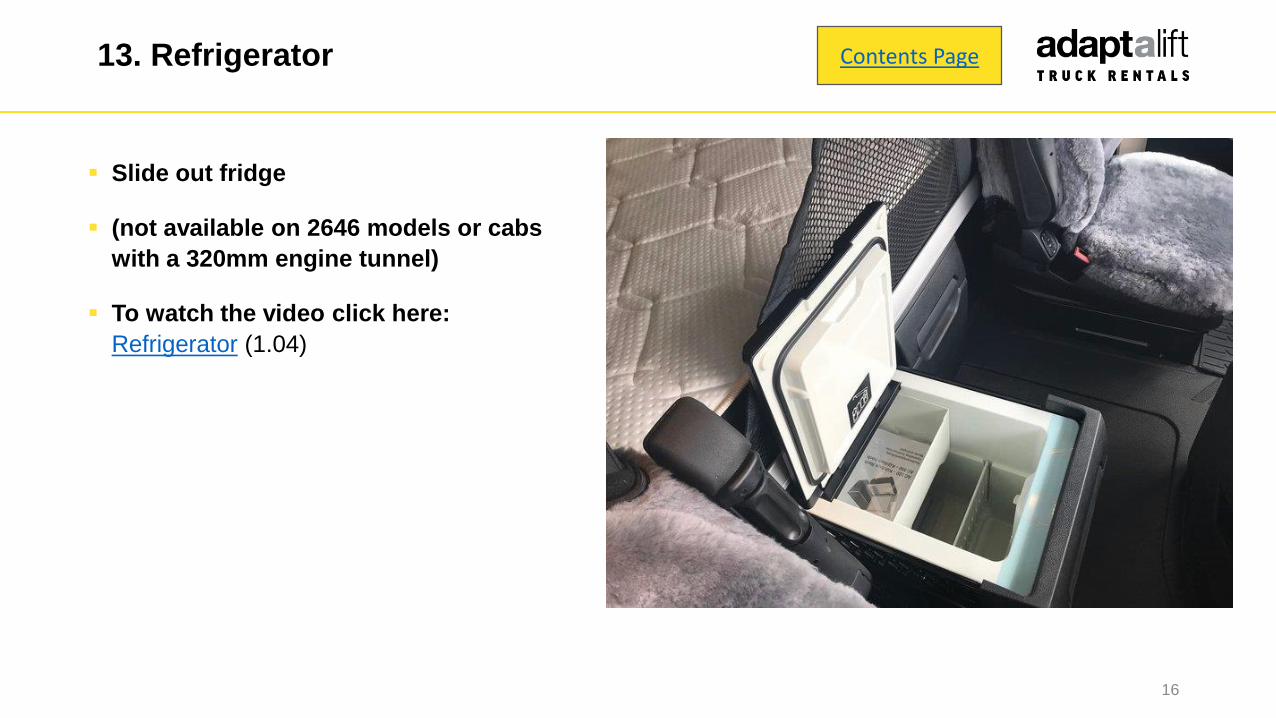
Slide out fridge
(not available on 2646 models or cabs
with a 320mm engine tunnel)
To watch the video click here:
Refrigerator (1.04)
Contents Page
14. Fuel and Adblue
17
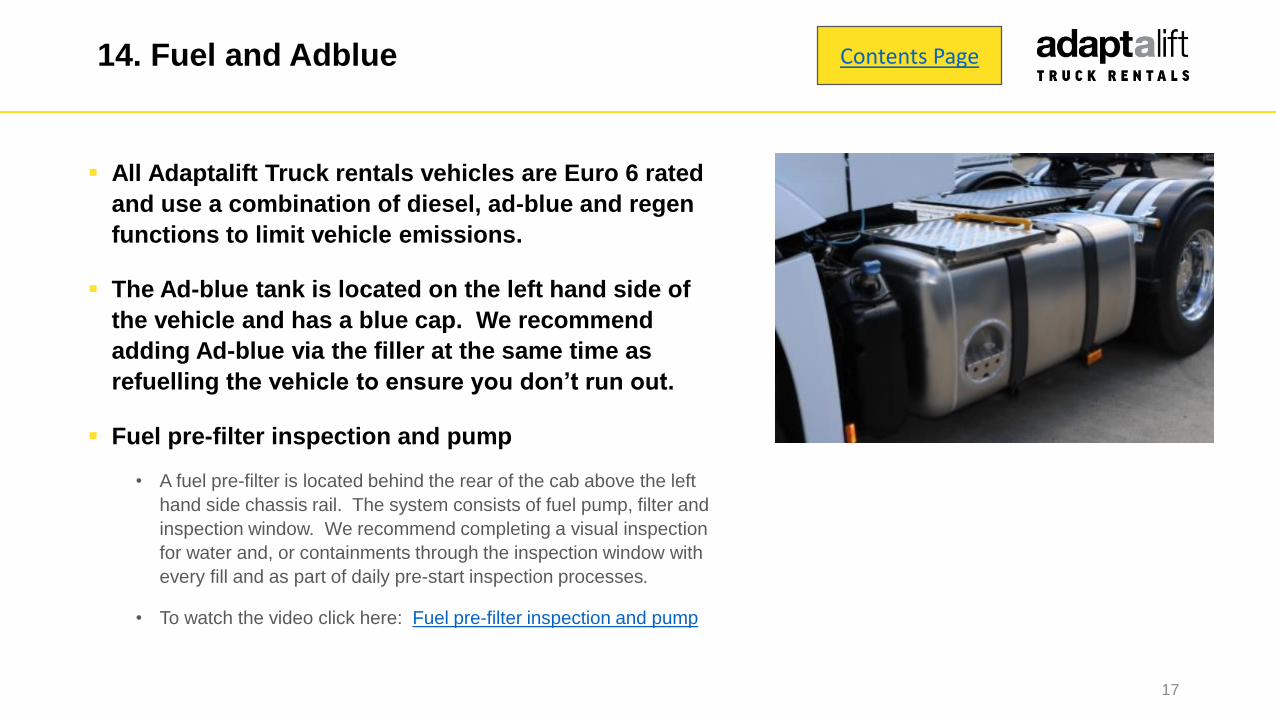
All Adaptalift Truck rentals vehicles are Euro 6 rated
and use a combination of diesel, ad-blue and regen
functions to limit vehicle emissions.
The Ad-blue tank is located on the left hand side of
the vehicle and has a blue cap. We recommend
adding Ad-blue via the filler at the same time as
refuelling the vehicle to ensure you don’t run out.
Fuel pre-filter inspection and pump
• A fuel pre-filter is located behind the rear of the cab above the left
hand side chassis rail. The system consists of fuel pump, filter and
inspection window. We recommend completing a visual inspection
for water and, or containments through the inspection window with
every fill and as part of daily pre-start inspection processes.
• To watch the video click here: Fuel pre-filter inspection and pump
Contents Page
15. Truck level control
18
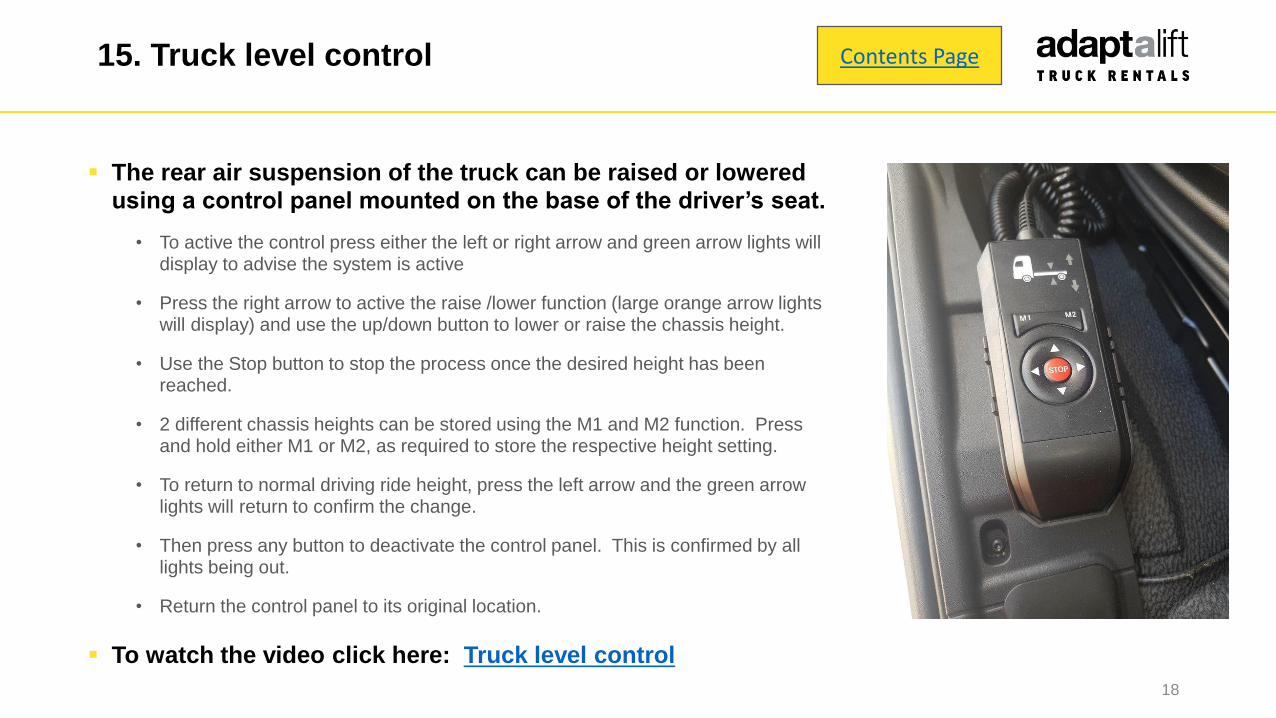
The rear air suspension of the truck can be raised or lowered using a control panel mounted on the base of the driver’s seat.
• To active the control press either the left or right arrow and green arrow lights will display to advise the system is active
• Press the right arrow to active the raise /lower function (large orange arrow lights will display) and use the up/down button to lower or raise the chassis height.
• Use the Stop button to stop the process once the desired height has been reached.
• 2 different chassis heights can be stored using the M1 and M2 function. Press and hold either M1 or M2, as required to store the respective height setting.
• To return to normal driving ride height, press the left arrow and the green arrow lights will return to confirm the change.
• Then press any button to deactivate the control panel. This is confirmed by all lights being out.
• Return the control panel to its original location.
To watch the video click here: Truck level control
Contents Page
16. Climbing behind cab
19
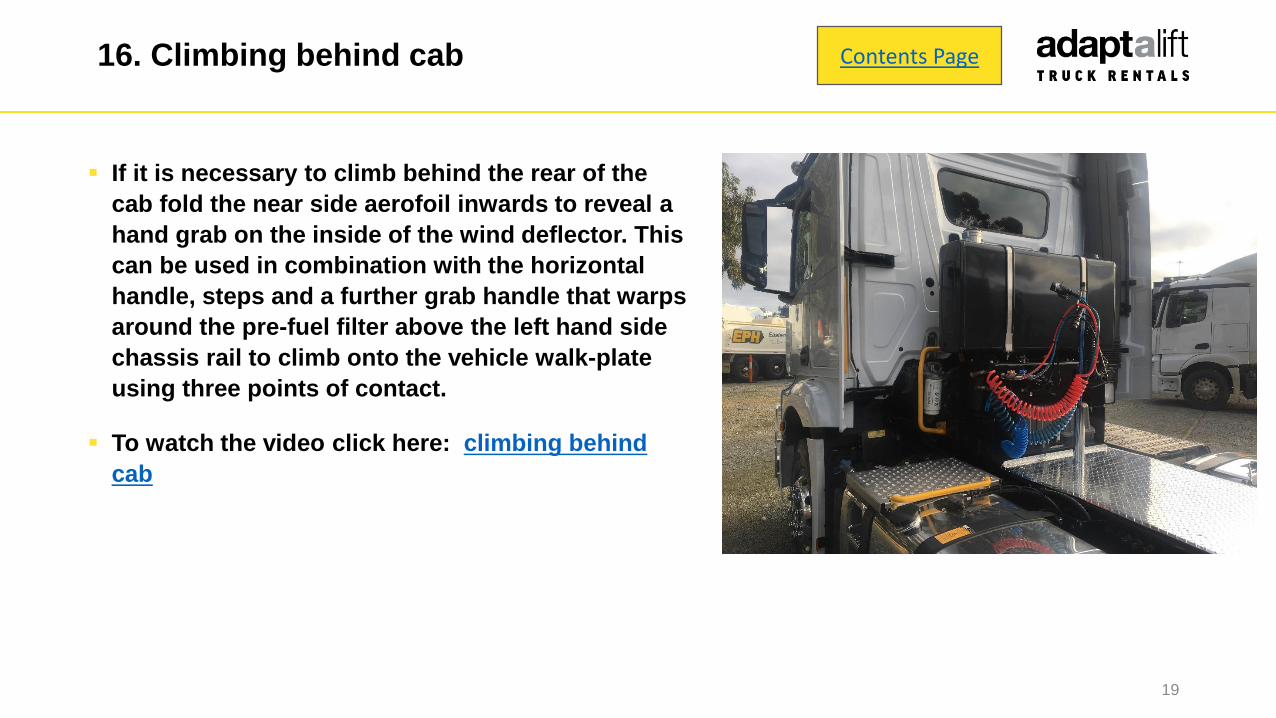
If it is necessary to climb behind the rear of the
cab fold the near side aerofoil inwards to reveal a
hand grab on the inside of the wind deflector. This
can be used in combination with the horizontal
handle, steps and a further grab handle that warps
around the pre-fuel filter above the left hand side
chassis rail to climb onto the vehicle walk-plate
using three points of contact.
To watch the video click here: climbing behind
cab
Contents Page
16. Trailer connection
20
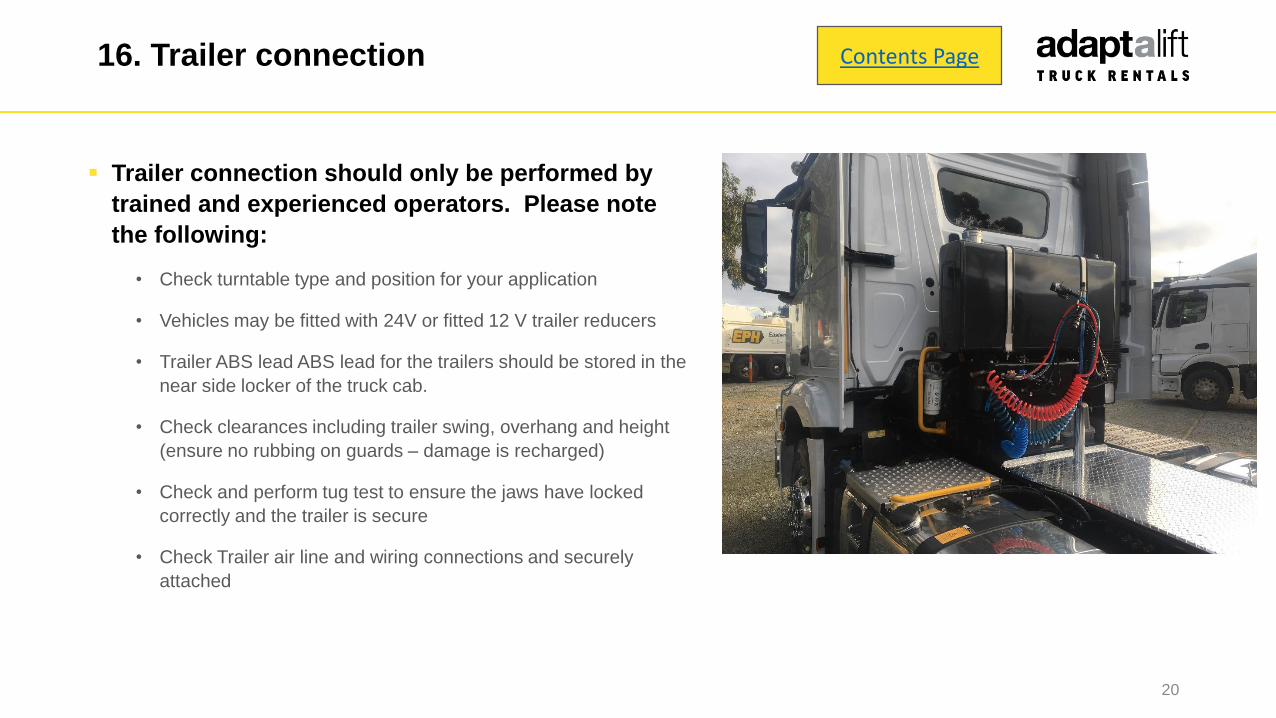
Trailer connection should only be performed by
trained and experienced operators. Please note
the following:
• Check turntable type and position for your application
• Vehicles may be fitted with 24V or fitted 12 V trailer reducers
• Trailer ABS lead ABS lead for the trailers should be stored in the
near side locker of the truck cab.
• Check clearances including trailer swing, overhang and height
(ensure no rubbing on guards – damage is recharged)
• Check and perform tug test to ensure the jaws have locked
correctly and the trailer is secure
• Check Trailer air line and wiring connections and securely
attached
Contents Page