Embed Size (px)
Citation preview

VNDPORUG-10.0.0.0-A
Vendor Portal User Guide
For Astea Alliance 10.0 SP1
18 Feb 2010
Vendor Portal User Guide
Page ii
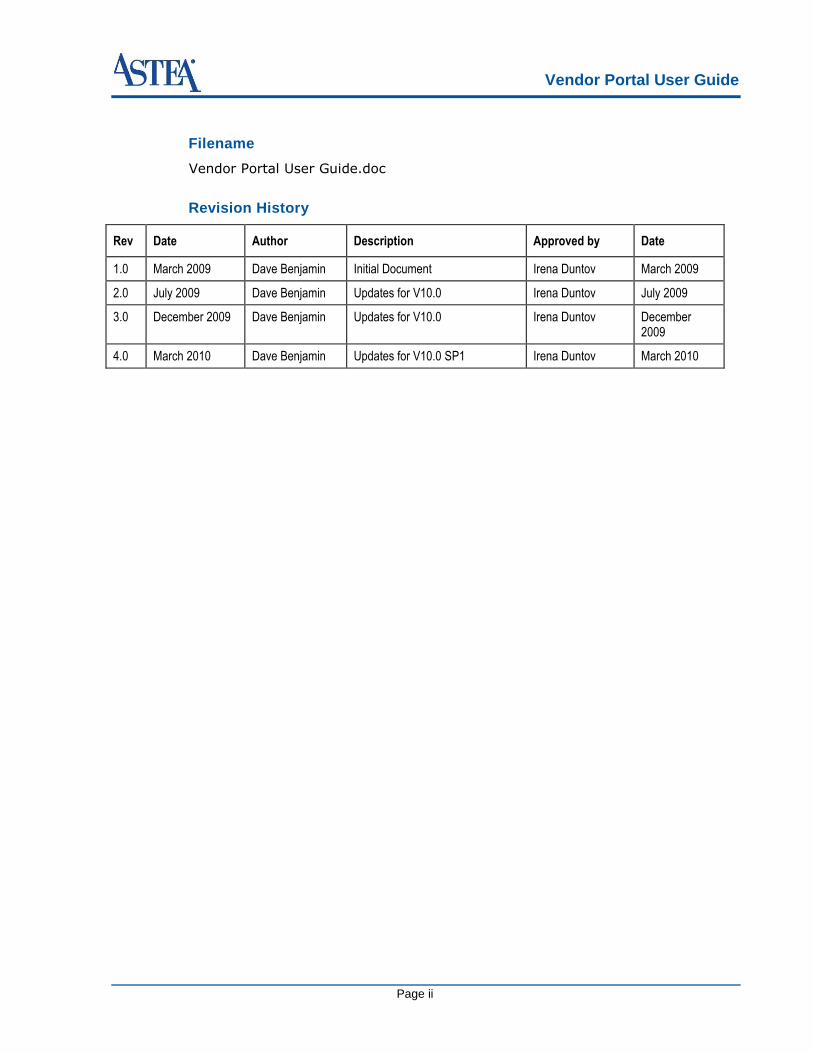
Filename
Vendor Portal User Guide.doc
Revision History
Rev Date Author Description Approved by Date
1.0 March 2009 Dave Benjamin Initial Document Irena Duntov March 2009
2.0 July 2009 Dave Benjamin Updates for V10.0 Irena Duntov July 2009
3.0 December 2009 Dave Benjamin Updates for V10.0 Irena Duntov December 2009
4.0 March 2010 Dave Benjamin Updates for V10.0 SP1 Irena Duntov March 2010
Vendor Portal User Guide
Page iii
Copyright
Copyright ©2009 by Astea International, Inc. All rights reserved.
This copyright notice is a precaution against inadvertent publication and does not constitute an acknowledgment that publication has occurred nor does it imply any waiver of confidentiality or proprietary rights.
The information in this document, which is confidential proprietary information belonging
solely to Astea International Inc. is provided pursuant to the terms of a certain License Agreement between Astea International and the recipient and may not be reproduced, published, or otherwise disclosed without the prior express written authorization of Astea International Inc.
Use, duplication, or disclosure by the U.S. Government is subject to restrictions set forth in subdivision (b) (3) (ii) of the Rights in Technical Data and Computer Software at section 52.227-7013, of the Federal Acquisition Regulations.
The information in this document is subject to change without notice and should not be construed as a commitment by Astea International Inc.
The following are registered trademarks of Astea International Inc.: Astea, ServiceAlliance, Alliance Enterprise, Astea CRM Suite, Astea Alliance.
The following are trademarks of Astea International Inc.: Astea Objects, SalesAlliance, AllianceExecutive, AllianceLink for Financials, AllianceProjects.
Acrobat Reader Copyright ©1987-2009 Adobe Systems Incorporated. All rights reserved.
Internet Explorer, MS SQL Server, Microsoft Windows XP and Windows 2000 & 2003 are trademarks of Microsoft Corporation.
Other products and brand names such as: Oracle, are registered trademarks or trademarks of their respective companies.
Printed in the United States of America.

Vendor Portal User Guide
Page iv
Table of Contents
About this Guide .................................................................................................................. 1
What you Should Know ............................................................................................................................ 1
Target Audience ....................................................................................................................................... 1
Getting Started (For all Types of Vendor Portal Users)..................................................... 2
Title Bar .................................................................................................................................................... 2
Customize Quick Access Toolbar ............................................................................................................ 2 More Commands Submenu ............................................................................................................. 3 Showing the Menu Bar Below the Ribbon ....................................................................................... 4 Minimizing the Ribbon ...................................................................................................................... 5
Menu Bar and Ribbon .............................................................................................................................. 5 Menu Bar .......................................................................................................................................... 5 Home Menu ...................................................................................................................................... 5 Vendor Button .................................................................................................................................. 7 My Calendar Button ......................................................................................................................... 7 Application Map Button .................................................................................................................... 7 Reports Button ................................................................................................................................. 7 New Tab Button ............................................................................................................................... 8 Personal Info Button ......................................................................................................................... 8 Options Button.................................................................................................................................. 8 Floating Parts Button ........................................................................................................................ 9 Retrieve Limit Button ...................................................................................................................... 10 Delete Cache Button ...................................................................................................................... 10 Create Shortcut .............................................................................................................................. 10 Online Update Button ..................................................................................................................... 10 Logout Button ................................................................................................................................. 10 Tab Bar ........................................................................................................................................... 10 Displaying All the Tabs in a Menu .................................................................................................. 11 Quick Tabs ..................................................................................................................................... 11 New Tab ......................................................................................................................................... 11 View Bar ......................................................................................................................................... 11
Using the Part Catalog ........................................................................................................................... 12
Using Your Calendar .............................................................................................................................. 13
Searching and Communicating Through Customer Contacts ................................................................ 15
Using the Application Map ...................................................................................................................... 16
Using Vendor Portal as an Administrator ........................................................................ 18
Updating Your Company’s Profile .......................................................................................................... 19 Adding Company Information......................................................................................................... 19 Viewing Your Company’s Organization Tree ................................................................................. 20

Vendor Portal User Guide
Page v
Adding and Modifying Addresses .................................................................................................. 20 Adding or Deleting Phone Numbers .............................................................................................. 22
Adding and Modifying Contacts.............................................................................................................. 22 Adding a New Contact ................................................................................................................... 24
Assigning Security Roles and Access Rules .......................................................................................... 26
Defining Your Company’s Access Hours ............................................................................................... 28
Viewing Orders ....................................................................................................................................... 29 Viewing Open Orders ..................................................................................................................... 29 Viewing Closed Orders .................................................................................................................. 30
Viewing Invoices ..................................................................................................................................... 31 Viewing Invoices (From) ................................................................................................................. 31 Viewing Invoices (To) ..................................................................................................................... 32
Costing Products and Activities .............................................................................................................. 33 Updating Costing Manually ............................................................................................................ 33 Updating Product Costing Automatically Using an Excel File ........................................................ 35 Updating Activities Costing ............................................................................................................ 37 Adding New Products/Activities Costs ........................................................................................... 38
Using Vendor Portal as an External Service Agent ......................................................... 40
Using the Part Catalog as an External Service Agent............................................................................ 40 Viewing and Understanding the My Activities (Duration) Graph .................................................... 41 Viewing and Understanding How am I Doing (Activities) ............................................................... 41 Customizing Column Display ......................................................................................................... 42
Viewing and Responding to Tasks ......................................................................................................... 43 Using Single Order Fast Close ....................................................................................................... 44
Viewing Vendor Contracts ...................................................................................................................... 46
Using Vendor Portal as a Logistics Person ..................................................................... 47
Using the Parts Catalog as a Logistics Person ...................................................................................... 47 Viewing and Understanding the Outstanding PRs (Value) Graph ................................................. 48 Viewing and Understanding How am I Doing (Fulfillments) ........................................................... 48 Customizing Column Display ......................................................................................................... 49
Dealing with Purchase Requisitions ....................................................................................................... 49 Accepting or Rejecting Purchase Requisitions .............................................................................. 49 Viewing or Changing Details .......................................................................................................... 51
Processing Items from Your Inbound Queue ......................................................................................... 53
Accepting or Rejecting Warranty Claims ................................................................................................ 55
Common Task Flowchart .................................................................................................. 57

Vendor Portal User Guide
Version: REV A Page 1 Astea Proprietary and Confidential
About this Guide
This document provides procedural instructions for configuring and using Vendor
Portal.
What you Should Know
Vendor Portal provides vendor employees, limited access to Astea Alliance that
allows basic update and enquiry access options to the Service Order and Logistic
modules.
Vendor Portal covers technician (SA) functions as well as a number of logistics
functions. Third-party logistics people have access to logistics functions and can
participate in supply chain functions, as well as reverse logistics.
Vendor Portal includes a number of sub-components. Access to certain
components is defined by the user’s security role settings that are controlled by
either the system administrator, or by the service provider.
A customizable Vendor Home page, which acts as the Astea Alliance portals.
Field service related functions based on Astea Alliance functionality (activity
tasks, scheduling capabilities, service order, history, knowledge base, etc.).
Logistics functions including: purchase requisitions accept/reject, advance
receiving notification (ARNs), acceptance of parts, warranty claims
accept/reject, update vendor costing on parts and labor.
A number of administration modules such as Vendor (My Company) profile
and contacts (Vendor employees).
In this guide we explain the new UI (User Interface) and the most common user
roles:
Administrator (Office administrator)
Service Agent
Logistics User
Target Audience
The information contained in this document is relevant to system administrators,
as well as to all Vendor Portal users.

Vendor Portal User Guide
Version: REV A Page 2 Astea Proprietary and Confidential
Getting Started (For all Types of Vendor Portal Users)
In this section we describe the UI (User Interface) and the settings and options
that are relevant to all types of Vendor Portal users.
Title Bar
The Title Bar includes the following:
Customize Quick Access Toolbar (the Astea button)
Application data
User information
Browser command buttons (minimize, maximize, and close).
Customize Quick Access Toolbar
The Customize Quick Access Toolbar (Astea button) is located on the left of
the Title Bar.
To display the Customize Quick Access menu:
Click the arrow on the right of the button.
The Customize Quick Access Toolbar menu is displayed as a drop-down
submenu list.
The Customize Quick Access menu includes three submenus:
More Commands
Show Below the Ribbon
Minimize the Ribbon.

Vendor Portal User Guide
Version: REV A Page 3 Astea Proprietary and Confidential
These submenus are explained in the following sections.
More Commands Submenu
The More Commands option enables you to add \ remove icons to customize your
Quick Access Toolbar.
1. Select More Commands from the drop-down list. The Options—Customize
dialog box is displayed.
2. Add/remove commands to your customized Quick Access Toolbar from the left
box to the right box.
3. To show your Quick Access Toolbar below the ribbon, check the corresponding
checkbox.

Vendor Portal User Guide
Version: REV A Page 4 Astea Proprietary and Confidential
4. Complete adding/removing buttons and click OK.
Showing the Menu Bar Below the Ribbon
By selecting this submenu, the Customize Quick Access Toolbar moves
below/above the ribbon.
1. Click Show Below the Ribbon.
The Customize Quick Access Toolbar moves below the ribbon.
2. To return the Customize Quick Access Toolbar to its initial place, click Show
Above the Ribbon.

Vendor Portal User Guide
Version: REV A Page 5 Astea Proprietary and Confidential
Minimizing the Ribbon
By default, the Astea Alliance Vendor Portal opens with the ribbon maximized to
show submenus and icons (as shown above).
To shrink the ribbon to the main menu level, select Minimize the Ribbon.
To expand the ribbon, de-select Minimize the Ribbon.
Menu Bar and Ribbon
This section describes the Menu Bar and the Ribbon as a whole, as the Ribbon
represents the expanded view of the Main Menu (submenus).
Menu Bar
The Astea Alliance Vendor Portal Menu bar consists of the following menu items:
Home
Search
Links
In the extended Ribbon view, when you select a menu item, the Ribbon's content
changes and the selected menu's contents are displayed. For example, by
clicking Search, the different search options available to you are displayed.
Home Menu
The Home menu includes the following submenu sections and buttons:
Application Pages
* Vendor

Vendor Portal User Guide
Version: REV A Page 6 Astea Proprietary and Confidential
* My Calendar
* Application Map
* Reports
* New Tab
Personal
* Personal Info
Options
* Options
* Floating Parts
* Retrieve Limit
* Delete Cache
* Create a Shortcut
Logout
Update
* Online Update

Vendor Portal User Guide
Version: REV A Page 7 Astea Proprietary and Confidential
Vendor Button
The Vendor Button opens your Homepage tab(s) in the browser's Work Area
(for details about opening tabs and adjusting view modes, refer to the Tab Bar
and View Bar sections below.
My Calendar Button
The My Calendar button opens the Astea Calendar in the browser's work area.
See Using Your Calendar.
Application Map Button
The Application Map feature displays all of the modules and parts available to
you. Use the Application Map to navigate between the modules and parts of
Vendor Portal. See Using the Application Map.
Reports Button
Clicking the Reports button provides access to the Astea Alliance Report Center
where you can find a specific report according to entered criteria.
Click Reports.
The Report Center opens in a new tab.

Vendor Portal User Guide
Version: REV A Page 8 Astea Proprietary and Confidential
New Tab Button
The New Tab button opens a new tab of the last opened window/module.
Personal Info Button
The Personal Info button opens your Astea Alliance My Colleague Board. On this
board, you can update your personal information.
Click Personal Info.
The Astea My Colleague board is displayed in a new tab.
Options Button
Clicking the Options button opens the Options dialog box where you can do the
following:
Change your Astea Browser settings
Set the Astea Browser security settings
Select the number of documents to display in the application menu
Adjust text size and foreground color
Customize the Quick Access Toolbar (see Customize Quick Access Toolbar)

Vendor Portal User Guide
Version: REV A Page 9 Astea Proprietary and Confidential
Floating Parts Button
Clicking the Floating Parts button shows/hides the floating pane. To add a part
to the floating pane, click to the right of the part in the Part Catalog and then
click on the floating window to add the window to the floating pane.
Floating Pane

Vendor Portal User Guide
Version: REV A Page 10 Astea Proprietary and Confidential
Retrieve Limit Button
Use the Retrieve Limit button to determine the maximum number of search
results that are displayed. The system default is 100, you can choose to limit that
number to 10, 20, or 30.
Delete Cache Button
Use the Delete Cache button to delete your browsers cache according to the
following options: Delete Personal Views, Delete Personal Settings, Delete
Local Settings, Delete Browser Cache, or Delete All.
Create Shortcut
Use the Create Shortcut button to create a shortcut to Vendor Portal on your
desktop.
Online Update Button
Clicking the Online Update button allows you to prompt for the Vendor Portal's
online updates (if available).
Logout Button
Clicking the Logout button allows you to temporarily log out of the system and
close the browser. Within a couple of seconds, the Vendor Portal Login window is
displayed, allowing you to log in to the system again.
Tab Bar
The Tab Bar includes the following buttons:
Display All Tabs in a Menu button
Quick Tabs button
New Tab button
For the button’s description, refer to the following sections.

Vendor Portal User Guide
Version: REV A Page 11 Astea Proprietary and Confidential
Displaying All the Tabs in a Menu
Clicking the Display All the Tabs in a Menu button displays the list of tabs
currently open.
Click the Display All the Tabs in a Menu button and choose a tab from the
list to switch to that tab.
Quick Tabs
Clicking the Quick Tabs button displays open tabs in the View Tabs window.
To close an opened tab, click X in the upper right corner of the tab.
New Tab
The New Tab button opens a new tab of the last opened window/module.
View Bar
The View bar includes the following controls:
Customize Quick Access Links button

Vendor Portal User Guide
Version: REV A Page 12 Astea Proprietary and Confidential
Change to Single/Multiple Document View button
Set One Column button
Set Two Columns button
Set Three Columns button
Show/Hide Part Catalog button
Using the Part Catalog
The parts/modules displayed in the Part Catalog vary according to your user role.
The personalization methods are common to all user roles.
1. To determine the number of columns viewed, click to view one column
only, to view two columns, or to view three columns.
2. Click and the Part Catalog is locked open, the pin icon changes to , click
the pin again to hide the Part Catalog.

Vendor Portal User Guide
Version: REV A Page 13 Astea Proprietary and Confidential
Using Your Calendar
1. Double-click a date on the calendar to open the calendar module.
2. Double-click again on a date to open the Task/Appointment page.

Vendor Portal User Guide
Version: REV A Page 14 Astea Proprietary and Confidential
3. Enter all of the relevant information and click Save to add the meeting to
your calendar.
NOTE: As with many of Vendor Portal’s pages, you can use the lookup
button (when it exists) to open the lookup page and choose the
parameter from the list.

Vendor Portal User Guide
Version: REV A Page 15 Astea Proprietary and Confidential
Searching and Communicating Through Customer Contacts
1. To search for a Customer Contact enter one or more of the search criteria
(Name, Customer, or Customer ID for example) and click Search. The search
results are displayed.
2. Right-click the contact to open the Communication Center’s E-mail page.
NOTE: Fields marked with a red asterisk * are mandatory.
3. Enter the recipient’s E-mail address or click the Lookup button to choose the recipient from the list, type your message and click Send .

Vendor Portal User Guide
Version: REV A Page 16 Astea Proprietary and Confidential
4. To send an SMS message, click , enter the recipient’s Person ID or
click the Lookup button and choose the recipient from the list.
5. Click the Lookup button to choose the Device Type from the list, type your message and click Send .
NOTE: The Device No. field is used to enter a device number manually
(often used for device numbers that are not saved in the user’s
ID).
Using the Application Map
The Application Map displays all of the modules and parts available to you. Use
the Application Map to navigate between the modules and parts of Vendor Portal.
NOTE: The modules and parts that are displayed on the Application Map
vary according to your user role.
1. Click on the Ribbon to open the Application Map.

Vendor Portal User Guide
Version: REV A Page 17 Astea Proprietary and Confidential
NOTE: The plus sign next to a module opens a short menu that enables
search or Open New Page options (as shown above).
2. Click a letter on the keyoard to navigate to parts beginning with that letter on
the Application Map (for example B moves you to Bug Report).
NOTE: Your most commonly used links are colored according to colors of
your choice (Options > Statistics) after they have been clicked
three or more times during a session.
3. Click a row to open that module or part.

Vendor Portal User Guide
Version: REV A Page 18 Astea Proprietary and Confidential
Using Vendor Portal as an Administrator
Vendor Portal’s administrator is responsible for adding and updating the
company’s profile (adding new phone numbers, address changes or updates etc.)
adding users to the system and providing them with usernames, passwords, and
describing and updating the pricing of products.
NOTE: As an Administrator your default Parts Catalog contains Customer
Contacts and Calendar only. However, extra parts can be added by
the system administrator (Power User) by using the system
security setup utility.

Vendor Portal User Guide
Version: REV A Page 19 Astea Proprietary and Confidential
Updating Your Company’s Profile
Adding Company Information
1. Click Search from your home page and type My Company Profile to open the
My Company Profile > Company page.
NOTE: Fields that are not available to you (grayed out), are for the
service provider’s use only.
2. Use this page to update your address, phone and fax information, to choose
your preferred method of communication with the service provider, to add or
change your company’s Website address and E-mail details.
TIP: You may type in the relevant information, or click the Lookup
button to open the corresponding Lookup page and choose the
required information from the list.

Vendor Portal User Guide
Version: REV A Page 20 Astea Proprietary and Confidential
Viewing Your Company’s Organization Tree
This is a read only page that displays your company’s organization tree.
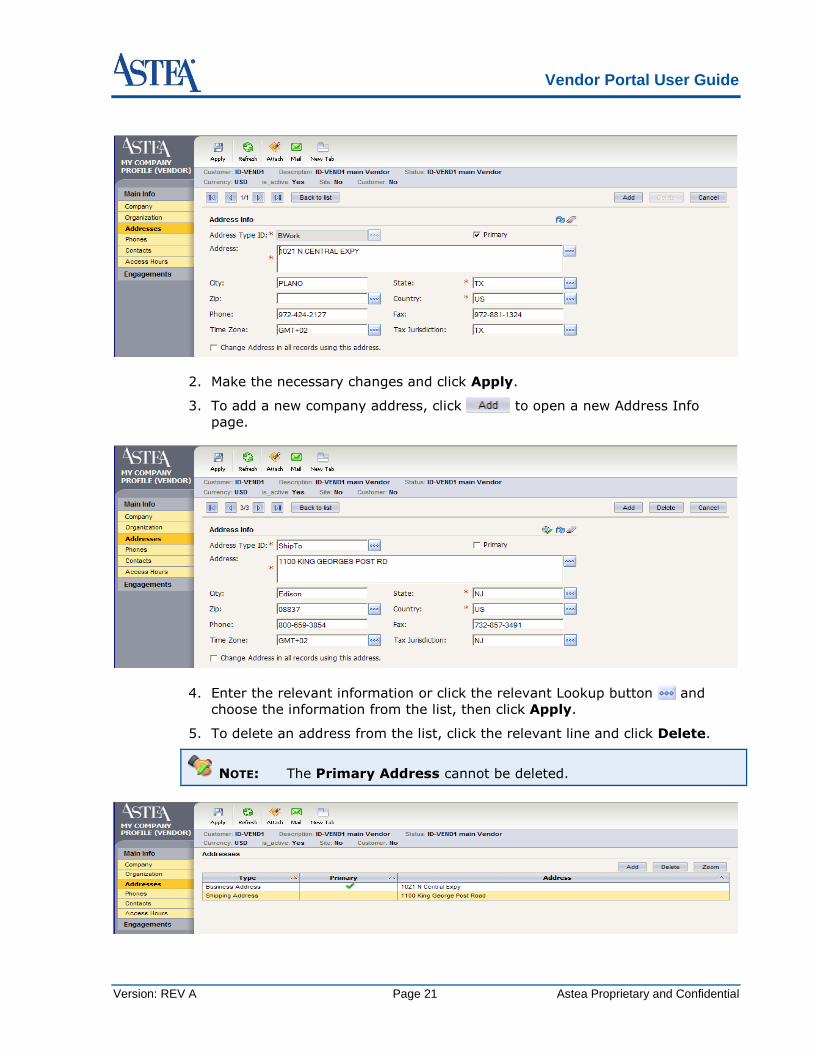
Adding and Modifying Addresses
1. To modify your existing address information, click the relevant line and then
click to open the Address Info page.
Vendor Portal User Guide
Version: REV A Page 21 Astea Proprietary and Confidential
2. Make the necessary changes and click Apply.
3. To add a new company address, click to open a new Address Info
page.
4. Enter the relevant information or click the relevant Lookup button and
choose the information from the list, then click Apply.
5. To delete an address from the list, click the relevant line and click Delete.
NOTE: The Primary Address cannot be deleted.

Vendor Portal User Guide
Version: REV A Page 22 Astea Proprietary and Confidential
Adding or Deleting Phone Numbers
Use the Phones page to add a new phone number to your company’s profile.
1. Click to open a new line.
2. Enter the phone number.
3. Click the Lookup button and choose the phone Type from the list (Cell
Phone, Office Phone, Fax etc.).
4. Add an extension number (Ext.) if there is one.
5. Add a description and click Apply.
6. To delete a phone number, click the relevant line and then click Delete.
Adding and Modifying Contacts
Access to a contact’s record is from two places: My Company Profile and My
Colleagues.
Use the My Company Profile > Contacts or the My Colleagues page to
modify existing contact details, or to add new contacts.
1. To modify an existing contact’s details from My Company Profile, click the
blue Search Name and the Contact Info page is displayed.

Vendor Portal User Guide
Version: REV A Page 23 Astea Proprietary and Confidential
2. Enter all necessary changes and click Save.

Vendor Portal User Guide
Version: REV A Page 24 Astea Proprietary and Confidential
Adding a New Contact
1. From the My Company Profile > Contacts page click to open the
New Colleague page. Or from My Colleague, click
2. Enter the relevant details.
NOTE: All fields marked with a red asterisk * are mandatory. Some of the
fields are filled automatically according to your company’s details.
3. Click to create a password for the new contact (user), the Confirm
Password window is displayed.

Vendor Portal User Guide
Version: REV A Page 25 Astea Proprietary and Confidential
4. Enter and confirm the new password and click Submit.
NOTE: The service provider is responsible for the password parameters
(SOX security). If you use a password that does not conform, an
error message similar to the following message is displayed.
5. Enter the Favorite Question and Favorite Answer.
The question and answer are used if the contact forgets the password and
tries to recover it.
6. Click Save and Continue to open the Contact Info page, where additional
details may be added.
NOTE: From My Company Profile, Save and Continue returns you to
the My Company Profile page.
Or
7. Click Save and Exit to return to your list of contacts.
Or
8. Click Save and New to add another new contact.
9. To define the employee as an External SA, click the Lookup Icon next to
Agent Type and choose the relevant option from the list.
10. If this agent belongs to a vendor that allows internal inventory usage, define
that here under Default Whse. and Def.Return Whse.

Vendor Portal User Guide
Version: REV A Page 26 Astea Proprietary and Confidential
Assigning Security Roles and Access Rules
The security roles and access rules that are available to you are determined by
the service provider in Astea Alliance. From the roles available, you determine
which roles and access levels to assign to each user (contact).
1. Open the My Colleagues page.
2. Type the name of the contact in the relevant search field and click Search, or
leave the search fields blank and click Search to view all contacts.
3. Click the blue Contact ID number to open the contact’s information page.

Vendor Portal User Guide
Version: REV A Page 27 Astea Proprietary and Confidential
4. Click the lookup icon next to Vend. Sec. Role: to open the Security Role
Lookup window.
5. Click the relevant Security Role from the list to apply that role to the
contact.
6. Click Vendor Services > Position to choose the contact’s Access Rule.
NOTE: Access rules define which data is available to the user.
7. Choose the relevant Access Rule from the list.
* Agent’s orders = user can see personal service orders only.
* Action group’s orders = user can see all of the service orders belonging
to the action group that he is assigned to.
* Vendor’s orders = user can see all of the home branch service orders.
* Vendor/child’s orders = user can see all service orders from all of the
vendor’s branches.

Vendor Portal User Guide
Version: REV A Page 28 Astea Proprietary and Confidential
8. To assign the user the option to customize Vendor Portal’s user interface
views for your whole organization system-wide, check Customizer.
9. To allow the user to the option to personalize their own layout only (including
which search parameters are displayed), check Personalization.
NOTE: When Personalization is left unchecked, users cannot change the
user interface views.
Defining Your Company’s Access Hours
Use the Access Hours page to determine the times that you are committed to be
available.
1. Click Add.
2. Click and choose the Day of the Week.
3. Click and choose the From Time and do the same to choose the To Time.
4. To remove a day, click the relevant line and click Delete.
5. To save your changes click Apply.

Vendor Portal User Guide
Version: REV A Page 29 Astea Proprietary and Confidential
Viewing Orders
Viewing Open Orders
Use the Open Orders page to view your open orders and their status.
NOTE: Specific groups of orders can be displayed according to the
different search parameters: Company ID, Site ID, Order Status,
SA (Service Agent), ETA to and from dates, Open to and from
dates.
Click the blue Request ID number to open the order’s details page.
NOTE: You need the required access rights to view an order’s details. The
service provider determines your access rights. Without the
required access rights, the following message is displayed.

Vendor Portal User Guide
Version: REV A Page 30 Astea Proprietary and Confidential
Viewing Closed Orders
Use the Closed Orders page to view all orders in history.
TIP: Specific groups of orders can be displayed according to the
different search parameters: Company ID, Site ID, Order Status,
SA (Service Agent), ETA to and from dates, Open to and from
dates.
Click the blue Request ID number to open the order’s History page.
NOTE: You need the required access rights to view an order’s history. The
service provider determines your access rights. Without the
required access rights, the following message is displayed.

Vendor Portal User Guide
Version: REV A Page 31 Astea Proprietary and Confidential
Viewing Invoices
Viewing Invoices (From)
Use the Invoices (From) page to view invoices from the service provider to you.
NOTE: You need the required access right to view the invoice’s details.

Vendor Portal User Guide
Version: REV A Page 32 Astea Proprietary and Confidential
Viewing Invoices (To)
Use the Invoices (To) page to view invoices from you to the service provider.
Click the blue Invoice No. to open the Invoice Details page.
NOTE: You need the required access right to view the invoice’s details.

Vendor Portal User Guide
Version: REV A Page 33 Astea Proprietary and Confidential
Costing Products and Activities
Use the Vendor Costing page to update the cost of existing products and
activities or to add new product/activity costs to the list.
Seasonal costing or varying costs for different areas (Nodes) are the most
common reason for updating costs.
In the following example we will assume that you provide parts and labor, and
that you give a cost discount during the winter months, but the discount varies
according to the area (Node) to which the part or service agent needs to be
supplied. This means that you might have multiple different costs for the same
product at different times of the year, or for the same product in different Nodes.
There are two options for updating costs:
1. Manually (individual products)
2. Automatically by using a pre-defined Excel file (enables changes to multiple
products or activities simultaneously).
NOTE: For large lists of products, best practice is to upload a pre-defined
Excel file.
Updating Costing Manually
1. Choose the product from the list and click to open the product’s
details page
NOTE: The Product field contains the service provider’s product
name/ID, the Vendor’s Product field allows you to use your own
name/ID for the product.

Vendor Portal User Guide
Version: REV A Page 34 Astea Proprietary and Confidential
2. Click to choose the date that the cost change is Effective From.
The Effective To date is optional and can be added later.
Or
3. Click to choose the Node that the cost change is relevant to.
CAUTION: The Node or Effective From date must differ from the existing
node/date that’s related to the product, so that the system
recognizes it as unique.
4. When you have updated all the relevant fields, click Apply.
NOTE: You may need to repeat the process on the same product multiple
times, for each Node or date range to which the cost change
applies.

Vendor Portal User Guide
Version: REV A Page 35 Astea Proprietary and Confidential
Updating Product Costing Automatically Using an Excel File
CAUTION: Excel files for products MUST use the column format that is
displayed in the following Excel file samples (columns A through
S).
1. Click the Product button.
2. In the Choose file window that is displayed, navigate to the pre-defined Excel
file.

Vendor Portal User Guide
Version: REV A Page 36 Astea Proprietary and Confidential
3. Double-click the file or click the file and then click Open.
4. Click Save.

Vendor Portal User Guide
Version: REV A Page 37 Astea Proprietary and Confidential
Updating Activities Costing
1. Click the Activities button.
CAUTION: Excel files for activities MUST use the column format that is
displayed in the following Excel file sample (columns A through H).
See Updating Product Costing Automatically Using an Excel File as the remainder
of the process is identical to that of uploading an Excel file for products.

Vendor Portal User Guide
Version: REV A Page 38 Astea Proprietary and Confidential
Adding New Products/Activities Costs
The only reason for you to add a product is to define your purchase or exchange
cost for an existing product/activity.
1. Click to open the product details page.
2. Click the Product lookup button to open the product list.

Vendor Portal User Guide
Version: REV A Page 39 Astea Proprietary and Confidential
3. Choose the product from the list by clicking the blue Product ID number.
4. Enter the Effective From date, Node, Unit Cost, and all other relevant
information.
5. Click Apply.
NOTE: The same process applies when adding activities instead of
products.

Vendor Portal User Guide
Version: REV A Page 40 Astea Proprietary and Confidential
Using Vendor Portal as an External Service Agent
As an external service agent you are able to view and update service orders,
including all standard field service features.
Using the Part Catalog as an External Service Agent
As an external Service Agent your Part Catalog contains links to the following
parts: Tasks Queue, Single Order Fast Close, Customer Contacts, My
Activities (Duration) Graph, How am I Doing (Activities) Dashboard, and
Calendar.
NOTE: These are the default parts for an external SA. However, extra
parts can be added to your part catalog by the system’s
administrator (Power User), by using the systems security setup
utility.

Vendor Portal User Guide
Version: REV A Page 41 Astea Proprietary and Confidential
Viewing and Understanding the My Activities (Duration) Graph
The My Activities (Duration) Graph shows all of the activities assigned to you and
the duration percentage of each activity in relation to the total duration of all
activities.
1. Mouse-over an activity to view that activity’s duration percentage.
2. Use the Graph Mode drop-down list to choose the type of graph to be
displayed.
3. Double-click an activity to open the activity’s page.
Viewing and Understanding How am I Doing (Activities)
The How am I Doing (Activities) dashboard shows the average percentage of
activity arrivals for the last 30 days (delayed or early).
NOTE: 30 days is the default setting, you may choose a different time
period.

Vendor Portal User Guide
Version: REV A Page 42 Astea Proprietary and Confidential
Customizing Column Display
1. To customize the position of columns: drag the column to the desired
position.
2. To add or remove columns: right-click the row of columns and check/uncheck
the column to be displayed/hidden.

Vendor Portal User Guide
Version: REV A Page 43 Astea Proprietary and Confidential
Viewing and Responding to Tasks
All tasks that are you are allowed to see according to your access rule, are
displayed in the Task Queue window.
All of the service related actions are available to you from the right-click menu.
Vendor Portal User Guide
Version: REV A Page 44 Astea Proprietary and Confidential
When a new task (Service Order) is displayed that you are going to accept:
NOTE: If you are not accepting the order, right-click the order and choose
to Reject or to Reassign (If reassignment is your responsibility).
1. Right-click the order
2. Choose Accept, the order’s status changes accordingly.
3. As soon as you are ready to start travelling to the task’s location, click Start
Travel, the order’s status changes accordingly.
4. When you reach your destination, click Arrive, the order’s status changes
accordingly.
5. When you have completed the task, click Fulfill Activity, the task disappears
from this queue.
6. Choose Not Done to cancel the task.
7. When all tasks related to the service order are complete, click Resolve
Order.
NOTE: The previous steps do not necessarily need to be performed in any
particular order.
The activity’s status change is updated in the Activity Status
column of the Task Queue on each status change.
Using Single Order Fast Close
Single Order Fast Close enables you to view and update all of the activities,
materials, and expenses relating to a specific order.
1. Enter the order’s number into the Order No. search field or click to open
the lookup window and choose the order from the list. The order’s activities,
materials, and expenses list is displayed.

Vendor Portal User Guide
Version: REV A Page 45 Astea Proprietary and Confidential
2. Right-click the row you want to update and choose either: Fulfill, Not Done,
Resolve Order, Invoice, or View from the list.
3. Repeat the process for all rows.
NOTE: All rows must be set to fulfilled before the order can be invoiced.

Vendor Portal User Guide
Version: REV A Page 46 Astea Proprietary and Confidential
Viewing Vendor Contracts
As a vendor you can view all of your contracts and their details from the Vendor
Contract module.
To open the Vendor Contract module, click Application Map > Vendor
Contracts and choose the relevant contract from the list.
NOTE: All fields are Read Only. The Approve and Submit buttons are
available when the contract needs is awaiting approval.
A Vendor Contract search option has been added to the Service Order QBE, as
displayed below

Vendor Portal User Guide
Version: REV A Page 47 Astea Proprietary and Confidential
Using Vendor Portal as a Logistics Person
As a logistics user, you are responsible for initially accepting/rejecting purchase
requisitions and the shipping of products to the customer.
Using the Parts Catalog as a Logistics Person
As a logistics person (Supply user) your Part Catalog contains links to the
following parts: Inbound Queue, Purchase Requisitions Queue, Customer
Contacts, Warranty Claims Queue, Outstanding PRs (Value) graph, How
am I Doing (Fulfillments) dashboard, and Calendar.
NOTE: These are the default parts for a Logistics Person. However, extra
parts can be added to your part catalog by the system’s
administrator (Power User) by using the security setup application.

Vendor Portal User Guide
Version: REV A Page 48 Astea Proprietary and Confidential
Viewing and Understanding the Outstanding PRs (Value) Graph
The Outstanding PRs (Value) Graph shows all your outstanding PRs and the
percentage value of each PR in relation to the total value of all PRs.
1. Mouse-over a Value of Product row to view that product’s value percentage.
2. Use the Graph Mode drop-down list to choose the type of graph to be
displayed.
Viewing and Understanding How am I Doing (Fulfillments)
The How am I Doing (Fulfillments) dashboard shows the average percentage of
parts shipped on time for the last 30 days.
NOTE: 30 days is the default setting, you may choose a different time
period.

Vendor Portal User Guide
Version: REV A Page 49 Astea Proprietary and Confidential
Customizing Column Display
1. To customize the position of columns: drag the column to the desired
position.
2. To add or remove columns: right-click the row of columns and check/uncheck
the column to be displayed/hidden.
Dealing with Purchase Requisitions
Your purchase requisition queue displays all approved purchase requisitions that
require action.
Accepting or Rejecting Purchase Requisitions
When you receive an approved purchase requisition from the service provider it
is displayed in your Purchase Requisitions Queue.
1. Right-click the purchase requisition and choose to either Accept or Reject.

Vendor Portal User Guide
Version: REV A Page 50 Astea Proprietary and Confidential
2. When the product/s is ready for shipment|: right- click again and choose
Create ARN (Advance Receiving Notice). The ARN page is displayed.
3. Add the Carrier, Tracking numbers, check Shipped, and all other relevant
information.
4. Click Apply.

Vendor Portal User Guide
Version: REV A Page 51 Astea Proprietary and Confidential
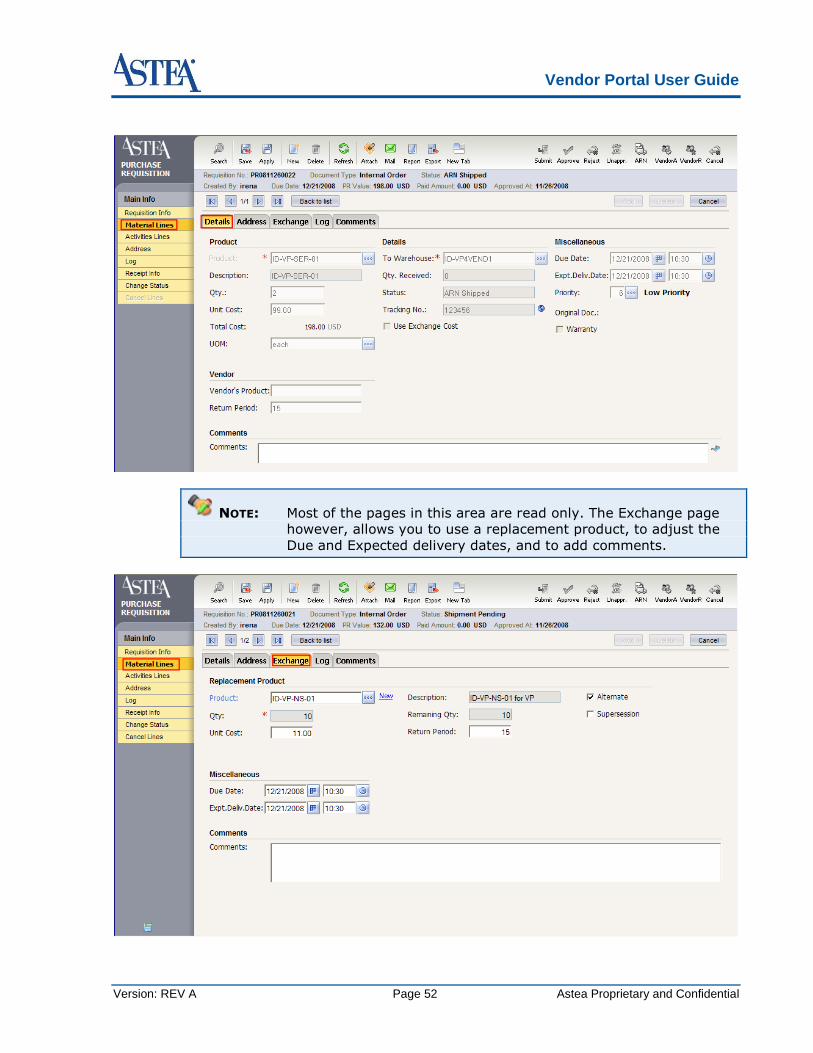
Viewing or Changing Details
1. From the Purchase Requisitions Queue: double-click the blue Purchase No.
The Requisition Info page is displayed.
NOTE: You need the required access rights to view the PR’s information
page. The service provider determines your access rights.
NOTE: The Requisition Info page is read only.
2. Click Material Lines, click the relevant row and then click Zoom to open the
Details page.
Vendor Portal User Guide
Version: REV A Page 52 Astea Proprietary and Confidential
NOTE: Most of the pages in this area are read only. The Exchange page
however, allows you to use a replacement product, to adjust the
Due and Expected delivery dates, and to add comments.

Vendor Portal User Guide
Version: REV A Page 53 Astea Proprietary and Confidential
3. To change the product to a replacement product, add the product’s ID, or
click the Lookup button and choose the product from the list.
4. Change the Due and Expected delivery dates if necessary and add your
comments.
5. Click Apply.
NOTE: Replacing the originally ordered product submits the purchase
requisition for re-approval. The following message is displayed.
Processing Items from Your Inbound Queue
Use Inbound Queue to view and process your outstanding return and exchange
shipments.
1. To acknowledge receipt of the item: right-click the line in the list and click
Received by Vendor.

Vendor Portal User Guide
Version: REV A Page 54 Astea Proprietary and Confidential
The Shipment Status changes to Accepted by Vendor.
NOTE: You may select multiple lines (Ctrl + click) and then right-click to
change the status of the selected items simultaneously.
2. For exchange items: right-click the line and select Create ARN. The ARN
page is displayed.
3. Add the Carrier, Tracking numbers, check Shipped and all other relevant
information.
4. Click Apply.

Vendor Portal User Guide
Version: REV A Page 55 Astea Proprietary and Confidential
Accepting or Rejecting Warranty Claims
Use your Warranty Claims Queue to Accept or Decline warranty claims on
products or services that you supplied to the service provider.
1. Enter one or more search criteria and click Search. The search results are
displayed.
2. To accept a warranty claim: right-click the claim and click Accept.
The service provider receives your acceptance.
3. To reject a warranty claim: right-click the claim and click Decline. The
Decline reason window is displayed.

Vendor Portal User Guide
Version: REV A Page 56 Astea Proprietary and Confidential
4. Enter your reason for declining the claim or click the Lookup button and
choose the reason from the list.

Vendor Portal User Guide
Version: REV A Page 57 Astea Proprietary and Confidential
Common Task Flowchart
Scenario for External SAs
Managed sub-contractors (assigned tasks by service organization).
Reporting labor and part usage.

Vendor Portal User Guide
Version: REV A Page 58 Astea Proprietary and Confidential