Embed Size (px)
Citation preview

<COPYRIGHT 2004 - 2006 DS Development SRL>
Standard printmanual

Table of Contents
Foreword 0
Part I About Us 3
................................................................................................................................... 31 About DS Development
................................................................................................................................... 32 Contact Us / Service Support
................................................................................................................................... 43 Other Products from DS Development
Part II Licensing Questions 5
................................................................................................................................... 51 How to Purchase Your License
................................................................................................................................... 62 Ordering & Payment Options
................................................................................................................................... 63 Volume Discounts Table
................................................................................................................................... 74 Transaction Security & License Protection
................................................................................................................................... 75 Benefits of Licensed Users
................................................................................................................................... 76 30 Days Refund Policy
................................................................................................................................... 77 Product Upgrades Policy
................................................................................................................................... 88 How Do I Re-install a License?
................................................................................................................................... 89 Lost Your License?
................................................................................................................................... 810 License Activation Problems?
Part III Getting Started 9
................................................................................................................................... 91 System Requirements
................................................................................................................................... 92 Installing Bells & Whistles for Outlook
................................................................................................................................... 93 Updating from Older Versions of Bells & Whistles
................................................................................................................................... 104 Basics of the User Interface
................................................................................................................................... 115 Uninstalling Bells & Whistles for Outlook
Part IV Reply Options 11
................................................................................................................................... 121 Using Reply Profiles
................................................................................................................................... 132 Reply Greetings
................................................................................................................................... 143 Numbering Replies per Subject
................................................................................................................................... 144 Handling Attachments on Email Replies
................................................................................................................................... 155 Automatically Setting the Reply Format
................................................................................................................................... 166 Adding Replied Addresses to Outlook Contacts
................................................................................................................................... 167 Email Signatures
Part V Alerts & Notes 17
................................................................................................................................... 171 Enabling the Notes Feature
................................................................................................................................... 172 Working with Email Notes
Bells & Whistles for OutlookI
© <2004 - 2006> ... DS Development SRL

................................................................................................................................... 193 Using Alerts
Part VI Email Templates 20
................................................................................................................................... 201 Explaining the Templates tab
................................................................................................................................... 212 Working with Categories
................................................................................................................................... 213 The Template Editor
................................................................................................................................... 234 Inserting a Template into Emails
Part VII Other Options 23
................................................................................................................................... 231 Add Date/Time Stamps
................................................................................................................................... 242 Using Email Tracking IDs
................................................................................................................................... 243 Send Again Options
Part VIII Send Options 25
................................................................................................................................... 251 Send Options Tab
................................................................................................................................... 252 Using Send Rules
................................................................................................................................... 263 Explaining Rule Actions
................................................................................................................................... 284 Send Again / Edit & Send Again
Part IX Attachment Blocking 29
Part X Using Options per Outlook Profile 29
Part XI Export & Import Settings 30
Part XII Using the Outlook Addin Utility 31
Part XIII Checking for Product Updates 32
Part XIV Frequently Asked Questions 33
................................................................................................................................... 331 How Do I Print This Help File?
................................................................................................................................... 332 Does It Work with Outlook Express?
................................................................................................................................... 333 Does It Work with Any MS-Office Regional Version?
................................................................................................................................... 334 Can I Use It with MS-Exchange?
................................................................................................................................... 335 Outlook Disabled Bells & Whistles, What Now?
................................................................................................................................... 346 Why JPEG or RAR Files Are Not Compressed?
................................................................................................................................... 347 Any Known Conflicts with Other Outlook Addins?
Index 35
IIContents
II
© <2004 - 2006> ... DS Development SRL

Bells & Whistles for Outlook3
© <2004 - 2006> ... DS Development SRL
1 About Us
1.1 About DS Development
Company Profile
At DS Development, we deal with digital ideas. We have the inspiration to produce them and theknowledge to turn them into reality. With inspiration and knowledge, we produce solutions. We createIntelligent Software.
In 1998, DS Development was formed by a group of IT industry and programming professionals todevelop, market and provide email communication, protection and management software solutionsand services for world-wide businesses. Our mission is to provide organizations of all sizes with theability to take full advantage of the communication benefits offered by the Internet.
We take great pride in the amount of time and efforts we put into developing our products line and ourbest reward is your satisfaction. The high quality of our products and the excellent customer servicesupport, relying on your positive feedback, make us believe we are on the right track for offering youthe best products and services you can get.
DS Development is also committed to offering high quality programming services and cost effectivesolutions for business software development, proving that Romanian programmers rely on imaginationand innovation as their best arguments to hold their top position on the IT scene.
1.2 Contact Us / Service Support
The best and easiest method of reaching our service support department is by using the "ContactService Support" function located under the main Bells & Whistles menu displayed on the Outlookmain toolbar area:

About Us 4
© <2004 - 2006> ... DS Development SRL
We also strongly recommend you to use our Service Support Forum to post and discuss any problemsyou may have related to our products.
How to contact us:General inquiries: [email protected]/7 free technical support: [email protected] .Programming services: [email protected] box: [email protected]
S.C. DS Development S.R.L. Phone: +40-31-4027259 Fax: +40-21-4442710 22 Serban Voda Avenue, Sector 4 Bucharest, Romania
1.3 Other Products from DS Development
We take great pride in the amount of time and efforts we put into developing our products line and ourbest reward is your satisfaction. The high quality of our products and the excellent customer servicesupport, relying on your positive feedback, make us believe we are on the right track for offering youthe best products and services you can get.
To download evaluation versions of our products, please visit this page:http://www.emailaddressmanager.com/products.html
Easy Mail Merge for Outlook· Automatically compose individual personalized emails for a mailing list;· Use logical scenarios to vary the personalized text;· Import email addresses and mail merge records from Outlook Contacts, Outlook Distribution Lists or
CSV files;· Set email sending options, such as choosing when the emails are sent, how many to send at once
and what delay to have between emails.
Auto Reply Manager for Outlook· Auto reply addin for Microsoft Outlook;· Create out of office auto replies or redirect emails;

Bells & Whistles for Outlook5
© <2004 - 2006> ... DS Development SRL
· Supports complex rules generation, based on email accounts, keywords, date/time periods andmore;
· Fully integrated with Microsoft Outlook, it does not require Microsoft Exchange or any special mailserver software.
Email Address Collector
· Email extractor for Microsoft Outlook, Outlook Express, MSN Messenger, Outlook Contacts,Windows Address Book or any local files.
· Exports email contacts to the Windows Address Book, Outlook Contacts or CSV files.
Email Sentinel Pro
· Block unsafe attachments, e-mail viruses, spam validators and other malicious e-mails;· 5 email protection levels tailored on your needs.
SilentMail for Outlook
· Monitor every email that leaves your company.· Easily enforce your email policies.· Silently watch every outgoing email without alerting the sender.· Smooth integration with Microsoft Outlook.
2 Licensing Questions
2.1 How to Purchase Your License
To purchase, please download the evaluation version of our product then follow the "Buy Now"instructions from the product startup screen (displayed when you start Microsoft Outlook).
In order to purchase your license, click on the Buy Now button from the application startup screen, thenchoose to Purchase license and then enter your billing details. You can securely purchase by creditcard or by PayPal.
Once you placed your order, you will receive an email with your registration details, including theLicence Holder Name and Purchase Reference Number.

Licensing Questions 6
© <2004 - 2006> ... DS Development SRL
In order to activate or to re-install your license, from the same startup menu, click the Activate Licensebutton and then select to Re-install existing license. You will have to enter your registration details, asthey were provided in the purchase confirmation email.
2.2 Ordering & Payment Options
Online Ordering & Payment OptionsOur online ordering and licensing system is provided by Softwrap Ltd, in association with VerSign. Youcan purchase by using PayPal or by using a valid credit card (Visa, Mastercard, American Express).You can access the online ordering system by clicking on the related "Buy Now" button from our webpages. As an alternative, you can also purchase online from within our product window: simplydownload, install and start any of our products and you will notice a startup window allowing you toplace a license order.
You will find the name "www.softwrap.com" on your credit card statement for any online purchasesfrom our web site.
Offline Ordering & Payment OptionsThe offline ordering method is available by request, as an alternative payment method only for volumeorders. The payment is to be done via wire transfer in our USD bank account.
2.3 Volume Discounts Table
About Volume LicensingOur Volume Licensing program provides you or your organisation with discounts whenever yourpurchase more than 4 licenses at the same time.
How Does Volume Licensing Work?The Volume Licensing program offers discounted pricing based on your order quantity. The greater thevolume, the higher the discount.
How Do I Apply?If you wish to purchase more then 4 licenses at the same time, please contact us prior to placing yourorder and we will instruct you on how to take advantage of our discounts.
Discounts Table (available for all our products)5 - 15 licenses: a 10% discount will apply from the single license price;16 - 25 licenses: a 15% discount will apply from the single license price;26 - 50 licenses: a 25% discount will apply from the single license price;51 - 120 licenses: a 40% discount will apply from the single license price;121 or above: a 50% discount will apply from the single license price;
Bells & Whistles for Outlook7
© <2004 - 2006> ... DS Development SRL
Site license (unlimited license activation within the same organization): please contact us for details.
2.4 Transaction Security & License Protection
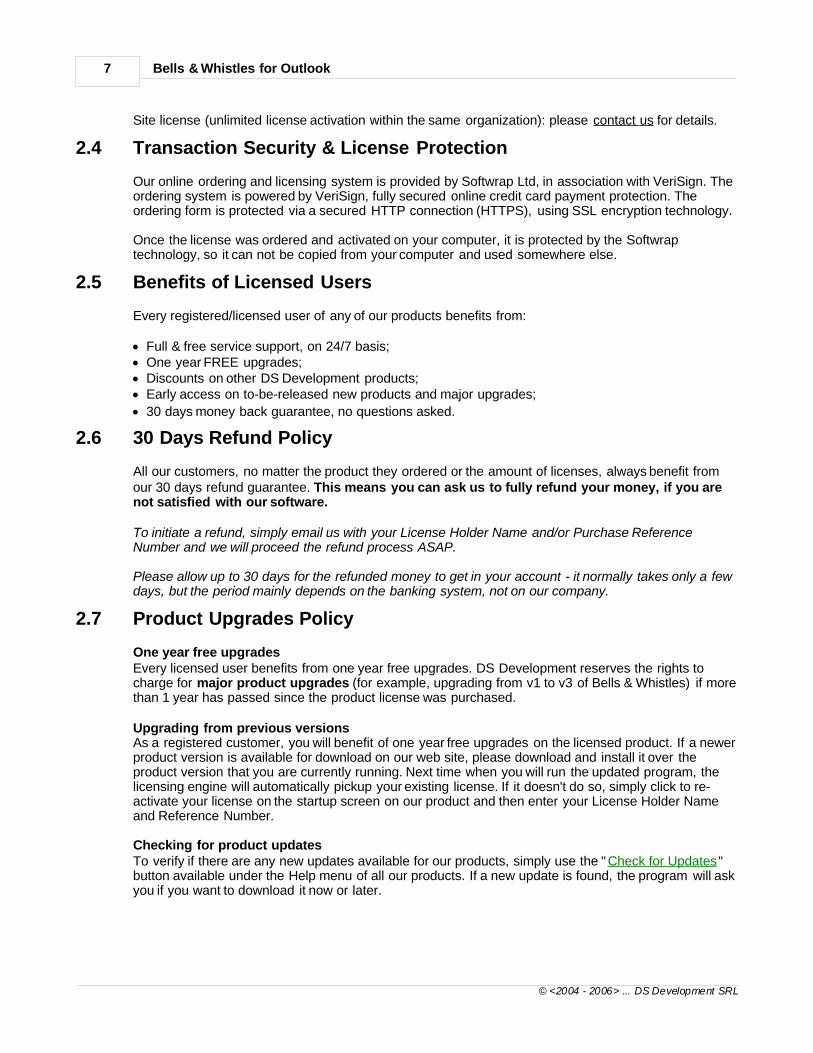
Our online ordering and licensing system is provided by Softwrap Ltd, in association with VeriSign. Theordering system is powered by VeriSign, fully secured online credit card payment protection. Theordering form is protected via a secured HTTP connection (HTTPS), using SSL encryption technology.
Once the license was ordered and activated on your computer, it is protected by the Softwraptechnology, so it can not be copied from your computer and used somewhere else.
2.5 Benefits of Licensed Users
Every registered/licensed user of any of our products benefits from:
· Full & free service support, on 24/7 basis;· One year FREE upgrades;· Discounts on other DS Development products;· Early access on to-be-released new products and major upgrades;
· 30 days money back guarantee, no questions asked.
2.6 30 Days Refund Policy
All our customers, no matter the product they ordered or the amount of licenses, always benefit fromour 30 days refund guarantee. This means you can ask us to fully refund your money, if you arenot satisfied with our software.
To initiate a refund, simply email us with your License Holder Name and/or Purchase ReferenceNumber and we will proceed the refund process ASAP.
Please allow up to 30 days for the refunded money to get in your account - it normally takes only a fewdays, but the period mainly depends on the banking system, not on our company.
2.7 Product Upgrades Policy
One year free upgradesEvery licensed user benefits from one year free upgrades. DS Development reserves the rights tocharge for major product upgrades (for example, upgrading from v1 to v3 of Bells & Whistles) if morethan 1 year has passed since the product license was purchased.
Upgrading from previous versionsAs a registered customer, you will benefit of one year free upgrades on the licensed product. If a newerproduct version is available for download on our web site, please download and install it over theproduct version that you are currently running. Next time when you will run the updated program, thelicensing engine will automatically pickup your existing license. If it doesn't do so, simply click to re-activate your license on the startup screen on our product and then enter your License Holder Nameand Reference Number.
Checking for product updatesTo verify if there are any new updates available for our products, simply use the " Check for Updates"button available under the Help menu of all our products. If a new update is found, the program will askyou if you want to download it now or later.

Licensing Questions 8
© <2004 - 2006> ... DS Development SRL
2.8 How Do I Re-install a License?
To re-install software that you have removed on the same PC or move the license to a new one, youmust re-run the software's original installation set-up. Softwrap™ may detect that you have previouslybought this software and will automatically run in a purchased status. This means you will not see theSoftwrap Dialogue box and will have the full use of the software. If the system does not detect thepurchase, this could be due to a major change to the hardware of your system or the installation takingplace on a new PC. You can now simply select to re-install the license from the Softwrap dialogue boxand using your License Holder Name and Purchase Reference Number received by email during youroriginal purchase, the software can be unlocked to a purchased state.
In the event you no longer have the Licence Holder Name and Purchase Reference Number detailsplease please click on this link or email us with your full name, approximate date of purchase, last 4digits of the 16 digit credit card number you used to effect the purchase as well as the the name of theSoftware title you are wishing to re-install.
2.9 Lost Your License?
If you need to reinstall your license, but you can't find your license registration details,please click on this link.
Please make sure that you fill the license request form with the same email address that was used onthe license purchase form. If that email address is no longer in use, please email us with your fullname, approximate date of purchase, last 4 digits of the 16 digit credit card number you used to effectthe purchase as well as the the name of the Software title you are wishing to re-install.
2.10 License Activation Problems?
For detailed answers and information on potential license activation problems, please see ourservice support section dedicated to this subject.
The most common license activation errors happen because:· you are trying to activate a license on a product major version newer than the one of your purchase
(eg: trying to activate Bells & Whistles v3 with a license issued for Bells & Whistles v1.2);· you are not allowed to re-activate your single-user license because you already activated it on more
than 2 computers (each single-user license can only be activated on max 2 computers at a time). Ifyou have a new computer and you want to reinstall your license, but you receive the error "maximumcount reached", please contact us and we will assist you on solving the problem;
· you are using a firewall that prevents our program from communicating with the Softwrap licensingserver. If you have problems activating your license while your firewall is on, please disable it andthen try again to activate your license;
· if you are using a proxy server for your Internet connection, please make sure it is setup tohandle/allow HTTPS connections;
· if you receive an error like "memory debug detected" or "filemon detected", please make sure thatyou don't run any memory managers, file monitoring programs or debuggers while trying to register.For license security reasons, you are not allowed to activate a license if such a program is running.

Bells & Whistles for Outlook9
© <2004 - 2006> ... DS Development SRL
3 Getting Started
3.1 System Requirements
Bells & Whistles System Requirements
Personal computer with 300MHz Pentium® processor.64 MB RAM (128MB recommended).10 MB available hard disk space.Microsoft® Windows 98, Microsoft® Windows Me, Microsoft® Windows 2000, or Microsoft® WindowsXP.Microsoft® Outlook 2000, 2002/XP or 2003.
Internet connection (to purchase and register your license).
3.2 Installing Bells & Whistles for Outlook
Once you downloaded or obtained the setup file of Bells & Whistles for Outlook, simply run it in orderto install the Outlook addin. To properly install it, please make sure that:· Microsoft Office Outlook 2000 or higher is already installed on your computer;· You have at least one email account defined in Microsoft Outlook;· You are logged on to Windows via a local Windows account with administrator rights;· Microsoft Outlook is not running while Bells & Whistles for Outlook is being installed.
During the installation process, you can choose to perform a full installation (all modules will beinstalled) or a custom installation (you can choose to install just the addin for Outlook or to install theOutlook Addin Utility, too). Also, you can choose to install the addin only for the active Windowsaccount (the one on which you are currently logged on) or to install it for all local Windows accounts(so Bells & Whistles will be accessible through all accounts of your Windows operating system).
When the installation is done, simply start Microsoft Outlook: you will notice a new startup screen,showing you the licensing options for Bells & Whistles. You can choose to use the free trial periodwithout any cost, to buy one or more licenses for it, or to activate a license that you previously bought.
3.3 Updating from Older Versions of Bells & Whistles
Bells & Whistles v3 comes with its own live update module, allowing you to easily check for updates onthe program. By default, the program will check for updates weekly, but you can change this settingand you can manually check for updates whenever you want. The "Check for Updates" function islocated on the Bells & Whistles menu displayed on the main toolbar area of Outlook:

Getting Started 10
© <2004 - 2006> ... DS Development SRL
If an update is found on our server, the program will ask you if you want to download & install theupdate. Once the download is completed (a download icon is displayed on your systray icons area,showing you the download progress), it will automatically start the install process. Please make sureOutlook is not running while performing the update installation.
· If you install an update on a registered version of Bells & Whistles and if it is a minor update (likeupdating from v3.01 to v3.2), the licensing engine should automatically find and use the existinglicense, without asking you to re-activate your license.
· If you install an update on a non-registered (trial) version of Bells & Whistles or if you are performinga major upgrade (like upgrading from v1 to v3), then the licensing engine will prompt you to try thenew version, to buy a license or to activate it. If you consider that the Try/Buy/Activate screen isdisplayed by mistake, then please contact us with your license details and we will promptly assistyou.
3.4 Basics of the User Interface
In order to use Bells & Whistles, you need to start Microsoft Office Outlook. On the main Outlookwindow, you will notice a new menu toolbar, called Bells & Whistles for Outlook:
The Bells & Whistles toolbar menu consists of two buttons:· the Notes button: by clicking on it, you will add an email note on the email message which is
currently selected in your mailbox folder. You can achieve the same goal by right clicking on theemail message and selecting Notes from the right click menu;
· the Bells & Whistles button: this is a drop-down list button that will display the main options &settings of Bells & Whistles for Outlook.
Most of the Bells & Whistles goodies can be found under the Options menu entry:
The Options window is designed using a tabbed interface. This means that we grouped the program

Bells & Whistles for Outlook11
© <2004 - 2006> ... DS Development SRL
functions on 5 sections (or tabs). You can switch between these tabs by clicking on the top tab names:
To learn more about each function or option, please see the related help menu entries from the Tableof Contents of this help manual.
3.5 Uninstalling Bells & Whistles for Outlook
If you decide to uninstall Bells & Whistles for Outlook, please use its Uninstall function located in theBells & Whistles programs group:
When you perform the uninstall sequence, please make sure Microsoft Outlook is not running,otherwise the uninstall script will fail to uninstall all Bells & Whistles entries. During the uninstallprocess, you can choose to keep the Outlook Addin Utility, for free. You can later use it to manage(enable/disable) other Outlook addins that can't be easily enabled or removed from Outlook.
4 Reply Options
The Reply Options tab can be accessed by clicking on the Options menu entry of theBells & Whistles toolbar , displayed on the main Outlook window:

Reply Options 12
© <2004 - 2006> ... DS Development SRL
4.1 Using Reply Profiles
Starting from Bells & Whistles v3, the reply options are now grouped per profiles. What is a profile? Onour program, a reply profile is a set of rules that determine to which email messages will Bells &Whistles apply the selected reply options.
For example, if you want to add your business signature to all email replies, except for the emails sentto your family, you can define the global profile ("everyone") to include your business signature, andthen define another reply profile that will be active only for the email addresses of your family. Thisway, when you will reply to your family email addresses, the program will not include your businesssignature. By default, Bells & Whistles has a single profile that is defined to handle all email replies inthe same way.
To add a new profile, simply click on the Edit button located on the right side of the profiles list:
Then, click on the Add button and design the new profile:

Bells & Whistles for Outlook13
© <2004 - 2006> ... DS Development SRL
So, if you want to define separate reply rules for emails received from your family email addresses,simply enter these email addresses in the Filter field, give a name to the profile and click Ok to save it.Once you saved the profile, it will be visible in the profiles list, so you can define your special replysettings for this profile only:
For each profile, the following reply options are available:· Automated greetings text ;· Auto-number replies per subject;· Auto-format the email reply body (plain text or html);· Include list of original attachments;· Include actual attachments from the original received message ;· Automatically put replied addresses in your Contacts list;· Custom signature.
4.2 Reply Greetings
The Reply Greetings function allows you to create faster email replies, by automatically inserting agreeting into the reply that you are composing. So instead of typing "Hi John," the program willautomatically insert this text for you. Neat, isn't it?
To enable the Reply Greetings function, simply check/mark the box "Insert greeting when replying toemails". To customize the greetings text, click on the Settings button:
On the greetings settings window, you can define various options for your greetings, such as:· the introduction greetings text (like "Hi" or "Hello" or "Dear"). You can even choose to let Bells &
Whistles to pick up randomly a greetings text from a list of predefined texts;

Reply Options 14
© <2004 - 2006> ... DS Development SRL
· you can choose to use different greetings for different periods of the day. For example, in themornings you can start your replies with "Good morning", while in the evenings you can automaticallystart replies with "Good evening";
· after the introduction text, you can let Bells & Whistles to include the name of the person for whichyou are composing the reply. This way, even if the greeting is fully automated, it will look and feelvery personal. Bells & Whistles is taking the person's name from the Alias name of his/her emailaddress;
· you can configure the font style of the greeting text. If you want to use the same format that wasused on the email to which you are now replying, simply do not check/mark the box for using acertain text format.
4.3 Numbering Replies per Subject
To enable the reply subject counter, from the Reply Options menu section, enable the option "Auto-number replies per subject". Once this option is enabled, Bells & Whistles will add a reply number onthe email subject, making it easier to track the history of an email exchange.
When this option is enabled, the subject of an email reply will be automatically formatted like this: "RE:[X] Subject text", where [X] is the reply number per unique subject.
4.4 Handling Attachments on Email Replies
For better email management, Bells & Whistles allows you to include a list with the original fileattachments of the email to which you reply and to include the actual attachments in the email reply.
To enable these features, on the Reply Options tab, you have to mark the checkboxes named "Include

Bells & Whistles for Outlook15
© <2004 - 2006> ... DS Development SRL
a list of original attachments" and "Include attachments from original message":
To further customize the look of the attachments list, you can choose to pre-format the list font style, byenabling the "Format" option and selecting the desired font style using the "Font..." button:
4.5 Automatically Setting the Reply Format
Although Microsoft Outlook allows you to select a default email format when sending new emails, thissetting does not apply when replying to email messages. By default, when composing a reply, Outlookwill use the email format of the original email. Thus, no matter if your default format for new mail is setto "plain text", if you are replying to a HTML email, your own reply will be generated as a HTML email.
To increase your Outlook productivity, Bells & Whistles makes it very easy to specify a default emailformat even when sending replies. As a result, the selected format will be automatically applied on allyour email replies, no matter the format of the original email.
To use this feature, you have to enable the option "Always reply using..." from the "Reply Options"section of the Bells & Whistles configuration screen, which can be launched from the Outlook -> Tools-> Bells & Whistles Options menu or from the Bells & Whistles toolbar displayed on the main Outlookwindow.

Reply Options 16
© <2004 - 2006> ... DS Development SRL
4.6 Adding Replied Addresses to Outlook Contacts
Earlier versions of Microsoft Outlook included a feature for automatically putting addresses in outgoingemails to the Outlook address book. Since the latest Outlook versions do not include this feature, Bells& Whistles comes with a similar function. This way, you can build your address book in a way thatsaves a lot of typing and trying to remember adding people as you reply to their messages.
To enable this feature, go to the Bells & Whistles Reply Options tab, then mark the checkbox called"Automatically put people I reply to in" then use the Browse button and select the desired Contactsfolder where these contacts will be automatically added:
4.7 Email Signatures
Microsoft Outlook is delivered with its own email signature options, but these options don't offer you thefreedom of the Bells & Whistles signatures feature. Using Bells & Whistles, on top of what Outlook cando with signatures, you can:· define a signature for certain Contacts or email addresses, so you don't mix signatures for personal
emails with signatures for business emails;
· compose the signature using a fully fledged HTML editor that allows you to insert images, hyperlinkson images or other objects in the signature.
To enable the Signatures feature, from the Reply Options menu section, enable the option "Insertsignature" and click on the Edit button to compose the signature:
The signature editor is the same as the editor used for text templates. All signatures will be saved intothe Signatures category of the Text Templates. This category is only accessible by using the Editbutton from under the "Insert signature" checkbox: you can't edit signatures by using the regular texttemplates editor.
The signature editor is very straight forward, as it ressembles the text editor interface of MicrosoftWord or Outlook.

Bells & Whistles for Outlook17
© <2004 - 2006> ... DS Development SRL
5 Alerts & Notes
5.1 Enabling the Notes Feature
Bells & Whistles for Outlook introduces a new Outlook email concept: email notes attached to Inboxemail messages.
The goal of this feature is to allow you to quickly record a text (comments, ideas, to-do, etc) withinOutlook, while keeping it related to a certain email subject.
By default, once installed Bells & Whistles will enable this feature. You can manually enable/disable it,by going to the Alerts&Notes tab and marking the checkbox called "Enable email notes". You can alsochoose if the email notes sign is going to be displayed by Outlook, as a message property column:
When this function is enabled, you will see a new button attached to the Bells & Whistles toolbar menuof Outlook. In order to insert an Email Note, simply select the desired email message and click on the"Notes" button from the toolbar. A new window will popup, so you can type the desired note:
5.2 Working with Email Notes
As described on the Email Notes main help page, in order to insert an Email Note you simply have toright click on the desired email message and select "Notes" from the list. A new window will popup, soyou can type the desired note:

Alerts & Notes 18
© <2004 - 2006> ... DS Development SRL
When you write your text, you can also attach a date stamp on it in order to help you remember whenyou actually added the note to that email message. Then, just click on the "OK" button and Outlook willsave the note, attached to the selected email message.
To quickly sort Inbox email messages based on their Notes, Bells & Whistles inserts a new messagecolumn view, called Notes:

Bells & Whistles for Outlook19
© <2004 - 2006> ... DS Development SRL
When a note is attached to an email, you will see a checkbox added to the Notes column of that emailmessage. You can also configure Bells & Whistles to display the actual note text in the column, insteadof the notes icon:
5.3 Using Alerts
Bells & Whistles can save you from a lot of trouble and unpleasant situations, by notifying you withalerts whenever you forget to attach a file, to enter an email subject or to reply to all email addressesthat were put on the original received email.
To enable these alerts, open the Bells & Whistles configuration window (from the Outlook Tools menu)and you will see a tab section called "Alerts". You can choose to enable both the subject and themissing attachment alerts or you can enable only one of them.
If the missing attachment alert is enabled, then by clicking on the Settings buton, you can definecustom words that will trigger the missing attachment alert. Whenever you want to send a new email,Bells & Whistles will silently scan the email for missing attachment trigger words and, if one of them isfound, it will popup the alarm. Bells & Whistles will always look for these words only on the text sectionthat you composed, so it will skip previous replies or forwards.

Alerts & Notes 20
© <2004 - 2006> ... DS Development SRL
6 Email Templates
6.1 Explaining the Templates tab
The goal of the Templates feature is to allow Outlook users to quickly insert blocks of text into emailmessages, without having to type that text over and over again. For example, if you work as a salesrepresentative and you have to type the product payment terms over and over again for variouscustomers, it would be a lot easier to simply define the payment terms as a text template and then toinsert it into an email message with a single mouse click.
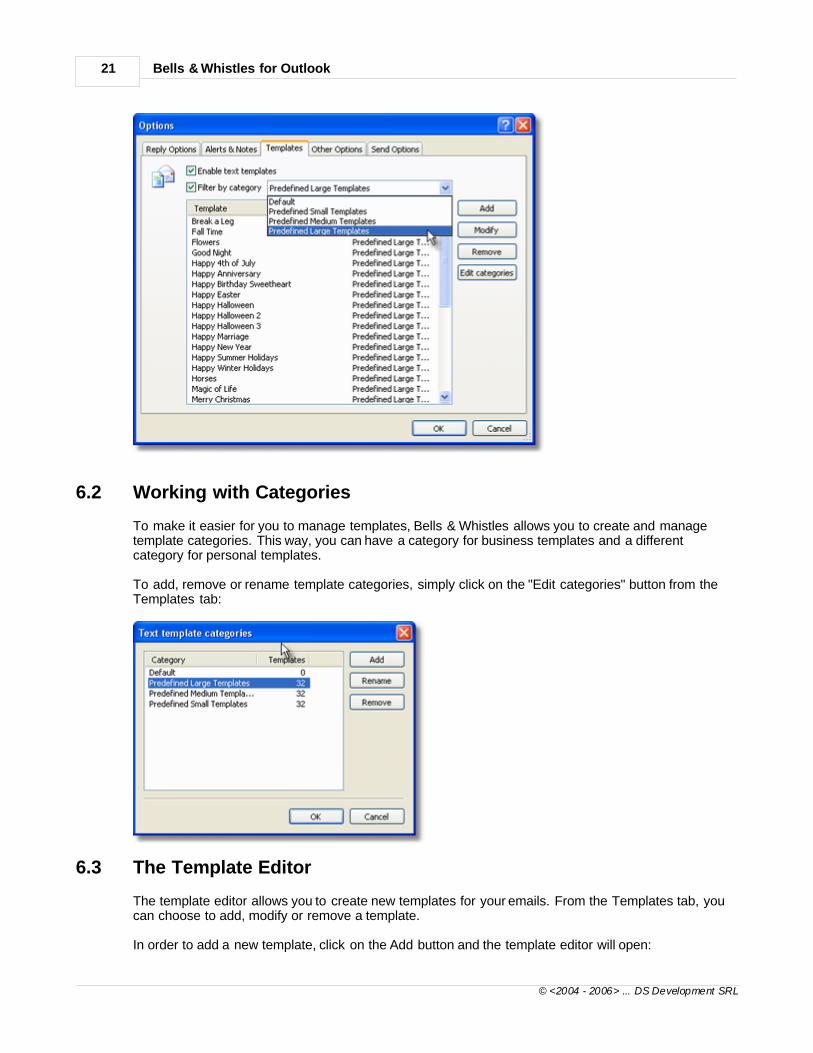
The Templates tab can be accessed from the Bells & Whistles options window . By default, when Bells& Whistles is installed, the templates feature is enabled. Also, starting with v3 of Bells & Whistles, theprogram is delivered with over 30 predefined templates that are surely handy for sending nice emails toyour friends & family. The predefined templates are grouped in three categories: small, medium andlarge templates.
Bells & Whistles for Outlook21
© <2004 - 2006> ... DS Development SRL
6.2 Working with Categories
To make it easier for you to manage templates, Bells & Whistles allows you to create and managetemplate categories. This way, you can have a category for business templates and a differentcategory for personal templates.
To add, remove or rename template categories, simply click on the "Edit categories" button from theTemplates tab:
6.3 The Template Editor
The template editor allows you to create new templates for your emails. From the Templates tab, youcan choose to add, modify or remove a template.
In order to add a new template, click on the Add button and the template editor will open:

Email Templates 22
© <2004 - 2006> ... DS Development SRL
The template editor interface depends on the template format type: HTML or plain text. We will furtherexplain the usability of the HTML templates editor, as the plain text editor is very simple & straightforward. Moreover, once you define a HTML template, you can easily copy it as a plain text template,by clicking on the "Copy to plain text format" button displayed just below the HTML text editor frame.
The HTML template editor pretty much ressembles the standard Microsoft editor for rich text or HTML,like Microsoft Word. The editor interface is composed by the following sections:· Category: using the provided dropdown list, you can choose the template category to which the new
template will belong to. To manage categories, you need to exit the templates editor and click on the"Edit categories" button located on the Templates tab;
· Name: to make it easy for you to remember what the template is about, you have to enter a name foreach template. These names will be visible on your Outlook email editor window, so you can quicklychoose and insert the desired template;
· Format: using the format option, you can switch between HTML and plain text templates;· Text: the text section is composed by several HTML editor functions, allowing you to specify the text
font, size, colour, other text properties, allignment, numbering, etc. You can also insert images into atext template and you can create hyperlinks over text, images or other HTML objects;
· Shortcut: using provided the dropdown list, you can choose a shortcut combination (Ctrl + Alt + anyletter/number) that will allow you to quickly insert a template into an email message, simply by usingthe shortcut keyboard combination;
Not only that you can define templates for the email body content, but you can also attach other emailproperties to each template. For example, you can configure a template so it will automaticall fill theTo, CC, BCC or Subject fields whenever the template is inserted.
When you are done editing a template, click on the OK button to save it. You can nowuse & insert the template into Outlook emails.

Bells & Whistles for Outlook23
© <2004 - 2006> ... DS Development SRL
6.4 Inserting a Template into Emails
Using Bells & Whistles for Outlook, you can create templates or use predefined templates for Outlookemails. To insert a template into an email message, simply edit the email as you used to do. While youare using Outlook to compose the email message, you will notice a new toolbar displayed on theOutlook editor window:
The templates toolbar has 5 functions:· using the first dropdown list, you can select the templates category from which you wish to insert a
template;· using the second dropdown list, you can browse the template names and select the desired template
to be inserted into the email content;· using the "New" button, you can start building a new template, without having to go to the main
Outlook window and enter the Bells & Whistles options window. This way, if you notice that a blockof text repeats itself as you are typing it, you can simply select it, copy to clipboard, then use the Newbutton to transform it into a text template for later use;
· using the Edit button, you can edit the selected template;· using the Insert button, you can insert the selected template into the email content. The template will
be inserted exactly in the position where the text cursor is positioned within your email text content.
7 Other Options
7.1 Add Date/Time Stamps
Adding date and time stamps to emails may seem obsolete, as your email client and mail servers areanyway adding these stamps to email headers during the email delivery process. However, for yourfurther email processing and handling needs, especially when dealing with public or shared mailfolders, Bells & Whistles allows you to automatically add date and time stamps on every outgoingemail.
To add these stamps, simply open the Bells & Whistles configuration screen (under Outlook -> Tools),go to the "Other Options" tab and enable the date and/or time stamp options.
Once these options are enabled, Bells & Whistles will auto-insert stamps within the email messagecontent, every time when you will send out a new email, reply or forward message.
To further customize the look of these stamps, you can choose the desired time & date format and youcan format the font style of these stamps.

Other Options 24
© <2004 - 2006> ... DS Development SRL
7.2 Using Email Tracking IDs
In order to increase your productivity while using Outlook, Bells & Whistles can add subject tracking ID-s to every outgoing email message. To enable this option, simply open the Bells & Whistlesconfiguration window, then go to the "Other Options" tab and mark the checkbox called "Add trackingID on every message thread":
By default, Bells & Whistles will start counting IDs from 100000, but you can choose to start countingfrom a different number, by inserting that number on the counter text box. You can also use a prefix forthe counter: this way, if you have multiple Bells & Whistles users, you can make a difference betweentracking ids issued by user A and user B, based on their prefix.
7.3 Send Again Options
The Send Again options are one of the brand new features of version 3 of Bells & Whistles for Outlook.This feature was requested by several Outlook users, in order to fill the following demand: if youcomposed and sent an Outlook email, how can you later re-edit it and send it again? Without this newfeature of Bells & Whistles, your only solution is create a new email, then copy the To, CC, BCCaddresses, the email subject and the email text of the sent email, then send it again.
Let's put it like this: it often happens you send an email, but the receiver claims the email was neverreceived. Using the Send Again feature, you can quickly resend the email, saving you from wasting alot of time copying the original email fields into a new email and resending it.
To enable the Send Again features, you need to check/mark the box for "Show Send Again options onSent Items".
When this option is enabled, you will notice a new toolbar menu displayed in your Sent Items folder:
To resend an email, simply select it from your Sent Items list, then click on the Send Again button (itwill automatically put the same email in the Outbox folder, ready to be sent by Outlook) or on the Editand Send button (it will open an email compose window with the email to be sent, allowing you to dochanges on the email content).
You can also access these two options by right clicking on the desired email message from the SentItems folder:

Bells & Whistles for Outlook25
© <2004 - 2006> ... DS Development SRL
8 Send Options
8.1 Send Options Tab
The Bells & Whistles Send Options are a group of functions designed for helping you to increase yourproductivity when sending Outlook email messages. The Send Options tab can be accessed from theBells & Whistles Options menu :
To activate the send options, please make sure that the checkbox "Enable send rules" is marked.Once this option is marked/enabled, you can add rules for sending Outlook emails.
8.2 Using Send Rules
By default, Bells & Whistles is delivered with a universal rule that is applied to all outgoing emails. Ifyou wish to exclude certain messages or to define other rules for certain messages, you can add anew rule (or a set of rules). Each new rule will be placed on top of existing rules, making it to applyfirstly. So, if two or more rules theoretically apply to a given email message, only the first rule that meetthe criteria will be used by Bells & Whistles. To change the priority of each rule, select the desired ruleand use the "Move up" and "Move down" buttons to move it on the rules list. The more on top it is

Send Options 26
© <2004 - 2006> ... DS Development SRL
placed, the more priority it has.
To add a new rule, click on the Add button located on the right side of the rules list:
Once you clicked to add a new rule, the rule options window will open, allowing you to specify therule criteria and actions.
8.3 Explaining Rule Actions
The Rule Actions window gives you two major functions:1. to specify the criteria based on which the rule actions will be activated;2. to specify the actions that are going to be performed by Outlook, when the rule criteria is met.

Bells & Whistles for Outlook27
© <2004 - 2006> ... DS Development SRL
The first half of the rule actions window allows you to define the rule criteria. You can enter a name foryour rule and you can specify when exactly the rule should be activated: when an email message isgoing to be sent (as a new mail, reply or forward) to a specified email address (or to a specified set ofaddresses).
The rule actions are diverse, as you can choose to:· automatically have Outlook to send the email message through a specified email account without
having you to always manually select the desired outgoing email account (so the rule action can beresumed as: "if I send an email to Mr. X, then always send it via by business email address);
· automatically add certain receipts (email addresses) to the outgoing email message (so the ruleaction can be resumed as: "if I send an email to Mr. X, then always add the following email addressto the To, CC or BCC fields");
· automatically attach a file to the outgoing email message - if this action is enabled, you have to usethe Browse button to specify the path to the desired file to be attached;
· automatically configure the outgoing email message so it is using a reply-to email address differentfrom the one that is used for sending the email (so the rule can be resumed as: "if I send an email toMr. X, then configure the message so Mr. X will reply to the following email address";
· archive attachments on outgoing email messages: if this action is enabled, Bells & Whistles forOutlook will always compress the attachments found in outgoing email messages. Practically, if youattach a BMP file to your message, the receiver will receive the message with a ZIP attachment,containing the BMP file. This way, you can significantly decrease the attachment size, making itfaster to be sent and delivered.
Mail merging from Outlook always use to be a pain, as you must deal with Outlook distribution lists,Outlook Contacts and MS-Word.
Bells & Whistles for Outlook makes it very easy, by converting the BCC field to a mail merge field. As a

Send Options 28
© <2004 - 2006> ... DS Development SRL
result, in order to avoid sendingemails with multiple CC, BCC or TO addresses and to quickly generate messages with unique TO
fields, you must enable the Bells &Whistles BCC mail merge option and Outlook will fire one email for each address added to the BCC
field of a composed message.
8.4 Send Again / Edit & Send Again
The Send Again options are one of the brand new features of version 3 of Bells & Whistles for Outlook.This feature was requested by several Outlook users, in order to fill the following demand: if youcomposed and sent an Outlook email, how can you later re-edit it and send it again? Without this newfeature of Bells & Whistles, your only solution is create a new email, then copy the To, CC, BCCaddresses, the email subject and the email text of the sent email, then send it again.
Let's put it like this: it often happens you send an email, but the receiver claims the email was neverreceived. Using the Send Again feature, you can quickly resend the email, saving you from wasting alot of time copying the original email fields into a new email and resending it.
To enable the Send Again features, you need to check/mark the box for "Show Send Again options onSent Items".
When this option is enabled, you will notice a new toolbar menu displayed in your Sent Items folder:
To resend an email, simply select it from your Sent Items list, then click on the Send Again button (itwill automatically put the same email in the Outbox folder, ready to be sent by Outlook) or on the Editand Send button (it will open an email compose window with the email to be sent, allowing you to dochanges on the email content).
You can also access these two options by right clicking on the desired email message from the SentItems folder:

Bells & Whistles for Outlook29
© <2004 - 2006> ... DS Development SRL
9 Attachment Blocking
By default, Microsoft Outlook will prevent you from opening certain file attachments that can damageyour computer, by containing malware code. However, sometimes you need to be able to handle theseattachments (for example Word or Excel files).
Bells & Whistles offers you the ability to easily decide which file attachments you can trust, bymanaging the file extensions for the blocked attachments. To customize the attachment blocking list,open the Bells & Whistles menu, then select the "Attachment Blocking" menu option:
For example, if you want to be able to receive and open EXE files, simply select the EXE extensionfrom the attachment extensions list and click on the "Remove" button.
For security reasons, you can password protect this list, so only you can decide which attachments totrust and which to block. To enable the password protection, simply mark the checkbox "Passwordprotect attachment blocking list" then insert your desired password. Next time when you will want toalter the list, you will be asked to input the password firstly.
If a file extensions was added/removed from the list, you will have to restart Outlook for thechanges to take effect.
10 Using Options per Outlook Profile
When Bells & Whistles is installed, by default it will save and use the same Bells & Whistles options forall Outlook profiles. So, even if you have 3 separate Outlook profiles, Bells & Whistles will use thesame settings for all your profiles.
However, you can switch Bells & Whistles to use separate settings for each Outlook profile. This way,for example you can have a set of text templates for an Outlook profile, and a different set of templates

Using Options per Outlook Profile 30
© <2004 - 2006> ... DS Development SRL
for another Outlook profile.
To enable this feature, simply go to the main menu of Bells & Whistles, then click on "Enable Optionsper Outlook Profile":
You will have to restart Outlook in order to allow Bells & Whistles to activate this feature.
11 Export & Import Settings
The Export & Import Settings feature is designed so you can move or copy Bells & Whistles settings,templates and rules from one computer to the other. So, if you defined a set of 50 templates on yourbusiness desktop computer, you can easily copy them to your notebook computer by exporting themfrom your desktop pc and importing them on your notebook. Bells & Whistles is saving your optionsand files as a single file with the BWO extension.
To backup or to move your Bells & Whistles settings from a computer, click on the Browse button fromthe Export frame, select the path where the BWO options file will be saved, then click on the Exportbutton:
To load or import an options file, click on the Browse button located on the Import section and specifythe path to the .BWO file. You can choose to import all settings or to import only certain settings: replyoptions, alerts & notes, other options, send options or templates. When you are ready to import the

Bells & Whistles for Outlook31
© <2004 - 2006> ... DS Development SRL
settings, click on the Import button.
Please note that, by importing a Bells & Whistles options file, you are overwrite your existingBells & Whistles options.
12 Using the Outlook Addin Utility
The Outlook Add-in Utility is a bonus utility of the Bells & Whistles package for Outlook and it can beinstalled by downloading and doing a complete installation of Bells & Whistles for Outlook. Onceinstalled, you can run it from the Bells & Whistles program group:
The goal of our Add-in Utility is to give you a user-friendly solution for handling Outlook Add-ins. Unfortunately, some 3rd party add-ins simply don't list themselves on the Outlook COMAdd-in section and so you would not be able to disable them using the standard Outlookinterface.
Also, if an Outlook Add-in is causing Outlook to fail while trying to start, then you will not be able to usethe Outlook builtin add-in manager.
Once loaded, the Bells & Whistles Outlook Add-in Utility will display a clear list of installed Outlook add-ins. This list contains both enabled and disabled add-ins. If the Outlook add-in status is "Active", itmeans the related add-in is enabled while you try to start Microsoft Outlook. If the status is set to"disabled", it means the related add-in is not going to be loaded when Microsoft Outlook starts.
The enable or to disable an Outlook add-in, simply select it from the add-ins list and click on the Enableor Disable button. You will notice that its status will change. To apply this change, you will have torestart Microsoft Outlook.

Using the Outlook Addin Utility 32
© <2004 - 2006> ... DS Development SRL
System Requirements: Microsoft Office Outlook 2000, 2002 (XP), 2003 / Outlook 2000, 2002 (XP),2003.
13 Checking for Product Updates
Bells & Whistles v3 comes with its own live update module, allowing you to easily check for updates onthe program. By default, the program will check for updates weekly, but you can change this settingand you can manually check for updates whenever you want. The "Check for Updates" function islocated on the Bells & Whistles menu displayed on the main toolbar area of Outlook:
If an update is found on our server, the program will ask you if you want to download & install theupdate. Once the download is completed (a download icon is displayed on your systray icons area,showing you the download progress), it will automatically start the install process. Please make sureOutlook is not running while performing the update installation.
· If you install an update on a registered version of Bells & Whistles and if it is a minor update (likeupdating from v3.01 to v3.2), the licensing engine should automatically find and use the existinglicense, without asking you to re-activate your license.
· If you install an update on a non-registered (trial) version of Bells & Whistles or if you are performinga major upgrade (like upgrading from v1 to v3), then the licensing engine will prompt you to try thenew version, to buy a license or to activate it. If you consider that the Try/Buy/Activate screen isdisplayed by mistake, then please contact us with your license details and we will promptly assist

Bells & Whistles for Outlook33
© <2004 - 2006> ... DS Development SRL
you.
14 Frequently Asked Questions
14.1 How Do I Print This Help File?
We do not recommend that you print directly from the Microsoft help viewer because the quality ispoor.
You can also download and print the entire online help in PDF format from here:http://www.emailaddressmanager.com/helpdesk.html
14.2 Does It Work with Outlook Express?
Bells & Whistles is designed for Microsoft Outlook and it functions as an add-in for Outlook. As aresult, Bells & Whistles does not support Outlook Express.
14.3 Does It Work with Any MS-Office Regional Version?
Bells & Whistles is designed for any Microsoft Outlook regional (language) version, including but notlimited to the English, German, Dutch, Italian, French, Russian, Romanian versions.
14.4 Can I Use It with MS-Exchange?
Bells & Whistles is designed to work as an add-in for Microsoft Outlook. If you are using MicrosoftOutlook as a client for Microsoft Exchange, then Bells & Whistles will work just fine.
14.5 Outlook Disabled Bells & Whistles, What Now?
If, for some reasons, Microsoft Outlook disabled the Bells & Whistles add-in, you can always enable itback.
To enable it, go to the Outlook Help menu, then click on the option "About Microsoft Office Outlook":
The Microsoft Outlook About window will open: from the bottom section, click on the "Disabled Items..." button:

Frequently Asked Questions 34
© <2004 - 2006> ... DS Development SRL
Then, select Bells & Whistles from that list and click on the "Enable " button. You will have to restartOutlook in order to apply the changes.
14.6 Why JPEG or RAR Files Are Not Compressed?
The attachment compression feature is using the ZIP archiving technology to compress attached fileson outgoing emails. To avoid unnecessary compressions, Bells & Whistles is ignoring files for whichthe compression would not decrease the file size, such as Rar, JPEG, PNG or already zipped files.
14.7 Any Known Conflicts with Other Outlook Addins?
As far as we can tell, there are no known conflicts with 3rd party Outlook addins, as long as theseaddins do not seriously change the interface functionality of Microsoft Outlook.
Also, no problems were found when testing on Windows systems running:- any popular antivirus software;- any popular anti-spy or anti-spam software.
For further information, please check our dedicated forum topic on this subject. Thank you.

Index- A -actions 26
add 25
add date and time stamps 23
Add-in 31
Add-in Utility 31
Address Collector 4
alerts 19
Alerts&Notes 17
archive 26
archive attachments 26
archiving technology 34
attachment 34
attachment alerts 19
Attachment Blocking 29
attachment compression 34
attachments 29
Auto Reply 4
auto-insert stamps 23
automatically add certain receipts 26
automatically attach a file 26
automatically configure 26
Automatically put people I reply 16
Auto-number 14
- B -backup 30
Basics 10
Bells & Whistles 9
Benefits 7
blocked attachments 29
blocks of text 20
build your address book 16
Buy 5
- C -Categories 21
Check for Updates 32
compress 34
Conflicts 34
Contact 3
Contacts folder 16
counter text box 24
criteria 26
- D -Date/Time Stamps 23
default email format 15
disabled 33
Disabled Items 33
Discounts 6
DS Development 3
Dutch 33
- E -Edit and Send 24
Edit categories 21
Email Note 17
email notes 17
email signature 16
Email Tracking IDs 24
enable 33
Enable email notes 17
Enable Options 29
Enable send rules 25
English 33
Exchange 33
Export 30
- F -file attachments 14, 29
file extensions 29
- G -German 33
greetings settings 13
- I -ID 24
Import 30
Include attachments from original message 14
Bells & Whistles for Outlook35
© <2004 - 2006> ... DS Development SRL

Insert 23
insert a template 23
Insert signature 16
install 9
installation 9
Italian 33
- J -JPEG 34
- L -Licence Holder Name 8
license 5, 8
license activation 8
license activation errors 8
list of original attachments 14
load 30
- M -Mail Merge 4
Microsoft Exchange 33
Microsoft Outlook 33
move 30
- N -new rule 25
new template 21
new templates 21
Notes 17
Notes column 17
- O -Options menu 10
Outlook 4
Outlook Add-in 31
Outlook address book 16
Outlook Express 33
Outlook Profile 29
Outlook profiles 29
- P -Payment 6
PNG 34
predefined templates 20
prefix 24
print 33
problems 34
programming services 3
Protection 7
purchase 5
Purchase Reference 8
- R -Refund 7
re-install 8
Reply Format 15
Reply Greetings 13
reply number 14
Reply Options 11
Reply Profiles 12
reply subject counter 14
Requirements 9
Rule Actions 26
- S -Security 7
Send Again 24
Send Options 25
Send Options tab 25
Send Rules 25
Sent Items 24
service support 3
Settings 30
Show Send Again 24
signature editor 16
signatures 16
Signatures feature 16
specified email account 26
subject tracking 24
- T -template 23
Index 36
© <2004 - 2006> ... DS Development SRL

template categories 21
template editor 21
Templates 20
Templates feature 20
Templates tab 20
time stamp 23
tracking ID 24
- U -uninstall 11
Uninstalling 11
update 9
updates 7, 9, 32
Upgrades 7
User Interface 10
- V -Volume 6
- Z -ZIP 34
Bells & Whistles for Outlook37
© <2004 - 2006> ... DS Development SRL