Embed Size (px)
Citation preview
RenWeb Training Creating Your Classroom Website
October 2013

RenWeb Training – Table of Contents
2
RenWeb Training Manual
Table of Contents
Ren –Web Survey 3
Pre-Training Handout: Saving a Document as a PDF 4
Lesson 1: Adding Homework & Web Document 6
Handout 1A: Adding Homework & Web Document 8
Lesson 2: Creating Announcements 13
Handout 2A: Creating Announcements 15
Lesson 3: Creating Calendar Events 18
Handout 3A: Creating Calendar Events 19
Lesson 4: Placing Resources or Web Documents onto the Class Website 21
Handout 4A: Creating Resource Links 23
Handout 4B: Uploading Web Documents 26
Handout 4C: uploading Web Documents with Screenshots 29
Lesson 5: Placing Pictures onto Your Class Website 32
Handout 5A:Uploading Picture Gallery 33
Handout 5B: Uploading a Picture with Screenshots 36
Handout 6A: Parent Web Views 39
Post-Training Survey 43

RenWeb Training – RenWeb Survey
3
RenWeb Survey
Based on you knowledge of RenWeb right now, please answer each of the following questions.
1. What do you feel most comfortable using on RenWeb?
2. What do you feel least comfortable using on RenWeb?
3. What areas of RenWeb do you feel you need more instruction on to use effectively?

RenWeb Training – Pre-Training Handout
4
Pre-Training Handout: Saving a Document as a PDF
The steps below are for saving a document as a PDF in Microsoft Word, but the steps will work
in any word processing program.
1. Open the document in Microsoft Word.
2. Go to the file tab in the upper right-hand corner.
3. Select Save As
File Tab
Save As

RenWeb Training – Pre-Training Handout
5
4. After selecting Save As, a dialogue box will popup. Type a file name and then press the
down arrow in the Save as type box.
5. On the drop down menu that appears, select PDF and then select save.
6. You have now successfully saved a document as a PDF.
1. Insert file
name here 2. Press this
down arrow
1. Select PDF
2. Select Save

RenWeb Training – Lesson 1
6
Lesson 1: Adding Homework Assignment & Web Document
Objectives:
Teachers will be able to add homework assignments to their class website.
Teachers will be able to navigate to the Faculty Web to add homework assignments to
their class website.
Teachers will be able to add a Web Document that is linked to an added homework
assignment.
Materials:
1. Laptop
2. Document that has been saved as a PDF that is linked to a homework assignment.
Resources:
1. Handout about Adding Homework Assignments and Web Documents section on the
faculty web page.
2. http://www.renweb.com/robohelp/sg1116dgh/renweb.htm (Follow these links once on
the help page: Home > Faculty > Managing Your Classroom > Create Lesson Plans)
Content:
1. Please have out the homework assignments that you have for your class that can be added
to your class website.
2. Login to RenWeb and access the Faculty Web Homepage. The directions for adding
homework assignments can be found in Handout 1A.
3. Click on the Lesson Plan button. (Please note that we will not be using the lesson plan
box. The homework assignment box will only be used on this page.)
4. Select the class for which you will be adding the homework assignment.
5. Make sure that the correct date is selected on the top of the window.
6. Click inside the homework box and type the assignment. The homework assignment
should be one that has a document linked to it (worksheet, note sheet, etc.).
7. Once the homework assignment has been added, be sure to save the lesson plan at the
bottom of the window.
8. To add the document to the assignment click on the Details button at the upper right hand
corner above the dated homework box.
9. In the Details box, find the Documents box and click on the My Web Documents.
10. Click on Add Web Document. Click Browse button and locate the document on your
hard and then click Open.
11. Click Submit to add the document to the web.

RenWeb Training – Lesson 1
7
12. Once the document has been successfully uploaded, select the document and click the
OK button.
13. The document will appear in the Documents box. Click Save on the left-hand side of the
page.
14. Click Back.
15. Click Web Preview button to see what parent will see on the site. Handout 6A can be
followed to navigate the Parents Web Page.
16. Add another assignment to a class on your own.
17. When you have added all of your assignments you can logout of RenWeb.
Evaluation:
1. As teachers are putting their homework assignments on the site, walk around the room to
see that steps are being followed.
2. As teachers are adding the document to the homework assignment on the site, walk
around the room to see that steps are being followed.
3. Teachers will add another homework assignment to their class site on their own. Walk
around to check for completion of task.

RenWeb Training – Handout 1A
8
Handout 1A: Adding Homework Assignment & Web Document
Login into RenWeb and access the Faculty Web page.
1. Click on Lesson Plan
2. Select the class you wish to add a homework assignment for. Then in the boxes for
homework, enter the assignment for the specific day. Be sure the correct date is selected.
Homework assignments can be entered for the entire week.
Click on
Lesson Plan
Tab
1. Select Class
3. Enter
assignments in the
column for the
specific date. 2. Be sure the
correct date is
selected.

RenWeb Training – Handout 1A
9
3. If there is a worksheet that goes with the assignment, this worksheet can be uploaded to
website. Click on Details above the homework box with the assignment.
4. Click on My Web Documents Button.
Click here to add a
document to the
assignment.
Click on My Web Documents

RenWeb Training – Handout 1A
10
5. Click on Add New Document.
6. Click on Browse to find the document on your computer’s hard drive.
Click on Add Web Document
Click on Browse

RenWeb Training – Handout 1A
11
7. Find the document on your computer’s hard drive. Select the document and then select
open.
8. Click on Submit. Once the document has been uploaded you will get a successful upload
message. Then close out of window.
1. Select the document
2. Click on Open
1. Click on Submit
2. Successful upload
message will appear
3. Click on X to
close out window

RenWeb Training – Handout 1A
12
9. Select correct document from list (if this is your first upload, you will only have one
document in the window). Click OK.
10. Your document will appear in the Documents box. Click on Save. Once you have seen
the message that your lesson plan has been saved successfully then click on Back.
11. Repeat steps 3 through 11 if you need to add an assignment to another class. If you do not
need to add another assignment, click on Parents Web to see what the parent will see.
Follow Parents’ Web View Handout. Then logout.
1. Select document
2. Click OK
1. Document will
appear in My Web
Document
2. Click Save
3. Click Back

RenWeb Training – Lesson 2
13
Lesson 2: Creating Announcements
Objectives:
Teachers will be able to navigate to the Faculty Web to add announcements to their class
website.
Teachers will be able to add announcements to individual classes or general
announcements meant for general information for their homerooms.
Materials:
Laptop
Information for what announcements will be added to the classroom site.
Resources:
Handout about accessing announcements section on faculty web page
http://www.renweb.com/robohelp/sg1116dgh/renweb.htm (Follow these links once on
the help page: Faculty > Communications > Announcements)
Introduction:
1. Discuss what will be covered today. Discuss the following questions: What items do you
want posted on the website? What do you want parents to have access to on your class
site?
2. Most of this information was covered in the survey that was completed before the
training but it allows them to discuss what they want out of this training and may bring
up other concerns not thought of during the completion of the survey.
3. Explain that we are going to start with adding announcements to classroom sites and that
there are two different types of announcements that can be placed on the site. One type of
announcements are specific to a particular class. For example on Thursday you will need
to bring an apple for science class. This announcement would go on the science class
page. The second type of announcement is a general announcement that applies to your
homeroom class. This would include an announcement about field trip forms, or hot
lunch forms are due today or tomorrow is red day.
Content:
1. Please have the announcement examples out that you were supposed to have brought
with you to this training.
2. Login to RenWeb and access the faculty web. Once the faculty web has been accessed,
follow the directions on Handout 2A to access the web configuration tab. This is the tab
we will continually come back to throughout the training.

RenWeb Training – Lesson 2
14
3. Creating announcement steps are on handout 1 but we will go through these steps
together.
a. Select the class that you wish to create the announcement for. If the
announcement not class specific, choose your homeroom.
b. Select the date that you wish the announcement to begin to appear and the date
when it can come off of your class site. (Note: This would be the day after the
event has occurred)
c. Type in a title for the announcement (Supplies, Field Trip, Color Day, etc) and
then in the larger box type in the needed information.
d. Click save. The announcement will appear on the left-hand side of the screen.
e. If changes need to be made to the announcement, double click on the
announcement from the left-hand side of the screen.
f. Be sure to always click save.
g. Click on Parents Web Tab on the faculty Web homepage to see how
announcement will appear for parents. See Handout 6A for the steps and what
each screen should look like in the Parents Web.
Evaluation:
As teachers are putting their first announcement up, walk around the room to see that
steps are being followed.
Teachers will place a second announcement up on their class site on their own. Walk
around to check for completion of task.

RenWeb Training – Handout 2A
15
Handout 2A: Creating Announcements
1. Login into RenWeb and access the FacultyWeb homepage.
2. From the Main Menu, click Web Configuration. Click the Announcements button.
The Web Configuration (Announcements) screen displays.
3. From the Class drop-down list, select the class for which the announcement is
intended.
FacultyWeb Version Appearance

RenWeb Training – Handout 2A
16
Creating Announcements
1. Select the Begin Date for the announcement. This is the first date the announcement is
displayed.
2. Select the End Date for the announcement. This is the last date the announcement is
displayed.
3. Type a title for the announcement.
4. Enter any additional information in the larger text box below the title.
5. Select the Global option to make the announcement viewable by all classes taught by
the teacher.
6. Click Save.
The announcement displays in the announcement list on the left side of the Web
Configuration screen.
Editing Announcements
1. Navigate to the Web Configuration (Announcements) screen.
2. Double-click the announcement in the left column to edit.
The announcement information displays in the text fields on the right.
3. Edit the announcement information.
4. Click Save.

RenWeb Training – Handout 2A
17
Deleting Announcements
1. Navigate to the Web Configuration (Announcements) screen.
2. Double-click the announcement in the left column to delete.
The announcement information displays in the text fields on the right.
3. Click Delete.

RenWeb Training – Lesson 3
18
Lesson 3: Placing Calendar Events on Class Website
Objectives:
Teachers will be able to navigate to the Faculty Web to add calendar events to their class
website.
Teachers will be able to add calendar events to individual classes or to all classes taught
by the teacher.
Materials:
Laptop
Information for important dates that will be added to the classroom site.
Resources:
Handout about calendar events section on faculty web page
http://www.renweb.com/robohelp/sg1116dgh/renweb.htm (Follow these links once on
the help page: Faculty > Communications > Calendar Events)
Content:
1. Teachers will return to the Faculty Web homepage to access the Calendar Events tab
under the Web Configuration. This is the same start as in Lesson 2.
2. Handout 3A contains the step-by-step directions. Select the class that the calendar
date should appear. For primary grades this should be in your homeroom class.
3. Select the date for the calendar event.
4. Type the information for the date selected.
5. If the date is something that applies to all classes, check the global box.
6. Click Save.
7. To change or alter the date if a mistake has been made, double click on the event in
the left-hand side of the calendar events window. The event will appear in the right-
hand side of the window and can then be altered.
8. Click on Parents Web Tab on the Faculty Web homepage to see how calendar
event(s) will appear for parents. See Handout 6A for the steps and what each screen
should look like in the Parents Web.
Evaluation:
As teachers are putting their first calendar event on the site, walk around the room to see
that steps are being followed.
Teachers will place a second calendar event up on their class site on their own. Walk
around to check for completion of task.

RenWeb Training – Handout 3A
19
Handout 3A: Creating Calendar Events
1. Login into RenWeb and access the FacultyWeb homepage.
2. From the Main Menu, click Web Configuration.
3. Click the Calendar button. The Web Configuration (Calendar) screen displays.
4. From the Class drop-down list, select the class for which the calendar item is intended.
FacultyWeb Version Appearance

RenWeb Training – Handout 3A
20
Creating Calendar Events
1. From the Date drop-down list, select the date of the event.
2. In the title text field below Date, enter a title for the event.
3. Enter any additional information in the larger text box below the title.
4. Select the Global option to make the event viewable by all classes taught by the teacher.
5. Click Save.
The event appears in the calendar list (left) of the Calendar screen.
Editing Calendar Events
1. Navigate to the Calendar screen.
2. Double-click the event in the left column.
The event information appears in the text fields in the right column.
3. Edit the event information.
4. Click Save.
Delete Calendar Events
1. Navigate to the Calendar screen.
2. Double-click the event in the left column.
The event information appears in the text fields in the right column.
3. Click Delete. It is not necessary to click the Save button.
RenWeb Training – Lesson 4
21
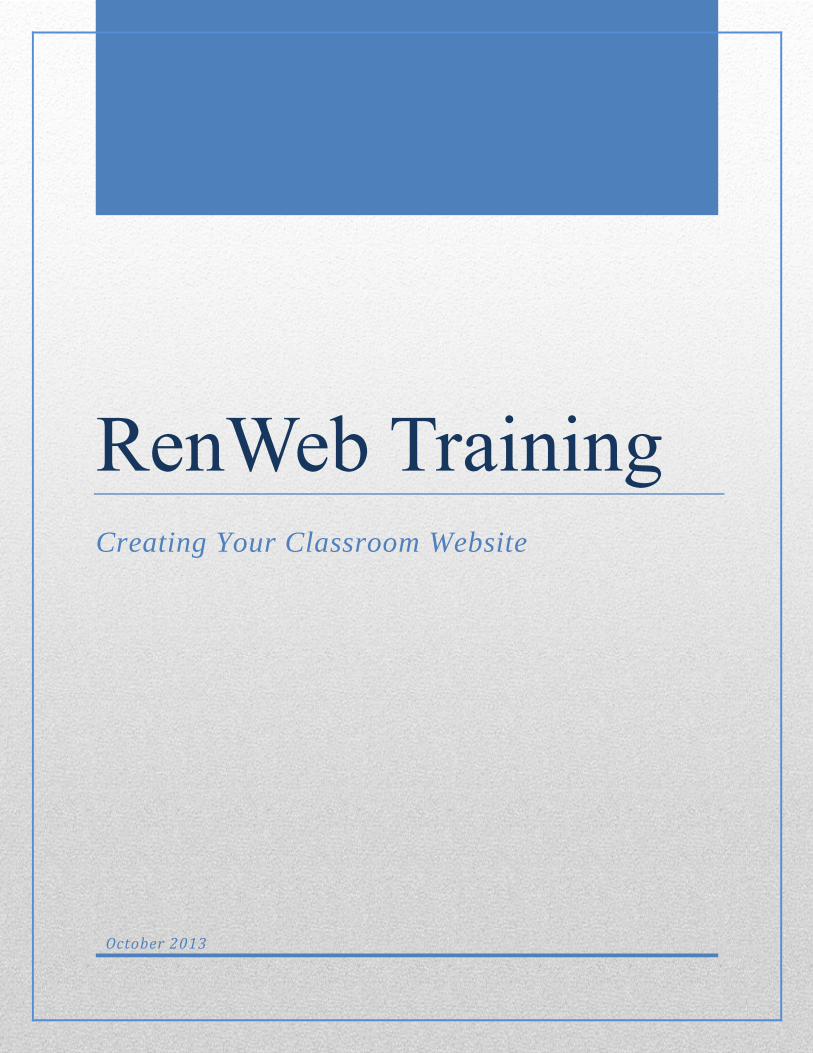
Lesson 4: Placing Resources or Web Documents onto the Class Website
Objectives:
Teachers will be able to explain the difference between a Resource and a Web Document.
Teachers will be able to navigate to the Faculty Web to add Resources or Web
Documents to their class website.
Teachers will be able to add Resources or Web Documents to individual classes or to all
classes taught by the teacher.
Materials:
Laptop
Documents that have been previously saved as a PDF that will be added to the
classroom site.
Resources:
Handout about accessing Resources and Web Documents section on the faculty web
page.
http://www.renweb.com/robohelp/sg1116dgh/renweb.htm (Follow these links once on
the help page: Faculty > Communications > Resources)
http://www.renweb.com/robohelp/sg1116dgh/renweb.htm (Follow these links once on
the help page: Faculty > Communications > Web Documents)
Introduction:
1. What is the difference between a Resource and a Web Document? Discussion will be
had that a resource is a website that you would like the class to go to practice skills or to
learn about a topic being covered in class. A web document is a PDF, Word, Excel,
PowerPoint, etc. that you have created on your computer and want it made available to
your students.
Content:
1. Adding a resource link will be looked at first. At this time none of the teachers have links
that they want made available to their class. We will show how it is done with a generic
link to a math website. Once they have a link they want to add they can follow the
handout directions and seek out help if needed.
2. Give out Handout 4A which will cover the steps for adding a resource to the class
website.
3. Teachers will return to the Faculty Web homepage to access the Resource tab under the
Web Configuration. This is the same start as in Lesson 2 and 3.
4. Select the class that we would like the link associated with. Since we are going to
practice with a math link, please select your math class.

RenWeb Training – Lesson 4
22
5. In the Resource Window the first box is “Sort Order.” Since this is the first link we are
adding, there is no sort order. As you add more links to the list you can place them in a
specific order by placing a number in the “Sort Order” box.
6. In the description box you will write a brief statement about the website that we are
linking to. In this case let’s put, “A math site to help students work on their math skills.”
7. In the URL box we are going to put the website: http://www.aplusmath.com/.
8. Since this site is only dealing with the subject of math we will not check the global box.
If the website covered more than one subject you can check the global box and it will
show up for every class the teacher teaches.
9. Be sure to click save and then test the link just to be sure the URL is correct.
10. To see how it will look to the parents, click on the Parent Web and click on the resource
tab. See Handout 6A for more detailed directions On the Parent’s Web view.
11. After the resource has been entered, web documents will now be looked at and added to
the class site. Every teacher should have brought at least two documents to load to their
site. One should be their class newsletter.
12. Return back to the Faculty Web homepage and click on Web Configuration and then
Web Documents.
13. We will first add your class newsletter and then have each teacher upload a different
document on their own. Handout 4B is a step-by-step guide to what completed in the
training class.
14. Since the newsletter is going to be uploaded to the class site, everyone should select their
homeroom class.
15. Near the bottom of the window, click on the button that says “Add New Document.”
Handout 4C will show screenshots for uploading a new document to the site.
16. Browse your computer for the specific document to be uploaded. Click Open and then
Submit. A successfully uploaded message will appear. Once this message comes up,
close out of the browse window.
17. Double Click on the newly uploaded document.
18. Add a caption, a begin date and an end date for this document.
19. Click Save and then Preview to see the uploaded document.
20. To see the page as the parents will see it, click on Parents Web and follow Handout 6A.
Evaluation:
As teachers are putting the resource up on the site, walk around the room to see that steps
are being followed.
As teachers are putting the web document up on the site, walk around the room to see that
steps are being followed.
Teachers will upload a second web document up on their class site on their own. Walk
around to check for completion of task.

RenWeb Training – Handout 4A
23
Handout 4A: Creating Resource Links
1. Login into RenWeb and access the FacultyWeb homepage.
2. From the Main Menu, click Web Configuration.
3. Click the Resources button. The Web Configuration (Resources) screen displays.
4. From the Class drop-down list, select the class for which the resource link is intended.
FacultyWeb Version Appearance
Adding a Class Resource Link

RenWeb Training – Handout 4A
24
1. From the Class drop-down list (top left), select the class.
2. Click New.
3. In the Sort Order field, insert the order that this link should have in the list of
Resources.
Order defines the order in which the resources are displayed on the web page.
4. In the Description field, type a description of the link.
5. In the URL field, type the website address following the address convention shown
above the field.
Example http://www.yahoo.com
6. Click the Global check box to make the resource viewable by all classes taught by
you.
7. Click Save. Recommended: Test the resource link.
Testing a Class Resource Link
1. Navigate to the Resources screen.
2. Click the web site listing you want to test (left).
3. Click Test Link.
If the link is entered correctly, the web site opens in a new browser window.
4. Close the newly opened browser window.
5. Click Save.
Editing a Class Resource Link
1. Navigate to the Resources screen.

RenWeb Training – Handout 4A
25
2. Double-click the web site listing to edit (left). The web site information displays in the
text fields on the right.
3. Edit the information.
4. Click Save.
Deleting a Class Resource Link
1. Navigate to the Resources screen.
2. Double-click the web site listing to delete (left).
The web site information displays in the text fields on the right.
3. Click Delete. Confirm the deletion.
4. Click Save.

RenWeb Training – Handout 4B
26
Handout 4B: Uploading Web Documents
1. Login into RenWeb and access the FacultyWeb homepage.
2. From the Main Menu, click Web Configuration.
3. Click the Web Documents button. The Web Configuration (Web Documents) screen
displays.
4. From the Class drop-down list, select the class for which the calendar is intended.
FacultyWeb Version Appearance

RenWeb Training – Handout 4B
27
Uploading a Web Document
1. Click New (right).
2. Click Add New Document to access the folders containing your documents on your
computer.
The Open folder directories dialog box displays.
3. From the displayed folder directory, select the folder and the document to upload.
4. Click Open, then click the button to exit the screen.
The file name of the uploaded document appears in the FileName grid.
5. Double-click the recently added file name in the FileName grid.
The file name displays in the File Name text box.
6. In the Caption text box, type a title describing the document.
7. The Document ID is automatically assigned to each uploaded document.
8. From the Begin Date and End Date drop-down lists, select the time frame to make the
document available for download.
9. Select the Global option to make the document available to all classes you teach.
10. Click Save to save the document.
11. To preview a document download screen, double-click the file name. Click Preview.
12. Click Save.

RenWeb Training – Handout 4B
28
Delete a Web Document
1. Navigate to the Web Documents screen.
2. Double-click the document to be deleted (left).
The document information appears in the text boxes to the right of the screen.
3. Click Delete. Confirm the deletion.
Updated 4/17/2012

RenWeb Training – Handout 4C
29
Handout 4C: Uploading a Web Document with Screenshots
1. Click Add a New Document.
2. Click Browse to access the folders containing your documents on your computer.
3. Find the document that you wish to upload to your site. Then Click on Open.
Click on Browse Button
1. Find your document
2. Click on Open

RenWeb Training – Handout 4C
30
4. Click on Submit.
5. You will get the following message when your document has been successfully uploaded.
Click on Submit.
Successful upload
message

RenWeb Training – Handout 4C
31
6. Exit window and double click the document that was just added. You will then add a tile
in the Caption box. The Document ID is automatically assigned to the document. From
the Begin Date and End Date lists, select the dates that you would like this document
available to your parents. Click Global if this document applies to all classes that are
taught. Click Save. Click Preview to see the document.
1. Double Click the
document
2. Type a description
of document
3. Document ID
will already be in
box
4. Select the begin
and end date from
the drop-down list
5. Click only if you
want this document
to appear on every
class
6. Click Save
7. Click
Preview

RenWeb Training – Lesson 5
32
Lesson 5: Placing Pictures onto the Class Website
Objectives:
Teachers will be able to navigate to the Faculty Web to add pictures to their class
website.
Teachers will be able to add Pictures to individual classes or to all classes taught by the
teacher.
Materials:
Laptop
Pictures of their class that are loaded on their computers
Resources:
Handout about accessing Picture Gallery section on the Faculty Web page.
http://www.renweb.com/robohelp/sg1116dgh/renweb.htm (Follow these links once on
the help page: Faculty > Communications > Picture Gallery)
Content
1. Give out Handout 5A which will cover the steps for adding pictures to the class website.
2. Teachers will return to the Faculty Web homepage to access the Resource tab under the
Web Configuration. This is the same start as in Lesson 2 through 4.
3. For primary grades (pre-k through 5th
) pictures should be attached to the homeroom class.
In the upper left-hand corner of window, select the homeroom class.
4. In the right-hand side of the window click on the “Get Picture” button to load picture
onto website. Handout 5B will show screenshots for uploading a picture to the site.
5. Browse the computer for the specific picture to be uploaded. Click Open and then
Submit. A successfully uploaded message will appear. Once this message comes up,
close out the browse window. (Note: It may take up to 1 minute for this message to
appear.)
6. Double Click on the newly uploaded picture.
7. Add a caption, the location, and group for the picture. (Caption- brief description,
location – cover or gallery, and group – what group or album it belongs to)
8. Click Save and the Preview to see the uploaded picture.
Evaluation:
As teachers are putting the picture up on the site, walk around the room to see that steps
are being followed.
Teachers will upload a second picture to their class site on their own. Walk around to
check for completion of task.

RenWeb Training – Handout 5A
33
Handout 5A: Uploading Picture Gallery
1. Login into RenWeb and access the FacultyWeb homepage.
2. From the Main Menu, click Web Configuration.
3. Click Picture Gallery. The Web Configuration (Picture Gallery) screen displays.
4. From the Class drop-down list, select the class for which the picture is intended.
FacultyWeb Version Appearance

RenWeb Training – Handout 5A
34
Upload a Picture
1. From the Picture Gallery screen, click New (top right).
2. Click Get Picture to access the folders on your computer that contain your pictures.
The folder directory dialog box displays.
3. From the folder directory, select the folder and picture to upload.
4. Click Open.
5. Click Submit. Click to exit after you receive the Successfully Uploaded message.
The file name displays in the picture file list (bottom).
6. From the picture file list (bottom), double click the uploaded file name.
The picture file name displays in the text box below Picture Properties (top).
7. In the Caption text box, type a title for that picture.
The Picture ID and Staff ID are automatically assigned to each uploaded picture.
8. From the Location drop-down box, select the location where the photograph will be
displayed.
a. Cover The image displays on the front page of the Classroom web site,
below the banner and above Announcements.
b. Gallery – The image displays in the selected gallery.
9. In the Grouping text box, select the group, or album, to which the photograph
belongs, or type a name in (i.e., athletics, student life, our graduates, etc.).
10. If you want to hyperlink the picture to another web site, type the URL in the
Hyperlink text box.
11. If the picture should be viewable by all classes, check the Global check box or leave

RenWeb Training – Handout 5A
35
blank for the current class only.
12. Click Save to upload the image.
Notes:
Often images scanned or taken from digital cameras are saved in a very large format.
Uploading large photographs can be time-consuming, and use a great deal of space on the
server. It is better to load the images into photo editing software (Paint Shop Pro, Adobe
Photoshop, Corel, etc.) and reduce them in size before uploading them to your web site.
For ease of viewing and uploading, horizontal photos will be automatically re-sized to
have a width of 400 pixels and vertical photographs resized to have a height of 400
pixels.
Edit a Picture
1. Navigate to the Picture Gallery screen.
2. From the picture file name list (bottom), double-click the file name to edit.
3. Edit the information.
4. Click Save to save your changes.
Delete a Picture
1. Navigate to the Picture Gallery screen.
2. From the picture file name list (bottom), double-click the file name to delete.
3. Click Delete. Confirm the deletion.
Updated 5/8/2012

RenWeb Training – Handout 6A
36
Handout 5B: Uploading a Picture with Screenshots
1. Click Get Picture.
2. Click Browse to access the folders containing your documents on your computer.
3. Find the picture that you wish to upload to your site. Then Click on Open.
Click on Browse Button
1. Find your picture
2. Click on Open

RenWeb Training – Handout 6A
37
4. Click on Submit.
5. You will get the following message when your picture has been successfully uploaded.
Once this message appears, close out the window (hit the x in the top right corner of
window)
Click on Submit
Successful upload
message

RenWeb Training – Handout 6A
38
6. Double click the document that was just added. You will then add a tile in the Caption
box. The Photo ID and Staff ID are automatically assigned to the document. From the
Location list select either cover or gallery. Cover means it will be on the front page of
the website and gallery means it will display within the gallery you select to your parents.
In Grouping, select the group the picture belongs or type the title for the new group you
are creating (Apple Orchard, Chapel, etc.). Click Global if this document applies to all
classes that are taught. Click Save. Click Preview to see the document.
1. Double click photo
2. Type a
description of
photo
3. Photo ID
and Staff ID
will already
be in box.
4. Select Cover or
Gallery for location
of picture
5. Select previous
name or add title for
picture group
6. Click Save
7. Click
Preview

RenWeb Training – Handout 6A
39
Handout 6A: Parents Web Views
1. Click on Parents Web from the Faculty Web homepage.
2. Click on Classes tab.
Click here for
Parents Web
Click here for
Classes tab

RenWeb Training – Handout 6A
40
3. All classes that you teach will appear. Click on your homeroom class (or any class that
you have added material to).
4. Once you have clicked on your homeroom you will be able to see any announcements or
calendar events that have been added.
Announcements are shown here. Calendar events are shown
here.

RenWeb Training – Handout 6A
41
5. By clicking on the Homework tab and Resources tab, you will be able to see the
homework that has been added and the documents and web links that you have added to
your site. The lesson plan tab will show any worksheets that are associated with a
homework assignment. We do not use the syllabus tab.
Homework tab will appear as seen below.
Homework Assignment Tab
Resource Tab
Lesson Plan Tab

RenWeb Training – Handout 6A
42
Resource tab will appear as seen below.
If a document has been added to a homework assignment it will be found in the
lesson plan tab as shown below.
This is a web document that
has been added for this
class.
This is a web document is
associated with an added
homework assignment.
RenWeb Training – Post-Training Survey
43
Post-Training Survey Please rate your confidence on the skills presented during this training session on a scale of 1
through 5 (5 being very confident and 1 being not confident at all)
1. Adding homework to your classroom website
1 2 3 4 5
2. Adding a web document to a homework assignment
1 2 3 4 5
3. Adding announcements to your classroom website
1 2 3 4 5
4. Adding calendar events to your classroom website
1 2 3 4 5
5. Adding resources to your classroom website
1 2 3 4 5
6. Adding web documents to your classroom website
1 2 3 4 5
7. Adding a picture gallery to your classroom website
1 2 3 4 5

RenWeb Training – Post-Training Survey
44
Strongly
Agree
Agree Neutral Disagree Strongly
Disagree
The training met my expectations.
The topics covered were relevant
to me.
The content was well organized
and easy to follow.
The handouts were well organized
and useful.
Time was given for questions and
discussion.
The time allotted for the training
was sufficient.
8. What was most helpful about the training?
9. What could have been improved with the training?
10. Is there any area of the RenWeb program that you feel you need additional training with?
Explain.
11. Any other comments?


![NCoE Training Sample handout [road safety]](https://img.dokumen.tips/doc/110x75/5590ce601a28ab11398b45ce/ncoe-training-sample-handout-road-safety.jpg)