Embed Size (px)
Citation preview

For Technical support visit us at www.sunsetter.com/ownerscorneror call Toll Free 800-670-7071 • Fax 877-224-4944
EASYSHADE ®
OWNER’S MANUAL& INSTALLATIONINSTRUCTIONS
WARNING:FAILURE TO FOLLOW THESE
INSTRUCTIONS COULDRESULT IN
PERSONAL INJURY!
Do Not Discard,Retain for Future Reference
MotorizedEasyShade®

Tools Needed: Electric Drill, 1/8” Drill Bit, Pencil, 7/16” Open End Wrench, Phillips Screwdriver, Tape Measure, and Level.
Parts Supplied: Shade Assembly, Mounting Brackets – (2) for 4’ to 9’ Models and (3) for 10’ to 12’ Models, #8 x 1- ½” Round-Head Screws – (4) for 4’ to 9’ Models and (6) for 10’ to 12’ Models, 1/8” Allen Wrench – for securing mounting bracket set screws, Cable Guide (2), Cable Guide Bracket (2), Cable Guide Stops (2), 5/64” Allen Wrench – for securing cable guide stop set screws,#8 x 1- ½” Flat-Head Screws (4), Multi-Channel Remote Transmitter with Wall Mounting Post(1).
WARNING: FAILURE TO FOLLOW THESE INSTRUCTIONS CAN RESULT IN PERSONAL INJURY! PLEASE READ THESE INSTRUCTIONS IN ITS ENTIRETY BEFORE ATTEMPTING TO COMPLETE THIS PROCEDURE.
NOTE: PRIOR TO INSTALLING YOUR EASYSHADE, PLEASE REVIEW FIGURE 1a (EASYSHADE SCHE-MATIC VIEW) AND INSPECT TO ENSURE THAT THERE ARE NO OBSTRUCTIONS ON YOUR WALL SURFACE, SUCH AS LIGHT FIXTURES, DOOR HANDLES, ETC THAT WOULD INTERFERE WITH OR BLOCK THE SHADE PANEL AS IT IS EXTENDED. FOR PROPER OPERATION YOU MUST ENSURE THAT THE ALUMINUM HOUSING AND CABLE GUIDE BARCKETS ARE MOUNTED ON THE SAME VERTICAL PLANE OR SURFACE.
The SunSetter EasyShade can be installed with the mounting brackets on a wall (vertical surface) see Figure 1b or on the underside of a structure (horizontal surface) see Figure 1c. For the 4’ to 9’ models, each of the brackets should be installed so that it is no more than 10” from the end of the shade assembly. For the 10’ to 12’ models, a mounting bracket should be installed at each end of the shade assembly so that it is no more than 10” from the end of the shade assembly. The third mounting bracket should be installed at the mid point between the two end brackets.
*Helper Needed*
1
FIGURE 1-PARTS SUPPLIED
Round Head Screw4’ - 9’: Qty-4
10’ - 12’: Qty-6
Wall Mount Kit forRemote Transmitter
Qty-1
Multi-ChannelRemote Transmitter
Qty-1
Cable Guide StopQty-2
Cable Guide BracketQty-2
EasyShadeMounting Bracket
4’ - 9’: Qty-210’ - 12’: Qty-3
Flat Head ScrewQty-4
my

Step 1. Determine the desired location for the mounting brackets, making sure that they are plumb and level. Using a pencil, mark the 2 hole locations in the bracket. Using a 1/8” bit, drill holes approxi-mately 1-½” deep at both hole locations. Repeat for the mounting bracket on the other side, and the center mounting location on 10’ to 12’ models.
Step 2A. For mounting on a wall (vertical surface), secure each bracket with two #8 x 1-½”round-head screws. Note the orientation of the bracket, the end with the set screw should be at the bottom. See Figure 1a.
Note: Aluminum housing and cable brackets need to be mounted on the same vertical surface. If mounting to siding it may be neces-sary to shim brackets to create a flat mounting surface.
Step 2B. For mounting on an underside structure (horizontal surface), secure each bracket with two #8 x 1-½” round-head screws. Note the orientation of the bracket, the end with the set screw should face toward you as you face your mounting location. See Figure 1b.
Step 3. With your helper, lift the shade assembly up to the installed mounting brackets and insert the Top groove of the shade assembly onto the protruding tab on the mounting brackets (See Figure 1a). While maintaining upward pressure to keep the top groove of the shade assembly on the tab of the mounting brackets, press the shade assembly toward the mounting bracket and be sure that the set screw is aligned in the recessed portion of the shade assem-bly. See Figure 2.
2
FIGURE 1c
Mounting Bracket
- - - - - - - - - - - - -
- - -
- - -
- - -
- - -
- - -
- - - - - - - - - - - - - - - - - - - - - - - - - - - - - -
#8 x 1-1/2 RoundHead Screw
Top Groove
Set Screw
Shade Assembly
FIGURE 1b
- - - - - - - - - - - - - - - - - - - - - - - - - - - -
- - -
- - -
- - -
- - -
-
- - - - - - - - - - - - - - - - -
Top GrooveMounting Bracket
Vertical MountingSurface Wall
#8 x 1-1/2 RoundHead Screw
Shade Assembly
Set Screw
- - -
- - -
- - -
- - -
- - -
-
- - - - - - - - - - - - - - - - - - - - - - - - - - - - - - - - - - - - - - - - - - - - - - - - - - - - - - - - - - - -
- - - - - - - - - - - - -
- - -
- - -
- - -
- - -
- - -
- - - - - - - - - - - - - - - - - - - - - - - - - - - - - -
- - - - - -- --- -- - - - -- - - - - - - - - - -- - - - -- - - - - - ---
----
------------- -
- - -
- - -
-- -- -
- -
- - -
- -
- - -
- - -
--------
-
- - - - - - -
- -- -- - -- - -
-
- - - - - - - -
-- --- ---------- -------
Set Screw
Recessed AreaFIGURE 2
GuidingCable
GuidingCable
CableGuide
Hole
Bottom Tube
12 ftPlug-inMotorCord
CableBracket
CableBracket
NOTE: The screen width is 3” less than the EasyShade width. Screen unrolls up to 7 feet
down.
Solar Screen
CableGuideHole
Bottom Tube
Aluminum Housing
Motorized EasyShade Schematic View
FIGURE 1a

Step 4. Tighten the set screw in each mounting bracket until the shade assembly is secure. (See Figure 2a)
Step 5. Plug the motor power cord into your electri-cal outlet.
NOTE: THE OPEN AND CLOSE STOP LIMITS ON THE EASYSHADE MOTOR WERE SET AND TESTED AT THE FACTORY PRIOR TO SHIPMENT. THE OPEN STOP LIMIT WAS SET AT 36 INCH EXTENSION, THIS WILL ALLOW FOR COMPLE-TION OF THE INSTALLATION PROCESS.
Step 6. Open your EasyShade using the open button on your remote control. (See Figure 3) Once you opened the EasyShade, unplug the power cord from the electrical outlet.
NOTE: IF THE EASYSHADE DOES NOT RESPOND WHEN YOU PRESS THE OPEN BUTTON ON THE REMOTE CONTROL, CHECK TO SEE IF THE FIRST CHANNEL SELECTOR LIGHT ON THE REMOTE BLINKS ON AND OFF WHEN YOU PRESS THE OPEN BUTTON. (See Figure 4). IF ONE OF THE OTHER CHANNEL LIGHTS COMES ON, PRESS THE CHANNEL SELECTOR BUTTON UNTIL YOU HAVE SWITCHED TO THE FIRST CHANNEL. (See Figure 5)
Step 7. At each end of the EasyShade Housing Assembly you will find a Vinyl Coated Cable, you will need to unroll this cable and allow it to hang flat against the mounting surface. (See Figure 6)
Step 8. Insert the Vinyl Coated Cable located at each end of the Housing Assembly through the guide holes at each end of the EasyShade drop down panel. (See Figure 7)
3
FIGURE 3
my
Open Button
FIGURE 4
my
First Lightfrom Left
my
FIGURE 5
Channel SelectorButton
FIGURE 6
VinylCoated
Cable
FIGURE 7
GuideHole Vinyl Coated
Cable
EasyShadeDrop Down
Panel
FIGURE 2a
Set Screw
Shade Assembly
Mounting Bracket

Step 9. Determine how far down your EasyShade will be extended (this is limited to the length of the Vinyl Coated Cable, but you may not exceed 84” from the bottom of the EasyShade housing). Below each end of the EasyShade Housing Assembly, mark a horizontal line on the wall. (See Figure 8)
Step 10. Using the Vinyl Coated Cable as a guide, ensure the cable is straight and plumb and mark a vertical line where it crosses the horizontal lines made in Step 9. (See Figure 9) Cable Guide Brack-ets must be mounted on the same vertical plane as Aluminum housing.
Step 11. Locate the Cable Guide Brackets and Cable Guide stops in your hardware package.
Step 12. Align the top of the Cable Guide Brackets below the horizontal line and centered on the vertical lines as shown in Figure 10. Ensure the bracket is plumb and on the same vertical plane as the Alumi-num housing above, then mark both screw hole locations. Remove the bracket and pre-drill both screw hole locations with a 1/8” drill bit. Repeat for the other side of the EasyShade.
Step 13. Place the Cable Guide Bracket over the pre-drilled holes and secure in place with the #8 x 1-1/2 Flat Head screws.
Step 14. Place the lower end of one of the Vinyl Coated cables through the hole in the Cable Guide Bracket you just installed and from the bottom, slide one of the Cable Guide Stops onto the vinyl cable and secure in place with the supplied 5/64” Allen wrench. Repeat for the other side of the EasyShade. (See Figure 11)
Step 15. You should check to ensure that the Vinyl Coated Cables are tight, if they seem to be loose you can adjust the tension using a 7/16” open end wrench as follows. On each of the Cable Guide Stops you will find 7/16” nut, by turning the nut Counter Clockwise you can tighten the cable. (See Figure 12) NOTE: DO NOT OVER TIGHTEN THE CABLE.
4
FIGURE 10
Cable GuideBracket
FIGURE 12
7/16” Nut
FIGURE 11
Cable GuideBracket
Cable GuideStop
FIGURE 8
HorizontalLine
FIGURE 9
HorizontalLine
Vinyl CoatedCable
Vertical Line

Step 16. If you have excess Vinyl Coated Cable extending from the bottom of the Cable Guide Stops, trim it off using wire cutters. (See Figure 13)
Step 17. Plug the power cord back into the electri-cal outlet.NOTE: THE FOLLOWING PROCEDURE WILL ALLOW YOU TO SET THE OPEN LIMIT TO YOUR SPECIFIC INSTALLATION POSITION.
Step 18. Use the close button on your remote to Close the EasyShade. (See Figure 14)
Step 19. Use the open button on your remote to Open the EasyShade to the current “factory set” open limit position and let it stop. (See Figure 15)
Step 20. Press the Open and Close buttons simul-taneously until the EasyShade jogs, then release. (A “jog” is a small back and forth movement of the motor.) (See Figure 16)
Step 21. Use the Open button on the remote to adjust the EasyShade to your new Open limit posi-tion that you marked in Step 9. (See Figure 17)CAUTION: Do not let the screen roll down more than 84” from the housing. Unrolling the screen more than 84” will cause the screen to roll up back-wards in the housing.
Step 22. Press the center button on your remote until the EasyShade jogs, then release. (See Figure 18) Your new open position is now set.
Step 23. Test the operation of your EasyShade by using the open and close buttons on your remote control.
Step 24. We’ve supplied a wall holder for the remote transmitter, see figure 1 on page 1. Positionthe wall post at the desired location and secure as needed.
“Congratulations your installation is complete”.5
my
FIGURE 15
Open Button
FIGURE 18
myCenter Button
FIGURE 16
my
Close Button
Open Button
FIGURE 13
my
FIGURE 14
Close Button FIGURE 17Open LimitPosition
84” MaximumExtension
EasyShadeHousingBottom ofHousing
CAUTION: DO NOT LEAVE YOUR MOTORIZED EASYS-HADE EXTENDED DURING WINDY CONDITIONS , AS THE UNCONTROLLED MOVEMENT OF THE EXTENDED SOLAR SCREEN COULD CAUSE DAMAGE TO THE PRODUCT AND SURROUNDING ITEMS. SIMPLY CLOSE THE MOTORIZED EASYSHADE BY PRESSING THE UP BUTTON ON THE REMOTE TRANSMITTER.
CAUTION: DO NOT PERMIT THE HAND-HELD REMOTE TRANSMITTER TO GET WET AS THIS CAN AFFECT IT’S PROPER OPERATION. IT IS RECOMMENDED TO KEEP THE REMOTE TRANSMITTER INDOORS WHEN THE EASYSHADE IS NOT IN USE OR IF RAIN IS EXPECTED.
CAUTION: THE INSTALLATION PROCEDURE FOR THE MOTORIZED EASYSHADE INCLUDES THE USE OF CABLE GUIDES TO STABILIZE THE EXTENDED SOLAR SCREEN DURING NORMAL USE. IF YOUR APPLICA-
TION DOES NOT PERMIT THE INSTALLATION OF THE NECESSARY CABLE GUIDES OR YOU DO NOT PLAN TO INSTALL THEM, YOU MUST USE ADDITIONAL CARE TO PREVENT DAMAGE TO YOUR PRODUCT. WHILE WE DO NOT RECOMMEND INSTALLING THE MOTORIZED EASYSHADE WITHOUT THE SUPPLIED CABLE GUIDES, SOME CUSTOMERS MAY DETERMINE THAT THEIR APPLICATION DOES NOT HAVE A VERTI-CAL SURFACE TO INSTALL THE SUPPLIED CABLE GUIDES AS INSTRUCTED.
NOTE: During an electrical outage, you will not have the ability to open or close your EasyShade.
6
APPENDIX A
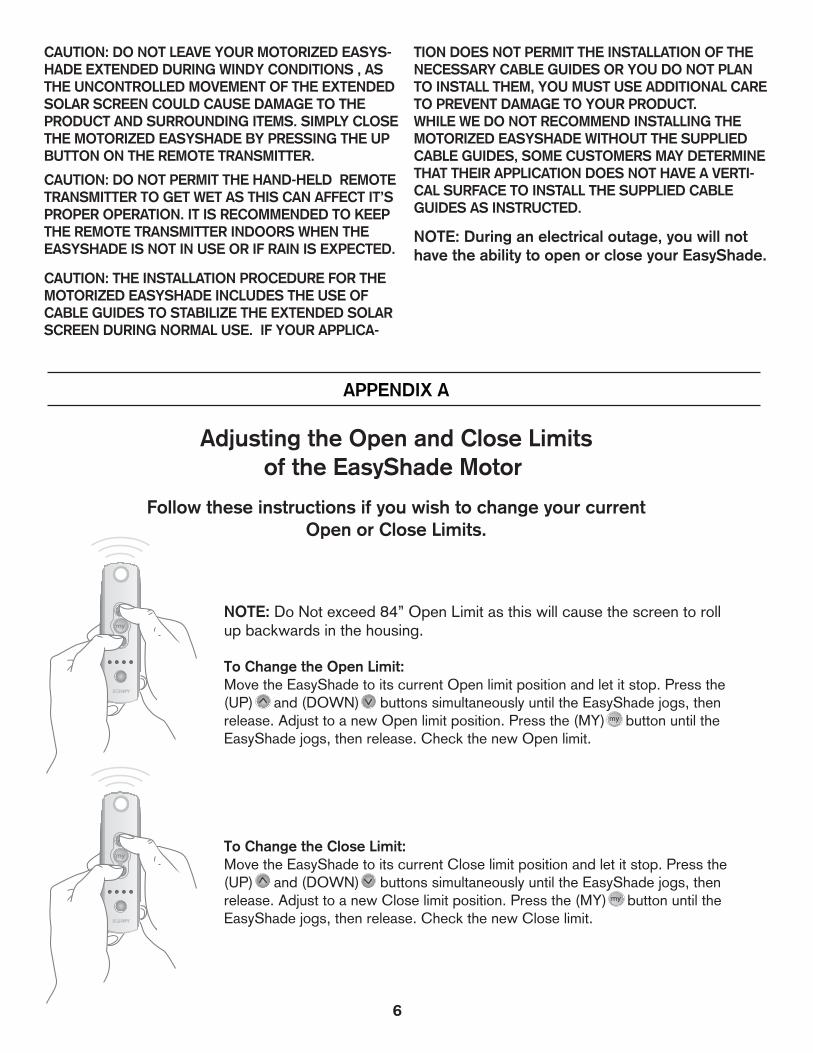
Adjusting the Open and Close Limitsof the EasyShade Motor
NOTE: Do Not exceed 84” Open Limit as this will cause the screen to roll up backwards in the housing.
To Change the Open Limit:Move the EasyShade to its current Open limit position and let it stop. Press the (UP) and (DOWN) buttons simultaneously until the EasyShade jogs, then release. Adjust to a new Open limit position. Press the (MY) button until the EasyShade jogs, then release. Check the new Open limit.
To Change the Close Limit:Move the EasyShade to its current Close limit position and let it stop. Press the (UP) and (DOWN) buttons simultaneously until the EasyShade jogs, then release. Adjust to a new Close limit position. Press the (MY) button until the EasyShade jogs, then release. Check the new Close limit.
my
my
my
my
Follow these instructions if you wish to change your currentOpen or Close Limits.

STEP 8
APPENDIX B
STEP 9
STEP 10
STEP 12
STEP 11
STEP 13
Resetting the Communication Between the Remote Transmitter to the Motor
my
With the motor cord plugged in to an outdoor receptacle,
initiate programming by pressing both the (Up) and (Down) buttons at the same time until
the EasyShade jogs.
Check the direction of motorrotation. Press and hold the (Down) button and confirm that it opens the
EasyShade (the motor will be in momentary mode which means the EasyShade will
stop moving when you take your finger off the button). To change the direction of the motor, press and hold the (My)
button until the EasyShade jogs.
Close the EasyShade to your desired close limit. Press and hold the (My) and (Down) buttons
until the EasyShade begins to open, then release. Stop the EasyShade where the Open limit should be
set by pushing the middle or My Button,you can adjust by pressing
the (Up) or (Down) buttons.
Press and hold the (My) and (Up) buttons until the EasyShade
begins to close. The EasyShade will stop at the original Close position.
Press and hold the (My) button until the EasyShade moves to its Close
limit to confirm setting.
Press and hold the Program button on the back of the transmitter until the
EasyShade jogs. It will now operate in a maintained mode, which means the
EasyShade will move all the way to the Open or Close position when that button
is pressed once. Double check the Open and Close limits as a precaution.
my
mymy
my
This procedure describes the actions needed to reset the communication between the motor and the remote transmitter that’s supplied with your motorized EasyShade. This procedure should only be performed if the remote transmitter doesnot operate the motorized EasyShade. Please review the steps below to familiarize yourself with the procedure before attempting to complete them. Please check to ensure your Remote Transmitter is on channel 1.
7
Add/Delete a Control Device (Transmitter)To ADD an additional Control Device (second remote, all weather remote or wireless switch).
• Press the programming button on the back of the transmitter that was supplied with the EasyShade until the motor ‘jogs’. • On the additional Control Device, press the programming button until the motor ‘jogs’, then release. If you wish to DELETE a Control Device, simply repeat the two steps listed above.
my
my
ProgramButton
my
my
my
To Reset the Motor:Step 1. Verify red light on the Remote Transmitter comes on. Step 2. Ensure that your multi-channel remote is set to the proper channel (factory default is Channel #1). You will need to disconnect power (120 AC) for two seconds. Step 3. Reconnect for 10 seconds. Step 4. Disconnect for another two seconds and reconnect. Step 5. The motor should start to move and then stop on its own (if this does not happen, continue to perform the disconnects until it does). Step 6. Once the motor stops moving on its own, press and hold the Program button on the back of the remote and count to ten without letting go. The EasyShade will jog twice a few seconds apart . Step 7. The motor has now been reset. Complete steps 8 thru 13 below to restore communication to the transmitter, verify the motor rotation and to reset.

8
APPENDIX C
PROGRAMMING INSTRUCTIONS-4 CHANNEL REMOTE
The 4 channel remote supplied with your SunSetter Motorized EasyShade can be programmed to operate up to 4 SunSetter EasyShade products (independently or simultaneously), supplied with Somfy motors. There are 4 chan-nels available on this remote and the channels are selected by the bottom button (Program Selector Button) located on the front side of your remote. Press the Program Selector Button once to move from channel # 1 to channel # 2 left to right. The second light from left will blink.Repeat this step to move from channel # 2 to # 3, etc. The channel you are currently using will always blink. If all four channels are blinking simultaneously, press and hold the Program Selector Button to return to channel # 1
To Operate Products on Seperate Channels: • To add the 4 channel remote to a second SunSetter EasyShade you must first: 1. Please make sure that the second SunSetter motorized unit is opened halfway (so the unit has the ability to “jog”) 2. Press the programming button on the back of the transmitter that was supplied with the second SunSetter Motorized EasyShade product until the unit “jogs” 3. On the 4 channel remote (while in channel # 2), press the programming button (on the back of the remote) until the second unit jogs
• To repeat this process and add a third SunSetter Shade product, using the Program Selector Button move to channel # 3 and repeat process as follows: 1. Please make sure that the third SunSetter motorized unit is opened halfway (so the unit has the ability to “jog”) 2. Press the programming button on the back of the transmitter that was supplied with the third SunSetter Motorized EasyShade until the unit “jogs” 3. On the 4 channel remote (while in channel # 3), press the programming button (on the back of the remote) until the third unit jogs
To Operate Products on Simultaneously:
You may also select any one channel to operate all of your Motorized EasyShades simultaneously. In order to complete this process select the channel you wish to program and 1. Make sure that all SunSetter EasyShades are opened halfway (so each unit has the ability to “jog”) 2. Press the programming button on the back of the transmitter that was supplied with the FIRST SunSetter Motorized EasyShade product until the unit “jogs” 3. On the 4 channel remote that you will using to OPERATE ALL , press the programming button (on the back of the remote) until the added unit (second unit) jogs Repeat steps # 2. And # 3 above for each SunSetter Motorized EasyShades that you wish to add to the OPERATE ALL channel.

9
TROUBLESHOOTING
Solution
SunSetter cannot be responsible for any changes in the electrical configuration of the motorized EasyShade. Have your electrician contact Somfy (the motor manufacturer) directly via their website, www.somfysystems.com.
• Is there power to the receptacle?• Verify that the red light is on the remote transmitter comes on when you press and hold a button (if light blinks for less than 5 seconds, the batteries should be replaced)• If red light does not come on, remove battery and reinsert in slot and try pushing button again, If still no light, the replacement battery is a 3V Lithium CR2430. You should find this battery in any local hardware store. To replace battery simply remove the small Phillips screw on back of the remote transmitter, remove back cover, replace the old battery (be sure to note the battery orientation) and reinstall the cover with the Phillips screw. You may need to reprogram the remote transmitter – see Resetting the Remote Transmitter (Appendix B)
Solution
It is necessary to have the Guiding Cables completely plumb, up and down and both the Aluminum Housing and the Cable Brackets must be installed on the same vertical surface or plane in order for the fabric to open and close smoothly and evenly. Please check to insure the Guiding Cable is plumb front to back and left to right. You may need to move the cable brackets or shim them to insure they are located on the same plane.
Problem with Installation
Can I "hard-wire" the Motorized EasyShade motor into my home.
After Installing, my Motorized EasyShade will not function.
Problem with Appearance
Fabric rolls up unevenly or pulls to one side when the Motorized EasyShade is being closed
10
TROUBLESHOOTING (cont.)
Solution
Adjust the Close Limit on your EasyShade motor, see Adjusting the Open and Close Limits (Appendix A).
Adjust the Open Limit on your EasyShade motor, see Adjusting the Open and Close Limits (Appendix A). Use caution to ensure that you do not exceed the maximum projection of 84”, as this will cause the screento roll up backwards in the housing.
The over temperature sensor has temporarily shut off the motor. The motor will resume normal operation after about 15 minutes of cooling down.Note: If the Motorized EasyShade is in the closed position and ambient temperature is elevated, it might take a little longer.
If the EasyShade is open in high winds and excessive force is applied to the cables, it is possible that the Guiding Cable can come unattached from the bushing that holds it inside the Aluminum Housing. The cable can be replaced, please call Customer Service at 1-800-670-7071 for a replacement Cable Guide Assembly and Instructions for reinstalling.
Problem with Operation
My Motorized EasyShade retracts but will not fully close to the Aluminum Housing.
My Motorized EasyShade rolls out and keeps going and Solar Screen starts to sag
After opening and closing the Motor-ized EasyShade several times, the motor suddenly stopped working and will not close or open the rest of the way
My guiding cables have detached from inside the aluminum housing

11
TROUBLESHOOTING (cont.)
Solution
• If red light does not come on, remove battery and reinsert in slot and try pushing button again, If still no light, the replacement battery is a 3V Lithium CR2430. You should find this battery in any local hardware store. To replace battery simply remove the small Phillips screw on back of the remote transmitter, remove back cover, replace the old battery (be sure to note the battery orientation) and reinstall the cover with the Phillips screw. You may need to reprogram the remote transmitter – see Resetting the Remote Transmitter (Appendix B)
Yes, you can program multiple Motorized EasyShades to operate off the same channel or you can program individual Motorized EasyShades to one of five channels on your Remote Transmitter. See Programming Instructions for your 4-Channel Remote Transmitter (Appendix C)
Yes, you can purchase an additional transmitter from SunSetter Products and follow the steps to Add/Delete a Control Device located in Appendix B.
The remote transmitter can be replaced. Please call customer service at 1- 800-670-7071 for a replacement. Then follow the steps to Add/Delete a Control Device located in Appendix B.
Remote Transmitter
The red light on the remote transmit-ter does not come on when I press the button
Can I program multiple Motorized EasyShades to one remote?
Remote transmitter, can I use more than one?
What if lose my remote or it becomes damaged, can I replace it?

12
5-Year Limited Manufacturer’s Warranty For SunSetter EasyShade (Motorized Operation)
A. WHO GIVES THIS WARRANTY?SunSetter Products, 184 Charles Street, Malden, MA 02148.
B. WHO IS ENTITLED TO THIS WARRANTY?This Warranty applies only to the original purchaser who paid for the product and may not be assigned or transferred to subsequent owners. This Warranty applies only to products purchased and installed in the US.
C. WHAT ARE THE RESPONSIBILITES OF SUNSET-TER PRODUCTS UNDER THIS WARRANTY?Subject to the terms and conditions set forth herein, SunSetter Products will furnish replacements for parts found by SunSetter Products to be defective in design, manufacture or assembly, under each specific compo-nent or product warranty as set forth below.
D. WHAT ARE THE RESPONSIBILITES OF THE ORIGINAL PURCHASER UNDER THE WARRANTY?1. Before any claims may be made under this Warranty, the original purchaser must have paid in full for the product covered under the Warranty, according to the terms and conditions of the pay-plan defined in the original order. IF THE PURCHASER HAS FAILED TO MAKE FULL PAYMENTS ACCORDING TO THE SPECIFIC PAY PLAN FOR THE PRODUCT, THIS WARRANTY SHALL BE NULLIFIED AND SUNSETTER PRODUCTS SHALL BE RELIEVED FROM ANY RESPONSIBILITY OR LIABILITY UNDER THIS WAR-RANTY. The purchaser agrees and acknowledges that this Warranty agreement constitutes an executory contract.
2. The purchaser must use care in installation, mainte-nance, operation, use, and storage of the product in accordance with the instructions contained with the product. ANY FAILURE TO INSTALL, MAINTAIN, OPERATE, USE AND STORE THE PRODUCT IN ACCORDANCE WITH THE INSTRUCTIONS CON-TAINED WITH THE PRODUCT WILL NULLIFY THIS WARRANTY AND RELIEVE SUNSETTER PRODUCTS FROM ANY RESPONSIBILITY OR LIABILITY UNDER THIS WARRANTY.
3. Promptly notify SunSetter Products of any claims.
4. The purchaser may be required to provide a phot-graph of any defective parts. The purchaser may also be required to pay a deposit until the defective parts are returned to SunSetter Products for inspection. The purchaser must obtain a return authorization form from SunSetter Products’ customer service department prior to the return of any merchandise and after having received such authorization, return the part or product, freight prepaid, to SunSetter Products.
E. WHAT IS COVERED UNDER THIS WARRANTY?1. The following components of the SunSetter EasyS-ahde are covered under this Warranty, subject to the limitations set forth below. These components have a five (5) year limited (prorated) warranty, against manufacturer’s defects as outlined below:
(a) Should the purchaser promptly notify SunSetter Products of such defects within one year (12 months) from the date of the original purchase, the defective component will be replaced at no charge.
(b) After one year but within five years (60 months) from the date of the original purchase, a defective component will be replaced upon the purchaser’s payment of 1/60th of the full retail cost of the compo-nent for each month of use prior to the claim.
2. Covered Components:
STRUCTURAL COMPONENTS AND THE ELECTRIC MOTOR are warranted for five (5) years not to fail under normal conditions if maintained, operated, used, and stored in accordance with the instructions contained with the product.
VINYL MESH is warranted for five (5) years against:
(a) Excessive fading under normal conditions if main-tained, operated, used, and stored in accordance with the instructions contained with the product.
(b) Mildew on vinyl mesh. Mildew will not form on the mesh itself, but may form on dirt and dust that have not been removed from it. The purchaser must clean the vinyl mesh periodically with water and mild soap to prevent dirt from accumulating.
(c) Excessive cracking or peeling under normal condi-tions if maintained, operated, used, and stored in accordance with the instructions contained with the product.
F. WHAT IS NOT COVERED UNDER THIS WAR-RANTY?
1. Any failure or damage of the components that results from any intentional or negligent actions by the purchaser or by any other person is not covered by this Warranty.
2. It is the responsibility of the purchaser to securely fasten the EasyShade to studs, joists, headers or other structural members. Any failure or damage that results from the EasyShade falling from its installed position is not covered by this Warranty.
3. Labor charges connected with installation of replacement parts are not covered by this Warranty.

11/21/11 ©SunSetter Products, a Massachusetts Limited Partnership, 184 Charles Street, Malden MA 02148
G. GENERAL PROVISIONS AND LIMITATIONS
4. Freight expenses to and from SunSetter Products in shipping damaged or replacement parts are not covered by this Warranty and must be paid by the purchaser.
G. GENERAL PROVISIONS AND LIMITATIONS
1. THE WARRANTY GRANTED HEREIN IS THE EXCLUSIVE REMEDY FOR THE PURCHASER. SUNSETTER PRODUCTS MAKES NO OTHER WAR-RANTIES TO THE PURCHASER, EXPRESS, STATU-TORY, IMPLIED OR OTHERWISE AND ALL IMPLIED WARRANTIES, INCLUDING WITHOUT LIMITATIONS, IMPLIED WARRANTIES OF MERCHANTABILITY AND FITNESS FOR A PARTICULAR PURPOSE, ARE HEREBY DISCLAIMED.
2. TO THE EXTENT PERMITTED BY LAW, SUNSET-TER PRODUCTS SHALL HAVE NO LIABILITY TO THE PURCHASER OR ANY OTHER PERSON FOR INCI-DENTAL, SPECIAL, CONSEQUENTIAL, INDIRECT OR SIMILAR DAMAGES OF ANY KIND OR NATURE WHATSOEVER, WHETHER ARISING OUT OF BREACH OF WARRANTY OR OTHER BREACH OF CONTRACT, NEGLIGENCE OR OTHER TORT, OR OTHERWISE, EVEN IF SUNSETTER PRODUCTS SHALL HAVE BEEN ADVISED OF THE POSSIBILITY OR LIKELIHOOD OF SUCH POTENTIAL LOSS OR DAMAGE. IN NO EVENT SHALL SUNSETTER PROD-UCTS BE LIABLE FOR LOSS OF PROFITS AND/OR WAGES.
3. Some states do not allow limitations on how long an implied warranty lasts, or do not allow the exclusion or limitation of incidental or consequential damages, so the above limitations may not apply to you.
4. This warranty gives you specific rights, and you may have other rights, which vary from state to state.