Embed Size (px)
Citation preview

XC90QUICK GUIDE
VÄLKOMMEN!This Quick Guide describes a selection of features and functions in your Volvo. Additional owner's information is available in your vehicle, inan app and on the Internet.
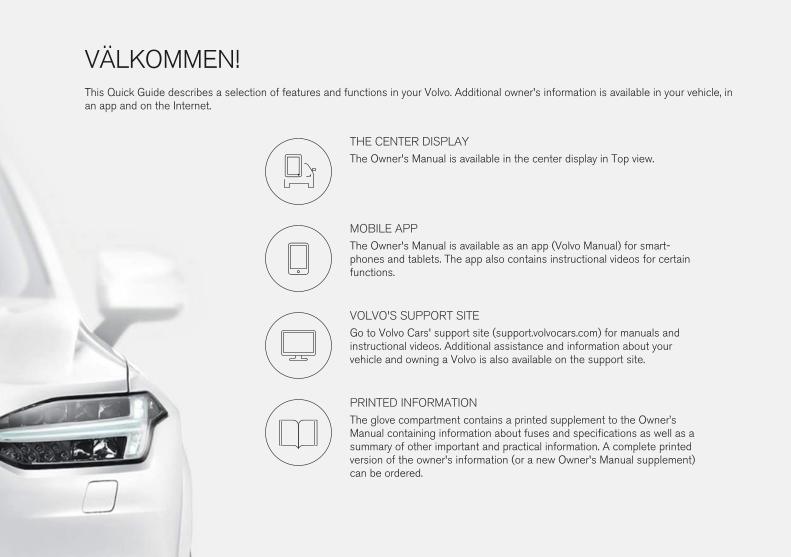
THE CENTER DISPLAYThe Owner's Manual is available in the center display in Top view.
MOBILE APPThe Owner's Manual is available as an app (Volvo Manual) for smart-phones and tablets. The app also contains instructional videos for certainfunctions.
VOLVO'S SUPPORT SITEGo to Volvo Cars' support site (support.volvocars.com) for manuals andinstructional videos. Additional assistance and information about yourvehicle and owning a Volvo is also available on the support site.
PRINTED INFORMATIONThe glove compartment contains a printed supplement to the Owner’sManual containing information about fuses and specifications as well as asummary of other important and practical information. A complete printedversion of the owner's information (or a new Owner's Manual supplement)can be ordered.

CONTENT
01. GETTING TO KNOW YOUR VOLVOThis chapter gives you information on some of Volvo's systems and services, and an overview of the inside and out-side, and the center display.
02. INTERIOR AND CONNECTIONSThis chapter provides information about features and functions in the passenger compartment e.g. seat settings andInternet connection.
03. CENTER DISPLAY VIEWSThis chapter contains information about the center display's main views, which control many of the vehicle's func-tions.
04. SMART DRIVINGThis chapter describes several driver support functions and offers tips on how to drive more economically.
05. VOICE CONTROLThis chapter provides a list of commands/phrases you can use with the voice control system.
06. SUPPLEMENTARY INFORMATIONWarning, caution and note texts, which must be read.
All options and accessories, known at the time of publication, are marked with an asterisk: *.

01

GETTING STARTED
The following functions, concepts and tips are intended to help familiar-ize you with your Volvo as quickly as possible.
Volvo IDVolvo ID is a personal ID that gives you access to a number of serviceswith a single username and password. Some examples are Volvo On Call, navigation* and the opportunity to schedule service and repairs.You can create a Volvo ID via the Volvo On Call app or directly in yourvehicle.
SensusSensus is your vehicle's intelligent interface and includes all of its solu-tions relating to entertainment, connecting to the Internet, navigation*and information services. Sensus enables communication between you,the vehicle and the digital world around you.
Volvo On CallVolvo On Call gives you direct contact with your vehicle and enhancedcomfort and assistance 24 hours a day. With the Volvo On Call app, youcan see if e.g. any bulbs need replacing and if washer fluid needs to befilled. You can lock and unlock the vehicle, check the fuel level and findyour nearest service station. Preconditioning can also be set andstarted via the vehicle's parking climate or the engine remote startfunction1. Download the Volvo On Call app to get started.
Volvo On Call also gives you access to roadside assistance, othersecurity services and emergency assistance using the ON CALL andSOS buttons in the ceiling console.
Driver profilesMany of the vehicle's settings can be adapted to the driver's personalpreferences and saved in one or more driver profiles. Each of theremote keys can be linked to a driver profile. See the section "Topview" in this Quick Guide for more information on driver profiles.
1 Available on certain markets and models.
01

01

EXTERIOR OVERVIEW
Checking and storing of tire inflation pressure (TPMS)* is per-formed via TPMS in the Car Status app in the center display's Appview. If inflation pressure is too low, the symbol will be steadilyilluminated in the instrument panel. If inflation pressure is low,check and adjust the inflation pressure in all four tires and tapStore Pressure to store the new tire pressure.
The Car Status app is used to check engine oil level. You canalso view any status-related messages and schedule service andrepairs*.
The door mirrors can be automatically* tilted down when reversegear is engaged. When the vehicle is locked/unlocked using theremote key, the door mirrors will automatically fold in/out. Activatethese functions under Settings My Car Mirrors andConvenience in the center display's Top view.
Keyless locking/unlocking* makes it possible to lock or unlockthe vehicle simply by having a remote key in your possession, e.g. ina pocket. The remote key must be within approximately 1 meter(3 feet) from the vehicle.
To unlock the vehicle, grasp one of the door handles or press therubberized button under the tailgate's handle. To lock the vehicle,press one of the indentations on the outside of a door handle.Avoid touching both the outside and inside of the door handles atthe same time.
The panoramic roof* has an opening glass section with a sunshade and can be operated using a control above the rearview mir-ror when the vehicle is in at least ignition mode I. Open to ventila-tion position by pressing the control upward and close by pullingthe control downward. To fully open the panoramic roof, pull thecontrol rearward twice. Close by pulling the control downward twice.
The power operated tailgate* can be opened using the foot-operated tailgate function* by means of a slow forward kickingmotion under the left-hand part of the rear bumper. Close and lock
the tailgate by pressing the button on the lower edge of thetailgate. You can also close the tailgate by moving your foot slowlyunder the rear bumper. For it to be possible to unlock the tailgateusing the foot movement sensor, the vehicle must be equipped withkeyless locking/unlocking*. The remote key must be within a rangeof approximately 1 meter (3 feet) behind the vehicle for foot move-ment operation to be possible.
To prevent the tailgate from e.g. hitting the roof of a garage, a maxi-mum opening height can be programmed. Set a maximum openingheight by opening the tailgate to the desired opening position.Then press for at least 3 seconds to store the position.
01

01

LOCKING/UNLOCKING
Remote keyPress briefly to lock doors, tailgate and fuel filler door and arm thealarm.
A long press closes all side windows simultaneously.
Press briefly to unlock doors, tailgate and fuel filler door and disarmthe alarm.
Press and hold to open all door windows at the same time.
Press briefly to unlock and disarm only the tailgate.
Press and hold to open or close the power* tailgate.
The panic alarm activates the turn signals and horn to attract atten-tion in emergency situations. To activate, press and hold the buttonfor at least three seconds or press the button twice within threeseconds. The function can be switched off using the same buttonafter it has been activated for at least five seconds. Otherwise, it willswitch off automatically after three minutes.
Private (valet) lockingPrivate locking locks the tailgate and the glove compartment, which canbe practical when, for example, the vehicle is taken in for service or at ahotel.
– In the center display's Function view, tap Private Locking
to activate/deactivate the function.
A pop-up window will appear showing whether the func-tion is activated or deactivated. A four-digit code must beselected each time the function is activated. The firsttime the function is used, an extra security code must beselected.
01

01
INTERIOR OVERVIEW
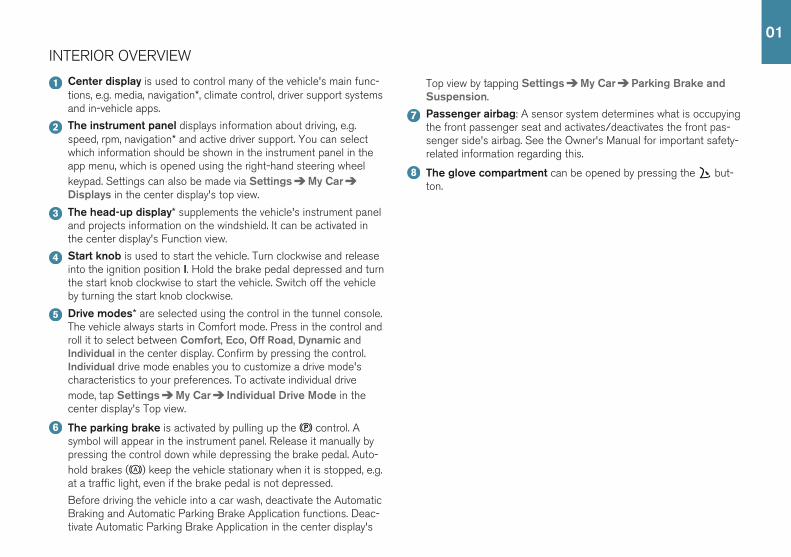
Center display is used to control many of the vehicle's main func-tions, e.g. media, navigation*, climate control, driver support systemsand in-vehicle apps.
The instrument panel displays information about driving, e.g.speed, rpm, navigation* and active driver support. You can selectwhich information should be shown in the instrument panel in theapp menu, which is opened using the right-hand steering wheelkeypad. Settings can also be made via Settings My CarDisplays in the center display's top view.
The head-up display* supplements the vehicle's instrument paneland projects information on the windshield. It can be activated inthe center display's Function view.
Start knob is used to start the vehicle. Turn clockwise and releaseinto the ignition position I. Hold the brake pedal depressed and turnthe start knob clockwise to start the vehicle. Switch off the vehicleby turning the start knob clockwise.
Drive modes* are selected using the control in the tunnel console.The vehicle always starts in Comfort mode. Press in the control androll it to select between Comfort, Eco, Off Road, Dynamic andIndividual in the center display. Confirm by pressing the control.Individual drive mode enables you to customize a drive mode'scharacteristics to your preferences. To activate individual drivemode, tap Settings My Car Individual Drive Mode in thecenter display's Top view.
The parking brake is activated by pulling up the control. Asymbol will appear in the instrument panel. Release it manually bypressing the control down while depressing the brake pedal. Auto-hold brakes ( ) keep the vehicle stationary when it is stopped, e.g.at a traffic light, even if the brake pedal is not depressed.
Before driving the vehicle into a car wash, deactivate the AutomaticBraking and Automatic Parking Brake Application functions. Deac-tivate Automatic Parking Brake Application in the center display's
Top view by tapping Settings My Car Parking Brake andSuspension.
Passenger airbag: A sensor system determines what is occupyingthe front passenger seat and activates/deactivates the front pas-senger side's airbag. See the Owner's Manual for important safety-related information regarding this.
The glove compartment can be opened by pressing the but-ton.
01

01

CENTER DISPLAY
The center display is used to adjust settings and control most of thevehicle's functions. The center display has three main views: home view,function view and app view. You can reach the function view and appview from the home view by swiping right or left. There is also a topview that you can access by swiping down from the top section of thedisplay.
Change the appearance of the center display and the instrument
panel by choosing a theme in Settings My Car Displays in topview. You can also select a dark or light background for the center dis-play.
Return to the home view from another view by means of a shortpress on the physical home button under the display. The last modeused for the home view will then be shown. A further short press on thehome button sets all of the home view's tiles in standard mode.
To clean the center display, press and hold the home button under thedisplay to lock the touchscreen function. Press the home button brieflyto reactivate the display.
The status bar at the top of the display shows the status of currentvehicle activities and functions. Shown on the left is network and con-nection information, with media-related information; the time and back-ground activity indicator shown on the right.
In the climate row at the bottom you can set temperature and seatcomfort by tapping on the respective icon. Open the climate view bytapping on the center button in the climate row.
01

POWER* FRONT SEATS
Use the controls on the outside of the seat to adjust e.g. seat positionand lumbar support*. The two controls that together form the shape ofa seat are used to adjust the seat position. The third, the multi-functioncontrol*, is used to adjust the comfort functions, e.g. massage*.
The seat-shaped controlsUse the lower section of the control to adjust the height of the seatcushion or move the entire seat. Use the rear section of the control toadjust backrest tilt.
The multifunction control2
Settings for massage*, side bolsters*, lumbar support* and seat cushionextension* are adjusted using the multifunction control.
1. Turn the multifunction control upward/downward to open the seatsettings window in the center display.
2. Switch between the various functions in the center display by turningthe control upward/downward.
3. Adjust the setting of the selected function by pressing the upper/lower/front/rear sections of the control.
Storing positions1. Adjust the seat, door mirrors and head-up display* to the desired
positions and press the M button on the door panel. The indicatorlight in the button will illuminate.
2. Press and hold down memory button 1, 2 or 3 within three seconds.An audible signal will sound and the indicator light in the M buttonwill go out.
To use your stored position:
With door open - press one of the memory buttons and release.
With door closed - press and hold one of the memory buttons until theseat reaches the stored position.
2 On vehicles with four-way support*
02

FOLDING DOWN THE REAR SEAT BACKRESTS
The front and rear seats may need to be adjusted in order to fold downthe backrests.
Second row of seats, center position1. Press down the head restraint manually by pressing the button
located between the head restraint and the seat's backrest. Pushdown the head restraint at the same time.
2. Pull the strap in the center seat upward/forward and fold downthe backrest.
Second row of seats, outboard positions
– Pull the handle on the side of the outboard seat upward and folddown the seat at the same time. The head restraint folds down auto-matically.
To fold up the center or outboard seat backrests, pull the strap or thehandle upward. Fold up the backrest manually until it locks in position.Return the head restraint to the upright position manually.
Third row of seats*
– Pull the handle on the upper side of the backrest upward/forwardwhile pushing the backrest forward. The head restraints folds downautomatically.
To access the third row of seats, pull the handle on the top of the sec-ond-row center seat upward/forward. Fold down the backrest andmove the entire seat forward.
02

STEERING WHEEL
Adjusting the steering wheelYou can adjust the position of the steering wheel for both height anddepth.
1. Push the lever under the steering wheel forward and adjust thesteering wheel to the desired position.
2. Pull the lever back to the locked position.
Left-side steering wheel keypadDriver support functions are selected in the instrument panel using the
and arrow buttons on the left-side steering wheel keypad. Whenthe driver support symbol is white, the function is active. A gray symbolindicates that the function is disabled or in standby mode.
Symbols in the instrument panel:
Cruise Control helps the driver maintain a set speed.
Adaptive Cruise Control* helps the driver maintain a constantspeed and a set time interval to the vehicle ahead.
Pilot Assist helps keep the vehicle between the traffic lane mark-ings by providing steering assistance, and helps maintain a con-stant speed and a set time interval to the vehicle ahead.
Tap to start or cancel the selected function.
Tap / to increase/decrease the set speed by 5 km/h (5 mph).Press and hold the button to change the speed in increments. Releasethe button when the desired speed is reached.
/ decreases/increases the distance to the vehicle ahead whenusing Adaptive Cruise Control and Pilot Assist.
Pressing also resumes the stored speed for the selected function.
02

Right-side steering wheel keypadThe right-side steering wheel keypad controls the instrument panel.
Open/close the app menu. From here, you can control the tripcomputer, media player, a connected cell phone and the naviga-
tion system*.
Press the left/right arrows to scroll among the apps.
Select/deselect or confirm a choice, e.g. select the trip comput-er's menu or erase a message from the instrument panel.
Scroll among a selected app's functions by pressing the up/downarrows.
Raise/lower the media volume by pressing or . If no otherfunction is active these buttons serve as volume control.
Voice control is activated by pressing the button to give voice com-mands for e.g. media, navigation and climate systems. Say e.g. “Radio”,“Raise temperature” or “Cancel”.
See the chapter "Voice control" in this Quick Guide for additional voicecommands.
Trip computerThe trip computer shows e.g. mileage, fuel consumption and averagespeed. You can choose the type of trip computer information that willbe displayed in the instrument panel. The trip computer calculates thedistance that can be driven on the amount of fuel remaining. Use thebuttons on the right-side steering wheel keypad to display the variousoptions. When “----” is displayed in the instrument panel, the fuel levelis too low to calculate the distance remaining. Refuel as soon as possi-ble.
02

LEFT-SIDE STEERING WHEEL LEVER
Headlight functions are controlled using the left-side steering wheellever.
In AUTO mode, the vehicle will automatically monitor lighting conditionsand adjust headlight illumination accordingly, e.g. switch from daytimerunning lights to low beam when the sun goes down or when you driveinto a tunnel. To switch on the Active High Beam function, which auto-matically dims the headlights for approaching vehicles, turn the lightingring on the lever to . Move the lever toward the steering wheel toactivate manual high beams and toward the dashboard to deactivate.
Active Bending Lights* are designed to follow the movement of thesteering wheel to help provide maximum illumination in turns and inter-sections. The function is automatically activated when the engine isstarted and can be deactivated in the center display's Function view,
.
Approach lighting is activated when you unlock the vehicle using thekey and provides illumination to help you approach the vehicle safely inthe dark.
Home Safe Lighting illuminates some of the exterior lights after thevehicle is locked to provide illumination around the vehicle in dark con-ditions. To activate the function, switch off the ignition and move theleft-side steering wheel lever toward the dashboard and release. Thelength of time home safe lighting remains illuminated can be set in thecenter display.
Resetting the trip odometersReset all information in the manual trip odometer (TM) by pressing andholding the RESET button. Press the button briefly to reset only themileage. The automatic trip odometer (TA) resets automatically whenthe vehicle is switched off for more than 4 hours.
02

RIGHT-SIDE STEERING WHEEL LEVER
The right-side steering wheel lever controls the wipers and the rainsensor.
– Move the lever downward for a single sweep of the windshield.
– Move the lever upward in steps for intermittent, normal speed andhigh speed.
– Use the lever's thumb wheel to adjust intermittent wiping speed.
– Move the lever toward the steering wheel to start the windshield andheadlight washers and toward the dashboard to start the rear windowwashers.
Press the rain sensor button to activate/deactivate the rain sensor.The windshield wiper lever should be in position 0, or in the singleswipe position. The rain sensor monitors the amount of water onthe windshield and starts the windshield wipers automatically whenneeded. Turn the thumb wheel upward/downward for higher/lowersensitivity.
Press for rear window intermittent wiping.
Press for continuous rear window wiper speed.
Use the windshield wipers service position when you e.g.replace, wash or lift the wiper blade. Tap Wiper Service
Position in the center display's function view to activate ordeactivate service position.
02

02

PASSENGER COMPARTMENT CLIMATE
Climate system functions for the front and rear sections of the passen-ger compartment are controlled from the center display and from thebuttons on the center console and the rear side of the tunnel console*.Some functions can also be controlled using voice commands.
The icon for opening Climate view is located at the center ofthe climate bar at the bottom of the center display. When theClean Zone text is BLUE, this indicates that the conditions forgood air quality in the passenger compartment have been met.
– Tap AUTO in climate view for automatic control of several climatesystem functions. Tap for automatic control of air recirculation, airconditioning and air distribution.
Press and hold for automatic control of air recirculation, air condition-ing and air distribution and to change temperature and blower speedto standard settings: 22 °C (72 °F) and speed 3 (speed 2 in the rearseat3). It is possible to change the temperature and blower speedwithout deactivating automatic climate control.
– Tap any of the icons in the climate bar at the bottom of the centerdisplay to set temperature, seat heating* and blower speed.
To synchronize the temperature for all of the vehicle's zones with thedriver side's temperature, tap the driver side's temperature icon andthen tap Synchronize temperature .
Preconditioning*Preconditioning can be set in the vehicle's center display and with theVolvo On Call app.
Preconditioning ventilates the passenger compartment before driving.Preconditioning can be started directly from the vehicle or set to startautomatically using a timer.
Preconditioning direct start1. Open Climate view in the center display.
2. Tap the Parking climate tab and then tap Preconditioning.
Setting a preconditioning timer1. Open Climate view in the center display.
2. Select the Parking climate Add timer tab and set a date/day/time.
Interior Air Quality System IAQS*
IAQS is part of the Clean Zone Interior Package* and is a fully auto-matic system that filters passenger compartment air to help remove aircontaminants such as particulates, hydrocarbons, nitric oxides andground-level ozone. Tap Settings Climate Air Quality Sensor inthe center display's top view to activate the function.
3 For vehicles with 4-zone climate system*.
02

CONNECTIONS
The vehicle's various types of connections can be used to play or voice-control media, send or receive text messages, make or receive phonecalls, connect to the Internet, etc. from an external device such as asmartphone. In order to connect your devices to the vehicle, the ignitionmust be in at least mode I.
Vehicle's modem4
The easiest and most efficient way to connect the vehicle to the Inter-net is to use its own modem. This provides the highest performance, isactivated automatically each time the engine is started and does notrequire the use of a smartphone.
1. Insert a personal SIM card in the holder in the cargo compartment.
2. Tap Settings Communication Vehicle Modem Internet intop view.
3. Activate by checking the box for Vehicle modem Internet.
Sharing Internet connection (tethering)When the vehicle is connected to the Internet via the vehicle's modem,you can share the vehicle's Internet connection (Wi-Fi hotspot) withother devices under Settings in top view. Tap CommunicationVehicle Wi-Fi Hotspot.
BluetoothUse Bluetooth as first choice for handling phone calls, text messagesand media from your phone to the vehicle's systems. Bluetooth canalso be used to connect the vehicle to the Internet. Two Bluetooth devi-ces can be connected at the same time but only one of them can beused to stream media. The two most recently connected phones willconnect automatically when the ignition is switched on (if the phone's
02

Bluetooth function is activated). Up to 20 devices are saved in a list tofacilitate connection at a later time.
1. Activate Bluetooth in the phone. Also activate tethering/personalhotspot if you would like to connect to the Internet.
2. Open the phone tile in the center display.
3. Tap Add phone or, if a phone is already connected, tap Change andthen Add phone.
4. Select the phone to be connected and then follow the steps on thecenter display and in the phone. Note that in certain phones, themessage function is activated.
Wi-FiWi-Fi connections can be used to connect the vehicle to the Internet atgreater speeds than are possible using Bluetooth to stream onlineservices such as web radio and music via apps in the vehicle, down-load/upload software, etc. A Wi-Fi connection from a smartphone actsas a hotspot for the vehicle and any external devices that may be in thevehicle.
1. Activate tethering in the phone.
2. Tap Settings in the center display's top view.
3. Tap Communication Wi-Fi and activate by checking the box forWi-Fi connection.
Please note that in certain phones, tethering is closed after contactwith the vehicle has been broken. The phone's tethering function willthen need to be reactivated before it can be used again.
USBThe USB ports can be used to connect an external device to e.g. playmusic. You can also use the USB port for Apple CarPlay* and Android Auto*. If there are two USB ports, use the one with the white frame. Theexternal device will also be recharged while it is connected to the vehi-cle.
USB ports (type A) are provided in the armrest storage compart-ment between the seats.
Electrical socketsYour vehicle contains the following electrical sockets:
12-volt electrical socket.
12-volt electrical socket and 120-volt electrical socket*. There isalso a 12-volt socket* in the trunk/cargo compartment.
4 Only vehicles with P-SIM. Vehicles equipped with Volvo On Call will use the vehicle modem Inter-net connection for the services.
02

5 For information about which phones are compatible with the vehicle, go to support.volvocars.com.
USING CONNECTED DEVICES
External devices can be connected to e.g. handle phone calls and playmedia in the vehicle's audio and media systems.
Handling phone calls5
You can make and receive calls from a Bluetooth-connected phone.
Making calls using the center display1. Open the Phone tile in home view. Select to make a call using the
list of recent calls or your list of contacts, or enter a number usingthe keypad.
2. Tap .
Making a call using the right-side steering wheel keypad
1. Tap and navigate to Phone by tapping or .
2. Scroll through the list of calls using and select using .
You can also handle calls using voice commands. Tap the voice controlbutton ( ) in the right-side steering wheel keypad. For voice com-mands, see the "Voice control" chapter in this Quick Guide.
Playing mediaIn order to listen to audio content from an external device, connect it tothe vehicle using the connection of your choice; see the previous sec-tion for connection options.
Bluetooth-connected device
1. Start playback in the connected device.
2. Open the Bluetooth app in App view in the center dis-play. Playback will begin.
USB-connected device
1. Start the USB app in app view.
2. Select a song, track, etc. Playback will begin.
02

6 Apple and CarPlay are registered trademarks of Apple Inc.
MP3 player or iPod
1. Start playback in the device.
2. Open the iPod or USB app, depending on connectionmethod. For playback from iPod, select the iPod appregardless of connection method. Playback will begin.
Apple® CarPlay®*6 and Android Auto*CarPlay and Android Auto make it possible to use certain apps in youriOS or Android device via the vehicle to e.g. play music or listen to pod-casts. This interaction takes place via the vehicle's center display oryour device.
To use CarPlay, Siri must be activated on the iOS device. The devicemust also be connected to the Internet via Wi-Fi or a mobile network.
1. Connect the phone to the USB port with a white frame.
2. Tap Apple CarPlay or Android Auto in app view to acti-vate.
Activate voice control with CarPlay and Android Auto by pressing andholding the button in the right-side steering wheel keypad. Pressingthis button briefly will instead activate the vehicle's own voice controlsystem.
Bluetooth is deactivated when CarPlay is used. Use Wi-Fi or the vehi-cle's modem if you would like to connect the vehicle to the Internet.
02

03

HOME VIEW
When the center display starts it shows the Home view. From here, youcan access the tiles for Navigation, Media and Phone, as well as thelast used app or vehicle function.
Navigation – Tap to access Sensus Navigation*.
Entering a destination with a free text search - Expand the tool-bar using the down arrow on the left side and tap . The map dis-play will change to a screen where you can search by entering text.Enter a search word/phrase.
Entering a destination on the map – Tap to maximize themap. Press and hold the location you want to go to and select Go
here.
Deleting a destination - Tap to open the itinerary. Tap therecycling bin to delete an intermediate destination (waypoint) in theitinerary or tap Clear itinerary to delete the entire itinerary.
Map updates7 - Tap Download Center in app view. Maps showsthe number of available map updates. Tap Maps Install toupdate maps or install a selected map. Maps can also be downloa-ded from support.volvocars.com to a USB flash drive and thentransferred to the vehicle.
Media - this shows e.g. your music on an external device or FM
radio if you have selected that in app view. Tap the tile to accesssettings. From here, you can see your music libraries, radio stations,etc.
Phone - this provides access to phone functions. Tap the tile toexpand it. From here, you can make calls using your list of recentcalls or your contact list, or by entering a number using the keypad.When you have selected a number, tap .
Last used app or vehicle function - here you can see the lastused app or vehicle function that is not shown in any of the other
tiles, e.g. Car status or Driver performance. You can also access arecently used function by tapping its tile.
7 The function's availability may vary from market to market.
03
03

FUNCTION VIEW AND APP VIEW
Function view
In home view, swipe the screen from left to right8 to access functionview. From here, you can activate/deactivate various vehicle functions,such as Head-up Display* and Park Assist. Activate/deactivate a func-tion by tapping its symbol. Some functions open in their own windows.
App view
In home view, swipe from right to left8 to access app view. This displaysthe vehicle's factory-installed apps as well as any apps you have down-loaded and installed.
Managing and updating apps and systemsYou can update many of the vehicle's systems in Download
Center in app view. The vehicle must be connected to theInternet in order for this to be possible. In Download Center,you can:
Download apps - Tap New apps and select the desired app. SelectInstall to download the app.
Update apps - Tap Install all to update all apps. Or tap Application
updates to display a list of available updates. Select the desired appand tap Install.
Uninstall apps - Tap Application updates and select the desired app.Tap Uninstall to delete the app.
Update system software - Tap System updates to display a list ofupdates that can be installed in the vehicle. Tap Install all at the bottomof the list to update all software or Install to update specific software. Ifyou do not want a list, select Install all near the System updates but-ton.
Moving iconsThe apps and buttons for vehicle functions in app view and functionview can be moved to customize these views.
1. Press and hold an app or button.
2. Drag the app or button to the desired location in the view andrelease it.
8 Applies for left-hand drive vehicles. For right-hand drive vehicles, swipe the opposite way.
03

03

TOP VIEW
There is a tab in the upper part of the display that you can pull down toaccess top view. This view provides access to Settings, Owner's
manual, Profile and the vehicle's stored messages.
Personal settingsMany personal settings can be changed under Settings, e.g. displays,mirrors, front seat, navigation*, audio and media systems, language andvoice control.
Driver profilesIf the vehicle is used by more than one driver, each driver canhave a personal driver profile. Each time you enter the vehicle,you can select your driver profile where your personal settingsare stored. The number of profiles displayed depends on how
many keys are detected in the vehicle. The Guest profile is not con-nected to any specific key.
The most recently active driver profile will be activated when the vehicleis unlocked. To change the driver profile, select Profile in top view.
Driver profiles can be linked to specific vehicle keys and when the vehi-cle is unlocked, settings will be automatically adapted to your personalsettings. To link a key, tap Settings System Driver Profiles.Select one of the driver profiles (the Guest profile cannot be linked).Home view will reappear. Pull top view down again, repeat the aboveprocedure and select Edit for the selected profile and then Connect
key.
Individual drive modeTo adapt the Comfort, Eco or Dynamic drive modes to your personalpreferences, activate the drive mode by tapping Settings My CarIndividual Drive Mode.
System volumesTo adjust or switch off the volume of system sounds, e.g. screen tapsounds, go to Settings Sound System Volumes.
03

04

DRIVER SUPPORT
Your vehicle is equipped with a number of functions to help you drivesafely and help prevent accidents. These functions are activated in thecenter display's function view. Keep in mind that these driver supportfunctions are only aids. The driver always has full responsibility for oper-ating the vehicle in a safe manner. A selection of these is listed below:
City Safety™
City Safety9 can help assist the driver in critical situations in order tohelp prevent or mitigate a collision with other vehicles, large animals,pedestrians or cyclists. Visual, acoustic and haptic signals are given toalert the driver of a collision and assist you to act in time to avoid it. Ifyou do not have time to react and a collision is imminent, the systemcan automatically apply the brakes. City Safety is activated when theengine is started and cannot be disabled.
Blind Spot Information (BLIS)*BLIS can notify the driver of vehicles in your blind spot and ofrapidly approaching vehicles in adjacent lanes.
Cross Traffic Alert (CTA)*CTA is a supplementary driver support system for BLIS thatcan alert drivers to crossing traffic behind the vehicle. CTA isactivated when reverse gear is engaged or if the vehicle is roll-ing backward.
Lane Keeping AidLane Keeping Aid can help the driver reduce the risk of thevehicle unintentionally veering out of the lane. To select thetype of assistance that should be provided, select Settings
My Car IntelliSafe Lane Keeping Aid Mode in the cen-ter display's top view.
Steering assistance during collision risksThe Collision avoidance assistance function can help thedriver reduce the risk of the vehicle unintentionally veering outof the lane and/or colliding with another vehicle/obstacle byactively steering the vehicle back into the lane and/or swerv-ing out of the way. The function consists of the sub-functionsRun-Off Mitigation with steering assistance, Steering assis-tance during collision risks from oncoming traffic and Steeringassistance during collision risks from behind*.
Pilot Assist
Pilot Assist10 is a convenience function that can assist the driver inkeeping the vehicle in its own lane and at a set distance to the vehicleahead. Pilot Assist is selected and activated using the left-side steeringwheel keypad. For steering assistance to be possible, certain conditionsmust be met, e.g. both of the driver's hands must be on the steeringwheel and the lane markings must be visible. When steering assistanceis active, a GREEN steering wheel symbol will be displayed in theinstrument panel.
9 Not available on all markets.10 Depending on market, this function can be either standard or optional.
04

04

PARKING ASSISTANCE SYSTEMS
Park Assist Pilot*Park Assist Pilot can help the driver steer the vehicle while parking. Thedriver's task is to check the area around the vehicle, follow the instruc-tions provided in the center display, select the appropriate gear, controlthe vehicle's speed and be prepared to apply the brakes to stop thevehicle.
Parking with Park Assist PilotDo not drive faster than 30 km/h (20 mph) when parallelparking or 20 km/h (12 mph) when perpendicular parking.The distance between the vehicle and the parking spaceshould be about 1 meter (3 feet) when the function is look-ing for parking.
1. Tap Park In in Function view or Camera view.
2. Be prepared to stop the vehicle when notified by agraphic and a message in the center display that a suita-ble parking space has been found. A pop-up window willappear.
3. Select Parallel parking or Perpendicular parking andengage reverse gear.
Pulling out of a parallel parking space with Park Assist PilotThis function can only be used when the vehicle has been parallelparked.
1. Tap Park Out in Function view or camera view.
2. Use the turn signals to indicate the direction in which thevehicle will pull out of the parking space.
3. Follow the instructions in the center display.
Park Assist Camera*The Park Assist Camera can help the driver steer the vehicle in tightspaces by alerting the driver to obstacles using the camera screen andgraphics in the center display. Camera views and guiding lines can be
selected in the center display. Note that objects/obstacles may becloser to the vehicle than they appear on the display. The Park AssistCamera starts automatically when reverse gear is engaged. It can alsobe started manually from the center display.
– Tap the Camera button in Function view to manuallyactivate/deactivate the function.
04

04
PURER DRIVING PLEASURE
Planning your trip and driving economically helps reduce fuel consump-tion, carbon emissions and other air pollutants. This can reduce yourimpact on the environment and reduce your fuel costs. Some factorsyou can influence and others you cannot. Here are some tips.
Plan your trips by always• Plan your trip - a lot of unnecessary stops and uneven speeds
increase fuel consumption.
Drive economically by• Activating Eco drive mode, which adapts the vehicle to more energy-
efficient driving.• Avoiding idling – switch off the engine when the vehicle is stopped
for long periods of time.• Maintaining a consistent speed and planning ahead to help minimize
braking.• Maintaining the recommended tire inflation pressure and checking it
regularly.• Keeping the windows closed while driving.
Factors you cannot influence• The traffic situation.• Road condition and topography.• Ambient temperature and headwinds.
See your Owner's Manual for more tips on driving economically.
04

VOICE COMMANDS
The voice control system makes it possible to control11 certain func-tions in the media player, Bluetooth-connected phones, climate systemand the Volvo navigation system* using voice commands. To activatevoice control, press the voice control button in the right-side steeringwheel keypad.
The following commands can usually be used in any situation:• Repeat
• Cancel
• Help
Cell phone voice commands• Call [contact]
• Call [phone number]
• Recent calls
• Read message
• Message to [contact]12
Radio and media voice commands• Media
• Play [artist]
• Play [song title]
• Play [song title] from [album]
• Play [radio station]
• Tune to [frequency]
• Tune to [frequency] [waveband]
• Radio
• Radio FM
• Radio AM
• SiriusXM*
• CD*
• USB
• iPod
• Bluetooth
• Similar music
Climate system voice commands• Climate
• Set temperature to X degrees
• Raise temperature/Lower temperature
• Sync temperature
• Air on feet/Air on body
• Air on feet off/Air on body off
05

• Set fan to max/Turn off fan
• Raise fan speed/Lower fan speed
• Turn on auto
• Air condition on/Air condition off
• Recirculation on/Recirculation off
• Turn on defroster /Turn off defroster
• Turn on max defroster/Turn off max defroster
• Turn on rear defroster/Turn off rear defroster
• Turn steering wheel heat on/Turn steering wheel heat off*
• Raise steering wheel heat/Lower steering wheel heat*
• Turn on seat heat/Turn off seat heat*
• Raise seat heat/Lower seat heat*
• Turn on seat ventilation/Turn off seat ventilation*
• Raise seat ventilation/Lower seat ventilation*
Navigation system voice commands*• Navigation
• Take me home
• Go to [city]
• Go to [address]
• Add intersection
• Go to [zip code]
• Go to [contact]
• Search [POI category]
• Search [POI category] [city]
• Search [POI name]
• Change country/Change state13, 14
• Show favorites
• Clear itinerary
• Repeat voice guidance
• Turn off voice guidance
• Turn on voice guidance
11 Certain markets only.12 Only certain phones can send messages via the vehicle. For additional information on compatibil-
ity, see support.volvocars.com.13 For European countries, "country" is used instead of "state".14 For Brazil and India, the search area is changed using the center display.
05

SUPPLEMENTARYINFORMATIONThe Owner's Manual and other manuals containsafety instructions and all warning, caution and notetexts, which must be read. Some functions onlyapply to certain markets.
WARNING
GETTING STARTEDVolvo On Call – The system's services only work inareas in which Volvo On Call's partners have cellu-lar coverage and in markets where Volvo On Call isavailable.
Just as with cellular phones, atmospheric disturban-ces or areas with fewer transmitters, e.g. sparselypopulated rural areas, can make connection impos-sible.
For warning, caution and note texts for Volvo On Call services, see the Owner's Manual and theapplicable agreement for the Volvo On Call sub-scription.
Sensus Navigation* – Direct all your attention tothe road and make sure that your concentration isfocused on driving. Follow applicable traffic lawsand use good judgment while driving. Road condi-tions can be affected by weather or season, whichmay make certain recommendations less reliable.
EXTERIOR OVERVIEWTailgate – bear in mind the risk of pinching whenopening/closing the tailgate. Make sure that no oneis in the path of the tailgate who could be injured byits movement. Always operate the tailgate with cau-tion.
Keyless locking/unlocking* – Check that childrenor other passengers are not at risk of crushingwhen all the windows are closed with keyless clos-ing*.
INTERIOR OVERVIEWPassenger airbag – Volvo recommends that alloccupants (adults and children) shorter than
140 cm (4 foot 7 inches) be seated in the rear seatof any vehicle with a front passenger side airbagand be properly restrained for their height andweight.
Occupant Weight Sensor (OWS)• No objects that add to the total weight on the
seat should be placed on the front passenger'sseat. If a child is seated in the front passenger'sseat with any additional weight, this extra weightcould cause the OWS system to enable the air-bag, which might cause it to deploy in the eventof a collision, thereby injuring the child.
• The seat belt should never be wrapped around anobject on the front passenger's seat. This couldinterfere with the OWS system's function.
• The front passenger's seat belt should never beused in a way that exerts more pressure on thepassenger than normal. This could increase thepressure exerted on the weight sensor by a child,and could result in the airbag being enabled,which might cause it to deploy in the event of acollision, thereby injuring the child.
Always take the remote key with you when youleave the vehicle. Make sure the ignition is in mode0, especially if there are children in the vehicle.
Always apply the parking brake when parking onan incline. Selecting a gear or putting the automatictransmission in P may not be sufficient to keep thevehicle stationary in all situations.
POWER FRONT SEATSDo not adjust the seat while driving. The seat mustbe positioned in a way that allows the driver to fullydepress the brake pedal. Adjust the seat as farrearward as comfort and control allow. After adjust-ing the seat, make sure that it is securely lockedinto position before starting to drive.
FOLDING DOWN THE REAR SEAT BACKRESTSMake sure the backrest is correctly engaged beforefolding up and down and that the head restraint iscorrectly engaged after folding up. The headrestraints on the outboard second-row seats mustalways be folded up when there are passengers inthe third row of seats*.
CONNECTIONS• Only use accessories that are not damaged or
malfunctioning. The accessories must be CEmarked, UL marked or have an equivalent safetymarking.
• Accessories must be designed for 120 V and 60Hz, with plugs intended for the outlet.
• New let outlets, plugs or accessories come intocontact with water or another fluid. Do not touchor use the outlet if it appears damaged or hasbeen in contact with water or another fluid.
• Do not connect power strips, adapters or exten-sion cords to the outlet has this could cause theoutlet's safety functions to malfunction.
• The outlet is equipped with a pet guard. Makesure that no one picks at or damages the outletin such a way that the guard is disabled. Childrenshould not be left unsupervised in the vehiclewhen the outlet is active.
DRIVER SUPPORTThe vehicle's driver support systems are designedto offer supplementary assistance to the driver, butcannot handle all situations in all traffic, weatherand road conditions. They are never a substitute forthe driver's attention and judgment. The driver isalways responsible for ensuring the vehicle is drivenin a safe manner, at the appropriate speed, with anappropriate distance to other vehicles, and inaccordance with current traffic rules and regula-tions. The driver always has ultimate responsibilityfor braking and steering the vehicle.
Before driving your vehicle, read all sections of theOwner's Manual concerning driver support systemsin the vehicle.
PARKING ASSISTANCE SYSTEMSPark Assist Pilot is a supplementary driver supportbut cannot handle all situations. The function is onlyintended to assist the driver when parallel and per-pendicular parking. The driver bears full responsibil-ity for parking the vehicle safely and braking whennecessary. Objects located far into the parkingspace may not be detected when scanning. Thedriver is always responsible for assessing whetherthe space suggested by Park Assist Pilot is suitablefor parking.
Park Assist Camera is supplementary driver sup-port intended to assist when parking the vehicle.The function is never a substitute for the driver'sattention and judgment. The cameras have dead/blind spots where objects cannot be detected. Payparticular attention to people and animals near thevehicle. Bear in mind that the front end of the vehi-cle may swing out towards oncoming traffic duringthe parking maneuver.
Before driving your vehicle, read all sections of theOwner's Manual concerning driver support systemsin the vehicle.
VOICE COMMANDSThe driver is always responsible for ensuring thatthe vehicle is operated in a safe manner and that allapplicable traffic regulations are followed.
CAUTION
INTERIOR OVERVIEWDo not use the OFF ROAD drive mode when tow-ing a trailer without an electrical connection. Thiscould result in damage to the pneumatic suspen-sion system's bellows.
The information is projected from a head-up dis-
play unit* located in the dashboard. To help pre-vent damage to the display unit's glass cover, donot place any objects on the glass and preventobjects from falling onto it.
CENTER DISPLAYWhen cleaning the center display, use a microfibercloth that is free from sand and similar debris.When cleaning the center display, apply only lightpressure to the display. Pressing too hard coulddamage the display.
Do not spray liquid or corrosive chemicals directlyonto the center display. Do not use window clean-ers, cleaning agents, aerosol sprays, solvents, alco-hol, ammonia or detergents that contain abrasives.Never use abrasive cloths, paper towels or tissuepaper, as these may scratch the display.
FOLDING DOWN THE REAR SEAT BACKRESTSWhen the backrest is folded down, make sure thereare no objects in the rear seat, and the seat beltsare not buckled. The integrated booster cushion*/
06

armrest* on the center seating position must be inthe stowed position.
RIGHT-SIDE STEERING WHEEL LEVERWiper blades in service position - Before placingthe wipers in service position, ensure that they havenot frozen to the windshield. If the wiper arms inservice position are raised from the windshield, theymust be folded back against the windshield beforeactivating wiping, washing or rain sensor as well asbefore departure. This is to prevent scratching thepaint on the hood.
CONNECTIONSElectrical outlet – Each 12-volt socket can supplya maximum of 120 W (10 A).
120-volt sockets can supply a maximum of 150 W.
NOTE
EXTERIOR OVERVIEWFoot-operated tailgate - There is a risk ofreduced or lost function if there are large amountsof snow, ice, dirt, etc. on the rear bumper. Makesure to keep the bumper clean.
Please note that the system could be inadvertentlyactivated in a car wash or similar if the remote keyis within range.
Setting maximum opening height - If the systemhas been working continuously for a prolongedperiod of time, it will be switched off to avoid over-load. It can be used again after approximately2 minutes.
Electromagnetic fields and obstructing objects mayinterfere with remote key functions. Avoid storingthe remote key near metal objects or electronicdevices, e.g. cell phones, tablets, laptops or charg-ers – preferably no closer than 10-15 cm (4-6 in.).
INTERIOR OVERVIEWOFF ROAD drive mode is not designed to beused for normal street driving.
With a cold start, idling speed may be considerablyhigher than normal for certain engine types. This isdone to get the emissions system up to normaloperating temperature as quickly as possible, whichminimizes exhaust emissions and protects the envi-ronment.
Head-up display* – When a City Safety function isactivated, the information in the head-up display willbe replaced by a City Safety graphic. This graphicwill illuminate even if the head-up display is turnedoff.
The driver's ability to see information in the head-updisplay may be impeded by the use of e.g. polarizingsunglasses, a driving posture in which the driver isnot centered in the seat, objects on the displayunit's glass cover and/or unfavorable lighting condi-tions. People with certain types of vision problemsmay experience headaches or eye strain whenusing the head-up display.
STEERING WHEELTrip computer - Calculation of driving range mayvary if your driving style changes.
PASSENGER COMPARTMENT CLIMATEHeating/cooling cannot be accelerated by choos-ing a higher/lower temperature than the desiredtemperature.
Preconditioning - The vehicle's doors and win-dows should be closed during preconditioning ofthe passenger compartment.
CONNECTIONSInternet - Data (data traffic) is transfered whenusing the Internet, which can incur additional costs.Activating data roaming and Wi-Fi hotspots canincur additional charges. Contact your networkoperator about data traffic costs. When download-ing using a phone, pay extra attention to the datatraffic costs.
Data downloading can affect other services thattransfer data, e.g. web radio. If the affect on otherservices is experienced as problematic, the down-load can be interrupted. Alternatively, it may beappropriate to switch off or cancel other services.When downloading using a phone, pay extra atten-tion to the data traffic costs.
Updating – If the phone's operating system isbeing updated, it is possible that the Bluetooth con-nection will be interrupted. Delete the phone fromthe vehicle and reconnect.
USING CONNECTED DEVICESApple CarPlay and Android Auto - Volvo is notresponsible for the content of the CarPlay orAndroid Auto apps.
06

WARNING
California Proposition 65
Operating, servicing and maintaining a passen-ger vehicle can expose you to chemicalsincluding engine exhaust, carbon monoxide,phthalates, and lead, which are known to theState of California to cause cancer and birthdefects or other reproductive harm. To mini-mize exposure, avoid breathing exhaust, do notidle the engine except as necessary, serviceyour vehicle in a well ventilated area and weargloves or wash your hands frequently whenservicing your vehicle. For more information goto www.P65Warnings.ca.gov/passenger-vehicle.

TP 27071 (English - USA & Canada), AT 1846, MY19, Copyright © 2000-2018 Volvo Car Corporation