Embed Size (px)
Citation preview
WYNN
Installation and
Reference Guide
The Reading, Writing, Studying Tool from Freedom Scientific Inc.
WYNN contains technology licensed and/or developed by © Caere Corporation. WYNN is an IBM Independence Series product. The “IBM Independence Series product” trademark is an International Business Machines Corporation (IBM) owned trademark and is used by Freedom Scientific, Inc. under license. WYNN uses ViaVoice speech software licensed from International Business Machines Corporation (IBM). Portions of this product were created using Web Access Technology (WAT) licensed from International Business Machines Corporation (IBM). FineReader recognition technology (c) ABBYY(tm), Moscow, Russia. The Sentry Spelling-Checker Engine Copyright © 1999 Wintertree Software Inc. Wordsmyth Educational Dictionary Thesaurus Copyright Wordsmyth, Ithica, New York. Portions of this product were created using technology licensed from textHELP! Limited. This application utilizes a licensed copy of EasyMail Objects. EasyMail Objects is copyrighted and owned exclusively by Quiksoft Corporation. All rights reserved. Use of the objects outside of the context of this application is a violation of federal copyright laws and international treaty provisions. Portions of this product were created using technology licensed from Inso Corporation. Portions of this product were created using LEADTOOLS 1991-2000, LEAD Technologies Inc. All rights reserved.
1
Installation Overview
This section of the WYNN manual is designed to help you install WYNN. If you are an experienced computer user, you can skip to the section called “Installing WYNN—Quick Instructions.” If you are unsure of how to install a computer program from a CD, use the section called “Installing WYNN—Detailed Instructions.” What’s In Your WYNN Package
WYNN usually comes in a box with the following items: • The WYNN program CD • The user manuals:
o This Installation Guide and Reference Guide o Quick Start Guide o Tutorial Guide
• A microphone • Warranty card Depending on whether you purchased an individual product, a group of products, a site license, or a network product, these contents may vary. What You Need to Run WYNN
WYNN software comes in two versions: • WYNN Wizard includes optical character recognition (OCR) that
allows you to scan and read pages as well as read word processing and text files; write and edit documents using such tools as word prediction and spell checking; browse the Internet; create outlines; study using traditional study aids such as highlighting, bookmarks, dictionary, and thesaurus; and other features.
2
• WYNN Reader includes everything that is in WYNN Wizard, except the scanning and OCR capabilities. You can use WYNN Reader to read documents, write, study, browse the Internet, and other things.
The minimum system requirements to run WYNN are: • An IBM-compatible Pentium or higher computer running at least
233 MHz • Windows 95, Windows 98, Windows NT, Windows 2000, or
Windows Me • 64 MB of RAM (at least—more RAM will increase speed and
performance) • A CD-ROM drive • 200 megabytes of available hard disk space (plus room for
document storage). You will also need 45 MB additional room to install Internet Explorer 5.5 if you have version 4 or earlier of Internet Explorer (needed for WYNN’s Web access feature).
• A standard keyboard • SoundBlaster 16-compatible (or better) sound card with speaker (or
an SSIL-supported speech synthesizer with speaker) • (for WYNN Wizard) A supported TWAIN-compatible scanner or a
supported Hewlett-Packard flatbed scanner • A video card and monitor capable of VGA video in 800x600, 256
color mode or greater (to take advantage of all WYNN’s features, WYNN should normally be used at high-color 16-bit or greater, instead of 256-color mode)
Optional components include: • A modem, DSL, or network connection, plus an ISP (Internet
Service Provider), to give you access to WYNN’s new Web-browsing and Email features.
3
Network Version: Network Administrators
If you are a Network Administrator installing the network version of WYNN, please note that there is a separate directory, Readme file, and installation program for you to use. The directory is the \Net directory on the WYNN CD. Print out and follow the instructions in the Readme file in the \Net directory to install Network WYNN. IMPORTANT: DO NOT USE THE INSTALLATION PROGRAM THAT RUNS AUTOMATICALLY WHEN THE CD IS INSERTED IN THE CD-ROM DRIVE! DO NOT ATTEMPT THIS NETWORK INSTALLATION UNLESS YOU ARE A NETWORK ADMINISTRATOR OR OTHER KNOWLEDGEABLE PROFESSIONAL. YOU MUST HAVE PURCHASED A NETWORK LICENSE TO INSTALL THE NETWORK VERSION. BE PREPARED TO TELEPHONE FREEDOM SCIENTIFIC AFTER THE FIRST PART OF THE INSTALLATION TO RECEIVE THE NETWORK UNLOCK CODE. Network Version: Client Installations
After the Network Administrator has installed the network software, you may install the client installations on any networked workstations. You should follow the separate instructions below for the network client installations.
1. Find out from your Network Administrator the network location of the client installation program.
2. Run that setup.exe program to install WYNN onto the client workstation over the network.
Note: Do not use the WYNN CD to install the Network WYNN client. The CD will only install the stand-alone version of WYNN, not the Network version!
4
Installing WYNN If You Have a Previous Version
If you already have an earlier version of WYNN on your computer, the installation program will ask you if you want to uninstall (“Remove”) the earlier version. You can remove the earlier version, but you don’t have to—you can keep both versions on your computer. We suggest that you uninstall the earlier version, mainly because WYNN uses a lot of room on your hard drive. Regardless of which option you select, your document files will not be deleted. And after you have uninstalled the earlier version, WYNN will allow you to copy the older files to the WYNN 3 documents folder. If you choose to keep your previous version, be sure you do not use the same directory (folder) name for WYNN 3.0. The default directory for WYNN 3.0 is WYNN3 (for WYNN Wizard) or WYNNR3 (for WYNN Reader), so it is unlikely that you would need to change this. If you chose to remove the previous version, follow the prompts until the uninstall is complete. The install program will then reboot your machine and re-start the WYNN 3 installation program. If after rebooting, the installation does not re-start, you will need to eject and re-insert the WYNN CD in your CD-ROM drive to activate your computer’s auto-run process again. Or you can type x:\setup from the Run… option (where ‘x’ is your CD ROM drive letter) from the Start button. Installing WYNN—Quick Instructions
Note 1: This new version of WYNN automatically finds your scanner, so you no longer need to specify scanner drivers during installation! Note 2: If you have an older version of WYNN on your computer, the install program will ask if you want to uninstall the older version before
5
installing the newer one. The uninstall process will not remove your documents or settings files. We recommend that you uninstall your older version, but you do not need to do so. Note 3: Don’t worry if you don’t know how to answer a question during installation. You can always re-run the installation program later to reconfigure your system. Note 4: When installing Network WYNN over a network connection, the installation procedure will be different from these instructions. See the instructions for Network WYNN installation. 1. Put the CD in your CD-ROM drive. The installation program will start
automatically. 2. Fill in your name, company (or city) name, and serial number in the
blanks when asked. Note: All three blanks must be completed to continue with the installation process.
3. Choose Typical install if you want the default options:
• ViaVoice English speech; • A variety of scanning (OCR) languages; • Default directories; • Links to other programs in your computer.
Choose Custom install if you want to do any of the following: • Install additional speech engines besides (or instead of) ViaVoice
5.0 English; • Install WYNN in a different location; • Select specific scanning (OCR) languages; • Make changes to the links WYNN makes to other programs in your
computer (we call these “launchables”). 4. Confirm your selections, read the README file, and complete the
installation.
6
Installing WYNN—Detailed Instructions
The WYNN Installation program installs the program and creates folders for user documents and settings. It also checks to see if you have a sound card. Finally, the Installation program places the WYNN icon on the desktop. Before you install: • Turn on your PC. • (For WYNN Wizard) Install and turn on your scanner, making sure that
it is unlocked. (Your scanner must be separately installed using the CD that comes with the scanner.) You may install your scanner after installing WYNN if you prefer.
• Have your software serial number handy. The serial number is located in two places: on the outside of the box and on the outside of the plastic case that holds the WYNN CD.
Using the Installation Program
Follow the steps below to install WYNN on your computer. Note that you can exit the installation program at any time, simply by selecting CANCEL. 1. To begin the installation procedure, place the WYNN CD in your CD-
ROM drive. WYNN automatically starts the installation process.
NOTE: If, for some reason, WYNN does not automatically start the installation process, follow these steps: • With the WYNN CD in your CD-ROM drive, open the Windows
START menu on the task bar. • Select RUN. • In the Edit Field, type in the name of your CD drive (usually d:\),
followed by the word SETUP (for example, d:\setup).
7
• Select the OK button in the RUN dialog box, or press the ENTER key.
2. If you do not have Internet Explorer version 5.0 or greater, WYNN can
install it for you (either by upgrading it from version 4.x or, if you do not have Internet Explorer on your system at all, installing it completely). This process may take awhile, and may require that you restart your computer.
Note: You must have Internet Explorer 5.0 or greater if you want to take advantage of WYNN’s new Web access capabilities.
3. The Software License screen will be displayed. You must agree to the software license to install and use WYNN. Read this license, and then select OK to agree to its terms and continue the installation.
4. The installation program asks you to provide your name, organization or city, and serial number. Your serial number is found in two places: on the outside of the WYNN package, and on the CD case. Note that you can provide your city instead of your organization if you wish. Note: All three blanks must be completed to continue with the installation process.
5. Now the installation program asks whether you want to do a Typical or
Custom installation. Use the information below to determine which type of installation is appropriate for you.
a. Typical
This installation installs all the default files to run WYNN, along with the ViaVoice speech synthesizer software, which is included on your WYNN CD. If you want to use a different synthesizer, you must select the Custom installation. The installation program automatically installs ViaVoice American English. Note: Spanish, French, Italian, Brazilian, German, and British English ViaVoice are also available. If you wish to install any of these additional ViaVoice languages, you must choose the Custom install.

8
The Typical installation also installs the following scanning/recognition (OCR) languages: • American English • British English • Brazilian • Danish • Dutch • Finnish • French • German • Italian • Norwegian • Portuguese • Spanish • Swedish Note: The American English, British English, and Spanish recognition languages are used by the Caere MTX OCR engine. Caere is the default recognition engine. The other languages are used by FineReader. If you want to use one of these languages for recognition, you will need to change the setting called ‘Recognize Text Using’ in the Scanning Settings dialog box. The Typical installation also installs standard launchables. Launchables are links to commonly used programs on your computer, such as word processors.
b. Custom
If you are going to use a different or additional speech synthesizers, install additional ViaVoice languages, install extra recognition (OCR) languages, or if you want to install WYNN in a different directory, select Custom and you will be given a chance to specify these choices. Note that the newest version of WYNN
9
automatically detects your scanner, so it is no longer part of the installation process!
When you select Custom, you will get a series of installation options. 1) Speech synthesizer 2) Recognition languages 3) Directory 4) Program listing 5) Launchables
5. If you choose Custom, the installation program will first take you to the Synthesizer Selection dialog. The default synthesizer is ViaVoice. You may choose as many additional synthesizers as you want. To use the synthesizers, you must have them installed on your computer. This installation program does not install any synthesizers except ViaVoice—it just tells WYNN which installed synthesizers to use. The next screen will ask you which speech language(s) you want to install for ViaVoice, such as German, Spanish, etc., other than American English.
If you select more than one synthesizer, you must next choose which one to be the default. We recommend making ViaVoice your default synthesizer.
6. Next you must select which Launchable Applications you want. Launchables are applications that you can launch (run) from within the WYNN program. When you run a launchable in WYNN, WYNN will launch that program and automatically open your current document in it. Examples of launchable programs are Microsoft Word, WordPad, and Lotus Word Pro.
10
There are three options for launchables: • Setup Standard Launchable Applications Now • Customize Launchable Setup • Setup Launchable Applications Later If you choose Now, the most common launchables will be selected. It takes a few minutes for WYNN to find the launchables, then you will have a chance to accept or reject the programs WYNN finds. If you choose Customize, you will be able to browse through your hard drive to select individual programs to launch from within WYNN. When you customize launchables, you will also need to specify whether you want WYNN to open your current document in the other program. If you choose Later, you will be able to set up launchables later by re-running the setup.exe program from the WYNN CD.
7. Next you have the option to install extra FineReader recognition languages. WYNN automatically installs the 13 OCR languages mentioned above. For convenience, we have grouped the extra languages into two groups: Western European and Programming Languages, and Additional Languages.
8. Next you have the opportunity to choose the Destination Location for
the WYNN program files. The default destination directory is WYNN3. If you want to use a different directory, you can specify it by typing it in or using the Browse button.
9. Next, select the Program Folder for the installation. This is the name
that will appear in the Start menu under Programs. 10. Now the installation program will display a Summary of Installation
Choices. If you do not like any of the choices you made, you can go back and change them.
11
11. After you confirm your choices by pressing the Next button, the program will copy all the necessary files onto your hard drive. This process takes a few minutes.
12. When the installation is complete, you will be prompted to read the
README file. We recommend that you read over this file because it lists important new features, plus information that may not have been available at the printing of this manual.
13. The last step may be to restart your computer, if requested to do so. This is sometimes necessary so that WYNN can find the proper files when you start it.
Congratulations! You have successfully installed WYNN! Re-running the Installation Program Later
You can modify your installation options later by re-running the installation program. The following options are available: • Modify • Repair • Remove If you choose Modify, you can do any of several actions. You might do this if you add components to your system later. Or, you might make changes because you did not want to configure certain items during the standard installation process. • Synthesizer Driver Installation • Launchable Application Setup • Install Additional FineReader Recognition Languages • Internet Explorer v5.5 Installation
12
Starting WYNN
From the Windows desktop, use a mouse to double click on the WYNN icon. How Do I Get Help?
There are several ways to get help when you are using WYNN. Help Topics You can read any part of this manual using the WYNN Help topics. These are found in the Help menu. When you go to the Help menu you have two choices: Index and Table of Contents. With both choices, WYNN will display a dialog box with subject areas. Select the item you want. You can read the topic using WYNN’s reading capabilities. When you are done, use WYNN’s Close button (on the blue tool bar) to close the Help topic. Status Bar Help When you are on a menu in WYNN, the Status Bar at the bottom of the screen provides a short description of each menu item. Context-Sensitive Help When you are in a dialog box, you can click on the little question mark in the upper right corner of the dialog, then click on any item in the dialog box. WYNN will display a context-sensitive help message for that item. You can also access Context-sensitive Help with a right mouse-click, which will bring up the floating “What’s This?” button. Click on that button to bring up the context-sensitive help message for that item. The Readme File WYNN’s README file gives you the latest technical information. You can open and read the README file using the Help system.
13
Technical Support Reach Technical Support using the following options: • World Wide Web site: http://www.FreedomScientific.com/wynn • Technical Support e-mail: [email protected] • Technical Support Telephone: (727) 803-8600 When you call, be at your computer, have your documentation in hand, and be prepared to provide the following information:
• Product serial number used for registration. • Product name and version number. • Type of computer hardware you are using. • Software version number of Windows. • Exact wording of any messages on your screen. • What you were doing when the problem occurred. • How you tried to solve the problem.
Office hours: Monday through Friday 8:30 A.M. to 5:00 P.M. Eastern Time (USA).
14
Installing WYNN on a Mac
You can install and use WYNN on an Apple Macintosh computer using Virtual PC from Connectix. This program allows the Mac to run under a Windows 98 operating system. Below is a brief overview of requirements and installation procedures, followed by detailed installation instructions. Systems Requirements
Any Mac with the following minimum capabilities: • G3 or G4 processor running at 300 MHz or greater (350 MHz highly recommended) • 96 MB RAM or greater (128 MB RAM recommended) • 1.3 GB of available hard disk space • Mac OS 9
Add the following:
• Virtual PC with Windows 98 from Connectix, version 3.0 or later • WYNN Wizard 3 or WYNN Reader 3 or a Network WYNN client • An external Mac microphone, or WYNN's PC microphone and a
$10 "NE Mic" Mac audio adapter from Griffin Technology (for Macs with PlainTalk microphone jack)
• A supported USB scanner (for WYNN Wizard)
Optional: • A Kensington 2-button mouse for Mac • A Mac printer • A modem or network connection to a PC network
Supported Scanners (double check with us as scanner models change frequently):
• Epson Perfection 1200U, 1240U, or 1640SU • Canon FB 630Ui [Not good for scanning books near the margin]
15
Notes:
• HP scanners are not recommended. • The WYNN timed evaluation CD will not run on the Mac.
Detailed Mac Installation Instructions
Installing Virtual PC V3.0 1. Insert the Virtual PC 3.0 CD-ROM into the Macintosh 2. Open the Virtual PC 3.0 CD 3. Launch the Virtual PC 3.0 installer 4. When prompted to run the Virtual PC setup Assistant, select Yes
Virtual PC Setup Assistant Recommended Options (If not listed below select the default choice)
• Application Performance: Yes: Set to 64MB or greater • Video Performance: No: Keep current • Full Screen Mode: Yes • Primary Hard Drive: Yes: Resize to 1024MB or maximum
allowable • Secondary Hard Drive: No • Modem settings: Yes, if you want to use the modem within Virtual
PC; No, if you don’t have a modem or don’t need to use one within
Virtual PC Installing Virtual PC V4.0 Upgrade
1. Insert the Virtual PC 4 Upgrade CD-ROM into the Macintosh. 2. Open the Virtual PC 4 Upgrade CD. 3. Launch the Virtual PC 4 Upgrader. 4. Select Easy Install and click Install. 5. When installation is complete, click Quit.

16
Setting up MacOS
Turning off Virtual Memory in MacOS 9 1. From the desktop, select the Apple menu (picture of an apple). 2. Select: Control Panels --> Memory. 3. In the dialog box, select the Off button in the Virtual Memory
section.
Setting the Microphone Level in MacOS 9 1. From the desktop, select the apple menu (picture of an apple). 2. Select: Control Panels --> Sound. 3. Select the input tab. 4. Select External Mic from the list. 5. Select the Check Signal Level button. 6. Adjust the Gain to about halfway.
Running Virtual PC
1. Select the Macintosh HD 2. Open the Virtual PC 4 folder 3. Double click the Virtual PC icon to launch the Virtual PC
application 4. When the Virtual PC serial dialog appears, fill in the required
information and click OK (Serial number is in the Virtual PC 4 user guide)
5. Start the virtual machine that contains Windows
Virtual PC 4 Additions
1. On your Windows desktop, double click the vpc4add file. This installs the Virtual PC 4 additions.
2. Click Next to continue. 3. When prompted for the installation options, install all options. 4. When installation is complete click the Finish button.
17
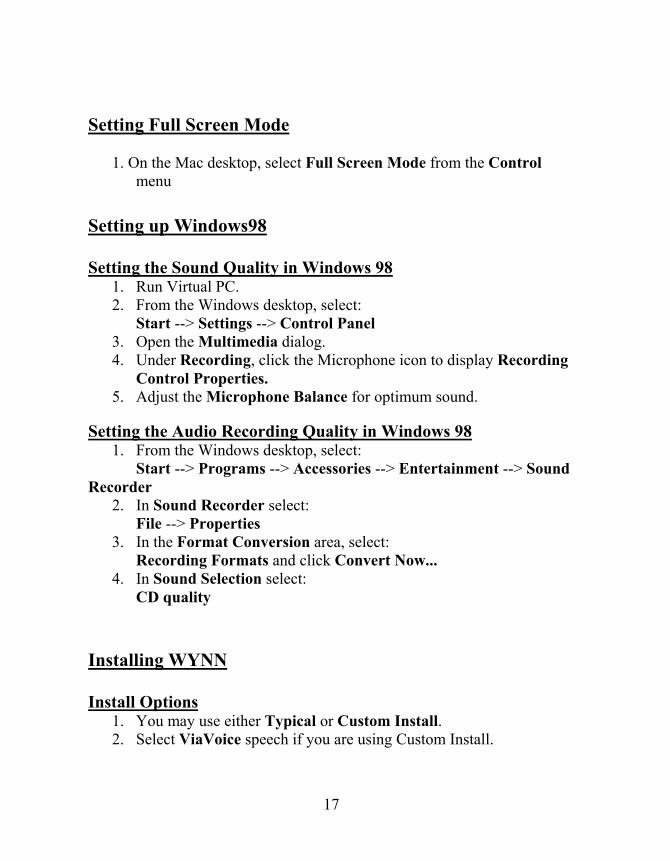
Setting Full Screen Mode
1. On the Mac desktop, select Full Screen Mode from the Control menu
Setting up Windows98
Setting the Sound Quality in Windows 98 1. Run Virtual PC. 2. From the Windows desktop, select:
Start --> Settings --> Control Panel 3. Open the Multimedia dialog. 4. Under Recording, click the Microphone icon to display Recording
Control Properties. 5. Adjust the Microphone Balance for optimum sound.
Setting the Audio Recording Quality in Windows 98
1. From the Windows desktop, select: Start --> Programs --> Accessories --> Entertainment --> Sound
Recorder 2. In Sound Recorder select:
File --> Properties 3. In the Format Conversion area, select:
Recording Formats and click Convert Now... 4. In Sound Selection select:
CD quality
Installing WYNN
Install Options 1. You may use either Typical or Custom Install. 2. Select ViaVoice speech if you are using Custom Install.
18
For all other options select the default options.
Installing SPCHAPI3.exe (In Windows 98)
• In the root directory of the WYNN 3 CD, launch the SPCHAPI3.exe file. This will install a fix for speech synchronization within WYNN.
19
Reference Guide
This Reference Guide is an alphabetical list of every menu item and dialog box entry that appears in WYNN. Each item has the following:
1. What. The name of the item as it appears in the menu or dialog. 2. Where (in parentheses). Which menu or dialog box the item
appears in. If the item appears in more than one place, each place listing is separated with a semi-colon. If the item is a button, that is indicated first.
3. Shortcut (in parentheses). The Windows access key you can use for the item.
4. Description. The explanation of what the item does, what the default settings are, and any important references.
Here is an example of an entry for ‘Close.’ Following the entry is an explanation. Close (tool bar button); (File Menu item) (CTRL+W) (C); (button) (in Email System screen) (C). Select Close to close the document you are currently reading. When you select Close, WYNN asks you if you want to save any changes you have made to the document. These changes include edits and additions; mark-ups inserted into the document (highlighting, bookmarks, and notes); and general settings changes (font size, color). When you are in the Email System, pressing the Close button closes the email system and returns you to WYNN’s browser/editor. Explanation: Close appears in three places in WYNN:
• As a tool bar button • As a File Menu item, where you can use CTRL+W or C as a
shortcut. • As a button on the Email System screen, where you can use C as a
shortcut.

20
1/2 Line (Page Scrolling sub-menu) (1). WYNN scrolls up half a screen. 2-Page Scanning (in Scanning Settings dialog box; Scan Menu item)
(2). This setting allows WYNN to scan two side-by-side pages of an open paperback book (or other book in which both facing pages fit on the scanner) in a single scan. WYNN will store the pages separately, with separate page numbers. This allows the page numbers in your document to match the pages numbers in the scanned book. After scanning, WYNN will read the first page first, and then read the second page. The default for this item is off.
3/4 Line (Page Scrolling sub-menu) (3). WYNN scrolls up nearly a full
screen. About WYNN (Help Menu item) (A). This item displays program name,
version number, serial number, and copyright information. Add (button) (in Pronunciation Dictionary dialog box); (in OCR
Correction dialog box) (A). Select this button to add a word to the word list.
Add (button) (in Word Prediction Phonetics dialog box) (A). Press the
Add button to add the phonetic association that you have just entered in the Phonetic box. The association will also be checked (selected for use). You should use Update if you want to add the phonetic association without checking (selecting) it.
Add (in Customize Tool Bar dialog box) (D). The Add button lets you
add buttons to the Custom Tool Bar. Add (in Differential Coloring dialog box) (D). The Add button adds the
character combination in the Preview box to the list of Defined Combinations.
Add Addresses to Group (in New Address screen) (A). This is the list of
addresses in your address book. Move your cursor to the address
21
you want to add to the group, and then press the Add to Group button.
Add a New Noun or Verb (dialog box) (from Add a Word button in
Word Prediction Edit Lists). When you press the Add a Word button, WYNN brings up the Add a New Noun or Verb dialog box, where you will need to define the word’s grammatical context. When you add a verb, you must list the correct present, past, participle, and future/conditional tenses for the word. When you add a noun, you must list the noun’s singular/plural forms, collective/group forms, and specify whether it uses ‘a or ‘an,’ and how its quantities are defined. If the word is neither a verb nor a noun, you should select ‘Other,’ where you are asked to give examples of three-word phrases for the word. Note that the new word must not be the first word in the phrase.
Add a Word (button) (in Word Prediction Edit Lists dialog box) (A).
Press this button to add a new word to the word list. When you press the button, WYNN brings up the Add a New Noun or Verb dialog box, where you will need to define the word’s grammatical context.
Add Folder (button) (in Email System screen) (A). You can create
folders to store your saved email messages more efficiently. When you select Add Folder, WYNN brings up a dialog box with a blank field for you to type in the name of a new folder. You can use any characters, including spaces, in the folder name.
Add to Address Book (button) (in Read Message screen) (K). Select
this button to add an email address to your personal address book. This will add the address of the person who sent you the message. When you select this item, WYNN displays the New Address dialog box, inserts the address into the Email Addresses field, and puts your cursor in the Name field.
22
Add to Dictionary (button) (in Spell Check dialog box) (D). Adds the word from the ‘Word Not Found’ box to your own list of frequently-used words in the Personal Dictionary.
Add to Favorites (Web Favorites item) (A). To add a page to your list of
favorite pages, go to the page you want to add to your Favorites list, On the Favorites menu, click Add to Favorites, then type a new name for the page if you want to. Note that when you want to open one of you Favorites pages, click the Favorites menu, and then click the page you want to open. As your list of favorite pages grows, you can organize them into folders. See the entry for Organize Favorites for more details.
Address (in Web Settings dialog box) (A). Type the complete Web
address of the page you want to use for your home page. The default home page is http://www.freedomscientific.com/wynn. IMPORTANT NOTE: If you change this setting. you must save your settings, using WYNN’s Save Settings command, for the Web configuration to be active from that point forward.
Add to Group (button) (in New Address screen) (G). Use this button to
add an address that is in your address book to the current group. Use the arrow keys to review the names in the address list, then press this button to add the selected address to the group name in the Name or Group field.
Address BCC (button) (in Address Book) (B). Select the Address BCC
button to add the selected recipient to the BCC field of your email. These are the people you want to send ‘blind’ copies of this message to. These names will not show up on anyone else’s copy of the message. If the regular recipients (those in the To and Cc fields) reply to the message, the Bcc recipients will not be included in the reply list.
Address Book (button) (in Email System screen) (B); (button) (in
Compose Email Message screen) (K). An email address book is a
23
powerful tool for organizing the names and addresses of people you frequently communicate with. WYNN’s email system contains an address book so that you can keep a list of important email addresses. You can get to the address book in several ways. Because it is an important tool, it is available from all the email display screens. From the main Email System screen, you can use the Address Book button to manage your list of addresses. From the Compose Message screen, you can select the Address Book button to easily insert addresses into your message. From the Read Message screen, you can select the Add to Address Book button to add an address to the address book. When you select Address Book, WYNN brings up the Address Book dialog box. You can add individual addresses to the address book. To enter a new address, press the New Entry button and enter the person’s name and email address. You can also create groups of addresses. For example, if you often want to send messages to all the people in your department at work, or to a certain group of friends, you can put these people in a group. You give the group a unique name, such as Marketing Department, or Church Friends, that will help you select the right group later. This will save you time, since you won’t have to enter each name separately when you send a message. To create a group, type the name for the group in the Name or Group field, then select names from the list in Add Addresses to Group and press the Add to Group button.
Address CC (button) (in Address Book) (R). Select the Address CC
button to add the selected recipient(s) to the CC field of your email. Address To (button) (in Address Book) (T). Select the Address To
button to add the selected recipient(s) to the To field of your email. Adjust (tool bar button). Press the Adjust button to make adjustments to
the items in your outline. Using Adjust, you can move an item Back One Level, Forward One Level, Move Up, or Move Down. This button is only available when you have activated Outlines.
24
Advanced Menu (ALT+A). Use the Advanced menu to control some of WYNN’s advanced features, including the Pronunciation Dictionary, OCR Correction, Broadcast Documents or Settings, and Teacher Controls.
All (button) (in Speech Settings dialog box) (A). To select all four types
of items, press this button. All (in Find Mark-up dialog box) (A). Click ‘All’ to have WYNN look
for all types of mark-ups in your document: highlights, bookmarks, text notes, and voice notes.
All x Pages (in Print dialog box) (A). Prints the entire document,
including any text notes, which are printed on a separate page at the end of the document. The ‘x’ will actually be the number of pages in your document, so that if the document has 3 pages, this item will display as ‘All 3 Pages.’
All Settings (under ‘More’ button in Save Settings dialog box) (A).
Check this item if you want WYNN to save all the settings that are currently active.
Allow scanner to finish when canceling a scan (in Scanner Selection
dialog box) (C). If you are unable to scan at all after you have canceled scanning in the middle of a scan, try this setting.
Apply to Current Document (in OCR Correction dialog box) (P).
Select this button to have WYNN apply corrections from its list to the open document.
Attach File... (button) (in Compose Email Message screen) (A). Select
this button to select a file to send with your message. When you select Attach File, WYNN brings up the Attach File dialog box. This dialog box works the same way the File Open dialog box does. WYNN will attach the file to the message and list the file name in the Attachments field. Note that, as with most other Windows
25
programs, if the file is in use, WYNN will not be able to attach it and you will get an error message.
Attachments (in Compose Email Message screen) (M); (in Read
Message screen) (M). In the Compose Email Message screen, any files you attach to the message will be listed here. IN the Read Message Screen, if the person who sent you the message attached any files, they will be listed here. If there were no files attached, this field will be grayed out.
Automatic disconnect after send or receive (in Email Settings dialog
box) (R). Select this checkbox to have WYNN disconnect from the Internet as soon as you have completed sending or receiving your messages. The default is unchecked. Note that WYNN will not automatically disconnect if you have a dedicated connection, if Web is activated, or if WYNN initiated the connection. IMPORTANT NOTE: After completing this information, you must save your settings, using WYNN’s Save Settings command, for the email configuration to be active from that point forward.
Automatically Apply OCR Corrections (in Scanning Settings dialog
box) (O). Select this item to have WYNN automatically apply the OCR Correction words to documents as they are scanned. WYNN has an OCR Corrections feature that allows you to specify text string replacements for words the OCR engine has not correctly identified. If you will be scanning types of documents that you know WYNN has had trouble identifying, you should check this box so that you don’t have to go through your scanned documents to apply corrections manually. The default setting for this item is checked.
Automatically insert page breaks when importing large documents (in
General Settings dialog box) (M). If you open a large document that does not have page breaks in it, WYNN will open it as one very large page. This can slow WYNN’s actions. You can set this item to overcome this problem. When this item is checked, WYNN puts
26
a page break after approximately every 35 lines for files you open (if you use a different font size, the number of lines per page will change). This applies to all file types except WYNN Documents (*.wyn) and Arkenstone Documents (*.ark). Note that this does not apply to documents you paste into a WYNN document; just to documents you open using the Open command. The default for this item is checked, that is, WYNN will automatically insert page breaks in imported documents.
Automatically learn as I type (in Word Prediction Learning Text
dialog box) (A). Check this box if you want WYNN to learn new words as you type them into the current document. When you check this item, WYNN will continue to learn everything you type until you un-check the box. Note that WYNN can also learn new words from a text file or the current WYNN document. The default for this item is checked.
Automatically speak list (in Word Prediction Settings dialog box) (A).
Check this box if you want the word list in the predictor box to speak automatically whenever it changes. The default for this item is unchecked.
Available Buttons (in Customize Tool Bar dialog box) (B). The
‘Available Buttons’ list, on the left side of the dialog box, displays all available WYNN tool bar buttons, with a brief description next to them.
Back (Web tool bar button) (Web Menu item) (B) Select Back to go to
the last page you viewed, that is, the last Web address the browser visited.
Back One Level (Outline Control sub-menu item). Moves the current
item to a higher level, which moves it out more toward the left margin. Some outline programs call this ‘Promote.’ The keyboard equivalent is SHIFT+TAB (you can also use ALT+LEFT ARROW).
27
Background (in Masking dialog box) (B). Both the Text and Background
options let you choose the intensity of shading, in a range from lighter to darker. Use the mouse to move the pointer on the bar to the desired position.
Background Color (in Visual Settings dialog box) (K); (in Word
Prediction Settings dialog box) (K). Use this item to change the background color on the screen. The default background color for the WYNN screen is white. In the Word Prediction box, the default background color is light green.
Basic Dictionary... (Tools Menu item) (A). Select this menu item to open
WYNN’s basic dictionary. This dictionary has fewer words and definitions than the Standard dictionary.
BCC (in Compose Email Message screen) (B). Write the names or email
addresses of all the people you want to send ‘blind’ copies of this message to. These names will not show up on anyone else’s copy of the message. If the regular recipients (those in the To and Cc fields) reply to the message, the Bcc recipients will not be included in the reply list. You can enter names directly from the address book if you want. Refer to the section on the Address Book button for further information. You must separate each name or address with either a semi-colon (;) or a comma (,). WYNN will recognize either of these as separators.
Black and white contrast uses Brightness instead of Threshold (in
Scanner Selection dialog box) (K). If, when scanning with Color OFF and Keep Exact View ON, all contrast settings result in a scan identical to a contrast setting of 255, try this setting.
Block (in General Settings dialog box) (B). The Block Spotlight is a
colored box that surrounds the emphasized text in the open document. This is how WYNN represents the cursor in Read-only Mode. This is the default setting.

28
Bold (Edit Menu item) (CTRL+B) (B); (in Word Prediction Settings
dialog box) (B). When you are writing, you can choose Bold to make your text bolded. Choose Bold again to remove the bold from text. If you have selected text, WYNN will apply the Bold attribute to it. If you have not selected text, when you start typing, the text at your cursor will be bolded. When you are using Word Prediction, you can check Bold if you want the words in the predictor box to appear in a bold font. The default setting is unchecked.
Bookmark (tool bar button); (in Find Mark-up dialog box) (B). Press
the Bookmark button to insert a bookmark symbol in the document text. When you press Bookmark, WYNN opens a drop-down menu with five bookmark options: a red asterisk, blue circle, green square, yellow triangle, or an eraser. Click on the desired bookmark, and WYNN inserts it at the current cursor position in the open document. If you choose the eraser, drag it over a bookmark and it erases it. In the Find Mark-up dialog box, click Bookmark to have WYNN look for bookmarks in the document.
Bookmark Type (Tools Menu item) (B). Use this menu item to select
which type of bookmark you want WYNN to insert when you next select Insert Bookmark from the menu. When you select this item, WYNN opens a drop-down menu with five bookmark options: a red asterisk, blue circle, green square, yellow triangle, and an eraser. Click on the desired bookmark symbol. Note that if you select the eraser, you should drag the eraser over the bookmark symbol to erase it. When you are done erasing, click the Bookmark button on the pink tool bar to turn off the eraser.
Bottom Boundary (in Scanning Settings dialog box) (M). The Left,
Right, Top, and Bottom boundaries determine how much of the page WYNN should recognize, by defining the distance from the side of the page. This tells WYNN to ignore anything outside that boundary. The standard setting for all four boundaries (left, right, top, and bottom) is zero, which means that the entire page will be
29
scanned and recognized. However, if you are scanning a book and wish to delete the bottom part of each page (which usually has the page numbers and other information), try defining a bottom boundary of one inch. You’ll need to experiment on each book to get the correct setting.
Bottom Margin (in Print Setup dialog box) (B). Enter the distance you
want between the bottom edge of the paper and the bottom of the last line on the page.
Broadcast Documents... (Advanced Menu item) (B). A teacher can use
this menu item to send document files to all students who have accounts on the current workstation or network drive. This item is only visible and available when the teacher logs in as the user ‘Shared.’ Then Broadcast Documents and Broadcast Settings will appear in the Advanced menu. Broadcast Documents sends a specific document to all users.
Broadcast Settings... (Advanced Menu item) (R). A teacher can use this
menu item to send settings files to all students who have accounts on the current workstation or network drive. This item is only visible and available when the teacher logs in as the user ‘Shared.’ Then Broadcast Documents and Broadcast Settings will appear in the Advanced menu. Broadcast Settings sends a specific settings file to all users. The settings files include both settings that are saved in the Settings menu, and specialized files such as word prediction word lists, pronunciation dictionary, OCR correction list, and others.
By Bookmark Type (in General Settings dialog box) (Y). When you
select this item, new Bookmark Lists will be created by bookmark type. Note that this applies only to lists you create using the Lists item in the Tools menu, not the Lists button on the pink tool bar.
By Highlight Color (in General Settings dialog box) (H). When you
select this item, new Highlight Lists will be created by highlight

30
color. Note that this applies only to lists you create using the Lists item in the Tools menu, not the Lists button on the pink tool bar.
Cancel (button) (ESC); (in Compose Email Message screen) (C).
Closes any dialog box without saving any changes you have made. In the Compose Email Message screen, use the Cancel button to discard the message without sending it, and return to the Email System screen. When you select Cancel, WYNN asks you to confirm your cancellation.
Case Sensitive (in Pronunciation Dictionary dialog box); (in OCR
Correction dialog box) (E). Check this field if you want WYNN to perform a case-sensitive replacement. The default for this setting is unchecked, that is, not case sensitive.
CC (in Compose Email Message screen) (:); (in Read Message screen)
(:). Write the names or email addresses of all the people you want to copy this message to. You can enter names directly from the address book if you want. Refer to the section on the Address Book button for further information. You must separate each name or address with either a semi-colon (;) or a comma (,). WYNN will recognize either of these as separators.
Character String (in Differential Coloring dialog box) (H). The
‘Character String’ entry field allows you to type in the character or characters WYNN should emphasize.
Characters (in Visual Settings dialog box) (H). Use the item to adjust the
amount of space between each character in your documents on screen. Putting more space between items on screen can help some people with visual bleed.
Check for Email (button) (in Email System screen) (P). Use this button
to download new messages to your Inbox. When you select Check for Email, WYNN connects to the Internet through your modem, network, or other dedicated Internet connection, looks for new
31
messages, and transfers them into your Inbox. Note that you must already have an Internet account, a means to connect to the Internet (such as a modem or DSL), and have configured WYNN’s Email Settings before WYNN can download any messages. WYNN will connect to an existing account through an existing connection.
Choose a settings file to delete (in Delete Settings dialog box) (D). Click
on any settings file name, then press OK to delete the file. Note that you cannot delete the file named Default.
Choose a settings file to replace (in Save Settings dialog box) (R). If you
want to overwrite an existing settings file, click one of the file names in this box, then press Save. If you want WYNN to load your favorite settings each time you start, you should save the settings using the file name Default.
Choose a settings file to retrieve (in Retrieve Settings dialog box) (R).
This is the list of available settings files. Click on any settings file name, then press OK to make those the active settings. Note that if you want to retrieve settings for all aspects of WYNN behavior, including Visual, Scanning, Web, and the rest, you should choose a file type that says ‘All Settings.’ If you just want to retrieve one type of settings file, such as Visual, choose a file type that says Visual. When you retrieve this file, it will overwrite your current visual settings without changing the rest of the active settings.
Clear All (button) (in Word Prediction Phonetics dialog box) (C). Press
Clear All to uncheck all the phonetic associations. Clear all personal learned text (button) (in Word Prediction Edit Lists
dialog box) (C). Press this button to clear all your changes and restore the currently active word list to its original settings.
Clear History (in Web Settings dialog box) (H). Press this button to clear
the record of all the pages that were visited recently.
32
Close (tool bar button); (File Menu item) (CTRL+W) (C); (button) (in Email System screen) (C). Select Close to close the document you are currently reading. When you select Close, WYNN asks you if you want to save any changes you have made to the document. These changes include edits and additions; mark-ups inserted into the document (highlighting, bookmarks, and notes); and general settings changes (font size, color). When you are in the Email System, pressing the Close button closes the email system and returns you to WYNN’s browser/editor.
Close (tool bar button). Select the Close button to close the document you
are currently reading. When you select Close, WYNN asks you if you want to save any changes you have made to the document. These changes include edits and additions and mark-ups inserted into the document (highlighting, bookmarks, and notes).
Close Email (tool bar button). When you are in the Email system, the
‘Go To Email’ button toggles to become ‘Close Email.’ Press this button to leave WYNN’s email system.
Close Web (tool bar button). When you are using WYNN’s Web
browser, the ‘Go To Web’ button toggles to become ‘Close Web.’ Press this button to leave WYNN’s Web browser.
Color (tool bar button). Press this button to choose a specific
combination of text and background colors to make the page more readable. When you press Color, WYNN cycles through the available color combinations. As WYNN cycles through the options, the text on screen reflects the new setting.
Color Scanning (Scan Menu item) (C); (in Scanning Settings dialog
box) (I). Determines whether WYNN scans in color or in black and white. When checked, WYNN will scan all colored text, art, and photographs in color. If you do not have a color scanner installed, WYNN will tell you that color scanning is not possible. Color scanning and recognition is a much slower process than the standard
33
black-and-white scanning, so we recommend that you only use this item when you know you have something you want to save in its original color presentation. Additionally, the results of Color Scanning are only apparent while you are in Exact View, so you must have Exact View checked to use Color Scanning. Also note that you can only do color scanning at 300 dpi resolution. The default for this item is off, that is, WYNN will not scan in color.
Comment (in Print dialog box). This includes any additional information
about the selected printer. Compose (button) (in Email System screen) (P). Use this button to
compose a new message. When you select Compose, WYNN overlays the Compose Message screen on top of the Email System screen. The Compose Message screen contains the message header information, sometimes called the message envelope, several buttons, and a blank area in which you can write your message.
Confirm Password (in Teacher Lockout dialog box) (C). ‘Confirm
Password’ requires that you type in the password once again. When you press OK, the items selected using the check boxes will be locked out. To unlock those items, open Teacher Lockout and re-enter the password. Note: If you forget your password, simply exit WYNN. When you restart WYNN, the locked features will once again be available.
Continue Draft (button) (in Email System screen) (R). Use this button
to send or continue writing a message you have previously saved. When you save a draft of a message using the Save Draft button, it is stored in the Drafts folder. When you view the contents of the Drafts folder, the Read button in the Email System screen changes to the Continue Draft button.
Continuous (in General Settings dialog box) (C). If you select
Continuous, WYNN reads from line to line and from paragraph to
34
paragraph until you press the Pause button. The Spotlight moves continuously with the reading. This is the default reading mode.
Copies (group) (in Print dialog box). This group contains a place for you
to specify the number of copies to print. Copy (Edit Menu item) (CTRL+C) (C). Select this menu item to copy
selected text to the Microsoft Windows clipboard without removing it from the document. You can only use this item if you have already selected text using the arrow keys or mouse. Once you have selected the text, select Copy, and WYNN will copy the text to the Clipboard. You can then paste the text into another part of the open document, into a new WYNN document, or into another application such as Microsoft Word. Note that this item is not available until you have selected some text.
Copy to Clipboard (in Dictionary dialog box) (in Thesaurus dialog box)
(O). Press this button to have WYNN copy your selected text to the Windows clipboard. Note that you must have selected text before you press the Copy to Clipboard button. When you return to your document, you can then use the Paste command to paste the definition into your document.
Correct Word (in OCR Correction dialog box) (R) In this field, enter the
word the way WYNN should have recognized it. Corrections can include spaces.
Create Bookmark Lists (group) (in General Settings dialog box). This
group controls the creation of a separate document listing your bookmarked text. These settings control the order of presentation of items in your list when you create the list from the menu system instead of the tool bar. When you bookmark text in a document and choose the Lists item in the Tools menu, WYNN asks you what type of list you want. You have two choices. The order the bookmarked list appears in will be determined by your selection in this group.
35
Create Folder (button) (in Organize Favorites menu) (C). Click this button to create a new folder in your Favorites list. After you click this button, type a name for the folder, then press ENTER.
Create Highlight Lists (group) (in General Settings dialog box). This
group controls the creation of a separate document listing your highlighted text. These settings control the order of presentation of items in your list when you create the list from the menu system instead of the tool bar. When you highlight text in a document and choose the Lists item in the Tools menu, WYNN asks you what type of list you want. You have two choices. The order the highlighted list appears in will be determined by your selection in this group.
Create In (button) (in Add Favorite menu) (C). Click this button to save
the current page in a different or new folder. When you click the Create In button, the dialog box expands to display the list of folders. You can click on a folder name to save the current page in that folder. If you want to save the page in a new folder, click the New Folder button.
Create Outline (Edit Menu item) (U). Using WYNN, you can create
outlines of your ideas. This can help you organize ideas as you prepare to write essays, research papers, or even stories. When you use WYNN’s outlines feature, you are writing in outline format. WYNN opens a new document for your outline, and everything you write will be in outline format. You can change the order of items using the Outline Adjustments menu item. When you use Outlines, WYNN will open a new document and put the word ‘Title’ in brackets. Type over that word to enter your outline title. WYNN will automatically start the outline for you by putting your cursor at Roman numeral I. You can enter items this way.
Current Document (button) (in Word Prediction Learning Text dialog
box) (C). Press this button to have WYNN learn new text from the document that is currently on the screen in WYNN. Note that WYNN can also learn new words from a text file, or as you type.
36
Current Settings File (in Retrieve Settings dialog box) (F). This shows
you the settings file that is currently active. Custom Tool Bar (in Customize Tool Bar dialog box) (T). The ‘Custom
Tool Bar,’ on the right side of the dialog box, displays all the buttons you have placed on your personal tool bar.
Custom Tool Bar Settings (under ‘More’ button in Save Settings dialog
box) (T). Check this box if you want WYNN to save just the Custom Tool Bar Settings.
Custom Tool Bar Settings... (Settings Menu item) (T). Select this item
to show the Customize Tool Bar dialog box. Select this item to create your own personal tool bar, with the buttons you most commonly use on it.
Cut (Edit Menu item) (CTRL+X) (T). Select this menu item to remove
selected text from the document and copy it to the Microsoft Windows clipboard. You can only use this item if you have already selected text using the mouse to drag-select the text. Once you have selected the text, select Cut, and WYNN will delete the text from the document and copy it to the clipboard. You can then paste the text into another part of the open document, into a new WYNN document, or into another application such as Microsoft Word. Note that this item is only available when you are in Writing Mode and text is selected.
Cut/Paste (tool bar button). Select the Cut/Paste button to (1) Cut
selected text from the document to the Microsoft Windows clipboard, (2) Copy selected text to the Clipboard without removing it from the document, or (3) Paste (insert) text from the Clipboard into your document. When you select the Cut/Paste button, WYNN gives you a choice of Cut, Copy, or Paste. Note that Cut and Paste are only available when you are in Writing Mode.

37
Date Created (in Document Properties dialog box). The date and time that the current file was first saved on this computer.
Date Sent (in Read Message screen) (N). This field contains the date and
time the message was sent. In its default mode, WYNN uses 12-hour time. You can switch to 24-hour time using the ‘Time displayed as 24 hour’ checkbox in the Email Settings page.
Days to keep pages in (in Web Settings dialog box) (D). You can change
how many days WYNN keeps information about the pages you recently visited. The default is to keep a record of the pages for 30 days. IMPORTANT NOTE: If you change this setting. you must save your settings, using WYNN’s Save Settings command, for the Web configuration to be active the next time you use WYNN.
Default File Format (in General Settings dialog box) (F). Use this item
to specify what you want WYNN to use as its default file format. This refers to whether a file is saved as a WYNN file type, a Word file, a DOS text file, or another file type. You must select from the list provided. Note that this does not mean you can only save WYNN files in the formats in this list; these are just the formats you can specify as the default. You can always select a different file format in the File Save As dialog box. The default file format is the proprietary WYNN format (*.wyn).
Default File Location (in General Settings dialog box) (U). Use this item
to specify where you want WYNN to save and retrieve files. You must specify a complete path name, including the drive, such as C:\My Documents. The default for this item is C:\WYNN3\Users\UserName\Docs (where UserName is the name of the current user’s folder).
Default View (group) (in Web Settings dialog box). Use this group to
have WYNN’s Web viewing default to either the Exact View (the standard Web page) or the Text View (the Web page with graphics and formatting stripped out). IMPORTANT NOTE: If you change
38
this setting. you must save your settings, using WYNN’s Save Settings command, for the Web configuration to be active from that point forward.
Defined Combinations (in Differential Coloring dialog box) (E). The
‘Defined Combinations’ area lists any established character combinations and their emphasis color.
Definition (in Dictionary dialog box) (N). This is the definition of the
word you looked up in the dictionary. Delete (button) (in Email System screen) (D). Use this button to delete
the message that is highlighted (or selected) in the message list. WYNN will delete that message and put the highlight selection on the next message in the list.
Delete (button) (in Organize Favorites menu) (D). Click this button to
delete the selected Web page or folder. Note that you must first select the Web page or folder in the Favorites list, then click the Delete button.
Delete (button) (in Pronunciation Dictionary dialog box); (in OCR
Correction dialog box) (D). Select this button to delete a word and its pronunciation/correction from the word list. Note that WYNN will not ask you to confirm the deletion.
Delete (button) (in Word Prediction Phonetics dialog box) (D). Press
the Delete button to delete a phonetic association that you have selected. You must first select the association, and then press Delete.
Delete (Edit Menu item) (DEL) (D). Select this menu item to delete
selected text from the document without copying it to the Microsoft Windows clipboard. Once you have selected the text, select Delete, and WYNN deletes the text from the document. The selected text is deleted from the page permanently (when you use Delete, the text is
39
not copied to the Windows clipboard, it’s just gone). Note that this item is only available when you are in Writing Mode.
Delete Current Page (Edit Menu item) (CTRL+DEL) (N). Select this
menu item to delete the page your cursor is on. When you select Delete Current Page, WYNN opens a small dialog box on the screen warning you that page deletion cannot be undone, and asking you to confirm the deletion.
Delete email after X days (in Email Settings dialog box) (A). Use this
field to tell WYNN how often to delete old messages from the server. The default is 90 days. This item is grayed out unless ‘Leave mail on server’ is checked. IMPORTANT NOTE: After completing this information, you must save your settings, using WYNN’s Save Settings command, for the email configuration to be active from that point forward.
Delete Entry (button) (in Address Book) (D). Select this button to delete
a name or group you have entered in your address book. First move your cursor to the name or group you want to delete, then press the Delete Entry button. WYNN will ask you to confirm the deletion.
Delete Folder (button) (in Email System screen) (L). Use this button to
delete a folder that you have created. This will also delete all the messages contained in the folder. Note that you cannot delete the Inbox, Sent Messages, or Drafts folders.
Delete old email from server (in Email Settings dialog box) (D). If you
choose to leave your email messages on the server, you should eventually delete them. Use this checkbox to configure WYNN to delete messages after a predefined number of days. This item is grayed out unless ‘Leave mail on server’ is checked. If you check this box, the next item, in which you tell WYNN how many days to use, becomes available. The default is unchecked. IMPORTANT NOTE: After completing this information, you must save your
40
settings, using WYNN’s Save Settings command, for the email configuration to be active from that point forward.
Delete Page Break (Edit Menu item) (CTRL+SHIFT+ENTER) (L).
Select this menu item to delete a page break in a document. You can only use this item if you have already placed your cursor immediately before the page break, that is, when your cursor is on the last line of the previous page. When you select Delete Page Break, WYNN deletes the break from the document, merging the second page into the first. Note that this item is only available when you are in Writing Mode.
Delete selected phrase (button) (in Word Prediction Edit Lists dialog
box) (D). If you want to delete a phrase from the word list, select the phrase in the phrase list, then press this button.
Delete Settings... (Settings Menu item) (D). Choose Delete Settings to
delete a settings file. When you select Delete Settings, WYNN brings up the Delete Settings dialog box. Click on any settings file name, and then press OK to delete the file. Note that you cannot delete the file named Default, so it is not listed here.
De-skew (in Scanning Settings dialog box) (D). Using de-skew will
correct as much as ten degrees of skew in a crooked page, straightening up to three quarters of an inch for a standard eight-and-a-half inch page. Use this option if you are concerned that the page is on the scanner slightly crooked, or skewed. It is also helpful when reading documents that have been photocopied, since the text may not be perfectly straight on the page. However, de-skewing will add a few seconds to the scan time. The default for this item is on.
De-speckle (in Scanning Settings dialog box) (K). De-speckle corrects
for a page that doesn’t have a clean, clear background, such as a page that has been photocopied several times, newspapers, or text
41
on paper with speckled shading on it, such as colored newsprint or magazines. The default setting for this item is on.
Dialup Networking (group) (in Email Settings dialog box). Use this
group to tell WYNN which type of connection you will use. IMPORTANT NOTE: After completing this information, you must save your settings, using WYNN’s Save Settings command, for the email configuration to be active from that point forward.
Dictionary (in Teacher Lockout dialog box) (D). Select this item to
disable use of the Dictionary. This will also lock out the Syllabify Word item on the menu, and the Syllable button on the tool bar.
Dictionary/Thesaurus (tool bar button). Select a word, and then press
Dictionary. WYNN asks you to choose either the Basic or Standard dictionary, and then opens the Dictionary dialog box.
Differential Color (in Differential Coloring dialog box) (I). The
‘Differential Color’ field allows you to determine the color WYNN uses to emphasize the selected string. Use the arrow to make your choice.
Differential Coloring Settings (under ‘More’ button in Save Settings
dialog box) (O). Check this box if you want WYNN to save just the Differential Coloring Settings.
Differential Coloring Settings... (Settings Menu item) (O). Select this
item to show the Differential Coloring Settings dialog box, where you can change the color of specified letters or characters in the document, to emphasize those combinations that may be particularly difficult to distinguish when reading the page, or for doing exercises involving certain types of prefixes or suffixes. Here’s how it works: First, define the combination of letters or punctuation you want to emphasize. Then choose the emphasis color. Finally add the character/color combination to the Defined list. Once you press OK
42
or Apply, all occurrences of the character combination in the open document will be displayed with differential coloring.
Discard Blank Pages (in Scanning Settings dialog box) (B). Check this
box if you want WYNN to throw away scanned pages that are blank. Note that sometimes you will want to keep blank pages so that you can maintain the original page numbering and order. The default is unchecked.
Display words alphabetically (in Word Prediction Settings dialog box)
(D). Check this item if you want the words in the predictor box displayed in alphabetical order. If this is unchecked, the words will be displayed in order of statistical frequency in English usage. The default is unchecked, that is, the list is displayed in order of statistical frequency.
Document Location (in Document Properties dialog box). This is the
name of the drive and folder where the current document has been saved.
Document Name (in Document Properties dialog box). This is the name
of the open file. Document Properties (File Menu item) (CTRL+R) (R). Select this item
to learn specific information about the document you have open. When you select Properties, WYNN opens a dialog box listing the document properties, including Document Name, Document type, MS-DOS name, Document location, Document size, Date created, Last modified, and Last accessed. Note: These fields do not allow you to modify or add information.
Document Size (in Document Properties dialog box). This is the size of
the open file. Document Type (in Document Properties dialog box). This is the type
of file format for the currently open file.
43
Down (in Find Text dialog box); (in Find and Replace dialog box); (in
Find Mark-up dialog box) (D). Click on Down to have WYNN search from your current point down to the end of the document. When it reaches the bottom of the document, WYNN will wrap around to the beginning and search down from there to your cursor. This is the default setting.
Edit Entry (button) (in Address Book) (E). Select this button to edit an
address or group you have already entered in your address book. You should first move your cursor to the name or group that you want to change, then press the Edit Entry button. WYNN will bring up the Edit Address dialog box with the information of the entry you selected. This dialog is identical to the New Address dialog, but with the selected name and address already inserted in the appropriate places. You can cancel the changes by pressing ESC at any time.
Edit Menu (ALT+E). This menu allows you to edit documents; cut, copy,
and paste text; add bold, italic, or underline attributes to text; create outlines; find text or mark-ups in the document; add or delete page breaks; go to a specific page; and renumber the pages in the document.
Edit Mode (Edit Menu item) (CTRL+E) (E). Select this menu item to
switch, or toggle, from Read-only mode to Writing Mode. When you start WYNN, you are in Read-only mode. Select Edit and you switch to Writing Mode. To switch back to Read-only mode, select Edit again. Once you have selected Edit mode, you can type directly into the document on the screen. Many word processing conventions will work in Writing Mode, such as the delete key and the backspace key. Use Edit to make changes in a word processing file, or on a scanned page. Or use Edit to write an original document from scratch. This menu item duplicates the Write Button on all the tool bars. This menu item is an alternate, or toggle, for Read-Only Mode
44
Email (in Teacher Lockout dialog box) (E). Select this item to disable
use of the Email feature. Email Address (in Email Settings dialog box) (E). Enter your complete
email address. This address will follow a standard format: your user name followed by the @ sign followed by the name of the Internet service you use. It will look something like this: [email protected]. Note that we are referring here to your email user name, not your formal name. IMPORTANT NOTE: After completing this information, you must save your settings, using WYNN’s Save Settings command, for the email configuration to be active from that point forward.
Email Settings (under ‘More’ button in Save Settings dialog box) (E).
Check this box if you want WYNN to save just the Email Settings. Email Settings... (Settings Menu item) (E). Select this item to show the
Email Settings dialog box. Use these settings to configure WYNN’s email system. You can send and receive email in WYNN, while keeping WYNN’s ability to tailor the visual and auditory presentation while reading and writing messages. Before you can use WYNN’s email system, you must already have an email account with an Internet provider. You must also have some means to connect to the Internet, such as a modem, DSL, or network connection. You then need to tell WYNN which username, password, sending (SMTP) and receiving (POP3) servers your account uses. These settings are configured in the email settings dialog box. IMPORTANT NOTE: After completing this information, you must save your settings, using WYNN’s Save Settings command, for the email configuration to be active from that point forward.
Email Addresses (in New Address screen) (E). Enter the email address
of the person you want to add to the address book, or the people you want to add to the group.
45
Email... (Tools Menu item) (F5) (E). Select this item to open WYNN’s
email program. WYNN’s email program includes all the standard email features, such as an Inbox; an address book; ability to read, write, reply to, and forward messages; ability to send and receive file attachments; and the ability to create folders to store messages in. Before you can use WYNN’s email system, you need to have a modem, DSL, or LAN to connect with the Internet. You also need to have an account with an ISP or an online service. WYNN’s email system will communicate with your modem to dial up the connection you have specified. You need to set up WYNN’s email system by giving it information about your Internet connection, such as your user name, address, and password. You also need to specify the incoming and outgoing routing addresses for your email messages. You will need to enter that information in the Email Settings page, which is in the Settings menu.
Enable Multiuser Logins (File Menu item) (E). Select this item to switch
between multi-user and single-user mode. When you uncheck this item, WYNN switches to single-user mode, and does not display the User Log In screen when you launch the program. The default mode is checked. Note that this item is not available in the network version of WYNN: it always stays checked.
Enter a page number (in Go To Page dialog box) (E). Type the number
of the page you want to go to. Enter new settings file name (in Save Settings dialog box) (F). This is
the area where you should type in the name you want to give the settings file you save.
Enter Web Search Text (in Web Search dialog box). Enter the text that
you want to find in the World Wide Web, then press the Search Now button or the ENTER key. When you enter text, WYNN will send it to the Google search engine and display Google’s results.
46
Exact View (in Visual Settings dialog box) (C); (in Web Settings dialog box) (E). Select Exact View if you want WYNN to display the Exact View whenever it brings up a new document or a new page in a document. If you select Exact View, WYNN will display the Exact View unless it is not available or when it doesn’t make sense to do so, such as when you have manually switched to Text View and are going from one page to another. In this case, WYNN assumes you want to stay in the View you switched to. The default is to prefer Text View. In the Web Settings dialog box, choose Exact View if you want Web pages to display in Exact View, that is, in the original Web page format. IMPORTANT NOTE: If you change this setting. you must save your settings, using WYNN’s Save Settings command, for the Web configuration to be active from that point forward.
Exact View (tool bar button). Press this button to display the scanned
page on the screen just as it is in the original document. This includes any graphics, line art, tables, columns, and other elements that affect how the page looks. While in Exact View, you can read the page, change text and background colors, and Zoom in and out, but you cannot make any other modifications or additions to the way WYNN presents the text. To make modifications, you must switch to Text View. Note that this button is available only if you are viewing scanned pages. This menu item is an alternate, or toggle, for Show Text View. IMPORTANT NOTE: If you scan in a page and then edit the page in Text View, when you read the page using Exact View, the text on the screen may not match the text WYNN reads aloud. This is because WYNN reads aloud using the Text View version of the page. If you have made simple corrections, the difference will be minor. But, if you significantly modified the text, the discrepancy may be noticeable. Therefore, whenever you select Exact View for a page you have edited, WYNN will open a dialog box that warns you that ‘the Exact View may not match the Text View you have edited.’ This button is on every tool bar.
47
Exit (File Menu item) (X) (ALT+F4). Select this menu item to close WYNN. When you select Exit, WYNN asks if you want to save changes to the current document, closes this document, then closes WYNN and returns to the Windows desktop.
Express Batch Delay (in Scanning Settings dialog box) (X). To set the
amount of time between one scan and the next when scanning in Express Batch or Express Batch in Background modes, use the arrow keys to choose a value between 0 and 25. A larger number gives you more time to turn the pages. When you start WYNN, Express Batch Delay is set to 0, the shortest amount of delay.
Extra Pause After Each Sentence (in Speech Settings dialog box) (S).
WYNN naturally pauses slightly after each sentence. You can increase the amount of the pause using this item. The choices range from No Extra Pause to 3 seconds, in half-second increments. The default is No Extra Pause between sentences.
Extra Spacing Between (group) (in Visual Settings dialog box). Use this
group to adjust the amount of space between letters, words, lines, and sentences. Putting more space between items on screen can help some people with visual bleed.
Fastest Scanning (Scan Menu item) (F). Choose Fastest Scanning for
pages that are clean and straightforward in their characters and presentation. This setting uses the Caere MTX OCR (Optical Character Recognition) engine to scan; it uses normal contrast (the Scanning Contrast setting) and normal orientation (the Page Orientation setting); and de-skew, de-speckle, white on black, and language analyst are all turned off. For more information about these features, see their individual entries. IMPORTANT NOTE: The Fastest Scanning setting does not detect how your page is oriented on the scanner! You must place your page on the scanner so that the top of the page is where your scanner indicates the top should be! Also note that the three settings: Most Accurate Scanning, Standard Scanning (the default), and Fastest Scanning,
48
are mutually exclusive, so that when you select one, the others are de-selected. In addition, if you modify settings in the Scanning Settings dialog box, you may find that none of these items is selected. The current selection is indicated with a checkmark.
Favorites... (Web tool bar button) (Web Menu item) (A). When you
find Web sites or pages that you like, you can keep track of them, so it's easy to open them in the future. To add a page to your list of favorite pages, go to the page you want to add to your Favorites list, On the Favorites menu, click ‘Add to Favorites,’ then type a new name for the page if you want to. Any time you want to open that page, just click the Favorites button on the toolbar, and then click the shortcut in the Favorites list.
File Menu (ALT+F). This menu allows you to open, save, and print
documents, or quit WYNN. Note: Some items in this menu are only available when displaying a document in Text View.
File name (File Open dialog box) (File Save As dialog box) (N). WYNN
fills in the ‘File name’ field with the first file that matches your request. You can arrow through the file list or type the file name.
File Open/Select a file to open (dialog box). The File Open menu item
brings up a dialog box titled ‘Select a file to open.’ Use this dialog box to choose a file to open. Use ‘Look in’ to tell WYNN what folder to look in to find the file you want to open. The default location is your \Docs folder in your user folder. Note that you cannot have more than two documents open at a time. If you already have two documents open, WYNN will ask if you want to close the document you are not currently using, then open the requested document. Note: you can change the default file location in the General Settings dialog box in the Settings menu. Use ‘Files of type’ to tell WYN to open a different format file, such as a .txt file or a .doc file. The default file format is .wyn files. Note: You can change the default file format in the General Settings dialog box in the Settings menu.
49
Files of type (File Open dialog box) (File Save As dialog box) (T). Use
‘Files of type’ to tell WYN to use a different format file, such as a .txt file or a .doc file. The default file format is .wyn files. Note: You can change the default file format in the General Settings dialog box in the Settings menu.
Find (tool bar button). Select the Find button to have WYNN find either
text or mark-ups in the current document. When you select Find, WYNN asks you to choose whether you want to find text or find mark-ups. Select Text to have WYNN find a word or phrase within the open document, and possibly replace it with alternative text. Select Mark-ups to have WYNN find mark-ups in the current document, including highlighting, bookmarks, text notes, and voice notes.
Find Mark-up… (Edit Menu item) (CTRL+M) (M). Select this menu
item to have WYNN find mark-ups in the current document, including highlighting, bookmarks, text notes, and voice notes. When you select Find Mark-up, WYNN opens the Find Mark-up dialog box, which contains areas for you to specify which mark-ups you want to find, and which direction you want it to look.
Find Next (button) (in Find Text dialog box); (in Find and Replace
dialog box) (F). Press this button to have WYNN search for the next occurrence of the word or phrase you have typed. If it finds the text you are seeking, WYNN goes to that text in the document, and places the cursor at that point. If WYNN does not find the text you are seeking, it notifies you.
Find Text... (Edit Menu item) (CTRL+F) (F). Select this menu item to
find a word or phrase within the open document. When you select Find, WYNN opens the Find Text dialog box, which contains fields for you to enter the text you want to find, plus several options, such as finding only whole words or matching the case of the text.
50
Find what (in Find Text dialog box); (in Find and Replace dialog box) (N); (in Find Mark-up dialog box). Type the word or phrase you want WYNN to find. In the Find Mark-up dialog box, use this group to have WYNN look for a specific type of mark-up, or any mark-up.
Find Whole Words Only (in Find Text dialog box); (in Find and
Replace dialog box) (W). WYNN will search for just whole words, and not words that are part of a larger word. For example, if you search for the word ‘the’ and do not check ‘Find Whole Words Only,’ WYNN will also find the letters ‘the’ in the word ‘mother.’ The default setting for this item is unchecked.
Find/Replace Text… (Edit Menu item) (CTRL+H) (R). Select this
menu item to find a word or phrase within the open document, and replace it with alternative text. When you select Find/Replace, WYNN opens the Find and Replace dialog box, which contains fields for you to enter the text you want to find, any replacement text, plus several options, such as finding only whole words or matching the case of the text.
Folder (in Email System screen) (F). WYNN automatically puts all new
email messages in the Inbox. The Inbox is actually a folder, one of several folders WYNN uses to store email messages. WYNN puts all messages you send in the Sent Messages folder. You can create other folders to store messages in. Note that WYNN’s email system will always open to the Inbox folder item.
Font (tool bar button). Press this button to determine the type of font used
for text on the document page. When you press Font, WYNN cycles through several fonts. As WYNN cycles through the options, the text on screen reflects the new setting.
Forward (button) (in Read Message screen) (W). Select this button to
forward the message to another person or people. When you select Forward, WYNN displays the Compose Message screen and puts

51
your cursor in the To field so that you can enter the names or addresses of the people you want to forward the message to. It also inserts the characters FW: at the beginning of the Subject line. When forwarding a message, if there was a file attachment in the original message, this attachment will also be sent with your forwarded message.
Forward (Web tool bar button) (Web Menu item) (F). Select Forward
to go to the last page you viewed before selecting the Back button or menu command.
Forward One Level (Outline Control sub-menu item). Moves the
current item to a lower level, which indents it farther. Some outline programs call this ‘Demote.’ The keyboard equivalent is TAB (you can also use ALT+RIGHT ARROW).
Found phrases (in Word Prediction Edit Lists dialog box) (F). This is
where WYNN displays all the phrases that contain the word you entered in the Search box.
From (in Read Message screen) (F). This field contains the name or
email address of the person who sent you the email message. If the sender has designated his name instead of his email address, the name will show up as the sender. If not, the email address will be listed.
General Settings (under ‘More’ button in Save Settings dialog box) (G).
Check this box if you want WYNN to save just the General Settings.
General Settings... (Settings Menu item) (G). Select this item to show
the General Settings dialog box, which includes settings for the type of spotlight, the reading increment, the ability to automatically insert page breaks in imported documents, the default file type and format, and other items.
52
Go (in Go To Page dialog box) (G). To go to the page you have typed, click ‘Go.’
Go To Email (tool bar button). Select the Email button to go to WYNN’s
email system. Using Email, you can send and receive email messages and keep an address book.
Go To (tool bar button); Go To Page (Edit Menu item) (CTRL+G) (G).
Press this button to go to a new page in the open document. When you press Go To, WYNN opens the Go To Page dialog box, where you can enter the page number you wish to go to. If the document does not contain the requested page, WYNN will take you to the closest page, usually the last page in the document. This item is only available if the open document contains more than one page.
Go To Web (tool bar button). Select the Web button to go to WYNN’s
specialized Web browser. This allows you to browse the Internet. Go To Web Page... (Web tool bar button) (Web Menu item) (G). Select
Go To Web Page to specify a Web address and have WYNN go directly there. When you select this item, it brings up a WYNN dialog box in which you can enter the Web page address. Press Go or the ENTER key and WYNN will take you to the address.
Help Menu (ALT+H). This menu gives you access to information for
learning and using WYNN. Highlight (in Find Mark-up dialog box) (H). Click ‘Highlight’ to have
WYNN look for text you have highlighted in the document. Highlight (tool bar button). Press this button if you want to highlight text.
When you press Highlight, WYNN opens a drop-down menu with four options: a green, blue, or pink highlighter, or an eraser. If you don’t have any text already selected: When you select your Highlight color, your mouse cursor turns into a ‘highlighter pen.’ Click or drag the mouse over the areas that you want highlighted,

53
and WYNN surrounds the text with a bold color highlight. If you have already selected an area of text using the mouse cursor or arrow keys: When you press Highlight and choose your highlighter color, WYNN automatically surrounds the selected text with a bold color highlight.
Highlight Text Only (in Print dialog box) (H). Prints only the text that
has been highlighted in the document. Highlighter Pens (Tools Menu item) (G). Use this menu item to choose
the color highlighter pen you want to use for highlighting in your document. You can also choose the highlight eraser from this item.
History... (Web tool bar button) (Web Menu item) (Y). WYNN
maintains a history list of pages you have viewed recently. You can use the History button or menu item to go back to those Web sites and pages you visited in recent days and weeks. When you select History, WYNN brings up the history list in the top left corner of the screen. Click a week or day, then click a Web site name, and then click the page name to display the specific Web page. Note that you can specify how many days pages are saved in your History list using the Web Settings dialog box.
Home (Web tool bar button) (Web Menu item) (H). Select Home to go
(return) to the page that appears each time you start WYNN’s Web browser. The default home page is the WYNN page. You can change the home page using the Web Settings dialog box.
Home Page (group) (in Web Settings dialog box). You can change
which page to use for your home page by entering the Web address in this group, or by using the ‘Use Current’ button to have WYNN use the Web page you are on for the home page. IMPORTANT NOTE: If you change this setting. you must save your settings, using WYNN’s Save Settings command, for the Web configuration to be active from that point forward.

54
Ignore (button) (in Spell Check dialog box) (I). The ‘Ignore’ button leaves the word unchanged and finds the next misspelling. If you want the spell checker to ignore all occurrences of the word in this document, choose ‘Ignore All.’
Ignore All (button) (in Spell Check dialog box) (L). The ‘Ignore All’
button leaves all occurrences of the word unchanged throughout the document.
Image Format (in Scanning Settings dialog box) (F). This setting allows
you to specify the format WYNN should use to save an image you will scan using the Image Only scanning mode. Your choices are PCX and several types of TIFF formats.
In Original Bookmark Order (in General Settings dialog box) (I).
When you select this item, a new Bookmark List will be created with the bookmarks kept in the original order they appeared in the document. Note that this applies only to lists you create using the Lists item in the Tools menu, not the Lists button on the pink tool bar.
In Original Highlight Order (in General Settings dialog box) (O).
When you select this item, a new Highlight List will be created with the highlights kept in the original order they appeared in the document. Note that this applies only to lists you create using the Lists item in the Tools menu, not the Lists button on the pink tool bar.
Include a space after inserted word (in Word Prediction Settings dialog
box) (N). Check this item if you want WYNN to add a space after each word chosen from the list. The default setting for this item is checked, that is, WYNN will insert a space after each word.
Include phrase definitions (in Dictionary dialog box) (I). When this box
is checked, WYNN includes definitions of the word in phrases. For
55
example, when you look up the word ‘run’, WYNN includes definitions for ‘run into,’ ‘run out of,’ and ‘in the long run.’
Inflection (in Speech Settings dialog box) (I). To select how much
inflection WYNN’s voice uses, move the slider to the left or right. A voice with very little inflection will sound ‘flat.’ Note that this option is not available with some speech synthesizers.
Insert Bookmark (Tools Menu item) (F9) (I). Select this menu item to
insert a bookmark symbol in the document text. When you select Bookmark, WYNN inserts a bookmark at the cursor position in the open document. If you have selected Eraser as your bookmark type, the next time you select Insert Bookmark, your cursor becomes an eraser. Drag the eraser over a bookmark to erase it. To turn off the eraser, click on the Bookmark tool bar button.
Insert Page Break (Edit Menu item) (CTRL+ENTER) (I). Select this
menu item to insert a page break in the document. If you select Insert Page Break while you are reading a scanned file, WYNN warns you that your Text View (the one you are editing) will no longer match your Exact View. WYNN then inserts a page break immediately before the current line of the document. The text after the inserted page break becomes the beginning of the new page; the text before the inserted page break becomes the end of the previous page. Note that this item is only available when you are in Writing Mode.
Insert Text Note... (Tools Menu item) (F10) (N). Select this menu item to
put a text note into your document. When you select Text Note, WYNN brings up the Insert Text Note dialog box, where you can begin typing your Text Note. You can also Paste text from the Windows Clipboard into the Note.
Insert Voice Note... (Tools Menu item) (F11) (V). Select this menu item
to put a voice note into your document. When you select Voice Note, WYNN brings up the Voice Note dialog box, where you can
56
record your voice note. Note that you must have a microphone connected before you can record a voice note.
Italic (Edit Menu item) (CTRL+I) (I) (in Word Prediction Settings
dialog box) (I). Choose Italic to make your selected text italicized. Choose Italic again to remove the italics from existing italicized text. In the Word Predictions settings, check this box if you want the words in the predictor box to appear in italics. The default setting is unchecked.
Keep Exact View (in Scanning Settings dialog box) (V). This item tells
WYNN to save two versions of any scanned page: the image file (the actual picture of the page) and the text file (the recognized text from the page). Since an image file can be very large, we recommend that you only save this version of the page if you will be referring to the Exact View. The default for this item is on, that is, WYNN will keep the Exact View of any page it scans.
Key Echo During Editing (in Speech Settings dialog box) (K). To tell
WYNN to speak your typed keystrokes out loud when you are in Writing Mode, enter your selection or use the arrow keys. This spoken ‘echo’ of your keystrokes allows you to hear your typing as you type. You have six options: Off, Character, Word, Both Character and Word, Sentence, and Both Word and Sentence. The default setting is Both Word and Sentence, so WYNN will repeat each word after you type it, and then repeat the entire sentence after you finish it.
Landscape (in Print Setup dialog box) (A). Prints the document so that
the long edge of the paper is at the top of the page. Language (in Speech Settings dialog box) (L). To select which language
WYNN uses when reading, type in your selection or use the arrow keys. Note that you must be using a multilingual speech synthesizer, such as the ViaVoice synthesizer that comes with WYNN, or this option will not be available.
57
Language Analyst (in Scanning Settings dialog box) (A). This item
improves accuracy on difficult pages. However, this feature may slow the recognition process. The default setting is on.
Last Accessed (in Document Properties dialog box). The date and time
that the current file was last opened. Last Modified (in Document Properties dialog box). The date and time
that the current file was last saved. Launchables (Advanced Menu item). Select this menu item to launch
other Windows applications, such as Microsoft Word or Word Perfect. The programs listed here were the ones selected during installation. When you launch an application using this feature, the new program opens and becomes the active program. WYNN does not close, but remains open in the background.
Leave mail on server (in Email Settings dialog box) (L). Check this box
if WYNN is not the only email system you use, because you may want to leave your incoming email messages on the server so you can also retrieve them with another email system. The default is unchecked, so that WYNN will not leave mail on the server. If you do not check this item, the next two items will be unavailable (grayed out). IMPORTANT NOTE: After completing this information, you must save your settings, using WYNN’s Save Settings command, for the email configuration to be active from that point forward.
Left (Visual Settings dialog box) (L). Use the Left Side Margin to adjust
the amount of blank space at the left side of the document on the screen. The range is 0 to 1.5 inches. The default is 0.2 inches.
Left Boundary (in Scanning Settings dialog box) (L). The Left, Right,
Top, and Bottom boundaries determine how much of the page WYNN should recognize, by defining the distance from the side of
58
the page. This tells WYNN to ignore anything outside that boundary. The standard setting for all four boundaries (left, right, top, and bottom) is zero, which means that the entire page will be scanned and recognized.
Left Margin (in Print Setup dialog box) (L). Enter the distance you want
between the left edge of the paper and the left edge of the print. Length (in General Settings dialog box) (G). The Length indicator lets
you choose to read by a specified number of words, lines, sentences, or paragraphs. Type a number from 1 to 5 to apply to the Read By options (Word, Line, Sentence, or Paragraph). For example, if you select Read By Word and the number 5 on the Length indicator, the Spotlight moves through the document in groups of 5 words. The default setting is 1.
Less (under ‘More’ button in Save Settings dialog box) (L). If you want
to collapse the Save Settings dialog box so that it only shows you the settings file names, press Less.
Line (in General Settings dialog box) (L). Read By Line moves the
reading spotlight line by line during reading. If you choose Read By Line, the spotlight includes the current line, and moves through the document line by line. Within the spotlight, WYNN indicates the cursor — your exact position in the document — with a word in differently colored text. The default setting is Read By Word.
Line (in Masking dialog box) (L). Line Masking shades the entire page
except the line the cursor is currently on. Line Space (tool bar button). Press this button to adjust the amount of
space between each line of text. Each time you press Line Space, the amount of space between lines increases, until it returns to the original setting. As WYNN cycles through the options, the text on screen reflects the new setting.
59
Lines (in Visual Settings dialog box) (I). Use the item to adjust the amount of space between each line in your documents on screen. Putting more space between items on screen can help some people with visual bleed or with tracking problems.
List of phonetic associations (in Word Prediction Phonetics dialog box)
(L). This is the list of phonetic associations that the word prediction system can recognize. You can add to the list or delete associations.
Lists (tool bar button) (Tools Menu item) (L). Select Lists if you want to
create a separate document listing your highlighted or bookmarked text. When you highlight or bookmark text in a document, WYNN activates this item. Then, when you press List, WYNN opens a drop-down menu with four options: By Highlight Color, By Highlight Order, By Bookmark Type, and By Bookmark Order. WYNN will open a new document listing all the highlighted or bookmarked words or phrases from the original document. Note that if you already have two documents open, WYNN will warn you that it is about to close the one you are not using before creating the List document.
Log In Different User… (File Menu item) (L). Select this menu item to
Log In new users. When you select Log In Different User, WYNN opens the Log In dialog box. Note that this item will only be available if Multiuser Logins are enabled.
Look in (File Open dialog box); Save in (File Close dialog box) (I). Use
‘Look in’ to tell WYNN what folder to look in to find the file you want. The default location is your \Docs folder in your user folder. Note: you can change the default file location in General Settings.
Look Up Synonyms/Look Up Definition (button) (in Dictionary dialog
box) (L). This button toggles between the dictionary and the thesaurus.
60
Make predictions using phonetic replacements (in Word Prediction Settings dialog box) (E). Many people spell and type phonetically. For example, they type ‘fone’ for ‘phone,’ or ‘newmatic’ for ‘pneumatic.’ Phonetic prediction can use phonetic mappings to help suggest words a person is trying to spell. Check this item if you want WYNN to use phonetic spelling when searching for replacements, so that it will, for example, suggest the word ‘phone’ when the user types the letter ‘f’. The default for this item is checked, that is, WYNN will include phonetic spelling for its word suggestions.
Margins (group) (in Print Setup dialog box). The entry fields in the
‘Margins group (Left, Right, Top, Bottom) allow you to change any of the four margins on the page. These Print margins override any side margins you may have set while viewing your document in WYNN. Note: WYNN will use the side margins that you specified in your on-screen document (from the Margins button on the green tool bar) unless you check the item called ‘Use Instead of Side Margin Setting’ in this dialog box.
Margins (tool bar button). Press this button to adjust the amount of blank
space at the right and left sides of the document page. Each time you press Margins, the amount of space on each side increases, until it returns to the original setting. As WYNN cycles through the options, the text on screen reflects the new setting. Larger numbers mean sizes mean more blank space on each side of the document page.
Mark Unread (button) (in Email System screen) (U). Use this button to
mark a selected message as unread. This can be helpful if you have read a message but want to read it again. Marking a message as unread can also help separate it from the rest of the messages.
Mask (tool bar button). Press this button to determine which type of
masking to use. Masking uses shading to de-emphasize all areas of the text except the area of focus. Note that Masking is only
61
available in Read-only mode. When you press Mask, WYNN cycles through four options: Line Masking, Sentence Masking, Paragraph Masking, and No Masking. Note that when you are using masking, the Read By button is not available. Read By is only available when you choose No Masking.
Mask Color (group) (in Masking dialog box). Use this group to
determine the intensity of color of the masked text and background. Note that masking can only be used in Read-only Mode.
Mask Increment (group) (in Masking dialog box). Use this group to
determine which type of masking to use. Note that masking can only be used in Read-only Mode.
Masking Settings (under ‘More’ button in Save Settings dialog box)
(M). Check this box if you want WYNN to save just the Masking Settings.
Masking Settings... (Settings Menu item) (M). Select this item to show
the Masking Settings dialog box, where you can set the Masking increment and colors. Masking uses shading to de-emphasize all areas of the text except the area of focus. Note that masking can only be used in Read-only Mode.
Match Case (in Find Text dialog box); (in Find and Replace dialog box)
(M). WYNN will search only for matching uppercase and lowercase letters. For example, if you check this item when you are looking for the word ‘States,’ WYNN will find the word in ‘United States,’ but will not find the word ‘states’ without a capital S. The default setting for this item is unchecked.
Menu Bar (View Menu item) (SHIFT+F3) (M). Select this menu item to
display or hide the WYNN menu bar. The menu bar is a line of words (File, Edit, etc.) located at the top of the screen that lists all the menus available. You can hide the Menu bar and run WYNN exclusively from the Tool Bar. WE DO NOT RECOMMEND
62
THAT YOU HIDE THE MENU BAR, BECAUSE THE ONLY WAY YOU CAN ‘UN-HIDE’ IT IS TO HOLD DOWN THE SHIFT KEY, THEN PRESS THE F3 KEY! The default for this item is checked, that is, WYNN shows the menu bar.
Menus & Dialogs (in Speech Settings dialog box) (M). To speak the
pull-down menus and the contents of dialog boxes, choose Menus & Dialogs. The default for this item is unchecked, that is, WYNN will not speak menus and dialogs.
Messages (in Email System screen) (M). This is the list of messages that
have been downloaded. (It is actually a list of all messages in the current folder. Since the email system starts in the Inbox folder, it is the list of messages in the Inbox.) The first time you run the email system, there are no messages in the Inbox, so the message list is empty.
Messages (in Speech Settings dialog box) (G). To speak error messages
and other types of system messages, select this item. The default for this item is unchecked, that is, WYNN will not speak messages.
Mis-identified Word (in OCR Correction dialog box) (M). You enter
the word that WYNN has not recognized correctly in this field. WYNN’s OCR Correction feature only looks for whole words. It will ignore any spaces you try to enter. It will recognize punctuation. In fact, punctuation characters are some of the most common mis-identified ones.
More (in Save Settings dialog box) (M). If you want to expand the Save
Settings dialog box so that it shows you all the settings types, press More.
Most Accurate Scanning (Scan Menu item) (A). Choose Most Accurate
Scanning if the other scanning settings are not accurate enough for the material you need to scan. Most Accurate Scanning is the best choice for pages with very small text, usually smaller than 10 point.
63
This setting uses the FineReader OCR (Optical Character Recognition) engine to scan; it uses automatic contrast (the Scanning Contrast setting) and automatic orientation (the Page Orientation setting); and de-skew, de-speckle, white on black, and language analyst are all turned on. The FineReader engine causes scanning and processing to take longer. For more information about these features, see their individual entries. Note that the three settings: Most Accurate Scanning, Standard Scanning (the default), and Fastest Scanning, are mutually exclusive, so that when you select one, the others are de-selected. In addition, if you modify settings in the Scanning Settings dialog box, you may find that none of these items is selected. The current selection is indicated with a checkmark.
Move Down (Outline Control sub-menu item). Moves the current item
down within the current level. Some programs call this ‘Lower.’ The keyboard equivalent is ALT+DOWN ARROW.
Move Down One Page (button) (in Move Page dialog box) (D). Moves
the current page back one page in the document. Once WYNN moves the page, it will tell you the current page’s new page number. Please note that all other pages in the document will be renumbered as necessary to accommodate the moved page.
Move Page… (Edit Menu item) (O). Select this menu item to move the
current page to another location in a document. When you select Move Page, WYNN opens the Move Page dialog box. You can move a page to a specific place, or you can move it to the previous, next, top, or bottom, of the document. Once WYNN moves the page, it will tell you the current page’s new page number. Please note that all other pages in the document will be renumbered as necessary to accommodate the moved page. Note that if the open document does not contain more than one page, this item is not available.
64
Move to Bottom (button) (in Move Page dialog box) (B). Moves the current page to the end of the document. Once WYNN moves the page, it will tell you the current page’s new page number. Please note that all other pages in the document will be renumbered as necessary to accommodate the moved page.
Move to Folder (button) (in Email System screen) (V). You can create
folders to store your saved email messages more efficiently. The Move to Folder button allows you to move a message to a different folder. When you select Move to Folder, WYNN brings up a dialog box that lists all the available folders. You should first click your mouse to select the message you want to move, and press the Move to Folder button. Next, select the folder in which you want to store the selected message, and WYNN will move it there.
Move to Folder (button) (in Organize Favorites menu) (M). Click this
button to move the selected Web page or folder to a new folder. Note that you must first select the Web page or folder in the Favorites list, then click the Move to Folder button.
Move to page (in Move Page dialog box) (M). Type in the page number
to which you wish to move the current page. Or type in the relative position you want to move to. For example, if you are on page 50 and you know you want to move the page to page 48, you can enter –2 to move back 2 pages. Or enter +10 to move the page forward 10 pages in the document. When you have entered the page number, press the ‘OK’ button and WYNN will move the page. Once WYNN moves the page, it will tell you the current page’s new page number. Please note that all other pages in the document will be renumbered as necessary to accommodate the moved page.
Move to Top (button) (in Move Page dialog box) (T). Moves the current
page to the beginning of the document. Once WYNN moves the page, it will tell you the current page’s new page number. Please note that all other pages in the document will be renumbered as necessary to accommodate the moved page.
65
Move Up (Outline Control sub-menu item). Moves the current item up
within the current level. Some programs call this ‘Raise.’ The keyboard equivalent is ALT+UP ARROW.
Move Up One Page (button) (in Move Page dialog box) (U). Moves the
current page forward one page in the document. Once WYNN moves the page, it will tell you the current page’s new page number. Please note that all other pages in the document will be renumbered as necessary to accommodate the moved page.
Moving prediction box (in Word Prediction Settings dialog box) (M).
Check this item to have the predictor box follow the cursor. If this item is unchecked, the predictor box will stay parked in one place. You can move the predictor box wherever you want to park it by putting the pointer on the top line of the predictor box, then holding down the left mouse button as you drag the box to the desired location on the screen. Many people like to keep the predictor box on the lower right part of the screen. The default for this item is checked, that is, the predictor box will follow along as you type.
MS DOS Name (in Document Properties dialog box). This is the MS-
DOS name for the current file. Must close TWAIN after each scan (in Scanner Selection dialog box)
(W). If your first scan works, but subsequent scans seem to ignore changes in scanner settings, try this setting.
Name (in Add Favorite menu) (N). This is the name of the current page
you are viewing, as it will appear in your Favorites folder. You can change the name if you want. To add this shortcut to a different folder, press the Create In button.
Name (in Email Settings dialog box) (N). You must tell WYNN what
name is listed for this connection. This name will appear whenever you send an email. It will be your 'formal name.' Usually this will
66
be your first and last name. IMPORTANT NOTE: After completing this information, you must save your settings, using WYNN’s Save Settings command, for the email configuration to be active from that point forward.
Name (in Print dialog box) (N). This is where you can select which
printer you want to print your document. The printer you select becomes the default printer for the rest of the session or until you change it.
Name or Group (in New Address screen) (N). This is the field in which
type the name of the person or group you want to add to your address book.
New (tool bar button) (File Menu item) (CTRL+N) (N). Select New to
create a new document. When you select New, WYNN opens a document. You can type into this document, or scan pages into it, and save it under a new name. Note that you cannot have more than two documents open at a time. If you already have two documents open, WYNN will ask if you want to close the document you are not currently using, then open the requested document.
New Entry (button) (in Address Book) (N). Select this button to add a
new entry to your address book. When you select New Entry, WYNN takes you to the New Address dialog box, where you can type in the name and address. The New Address dialog has three fields: ‘Name or Group,’ in which you type the name of the person or group; ‘Email Addresses,’ in which you type the person’s complete address; and ‘Add Address to Group,’ in which you can add an existing address to a pre-defined group. The Name and Address fields are edit boxes, so you need to type the information in them. If you are creating a group, you can type all the addresses in the Email Addresses area, separating addresses with a comma or semi-colon, or you can select existing addresses from the Group field. You can type as many addresses as you want in the Email Addresses area. The Group field is a list box, which means you
67
cannot type in it. You can only select from the list of existing addresses.
New Folder (button) (in Add Favorite menu) (W). Click this button to
specify the name of a new folder for your favorite pages. New number for page x is (in Renumber Pages dialog box) (N). Enter
the number you want to use instead of the existing page number. WYNN will renumber any subsequent pages so they follow the new page number in sequence. Note that page numbering can only go up. For example, you could have a 3-page document that you renumber as pages 10, 20, and 30, but you can’t renumber the pages as 20, 30, and 10, because the numbers are not all going up. If you type in a number that breaks this rule, WYNN will prompt you to enter a valid number.
Next (tool bar button). Press this button to switch to the next tool bar.
You can easily operate WYNN using the rotating Tool bar located at the top of the screen. There are actually four Tool bars, which cycle when you press the Next button. Each Tool bar has several color-coded buttons on it. The buttons are labeled with their name, and each has an accompanying tool tip, which gives a slightly expanded description of the button’s function when the mouse hovers over the button. This button is on every tool bar.
Next Look-up (button) (in Dictionary dialog box); (in Thesaurus dialog
box) (X). Press this button to have WYNN go forward to the next word you looked up in this dictionary session.
Next Page (in Go To Page dialog box) (N). Click ‘Next Page’ to go
directly to the next page in the document. No Masking (in Masking dialog box) (N). No Masking presents the page
normally, with no shading.
68
Non-Continuous (in General Settings dialog box) (N). If you select Non-Continuous, WYNN reads the current item and then stops. To continue reading, and advance the Spotlight to the next increment, you must press the Read button again. The increment is determined by the Read By setting found in the General Settings dialog box. If the Read By increment is Word (the default increment), WYNN reads one word at a time. If the Read By increment is Line, WYNN reads a line, then stops and waits for you to press the Read button again. This setting can be useful for people who want extra time to absorb chunks of information.
None (button) (in Speech Settings dialog box) (N). To select none of the
items, press this button. Note (tool bar button). Select the Text Note button to put a text note into
your document. When you select Text Note, WYNN brings up the Insert Text Note dialog box, where you can begin typing your Text Note. You can also Paste text from the Windows Clipboard into the Note.
Number of Copies (in Print dialog box) (U). Enter the number of copies
you want to print. The default is 1. OCR Correction... (Advanced Menu item) (O). Use OCR Correction to
correct any words that WYNN’s OCR engine has not correctly identified. WYNN’s OCR engines usually do a very good job of identifying text correctly. However, due to the wide range of type styles, fonts, and reproduction quality for documents you are likely to encounter, not all words will be correctly identified with every scan. Using WYNN’s OCR Correction feature, you can apply corrections for any text string to your documents.
OK (ENTER) (O). Saves the changes you have specified and closes the
dialog box.
69
One Line (Page Scrolling sub-menu) (O). WYNN scrolls up one line at a time.
Open (tool bar button). Select Open to open a document. Selecting Open
brings up a dialog box titled ‘Select a file to open.’ Use this dialog box to choose a file to open. Use ‘Look in’ to tell WYNN what folder to look in to find the file you want to open. The default location is your \Docs folder in your user folder. Note that you cannot have more than two documents open at a time. If you already have two documents open, WYNN will ask if you want to close the document you are not currently using, then open the requested document. Use ‘Files of type’ to tell WYN to open a different file format, such as a .txt file or a .doc file. The default file format is .wyn files. Note that you can change the default file location and default file format in the General Settings dialog box in the Settings menu.
Open Web Page (Web Menu item) (O). Select Open Web Page to go to
WYNN’s specialized Web browser. This allows you to browse the Internet.
Open/Save (button) (File Open dialog box) (O) Opens/Saves the file with
the name, file type, and location you specified. Organize Favorites (Web Favorites item) (O). As your list of favorite
pages grows, you can keep it organized by creating folders. You might want to organize your pages by topic. For example, you could create a folder named Art for storing information about art exhibits and reviews. Here’s how to do this: On the Favorites menu, click ‘Organize Favorites.’ Next, click ‘Create Folder,’ type a name for the folder, and then press ENTER. Finally, drag the shortcuts (or folders) in the list to the appropriate folders. If the number of shortcuts or folders makes dragging impractical, you can use the ‘Move to Folder’ button instead.
70
Orientation (group) (in Print Setup dialog box). In the Orientation group there are two options: Portrait or Landscape. Click on the layout you wish to choose. The graphic at the top of the dialog box changes as you make your selection to give you a better idea of what each of these choices look like.
Other Doc (tool bar button). Press this button to switch between two
open documents. Note that you can have no more than two documents open at the same time. This button is on every tool bar.
Outline Adjustments (Edit Menu item) (J). Use Outline Adjustments to
move items around in your outline. There are four options: Back One Level, Forward One Level, Move Up, and Move Down. See the individual entries for each of these options for more information.
Outlines (tool bar button). Using WYNN, you can create outlines of your
ideas. This can help you organize ideas as you prepare to write essays, research papers, or even stories. When you use WYNN’s outlines feature, you are writing in outline format. When you press the Outlines button, WYNN opens a new document for your outline, and everything you write will be in outline format. WYNN puts the word ‘Title’ in brackets. Type over that word to enter your outline title. WYNN will automatically start the outline for you by putting your cursor at Roman numeral I. You can enter items this way. You can change the order of items using the Adjust tool bar button or the Outline Adjustments menu item.
Page Orientation (in Scanning Settings dialog box) (P). Use this setting
to specify the orientation of the page on the scanner. Automatic lets WYNN determine which way the page is situated on the scanner. This is the easiest setting but it can add slightly to the scanning time. Normal means the top of the page is flush with the edge of the scanner glass that the scanner says is the top. Sideways means the top of the page is flush with the scanner glass side that is to the right of the scanner’s top. Upside-down means the top of the page is flush with the opposite edge of the scanner’s glass plate.
71
Sideways Upside-down means the top of the page is flush with the scanner glass side that is to the left of the scanner’s top. The default setting for this item is Automatic Orientation.
Page Scrolling (View Menu item) (P). Select this menu item to determine
how much of the page is moved up when WYNN is reading and gets to the bottom of the page. The options are: One line – WYNN scrolls up one line at a time; 1/2 screen – WYNN scrolls up half a screen; 3/4 screen – WYNN scrolls up nearly a full screen.
Page Selection (in Save Pages dialog box) (P). If you want to save a
range of pages, enter the range of pages you want to save in the Page Selection box, with a dash between the page numbers. For example, if you want to saves pages 2 through 6, you must enter 2-6 here. If you want to save random non-sequential pages, enter the page numbers with a comma separating the page numbers. If you enter a number that is not in the document, such as if you enter 2-6 in a 5-page document, WYNN will display an error message. Once you have entered a valid range, click the OK button. WYNN will take you to the File Open dialog and prompt you for a file name. Note: If you have used the Renumber Pages function to change the number sequence in your document, you must specify the revised page numbers in the Save Pages dialog.
Pages from X to Y (in Print dialog box) (P). Prints only the pages you
specify. Type the page numbers of the first and last pages you want to print.
Paper (group) (in Print Setup dialog box). This group contains
specifications for the paper you will use to print your document. Paper Size (in Print Setup dialog box) (Z). The ‘Paper Size’ entry field
in the Paper group lists all the paper sizes supported by your printer, and indicates which size is currently selected. To select a different size, type in the name or select it from the list using the arrow keys.
72
Paper Source (in Print Setup dialog box) (S). The ‘Paper Source ‘ entry field in the Paper group lets you choose the printer tray or feeder. Use the arrow keys to select the printer tray from which you want to print your document.
Paragraph (in General Settings dialog box) (P). Read by Paragraph
moves the reading spotlight paragraph by paragraph during reading. The default setting is Read By Word.
Paragraph (in Masking dialog box) (P). Paragraph Masking shades the
entire page except the paragraph the cursor is currently on. Password (in Email Settings dialog box) (P). Every Internet account has
a password to protect your privacy. Passwords are usually five to eight characters long. WYNN, like most programs, represents each character visually by an asterisk. In addition, WYNN does not speak the characters as you type them or review them. These things are done so that other people cannot learn your password. IMPORTANT NOTE: After completing this information, you must save your settings, using WYNN’s Save Settings command, for the email configuration to be active from that point forward.
PASSWORD (in Teacher Lockout dialog box) (P). The ‘Password’
field lets you enter a password code of between 5 and 8 characters (letters and/or numbers in any combination). You must confirm the password before the lockout is valid. You will need to enter this same password later to unlock the selected items for use by the current user.
Paste (Edit Menu item) (CTRL+V) (P); (in Insert Text Note dialog box)
(P). Select Paste to insert text that you have previously put in the Microsoft Windows clipboard, into your document or Text Note. You can only use this item if you have already cut or copied text into the Clipboard. You can paste the text into another part of the open document, into a new WYNN document, or into a text note. (You can also paste text into another application, such as Microsoft
73
Word, by using the hotkeys or using that application’s Paste function.) Find the location where you want the text inserted, then select Paste. The text is inserted into the document. Note that this item is only available when you are in Writing Mode and there is already text in the Clipboard.
Pause (tool bar button). Press this button while WYNN is reading, and
WYNN will stop reading. This button is an alternate, or toggle, for Read. This button is on every tool bar.
Pause before speaking (in Word Prediction Settings dialog box) (P).
Use this item to set how many seconds WYNN waits before it starts reading the words in the predictor box. The default is 1.0 second.
Pause between choices (in Word Prediction Settings dialog box) (U).
Use this item to set how long WYNN pauses between each word in the list. Some people may benefit from having more time to absorb the words, so they would want a bigger pause between choices. The default is 1.0 second.
Phonetic (in Word Prediction Phonetics dialog box) (P). Use this box to
add new phonetic associations to the list. To add a new phonetic association, first type the incorrect letter or letters followed by a comma, then type the correct letter or letters. For example, to have WYNN recognize the letter ‘f’ as a possible misspelling for the letters ‘ph,’ you would type: f,ph and then press the Add button. Once you add phonetic associations, you can choose to use them or not by checking each association in the list. You can also turn off phonetic spelling analysis by unchecking the checkbox called ‘Make predictions using phonetic replacements’ in the Word Prediction Settings dialog box, found in the Settings menu.
Pitch (in Speech Settings dialog box) (P). To select how high or low the
voice reads, move the slider to the left or right.
74
Play (in Insert Voice Note dialog box) (P). Press Play to hear the voice note you recorded.
Please Sign In Here (in User Log In dialog box). The first time you Log
In, type in your name. The next time you Log In, WYNN includes your name on the list of users and you can select it by typing it in or by using the down arrow next to the sign-in field to scroll through the list of names, then clicking on your name. Note that this will only be displayed if Multiuser Logins are enabled.
POP3 Server (in Email Settings dialog box) (3). The POP3 Server is the
incoming mail server address. It will probably look something like this: pop3.mindspring.com, although some servers use 'mail' or other text instead of 'pop3' in the address. IMPORTANT NOTE: After completing this information, you must save your settings, using WYNN’s Save Settings command, for the email configuration to be active from that point forward.
Portrait (in Print Setup dialog box) (O). Prints the document so that the
short edge of the paper is at the top of the page. Predict (tool bar button). Press the Predict button to activate WYNN’s
word prediction system. Word prediction can be useful for people who have difficulty coming up with words while they write. You can use word prediction to access a list of words that could complete the word you are currently typing. Word prediction will also suggest your next word when you finish typing a word.
Preferred View (group) (in Visual Settings dialog box). Use the
Preferred View to select whether you want WYNN to open and display scanned pages in Exact View or in Text View. Note that both views are still available: this item merely sets your preference. If you select Exact View, WYNN will display the Exact View whenever it is available, unless it doesn’t make sense to do so, such as when you have manually switched to Text View and are going from one page to another. In this case, WYNN assumes you want to
75
stay in the View you switched to. The default is to prefer Text View.
Previous Look-up (button) (in Dictionary dialog box); (in Thesaurus
dialog box) (P). Press this button to have WYNN display and look up the previous word you looked up in this dictionary session.
Previous Page (in Go To Page dialog box) (P). Click ‘Previous Page’ to
go directly to the previous page in the document. Print (tool bar button) (File Menu item) (CTRL+P) (P). Select Print to
print the active document. When you select Print, WYNN opens the Print dialog box. The printed copy of your file will reflect the text size, font, and spacing choices you have selected for viewing your document on the screen. If you are using a color printer, your highlighted text will print in color. If you do not have a document open to print, this item will not be available. This feature is only available when displaying a document in Text View; you cannot print the Exact View of a document.
Print Range (group) (in Print dialog box). This group of items contains
radio buttons that you use to select what part of the document you want to print. The options are: All Pages, Pages from X to Y (where you specify the range), Selected Text Only, Highlight Text Only, and Text Notes Only. Each of these options is described in more detail in its own section.
Print Setup (File Menu item) (U). Select this menu item to determine
how WYNN sets up the document for printing: the size of the page, print margins, direction on the page, and how it feeds out of the printer. When you select Print Setup, WYNN opens the standard Windows Print Setup dialog box.
Printer (group) (in Print dialog box). This group of items contains
information about the printer’s name, status (such as busy or idle),
76
type, and location, along with any comments available about the printer.
Progressive (in General Settings dialog box) (V). Use this item to select
how WYNN’s reading cursor spotlights text as it reads in Text View. If you select Progressive (instead of Transient), the spotlight progressively adds to the emphasized text as it reads, instead of just emphasizing the current text unit. For example, if you have selected Read By Line and choose Progressive, the spotlight emphasizes the first line and moves the cursor through it, but when the cursor leaves the last word in the line, the Spotlight continues to emphasize that line and also emphasizes the next line. As the Spotlight moves through the document, the emphasized area increases with each new line. This setting applies to Read By Line, Read By Sentence, and Read By Paragraph, but not Read By Word. The default setting is Transient.
Pronunciation (in Pronunciation Dictionary dialog box) (P). You enter
the correct pronunciation for the word in this field. Pronunciations can include spaces. Sometimes inserting a space between letters helps with placing the stress on the correct syllable, and with pronunciation of vowels.
Pronunciation Dictionary... (Advanced Menu item) (P). Use the
Pronunciation Dictionary to change the pronunciation of any word or combination of letters. Most speech synthesizers do a very good job of pronouncing words through a combination of their text-to-speech programming and their internal dictionaries. However, there will always be words that a given synthesizer will not pronounce well. These words vary from synthesizer to synthesizer. Using WYNN’s Pronunciation Dictionary, you can change the pronunciation of any word.
Rate (in Speech Settings dialog box) (R). To select how fast WYNN
reads, move the slider to the left or right. The default is 150 words per minute for the ViaVoice speech software included with WYNN.
77
Read (button) (in Email System screen) (R). Use this button to read the
message that is highlighted (or selected) in the message list. When you select Read, WYNN overlays a new screen on top of the Email System screen. This is the Read Message screen. The Read Message screen contains the message header information, sometimes called the message envelope, several buttons, and the message text.
Read (group) (in General Settings dialog box). This group controls
whether WYNN reads continuously or whether you need to press the Read button each time you finish reading the spotlighted text. The default mode is continuous reading. Note that this function is tied to the option selected in the ‘Read By’ group box or the ‘Read By’ button on the green tool bar.
Read (in Insert Text Note dialog box) (R). To hear your Text Note
spoken aloud, press this Read button. Read (tool bar button). Press this button and WYNN reads the open
document aloud, moving the cursor along as it reads. This button is an alternate, or toggle, for Pause. This button is on every tool bar. Note that this function is tied to the option selected in the ‘Read By’ group box or the ‘Read By’ button on the green tool bar.
Read --> (button) (in Dictionary dialog box); (in Thesaurus dialog box)
(>). Press this button to have WYNN read the definition aloud, item by item. Press the Read --> button to read the next line forward, and the Read <-- button to read the previous line.
Read <-- (button) (in Dictionary dialog box); (in Thesaurus dialog box)
(<). Press this button to have WYNN read the definition aloud, item by item. Press the Read --> button to read the next line forward, and the Read <-- button to read the previous line.
78
Read By (tool bar button); (in General Settings menu). Press this button to determine how much of the text WYNN includes in the Spotlight. The spotlight is a way of accentuating a portion of the text using brightly colored emphasis. When you press Read By, WYNN cycles through five options: Word, 3 Words, Line, Sentence, and Paragraph. If you choose Read By Word, the spotlight includes a single word, and moves word by word. With this option, the spotlight is essentially the same as the cursor. If, however, you choose Read By 3 Words, the spotlight includes 3 words, and moves through the document in groups of 3 words.
Read Syllables (in Syllables dialog box) (E). To read each syllable, click
Read Syllables. Read Word (in Dictionary dialog box); (in Thesaurus dialog box); (in
Syllables dialog box) (R). Press this button to have WYNN read the word aloud.
Read-only Mode (Edit Menu item) (CTRL+E) (E). Select Read-only to
switch, or toggle, from Writing mode to Read-only mode. When you start WYNN, you are in Read-only mode. This menu item is an alternate, or toggle, for Writing Mode. The Read-only button is on every tool bar.
Receiving Email (group) (in Email Settings dialog box). Use this group
to tell WYNN the user login name, password, and POP3 server that is used for the connection you will use with WYNN’s email program. IMPORTANT NOTE: After completing this information, you must save your settings, using WYNN’s Save Settings command, for the email configuration to be active from that point forward.
Recognition Language (in Scanning Settings dialog box) (G). The
recognition language is the language WYNN uses to recognize text. This option is useful if the document you are using has text that contains accent marks, umlauts, or other characters unique to a
79
particular language. Note that this does not refer to the language WYNN speaks in; rather it refers to the characters the OCR engine identifies during the recognition portion of the scanning process. The languages listed will vary depending on what languages were installed with WYNN, but always includes the 13 Western European languages. The default is American English.
Recognize Columns (Scan Menu item); (in Scanning Settings dialog
box) (Z). Determines how WYNN will scan, save, and present your document for reading. When Recognize Columns is checked, WYNN saves and reads all of column one first, then column two, and so on. If it encounters tables, WYNN is smart enough to automatically present them properly. When Recognize Columns is not checked, WYNN will scan, save, and present the entire page as though there were no columns. Most of the time column recognition is the best choice. The default for this item is on.
Recognize Text Using (in Scanning Settings dialog box) (U). Use this
item to specify which OCR (Optical Character Recognition) engine you want WYNN to use to recognize scanned text. WYNN has two OCR engines to choose from: Caere MTX and FineReader. The default is the Caere MTX engine. When you change OCR engines, the change will take effect with the next page you scan.
Record (in Insert Voice Note dialog box) (R). Press Record to begin
recording your voice note. Refresh (Web tool bar button) (Web Menu item) (R). Select Refresh to
reload the current page using the latest version of the page. Remove (in Customize Tool Bar dialog box); (in Differential Coloring
dialog box) (R). The Remove button lets you remove items from your list. In the Customize Tool bar dialog box, it removes buttons from the Custom Tool Bar. In the Differential Coloring dialog box, it removes defined character combinations from the list
80
Remove Attachment (button) (in Compose Email Message screen) (R). Select this button to remove a file from the attachment list. When you select Remove Attachment, WYNN will not ask you to confirm the deletion. It will remove the highlighted file.
Rename (button) (in Organize Favorites menu) (R). Click this button to
rename the selected Web page or folder. Note that you must first select the Web page or folder in the Favorites list, then click the Rename button.
Rename Folder (button) (in Email System screen) (N). Use this button
to rename a folder that you have already created. Note that you cannot rename the Inbox, Sent Messages, or Drafts folders.
Renumber Pages (Edit Menu item) (A). This command allows you to
change the numbering system for the pages of the open document. When you scan a document that does not begin on page 1, such as part of a book, you will sometimes want to maintain the book’s page numbers in your scanned document. This function allows you to do that. You can renumber pages many times. You can give each succeeding page a new number. But each page number must be greater than the page numbers before it. Page numbering can only go up. For example, you could have a 3-page document that you renumber as pages 10, 20, and 30, but you can’t renumber the pages as 20, 30, and 10, because the numbers are not all going up. If you type in a number that breaks this rule, WYNN will prompt you to enter a valid number. You can revert to WYNN’s original page numbering sequence at any time by selecting checkbox called ‘Revert to original page numbers.’ The page numbers will then begin at page 1.
Repeat list when finished (in Word Prediction Settings dialog box) (R).
Check this box if you want WYNN to loop back to the first word when the entire list has been spoken. When this box is checked, the word list is repeated until the user takes an action to stop it. The default for this item in unchecked.
81
Replace (button) (in Spell Check dialog box); (in Find and Replace
dialog box) (R). Select ‘Replace’ to have WYNN substitute the replacement text for the text in the current instance only. When you are using Spell Check, it replaces the current misspelled word. When you are using Find and Replace, it replaces the current instance of the ‘Find’ text. If you want to replace every instance of the text in your document, you should choose ‘Replace All.’
Replace All (button) (in Spell Check dialog box); (in Find and Replace
dialog box) (A). Select ‘Replace All’ to have WYNN search through the entire document and automatically substitute the replacement text for the text in all instances. When you are using Spell Check, it replaces all occurrences of the misspelled word. When you are using Find and Replace, it replaces all instance of the ‘Find’ text. If you want to review each occurrence of the text, you should choose ‘Replace’ instead of ‘Replace All.’
Replace with (in Spell Check dialog box) (W); (in Find and Replace
dialog box) (E). In the Spell Check dialog box, WYNN displays a list of corrections for the possibly misspelled word in the ‘Replace With’ box. Notice that this box has a little arrow pointing down on the right. This means there are more words that you can choose from if you click the arrow. Select the word you want to use and click the ‘Replace’ button. The suggested words are from the main dictionary and your Personal Dictionary. In the Find and Replace dialog box, if you want to replace your text with some other text, enter that text in the ‘Replace with’ field. You do not have to use this field if you just want WYNN to find your text, not replace it. If you want to delete occurrences of a word in your document, just leave the ‘Replace with’ box empty, then choose Replace when WYNN finds your text. WYNN will search for your word, then replace it with nothing.
Reply (button) (in Read Message screen) (R). Select this button to reply
only to the sender of the message, and not the rest of the people it
82
was originally sent to. When you select Reply, WYNN displays the Compose Message screen, inserts the sender’s name in the To field, inserts the characters RE: at the beginning of the Subject line, and puts your cursor at the beginning of the message text area. The original message is displayed below your cursor with a separator. Note that when replying, if there was a file attached to the original message, it will not get attached to the message reply.
Reply All (button) (in Read Message screen) (P). Select this button to
send your reply to everyone listed in the To field of the message. When you select Reply All, WYNN displays the Compose Message screen and inserts all the original To and Cc names in the To field. It also inserts the characters RE: at the beginning of the Subject line, and puts your cursor at the beginning of the message text area. The original message is displayed below your cursor with a separator. Note that when replying, if there was a file attached to the original message, it will not get attached to the message reply.
Retrieve Settings... (Settings Menu item) (R). Choose Retrieve Settings
to make another settings file the active one. When you select Retrieve Settings, WYNN brings up the Retrieve Settings dialog box. Click on any settings file name, then press OK to make those the active settings. Note that if you want to retrieve settings for all aspects of WYNN behavior, including Visual, Scanning, Web, and the rest, you should choose a file type that says ‘All Settings.’ If you just want to retrieve one type of settings file, such as Visual, choose a file type that says Visual. When you retrieve this file, it will overwrite your current visual settings without changing the rest of the active settings.
Revert to original page numbers (in Renumber Pages dialog box) (R).
You can revert to WYNN’s original page numbering sequence at any time by selecting this checkbox. The page numbers will then begin at page 1.

83
Right (Visual Settings dialog box) (R). Use the Right Side Margin to adjust the amount of blank space at the right side of the document on the screen. The range is 0 to 1.5 inches. The default is 0.2 inches.
Right Boundary (in Scanning Settings dialog box) (R). The Left, Right,
Top, and Bottom boundaries determine how much of the page WYNN should recognize, by defining the distance from the side of the page. This tells WYNN to ignore anything outside that boundary. The standard setting for all four boundaries (left, right, top, and bottom) is zero, which means that the entire page will be scanned and recognized.
Right Margin (in Print Setup dialog box) (R). Enter the distance you
want between the right edge of the paper and the right edge of the lines of print.
Ruler (in General Settings dialog box) (R). The Ruler Spotlight is a thin
colored line running above the emphasized text coupled with a thicker line running beneath the text. When Ruler is selected, the Spotlight is always set to Read By Line. The default setting is Block spotlight.
Save (tool bar button); (File Menu item) (CTRL+S) (S). Select Save to
save the document you are currently reading without closing it. When you select Save, WYNN automatically saves the document, and you can continue reading.
Save As... (tool bar button); (File Menu item) (A). Select Save As to
save your open document. Pressing this button brings up a dialog box. Use this dialog box to save the active file with a different file name, location, or file format. Use ‘Look in’ to tell WYNN what folder you want to save your file in. The default location is your \Docs folder in your user folder. Use ‘Files of type’ to tell WYN to save your file using a different format, such as a .txt file or a .doc file. The default file format is .wyn files. Note that you can change
84
the default file format and default file location in the General Settings dialog box in the Settings menu.
Save Attachment (button) (in Read Message screen) (S). Select this
button to save attachments that came with the email message. You can choose which attachment to save by putting the cursor on the appropriate attachment file name, then selecting Save. If there are no attachments with the message, this button is grayed out.
Save Current Page (button) (in Save Pages dialog box) (S). If you want
to save only the current page, click the Save Current Page button. WYNN will take you to the File Open dialog and prompt you for a file name. Note: There is a hotkey to save the current page. The hotkey is CTRL+SHIFT+S. You can press CTRL+SHIFT+S from anywhere in your document to save the current page, without going into the Save Pages dialog box.
Save Draft (button) (in Compose Email Message screen) (D). Use this
button to save a draft of your message. Sometimes you will want to write a message at one time, but wait to send it later. This is what Drafts is for. When you select Save Draft, WYNN stores your message in the Drafts folder. You can open the draft message later by switching to the Drafts folder, then selecting the Continue Draft button or double-clicking on the draft message.
Save Pages (File Menu item) (G). This command allows you to save
either the current page or a range of pages in the open document. Sometimes you will scan items, not knowing whether you will want to keep them or not. You can use the Save Pages function to selectively save only the pages you need to keep. You can save just the page your cursor is on, or you can specify several pages to save. If you want to save only the current page, click the Save Current Page button. WYNN will take you to the File Open dialog and prompt you for a file name. If you want to save a range of pages, enter the range of pages you want to save in the Page Selection box, with a dash between the page numbers. For example, if you want to
85
saves pages 2 through 6, you must enter 2-6 here. If you want to save random non-sequential pages, enter the page numbers with a comma separating the page numbers. If you enter a number that is not in the document, such as if you enter 2-6 in a 5-page document, WYNN will display an error message. Once you have entered a valid range, click the OK button. WYNN will take you to the File Open dialog and prompt you for a file name. Note: If you have used the Renumber Pages function to change the number sequence in your document, you must specify the revised page numbers in the Save Pages dialog. Note: There is a hotkey to save the current page. The hotkey is CTRL+SHIFT+S. You can press CTRL+SHIFT+S from anywhere in your document to save the current page, without going into the Save Pages dialog box.
Save Password (in Email Settings dialog box) (V). You can check this
box to tell WYNN to save and remember your password so that you don't have to enter it every time you log on. Your password is saved in an encrypted format so you don't have to worry about others discovering it. The default setting (the setting when you first start WYNN) for this item is unchecked. IMPORTANT NOTE: After completing this information, you must save your settings, using WYNN’s Save Settings command, for the email configuration to be active from that point forward.
Save Settings... (Settings Menu item) (S). Choose Save Settings to save
some or all of the currently active settings. You can use this dialog to save your current settings. You can save all the settings, or just save one kind of settings, such as Visual, Speech, or Web. If you want to save all the settings that are currently active, just type a name for the settings file and press Save. If you want to save only one kind of settings (such as Visual Settings), press the More key to have WYNN show you the expanded Settings dialog. Here you can choose which type of settings you want to save. IMPORTANT NOTE: Whenever you start WYNN, it loads the settings file called Default. If you want WYNN to load your favorite settings each
86
time you start, you must save the settings using the file name Default!
Scan (tool bar button). Select this button to scan a page into the current
document. When you press the Scan button, WYNN will begin scanning the page, and will display a progress message to tell you what stage of scanning it has reached. When the page has been scanned, WYNN displays it on the screen so you can read, change, or save it. Note that this button is inactive in WYNN Reader.
Scan and Insert New Page (Scan Menu item) (I). Select this menu item
when you are in a document, to scan a page and have it inserted before the current scanned page. WYNN lets you insert a new scanned page into any document, including a word processing file. You can insert pages at any location in the document. Note: if using the 2-page scanning mode, this item inserts 2 pages before the current page.
Scan and Replace Current Page (Scan Menu item) (R). Select this menu
item when you are in a scanned document, to scan a page and have it replace the current scanned page. This option is useful if you are reading a scanned document and come to a page that seems to contain nonsense words or symbols. Scan and Replace Current Page lets you re-scan that page and put it in the right place in your document. Note: if using the 2-page scanning mode, this item replaces both the current and the next scanned pages in the document.
Scan Menu (ALT+S). This menu lets you control how WYNN scans and
displays the page after scanning it. If you do not have a scanner installed, items on this menu may not be available. In addition to the items on the scan menu, WYNN provides a number of other ways to scan and read text, all of which can be set using the Scanning Settings, located in the Settings menu.
87
Scan Page (Scan Menu item) (F3) (S). Select this menu item to begin scanning the page you have placed on the scanner. Place the page on the scanner first, then begin scanning. While the page is being scanned, a dialog box informs you that WYNN is processing the page. To interrupt scanning, you can press the Cancel button on this dialog box; however, most other buttons and menu items will be unavailable. There may be a slight delay before WYNN interrupts the scanning process. WYNN keeps you posted on the progress of the scanning procedure with messages in this dialog box. Once scanning is done, WYNN displays the scanned page on your screen in Text View (see the ‘Exact View’ entry for other options). When you scan subsequent pages, they are inserted after the page your cursor is on.
Scanner Selection... (Advanced Menu item) (S). Use this item to specify
which type of scanner driver you want WYNN to use. Several choices may exist, depending on how many scanners are installed in your system. WYNN automatically detects the scanner drivers that are installed on your computer, and it selects the one it thinks you will want to use as the default. If there does not appear to be an obvious scanner choice, WYNN will display this item the first time you scan a document, and ask you to confirm the scanner driver selection. Note that we do not recommend using the HP TWAIN driver unless you are using one of the HP 3200-4300 series scanners, due to its slow speed.
Scanning Contrast (in Scanning Settings dialog box) (C). Use Scanning
Contrast to control the dark-to-light contrast ratio in the scanned document. You have several choices. Using Automatic Contrast, WYNN will individually evaluate each page to determine the best contrast setting for maximum accuracy. This is the easiest setting but it adds to the scanning time. Normal Contrast works for most books and memos, or anything else that has reasonably good black print on white paper. Darken Page is useful when the print on the page is too light. When WYNN reads a light page, letters seem to ‘break up.’ An example of this is when WYNN reads ‘iii’ instead
88
of the letter ‘m.’ Lighten Page is a good choice if the letters are becoming ‘glued together.’ An example of this is when WYNN reads the letter ‘m’ instead of the letters ‘r’ and ‘n.’ You can fine-tune the contrast level using Custom contrast, which has numbers from 0 to16. The darkest value is 0, and the lightest value is 16. Darken Page is equivalent to a value of 4, Normal Contrast is 8, and Lighten Page is 12. The default setting for this item is Automatic Contrast.
Scanning Hotkey (in Scanning Settings dialog box) (H). Use this item to
specify the key combination that you can use to scan a document from within another program. The key combination must be CTRL+ALT along with an alphanumeric key (a letter or a number). When you press the scanning hotkey from outside WYNN (that is, when WYNN is running but is not the active program), WYNN will scan the page using Scan in Background mode and place it at the end of the active document in WYNN. The default setting is CTRL+ALT+S.
Scanning Mode (in Scanning Settings dialog box) (S). Use this setting to
select one of several different ways to scan documents. There are many scanning modes available. Scan and Read lets you first scan a page, then read it. Scan in Background lets you scan one page while reading another. The document you are scanning may be the same as the document you are reading, or you may scan into one document, then open and read another. While WYNN reads the page, you’ll hear a small musical tone, your signal that WYNN is ready to scan another page. Place a second page on the scanner, then press the Scan key. WYNN will continue to read while the second page is being scanned. Note that this mode is not recommended unless you have a hardware synthesizer, such as DECtalk PC or DECtalk Express. Otherwise, speech is interrupted during scanning. Large Batch lets you divide the scanning process into two parts: Scanning the page, and Processing and Recognizing the page. Scanning requires your participation to turn the pages. But Processing and Recognition -- the lengthier procedures -- can be

89
done by the computer without your involvement. Using Large Batch, you can scan all the pages of a large document -- like a book -- then instruct WYNN to process the pages while you do something else. You don’t have to be present during the processing step. If you are using an Automatic Document Feeder (ADF), the process is even more automated. You can place batches of 20 to 25 pages in the ADF, and scan them as a group. Please note that if you are using 2-page scanning with an ADF, you must scan the backs of the pages in reverse order so that WYNN can match them up correctly. Batch in Background allows you to begin Large Batch scanning, and while you are scanning, open and read a document. Express Batch is a simpler version of Large Batch scanning. While Large Batch gives you prompts when it has completed scanning and is ready for another page, Express Batch skips these prompts. You must listen for the sound of the scanner head reaching the bottom of the flatbed and returning to the top. In those few seconds it takes to do this, place a new page on the scanner. Express Batch is best used by a person who’s familiar with their scanner, and wants to scan a large document quickly. Do not use this mode with an ADF. Express Batch in Background combines background scanning with Express Batch. Image Only scans the page and saves it as an image file, without performing the recognition process. This setting is useful if you wish to create an image file to be faxed later or used as a graphic. Fax Files allows you to recognize image files, such as files that you have received via a fax card or files you have scanned but not processed. For the best possible recognition, be sure to get a fine fax image of 200 x 200 dpi, and save the file in PCX, DCX or TIF format. When you choose this scanning mode, you will need to tell WYNN where to find the file you wish to recognize. The default scanning mode is Scan and Read.
Scanning Resolution (in Scanning Settings dialog box) (R). This item
controls how fine the scanner makes a picture of the page. Many scanners have a standard setting of 300 dots per inch. However, if you are reading pages printed in very small type and have a scanner that can resolve as finely as 400 dots per inch, you may see
90
improved recognition accuracy. For 400 dpi to be effective, your scanner must have an optical resolution of at least 400 by 400 dpi. An optical resolution of 300 by 600 dpi is not adequate. The point range for fonts with a 300 dpi scanner is 6 to 24 points; for a 400 dpi scanner, the range is 4 to 24 points. 400 dpi scanning resolution only works with black and white scanning and does not work with Exact View. Note that depending on your scanner’s specifications, you may have only one choice in this item. The default setting for this item is 300 dpi.
Scanning Settings (under ‘More’ button in Save Settings dialog box)
(C). Check this box if you want WYNN to save just the Scanning Settings.
Scanning Settings... (Settings Menu item) (C). Select this item to show
the Scanning Settings dialog box, which enables you to control the way WYNN scans pages. Options exist for scanning mode, scanning contrast, orientation, and a number of fine-tuning functions.
Search (button) (in Word Prediction Edit Lists dialog box) (S). Press
this button after you type the word you want WYNN to search for. It will search in the current word list.
Search Direction (group) (in Find Text dialog box); (in Find and
Replace dialog box); (in Find Mark-up dialog box). This group lets you specify whether you want WYNN to search from the current point up, or from the current point down in the document. The default setting is to search down.
Search for phrases containing (in Word Prediction Edit Lists dialog
box) (P). Type the word you want to search for, then press the Search button. WYNN will search the current word list for this word. Note that all phrases contain three words.
91
Search the Web (Web tool bar button); (Web Menu item) (W). Select Search to search the Web for text you want to find. WYNN’s search feature uses the Google (http://www.google.com) search engine to search the Web. When invoked, it will bring up WYNN's Web Search dialog box, where you type in the text you want to find. WYNN then sends the text to Google and displays the results in Google’s user interface. Google is an extremely fast and accurate search engine that also has a clean user interface, making it ideal for use with WYNN.
Secondary Language (in Scanning Settings dialog box) (Y). Use this
item to specify a secondary recognition language WYNN uses to recognize scanned text. WYNN will use both the primary and secondary languages to recognize text. This option is useful if the document you are using has text that contains accent marks, umlauts, or other characters unique to a particular language. Note that this does not refer to the language WYNN is set to speak; rather it refers to the characters the OCR engine identifies during the recognition portion of the scanning process (see the Speech Settings entry to find out how to change the language WYNN uses to speak). The default for this item is American English.
Select a new wordlist file (dialog box) (from Select Word List button in
Word Prediction Edit Lists). This is where you can select a different size word list. This dialog box comes up when you press the ‘Select Word List’ button. WYNN brings up a choice of the three sizes of word lists. It is important to use an appropriate size word list so that words predicted match the vocabulary level of the individual using the program. Choose Small for beginning writers, Medium for intermediate writers, and Large for advanced writers. Choose the one you want, press OK, and WYNN will load the new list.
Select a text file to learn (dialog box) (from Word Prediction Learning
Text dialog box). WYNN displays this dialog box when you press the Text File button. You must select a plain text file with a .txt
92
extension. Note that WYNN can also learn new words from the current WYNN document, or as you type.
Select All (button) (in Word Prediction Phonetics dialog box) (S). Press
Select All to check all the phonetic associations. Select All (Edit Menu item) (CTRL+A) (S). Select this menu item to
select all the text on the current page. Once you have selected all the text, you can Cut, Copy, or Delete it. Note that unlike many programs, WYNN’s ‘Select All’ command selects only the text on the current page, not in the entire document.
Select from the specialized word lists below (in Word Prediction Lists
dialog box) (S). When you check one or more of the lists, WYNN will use them during word prediction. Note that one of the lists is ‘Use text learned from typing, text files, and documents.’ If you do not want to include learned text, uncheck this item. All lists are checked by default.
Select items to be disabled (group) (in Teacher Lockout dialog box).
This group controls which items are locked out. Select Word List (button) (in Word Prediction Edit Lists dialog box)
(W). Use this button to change the size of the word list for the current user. It is important to use an appropriate size word list so that words predicted match the vocabulary level of the individual using the program. Choose Small for beginning writers, Medium for intermediate writers, and Large for advanced writers.
Selected Text Only (in Print dialog box) (Y). Prints only the text that has
been selected in the document. Usually, text is selected by dragging the mouse over a section of text while holding down the left mouse button.
Selected Word (in Syllables dialog box) (W). This is the word selected to
be broken into syllables.
93
Send (button) (in Compose Email Message screen) (S). Select this
button to send your completed message. When you select Send, WYNN will connect to the Internet (unless you are already connected) and send the message. You can press the ENTER or ESC keys to cancel the process. Once you have successfully sent your message, a copy of it will be automatically put in the Sent Messages folder. Note that before you can send any messages, you must have your email settings configured in the Email Settings dialog box.
Sending Email (group) (in Email Settings dialog box). Use this group to
tell WYNN what name, address, and SMTP server is used for the connection you will use with WYNN’s email program. IMPORTANT NOTE: After completing this information, you must save your settings, using WYNN’s Save Settings command, for the email configuration to be active from that point forward.
Sentence (in Masking dialog box) (S). Sentence Masking shades the
entire page except the sentence the cursor is currently on. Sentence (in General Settings dialog box) (S). Read by Sentence moves
the spotlight sentence by sentence during reading. The default setting is Read By Word.
Sentences (in Visual Settings dialog box) (S). Use the item to adjust the
amount of space between each sentence in your documents on screen. Putting more space between items on screen can help some people tell where the end of each sentence is.
Set Password (group) (in Teacher Lockout dialog box). Use the items in
this group to set the password to lock out the selected items. Settings Menu (ALT+G). Use the Settings Menu to change, delete, save,
or retrieve any of WYNN’s settings. The settings are items that you can change in WYNN’s behavior. For example, you can change
94
how things are displayed on the screen using the Visual Settings. You can change how WYNN speaks using the Speech Settings. Each item on the Settings menu is described in its individual entry.
Show Custom Tool Bar (in Customize Tool Bar dialog box) (S). Show
Custom Tool Bar displays the custom tool bar you created. If you have not created a customized tool bar, this option will not be available. When you select Show Custom Tool Bar, the Custom tool bar replaces the standard WYNN rotating tool bar. To go back to the standard tool bar, choose Show Default Tool Bar.
Show Differential Coloring (in Differential Coloring dialog box) (S).
Once you have set up the differential coloring combinations, you can show them only when you want. Check this item to show the differential coloring combinations in documents. The default for this item is checked.
Show Default Tool Bar (in Customize Tool Bar dialog box) (H). Show
Default Tool Bar displays the standard WYNN rotating tool bar instead of the custom tool bar.
Show Exact View (tool bar button) (View Menu item)
(CTRL+SHIFT+V) (H). Select this tool bar button or menu item to display the scanned page on the screen just as it is in the original document. This includes any graphics, line art, tables, columns, and other elements that affect how the page looks. While in Exact View, you can read the page, change text and background colors, and Zoom in and out, but you cannot make any other modifications or additions to the way WYNN presents the text. To make modifications, you must switch to Text View. Note that this option is available only if you are viewing scanned pages. This item is an alternate, or toggle, for Show Text View. IMPORTANT NOTE: If you scan in a page, then edit the page in Text View, when you read the page using Exact View, the text on the screen may not match the text WYNN reads aloud. This is because WYNN reads aloud using the Text View version of the page. If you have made simple
95
corrections, the difference will be minor. But, if you significantly modified the text, the discrepancy may be noticeable. Therefore, whenever you select Exact View for a page you have edited, WYNN will open a dialog box that warns you that ‘the Exact View may not match the Text View you have edited.’ The default is Show Text View.
Show Exact View (Web Menu item) (S). Select this menu item to display
the Web page exactly as it would be displayed in any Web browser. In Exact View, you can view graphics and formatting. All links are active. If you want to modify the way the text is presented on the screen to make it more readable, you can switch to WYNN’s Text View, which is the toggle, or alternate, for Exact View. The default is Show Exact View.
Show prediction accuracy using colored indicators (in Word Prediction
Settings dialog box) (W). The word prediction system uses colored indicators (little colored squares next to the words in the predictor box) to show the grammatical and statistical suitability of each word. This item controls whether WYNN displays these colored indicators. A green square indicates that the word has a very high likelihood of being grammatically correct. A red square indicates a somewhat high likelihood of the word being appropriate. A blue square indicates the lowest likelihood of the word being appropriate. This item is checked by default.
Show Text View (View Menu item) (CTRL+SHIFT+V) (H). Select this
menu item to display only the text from the page, without graphics, line art, tables, columns, and other elements that affect how the page looks. While in Text View, you can modify the way WYNN presents text on the screen. Note that you can change to Exact View using the Exact View menu item or button only if you are viewing scanned pages. This menu item is an alternate, or toggle, for Show Exact View. Show Text View is the default for scanned pages.
96
Show Text View (Web Menu item) (S). Select this menu item to display only the text from the current Web page, without graphics, line art, tables, columns, and other elements that affect how the page looks. Text View does include standard Web-browser visual indication for links: blue underlined text for unvisited links, and red underlined text for visited links. While in Text View, you can modify the way WYNN presents text on the screen. This menu item is an alternate, or toggle, for Show Exact View. Show Exact View is the default for Web pages.
Side Margins (group) (in Visual Settings dialog box). Use the Side
Margins group to adjust the amount of blank space at the right and left sides of the document on the screen.
Size (tool bar button). Press this button to choose the size of the
document text. Each time you press Size, the size of the font increases, until it returns to the original setting. As WYNN cycles through the options, the text on-screen reflects the new setting. Larger point sizes mean bigger characters on the screen.
SMTP Address (in Email Settings dialog box) (S). The SMTP Server is
the outgoing mail server address. It will probably look something like this: smtp.mindspring.com, although some servers use 'mail' instead of 'smtp' in the address. IMPORTANT NOTE: After completing this information, you must save your settings, using WYNN’s Save Settings command, for the email configuration to be active from that point forward.
Speak List (tool bar button). Press the Speak List button to listen to the
words in the word prediction list. This button is only available when word prediction is active.
Speak What (group) (in Speech Settings dialog box). This group
controls what items WYNN speaks.
97
Speech Settings (under ‘More’ button in Save Settings dialog box) (P). Check this box if you want WYNN to save just the Speech Settings.
Speech Settings... (Settings Menu item) (P). Select this item to open the
Speech Settings dialog box. This allows you to determine the type of voice, volume, pitch, and inflection of WYNN’s speaking voice.
Spell (tool bar button). Select the Spell button to spell the word the cursor
is on. When you select Spell, WYNN brings up the Spell Word dialog box, then says the word, spells it, and says it again.
Spell Check (in Teacher Lockout dialog box) (S). Select this item to
disable use of the Spell Checker. This will also lock out the Syllabify Word item on the menu, and the Syllable button on the tool bar.
Spell Check (tool bar button); (Tools Menu item) (F7) (P). Select Spell
Check to open the spell checker. You can check the spelling of a specific word, or of all the words in the document. WYNN checks words against a standard dictionary and against your ‘personal dictionary,’ a list of words that you can enter.
Spell check each word before learning (in Word Prediction Learning
Text dialog box) (S). To have WYNN spell check each word before adding it to the word list, press this button. This is checked in the default state. We recommend keeping it checked.
Spell Misspelled Word (button) (in Spell Check dialog box) (M).
Choose ‘Spell Misspelled Word’ to have WYNN spell the word it has flagged as possibly misspelled.
Spell Replacement Word (button) (in Spell Check dialog box) (S).
Choose ‘Spell Replacement Word’ to have WYNN spell the replacement word that is currently showing.
98
Spell Word (Tools Menu item) (W). Select this menu item to spell the word the cursor is on. When you select Spell, WYNN brings up the Spell Word dialog box, then says the word, spells it, and says it again.
Spotlight Advance (group) (in General Settings dialog box). This group
determines whether the Spotlight moves through the document in the selected increment, or adds onto itself by the selected increment. Your choices are Transient and Progressive. The default is Transient.
Spotlight Background Color (in Visual Settings dialog box) (G). Use
this item to change the color WYNN uses to indicate the spotlight Read-only Mode. The default spotlight background color is yellow.
Spotlight Text Color (in Visual Settings dialog box) (P). Use this item to
change the color WYNN uses to indicate the word at the cursor in Read-only Mode. The default spotlight text color is red.
Spotlight Type (group) (in General Settings dialog box). This group
determines which type of spotlight to use. The spotlight is a way of accentuating a portion of the text using brightly colored emphasis. The options are Block and Ruler spotlight. The default is Block.
Standard Dictionary... (Tools Menu item) (F4) (D). Select this menu
item to open WYNN’s standard dictionary. This dictionary contains more entries than the Basic dictionary.
Standard Scanning (Scan Menu item) (T). Choose Standard Scanning
for most of your scanning needs. This setting uses the Caere MTX OCR (Optical Character Recognition) engine to scan; it uses automatic contrast (the Scanning Contrast setting) and automatic orientation (the Page Orientation setting). De-skew, de-speckle, white on black, and language analyst are all turned on. For more information about these features, see their individual entries. Note that the three settings: Most Accurate Scanning, Standard Scanning
99
(the default), and Fastest Scanning, are mutually exclusive, so that when you select one, the others are de-selected. In addition, if you modify settings in the Scanning Settings dialog box, you may find that none of these items is selected. The current selection is indicated with a checkmark. ‘Standard Scanning’ is the default setting.
Start Highlight (Tools Menu item) (F8) (H). Select this item to start
using the highlight pens. When you select Start Highlight, WYNN will change your cursor to the highlight pen color specified in the Highlighter Pens menu item. You can turn off the highlighter pen using either the Stop Highlight (toggle for the Start Highlight menu item) or the Highlight button on the pink tool bar.
Start Reading (Tools Menu item) (F2) (S). Select this menu item to have
WYNN begin reading from the cursor position. Status (in Print dialog box). This describes the state of the selected
printer, such as busy, idle, ready, or default printer. Status Bar (View Menu item) (SHIFT+F5) (S). Select this menu item to
display or hide the WYNN status bar. The status bar is at the bottom of the page. When the cursor is on a menu item, the status bar gives a brief description of that item. The default for this item is checked, that is, WYNN shows the status bar.
Stop (in Insert Voice Note dialog box) (S). Press Stop to stop recording
or listening to the voice note. Stop (Web tool bar button) (Web Menu item) (T). Select Stop to abort
the loading of the requested page and remain on the current page. Style (tool bar button). Select the Style button to add Bold, Italic, or
Underline attributes to text in your document. When you select the Style button, WYNN gives you a choice of the three attributes. Select the one you want, and WYNN will apply it to the selected
100
text or current word. If the item is already checked, when you select it WYNN will remove the attribute from the selected text. This feature is only available in Text View.
Subject (in Compose Email Message screen); (in Read Message screen)
(J). This field contains the subject name for the message. The Subject is the title that the sender gives the message. If the message was forwarded to you, the subject line will begin with the characters FWD: followed by a space. If it is a reply to a previous message, the subject line will begin with RE: followed by a space.
Switch Document (Window Menu item) (S). Select this item to switch
from one open document to another. Syllables (tool bar button); Syllabify Word... (Tools Menu item) (Y).
Select Syllables to have WYNN speak and show you the syllables of the word the cursor is on. When you select Syllables, WYNN brings up the Syllables dialog box, where you can listen to the word and its syllables.
Syllables/Phonetics (in Syllables dialog box) (S). This is the word broken
into syllables. Synonyms (in Thesaurus dialog box) (N). This lists the synonyms for
each definition of the word. Synthesizer (in Speech Settings dialog box) (Y). To select which
synthesizer WYNN uses, type in your selection or use the arrow keys. Note that if you have only one synthesizer installed, such as the ViaVoice synthesizer that comes with WYNN, this item will be unavailable.
Table of Contents... (Help Menu item) (T). Select Table of Contents to
see this list of topics in WYNN’s online Help system. When you select a topic, WYNN will open a document that teaches you how to use aspects of WYNN.
101
Teacher Lockout... (Advanced Menu item) (T). Select this item to lock a
student or other user out of certain features, such as the Dictionary, Thesaurus, Spell Checker, or Web. This feature makes it possible for a student to use WYNN while taking a test. Teacher lockout is valid until the teacher unlocks the workstation, or until WYNN is restarted.
Test (button) (in Pronunciation Dictionary dialog box) (T); (in Speech
Settings dialog box) (E). You can use the Test button to test the pronunciation of a word before you add it to the Pronunciation Dictionary. You can also use the Test button to check the pronunciation of a word in that is already in your list. In the Speech settings dialog box, you can select Test to hear your changes before making them permanent.
Text (in Masking dialog box) (T). Both the Text and Background options
let you choose the intensity of shading, in a range from lighter to darker. Use the mouse to move the pointer on the bar to the desired position.
Text (in Speech Settings dialog box) (X). To speak text in your
document, choose Text. The default for this item is checked, that is, WYNN will speak text.
Text Color (in Visual Settings dialog box) (E); (in Word Prediction
Settings dialog box) (C). Use this item to change the color of the text as it is displayed on the screen. The default text color is black. In the Word Prediction box, use this item to select the foreground color, that is, the color of the words in the predictor box. The default color is dark blue
Text File (button) (in Word Prediction Learning Text dialog box) (T).
Select ‘Text File’ if you want WYNN to learn new vocabulary from a file. The file must be an ASCII or ANSI (plain text) file with a file extension of .txt. When you select Text File, WYNN will ask
102
you to give the file name. Note that WYNN can also learn new words from the current WYNN document, or as you type.
Text Font (in Visual Settings dialog box) (F); (in Word Prediction
Settings dialog box) (F). Use this item to change the font WYNN uses to display the text in your documents or in the Word Prediction box. In addition to standard fonts, such as Arial and Times New Roman, WYNN installs four special fonts: WYNN Basic, WYNN Bold, WYNN Serif, and WYNN Typewriter. The default font is Arial.
Text Highlight Color (in Word Prediction Settings dialog box) (H). Use
this item to select the color that WYNN uses for the word that is currently highlighted in the list. The default color is red.
Text Note (in Find Mark-up dialog box) (T). Select ‘Text Note’ to have
WYNN look for text notes in the document. Text Notes Only (in Print dialog box) (E). Prints only the text notes in
the document. Text Size (in Visual Settings dialog box) (T); (in Word Prediction
Settings dialog box) (S). Use this item to change the size of the font WYNN uses. The range is 8 point to 72 point. Larger point sizes mean bigger characters on the screen. The current point size is indicated below the slider. The default size is 14 point text.
Text Type (in Scanning Settings dialog box) (E). Use this item if you are
scanning pages that were printed on a Dot Matrix printer or on a typewriter that doesn’t use proportional spacing. Such pages may not scan clearly using the Normal Text setting. Selecting Typewritten or Dot Matrix Text may help WYNN read these pages more successfully. The choices are Normal Text and Typewritten or Dot Matrix Text. The default setting is Normal Text.
103
Text View (in Visual Settings dialog box) (X). Select Text View if you want WYNN to display the Text View whenever it brings up a new document or a new page in a document. If you select Text View, WYNN will display the Text View except when it doesn’t make sense to do so, such as when you have manually switched to Exact View and are going from one page to another. In this case, WYNN assumes you want to stay in the View you switched to. The default is to prefer Text View.
Text View (in Web Settings dialog box) (T). Choose Text View if you
want Web pages to display in Text View, that is, without graphics and formatting. Pages still contain links in Text View. IMPORTANT NOTE: After completing the Web settings, you must save your settings, using WYNN’s Save Settings command, for the Web configuration to be active from that point forward.
Text View (tool bar button). Press this button to display only the text
from the page, without graphics, line art, tables, columns, and other elements that affect how the page looks. While in Text View, you can modify the way WYNN presents text on the screen. Note that you can change to Exact View using the Exact View menu item or button only if you are viewing scanned pages. This menu item is an alternate, or toggle, for Show Exact View. This button is on every tool bar.
Thesaurus (in Teacher Lockout dialog box) (T). Select this item to
disable use of the Thesaurus. Thesaurus... (Tools Menu item) (SHIFT+F4) (T). Select this item to
open the thesaurus. You can look up a word’s synonym by selecting the word, then selecting Thesaurus. When you select Thesaurus, WYNN opens the Thesaurus dialog box, which shows a list of synonyms. You can also type a word into the ‘Selected Word’ entry field, and WYNN will look it up.
104
Time displayed as 24 hour (in Email Settings dialog box) (T). WYNN lists the time each mail message is sent or received. You can have the time displayed in either 12-hour or 24-hour format. The default is to use 12-hour format. IMPORTANT NOTE: After completing this information, you must save your settings, using WYNN’s Save Settings command, for the email configuration to be active from that point forward.
To (in Compose Email Message screen) (O). This field contains the
names or email addresses of all the people you want to send this message to. When you are reading a message, the To field contains the names of all the people the sender sent the message to. You can enter names directly from the address book if you want. Refer to the section on the Address Book for further information. You must separate each name or address with either a semi-colon (;) or a comma (,). WYNN will recognize either of these as separators. Note that it’s not necessary to include a space between addresses. You can enter either the person’s actual email address or, if the person is in your address book, you can simply use the name you assigned to that person.
Tool Bar (View Menu item) (T). Select this menu item to display or hide
the WYNN tool bar. The tool bar is a series of buttons at the top of the page. You can hide the Tool Bar and run WYNN exclusively from the menus, although it is not recommended. The default for this item is checked, that is, WYNN shows the tool bar.
Tool Bar Buttons (in Speech Settings dialog box) (T). To speak the tool
tips on the tool bar buttons, select this item. The default for this item is unchecked, that is, WYNN will not speak tool bar buttons.
Tools Menu (ALT+T). This menu gives you access to a variety of tools
including spelling, reference materials, highlighting, bookmarks, notes, word prediction, and email. Note: some items in this menu are only available when displaying a document in Text View.

105
Top Boundary (in Scanning Settings dialog box) (T). The Left, Right, Top, and Bottom boundaries determine how much of the page WYNN should recognize, by defining the distance from the side of the page. This tells WYNN to ignore anything outside that boundary. The standard setting for all four boundaries (left, right, top, and bottom) is zero, which means that the entire page will be scanned and recognized. However, if you are scanning a book and do not want to include the header (which could repeat the title of the book on each page), try defining a top boundary of one inch. You’ll need to experiment on each book to get the correct setting.
Top Margin (in Print Setup dialog box) (T). Enter the distance you want
between the top edge of the paper and the top of the first line on the page.
Transient (in General Settings dialog box) (T). If you select Read by
Line, and choose Transient, the spotlight emphasizes the first line and moves the cursor through it. When the cursor leaves the last word in the line, the Spotlight emphasizes the next line. This is the default setting.
TWAIN Properties (in Scanner Selection dialog box) (group). If you
are using the Unknown TWAIN driver selection in the Scanner field, you can fine-tune WYNN’s operation with your scanner. Note that you should not use the ‘Unknown TWAIN’ choice unless the other choices do not work with your scanner. Three items exist for this. All three are checkboxes. The three items are: ‘Allow scanner to finish when canceling a scan,’ ‘Black and white contrast uses Brightness instead of Threshold,’ and ‘Must close TWAIN after each scan.’ See the individual entries for each item for tips on when to use them. The default setting for each item is unchecked. You should only select an item if you are having problems that you think one of these items will solve.
Type (in Print dialog box). This tells the type and official name of the
selected printer.
106
Uncertain Text (in Scanning Settings dialog box) (N). This item tells
WYNN to indicate when it encounters a word or character it is unsure about by using the Uncertain Text Marker. See the description for Uncertain Text Marker for more information.
Uncertain Text Marker (in Scanning Settings dialog box) (N). To
designate a specific character, such as an asterisk, that will be spoken when WYNN finds a word or character it is unsure about, type the character into the box. When you start WYNN, Uncertain Text is set to Asterisk (*).
Underline (Edit Menu item) (CTRL+U) (U). Choose Underline to make
your selected text underlined. Choose Underline again to remove the underlining from existing underlined text.
Undo (Edit Menu item) (CTRL+Z) (U). Undo allows you to remove the
effect of the last edit you performed, whether it was typing or deleting. Note that Undo only undoes the last change you have made.
Up (in Find Text dialog box); (in Find and Replace dialog box); (in
Find Mark-up dialog box) (U). Click on Up to have WYNN search from your current point up to the beginning of the document. When it reaches the top of the document, WYNN will wrap around to the end and search up from there to your cursor.
Update (button) (in Word Prediction Phonetics dialog box) (U). Press
the Update button to add the phonetic association that you have just entered, but without checking it (selecting it for use). You should use Add if you want to add the association and check (select) it.
Use Current (button) (in Web Settings dialog box) (U). Press this button
to use the current Web page (the one you are on) as your new home page. IMPORTANT NOTE: If you change this setting. you must
107
save your settings, using WYNN’s Save Settings command, for the Web configuration to be active from that point forward.
Use Dialup Entry (in Email Settings dialog box) (Y). WYNN
automatically uses the first Internet access profile that was created using your Control Panel's Dial-up Networking function. If you want to use a different profile, you can select it here. IMPORTANT NOTE: After completing this information, you must save your settings, using WYNN’s Save Settings command, for the email configuration to be active from that point forward.
Use instead of side margin setting (in Print Setup dialog box) (U).
Check this setting if you want to use the left and right margins here instead of the Side Margins set with the Margins button on the green tool bar. The default setting for this item is unchecked.
User Log In (dialog box). Each time you start WYNN, the program
welcomes you with the Log In dialog box. This dialog box asks you to identify yourself. The first time you Log In, type in your name, and WYNN will add you as a new user. The next time you Log In, WYNN includes your name on the list of users and you can select it either by typing it in, or by mouse clicking on the arrow next to the sign-in field, then clicking on your name. Note: If you will be the only person using WYNN on a computer, you can disable the User Log In by un-checking the ‘Enable Multiuser Logins’ item in the File menu.
User Login Name (in Email Settings dialog box) (U). This is your email
name without the ending part. For example, if your email address is [email protected], then your user login name is yourname. IMPORTANT NOTE: After completing this information, you must save your settings, using WYNN’s Save Settings command, for the email configuration to be active from that point forward.
108
View Attachment (button) (in Read Message screen) (V). Select this button to look at attachments that came with the email message. You can choose which attachment to view by putting the cursor on the appropriate attachment file name, then selecting View. If there are no attachments with the message, this button is grayed out. This button may also be grayed out if WYNN does not recognize the file type of the attachment.
View Menu (ALT+V). This menu allows you to choose which WYNN
screen elements are visible, in which format pages are displayed, and determine the scrolling and zoom options. Note that some items in this menu are only available when displaying a document in Text View.
Visual Settings (under ‘More’ button in Save Settings dialog box) (V).
Check this box if you want WYNN to save just the Visual Settings. Visual Settings... (Settings Menu item) (V). Select this item to show the
Visual Settings dialog box, to change the way WYNN presents text on the screen. The Visual Settings dialog box has sections for the font style and size, colors, margins, and the amount of spacing between items on the screen.
Voice (in Speech Settings dialog box) (V). Lists voices used by each
language in WYNN. The speech software shipped with WYNN has five voice options for each language. (Other speech synthesizers may have a different number of options.) Type in your selection or use the arrow keys. The default voice is Reed.
Voice Note (in Find Mark-up dialog box) (V). Click ‘Voice Note’ to
have WYNN look for voice notes in the document. Voice Note (tool bar button). Select the Voice Note button to put a voice
note into your document. When you select Voice Note, WYNN brings up the Voice Note dialog box, where you can record your
109
voice note. Note that you must have a microphone connected before you can record a voice note.
Volume (in Speech Settings dialog box) (U). To select how loud WYNN
reads, move the slider to the left or right. Web (in Teacher Lockout dialog box) (W). Select this item to disable
use of the Web access feature. Web Menu (ALT+B). This menu allows you to use WYNN’s Web
browsing feature by giving you traditional Web controls, including Back, Forward, Stop, Reload, Home, Search, Favorites, and History. WYNN’s Web browser is built on top of Microsoft’s Internet Explorer 5.0 and IBM’s Web Access Technology.
Web Settings (under ‘More’ button in Save Settings dialog box) (W).
Check this box if you want WYNN to save just the Web Settings. Web Settings... (Settings Menu item) (W). Select this item to show the
Web Settings dialog box, where you can configure your home page, Internet History, the default view, and the method your system uses to connect to the Internet. IMPORTANT NOTE: If you change this setting. you must save your settings, using WYNN’s Save Settings command, for the Web configuration to be active from that point forward.
Where (in Print dialog box). This identifies the location of the selected
printer, and what printer port it is using. White on Black (in Scanning Settings dialog box) (W). This setting
allows WYNN to scan and recognize white text on a black background. This is useful when scanning magazines that often use light text on a dark background for emphasis.
Whole Words Only (in Differential Coloring dialog box) (W). Check
the ‘Whole Words Only’ item to have the differential coloring

110
combinations just apply to whole words, and not words that are part of a larger word. For example, if you define the word ‘the’ and check ‘Whole Words Only,’ WYNN will apply the differential coloring to the word ‘the’ but not the letters ‘the’ in the word ‘mother.’ The default setting for this item is unchecked.
Window Menu (ALT+W). This menu allows you to work with two open
documents at a time. You can also have an email file open, and a Web page open, in addition to the two documents.
Word (in Dictionary dialog box); (in Thesaurus dialog box) (W). This
is the word to be defined. Word (in General Settings dialog box) (W). Read By Word moves the
reading spotlight word by word during reading. If you choose Read By Word, the spotlight includes a single word, and moves word by word. With this option, the spotlight is essentially the same as the cursor. This is the default setting.
Word (in Pronunciation Dictionary dialog box) (W). You enter the
mispronounced word in this field. WYNN only looks for whole words. It will ignore any spaces you try to enter. It also ignores punctuation, so it will pronounce ‘it’s’ and ‘its’ the same way.
Word Count... (Tools Menu item) (F6) (R). Select this menu item to
have WYNN tell you how many words are in the current document. Word List (in Pronunciation Dictionary dialog box); (in OCR
Correction dialog box) (L). This is the list of words in the dictionary. Press the mouse or arrow keys to advance to the first word in the list.
Word Not Found (in Spell Check dialog box) (F). WYNN displays a
possible misspelled word in the ‘Word Not Found’ box. To make changes, select a word WYNN suggests in the ‘Replace With’ box

111
or type your own, then choose ‘Replace.’ If you want to keep the spelling of the word, choose ‘Ignore.’
Word Prediction (in Teacher Lockout dialog box) (O). Select this item
to disable use of the Word Prediction feature. Word Prediction (Tools Menu item) (O). Word prediction can be useful
for people who have difficulty coming up with words or spelling while they write. When you use word prediction as you write, WYNN suggests words that will complete the word you started. It also suggests the next word for you. WYNN incorporates the word prediction software from the textHELP! company. The word prediction database comes in three sizes. Each student can use the size most appropriate for her. It can use phonetic spelling when searching for replacements, so that it will, for example, find the word ‘phone’ when the user types the letter ‘f’. There are two places you can change word prediction settings. The most common settings are in the Word Prediction Settings dialog box in the Settings menu. These include settings a student might use. The more advanced settings, including settings a teacher would usually set, are in the Word Prediction Teacher Controls, which is in the Advanced menu. See the entries for those items for more information.
Word Prediction Edit Lists (dialog box) (in Word Prediction Teacher
Controls dialog box). Use the Edit Lists dialog box to select a different size word list or add words to the list for the current user. The word lists all end in the suffix .pre.
Word Prediction Learning Text (dialog box) (in Word Prediction
Teacher Controls dialog box). You can have the word prediction system learn new words in one of three ways: from a text file, from the current document, or as you type. You can also have WYNN spell check each word before it adds it to the word list. This is especially useful for creative spellers.
112
Word Prediction Lists (dialog box) (in Word Prediction Teacher Controls dialog box). Use the Lists dialog box to select one or more writing styles to use during word prediction. These vocabulary categories have been developed from detailed linguistic research and analysis of 100 million words of spoken and written English.
Word Prediction Phonetics (dialog box) (in Word Prediction Teacher
Controls dialog box). Use the items in the Phonetics dialog box to select phonetic associations on which to base predictions. Many people spell and type phonetically. For example, they type ‘fone’ for ‘phone,’ or ‘newmatic’ for ‘pneumatic.’ Phonetic prediction can use phonetic mappings to help suggest words a person is trying to spell.
Word Prediction Settings (under ‘More’ button in Save Settings dialog
box) (I). Check this box if you want WYNN to save just the Word Prediction Settings.
Word Prediction Settings... (Settings Menu item) (I). Use the Word
Prediction Settings to change the more common settings, including how the words in the predictor box look and are spoken. (If you want to change the more advanced word prediction settings, including settings a teacher would usually set, use the Word Prediction Teacher Controls, in the Advanced menu.) Using the Word Prediction Settings, you can: control how and when the word list speaks; have the predicted words displayed in alphabetical order or in order of statistical frequency; change the color, size, and other attributes of the words in the predictor box; have the predictor box move with the cursor or stay in one place on the screen; and have the word prediction system to include phonetic spelling when it considers its word lists.
Word Prediction Teacher Controls... (Advanced Menu item) (W).
When you select Word Prediction Teacher Controls, WYNN brings up this dialog box, which contains the more advanced word
113
prediction settings, including settings a teacher would usually set. The dialog box contains four tabs, each for a different aspect of word prediction. Use the Edit Lists dialog box to select a different size word list or add words to the list for the current user. Use the Learning Text dialog box to have the word prediction system learn new words from a file or words that you type. Use the Phonetics dialog box to set the phonetic rules for the phonetic spelling feature. Use the Lists dialog box to select from several specialized word lists.
Word Space (tool bar button). Press this button to adjust the amount of
space separating each word. Each time you press Word Space, the amount of space between words increases, until it returns to the original setting. As WYNN cycles through the options, the text on screen reflects the new setting.
Words (in Visual Settings dialog box) (W). Use the item to adjust the
amount of space between each word in your documents on screen. Putting more space between items on screen can help some people with visual bleed.
Write (tool bar button). Press this button to switch, or toggle, from Read-
only mode to Writing Mode. When you start WYNN, you are in Read-only mode. Press Write and you switch to Writing Mode. Once you have selected Writing Mode, you can type directly into the document on the screen. Many word processing conventions will work in Writing Mode, such as the delete key and the backspace key. Use Edit to make changes in a word processing file, or on a scanned page. Or use Edit to write an original document from scratch. This button is an alternate, or toggle, for Read-Only. This button is on every tool bar.
Zoom Exact View (View Menu item) (Z). Changes the display of the
scanned page shown in Exact View. Zoom range is from 25% of normal size, to 500% of normal size. Note that this button is available only if you are viewing scanned pages.

114

![Wynn Macau [1128.HK] · Wynn Resorts of the US owns 72.29% of the Company, ... Wynn Macau Encore Wynn Cotai Opening September 2006 April 2010 2015 or 2016 (planned)](https://img.dokumen.tips/doc/110x75/5b16bcbe7f8b9a5e6d8d7055/wynn-macau-1128hk-wynn-resorts-of-the-us-owns-7229-of-the-company-.jpg)