Embed Size (px)
Citation preview
FUJITSU StorageETERNUS DX, ETERNUS AF
Configuration Guide -Server Connection-
(Fibre Channel) for AIX
P3AM-3782-22ENZ0

This page is intentionally left blank.

Preface
This manual briefly explains the operations that need to be performed by the user in order to connect anETERNUS DX/AF to a server running AIX via a Fibre Channel interface.
This manual should be used in conjunction with any other applicable user manuals, such as those for theETERNUS DX/AF, server, OS, Fibre Channel cards, and drivers.
Refer to "Configuration Guide -Server Connection- Notations" for the notations used in this manual such asproduct trademarks and product names. For storage systems that are supported by the OS, refer to the ServerSupport Matrix of the ETERNUS DX/AF.
22nd Edition
April 2018
The Contents and Structure of this Manual
This manual is composed of the following 13 chapters.
• "Chapter 1 Workflow" (page 7)
This chapter describes how to connect the ETERNUS DX/AF to a server.
• "Chapter 2 Checking the Server Environment" (page 10)
This chapter describes which servers can be connected to ETERNUS DX/AF storage systems.
• "Chapter 3 Notes" (page 11)
This chapter describes issues that should be noted when connecting the ETERNUS DX/AF storage systemsand server.
• "Chapter 4 Checking the Server Information" (page 15)
This chapter describes how to check the server's WWN (World Wide Name).
• "Chapter 5 Installing and Setting Up ETERNUSmgr" (page 16)
This chapter describes how to install ETERNUSmgr.
• "Chapter 6 Setting Up the ETERNUS DX/AF" (page 17)
This chapter describes how to use ETERNUS Web GUI or ETERNUSmgr to set up the ETERNUS DX/AF storagesystems.
• "Chapter 7 Setting Up the Fibre Channel Switches" (page 18)
This chapter describes how to set up the Fibre Channel switches.
• "Chapter 8 Installing Drivers and Setting Up the Server" (page 20)
This chapter describes the driver and server settings.
• "Chapter 9 Checking Connections" (page 24)
This chapter describes how to check the connection status between the server and ETERNUS DX/AF.
• "Chapter 10 Setting the Multipaths" (page 26)
This chapter describes the settings when operating with a multipath configuration.
• "Chapter 11 Creating the Volumes" (page 27)
This chapter describes how to create a volume on the ETERNUS DX/AF storage systems.
• "Chapter 12 SAN Boot" (page 32)
This chapter provides notes for SAN Boot.
3FUJITSU Storage ETERNUS DX, ETERNUS AF Configuration Guide -Server Connection- (Fibre Channel) for AIX
Copyright 2018 FUJITSU LIMITEDP3AM-3782-22ENZ0

• "Chapter 13 Storage Migration" (page 33)
This chapter describes the procedures that are related to Storage Migration.
Preface
4FUJITSU Storage ETERNUS DX, ETERNUS AF Configuration Guide -Server Connection- (Fibre Channel) for AIX
Copyright 2018 FUJITSU LIMITEDP3AM-3782-22ENZ0

Table of Contents
Chapter 1 Workflow 7
Chapter 2 Checking the Server Environment 10
2.1 Hardware ..................................................................................................................................... 10
2.2 Operating System (OS) ................................................................................................................. 10
2.3 Fibre Channel Cards...................................................................................................................... 10
2.4 Veritas Volume Manager (VxVM).................................................................................................. 10
2.5 Veritas Cluster Server (VCS) .......................................................................................................... 10
Chapter 3 Notes 11
3.1 ETERNUS DX/AF Setup Notes......................................................................................................... 11
3.2 Notes Regarding the Number of LUNs.......................................................................................... 11
3.3 Fibre Channel Switch Notes .......................................................................................................... 12
3.4 LVM Notes .................................................................................................................................... 12
3.5 Server Startup and Power Supply Control Notes............................................................................ 13
3.6 Veritas Volume Manager (VxVM) Notes........................................................................................ 13
3.7 Notes for Veritas Volume Manager Dynamic Multipathing (VxVM DMP) ...................................... 13
3.8 Veritas Cluster Server (VCS) Notes ................................................................................................ 13
3.9 Multipath Notes ........................................................................................................................... 13
3.10 Virtual I/O Server (VIOS) Notes.................................................................................................... 14
3.11 Oracle RAC Notes ........................................................................................................................ 14
3.12 Path Addition Notes ................................................................................................................... 14
Chapter 4 Checking the Server Information 15
Chapter 5 Installing and Setting Up ETERNUSmgr 16
Chapter 6 Setting Up the ETERNUS DX/AF 17
Chapter 7 Setting Up the Fibre Channel Switches 18
5FUJITSU Storage ETERNUS DX, ETERNUS AF Configuration Guide -Server Connection- (Fibre Channel) for AIX
Copyright 2018 FUJITSU LIMITEDP3AM-3782-22ENZ0

Chapter 8 Installing Drivers and Setting Up the Server 20
8.1 Installing the Driver...................................................................................................................... 20
8.2 Setting Up the Driver Parameters ................................................................................................. 208.2.1 For AIX Configurations (Configurations other than a VIOS/VIOC Configuration)...................................................20
8.2.2 For VIOS/VIOC Configuration................................................................................................................................21
8.3 Installing the Multipath Driver ..................................................................................................... 22
8.4 Installing the FJspio Package........................................................................................................ 22
Chapter 9 Checking Connections 24
9.1 Turning On the Devices ................................................................................................................ 24
9.2 Setting Up the Server to Recognize the Logical Units ................................................................... 24
9.3 Setting Logical Units .................................................................................................................... 25
Chapter 10 Setting the Multipaths 26
Chapter 11 Creating the Volumes 27
11.1 Creating the Volume Groups....................................................................................................... 27
11.2 Creating the Logical Volumes ..................................................................................................... 29
Chapter 12 SAN Boot 32
Chapter 13 Storage Migration 33
Table of Contents
6FUJITSU Storage ETERNUS DX, ETERNUS AF Configuration Guide -Server Connection- (Fibre Channel) for AIX
Copyright 2018 FUJITSU LIMITEDP3AM-3782-22ENZ0

Chapter 1Workflow
This chapter describes how to connect the ETERNUS DX/AF to a server running AIX. The workflow is shownbelow.
Required Documents
• "Server Support Matrix"
• "Server Support Matrix for FC-SWITCH"
• "Configuration Guide -Server Connection- Storage System Settings" that corresponds to the ETERNUS DX/AFto be connected
• "Configuration Guide -Server Connection- (Fibre Channel) Fibre Channel Switch Settings"
• "ETERNUS Web GUI User's Guide"
• "ETERNUSmgr Install Guide"
• "ETERNUSmgr User Guide"
• Manuals supplied with the server, Fibre Channel card, Fibre Channel card driver, and multipath driver
Workflow
Installing ETERNUSmgr and Setting Up the ETERNUS DX/AFIf ETERNUSmgr is to be used, install it and set up the ETERNUS DX/AF. Also, check the WWN of theFibre Channel card for the server that is required to set the ETERNUS DX/AF.
• "Chapter 4 Checking the Server Information" (page 15)
• "Chapter 5 Installing and Setting Up ETERNUSmgr" (page 16)
• "Chapter 6 Setting Up the ETERNUS DX/AF" (page 17)
• Checking the setup and maintenance operations
- "ETERNUS Web GUI User's Guide"
• Installing ETERNUSmgr
- "ETERNUSmgr Install Guide"
• Checking the ETERNUSmgr operational procedures
- "ETERNUSmgr User Guide"
• Setting up the ETERNUS DX/AF
- "Configuration Guide -Server Connection- Storage System Settings" that corresponds to the ETER-NUS DX/AF to be connected
7FUJITSU Storage ETERNUS DX, ETERNUS AF Configuration Guide -Server Connection- (Fibre Channel) for AIX
Copyright 2018 FUJITSU LIMITEDP3AM-3782-22ENZ0

Setting Up the Fibre Channel SwitchesIf a Fibre Channel switch is to be used, set it up now.
• "Chapter 7 Setting Up the Fibre Channel Switches" (page 18)
• Checking the Fibre Channel switch connection requirements
- "Server Support Matrix for FC-SWITCH"
Installing the Fibre Channel Card Drivers and Setting the ParametersInstall the Fibre Channel card drivers, and set up the server environment.
• "8.1 Installing the Driver" (page 20)
• "8.2 Setting Up the Driver Parameters" (page 20)
• Checking the Fibre Channel card driver versions
- "Server Support Matrix"
For the standard multipath driver or the ETERNUSMultipath Driver
For single-path connection or Veritas VolumeManager
Installing the Multipath DriverInstall the ETERNUS Multipath Driver before usingit.
• "8.3 Installing the Multipath Driver" (page 22)
• Installing the Multipath Driver
- Installation & Configuration Guide
Installing the FJspio PackageInstall the FJspio.
• "8.4 Installing the FJspio Package" (page 22)
Setting Up the Server to Recognize the Logical UnitsSet up the server so that it can recognize the LUNs (logical unit numbers) of the ETERNUS DX/AF.
• "9.2 Setting Up the Server to Recognize the Logical Units" (page 24)
Chapter 1 Workflow
8FUJITSU Storage ETERNUS DX, ETERNUS AF Configuration Guide -Server Connection- (Fibre Channel) for AIX
Copyright 2018 FUJITSU LIMITEDP3AM-3782-22ENZ0

Setting the Server to Match the System ConfigurationSet up the server as required by the system configuration.
• Multipath configurations
- Setting up the standard multipath driver or the ETERNUS Multipath Driver
• "Chapter 10 Setting the Multipaths" (page 26)
- Veritas Volume Manager Dynamic Multipathing (VxVM DMP) Facility
• "3.6 Veritas Volume Manager (VxVM) Notes" (page 13)
• Volume manager
- Logical Volume Manager (LVM)
• "Chapter 11 Creating the Volumes" (page 27)
- Veritas Volume Manager (VxVM)
• "3.6 Veritas Volume Manager (VxVM) Notes" (page 13)
Creating the VolumesCreate LVM logical volumes.
• "Chapter 11 Creating the Volumes" (page 27)
Chapter 1 Workflow
9FUJITSU Storage ETERNUS DX, ETERNUS AF Configuration Guide -Server Connection- (Fibre Channel) for AIX
Copyright 2018 FUJITSU LIMITEDP3AM-3782-22ENZ0

Chapter 2Checking the Server Environment
Connection to servers is possible in the following environments.
Check the "Server Support Matrix" for server environment conditions.
2.1 Hardware
Refer to the "Server Support Matrix".
2.2 Operating System (OS)
Refer to the "Server Support Matrix".
2.3 Fibre Channel Cards
Refer to the "Server Support Matrix".
2.4 Veritas Volume Manager (VxVM)
Refer to the "Server Support Matrix".
2.5 Veritas Cluster Server (VCS)
Refer to the "Server Support Matrix".
10FUJITSU Storage ETERNUS DX, ETERNUS AF Configuration Guide -Server Connection- (Fibre Channel) for AIX
Copyright 2018 FUJITSU LIMITEDP3AM-3782-22ENZ0

Chapter 3Notes
Note the following issues when connecting the ETERNUS DX/AF to a server.
3.1 ETERNUS DX/AF Setup Notes
The following settings will depend on the exact connection conditions.
• Host Response settings
"Host Specific Mode" and "Reservation Conflict Response for Test Unit Ready" settings
• Reset Group settings
Perform the settings correctly by referring to "Configuration Guide -Server Connection- Storage System Set-tings" that corresponds to the ETERNUS DX/AF to be connected.
3.2 Notes Regarding the Number of LUNs
The maximum number of LUNs vary according to the system environment.
System environment
ETERNUS DX/AF
ETERNUS DX S4/S3 series,ETERNUS AF series,ETERNUS DX200F,ETERNUS DX80 S2/DX90 S2,ETERNUS DX400 S2 series,ETERNUS DX8000 S2 series
ETERNUS DX60 S2
Single path (FJspio) environment Maximum 512 LUNs Maximum 256 LUNs
ETERNUS DX/AF ODM package for AIXMPIO
Exact details depend on the OS being used.There are no specific ODM package restrictions.
ETERNUS Multipath Driver 2 (AIX) envi-ronment
Exact details depend on the OS being used.There are no specific multipath driver restrictions.
11FUJITSU Storage ETERNUS DX, ETERNUS AF Configuration Guide -Server Connection- (Fibre Channel) for AIX
Copyright 2018 FUJITSU LIMITEDP3AM-3782-22ENZ0

3.3 Fibre Channel Switch Notes
The Fibre Channel switches that can be connected depend on the connection configuration that is used (theOS and the ETERNUS DX/AF). Refer to the "Server Support Matrix for FC-SWITCH" before starting.
When a Fibre Channel switch (ETERNUS SN200 series, Brocade series) is to be used between the server andETERNUS DX/AF, follow the preparation-in-advance and Fibre Channel switch setup procedures given in the"Configuration Guide -Server Connection- (Fibre Channel) Fibre Channel Switch Settings".
• If AIX server is connected to a Fibre Channel switch, the Fibre Channel switch port link speed must be set.Set the link speed of the Fibre Channel switch ports according to the link speeds of the server-side FibreChannel cards, as follows:
Combination of devicesSet the Fibre Channel switch port linkspeed to...Maximum link speed of Fibre Channel
cardMaximum link speed of the FibreChannel switch
8Gbit/s 32Gbit/s 8Gbit/s fixed
16Gbit/s 8Gbit/s fixed
8Gbit/s 8Gbit/s fixed
4Gbit/s 4Gbit/s fixed
2Gbit/s 2Gbit/s fixed
4Gbit/s 32Gbit/s —
16Gbit/s 4Gbit/s fixed
8Gbit/s 4Gbit/s fixed
4Gbit/s 4Gbit/s fixed
2Gbit/s 2Gbit/s fixed
2Gbit/s 32Gbit/s —
16Gbit/s —
8Gbit/s 2Gbit/s fixed
4Gbit/s 2Gbit/s fixed
2Gbit/s 2Gbit/s fixed
If the devices being connected together both have automatically set link speeds, the resulting link speedmay be less than optimal. The default link speed setting for Fibre Channel switch ports is "Automatic". Thelink speed setting of a true IBM Fibre Channel card cannot be changed to other than "Automatic", so theFibre Channel switch port link speeds must be fixed to match the actual speed of the server-side FibreChannel cards, as per the above table, so that the same link speed is always used.
3.4 LVM Notes
Disable [Bad Block Relocation] for a LVM logical volume that was created on ETERNUS DX/AF storage sys-tems' LUN. Also, [Bad Block Relocation] must be disabled for the logical volume in which file system logs arestored.
Chapter 3 Notes3.3 Fibre Channel Switch Notes
12FUJITSU Storage ETERNUS DX, ETERNUS AF Configuration Guide -Server Connection- (Fibre Channel) for AIX
Copyright 2018 FUJITSU LIMITEDP3AM-3782-22ENZ0

3.5 Server Startup and Power Supply Control Notes
Before turning the server on, check that the ETERNUS DX/AF storage systems and Fibre Channel switches areall "Ready". If the server is turned on and they are not "Ready", the server will not be able to recognize theETERNUS DX/AF storage systems.
Also, when the ETERNUS DX/AF power supply is being controlled by a connected server, make sure that theETERNUS DX/AF does not shut down before the connected servers. Similarly, the Fibre Channel switches mustalso be turned off after the connected servers have been shut down. If turned off, data writes from the run-ning server cannot be saved to the ETERNUS DX/AF storage systems, and already saved data may also beaffected.
3.6 Veritas Volume Manager (VxVM) Notes
• Confirm and acquire the ASL required for using the ETERNUS DX/AF storage systems from the following Ver-itas web-site.
https://sort.veritas.com/asl
• Refer to "8.4 Installing the FJspio Package" (page 22) and install the FJspio package on the AIX systembefore installing VxVM.
• Install Veritas Array Support Library (ASL) after installing VxVM.
• For VxVM 5.1 or later
ASL does not need to be installed.
3.7 Notes for Veritas Volume Manager Dynamic Multipathing(VxVM DMP)
When using the VxVM DMP function, do not use it with a single path configuration.
3.8 Veritas Cluster Server (VCS) Notes
Veritas Cluster Server should be installed according to the directions given in the documentation providedwith Veritas Cluster Server.
3.9 Multipath Notes
Refer to the "Server Support Matrix" for details of the different combinations of Multipath configurations.
Chapter 3 Notes3.5 Server Startup and Power Supply Control Notes
13FUJITSU Storage ETERNUS DX, ETERNUS AF Configuration Guide -Server Connection- (Fibre Channel) for AIX
Copyright 2018 FUJITSU LIMITEDP3AM-3782-22ENZ0

3.10 Virtual I/O Server (VIOS) Notes
• Perform the settings described in this manual only for a VIOS.
When performing VIOS settings or installing software, the root privilege for the VIOS environment is re-quired.
• To use a VIOS, ETERNUS Multipath Driver 2 (AIX) or FJSVmpio is required. Install ETERNUS Multipath Driver 2(AIX) or FJSVmpio in the VIOS.
• Configuring LVM on the VIOS is not supported.
3.11 Oracle RAC Notes
• Set the CSS miscount parameter to a value of 60 or higher.
• Set "fc_err_recov", an "fscsi" attribute, to "fast_fail".
3.12 Path Addition Notes
Added paths may not be automatically recognized if the OS is not rebooted after adding the paths. In thatcase, execute the following command.
#cfgmgr
In addition, if Veritas Volume Manager (VxVM) is used, execute the following command.
#vxdctl enable
Chapter 3 Notes3.10 Virtual I/O Server (VIOS) Notes
14FUJITSU Storage ETERNUS DX, ETERNUS AF Configuration Guide -Server Connection- (Fibre Channel) for AIX
Copyright 2018 FUJITSU LIMITEDP3AM-3782-22ENZ0
Chapter 4Checking the Server Information
Check the World Wide Name (WWN).
Execute the following command to display the WWN of fcs0.
# lscfg -vl fcs0
The WWN is displayed in the [Network Address].
If multiple Fibre Channel cards are installed, change the parameter and re-execute the command.
15FUJITSU Storage ETERNUS DX, ETERNUS AF Configuration Guide -Server Connection- (Fibre Channel) for AIX
Copyright 2018 FUJITSU LIMITEDP3AM-3782-22ENZ0

Chapter 5Installing and Setting Up ETERNUSmgr
If ETERNUSmgr is to be used, install it according to the directions given in the "ETERNUSmgr Install Guide".After installation is complete, follow the instructions in "ETERNUSmgr User Guide" and set up ETERNUSmgr.
16FUJITSU Storage ETERNUS DX, ETERNUS AF Configuration Guide -Server Connection- (Fibre Channel) for AIX
Copyright 2018 FUJITSU LIMITEDP3AM-3782-22ENZ0

Chapter 6Setting Up the ETERNUS DX/AF
Set up the ETERNUS DX/AF storage systems using ETERNUS Web GUI or ETERNUSmgr.
ETERNUS DX/AF setup can be performed independently of server setup. For details on how to perform thesesettings, refer to the following manuals.
• "Configuration Guide -Server Connection- Storage System Settings" that corresponds to the ETERNUS DX/AFto be connected
• "ETERNUS Web GUI User's Guide" or "ETERNUSmgr User Guide"
17FUJITSU Storage ETERNUS DX, ETERNUS AF Configuration Guide -Server Connection- (Fibre Channel) for AIX
Copyright 2018 FUJITSU LIMITEDP3AM-3782-22ENZ0

Chapter 7Setting Up the Fibre Channel Switches
Perform the settings required to connect the ETERNUS DX/AF storage systems and server via the Fibre Chan-nel switch, according to "Configuration Guide -Server Connection- (Fibre Channel) Fibre Channel Switch Set-tings".
If the access path is set with ETERNUS SF Storage Cruiser, the Host Response settings are set to the defaultvalues.
If the Host Response settings are changed from the default values, set the Host Response again.
The following examples show configurations in which a server is connected to a Fibre Channel switch withzoning.
The following example shows a configuration for multiple servers.
Port2Port0 Port6Port4
Port3Port1 Port7Port5
Port2Port0 Port6Port4
Port3Port1 Port7Port5
ZONE1 ZONE2 ZONE3
ZONE4
Name : Server#1
Port1Port0
Name : Server#2
Port1Port0
Cascading line
FC switch FC switch
CM0 CM1
Name : RAID#1
ETERNUS DX/AF
Port1 Port1Port0 Port0
18FUJITSU Storage ETERNUS DX, ETERNUS AF Configuration Guide -Server Connection- (Fibre Channel) for AIX
Copyright 2018 FUJITSU LIMITEDP3AM-3782-22ENZ0

The following example shows a configuration for a single server.
Port2Port0 Port6Port4
Port3Port1 Port7Port5
Port2Port0 Port6Port4
Port3Port1 Port7Port5
Cascadingline
ZONE1
ZONE2
ZONE3 ZONE4
FC switch
Server
Port0 Port1
CM0 CM1
ETERNUS DX/AF
Port0 Port0 Port1Port1
FC switch
Chapter 7 Setting Up the Fibre Channel Switches
19FUJITSU Storage ETERNUS DX, ETERNUS AF Configuration Guide -Server Connection- (Fibre Channel) for AIX
Copyright 2018 FUJITSU LIMITEDP3AM-3782-22ENZ0

Chapter 8Installing Drivers and Setting Up the Server
8.1 Installing the Driver
Install the necessary drivers and patches following the Fibre Channel card installation guide.
8.2 Setting Up the Driver Parameters
8.2.1 For AIX Configurations (Configurations other than a VIOS/VIOC Configuration)Use the "smit" command and other commands to set the driver parameters.
If a "fscsiN" entry (where "N" is a number) corresponding to the Fibre Channel card is displayed, delete thefscsiN device temporarily using the "rmdev" command to change the fscsiN device parameter.
The deleted fscsiN device will be recreated after rebooting or at the next "cfgmgr" command execution.Enter the fscsi number to delete for "N".
# rmdev -Rdl fscsiN
Set the parameter as shown in the following table.
Parameter Setting target Setting value Remarks
init_link fcs • For direct connections,select [al].
• For switch connections,select [pt2pt].
This setting is fixed to "Au-to" for some Fibre Channelcards (e.g. 5735), and can-not be changed. Use thoseHBAs as they are, in the"Auto" setting.
num_cmd_elems fcs Arbitrary (*1)
(Up to 1024 for each FCport of the ETERNUSDX/AF)
—
*1: Recommended value = 1024 ¸ (number of Fibre Channel ports that are connected to a single CA port)
(Round the result down)
• Use the minimum value of the driver if the actual result is lower.
20FUJITSU Storage ETERNUS DX, ETERNUS AF Configuration Guide -Server Connection- (Fibre Channel) for AIX
Copyright 2018 FUJITSU LIMITEDP3AM-3782-22ENZ0

• To achieve maximum system performance, this value can be changed according to the server loadand the peak operating times.
• The number of simultaneous command executions per CA port for the ETERNUS DX/AF is limited to1024. This value is used by multiple servers that share the CA port. A maximum of 1024 commandscan be executed per CA port.
8.2.2 For VIOS/VIOC ConfigurationLog in to VIOS with the padmin user, use the "oem_setup_env" command to change the padmin user to theroot user, and then use the "smit" command or another command to set the driver parameters.
● For a virtual SCSI
Set the parameter as shown in the following table.
Target server Parameter Setting target Setting value Remarks
VIOS init_link fcs • For direct connec-tions, select [al].
• For switch connec-tions, select [pt2pt].
—
num_cmd_elems fcs Arbitrary (*1)(Up to 1024 for each FCport of the ETERNUSDX/AF)
—
Dyntrk fscsi yes When ETERNUS Multi-path Driver 2.0 is used,dyntrk must be set to"no".
fc_err_recov fscsi fast_fail —
VIOC queue_depth hdisk 8 —
Dyntrk fscsi yes
fc_err_recov fscsi fast _fail
*1: Recommended value = 1024 ¸ (number of Fibre Channel ports that are connected to a single CA port)
(Round the result down)
• Use the minimum value of the driver if the actual result is lower.
• To achieve maximum system performance, this value can be changed according to the server loadand the peak operating times.
• The number of simultaneous command executions per CA port for the ETERNUS DX/AF is limited to1024. This value is used by multiple servers that share the CA port. A maximum of 1024 commandscan be executed per CA port.
● For a virtual FC adapter
Set the parameter as shown in the following table.
Target server Parameter Setting target Setting value Remarks
VIOS init_link fcs auto —
dyntrk fscsi yes
fc_err_recov fscsi fast _fail
Chapter 8 Installing Drivers and Setting Up the Server8.2 Setting Up the Driver Parameters
21FUJITSU Storage ETERNUS DX, ETERNUS AF Configuration Guide -Server Connection- (Fibre Channel) for AIX
Copyright 2018 FUJITSU LIMITEDP3AM-3782-22ENZ0

Target server Parameter Setting target Setting value Remarks
VIOC num_cmd_elems fcs Arbitrary (*1)(Up to 1024 for each FCport of the ETERNUSDX/AF)
—
fc_err_recov fscsi fast _fail
Dyntrk fscsi yes
*1: Recommended value = 1024 ¸ (number of Fibre Channel ports that are connected to a single CA port)
(Round the result down)
• Use the minimum value of the driver if the actual result is lower.
• To achieve maximum system performance, this value can be changed according to the server loadand the peak operating times.
• The number of simultaneous command executions per CA port for the ETERNUS DX/AF is limited to1024. This value is used by multiple servers that share the CA port. A maximum of 1024 commandscan be executed per CA port.
8.3 Installing the Multipath Driver
• When the standard multipath driver is used
Install FJSVmpio by following the readme file provided with FJSVmpio.
• When the ETERNUS Multipath Driver is used
Install the ETERNUS Multipath Driver by following the manual provided with the ETERNUS Multipath Driver.
8.4 Installing the FJspio Package
FJspio is used to register the ETERNUS DX/AF on the AIX server's ODM.
The FJspio package must be installed in both of the following cases:
• Single-path connection is used
• Multi-path connection is configured using VxVM
FJspio package installation conditions:
Storage system FJspio package version
ETERNUS DX S4 series FJspio_1_5_0_22 or later
ETERNUS AF series
ETERNUS DX200F
ETERNUS DX500 S3/DX600 S3 FJspio_1_5_0_21 or later
ETERNUS DX8700 S3/DX8900 S3
ETERNUS DX60 S3/DX100 S3/DX200 S3 FJspio_1_5_0_20 or later
ETERNUS DX80 S2/DX90 S2
ETERNUS DX400 S2 series
Chapter 8 Installing Drivers and Setting Up the Server8.3 Installing the Multipath Driver
22FUJITSU Storage ETERNUS DX, ETERNUS AF Configuration Guide -Server Connection- (Fibre Channel) for AIX
Copyright 2018 FUJITSU LIMITEDP3AM-3782-22ENZ0

Storage system FJspio package version
ETERNUS DX8000 S2 series FJspio_1_5_0_19 or later
ETERNUS DX60 S2
Contact your Fujitsu sales representative or engineer for details on obtaining the FJspio package.
Refer to "readme_FJspio" included in the FJspio package for instructions about how to install the FJspio pack-age.
Refer to "3.6 Veritas Volume Manager (VxVM) Notes" (page 13) when installing Veritas Volume Managerand follow the manual provided with Veritas Volume Manager.
Chapter 8 Installing Drivers and Setting Up the Server8.4 Installing the FJspio Package
23FUJITSU Storage ETERNUS DX, ETERNUS AF Configuration Guide -Server Connection- (Fibre Channel) for AIX
Copyright 2018 FUJITSU LIMITEDP3AM-3782-22ENZ0
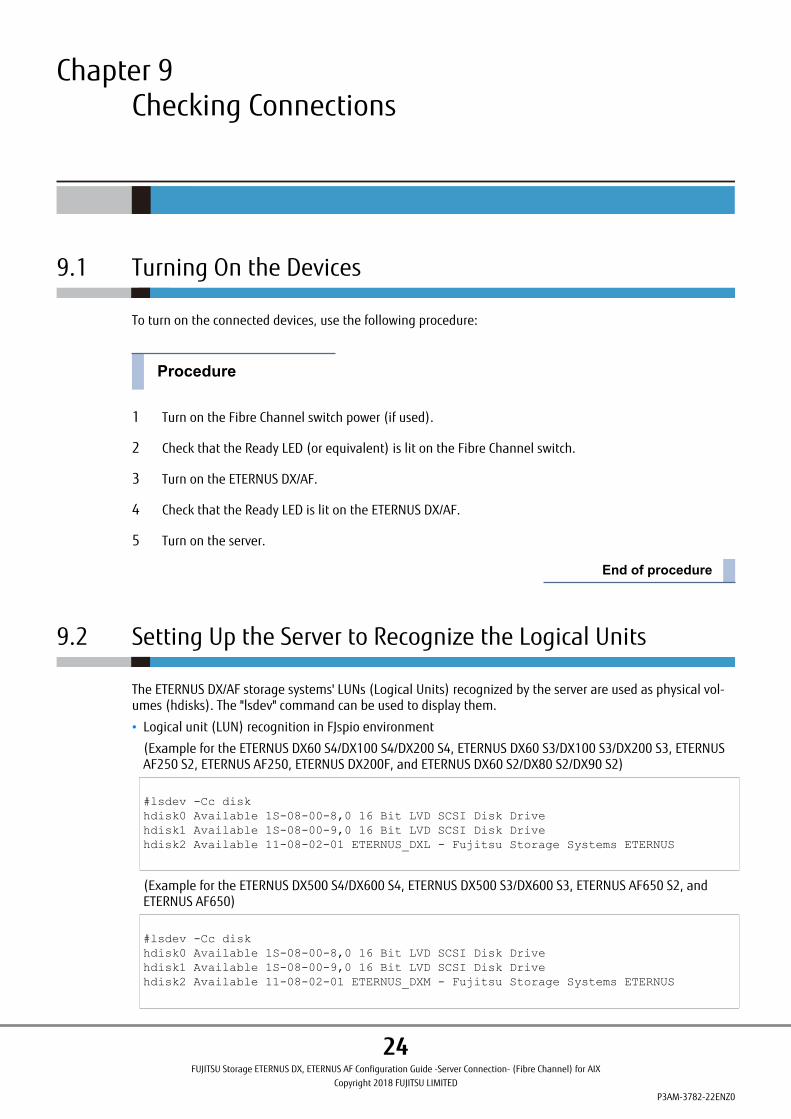
Chapter 9Checking Connections
9.1 Turning On the Devices
To turn on the connected devices, use the following procedure:
1 Turn on the Fibre Channel switch power (if used).
2 Check that the Ready LED (or equivalent) is lit on the Fibre Channel switch.
3 Turn on the ETERNUS DX/AF.
4 Check that the Ready LED is lit on the ETERNUS DX/AF.
5 Turn on the server.
9.2 Setting Up the Server to Recognize the Logical Units
The ETERNUS DX/AF storage systems' LUNs (Logical Units) recognized by the server are used as physical vol-umes (hdisks). The "lsdev" command can be used to display them.
• Logical unit (LUN) recognition in FJspio environment
(Example for the ETERNUS DX60 S4/DX100 S4/DX200 S4, ETERNUS DX60 S3/DX100 S3/DX200 S3, ETERNUSAF250 S2, ETERNUS AF250, ETERNUS DX200F, and ETERNUS DX60 S2/DX80 S2/DX90 S2)
#lsdev -Cc diskhdisk0 Available 1S-08-00-8,0 16 Bit LVD SCSI Disk Drivehdisk1 Available 1S-08-00-9,0 16 Bit LVD SCSI Disk Drivehdisk2 Available 11-08-02-01 ETERNUS_DXL - Fujitsu Storage Systems ETERNUS
(Example for the ETERNUS DX500 S4/DX600 S4, ETERNUS DX500 S3/DX600 S3, ETERNUS AF650 S2, andETERNUS AF650)
#lsdev -Cc diskhdisk0 Available 1S-08-00-8,0 16 Bit LVD SCSI Disk Drivehdisk1 Available 1S-08-00-9,0 16 Bit LVD SCSI Disk Drivehdisk2 Available 11-08-02-01 ETERNUS_DXM - Fujitsu Storage Systems ETERNUS
24FUJITSU Storage ETERNUS DX, ETERNUS AF Configuration Guide -Server Connection- (Fibre Channel) for AIX
Copyright 2018 FUJITSU LIMITEDP3AM-3782-22ENZ0

(Example for the ETERNUS DX8700 S3/DX8900 S3)
#lsdev -Cc diskhdisk0 Available 1S-08-00-8,0 16 Bit LVD SCSI Disk Drivehdisk1 Available 1S-08-00-9,0 16 Bit LVD SCSI Disk Drivehdisk2 Available 11-08-02-01 ETERNUS_DXH - Fujitsu Storage Systems ETERNUS
(Example for the ETERNUS DX400 S2 series)
#lsdev -Cc diskhdisk0 Available 1S-08-00-8,0 16 Bit LVD SCSI Disk Drivehdisk1 Available 1S-08-00-9,0 16 Bit LVD SCSI Disk Drivehdisk2 Available 11-08-02-01 ETERNUS_DX400 - Fujitsu Storage Systems ETERNUS
(Example for the ETERNUS DX8000 S2 series)
#lsdev -Cc diskhdisk0 Available 1S-08-00-8,0 16 Bit LVD SCSI Disk Drivehdisk1 Available 1S-08-00-9,0 16 Bit LVD SCSI Disk Drivehdisk2 Available 11-08-02-01 ETERNUS_DX8000 - Fujitsu Storage Systems ETERNUS
9.3 Setting Logical Units
Set the parameters for the LUNs that are recognized by the VIOS.
The following procedure is only required when a virtual SCSI connection is used.
Perform the following procedure using the padmin user account.
1 Use the "chdev" command to set the reserve policy.
Enter the hdisk number to set for "N".
$ chdev -dev hdiskN -attr reserve_policy=no_reserve
2 Use the "lsdev" command to check the configured settings.
Enter the hdisk number to set for "N".
$ lsdev -dev hdiskN -attr
Chapter 9 Checking Connections9.3 Setting Logical Units
25FUJITSU Storage ETERNUS DX, ETERNUS AF Configuration Guide -Server Connection- (Fibre Channel) for AIX
Copyright 2018 FUJITSU LIMITEDP3AM-3782-22ENZ0

Chapter 10Setting the Multipaths
Set up the ETERNUS Multipath Driver by following the manual provided with the Multipath Driver.
26FUJITSU Storage ETERNUS DX, ETERNUS AF Configuration Guide -Server Connection- (Fibre Channel) for AIX
Copyright 2018 FUJITSU LIMITEDP3AM-3782-22ENZ0

Chapter 11Creating the Volumes
Create a volume group, logical volume and file system.
LVM on the VIOS is not supported. Do not perform any of the procedures described in this chapter on aVIOS.
11.1 Creating the Volume Groups
To create logical volumes, use the "smit" command.
1 Execute the "smit" command.
The [System Management] menu is displayed.
2 Select in the following order:
(1) [System Storage Management (Physical & Logical Storage)]
(2) [Logical Volume Manager]
(3) [Volume Group]
27FUJITSU Storage ETERNUS DX, ETERNUS AF Configuration Guide -Server Connection- (Fibre Channel) for AIX
Copyright 2018 FUJITSU LIMITEDP3AM-3782-22ENZ0

(4) [Add a Volume Group]
The [Add a Volume Group] window will appear.
3 Specify the following items.
• Specify any name for the [VOLUME GROUP name].
• Be sure to specify the [PHYSICAL VOLUME names].
4 After the settings are complete, exit the "smit" command.
5 Check the contents of the new volume group.
Use the "lsvg" command to discover the number of physical partitions (the "Total PPs" value). This isrequired in "11.2 Creating the Logical Volumes" (page 29).
raid_vg2raid_vg3raid_vg4raid_vg5# lsvg raid_vg6VOLUME GROUP: raid_vg6 VG IDENTIFIER: 000972ca57abbe2bVG STATE: active PP SIZE: 4 megabyte(s)VG PERMISSION: read/write TOTAL PPs: 511 (2044 megabytes)MAX LVs: 256 FREE pps: 10 (40 megabytes)LVs: 2 USED PPs: 501 (2004 megabytes)OPEN LVs: 2 QUORUM: 2TOTAL PVs: 2 VG DESCRIPTORES: 2STALE PVs: 0 STALE PPs: 0AVTIVE PVs: 1 AUTO ON: yesMAX PPs per PV: 16256 MAX PVs: 2
Chapter 11 Creating the Volumes11.1 Creating the Volume Groups
28FUJITSU Storage ETERNUS DX, ETERNUS AF Configuration Guide -Server Connection- (Fibre Channel) for AIX
Copyright 2018 FUJITSU LIMITEDP3AM-3782-22ENZ0

11.2 Creating the Logical Volumes
To create logical volumes, use the "smit" command.
1 Execute the "smit" command.
The [System Management] menu is displayed.
2 Select in the following order:
(1) [System Storage Management (Physical & Logical Storage)]
(2) [Logical Volume Manager]
(3) [Logical Volume]
(4) [Add a Logical Volume]
3 Specify a [VOLUME GROUP name].
Either type a name in the [Entry Fields], or press the [F4] key to select a name from the list.
Chapter 11 Creating the Volumes11.2 Creating the Logical Volumes
29FUJITSU Storage ETERNUS DX, ETERNUS AF Configuration Guide -Server Connection- (Fibre Channel) for AIX
Copyright 2018 FUJITSU LIMITEDP3AM-3782-22ENZ0

The [Add a Logical Volume] window will appear.
4 Specify the following items.
• Specify any name for the [Logical volume NAME].
• Specify the [Number of LOGICAL PARTITIONS], according to the following formula.
Logical volume capacity = logical partition size ´ number of logical partitions
Also, when creating a file system, a Journal Log is also created on the same disk, so be sure to leaveat least one logical partition in the Volume Group.
• Regarding [Enable BAD BLOCK relocation?], be sure to specify "no".
5 After the settings are complete, exit the "smit" command.
6 Check the contents of the created logical volume.
If the logical volume name is "raid_lv6", execute the command as follows:
# lslv raid_lv6
Chapter 11 Creating the Volumes11.2 Creating the Logical Volumes
30FUJITSU Storage ETERNUS DX, ETERNUS AF Configuration Guide -Server Connection- (Fibre Channel) for AIX
Copyright 2018 FUJITSU LIMITEDP3AM-3782-22ENZ0

7 Check that the [BB POLICY:] parameter is shown as "non-relocatable".
If not, re-execute the "smit" command and try again.
LOGICAL VOLUME: raid_lv6 VOLUME GROUP: raid_vg6LV IDENTIFIER: 000972ca57abbe2b.l PERMISSION: read/writeVG STATE: active/complete LV STATE: opened/syncdTYPE: jfs WRITE VERIFY: offMAX LPs: 512 PP SIZE: 4 megabyte(s)COPIES: 1 SCHED POLICY: parallelLPs: 500 PPs: 500STALE PPs: 0 BB POLICY: non-relocatableINTER-POLICY: minimum RELOCATABLE: yesINTRA-POLICY: middle UPPER BOUND: 32MOUNT POINT: /mnt/raid_lv6 LABEL: /mnt/raid_lv6MIRROR WRITE CONSISTENCY: onEACH LP COPY ON A SEPARATE PV ?: yes
Execute this command for all logical volumes created on ETERNUS DX/AF storage systems' LUNs todisable [Bad Block Relocation].
If [Redistribution of bad blocks] is not disabled, file system may be damaged.
Chapter 11 Creating the Volumes11.2 Creating the Logical Volumes
31FUJITSU Storage ETERNUS DX, ETERNUS AF Configuration Guide -Server Connection- (Fibre Channel) for AIX
Copyright 2018 FUJITSU LIMITEDP3AM-3782-22ENZ0

Chapter 12SAN Boot
• Refer to "Server Support Matrix" to check the support status of SAN Boot and refer to the manual of theserver, OS, or the Fibre Channel card that is to be used.
• When using a logical unit (LUN) of the ETERNUS DX/AF storage systems as a boot disk, make sure that theLUN has enough capacity to install the OS.
32FUJITSU Storage ETERNUS DX, ETERNUS AF Configuration Guide -Server Connection- (Fibre Channel) for AIX
Copyright 2018 FUJITSU LIMITEDP3AM-3782-22ENZ0

Chapter 13Storage Migration
This chapter explains how to configure the server for performing Storage Migration.
When Storage Migration is performed, configure the settings so that the ETERNUS DX/AF LUNs can be usedfrom the server (AIX).
■ Setting Procedure Outline
Execute the operation to start Storage Migration from ETERNUS Web GUI. Perform all other operations in theserver (AIX).
1 Unmount the file system.
2 Deactivate the volume group.
3 Export the volume group.
4 Remove the LUN.
5 Turn off the server.
6 Start Storage Migration, change the connection destination to the migration destination ETERNUSDX/AF, and then reboot the server.
7 Import the volume group.
8 Mount the file system.
■ Example Setting Procedure
The following procedure shows an example configuration for AIX 6.1.
1 Unmount the file system.
# df -mFilesystem MB blocks Free %Used Iused %Iused Mounted on fCheck the mounted file system./dev/hd4 512.00 225.22 57% 17724 26% //dev/hd2 2816.00 327.03 89% 47964 38% /usr(Omitted)/dev/livedump 256.00 255.64 1% 4 1% /var/adm/ras/livedump/dev/fslv00 20000.00 18764.31 7% 5 1% /mnt/fs001# umount /mnt/fs001 fUnmount the file system.# df -m fConfirm that the file system is unmounted.Filesystem MB blocks Free %Used Iused %Iused Mounted on/dev/hd4 512.00 225.22 57% 17724 26% //dev/hd2 2816.00 327.03 89% 47964 38% /usr(Omitted)/dev/livedump 256.00 255.64 1% 4 1% /var/adm/ras/livedump#
33FUJITSU Storage ETERNUS DX, ETERNUS AF Configuration Guide -Server Connection- (Fibre Channel) for AIX
Copyright 2018 FUJITSU LIMITEDP3AM-3782-22ENZ0

2 Deactivate the volume group.
# lsvg -o fCheck the volume group that is currently active.vg001rootvg# lspv fCheck the relationship between the volume group and the physical volume.hdisk0 00f7ab330800bb87 rootvg activehdisk5 00f7ab33e0343ab5 vg001 active fhdisk5 is used to configure vg001.# varyoffvg vg001 fDeactivate the volume group.# lsvg -o fConfirm that the volume group is deactivated.rootvg#
3 Export the volume group.
# lsvg fCheck the volume group.rootvgvg001# exportvg vg001 fExport the volume group.# lsvg fConfirm that the volume group is not recognized.rootvg#
4 Remove the LUN.
# /usr/lpp/FJSVmpd/iompadm info fCheck the ETERNUS DX/AF LUN.
Multipath Group 0x00hdisk5 : ETERNUS_DX400-6A0BA0-4100 fThe LUN is recognized as hdisk5. fscsi0 : standby "online" CM10-CA40-PORT10 (mpdt4) fscsi2 : active "online" CM11-CA41-PORT12 (mpdt12)
# /usr/lpp/FJSVmpd/mpdrmdev -d hdisk5 fRemove the ETERNUS DX/AF LUN.hdisk5 deletedmpdt0 deletedmpdt8 deleted# /usr/lpp/FJSVmpd/iompadm info fConfirm that the LUN has been removed.#
5 Turn off the server.
6 Start Storage Migration from ETERNUS Web GUI and then change the connection destination to the mi-gration destination ETERNUS DX/AF and reboot the server.
7 Import the volume group.
# /usr/lpp/FJSVmpd/iompadm info fCheck the ETERNUS DX/AF LUN and the device name.
Multipath Group 0x00hdisk1 : ETERNUS_DXH-2B0101-4100 fThe LUN is recognized as hdisk1. fscsi0 : active "online" CM10-CA50-PORT0030 (mpdt0) fscsi2 : active "online" CM20-CA51-PORT0032 (mpdt8)
# importvg -y vg001 hdisk1 fImport the volume group.vg001# lsvg fConfirm that the volume group is recognized.rootvgvg001#
Chapter 13 Storage Migration
34FUJITSU Storage ETERNUS DX, ETERNUS AF Configuration Guide -Server Connection- (Fibre Channel) for AIX
Copyright 2018 FUJITSU LIMITEDP3AM-3782-22ENZ0

8 Mount the file system.
# mount /mnt/fs001 fMount the file system.# df -m fConfirm that the file system is mounted.Filesystem MB blocks Free %Used Iused %Iused Mounted on/dev/hd4 512.00 225.22 57% 17724 26% //dev/hd2 2816.00 327.03 89% 47964 38% /usr(Omitted)/dev/livedump 256.00 255.64 1% 4 1% /var/adm/ras/livedump/dev/fslv00 20000.00 18764.31 7% 5 1% /mnt/fs001#
After this procedure is completed, the file system can be used in the migration destination ETERNUS DX/AFthe same way as before the migration.
Chapter 13 Storage Migration
35FUJITSU Storage ETERNUS DX, ETERNUS AF Configuration Guide -Server Connection- (Fibre Channel) for AIX
Copyright 2018 FUJITSU LIMITEDP3AM-3782-22ENZ0

FUJITSU Storage ETERNUS DX, ETERNUS AF Configuration Guide -Server Connection-(Fibre Channel) for AIX
P3AM-3782-22ENZ0
Date of issuance: April 2018Issuance responsibility: FUJITSU LIMITED
• The content of this manual is subject to change without notice.
• This manual was prepared with the utmost attention to detail. However, Fujitsu shall assume no responsibility for anyoperational problems as the result of errors, omissions, or the use of information in this manual.
• Fujitsu assumes no liability for damages to third party copyrights or other rights arising from the use of any informationin this manual.
• The content of this manual may not be reproduced or distributed in part or in its entirety without prior permission fromFujitsu.