Embed Size (px)
Citation preview

Construction –Inner Panel-
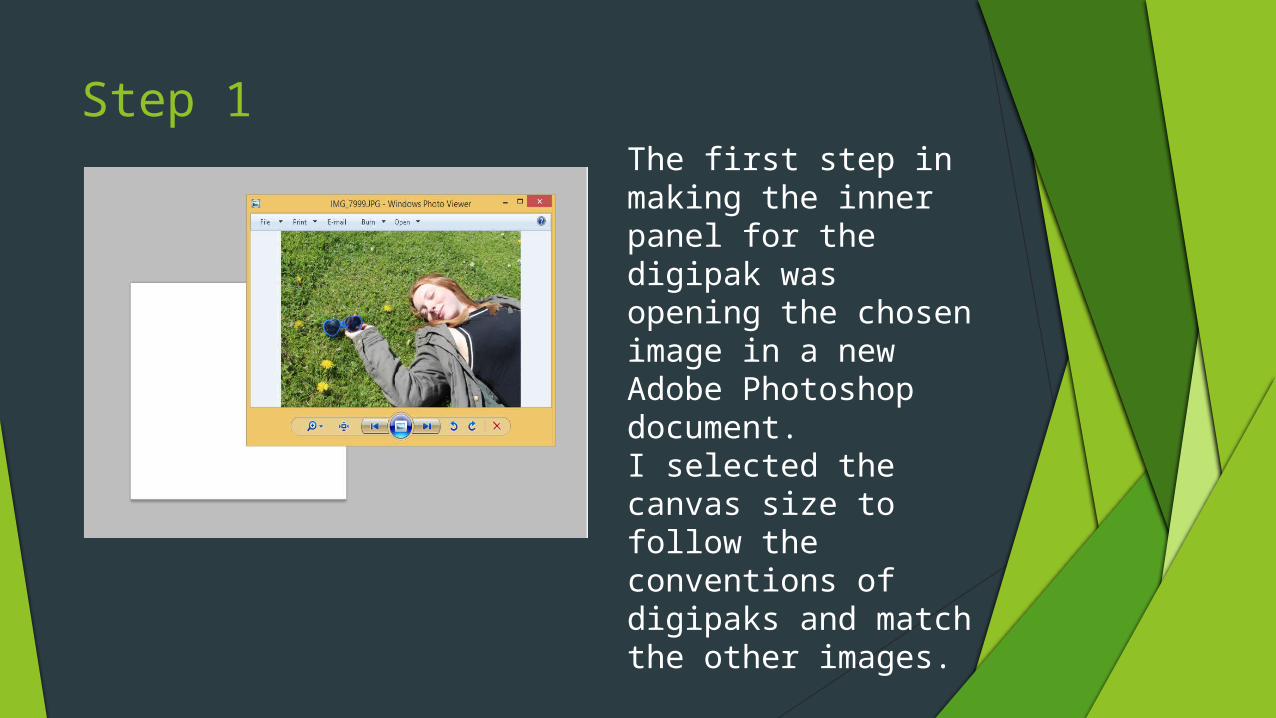
Step 1The first step in making the inner panel for the digipak was opening the chosen image in a new Adobe Photoshop document. I selected the canvas size to follow the conventions of digipaks and match the other images.

Step 2 Next, I selected the magic want tool and clicked on the glasses which highlighted their blue frame. This was needed to enhance the colour to make them ‘pop’ against the background. In turn this will allow the glasses to be a focal point and create synergy with other parts of the print products.
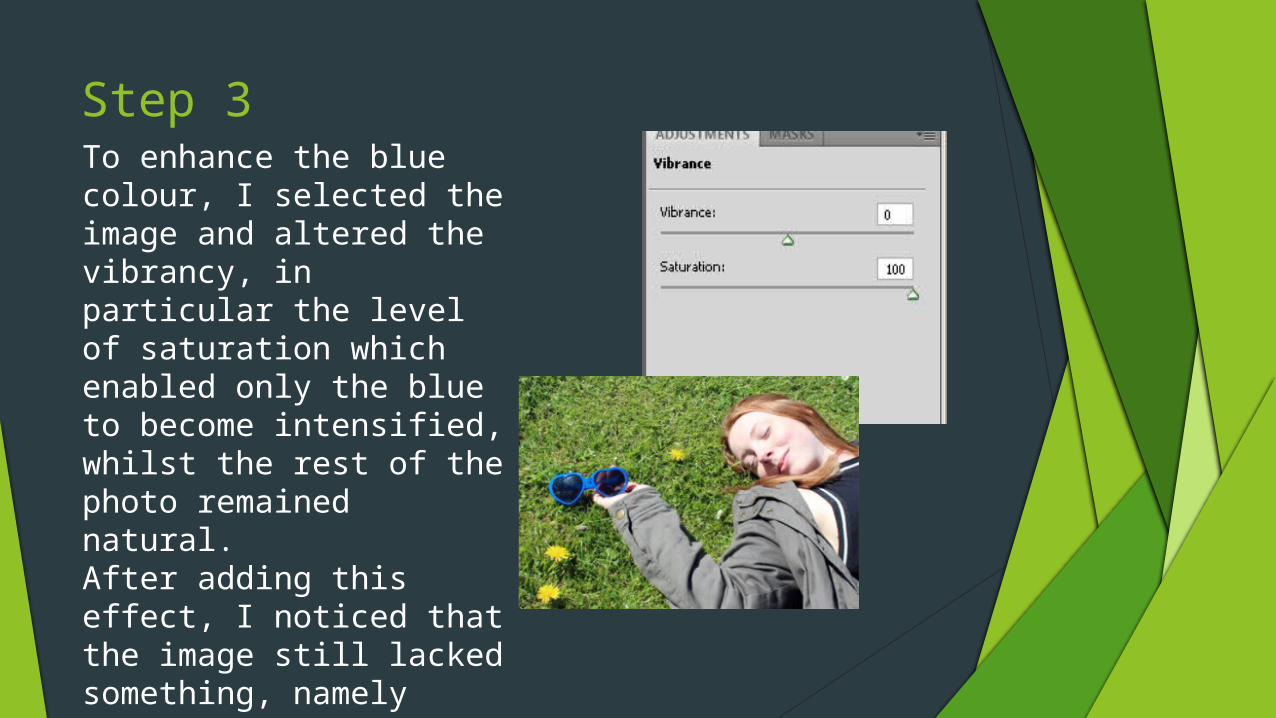
Step 3To enhance the blue colour, I selected the image and altered the vibrancy, in particular the level of saturation which enabled only the blue to become intensified, whilst the rest of the photo remained natural.After adding this effect, I noticed that the image still lacked something, namely definition. Therefore I decided to alter the sharpness.

Step 4 In order to sharpen the image I used the website PicMonkey because of their range of easy to use, professional tools. I only used the ‘sharpen’ tool, moving it to a level that still looked natural but also offered definition.

Final Image:

Here are some other images that I experimented with, adding and adjusting colours or filters to get different effects. I didn’t use the upper image due to it lacking vibrancy, whilst the lower of the two was too warm and sepia, which although looking effective, it didn’t complement the other images of the digipak which all featured bright, saturated greens.