Embed Size (px)
Citation preview
1
Year 6 Topic Plan and Resources 1st – 5th February 2021 Remember to upload any completed homework to your class Teams Channel or email us at
[email protected]. Don’t forget to ask any questions you might have.
TOPIC LESSONS THIS WEEK: RECORDED LESSON AVAILABLE ON TEAMS Science – leaf key
Computing – fact or fake?
Geography – rainforests & deforestation YES
RE – animals in Judaism & Hinduism
Art – quilled paper butterflies YES
Use a
simple
key to
identify
leaves.
Science
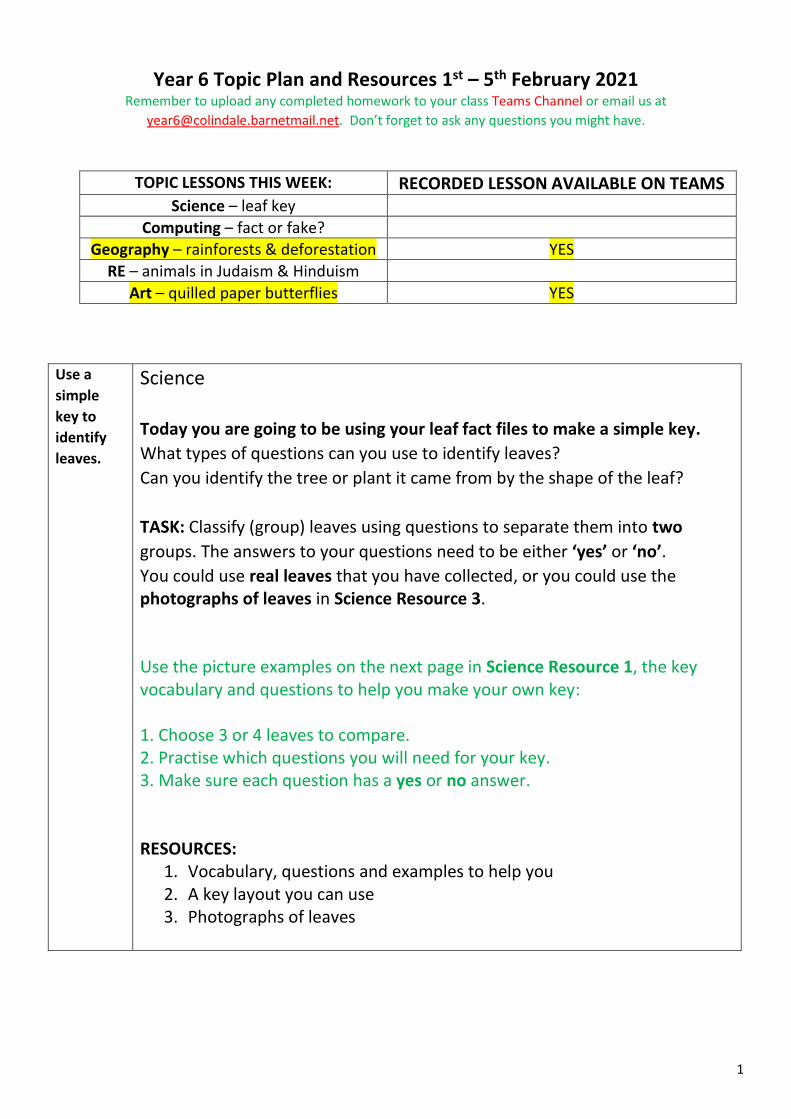
Today you are going to be using your leaf fact files to make a simple key.
What types of questions can you use to identify leaves?
Can you identify the tree or plant it came from by the shape of the leaf?
TASK: Classify (group) leaves using questions to separate them into two
groups. The answers to your questions need to be either ‘yes’ or ‘no’.
You could use real leaves that you have collected, or you could use the photographs of leaves in Science Resource 3. Use the picture examples on the next page in Science Resource 1, the key vocabulary and questions to help you make your own key: 1. Choose 3 or 4 leaves to compare. 2. Practise which questions you will need for your key. 3. Make sure each question has a yes or no answer. RESOURCES:
1. Vocabulary, questions and examples to help you 2. A key layout you can use 3. Photographs of leaves
2
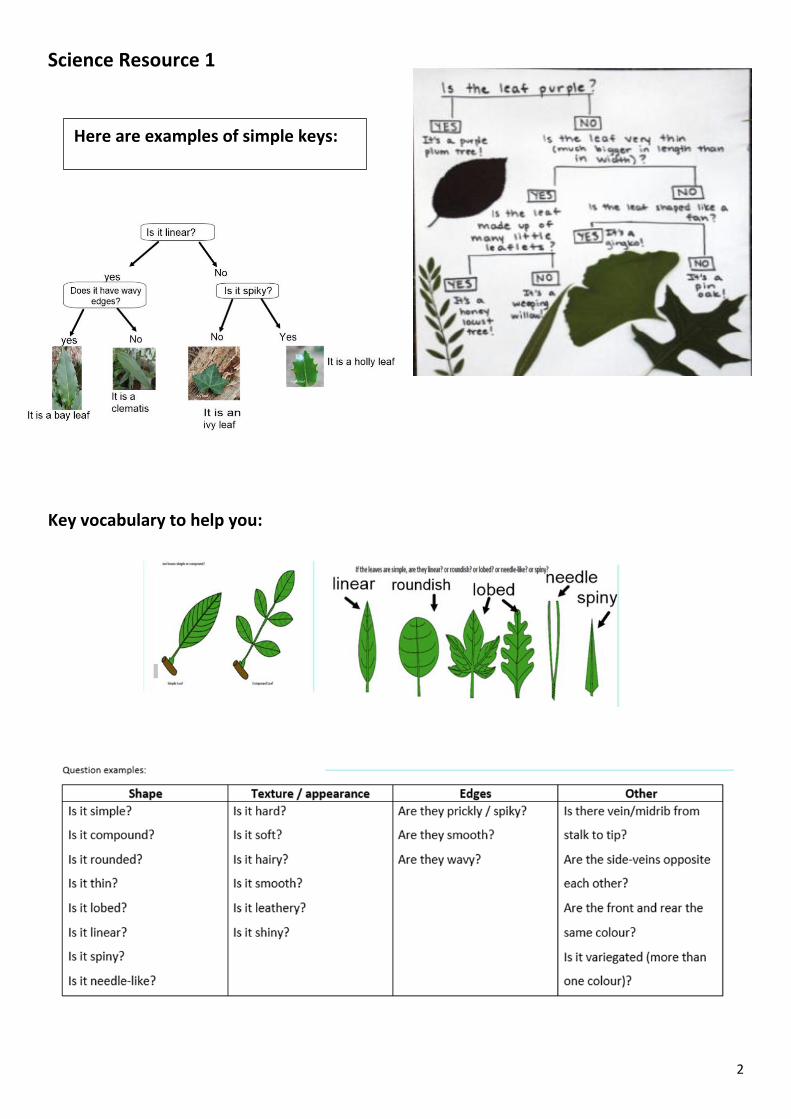
Science Resource 1
Key vocabulary to help you:
Here are examples of simple keys:

3
Science Resource 2
You can use this blank key below or you can make one of your own.

4
Science Resource 3

5
Computing Resource 1
To recognise when an article is factual or fake.
Computing - Fact or Fake?
TASK: 1. Log onto Purple Mash. There you will find some activities for you to complete. 2. Read the articles carefully, then click on the ‘add page’ symbol to open the page with
the questions. 3. Click on SAVE and then exit to go to the next activity. If you do not have internet access, you can use the COMPUTING RESOURCE SHEETS below to complete the activity.
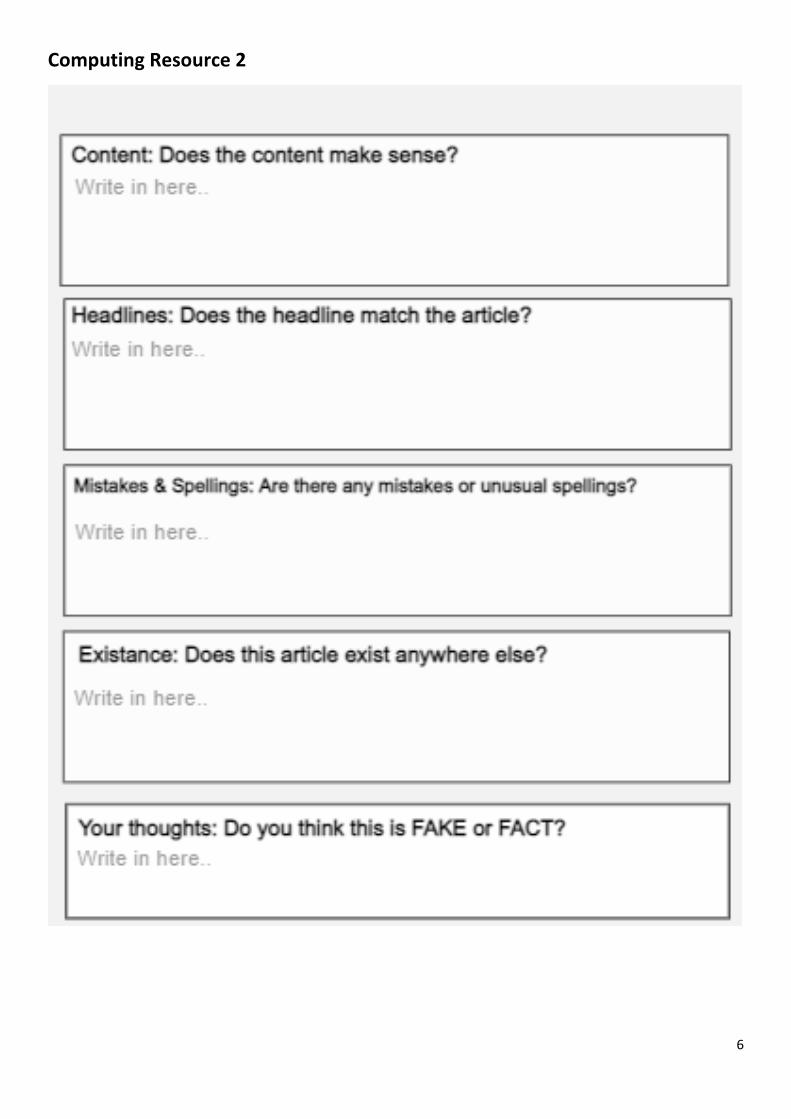
Read the article below and then answer the questions in Computing Resource 2 on the
next page.
6
Computing Resource 2
7
Understand
the reasons
for
deforestation
and its effects
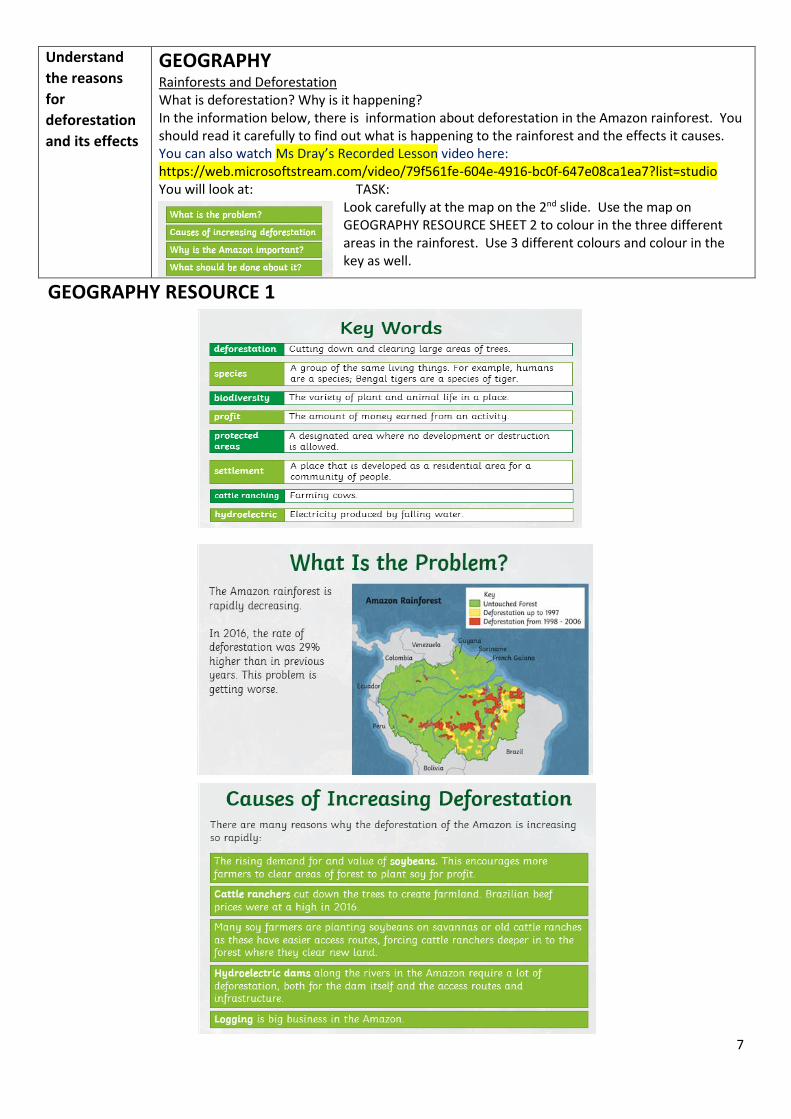
GEOGRAPHY
Rainforests and Deforestation What is deforestation? Why is it happening? In the information below, there is information about deforestation in the Amazon rainforest. You should read it carefully to find out what is happening to the rainforest and the effects it causes. You can also watch Ms Dray’s Recorded Lesson video here: https://web.microsoftstream.com/video/79f561fe-604e-4916-bc0f-647e08ca1ea7?list=studio You will look at: TASK:
Look carefully at the map on the 2nd slide. Use the map on GEOGRAPHY RESOURCE SHEET 2 to colour in the three different areas in the rainforest. Use 3 different colours and colour in the key as well.
GEOGRAPHY RESOURCE 1

8

9
GEOGRAPHY RESOURCE 2

10
RE RESOURCE 1
Judaism and animals The holy book (Torah) gives several instructions on animal welfare. Here are some: • A person must feed his animals before himself • Animals must be allowed to rest on the Sabbath Day (Saturday) • An animal must not suffer Hunting
• Hunting for sport is forbidden
These are some rules for Jewish slaughter (killing of animals for food): • The person to kill an animal must be a specially trained Jew called a
shochet • A shochet is trained in the Jewish laws of shechita • In the UK, a shochet has to have a licence • The animal must be killed by cutting the throat with a single stroke from a
very sharp instrument called a chalaf • The shochet must inspect the animal afterwards to confirm that the killing
was correctly carried out and that the animal did not suffer. Is this a cruel way to kill an animal?
• Some people say that the animal killed in this way does not suffer if the cut is made quickly and cleanly enough.
• Other experts disagree and say that the animal remains conscious long enough to feel severe pain.
Hinduism and Animals
• Most Hindus are vegetarian • No Hindu will eat beef • Most Hindus believe that animals are inferior (less
important) to human beings • Cows are sacred to Hindus, which means connected to God. • Some Hindu temples keep sacred animals • Some Hindu gods have animal characteristics. E.g. Ganesh has the head of
an elephant and Hanuman takes the form of a monkey. Cows
• Killing cows is banned in India
• The cow is a symbol of life and of the Earth, and thought of by many as a mother, because she gives food through her milk.
• Lord Krishna is often pictured as a cow-herder and some Hindus try to follow his example by caring for cows and respecting other animals.
Reincarnation
• Most Hindus believe the soul lives many lives on Earth, some of these in the form of animals. This belief is known as reincarnation.
• Some Hindus believe that if they keep on repeating their mistakes or bad deeds, their soul may be reborn in an animal form.
• The main reason for Hindu respect for animal rights is ahimsa, which means respect for all living things.
• No living thing should be harmed. This applies to humans and animals.
Identify
similarities and
differences
between
religions
RE Today you are going to read about 2 different religions and their views on animals. Find information about how they feel about animals and what their views are. Complete the FACT FILE by writing in your own words about what you have found out. Write in full sentences, then check for sense and punctuation. You can draw a small picture if you like. Keep your FACT FILES together to bring into school when you come back.

11
RE RESOURCE 2 RE FACT FILE
Judaism and Animal Rights Hinduism and Animal Rights
What do you think is similar and what is different?

12
ART RESOURCE SHEET 1
1. 2.
1. For the petals, mark dots on the paper - as you did for the butterfly last week.
2. Mark 8 dots every 0.5 cm then repeat along the long edge of the paper at different places.
3. Take your ruler and join up the lines, then cut out so you have 8 strips.
(You can always look back at the video from last week or read last week’s more detailed instructions again).
1. Fold over the end of one strip to make a small loop. 2. Stick the end of the strip down using a small dab of glue. 3. Hold it together with your finger and thumb to help it bond (stick
together).
Use the
quilling
technique to
create paper
shapes
ART Last week, you made a quilled paper butterfly using ‘coils’ and now you are going to make a paper flower to go with your butterfly.
You are going to use a paper shape called a wheatear coil (this is because they look a bit like the top of a wheat plant which is called an
‘ear’).
You will only need the equipment that you used previously: A4 white or coloured paper, glue, scissors, ruler and a
pencil or pen.
To be able to make the flower and leaves, you can watch Ms Dray’s recorded lesson video with the instructions. https://web.microsoftstream.com/video/8015ddd9-ca24-42ac-84f0-52fc8dc93016?list=studio If you can’t watch the video, then follow the instructions below in ART RESOURCE SHEET 1.
13
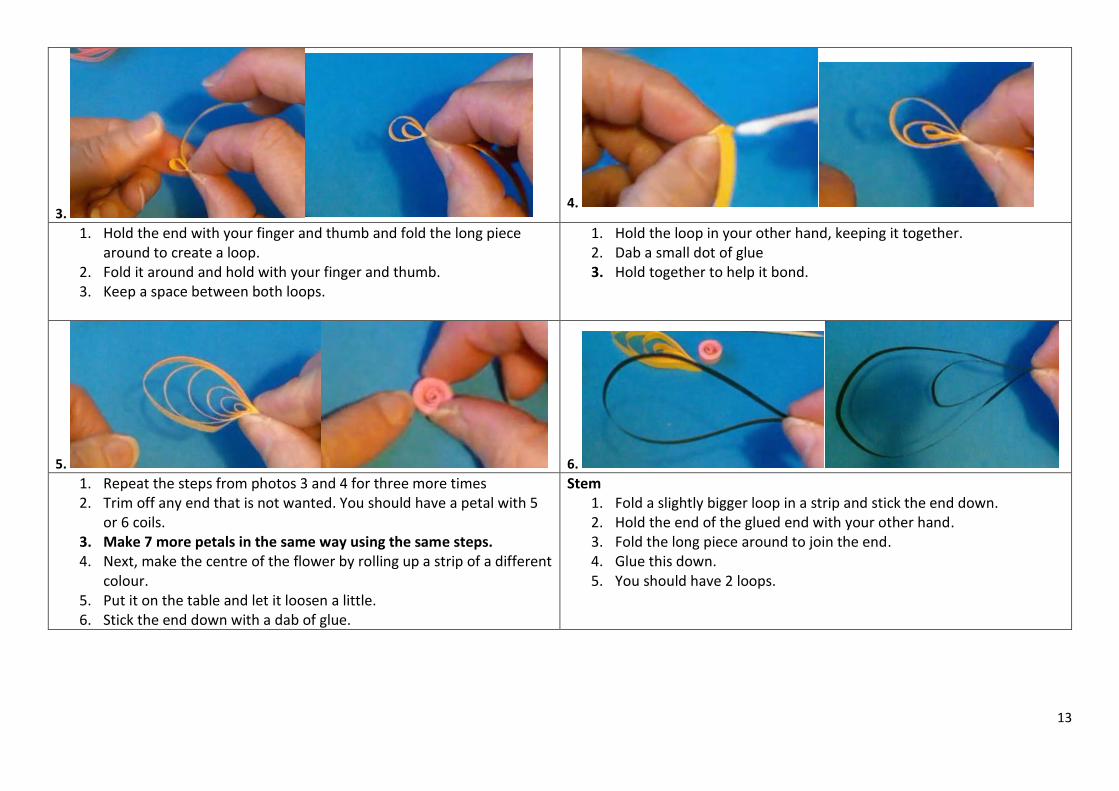
3. 4.
1. Hold the end with your finger and thumb and fold the long piece around to create a loop.
2. Fold it around and hold with your finger and thumb. 3. Keep a space between both loops.
1. Hold the loop in your other hand, keeping it together. 2. Dab a small dot of glue 3. Hold together to help it bond.
5. 6.
1. Repeat the steps from photos 3 and 4 for three more times 2. Trim off any end that is not wanted. You should have a petal with 5
or 6 coils. 3. Make 7 more petals in the same way using the same steps. 4. Next, make the centre of the flower by rolling up a strip of a different
colour. 5. Put it on the table and let it loosen a little. 6. Stick the end down with a dab of glue.
Stem 1. Fold a slightly bigger loop in a strip and stick the end down. 2. Hold the end of the glued end with your other hand. 3. Fold the long piece around to join the end. 4. Glue this down. 5. You should have 2 loops.

14
7. 8.
Stem 6. Gently pinch along the loops to make a longer shape. 7. Put a dab of glue on the insides of the strip above the smaller loop. 8. Hold it together a little until it bonds.
Leaves 1. The leaves are made in the same way as the petals. (Photos – 1-5) 2. Leave slightly bigger gaps between each loop. 3. You should have about 3 or 4 loops. 4. Make 2 leaves.
9 10.
You should now have 6-8 petals, 1 flower centre, 1 stem and 2 leaves.
1. Place all your pieces onto another piece of paper or card. It would be better to have a different colour.
2. Dab glue on the ends of the petals and stick them together around the centre coil.
3. Dab some glue on the long end of the stem and slide it in between 2 petals. Glue the other end down onto the paper.
4. Dab glue on the ends of the leaves and stick to the bottom of the stem. 5. Lastly, you can glue your butterfly, you made last week, next to the flower. 6. Now you are finished!
Please send a photo of your finished flower to your teacher. Next week we will make a final piece for your scene. Happy Crafting!