Embed Size (px)
Citation preview

WEEK 7: Additional Options, Closure, & Block
WELCOME TO THE FINAL WEEK!!! Week 7: Additional Options, Closure, & Block
Very soon, your beautiful new garment will be done and ready for the wearing! Waste no time, let’s get
to it!!
Our first task: The Flower Tie Closure
This little ditty can be used to tie and wear the shawls in an infinite number of ways, only limited by
your imagination!
We will be creating a flower similar to the others, but some changes for function.
Mainly, we will hold our yarn DOUBLE STRANDED (still working with the same hook)
MULTI LAYER FLOWER, DOUBLE STRANDED: (Make 1)
Use any remaining gradient that you like, I used my balls 7 & 8 held double.
Make magic circle:
Rnd 1: ch 1, 8 dc in ring, sl st to 1st dc to close.
Rnd 2: ch 1 (does not count as st) htr in same st, ch 1, *htr in nxt st, ch 1, repeat from *, 6 times more, sl
st to top of 1st htr made. (8 htr, 8 ch-1 sps)
Rnd 3: sl st to 1st ch-1 sp, 3 htr in same sp, sl st in next htr, *3 htr in nxt ch-1 sp, sl st in nxt htr, repeat
from *. 6 times more. (24 htr, 8 petals)
Rnd 4: ch 1 (does not count as st) bphtr around htr directly below from round 2 from BEHIND the petals
of round 3, ch 3, *bphtr around next htr from round 2 from behind, ch 3, repeat from * 6 times more, sl
st to top of 1st bphtr made. (8 bphtr, 8 ch-3 sps)
Rnd 5: sl st to the 1st ch-3 space, 7 htr in the same space, sl st in nxt bphtr, *7 htr in the nxt ch-3 sp, sl st
in nxt bphtr, repeat from *, 6 times more. (40 htr, 8 petals)
Rnd 6: ch 1, (does not count as st), bphtr around bphtr directly below from round 4 working behind
petals, ch 3, *bphtr around nxt bphtr from round 4, ch 3, repeat from *, 6 times more, sl st to top of beg
bphtr. (8 bphtr, 8 ch-3 sps)

TIP: When you are working the bptr, the chain can tend to roll. I use my fingers and “pin” the chain to
the rear of the work to anchor it to make the bphdc easier to complete
Rnd 7: sl st to the 1st ch-3 space, 9 htr in the same sp, sl st in next bphtr, *9 htr in the nxt ch-3 sp, sl st in
nxt bphtr, repeat from *, 6 times more, sl st to 1st sl st made, tie off. (72 htr, 8 petals)
Weave in the ends and set the flower aside for a moment.
The TIE: Using the same yarn as the flower, still held double stranded, CHAIN 75 and TIE OFF.
Knot each end just at the first and last chain made and trim the ends to about ½”.
Now, turn the flower over so the wrong side is up and using your hook, pull one end of the chain
through one of the bphtr near the center.
Center the tie so it is even on both sides, and tie it in place.
NOW: You will lace that tie through the fabric ANY WAY YOU CHOOSE to secure a wearing option.
It will function as a shawl pin, but it is a shawl tie! Fancy pants, right??!
Here is the closure from the front and back:
NOW, Let’s talk about YOU for a minute!! Do you consider yourself minimalist, a little flair, or full on
bold in style and taste?? We will utilize the remaining yarn to add as many flowers are you or the yarn
allows you as well as an optional opening border. As you can see, I have chosen to leave mine
understated, you may choose to LOAD your shawl body with them! Some of the testers have added
some and some have not!
THIS is where you will personalize and make this shawl your OWN creation!
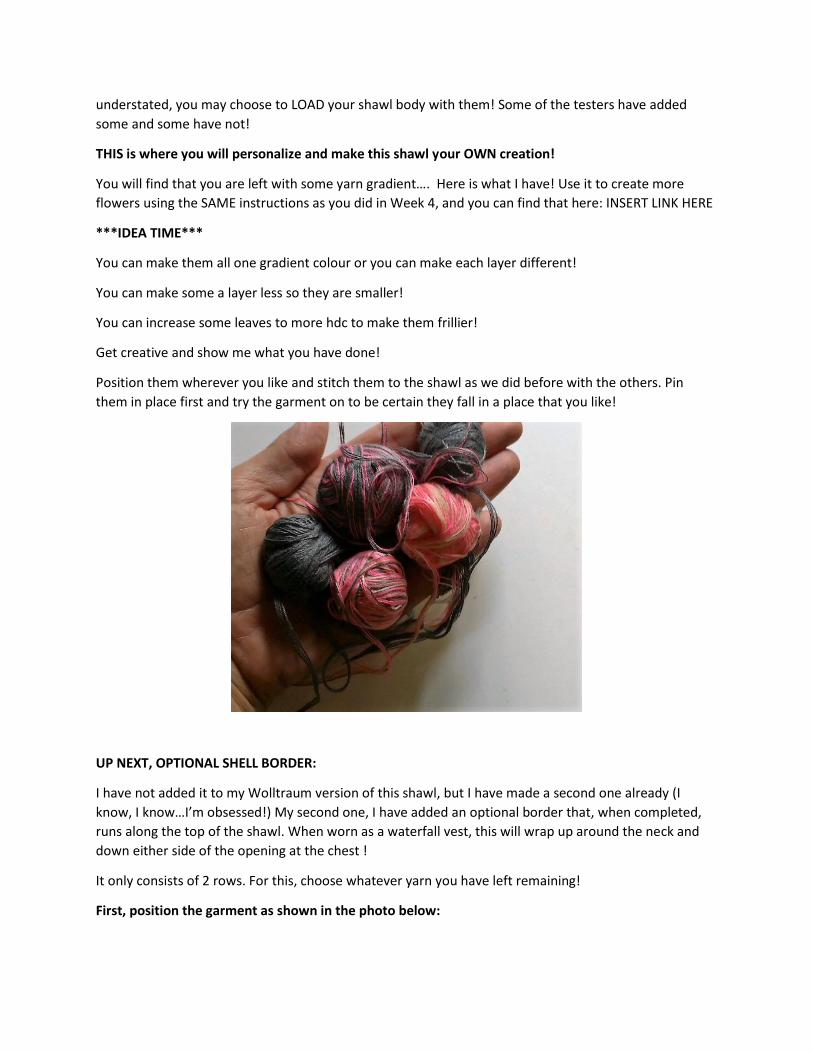
You will find that you are left with some yarn gradient…. Here is what I have! Use it to create more
flowers using the SAME instructions as you did in Week 4, and you can find that here: INSERT LINK HERE
***IDEA TIME***
You can make them all one gradient colour or you can make each layer different!
You can make some a layer less so they are smaller!
You can increase some leaves to more hdc to make them frillier!
Get creative and show me what you have done!
Position them wherever you like and stitch them to the shawl as we did before with the others. Pin
them in place first and try the garment on to be certain they fall in a place that you like!
UP NEXT, OPTIONAL SHELL BORDER:
I have not added it to my Wolltraum version of this shawl, but I have made a second one already (I
know, I know…I’m obsessed!) My second one, I have added an optional border that, when completed,
runs along the top of the shawl. When worn as a waterfall vest, this will wrap up around the neck and
down either side of the opening at the chest !
It only consists of 2 rows. For this, choose whatever yarn you have left remaining!
First, position the garment as shown in the photo below:

Row 1: Join yarn with a sl st by pushing apart the dc that are around the post on the edge and inserting
your hook from front to back, *ch 2, BACK POST SINGLE CROCHET (bpdc) around the post of the nxt tr,
repeat from * across the top, at the last space, ch-2 and sl st around the last tr as you did when you
joined the yarn (pushing aside the dc around it) (91 ch-2 spaces)
Row 2: ch 1, turn, sl st into the 1st ch-2 sp, ch 1 (does not count as a stitch), make 5 htr in the same sp,
*htr in the nxt sp, 5 htr in the nxt sp, repeat from * across, sl st into the last sl st made, tie off.
LAST TASK! ONE FINAL BLOCK: You have added all those beautiful textured motifs, and so they can
show their best, I HIGHLY recommend one final block. Just do as you did before. I promise it will elevate
your project from beautiful to WOWOWOW STUNNING!
Let me add in a few ideas on how to care for your new garment too! We have spent time together on it,
so let’s make sure it looks good for as long as possible!

Here is what I do with all of my crochet garments, this one included:
1. I always HANDWASH in my sink in COOL water with a MILD soap. Something like Dreft or Woolite is a
great choice.
2. I SQUEEZE the excess water from my garment, NEVER WRING or TWIST it.
3. You can pin it out to dry or you can simply lay it flat to dry, but NEVER HANG it to dry. The weight of
the fabric will cause it to stretch out.
4. I do NOT STORE ON A HANGER. Instead, I fold it and store it in a drawer or on a shelf. The open work
stitch and gravity from hanging will cause it to stretch too much.
That’s it! I hope you enjoy and wear your new garment in health and happiness!
Here is just a FEW ways you can use the flower closure to style this garment! Try one out, then make
one up of your own and post it! I would love to see!
Here is a sample done in just a regular mercerized fingering weight cotton, as long as you like the fabric
created and can meet gauge, most fingering weight yarns can be substituted!!

***FINAL CHALLENGE TIME!***
Post a picture of your beautiful self in your beautiful new garment and post it to the Crochetverse and
CAL – Crochet A Long Facebook groups!
Thank you so much for joining along with me on this CAL, it is such a pleasure to see everyone’s work
and I appreciate it so much!
Until next time! I appreciate each and every one of you working along with us so very much!
Much Love & Yarn,
Stephanie
Follow on Facebook Here!
Follow on Instagram Here!
Follow on Ravelry Here!

Follow on Pinterest Here!
Follow on YouTube Here!
Follow on Twitter Here!
Follow on Etsy Here!
The information and photos in this posting are the sole copyrighted property of
Crochetverse©2016. Please do not copy and paste any of the information
contained within either electronically, verbally, or written in part or in whole.
Instead, please share the DIRECT LINK to this posting only, and if you do, I
thank you for sharing. You of course may sell anything you make from this
pattern that you have made with your own two hands, no contract labor or
mass productions are permitted. If you credit Crochetverse as the designer that
is greatly appreciated!