Embed Size (px)
Citation preview

A practical approachto running
Year TwoIssue #24Dec 2015ODROID
Magazine
Striping LVs • Solarus • Linux Gaming • Android Development • Gradle
Easily Multiboot yourODROID-XU4
RobotThe future of sports is comingand will be powered by an ODROID
Goalkeeper
Linux Containers

What we stand for.We strive to symbolize the edge of technology, future, youth, humanity, and engineering.
Our philosophy is based on Developers. And our efforts to keep close relationships with developers around the world.
For that, you can always count on having the quality and sophistication that is the hallmark of our products.
Simple, modern and distinctive.So you can have the best to accomplish everything you can dream of.
We are now shipping the ODROID-U3 device to EU countries! Come and visit our online store to shop!
Address: Max-Pollin-Straße 1 85104 Pförring Germany
Telephone & Faxphone: +49 (0) 8403 / 920-920email: [email protected]
Our ODROID products can be found athttp://bit.ly/1tXPXwe

EDITORIAL
ODROID Magazine, published monthly at http://magazine.odroid.com, is your source for all things ODROIDian.Hard Kernel, Ltd. • 704 Anyang K-Center, Gwanyang, Dongan, Anyang, Gyeonggi, South Korea, 431-815 Hardkernel manufactures the ODROID family of quad-core development boards and the world’s first ARM big.LITTLE single board computer.For information on submitting articles, contact [email protected], or visit http://bit.ly/1ypImXs.You can join the growing ODROID community with members from over 135 countries at http://forum.odroid.com.Explore the new technologies offered by Hardkernel at http://www.hardkernel.com.
The day has finally come when robots are completely replac-ing humans, at least on the soccer field! Meet Faro, the robotic ODROID-powered goalkeeper, part of a team of ad-
vanced humanoid robots that belong to the Robocup Foundation, whose goal is to eventually defeat a World Cup level human soc-
cer team. Using an ODROID-C1, the Gadjah Mada Robotic Team has de-veloped algorithms that work with a camera, compass, and gyroscopic
sensors to predict where the ball will be traveling in real-time and prevent a goal
from being scored.We also celebrate the release of Fallout 4 with
a review by Tobias of the original Fallout game. Zelda fans can enjoy some fan-made games using Solarus, and
emerging rock stars can practice their riffs using Frets on Fire, an open-source Guitar Hero clone. Jon presents a tutorial on using the GPIO ports to read from an external sensor, David continues his series on Logical Volume Management, Andrew presents a guide to Gradle and the Android NDK, Adrian gives an overview of Linux Containers, and Hardkernel gives us a peek inside their new offices.

STAFF
ODROIDMagazine
Manuel Adamuz, Spanish Editor
I am 31 years old and live in Seville, Spain, and
was born in Granada. I am married to a wonderful woman and have a child. A few years ago I worked as a com-puter technician and programmer, but my current job is related to quality management and information tech-nology: ISO 9001, ISO 27001, and ISO 20000. I am passionate about computer science, especially micro-computers such as the ODROID and Raspberry Pi. I love experiment-ing with these computers. My wife says I’m crazy because I just think of ODROIDs! My other great hobby is mountain biking, and I occasionally participate in semi-professional com-petitions.
Nicole Scott, Art Editor
I’m a Digital Strate-gist and Transmedia
Producer specializing in online optimization and inbound marketing strategies, social media directing, and media production for print, web, video, and film. Manag-ing multiple accounts with agencies and filmmakers, from Analytics and Adwords to video editing and DVD authoring. I own an ODROID-U3 which I use to run a sandbox web server, live in the California Bay Area, and enjoy hiking, camping and playing music. Visit my web page at http://www.nicolecscott.com.
JamesLeFevour, Art Editor
I am a Digital Media Specialist who is also en-
joying freelance work in social network marketing and website administration. The more I learn about ODROID ca-pabilities, the more excited I am to try new things I’m learning about. Being a transplant to San Diego from the Mid-west, I am still quite enamored with many aspects that I think most West Coast people take for granted. I live with my lovely wife and our adorable pet rabbit; the latter keeps my books and computer equipment in constant peril, the former consoles me when said peril manifests.
Bruno Doiche, SeniorArt Editor
What to do when you have to move to
your new house while still having this magazine deadline to work on? You do whatever you can on your laptop in the best hobo style, sitting on the floor at the old house that still has Internet access. After all is done, this loony art editor is very pleased with his new humble abode.
Rob Roy, Chief Editor
I’m a computer programmer in San
Francisco, CA, design-ing and building web applications for local clients on my network cluster of ODROIDs. My primary languages are jQuery, Angular JS and HTML5/CSS3. I also develop pre-built operating systems, custom kernels and optimized applications for the ODROID platform based on Hardkernel’s official releases, for which I have won several Monthly Forum Awards. I use my ODROIDs for a variety of purposes, including media center, web server, applica-tion development, workstation, and gaming console. You can check out my 100GB collection of ODROID software, prebuilt kernels and OS images at http://bit.ly/1fsaXQs.

INDEX
LINUX CONTAINERS - 10
LINUX GAMING: FALLOUT - 26
FRETS ON FIRE - 23
FARO - 18
SOLARIS - 34
MEET AN ODROIDIAN - 40
MULTIBOOT - 24
ANDROID GAMING: FIVE NIGHTS AT FREDDY’S - 33
SHT15 SENSOR - 30
LOGICAL VOLUME MANAGEMENT - 6
HARDKERNEL OFFICES - 8
COMMUNITY wIKI -41
GRADLE - 20
C1+ OTG JUMPER - 37
ANDROID DEVELOPMENT - 38
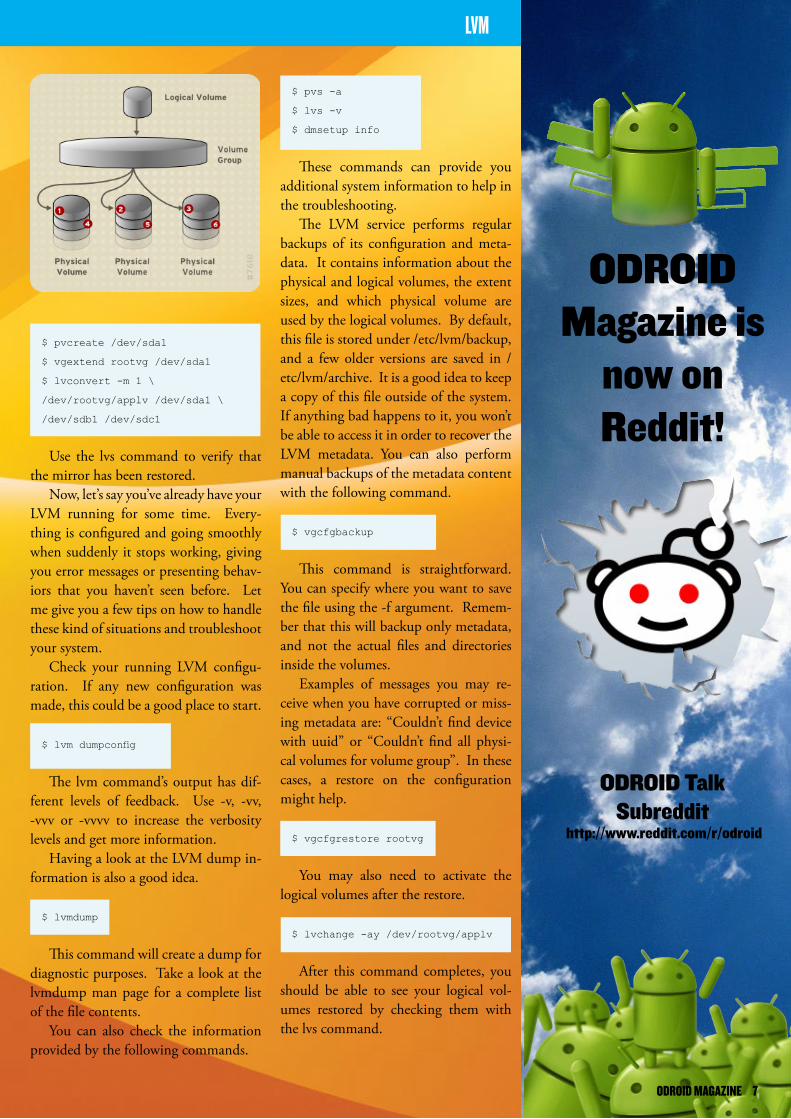
When you start using Logical Volume Management (LVM) for more than personal and home systems, and implement it in a business environment, a few
key features of it can be very useful. In this article, I will pres-ent some of this wonderful facilities provided by LVM.
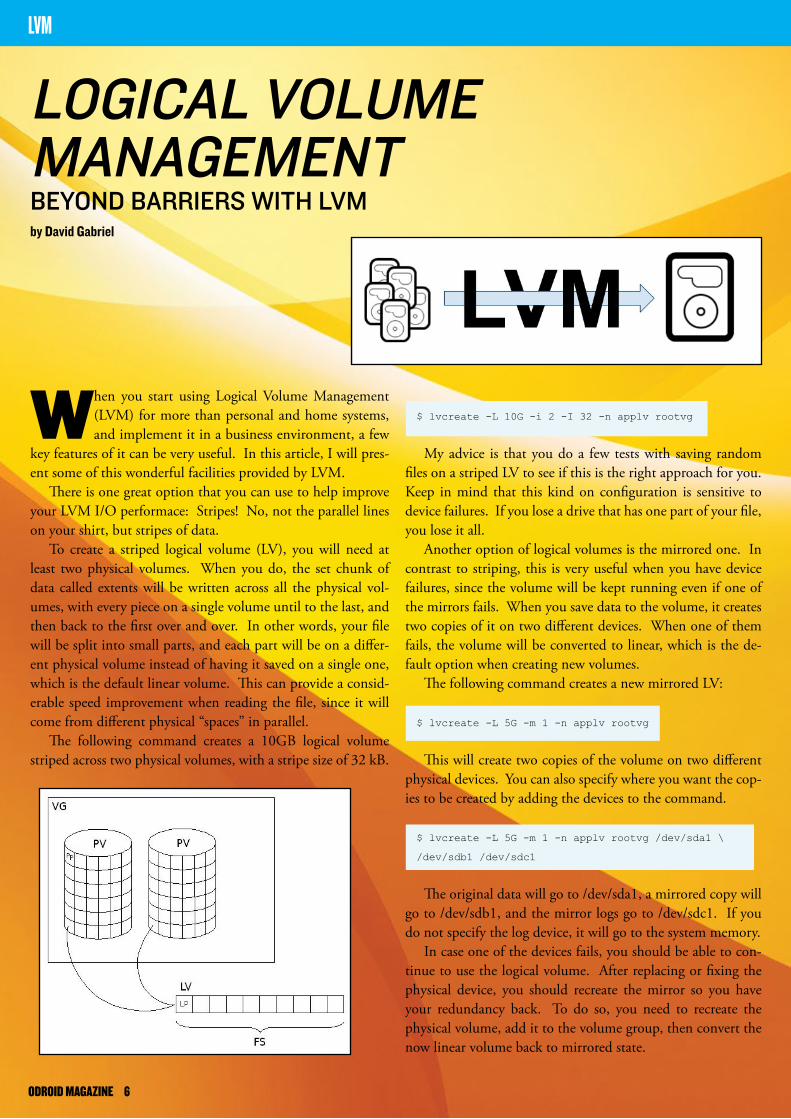
There is one great option that you can use to help improve your LVM I/O performace: Stripes! No, not the parallel lines on your shirt, but stripes of data.
To create a striped logical volume (LV), you will need at least two physical volumes. When you do, the set chunk of data called extents will be written across all the physical vol-umes, with every piece on a single volume until to the last, and then back to the first over and over. In other words, your file will be split into small parts, and each part will be on a differ-ent physical volume instead of having it saved on a single one, which is the default linear volume. This can provide a consid-erable speed improvement when reading the file, since it will come from different physical “spaces” in parallel.
The following command creates a 10GB logical volume striped across two physical volumes, with a stripe size of 32 kB.
LOGICAL VOLuME MAnAGEMEnTBEYOnD BARRIERS wITH LVMby David Gabriel
LVM
$ lvcreate -L 10G -i 2 -I 32 -n applv rootvg
My advice is that you do a few tests with saving random files on a striped LV to see if this is the right approach for you. Keep in mind that this kind on configuration is sensitive to device failures. If you lose a drive that has one part of your file, you lose it all.
Another option of logical volumes is the mirrored one. In contrast to striping, this is very useful when you have device failures, since the volume will be kept running even if one of the mirrors fails. When you save data to the volume, it creates two copies of it on two different devices. When one of them fails, the volume will be converted to linear, which is the de-fault option when creating new volumes.
The following command creates a new mirrored LV:
$ lvcreate -L 5G -m 1 -n applv rootvg
This will create two copies of the volume on two different physical devices. You can also specify where you want the cop-ies to be created by adding the devices to the command.
$ lvcreate -L 5G -m 1 -n applv rootvg /dev/sda1 \
/dev/sdb1 /dev/sdc1
The original data will go to /dev/sda1, a mirrored copy will go to /dev/sdb1, and the mirror logs go to /dev/sdc1. If you do not specify the log device, it will go to the system memory.
In case one of the devices fails, you should be able to con-tinue to use the logical volume. After replacing or fixing the physical device, you should recreate the mirror so you have your redundancy back. To do so, you need to recreate the physical volume, add it to the volume group, then convert the now linear volume back to mirrored state.
ODROID MAGAZINE 6
LVM
$ pvcreate /dev/sda1
$ vgextend rootvg /dev/sda1
$ lvconvert -m 1 \
/dev/rootvg/applv /dev/sda1 \
/dev/sdb1 /dev/sdc1
Use the lvs command to verify that the mirror has been restored.
Now, let’s say you’ve already have your LVM running for some time. Every-thing is configured and going smoothly when suddenly it stops working, giving you error messages or presenting behav-iors that you haven’t seen before. Let me give you a few tips on how to handle these kind of situations and troubleshoot your system.
Check your running LVM configu-ration. If any new configuration was made, this could be a good place to start.
$ lvm dumpconfig
The lvm command’s output has dif-ferent levels of feedback. Use -v, -vv, -vvv or -vvvv to increase the verbosity levels and get more information.
Having a look at the LVM dump in-formation is also a good idea.
$ lvmdump
This command will create a dump for diagnostic purposes. Take a look at the lvmdump man page for a complete list of the file contents.
You can also check the information provided by the following commands.
$ pvs -a
$ lvs -v
$ dmsetup info
These commands can provide you additional system information to help in the troubleshooting.
The LVM service performs regular backups of its configuration and meta-data. It contains information about the physical and logical volumes, the extent sizes, and which physical volume are used by the logical volumes. By default, this file is stored under /etc/lvm/backup, and a few older versions are saved in /etc/lvm/archive. It is a good idea to keep a copy of this file outside of the system. If anything bad happens to it, you won’t be able to access it in order to recover the LVM metadata. You can also perform manual backups of the metadata content with the following command.
$ vgcfgbackup
This command is straightforward. You can specify where you want to save the file using the -f argument. Remem-ber that this will backup only metadata, and not the actual files and directories inside the volumes.
Examples of messages you may re-ceive when you have corrupted or miss-ing metadata are: “Couldn’t find device with uuid” or “Couldn’t find all physi-cal volumes for volume group”. In these cases, a restore on the configuration might help.
$ vgcfgrestore rootvg
You may also need to activate the logical volumes after the restore.
$ lvchange -ay /dev/rootvg/applv
After this command completes, you should be able to see your logical vol-umes restored by checking them with the lvs command.
ODROID Talk Subreddit
http://www.reddit.com/r/odroid
ODROID Magazine is
now on Reddit!
ODROID MAGAZINE 7
HARDKERNEL
nEw HARDKERnEL OFFICESA TOuR OF THE MAIn HEADquARTERSedited by Rob Roy
Hardkernel, based in South Ko-rea, has announced that they moved into a new office recent-
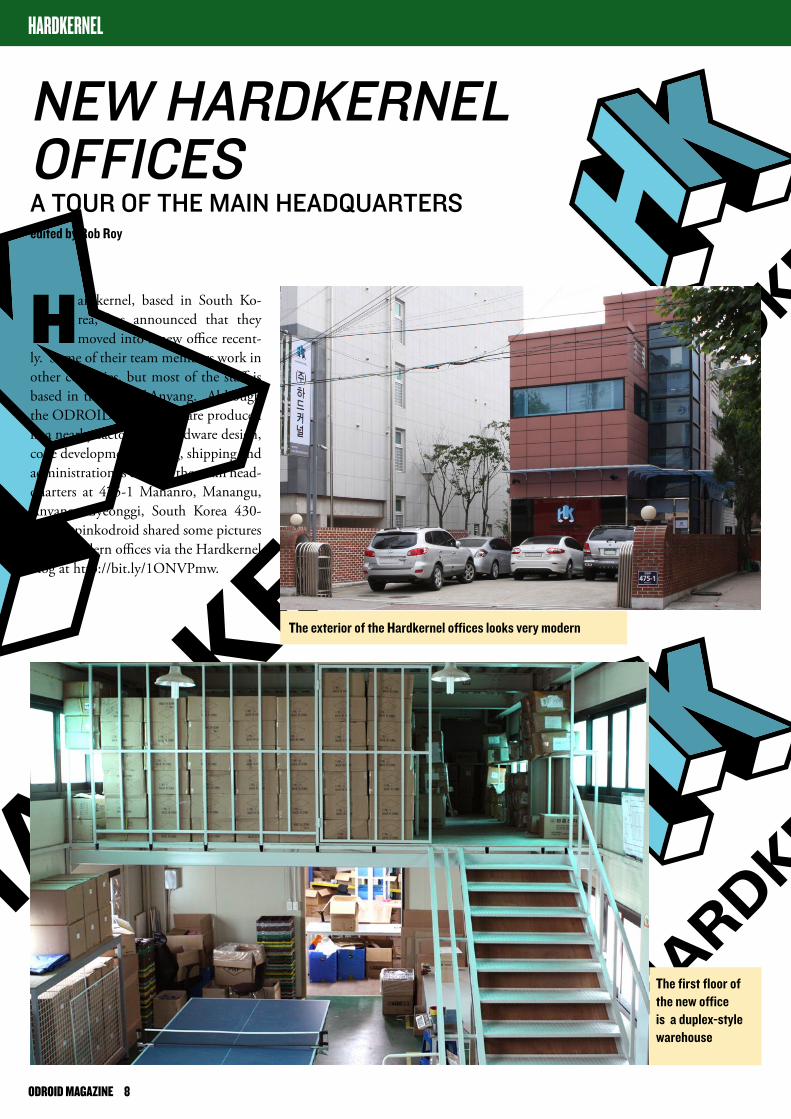
ly. Some of their team members work in other countries, but most of the staff is based in the city of Anyang. Although the ODROIDs themselves are produced in a nearby factory, the hardware design, code development, testing, shipping and administration is done in the main head-quarters at 475-1 Mananro, Manangu, Anyang, Gyeonggi, South Korea 430-852. @pinkodroid shared some pictures of the modern offices via the Hardkernel blog at http://bit.ly/1ONVPmw.
The exterior of the Hardkernel offices looks very modern
The first floor of the new office is a duplex-style warehouse
ODROID MAGAZINE 8

HARDKERNEL
A garden on the rooftop, great for lunch when the weather is good The second floor is the main office, where the developers work
On the first day, the team gathered on the rooftop for a celebration
Prayers are offered for Hardkernel’s
continued success
Shamanism is an important part of
Korean culture
Following the Korean tradition, lots of food was prepared
Hardkernel employees enjoy eating together after a long day
ODROID MAGAZINE 9
You’ve gone ahead and bought an ODROID and you like it. Wouldn’t you want more? Maybe you need an isolated system for testing, or want to run multiple
instances of some software. Maybe you want to run various network tests and need to simulate multiple independent cli-ents. If processing power is not an issue for you, then Linux Containers, inspired from Solaris, can do the job well on your ODROID.
How it worksLXC is a lightweight virtualization method to run simulta-
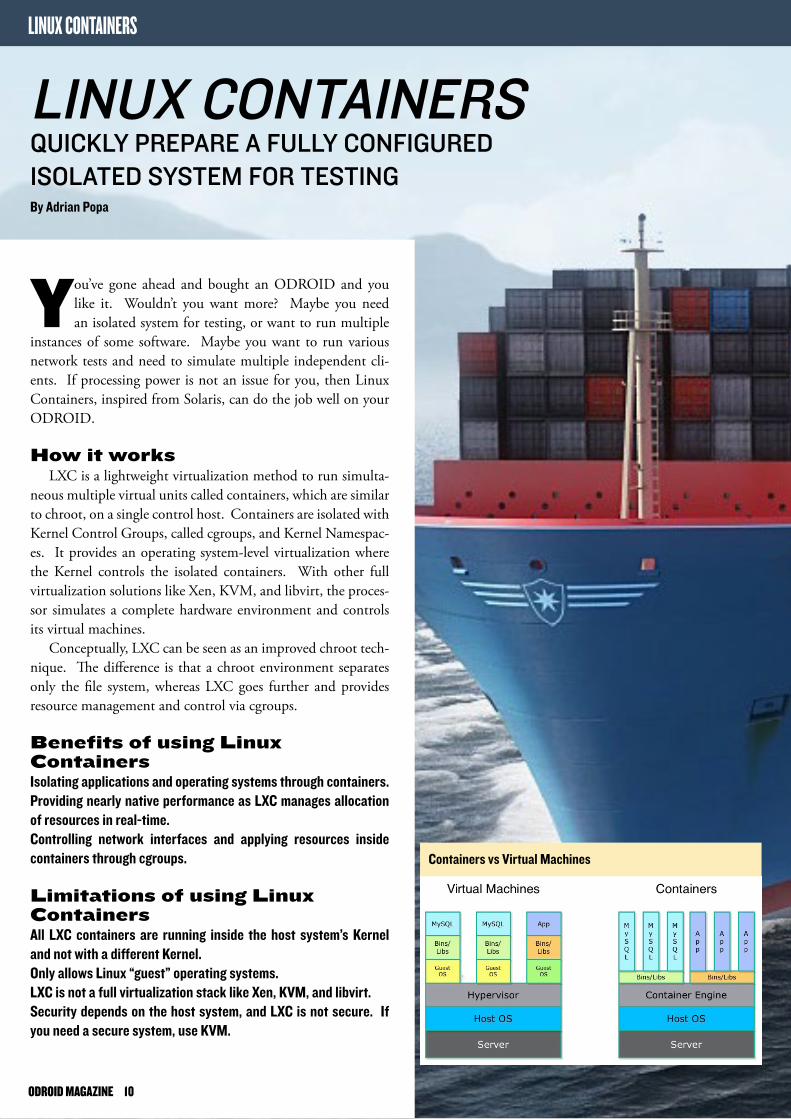
neous multiple virtual units called containers, which are similar to chroot, on a single control host. Containers are isolated with Kernel Control Groups, called cgroups, and Kernel Namespac-es. It provides an operating system-level virtualization where the Kernel controls the isolated containers. With other full virtualization solutions like Xen, KVM, and libvirt, the proces-sor simulates a complete hardware environment and controls its virtual machines.
Conceptually, LXC can be seen as an improved chroot tech-nique. The difference is that a chroot environment separates only the file system, whereas LXC goes further and provides resource management and control via cgroups.
Benefits of using Linux ContainersIsolating applications and operating systems through containers.Providing nearly native performance as LXC manages allocation of resources in real-time.Controlling network interfaces and applying resources inside containers through cgroups.
Limitations of using LinuxContainersAll LXC containers are running inside the host system’s Kernel and not with a different Kernel.Only allows Linux “guest” operating systems.LXC is not a full virtualization stack like Xen, KVM, and libvirt.Security depends on the host system, and LXC is not secure. If you need a secure system, use KVM.
LInuX COnTAInERSquICKLY pREpARE A FuLLY COnFIGuREDISOLATED SYSTEM FOR TESTInGBy Adrian Popa
LINUX CONTAINERS
Containers vs Virtual Machines
ODROID MAGAZINE 10

LINUX CONTAINERS
To install and use LXC, simply use apt-get to install the LXC package:
$ sudo apt-get install lxc
InitializationIn order to create or operate Linux containers, you’ll need
to have root privileges. Private containers can also be created by non-privileged users, but for this to work well, you need at least kernel version 3.13. However, the Ubuntu 15.04 image from HardKernel comes with kernel version 3.10. In addition to root, you’ll also need to have some specific kernel configura-tions active if you’ve built your own kernel. The default kernel from HardKernel contains all the necessary configuration to run LXC out of the box. To check that your system is ready for LXC, run the lxc-checkconfig command. If your kernel does not support lxc, refer to the Docker article in the January 2015 issue of ODROID Magazine at http://bit.ly/1OfT2zo in order to find out what you need to enable in the kernel’s configura-tion.
To create a new container, you first need to setup an initial configuration file and select a suitable template. The templates instruct LXC how to download the necessary packages for the distribution of your choice. In Ubuntu 15.04 you get these templates by default:
# ls /usr/share/lxc/templates/
lxc-alpine lxc-centos lxc-fedora lxc-
oracle lxc-ubuntu-cloud
lxc-altlinux lxc-cirros lxc-gentoo lxc-
plamo
lxc-archlinux lxc-debian lxc-openmandriva lxc-
sshd
lxc-busybox lxc-download lxc-opensuse lxc-
ubuntu
Unfortunately, since you’re not running an Intel platform, not all of them will work on our ODROIDs. To find out if your favorite distribution will run as a container, you need to investigate if they also provide an ARM build. We will first create a new container for Fedora Linux. We want the network configuration to go through lxcbr0 which does NAT, so we will setup the configuration like this:
# cat fedora.conf
lxc.utsname = fedoracontainer
lxc.network.type = veth
lxc.network.flags = up
lxc.network.link = lxcbr0
lxc.network.name = eth0
ODROID MAGAZINE 11
LINUX CONTAINERS
The configuration simply specifies that the container will be called “fedoracontainer” internally as the hostname, that net-working is bridged to lxcbr0, and that the internal network interface name is eth0. Unfortunately, the template for Fedora is out of date and will fail by default, so you’ll need to correct some mirror paths:
# sed -i ‘s/mirrorurl=”mirrors.kernel.org::fedora”\
/mirrorurl=”mirrors.kernel.org::archive\/\
fedora-archive”/’ /usr/share/lxc/templates/lxc-fedora
To create the container, use this command:
# lxc-create -t /usr/share/lxc/templates/lxc-fedora \
-f fedora.conf -n fedoracontainer -- --release 23
The -t parameter specifies the template to be used, -f points to the configuration file we’ve just created and -n sets the con-tainer’s name. The -- switch informs lxc-create to pass any ad-ditional parameters to the template (which is a bash script), and we’re asking for Fedora 23. The bootstrap script will take care and download a “livecd” version of Fedora 20 and use it to install a Fedora 23 minimal image. The whole process may take a while. After the container is created, you can safely delete the bootstrap and cache if you don’t plan on installing other fedora-based containers soon:
# rm -rf /var/cache/lxc/fedora/armhfp/bootstrap
# rm -rf /var/cache/lxc/fedora/armhfp/LiveOS
Right now, the container is shut down and stores its files, including the container config, in the /var/lib/lxc/fedoracon-tainer/ directory, which uses 657MB for the minimal install.
Let’s investigate using Ubuntu 15.10 as a container. I’ve heard there are still problems if you run it as a main operating system on ODROID, but let’s investigate it.
First, prepare the initial config file. It’s similar to Fedora’s, but this time we want the container to be bridged to eth0, so we’ll need to create a bridge interface connected to eth0 which we’ll call brlan0.
Changing your wired network connection to a bridge in-terface can be difficult if you are doing this remotely over the network. The best way to do it and have persistency across reboots is to add this config to /etc/network/interfaces, then reboot your ODROID:
auto brlan0
iface brlan0 inet dhcp
bridge_ports eth0
ODROID MAGAZINE 12
LINUX CONTAINERS
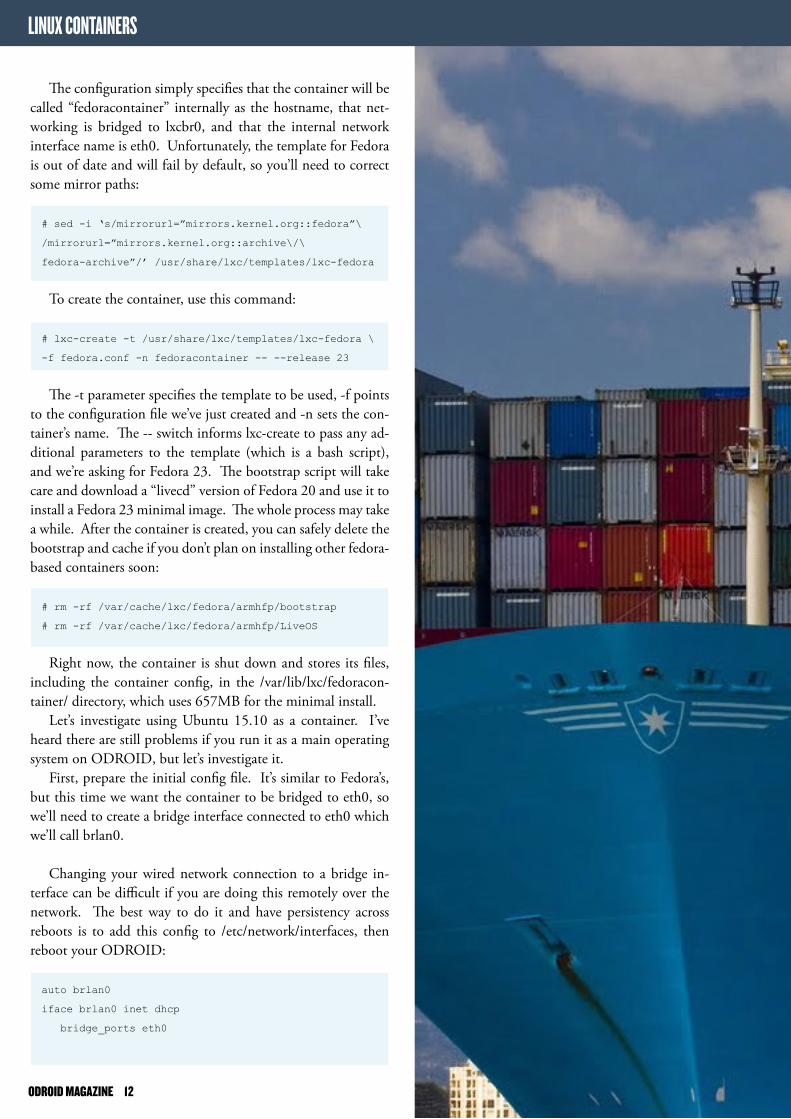
Bridging to the wireless adapter
Note that the brlan0 interface will become the layer 3 inter-face in your system and obtain an IP address, and eth0 will be just a layer 2 switch port. Also, changing the network configu-ration might break processes where the interface is specified by name, such as iptables, arpwatch, and munin.
Once the bridge interface is up and running after reboot-ing your ODROID, use this configuration to prepare the con-tainer:
# cat ubuntu.conf
lxc.utsname = ubuntucontainer
lxc.network.type = veth
lxc.network.flags = up
lxc.network.link = brlan0
lxc.network.name = eth0
# lxc-create -t /usr/share/lxc/templates/lxc-ubuntu \
-f ubuntu.conf -n ubuntucontainer -- --release wily
The 10.15 minimal install uses only 326MB.
If you want to bridge to your wireless adapter, the bad news is that you can’t, as discussed at http://bit.ly/1WZNdOb. This is because the wireless driver can create multiple logical inter-faces (such as wlan0), and you can’t move the logical interface in a different namespace without moving the whole network card. However, LXC provides a mechanism to detach the whole network card from your host system and attach it to a running container:
# lxc-device -n container-name add wlan0
Once the wifi card has been attached to the container, it will no longer be visible in the host OS, so you’ll need an alternate way of connecting to it.
Starting and stoppingNow that you have two containers, it’s time to start them
up. This can be done with the following command:
# lxc-start -n fedoracontainer -d
The -d switch tells the command to start the container in the background, otherwise it would attach your terminal to its console, and killing the terminal would also terminate the con-tainer. If you are having problems starting your container up, remove the -d parameter to follow the boot messages. To at-tach to the container and do some actual work, use lxc-attach:
ODROID MAGAZINE 13

LINUX CONTAINERS
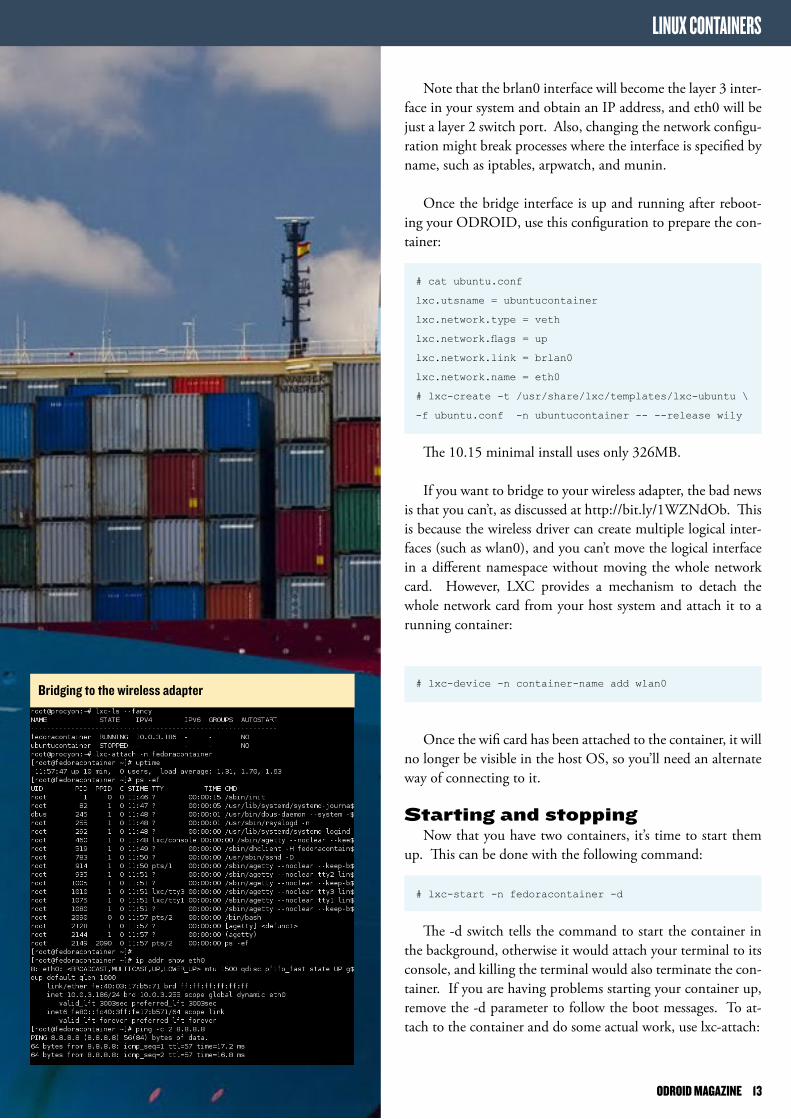
LXC container running
# lxc-attach -n fedoracontainer
[root@fedoracontainer ~]#
You can attach before the container has had time to fully start, so some services, such as network services, might not be available immediately. Simply wait for the container to fully start, which will be indicated by a getty process in your process list. If you take a peek inside, you’ll see only a few processes running. You can then use yum to install your favorite pack-ages, as if the system was running on its own hardware.
To exit the container without stopping it, you can simply type exit at the prompt. You can also access the container via ssh from the host via the internal network. To turn off a con-tainer, you can issue the lxc-stop command:
# lxc-stop -n fedoracontainer
If you want your container to be started together with the system, you can enable the auto startup feature by modifying the container’s configuration located at /var/lib/lxc/fedoracon-tainer/config and add the following lines:
lxc.start.auto = 1
lxc.start.delay = 10
The lxc-ls command will then show you if it is scheduled for autostart:
# lxc-ls --fancy
NAME STATE IPV4 IPV6 GROUPS AUTOSTART
----------------------------------------------------
---
fedoracontainer STOPPED - - - YES
ubuntucontainer STOPPED - - - NO
To get additional info about your running container, you can also use the following command:
# lxc-info -n fedoracontainer
Name: fedoracontainer
State: RUNNING
PID: 24396
IP: 10.0.3.186
CPU use: 41.87 seconds
Memory use: 15.09 MiB
Link: vethTSW172
TX bytes: 3.27 KiB
RX bytes: 28.89 KiB
Total bytes: 32.16 KiB
ODROID MAGAZINE 14
LINUX CONTAINERS
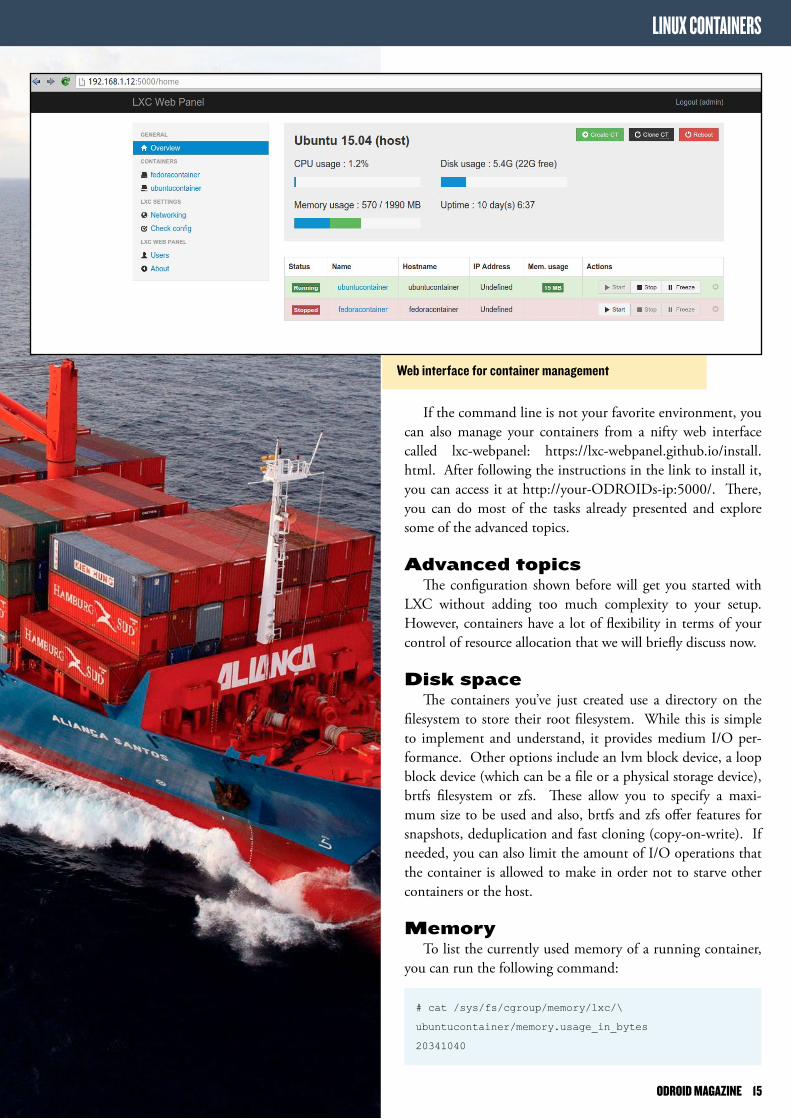
web interface for container management
If the command line is not your favorite environment, you can also manage your containers from a nifty web interface called lxc-webpanel: https://lxc-webpanel.github.io/install.html. After following the instructions in the link to install it, you can access it at http://your-ODROIDs-ip:5000/. There, you can do most of the tasks already presented and explore some of the advanced topics.
Advanced topicsThe configuration shown before will get you started with
LXC without adding too much complexity to your setup. However, containers have a lot of flexibility in terms of your control of resource allocation that we will briefly discuss now.
Disk spaceThe containers you’ve just created use a directory on the
filesystem to store their root filesystem. While this is simple to implement and understand, it provides medium I/O per-formance. Other options include an lvm block device, a loop block device (which can be a file or a physical storage device), brtfs filesystem or zfs. These allow you to specify a maxi-mum size to be used and also, brtfs and zfs offer features for snapshots, deduplication and fast cloning (copy-on-write). If needed, you can also limit the amount of I/O operations that the container is allowed to make in order not to starve other containers or the host.
MemoryTo list the currently used memory of a running container,
you can run the following command:
# cat /sys/fs/cgroup/memory/lxc/\
ubuntucontainer/memory.usage_in_bytes
20341040
ODROID MAGAZINE 15

LINUX CONTAINERS
By default, the container will be able to use the whole sys-tem memory. If that’s not what you want, you can limit the memory with the following commands:
# lxc-cgroup -n ubuntucontainer memory.limit_in_bytes
40M
# cat /sys/fs/cgroup/memory/lxc/\
ubuntucontainer/memory.limit_in_bytes
41943040
The changes will be reflected immediately in your running container:
root@ubuntucontainer:~# free -m
total used free shared
buffers cached
Mem: 40 31 8 31
0 23
-/+ buffers/cache: 7 32
Swap: 0 0 0
If you go over the memory limit, the kernel will try to re-move some caches, but in the end, if there’s no more memory, you’ll see processes dying with “Cannot allocate memory” er-rors.
root@ubuntucontainer:~# mount -t tmpfs -o size=50m
tmpfs /mnt/ramdisk3
root@ubuntucontainer:~# dd if=/dev/zero \
of=/mnt/ramdisk3/1
dd: writing to ‘/mnt/ramdisk3/1’: Cannot allocate
memory
Alternatively, you can add the memory limit directly in the container’s configuration by adding the following line:
lxc.cgroup.memory.limit_in_bytes = 40M
CPUYou can assign specific CPU cores to a container, or allocate
a number of CPU shares to that container to restrict CPU us-age. By default each container gets 1024 shares:
# cat /sys/fs/cgroup/cpu/lxc/\
ubuntucontainer/cpu.shares
1024
# echo 256 > /sys/fs/cgroup/cpu/lxc/\
ubuntucontainer/cpu.shares
# cat /sys/fs/cgroup/cpu/lxc/\
ubuntucontainer/cpu.shares
256
ODROID MAGAZINE 16

LINUX CONTAINERS
To set it in the container’s configuration, add the following directives:
lxc.cgroup.cpuset.cpus = 1,2
lxc.cgroup.cpu.shares = 256
Kernel modulesIn order to use specific kernel modules such as iptables in-
side a LXC container, you first need to load that module on the host.
Special filesSimilar to the special configuration needed to attach a wifi
interface to a running LXC, you can bind special files from the host to be used exclusively by the container. For instance, to be able to use a USB-to-Serial adapter in the container, you could run this command in the host:
# lxc-device add -n ubuntucontainer \
/dev/ttyUSB0 /dev/ttyS0
Use casesContainers can be useful as test systems where you can ex-
periment without risk of breaking things. You can give root access to your friends and share multiple independent environ-ments on top of the same hardware.
I learned how to use LXC and bought a few ODROIDs in order to conduct network tests using multiple NICs from multiple locations. My employer was running multiple Smokeping slave instances over multiple providers to measure website response time, Youtube video download, and Speed-test.net results from two independent containers running on an ODROID. The containers allowed us to use bridged network-ing to access remote resources via both links simultaneously by keeping different routing tables. Because the application doesn’t need a lot of CPU cycles or memory, the ODROIDs were perfect for the task.
My plan for the future is to get Android running inside a container, which is possible according to the article available at http://bit.ly/1QO855N. Have fun playing with contain-ers, and feel free to post a response on the support thread at http://bit.ly/1PANHG0 if you manage to use other containers.
Further readingLXC Quickstart: http://bit.ly/1WZO8htAdvanced guide: http://bit.ly/1S5j9tW
ODROID MAGAZINE 17
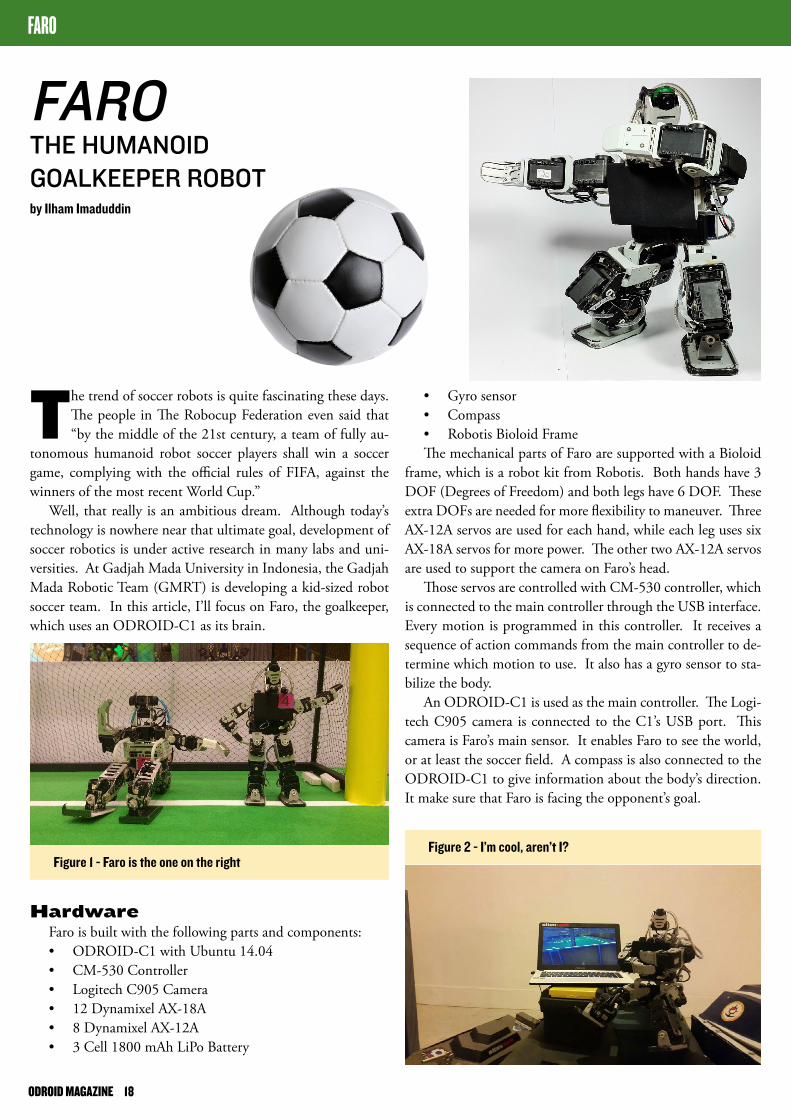
• Gyro sensor• Compass• Robotis Bioloid FrameThe mechanical parts of Faro are supported with a Bioloid
frame, which is a robot kit from Robotis. Both hands have 3 DOF (Degrees of Freedom) and both legs have 6 DOF. These extra DOFs are needed for more flexibility to maneuver. Three AX-12A servos are used for each hand, while each leg uses six AX-18A servos for more power. The other two AX-12A servos are used to support the camera on Faro’s head.
Those servos are controlled with CM-530 controller, which is connected to the main controller through the USB interface. Every motion is programmed in this controller. It receives a sequence of action commands from the main controller to de-termine which motion to use. It also has a gyro sensor to sta-bilize the body.
An ODROID-C1 is used as the main controller. The Logi-tech C905 camera is connected to the C1’s USB port. This camera is Faro’s main sensor. It enables Faro to see the world, or at least the soccer field. A compass is also connected to the ODROID-C1 to give information about the body’s direction. It make sure that Faro is facing the opponent’s goal.
The trend of soccer robots is quite fascinating these days. The people in The Robocup Federation even said that “by the middle of the 21st century, a team of fully au-
tonomous humanoid robot soccer players shall win a soccer game, complying with the official rules of FIFA, against the winners of the most recent World Cup.”
Well, that really is an ambitious dream. Although today’s technology is nowhere near that ultimate goal, development of soccer robotics is under active research in many labs and uni-versities. At Gadjah Mada University in Indonesia, the Gadjah Mada Robotic Team (GMRT) is developing a kid-sized robot soccer team. In this article, I’ll focus on Faro, the goalkeeper, which uses an ODROID-C1 as its brain.
HardwareFaro is built with the following parts and components:• ODROID-C1 with Ubuntu 14.04• CM-530 Controller• Logitech C905 Camera• 12 Dynamixel AX-18A• 8 Dynamixel AX-12A• 3 Cell 1800 mAh LiPo Battery
FAROTHE HuMAnOID GOALKEEpER ROBOTby Ilham Imaduddin
FARO
Figure 1 - Faro is the one on the rightFigure 2 - I’m cool, aren’t I?
ODROID MAGAZINE 18
that they are currently doing. This enables the team to coor-dinate and do their teamwork, doing the best strategy to beat the opponent. The communication is done through a Wi-Fi network.
One of the biggest challenge of a goalkeeper robot is, of course, to make sure that it catches the ball. A problem arises when the ball is moving faster than the robot’s ability to pro-cess and catch it in time. In that case, the system fails to track the ball, so it stands still, not knowing that it just lost a point, or the system could succeed to track the ball, but then it’s too late, so it moves to catch the ball but the ball is passing through anyway.
The processing time of all those routine is small enough for Faro to catch the ball in time on average ball movement, but sometime it fails (even humans fail sometimes, don’t we?) So, it would be good to improve the response time by using a more powerful computer, such as the ODROID-XU4. But even more processing power doesn’t guarantee that the robot can catch the ball in time. The physical capability of the robot also plays a big role. The robots need enough power and speed to act on the brain’s commands, so that it can catch the ball in time and ultimately guard the goal against every opponent’s kick. What’s the point of knowing without the ability to act, anyway?
Development of humanoid robots as a soccer team is far from completed. Even today’s robot soccer team is easily de-feated by a kindergartner. More processing power, more com-plex algorithms, and more physical power is needed to surpass a human’s abilities. A lot of research still needs to be done to reach the ultimate goal: winning a soccer game against human World Cup champions.
The power comes from a 3 cell LiPo battery (11.1 V), which is divided into two paths. One is directly connected to CM-530 controller, and the other one is regulated to 5V for power-ing the ODROID-C1.
AlgorithmFaro’s task is straight and simple: prevent the ball from get-
ting into the goal. To achieve this task, several processes are applied.
The first process is to detect the ball. It is done by capturing video from the camera and finding the features of a ball from the footage, including color, shape, edges, and other param-eters. The ball is orange, with a diameter of approximately 10 cm. After the ball is found, Faro starts tracking the ball move-ment.
By tracking the ball movement, Faro can predict and sense danger coming to its goal. When Faro detects the ball moving to its direction, it counts and predict the trajectory of the ball and does an action based on that prediction, such as standing by or jumping to save the goal.
All of theses processes are done inside the ODROID-C1 with the help of the OpenCV library. Even though image pro-cessing requires a lot of processing power, the ODROID-C1 is actually powerful enough to do the job.
If Faro thinks that a ball is threatening the goal, an action command will be sent to the CM-530 controller. This com-mand include a selection of motions, such as left dive, right dive or standing up from a falling position.
All those motions are programmed into the CM-530 con-troller, so when the CM-530 receives an action command, it will choose the appropriate motion and count every servo’s angle. Finally, the CM-530 signals the servo to do the motion.
While the ball tracking routine is being executed, Faro also communicates with other team player to coordinate. Every team player will share information about what it senses, es-pecially the position of the ball. They also share the action
FARO
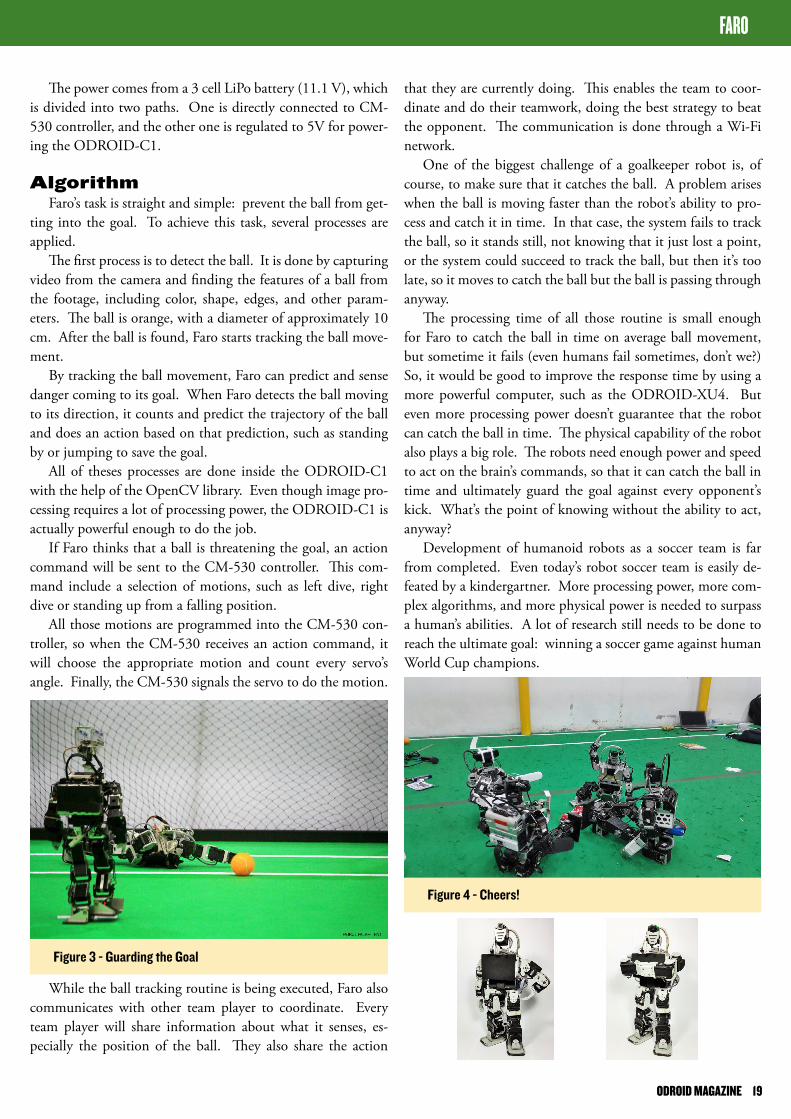
Figure 3 - Guarding the Goal
Figure 4 - Cheers!
ODROID MAGAZINE 19

from Android Development Tools (ADT), a plug-in for Eclipse, to Android Studio, which is based on NetBrains’ In-tellij, as their default IDE for Android. Studio, unlike ADT, uses a build system known as Gradle. Although not avail-able at launch, preliminary NDK sup-port for Gradle has been added since Studio version 1.3. Although support has been added for the NDK, integra-tion into the IDE is still very limited, and its use requires manual changes and use of alpha versions of certain modules.
InstallationLet’s begin with the very basic of get-
ting all the parts we need setup. The in-stallation of Android Studio, the SDK, and the NDK take a while to install and require about 2GB of files to be down-loaded.
Android StudioFor starters, you should have the lat-
est version of Android Studio installed. If it isn’t, download a copy from http://bit.ly/IKeIqs. Installation is fairly straightforward for all platforms, and Google provides good documentation if you encounter difficulties during the installation.
NDK and SDKLaunch Android Studio and click on
the SDK Manager button on the top
This article is a look at how to use the Android NDK within the Android Studio Gradle build sys-
tem. As an example, I used HardKer-nel’s Android WiringPi app at http://bit.ly/1Eq3UpF. Let’s begin with a few ba-sics such as what the NDK is, and more importantly, how should it be used.
Android’s NDK (Native Develop-ment Kit), is a means of allowing An-droid apps which are Java-centric to interface with C or C++ libraries. This can be useful by allowing us make use of existing libraries, as well as gain any performance benefits from using C or C++ which are compiled from source to a specific platform. Before you get too excited about the the use of mixing C and C++ into your next app, there are a few pit-falls and advisories. Google’s documentation on the NDK best sum up these concerns:
“Before downloading the NDK, you should understand that the NDK will not benefit most apps. As a developer, you need to balance its benefits against its drawbacks. Notably, using native code on Android generally does not result in a noticeable performance im-provement, but it always increases your app complexity. In general, you should only use the NDK if it is essential to your app and never because you simply prefer to program in C/C++.”
In May of 2013, Google switched
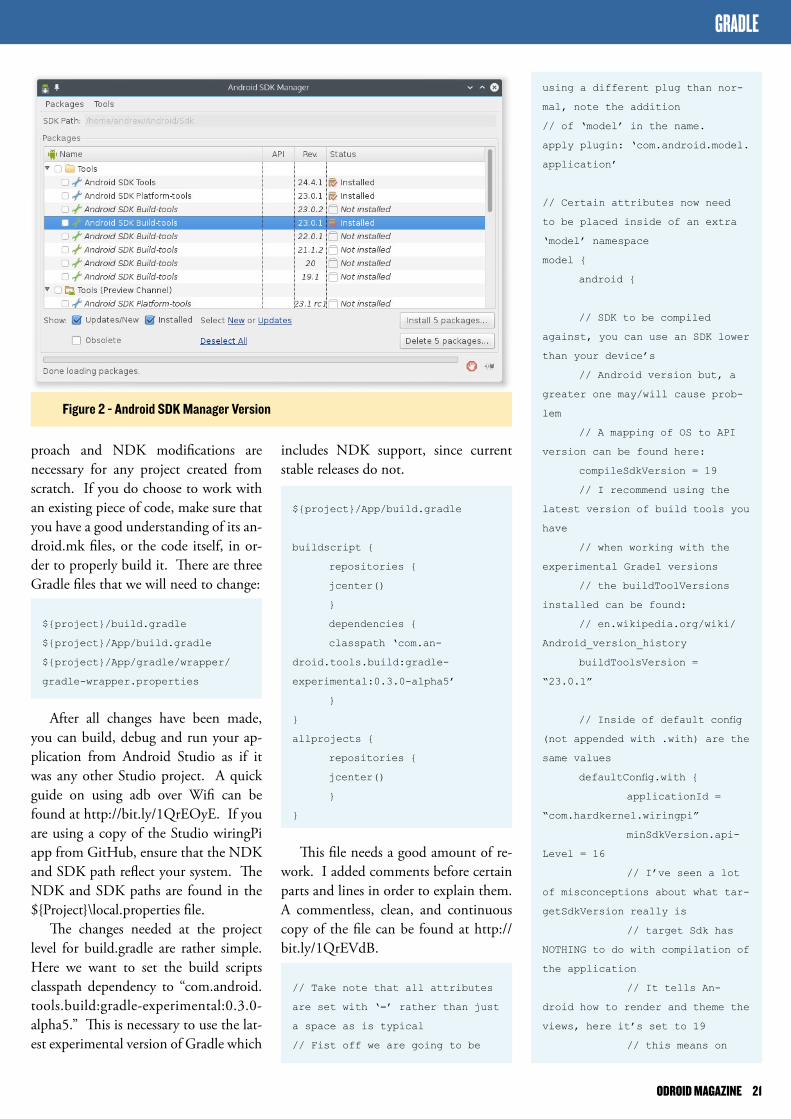
icon panel, as shown in Figure 1. Af-ter that loads, click on the text near the bottom called “Launch Standalone SDK Manager”, from where we will want to install, at a minimum, the following items:
Android 4.4.2 (API 19) → SDK
Platform
Extras → Ndk Bundle
This assumes that you plan on using the official HardKernel Android im-age, which is limited to Kitkat 4.4.2, but there are several community images which are based on newer Android re-leases. Look at the Android SDK Build tools and make a note of the most re-cent version that you have installed. As shown in Figure 1, I only have 23.0.1 installed. After all packages have been selected click “Install <X> packages..” and sit back and relax as they download and install. After it finishes, restart An-droid Studio.
Editing the projectAs I stated before, I’m using Hard-
Kernel’s wiringPi app, which I imported into Studio. However, the same ap-
uSInG AnDROID nDK In AnDROID STuDIO AnD GRADLEwORKInG wITH wIRInGpI In AnDROIDby Andrew Ruggeri
GRADLE
Figure 1 - Android SDK Manager Button
ODROID MAGAZINE 20
includes NDK support, since current stable releases do not.
${project}/App/build.gradle
buildscript {
repositories {
jcenter()
}
dependencies {
classpath ‘com.an-
droid.tools.build:gradle-
experimental:0.3.0-alpha5’
}
}
allprojects {
repositories {
jcenter()
}
}
This file needs a good amount of re-work. I added comments before certain parts and lines in order to explain them. A commentless, clean, and continuous copy of the file can be found at http://bit.ly/1QrEVdB.
// Take note that all attributes
are set with ‘=’ rather than just
a space as is typical
// Fist off we are going to be
proach and NDK modifications are necessary for any project created from scratch. If you do choose to work with an existing piece of code, make sure that you have a good understanding of its an-droid.mk files, or the code itself, in or-der to properly build it. There are three Gradle files that we will need to change:
${project}/build.gradle
${project}/App/build.gradle
${project}/App/gradle/wrapper/
gradle-wrapper.properties
After all changes have been made, you can build, debug and run your ap-plication from Android Studio as if it was any other Studio project. A quick guide on using adb over Wifi can be found at http://bit.ly/1QrEOyE. If you are using a copy of the Studio wiringPi app from GitHub, ensure that the NDK and SDK path reflect your system. The NDK and SDK paths are found in the ${Project}\local.properties file.
The changes needed at the project level for build.gradle are rather simple. Here we want to set the build scripts classpath dependency to “com.android.tools.build:gradle-experimental:0.3.0-alpha5.” This is necessary to use the lat-est experimental version of Gradle which
GRADLE
using a different plug than nor-
mal, note the addition
// of ‘model’ in the name.
apply plugin: ‘com.android.model.
application’
// Certain attributes now need
to be placed inside of an extra
‘model’ namespace
model {
android {
// SDK to be compiled
against, you can use an SDK lower
than your device’s
// Android version but, a
greater one may/will cause prob-
lem
// A mapping of OS to API
version can be found here:
compileSdkVersion = 19
// I recommend using the
latest version of build tools you
have
// when working with the
experimental Gradel versions
// the buildToolVersions
installed can be found:
// en.wikipedia.org/wiki/
Android_version_history
buildToolsVersion =
“23.0.1”
// Inside of default config
(not appended with .with) are the
same values
defaultConfig.with {
applicationId =
“com.hardkernel.wiringpi”
minSdkVersion.api-
Level = 16
// I’ve seen a lot
of misconceptions about what tar-
getSdkVersion really is
// target Sdk has
NOTHING to do with compilation of
the application
// It tells An-
droid how to render and theme the
views, here it’s set to 19
// this means on
Figure 2 - Android SDK Manager Version
ODROID MAGAZINE 21
create(“arm8”) {
ndk.abiFilters +=
“arm64-v8a”
}
create(“x86”) {
ndk.abiFilters +=
“x86”
}
create(“x86-64”) {
ndk.abiFilters +=
“x86_64”
}
create(“mips”) {
ndk.abiFilters +=
“mips”
}
create(“mips-64”) {
ndk.abiFilters +=
“mips64”
}
// Set to build all ABI fla-
vours
create(“all”)
}
}
The final change we need to make is to the properties files in order to specify the Gradle version. The ending value part of the distribution URL needs to be changed from “gradle-2.6-all.zip” if you are using an earlier version.
${project}/App/gradle/wrapper/
gradle-wrapper.properties
#Sat Nov 07 12:41:05 EST 2015
distributionBase=GRADLE_USER_HOME
distributionPath=wrapper/dists
zipStoreBase=GRADLE_USER_HOME
zipStorePath=wrapper/dists
distributionUrl=https\://ser-
vices.gradle.org/distributions/
gradle-2.6-all.zip
CFlags += “-I${file(“src/
main/jni/wiringPi”)}”.toString()
CFlags += “-I${file(“src/
main/jni/devLib”)}”.toString()
// external library that
need to be referenced
ldLibs += [“log”, “dl”]
}
android.buildTypes {
release {
minifyEnabled =
false
proguardFiles +=
file(‘proguard-rules.txt’)
}
}
// This following part of
code is set to build NDK for ALL
platform types
// which NDK supports. For
Odroid devices (currently) we
only need the arm
// and x86 (for debug on a
host computer) ABIs. For infor-
mation about the
// Support ABIs can be
found at the link bellow.
// https://developer.an-
droid.com/ndk/guides/abis.html
android.productFlavors {
create(“arm”) {
// the abiFilters
set the directory name where the
lib will be located
ndk.abiFilters +=
“armeabi”
}
create(“arm7”) {
ndk.abiFilters +=
“armeabi-v7a”
}
Android Lollipop (SDK 23) it will
still render as
// all the views as
if they were on 19, unset this
default to minSdkVersion
targetSdkVersion.
apiLevel = 19
}
}
// It is advisable to keep
both these version the same
compileOptions.with {
// Java source libraries
that are used
sourceCompatibility = Java-
Version.VERSION_1_7
// Java compiler that is
used to create bytecode
targetCompatibility = Java-
Version.VERSION_1_7
}
// Here is where all the
configuration for the NDK
android.ndk {
// moduleName is the name
of the library being build by the
NDK
// the name must EXACTLY
match the name of the NDK library
// which is being load-
ed from java’s “loadLibrary()”
method
moduleName = “wpi_android”
// This is the NDK platform
which will be used
// In the Android.mk this
was ‘APP_VERSION’
// if not set platform ver-
sion is set the compileSdkVersion
platformVersion = 19
// For any compiler flags
they are set with either CFlags
or CPPFlags
CFlags += “-DRMOLD”
CFlags += “-UNDEBUG”
CFlags += “-DANDROID”.to-
String()
CFlags += “-I${file(“src/
main/jni”)}”.toString()
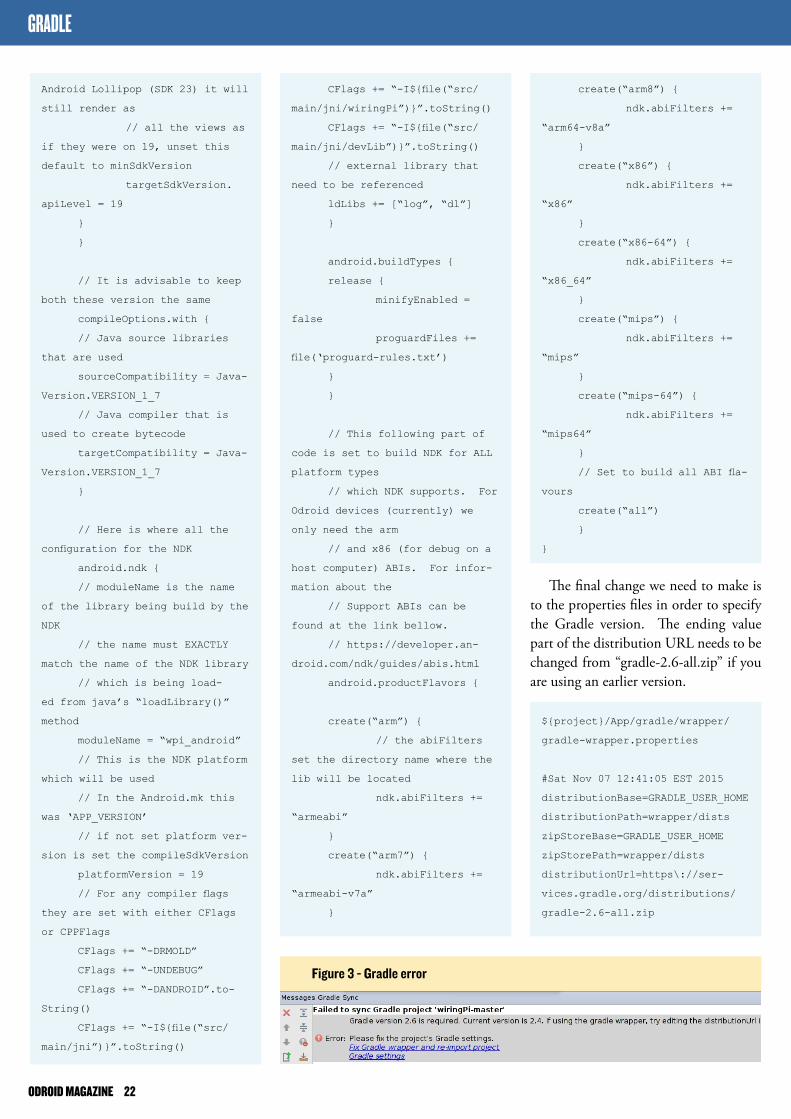
Figure 3 - Gradle error
GRADLE
ODROID MAGAZINE 22

Other changesDepending on your settings, you
may see a “Failed to sync Gradle project <Project Name>” error, which is caused by a mismatch between the system Gra-dle version and the project version. If you click on the link in the error de-scription, it will launch the Gradle edi-tor. Under “Project-level Settings,” set the radio button to “Use default gradle wrapper (Recommended).” This causes the project to default to the Gradle ver-sion that is specified in the properties file.
Figure 4 - Gradle Settings
GRADLE
FRETS On FIRERELEASE YOuR InnER ROCK STARby @v0ltumna
FRETS ON FIRE
Figure 1 - Frets on Fire gameplay
odroid_20150922-1_armhf.deb
$ sudo apt-get install gdebi
$ sudo gdebi libgl*.deb
Then, link the Mali drivers (on the XU3 and XU4, use libmali.so instead of libMali.so):
$ ln -sf /usr/lib/arm-linux-gnue-
abihf/mali-egl/libMali.so /usr/
lib/arm-linux-gnueabihf/libEGL.so
$ ln -sf /usr/lib/arm-linux-
gnueabihf/mali-egl/libMali.so /
usr/lib/arm-linux-gnueabihf/lib-
GLESv1_CM.so
$ ln -sf /usr/lib/arm-linux-
gnueabihf/mali-egl/libMali.so /
usr/lib/arm-linux-gnueabihf/lib-
GLESv2.so
Next, change the file /usr/games/fofix to match the following:
The ODROID already supports karaoke (http://bit.ly/1PLowzd) and dancing (http://bit.
ly/1NAnHoc) software, so the next logical step is to add some guitars and drums! Frets on Fire is a Python clone of Guitar Hero available in the Debian repository. A gameplay video is available at http://bit.ly/1MSjhZe.
Installing Frets on Fire is easy:
$ sudo apt-get install fofix
Frets on Fire needs OpenGL support, so GLshim is needed so that the game will run using OpenGLES:
$ cd ~/Downloads
$ mkdir glshim
$ cd glshim
$ wget http://oph.mdrjr.net/
meveric/other/freeorion/libgl-
ODROID MAGAZINE 23

#!/bin/sh -e
export LD_LIBRARY_PATH=/usr/lo-
cal/lib
cd /usr/share/fofix/src
exec ${PYTHON:-python} ${FOFIX_
PYTHON_FLAGS:--OO} FoFiX.py “$@”
Now you are able to start the game:
$ fofix
But where do you put your music or custom themes? Usually, you would put them in the directory /usr/share/fofix/data, but I prefer putting those in my home folder in order to easily access them. To do so, start the game, then exit so that the folder ~/.fofix is created. Move the themes to your home folder and create symbolic links so that you can put your songs in ~/.fofix/songs and themes in ~/.fofix/themes:
$ sudo mv /usr/share/fofix/data/
themes /home/odroid/.fofix/
$ sudo chown -R odroid:odroid /
home/odroid/.fofix/themes
$ sudo rmdir /usr/share/fofix/
data/songs
$ mkdir /home/odroid/.fofix/songs
$ sudo chown odroid:odroid /home/
odroid/.fofix/songs
$ sudo ln -s /home/odroid/.fofix/
songs /usr/share/fofix/data/songs
$ sudo ln -s /home/odroid/.fofix/
themes /usr/share/fofix/data/
themes
Have fun rocking your ODROID, and probably your neighbors! For com-ments, questions and suggestions, visit the original thread at http://bit.ly/1l1eyhu.
FRETS ON FIRE
It is often convenient to have mul-tiple operating systems installed to the same microSD card or eMMC
module. I have written some convenient scripts in order to be able to do this on an ODROID-XU3 or ODROID-XU4. This guide details the steps necessary to use my scripts in order to create a multi-boot installation.
Overview• Create multiboot installation on a
single SD card or eMMC module with any combination of Android, Linux and OpenELEC
• Boot menu for OS selection• Tested with Hardkernel’s offi-
cial images for Android 4.4, CM 12.1 Android 5.1.1, Ubuntu Mate 15.04, Ubuntu Server 14.04, and OpenELEC 5.0.7.0
• Verified working with an ODROID-XU4, but is also com-patible with the ODROID-XU3
• Creates installation directly from Android update.zip, Linux instal-lation image and OpenELEC up-date archive
• Installation source for Android and Linux can be a backup of your existing Android/Linux installa-tion (backup scripts are included)
• All partition sizes can be set• It is recommended to run the
eMMC card preparation and in-stallation using Linux
• As a bonus, you don’t have to re-move the eMMC module from the ODROID
ODROID-Xu4 MuLTI-BOOT SCRIpTSDO IT THE EASY wAYby @loboris
MULTIBOOT
Build ProcedureFirst, download and unpack
the scripts package from http://bit.ly/1MjfYgx. Note that all commands below must be run in the script direc-tory.
You may need to install some auxilia-ry packages that are reported as missing by the script during installation using the apt-get command.
PreparationThe recommended card size is 16GB
or larger, but an 8GB card can be used as a minimum. Before running the script, you can edit the prepare_multi-card script file in order to set the desired partition sizes by editing the variables at the beginning of the script.
To begin, insert your card in the Linux host USB reader and run the fol-lowing commands in the script direc-tory:
$ sudo ./prepare_multicard
<sd|mmc_card> <card_type>
<sd|mmc_card> is your card block device (/dev/sdX, /dev/mmcblkX), and <card_type> is either “sd” for SD card installation or “em” for eMMC card in-stallation. After running the script, you will have an SD card or eMMC mod-ule that is ready for installing Android, Linux and OpenElec.
ODROID MAGAZINE 24
MULTIBOOT
Installing AndroidInsert your card that has been pre-
pared for multiboot by the script into a USB SD card reader on the Linux host and run the following commands in the script directory:
$ sudo ./copy_android <source>
<dest> <card_type> [update]
<source> can be:• Android update archive (update.
zip)• Directory with Android backup
(created with the backup_single_android or copy_android script)
• sd/emmc card (/dev/sdX, /dev/mmcblkX)) with valid multiboot installation
<dest> can be:• SD card or eMMC module (/dev/
sdX, /dev/mmcblkX)) prepared for multiboot
• Directory (creates backup of mul-tiboot Android installation)
<card_type> must be “sd” for SD card installation or “em” for eMMC module installation
If the 4th [update] parameter is pres-ent, the script won’t copy the contents of the data partition. This option is in-tended to be used in order to update an existing multiboot Android installation. Enter it only if updating to the same An-droid version.
Installing LinuxInsert your multiboot-prepared card
into the reader and run the following commands in the script directory:
$ sudo ./copy_linux <source>
<dest> <card_type>
<source> can be:• Unpacked Linux installation im-
age (linux_ver-xxx.img)• Directory with Linux backup (cre-
ated with backup_single_linux or copy_linux script)
• SD card or eMMC module (/dev/sdX, /dev/mmcblkX)) with valid multiboot installation
<dest> can be:• SD card or eMMC module (/dev/
sdX, /dev/mmcblkX)) prepared for multiboot
• Directory (creates backup of mul-tiboot Linux installation)
<card_type> must be “sd” for SD card installation or “em” for eMMC module installation
Installing OpenELECInsert your card (prepared for multi-
boot) in the reader and run the following commands in the script directory:
$ sudo ./copy_oelec <source>
<dest> <card_type>
<source> can be:• OpenELEC update archive
( Op e n E L E C - Od ro i d - X U 3 -x.x.x.x.tar)
<dest> can be:• SD card or eMMC module (/dev/
sdX, /dev/mmcblkX)) prepared for multiboot
<card_type> must be “sd” for SD card installation or “em” for eMMC module installation
Default OS andtimeout
After removing the SD card or eMMC module from the Linux host,
then inserting it into the ODROID and powering on, you will be presented with a boot menu so that you can se-lect which OS to load. You can edit the file “boot.ini.sel” on the FAT partition (userdata) in order to set the default OS that is used if no key is pressed (DE-FAULT_OS variable). You can also set the timeout (in seconds) after which the default OS is booted if no key is pressed (BOOT_DELAY variable). Finally, you can specify the screen resolution of the boot menu (videoconfig variable), but not all resolutions may work with your monitor.
Copying a backupYou can backup your old Android/
Linux SD card or eMMC module and use the backup as the source for the mul-tiboot installation. Insert the SD card or eMMC module containing the exist-ing operating system in the reader and run one of the two the following com-mands in the script directory, depending on whether the source OS is Android or Linux:
$ sudo ./backup_single_android
<sd|mmc> <backup_dir>
or
$ sudo ./backup_single_linux
<sd|mmc> <backup_dir>
For this command, <sd|mmc> is your SD card or eMMC module with the old Android/Linux installation (/dev/sdX, /dev/mmcblkX), and <backup_dir> is the name of the backup directory. The script will create subdirectories for the card partitions, so you can backup An-droid and Linux card to the same base directory.
For comments, suggestions and ques-tions, please visit the original forum thread at http://bit.ly/1j9r6TG.
ODROID MAGAZINE 25

from Vault 13, growing up in relatively safety. You are then sent out on a quest to save your Vault. The water purifica-tion facility has broken down, and with-in 150 in-game days, your Vault will run out of water. You are supposed to find a water chip, which is a replacement for the broken part in your own Vault.
The game has an isometric style, and switches between real-time and turn-based mode. Every time you get into a fight, you use a turn-based system in which you have a certain amount of Ac-tion Points (AP) to perform different tasks, like walking, using items, or at-tacking.
The game offers many different ar-mors, weapons and other items for you to use or trade with. You have a set of dif-ferent skills, such as first aid, lockpick-ing or sneaking which you can train to improve your character. Fallout is fun to play, although it takes place in a very dark setting, which shows why war is al-ways bad.
PrerequisitesThe game is available for both DOS
and Windows systems. Since we have a working version of DOSBox in my re-pository, which is a DOS emulator, it should be fairly easy to get Fallout to run in DOSBox. If you only own the Windows version of the game (or the GoG.com version) don’t worry, there is
I have always been a fan of the Fall-out series. When it first came out, I played it for hours and hours, trying
to find every little secret. As much as I liked the game, I also kept dying many times, since I was rather young and inex-perienced in 1997. However, that never stopped me from continuing, and I kept playing and playing until I finally beat the game. Today, I’m much more expe-rienced when it comes to games like this, but also a little less patient. The Fallout series, especially the first one, will always be a very good memory, and I wanted to play it again on my ODROID and see how well I could do.
OverviewAs the name suggests, the game
is set in the future where most of the earth has been destroyed in nuclear at-tacks. An all-out war has left the earth devastated, annihilating most of man-kind, animals and vegetation. There are some survivors in underground bunkers called “Vaults.” Some other less lucky creatures have survived the nuclear blast, but they are mutated or disfigured from the nuclear radiation. What followed is a very hostile environment in which people try to survive. Some just want to live a peaceful life and rebuild society, and others believe it’s easier to steal from and terrorize the weak.
In the game, you play an inhabitant
LInuX GAMInGFALLOuT: A pOST-nuCLEAR ROLE pLAYInG GAMEby Tobias Schaaf
LINUX GAMING
an easy way for you to play the game on ODROIDs as well.
Installation
$ sudo apt-get install dosbox-
odroid
ConfigurationStart DOSBox once to create the de-
fault config file, then exit it right away. Open /home/odroid/.dosbox/dosbox-SVN.conf in a text-editor and change the following lines:
[sdl]
fullscreen=true
fullresolution=desktop
output=overlay
[dosbox]
memsize=31
[render]
frameskip=3
aspect=true
[cpu]
core=dynamic
Before starting DOSBox, I created a folder where I want to place my games later:
$ mkdir DOS
I then copied over the ISO from Fallout and placed it into a folder called
ODROID MAGAZINE 26
game on your Windows PC. Copy the install folder to your ODROID in the folder you created for DOSBox, such as /home/odroid/DOS. You need to download the 1.1 DOS patch of Fallout, as well as some basic DOS files. I put them all on my web space hosted by @mdrjr, so all necessary files can be down-loaded from http://bit.ly/1HZAHSt. The Fallout 1.1 DOS patch includes a DOS starter executable, which can be used to play the Windows version of Fallout under DOS.
The rest of the files are needed to launch fallout.exe. After you copy all of the files onto your ODROID into your Fallout folder from your Windows ver-sion of Fallout, everything should be ready to play.
IntroductionThe game starts with a rather dark
introduction movie, which explains the background and setting of the game in a video cutscene, after which you are pre-sented with the main menu. You can then start a new game or load one of your save games. Starting a new game presents a character selection screen where you can choose to play one out of three pre-made characters, or create your own personal character. I normally choose the latter.
Character creation, and later level ups, is one of the most important thing to do in the game. Here you choose you basic abilities, traits and skills. It can take a while to create a character and se-
LINUX GAMING
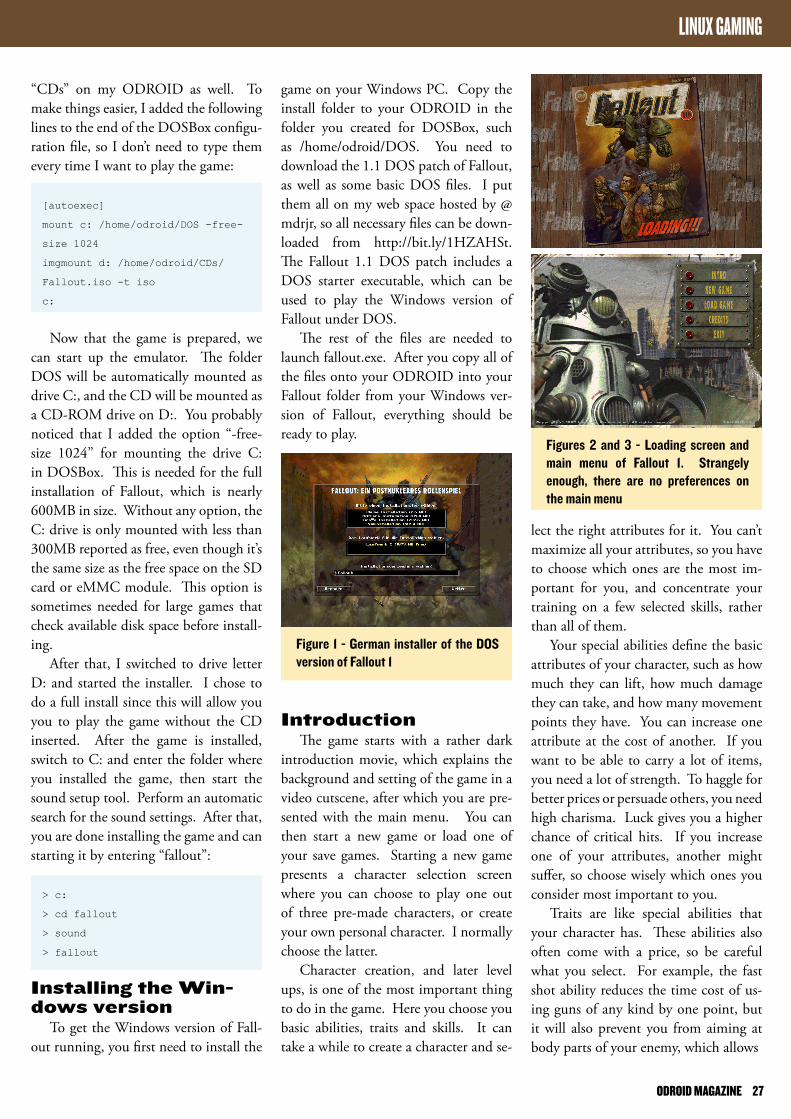
Figure 1 - German installer of the DOS version of Fallout 1
lect the right attributes for it. You can’t maximize all your attributes, so you have to choose which ones are the most im-portant for you, and concentrate your training on a few selected skills, rather than all of them.
Your special abilities define the basic attributes of your character, such as how much they can lift, how much damage they can take, and how many movement points they have. You can increase one attribute at the cost of another. If you want to be able to carry a lot of items, you need a lot of strength. To haggle for better prices or persuade others, you need high charisma. Luck gives you a higher chance of critical hits. If you increase one of your attributes, another might suffer, so choose wisely which ones you consider most important to you.
Traits are like special abilities that your character has. These abilities also often come with a price, so be careful what you select. For example, the fast shot ability reduces the time cost of us-ing guns of any kind by one point, but it will also prevent you from aiming at body parts of your enemy, which allows
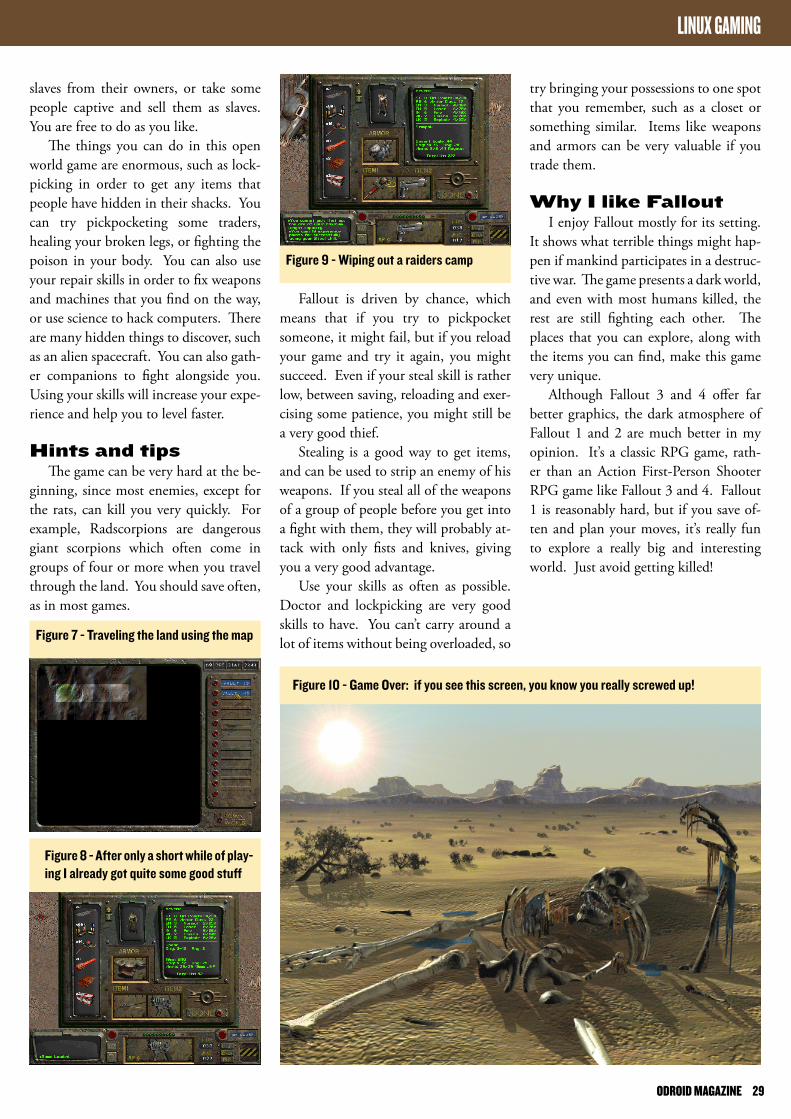
Figures 2 and 3 - Loading screen and main menu of Fallout 1. Strangely enough, there are no preferences on the main menu
“CDs” on my ODROID as well. To make things easier, I added the following lines to the end of the DOSBox configu-ration file, so I don’t need to type them every time I want to play the game:
[autoexec]
mount c: /home/odroid/DOS -free-
size 1024
imgmount d: /home/odroid/CDs/
Fallout.iso -t iso
c:
Now that the game is prepared, we can start up the emulator. The folder DOS will be automatically mounted as drive C:, and the CD will be mounted as a CD-ROM drive on D:. You probably noticed that I added the option “-free-size 1024” for mounting the drive C: in DOSBox. This is needed for the full installation of Fallout, which is nearly 600MB in size. Without any option, the C: drive is only mounted with less than 300MB reported as free, even though it’s the same size as the free space on the SD card or eMMC module. This option is sometimes needed for large games that check available disk space before install-ing.
After that, I switched to drive letter D: and started the installer. I chose to do a full install since this will allow you you to play the game without the CD inserted. After the game is installed, switch to C: and enter the folder where you installed the game, then start the sound setup tool. Perform an automatic search for the sound settings. After that, you are done installing the game and can starting it by entering “fallout”:
> c:
> cd fallout
> sound
> fallout
Installing the Win-dows version
To get the Windows version of Fall-out running, you first need to install the
ODROID MAGAZINE 27

strategically plan your next moves, while considering the moves from your ene-mies. Like your character, your enemies have a certain amount of AP, which allow them to move and attack. Sometimes it’s wiser to just walk away a few steps so the enemy has to walk towards you, and therefore use up most of its AP, which means it can not attack you. On your next turn, you have your full amount of AP and can strike first.
If you look at the picture of our char-acter fighting a rat in Figure 5, you’ll see that it shows the chance to hit the enemy over the enemy when you try to attack it. That way, you get an idea of how likely you will hurt or kill an enemy. The bet-ter your skill level for a certain type of weapon, the more likely you’re going to hit the enemy with that type.
The game mechanics are similar to most other RPG games. You walk around, talk to people, accept quests, fight, level up and upgrade your skills. You can improve your character and equipment, and buy or steal items. Money is always useful, but you’ll nev-er have enough of it (like in real life). What makes the game unique is its dark setting, the characters you deal with, and the things that you encounter.
Fallout has day and night cycles and a huge map to explore, with random events and encounter while traveling through the land. You are virtually free to do whatever you like in this game. Do you find it troublesome to solve quests for some villagers? Are they starting to make you mad, and don’t give you any reward for your hard work? If you want to just wipe out an entire village and take what they owe you, you can do that in Fallout. If an NPC is aggravating you, go ahead and shoot him. If his friends are trying to gang up on you, you can blast them away as well. Has a villager gotten caught in the crossfire and is now attacking you? Just keep firing! Acci-dents happen, and sometimes they result in wiping out an entire village in Fallout. You can choose if you want to free some
supposed to get a new water chip for your Vault. It also tells you that there is another Vault nearby that you should visit. That’s about all the information that you get. The start of the game can be a little bit difficult, since there is no real tutorial except for an NPC that tells you how to play the game. When the game first came out, you were supposed to read the manual to find out informa-tion like this.
You start in a cave infested with a bunch of rats, which you can use to train up a little and learn how to fight. Al-though you probably have a gun, you are better off using a knife at first, so open your inventory, setup your character and start exploring the world.
The game is played in 3rd person isometric view. You follow your charac-ter, but can also scroll away from your character in order to explore your sur-rounding. You can walk freely until you get into a fight, which is when the game switches to a turn-based mode.
During fights, you have to choose what actions you want to perform, and
you to selectively send a bullet to the head of your enemy rather than the ar-mored chest. The gifted ability, which will increase your beginning attributes and skills, will make the start of the game much easier, but also reduces the speed at which you learn new things, making it harder for you in the end. Fast metabolism will heal you faster, but will also spread poison through your body more quickly. Chemical resistance will prevent you from getting a drug addic-tion, but will also cause drugs that im-prove your abilities to wear off much faster, while chemical reliance will do ex-actly the opposite. Choosing traits can also be very important and will affect the development of your character.
SkillsSkills define how good you are with
the use of certain types of weapons or fighting styles, as well as abilities like first aid and lockpicking. You can choose three “tag skills,” which have higher starting attributes as well as double-speed leveling if you distribute points into them during a level-up.
There is a lot to consider when creat-ing a new character, but it also offers a lot of opportunities and gives the game a higher replay value in trying out a differ-ent approach each time.
GameplayAfter you pick your character, a sec-
ond introduction tells you that you’re
Figure 4 - The character creation screen of Fallout 1 using the SPECIAL (Strength, Perception, Endurance, Charisma, Intel-ligence, Agility, Luck) system
Figure 5 - The game starts with us leav-ing the Vault 13 our home
Figure 6 - Fighting rats isn’t really hard but a good training
LINUX GAMING
ODROID MAGAZINE 28
try bringing your possessions to one spot that you remember, such as a closet or something similar. Items like weapons and armors can be very valuable if you trade them.
Why I like FalloutI enjoy Fallout mostly for its setting.
It shows what terrible things might hap-pen if mankind participates in a destruc-tive war. The game presents a dark world, and even with most humans killed, the rest are still fighting each other. The places that you can explore, along with the items you can find, make this game very unique.
Although Fallout 3 and 4 offer far better graphics, the dark atmosphere of Fallout 1 and 2 are much better in my opinion. It’s a classic RPG game, rath-er than an Action First-Person Shooter RPG game like Fallout 3 and 4. Fallout 1 is reasonably hard, but if you save of-ten and plan your moves, it’s really fun to explore a really big and interesting world. Just avoid getting killed!
Fallout is driven by chance, which means that if you try to pickpocket someone, it might fail, but if you reload your game and try it again, you might succeed. Even if your steal skill is rather low, between saving, reloading and exer-cising some patience, you might still be a very good thief.
Stealing is a good way to get items, and can be used to strip an enemy of his weapons. If you steal all of the weapons of a group of people before you get into a fight with them, they will probably at-tack with only fists and knives, giving you a very good advantage.
Use your skills as often as possible. Doctor and lockpicking are very good skills to have. You can’t carry around a lot of items without being overloaded, so
slaves from their owners, or take some people captive and sell them as slaves. You are free to do as you like.
The things you can do in this open world game are enormous, such as lock-picking in order to get any items that people have hidden in their shacks. You can try pickpocketing some traders, healing your broken legs, or fighting the poison in your body. You can also use your repair skills in order to fix weapons and machines that you find on the way, or use science to hack computers. There are many hidden things to discover, such as an alien spacecraft. You can also gath-er companions to fight alongside you. Using your skills will increase your expe-rience and help you to level faster.
Hints and tipsThe game can be very hard at the be-
ginning, since most enemies, except for the rats, can kill you very quickly. For example, Radscorpions are dangerous giant scorpions which often come in groups of four or more when you travel through the land. You should save often, as in most games.
Figure 7 - Traveling the land using the map
Figure 8 - After only a short while of play-ing I already got quite some good stuff
Figure 10 - Game Over: if you see this screen, you know you really screwed up!
LINUX GAMING
Figure 9 - wiping out a raiders camp
ODROID MAGAZINE 29
It’s recommended by the manufacturer as a set-up that yields good measurements. Second, soldering an SHT15 is difficult. To make things easier, this tutorial uses a pre-manufactured SHT15 sensor board.
Required SuppliesTo get started, the following parts and tools are needed:
• ODROID (http://bit.ly/1QPVZa9)• ODROID tinkering kit (http://bit.ly/1LmFcdf )• SHT15 sensor board (http://bit.ly/1qd22ZL)• Wires• Soldering iron and solder
Once you have the SHT15 sensor board, make the follow-ing connections after soldering wires to it:
• Connect VCC to the ODROID’s +3.3V power source• Connect DATA to the ODROID’s GPIO pin #100• Connect SCK to the ODROID’s GPIO pin #97• Connect GND to the ODROID’s GND
This project’s goal is to use an ODROID to read tempera-ture and humidity data from an SHT15 sensor, as well as explaining how an ODROID communicates with an
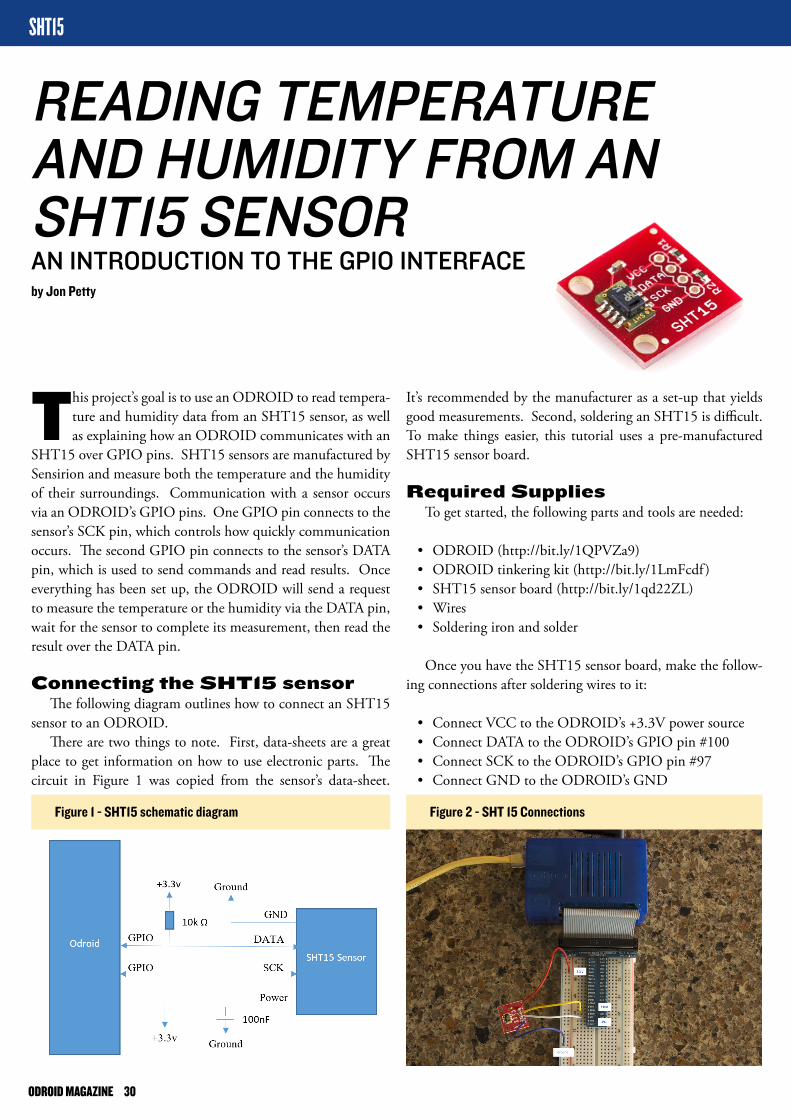
SHT15 over GPIO pins. SHT15 sensors are manufactured by Sensirion and measure both the temperature and the humidity of their surroundings. Communication with a sensor occurs via an ODROID’s GPIO pins. One GPIO pin connects to the sensor’s SCK pin, which controls how quickly communication occurs. The second GPIO pin connects to the sensor’s DATA pin, which is used to send commands and read results. Once everything has been set up, the ODROID will send a request to measure the temperature or the humidity via the DATA pin, wait for the sensor to complete its measurement, then read the result over the DATA pin.
Connecting the SHT15 sensorThe following diagram outlines how to connect an SHT15
sensor to an ODROID.There are two things to note. First, data-sheets are a great
place to get information on how to use electronic parts. The circuit in Figure 1 was copied from the sensor’s data-sheet.
READInG TEMpERATuRE AnD HuMIDITY FROM An SHT15 SEnSORAn InTRODuCTIOn TO THE GpIO InTERFACEby Jon Petty
SHT15
Figure 1 - SHT15 schematic diagram Figure 2 - SHT 15 Connections
ODROID MAGAZINE 30

$ echo out > \
/sys/class/gpio/gpio100/direction
The next command changes GPIO pin 100 to read mode.
$ echo in > \
/sys/class/gpio/gpio100/direction
To determine which mode a GPIO pin is in, you can read the “direction” value. For example, the following com-mand determines whether GPIO pin 100 is in read mode or write mode.
$ cat \
/sys/class/gpio/gpio100/direction
The second important file to take note of is “value”. For GPIO pin 100, it’s found at /sys/class/gpio/gpio100/val-ue. Reading and writing binary data is done using the “value” file. If the pin is in write mode, the “value” file is used to output binary data. If the pin is in read mode, the “value” file is again used, but in this case it reads binary data from the pin. To demonstrate this, we can run a small test to see if the circuit board is connected correctly. When initially con-nected, the DATA pin should be HIGH and the SCK pin should be LOW. To determine if this is the case, first change both pins to read mode.
$ echo in > \
/sys/class/gpio/gpio100/direction
$ echo in > \
/sys/class/gpio/gpio97/direction
Next, read the GPIO value for each pin.
$ cat \
/sys/class/gpio/gpio100/value
$ cat \
/sys/class/gpio/gpio97/value
Pin 100 (DATA) should print a value of “1”, and pin 97 (SCK) should print a
GPIO pins are located in the /sys/class/gpio directory:
$ cd /sys/class/gpio
A program called “export” is in this directory, which initializes connections with GPIO pins. A pin needs to be ini-tialized before data can be read from it or written to it. To initialize a connec-tion, pass the identification number of the pin.
In this tutorial, we connected the SHT15 sensor’s DATA pin to GPIO pin 100, and the sensor’s SCK pin to GPIO pin 97. These two connections are ini-tialized with the following two com-mands.
$ echo 100 > /sys/class/gpio/ex-
port
$ echo 97 > /sys/class/gpio/ex-
port
After these commands complete, you should find the following newly created directories:
/sys/class/gpio/gpio100
/sys/class/gpio/gpio97
These directories contain everything needed to read and write data from their corresponding GPIO pins. The first im-portant file to take note of is “direction.” For GPIO pin 100, it’s found in the file /sys/class/gpio/gpio100/direction. The “direction” file changes a pin between read mode and write mode. You cannot simultaneously read and write data at the same time on a single pin. You can, however, have multiple pins where some are reading data and others are writing data.
A pin can be changed to write mode by writing a value of “out” to the “direc-tion” file. Likewise, a pin can be changed to read mode by writing a value of “in” to the “direction” file. For example, the following command changes GPIO pin 100 to write mode:
You should end up with something that looks like Figure 2.
Reading and Writing GPIO values
GPIO pin stands for general-purpose input/output pin. How many of them your ODROID has depends on the model, but in all cases, they’re used to read and write binary data. Binary data is data with only two states, commonly referred to as HIGH and LOW, or 1 and 0. Physically, a HIGH value means the pin voltage is +3.3 volts, and a LOW value means the pin voltage is +0.0 volts. Note that the voltage level depends on the device. For example, an Arduino op-erates from +5.0 volts to +0.0 volts. If the ODROID is writing data to a GPIO the pin, it will change the voltage be-tween +3.3 volts and +0.0 volts depend-ing on if HIGH or LOW has been writ-ten. If the ODROID is reading data, it will measure HIGH when +3.3 volts is applied to the pin, and LOW when +0.0 volts is applied to the pin.
For this project, we’re going to read and write data to and from two GPIO pins. At a high level, this involves the following steps:
• Connect your ODROID GPIO pins to the sensor
• Login to Linux on the ODROID and navigate to the GPIO directory
• Initialize a connection with the two connected GPIO pins (one for DATA and one for SCK)
• When needed, set the pins to write mode and write data
• When needed, set the pins to read mode and read data
To get started, login to your ODROID and open up a command line terminal. Some of the following commands need to be executed as root, which can be done with the following command:
$ sudo su -
SHT15
ODROID MAGAZINE 31
while transmitting each bit over DATA allows the ODROID to send measurement requests to the sensor.
The last section of note in the diagram above is the ACK section, also known as the acknowledgement section. In this section, the ODROID changes the DATA pin to read mode. This causes it to read values written by the sensor. If the SHT15 sensor correctly received the command, it will write a value of 0 to DATA during the ACK section, then change DATA to 1. The ODROID continues to control the value of SCK in write mode, and it takes a moment for the sensor to record a measurement.
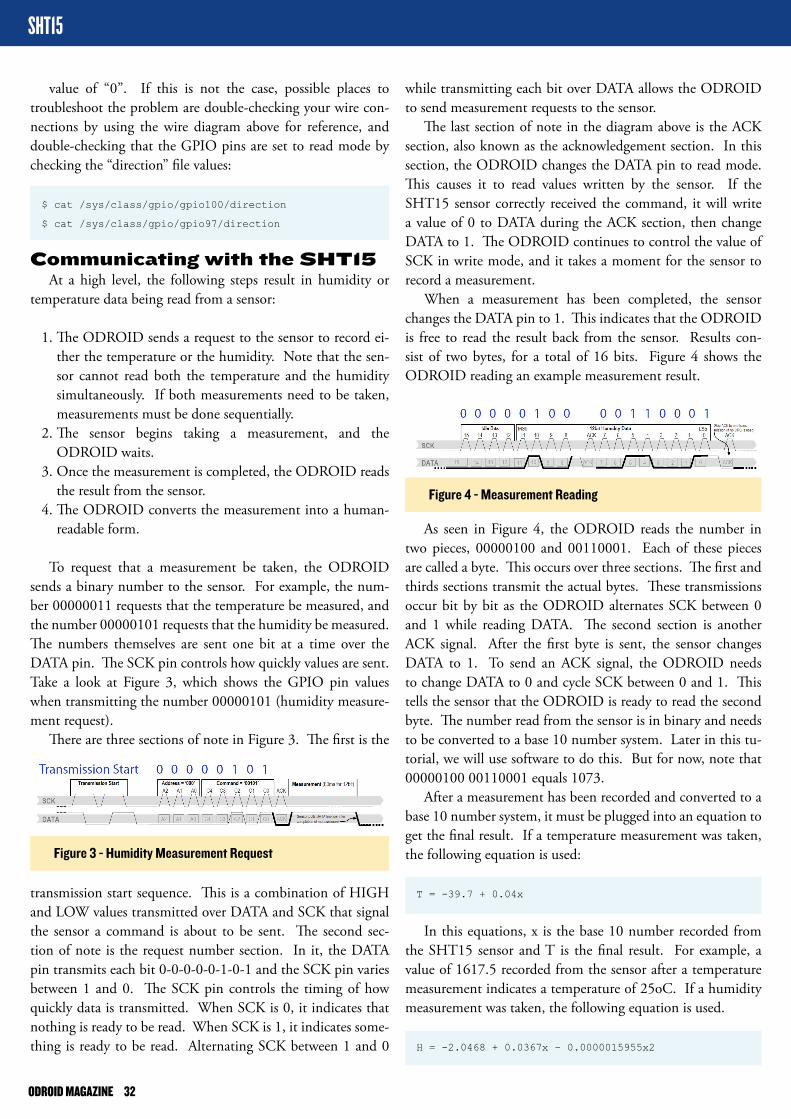
When a measurement has been completed, the sensor changes the DATA pin to 1. This indicates that the ODROID is free to read the result back from the sensor. Results con-sist of two bytes, for a total of 16 bits. Figure 4 shows the ODROID reading an example measurement result.
As seen in Figure 4, the ODROID reads the number in two pieces, 00000100 and 00110001. Each of these pieces are called a byte. This occurs over three sections. The first and thirds sections transmit the actual bytes. These transmissions occur bit by bit as the ODROID alternates SCK between 0 and 1 while reading DATA. The second section is another ACK signal. After the first byte is sent, the sensor changes DATA to 1. To send an ACK signal, the ODROID needs to change DATA to 0 and cycle SCK between 0 and 1. This tells the sensor that the ODROID is ready to read the second byte. The number read from the sensor is in binary and needs to be converted to a base 10 number system. Later in this tu-torial, we will use software to do this. But for now, note that 00000100 00110001 equals 1073.
After a measurement has been recorded and converted to a base 10 number system, it must be plugged into an equation to get the final result. If a temperature measurement was taken, the following equation is used:
T = -39.7 + 0.04x
In this equations, x is the base 10 number recorded from the SHT15 sensor and T is the final result. For example, a value of 1617.5 recorded from the sensor after a temperature measurement indicates a temperature of 25oC. If a humidity measurement was taken, the following equation is used.
H = -2.0468 + 0.0367x – 0.0000015955x2
value of “0”. If this is not the case, possible places to troubleshoot the problem are double-checking your wire con-nections by using the wire diagram above for reference, and double-checking that the GPIO pins are set to read mode by checking the “direction” file values:
$ cat /sys/class/gpio/gpio100/direction
$ cat /sys/class/gpio/gpio97/direction
Communicating with the SHT15At a high level, the following steps result in humidity or
temperature data being read from a sensor:
1. The ODROID sends a request to the sensor to record ei-ther the temperature or the humidity. Note that the sen-sor cannot read both the temperature and the humidity simultaneously. If both measurements need to be taken, measurements must be done sequentially.
2. The sensor begins taking a measurement, and the ODROID waits.
3. Once the measurement is completed, the ODROID reads the result from the sensor.
4. The ODROID converts the measurement into a human-readable form.
To request that a measurement be taken, the ODROID sends a binary number to the sensor. For example, the num-ber 00000011 requests that the temperature be measured, and the number 00000101 requests that the humidity be measured. The numbers themselves are sent one bit at a time over the DATA pin. The SCK pin controls how quickly values are sent. Take a look at Figure 3, which shows the GPIO pin values when transmitting the number 00000101 (humidity measure-ment request).
There are three sections of note in Figure 3. The first is the
transmission start sequence. This is a combination of HIGH and LOW values transmitted over DATA and SCK that signal the sensor a command is about to be sent. The second sec-tion of note is the request number section. In it, the DATA pin transmits each bit 0-0-0-0-0-1-0-1 and the SCK pin varies between 1 and 0. The SCK pin controls the timing of how quickly data is transmitted. When SCK is 0, it indicates that nothing is ready to be read. When SCK is 1, it indicates some-thing is ready to be read. Alternating SCK between 1 and 0
Figure 3 - Humidity Measurement Request
Figure 4 - Measurement Reading
SHT15
ODROID MAGAZINE 32
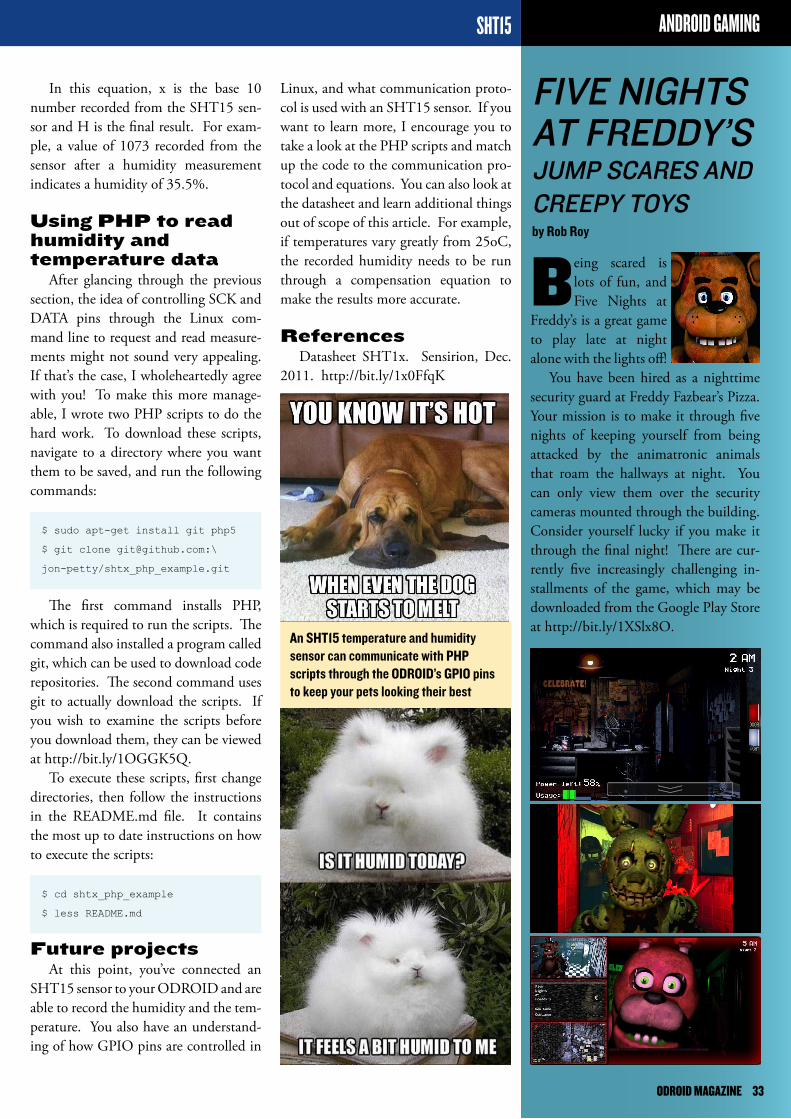
Linux, and what communication proto-col is used with an SHT15 sensor. If you want to learn more, I encourage you to take a look at the PHP scripts and match up the code to the communication pro-tocol and equations. You can also look at the datasheet and learn additional things out of scope of this article. For example, if temperatures vary greatly from 25oC, the recorded humidity needs to be run through a compensation equation to make the results more accurate.
ReferencesDatasheet SHT1x. Sensirion, Dec.
2011. http://bit.ly/1x0FfqK
SHT15 ANDROID GAMING
An SHT15 temperature and humidity sensor can communicate with PHP scripts through the ODROID’s GPIO pins to keep your pets looking their best
In this equation, x is the base 10 number recorded from the SHT15 sen-sor and H is the final result. For exam-ple, a value of 1073 recorded from the sensor after a humidity measurement indicates a humidity of 35.5%.
Using PHP to read humidity and temperature data
After glancing through the previous section, the idea of controlling SCK and DATA pins through the Linux com-mand line to request and read measure-ments might not sound very appealing. If that’s the case, I wholeheartedly agree with you! To make this more manage-able, I wrote two PHP scripts to do the hard work. To download these scripts, navigate to a directory where you want them to be saved, and run the following commands:
$ sudo apt-get install git php5
$ git clone [email protected]:\
jon-petty/shtx_php_example.git
The first command installs PHP, which is required to run the scripts. The command also installed a program called git, which can be used to download code repositories. The second command uses git to actually download the scripts. If you wish to examine the scripts before you download them, they can be viewed at http://bit.ly/1OGGK5Q.
To execute these scripts, first change directories, then follow the instructions in the README.md file. It contains the most up to date instructions on how to execute the scripts:
$ cd shtx_php_example
$ less README.md
Future projectsAt this point, you’ve connected an
SHT15 sensor to your ODROID and are able to record the humidity and the tem-perature. You also have an understand-ing of how GPIO pins are controlled in
FIVE nIGHTSAT FREDDY’SJuMp SCARES AnDCREEpY TOYSby Rob Roy
Being scared is lots of fun, and Five Nights at
Freddy’s is a great game to play late at night alone with the lights off!
You have been hired as a nighttime security guard at Freddy Fazbear’s Pizza. Your mission is to make it through five nights of keeping yourself from being attacked by the animatronic animals that roam the hallways at night. You can only view them over the security cameras mounted through the building. Consider yourself lucky if you make it through the final night! There are cur-rently five increasingly challenging in-stallments of the game, which may be downloaded from the Google Play Store at http://bit.ly/1XSlx8O.
ODROID MAGAZINE 33
Getting startedYou need at least cmake-version
2.8.11, which is available on most sys-tems. Simply install the cmake-version which is provided along with the dis-tributions, except for Debian Wheezy, which requires the installation of a more recent version. The easiest way to do this is to install the versions from the back-port repository:
$ sudo apt-get install -t wheezy-
backports cmake
After you made sure to have a suit-able version of cmake, clone the Solarus engine:
$ git clone git://github.com/
christopho/solarus
$ cd solarus
You will also need some dev pack-ages:
$ sudo apt-get install libsdl2-
dev \
libsdl2-image-dev libsdl2-ttf-
dev \
libphysfs-dev libluajit-5.1-dev
Solarus uses some c++ functions which are implemented only in version 4.8, so the 4.7.2 version in Wheezy does not support them. Verify your gcc ver-
Do you remember the days when you played Zelda: A Link to the Past and could not stop playing
until you made it to the end at least one time? Well, the past still lives on in some really well made Zelda fan games. This means new huge worlds and dungeons waiting to be explored and bad enemies needing to be conquered, so it is time to pick up your old 2D sword again. It is all open source and made by fans for fans and is not connected to Nintendo in any way, except from using the story and some resources of the original Zelda games.
Not only do the engine and the games work on the ODROID, but the Solarus editor can also be used to create new worlds and adventures. If you like to tell others your stories and let them solve your riddles, that might be a nice option for you.
sion with the command “gcc --version”. If you have version 4.8 or newer, ignore this step and continue on to the com-pilation section. If you use such an old version of gcc, you have to apply the following patch, which gets rid of those newer functions without affecting game-play. To ensure that the patch is viable, we will check out a suitable commit. For more recent commits, you might have to alter the source code in a similar way as the patch does.
$ git checkout 4a662991f-
967251101a32bd58dced44f0f3cf300
$ wget -O patch.txt http://paste-
bin.com/raw.php?i=p5qLknQd
$ patch -p0 < patch.txt
After that, you can compile and in-stall the engine:
$ mkdir build
$ cd build
$ cmake ..
$ make -j5
$ sudo make install
At this time, three full games exist that make use of the Solarus engine. You have to create the gamedata and start So-larus with that data in order to be able to play.
Before installing any game data, in-stall glshim so that the games will run
FAn-MADE ZELDA GAMESYOuR FAVORITE FAnTASY wORLD EXpAnDSby Oliver Schmitt
SOLARUS
Figure 1 - Link and Zelda
ODROID MAGAZINE 34

Zelda: Mystery of Solarus DX
This is the game the whole engine originally was designed for. It is a sequel to A Link to the Past. You have to pro-tect the Triforce, save some children and, in the end, restore peace in Hyrule.
First, clone the game and build the package:
$ git clone git://github.com/
christopho/zsdx
$ cd zsdx/build
$ cmake ..
$ make -j5
Change the file zsdx so that it looks like this:
#!/bin/sh
export LD_LIBRARY_PATH=”/usr/lo-
cal/lib/arm-linux-gnueabihf/;/
usr/local/lib/”
solarus_run /usr/local/share/so-
larus/zsdx
Finally, install and start the game:
$ sudo make install
$ zsdx
Once you start the game, the config-uration will be saved in the folder ~/.so-larus/zsdx. General settings are saved in settings.dat. Saved game settings have their own files, such as the mapping of your joypad or keyboard. To use an Xbox 360 controller, run the following commands prior to starting the game:
$ sudo apt-get install xboxdrv
$ sudo xboxdrv --dpad-only --si-
lent &
Zelda: Mystery of Solarus XD
Mystery of Solarus XD was started as an April 1st joke, but it’s still worth a look, with two huge dungeons and sev-eral hours of gameplay. It is really fun to play, as there are not only dungeons
using OpenGLES:
$ cd ~/Downloads
$ mkdir glshim
$ cd glshim
$ wget http://oph.mdrjr.net/
meveric/other/freeorion/libgl-
odroid_20150922-1_armhf.deb
$ sudo apt-get install gdebi
$ sudo gdebi libgl*.deb
Then, link the Mali drivers (on the XU3 and XU4, use libmali.so instead of libMali.so):
$ ln -sf /usr/lib/arm-linux-gnue-
abihf/mali-egl/libMali.so /usr/
lib/arm-linux-gnueabihf/libEGL.so
$ ln -sf /usr/lib/arm-linux-
gnueabihf/mali-egl/libMali.so /
usr/lib/arm-linux-gnueabihf/lib-
GLESv1_CM.so
$ ln -sf /usr/lib/arm-linux-
gnueabihf/mali-egl/libMali.so /
usr/lib/arm-linux-gnueabihf/lib-
GLESv2.so
SOLARUS
to explore but also a lot of jokes, and even Yoda has a guest appearance. If you have ever wondered what bureaucracy in Hyrule is like, this game will give you the answer.
First clone and build it:
$ git clone git://github.com/
christopho/zsxd
$ cd zsxd/build
$ cmake ..
$ make -j5
Change the file zsxd like before so that it matches the following content:
#!/bin/sh
export LD_LIBRARY_PATH=”/usr/lo-
cal/lib/arm-linux-gnueabihf/;/
usr/local/lib/”
solarus_run /usr/local/share/so-
larus/zsxd
Finally, install and launch the game:
$ sudo make install
$ zsxd
Figure 3 - The Legend of Zelda Mystery of Solarus screenshot
Figure 2 - The Legend of Zelda Mystery of Solarus logo
Figure 4 - The Legend of Zelda Mystery of Solarus XD Logo
Figure 5 - The Legend of Zelda Mystery of Solarus XD screenshot with Yoda
ODROID MAGAZINE 35

The editor may be launched with the following command:
$ LD_LIBRARY_PATH=”/usr/local/
lib/arm-linux-gnueabihf/;/usr/lo-
cal/lib/” solarus-quest-editor
Good luck in your adventures of game creation!
Non-Solarus gamesBesides the Solarus engine, there are
also other fan games which work on the ODROIDs. We already know the first on the list, but we will describe this in detail because the others can be built the same way. One such game is Zelda: Re-turn of the Hylian in its original version.
The story is summarized on the homepage: “After Link’s victory over Ganon (in A Link to the Past), no one knows what Link’s wish to the Triforce was. But this wish reunified the Light World and the Dark World and brought the 7 wise men’s descendants back to life. Peace was back in Hyrule. Unfortunate-
$ sudo make install
$ zelda_roth_se
Create your ownAs mentioned above, you may also
create your own games with the editor for the Solarus engine. It runs directly on the ODROID. After you have com-piled and installed it with the instruc-tions below, a good starting point for development is http://bit.ly/1OFrdTJ, where you may find resource packages and some nice video tutorials.
To build the Solarus editor, first clone the repository and prepare your system. You will need the following develop-ment packages:
$ sudo apt-get install qtbase5-
dev qttools5-dev qttools5-dev-
tools
On Debian Wheezy, these should be installed from the backports repository:
$ sudo apt-get install -t wheezy-
backports qtbase5-dev qttools5-
dev qttools5-dev-tools
After that, clone and build:
$ git clone git://github.com/
christopho/solarus-quest-editor
$ cd solarus-quest-editor
$ mkdir build
$ cd build
$ cmake ..
$ make -j5
$ sudo make install
Zelda: Return of the Hylian SE
A remake of Vincent Jouillat’s game was also implemented with this engine. First, clone the source code and build it:
$ git clone --branch solarus-1.5
\
git://github.com/christopho/
zelda_roth_se
$ cd zelda_roth_se
$ mkdir build
$ cd build
$ cmake ..
$ make -j5
Then, change the file zelda_roth_se so that it matches the following content:
#!/bin/sh
export LD_LIBRARY_PATH=”/usr/lo-
cal/lib/arm-linux-gnueabihf/;/
usr/local/lib/”
solarus_run /usr/local/share/so-
larus/zelda_roth_se
Finally, install the game:
Figure 6 - The Legend of Zelda Return of the Hylian Solarus Edition Logo
Figure 7 - The Legend of Zelda Return of the Hylian Solarus Edition screenshot
Figure 8 - Solarus editor
Figure 9 - Return of the Hylian game title screen
Figure 10 - Return of the Hylian gameplay screenshot
SOLARUS
ODROID MAGAZINE 36
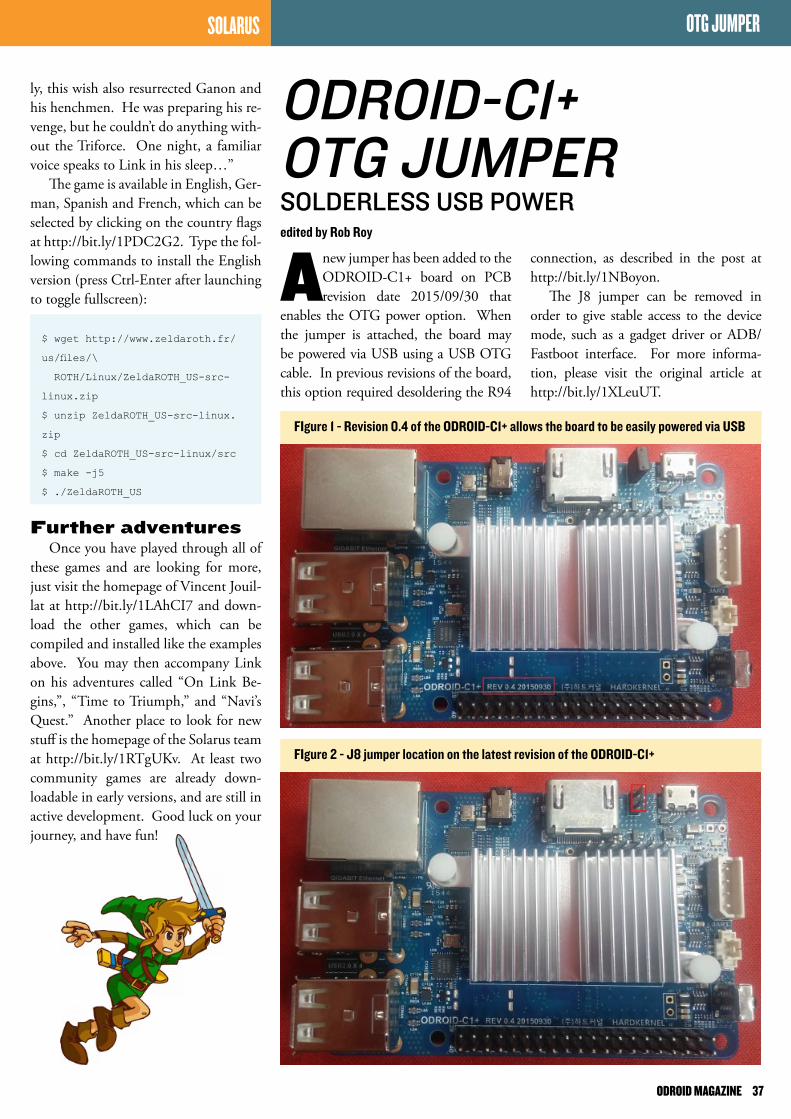
A new jumper has been added to the ODROID-C1+ board on PCB revision date 2015/09/30 that
enables the OTG power option. When the jumper is attached, the board may be powered via USB using a USB OTG cable. In previous revisions of the board, this option required desoldering the R94
ly, this wish also resurrected Ganon and his henchmen. He was preparing his re-venge, but he couldn’t do anything with-out the Triforce. One night, a familiar voice speaks to Link in his sleep…”
The game is available in English, Ger-man, Spanish and French, which can be selected by clicking on the country flags at http://bit.ly/1PDC2G2. Type the fol-lowing commands to install the English version (press Ctrl-Enter after launching to toggle fullscreen):
$ wget http://www.zeldaroth.fr/
us/files/\
ROTH/Linux/ZeldaROTH_US-src-
linux.zip
$ unzip ZeldaROTH_US-src-linux.
zip
$ cd ZeldaROTH_US-src-linux/src
$ make -j5
$ ./ZeldaROTH_US
Further adventuresOnce you have played through all of
these games and are looking for more, just visit the homepage of Vincent Jouil-lat at http://bit.ly/1LAhCI7 and down-load the other games, which can be compiled and installed like the examples above. You may then accompany Link on his adventures called “On Link Be-gins,”, “Time to Triumph,” and “Navi’s Quest.” Another place to look for new stuff is the homepage of the Solarus team at http://bit.ly/1RTgUKv. At least two community games are already down-loadable in early versions, and are still in active development. Good luck on your journey, and have fun!
SOLARUS OTG JUMPER
ODROID-C1+OTG JuMpERSOLDERLESS uSB pOwERedited by Rob Roy
FIgure 2 - J8 jumper location on the latest revision of the ODROID-C1+
connection, as described in the post at http://bit.ly/1NBoyon.
The J8 jumper can be removed in order to give stable access to the device mode, such as a gadget driver or ADB/Fastboot interface. For more informa-tion, please visit the original article at http://bit.ly/1XLeuUT.
FIgure 1 - Revision 0.4 of the ODROID-C1+ allows the board to be easily powered via USB
ODROID MAGAZINE 37

Init ServicesAs the name implies, the system
server core task is to initialize the vari-ous system services that need to be run and made available. Failure to start these services will stop the whole Android sys-tem will from booting up, forcing it into what is known as a ”boot loop,” which is a situation where you see the boot ani-mation over and over again.
The following list shows the services that are made available by the system server, some of which are used by user applications. You can use the service list provided by the adb command to print out the services that have been initialized by the system.
0 sip: [android.net.sip.
ISipService]
1 phone: [com.android.inter-
nal.telephony.ITelephony]
2 iphonesubinfo: [com.android.
internal.telephony.IPhoneSubInfo]
3 simphonebook: [com.android.
internal.telephony.IIccPhoneBook]
4 isms: [com.android.internal.
telephony.ISms]
5 media_router: [android.me-
dia.IMediaRouterService]
6 print: [android.print.
IPrintManager]
7 assetatlas: [android.view.
IAssetAtlas]
8 dreams: [android.service.
dreams.IDreamManager]
9 commontime_management: []
10 samplingprofiler: []
11 diskstats: []
….....
37 statusbar: [com.android.
In this article, we are going to take a look at the Android system serv-er. The system server is the main
internal application that takes care of initializing a number of services, such as running the necessary hardware system services that are available on your device, initializing the package manager service (which takes care of package manage-ment such as upgrading, installing, and removing.apk files), and many more im-portant tasks. Failure in starting up the system server will make Android go into a boot loop and render your device use-less. Different versions of Android have different services, so for this article, I am going to discuss Kitkat 4.4.2 for the ODROID-C1.
Life after ZygoteThe application that initiates the
system server process is called Zygote, which is invoked during the bootup init process. You can learn more about Zy-gote from ODROID January edition at http://bit.ly/1MOtlH5. The code re-sides inside ZygoteInit.java, as shown in Figure 1. This particular code snippet is responsible for starting up system server.
internal.statusbar.IStatusBarSer-
vice]
38 device_policy: [android.
app.admin.IDevicePolicyManager]
39 lock_settings: [com.an-
droid.internal.widget.ILockSet-
tings]
40 mount: [IMountService]
….....
50 alarm: [android.app.IAlarm-
Manager]
51 consumer_ir: [android.hard-
ware.IConsumerIrService]
52 vibrator: [android.
os.IVibratorService]
….....
64 procstats: [com.android.
internal.app.IProcessStats]
65 activity: [android.app.IAc-
tivityManager]
66 package: [android.content.
pm.IPackageManager]
67 schedul-
ing_policy: [android.
os.ISchedulingPolicyService]
75 SurfaceFlinger: [android.
ui.IsurfaceComposer]
The number of services grows with each version of Android. In the fol-lowing list, you can see services that are made available to user applications in KitKat (http://bit.ly/1X3EchG):
WINDOW_SERVICE (window)
The top-level window manager in which you can place custom windows. The re-turned object is a WindowManager.LAYOUT_INFLATER_SERVICE (layout_in-
flater)
A LayoutInflater for inflating layout re-
ANDROID DEVELOPMENT
AnDROID DEVELOpMEnTInSIDE THE SYSTEM SERVERby Nanik Tolaram
Figure 1 - ZygoteInit.java
ODROID MAGAZINE 38
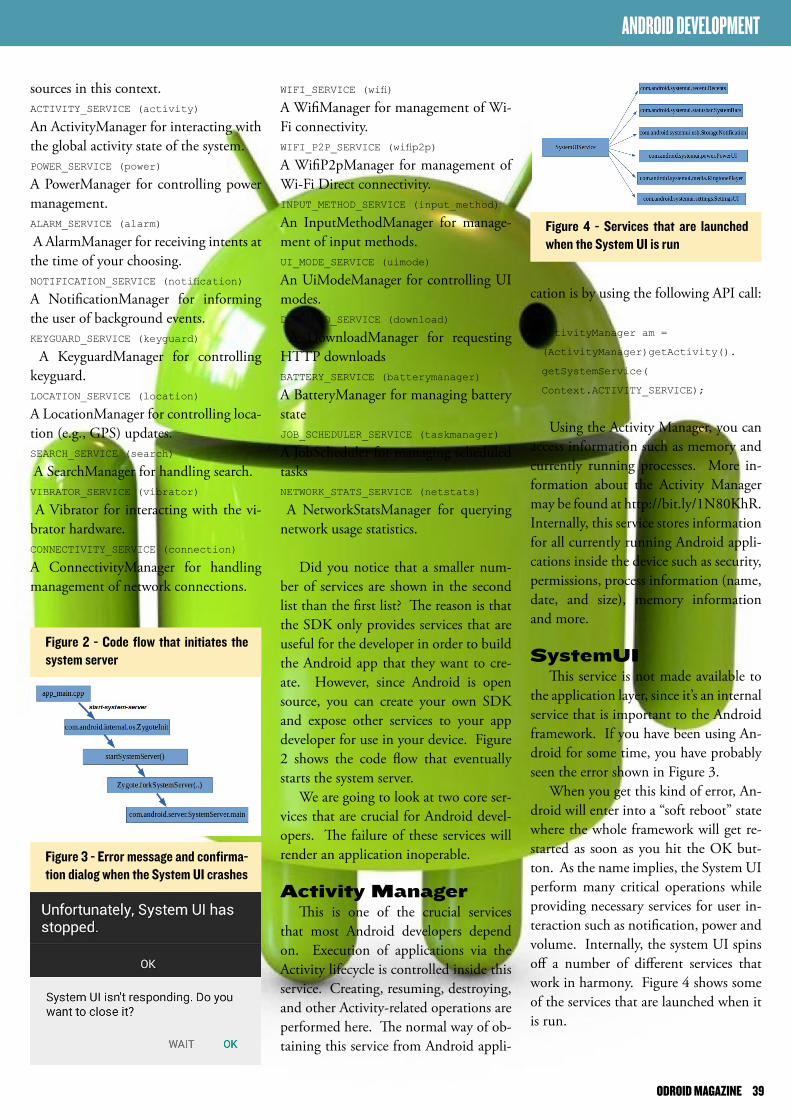
WIFI_SERVICE (wifi)
A WifiManager for management of Wi-Fi connectivity.WIFI_P2P_SERVICE (wifip2p)
A WifiP2pManager for management of Wi-Fi Direct connectivity.INPUT_METHOD_SERVICE (input_method)
An InputMethodManager for manage-ment of input methods.UI_MODE_SERVICE (uimode)
An UiModeManager for controlling UI modes.DOWNLOAD_SERVICE (download)
A DownloadManager for requesting HTTP downloadsBATTERY_SERVICE (batterymanager)
A BatteryManager for managing battery stateJOB_SCHEDULER_SERVICE (taskmanager)
A JobScheduler for managing scheduled tasksNETWORK_STATS_SERVICE (netstats)
A NetworkStatsManager for querying network usage statistics.
Did you notice that a smaller num-
ber of services are shown in the second list than the first list? The reason is that the SDK only provides services that are useful for the developer in order to build the Android app that they want to cre-ate. However, since Android is open source, you can create your own SDK and expose other services to your app developer for use in your device. Figure 2 shows the code flow that eventually starts the system server.
We are going to look at two core ser-vices that are crucial for Android devel-opers. The failure of these services will render an application inoperable.
Activity ManagerThis is one of the crucial services
that most Android developers depend on. Execution of applications via the Activity lifecycle is controlled inside this service. Creating, resuming, destroying, and other Activity-related operations are performed here. The normal way of ob-taining this service from Android appli-
sources in this context.ACTIVITY_SERVICE (activity)
An ActivityManager for interacting with the global activity state of the system.POWER_SERVICE (power)
A PowerManager for controlling power management.ALARM_SERVICE (alarm)
A AlarmManager for receiving intents at the time of your choosing.NOTIFICATION_SERVICE (notification)
A NotificationManager for informing the user of background events.KEYGUARD_SERVICE (keyguard)
A KeyguardManager for controlling keyguard.LOCATION_SERVICE (location)
A LocationManager for controlling loca-tion (e.g., GPS) updates.SEARCH_SERVICE (search)
A SearchManager for handling search.VIBRATOR_SERVICE (vibrator)
A Vibrator for interacting with the vi-brator hardware.CONNECTIVITY_SERVICE (connection)
A ConnectivityManager for handling management of network connections.
ANDROID DEVELOPMENT
cation is by using the following API call:
ActivityManager am =
(ActivityManager)getActivity().
getSystemService(
Context.ACTIVITY_SERVICE);
Using the Activity Manager, you can access information such as memory and currently running processes. More in-formation about the Activity Manager may be found at http://bit.ly/1N80KhR. Internally, this service stores information for all currently running Android appli-cations inside the device such as security, permissions, process information (name, date, and size), memory information and more.
SystemUI
This service is not made available to the application layer, since it’s an internal service that is important to the Android framework. If you have been using An-droid for some time, you have probably seen the error shown in Figure 3.
When you get this kind of error, An-droid will enter into a “soft reboot” state where the whole framework will get re-started as soon as you hit the OK but-ton. As the name implies, the System UI perform many critical operations while providing necessary services for user in-teraction such as notification, power and volume. Internally, the system UI spins off a number of different services that work in harmony. Figure 4 shows some of the services that are launched when it is run.
Figure 3 - Error message and confirma-tion dialog when the System UI crashes
Figure 2 - Code flow that initiates the system server
Figure 4 - Services that are launched when the System UI is run
ODROID MAGAZINE 39

Please tell us a little about yourself.My name is Saleem Almajed. I am 22 years old, and live in
a small country called Bahrain. I’ve always been in love with technology. I like everything about computers, smartphones, and operating systems.
How did you get started with computers?My teacher in primary school, while he was teaching me
basic computing skills, saw that I had a talent to be something in the future. He insisted to my mother that “Saleem has so much potential to be an IT expert, please follow my advice and get him a PC.” So she did, and I started playing with comput-ers since childhood. I got my first Linux operating system after two years of using Windows ME, when I found an article say-
MEET An ODROIDIAnSALEEM ALMAJED (@XEOSAL)EMERGInG TECHnOLOGY EXpERT AnD AVID MuSICIAnedited by Rob Roy
ing that I could actually order an Ubuntu installation CD for free, thanks to Canonical.
What attracted you to the ODROID platform?I was introduced to the ARM embedded computer world
through the Raspberry Pi. After using it for about a month, I decided to look for alternatives, and that’s when I read about the ODROID-C1. It proved to be much better for my pur-poses, especially the dual USB 2.0 buses, Mali GPU, better CPU and RAM. I also liked that there were other, more pow-erful ODROIDs available. I was able to learn a lot about these little computers and their specifications by using them and ex-ploring the ODROID forums, and that’s when I decided to support HardKernel.
How do you use your ODROIDs?I use them mostly as desktop replacements for software,
operating system and kernel development purposes. I also use them as media centers, local servers and retro emulators for my younger brother.
Which ODROID is your favorite?The ODROID-C1.
Although he looks like he’s having fun, Saleem is really thinking about all the projects that he can build with his ODROID-C1
MEET AN ODROIDIAN
Saleem is very talented when it comes to electronics
ODROID MAGAZINE 40
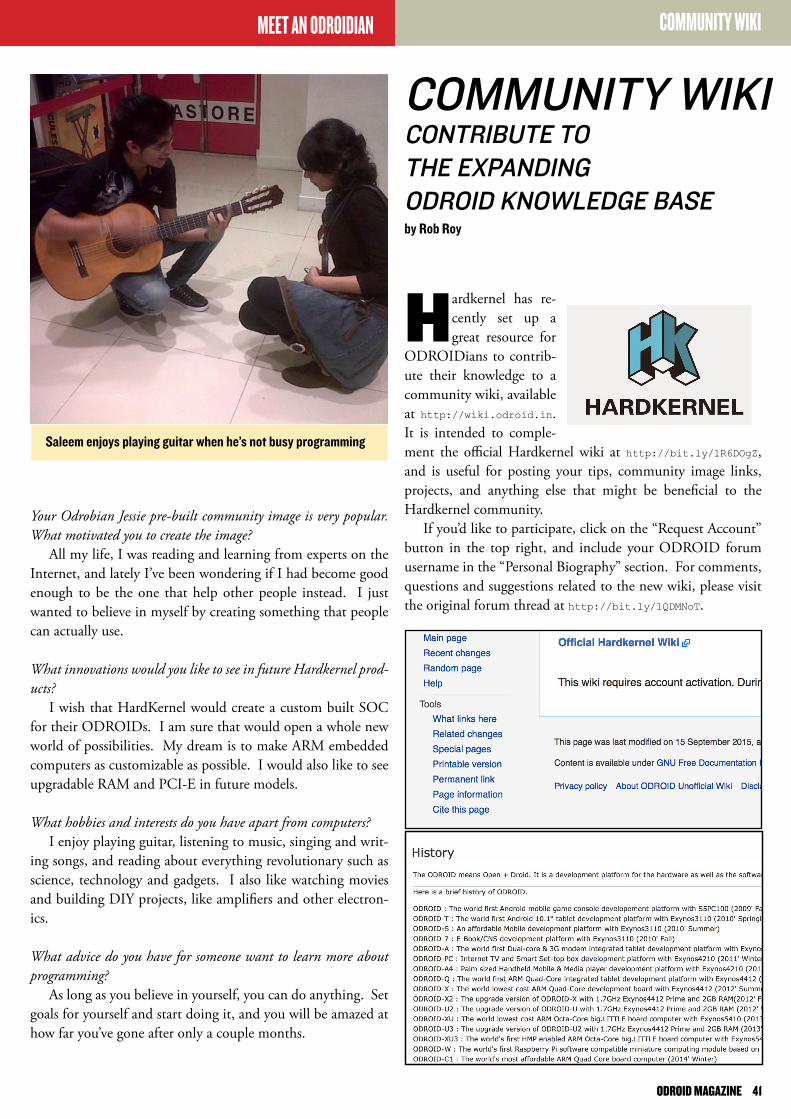
Your Odrobian Jessie pre-built community image is very popular. What motivated you to create the image?
All my life, I was reading and learning from experts on the Internet, and lately I’ve been wondering if I had become good enough to be the one that help other people instead. I just wanted to believe in myself by creating something that people can actually use.
What innovations would you like to see in future Hardkernel prod-ucts?
I wish that HardKernel would create a custom built SOC for their ODROIDs. I am sure that would open a whole new world of possibilities. My dream is to make ARM embedded computers as customizable as possible. I would also like to see upgradable RAM and PCI-E in future models.
What hobbies and interests do you have apart from computers?I enjoy playing guitar, listening to music, singing and writ-
ing songs, and reading about everything revolutionary such as science, technology and gadgets. I also like watching movies and building DIY projects, like amplifiers and other electron-ics.
What advice do you have for someone want to learn more about programming?
As long as you believe in yourself, you can do anything. Set goals for yourself and start doing it, and you will be amazed at how far you’ve gone after only a couple months.
Saleem enjoys playing guitar when he’s not busy programming
MEET AN ODROIDIAN COMMUNITY WIKI
COMMunITY wIKICOnTRIBuTE TO THE EXpAnDInGODROID KnOwLEDGE BASEby Rob Roy
Hardkernel has re-cently set up a great resource for
ODROIDians to contrib-ute their knowledge to a community wiki, available at http://wiki.odroid.in. It is intended to comple-ment the official Hardkernel wiki at http://bit.ly/1R6DOgZ, and is useful for posting your tips, community image links, projects, and anything else that might be beneficial to the Hardkernel community.
If you’d like to participate, click on the “Request Account” button in the top right, and include your ODROID forum username in the “Personal Biography” section. For comments, questions and suggestions related to the new wiki, please visit the original forum thread at http://bit.ly/1QDMNoT.
ODROID MAGAZINE 41