Embed Size (px)
Citation preview

184
Students hear a story of a scientist who studies microbe decomposers, then plan and take a trip outside to collect items for culturing microbes.
Session 1
1. Read and discuss the story of Dr. Elaine Ingham's microbe research.
2. Predict the best places to look for decomposition, and which non-living things will have many and few microbes.
3. Categorize list of non-living things as biotic and abiotic.
4. Plan for trip outside, and learn field techniques.
1 hour * linking to real world
.. * examining prior ideas
.. * generating ideas & questions
* demonstrating methods
Continued
Module 2: Decomposer Dynamics

Session 2 1 hour OUTDOORS
1. Discuss how to behave like scientists while ~ setting standards doing field work.
2. Get oriented to the outdoor site. ~ familiarizing
3. Observe and record evidence of decomposition. , observing & recording
4. Collect non-living items. , investigating
5. Share and discuss observations. ., * processing findings
6. Sequence leaves in various stages of decomposition. ~ applying knowledge
De~ireJ Ou'come~ Throughout the lesson, check that students:
./ Realize that scientists study decomposition to create knowledge that people can use to make wise decisions about how to manage land so it stays fertile .
./ Can give examples of biotic and abiotic items .
./ Are able t.o find evidence of decomposition outdoors.
What You'll Need
Session 1
For the class: o petri dish or other clear container with flat bottom and cover o newsprint sheets for class lists o sandwich-size ziplock baggie o small eraser or piece of chalk
Session 2
For the class: o newsprint for leaf continuum (see "Getting Ready")
For each pair of students: o 2 sandwich-size ziplock baggies o masking tape or permanent marker 02 hand lenses (optional) o ruler (optional)
.2 Stalking the Unseen 185

186
Vocabulary
CULTURE - To grow living things in a prepared substance.
Session 1
·~~k~ . 'I!/ Ii ~t!?i: '. . ,. I 2 W',I';',IIIIIIIIIIIII',14 .',IIIIII,J
• Choose an outdoor location where students can collect non-living items (see "Planning Ahead," page 171).
Session 2 • Prepare a sheet of newsprint for a class leaf decomposition continuum. Position the sheet
horizontally and draw a horizontal line across it. Label the left end of the line "Least Decomposed" and the right end "Most Decomposed".
• Decide on pairs of students to work together, or plan to let them choose partners.
Session 1 We're going to spend several days doing an experiment to learn more about microbes that are decomposers. First I'm going to read a story about a scientist who studies microbes.
Read "Mad About Microbes: The Work of Ecologist Dr. Elaine Ingham" (pages 194-195), pausing where indicated for discussion .
• Follow up with questions such as:
~ What does Dr. Ingham try to find out through her research? % She looks at what different microbes are in different habitats, and at which ones ~ are eating what. She al~o studies how the way people use land affects these % microbes.
% % ~
What are some of the things she has discovered? 1) Even in a small outdoor area the decomposers you find can be completely different depending on where you look.
Module 2: Decomposer Dynamics

2) Bacteria typically eat food that is easy to digest, whereas fungi eat wood and tougher material, so more active fungi than bacteria are usually found in soil near dead trees.
3) Many bacteria on dead plants are in a resting state, waiting for food or conditions that are just right.
4) After forests are clear-cut, there are fewer fungi living in the soil and breaking down the dead plants.
5) When farmers spray crops, they can kill microbes in the soil that they didn't intend to harm.
Why do only a fraction of the microbes that are in a soil sample show up when Dr. Ingham stains them?
The stain only shows microbes that have eaten recently. A lot of microbes "rest" where they land until conditions are just right for them to begin eating.
What does Dr. Ingham's study of microbes have to do with living plants? When microbes break down dead plants, the nutrients that were inside of the plants eventually get back into the soil where new plants can take them up. If it wasn't for microbes breaking down dead plants, living plants wouldn't get the nutrients they need.
During our next session, we're going outside to look for evidence of decomposition, and to collect items that might have decomposer microbes on them.
Tell students where they'll do their outdoor study. If they're familiar with the site, ask them to describe it. You might want to make a list of characteristics they mention.
If the site is not familiar, describe what you saw when you visited it .
• Help students think about searching for decomposition with questions such as:
/. What could we see that would tell us if decomposition is occurring? ~ Students might mention that dead leaves, mushrooms, and small critters such as ~ sow bugs and earthworms are indicators of decomposition. They might also see ~ large items like leaves broken into smaller pieces. Remind them of the threadlike ~ hyphae they saw when they looked at mold, and tell them that they might see ~ thin white strands on dead leaves, on or just below the soil surface. Students ~ might smell slightly pungent odors in a pile of moist leaves, which could ~ also indicate decomposition.
~ ~ ~ ~ ~ ~ ~
Are some places more likely to have evidence of decomposer action than other places?
Students might have an intuitive sense that decomposers prefer moist environments, although they won't confirm this until later in this module when they test conditions that promote decomposition. Students might also suggest dark, shady spots, which are good for decomposers because they retain moisture.
lking the Unseen 187
188
• Where do you think will be the best spots to look for decomposition?
Decomposition happens where there is food for decomposers to consume, so ~ students might suggest looking among dead plant material. If students are familiar ~ with the study site, they might have specific spots in mind for finding ~ decomposition. They might also suggest places that you know are unlikely to ~ have evidence of decomposition. The point is for them to have a plan and reasons ~ in mind for where to look. Later they'll compare what they actually find with Y. what they thought they'd find.
LluHon! If students mention that dead animals are a good place to find evidence of decomposition, tell them that they are not allowed to go near, touch, or collect a dead animal. The kinds of microbes that grow on them can make humans sick. Also do not allow students to touch or collect animal feces, since some of the microbes that can grow on them are also pathogens (disease-causing agents).
When we're outside, you'll work in pairs. Your task will be to find one non-living thing that you think has a lot of decomposer microbes on it, and one that you think does not. Each has to be small enough to fit in these containers.
Show students a few empty petri dishes.
We're going to CULTURE the microbes that are on the things we collect. In other words, we're going to make the microbes grow.
Let's make a list of non-living things we might find on the study site.
Expect that students will raise the distinction between Ifnaturallf non-living things, and nonliving things made by people.
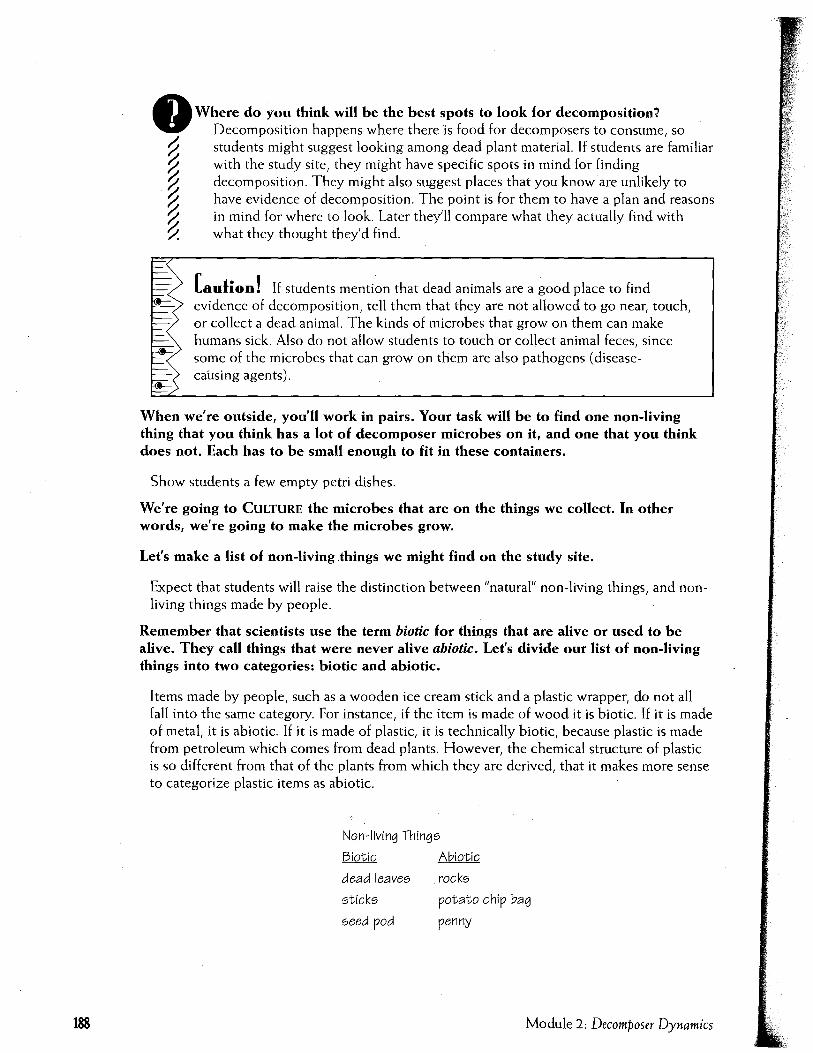
Remember that scientists use the term biotic for things that are alive or used to be alive. They call things that were never alive abiotic. Let's divide our list of non-living things into two categories: biotic and abiotic.
Items made by people, such as a wooden ice cream stick and a plastic wrapper, do not all fall into the same category. For instance, if the item is made of wood it is biotic. If it is made of metal, it is abiotic. If it is made of plastic, it is technically biotic, because plastic is made from petroleum which comes from dead plants. However, the chemical structure of plastic is so different from that of the plants from which they are derived, that it makes more sense to categorize plastic items as abiotic.
Non-living Things
Biotic
dead leaves
sticks
seed pod
Abiotic
rocks
potato chip bag
penny
Module 2.: Decomposer Dynamics

What non-living things should we collect that you predict will have many and few microbes on them?
As students offer suggestions, have them explain why they think some non-living items will have many microbes, and other items will have few. You might want to remind them that microbes only grow on things that they are using for food.
Some students might want to compare the amount of microbes on two biotic items, while others will want to compare a biotic and an abiotic item. Although microbes don't consume abiotic items such as bottle caps, candy wrappers, and pebbles, there are often residues (e.g., sugar, vegetable oil, or soil with dead plant particles) on non-living items that microbes do consume. If students decide to collect these items, this is something you'll have to explain later to help them interpret their culture test results.
Make a list of the comparisons they suggest.
Non-living Things to Compare for Microbes
two different kinds of dead leaves
soil from the surface and soil from below ground
two samples of the same kind of leaf, one newly fallen and one partly decomposed
a pebble and a stick
two samples of the same kind of leaf, one from a wet place and one from a dry place
a plastic wrapper and a leaf
soil beneath plants and soil from an area with no plants
a pine needle and a leaf
When we're outside, each pair will have two plastic bags - one for the non-living item you think has a lot of decomposer microbes on it, and the other for the item you think has few microbes on it.
Keep the bags sealed until you are ready to pick up an item. Then invert the bag over your hand to pick the item up, so that you don't touch it with your bare hands.
Demonstrate the method by picking up a piece of chalk or a small eraser with a plastic bag over your hand.
2.2 Stalking the Unseen 189

~ ~
190
Why is it important not to touch the item or the inside of the bag?
Decomposer microbes feed on our dead skin flakes and body oils. Shielding hands with plastic will prevent microbes, skin, and oils from getting inside the bags.
What do you think will be important information to record in your journals when we're outside?
Have students offer suggestions for what they should record when they collect their items. Recording the date, the name of the item, where they found it, and what itlooks like are some possibilities.
Session 2 Before we>go outside, let's review how scientists behave while doing research.
Have students generate suggestions for how to behave as field ecologists. If your class has not done ecology field work before, see the suggested list of outdoor research behaviors in Lesson 1.2 (page 69).
Each pair needs to label two plastic bags, and each person should bring a journal and a pencil outdoors.
Hand out the baggies and masking tape or permanent markers. Keeping them sealed, have students label them as "Many" and "Few" along with their initials, by writing directly on the bags or on a masking tape label.
In addition to the baggies and journals, you might want students to bring rulers and hand lenses outside to enhance observations.
We also need to review the purpose of our study trip.
Have students tell you the goal of the outdoor excursion - collecting one non-living thing that they think has a lot of decomposer microbes on it, and one that they think does not.
When you arrive at the study site, gather students in a central meeting location. Point out key landmarks that serve as site boundaries.
When you hear this signal (demonstrate a whistle, hand clap, or some other attentiongetting signal), come back to this meeting place. Go ahead and look for evidence of decomposition. Then look for items that you think have a lot and a few decomposer microbes on them. Collect one of each item and take field notes.
While pairs are working, listen to' their discussions as they decide where to look for decomposition, and what items to collect. Encourage them to make careful observations and thorough journal entries about the items they collect. It is especially important that students record where they collected something. For instance, a rock found in a pile of leaves might have plant particles and microbes on it, whereas one found in the open playground on pavement might not.
Module 2: Decomposer Dynamics
r::::::::==- -====a r::::::::=- I -==:::J § f your students haven't experienced Module 1, encourage them to look for non-microbe ~ ~ decomposer organisms (e.g., sow bugs, beetles, termites, worms) in leaf litter and upper soil ..:::S ~ layers. You could also collect some soil and leaf litter to extract hidden invertebrate ~ ~ decomposers using a Berlese funnel (see page 84). ~ r::::::::=- -==:::J c::::= ===-
Everyone come to our meeting place to describe the evidence of decomposition you observed.
Students will probably be ready to share their findings with the whole class after about twenty minutes of collecting and notetaking.
ro FHLD No1cs MA(\tH \~
~lu.Q. JtU\ ~t.~~her -1 \-OI.U"\d.. ~+ u.h~t.r nec...+\-' 50rnt.. d..ecul \e:vts over 'P'-t -the.. ~enc.e. I\- wo..S ~t"\c\.. o~ ~t.+ <U\cl \ooket\,olo.. -111l.t. ·,t wctc;, :>·,+tinC\ thtre ~or 0... \onq lrimt.· -
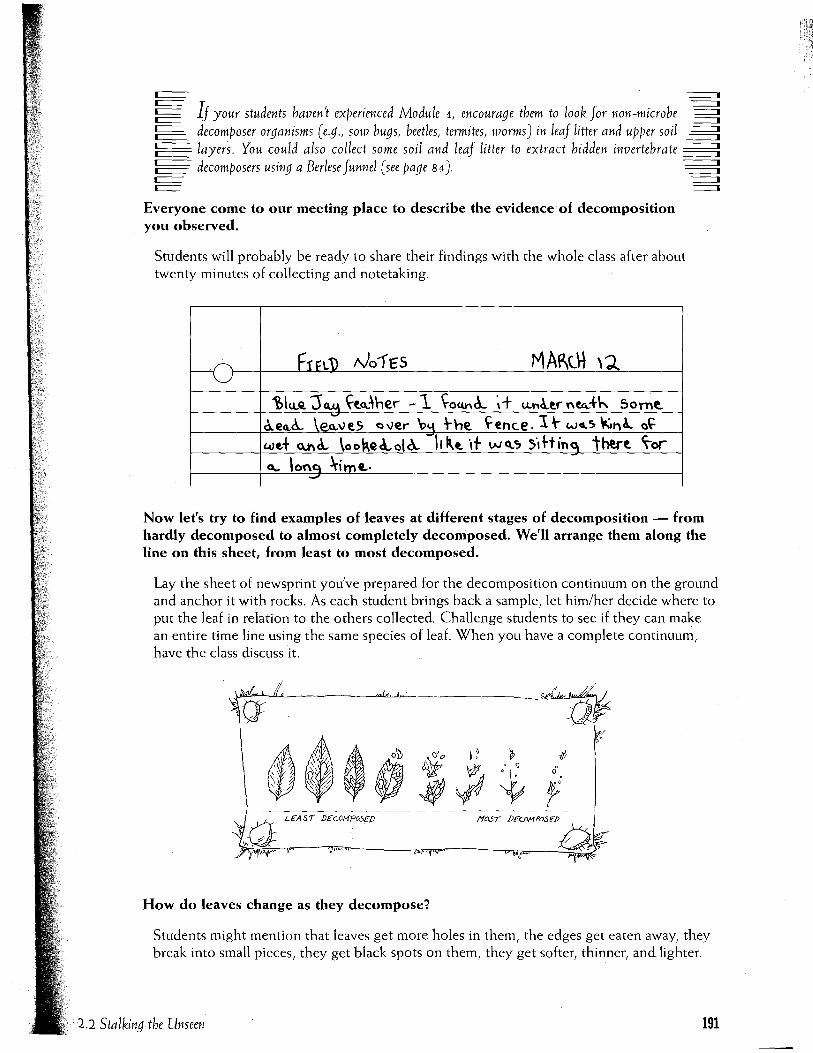
Now let's try to find examples of leaves at different stages of decomposition - from hardly decomposed to almost completely decomposed. We'll arrange them along the line on this sheet, from least to most decomposed.
Lay the sheet of newsprint you've prepared for the decomposition continuum on the ground and anchor it with rocks. As each student brings back a sample, let him/her decide where to put the leaf in relation to the others collected. Challenge students to see if they can make an entire time line using the same species of leaf. When you have a complete continuum, have the class discuss it.
J ~~~L-________ ~~~ _______________ ~~~~~
How do leaves change as they decompose?
Students might mention that leaves get more holes in them, the edges get eaten away, they break into small pieces, they get black spots on them, they get softer, thinner, and lighter.
2.2 Stalking the Unseen 191

192
If you live in an arid or tropical environment, students may be unable to find leaves at -====:J -==::J ==::::J ==::::J
r:=::=t::=:=' ~ ~ c:::=:::.~
various stages of decay. Have them discuss whether decomposition isnt happening, or --=S ~ whether things decompose so quickly that no examples of the various stages are available. -====-
====::J ===::::::J ===::::t
Although physical battering by rain and wind might cause some wear on leaves, the break down is caused primarily by decomposers - small animals and microbes -that are using the dead leaves as food.
At the end of the period, have students put the leaves back on the ground.
When back indoors, have students store their baggies of non-living items in an area of the classroom that is cool and dark (i.e., not on a windowsill or near a heater).
StUdent Reflections Have students send a C-Mail message, or record thoughts in their journals. Optional writing prompts include:
Being a scientist who studies microbes for a living would be ________ because . ..
The best part about doing field work is . ..
I learn the most when I ________ because ...
Teacher Reflections o What did students' reasons for why different non-living items would have many or few
decomposer microbes reveal about their understanding of decomposition?
o Did students' ideas about where they would find evidence of decomposition change after they went outside?
o Did students stay focused on their outdoor tasks and take good field notes?
Soil Sample Cultures. Help students replicate Dr. Ingham's work. Collett the top 5 cm of soil - about the length of a thumb - from different spots, such as under and several meters away from a shrub, tree, or dead plant; under and between grass clumps; next to two different kinds of plants; from woods and a field. Sprinkle a small amount of each soil sample over dishes of Jello, then compare how many and what types of microbes grow on each.
Module 2: Decomposer Dynamics

Soil Layer Cake. Demonstrate how the dead plants that decomposers break down help build soil. (Note: This works best in non-arid environments where there is pronounced soil development, especially in woods or grasslands. In arid environments, try it under shrubs.) Cut a 2.0 cm square template out of cardboard. Lay the square on the ground, and cut around it with a sharJ) knife, penetrating as deeply as possible. Remove the cardboard and use a trowel to lift the square of soil intact onto a tray. Have students identify the layers, from whole leaves on the top, to partly decomposed leaves, to small organic particles mixed with soil, to paler layers of mineral soil where there is little organic matter. Look for white, threadlike strands of fungal hyphae between layers of moist leaves near the top of the layer cake. Look also for plant roots concentrated in the enriched upper layers of the soil. Students can help you replace the materials back in the hole.
)-- OR.GANIc... MA,£/UAL
)- MIN£RAL SOIL
2. Stalking the Unseen 193

MAD ABOUT MICROBES: L
THE WORK OF ECOLOGIST DR. ELAINE INGHAM
194
When Elaine Ingham was in her last semester of college, she took a course called Microbiology and knew from that moment that she wanted to spend her career studying microbes -living things that are so tiny you need a microscope to see them. "The world of life under a microscope is fascinating, and the microbes are cute!" she says. "When you are able to recognize the different kinds of organisms, it's like saying hello to your old friends! Plus there are always new things to look at that you haven't seen before, so it's exciting."
Dr. Ingham is now a soil ecologist working at Oregon State University. The soil is a good thing to study if you're interested in microbes, because lots of microbes live there. In just a teaspoon of suil there can be more microbes than there are people living on the earth - over 500 million individual bacteria (about 40,000 different species), and up to 6,000 meters of hyphae from fungi.
Some microbes that live in soil, such as certain kinds of fungi and bacteria, are decomposers; they eat dead plants that fall to the ground. Other tiny soil organisms eat the fungi and bacteria that are eating the dead plants. Dr. Ingham tries to figure out what different kinds of microbes live in the soil in different places, such as in a forest, a grassland, and a mountain meadow. She calculates how many microbes there are and what they eat.
When Dr. Ingham gets to a site, the first thing she does is decide where to collect soil samples - near a tree, under a dead log, beside a blueberry bush, between patches of grass, and so on. These decisions are very important. Different areas, even when less than half a meter away from each other, can have completely different microbes. One reason is that bacteria are better than fungi at eating "fast food" - material that is high in energy and easy to digest. But when the food is tougher -like bark and logs - fungi win out. Do you think you'd find more fungi or bacteria in soil close to a dead tree?
Pause for discussion.
Once she decides where to s~mple, Dr. Ingham uses trowels and soil corers to collect the top 5 cm of soil where the microbes are most concentrated. She puts the soil samples in plastic bags. which are stored in coolers with ice to slow down the microbes until she gets back to the lab.
At the lab, Dr. Ingham puts a measured amount of sterilized water in a measured amount of soil, mixes it well, and looks at it under a microscope to identify the kinds of microbes that are there. She also wants to know how many of the microbes she sees have been eating dead
plant material, instead of just resting. To find this out she helped invent a way to use dyes that turn color only on the microbes that are actively using food they've eaten recently. Imagine that someone poured a similar dye over you. While you were sleeping, it wouldn't turn color, but right after you ate, you would turn neon green!
Module 2: Decomposer Dynamics

When Dr. Ingham stains the samples she finds that only 2 to 20% of all the bacteria she sees are actually eating and breaking things down. This is because many bacteria are picky eaters, and particular about their living conditions. A lot of microbes are carried by wind, water, or animals to new places, but they stay in a sleeping stage unless everything is just right - they might need a certain kind or part of a plant, or lood with a lot of iron in it, or a certain temperature. But if one kind of microbe doesn't like the food and conditions around it, there are usually others there that do!
Dr. Ingham also studies how the things people do to the land affect the microbes that live there. In one study, she compared un-cut forests to ones that people have clear-cut for lumber. She found out that after one year, the clear-cut forest had 10 times fewer fungi in its soil than the un-cut forest. After five years it had 100 times fewer fungi! This is because once the trees are gone, the forest floor is exposed to the sun. The soil dries out, making conditions that are too harsh for the fungi to live in. How do you think this could affect the land where the forest on~e grew?
Pause for discussion.
When there are less fungi to break down the leftover leaves, branches and trunks of trees in clear-cut forests, then nutrients (minerals that all living things need to stay healthy) don't get returned to the forest soil. So the land that was clear-cut might not be a good place for growing trees in the future.
Dr. Ingham also studies crops and other places where chemicals such as herbicides and pesticides are sprayed. She found that when a chemical is sprayed to control weeds or a disease that is attacking plants, it often kills microbes in the soil that it wasn't designed to kill. When one kind of microbe, such as bacteria, is wiped out, then the whole underground food web of microbes changes. Since microbes perform a very important step in returning nutrients to the soil that living plants need, it is important for scientists like Dr. Ingham to help farmers understand how crop spraying affects soil fertility.
Dr. Ingham has lots of adventures while she works, and some mishaps. "Sometimes when I'm walking around a plot in a clear-cut forest," she says, "J'm carrying my cooler and looking ahead for my plot markers. The next thing I know 'BOOM!' - I fall over a log and spend the rest of the day hobbling around on a sprained ankle. It's quite a comical sight!"
One of the forests where Dr. Ingham works has a lot of "widow makers" - trees that have big branches that fall whenever the wind blows, posing a danger to anyone below. Dr. Ingham has also been caught in mud slides while working in the mountains. "All of the sudden a heavy rain comes down, and the path gives way and you're zooming down the side of the bank along with the mud," she says.
But all of this outdoor adventure still isn't as exciting to Dr. Ingham as the world under her microscope. She knows that her work on microbes is important because it helps people like foresters and farmers understand how what they do to the land affects whether plants will get the nutrients they need to stay alive.
2.2 Stalking the Unseen 195