Embed Size (px)
Citation preview

Rebuilding the Super Auto Eject
By Thomas NugentKussmaul Electronics

Rebuilding the Auto Eject

Tools needed

Arm Adjustment Spacer
1.200
0.750 0.50
A091-55-142Arm Adjustment Spacer
Arm Adjustment Dimension
Power Switch Adjustment Dimension

Ejecting Bracket Spacer
0.700
0.031
2.250
0.700
A091-55-141Ejecting Bracket Spacer

Disassembling the unit

Remove the rear cover

Remove solenoid wires

Remove ejecting arm and micro switch assy.

Remove the springs and bumpers

Remove solenoid

Remove spring and plunger

Move pull down out of the way
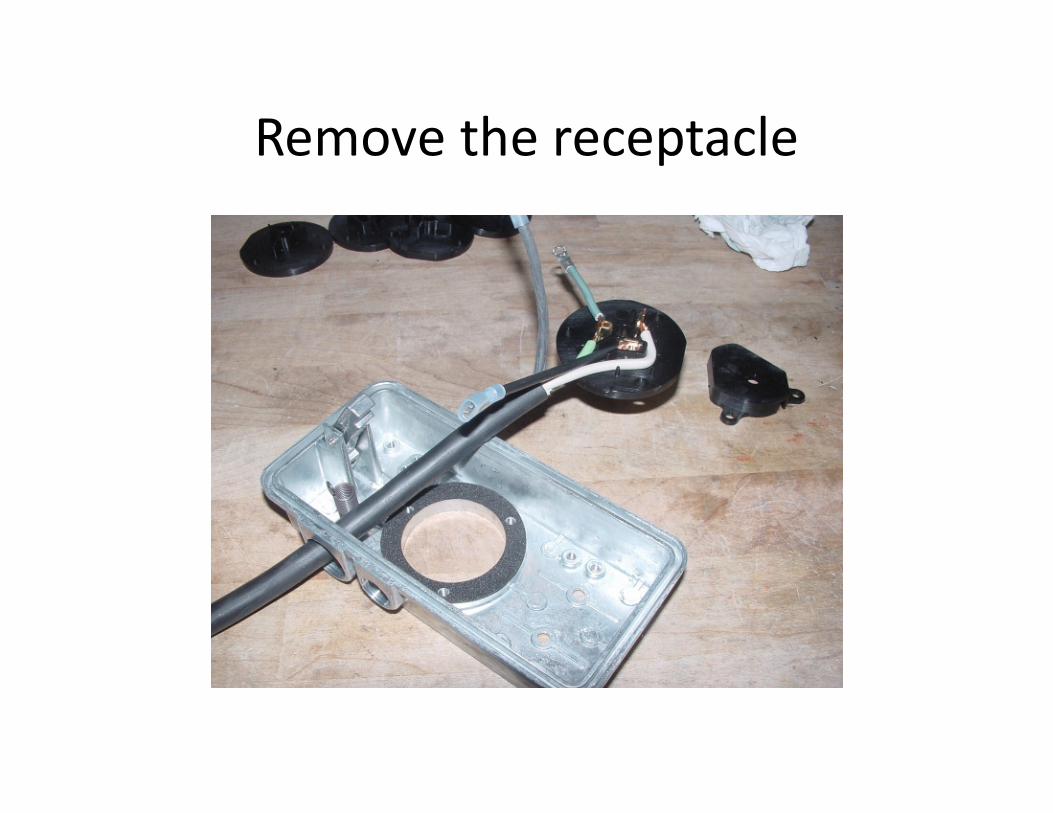
Remove the receptacle

Reassembling the unit

Install new receptacle

New receptacle Installed

Install solenoid and spring

Screw in solenoid with loctite

Install ejecting pin

Install new springs and bumpers
Yellow spring this side

Attach springs to ejecting arm

Reattach micro switch wires

Micro switch wiring

Install ejecting arm loosely to solenoid

Insert gauge to set spacing

Place shim as shown

Adjustment, Ejecting Bracket Mount
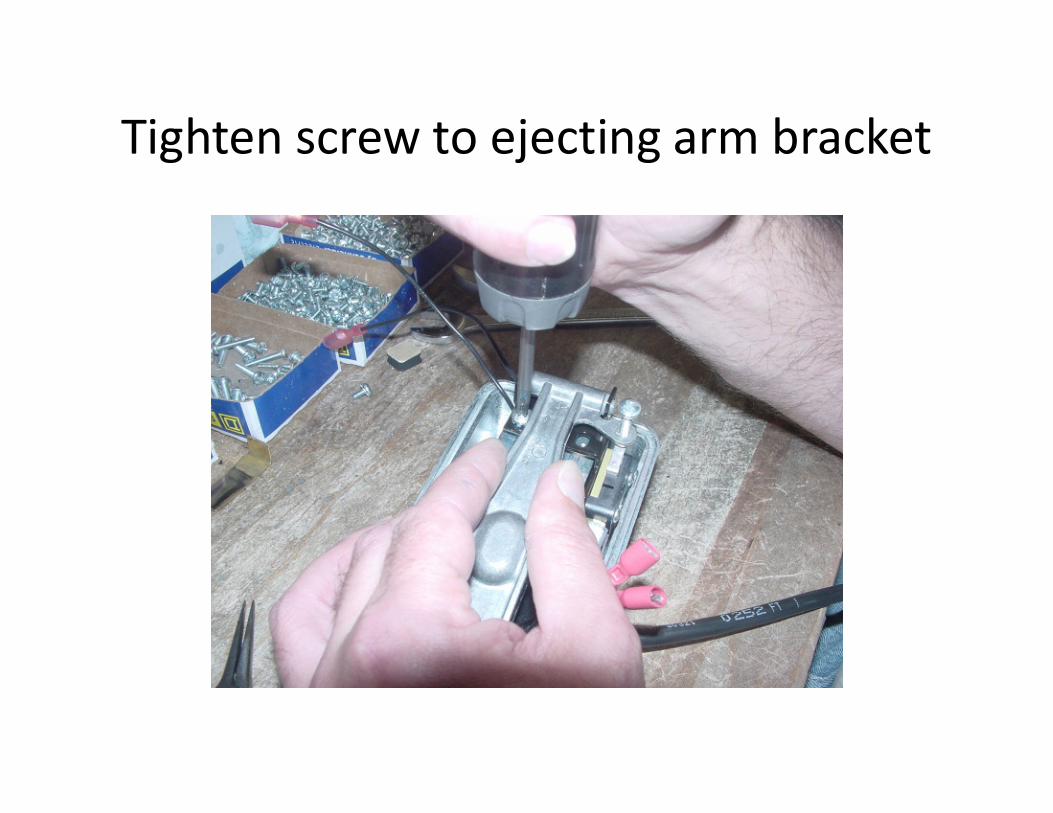
Tighten screw to ejecting arm bracket
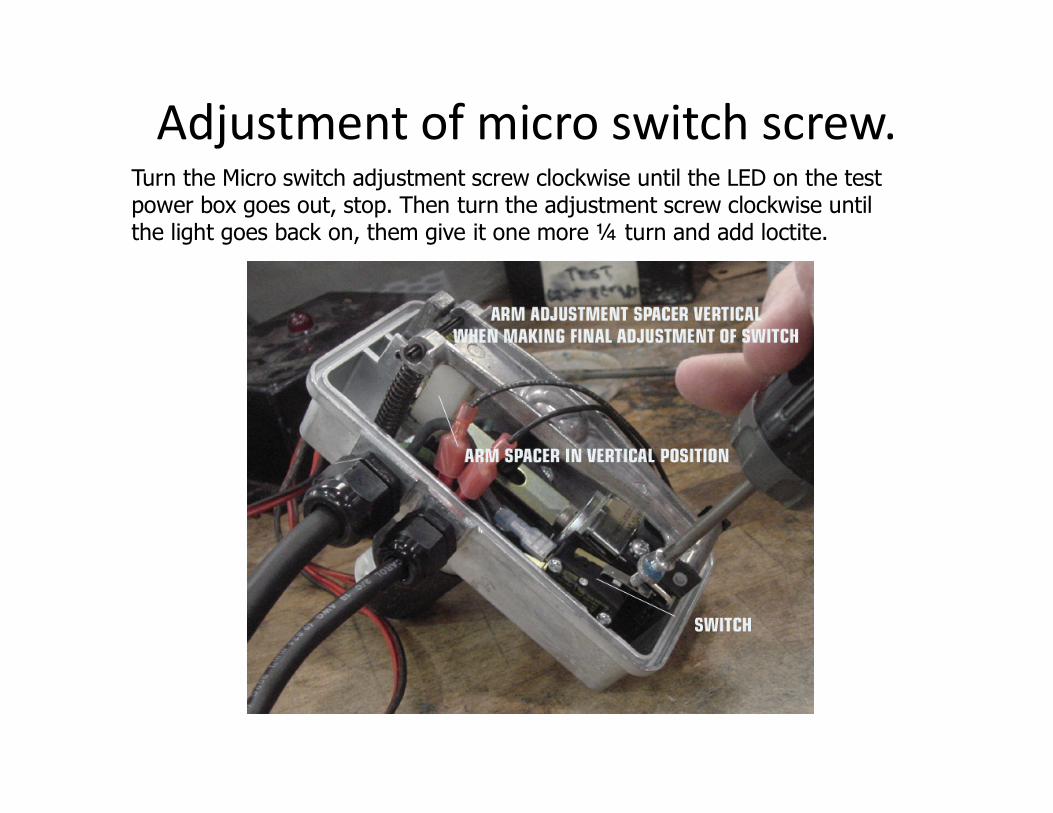
Adjustment of micro switch screw. Turn the Micro switch adjustment screw clockwise until the LED on the test power box goes out, stop. Then turn the adjustment screw clockwise until the light goes back on, them give it one more ¼ turn and add loctite.
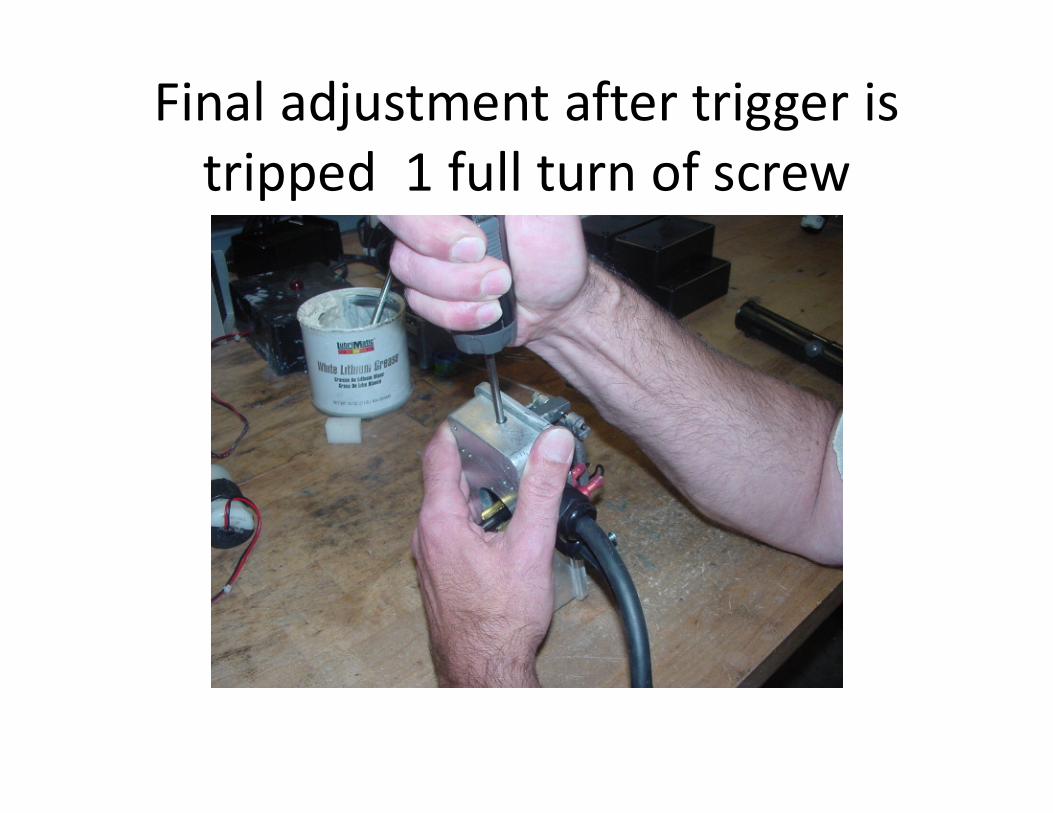
Final adjustment after trigger is tripped 1 full turn of screw

Install back cover

The end