Embed Size (px)
DESCRIPTION
Prezi
Citation preview
by Billy Meinke
PreziFirst Edition
Tips for Building, Moving, and Styling your
Prezi Presentations
Quick Guidethe unofficial
iBooks Author
i
Welcome! This short guide will have you making beautiful Prezis in no time. Prezi is a dynamic tool that can be used to captivate an audience and convey a message. People will remember your Prezi.
What makes it so powerful?
Simply put, Prezi allows you to dive into a topic like never before, placing emphasis on impor-tant points and show relationships between ideas that your audience will relate to. Although there is no “winning formula” for creating an effective Prezi, the tips in this guide will help you easily structure your Prezi in a way that makes sense. Read this guide before you make your Prezi or use it as a reference when making a Prezi to get the most out of your time.
There are three main sections to this guide:
Building Brainstorming and categorizing your ideas
Moving Adding a path that flows through your topic
Styling Easy formatting and color tips
Welcome!
!Warning: You may be tempted to jump ahead and start making major alterations to the styling and movements in Prezi before reading through this guide, but we urge you to wait! This short guide will help you gain an understanding of techniques that all Prezi builders use. Pay attention to the tips and you will be cre-ating impressive presentations in no time.
iBooks Author

BasicsEssentials of Prezi Structure
iBooks Author
Building
Effective Prezis share a common trait: the information flows.
Often times, this flow is from general to specific, with the big-picture ideas appearing larger on the screen. For example, if you were asked to explain cars to someone who had never seen a car before, would you jump right in and talk about brake pads? What about engine oil?
It’s likely that none of that would make sense if the person didn’t have a basic idea of what a car is. Remember, Prezi will allow you to zoom in and emphasize the more specific ideas after you speak about the larger topics. Thus, we need to build up knowledge about cars.
So what do we do about this? Start big. Tell them what a car does.
Cars move people. Yep, they are a form of transportation.
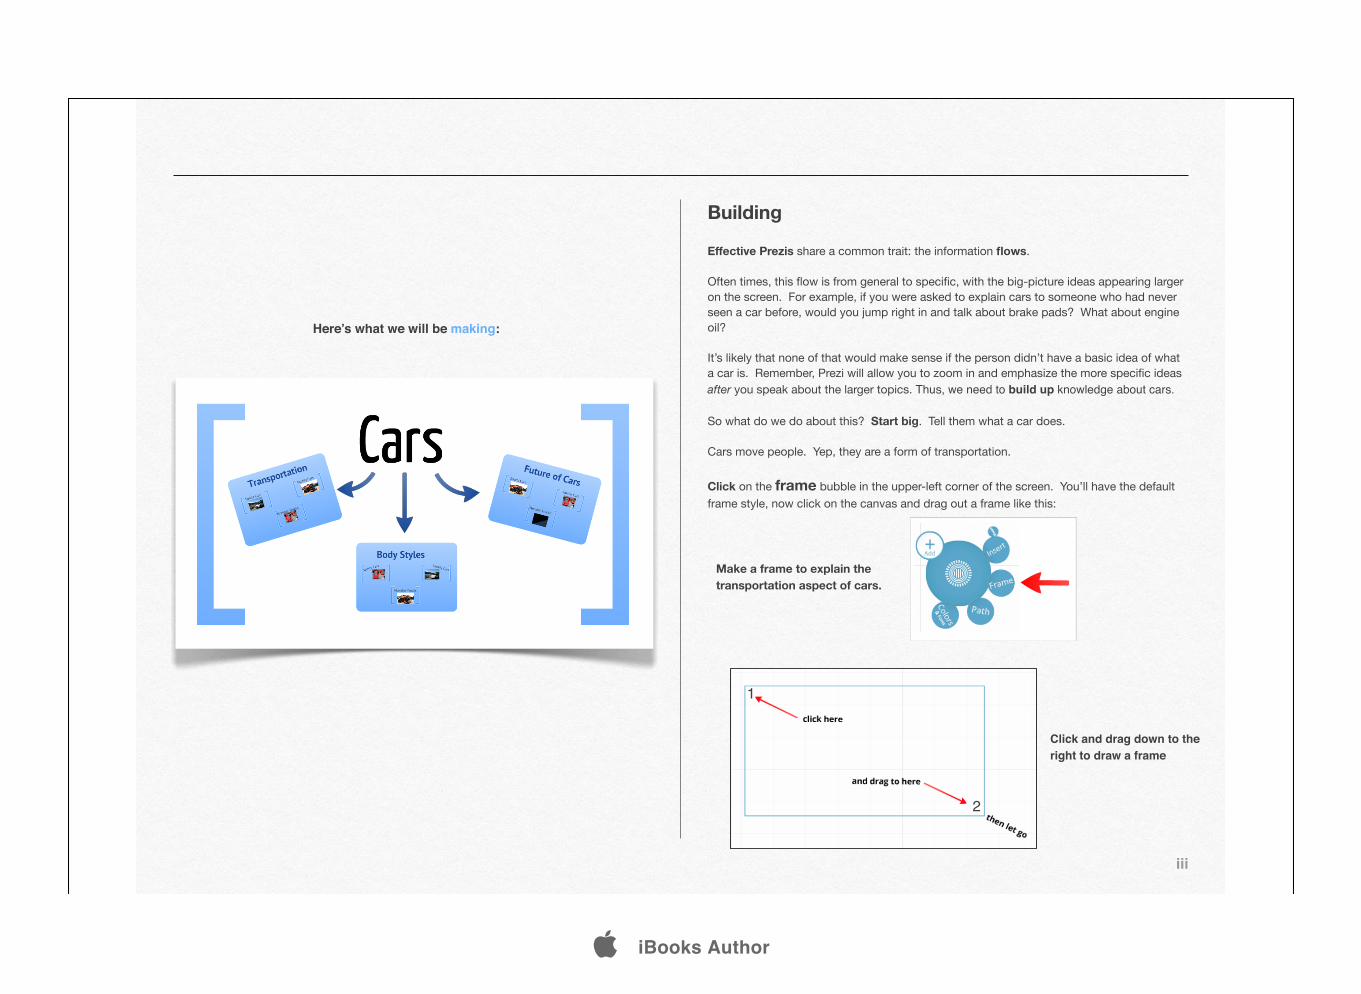
Click on the frame bubble in the upper-left corner of the screen. You’ll have the default frame style, now click on the canvas and drag out a frame like this:
iii
Here’s what we will be making:
Make a frame to explain the transportation aspect of cars.
Click and drag down to the right to draw a frame
1
2
iBooks Author
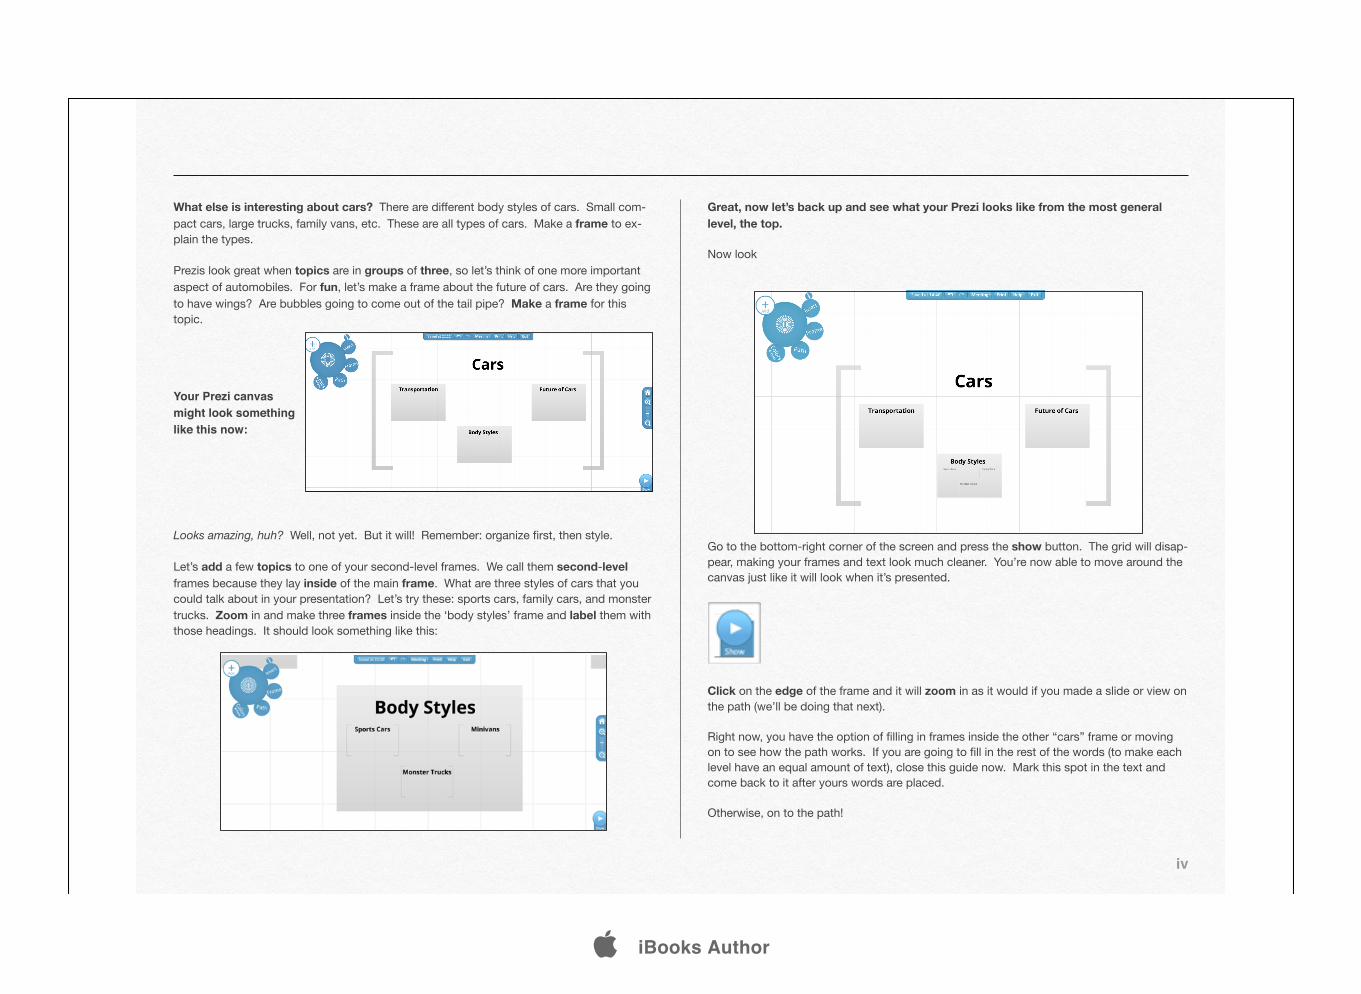
What else is interesting about cars? There are different body styles of cars. Small com-pact cars, large trucks, family vans, etc. These are all types of cars. Make a frame to ex-plain the types.
Prezis look great when topics are in groups of three, so let’s think of one more important aspect of automobiles. For fun, let’s make a frame about the future of cars. Are they going to have wings? Are bubbles going to come out of the tail pipe? Make a frame for this topic.
Looks amazing, huh? Well, not yet. But it will! Remember: organize first, then style.
Let’s add a few topics to one of your second-level frames. We call them second-level frames because they lay inside of the main frame. What are three styles of cars that you could talk about in your presentation? Let’s try these: sports cars, family cars, and monster trucks. Zoom in and make three frames inside the ‘body styles’ frame and label them with those headings. It should look something like this:
Great, now let’s back up and see what your Prezi looks like from the most general level, the top.
Now look
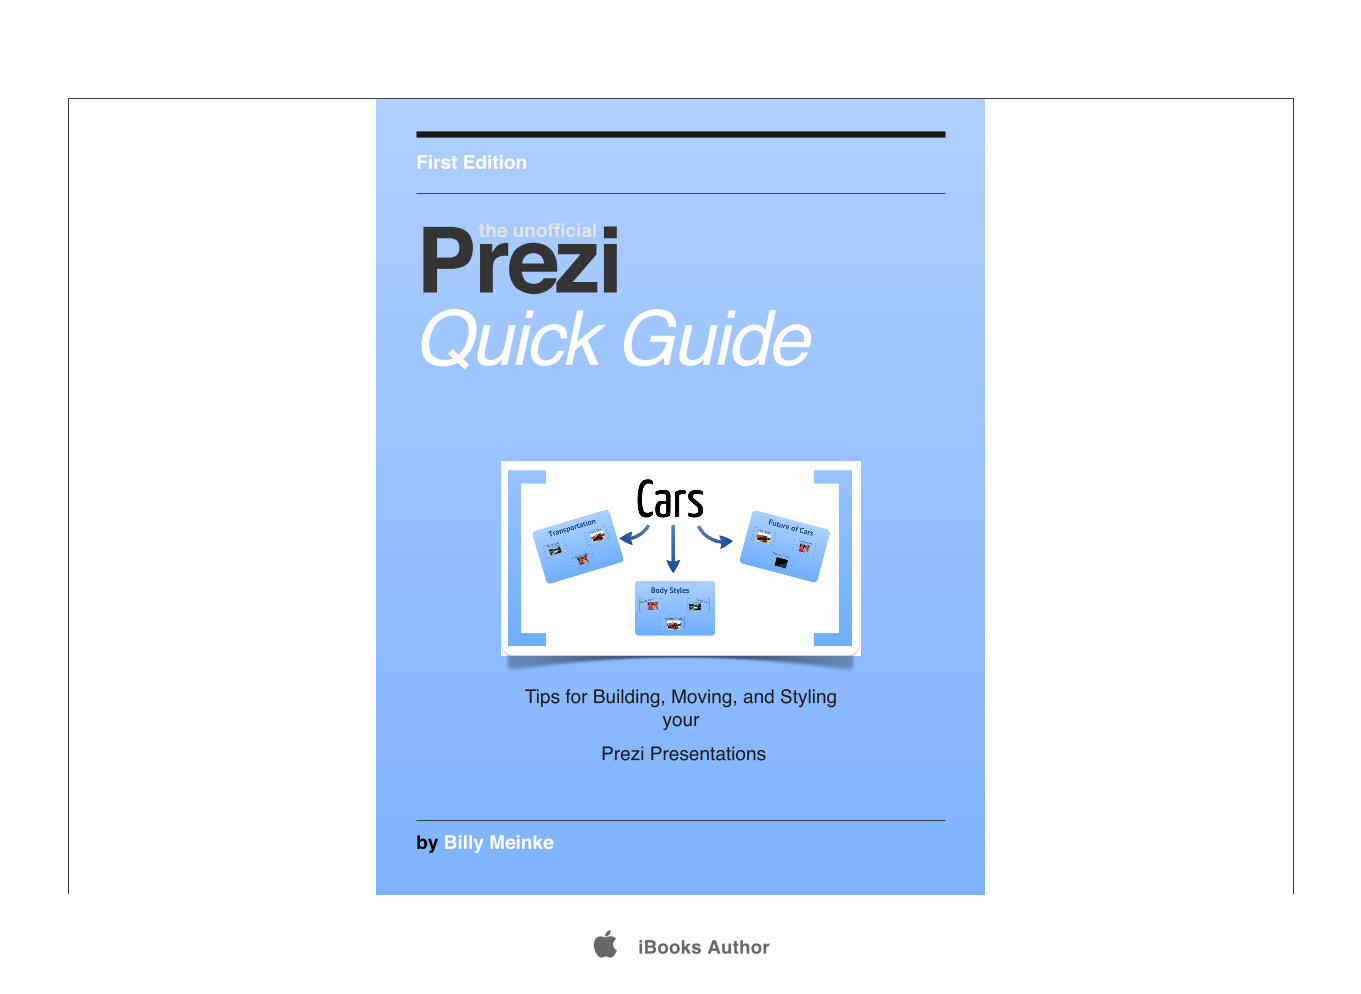
Go to the bottom-right corner of the screen and press the show button. The grid will disap-pear, making your frames and text look much cleaner. You’re now able to move around the canvas just like it will look when it’s presented.
Click on the edge of the frame and it will zoom in as it would if you made a slide or view on the path (we’ll be doing that next).
Right now, you have the option of filling in frames inside the other “cars” frame or moving on to see how the path works. If you are going to fill in the rest of the words (to make each level have an equal amount of text), close this guide now. Mark this spot in the text and come back to it after yours words are placed.
Otherwise, on to the path!
iv
Your Prezi canvas might look something like this now:
iBooks Author

Moving
Go back to the editing view of your Prezi by pressing the Escape key on your keyboard.
What we do now is set a programmed path for you to show different parts of your presen-tation in a creative way. While you are doing this, it’s important for you to remember to use the scroll wheel on your mouse (recommended) or multi-touch pad on your laptop. We’ll set a couple path points, zooming in and out manually as we go.
Click on the path bubble and a slide-show bar will appear at the bottom of your page. This should look familiar because it’s a slide-sorting bar, just like others out there. We’ll get a couple shots in there and it will make sense.
Zoom out to this view in the picture below:
Move your mouse over the edge of the main frame. It will have a shadow over it now, look-ing darker. Click once and watch the view of that frame be turned into a slide.
It will have the number over it while you are editing the path. This way you can keep track of your path order. Go ahead and click a few more frames or objects, creating slides for them. Once you have four or five slides down in the bottom of your screen, click the show button again.
This will show you how your Prezi is set to be displayed. Each of the frames or objects you select is a talking point. See how starting general and building down to more specific ideas makes sense? There is no limit to the depth of your presentation, but it’s important to group similar-level information together. This takes a little practice, but you’ll also under-stand the relationship between ideas much better!
Okay, so now we have a Prezi with a few frames and words in it. Let’s add a little style!
v
Press the right-arrow key on your key-board or the right-arrow in the bottom corner of the screen to move through your path points.
iBooks Author
Style
You’re almost done! Try these simple styling changes to help the frames and ideas stand out. This section will cover rotation, text styles, canvas styles, adding pictures, and add-ing arrows. These style tips are not only easy to make, but are also used in some of the best Prezis out there. Feel free to experiment, but keep the changes small at first until you get the hang of it.
Rotate
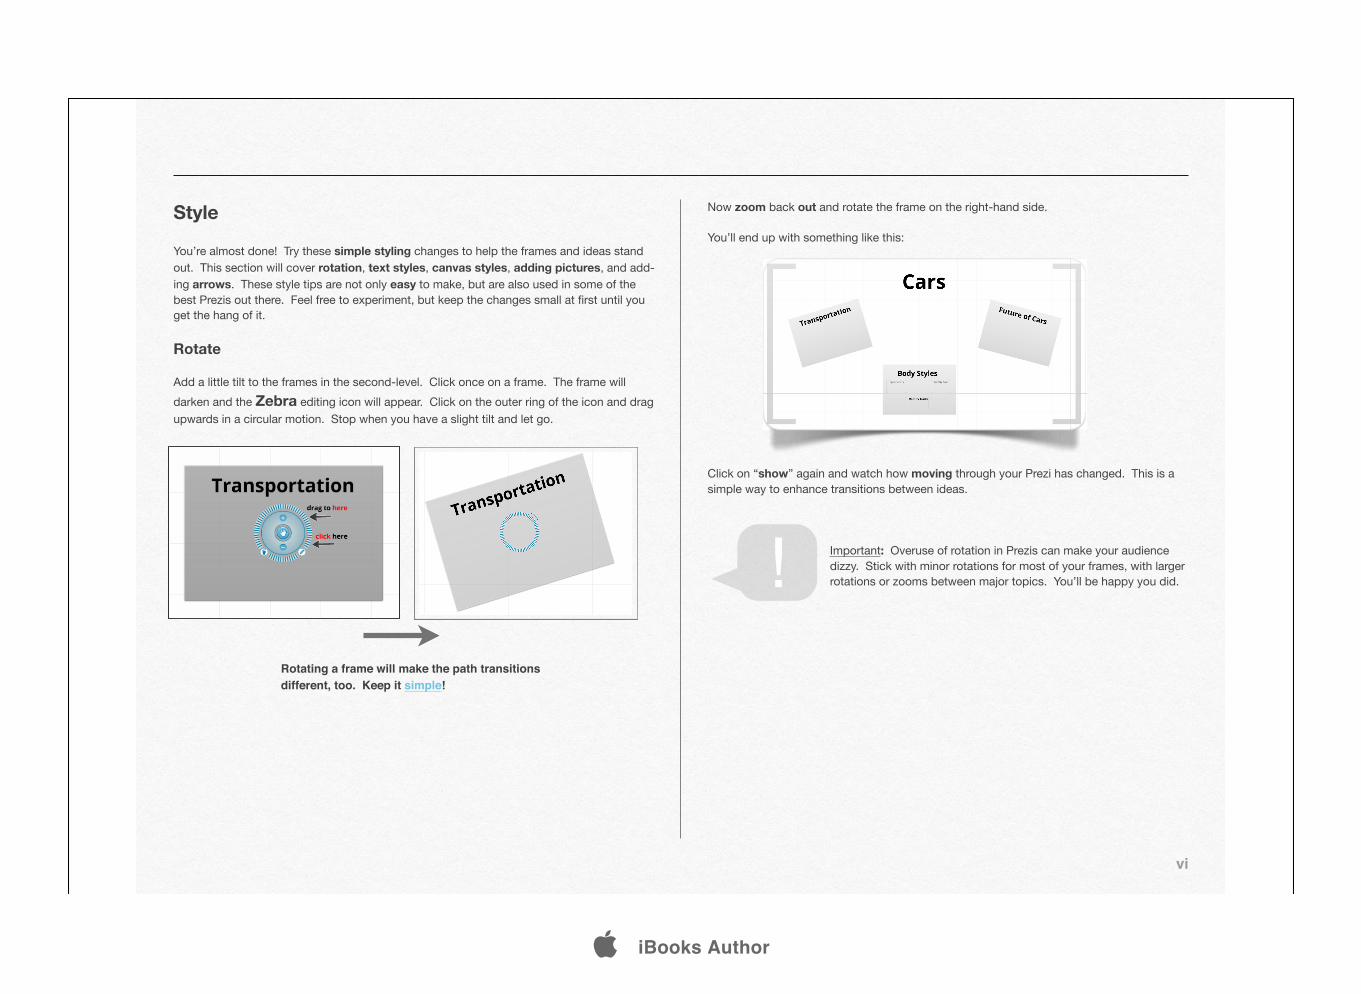
Add a little tilt to the frames in the second-level. Click once on a frame. The frame will darken and the Zebra editing icon will appear. Click on the outer ring of the icon and drag upwards in a circular motion. Stop when you have a slight tilt and let go.
Now zoom back out and rotate the frame on the right-hand side.
You’ll end up with something like this:
Click on “show” again and watch how moving through your Prezi has changed. This is a simple way to enhance transitions between ideas.
Important: Overuse of rotation in Prezis can make your audience dizzy. Stick with minor rotations for most of your frames, with larger rotations or zooms between major topics. You’ll be happy you did.
vi
Rotating a frame will make the path transitions different, too. Keep it simple!
!
iBooks Author
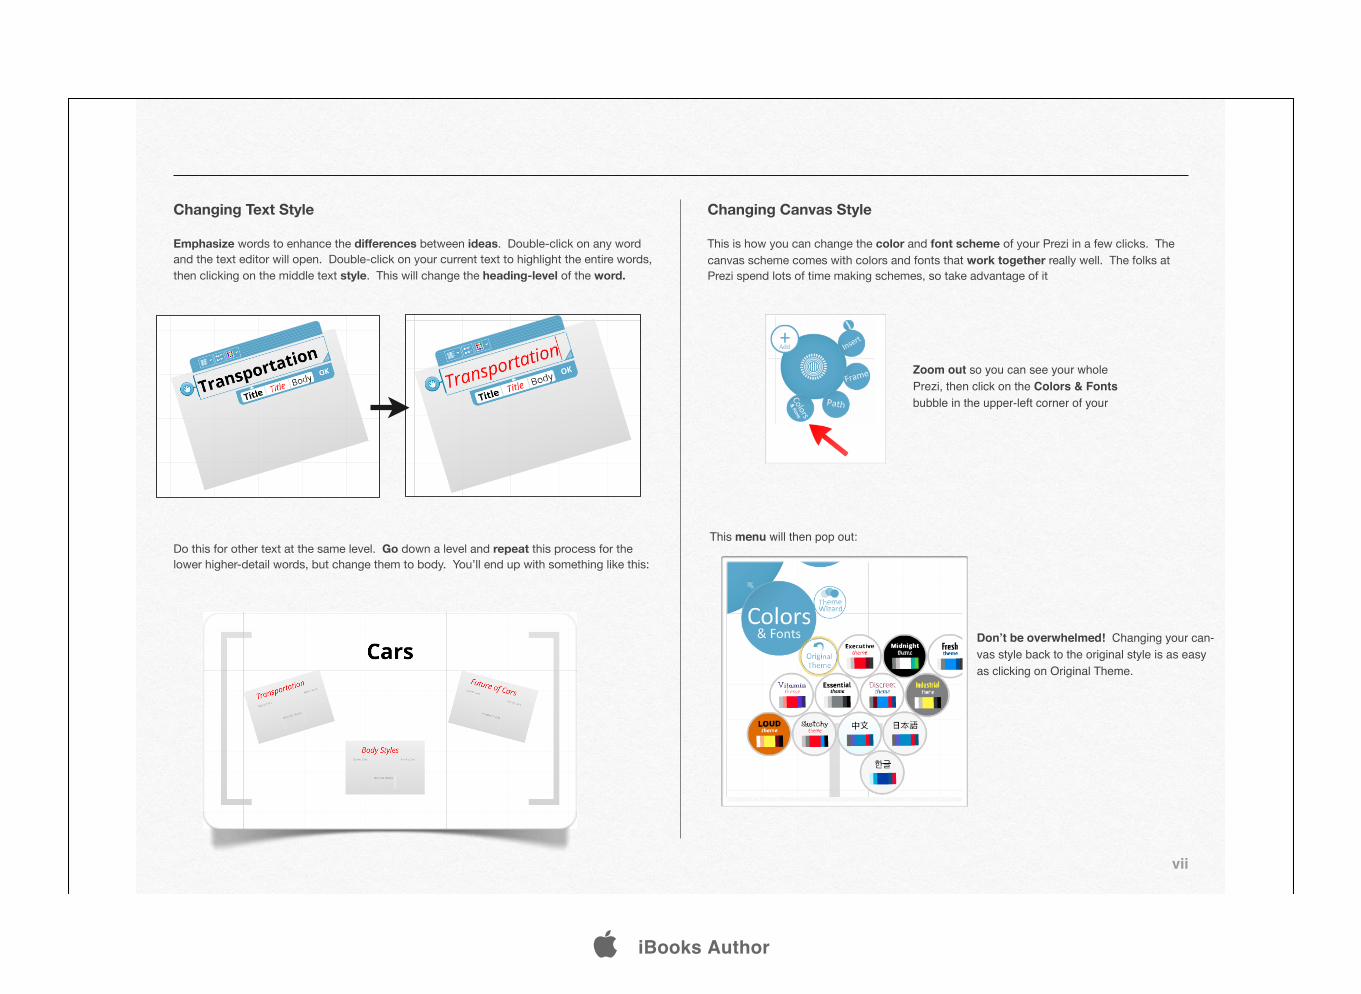
Changing Text Style
Emphasize words to enhance the differences between ideas. Double-click on any word and the text editor will open. Double-click on your current text to highlight the entire words, then clicking on the middle text style. This will change the heading-level of the word.
Do this for other text at the same level. Go down a level and repeat this process for the lower higher-detail words, but change them to body. You’ll end up with something like this:
Changing Canvas Style
This is how you can change the color and font scheme of your Prezi in a few clicks. The canvas scheme comes with colors and fonts that work together really well. The folks at Prezi spend lots of time making schemes, so take advantage of it
vii
This menu will then pop out:
Don’t be overwhelmed! Changing your can-vas style back to the original style is as easy as clicking on Original Theme.
Zoom out so you can see your whole Prezi, then click on the Colors & Fonts bubble in the upper-left corner of your
iBooks Author
viii
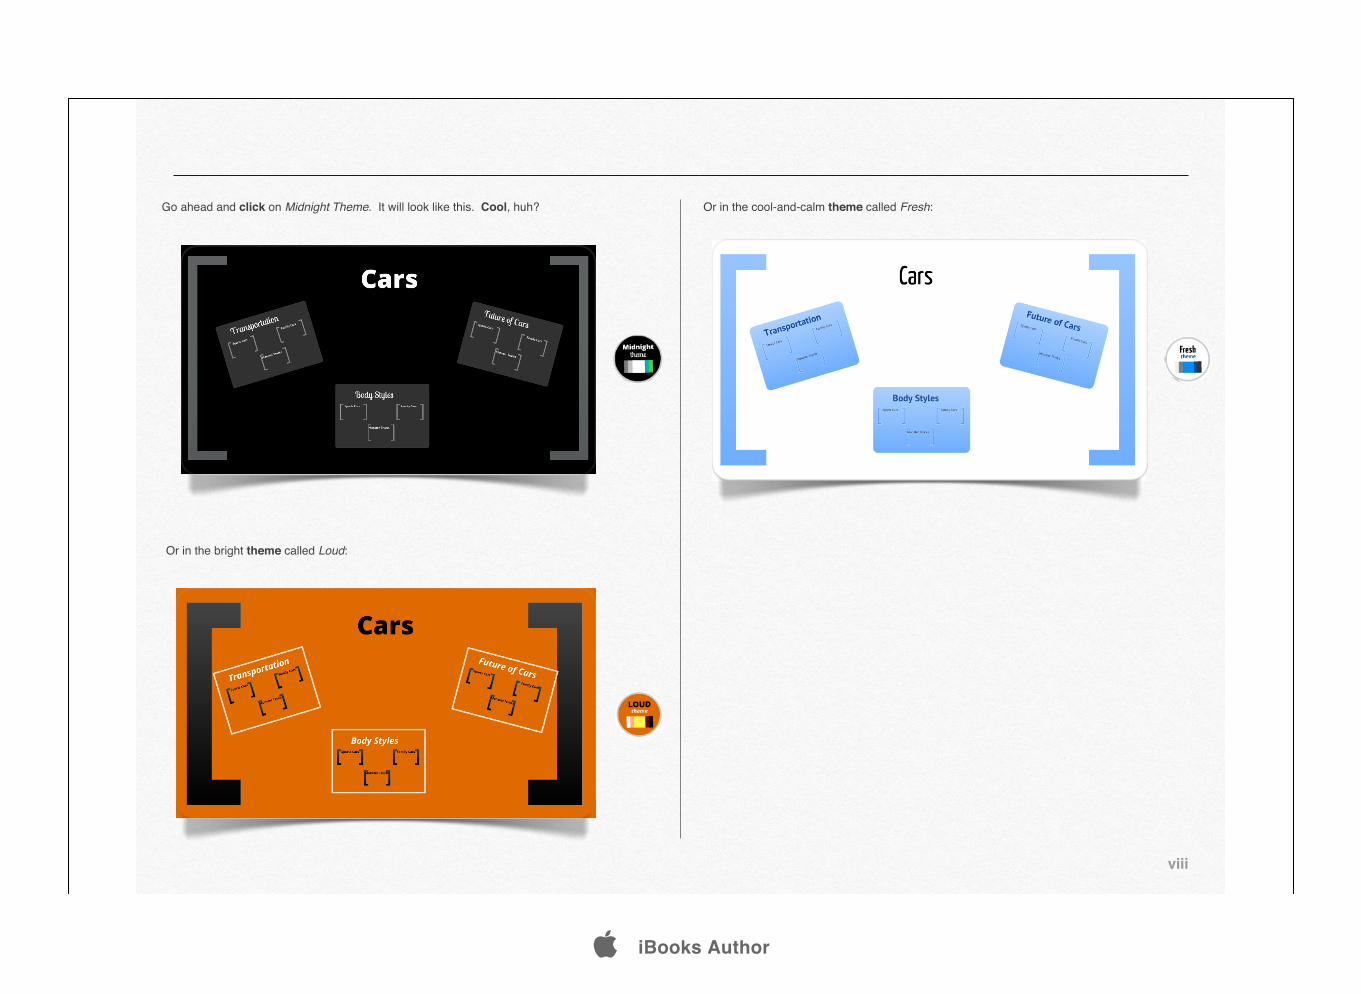
Go ahead and click on Midnight Theme. It will look like this. Cool, huh?
Or in the bright theme called Loud:
Or in the cool-and-calm theme called Fresh:
iBooks Author
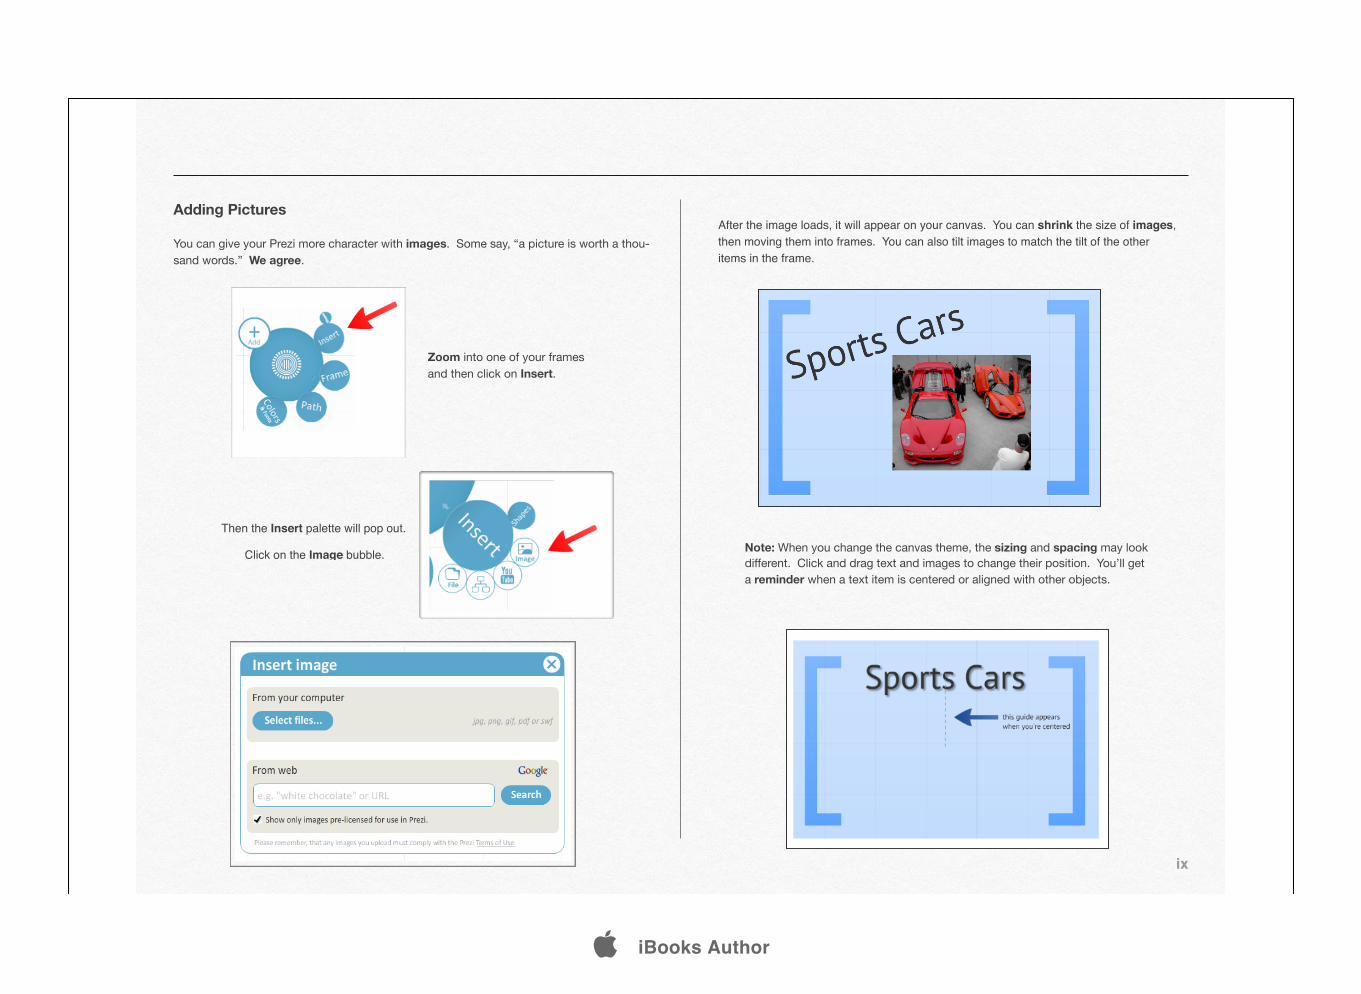
Adding Pictures
You can give your Prezi more character with images. Some say, “a picture is worth a thou-sand words.” We agree.
ix
Then the Insert palette will pop out.
Zoom into one of your frames and then click on Insert.
After the image loads, it will appear on your canvas. You can shrink the size of images, then moving them into frames. You can also tilt images to match the tilt of the other items in the frame.
Click on the Image bubble. Note: When you change the canvas theme, the sizing and spacing may look different. Click and drag text and images to change their position. You’ll get a reminder when a text item is centered or aligned with other objects.
iBooks Author
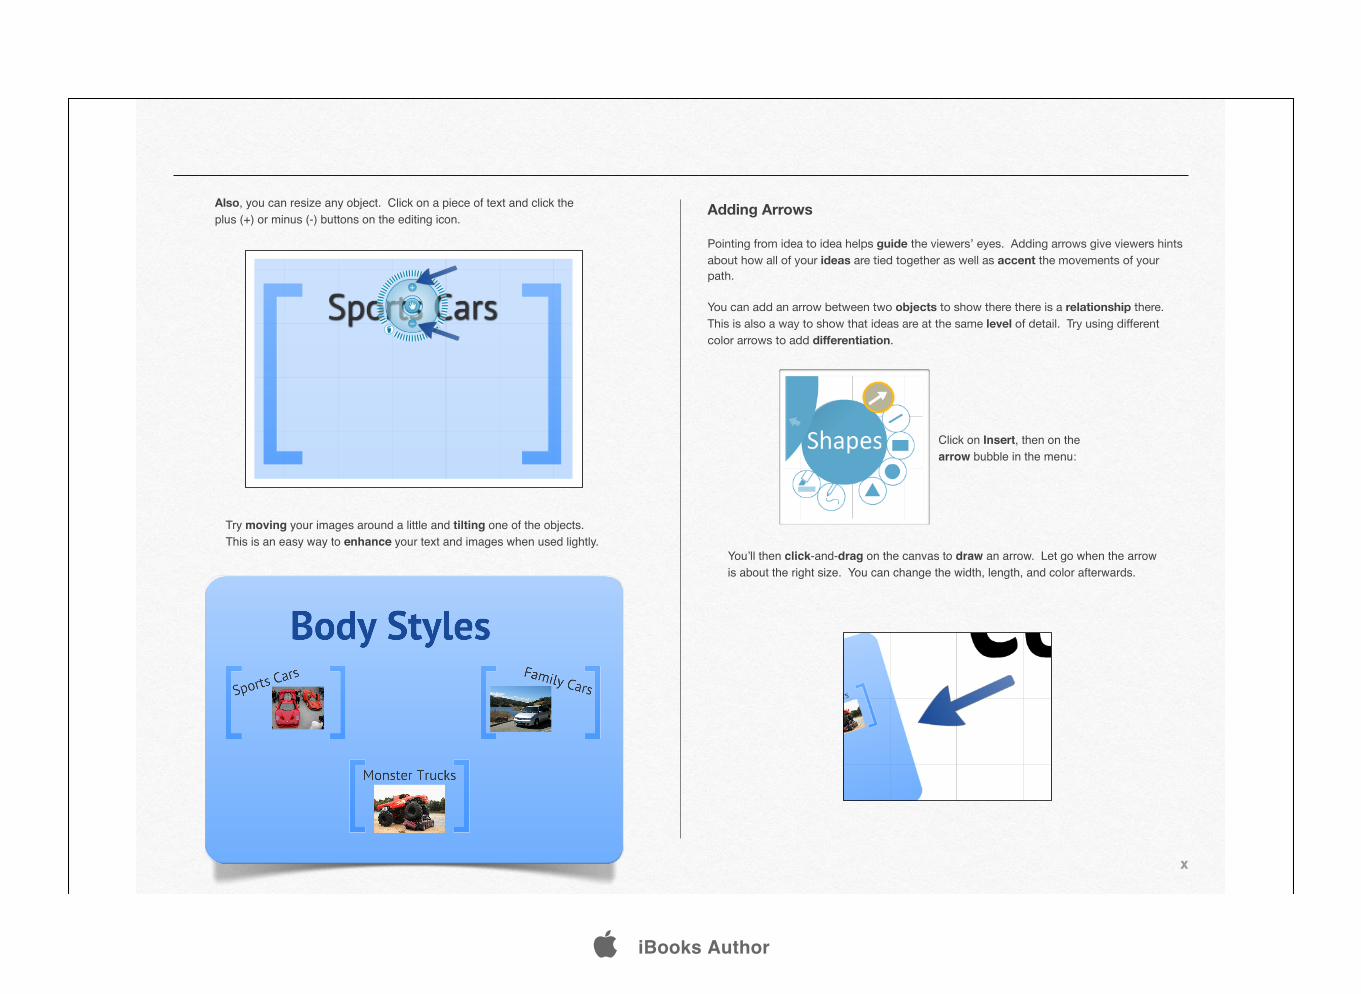
Adding Arrows
Pointing from idea to idea helps guide the viewers’ eyes. Adding arrows give viewers hints about how all of your ideas are tied together as well as accent the movements of your path.
You can add an arrow between two objects to show there there is a relationship there. This is also a way to show that ideas are at the same level of detail. Try using different color arrows to add differentiation.
x
Click on Insert, then on the arrow bubble in the menu:
Try moving your images around a little and tilting one of the objects. This is an easy way to enhance your text and images when used lightly.
Also, you can resize any object. Click on a piece of text and click the plus (+) or minus (-) buttons on the editing icon.
You’ll then click-and-drag on the canvas to draw an arrow. Let go when the arrow is about the right size. You can change the width, length, and color afterwards.
iBooks Author
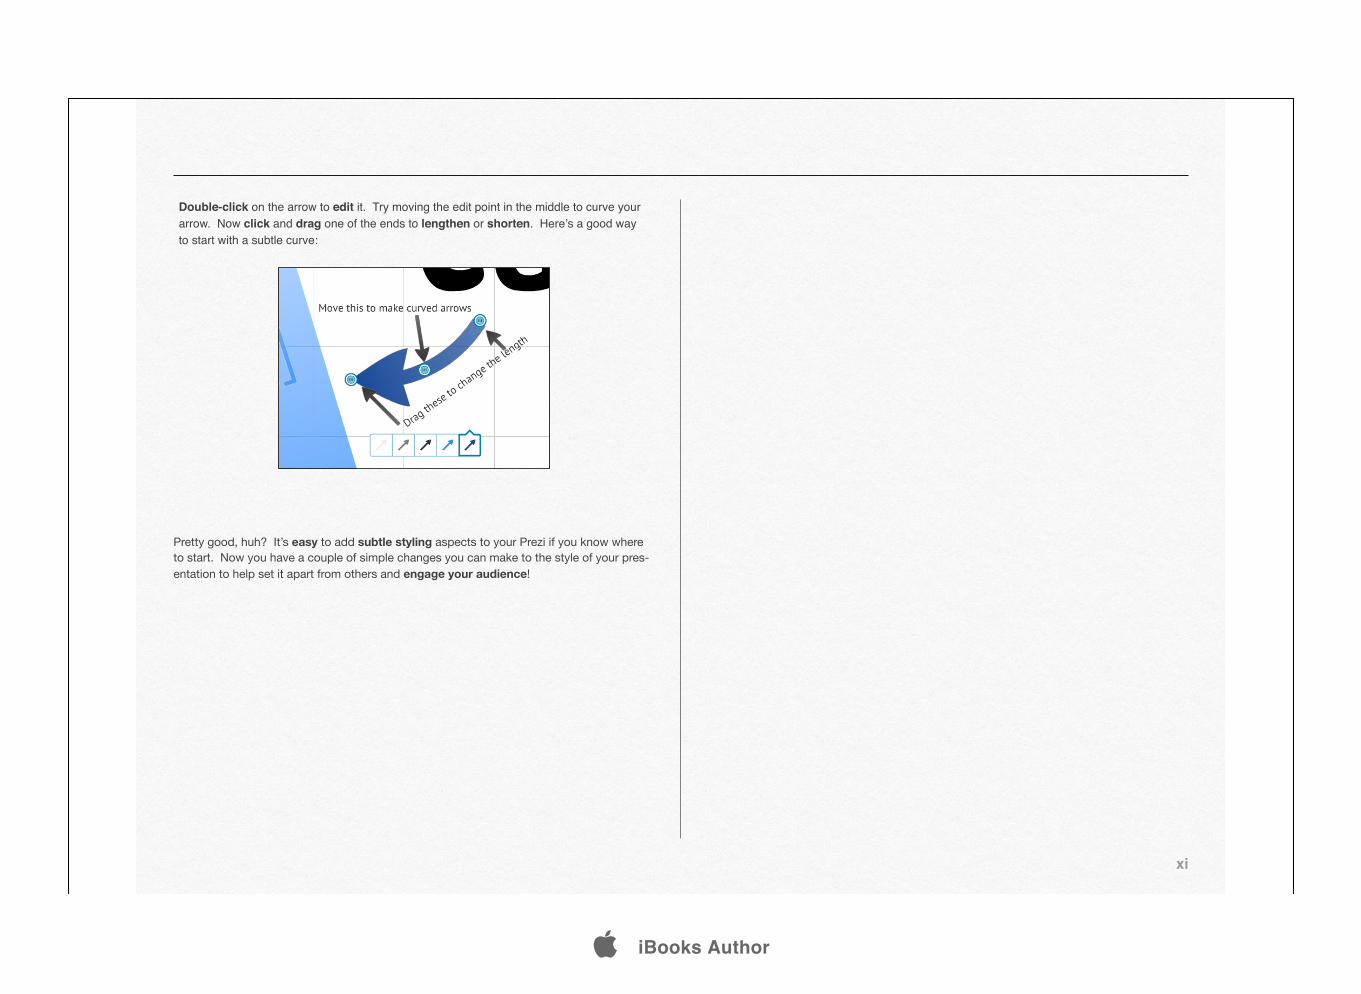
Pretty good, huh? It’s easy to add subtle styling aspects to your Prezi if you know where to start. Now you have a couple of simple changes you can make to the style of your pres-entation to help set it apart from others and engage your audience!
xi
Double-click on the arrow to edit it. Try moving the edit point in the middle to curve your arrow. Now click and drag one of the ends to lengthen or shorten. Here’s a good way to start with a subtle curve:
iBooks Author
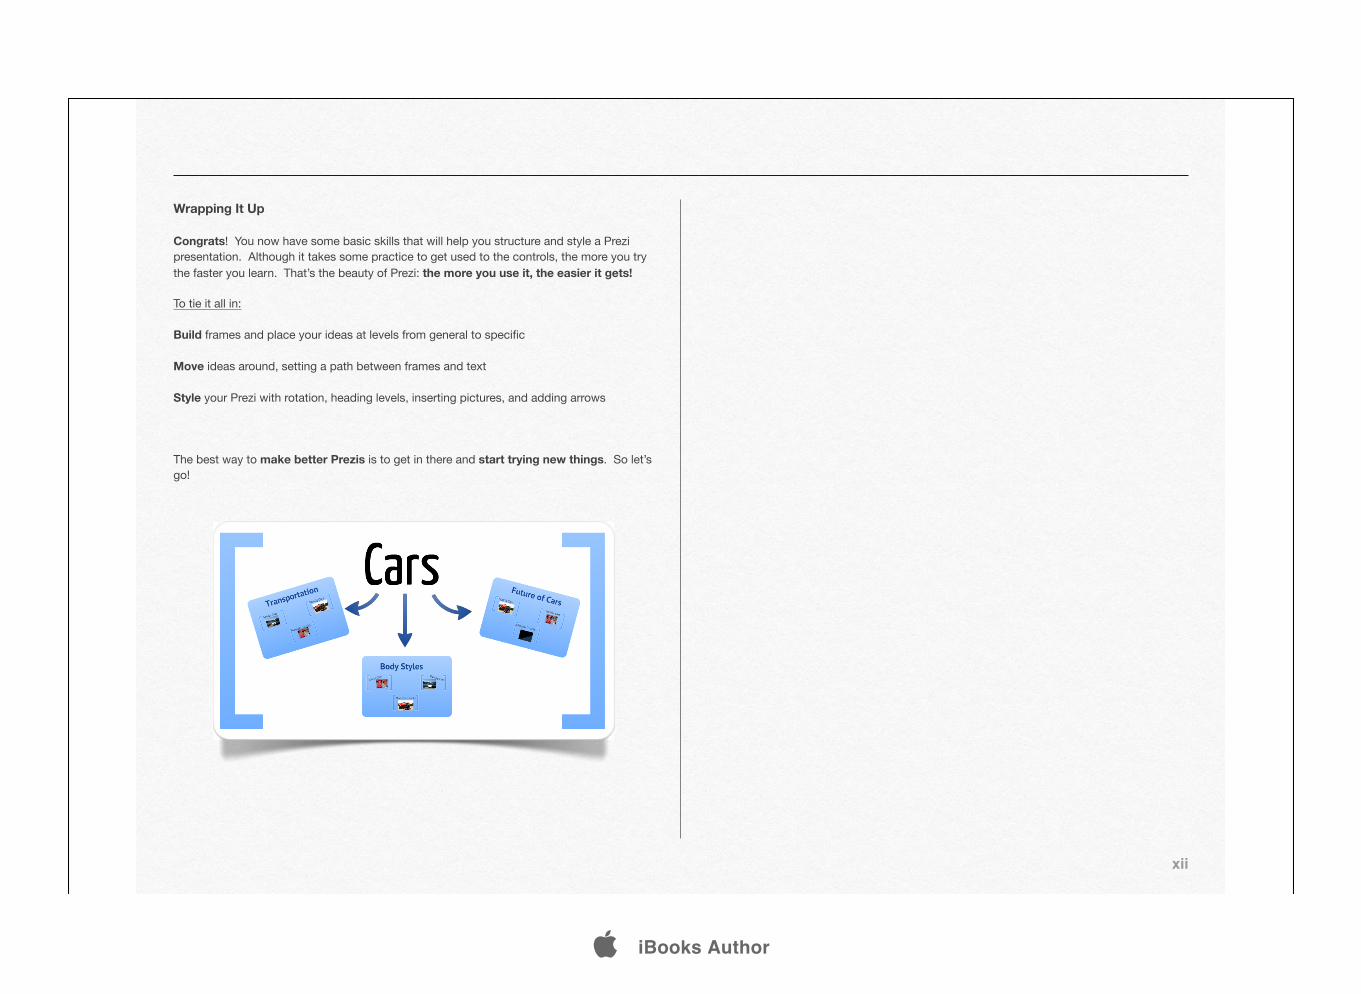
Wrapping It Up
Congrats! You now have some basic skills that will help you structure and style a Prezi presentation. Although it takes some practice to get used to the controls, the more you try the faster you learn. That’s the beauty of Prezi: the more you use it, the easier it gets!
To tie it all in:
Build frames and place your ideas at levels from general to specific
Move ideas around, setting a path between frames and text
Style your Prezi with rotation, heading levels, inserting pictures, and adding arrows
The best way to make better Prezis is to get in there and start trying new things. So let’s go!
xii
iBooks Author
xiii
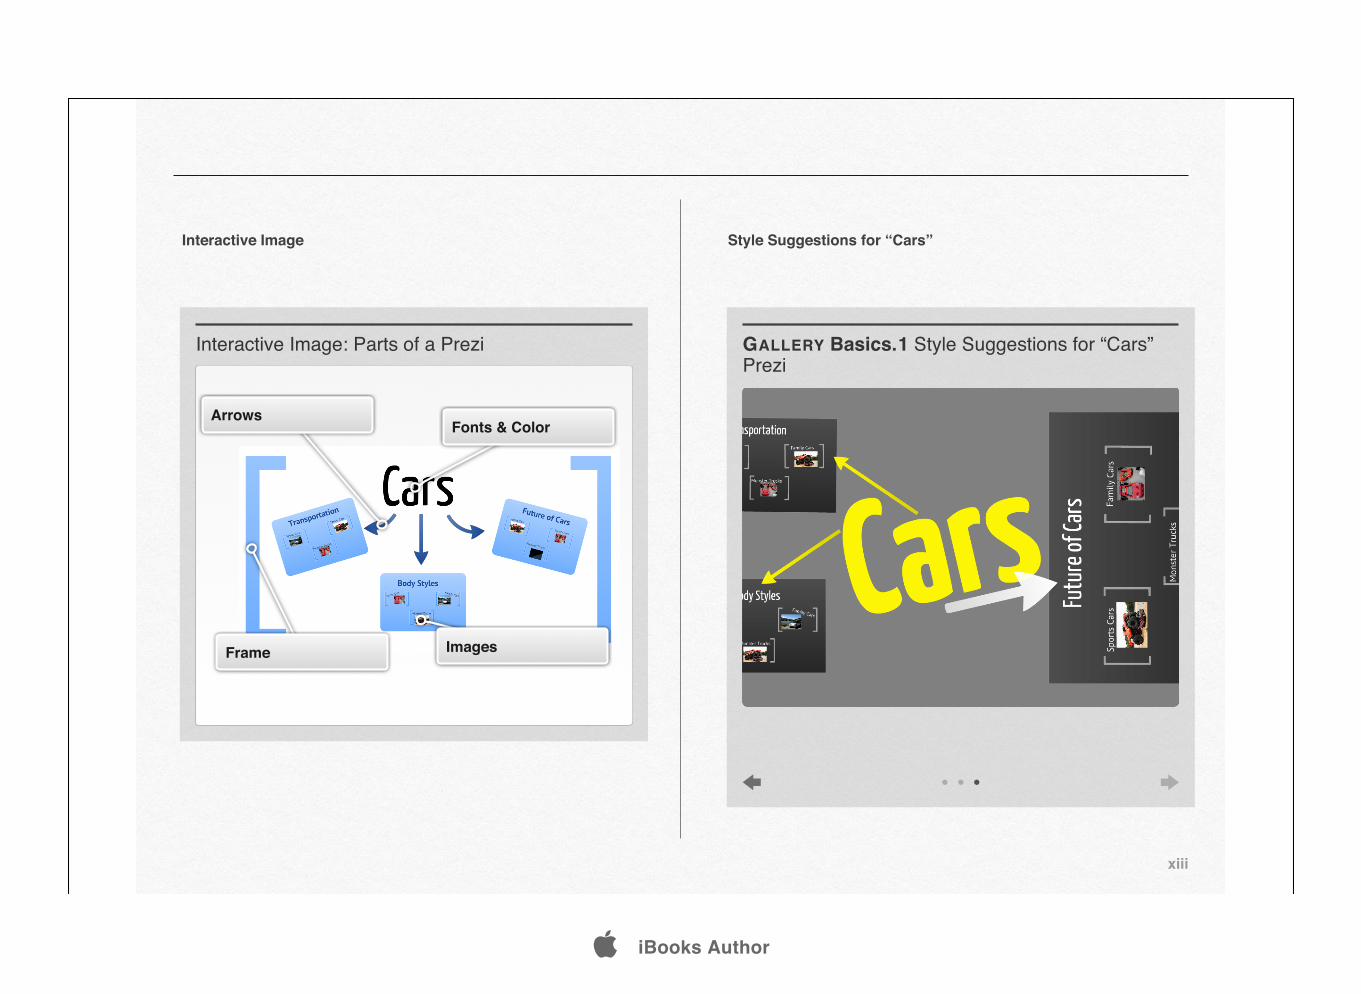
Style Suggestions for “Cars”
GALLERY Basics.1 Style Suggestions for “Cars” Prezi
Arrows
Frame Images
Fonts & Color
Interactive Image: Parts of a Prezi
Interactive Image
iBooks Author
xiv
©2012 Billy Meinke
Prezi Quick Guide by Billy Meinke is licensed under a Creative Commons Attribution-NonCommercial-ShareAlike 3.0 Unported License.
Creative Commons License
iBooks Author
xv
Thanks to my wonderful supervisors and colleagues at the University of Hawaii, Manoa. The knowledge and values they teach are invaluable.
Thanks also to my close friends and family that supported me through my education; without them I would not be where I am.
For information about the Educational Technology Department at the University of Hawaii, please follow this link: UH ETEC Program
Thank You
iBooks Author
xvi
Billy Meinke is an Instructional Design Assistant for Distance Course Design & Consulting (DCDC) Group at Technology & Distance Programs at the University of Hawaii, Manoa. His professional interests include eLearning, Social Media, Mobile Development, and Open Source/Open Educational Resources. He will graduate with a Masters Degree in Educational Technology in May, 2012.
To contact Billy regarding collaboration and professional interests, please use the following methods:
About the Author
@billymeinke
Billy Meinke’s LinkedIn Profile
iBooks Author
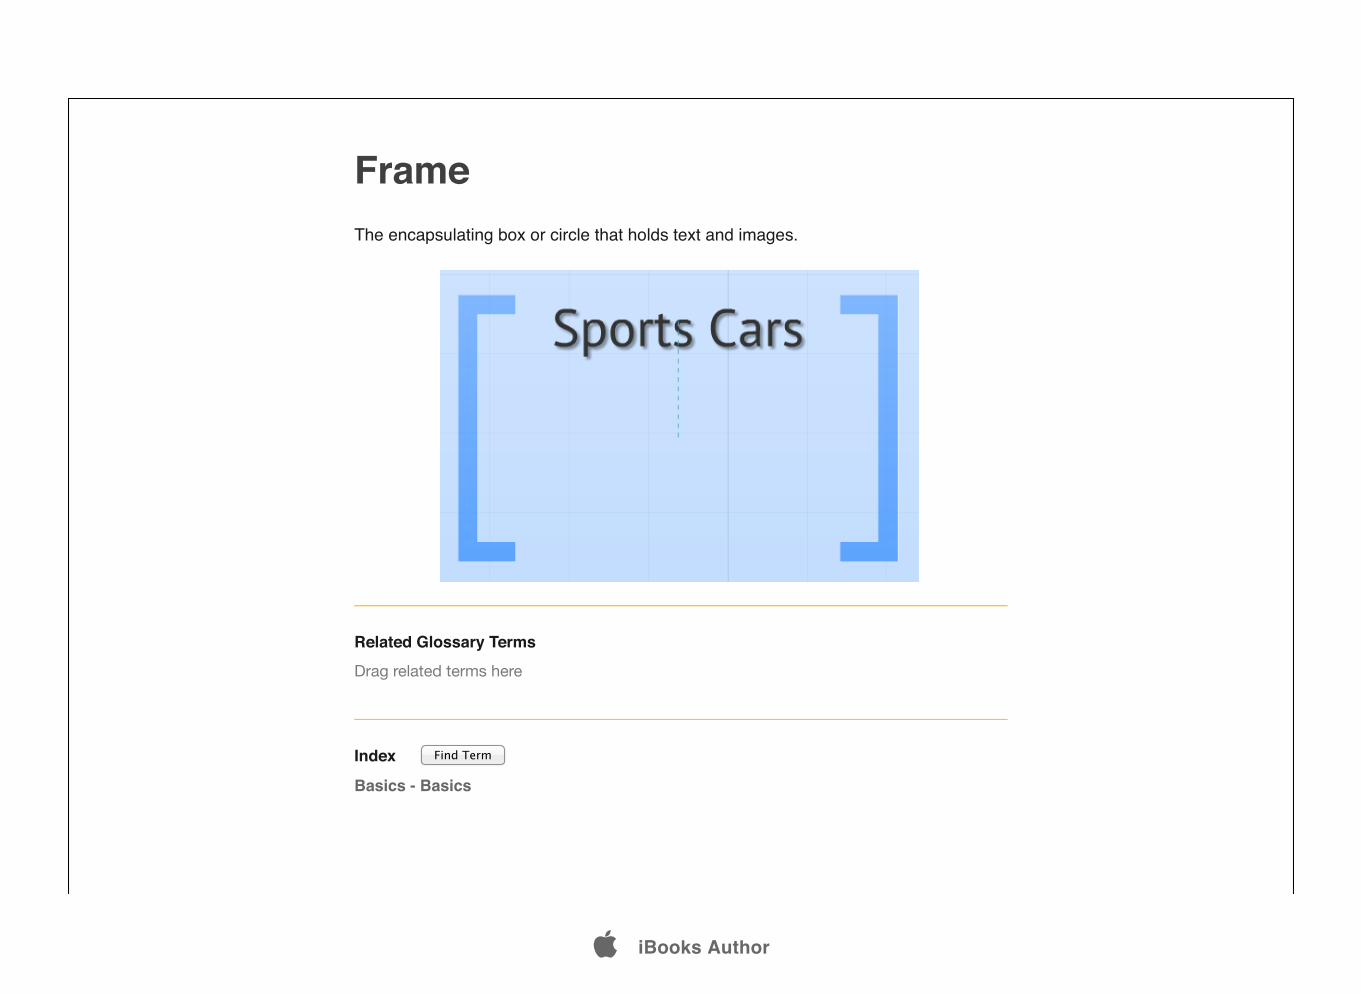
FrameThe encapsulating box or circle that holds text and images.
Related Glossary Terms
Index
Basics - Basics
Drag related terms here
Find Term
iBooks Author
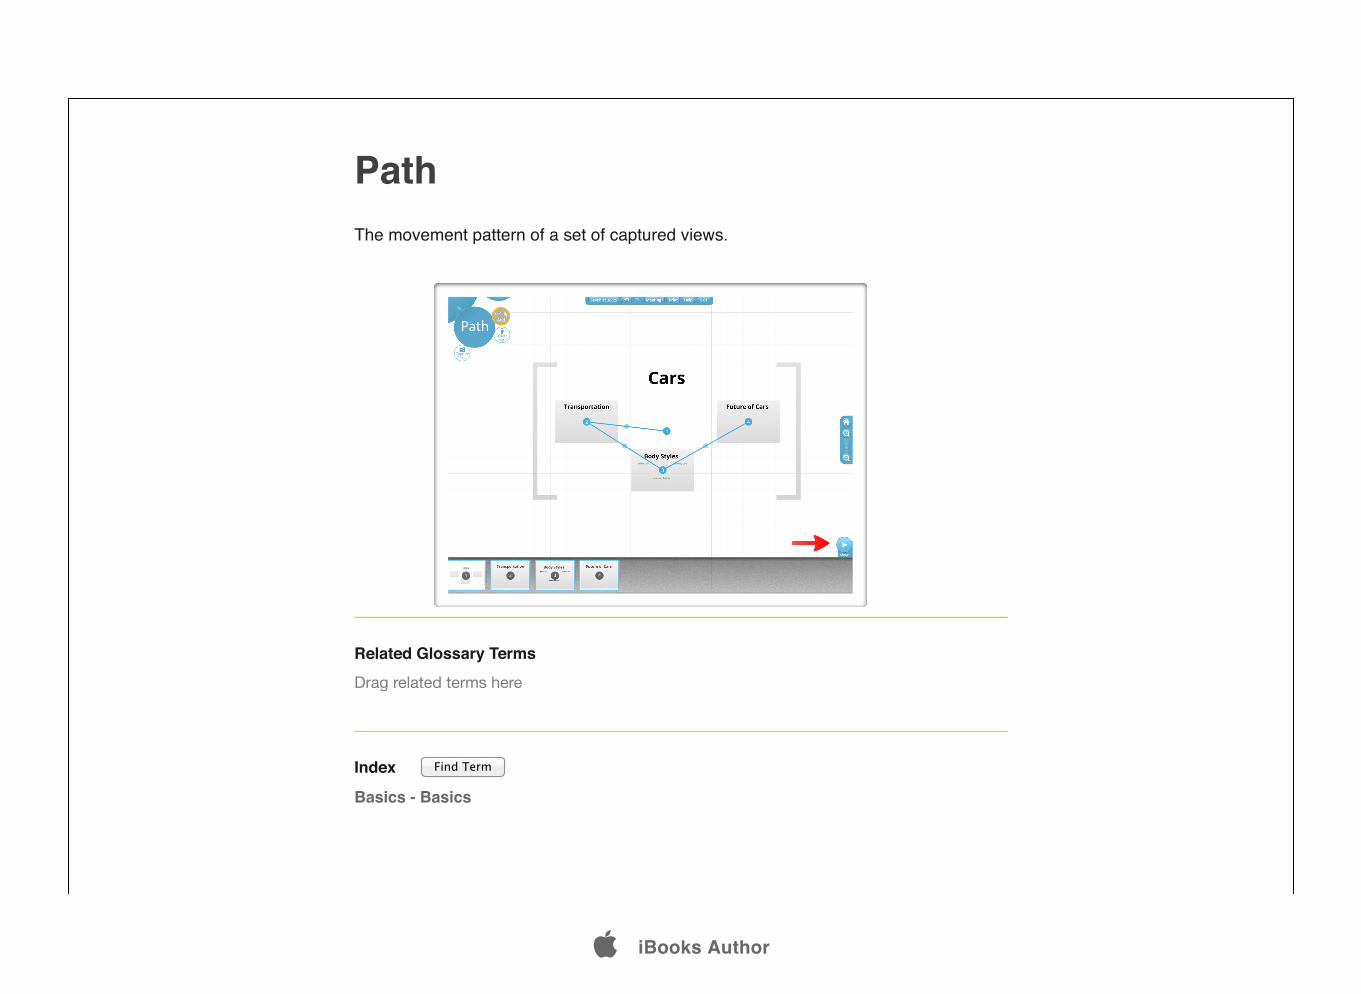
PathThe movement pattern of a set of captured views.
Related Glossary Terms
Index
Basics - Basics
Drag related terms here
Find Term
iBooks Author
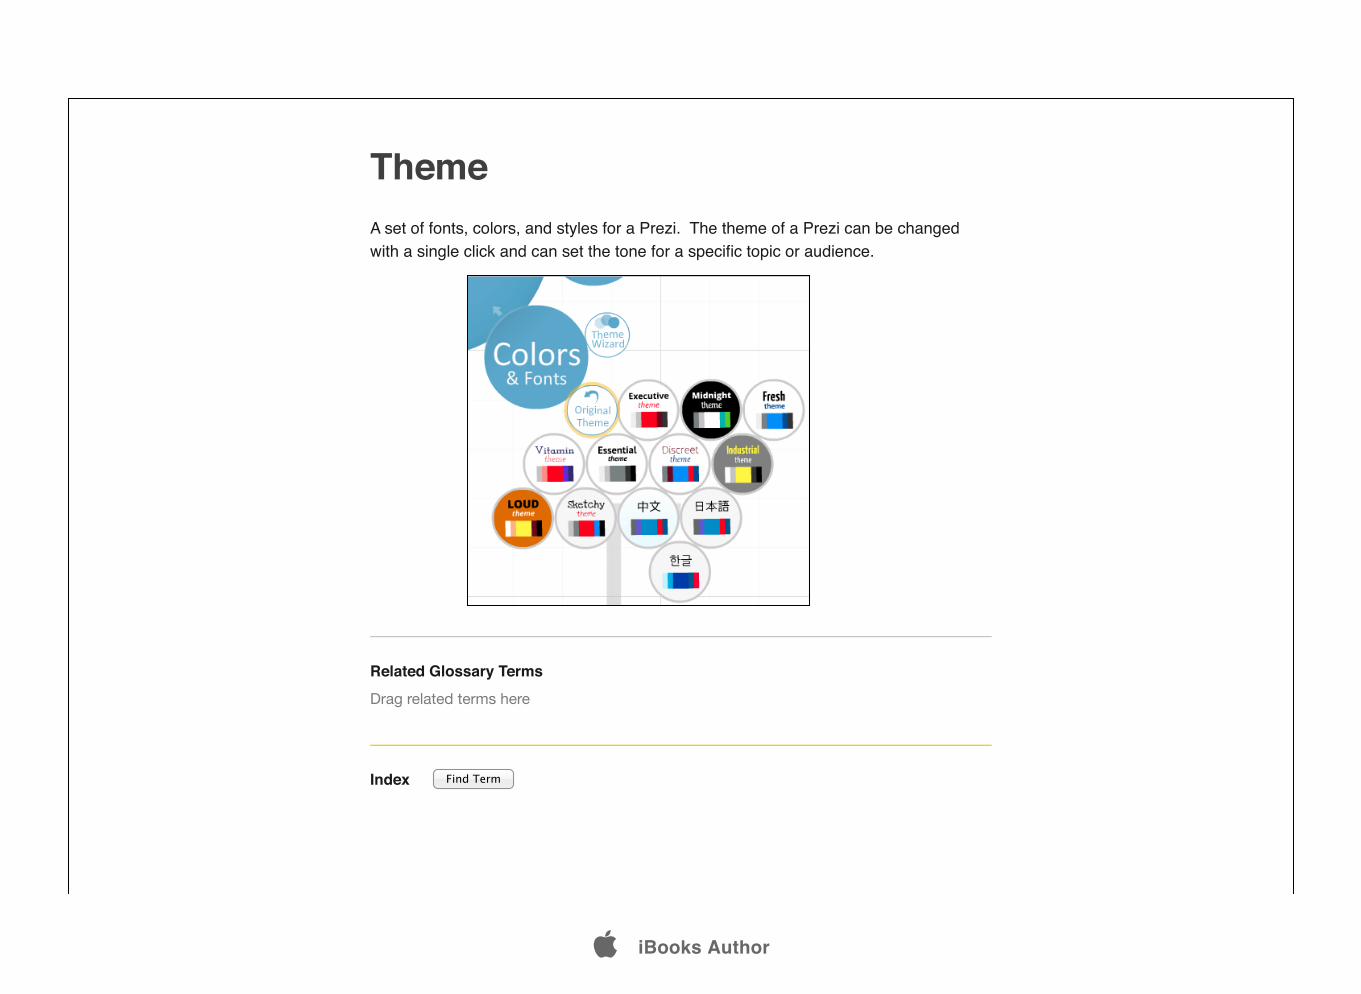
ThemeA set of fonts, colors, and styles for a Prezi. The theme of a Prezi can be changed with a single click and can set the tone for a specific topic or audience.
Related Glossary Terms
Index
Drag related terms here
Find Term
iBooks Author
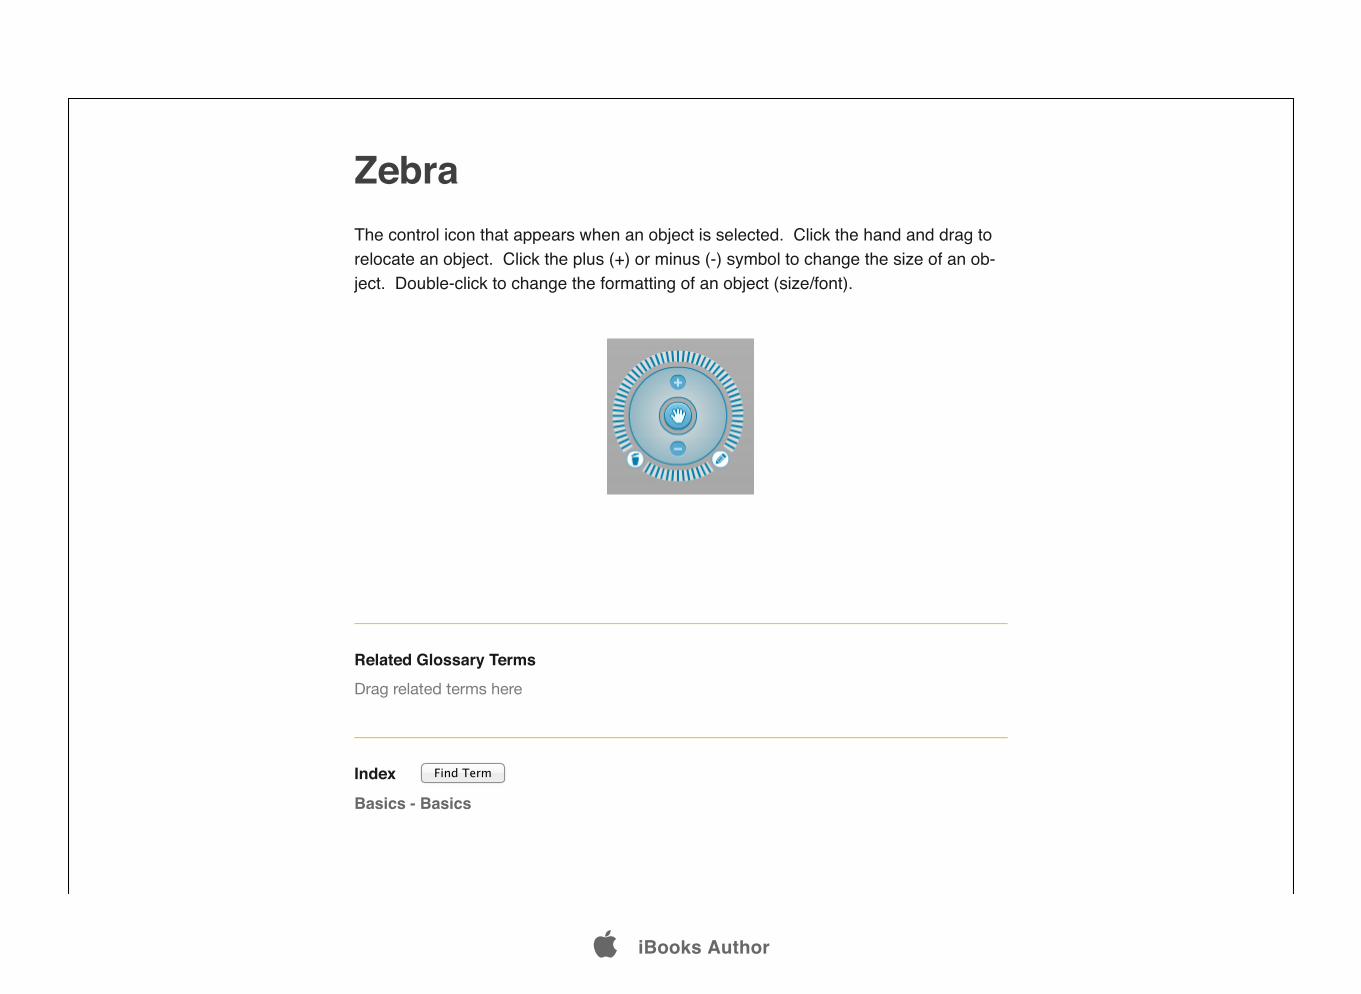
ZebraThe control icon that appears when an object is selected. Click the hand and drag to relocate an object. Click the plus (+) or minus (-) symbol to change the size of an ob-ject. Double-click to change the formatting of an object (size/font).
Related Glossary Terms
Index
Basics - Basics
Drag related terms here
Find Term
iBooks Author