Embed Size (px)
Citation preview
Session 4: Designing Learning Experiences 1
© 2015 Regents of the University of California
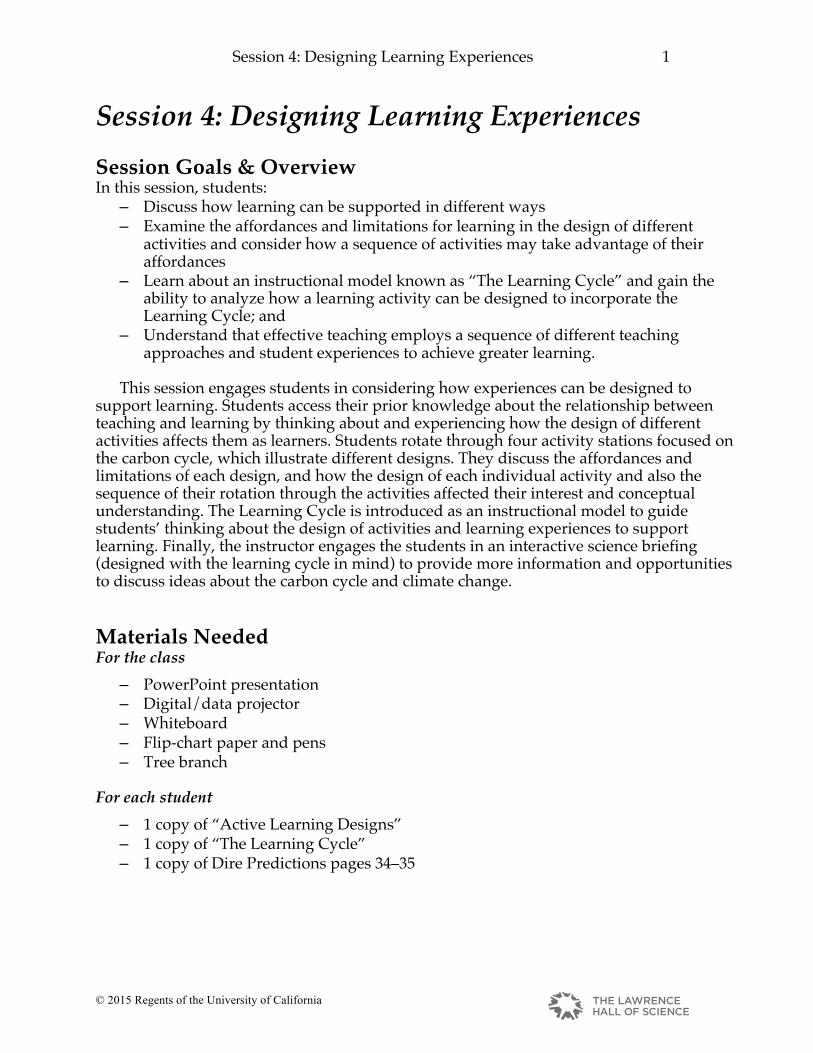
Session 4: Designing Learning Experiences Session Goals & Overview In this session, students:
– Discuss how learning can be supported in different ways – Examine the affordances and limitations for learning in the design of different
activities and consider how a sequence of activities may take advantage of their affordances
– Learn about an instructional model known as “The Learning Cycle” and gain the ability to analyze how a learning activity can be designed to incorporate the Learning Cycle; and
– Understand that effective teaching employs a sequence of different teaching approaches and student experiences to achieve greater learning.
This session engages students in considering how experiences can be designed to
support learning. Students access their prior knowledge about the relationship between teaching and learning by thinking about and experiencing how the design of different activities affects them as learners. Students rotate through four activity stations focused on the carbon cycle, which illustrate different designs. They discuss the affordances and limitations of each design, and how the design of each individual activity and also the sequence of their rotation through the activities affected their interest and conceptual understanding. The Learning Cycle is introduced as an instructional model to guide students’ thinking about the design of activities and learning experiences to support learning. Finally, the instructor engages the students in an interactive science briefing (designed with the learning cycle in mind) to provide more information and opportunities to discuss ideas about the carbon cycle and climate change. Materials Needed For the class
– PowerPoint presentation – Digital/data projector – Whiteboard – Flip-chart paper and pens – Tree branch
For each student
– 1 copy of “Active Learning Designs” – 1 copy of “The Learning Cycle” – 1 copy of Dire Predictions pages 34–35
Session 4: Designing Learning Experiences 2
© 2015 by The Regents of the University of California
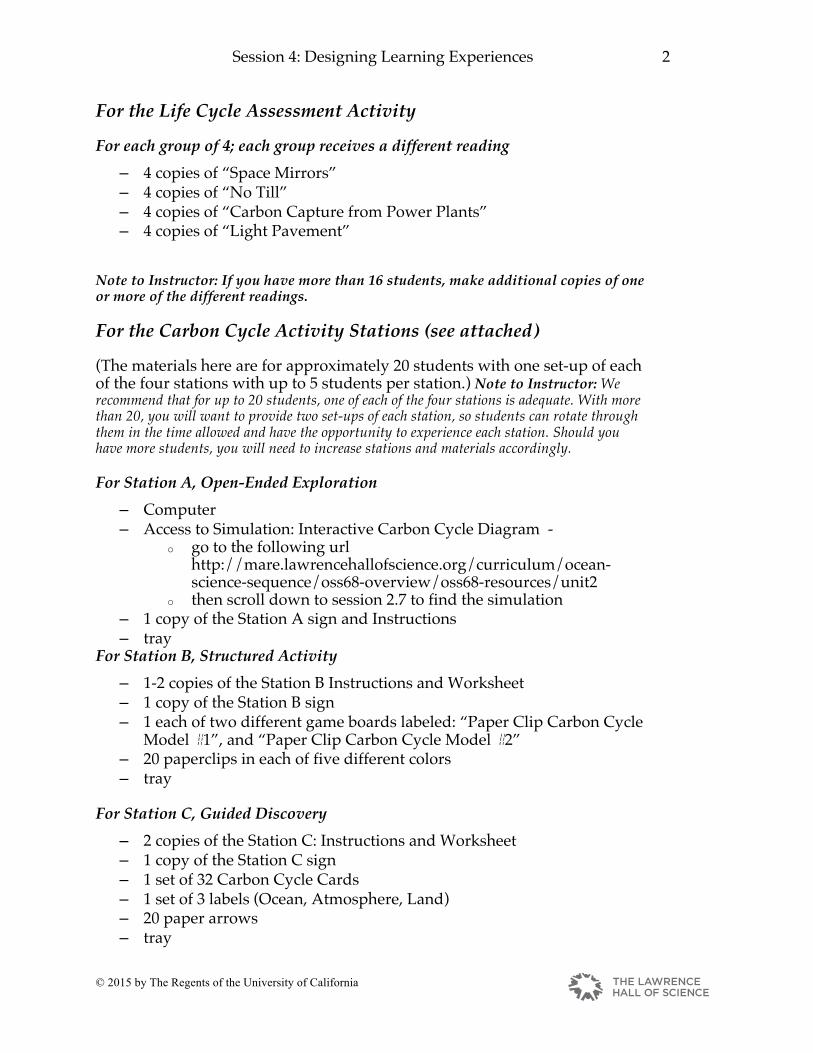
For the Life Cycle Assessment Activity
For each group of 4; each group receives a different reading – 4 copies of “Space Mirrors” – 4 copies of “No Till” – 4 copies of “Carbon Capture from Power Plants” – 4 copies of “Light Pavement”
Note to Instructor: If you have more than 16 students, make additional copies of one or more of the different readings.
For the Carbon Cycle Activity Stations (see attached)
(The materials here are for approximately 20 students with one set-up of each of the four stations with up to 5 students per station.) Note to Instructor: We recommend that for up to 20 students, one of each of the four stations is adequate. With more than 20, you will want to provide two set-ups of each station, so students can rotate through them in the time allowed and have the opportunity to experience each station. Should you have more students, you will need to increase stations and materials accordingly. For Station A, Open-Ended Exploration
– Computer
– Access to Simulation: Interactive Carbon Cycle Diagram - o go to the following url
http://mare.lawrencehallofscience.org/curriculum/ocean-science-sequence/oss68-overview/oss68-resources/unit2
o then scroll down to session 2.7 to find the simulation
– 1 copy of the Station A sign and Instructions
– tray For Station B, Structured Activity
– 1-2 copies of the Station B Instructions and Worksheet – 1 copy of the Station B sign – 1 each of two different game boards labeled: “Paper Clip Carbon Cycle
Model #1”, and “Paper Clip Carbon Cycle Model #2” – 20 paperclips in each of five different colors – tray
For Station C, Guided Discovery
– 2 copies of the Station C: Instructions and Worksheet – 1 copy of the Station C sign – 1 set of 32 Carbon Cycle Cards – 1 set of 3 labels (Ocean, Atmosphere, Land) – 20 paper arrows – tray
Session 4: Designing Learning Experiences 3
© 2015 by The Regents of the University of California
Preparation of Materials 1. Copy station signs, and Instructions and Worksheet.
Make enough to have one-two for each station you are setting up.
2. Make copies for each participant: – 1 copy of “Active Learning Designs” – 1 copy of “The Learning Cycle” sheet – 1 copy of Dire Predictions pages 34–35
3. Make enough copies of the four different Life Cycle Assessment readings (attached) so that each student in a small group of four has the same reading. Make sure that at least one group is assigned each of the four different readings:
– 1 copy of “Space Mirrors” – 1 copy of “No Till” – 1 copy of “Carbon Capture from Power Plants” – 1 copy of “Light Pavement”
4. Make a wall chart list of station titles.
Write the following list of the stations in large lettering on chart paper or a slide to refer to throughout the session: A — Open-ended Exploration; B — Structured Activity C — Guided Discovery; D — Active Reading
5. Set up the stations. – Set up the three stations by putting the materials (described under
“What You Need” above) on a tray, with the instructions for that station. You’ll need to set up duplicate sets of these stations if you have more than 20 students. The three stations are: Open-Ended Exploration; Structured Activity; and Guided Discovery.

Session 4: Designing Learning Experiences 4
© 2015 by The Regents of the University of California
Session at a Glance Task Description Estimated Time
(in minutes) A. Quick Write Quick write focused on sea level rise, including
what students learned and their muddiest point. 10
B. Minute Paper Two prompts about where the mass of a tree comes from and student ideas about the carbon cycle. Ideas are revisited throughout session.
10
C. Activity: Carbon Cycle Investigation Stations
Three activities (plus a reading) focus on the carbon cycle to explore how design of experiences support learning in different ways. Questions are gathered as an entry into science briefing.
65
D. Science Briefs: The Carbon Cycle & Climate Change and Life Cycle Assessment
Interactive PPT presentation on the carbon cycle as it pertains to climate change to address the student questions. A Life Cycle Assessment activity engages students in a problem-solving challenge to apply understanding of carbon cycle.
45
E. Reflection Students revisit initial minute paper and share their explanations with small and then whole group.
10
F. Discussion: Design experiences to support learning
Reflect on carbon cycle activities, and discuss how each of the designs supported learning.
10
G. Research Discussion: The Learning Cycle
The Learning Cycle is introduced. 15
H. Optional Reflection
Students reflect on how the activities were presented in relation to learning about the carbon cycle.
10 (not included in
total time)
I. Homework Readings due next week and other assignments. 5 TOTAL: 2 hrs 50 minutes 170
Session 4: Designing Learning Experiences 5
© 2015 by The Regents of the University of California
Instructor’s Guide–Session Details
A. Quick Write
1. Students do Quick Write. Display the Quick Write prompts about the reading that was assigned for homework, and what they learned in the last session. Give students about 5 minutes to respond.
• Explain the causes of sea level rise using what you learned last week from the science briefing, activity and reading.
• What is a common misconception about sea level rise and how might you help others to come to a more scientific understanding about that?
• What is the muddiest point for you about sea level rise? 2. Share highlights of quick write. After about 5 minutes, have students share their reflections with a partner. Optional: have partners share the highlights with the entire class. B. Minute Paper Note to Instructor: In order for students to feel comfortable sharing their ideas in a discussion, it’s important for the instructor to be accepting of all responses. The discussion may be much less effective if a hidden agenda emerges when the discussion leader responds in a positive fashion to some comments while negatively to others. Also, to encourage participation from everyone rather than just a few more assertive students, after asking a question, allow 3–4 seconds (“wait time”) before calling on anyone.
Some background information for the instructor has been provided in the lesson as a guideline and framework, and should not be read to students. Rather, the discussion leader should sprinkle in open-ended questions—many of which are suggested in the lesson—and “flow” with the students’ responses and comments, while keeping the discussion generally on track and within schedule. This may entail asking additional follow-up questions and inserting information we have provided as appropriate, as well as sharing some personal experiences of your own related to the topic. All of this should take place with a focus on non-judgmental acceptance of the participant’s comments and insights, while those of the instructor are judiciously sprinkled throughout the session. This kind of dynamic interchange cannot be fully scripted, and depends on the facilitation skills of the instructor. Like everything else, these presentation skills can take time and practice to develop. 1. Hold up a tree branch. Hold up a tree branch and have students individually respond in writing to the following prompts: • Where does most of the mass in this branch come from? (Hint: from air,
water, or soil?) Explain your answer. • Thinking about your answer about the tree branch, draw your conception
of the carbon cycle. (Hint: it might be easier if you suggest that they start their drawing with a tree.)
2. Turn and talk – students share ideas. Have students turn to the person next to them to discuss their ideas and share their drawings. After a few

Session 4: Designing Learning Experiences 6
© 2015 by The Regents of the University of California
minutes of sharing, ask a couple of students to share their ideas about the prompts with the entire group. Encourage others to participate in the discussion.
Remember to do the following to engage students in the discussion: § Listen to their responses § Ask students to provide explanations, evidence, or clarifications to
elaborate on their thinking. Suggested probing questions: o What makes you think that? o What evidence do you have to support your ideas? o What do you mean? Can you explain that in another way?
§ Invite others to react and respond to the ideas shared. Suggested probing questions:
o Can anyone add something to that comment? o Who would like to share an alternative idea? o Does anyone disagree with that comment?
§ Reference and cross-reference their comments as you facilitate the discussion to encourage students to think about and respond to one another’s ideas.
3. Record on board. Record the students’ ideas on the board and tell them that they will revisit their ideas as we go through the session.
C. Activity: Carbon Cycle Stations
INVITATION At this point, students access prior knowledge and experience with the topic in order to engage them and set up the learning station activity. Note: The phases of the Learning Cycle have been labeled in this write-up for the presenter’s awareness, but are not meant to be announced to students. Introduction 1. Think-Pair-Share about the topic. Ask students to recall the different learning experiences that they have experienced themselves, and think about how they are designed. For example, in their university science course, the instructor may assign readings from a textbook, lectures for 1-hour three times a week, and has a lab section. During the class, the instructor may use simulations, demonstrations, offer a hands-on activity, etc. Have students first think to themselves, then discuss the following question with the person sitting next to them for about two minutes.
• If active engagement is so important for learning, how can we design experiences to promote learning for all learners?
Note to Instructors: As with all sessions in this guide, the presentation to students has been designed to “practice what we preach.” The lesson plan itself has been set up to reflect a learning cycle approach to instruction. Through the lesson, the students
Session 4: Designing Learning Experiences 7
© 2015 by The Regents of the University of California
actually experience a version of the Learning Cycle model as they learn about it. It’s important that the session and instructor provide the opportunity for students to experience each phase of the model for themselves—resisting the temptation to dole out too much information too early. Rather, the instructor should set up the circumstances and allow the students to bring up most issues, while strategically inserting appropriate information to help clarify and organize the experience (and learning!) of the students.
2. Introduce the overall goals of the Activity Stations. Point out that in this next part of the session, they will be rotating through three stations that represent different instructional designs or approaches.
– Stations designed to stimulate discussion. Let them know that these stations have been specifically designed to stimulate discussion on how people learn and the design of experiences to support learning. These station activities are not meant to be presented as one lesson. Explain that they may know a little or a lot about this particular topic, but the stations represent different approaches to teaching a topic of any kind.
– Reflect on learning experience. Emphasize that although one of their goals is to perform the assigned tasks, and get “caught up” in the activities themselves, the most important objective is to reflect on the learning experience. Emphasize that as they engage with the three stations they should think about the design of the stations:
o How are you engaging with the materials at each station to learn the content?
o What questions about the content arise for you as you engage in the activities? Record your questions.
3. Introduce the station activities. Explain that at each station they will:
– Do the activity. Work with a small group to read the signs and follow the directions. There will be a signal given when time is almost up. They should expect to spend about 12 minutes at each station.
– Write down questions. Before leaving a station, they should spend one minute writing down any questions that arose as they did the activity.
– Clean up the station. When they are finished, please reorganize the materials for the next group before moving on to the next station.
EXPLORATION Students experience a variety of learning stations, notice how they are affected by them, and begin to come up with questions and ideas on the topic. Rotating through Carbon Cycle Stations 1. Monitor station activities. Check in with groups to make sure they understand the directions, are making progress, and that they reorganize the station before they move on. 2. Announce time and rotate groups. Keep an eye on the progress of groups at Station B. When they have completed and discussed game board #2,
Session 4: Designing Learning Experiences 8
© 2015 by The Regents of the University of California
announce to the whole group that it’s time to reorganize the station and move on to the next. Remind them to write down any questions about the content that arose during the station activity. Explain how they should rotate, with people from Station A moving on to Station B, Station B moving to Station C, and Station C moving to Station A. Active Reading – the fourth “station” 1. Get whole groups’ attention. After each of the groups has rotated through the three stations, get the attention of the whole group to prepare them for the next activity – the fourth “station”. 2. Introduce reading “station”. Tell students that they will now engage in a fourth activity, but this time they will all do it simultaneously. This “station” includes reading about the carbon cycle from the course textbook, Dire Predictions. 3. Introduce active reading. Share with the students that you want them to read the 2 pgs about carbon cycle using a particular method you will describe. Show the slide with the following directions:
• As you read, underline things you think are interesting or important. • Circle things you think are confusing and write your questions in the
margin. • After reading, turn to your partner and help each other as you try to
answer your questions. 4. Distribute Dire Predictions 2-page spread. Distribute the handout to each student and have him or her do active reading. 5. Students share questions. Tell students to spend a minute jotting down any additional questions that they wondered about as they engaged in the four activities. Have students share their questions as you record. Tell them the questions will be used as an entry point into the science briefing on the carbon cycle and climate change.
D. Science Brief: Carbon Cycle & Climate Change
We’ve chosen to introduce science content about the carbon cycle and climate change as a follow-up to the Carbon Cycle stations to model how science content can be presented through an interactive series of discussions, demonstrations, and PowerPoint slides. The purpose of the science content presentation is threefold: (1) provide background about important concepts students may choose to communicate to the public, (2) provide an opportunity for students to apply their understanding of the carbon cycle, and (3) show how to make content presentations interactive.

Session 4: Designing Learning Experiences 9
© 2015 by The Regents of the University of California
Some typical student questions and instructor responses follow. The accompanying science brief slides can be used in a very flexible manner, e.g. choosing to show just those slides that address student questions, or the instructor may decide to present a certain sequence of slides for continuity and to help students come to a deeper understanding of some aspect of the content that students seemed to be confused about. Student question clusters and example instructor responses: Cluster 1: questions about isotopes and isotopic signatures What is an isotope?
• Ask students to ask each other what they know about the parts of an atom.
• Listen to their responses: generally, students remember that an atom is made up of electrons, protons, and neutrons. The electrons are negatively charged and the protons are positively charged. The neutrons have no charge.
• Call to mind that an atom of carbon always has 6 protons that are (generally) balanced out by the charges of 6 electrons: this is essentially a “definition” of a carbon atom.
• At this point, show the slide that depicts the different naturally occurring isotopes of carbon. The number of neutrons determines the isotope of the atom. For carbon, the most common isotopes are generally termed 12C, 13C, and 14C.
• Atoms with more neutrons are heavier and move more slowly. When plants or microorganisms have the option, their enzymes will process more palatable (lighter, easier to move) isotopes over heavier ones.
Where do isotopes come from?
• Both 12C and 13C are called stable isotopes. Once these atoms of carbon formed – in supernovas when many elements came to be -- their configuration was and is stable. Barring nuclear reactors and fusion experiments, these atoms are not destroyed on the Earth’s surface: they simply move around.
• 14C is unstable, but not very unstable on human timescales. Half of the 14C created will exist for 5,730 years before radioactively decaying back into nitrogen. It is created in the upper atmosphere.
• Most of our atmosphere is nitrogen gas. Nitrogen in the stratosphere is hit by a neutron generated from cosmic rays, knocking out a proton and creating an atom of 14C.
• In short, atoms of nitrogen in the stratosphere interact with cosmic rays, turn into 14C atoms, and decay back into nitrogen atoms, usually after thousands of years. There’s a small but constant amount of 14C being created in the atmosphere. If a living thing is getting some CO2 from the atmosphere, it will

Session 4: Designing Learning Experiences 10
© 2015 by The Regents of the University of California
take on the signal of the CO2 in the atmosphere. After that organism dies, it no longer exchanges CO2 with the atmosphere, and the radiocarbon that organism contains decays over time.
• Since fossil fuels were created by living things that died long ago, fossil fuels contain close to zero 14C atoms.
How do isotopes in CO2 allow us to distinguish between biogenic, volcanic, and fossil fuel CO2 in the atmosphere?
• Recall we now have 2 key pieces of information: § Fossil fuels contain no 14C. § Plants and microbes interacting with the atmosphere
will preferentially consume CO2 containing 12C over 13C, for the most part.
• Ask students to think-pair-share about how isotopes of CO2 in the atmosphere would allow us to figure out how much fossil fuel, volcanic, and biogenic carbon exist as CO2 in the atmosphere.
• Fossil fuel carbon will have no 14C, so the concentration of 14CO2 in the atmosphere will decrease with more fossil fuel burning (called the Seuss Effect).
• Biogenic carbon has distinct 12C/13C ratios. • CO2 from volcanoes is both depleted of 14C and doesn’t
distinguish between 12C and 13C.
Cluster 2: Carbon reservoir questions Why is there so much carbon stored in rocks and the ocean instead of the atmosphere?
If the Earth were the size of a basketball, the atmosphere would be like a layer of saran wrap over the ball. Compare the ocean and the atmosphere. Which is deeper? Which is denser? Compare the Earth’s crust to the atmosphere. Which is deeper? Which is denser? The atmosphere holds very little mass compared to the ocean and Earth’s rocks.
How do rocks store carbon? Why are limestone rocks treated differently than sedimentary rocks?
Limestone is a sedimentary rock formed from the shells of organisms that lived long ago. Shells are made of a compound called calcium carbonate – fossil remains of organisms from ocean. Carbonate contains carbon and contributes 12% the overall rock mass. Most other rocks in the continental crust are mostly made of silica and aluminum oxides with a small amount of other important elements. These other rocks don’t contain any carbon in bulk. Sedimentary rock is created where small pieces of rock become cemented together over time. During this slow process, dead organisms (trees, plankton) can get caught in sediments as they are being formed. If there are massive
Session 4: Designing Learning Experiences 11
© 2015 by The Regents of the University of California
amounts of carbon in sediments, coal or oil are created after millions of years. In essence, coal is a sedimentary rock that is a fossil fuel.
Where does carbon from volcanic eruptions come from?
Volcanoes release magma from deep within the Earth’s crust. Magma is underground melted rock. Gases that are dissolved in molten magma come out of solution when the magma is under less pressure, like bubbles coming out of a soda bottle when it’s opened. The composition of the gases that volcanoes emit varies from place to place, depending on the composition of the magma. If the rock that melted contained some carbon, carbon dioxide can form and is released when the volcano erupts. However, most of the gas that comes out of a volcano is water.
Life Cycle Assessment 1. Introduce life cycle assessment slides. Introduce and provide an example of how to do a life cycle analysis using the reforestation example shown in the slides. (Note to instructor: these slides are numbers 35-45 in the Carbon Cycle Science Briefing) 2. Distribute set of four approaches readings. Tell students to form groups of four, and they will read about and investigate possible solutions to global warming. Give each student in a group of four a copy of the same approach to read about and investigate as a possible solution to global warming. Tell them to read the article individually and then discuss the following prompts in their group.
⎯ What parts of the carbon cycle are affected? ⎯ Does it deal with the causes (mitigation) or the consequences (adaptation) of global
warming? ⎯ Decide if you think it is a good (or not) solution that you would support. Be ready
to explain why. 3. Lead whole group discussion. Call on a few groups to share their ideas and encourage others to participate in the discussion.
Remember to do the following to engage students in the discussion: § Listen to their responses § Ask students to provide explanations, evidence, or clarifications to
elaborate on their thinking. Suggested probing questions: o What makes you think that? o What evidence do you have to support your ideas? o What do you mean? Can you explain that in another way?
§ Invite others to react and respond to the ideas shared. Suggested probing questions:
o Can anyone add something to that comment? o Who would like to share an alternative idea? o Does anyone disagree with that comment?
Session 4: Designing Learning Experiences 12
© 2015 by The Regents of the University of California
§ Reference and cross-reference their comments as you facilitate the discussion to encourage students to think about and respond to one another’s ideas.
E. Reflecting on and Revising Minute Paper Responses 1. Reflecting on first ideas. At the end of the science briefing, give students a few minutes to individually revisit and revise their explanation of where most of the mass of carbon in a tree branch comes from and their carbon cycle diagram. 2. Small groups share. Have students share their ideas with a small group. As they discuss, have them record any additional or remaining questions they still have. 3. Lead whole group discussion. Call on a few groups to share their ideas and encourage others to participate in the discussion.
F. Discussion: Design experiences to support learning
1. Introduce learning goals. Share the following slide with the students and tell them that we will be investigating these questions in relationship to the design of the activities they have been engaging in during this class session:
The learning goals affect how learning experiences are designed. • How were you engaging with the materials and content in today’s
learning experiences (station activities, reading, science briefing) to learn about the carbon cycle?
• When and how would you use each of these learning designs to help others learn the content? What would be your purpose?
2. Students reflect on and discuss their experiences as learners. Draw students’ attention to Station A, the Open-ended Investigation, and ask for their reactions to the station. Be accepting of all responses. Be prepared for (and welcome) some disagreement. If only positive reactions to the station are brought up, ask if anyone had a negative reaction, and vice versa. 3. Discuss the affordances and limitations of the design. If it has not come up already, challenge students to think about how the activity at Station A is designed, and how the design affected their learning experience.
– What were you able to do in the activity? – What were you not able to do in the activity?
Point out that in this example, the Open-Ended Exploration station was intentionally unstructured in an exaggerated fashion, in order to provoke reaction and discussion. Exploration need not be completely unstructured, and more specific procedural directions, data recording charts and debriefing discussions can make it a more rewarding and educational experience for all learners.
Session 4: Designing Learning Experiences 13
© 2015 by The Regents of the University of California
4. Ask students to suggest some possible goals related to each of the four activity designs. Point out that the learning goals affect how educator designs the learning experiences. Ask what goals each type of design might serve. Lead a brief discussion about their ideas. 5. Distribute “Active Learning Designs” handout. Point out that the handout begins with a description of the common features found across all of the different designs. Remind students that these three features were first introduced as foundations of how learning happens. Review these ideas briefly. 6. Focus on seven learning designs. Tell students that there are seven designs described on the handout, including the four they just experienced. Each of the designs is described in terms of an example, a description of the design, and the goals or purpose for using that design. 7. Note other factors that may impact educator’s choices. Point out that the design of learning experiences also depend on many other factors, such as available time, context for the experience, home and school culture, and the previous experiences of the audience and the educator.
CONCEPT INVENTION Students’ experiences and ideas are integrated into research and pedagogy as science content about the Carbon Cycle and Climate Change is introduced and then later, the Learning Cycle is described.
G. Research Discussion: The Learning Cycle
1. Discuss the stations as being components of a whole experience. Let students know that a learning experience does not have to limited to only one Design Approach, and in fact, a combination of approaches offers multiple entry points for learners to experience and revisit the ideas. Tell students to consider the stations as not being individual stations for learning about the carbon cycle, but instead one big learning experience with multiple entry points. 2. Discuss the sequence of the stations. In the previous discussion, students’ preferences regarding the order of the stations may have already been mentioned. Point out that each group rotated through the stations in a different sequence. Ask if they liked the order they did the four activities, or if there was a different order they think would suit them better or be more effective. Have each group suggest the order they think would be the most effective way to organize the four stations. Encourage them to explain the reason underlying their ordering preference. 3. Provide background about the model. Tell students that research indicates the sequence does matter. The Learning Cycle is a model that was
Session 4: Designing Learning Experiences 14
© 2015 by The Regents of the University of California
developed to provide a method for organizing and delivering educational experiences that are consistent with what is known about how people learn. It has been transformed and deepened through educational research on common components of good instructional models, as well as the work of cognitive scientists and researchers who study teaching and learning. 4. Display Learning Cycle and describe phases. Use the following information to briefly describe each phase.
– Invitation: An invitation is a question, problem, observation, or demonstration that initiates the learning task. It should make connections between past and present learning experiences, anticipate activities and organize learners’ thinking toward the learning outcomes of current activities. If learners are not engaged, they may not retain what they learn, and are probably only involved in rote learning.
– Exploration: Learner is engaged in open-ended investigation of real phenomena, and can also involve some discussion about discoveries, results, ideas, and questions that arise. This can be through hands-on activity or through discourse and thought processes. It can be more or less structured, but the idea is that exploration should be driven mainly by the learner’s interest and questions.
– Concept Invention: The concept invention phase involves the active processing of the experience by the learner. Learners now review evidence and data gathered through exploration and try to make sense of it. With interest and attention focused, new ideas can be discovered and the learner can solve problems and begin to construct new meanings. When possible, learners should be free to invent and discuss their own understandings directly from their hands-on experiences, through discussion with their peers and with those with more knowledge.
– Application: Armed with new ideas and concepts, the learner applies knowledge and abilities to different situations than those they have already encountered. Researchers agree that in-depth learning requires being able to transfer knowledge from familiar circumstances to novel ones.
– Reflection: After trying out new ideas in different settings, learners reflect on how their original notions have been or need to be modified. They may also generate new questions that can initiate a new learning cycle.
5. Distribute the Learning Cycle handout. Distribute the handout and give the students just a few minutes to read it over. 6. Connect the structure of this session with the Learning Cycle model. Draw students’ attention to the elements of the Activity Stations lesson that fit with the Learning Cycle model. Ask students to identify the parts of the Learning Cycle in the lesson that they just experienced about the carbon cycle.
Session 4: Designing Learning Experiences 15
© 2015 by The Regents of the University of California
– Invitation: The initial questions posed at the beginning of the lesson. – Exploration: The station activities and discussion. – Concept Invention: The Science Briefing and this introduction to the
Learning Cycle model. – Application: The current and following activities. Further
applications will occur in subsequent lessons in this course. – Reflection: Opportunity to revisit the minute paper responses, and
also coming up at the end of the session APPLICATION Students apply the phases of the Learning Cycle to the activities they just experienced. Additional (optional) information you might want to share with students. 1. Discuss importance of personalizing lessons. Explain that it’s inherently difficult to write a “script” for an interaction with learners, especially when working with the public in informal environments, because each interaction is different and each visitor brings a variety of experiences and ideas they (and you) can draw from. Another complicating factor is that the learner is in charge of his or her own time, unlike formal education, where the learner has an assigned amount of time for an activity. This puts a greater emphasis on keeping the learner engaged and the need for the facilitator to personalize the interaction. By asking guiding questions and listening carefully, the facilitator can incorporate the learner’s ideas, observations, and questions to guide their investigation. 2. Explain how science is often presented. Point out that it’s very common for science topics to be presented to learners without giving the learner a chance to really engage in discovery. For example, an educator might introduce concepts and new vocabulary at the start of an activity, and then ask learners to merely follow a procedure or view a demo where those concepts are demonstrated and essentially nothing new is learned. Without the opening invitation and free exploration phases, learners have much less opportunity to become interested in and develop an understanding of the concepts. And merely delivering the information removes the engagement and educational impact of discovering ideas for themselves. Share how it is often possible to reformat “traditional” science exhibits, activities, or lessons to follow a more effective learning cycle approach. 3. Discuss how the Learning Cycle can be used. Point out that the Learning Cycle can be an extremely valuable tool for designing learning experiences, including lectures. When a lesson is ineffective, it’s often because concepts and vocabulary have been introduced before exploration. The learners aren’t interested yet, and have little context for the concepts. In some cases, learners are given the opportunity to explore, but not to engage, in concept invention, which is a missed opportunity for them to try to make sense of their
Session 4: Designing Learning Experiences 16
© 2015 by The Regents of the University of California
experience. Some otherwise great activities lack the opportunity for application or reflection, which can result in lessening the impact of the experience.
The Learning Cycle model is an excellent planning tool, and it can also help guide the many on-the-spot decisions educators must make during instruction. H. Reflection (optional, or make online assignment) Students reflect on science experiences. Ask students to think about himself or herself as a learner and to respond to the following prompt:
• What do you feel are the pros and cons about the way the science content on the carbon cycle and climate change was presented?
I. Homework
Reading – Paper. Bransford, J., Brown, A. L., Cocking, R. R. (2000). How people
learn: Brain, mind, experience, and school. Washington, D.C.: National Academy Press.
o Chapter 3: Learning and transfer (pp. 51-78). – Fenichel, M. & Schweingruber, H.A. (2009). Surrounded by Science:
Learning Science in Informal Environments. National Academies Press: Washington, D.C.
o Chapter 3: Designing for science learning—Basic principles (pp. 25-42).
Session 4: Designing Learning Experiences 17
© 2015 by The Regents of the University of California
Activity: Station A Instructions
Station A Open-ended Exploration
Investigate the Interactive Carbon Cycle Diagram. 1. Find a new way of looking at the carbon cycle, different from how you have viewed it before. 2. What are some of the things you discovered about the carbon cycle looking at it in this new way? 3. What are some questions that arose as you investigated the carbon cycle?
Session 4: Designing Learning Experiences 18
© 2015 by The Regents of the University of California
Activity: Station B Instructions
Station B Structured Activity
Follow the directions on the Station B instructions sheet. After running the model, discuss your ideas as a group using the discussion prompts on the instructions sheet.
Session 4: Designing Learning Experiences 19
© 2015 by The Regents of the University of California
Activity: Station B Worksheet
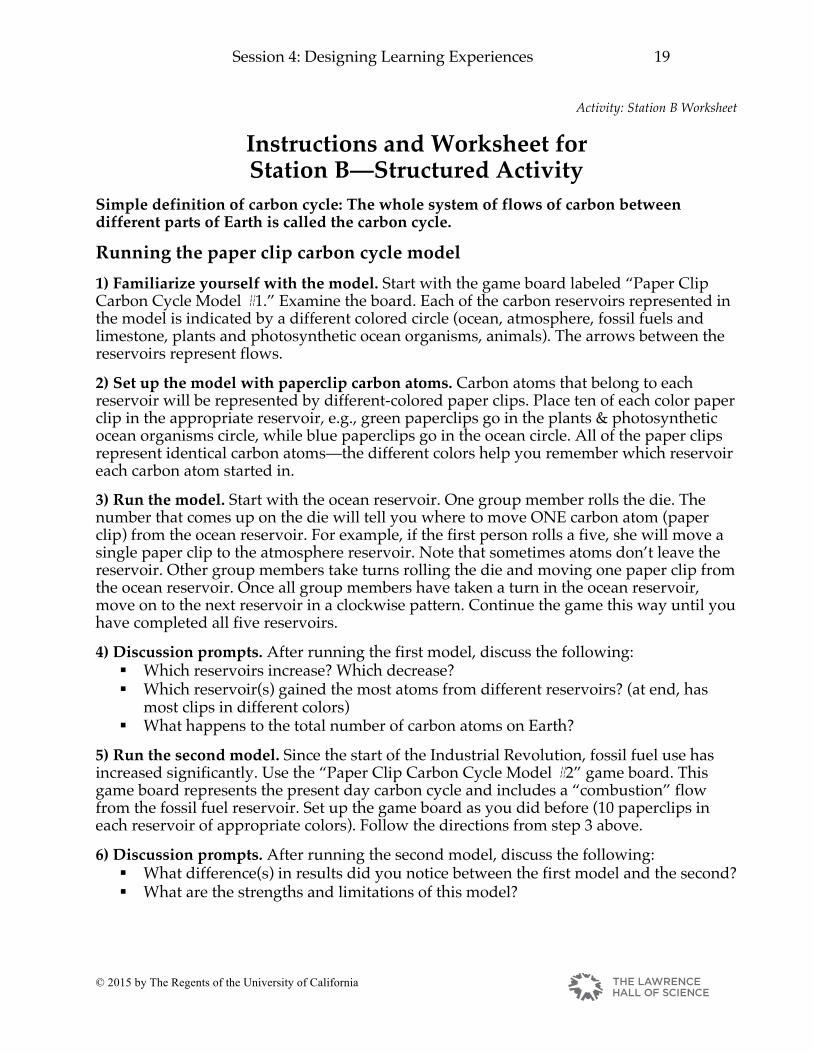
Instructions and Worksheet for Station B—Structured Activity
Simple definition of carbon cycle: The whole system of flows of carbon between different parts of Earth is called the carbon cycle. Running the paper clip carbon cycle model 1) Familiarize yourself with the model. Start with the game board labeled “Paper Clip Carbon Cycle Model #1.” Examine the board. Each of the carbon reservoirs represented in the model is indicated by a different colored circle (ocean, atmosphere, fossil fuels and limestone, plants and photosynthetic ocean organisms, animals). The arrows between the reservoirs represent flows. 2) Set up the model with paperclip carbon atoms. Carbon atoms that belong to each reservoir will be represented by different-colored paper clips. Place ten of each color paper clip in the appropriate reservoir, e.g., green paperclips go in the plants & photosynthetic ocean organisms circle, while blue paperclips go in the ocean circle. All of the paper clips represent identical carbon atoms—the different colors help you remember which reservoir each carbon atom started in. 3) Run the model. Start with the ocean reservoir. One group member rolls the die. The number that comes up on the die will tell you where to move ONE carbon atom (paper clip) from the ocean reservoir. For example, if the first person rolls a five, she will move a single paper clip to the atmosphere reservoir. Note that sometimes atoms don’t leave the reservoir. Other group members take turns rolling the die and moving one paper clip from the ocean reservoir. Once all group members have taken a turn in the ocean reservoir, move on to the next reservoir in a clockwise pattern. Continue the game this way until you have completed all five reservoirs. 4) Discussion prompts. After running the first model, discuss the following:
§ Which reservoirs increase? Which decrease? § Which reservoir(s) gained the most atoms from different reservoirs? (at end, has
most clips in different colors) § What happens to the total number of carbon atoms on Earth?
5) Run the second model. Since the start of the Industrial Revolution, fossil fuel use has increased significantly. Use the “Paper Clip Carbon Cycle Model #2” game board. This game board represents the present day carbon cycle and includes a “combustion” flow from the fossil fuel reservoir. Set up the game board as you did before (10 paperclips in each reservoir of appropriate colors). Follow the directions from step 3 above. 6) Discussion prompts. After running the second model, discuss the following:
§ What difference(s) in results did you notice between the first model and the second? § What are the strengths and limitations of this model?

Session 4: Designing Learning Experiences 20
© 2015 by The Regents of the University of California
Station C instructions
Station C
Guided Discovery
Follow the directions on the Station C instructions and worksheet. Discuss your ideas as you work together with your group to explore carbon cards and design a table top carbon cycle diagram.
Session 4: Designing Learning Experiences 21
© 2015 by The Regents of the University of California
Activity: Station C Worksheet
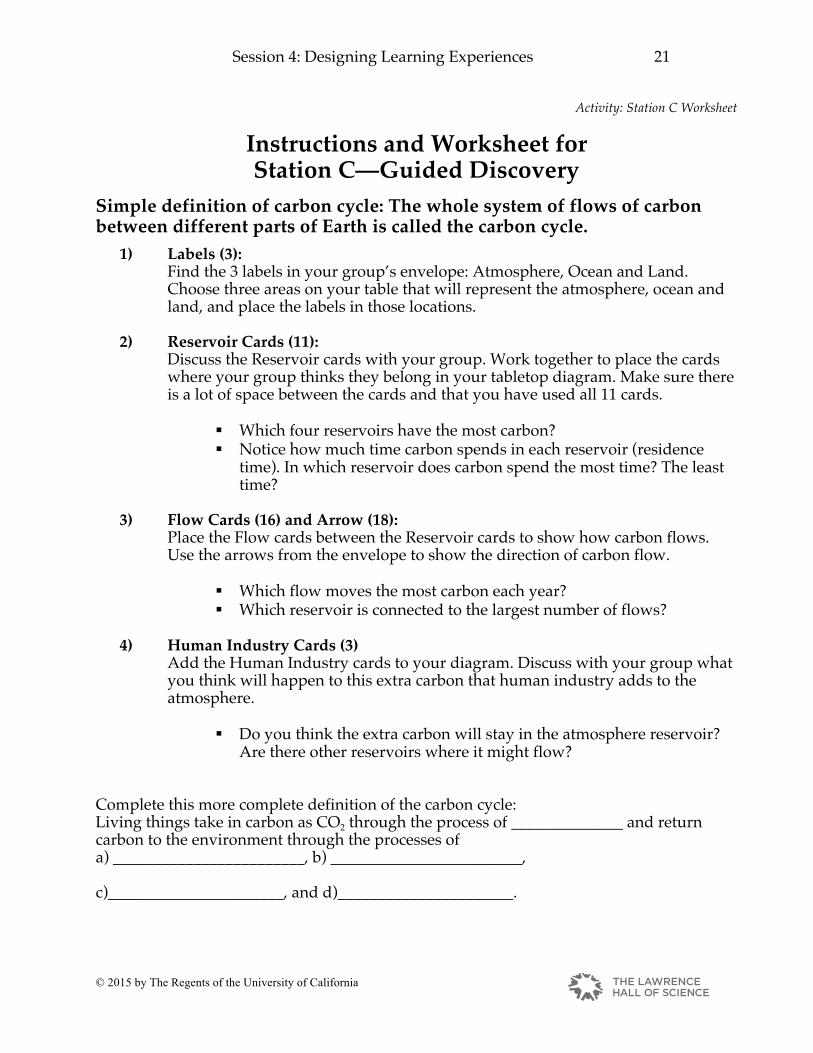
Instructions and Worksheet for Station C—Guided Discovery
Simple definition of carbon cycle: The whole system of flows of carbon between different parts of Earth is called the carbon cycle.
1) Labels (3): Find the 3 labels in your group’s envelope: Atmosphere, Ocean and Land. Choose three areas on your table that will represent the atmosphere, ocean and land, and place the labels in those locations.
2) Reservoir Cards (11):
Discuss the Reservoir cards with your group. Work together to place the cards where your group thinks they belong in your tabletop diagram. Make sure there is a lot of space between the cards and that you have used all 11 cards.
§ Which four reservoirs have the most carbon? § Notice how much time carbon spends in each reservoir (residence
time). In which reservoir does carbon spend the most time? The least time?
3) Flow Cards (16) and Arrow (18):
Place the Flow cards between the Reservoir cards to show how carbon flows. Use the arrows from the envelope to show the direction of carbon flow.
§ Which flow moves the most carbon each year? § Which reservoir is connected to the largest number of flows?
4) Human Industry Cards (3)
Add the Human Industry cards to your diagram. Discuss with your group what you think will happen to this extra carbon that human industry adds to the atmosphere.
§ Do you think the extra carbon will stay in the atmosphere reservoir? Are there other reservoirs where it might flow?
Complete this more complete definition of the carbon cycle: Living things take in carbon as CO2 through the process of ______________ and return carbon to the environment through the processes of a) ________________________, b) ________________________, c)______________________, and d)______________________.
Session 4: Designing Learning Experiences 22
© 2015 by The Regents of the University of California
Handout: The Learning Cycle pg. 1 of 2
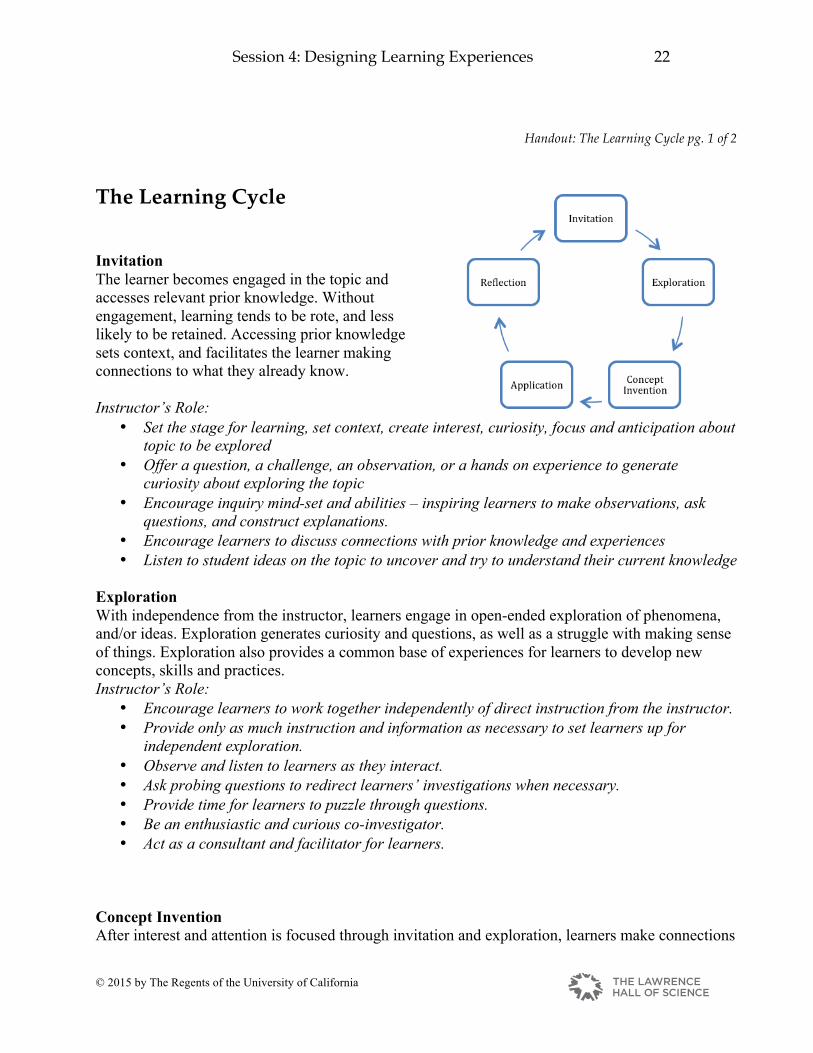
The Learning Cycle Invitation The learner becomes engaged in the topic and accesses relevant prior knowledge. Without engagement, learning tends to be rote, and less likely to be retained. Accessing prior knowledge sets context, and facilitates the learner making connections to what they already know. Instructor’s Role:
• Set the stage for learning, set context, create interest, curiosity, focus and anticipation about topic to be explored
• Offer a question, a challenge, an observation, or a hands on experience to generate curiosity about exploring the topic
• Encourage inquiry mind-set and abilities – inspiring learners to make observations, ask questions, and construct explanations.
• Encourage learners to discuss connections with prior knowledge and experiences • Listen to student ideas on the topic to uncover and try to understand their current knowledge
Exploration With independence from the instructor, learners engage in open-ended exploration of phenomena, and/or ideas. Exploration generates curiosity and questions, as well as a struggle with making sense of things. Exploration also provides a common base of experiences for learners to develop new concepts, skills and practices. Instructor’s Role:
• Encourage learners to work together independently of direct instruction from the instructor. • Provide only as much instruction and information as necessary to set learners up for
independent exploration. • Observe and listen to learners as they interact. • Ask probing questions to redirect learners’ investigations when necessary. • Provide time for learners to puzzle through questions. • Be an enthusiastic and curious co-investigator. • Act as a consultant and facilitator for learners.
Concept Invention After interest and attention is focused through invitation and exploration, learners make connections
Session 4: Designing Learning Experiences 23
© 2015 by The Regents of the University of California
and construct new meanings from experiences, often facilitated by an instructor. Ideally, this is largely student-generated, but if you have specific content you want them to know, this is the time to deliver it. But it’s key to understand that no matter what is “delivered” to them, learners actively generate ideas and concepts, and make sense of them for themselves. Each learner takes information and fits it into his/her own conceptual frameworks, and the concepts they walk away with are unique to each individual. Instructor’s Role:
• Encourage learners to explain concepts, definitions, and science practices in their own words.
• Ask for evidence, results and clarification from learners, to help guide them to making sense of their experience.
• Provide formal definitions, explanations, and new vocabulary, as necessary, to explain concepts.
• Use learners’ direct experiences as the basis for explaining concepts. Application To truly learn something, the learner needs to apply new concepts and ideas to a different context. Learners apply new knowledge, vocabulary and skills to solving a problem or meeting a challenge in a new situation, through activity, or through discussion. Learners gain deeper and broader understanding, gather more information, make connections to real world problems, and develop transferable skills. Instructor’s Role:
• Provide opportunities for learners to apply vocabulary, definitions, skills and explanations to new situations or problems.
• Evaluate student progress and understanding and provide feedback. Reflection Learners reflect on their learning, compare new ideas to alternative explanations and extend thinking. Through discussion, quiet thinking, writing, and/or drawing, they make connections and construct new conceptual frameworks. They examine and analyze how they arrived at their current understanding to help them understand how they learned what they learned. Instructor’s Role:
• Prompt learners to reflect on activities to help them confront their former ideas and evolve new ones.
• Prompt learners to solidify conceptual framework connections • Prompt learners to help build metacognitive (thinking about your own learning) skills.
© 2015 by The Regents of the University of California
24
Handout: Active Learning Designs pg. 1 of 3
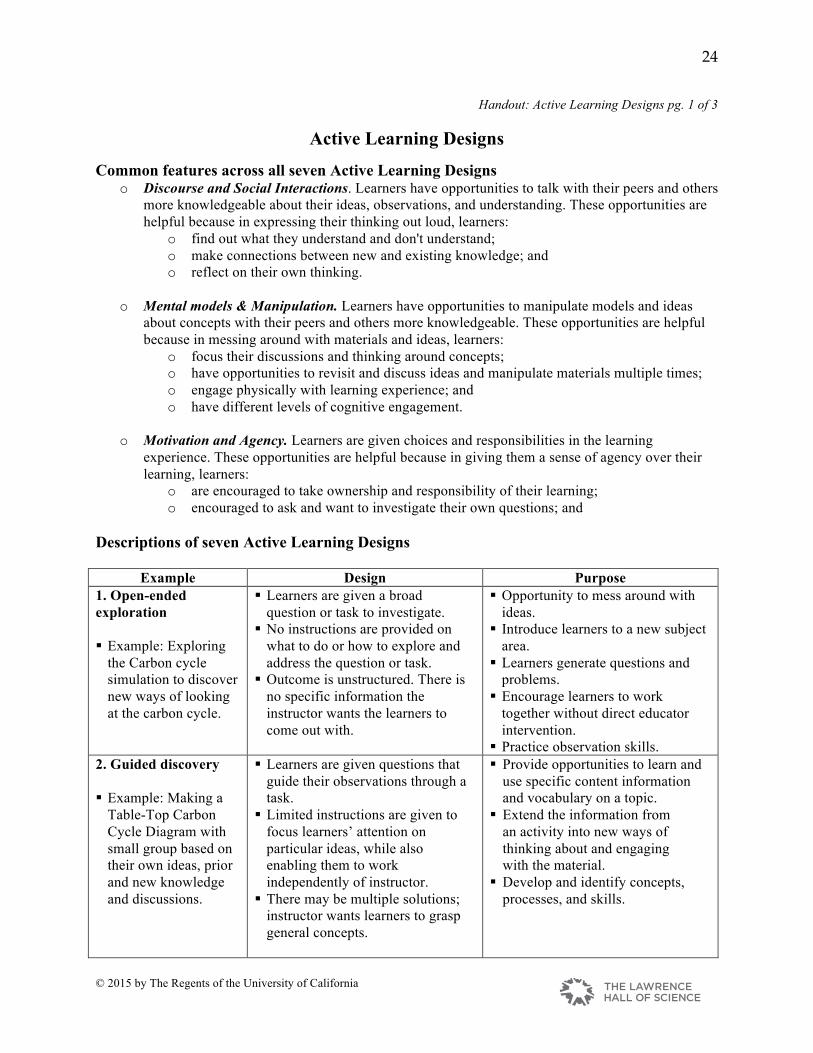
Active Learning Designs Common features across all seven Active Learning Designs
o Discourse and Social Interactions. Learners have opportunities to talk with their peers and others more knowledgeable about their ideas, observations, and understanding. These opportunities are helpful because in expressing their thinking out loud, learners:
o find out what they understand and don't understand; o make connections between new and existing knowledge; and o reflect on their own thinking.
o Mental models & Manipulation. Learners have opportunities to manipulate models and ideas
about concepts with their peers and others more knowledgeable. These opportunities are helpful because in messing around with materials and ideas, learners:
o focus their discussions and thinking around concepts; o have opportunities to revisit and discuss ideas and manipulate materials multiple times; o engage physically with learning experience; and o have different levels of cognitive engagement.
o Motivation and Agency. Learners are given choices and responsibilities in the learning
experience. These opportunities are helpful because in giving them a sense of agency over their learning, learners:
o are encouraged to take ownership and responsibility of their learning; o encouraged to ask and want to investigate their own questions; and
Descriptions of seven Active Learning Designs
Example Design Purpose 1. Open-ended exploration
§ Example: Exploring
the Carbon cycle simulation to discover new ways of looking at the carbon cycle.
§ Learners are given a broad question or task to investigate.
§ No instructions are provided on what to do or how to explore and address the question or task.
§ Outcome is unstructured. There is no specific information the instructor wants the learners to come out with.
§ Opportunity to mess around with ideas.
§ Introduce learners to a new subject area.
§ Learners generate questions and problems.
§ Encourage learners to work together without direct educator intervention.
§ Practice observation skills. 2. Guided discovery
§ Example: Making a
Table-Top Carbon Cycle Diagram with small group based on their own ideas, prior and new knowledge and discussions.
§ Learners are given questions that guide their observations through a task.
§ Limited instructions are given to focus learners’ attention on particular ideas, while also enabling them to work independently of instructor.
§ There may be multiple solutions; instructor wants learners to grasp general concepts.
§ Provide opportunities to learn and use specific content information and vocabulary on a topic.
§ Extend the information from an activity into new ways of thinking about and engaging with the material.
§ Develop and identify concepts, processes, and skills.
© 2015 by The Regents of the University of California
25
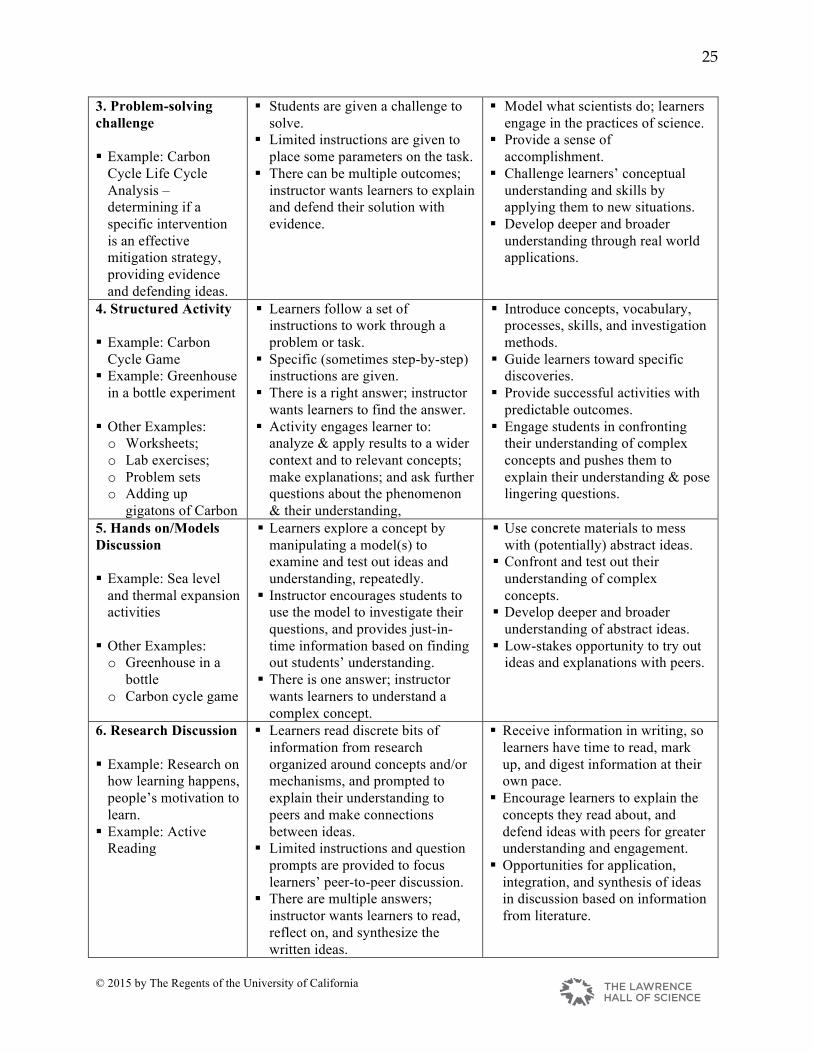
3. Problem-solving challenge
§ Example: Carbon
Cycle Life Cycle Analysis – determining if a specific intervention is an effective mitigation strategy, providing evidence and defending ideas.
§ Students are given a challenge to solve.
§ Limited instructions are given to place some parameters on the task.
§ There can be multiple outcomes; instructor wants learners to explain and defend their solution with evidence.
§ Model what scientists do; learners engage in the practices of science.
§ Provide a sense of accomplishment.
§ Challenge learners’ conceptual understanding and skills by applying them to new situations.
§ Develop deeper and broader understanding through real world applications.
4. Structured Activity § Example: Carbon
Cycle Game § Example: Greenhouse
in a bottle experiment
§ Other Examples: o Worksheets; o Lab exercises; o Problem sets o Adding up
gigatons of Carbon
§ Learners follow a set of instructions to work through a problem or task.
§ Specific (sometimes step-by-step) instructions are given.
§ There is a right answer; instructor wants learners to find the answer.
§ Activity engages learner to: analyze & apply results to a wider context and to relevant concepts; make explanations; and ask further questions about the phenomenon & their understanding,
§ Introduce concepts, vocabulary, processes, skills, and investigation methods.
§ Guide learners toward specific discoveries.
§ Provide successful activities with predictable outcomes.
§ Engage students in confronting their understanding of complex concepts and pushes them to explain their understanding & pose lingering questions.
5. Hands on/Models Discussion § Example: Sea level
and thermal expansion activities
§ Other Examples: o Greenhouse in a
bottle o Carbon cycle game
§ Learners explore a concept by manipulating a model(s) to examine and test out ideas and understanding, repeatedly.
§ Instructor encourages students to use the model to investigate their questions, and provides just-in-time information based on finding out students’ understanding.
§ There is one answer; instructor wants learners to understand a complex concept.
§ Use concrete materials to mess with (potentially) abstract ideas.
§ Confront and test out their understanding of complex concepts.
§ Develop deeper and broader understanding of abstract ideas.
§ Low-stakes opportunity to try out ideas and explanations with peers.
6. Research Discussion
§ Example: Research on how learning happens, people’s motivation to learn.
§ Example: Active Reading
§ Learners read discrete bits of information from research organized around concepts and/or mechanisms, and prompted to explain their understanding to peers and make connections between ideas.
§ Limited instructions and question prompts are provided to focus learners’ peer-to-peer discussion.
§ There are multiple answers; instructor wants learners to read, reflect on, and synthesize the written ideas.
§ Receive information in writing, so learners have time to read, mark up, and digest information at their own pace.
§ Encourage learners to explain the concepts they read about, and defend ideas with peers for greater understanding and engagement.
§ Opportunities for application, integration, and synthesis of ideas in discussion based on information from literature.
© 2015 by The Regents of the University of California
26
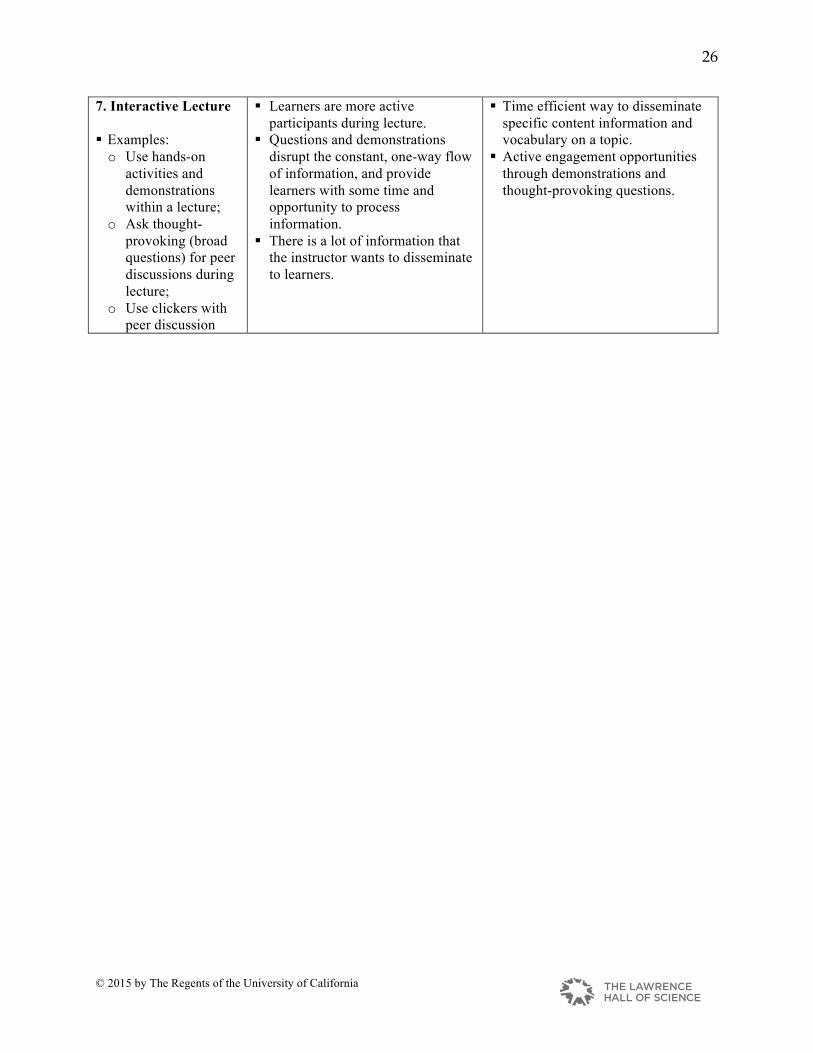
7. Interactive Lecture § Examples: o Use hands-on
activities and demonstrations within a lecture;
o Ask thought-provoking (broad questions) for peer discussions during lecture;
o Use clickers with peer discussion
§ Learners are more active participants during lecture.
§ Questions and demonstrations disrupt the constant, one-way flow of information, and provide learners with some time and opportunity to process information.
§ There is a lot of information that the instructor wants to disseminate to learners.
§ Time efficient way to disseminate specific content information and vocabulary on a topic.
§ Active engagement opportunities through demonstrations and thought-provoking questions.
© 2015 by The Regents of the University of California
27
Life cycle analysis approaches
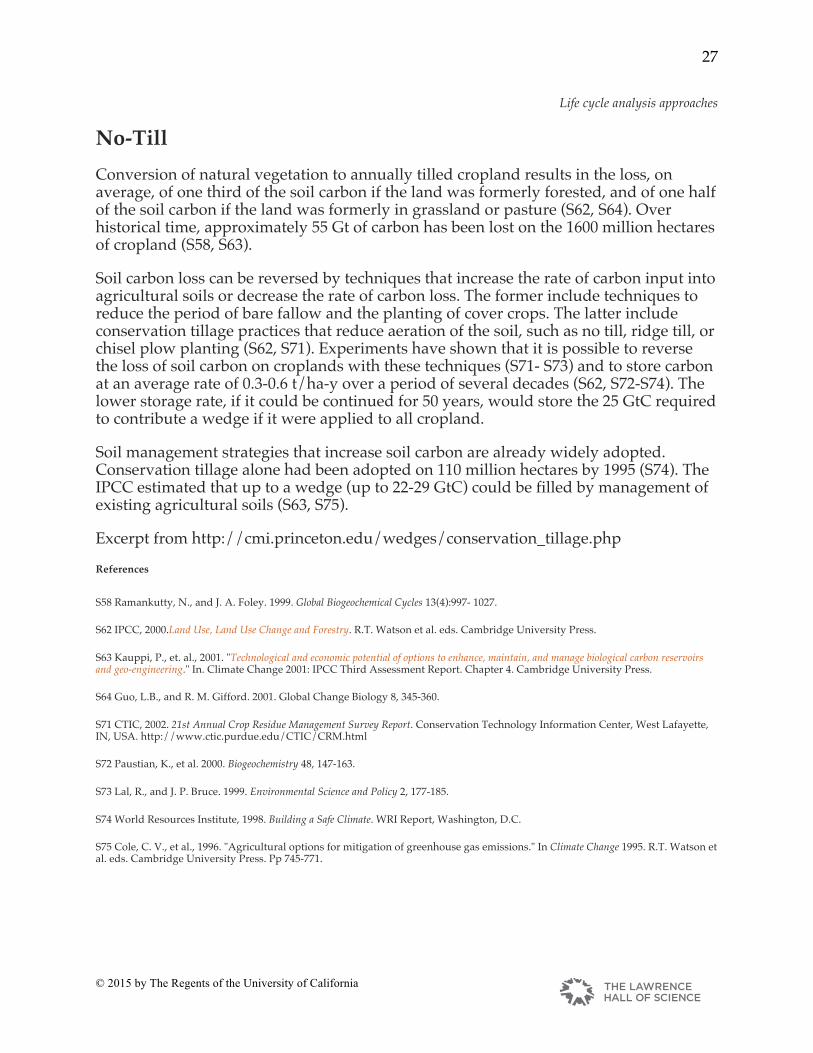
No-Till Conversion of natural vegetation to annually tilled cropland results in the loss, on average, of one third of the soil carbon if the land was formerly forested, and of one half of the soil carbon if the land was formerly in grassland or pasture (S62, S64). Over historical time, approximately 55 Gt of carbon has been lost on the 1600 million hectares of cropland (S58, S63).
Soil carbon loss can be reversed by techniques that increase the rate of carbon input into agricultural soils or decrease the rate of carbon loss. The former include techniques to reduce the period of bare fallow and the planting of cover crops. The latter include conservation tillage practices that reduce aeration of the soil, such as no till, ridge till, or chisel plow planting (S62, S71). Experiments have shown that it is possible to reverse the loss of soil carbon on croplands with these techniques (S71- S73) and to store carbon at an average rate of 0.3-0.6 t/ha-y over a period of several decades (S62, S72-S74). The lower storage rate, if it could be continued for 50 years, would store the 25 GtC required to contribute a wedge if it were applied to all cropland.
Soil management strategies that increase soil carbon are already widely adopted. Conservation tillage alone had been adopted on 110 million hectares by 1995 (S74). The IPCC estimated that up to a wedge (up to 22-29 GtC) could be filled by management of existing agricultural soils (S63, S75).
Excerpt from http://cmi.princeton.edu/wedges/conservation_tillage.php
References
S58 Ramankutty, N., and J. A. Foley. 1999. Global Biogeochemical Cycles 13(4):997- 1027.
S62 IPCC, 2000.Land Use, Land Use Change and Forestry. R.T. Watson et al. eds. Cambridge University Press.
S63 Kauppi, P., et. al., 2001. "Technological and economic potential of options to enhance, maintain, and manage biological carbon reservoirs and geo-engineering." In. Climate Change 2001: IPCC Third Assessment Report. Chapter 4. Cambridge University Press.
S64 Guo, L.B., and R. M. Gifford. 2001. Global Change Biology 8, 345-360.
S71 CTIC, 2002. 21st Annual Crop Residue Management Survey Report. Conservation Technology Information Center, West Lafayette, IN, USA. http://www.ctic.purdue.edu/CTIC/CRM.html
S72 Paustian, K., et al. 2000. Biogeochemistry 48, 147-163.
S73 Lal, R., and J. P. Bruce. 1999. Environmental Science and Policy 2, 177-185.
S74 World Resources Institute, 1998. Building a Safe Climate. WRI Report, Washington, D.C.
S75 Cole, C. V., et al., 1996. "Agricultural options for mitigation of greenhouse gas emissions." In Climate Change 1995. R.T. Watson et al. eds. Cambridge University Press. Pp 745-771.
© 2015 by The Regents of the University of California
28
Life cycle analysis approaches
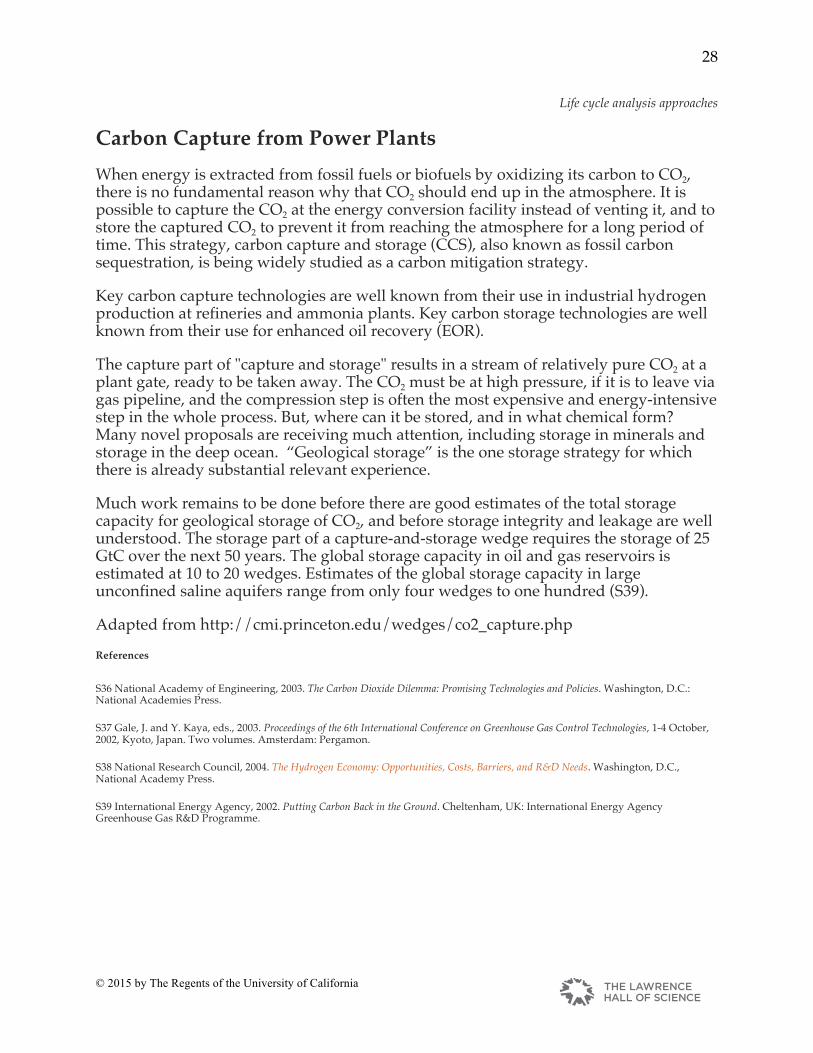
Carbon Capture from Power Plants
When energy is extracted from fossil fuels or biofuels by oxidizing its carbon to CO2, there is no fundamental reason why that CO2 should end up in the atmosphere. It is possible to capture the CO2 at the energy conversion facility instead of venting it, and to store the captured CO2 to prevent it from reaching the atmosphere for a long period of time. This strategy, carbon capture and storage (CCS), also known as fossil carbon sequestration, is being widely studied as a carbon mitigation strategy.
Key carbon capture technologies are well known from their use in industrial hydrogen production at refineries and ammonia plants. Key carbon storage technologies are well known from their use for enhanced oil recovery (EOR).
The capture part of "capture and storage" results in a stream of relatively pure CO2 at a plant gate, ready to be taken away. The CO2 must be at high pressure, if it is to leave via gas pipeline, and the compression step is often the most expensive and energy-intensive step in the whole process. But, where can it be stored, and in what chemical form? Many novel proposals are receiving much attention, including storage in minerals and storage in the deep ocean. “Geological storage” is the one storage strategy for which there is already substantial relevant experience.
Much work remains to be done before there are good estimates of the total storage capacity for geological storage of CO2, and before storage integrity and leakage are well understood. The storage part of a capture-and-storage wedge requires the storage of 25 GtC over the next 50 years. The global storage capacity in oil and gas reservoirs is estimated at 10 to 20 wedges. Estimates of the global storage capacity in large unconfined saline aquifers range from only four wedges to one hundred (S39).
Adapted from http://cmi.princeton.edu/wedges/co2_capture.php
References
S36 National Academy of Engineering, 2003. The Carbon Dioxide Dilemma: Promising Technologies and Policies. Washington, D.C.: National Academies Press.
S37 Gale, J. and Y. Kaya, eds., 2003. Proceedings of the 6th International Conference on Greenhouse Gas Control Technologies, 1-4 October, 2002, Kyoto, Japan. Two volumes. Amsterdam: Pergamon.
S38 National Research Council, 2004. The Hydrogen Economy: Opportunities, Costs, Barriers, and R&D Needs. Washington, D.C., National Academy Press.
S39 International Energy Agency, 2002. Putting Carbon Back in the Ground. Cheltenham, UK: International Energy Agency Greenhouse Gas R&D Programme.
© 2015 by The Regents of the University of California
29
Life cycle analysis approaches
Light Pavement Dark pavements get hot in the sun because they absorb 80-95% of sunlight. Hot pavements aggravate urban heat islands by warming the local air, and contribute to global warming by radiating heat into the atmosphere - pavements can aggravate urban heat islands because they comprise about one third of urban surfaces.1 Hot pavements can also raise the temperature of storm water runoff.2
Solar reflective "cool" pavements stay cooler in the sun than traditional pavements. Pavement reflectance can be enhanced by using reflective aggregate, a reflective or clear binder, or a reflective surface coating. Reflective pavements can reduce the need for street lighting at night.
Benefits include
Energy savings and emission reductions. Cool pavements lower the outside air temperature, allowing air conditioners to cool buildings with less energy. Cool pavements also save energy by reducing the need for electric street lighting at night. Improved comfort and health. Cool pavements cool the city air, reducing heat-related illnesses, slowing the formation of smog, and making it more comfortable to be outside. Pedestrians also benefit from cooler air and cooler pavements. Improved air quality. By decreasing urban air temperatures, cool pavements can slow atmospheric chemical reactions that create smog. Reduced power plant emissions. By saving energy on street lighting and A/C use in surrounding buildings, cool pavements reduce the emission of greenhouse gases and other air pollutants at power plants. Slowed climate change. Cool pavements decrease heat absorbed at the Earth’s surface and thus can lower surface temperatures. This decrease in surface temperatures can temporarily offset warming caused by greenhouse gases.
Excerpt from http://heatisland.lbl.gov/coolscience/cool-science-cool-pavements 1. Akbari H, Rose LS, Taha H. 1999. Characterizing the fabric of the urban environment: A case study of Sacramento, California. Lawrence Berkeley National Laboratory.
2. U.S. EPA Heat Islands Cool Pavements Page
© 2015 by The Regents of the University of California
30
Life cycle analysis approaches
Space Mirrors One of the most ambitious geoengineering schemes is a giant space "mirror" positioned between the Earth and sun to intercept sunlight. To build the mirror, physicist Lowell Wood, a senior staff scientist at Lawrence Livermore, proposes using a mesh of aluminum threads that are only a millionth of an inch in diameter and a thousandth of an inch apart. "It would be like a window screen made of exceedingly fine metal wire," he explains. The screen wouldn´t actually block the light but would simply filter it so that some of the incoming infrared radiation wouldn´t reach Earth´s atmosphere.
Wood, who has been researching the mirror idea for more than a decade, says it should be considered only as a safety net if all other means of reversing global warming "fail or fall grossly short over the next few decades."
Once in place, the mirror would cost almost nothing to operate. From Earth, it would look like a tiny black spot on the sun. "People really wouldn´t see it," says Michael MacCracken. And plant photosynthesis isn´t expected to be affected by the slight reduction in sunlight.
Wood calculates that deflecting 1 percent of incoming solar radiation would stabilize the climate, but doing so would require a mirror spanning roughly 600,000 square miles-or several smaller ones. Putting something that size in orbit would be a massive challenge, not to mention exorbitantly expensive.
Excerpt from Popular Science http://www.popsci.com/environment/article/2005-06/how-earth-scale-engineering-can-save-planet
Solar Radiation Management (SRM) techniques reflect a small percentage of the sun's light and heat back into space. These methods act quickly, and so may represent the only way to lower global temperatures quickly in the event of a climate crisis. However, they only reduce some, but not all, effects of climate change, while possibly creating other problems. They also do not affect CO2 levels and therefore fail to address the wider effects of rising CO2, including ocean acidification. Excerpt from the Royal Society http://royalsociety.org/policy/publications/2009/geoengineering-climate/
© 2015 by The Regents of the University of California
31
Background Information There has been much research, particularly in the past 25 years, seeking to uncover the processes involved in how people learn. An awareness of some of the main findings from this research is very useful to anyone involved in developing or presenting educational activities. This session is designed to open the door on the topic of relating how people learn, to crafting learning experiences that reflect this understanding. The Learning Cycle model introduced in this session has been developed by researchers and educators, and refined and deepened in recent years by newer findings in neuroscience and cognitive psychology. The model represents the learning process taking place in specific phases—invitation, exploration, concept invention, application, and reflection—which eventually leads the learner to begin the cycle once again. This model for instruction also takes into account the learners’ prior understandings and recognizes their need for firsthand experiences. Activities designed according to the Learning Cycle are learner-centered, provoke questions, and enable the learner to integrate and apply new ideas and information conceptually. In fact, all the learning activities in this course have been designed with the phases of the Learning Cycle in mind. Familiarity with this instructional model can help students begin to understand why they should follow carefully designed plans, and supports their ability to make thoughtful instructional decisions while leading science activities in general and sharing climate science in particular.
While its roots go back to forerunners such as Dewey, Vygotsky, Bruner, Piaget, and others, the contemporary idea of the Learning Cycle grew out of a breakthrough in science education in the early 1960s, as scientists and educators wrestled with more effective ways to help students acquire, retain, and apply important concepts. In 1962 Robert Karplus and J. Myron Atkin described a three-phase cycle: exploration, invention, and discovery, termed the “guided discovery” approach to learning. The model was further developed in the 1970s as it was applied toward developing more effective science activities for the elementary classroom. Other learning cycle models have evolved including similar phases, although they may be named differently. Some of these instructional models maintain the three main stages of the Atkin/Karplus model, others involve four or more phases such as Rodger Bybee’s “5 E’s” model (Bybee, Achieving Scientific Literacy, 1997). The research on the effectiveness of the Learning Cycle has been quite extensive, (for a summary see Lawson, Abraham, and Renner, 1989; and Lawson, 1995). The Learning Cycle has been instrumental in helping curriculum developers design materials and in assisting teachers in presenting educational experiences that are consistent with what is known about how people learn.
Note to Instructor on the 5 E’s: Engagement, Exploration, Explanation, Elaboration and Evaluation. Also David Kolb’s (1984) Experiential Learning Model: Concrete experience, Reflective observation, Abstract conceptualization, and Active experimentation. (Referred to in “Learning is About Making Connections” by K. Patricia Cross.) Also “Common Components shared by Instructional Models from Inquiry and the National Science Education Standards, page 35, and the chapter entitled Improving Instruction in Achieving Scientific Literacy: From Purposes to Practices by Roger Bybee (1997). These learning cycle-based instructional models share a common vision of how
learning takes place, and are grounded in a constructivist perspective on teaching and
© 2015 by The Regents of the University of California
32
learning. Constructivism is a perspective on learning grounded on the premise that we construct (build, create) our own understanding of the world we live in through our experiences and interactions. Constructivism has led educators to develop teaching strategies that can help make explicit the connections between new learning and previously learned knowledge; and that have been shown to be most effective, over time, in helping learners develop new ideas, deeper understandings, and construct more complete mental frameworks. These strategies engage and motivate learners with interesting, culturally/socially-relevant activities and experiences that allow them to discover, infer, reflect upon, and apply concepts. They also provide opportunities for learners, peers, and educators to engage in meaningful conversations about the experiences and content.
The Learning Cycle in Informal Environments
In informal environments such as museums and aquariums, learning cycles occur on a very different time scale than in a typical classroom, and often include several “false-starts” or partial cycles. In the classroom, students are typically guided through a 60- or 90- minute long lesson. In informal environments, direct engagement at exhibits or with educators may last only a few minutes. However, many visitors report thinking about and applying information they learned in a museum weeks or months after their visit.
Many of the experiences (exhibits, activities, programs) in informal institutions are designed to attract visitors and are easy to approach and to initiate—this serves as the invitation step of a learning cycle and is very successful in engaging most groups. During the exploration phase, visitors can familiarize themselves with the experience and determine if it is something that interests them and if they will spend time with it. Due to the self-guided and free-choice nature of informal settings, visitors will start many learning cycles (invitation and exploration), but will only follow through to complete those with the most interest and relevance to them personally. If they are motivated to continue an experience, visitors may move to the concept invention phase: manipulating the exhibit, reading text panels, and hopefully talking to their group and thinking about their conceptual understanding.
The fourth step of the learning cycle, application of the concepts, can happen immediately following the experience and is ideally prompted by facilitators or signage. In many cases, application of concepts happens, or continues to happen, well after the visit, when relevant ideas are encountered in an everyday situation.
Reflection or metacognition involves the learner in considering his or her own learning path and taking note of experiences and ideas that have led to their personal understanding. This type of internal self-monitoring is what exemplifies the reflection phase of the Learning Cycle. As learners acquire scientific knowledge and understandings, it’s critical that they spend time discussing how they arrived at these concepts and explaining their thinking. Through reflecting on their learning processes, learners develop the ability to think flexibly and acquire new understanding as needed. Reflection is important and can happen during any part of the learning cycle. Providing opportunities to discuss with peers, friends, families, or educators how they arrived at ideas and how these ideas connect with their prior knowledge is critical for deeper meaning-making to occur.
© 2015 by The Regents of the University of California
33
Every successful lesson need not include all stages of the Learning Cycle. There may be cycles within cycles in one lesson, or just one stage of a cycle in a lesson. Sometimes students may have explored a subject extensively before coming and be ready to enter the cycle at the concept invention phase right away. Emphasize that the Learning Cycle is a model—meant to represent, organize, and categorize main phases in learning—but not to suggest that this is the only way to conceptualize learning! Nor should it be seen as a rigid or mechanical model—people and their learning processes are gloriously complex. Depending on the person and the content being learned there is no requirement that these phases must take place during a single lesson.
It’s important to be mindful of the fact that the Learning Cycle we present is one model that can be used to represent, organize, and categorize main phases in science learning. It is not the only way to conceptualize learning. It should not be seen as a rigid or mechanical model—people and their learning processes are gloriously complex, and depending on the person and the content being learned there is no automatic order or sequence in which these phases must take place. That said, the Learning Cycle model of instruction can be powerful and enormously helpful in stimulating thinking about how people learn and in designing activities that succeed in conveying concepts to learners meaningfully and effectively.