Embed Size (px)
Citation preview

MICROCOLLECTION
(CAPILLARY PUNCTURE)

What is Capillary Puncture?
A few drops of blood specimen can be obtained
by making an incision in the capillary bed in the
dermal layer
Also known as dermal or skin puncture
Collection sites include the finger tips (which
ones?) of adults or children over the age of two;
and heels for infants.
2

Purpose of Capillary Puncture
• Adults & Older Children: • No accessible veins e.g. obese patients,
burns/scars, hematoma at the puncture site
• Patient has thrombotic tendencies
• Save veins for other procedures e.g. chemotherapy
• Intense fear of needles
• Point of care testing
3

Purpose of Capillary Puncture
Children/infants: Preferred method
Removing large volumes of blood is not advisable
Anemia, cardiac arrest (if large volume removed rapidly)
Chances of tissue damage are higher in children during venipuncture
Some tests are designed only for dermal puncture e.g. newborn screens
4

Composition of Capillary Specimens
• Mixture of arterial, venous, and capillary blood
– Higher proportion of arterial than venous especially if the area has been warmed
• Mixed with tissue fluid from surrounding tissues
5

Tests that cannot be Collected by
Microcollection
Some examples
ESR
Coagulation Tests which require plasma
Blood cultures
Tests that require large volumes of serum or plasma –
depends on technology used
6
Capillary Puncture Principles
• Order of Draw
– Blood gas specimens (CBGs)
– EDTA specimens
– Other additive specimens
– Serum specimens
7

Capillary Puncture Equipment:
• Equipment should allow
• To puncture skin safely
• To collect the sample quickly and
efficiently
• Minimum of discomfort to the patient
8

Capillary Puncture Equipment:
• Need general blood drawing equipment
– Lancet
– Antiseptic
– Microtubes or other collection containers (e.g.
capillary tubes, etc.)
– Gauze pad
– Bandages
– Sharp-safe disposal
9

Capillary Puncture Equipment:
Lancets
Many different devices available
Simplest is hand-held lancet: a thin-flat piece of steel with a sharp point
Puncture dimensions controlled by width and depth of the point
Automated devices with various color-coded depths available
1.8 mm
2.0 mm
2.4 mm
3.0 mm
10

Capillary Puncture Equipment
• Lancet/Incision Devices – Sterile, disposable, sharp-pointed or bladed instrument
– Punctures or cuts skin to obtain capillary blood specimen
– Designed for either finger or heel puncture
• Laser Lancet – Vaporizes water in skin to produce a small hole w/o. cauterizing
capillaries
– No risk of accidental sharps injury, no need for sharps disposal
11

Capillary Puncture Equipment
12
• Finger puncture lancets

Capillary Puncture Equipment
13
• Heel puncture lancets
Capillary Puncture Equipment
• Microcollection Containers
– Small plastic tubes used to collect tiny amounts of
blood from capillary punctures
– Some come with narrow capillary tubes attached
– Have color-coded bodies or stoppers
– Markings for min/max fill levels
14

Capillary Puncture Equipment
15
• Microcollection containers

Capillary Puncture
Equipment
• Microhematocrit Tubes and Sealants
– Disposable, narrow-bore plastic or plastic-clad glass tubes with anticoagulant
• Ammonium heparin
– Fill by capillary action & hold 50 to 75 L
– One end of tube is sealed with plastic or clay sealants
– Used primarily for hematocrit determinations
• Used with a special centrifuge and reading mechanism to calculate hematocrit
16
McCall & Tankersley: Instructor Resource Guide for Phlebotomy Essentials, 3rd ed., copyright Lippincott Williams & Wilkins, 2003
Chapter 10
Slide 11
Indications for performing skin puncture
• adults
no accessible veins
to save veins for
chemotherapy
clotting tendencies
home-testing
procedures

Capillary Puncture
Equipment Blood gas capillary tubes
• Different volume sizes according to
instrumentation
• Most common size is 100 µL with sodium
heparin
• Stirrers: tiny pieces of metal – fleas- inserted in
the capillary to facilitate mixing
• Magnet: moved back and forth along the
capillary tube pulling the fleas with it
• Plastic caps: to seal blood
• Transported on ice
17

Capillary Puncture Equipment
18
• Capillary blood gas collection equipment

Warming Devices
Warming increases blood
flow approx 7 times
More useful for infants
Heel-warming devices
available
Temp should not exceed
420C
Alternative: Towel or
cloth dampened with
warm water
McCall & Tankersley: Instructor Resource Guide for Phlebotomy Essentials, 3rd ed., copyright Lippincott Williams & Wilkins, 2003
Chapter 10
Slide 7
Skin Puncture Equipment (continued)
• Plastic/Clay Sealant
• Capillary Blood Gas
Collection
Equipment
• Micropipet Dilution
System
• Warming Devices
19

Blood Draw volume Body wt in kg Max drawn in one blood draw Maximum drawn in a 30 day period
2.5% of total blood volume 5% of total blood volume
1 kg 2.5 ml 5.0 ml
2 kg 4.5 ml 9.0 ml
3 kg 6 ml 12 ml
4 kg 8 ml 16 ml
5 kg 10 ml 20 ml
6 kg 12 ml 24 ml
7 kg 14 ml 28 ml
8 kg 16 ml 32 ml
9 kg 18 ml 36 ml
10 kg 20 ml 40 ml
11 thru 15 kg 22 - 30 ml 44 - 60 ml
16 thru 20 kg 32 - 40 ml 64 - 80 ml
21 thru 25 kg 42 - 50 ml 84 - 100 ml
26 thru 30 kg 52 - 60 ml 104 - 120 ml
31 thru 35 kg 62 - 70 ml 124 - 140 ml
36 thru 40 kg 72 - 80 ml 144 - 160 ml
41 thru 45 kg 82 - 90 ml 164 - 180 ml
46 thru 50 kg 92 - 100 ml 184 - 200 ml
Greater than 50 kg 100 ml 200 ml
20
For requests greater than the maximum draw, please contact
the attending physician for approval of additional amount.
http://www.phsa.ca/research/Documents/pediatric-blood-draw-guidance.pdf

STEPS IN PERFORMING
CAPILLARY PUNCTURE
21

Capillary Puncture Steps
• First 4 Steps Are Same as for Venipuncture
– Step 1: Review & accession test request
– Step 2: Approach, identify, & prepare patient
– Step 3: Verify diet restrictions & latex sensitivity
– Step 4: Sanitize hands & put on gloves
22

Capillary Puncture Steps
• Step 5: Position Patient
– Finger puncture: arm supported on firm surface,
hand extended & palm up
– Young child: held in lap of parent or guardian
– Infant heel puncture: supine with foot lower than
torso
23

Capillary Puncture Steps
• Step 6: Select the Puncture/Incision Site
– General criteria
• Skin is warm, pink, normal color
• No scars, cuts, bruises, rashes, cyanosis, edema,
or infection
24

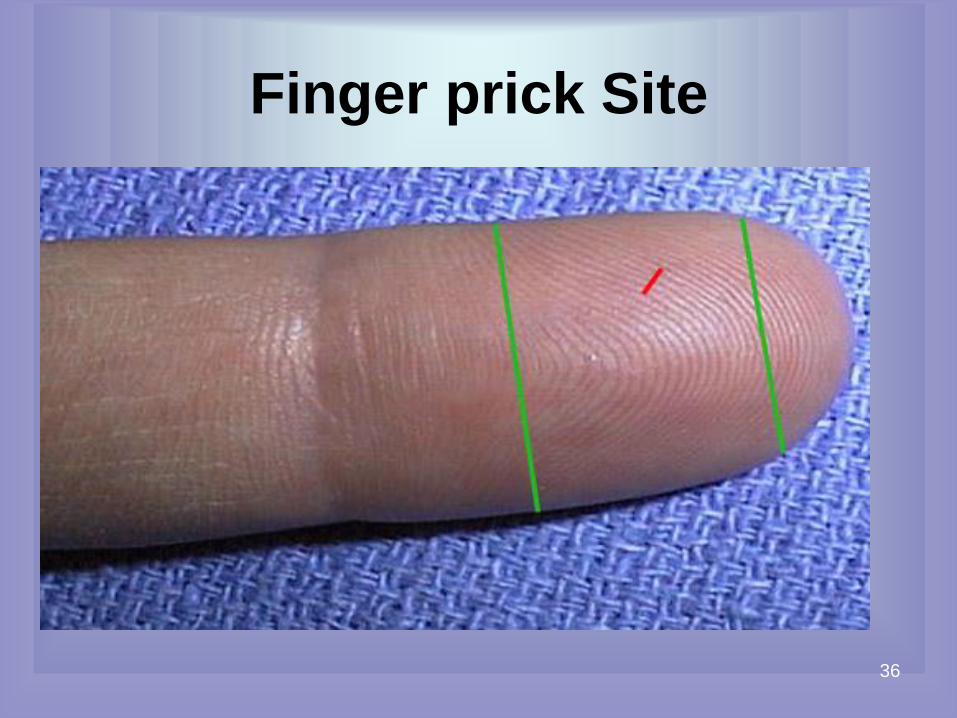
Site Selection for Older Children and Adults
• Recommended site
– Central, fleshy portion of finger
• Palmar surface
• Distal segment of the middle or ring finger of the
nondominant hand
• Slightly to the side of center
• Perpendicular to the whorls of the fingerprint to allow
formation of a drop – otherwise the blood flows over
the finger
25

Capillary Puncture Steps
26
• Recommended site & direction of finger puncture

Finger Puncture Precautions
• Do not puncture side or tip of finger
• Do not puncture parallel to the grooves of
the fingerprint
• Do not puncture the index finger
• Do not puncture the little finger
• Do not puncture fingers of infants or very
young children
27

Capillary Puncture Steps
• Step 6: Select the
Puncture/Incision Site
Cont’d – Infants (shaded area)
• Plantar surface of heel, on
medial or lateral edge to
avoid bone damage (<2.4
mm deep)
28

Skin Puncture Site Selection Criteria
• Cross section of a full term
infant’s heel:
• Capillaries at 0.35 mm
depth
• Pain fibers increase in
number below 2.4 mm
29

Skin Puncture Site Selection Criteria
30
High risk areas 1. AVOID Posterior
curvature –bone at 1
mm
2. Calcaneus (heel
bone) 2 mm below
the skin, can cause:
Osteomyelitis
Osteochondritis
Posterior curvature
Medial
Plantar Lateral
Plantar

Heel Puncture Precautions
Do not puncture deeper than 2.4 mm
Do not puncture through previous punctures
Do not puncture the area between imaginary boundaries
Do not puncture the posterior curvature of heel
Do not puncture in the arch
Do not puncture areas of the foot other than the heel
31

Capillary Puncture Steps
• Step 7: Warm the Site if Applicable
– Warming increases blood flow up to sevenfold
– Essential for pH or blood gas specimens & recommended
for heelsticks
– Wrap site for 3 to 5 min. with a warm, moist washcloth,
towel, or diaper
• Step 8: Clean and Air-Dry Site
– Cleanse site with an antiseptic (70% isopropyl alcohol)
– Allow to air-dry
32

Capillary Puncture Steps
33
• Clean and air-dry the site

Capillary Puncture Steps
• Step 9: Prepare Equipment
– Don gloves if not already on
– Select collection devices & place in easy reach
– Select new, sterile lancet/incision device
– Open packages in view of patient
34

Capillary Puncture Steps
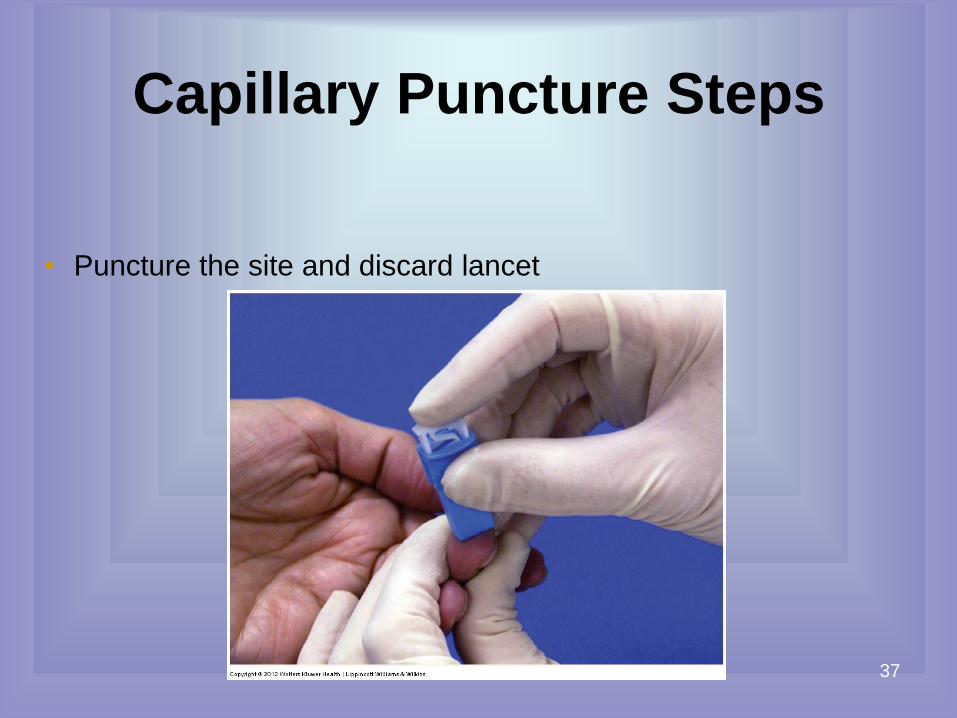
• Step 10: Puncture the Site and Discard
Lancet – Finger puncture
• Grasp patient’s finger between nondominant thumb & index
finger
• Place lancet device flat against skin in central, fleshy pad
– Heel puncture
• Grasp foot gently but firmly with nondominant hand
• Encircle heel by wrapping your index finger around arch, thumb
around bottom, & other fingers around top of foot
• Place lancet flat against skin on medial or lateral plantar surface
of heel
35
Finger prick Site
36
Capillary Puncture Steps
37
• Puncture the site and discard lancet

Capillary Puncture Steps
38
• Step 11: Wipe Away the First Blood Drop
– First drop is typically contaminated with excess tissue fluid
• Position the site downward to enhance blood flow
• Apply gentle intermittent pressure to produce full drops of
blood

Capillary Puncture Steps
• Step 12: Fill and Mix Tubes/Containers in
Order of Draw
– Collect blood gases, slides, platelet counts, &
other hematology specimens first to avoid
clumping & clotting
– Collect other anticoagulant containers next &
serum specimens last
– Touch collection tube or device to drop of blood
39

Collecting the samples
To make a blood film, touch the appropriate area of the slide to the drop
To fill a capillary tube, touch one end of the capillary to the drop, while holding it in a horizontal position. Seal it when full
To fill a microcollection container, hold it upright just below the blood drop – touch the edge/scoop to the drop, and let it trickle down the side of the tube. DO NOT SCOOP AGAINST THE SKIN. It can cause platelet clumping and hemolysis.
40

Capillary Puncture Steps
41
• Fill and mix tubes/containers in order of draw

Capillary Puncture Steps
• Step 13: Place Gauze and Apply Pressure
– Keep site elevated
• Step 14: Label Specimen and Observe Special Handling
Instructions
• Step 15: Check the Site and Apply Bandage
– Do not bandage small children or babies
• Step 16: Dispose of Used and Contaminated Materials
• Step 17: Thank Patient, Remove Gloves, and Sanitize Hands
• Step 18: Transport Specimen to the Lab
42

Special Capillary Puncture
Procedures
• Capillary blood gas specimen by heel puncture
• Neonatal bilirubin collection
• Newborn Metabolic screening (NMS)
43

Special Capillary Puncture
Procedures
44
• Newborn screening blood spot collection

45


![Capillary thermostatting in capillary electrophoresis · Capillary thermostatting in capillary electrophoresis ... 75 µm BF 3 Injection: ... 25-µm id BF 5 capillary. Voltage [kV]](https://img.dokumen.tips/doc/110x75/5c176ff509d3f27a578bf33a/capillary-thermostatting-in-capillary-electrophoresis-capillary-thermostatting.jpg)