Embed Size (px)
Citation preview

Lesson 1: What can we see in our room? Teacher Guide-
1st Grade Unit: How Does Light Help Me See Things and Communicate With Others?
nextgenstorylines.org These materials were developed through with support from the Michigan Department of Education; the Gordon and Betty Moore Foundation, and support from the NGSX Project at Clark University, Tidemark Institute, and Northwestern University.
This work is licensed under a Creative Commons Attribution 4.0 License http://creativecommons.org/licenses/by/4.0/
1

Teacher Guide Lesson 1: What can we see in our room? How Does Light Help Me See Things and Communicate With Others??
Getting Ready: Materials Preparation
Materials For the Whole Class
The investigation in this lesson will be completed as a whole group. ● Chart Paper and Markers● 1-2 low wattage nightlight(s)
(e.g. 4 W), if your classroomgets unsafely dark with thelights out and the shades drawn
● 4 Copy Paper Boxes forStations
For Part A: ● Shape Hunt Sign #1 (1)● Shape Hunt Sign #2 (1)
For Part B: ● Shape Hunt Sign #3 (1)● Shape Hunt Sign #4 (1)● Shape Hunt Sign #5 (1)● Shape Hunt Sign #6 (1)
Note: Signs #3 and #4 are identical as well as signs #5 and #6, but don’t tell students that at first. Ideally Shape Hunt Signs should be printed in color to have the best effects for the lesson.
Preparation of Materials (30 min.)
● Prepare a place in the room for the Driving Question Board - a bulletin board in theclassroom or a space on the wall is sufficient.
● Post 2 pieces of chart paper - one titled “Seeing in the Dark” and another titled “Ways toInvestigate our Design Problem(s)”
● Close all blinds & shades in the room. Make it dark enough so thatthe the modeling of Stations #1-#2 and locations of Stations #3-#6will make it hard to see all the shapes or letters on the paper.Leave some spots of light near the ground (using nightlights) forstudents to walk safely around.
● Station #3: Post Shape Hunt Sign #3 in a darker part of the room.One way to make a dark place for the a paper to sit under is todrape a sheet over a large table, making an opening on one end tolook into, and place the paper under the table.
● Station #4: Post Shape Hunt Sign #4 near a small opening near awindow (e.g. on a counter) near where light is coming into the room from the outside.
● Station #5: Post Shape Hunt Sign #5 near the bottom of the door into the classroom, wherelight is coming into the room from under the door, or near a night light on the floor.
● Station #6: Post a copy of Shape Hunt Sign #6 in another dark part of the room.Possibilities include a) on a wall in a dark closet that students look into or b) a box with thepaper taped to the top inside of the box, where students walk underneath & look up into it.
● At each station, tape a line approximately 1m from where students should stand when theyare making their observations to ensure a fair test. Post the number of each station sostudents can see it.
● For Lesson 1c, insert a photograph or photographs of your classroom with the lights turnedoff.
● Prepare a space in the room for the Driving Question Board and the Design Idea Gallerywhere students will post their thoughts throughout the unit.
nextgenstorylines.org These materials were developed through with support from the Michigan Department of Education; the Gordon and Betty Moore Foundation, and support from the NGSX Project at Clark University, Tidemark Institute, and Northwestern University.
This work is licensed under a Creative Commons Attribution 4.0 License http://creativecommons.org/licenses/by/4.0/
2

Teacher Guide Lesson 1: What can we see in our room? How Does Light Help Me See Things and Communicate With Others??
Materials For Each Student
● Lesson 1 - Student ActivitySheets (1)
● Lesson 1 - Student DesignSheets (1)
Safety
● Make sure to tell students to walk very slowly or hold hands with a neighbor betweenstations so they don’t trip and fall in the dark room.
Getting Ready: Teacher Preparation
Background Knowledge
PS4.B from the FRAMEWORK:
Objects can be seen only when light is available to illuminate them.
In this lesson, students will recall times when it has been harder to see objects in darkness than in the light.
Alternative Student Conceptions
When asked whether or not we can see objects in the dark, many students will believe that we can. This first investigation will begin to challenge that belief. We want controversy around this idea in order to motivate some of our future investigations. It’s ok that students are thinking this. Don’t clear that idea up right now. It it’s the motivation for first half of the unit. And students will come to this discovery over the course of the storyline through investigations and discussions you facilitate in future lessons.
Linking Our Understanding to Scientific Terminology
● N/A
nextgenstorylines.org These materials were developed through with support from the Michigan Department of Education; the Gordon and Betty Moore Foundation, and support from the NGSX Project at Clark University, Tidemark Institute, and Northwestern University.
This work is licensed under a Creative Commons Attribution 4.0 License http://creativecommons.org/licenses/by/4.0/
3

Teacher Guide Lesson 1: What can we see in our room? How Does Light Help Me See Things and Communicate With Others??
Learning Plan: What do we need in order to see inside our room (or the shoebox)?
3 periods: 45 min, 30
min, 45 min.
Teacher Supports & Notes
Day 1 - Lesson 1a
1. (15-20 min) The first part of the lesson is an investigation of the stations you prepared inadvance of the class. Part A you will model to the whole class, and Part B students will do incooperative groups.
Gather students together, building a sense of wonder and excitement as you begin a new unit. Share with students that you want to show them something very interesting. Tell them it is called a “phenomena” which is something scientists investigate to figure out things about our world. You will model how to complete the investigation in Part A on Lesson 1a - Student Activity Sheets with students, showing students how to record data from Station #1 and Station #2. Let them know that they will be conducting an investigation by traveling around the room to explore four different stations (Stations #3-#6).
Hand out Student Activity Sheet 1.1. Read through the checklist for Part A with students.
Hold up the printed image of Shape Hunt Sign #1, showing ten stars on it. If students can’t see from where they are sitting, pass the printed sheet around the room. Ask students,
➔ What patterns do you notice on this sheet?➔ How many stars can you see on this sheet?
Have students respond to the first question, and then when they raise the idea that there are stars on the sheet, or a different number of starts, count the number of stars on the sheet with them together and then have them write this number in station 1 on their student activity
nextgenstorylines.org These materials were developed through with support from the Michigan Department of Education; the Gordon and Betty Moore Foundation, and support from the NGSX Project at Clark University, Tidemark Institute, and Northwestern University.
This work is licensed under a Creative Commons Attribution 4.0 License http://creativecommons.org/licenses/by/4.0/
4

Teacher Guide Lesson 1: What can we see in our room? How Does Light Help Me See Things and Communicate With Others??
sheets.
Next, pass around the printed image of Shape Hunt Sign #2, which has three triangles on it. Ask students,
➔ What patterns do you notice on this sheet?➔ How many triangles can you see on this sheet?
Have them record this number also for station 2 on the first page of the Student Activity sheets. Then ask students to flip over their Student Activity sheets to examine the table on the second side. Explain that, they will be recording more observations in this table, about the number of stars or triangles they see on papers like these in different parts of the room, at four different stations.
Model how a student would approach each station, walking up to the line on the floor, keeping their body upright. Think aloud how they would look at the Shape Sign and record the number of shapes they can see at that station. Draw specific attention to the taped areas where students should put their feet when they are observing the posters A . Walk around the room and point out Stations #3-#6, so students know where each station is located.
Assign students to four equal groups, and start each group at one of the stations. Place a 10-minute timer on the board so students are aware of how much time have to complete all four stations. Have them circle the station they are starting at. Circulate and assist as students observe and record their data in part B of their activity sheet B .
2. (10 min) After students have had a chance to visit each station, gather them together for a
Additional Guidance
A When modeling the procedure for visiting each station, be sure to discuss the concept of a “fair test.” Ask, “if I was running in a race, and I got a head start, would that be fair?” Use this as a way to explain to students that scientists pay attention to fairness in their investigations. A fair test helps us know that we can count on the results of our investigation, or our data. To make this easier for students, mark the floor approximately 1m from the sign with masking tape, reminding students to keep their bodies upright and not bend over the line.
Additional Guidance
B You may want to have students cross off the station they complete as they are done with it, and circle the number of the next station they are going to before switching stations.
If traveling to each station as a group is a management challenge, consider sending a specific group of students to each station. Set the timer for 1-2 minutes, for that group to visit that station, count the shapes, and record it on their activity sheet. When the timer is done, rotate them clockwise to the next station.
nextgenstorylines.org These materials were developed through with support from the Michigan Department of Education; the Gordon and Betty Moore Foundation, and support from the NGSX Project at Clark University, Tidemark Institute, and Northwestern University.
This work is licensed under a Creative Commons Attribution 4.0 License http://creativecommons.org/licenses/by/4.0/
5

Teacher Guide Lesson 1: What can we see in our room? How Does Light Help Me See Things and Communicate With Others??
Building Understandings Discussion. Have students join you in a centralized location with just their Activity Sheets 1.1.
Suggested Prompts: ➔ How many of you so no stars at Station #3? How many saw 1 star at Station #3, 2 stars? Etc….➔ How many of you so no stars at Station #4? How many saw 1 star at Station #3, 2 stars? etc….➔ How many of you saw the same number of stars at Station #3 and #4?➔ How many of you saw a different number of stars at Station #3 and #4?➔ How many triangles did you see at Station #5?➔ How many triangles did you see at Station #6?➔ How many of you saw the same number of triangles at Station #5 and #6?➔ How many of you saw a different number of stars at Station #5
and #6?
Help students keep track of the results of the poll you take by building a distribution of the results of the class for a couple of the stations. An example of this is shown to the right as well as an alternate example. C .
Show students the papers from Station #3 and Station #4 (the lights should still be on), count the number of shapes on each together and pass the sheet around. Circle the actual number of shapes on the paper for each station in green. Continue the Building Understandings Discussion D .
Suggested Prompts: ➔ Some of us (or all of us) were unable to see all that shapes that were on the papers at Station
#3. Why was it hard to see all the shapes?➔ Why might some stations have been harder than others to see all the shapes that were on the
Classroom artifact
C In this alternate example, the students are adding up all their results to make sure that the number of results that are recorded matches the number of students in the class.
This activity provides an opportunity to embed additional questions in the discussion asking students to count along with, add, and identify which categories have the largest number of tally marks.
Strategies for this Building Understandings Discussion
D Conflicting ideas may arise here, with some students arguing that they could see all of the letters and numbers at every station. Encourage this debate among students, emphasizing the goal of understanding and restate and help them turn it into a question that they want to investigate: “What can we see in the dark?”
nextgenstorylines.org These materials were developed through with support from the Michigan Department of Education; the Gordon and Betty Moore Foundation, and support from the NGSX Project at Clark University, Tidemark Institute, and Northwestern University.
This work is licensed under a Creative Commons Attribution 4.0 License http://creativecommons.org/licenses/by/4.0/
6

Teacher Guide Lesson 1: What can we see in our room? How Does Light Help Me See Things and Communicate With Others??
paper?
Listen for student responses that refer to what we figured out, such as:
➔ We noticed that some of the stations it was easy to see everything, but some of the stations it was harder. You couldn’t see the same at every station because in some stations it was too dark!
➔ One of the stations was just in the light so we could see all the shapes. Some of the stations it was harder because it was pretty dark. E-
Day 2 - Lesson 1b
3. (15 min) Review the patterns in the data from the class observations, referring to the chartthe class made from last time.
Suggested Prompts: ➔ What patterns did we notice in what we could or couldn’t see at different stations last time?➔ Why was it hard to see all the shapes on the paper at each station?
Listen for student responses that refer to what we figured out, such as:
➔ We noticed that some of the stations it was easy to see everything, but some of the stations it was harder.
➔ You couldn’t see the same at every station because in some stations it was too dark!
Shift now into a Sharing Initial Ideas Discussion F . With students still seated as a whole group, use the chart paper you prepared with the title “Seeing in the Dark” to capture their ideas. Use the following prompts to stimulate conversation around students’ prior experiences with seeing in darkness.
Additional Guidance
E Most students will say it is harder to see in the dark than the if the lights were on.
Some classes of students will notice that it was easier to see the shapes at some stations and will suggest the ideas that it was because there more light in the place around that station (e.g. from the window or the cracks in the door). Some classes will not notice or comment on this. That is ok if they don’t raise this idea in this lesson. They will uncover it in later lessons.
Strategies for this Sharing Initial Ideas Discussion
F The goal of this discussion is to validate students’ experiences and build excitement over them. As students offer ideas, follow up with prompts such as, “Can you tell me more about that?” Or “Why do you think that is?” Or “That’s interesting! Has anyone else experienced this?”
nextgenstorylines.org These materials were developed through with support from the Michigan Department of Education; the Gordon and Betty Moore Foundation, and support from the NGSX Project at Clark University, Tidemark Institute, and Northwestern University.
This work is licensed under a Creative Commons Attribution 4.0 License http://creativecommons.org/licenses/by/4.0/
7

Teacher Guide Lesson 1: What can we see in our room? How Does Light Help Me See Things and Communicate With Others??
Suggested Prompts: ➔ Can you think of a time when you had a hard time seeing something because it was too dark?➔ What do you remember being able to see in the darkness?➔ Are some objects easier to see in the dark than others?
Listen for student responses G that refer to what we figured out last time, such as: ➔ One time I tried to read in my bed after my parents turned out the lights and I could barely see the
pages! (Expect and record many examples like this one.) ➔ When I try to look at something in the dark I have to get my eyes really close to it or I can’t really
see. The colors disappear when I look at something in the dark. ➔ I have glow in the dark stickers that I can see on my ceiling when it’s dark. My nightlight is easier
to see when it’s dark in my room.
Ask students questions about how dark we could make our room and what we would see in the room if we did.
Suggested Prompts: ➔ Could we ever make our classroom completely dark?➔ What would we be able to see in our room if we made it as dark as we possibly could?
Listen for student responses that make predictions such as: ➔ I think we could make our room completely dark if we covered the windows and blocked all the
light from coming in. ➔ I think we could see everything still OR I don’t think we would be able to see anything.
4. (10 min) Suggest to students that it sounds like we have conflicting ideas, and pose the
Adding a Classroom Artifact
G Capture ideas from the discussion on chart paper. Add in drawings or icons to support emergent readers as needed.
nextgenstorylines.org These materials were developed through with support from the Michigan Department of Education; the Gordon and Betty Moore Foundation, and support from the NGSX Project at Clark University, Tidemark Institute, and Northwestern University.
This work is licensed under a Creative Commons Attribution 4.0 License http://creativecommons.org/licenses/by/4.0/
8
Teacher Guide Lesson 1: What can we see in our room? How Does Light Help Me See Things and Communicate With Others??
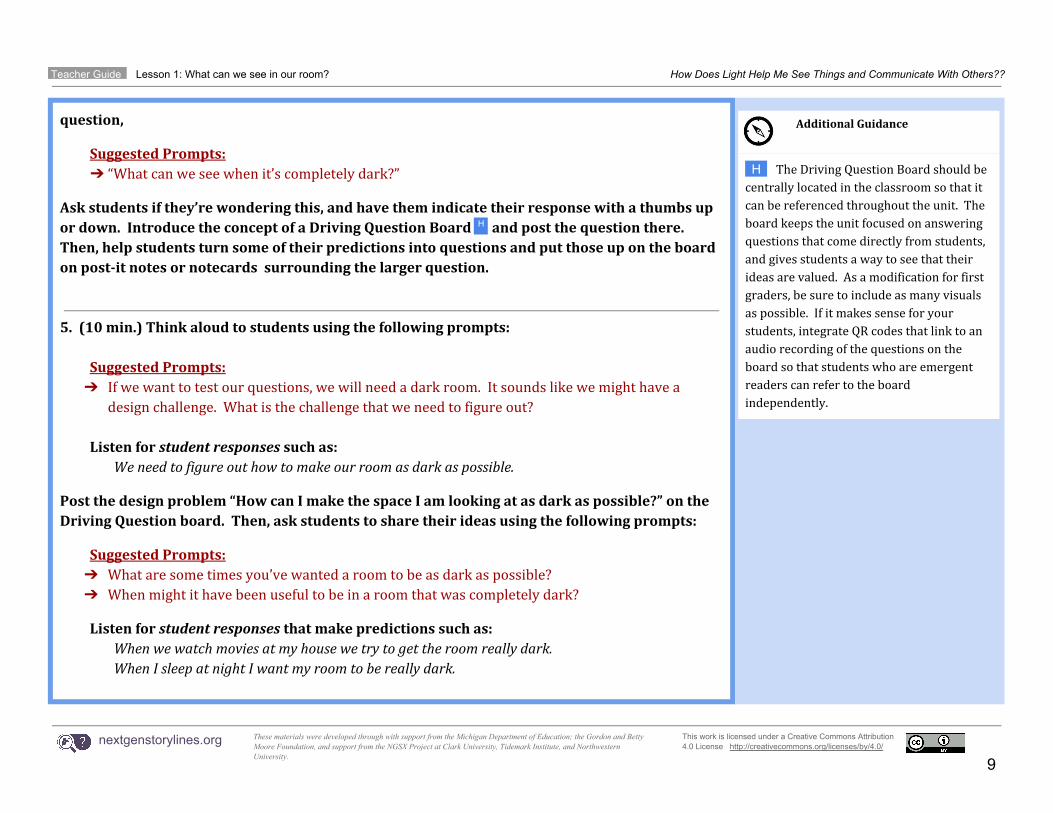
question,
Suggested Prompts: ➔ “What can we see when it’s completely dark?”
Ask students if they’re wondering this, and have them indicate their response with a thumbs up or down. Introduce the concept of a Driving Question Board H and post the question there. Then, help students turn some of their predictions into questions and put those up on the board on post-it notes or notecards surrounding the larger question.
5. (10 min.) Think aloud to students using the following prompts:
Suggested Prompts: ➔ If we want to test our questions, we will need a dark room. It sounds like we might have a
design challenge. What is the challenge that we need to figure out?
Listen for student responses such as: ➔ We need to figure out how to make our room as dark as possible.
Post the design problem “How can I make the space I am looking at as dark as possible?” on the Driving Question board. Then, ask students to share their ideas using the following prompts:
Suggested Prompts: ➔ What are some times you’ve wanted a room to be as dark as possible?➔ When might it have been useful to be in a room that was completely dark?
Listen for student responses that make predictions such as: ➔ When we watch movies at my house we try to get the room really dark. ➔ When I sleep at night I want my room to be really dark.
Additional Guidance
H The Driving Question Board should be centrally located in the classroom so that it can be referenced throughout the unit. The board keeps the unit focused on answering questions that come directly from students, and gives students a way to see that their ideas are valued. As a modification for first graders, be sure to include as many visuals as possible. If it makes sense for your students, integrate QR codes that link to an audio recording of the questions on the board so that students who are emergent readers can refer to the board independently.
nextgenstorylines.org These materials were developed through with support from the Michigan Department of Education; the Gordon and Betty Moore Foundation, and support from the NGSX Project at Clark University, Tidemark Institute, and Northwestern University.
This work is licensed under a Creative Commons Attribution 4.0 License http://creativecommons.org/licenses/by/4.0/
9

Teacher Guide Lesson 1: What can we see in our room? How Does Light Help Me See Things and Communicate With Others??
Tell students that they should think about how we can make our room as dark as possible more, and that we will work on this design problem more next time.
Day 3 - Lesson 1c
6. (5 min) Revisit the posted design problem, “How can I make the space I’m looking at as darkas possible?” Ask students to share what they remember about how we came to this question.
Listen for student responses that share ideas such as: ➔ We were trying to figure out why it was hard to see some of the sheets in the dark. ➔ We were wondering, “what we can see when it’s completely dark?” ➔ We decided that we weren’t really sure if we could see in complete darkness, so we decided to
investigate.
7. (10 min) Pass out the Lesson 1c Design Sheet. Present it to students, saying, We have a designproblem now. We need to figure out how to make our room as dark as possible. Look at thephotos on the Student Design Sheet. These are pictures of our classroom. What would you needto do to our classroom to make it completely dark? Write on the picture to show and tell whatyou would need to do in our classroom to make it completely dark.”
Give students time to add to their sheets. Circulate and assist as needed, encouraging students to write down or draw any and all ideas.
8. (10 min) Next, gather students back together with their Design Sheets for a Sharing InitialIdeas Discussion. As students come up to post their design sheets in the Design Idea Gallery, askthem to share with the class how they would make the room dark. Encourage students in theaudience to ask clarifying questions as needed. Keep a written list of ideas on a piece of chartpaper as students share to which you will refer later.
Adding a Classroom Artifact
I Here is an example from 1st grade classroom:
nextgenstorylines.org These materials were developed through with support from the Michigan Department of Education; the Gordon and Betty Moore Foundation, and support from the NGSX Project at Clark University, Tidemark Institute, and Northwestern University.
This work is licensed under a Creative Commons Attribution 4.0 License http://creativecommons.org/licenses/by/4.0/
10

Teacher Guide Lesson 1: What can we see in our room? How Does Light Help Me See Things and Communicate With Others??
Listen for student responses that suggest ideas such as: ➔ We need to turn all the lights off in our classroom. ➔ By covering windows and cracks that let light in. ➔ We should cover up any cracks under the door and any windows in the door that let light in
. 9. (5 min) After all students have shared, emphasize that we have lots of ideas to try next time.Help students connect what the goal of these ideas for investigations are, related to thequestions we formed earlier as a class.
Suggested Prompts: ➔ How will the ideas you came up with, help remind us what we should make sure to do in our
next science class?➔ What question(s) will we be able to start answering if we try some of these different ways for
making our room as dark as possible?
Listen for student responses that suggest ideas such as: ➔ We should test out some of these ways to make our room as dark as possible. ➔ If we make it as dark as we can, it will help us answer our question about what would we be able
to see in the dark.
nextgenstorylines.org These materials were developed through with support from the Michigan Department of Education; the Gordon and Betty Moore Foundation, and support from the NGSX Project at Clark University, Tidemark Institute, and Northwestern University.
This work is licensed under a Creative Commons Attribution 4.0 License http://creativecommons.org/licenses/by/4.0/
11

Teacher Guide Lesson 1: What can we see in our room? How Does Light Help Me See Things and Communicate With Others??
Alignment With Standards
Building Toward Target NGSS PE
● 1-PS4-2. Make observations to construct an evidence-basedaccount that objects in darkness can be seen only whenilluminated.
● 1-PS4-3 Plan and conduct investigations to determine theeffect of placing objects made with different materials in the path of a beam of light.
● K-2-ETS1-1 Ask questions, make observations, and gatherinformation about a situation people want to change to define a simple problem that can be solved through thedevelopment of a new or improved object or tool.
● K-2-ETS1-2 Develop a simple sketch, drawing, or physicalmodel to illustrate how the shape of an object helps itfunction as needed to solve a given problem.
Building Toward Common Core ELA Standard(s)
CCSS.ELA-LITERACY.SL.1.1 -Participate in collaborative conversations with diverse partners about grade 1 topics and texts with peers and adults in small and larger groups.
● CCSS.ELA-LITERACY.SL.1.1.A - Follow agreed-upon rules for discussions (e.g.,listening to others with care, speaking one at a time about the topics and texts under discussion).
● CCSS.ELA-LITERACY.SL.1.1.B - Build on others' talk in conversations byresponding to the comments of others through multiple exchanges.
● CCSS.ELA-LITERACY.SL.1.1.C - Ask questions to clear up any confusion about thetopics and texts under discussion.
CCSS.ELA-LITERACY.SL.1.4 Describe people, places, things, and events with relevant details, expressing ideas ….clearly.
nextgenstorylines.org These materials were developed through with support from the Michigan Department of Education; the Gordon and Betty Moore Foundation, and support from the NGSX Project at Clark University, Tidemark Institute, and Northwestern University.
This work is licensed under a Creative Commons Attribution 4.0 License http://creativecommons.org/licenses/by/4.0/
12

Lesson 2: How can I block light that’s coming into our room through the window? Teacher Guide-
1st Grade Unit: How Does Light Help Me See Things and Communicate with Others?
nextgenstorylines.org These materials were developed through with support from the Michigan Department of Education; the Gordon and Betty Moore Foundation, and support from the NGSX Project at Clark University, Tidemark Institute, and Northwestern University.
This work is licensed under a Creative Commons Attribution 4.0 License http://creativecommons.org/licenses/by/4.0/
13

Teacher Guide Lesson 2: How can I block the light that’s coming into our room through the window? How Does Light Help Me See Things and Communicate With Others?
Getting Ready: Materials Preparation
Materials For Each Group
The investigation in this lesson will be completed in small, cooperative groups and culminate as a large group
● Chart paper and markers● Various materials to test for blocking
light of same size (suggestion of 15cm x15 cm) (cardboard, fabric, paper, tissuepaper, construction paper, paper towel,transparencies, wax paper, mylar, plasticwrap, felt, cardstock, etc.)
● Tape (masking or blue painter’s)
Preparation of Materials (30 min.)
● Clear access to any windows in the classroom where the sun is shining intothe room or light from the outside is visible (and if no windows are available,secure a location in the school in which access to windows is available for theclass).
● Create a “Materials Station” where students can have access to multiplesamples of each material that will be tested in a central location for studentsto use for each test (*Maintain this for Lesson 3 as well)
● Post 3 pieces of chart paper - titled "How We Can Test if Each Material Blocksthe Light or Not", "Our Next Steps", and a T-chart with columns titled"Material" and "What We Discovered"
● One cut open box and attached CD/DVD & flashlight (see instructions formaking this in the next lesson).
● Display charts from Lesson 1 somewhere in the room.
Materials For Each Student
● Lesson 2 - Student Activity Sheet 2.1 (Labeleach material’s identity in each row of thissheet before copying the sheet for students)
● Student Design Sheet Lesson 2
Safety
● N/A
nextgenstorylines.org These materials were developed through with support from the Michigan Department of Education; the Gordon and Betty Moore Foundation, and support from the NGSX Project at Clark University, Tidemark Institute, and Northwestern University.
This work is licensed under a Creative Commons Attribution 4.0 License http://creativecommons.org/licenses/by/4.0/ 14

Teacher Guide Lesson 2: How can I block the light that’s coming into our room through the window? How Does Light Help Me See Things and Communicate With Others?
Getting Ready: Teacher Preparation
Background Knowledge
PS4.B from the FRAMEWORK:
Some materials allow light to pass through them, others allow only some light through and others block all the light and create a dark shadow on any surface beyond them, where the light cannot reach.
In this lesson, students will determine the effects of placing various materials in front of a window. In a preliminary fashion, they should observe the way that light interacts with different materials. Students will revisit this in later lessons, so it is not necessary to focus too heavily on this idea at this time. However, this investigation will be a good reference point in later lessons.
Alternative Student Conceptions Linking Our Understanding to Scientific Terminology
● Objects that allow light tocompletely pass through them are transparent.
● Objects that limit the lightthat can pass through them are translucent.
● Objects that block the lightfrom passing through themare opaque.
● Objects that redirect lightare reflective.
nextgenstorylines.org These materials were developed through with support from the Michigan Department of Education; the Gordon and Betty Moore Foundation, and support from the NGSX Project at Clark University, Tidemark Institute, and Northwestern University.
This work is licensed under a Creative Commons Attribution 4.0 License http://creativecommons.org/licenses/by/4.0/ 15

Teacher Guide Lesson 2: How can I block the light that’s coming into our room through the window? How Does Light Help Me See Things and Communicate With Others?
Learning Plan: How can I block the light that’s coming through my window?
( 60 min ) Teacher Supports & Notes
Day 1 - Lesson 2a
1. (5 min) The first part of the lesson is a review where students recap their thoughts on whetherlight is needed to see or not. Review what was decided upon last class by referring back to theDriving Question Board from Lesson 1 and by using the following prompts:
Suggested Prompts: ➔ Last time we were talking about light. What did we decide? Do we need light to see or not?
Listen for student responses that answer the Suggested Prompts. ➔ We couldn’t agree on whether or not we need light to see. So we decided we wanted to create a
classroom that was as dark as possible in order to find this out.
Show students one of the materials available to them (i.e. felt). Invite students to share some ideas about how they could use felt (or another material you choose) to make the classroom dark.
Suggested Prompts: ➔ How could we use felt to make our classroom dark?
Listen for student responses such as: ➔ We could use the materials to cover up the windows and see if it blocks out the light!
2. (10 min) Show students the “Materials Station” and how each material’s identity is labeled.Remind students that the goal of today’s lesson is to figure out which materials block as muchlight as possible coming into the classroom from the windows. This information will be used to
Additional Guidance
A Planning and carrying out an investigation for students this age will need teacher guidance. Students will want to test all the materials at once, instead of testing each material individually in the same way, controlling variables. After eliciting student ideas about how they will test each material, guide students into agreeing that each material needs to be tested in the same way so that the data collected can be compared in a fair way. For example, “Would using two pieces of cardboard and one piece of wax paper in front of the window be a fair test? Would testing them from different distances from the window be a fair test?” Students must understand the controlled process in carrying out an investigation so that the information can be used to reach the lesson’s intended goal.
nextgenstorylines.org These materials were developed through with support from the Michigan Department of Education; the Gordon and Betty Moore Foundation, and support from the NGSX Project at Clark University, Tidemark Institute, and Northwestern University.
This work is licensed under a Creative Commons Attribution 4.0 License http://creativecommons.org/licenses/by/4.0/ 16

Teacher Guide Lesson 2: How can I block the light that’s coming into our room through the window? How Does Light Help Me See Things and Communicate With Others?
help determine if light is really needed to see or not. Ask students how they can test each material’s ability to block light. Elicit student responses and record their thinking on the chart paper “How We Can Test If Each Material Blocks Light or Not?” A-
Suggested Prompts: ➔ How many of each material should I take at a time?➔ Can I test two materials at once?➔ Where should I go with the material?➔ How far should I place the material in front of the window?➔ How will I remember the information that I discover about each material?
Listen for student responses that answer the Suggested Prompts. ➔ We should only test one material at a time.➔ We should not test two materials together because that won’t tell us about each individual
material.➔ We should go to the same spot on the window for each test.➔ We should make sure we place each material the same distance in front of the window.➔ We will need to record the data in some way so we can tell others about it later when the
investigation is over.
3. (5 min) Once the investigation is planned, model a “Think Aloud” strategy B with onematerial so students can see how making predictions can be based on prior experiences,recording data in their data table on Student Activity Sheet 2.1, and completing the investigationfor one material.
Suggested Prompts: ➔ I am going to test cardboard first. I notice that cardboard is brown and thick. I can’t see
through it, and when I see packages delivered at home or school, I’ve noticed I can’t see what’sinside them. I have a prediction; I think that this means that the cardboard will block the light
Additional Guidance
B Modeling how to make a prediction is important so that students can see how prior experiences are useful in this decision-making process. Students should also see the progression of how they will make a prediction, carry out the investigation, and then record their data. Students will be so excited to test the materials that they will often undervalue the importance of recording data to later communicate with others at the close of the lesson. This will be needed to motivate the next investigation, where students will create model rooms to further test their ideas.
nextgenstorylines.org These materials were developed through with support from the Michigan Department of Education; the Gordon and Betty Moore Foundation, and support from the NGSX Project at Clark University, Tidemark Institute, and Northwestern University.
This work is licensed under a Creative Commons Attribution 4.0 License http://creativecommons.org/licenses/by/4.0/ 17

Teacher Guide Lesson 2: How can I block the light that’s coming into our room through the window? How Does Light Help Me See Things and Communicate With Others?
coming from the windows because it’s thick and I can’t see anything in a cardboard box. Does anyone agree or disagree with my prediction about cardboard’s ability to block light?
➔ Based on our thinking, I am going to record my prediction in my data table that cardboard willblock all of the light coming from the window. I find “ Cardboard ” under “Materials” and circleAll under “Prediction.”
➔ Now that I’ve made my prediction, I am going to stop and test the cardboard. I will bring thecardboard to the window and see what it does with the light coming from the window. Basedon what I see, I notice that the cardboard blocks all of the light and I can’t see through it. I evensee this dark spot on the floor, which I think is a shadow. On my data table, I am going to circle“All” under “Results” because the cardboard blocked all of the light coming from the window.
4. (10-15 min) Break students into small groups, allowing each group to test one material at atime in front of the windows. C Remind students to make predictions about their materialsbefore they actually test them. Circulate and assist.
5. (10 min) When students have had a chance to test each material provided, gather themtogether for a Building Understandings Discussion D . Record their thinking on the chart paperwith the t-chart entitled “Materials” and “What We Discovered.”
Suggested Prompts: ➔ What did you discover about each of the materials?➔ How much light did each material block coming from the window?➔ Were there any materials that seemed to do the same thing with the light, like block all all the
light from outside or not block any light at all?➔ What evidence do you have for this?
Listen for student responses E that refer to how they can block the light that’s coming in through the windows:
Differentiation Strategies and Alternate Activities
C Based on your student groupings, assign a student to be responsible for getting and returning the one material they will test at a time. If going to the Materials Station is a management challenge for your students, and/or if space in front of the windows is limited, consider placing various materials in front of the window in boxes. Have students line up behind each box, taking turns for each material’s test.
Strategies for this Building Understandings Discussion
D As students share, draw attention to crosscutting concepts where possible. For example, students may notice patterns related to the type of material and how well it can block the sunlight. If multiple students agree, name it as a pattern by asking, “Would you agree that this is a pattern that we’re noticing over and over?” As ideas are captured from the discussion on the chart paper, add in visuals to support emergent readers as needed.
Supporting students in designing investigations
E Conflicting ideas may arise here, where students will argue that some
nextgenstorylines.org These materials were developed through with support from the Michigan Department of Education; the Gordon and Betty Moore Foundation, and support from the NGSX Project at Clark University, Tidemark Institute, and Northwestern University.
This work is licensed under a Creative Commons Attribution 4.0 License http://creativecommons.org/licenses/by/4.0/ 18

Teacher Guide Lesson 2: How can I block the light that’s coming into our room through the window? How Does Light Help Me See Things and Communicate With Others?
➔ We noticed that some of the materials did a better job of blocking the sunlight than others, butit was still really hard to see because the windows are so large and the materials we’re usingare so small.
➔ Some materials blocked a lot of the light. Others blocked some of the light, and there weresome that didn’t block even any light!
➔ The materials we tested were really small compared to our window, so we still noticed ourroom was really bright.
➔ The materials that blocked the light were not see-through at all. The materials that were sort ofsee-through or completely see-through were the ones we shouldn’t use to block the lightcoming into our classroom.
Ask, “Now that we know which materials block the light best, what should we do with those materials in our room?”
Listen for student responses that suggest using the materials to make the room completely dark, such as:
➔ We need to try to use the materials that block light best (cardboard) to make our roomcompletely dark.
➔ We need to put cardboard all over our windows and in the cracks under the doors to block thelight coming into our classroom.
Day 2 - Lesson 2b
6. Have students review what they want to do in today’s lesson using the following prompts.
Suggested Prompts: ➔ What did we decide to do in class today?➔ How should we use our materials to accomplish this?
Listen for student responses that suggest using the materials to make the room completely dark, such as:
➔ We decided that we want to try to make our classroom completely dark using the materialsthat block out light best, like cardboard.
materials block out more light than others. Encourage this debate, as some element of controversy, uncertainty, or the unknown is what motivates many scientific endeavours. Revisit the investigation to see if each material was tested in a controlled manner.
nextgenstorylines.org These materials were developed through with support from the Michigan Department of Education; the Gordon and Betty Moore Foundation, and support from the NGSX Project at Clark University, Tidemark Institute, and Northwestern University.
This work is licensed under a Creative Commons Attribution 4.0 License http://creativecommons.org/licenses/by/4.0/ 19

Teacher Guide Lesson 2: How can I block the light that’s coming into our room through the window? How Does Light Help Me See Things and Communicate With Others?
➔ We should take the materials and get to work covering our windows!
Hand out a limited amount of materials to students and have them get started with the task of trying to cover all of the surfaces with the cardboard. After a few minutes, ask students, Is this working? What’s going wrong?
Listen for student responses such as: ➔ This window is too big!➔ We don’t have enough materials to cover everything.➔ Our windows are too tall and we can’t reach the top safely.
(10-15 min) Point out to students that from investigation so far we don’t really know which materials can make our classroom the darkest because the windows were so big and we couldn’t cover them completely. Because of this we still don’t know how to make our classroom the darkest possible. And we need to still figure that out because we want to use the right materials to help us make a room as dark as possible, so we can answer our initial question of whether we need light to see or not.
Co-construct a model of the room, the wall and window, the sun, and a person inside testing a material at the window. Make sure to label all of the factors that contribute to it being difficult for students to answer the questions “How do we make our room as dark as possible,” and “Do we need light to see?”
nextgenstorylines.org These materials were developed through with support from the Michigan Department of Education; the Gordon and Betty Moore Foundation, and support from the NGSX Project at Clark University, Tidemark Institute, and Northwestern University.
This work is licensed under a Creative Commons Attribution 4.0 License http://creativecommons.org/licenses/by/4.0/ 20

Teacher Guide Lesson 2: How can I block the light that’s coming into our room through the window? How Does Light Help Me See Things and Communicate With Others?
Ask students, “How would it be easier to conduct our investigation if we had a smaller window?” How could we make everything in our room smaller to conduct our investigation?
Tell students that when we don’t get the information we need from the original investigation, we might have to (re)design a new investigation. Tell students that when the stuff you want to investigate is too big to test, it might be useful and easier to try to test something similar to it at a smaller scale (use a smaller piece of similar stuff). Capture these ideas on chart paper with the title, “Our Next Steps,” using the following prompts:
Suggested Prompts: ➔ How would it be easier to investigate our question of how can we make our classroom as dark as
possible if we had a smaller window on a smaller wall?
Listen for student responses that answer the Suggested Prompts. ➔ We would be able to cover up a smaller window completely with the materials we have. Our
actual classroom window is way too big to cover completely.
Ask students to draft ideas for how to use some new materials to build a smaller version of the room in Student Design Sheet 2. Once they’ve drafted ideas, collect their ideas and co-construct a class model for how to assemble all of the materials to make a smaller window on which to conduct the investigation.
Tell students that they came up with some great ideas for how to use the CD/DVD case and a flashlight box to do an investigation that could help us figure out “Which materials block light the best”, so we can solve the design problem “How can I make the space I am looking at as dark as possible?” on the Driving Question Board F-. Let students know that you will create the actual small windows tomorrow based on their designs.
Posting a Classroom Artifact
F Once students have come up with the idea to use a CD/DVD case as a smaller version of a window, co-construct a model on the Driving Question Board that captures how the materials will be used to solve this problem.
nextgenstorylines.org These materials were developed through with support from the Michigan Department of Education; the Gordon and Betty Moore Foundation, and support from the NGSX Project at Clark University, Tidemark Institute, and Northwestern University.
This work is licensed under a Creative Commons Attribution 4.0 License http://creativecommons.org/licenses/by/4.0/ 21

Teacher Guide Lesson 2: How can I block the light that’s coming into our room through the window? How Does Light Help Me See Things and Communicate With Others?
Alignment With Standards
Building Toward Target NGSS PE
● 1-PS4-2. Make observations to construct an evidence-based account thatobjects in darkness can be seen only when illuminated.
● 1-PS4-3 Plan and conduct investigations to determine the effect ofplacing objects made with different materials in the path of a beam of light.
● K-2-ETS1-1 Ask questions, make observations, and gather information about a situation people want to change to define a simple problem that can be solved through the development of a new or improved object ortool.
● K-2-ETS1-2 Develop a simple sketch, drawing, or physical model toillustrate how the shape of an object helps it function as needed to solve agiven problem.
● K-2-ETS1-3 Analyze data from tests of two objects designed to solvethe same problem to compare the strengths and weaknesses of how eachperforms.
Building Toward Common Core Standard(s)
ELA standards: CCSS.ELA-LITERACY.SL.1.1 -Participate in collaborative conversations with diverse partners about grade 1 topics and texts with peers and adults in small and larger groups.
● CCSS.ELA-LITERACY.SL.1.1.A - Follow agreed-upon rules fordiscussions (e.g., listening to others with care, speaking one at a time about the topics and texts under discussion).
● CCSS.ELA-LITERACY.SL.1.1.B - Build on others' talk inconversations by responding to the comments of others throughmultiple exchanges.
● CCSS.ELA-LITERACY.SL.1.1.C - Ask questions to clear up anyconfusion about the topics and texts under discussion.
CCSS.ELA-LITERACY.SL.1.4 Describe people, places, things, and events with relevant details, expressing ideas ….clearly.
nextgenstorylines.org These materials were developed through with support from the Michigan Department of Education; the Gordon and Betty Moore Foundation, and support from the NGSX Project at Clark University, Tidemark Institute, and Northwestern University.
This work is licensed under a Creative Commons Attribution 4.0 License http://creativecommons.org/licenses/by/4.0/ 22

Lesson 3: Which materials will block the light best (to help us make our room as dark as possible? Teacher Guide-
1st Grade Unit: How Does Light Help Me See Things and Communicate With Others?
nextgenstorylines.org These materials were developed through with support from the Michigan Department of Education; the Gordon and Betty Moore Foundation, and support from the NGSX Project at Clark University, Tidemark Institute, and Northwestern University.
This work is licensed under a Creative Commons Attribution 4.0 License http://creativecommons.org/licenses/by/4.0/
23

Teacher Guide Lesson 3: Which materials will block the light best? How Does Light Help Me See Things and Communicate With Others?
Getting Ready: Materials Preparation
Preparation of Materials (60 min.) ---- See more preparation directions on the next page ------
● Copy Activity Sheet 3.1 for each student● “Material” and “What We Discovered” T-Chart(from Lesson 2)● “Our Next Steps” poster (from Lesson 2)● Prepare a second “Material” and “What We Discovered Part 2” poster to be used in this lesson.● Display the Driving Question Board from Lesson 1● Maintain “Materials Station” from Lesson 2, where students can have continued access to samples of each material to be tested
(pieces of cardboard, fabric, paper, tissue paper, etc.)● For each cooperative group, organize a flashlight and a Window testing platform (see directions below) into a bucket/basket for easy
distribution.
Build a Clear Window Testing Box for each group: 1. Cut a tissue box or copy paper box from lesson 1 in half, keeping the half that has no holes in it yet.2. Cut an approximately 3” x 3” square in middle of the largest face.3. Take apart a clear CD/DVD case its two halves (Clear transparency film found from old overhead
projectors or inside inexpensive frames also work).4. Tape the flat half of the case to the side of the box so that it covers the square cut-out in the box, like a
window. Tape should not cover the cut-out.
Build a Shoebox Room for each group: ● Prepare each group’s shoebox by cutting out an eye hole and two flaps for a window and a door (see
image). Add handles to the door by securing a piece of yarn with tape. These will be used by groupsin the next lesson. You will need one of these for this lesson. Alternatively you can cut a small doorwhere the eyehole is located so that it functions as the eye hole. You also may want to tape a pieceof clear plastic laminate or clear ziplock baggy material over the inside of the window.
nextgenstorylines.org These materials were developed through with support from the Michigan Department of Education; the Gordon and Betty Moore Foundation, and support from the NGSX Project at Clark University, Tidemark Institute, and Northwestern University.
This work is licensed under a Creative Commons Attribution 4.0 License http://creativecommons.org/licenses/by/4.0/
24

Teacher Guide Lesson 3: Which materials will block the light best? How Does Light Help Me See Things and Communicate With Others?
Materials For Whole Class
● Maintain “Materials Station” from Lesson 2, wherestudents can have continued access to samples of eachmaterial that will be tested (pieces of cardboard, fabric,paper, tissue paper, etc.)
● Shoebox with tight-fitting lid and cutout for an eyehole, awindow, and a door (see image above)
● 2 pieces of chart paper● Large index cards with the name of each material on them
and a small sample of the material taped to each indexcard. You will organize these with students on a piece ofchart paper at the end of the lesson.
Note: You need only 1 of these for the demonstration at the end this lesson, but each group will need their own for the next lesson:
Materials For Each Group
The investigation in this lesson will be completed in small, cooperative groups and culminate as a large group.
Provide 1 bin containing the following for each cooperative group (2-4 students depending on classroom dynamics) ● 1 Flashlight● 1 Clear Window Testing Box (see
preparation of materials)
The image to the right shows an example of how students will be using the materials from the Materials Station to test if they let light through them. The example shows what is seen when a post-it note is held up against the hole in the Clear Window Testing Box and a flashlight is pointed at the window from behind it.
Materials For Each Student
● Lesson 3 - Student Activity Sheets (1)● Student Design Sheet Lesson 3
Safety
● Wearing safety goggles and gloves for protection as youcarefully cut out eyehole and flaps from each shoebox with abox cutter.
nextgenstorylines.org These materials were developed through with support from the Michigan Department of Education; the Gordon and Betty Moore Foundation, and support from the NGSX Project at Clark University, Tidemark Institute, and Northwestern University.
This work is licensed under a Creative Commons Attribution 4.0 License http://creativecommons.org/licenses/by/4.0/
25

Teacher Guide Lesson 3: Which materials will block the light best? How Does Light Help Me See Things and Communicate With Others?
Getting Ready: Teacher Preparation
Background Knowledge
PS4.B from the FRAMEWORK:
Some materials allow light to pass through them, others allow only some light through and others block all the light and create a dark shadow on any surface beyond them, where the light cannot reach.
In this lesson, students will plan and carry out an investigation to determine the effects of placing various materials in front of a faux window. They will also use a shoebox to simulate a room that is as dark as possible. .
Alternative Student Conceptions Linking Our Understanding to Scientific Terminology
● Objects that allow light tocompletely pass through them are transparent.
● Objects that limit the lightthat can pass through them are translucent.
● Objects that block the lightfrom passing through themare opaque.
● Objects that redirect lightare reflective.
nextgenstorylines.org These materials were developed through with support from the Michigan Department of Education; the Gordon and Betty Moore Foundation, and support from the NGSX Project at Clark University, Tidemark Institute, and Northwestern University.
This work is licensed under a Creative Commons Attribution 4.0 License http://creativecommons.org/licenses/by/4.0/
26

Teacher Guide Lesson 3: Which materials will block the light best? How Does Light Help Me See Things and Communicate With Others?
Learning Plan: Which materials will block light the best?
( 60 min ) Teacher Supports & Notes
Day 1 - Lesson 3a
1. (5 min) Review the question from the Lesson 2 “How can I make the space I am looking at asdark as possible?” Show students the “Materials” and “What We Discovered” posters. While theydiscovered that some materials blocked the sun’s light better than others, it was impossible toblock all of the sun’s light because the windows were just too large. Ask students to summarizewhat it was that we decided upon last time. Then, show students the small windows that youcreated based on their designs. Use the following prompts to help students determine how touse the small rooms and flashlights to conduct the investigation.
Suggested Prompts: ➔ After holding materials against the windows in class, why did we decide we needed a new way
to test our materials?➔ How can we use a flashlight to simulate the sunlight that was coming in through our windows in
our investigation➔ What will we do with all of these materials to help us answer the questions, “How can we make
our classroom as dark as possible?” and “Which materials block the light best?”
Listen for student responses that answer the Suggested Prompts. ➔ The windows were too big to cover up completely, so we needed a smaller version to work with.➔ We can place the flashlight “outside” of our room pointing in through the window. This would
take the place of the sunlight in the diagram we drew in Lesson 2.➔ From our investigation so far, we don’t really know which materials can make our classroom the
darkest. We’re still trying to answer our initial question of whether we need light to see or not,
nextgenstorylines.org These materials were developed through with support from the Michigan Department of Education; the Gordon and Betty Moore Foundation, and support from the NGSX Project at Clark University, Tidemark Institute, and Northwestern University.
This work is licensed under a Creative Commons Attribution 4.0 License http://creativecommons.org/licenses/by/4.0/
27

Teacher Guide Lesson 3: Which materials will block the light best? How Does Light Help Me See Things and Communicate With Others?
and we still don’t know how to make our classroom the darkest possible to figure out the answer.
➔ We can use the case “window” and completely cover it with a material and hold the flashlight onthe other side of it. This way we can tell if we can see any light coming through to the other sideof it.
2. (15 min) Review the “Materials Station.” Remind students that the goal of today’s lesson is tofigure out which materials block as much light as possible by using a smaller window and sun,which will be a CD/DVD case and a flashlight. The information gathered from this investigationwill help determine if light is really needed to see or not.
Ask students how they can use this CD/DVD case (window) and flashlight (sun) to determine how each material interacts with the light.” A-
Suggested Prompts: ➔ Where should I place the CD/DVD case?➔ Where should I place the flashlight and which direction should I point it?➔ Where should I put each material in relationship to the window?➔ What will I look for when I turn the flashlight on?➔ How will I remember the information that I discover ab out each material?➔ Should we have the lights off in the classroom during the investigation?
Listen for student responses that answer the Suggested Prompts. ➔ We should place the CD/DVD case and box standing upright on our tables, like a real window
stands vertically in the walls of our school.➔ We should place the flashlight behind the case so that when we turn it on, it shines through the
CD/DVD case just like the sunlight comes into our classroom through the windows.➔ We should put each material one by one against the CD/DVD case where the flashlight is,
Additional Guidance
A Despite planning and carrying out an investigation in Lesson 2, students will continue to need teacher guidance in setting up an investigation. After eliciting student ideas about how they can use the flashlight to emulate the sun and the CD/DVD case to emulate the window, guide students into agreeing that each material must be placed against CD/DVD case in the same way, as well as positioning the CD/DVD case and flashlight in the same way. This way, the data collected can be compared in a fair way. For example, “Would placing the flashlight really close to the window be okay in one test and putting it back here (i.e. 20 cm away) be fair? “Would placing the material to be tested really close to the window be okay in one test and putting it back here in another test (i.e. 20 cm away) be fair?
Have two student volunteers come up and show where to hold the material (one student) and hold the flashlight (another student) for one material and then repeat it for another so everything is kept fair.
Students must understand the controlled
nextgenstorylines.org These materials were developed through with support from the Michigan Department of Education; the Gordon and Betty Moore Foundation, and support from the NGSX Project at Clark University, Tidemark Institute, and Northwestern University.
This work is licensed under a Creative Commons Attribution 4.0 License http://creativecommons.org/licenses/by/4.0/
28

Teacher Guide Lesson 3: Which materials will block the light best? How Does Light Help Me See Things and Communicate With Others?
almost like a curtain would cover a window. We should do this the same way for each material we test.
➔ We will look to see how the material blocks the sunlight and decide if it blocks all the light,some of the light, or no light at all.
➔ We will need to record the data in some way so we can tell others about it later.➔ We will need to turn the lights off when we're testing our materials so we can see the
flashlights light more easily.
3. (5 min) Once the investigation is planned, demonstrate B setting up the investigation, testingone material, and recording data in their data table on Student Activity Sheet 3.1.
Suggested Prompts: ➔ I am going to set up my “window” and “sun” first by placing the CD/DVD case here and the
flashlight behind it.➔ I am going to turn off the lights in the classroom so I can see the light from the flashlight more
easily.➔ I am going to test this piece of fabric first, by placing it on the other side of the CD/DVD case
that the flashlight is on. I write “Fabric” on my data sheet until “Material Being Tested.”➔ I am going to turn the flashlight on now, and will look at the other side of the fabric to see if it
blocks all the light, some of the light, or none of the light.➔ When I turn the flashlight on, I notice that I can still see a little bit of light on the other side of
the fabric. If the fabric blocked all the light then I wouldn’t be able to see any light, and since Isee some light on the other side of the fabric, I am going to circle “Some” on my data sheet.
4. (15 min) Break students into small groups, allowing them to get their buckets/basketscontaining their tissue box with attached CD/DVD cases, material squares, flashlights, and datasheets. Have each group test one material at a time in their CD/DVD case using their flashlights.C- Remind students to record the data they collect from each material they test. Circulate and
process in carrying out an investigation so that the information can be used to reach the lesson’s intended goal.
Additional Guidance
B Despite carrying out an investigation and communicating results in Lesson 2, continue to demonstrate how to do so for students of this age. You may want to demonstrate at least one other material as well.
Differentiation Strategies
C Based on your student groupings, assign a student to be responsible for getting and returning the bucket/basket containing the CD/DVD case and flashlight and another student to get the the one material they will test at a time. Also, if filling out the data sheet with material names is too advanced for your students, pre-write the materials that they will be testing before photocopying them.
nextgenstorylines.org These materials were developed through with support from the Michigan Department of Education; the Gordon and Betty Moore Foundation, and support from the NGSX Project at Clark University, Tidemark Institute, and Northwestern University.
This work is licensed under a Creative Commons Attribution 4.0 License http://creativecommons.org/licenses/by/4.0/
29

Teacher Guide Lesson 3: Which materials will block the light best? How Does Light Help Me See Things and Communicate With Others?
assist.
________________________________________________________________________________________________________________________
5. (10 min) When students have had a chance to test each material provided, gather themtogether for a Building Understandings Discussion D-. Record their thinking on the chart paperwith three column chart with the headings “blocked all the light”, “blocked some of the light”,and “blocked none of the light on top by showing each material they tested, taped to an indexcard with the name of the material on it and then asking students which category each materialshould be classified under and how they know?
Suggested Prompts: ➔ What did you discover about this material?➔ Did it block all, some or none of the light? What evidence do you have for this?➔ How does the data we collected from this investigation similar to, or different from when we
tested these materials in front of our actual classroom windows with sunlight?➔ Which materials would be best for blocking the light coming into our classroom from outside?
What evidence do you have for this?➔ Do we still have a dark enough room to prove if we need light to see or not?
Listen for student responses that refer to how they can block the light coming from the flashlight through the CD/DVD case.
➔ We discovered that some of the materials blocked all of the flashlight’s light, others blockedsome of the light, and then there were some that blocked no light at all.
➔ The materials that blocked the light were not see-through at all.➔ The materials that were sort of see-through or completely see-through were the ones we
shouldn’t use to block the light coming into our classroom.➔ This investigation was easier to see how much light the materials blocked because it was
smaller in size. Though it showed us which materials block light better than others, it still
Strategies for this Building Understandings Discussion
D As students share, ask other students if they also have evidence for the claim being made.
For any materials that there is disagreement in the results for, you may want to ask some students to come up and hold the material in front of the flashlight to demonstrate what they saw and explain their reasoning. This is an excellent opportunity to help students work with and build off each other’s noticing to help them come to agreement on a way that we can tell if the material is blocking some, all, or none of the light.
Draw attention to crosscutting concepts where possible. For example, students may notice patterns related to the type of material and how well it can block the light coming from the flashlight. If multiple students agree, name it as a pattern by asking, “Would you agree that this is a pattern that we’re noticing over and over?”
nextgenstorylines.org These materials were developed through with support from the Michigan Department of Education; the Gordon and Betty Moore Foundation, and support from the NGSX Project at Clark University, Tidemark Institute, and Northwestern University.
This work is licensed under a Creative Commons Attribution 4.0 License http://creativecommons.org/licenses/by/4.0/
30

Teacher Guide Lesson 3: Which materials will block the light best? How Does Light Help Me See Things and Communicate With Others?
wasn’t perfect because there was still light coming into our rooms and it wasn’t completely dark.
E- Close the lesson by letting students know that tomorrow we will try to tackle the problem of our imperfect small room. _____________________________________________________________________________________________________________________
Day 2 - Lesson 3b
6. (20 min) Review with students the problem that they settled on at the end of the last classperiod, that the small room was imperfect because it was letting a lot of light in, even when wecovered the small window and turned off the lights in our classroom.
Lead students in brainstorming ideas for how they can use what they learned in Lesson 1 and the beginning of Lesson 2 about making the room completely dark to gather evidence to support the idea of whether light is needed to see or not. Review these ideas:
● We noticed that in this investigation it was easier to see how much light the materialsblocked because it was smaller in size than trying to hold the materials against a bigwindow.
● Though it showed us which materials block light better than others, it still wasn’t perfectfor helping us investigate whether we can see in the dark because there was still lightcoming into our rooms and it wasn’t completely dark.
● We’ve learned that when we don’t get the information we need from the originalinvestigation, we might have to (re)design a new investigation.
● And in the last investigation we decided that when the stuff you want to investigate is too
Additional Guidance
E The DCI for this grade band refers to the words transparent, transluscent, and opaque. But the performance expectation does not. We are not convinced that using these words from this point onward in the unit will make the concepts and investigations more or less understandable for students. If you want to introduce these words, before the end of this investigation, to show how they apply to the results of this investigation.
Tell students that when an object falls into one of these three categories, it can be referred to by three different names: - Objects that allow light to pass through so that objects can be seen behind them arecalled “transparent”.- Objects that block some of the light, so thatyou can still see light coming through them(they glow when light is behind them), but can’t see objects behind them are called“translucent”. - Objects that block the light from passingthrough them are called “opaque”
Add these names to the top of the columns of the T-chart.
nextgenstorylines.org These materials were developed through with support from the Michigan Department of Education; the Gordon and Betty Moore Foundation, and support from the NGSX Project at Clark University, Tidemark Institute, and Northwestern University.
This work is licensed under a Creative Commons Attribution 4.0 License http://creativecommons.org/licenses/by/4.0/
31

Teacher Guide Lesson 3: Which materials will block the light best? How Does Light Help Me See Things and Communicate With Others?
big to test, it might be useful and easier to try to test something about that stuff at a smaller scale (a smaller piece of the stuff).
Pass out the Lesson 3 - Student Design Sheet and ask students to write or draw how to take the materials in the photo and use them to make something that was more like a room F-. Once students have had ample opportunity to brainstorm ideas, bring students back together to share out what they brainstormed, placing their design sheets in the Design Idea Gallery as they share.
Suggested Prompts: ➔ What could we do with the materials in the picture to make this box more like a real room?
Listen for student responses that suggest ideas such as: ➔ Some rooms are shaped like a box - they have a floor, four walls, and a ceiling.➔ The box we used for the last investigation has part of a floor and ceiling, but is missing a wall
and a door.➔ We could use a box that isn’t cut apart, like a shoebox or a paper box with a lid on it. That
would look more like a room because it would have a floor, walls, and a ceiling. Our room has adoor and windows too, so we’d have to cut out a door and windows like we have in our room.
➔ To block out all the light we could use some materials that block light, like cardboard, and coverup the doors and windows.
➔ We would have to poke a hole in the side so we could look inside the box (or make a reallysmall door so that we only can put our eye up to it when we open it)
Introduce the Shoebox Room as another tool we might be able to use to help us determine if light
Additional Guidance
F If students struggle to identify similarities between the box and the room, you may wish to refer to the shape of the classroom and how many sides or faces it has. This corresponds to CCSS 1.GA.2 Compose two-dimensional shapes (rectangles, squares, trapezoids, triangles, half-circles, and quarter-circles) or three-dimensional shapes (cubes, right rectangular prisms, right circular cones, and right circular cylinders) to create a composite shape, and compose new shapes from the composite shape.
Having students think of using the shoebox as a model classroom may be challenging for students this age. Show them the labels on each part and guide them into looking into the eyehole and lifting the window and door flaps.
nextgenstorylines.org These materials were developed through with support from the Michigan Department of Education; the Gordon and Betty Moore Foundation, and support from the NGSX Project at Clark University, Tidemark Institute, and Northwestern University.
This work is licensed under a Creative Commons Attribution 4.0 License http://creativecommons.org/licenses/by/4.0/
32

Teacher Guide Lesson 3: Which materials will block the light best? How Does Light Help Me See Things and Communicate With Others?
is needed to see. Show a single example of the Shoebox Room to the students in this introduction F-:
Suggested Prompts: ➔ How is this shoebox like a real room?➔ How does this shoebox with a “window” and a “door” have a similar shape to a room?➔ If I looked into this eye hole (or small door), how would that be like looking into a small room?➔ What sort of investigations could I do, by looking into the eye hole, that would help me figure
out if we need light to see in our room? G-
➔ What can these investigations tell us?
Listen for student responses that suggest ideas such as: ➔ The shoebox has a window and a door that can open or close.➔ It also has walls, floors, and a ceiling.➔ The eyehole allows us to see inside the room.➔ We can look through the eyehole with the “window” and “door” flaps closed. We can find out if
we can see anything inside the box when they’re closed. We can also look through the eyeholeand then lift the window. We can find out if we can see anything inside the box when it’s open.We can also lift the door flap to see if we see anything inside the box when it’s open, or even ifwe see more or less with it open.
➔ If we see inside the box when the window and door are closed, then we might not need light tosee. But if we don’t see anything inside the box when the window and door are closed, then wemight actually need light to see.
Tell students that we have some great ideas for how to use the box to continue investigating our questions, and that you will cut doors and windows in their boxes for them before next time and add these ideas to our Driving Question Board, so we all remember how we want to use the boxes again next time. G-
Posting a Classroom Artifact
G You may want to add a picture of our box to the Driving Question Board. At this point in the unit, the Driving Question Board will evolve into a place where you can add artifacts of any kind that are helpful in figuring out the answers to the questions you posted originally. This may include pictures, labels, ideas, or further questions you wish to investigate.
nextgenstorylines.org These materials were developed through with support from the Michigan Department of Education; the Gordon and Betty Moore Foundation, and support from the NGSX Project at Clark University, Tidemark Institute, and Northwestern University.
This work is licensed under a Creative Commons Attribution 4.0 License http://creativecommons.org/licenses/by/4.0/
33

Teacher Guide Lesson 3: Which materials will block the light best? How Does Light Help Me See Things and Communicate With Others?
Alignment With Standards
Building Toward Target NGSS PE
● 1-PS4-2. Make observations to construct an evidence-based account thatobjects in darkness can be seen only when illuminated.
● 1-PS4-3 Plan and conduct investigations to determine the effect ofplacing objects made with different materials in the path of a beam of light.
● K-2-ETS1-1 Ask questions, make observations, and gather information about a situation people want to change to define a simple problem that can be solved through the development of a new or improved object ortool.
● K-2-ETS1-2 Develop a simple sketch, drawing, or physical model toillustrate how the shape of an object helps it function as needed to solve agiven problem.
● K-2-ETS1-3 Analyze data from tests of two objects designed to solvethe same problem to compare the strengths and weaknesses of how eachperforms.
Building Toward Common Core Standard(s)
ELA standards: CCSS.ELA-LITERACY.SL.1.1 -Participate in collaborative conversations with diverse partners about grade 1 topics and texts with peers and adults in small and larger groups.
● CCSS.ELA-LITERACY.SL.1.1.A - Follow agreed-upon rules fordiscussions (e.g., listening to others with care, speaking one at a time about the topics and texts under discussion).
● CCSS.ELA-LITERACY.SL.1.1.B - Build on others' talk inconversations by responding to the comments of others throughmultiple exchanges.
● CCSS.ELA-LITERACY.SL.1.1.C - Ask questions to clear up anyconfusion about the topics and texts under discussion.
CCSS.ELA-LITERACY.SL.1.4 Describe people, places, things, and events with relevant details, expressing ideas ….clearly.
nextgenstorylines.org These materials were developed through with support from the Michigan Department of Education; the Gordon and Betty Moore Foundation, and support from the NGSX Project at Clark University, Tidemark Institute, and Northwestern University.
This work is licensed under a Creative Commons Attribution 4.0 License http://creativecommons.org/licenses/by/4.0/
34

Lesson 4: What do we see when we look into a place where all the outside light is blocked from getting in? Teacher Guide-
1st Grade Unit: How Does Light Help Me See Things and Communicate with Others?
nextgenstorylines.org These materials were developed through with support from the Michigan Department of Education; the Gordon and Betty Moore Foundation, and support from the NGSX Project at Clark University, Tidemark Institute, and Northwestern University.
This work is licensed under a Creative Commons Attribution 4.0 License http://creativecommons.org/licenses/by/4.0/ 35

Teacher Guide Lesson 4: What do we need to see inside our room (or shoebox)? How Does Light Help Me See Things and Communicate With Others?
Getting Ready: Materials Preparation
Materials For Whole Class
The investigation in this lesson will be completed in small, cooperative groups and culminate as a large group.
● 1 digital camera with display that cantake photos, movies, or feed livevideo to a computer screen.Examples include an iPad, tablet,camera on a laptop, smartphone, etc.
● Optional: projector to display imagesfrom the camera on.
Materials For Each Cooperative Group
(2-4 students depending on classroom dynamics)
● Shoebox with tight-fitting lid and cut out foran eyehole, a window, and a door, oneexample of which was created in Lesson 3(see image). Alternatively you can cut a smalldoor where the eyehole is located so that itfunctions as the eye hole. You also may wantto tape a piece of clear plastic laminate orclear ziplock baggy material over the inside ofthe window.
● Coloring supplies● 1-2 glue sticks
Materials For Each Student
● A 2”x 2” piece of an index card todraw an image on.
● A small paper slip 2”x 2” of anoutlined shape to color in (instead ofdrawing their own image)
● Student Design Sheet Lesson 4
Preparation of Materials (30 min.)
● “Material” and “What We Discovered” T-Chart (from Lesson 2)● “Our Next Steps” poster (from Lesson 2)● Prepare a poster entitled “Our Shoeboxes Told Us”● Display the Driving Question Board from Lesson 1
nextgenstorylines.org These materials were developed through with support from the Michigan Department of Education; the Gordon and Betty Moore Foundation, and support from the NGSX Project at Clark University, Tidemark Institute, and Northwestern University.
This work is licensed under a Creative Commons Attribution 4.0 License http://creativecommons.org/licenses/by/4.0/
36

Teacher Guide Lesson 4: What do we need to see inside our room (or shoebox)? How Does Light Help Me See Things and Communicate With Others?
Getting Ready: Teacher Preparation
Background Knowledge
PS4.B from the FRAMEWORK:
Objects can be seen only when light is available to illuminate them..
In this lesson, students will use a shoebox to simulate a room that is as dark as possible. They will plan and carry out an investigation to determine the effects of blocking light from the outside of a box, on what they can see inside a shoebox.
Alternative Student Conceptions
Many students will claim that they can see something in their box even when they block all the light out. This may be because they didn’t block all the light out, or because or human error. Highlight the controversy about these results, as you will use it motivate the need for a new tool that allows us to all look into the same box at the same time together to confirm our results at the end of this lesson..
Linking Our Understanding to
Scientific Terminology
● Illuminated.
nextgenstorylines.org These materials were developed through with support from the Michigan Department of Education; the Gordon and Betty Moore Foundation, and support from the NGSX Project at Clark University, Tidemark Institute, and Northwestern University.
This work is licensed under a Creative Commons Attribution 4.0 License http://creativecommons.org/licenses/by/4.0/
37

Teacher Guide Lesson 4: What do we need to see inside our room (or shoebox)? How Does Light Help Me See Things and Communicate With Others?
Learning Plan: What do we need to see inside our room (or shoebox)?
( 40-45 min )
Teacher Supports & Notes
1. (5-10 min) A- Ask students to brainstorm ideas for how they can use what they learned aboutin Lesson 1 and the beginning of Lesson 2 to brainstorm new ways we could test making theroom completely dark to gather evidence to determine whether light is needed to see or not.Review these ideas:
● We noticed that our large classroom window/materials investigation didn’t completelywork and neither did our CD/DVD case/flashlight investigation.
● Neither investigation blocked all the light from the sun or the flashlight, which meant ourroom didn't get completely dark, and we’re trying to figure out if we need light to see.
● We’ve learned that when we don’t get the information we need from the originalinvestigation, we might have to (re)design a new investigation.
● We also decided that when the stuff you want to investigate is too big to test, it might beuseful and easier to try to test something about that stuff at a smaller scale (a smallerpiece of the stuff).
Introduce the shoebox as another tool we might be able to use to help us determine if light is needed to see B-:
Suggested Prompts: ➔ How does this shoebox with a “window” and a “door” have a similar shape to a room?➔ If I looked into this eye hole, how would that be like looking into a small room?➔ What sort of investigations could I do, by looking into the eye hole, that would help me figure
out if I need light to see in our room?➔ Should our lights be on during our investigation?
Listen for student responses that suggest ideas such as:
Additional Guidance
A If you didn’t have time to introduce the shoebox in the last lesson, then give more time here for the brainstorming before introducing the shoebox. If you introduced the showbox, then this discussion is a condensed review of the ideas that students raised at the end of the last lesson.
Additional Guidance
B Having students think of using the shoebox as a scaled version classroom may be challenging for students this age. Show them the labels on each part and guide them into looking into the eyehole and lifting the window and door flaps.
This is an opportunity to emphasize connections to crosscutting concepts such of scale. Point out that scientists often study things that are too big to easily investigate, by making smaller scale version of them. And if something is too small to easily investigate, they scale it up to make it
nextgenstorylines.org These materials were developed through with support from the Michigan Department of Education; the Gordon and Betty Moore Foundation, and support from the NGSX Project at Clark University, Tidemark Institute, and Northwestern University.
This work is licensed under a Creative Commons Attribution 4.0 License http://creativecommons.org/licenses/by/4.0/
38

Teacher Guide Lesson 4: What do we need to see inside our room (or shoebox)? How Does Light Help Me See Things and Communicate With Others?
➔ Some rooms are shaped like a box - they have a floor, 4 walls, and a ceiling. ➔ The shoebox has a window and a door that can open or close. But it also has walls, floors, and a
ceiling. ➔ We can look through the eyehole with the “window” and “door” flaps closed. We can find out if we
can see anything inside the box when they’re closed. ➔ We can also look through the eyehole and then lift the window. We can find out if we can see
anything inside the box when it’s open. ➔ We can also lift the door flap to find out if we see anything inside the box when it’s open, or even if
we see more or less with it open. ➔ We can lift both the door flap and the window flap at the same time to compare what we see when
only one flap is open. ➔ If we see inside the box when the window and door are closed, then we might not need light to see.
But if we don’t see anything inside the box when the window and door are closed, then we might actually need light to see.
_______________________________________________________________________________________________________________________
2. (10 min) Hand out 2”x2” index cards and guide students to draw an image on their card. Next,model for students how to place their index card inside the box so that it can be seen when theyput their eye or camera to the eye hole. Explain to students that later, we will be testing outwhether or not we can see the objects we draw on our cards in our shoeboxes without any light.
Break students into small groups, allowing them to get their shoeboxes. Have each group test if they can see inside the box with the window and door both open and closed. Model for students how to put their eye right up against the eye hole and open the flaps when they conduct these tests.
_______________________________________________________________________________________________________________________
bigger.
Strategies for this Building Understandings Discussion
C As students share, draw attention to the crosscutting concept of Cause and Effect. Help students restate how these tests will help us gather evidence for whether we need light in order to see. Point out that simple tests can be designed to gather evidence to support or refute ideas about causes. In this case we are wondering about whether blocking light from entering a space is a cause behind whether we can see anything in that space (the effect).
nextgenstorylines.org These materials were developed through with support from the Michigan Department of Education; the Gordon and Betty Moore Foundation, and support from the NGSX Project at Clark University, Tidemark Institute, and Northwestern University.
This work is licensed under a Creative Commons Attribution 4.0 License http://creativecommons.org/licenses/by/4.0/
39

Teacher Guide Lesson 4: What do we need to see inside our room (or shoebox)? How Does Light Help Me See Things and Communicate With Others?
3. (5 minutes) When students have had a chance to test with their shoeboxes, gather themtogether for a Building Understandings Discussion C-. Record their thinking on the chart paperwith the title “Our Shoeboxes Told Us…”
Suggested Prompts: ➔ What did you discover about what you could see in the box when both the “window” and “door”
were closed?➔ What did you discover about what you could see in the box when both the “window” and “door”
were open?➔ What did you discover about what you could see in the box when just the "door" was open?➔ What did you discover about what you could see in the box when just the "window" was open?➔ What does this tell you about if you need light to see or not?
Listen for student responses that make summarize such as:
➔ It was really hard to see anything in the box when both the “window” and “door” were closed. ➔ We saw things inside the box when the “window” was opened, and we saw even more things inside
the box when we opened the “door.” ➔ Most of us claim that we do need light to see because we didn’t see anything when there was no
light in the box. ➔ Some of us claim that we could still see something in the box even when it was closed. ➔ We don’t all yet agree on whether we need light in order to see.
____________________________________________________________________________________________________________________
4. (10 min) Tell students that when scientists get different results for the same investigation,they try to figure out a way to design a more reliable way to test what it is they wereinvestigating. When scientists can design an investigation which allows everybody who does itto observe the same results, they are much more certain of their results. Pass out out the
nextgenstorylines.org These materials were developed through with support from the Michigan Department of Education; the Gordon and Betty Moore Foundation, and support from the NGSX Project at Clark University, Tidemark Institute, and Northwestern University.
This work is licensed under a Creative Commons Attribution 4.0 License http://creativecommons.org/licenses/by/4.0/
40

Teacher Guide Lesson 4: What do we need to see inside our room (or shoebox)? How Does Light Help Me See Things and Communicate With Others?
Student Design Sheet 4. Give students a few minutes to write or draw out how to use the materials to solve this design problem of not all being able to see the same thing at the same time. When students have finished, ask them to share their ideas using the following prompts:
Suggested Prompts: ➔ How could we use one single ipad, tablet, or camera phone to all observe what is inside our
shoebox window together right now at the same time?➔ How could we use this same device to all observe what is inside our box together at the same
time?
Listen for student responses that make summarize such as: ➔ We could put the camera up against the window or eye hole and take a photo. ➔ We could use the camera to record a movie and then play it back and watch it together. ➔ We could turn the camera app on, hold the camera up to the window, and then all look at the
screen of the device at the same time. ➔ We could use AirPlay to see what we can see through the camera when it is held up against the
window. ____________________________________________________________________________________________________________________
5. (5 min) Test the proposed method by holding the camera against the window of theclassroom. And then test it against the eye hole of a shoebox with the flaps all open on it. Don’ttest the camera against the box with the flaps closed on the box, as that is what we are buildingtoward wanting to do in the next lesson.
Point out to students that since it seems like the device is helping us all make the same observations together at the same time.
Suggested Prompts: ➔ How could we use this device and the shoe box to help us answer the question, "Do we need
nextgenstorylines.org These materials were developed through with support from the Michigan Department of Education; the Gordon and Betty Moore Foundation, and support from the NGSX Project at Clark University, Tidemark Institute, and Northwestern University.
This work is licensed under a Creative Commons Attribution 4.0 License http://creativecommons.org/licenses/by/4.0/
41

Teacher Guide Lesson 4: What do we need to see inside our room (or shoebox)? How Does Light Help Me See Things and Communicate With Others?
light in order to see?"
Listen for student responses that make summarize such as: ➔ We could do the same thing we did with the camera against the window, but put it against the hole
in the shoe box. ➔ If we close and cover the window and door of the shoebox and we don’t see anything in the camera
held against the hole, then we know that we can’t see without light.
Now with the whole class “eye,” suggest that we test whether or not we can see the 2x2 card drawings in each of our shoeboxes. Re-test looking inside the boxes and determining if we need light to see. Re-engage students in the same line of questioning from this step.
____________________________________________________________________________________________________________________
6. (5 min) OPTIONAL - Bring students back together and brainstorm some other types of smallobjects we could bring from home to place inside our boxes D-. For each object suggested, askthat student if they think we will be able to see it inside the box with the ipad camera, when weblock all the light from outside the box.
Suggested Prompts: ➔ Who else has a small object like that?➔ Do you think we will be able to see that object inside the box with the ipad camera when we
block all the light from outside the box? Thumbs up if yes, thumbs down if no.
Encourage students to bring a small toy from home that is theirs or that they find outside to use inside their box tomorrow if they want to.
Additional Guidance
D Guide students to include objects that are small enough to fit inside the box (to guarantee that the box can be closed) but that may also vary in properties (like some objects that are dull and others that are shiny). Remind students to tell their parents why they are bringing the object into school, and that it shouldn’t be anything of value.
nextgenstorylines.org These materials were developed through with support from the Michigan Department of Education; the Gordon and Betty Moore Foundation, and support from the NGSX Project at Clark University, Tidemark Institute, and Northwestern University.
This work is licensed under a Creative Commons Attribution 4.0 License http://creativecommons.org/licenses/by/4.0/
42

Teacher Guide Lesson 4: What do we need to see inside our room (or shoebox)? How Does Light Help Me See Things and Communicate With Others?
Alignment With Standards
Building Toward Target NGSS PE
● 1-PS4-2. Make observations to construct an evidence-based account thatobjects in darkness can be seen only when illuminated.
● 1-PS4-3 Plan and conduct investigations to determine the effect ofplacing objects made with different materials in the path of a beam of light.
● K-2-ETS1-1 Ask questions, make observations, and gather information about a situation people want to change to define a simple problem that can be solved through the development of a new or improved object ortool.
● K-2-ETS1-2 Develop a simple sketch, drawing, or physical model toillustrate how the shape of an object helps it function as needed to solve agiven problem.
● K-2-ETS1-3 Analyze data from tests of two objects designed to solvethe same problem to compare the strengths and weaknesses of how eachperforms.
Building Toward Common Core Standard(s)
ELA standards: CCSS.ELA-LITERACY.SL.1.1 -Participate in collaborative conversations with diverse partners about grade 1 topics and texts with peers and adults in small and larger groups.
● CCSS.ELA-LITERACY.SL.1.1.A - Follow agreed-upon rules fordiscussions (e.g., listening to others with care, speaking one at a time about the topics and texts under discussion).
● CCSS.ELA-LITERACY.SL.1.1.B - Build on others' talk inconversations by responding to the comments of others throughmultiple exchanges.
● CCSS.ELA-LITERACY.SL.1.1.C - Ask questions to clear up anyconfusion about the topics and texts under discussion.
CCSS.ELA-LITERACY.SL.1.4 Describe people, places, things, and events with relevant details, expressing ideas ….clearly.
nextgenstorylines.org These materials were developed through with support from the Michigan Department of Education; the Gordon and Betty Moore Foundation, and support from the NGSX Project at Clark University, Tidemark Institute, and Northwestern University.
This work is licensed under a Creative Commons Attribution 4.0 License http://creativecommons.org/licenses/by/4.0/
43

Lesson 5: How does letting light into the box affect what we can see inside it (with the iPad/Smart Phone)? Teacher Guide-
1st Grade Unit: How Does Light Help Me See Things and Communicate With Others?
nextgenstorylines.org These materials were developed through with support from the Michigan Department of Education; the Gordon and Betty Moore Foundation, and support from the NGSX Project at Clark University, Tidemark Institute, and Northwestern University.
This work is licensed under a Creative Commons Attribution 4.0 License http://creativecommons.org/licenses/by/4.0/
44

Teacher Guide Lesson 5: How does letting light into the box affect what we can see? How Does Light Help Me See Things and Communicate With Others?
Getting Ready: Materials Preparation
Materials For Whole Class
The investigation in this lesson will be completed in small, cooperative groups and culminate as a large group.
● 1 digital camera with display that can takephotos, movies, or feed live video to acomputer screen. Examples include an ipad,tablet, camera on a laptop, smartphone, etc…
● Optional: projector to display images from thecamera on.
● A working flashlight (with a switch on it)
Materials For Each Cooperative Group
(2-4 students depending on classroom dynamics)
● Shoebox with tight-fitting lid and cutoutfor an eyehole, a window, and a door(see image below)
● 2 pieces of cardboard large enough toput over both the window flap and thedoor flap.
● 2 pieces of fabric large enough to putover both the window flap and the door flap.
Materials For Each Student
● 2x2 notecards that students designed inLesson 4.
● Objects that students bring in to test in theshoeboxes.
Preparation of Materials (30 min.)
● Poster from Lesson 4 entitled“Our Shoeboxes Told Us”● Poster entitled “What We Need to See”
nextgenstorylines.org These materials were developed through with support from the Michigan Department of Education; the Gordon and Betty Moore Foundation, and support from the NGSX Project at Clark University, Tidemark Institute, and Northwestern University.
This work is licensed under a Creative Commons Attribution 4.0 License http://creativecommons.org/licenses/by/4.0/
45

Teacher Guide Lesson 5: How does letting light into the box affect what we can see? How Does Light Help Me See Things and Communicate With Others?
Getting Ready: Teacher Preparation
Background Knowledge
PS4.B from the FRAMEWORK:
Objects can be seen only when light is available to illuminate them..
In this lesson, students will use a shoebox to simulate a room that is as dark as possible. They will plan and carry out an investigation to determine what they can see inside a shoebox when varying amounts of light are let into the “room.”
Alternative Student Conceptions
This lesson is designed to resolve the question “What can I see if I make our room as dark as possible” The results of the camera/iphone observations of multiple boxes that have all their cracks sealed up, should provide evidence that the answer would be “nothing”.
Linking Our Understanding to Scientific Terminology
● Illuminated.
nextgenstorylines.org These materials were developed through with support from the Michigan Department of Education; the Gordon and Betty Moore Foundation, and support from the NGSX Project at Clark University, Tidemark Institute, and Northwestern University.
This work is licensed under a Creative Commons Attribution 4.0 License http://creativecommons.org/licenses/by/4.0/
46

Teacher Guide Lesson 5: How does letting light into the box affect what we can see? How Does Light Help Me See Things and Communicate With Others?
Learning Plan: How does letting light into the box affect what we can see?
( 60 min ) Teacher Supports & Notes
1. (5 minutes) Review the argument A- that the class had in the last lesson--that some studentswere convinced that they still didn’t need light to see because they could see in their shoe boxes.Review the investigation that students designed in which they would use a camera to capturewhat could be seen in the box with the window and door closed. Also review the idea that thewindow and door could possibly let in some light allowing individuals to be able to see what wasinside the box. Refer to the “Our Shoeboxes Told Us” poster.
______________________________________________________________________________________________________________________
2. (10 minutes) Ask students how they will use all the various materials to completely block outany and all light that might be getting into the box around the cracks of the door and window,showing them the cardboard and fabric pieces.
Suggested Prompts: ➔ We noticed that we were able to see something inside the shoe boxes even though both the
window and the door flaps were closed. I have some fabric and cardboard here. What can I dowith them?
➔ What will we do with the camera as we add cardboard and/or fabric to the outside of the flaps?➔ As you’re waiting for your turn with the camera, how can you gather evidence for the effects of
the cardboard and the fabric over the flaps?➔ What if we can still see light coming into the shoeboxes? What else can we do?➔ How will we know if light is coming into the shoe box allowing us to see things inside?➔ Should we have the lights in our classroom on or off when we do this experiment?
Listen for student responses that suggest ideas such as: ➔ We can close the flaps and tape the cardboard over the door and window flaps. We can also try
Supporting Students in Engaging in Argument from Evidence
A In step 1, students engage in the scientific practice of engaging in argument from evidence. The term “argument” in this case simply means that students should be defending their position with evidence from data they have collected in prior investigations.
nextgenstorylines.org These materials were developed through with support from the Michigan Department of Education; the Gordon and Betty Moore Foundation, and support from the NGSX Project at Clark University, Tidemark Institute, and Northwestern University.
This work is licensed under a Creative Commons Attribution 4.0 License http://creativecommons.org/licenses/by/4.0/
47

Teacher Guide Lesson 5: How does letting light into the box affect what we can see? How Does Light Help Me See Things and Communicate With Others?
this with the fabric to see which is better at letting no light into the box. ➔ We will place the camera over the eyehole and take a picture. ➔ We can look into the eyehole with our own eyes and determine what we can see in the box. ➔ If we still see inside the box, we can layer another piece of cardboard on top of the first one, or
another piece of fabric. These layers could possibly be thick enough to block out light. ➔ We will know light is still coming into the box if we can see anything we’ve placed inside the box. ➔ We should have our classroom lights off so that no light from our classroom gets into our box.
_______________________________________________________________________________________________________________________
3. (15 minutes) Begin the investigation by asking students to place their cards and/or objectsinside the shoe box. Have them use their eyes as a “camera” until the class camera can circulateand take pictures B-. Allow students to utilize all the materials at the “Materials Station,” one at atime. For example, students can take wax paper and place it over the window and door flapsand look inside the box. They can also take multiple pieces of wax paper and see how this affectshow and what can be seen inside the box. Guide students as they complete the investigation,testing one material after the next.
_______________________________________________________________________________________________________________________
4. (5 minutes) Once students have had a chance to test cards and/or objects inside their boxesalong with changing the material and amount of layers of materials, bring students together fora Building Understandings Discussion C-. For every student that offers an answer to one of theprompts below, ask them to bring their light box up to the class “eye” and project what they seeas evidence of their response to the prompt.
Suggested Prompts: ➔ What were you able to see inside your box with the flaps open? Why do you think so?➔ What were you able to see inside your box with the flaps closed? Why do you think so?
Additional Guidance
B If you have enough cameras for each group to gather evidence, then having students make observations with their eyes won’t be necessary. If the abilities of your students are such that they can’t complete this activity on their own in cooperative groups, consider modeling this while the camera is connected to a projector.
Strategies for this Building Understandings Discussion
C It is important to walk students through every part of the investigation they designed. Taking these individual steps will allow students to process the evidence they gathered to support the idea that light must be present inside the box in order to see something. This will help students understand the “why” behind what they are doing, and how what we did helps provide
nextgenstorylines.org These materials were developed through with support from the Michigan Department of Education; the Gordon and Betty Moore Foundation, and support from the NGSX Project at Clark University, Tidemark Institute, and Northwestern University.
This work is licensed under a Creative Commons Attribution 4.0 License http://creativecommons.org/licenses/by/4.0/
48

Teacher Guide Lesson 5: How does letting light into the box affect what we can see? How Does Light Help Me See Things and Communicate With Others?
➔ What were you able to see inside your box with the flaps closed but covered in a material youchose? Why do you think so?
➔ If you added additional pieces of that material, what happened to what you were able to seeinside the box?
➔ What were you able to see inside your box with the flaps closed and also covered in cardboard?Why do you think so?
➔ If you added additional pieces of cardboard, what happened to what you were able to see insidethe box?
Listen for student responses that suggest ideas such as: ➔ We could see everything that we placed inside the boxes when the flaps were open because light
was able to come inside. We are pretty sure we need light to see, so therefore, letting light in allowed us to see the cards and the objects we placed inside.
➔ When the flaps were closed, we could kind of see some of the objects inside, or at least the outline of them. We think we need light to see, so when we reduced the amount of light by closing the flaps, we started to see less even though we knew cards and/or objects were there.
➔ When we covered the window and door flaps in fabric, we could see less inside. We think it’s because any light that was leaking in through the edges of the window and door flaps was blocked by the fabric.
➔ As we placed more and more fabric on top of the windows, we continued to see less inside the boxes and we think it’s because the fabric continued to block light from coming in.
➔ When we covered the window and door flaps in cardboard, we could see even less inside than we could with the fabric . We think it’s because cardboard doesn’t let any light through it while fabric lets some light through.
➔ As we placed more and more cardboard on top of the windows, we saw nothing in the boxes. We think it’s because there was no light coming into the boxes whatsoever. This helps show that we need light to see objects, and we know that there are objects in the box because we put them in there.
____________________________________________________________________________________________________________________
evidence for making stronger claims.
As students share, draw attention to crosscutting concepts where possible. They will also start to see patterns emerge such as, the less light that is present, the less they can see inside the shoe boxes. Simultaneously, the more light that is present will allow them to see more inside the box. This relates closely to what students are working on with cause and effect relationships in the CCSS.
nextgenstorylines.org These materials were developed through with support from the Michigan Department of Education; the Gordon and Betty Moore Foundation, and support from the NGSX Project at Clark University, Tidemark Institute, and Northwestern University.
This work is licensed under a Creative Commons Attribution 4.0 License http://creativecommons.org/licenses/by/4.0/
49

Teacher Guide Lesson 5: How does letting light into the box affect what we can see? How Does Light Help Me See Things and Communicate With Others?
5. (15 min) Bring students back together for Consensus Building Discussion D-. This discussionshould leave students in agreement on what is needed in order for an object to be seen.
Suggested Prompts: ➔ From our shoebox investigation, what can we conclude about our original question, “What can I
see when it is completely dark?”➔ If we can’t see anything, does that mean that something is not there?➔ What evidence do you have for this?
Listen for student responses that suggest ideas such as: ➔ In order to see something, we need light to be present. ➔ If we can’t see something, it doesn’t necessarily mean something isn’t there. ➔ We know this because when the window and door flaps were closed on our shoe box and the flaps
were covered in cardboard, we saw nothing inside the shoeboxes. But we know something was inside the boxes because we put our cards and/or objects inside, proving that something was inside even though we didn’t see it.
Tell students that when we can’t see an object, but we know it is still there, we can refer to it as “not visible”. When we can see the object, we can refer to it as “visible”. Record the consensus statements on a poster entitled “What do we need in order to see something?
i. Objects in a space with no light in it are not visible. We can not see them.Ii. Objects in a space with enough light in it are clearly visible. We can see them clearly.Ii. Objects in a space with very little light in it are somewhat visible but difficult to see clearly.
Ask students for examples from our investigations where we saw evidence for each of these statements.
Listen for student responses that suggest ideas such as: ➔ When we closed the flaps of the shoebox and covered the cracks with cardboard, the objects we
Strategies for this Consensus Building Discussion
D Add student ideas and questions to the Driving Question Board either through pictures or words that are grade-level appropriate for students as they summarize what they’ve learned from this lesson.
nextgenstorylines.org These materials were developed through with support from the Michigan Department of Education; the Gordon and Betty Moore Foundation, and support from the NGSX Project at Clark University, Tidemark Institute, and Northwestern University.
This work is licensed under a Creative Commons Attribution 4.0 License http://creativecommons.org/licenses/by/4.0/
50

Teacher Guide Lesson 5: How does letting light into the box affect what we can see? How Does Light Help Me See Things and Communicate With Others?
put in side were not visible. This is because we kept the light from outside the box from getting into the box.
➔ When we opened the flaps of the window or door to let light into the box we could see the objects inside the box clearly. This is because we let light from outside the box into the box.
➔ When we opened the flaps of the window or door on shoebox and covered them with cloth or opened the flaps of the shoebox a little bit, the objects inside were somewhat visible, but they were difficult to see clearly. This is because we let light only a little bit of light from outside the box into the box.
____________________________________________________________________________________________________________________
6. (10 min) Help students think more about where the source of light was in the room when theyopened the flaps. Remind students that we know that the light came into the box from the room.But we haven’t talked about where that light in the room came from. This discussion will helpstudents start thinking about sources of light (or light sources) in the room and in the rest of theworld and will help motivate what we want to investigate in the next lesson. Use a flashlight inthis discussion to demonstrate another light source.
Suggested Prompts: ➔ We know light can get into our box from outside the box when we open the flaps, but where is
the light outside our box coming from?➔ What is the source of the light in our room?➔ Where are the switches we use to turn off some of sources of light in our room (or on our
ceiling)?➔ What do we need to do to this flashlight (turned off) in order to make it become a light source?➔ How do the lights in the room look when they are turned on, so that they become a source a
light?➔ Are there other sources of light you’ve seen besides the sun or the light bulbs in our room, that
“glow brightly”?
Listen for student responses that suggest ideas such as:
nextgenstorylines.org These materials were developed through with support from the Michigan Department of Education; the Gordon and Betty Moore Foundation, and support from the NGSX Project at Clark University, Tidemark Institute, and Northwestern University.
This work is licensed under a Creative Commons Attribution 4.0 License http://creativecommons.org/licenses/by/4.0/
51

Teacher Guide Lesson 5: How does letting light into the box affect what we can see? How Does Light Help Me See Things and Communicate With Others?
➔ The light outside our box is coming from lights in the room ...or from lights in the hall ...or from sunlight outside the windows of the school.
➔ The switch on the wall turns the lights on and off. There are lots of examples of this in our own houses (in our bedrooms, bathrooms, etc… )
➔ You need to turn the switch on the flashlight on in order to make it become a light source. ➔ Light bulbs glow brightly when they are turned on. That is what a light source looks like. The sun
looks like this too (but it’s so bright it can hurt and damage our eyes to look at it directly). ➔ Students may bring up other examples of light bulbs or lights outside their house (like street
lamps, or stop lights). Students may bring up other things that glow (like smart phone screens or glow in the dark stickers). If students don’t bring up other examples it's ok, they will investigate more examples in the next lesson.
Help students recognize that closing the box and covering the holes of it with certain materials kept light from getting into the box and prevented us from seeing things. But that light source outside the box was still there. Raise the question, “ Would moving the light source from outside the box to inside the box help us see inside the tightly closed box?”
Suggested Prompts: ➔ We learned that in order to block out all of the light from our boxes, we needed to cover up the
holes with certain materials. If we did that again, but put a light source inside our boxes, wouldwe be able to see inside the box?
➔ Are there light sources we could bring into our closed box that would light up the space inside ofit so that we could see the objects in the box even when no light comes in from outside the box?
➔ What type of light sources could we bring into our box to test this out?
Give students a minute or two to brainstorm some possible light sources we could bring into our
box to test this and end the lesson with recording this question on our driving question board,
“Are there light sources we could bring into our closed box that would help light up the space so
nextgenstorylines.org These materials were developed through with support from the Michigan Department of Education; the Gordon and Betty Moore Foundation, and support from the NGSX Project at Clark University, Tidemark Institute, and Northwestern University.
This work is licensed under a Creative Commons Attribution 4.0 License http://creativecommons.org/licenses/by/4.0/
52

Teacher Guide Lesson 5: How does letting light into the box affect what we can see? How Does Light Help Me See Things and Communicate With Others?
we could see the objects inside even when it is closed?” They will investigate this question
further in the next two lessons.
Alignment With Standards
Building Toward Target NGSS PE
● 1-PS4-2. Make observations to construct an evidence-based account thatobjects in darkness can be seen only when illuminated.
● 1-PS4-3 Plan and conduct investigations to determine the effect ofplacing objects made with different materials in the path of a beam of light.
● K-2-ETS1-3 Analyze data from tests of two objects designed to solvethe same problem to compare the strengths and weaknesses of how eachperforms.
Building Toward Common Core Standard(s)
ELA standards: CCSS.ELA-LITERACY.SL.1.1 -Participate in collaborative conversations with diverse partners about grade 1 topics and texts with peers and adults in small and larger groups.
● CCSS.ELA-LITERACY.SL.1.1.A - Follow agreed-upon rules fordiscussions (e.g., listening to others with care, speaking one at a time about the topics and texts under discussion).
● CCSS.ELA-LITERACY.SL.1.1.B - Build on others' talk inconversations by responding to the comments of others throughmultiple exchanges.
● CCSS.ELA-LITERACY.SL.1.1.C - Ask questions to clear up anyconfusion about the topics and texts under discussion.
CCSS.ELA-LITERACY.SL.1.4 Describe people, places, things, and events with relevant details, expressing ideas ….clearly.
nextgenstorylines.org These materials were developed through with support from the Michigan Department of Education; the Gordon and Betty Moore Foundation, and support from the NGSX Project at Clark University, Tidemark Institute, and Northwestern University.
This work is licensed under a Creative Commons Attribution 4.0 License http://creativecommons.org/licenses/by/4.0/
53

Lesson 6: What are some other light sources that are small enough and safe enough to bring into our box? Teacher Guide-
1st Grade Unit: How Does Light Help Me See Things and Communicate With Others?
nextgenstorylines.org These materials were developed through with support from the Michigan Department of Education; the Gordon and Betty Moore Foundation, and support from the NGSX Project at Clark University, Tidemark Institute, and Northwestern University.
This work is licensed under a Creative Commons Attribution 4.0 License http://creativecommons.org/licenses/by/4.0/
54

Teacher Guide Lesson 6: What are some other light sources in our world? How Does Light Help Me See Things and Communicate With Others?
Getting Ready: Materials Preparation
Materials For Each Group
For the whole class ● Pictures of various light sources
Preparation of Materials (5min.)
● Chart paper titled “Light Sources” with sun and flashlightalready listed on it.
Materials For Each Student
● Scissors● Lesson 6 - Student Activity Sheet (Interactive Reader on
Light Sources Mini-Book) ○ Use the directions in this link to create the
mini-book with your students. If you feel that it istoo challenging for your students to make,consider making them ahead of time.
Safety
● N/A
nextgenstorylines.org These materials were developed through with support from the Michigan Department of Education; the Gordon and Betty Moore Foundation, and support from the NGSX Project at Clark University, Tidemark Institute, and Northwestern University.
This work is licensed under a Creative Commons Attribution 4.0 License http://creativecommons.org/licenses/by/4.0/ 55

Teacher Guide Lesson 6: What are some other light sources in our world? How Does Light Help Me See Things and Communicate With Others?
Getting Ready: Teacher Preparation
Background Knowledge
PS4-2. Make observations to construct an evidence-based account that objects in darkness can be seen only when illuminated. The ability of an object to give off its own light causes the object to be seen in a space where there is no other light.
Alternative Student Conceptions Linking Our Understanding to Scientific Terminology
nextgenstorylines.org These materials were developed through with support from the Michigan Department of Education; the Gordon and Betty Moore Foundation, and support from the NGSX Project at Clark University, Tidemark Institute, and Northwestern University.
This work is licensed under a Creative Commons Attribution 4.0 License http://creativecommons.org/licenses/by/4.0/ 56

Teacher Guide Lesson 6: What are some other light sources in our world? How Does Light Help Me See Things and Communicate With Others?
Learning Plan: What are some other sources of light in our world?
( 45 min ) Teacher Supports & Notes
1. (5 minutes) Use the following prompts to engage students in a Consensus Building Discussionto connect today’s lesson to the work completed in previous lessons A-. If needed, re-raise thequestion, “Would moving the light source from outside the box to inside the box help us seeinside the tightly closed box?”
Give students a minute or two to brainstorm some possible light sources we could bring into our
box to test this.
Suggested Prompt: ➔ Are there light sources we could bring into our closed box that would help light up the space so
we could see the objects inside even when it is closed?
Listen for student responses that refer back to what they learned in the previous lesson. ➔ Glow sticks, battery operated candles, cell phone screens, flashlights, handheld games, etc.
Remind students that one of the times when they tested each of their materials with a CD/DVD case, they use a flashlight as a light source, and other times we turned the lights in our room (or ceiling) on or off to make the become a light source or to stop them from being a light source, and that we’ve talked about how the sun is a light source too.
In today’s lesson, they’ll be determining other possible light sources in their world. Remind them that some of what we figure out from our work today might help us generate more ideas of light sources we could put inside our box in future investigations.
Additional Guidance
A If students struggle to articulate what they have learned in previous lessons, try referring to anchor charts, models, and investigations that students have already completed.
nextgenstorylines.org These materials were developed through with support from the Michigan Department of Education; the Gordon and Betty Moore Foundation, and support from the NGSX Project at Clark University, Tidemark Institute, and Northwestern University.
This work is licensed under a Creative Commons Attribution 4.0 License http://creativecommons.org/licenses/by/4.0/ 57

Teacher Guide Lesson 6: What are some other light sources in our world? How Does Light Help Me See Things and Communicate With Others?
Read aloud the following story with students:
Tamara and Josiah were first grade students in Mrs. Swenson’s class. They had been learning about light with their teacher during science, and after weeks of careful observations and investigations, they both agreed that they needed light to see. If there was no light in a room then they wouldn’t be able to see anything, but if there was even just a little bit of light, they’d be able to see something in the room. The more light that was present, the better chance they’d have at seeing more things.
Tamara and Josiah also knew that when there was light, different objects would respond to it in different ways. Some objects let light go through them and the students could see the light coming through on the other side of the object. Other materials sort of let light go through them and they saw some light behind the materials. But the most interesting materials were the ones that didn’t let light through them at all, which caused the other side to stay dark, letting them know that no light was able to go through the material..
Mrs. Swenson had always let the students test their ideas using light from the sun that entered their classroom through the windows or from the flashlights that she had kept stored in her cabinets. These objects, she told the class, were known as “light sources.” Light sources were objects that give off their own light, allowing us to see. Light sources could be be natural objects, that occur in nature, like the sun. Or, they could be artificial, or human-made objects, like a flashlight.
Mrs. Swenson encouraged her students to come up with a list of other light sources that they could think of. She’d then allow students to bring light sources into school that the class decided were safe enough to use inside their classroom. This way, they could redo some of their investigations with light sources other than flashlights and the sun. Tamara and Josiah were up for the challenge!
_______________________________________________________________________________________________________________________
nextgenstorylines.org These materials were developed through with support from the Michigan Department of Education; the Gordon and Betty Moore Foundation, and support from the NGSX Project at Clark University, Tidemark Institute, and Northwestern University.
This work is licensed under a Creative Commons Attribution 4.0 License http://creativecommons.org/licenses/by/4.0/ 58

Teacher Guide Lesson 6: What are some other light sources in our world? How Does Light Help Me See Things and Communicate With Others?
2. (5 min) Ask the students, “If you were Tamara and Josiah, what other sources of light would youtell your teacher that you know of besides the sun or a flashlight?” Record student responses on thechart paper entitled “Light Sources.”
Listen for student responses B- such as: ➔ Lamps ➔ Television ➔ Tablet/Computer ➔ Smartphones ➔ Fire ➔ Glowstick ➔ Hot glass ➔ Fireflies ➔ Stove burners ➔ Matches ➔ Glow in the dark stickers ➔ fireworks
3. (20 min) After students determine a list of possible sources of light, distribute Activity Sheet6.1, walking through the steps to create the mini-book. Read it aloud, having students determinewhich object on each page is a light source, and if that light source is natural or artificial C-.Before setting students off to work, review the terms “natural” and “artificial,” guiding studentsto practice speaking the words aloud to develop their pronunciation of precise sciencevocabulary. Be sure that students can name a synonym for “artificial” and that they can provideexamples and non-examples of natural and artificial objects before working with the InteractiveReader.
______________________________________________________________________________________________________________________
Additional Guidance
B This is a great opportunity to draw attention to opposing viewpoints, as it gives us motivation to investigate further. If students assert that they are sure that what they suggest is a light source, remind them to back up their claim with evidence.
Formative Assessment Opportunities
C Read aloud each page in the Interactive Reader on Light Sources (Student Activity Sheet 9.1). Having students complete this mini-book independently will give you an opportunity to formatively assess student understanding of what makes a light source as well as if the light source is natural or artificial.
Should students struggle with any of the objects, be prepared to provide students with some kind of tangible example to help them make the determination. For example, if students are questioning whether or not lightning is a light source, bring up a video or image of lightning lighting up the sky on a dark night.
nextgenstorylines.org These materials were developed through with support from the Michigan Department of Education; the Gordon and Betty Moore Foundation, and support from the NGSX Project at Clark University, Tidemark Institute, and Northwestern University.
This work is licensed under a Creative Commons Attribution 4.0 License http://creativecommons.org/licenses/by/4.0/ 59

Teacher Guide Lesson 6: What are some other light sources in our world? How Does Light Help Me See Things and Communicate With Others?
4. ( 5 min) Once students complete the Activity Sheet 6.1, revisit the “Light Sources” chart theclass created. Remove or add any additional examples to the list._____________________________________________________________________________________________________________________
5. (10 min. ) Guide students in a Building Understandings Discussion with the suggested prompts:
Suggested Prompts: ➔ What do we know now about light sources?➔ How can light sources be different from one another?➔ How can we organize all the light sources that we listed here, in our “Light Sources” chart?➔ Which light sources would be safe to bring into our classroom and put inside our boxes to test
whether we can see inside the closed box with a light source inside of it? Why?➔ If they’re not safe to bring into our classroom, how come?➔ Can these “unsafe” light sources be used for some other purpose? What else do people use
them for?
Listen for student responses that refer back to what they learned in the previous lesson. ➔ Light sources are any object that gives off light. ➔ Light sources can be natural, like the sun, or artificial, like a flashlight. ➔ We can label the light sources that are natural, with an “N,” and those that are artificial with an
“A.” ➔ The light sources that would be safe to bring into our classroom would be the lamp, the tablet, and
the smart phone. These light sources are safe because they don’t get hot. ➔ All the others would unsafe because they get really hot when they become light sources (like the
candle and the fire) or are just unsafe for various reasons (fireworks--too dangerous, fireflies--not good to have bugs flying around the classroom, lightning--too hard to create in classroom, traffic light is too big, etc.)
➔ The fireworks can be used to entertain people at holiday celebrations when they’re used safely far away from people. The fire can be used to keep people warm or cook food. The fireflies’ light
nextgenstorylines.org These materials were developed through with support from the Michigan Department of Education; the Gordon and Betty Moore Foundation, and support from the NGSX Project at Clark University, Tidemark Institute, and Northwestern University.
This work is licensed under a Creative Commons Attribution 4.0 License http://creativecommons.org/licenses/by/4.0/ 60

Teacher Guide Lesson 6: What are some other light sources in our world? How Does Light Help Me See Things and Communicate With Others?
helps them see in the dark.
Ask students what would they predict they would see if we put a small safe light source inside of the box.
Suggested Prompts: ➔ Do you think you would you be able to see anything inside the box if you put a small safe light
source in it, closed it up and covered it with cardboard around all the flaps, but peeked insidethe eye hole?
➔ Why?➔ How could we test our predictions next time?
Tell students that we should investigate this question of what we would be able to see in the box with closed flaps (or any closed space) if we did (or didn’t bring a light source into it).
nextgenstorylines.org These materials were developed through with support from the Michigan Department of Education; the Gordon and Betty Moore Foundation, and support from the NGSX Project at Clark University, Tidemark Institute, and Northwestern University.
This work is licensed under a Creative Commons Attribution 4.0 License http://creativecommons.org/licenses/by/4.0/ 61

Teacher Guide Lesson 6: What are some other light sources in our world? How Does Light Help Me See Things and Communicate With Others?
Alignment With Standards
Building Toward Target NGSS PE
● 1-PS4-2. Make observations to construct an evidence-based account thatobjects in darkness can be seen only when illuminated.
Building Toward Common Core Standard(s)
ELA standards: CCSS.ELA-LITERACY.SL.1.1 -Participate in collaborative conversations with diverse partners about grade 1 topics and texts with peers and adults in small and larger groups.
● CCSS.ELA-LITERACY.SL.1.1.A - Follow agreed-upon rules fordiscussions (e.g., listening to others with care, speaking one at a time about the topics and texts under discussion).
● CCSS.ELA-LITERACY.SL.1.1.B - Build on others' talk inconversations by responding to the comments of others throughmultiple exchanges.
● CCSS.ELA-LITERACY.SL.1.1.C - Ask questions to clear up anyconfusion about the topics and texts under discussion.
CCSS.ELA-LITERACY.SL.1.4 Describe people, places, things, and events with relevant details, expressing ideas ….clearly.
nextgenstorylines.org These materials were developed through with support from the Michigan Department of Education; the Gordon and Betty Moore Foundation, and support from the NGSX Project at Clark University, Tidemark Institute, and Northwestern University.
This work is licensed under a Creative Commons Attribution 4.0 License http://creativecommons.org/licenses/by/4.0/ 62

Lesson 7: What would we be able to see in the box (or any closed space) if we brought a light source into it? Teacher Guide-
1st Grade Unit: How Does Light Help Me See Things and Communicate With Others?
nextgenstorylines.org These materials were developed through with support from the Michigan Department of Education; the Gordon and Betty Moore Foundation, and support from the NGSX Project at Clark University, Tidemark Institute, and Northwestern University.
This work is licensed under a Creative Commons Attribution 4.0 License http://creativecommons.org/licenses/by/4.0/ 63
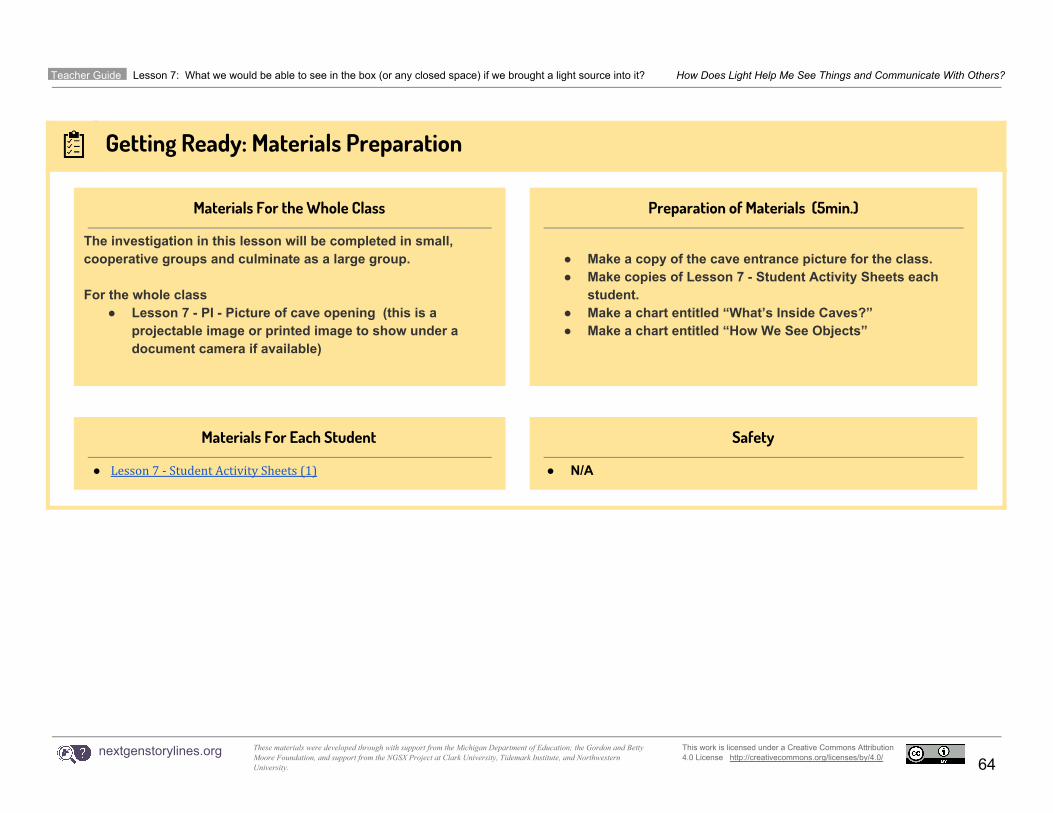
Teacher Guide Lesson 7: What we would be able to see in the box (or any closed space) if we brought a light source into it? How Does Light Help Me See Things and Communicate With Others?
Getting Ready: Materials Preparation
Materials For the Whole Class
The investigation in this lesson will be completed in small, cooperative groups and culminate as a large group.
For the whole class ● Lesson 7 - PI - Picture of cave opening (this is a
projectable image or printed image to show under adocument camera if available)
Preparation of Materials (5min.)
● Make a copy of the cave entrance picture for the class.● Make copies of Lesson 7 - Student Activity Sheets each
student.● Make a chart entitled “What’s Inside Caves?”● Make a chart entitled “How We See Objects”
Materials For Each Student
● Lesson 7 - Student Activity Sheets (1)
Safety
● N/A
nextgenstorylines.org These materials were developed through with support from the Michigan Department of Education; the Gordon and Betty Moore Foundation, and support from the NGSX Project at Clark University, Tidemark Institute, and Northwestern University.
This work is licensed under a Creative Commons Attribution 4.0 License http://creativecommons.org/licenses/by/4.0/ 64

Teacher Guide Lesson 7: What we would be able to see in the box (or any closed space) if we brought a light source into it? How Does Light Help Me See Things and Communicate With Others?
Getting Ready: Teacher Preparation
Background Knowledge
PS4.B from the FRAMEWORK:
Make observations to construct an evidence-based account that objects can be seen only when illuminated
In this lesson, students will use what they’ve learned about the conditions for how objects are seen by applying it to a new situation.
Alternative Student Conceptions Linking Our Understanding to Scientific Terminology
● Objects can only be seen if thereis light to illuminate them.
nextgenstorylines.org These materials were developed through with support from the Michigan Department of Education; the Gordon and Betty Moore Foundation, and support from the NGSX Project at Clark University, Tidemark Institute, and Northwestern University.
This work is licensed under a Creative Commons Attribution 4.0 License http://creativecommons.org/licenses/by/4.0/ 65

Teacher Guide Lesson 7: What we would be able to see in the box (or any closed space) if we brought a light source into it? How Does Light Help Me See Things and Communicate With Others?
Learning Plan: What we would be able to see in the box (or any closed space) if we brought a light source into it?
( 60 min ) Teacher Supports & Notes
1. (5 min) Use the prompts below to start with a Consensus Building Discussion to review Lesson6 where students figured out that sometimes it can be too dark to see things but that it doesn’tnecessarily mean something is not there. Review the idea that light is needed to see something.A-
Suggested Prompts: ➔ What did we figure out last time about what we need to be able to see?➔ If we can’t see something, does that mean that it isn’t there?➔ What did we predict we would see if we put a light source into our box, even with the flaps
closed?
Listen for similar student responses . ➔ We learned that you need light to be able to see things. ➔ We learned that you need your eyes to be able to see things. ➔ Sometimes it can be too dark to see things. Even though you can’t see them, they are still there. If
you let light into the dark space where those things are you will be able to see them. ➔ We think that bringing a light source into our closed box would help us seen stuff inside of it
through the eye hole, even with the flaps closed.
_______________________________________________________________________________________________________________________
2. (5 min) Introduce today’s goal: To use what we know about light and seeing objects to thinkabout our question from last time ”What we would be able to see in the box (or any closed space)if we did (or didn’t bring a light source into it)?” Remind students that we wanted to test this in
Strategies for the Building Consensus Discussion
A If necessary, revisit the investigations prior to Lesson 5 where students gathered evidence for this: Shape Hunt Signs (L1) and Shoeboxes (L4). Have students re-generate the ideas that objects may be in a space but that they can’t be seen because there isn’t enough light to illuminate them.
nextgenstorylines.org These materials were developed through with support from the Michigan Department of Education; the Gordon and Betty Moore Foundation, and support from the NGSX Project at Clark University, Tidemark Institute, and Northwestern University.
This work is licensed under a Creative Commons Attribution 4.0 License http://creativecommons.org/licenses/by/4.0/ 66

Teacher Guide Lesson 7: What we would be able to see in the box (or any closed space) if we brought a light source into it? How Does Light Help Me See Things and Communicate With Others?
our box, but that there is another situation similar to the box that you want them to think about.
Show students the image of the cave entrance. Ask students what they know about caves and record their responses on the chart paper entitled “What’s Inside Caves?” If students do not come up with these responses on their own, add them to the list.
Listen for similar student responses . ➔ Walls that are made of rock ➔ Water ➔ Darkness ➔ Animals, like bears, bats, birds, insects, spiders, etc. ➔ Stalactites and/or stalagmites ➔ Drawings made by people who lived long ago (ancient civilizations).
3. (15 min) Tell students that they are to imagine that they enter the cave that is seen on thecave image projected/shown to the class. The cave has already been explored, and is thereforesafe to enter B-.
Ask students, to imagine how looking into the cave might be similar to (and different than) looking into our box.
Suggested Prompts: ➔ What are some ways that looking into the cave is kind of like looking our box?
Listen for similar student responses . ➔ They both have holes in them. ➔ We are looking into each of them. ➔ They are both closed up from other directions ➔ They are both dark. ➔ There could be other stuff inside of the cave that maybe you can or can’t see.
Additional Guidance
B As students apply what they’ve learned about how light is needed to see objects to the cave experience on Activity Sheet 6.1, they will be modeling scientific phenomena. Modeling in K–2 builds on prior experiences and progresses to include identifying, using, and developing models that represent concrete events. In this case, students will be developing a model to represent patterns in the natural world, i.e. how light is needed to see objects.
nextgenstorylines.org These materials were developed through with support from the Michigan Department of Education; the Gordon and Betty Moore Foundation, and support from the NGSX Project at Clark University, Tidemark Institute, and Northwestern University.
This work is licensed under a Creative Commons Attribution 4.0 License http://creativecommons.org/licenses/by/4.0/ 67

Teacher Guide Lesson 7: What we would be able to see in the box (or any closed space) if we brought a light source into it? How Does Light Help Me See Things and Communicate With Others?
Distribute Activity Sheet 7.1 to students, reading through the directions with students, reminding them to draw and explain their thinking for both when they are not able to see the cave drawings and when they can see the cave drawings inside the cave. Dismiss students to their tables, encouraging them to discuss their thinking with their cooperative group. C- If students are having trouble with getting started, consider the following suggested prompts.
Suggested Prompts: ➔ If you can’t see the cave drawings, why might you not be able to see them, even though your
friend says they are there?➔ How could you show that the cave drawings can’t be seen?
Listen for similar student responses . ➔ Maybe I can’t see them because there’s no light in the cave; the cave is too dark. ➔ I could show that they can’t be seen by coloring the inside part of the cave completely black with
no light there. I could show me inside the cave carrying nothing that gives off light to light up the cave drawings, keeping it dark.
Suggested Prompts: ➔ If you can see the cave drawings, why might you be able to see them at certain times and then
at other times, you can’t?➔ How could you show that the cave drawings can be seen?
Listen for similar student responses . ➔ Maybe I can see the cave drawings now because some light got in the cave and now it is light
enough to see the drawings. I can’t see the drawings when there was no light in the cave or when there wasn’t enough light.
➔ I could show myself carrying the light source into the cave near the drawings. If there is light near the cave drawings, then I should be able to see what is on the walls because there is now light to see them.
Additional Guidance
C As students work in their cooperative groups, circulate around the room. Keep an eye out for students who have represented the phenomena in different ways to allow for greater discussion during the time to share.
nextgenstorylines.org These materials were developed through with support from the Michigan Department of Education; the Gordon and Betty Moore Foundation, and support from the NGSX Project at Clark University, Tidemark Institute, and Northwestern University.
This work is licensed under a Creative Commons Attribution 4.0 License http://creativecommons.org/licenses/by/4.0/ 68

Teacher Guide Lesson 7: What we would be able to see in the box (or any closed space) if we brought a light source into it? How Does Light Help Me See Things and Communicate With Others?
4. (15 min) After cooperative groups have had a chance to complete Activity Sheet 6.1, gatherthe class together for students to share their work. D-
Suggested Prompts: ➔ How did this student show that the cave drawings couldn’t be seen?➔ Why can’t the person in the picture see the cave drawings?➔ What evidence have we gathered in the past to support this idea that the person can’t see
inside the cave?
Listen for student responses.
➔ This student showed that they can’t see the cave drawings by coloring in the inside of the cave black. Coloring it black shows that no light got into the cave.
➔ The person can’t see the drawings because there’s no light shining on them. ➔ We know from our Shape Hunt cards and from our Shoeboxes that we need light to see objects.
Since there was no light going into the cave, there would be no way that the person could see anything in the cave.
Suggested Prompts: ➔ How did this student show that the cave drawings could be seen?➔ Why can the person in the picture see the cave drawings now, when they couldn’t beforehand?➔ What evidence have we gathered in the past to support this idea that the person can now see
inside the cave?
Listen for student responses.
➔ This student showed that they can see the cave drawings by having light get inside the cave (with a candle, flashlight, or some other light source).
➔ The person can now see the cave drawings because there is light inside the cave to illuminate the cave drawings.
➔ We know from our Shape Hunt cards and from our Shoeboxes that we need light to see objects. When there was a lot of light, we saw a lot of shapes on the Shape Hunt cards.
Building Understandings Discussion
D As students summarize their thinking about how objects are seen, draw any supports necessary for emergent readers. Draw the model of how objects are seen so that students can see how they’ve summarized this idea from various investigations. For the situation where the person can see include the following:
● An object● An eye ● A light source● A path for the light to get from the
light source to the object.
nextgenstorylines.org These materials were developed through with support from the Michigan Department of Education; the Gordon and Betty Moore Foundation, and support from the NGSX Project at Clark University, Tidemark Institute, and Northwestern University.
This work is licensed under a Creative Commons Attribution 4.0 License http://creativecommons.org/licenses/by/4.0/ 69

Teacher Guide Lesson 7: What we would be able to see in the box (or any closed space) if we brought a light source into it? How Does Light Help Me See Things and Communicate With Others?
➔ And when the door and window flaps were open on our Shoeboxes we saw what was inside, because light from the outside could get in .
_____________________________________________________________________________________________________________________
5a. (15 min) After students have had a chance to share their responses to the cave drawings examples, gather them together for a Consensus Building Discussion. E- Record their thinking on the chart paper with the title “How We See Objects.”
Suggested Prompts: ➔ What ideas did you use to determine if you could see the cave drawings or not? How did you
know you’d be able to see inside the cave or not?➔ What did we figure out must always be present in order for you to see an object?➔ How can we represent this idea (that you need light to see any object) no matter what situation
we are in?
Listen for student responses that summarize such as:
➔ We used the ideas that it was hard to see objects in the dark and easy to see objects when there was enough light. When there was just a little bit of light we could kind of see objects.
➔ In order for a person to see an object, there must be light. Having light present will also tell us if an object is even there or not.
➔ We can draw a person looking at an object with a light source present inside the space, like a candle, a flashlight, or the sun. Or we can show that the light from outside the space somehow moves into the space inside the space (e.g. using arrows).
5b. Ask students how could we use our boxes and a small safe light source that we could put inside the box to test all of our predictions we made about what we would or would not see in the cave in all three situations?
Suggested Prompts: ➔ If we wanted to test what we could see in the cave in each case, what could we use for a drawing
Co nsensus Building Discussion
E In this Consensus Building Discussion, students are assembling ideas from previous lessons and determining how they could draw a model. As students engage in discussion, encourage them to draw out their thinking on the board or on chart paper to help articulate their ideas. It is important that all students come to consensus on the model before you move on. If you are not able to come to consensus, complete step 5b to give another concrete example to which students can refer.
nextgenstorylines.org These materials were developed through with support from the Michigan Department of Education; the Gordon and Betty Moore Foundation, and support from the NGSX Project at Clark University, Tidemark Institute, and Northwestern University.
This work is licensed under a Creative Commons Attribution 4.0 License http://creativecommons.org/licenses/by/4.0/ 70

Teacher Guide Lesson 7: What we would be able to see in the box (or any closed space) if we brought a light source into it? How Does Light Help Me See Things and Communicate With Others?
on the wall? ➔ What we do in the first situation (shown on page 1 of our activity sheets)? Would we close or
open the flap? Would we bring a small safe light source into the box or leave it outside?➔ What we do in the second situation (shown on page 2 of our activity sheets)? Would we close
or open the flap? Would we bring a small safe light source into the box or leave it outside?➔ What we do in the third situation (shown on page 3 of our activity sheets)? Would we close or
open the flap? Would we bring a small safe light source into the box or leave it outside?
Test each prediction with the whole class using a box and a projected ipad or tablet camera held up to the window to confirm your predictions.
_____________________________________________________________________________________________________________________
6. (5 min) Before concluding the lesson, ask students to answer the following questions as aformative assessment. F-
● “What can we see in the dark?”● “How can we make the room as dark as possible?”
Students should be able to argue that we have evidence from the box and the cave investigations, that the answer to the first question is “nothing.”
Students should be able to support the argument that if we covered every opening completely with some of the materials that completely block light, turned off all the light sources in the room, and didn’t bring any other light sources into the room, we would make the room completely dark (like the box or cave) and see nothing.
Formative Assessment Opportunities
F This lesson concludes with students summarizing what they’ve figured out so far about two of the big questions of the unit. By collecting these as a formative assessment, teachers can determine whether there are any students that need additional instruction before moving on to the next lesson. These two ideas, that we need light to see and that we can make a space dark by blocking out all of the light, are two of the DCIs that are satisfied in this unit.
You may choose to have students complete this independently either with a paper and pencil, or in interviews with students. Alternatively, if you have access to the appropriate technology, students could record themselves answering the questions orally, or use speech-to-text capability on a device.
nextgenstorylines.org These materials were developed through with support from the Michigan Department of Education; the Gordon and Betty Moore Foundation, and support from the NGSX Project at Clark University, Tidemark Institute, and Northwestern University.
This work is licensed under a Creative Commons Attribution 4.0 License http://creativecommons.org/licenses/by/4.0/ 71

Teacher Guide Lesson 7: What we would be able to see in the box (or any closed space) if we brought a light source into it? How Does Light Help Me See Things and Communicate With Others?
Alignment With Standards
Building Toward Target NGSS PE
● 1-PS4-2. Make observations to construct an evidence-based account thatobjects in darkness can be seen only when illuminated.
● 1-PS4-3 Plan and conduct investigations to determine the effect ofplacing objects made with different materials in the path of a beam of light.
● K-2-ETS1-2 Develop a simple sketch, drawing, or physical model toillustrate how the shape of an object helps it function as needed to solve agiven problem.
Building Toward Common Core Standard(s)
ELA standards: CCSS.ELA-LITERACY.SL.1.1 -Participate in collaborative conversations with diverse partners about grade 1 topics and texts with peers and adults in small and larger groups.
● CCSS.ELA-LITERACY.SL.1.1.A - Follow agreed-upon rules fordiscussions (e.g., listening to others with care, speaking one at a time about the topics and texts under discussion).
● CCSS.ELA-LITERACY.SL.1.1.B - Build on others' talk inconversations by responding to the comments of others throughmultiple exchanges.
● CCSS.ELA-LITERACY.SL.1.1.C - Ask questions to clear up anyconfusion about the topics and texts under discussion.
CCSS.ELA-LITERACY.SL.1.4 Describe people, places, things, and events with relevant details, expressing ideas ….clearly.
nextgenstorylines.org These materials were developed through with support from the Michigan Department of Education; the Gordon and Betty Moore Foundation, and support from the NGSX Project at Clark University, Tidemark Institute, and Northwestern University.
This work is licensed under a Creative Commons Attribution 4.0 License http://creativecommons.org/licenses/by/4.0/ 72

Lesson 8: Where else do people use materials to block light? Teacher Guide-
1st grade unit: How Does Light Help Me See Things and Communicate With Others?
These materials were developed through with support from the Michigan Department of Education; the Gordon and Betty Moore Foundation, and support from the NGSX Project at Clark University, Tidemark Institute, and Northwestern University.
This work is licensed under a Creative Commons Attribution 4.0 License http://creativecommons.org/licenses/by/4.0/
73

Teacher Guide- Lesson 8: Where else do people use materials to block light? How Does Light Help Me See Things and Communicate With Others?
Getting Ready: Materials Preparation
Materials For Each Group
For the whole class ● Create a poster with a T-Chart. One
one side write “Times we want toblock out light,” and on the otherside write “How we block out light”
● Images of common tools used toblock out light in our daily life. Forexample, awnings, sun visors, hats,blinds, sunglasses, shades overplaygrounds, etc.
Preparation of Materials (5min.)
● Prepare the poster with the T-chart
Times we want to block out light
How we can block out the light
● Prepare images of everyday tools that block out light● Prepare a cardboard cutout of a triangle that is large enough to block the light
from a flashlight and create a shadow on the wall.● A blank poster on which you will construct a model for shadows● Images/diagrams of a light source (flashlight), wall, object (cardboard triangle).
Materials For The Whole Class
● 1 Flashlight● Cutout of a cardboard triangle (about 4-6” in width)● 1 Clear Window Testing Box (from lesson 3)● A white piece of paper● 2 pieces of poster paper● Cutouts of the “Shadow model images” to move around and tape to a poster paper.● Copies of Student Activity Sheet 8.1
These materials were developed through with support from the Michigan Department of Education; the Gordon and Betty Moore Foundation, and support from the NGSX Project at Clark University, Tidemark Institute, and Northwestern University.
This work is licensed under a Creative Commons Attribution 4.0 License http://creativecommons.org/licenses/by/4.0/
74

Teacher Guide- Lesson 8: Where else do people use materials to block light? How Does Light Help Me See Things and Communicate With Others?
Getting Ready: Teacher Preparation
Background Knowledge
PS4.B from the FRAMEWORK:
Some materials allow light to pass through them, others allow only some light through and others block all the light and create a dark shadow on any surface beyond them, where the light cannot reach.
In this lesson, students draw on their prior knowledge and experience to develop the idea that when a material blocks out all of the light, a dark shadow is created on the surface beyond it. This discussion of shadow addresses a small, but important part of PS4.B.
Alternative Student Conceptions Linking Our Understanding to Scientific Terminology
● Shadow: Light is blockedand a shadow is thedarkness beyond the object that is blocking the light.
These materials were developed through with support from the Michigan Department of Education; the Gordon and Betty Moore Foundation, and support from the NGSX Project at Clark University, Tidemark Institute, and Northwestern University.
This work is licensed under a Creative Commons Attribution 4.0 License http://creativecommons.org/licenses/by/4.0/
75

Teacher Guide- Lesson 8: Where else do people use materials to block light? How Does Light Help Me See Things and Communicate With Others?
Learning Plan: Where else do people use materials to block out the light?
( 60 min ) Teacher Supports & Notes
1. (10 min) Use the following prompts to engage students in a Consensus Building Discussion toreview what we figured out in the last lesson and create a bridge to today’s lesson.
Suggested Prompts: ➔ What did we figure out when we looked into our small room (shoebox) in a previous lesson?➔ Why couldn’t we see anything inside the box, even with our eyes open and even when we knew
there was something inside the box and we closed up all the openings?
Listen for student responses that answer the Suggested Prompts. ➔ We looked inside of our small rooms, and the only time we could see anything inside was when we
had one of our door or window flaps open. ➔ We need light to see. If we block out all of the light, we can’t see.
Remind students that, “In our first lesson, we wondered, ‘How can we make it dark?’ And through our investigations we’ve found lots of ways to make our room, our box, and a cave dark” Ask, “are there ever times when we want to block out sunlight in different places?”
Listen for student responses that provide suggestions such as A-: ➔ Sometimes if the sun is shining in our eyes we want to block out light. ➔ Sometimes if I’m trying to watch a movie I want the room to be darker. ➔ I like the room to be dark when I’m trying to sleep.
Share the poster you prepared in advance with the t-chart. Read the two sides of the t-chart aloud to students, adding in visual aids where appropriate. Solicit ideas from students to fill in both columns of the t-chart. Listen for student responses such as:
Differentiation Strategies
A If students do not readily offer suggestions of this variety, try using the following prompts to stimulate new ideas.
● What do you do if the sun is in youreyes when you’re in the car?
● Where do you go if you’re too hotwhen you’re at the park?
● What do you do to block the sun that comes in through your windows?
These materials were developed through with support from the Michigan Department of Education; the Gordon and Betty Moore Foundation, and support from the NGSX Project at Clark University, Tidemark Institute, and Northwestern University.
This work is licensed under a Creative Commons Attribution 4.0 License http://creativecommons.org/licenses/by/4.0/
76

Teacher Guide- Lesson 8: Where else do people use materials to block light? How Does Light Help Me See Things and Communicate With Others?
Times we want to block out sunlight How we can block out the sunlight
When we go to the beach Beach umbrella B-
When we go to the park Playground shade, gazebo, picnic shelter, trees
When I’m riding in or driving a car Sun visor or window shade
When I’m outside at a ballpark or stadium Some type of hat/visor
Hand out Lesson 8 - Student Activity Sheets to students. Ask students to sketch a model of one or more of the situations the class captured in the T-chart above (or an new one). Have students label the parts of their models as a way to practice engineering design sketches.
2. (10 min) Now share the images of objects we use to block out light with students one at a time.Use the following prompts to engage students in discussion about each image.
Suggested Prompts: ➔ What is happening in this photo?➔ What object is being used to block out the light?➔ What part of the picture shows evidence that the light is being blocked from there?➔ What is the source of light being blocked in this photo?➔ How do we know from the picture that there isn’t light reaching some spots? What patterns do
we see in these photos where the light is being blocked? C-
Listen for student responses that answer the Suggested Prompts. ➔ The light is being blocked by the ________. There is shade! There is a shadow!
Additional Guidance
B Students may say that other objects like sunglasses block out the light (or some of the light). If they suggest this idea, then add it to the driving question board as another material we want to test when as we investigate making shadows.
Additional Guidance
C After showing a few images, be sure to ask students if they notice any patterns. Eventually, students should recognize that each object that blocks the light results in a shadow.
These materials were developed through with support from the Michigan Department of Education; the Gordon and Betty Moore Foundation, and support from the NGSX Project at Clark University, Tidemark Institute, and Northwestern University.
This work is licensed under a Creative Commons Attribution 4.0 License http://creativecommons.org/licenses/by/4.0/
77

Teacher Guide- Lesson 8: Where else do people use materials to block light? How Does Light Help Me See Things and Communicate With Others?
When students have seen all of the images, pose the question, “What pattern did we notice in every photo when we saw an object blocking light?”
Listen for student responses such as: ➔ When the objects blocked the light, they formed a shadow. ➔ The light source being blocked is probably the sun.
3. (15 min) Gather students around in a circle for a demonstration. Hold up a cut out cardboardshape of a triangle. Ask students to predict if we could make a shadow using this object and aflashlight if we turned the rest of the lights off in the room.
Demonstrate this by holding the triangle at arm’s length from the flashlight and projecting a shadow of the triangle onto the wall. Ask all of the students to point to the surface where they predict the shadow will be seen. Test the prediction.
Ask students to predict and point to the surface of the object where the shadow will be seen if you move the flashlight below the star and point it upward. Again test the prediction and have them say what surface they see the shadow on.
Repeat this process a few times for different directions of the flashlight, by pointing the flashlight (turned off) and having students make prediction about which object’s surface they will see the shadow on, and then turn the flashlight on again and test it.
Help students realize that the shadow of the object shows up on the surface of another object (like a wall, table, or ceiling). The light source must be pointing at the surface where the shadow will fall.
Suggested Prompts: ➔ What patterns do you notice about where the shadow appears as I move the light source
These materials were developed through with support from the Michigan Department of Education; the Gordon and Betty Moore Foundation, and support from the NGSX Project at Clark University, Tidemark Institute, and Northwestern University.
This work is licensed under a Creative Commons Attribution 4.0 License http://creativecommons.org/licenses/by/4.0/
78

Teacher Guide- Lesson 8: Where else do people use materials to block light? How Does Light Help Me See Things and Communicate With Others?
around? ➔ What different surfaces did the shadow appear on?➔ How did you know where to look for the shadow?➔ What shape is the shadow?
Listen for student responses such as: ➔ It is on a different spot in the room each time. ➔ It is in a spot of the room that you are pointing the flashlight at. ➔ The shadow is the shape of a triangle. ➔ The shadow appeared on the wall, on the ceiling, on the floor. But it always shows up on
something that you are pointing the flashlight to.
Ask the students to make some predictions.
Suggested Prompts: ➔ Will you still be able see a shadow if you close your eyes? Why?➔ Will you still be able see a shadow if you open your eyes and turn the light source off? Why?➔ Will you still be able to see a shadow if you turn the light source on, open your eyes and face the
other direction? Why?➔ Will you still be able to see a shadow if you remove this object, the cardboard triangle? Why?
Listen for student responses such as: ➔ No, you need to have your eyes open in order to see the shadow. ➔ No, you need a light source in order to make a shadow. ➔ No you need to be looking in the right direction (facing the right way)in order to see the shadow. ➔ No, you need something (an object) to make the shadow.
After each response above, test each prediction with the students. Students should come to agreement on the things that you need in order to see the shadow.
Posting a classroom artifact
D Show an example of this
These materials were developed through with support from the Michigan Department of Education; the Gordon and Betty Moore Foundation, and support from the NGSX Project at Clark University, Tidemark Institute, and Northwestern University.
This work is licensed under a Creative Commons Attribution 4.0 License http://creativecommons.org/licenses/by/4.0/
79

Teacher Guide- Lesson 8: Where else do people use materials to block light? How Does Light Help Me See Things and Communicate With Others?
Summarize what we know is involved in making this shadow. Say “we have a light source”. Hold up the image of the light source (a) and the flashlight. Say, “we have this object.” Hold up the image of the triangle (b). Say “We have a shadow showing up on this surface (wall). Hold up an image of the wall (c) and point to the wall in the classroom.
Tell students that we are going to try to represent where everything is located when we made a shadow. Guide students to place the images on the poster paper to construct a model D- of how to create and see a shadow.
One object at a time, starting with the wall, then the triangle, then the light source, and finally a drawing of a person looking, to construct a model that demonstrates how a person can see a shadow.
Tell students that this is our model for everything we think is needed for us to make and see the shadow. We have a light source, an object, our eyes open and looking in a certain direction, and a surface (e.g. a wall) that we will see the shadow on. Label the model “How Can I Make A Shadow I Can See?”
4. (10 min) Ask the students to make some predictions. Hold up the triangle again for studentsto see and ask them the following questions:
Suggested Prompts: ➔ What material is this made of?➔ What do we know about cardboard from our previous experiments with it?
Listen for student responses such as: ➔ It is cardboard. ➔ Cardboard blocked the light ➔ It was good at blocking the light from outside the box from getting into our box
These materials were developed through with support from the Michigan Department of Education; the Gordon and Betty Moore Foundation, and support from the NGSX Project at Clark University, Tidemark Institute, and Northwestern University.
This work is licensed under a Creative Commons Attribution 4.0 License http://creativecommons.org/licenses/by/4.0/
80

Teacher Guide- Lesson 8: Where else do people use materials to block light? How Does Light Help Me See Things and Communicate With Others?
Suggested Prompts: ➔ In our previous experiments, how did we tell if it was good at blocking light?
Listen for student responses such as: ➔ When we put it in the CD window and turned the light on, we couldn’t see any light on the other
side of it when we looked back at the flashlight. ➔ It was good at blocking the light from outside the box from getting into our box
Suggested Prompts: ➔ Is that why it is making a shadow? Because it is blocking light?
Accept all student responses.
Suggest to students that we test this. Have one student volunteer walk over to stand right where the big triangle shadow is projected on the wall and give a thumbs up when they can see the light and a thumbs down when the light is blocked for them. Have them move back and forth in and out of the “shade.”
Have all students form a line to do the same thing to experience it for themselves. They should keep their thumb up when they can see the light and thumbs down when they are in the shade and can’t see the light source and then thumbs back up when they are on the other side.
Have students return to a circle to continue the discussion. Ask students to describe how the location of the shadow compares to where they couldn’t see the light from the light source.
Suggested Prompts: ➔ How is where the shadow is located related to where you could or couldn’t see the light source?➔ Where were you in the shade, where were you standing?➔ When you were in the shade could you see the light source?➔ What is the cardboard triangle doing to the light when you are in its shade and can’t see the
light source?
These materials were developed through with support from the Michigan Department of Education; the Gordon and Betty Moore Foundation, and support from the NGSX Project at Clark University, Tidemark Institute, and Northwestern University.
This work is licensed under a Creative Commons Attribution 4.0 License http://creativecommons.org/licenses/by/4.0/
81

Teacher Guide- Lesson 8: Where else do people use materials to block light? How Does Light Help Me See Things and Communicate With Others?
Listen for student responses such as: ➔ If you stood where the shadow was located you couldn’t see the light source. ➔ If you stood to the side of where the shadow was located, you could see the light source. ➔ You are in the shade when you can’t see the light source. ➔ The cardboard triangle is blocking the light source when you are in its shade.
5. (15 min) Point out that we blocked the light and made a shadow using a piece of cardboardshaped like a triangle. Ask students to predict what other type of materials can make shadows.
Suggested prompts: ➔ Is cardboard the only type of material that can make a shadow?➔ What are some other types of materials that might make shadows?➔ How do you know? What evidence do you have?
Listen for student responses such as: ➔ I am not sure. Maybe there are other types of materials that can make shadow. ➔ I’ve seen other materials make shadows that weren’t made of cardboard in other places. ➔ We worked with lots of other materials in other lessons, and some of them blocked out light. We
think these could make a shadow.
Share the real world images we looked at before one more time, asking students to pay attention to the materials that the objects are made of that are making the shadows. After showing the images, have students share patterns in the materials they noticed each object was made of.
Suggested Prompts:
These materials were developed through with support from the Michigan Department of Education; the Gordon and Betty Moore Foundation, and support from the NGSX Project at Clark University, Tidemark Institute, and Northwestern University.
This work is licensed under a Creative Commons Attribution 4.0 License http://creativecommons.org/licenses/by/4.0/
82

Teacher Guide- Lesson 8: Where else do people use materials to block light? How Does Light Help Me See Things and Communicate With Others?
➔ What patterns do you notice about the materials that each object was made of?
Accept all student responses
Point out that it seems like we agree that there were lots of different kinds of materials in those photographs that made shadows, not just cardboard. Make a new poster that says “Materials that block light and make shadows” Tape cutouts of some of the photographs up on this poster and add the triangle of cardboard to this. Emphasize that we think all of these materials can be added to the list, like awning, umbrellas, or car visors, because they all made shadows.
Then ask, “Could we use any material to create those objects such as awnings, umbrellas, or car visors and have them still make shadows? Or are the some materials that wouldn’t work?”
Listen for student responses such as: ➔ Yes! We can use any materials to make umbrellas. I’ve seen a clear umbrella before! ➔ No, we have to block out light so the material we choose has to block out all of the light. ➔ We aren’t sure, so we want to test out some materials to find out.
Now ask, “Which materials have we already tested in that we predict will make a shadow E- ?”
Student responses will likely vary, and may or may not arrive at the idea that the materials are thick/solid enough to block the light from coming through. Accept all responses, pointing out that since we have different claims, we will need to collect some evidence in order to figure out which claims are right. Emphasize that we have a new question to investigate next time, “Will all materials create a shadow?” Post this question in the room to refer to next time. Post the question next to the model for “How Do I Make A Shadow?”
Encourage students to think of ways they could investigate this question further on their own when they play outside today or at home tonight. Also encourage students to think of materials
Additional Guidance
E Students already have some experience from Lesson 3 that will assist with this discussion. Invite students to look at Student Activity Sheet 3.1 to come up with ideas for the materials they want to test to see if they will make a shadow. Students should begin to recognize that the materials that didn’t let any light through in Lesson 3 will also create shadows.
This is a great opportunity to draw attention to opposing viewpoints, as it gives us motivation to investigate further. If students assert that they are sure that any materials or only certain materials can be used, remind them that scientists always test out their hypotheses to ensure that they are correct.
These materials were developed through with support from the Michigan Department of Education; the Gordon and Betty Moore Foundation, and support from the NGSX Project at Clark University, Tidemark Institute, and Northwestern University.
This work is licensed under a Creative Commons Attribution 4.0 License http://creativecommons.org/licenses/by/4.0/
83

Teacher Guide- Lesson 8: Where else do people use materials to block light? How Does Light Help Me See Things and Communicate With Others?
we could test tomorrow in our Clear Window Testing Box to investigate this question.
Alignment With Standards
Building Toward Target NGSS PE
● 1-PS4-2. Make observations to construct an evidence-based account thatobjects in darkness can be seen only when illuminated.
● 1-PS4-3 Plan and conduct investigations to determine the effect ofplacing objects made with different materials in the path of a beam of light.
● K-2-ETS1-1 Ask questions, make observations, and gather information about a situation people want to change to define a simple problem that can be solved through the development of a new or improved object ortool.
● K-2-ETS1-3 Analyze data from tests of two objects designed to solvethe same problem to compare the strengths and weaknesses of how eachperforms.
Building Toward Common Core Standard(s)
ELA standards: CCSS.ELA-LITERACY.SL.1.1 -Participate in collaborative conversations with diverse partners about grade 1 topics and texts with peers and adults in small and larger groups.
● CCSS.ELA-LITERACY.SL.1.1.A - Follow agreed-upon rules fordiscussions (e.g., listening to others with care, speaking one at a time about the topics and texts under discussion).
● CCSS.ELA-LITERACY.SL.1.1.B - Build on others' talk inconversations by responding to the comments of others throughmultiple exchanges.
● CCSS.ELA-LITERACY.SL.1.1.C - Ask questions to clear up anyconfusion about the topics and texts under discussion.
CCSS.ELA-LITERACY.SL.1.4 Describe people, places, things, and events with relevant details, expressing ideas ….clearly.
These materials were developed through with support from the Michigan Department of Education; the Gordon and Betty Moore Foundation, and support from the NGSX Project at Clark University, Tidemark Institute, and Northwestern University.
This work is licensed under a Creative Commons Attribution 4.0 License http://creativecommons.org/licenses/by/4.0/
84

Lesson 9: Will All Materials Make A Shadow? Teacher Guide-
1st grade unit: How Does Light Help Me See Things and Communicate With Others?
These materials were developed with funding through a grant from the Gordon and Betty Moore Foundation to Northwestern University and the University of Colorado Boulder.
This work is licensed under a Creative Commons Attribution 4.0 License http://creativecommons.org/licenses/by/4.0/
85

Teacher Guide- Lesson 9: Will all materials make a shadow? How Does Light Help Me See Things and Communicate With Others?
Getting Ready: Materials Preparation
Materials For Each Group
For the whole class ● 3 Clear CD Window Testing Box es from Lesson 3● 3 Flashlights● Poster material and markers● Variety of materials: one piece of the it cut into a small triangle that can be
taped onto the CD Case “Windows.” and a larger piece to cover the flashlight.
Use materials from previous investigations for materials 1-9. But materials 10-15 should be materials students haven’t worked with before (e.g. a new piece of cloth, piece of wood, tupperware lid, a towel, aluminum foil, saran wrap, etc..
Put the materials into 3 different sets of three different materials each, where you know that one of the materials blocks all the light, one blocks some of the light, and the other material lets all the light through. There should be 15 materials total, 3 different ones in each set. Your 1st set should include cardboard as a material.
Preparation of Materials (45min.)
● Setup 3 Clear CD Window Testing Box esat front of the classroom, side by side.
● Place a flashlight the same distancefrom each of the “windows” so that thelight is facing away from the studentsthrough the window. Be sure the“windows” are placed in front of aconsistent background, such as awhite/chalkboard, piece of paper, etc sothat the light going through the“windows” projects onto thebackground.
● How Can I Make A Shadow I Can See?poster
Materials For Each Student
● Lesson 9 - Student Activity Sheets - part 1 (1).● Lesson 9 - Student Activity Sheets - part 2 (1).
Make sure to fill out the name materials you intend to use for 1-9, and 10-15 before copying the sheets for students. The materials in 1-9 should be ones that students tested before. The materials in 10-15 should be new materials.
Materials For Each Group (Optional)
A bin containing: ○ samples of materials 10-15, with small
triangles for making shadows & larger squares (to cover over the flashlight)
○ CD/DVD window case testing box○ Flashlight
These materials were developed with funding through a grant from re Foundation to Northwestern University and the University of Colorado Boulder.
This work is licensed under a Creative Commons Attribution 4.0 License http://creativecommons.org/licenses/by/4.0/
86

Teacher Guide- Lesson 9: Will all materials make a shadow? How Does Light Help Me See Things and Communicate With Others?
Getting Ready: Teacher Preparation
Background Knowledge
PS4.B from the FRAMEWORK:
Some materials allow light to pass through them, others allow only some light through and others block all the light and create a dark shadow on any surface beyond them, where the light cannot reach.
In this lesson, students build on the observations they made in the last lesson to further develop their understanding that not all materials will block all of the light to create a shadow. Some materials will allow some light through to create a partial shadow and others will let all of the light through so that no shadow is present.
Alternative Student Conceptions
Students will likely enter the lesson with the belief that all materials block light and create shadows. This lesson will bring together the information they learned about blocking light with different materials in Lesson 3 with what they discovered about shadows in Lesson 7. Together, this information will help students understand that shadows are created when all of the light is blocked, but not all materials will block all of the light.
Linking Our Understanding to Scientific Terminology
These materials were developed with funding through a grant from re Foundation to Northwestern University and the University of Colorado Boulder.
This work is licensed under a Creative Commons Attribution 4.0 License http://creativecommons.org/licenses/by/4.0/
87

Teacher Guide- Lesson 9: Will all materials make a shadow? How Does Light Help Me See Things and Communicate With Others?
Learning Plan: Will All Materials Make a Shadow?
2 classes: 35 min
+ 25-35 min.
Teacher Supports & Notes
Lesson 9b - Day 1
1. (10 min) Use the following prompts to engage students in a Consensus Building Discussion toconnect today’s lesson to the work completed in previous lessons. Refer to the “How Can I MakeA Shadow I Can See?” poster as you review what you figured out last time. A-
Suggested Prompts: ➔ What have we figured out about how shadows are made so far?➔ What were we wondering about last time after we looked at all the different materials that
people use to make shadows?
Listen for student responses that refer back to what we’ve learned in previous lessons. ➔ We need a light source to make a shadow. ➔ We know that materials that block out all of the light create a shadow. We drew a model of what
this looks like. We know that there are times in real life when people try to block out the light. ➔ There are lots of materials that can make shadows (and be used to block the light) ➔ We need a surface for the shadow to show up on. ➔ We were wondering if every material will make a shadow.
If needed, point to the question that reminds students that in the previous lesson that after we
Additional Guidance
A If students struggle to articulate what they have learned in previous lessons, try referring to anchor charts, models, and investigations that students have already completed. Use probing questions to jog students’ memories, such as:
● What did we figure out about what weneed to see when we used our lightboxes?
● Do all materials let light through in thesame way?
● How do people use materials in reallife to block out light?
Supporting Students in designing and conducting investigations .
B Some students may have tried something at home or outside since last time that they want to share. Provide time to
These materials were developed with funding through a grant from re Foundation to Northwestern University and the University of Colorado Boulder.
This work is licensed under a Creative Commons Attribution 4.0 License http://creativecommons.org/licenses/by/4.0/
88

Teacher Guide- Lesson 9: Will all materials make a shadow? How Does Light Help Me See Things and Communicate With Others?
observed some real life examples of objects that create shadows on purpose it made us wonder, “Could we use any materials to create those objects such as awnings, umbrellas, or car visors?” Ask student to share some ways we could investigate this question if we went outside or at home. B-
2. (10 min) Draw students’ attention to the 4 CD Clear Window Testing Boxes that you havealready set up in the front of the room. Remind students that one of the real-life objects weobserved in the last lesson was a window shade or sun visor. We can use ourminiature“windows” to test out how light interacts with different types of materials.
Take out your first set of materials (that includes cardboard). Hold up a sample of the shapes made from the 3 different materials that you put in the testing boxes to start with. Cover the flashlight with the first material (cardboard) and shine the light at the students. Have the record their observations in the first column (A) of their activity sheets for this material. Then have them make a prediction about whether this material will make a shadow in column B.
Tape the material to the window of the first box
Repeat this procedure of demonstrating and having students fill out column A and B for material 2. This material should be the one that blocks some of the light. Tape this material to thesecond box.
Repeat this procedure of demonstrating and having students fill out column A and B for material 2. This material should be the one that blocks some of the light. Tape this material to the thirdbox.
Without reviewing which materials are in each window, turn on the flashlights for the 3 windows that you have samples in and turn off the lights in the room. Ask students to “Turn
have students share out the results of these independent investigations to encourage students to keep thinking of ways to do these sorts explorations of their world outside of class.
Alternatively, provide time to brainstorm things that students could try outside (e.g. at recess or after school) and what materials they might want to test.
For students who are interested you can offer a small ziploc bag of the materials for students to take home/outside. Emphasize the need to clean-up and return the materials to you when they are done with them.
These materials were developed with funding through a grant from re Foundation to Northwestern University and the University of Colorado Boulder.
This work is licensed under a Creative Commons Attribution 4.0 License http://creativecommons.org/licenses/by/4.0/
89

Teacher Guide- Lesson 9: Will all materials make a shadow? How Does Light Help Me See Things and Communicate With Others?
toward the poster paper and tell me what you notice. Based on what you see projected onto the poster paper, can you tell which of these materials blocks all of the light, which one blocks some of the light and which one blocks none of the light?”
Listen for student responses that make observations and inferences such as: ➔ We see two shadows on the paper. ➔ One shadow is darker than the other. ➔ The one that is making a shadow must be the cardboard, because we tested it yesterday. ➔ We know that cardboard blocks all the light. ➔ One of the other materials must not block the light, because we can still see the circle of light from
the flashlight on the background. ➔ The material that is blocking some of the light, must be the one that is making a shadow, that is
not as dark as the first one that is blocking all of the light (the cardboard).
Have students record observations together for these 3 materials in the column C of their activity sheets.
3. (15 min) Now repeat the steps above but for another set of 3 new materials (Materials 4, 5,and 6). You may want to change the order this time going from the material that blocks none ofthe light, to the one that blocks some of the light to the one that blocks all of the light.
Lastly repeat the steps above but for the last set of 3 new materials (Materials 7, 8, and 9). You may want to change the order this time again of results.
4. (5 min) Ask students to look for patterns in their observations
Suggested Prompts: ➔ What patterns did you notice?
Formative Assessment Opportunities
C Read aloud the directions and each question on Student Activity Sheet 9.2. Students should complete this sheet independently. Students making adequate progress toward Performance Expectation PS4-3 will be able to provide make claims based on the patterns in the data they have observed so far.
These materials were developed with funding through a grant from re Foundation to Northwestern University and the University of Colorado Boulder.
This work is licensed under a Creative Commons Attribution 4.0 License http://creativecommons.org/licenses/by/4.0/
90

Teacher Guide- Lesson 9: Will all materials make a shadow? How Does Light Help Me See Things and Communicate With Others?
➔ Was there a pattern between which material blocked light or didn’t and which ones madeshadows or didn’t?
➔ What were the materials that let all of the light through? Did those materials make a shadow?➔ What were the materials that blocked all the light? Did those materials make a shadow?➔ What about the materials that blocked some of the light? How did their shadow compare to the
materials that blocked all the light?
Listen for student responses that refer back to what we’ve learned in previous lessons. ➔ The materials that didn’t block light didn’t make a shadow. ➔ The materials that blocked light didn’t make a shadow. ➔ The materials that blocked all the light made darker shadows than the materials that blocked
some o of the light.
Record these patterns on What we Figured Out poster for this lesson.
5. (5 min) Gather students together for a Consensus Building Discussion to reflect on how thisapplies to the what we could use these materials for?
Suggested Prompts: ➔ Would we be able to use just any fabric for our window shade if we wanted to block out all of
the light?➔ Do all materials make shadows?➔ What are some situations where people want to block out all the light? What materials would
work for that?➔ What are some situations where people want to block out only some of the light? What
materials would work for that?
These materials were developed with funding through a grant from re Foundation to Northwestern University and the University of Colorado Boulder.
This work is licensed under a Creative Commons Attribution 4.0 License http://creativecommons.org/licenses/by/4.0/
91

Teacher Guide- Lesson 9: Will all materials make a shadow? How Does Light Help Me See Things and Communicate With Others?
Listen for student responses that answer the Suggested Prompts. ➔ No! Some materials let all light through, like plastic wrap. Others only let some light through, like
tissue paper. These could probably be used as a window shade, but they wouldn’t be the best option. The best option would be materials like cardboard, which blocked all of the light and made a dark spot called a shadow.
➔ Not all materials make shadows. Those that let light through don’t make shadows.
Lesson 9b - Day 2
6. (10 min) Gather students together for a Consensus Building Discussion. Review the patternsdiscovered in step 4 last time. Ask students to look back at their results from the Lesson 9a toprovide evidence for each of the statements we wrote down on the “What We figured out poster”last time.
Suggested Prompts: ➔ What evidence do we have that if a material blocks all the light it will make a shadow?➔ What evidence do we have that if a material blocks some the light it will make a shadow, but
not as dark as one as the materials that block all the light?➔ What evidence do we have that if a material does not block the light it will not make a shadow?➔ So if we test a material and see that it doesn’t make a shadow when we hold it up to a light, is it
blocking all, some, or none of light?➔ So if we test a material and see that it does make a shadow when we hold it up to a light, is it
blocking all, some, or none of light?➔ So if we test a material and see that it does make a shadow when we hold it up to a light, but
the shadow it makes is not as dark as one that is made from cardboard, is it blocking all, some,or none of light?
These materials were developed with funding through a grant from re Foundation to Northwestern University and the University of Colorado Boulder.
This work is licensed under a Creative Commons Attribution 4.0 License http://creativecommons.org/licenses/by/4.0/
92

Teacher Guide- Lesson 9: Will all materials make a shadow? How Does Light Help Me See Things and Communicate With Others?
6. (10-15 min) Ask students if we should test our predictions with some other materials. Handout Lesson 9 - Student Activity Sheet - part 2. Students should complete this sheet independentlyso that the results can be used as a formative assessment.
On the first page of this interactive assessment you will show students three new materials and hold them up against a flashlight (Materials 10, 11, and 12)
For each of these materials, students will complete the top row of that table recording their results of whether all, some, or none of the light was block. Then they will immediately fill in their predictions for the row below, of whether it will make a dark shadow, a shadow that isn’t as dark as cardboard makes, or no shadow. Do this with the lights dimmed, pointing the flashlight at a paper toward the students that they can’t see the face of (so they can’t see if it makes a shadow or not), but facing them so that they can see if light is blocked by the materials or not.
Then on the second page of this interactive assessment you will show students the shadows made from three new materials pointing the flashlight away from them toward a piece of poster paper they can see (Materials 13, 14, and 15).
For each of these materials, students will complete the top row of that table recording their results of whether it made a dark shadow, a shadow that isn’t as dark as cardboard makes, or no shadow. Then they will immediately fill in their predictions for whether all, some, or none of the light was blocked.
Collect the students sheets.
These materials were developed with funding through a grant from re Foundation to Northwestern University and the University of Colorado Boulder.
This work is licensed under a Creative Commons Attribution 4.0 License http://creativecommons.org/licenses/by/4.0/
93

Teacher Guide- Lesson 9: Will all materials make a shadow? How Does Light Help Me See Things and Communicate With Others?
7. (10 min) Optional: Ask students how we they could test the predictions they made.
Pass out bins of these materials for students to work with along with a flashlight to see if their predictions were correct.
8. (10 min) Ask students if we would see these same sorts of relationships we discovered in ourclass with objects in the world outside our classroom.
Suggested Prompts: ➔ If we went outside of our school and looked at things in the world around us, would we see that
the things that blocked all the light from the sun also made dark shadows?➔ If we looked for things outside of our school, would we find some materials that block some of
the light that is behind them but not all of it?➔ If we looked around our neighborhood would we find evidence of materials outside of our
school, that don’t block any light?➔ What type of things might we see making shadows?➔ What type of materials are those things made of?➔ What type of light sources might we see in the day if we went on a walk around our
neighborhood or town?➔ What type of light sources might a person see in the night if they went on a walk around our
neighborhood or town?➔ How would we go about investigating these predictions?
Leave students with the idea that next time we should start planning a short walking field trip around our neighborhood to look for evidence of some of these things and that if we want to do that, we will first have to think through the type of observations we want to try to collect on that trip.
These materials were developed with funding through a grant from re Foundation to Northwestern University and the University of Colorado Boulder.
This work is licensed under a Creative Commons Attribution 4.0 License http://creativecommons.org/licenses/by/4.0/ 10
94

Teacher Guide- Lesson 9: Will all materials make a shadow? How Does Light Help Me See Things and Communicate With Others?
Alignment With Standards
Building Toward Target NGSS PE
● 1-PS4-3 Plan and conduct investigations to determine the effect ofplacing objects made with different materials in the path of a beam of light.
● K-2-ETS1-3 Analyze data from tests of two objects designed to solvethe same problem to compare the strengths and weaknesses of how eachperforms.
Building Toward Common Core Standard(s)
ELA standards: CCSS.ELA-LITERACY.SL.1.1 -Participate in collaborative conversations with diverse partners about grade 1 topics and texts with peers and adults in small and larger groups.
● CCSS.ELA-LITERACY.SL.1.1.A - Follow agreed-upon rules fordiscussions (e.g., listening to others with care, speaking one at a time about the topics and texts under discussion).
● CCSS.ELA-LITERACY.SL.1.1.B - Build on others' talk inconversations by responding to the comments of others throughmultiple exchanges.
● CCSS.ELA-LITERACY.SL.1.1.C - Ask questions to clear up anyconfusion about the topics and texts under discussion.
CCSS.ELA-LITERACY.SL.1.4 Describe people, places, things, and events with relevant details, expressing ideas ….clearly.
These materials were developed with funding through a grant from re Foundation to Northwestern University and the University of Colorado Boulder.
This work is licensed under a Creative Commons Attribution 4.0 License http://creativecommons.org/licenses/by/4.0/
95

Lesson 10: Where else in the world do we see light sources, light going through different materials, and different materials making shadows? Teacher Guide-
1st Grade Unit: How Does Light Help Me See Things and Communicate With Others?
This Lesson….What we are doing now: In this three part lesson you will help students design an investigation plan for going on a walking field trip to collecting data about light sources, materials being used to let light through, materials being used to block light, and interesting shadows we notice being formed in the world outside our school. Then you will take students on a walking field trip to conduct that investigation and collect that data. When you return with your data, you help students analyze the data. On a second pass through the data you will help students uncover a new phenomena - light sources that appear to be used for communicating information (e.g. brake lights, turn signals, stop lights, store signs).
Lesson Question
Phenomena Lesson Performance Expectation(s)
What We Figure Out (CCCs & DCIs), New Question s and Next Steps
L10 Where else in the world do we see light going through different materials?
Where else in the world do we see light making shadows?
(45 min. Prep., 60+ min. conduct, 45 min analyze)
Building toward
⬇ NGSS PEs:
1-PS4-2,1-PS4-3,1-PS4-4
K-2-ETS1-1
Brainstorm new ideas
Light hunt: Take our ipads and go record
stuff in the world outside
Photographs/video clips from the light hunt (exit signs,
signal lights on a car, stoplight, crosswalk sign, neon signs,
street lights, railroad crossings, lights on
an elevator, ambulance/fire truck lights, lighthouses)
Plan and conduct an investigation collaboratively to gather data that provides evidence for patterns in the way/where people are using light sources, materials and objects are being used for blocking light or letting light through,, and shadows are being formed in the world outside our school.
Engage in argument from evidence making a claim, supported by evidence from the above investigation, that some light sources in the world around us are doing more than just providing light for us to see, they are also be used to communicate a message because of a pattern between
We came up with the idea of wanting to look for more phenomena in the world outside our classroom, to try to explain using what we figured out about light sources, materials (and shapes of materials) for blocking light or letting it through, and shadows, and this led us to the idea of going on a Light and Shadow Hunt.
But then we started to brainstorm, what was it we wanted to look for? How are we going to record what we see? We agreed on wanting to keep track of:
● Light sources we see and what they look like● Places that we notice certain materials being used to let light through● Places that we notice certain materials being used to block light● Interesting shadows we notice
We practice walking in our hallway to prepare for our field trip - be sure there is something for students to observe during the practice run so they can practice writing down data.
When came back from our hunt, we analyzed our data and noticed patterns: ● There are a lot examples of light sources, materials, and shadows in our world around us.● There is a new kind of pattern we noticed in the way light is used in our world - sometimes it does the job of
sending messages!
We talked about this new pattern of how light is used and realized that light sources are often used to send messages in our world does it without making any noise.! People can observe colors of stoplights, brake lights, crosswalk lights, and none of them require sound to understand what the messages mean. Other times people can observe light sources that are the shape of letters and understand what the spell out, or what they letter stands for (a symbol to represent a certain kind of restaurant).
Our teacher gives us a new challenge - we want to try to use light to communicate messages through our school hallways so that we do not disturb classes as we transition from one class to the next. We think we can use ideas from what we discovered about light sources, different materials, and shadows to come up with some solutions
nextgenstorylines.org These materials were developed through with support from the Michigan Department of Education; the Gordon and Betty Moore Foundation, and support from the NGSX Project at Clark University, Tidemark Institute, and Northwestern University.
This work is licensed under a Creative Commons Attribution 4.0 License http://creativecommons.org/licenses/by/4.0/ 96

Teacher Guide Lesson 10: Where else in the world do we see light and shadow? How Does Light Help Me See Things and Communicate With Others?
their structure and function.
Before we can apply ideas from outside, we want to analyze our data a bit more. We go back to the data (photos and sketches) from our light hunt and break down the messages we thought were most powerful.
We ask ourselves a lot of questions about what we saw: ● Why the circle? Why red vs. green? Why blinking? Why a big hand? Why this patterns? Why are exit signs
always illuminated? How do lights work in combination?
We figure out that patterns (blinking), changes in brightness, color, symbols can be used to communicate complex messages. We will keep these in mind as we develop our own communication tools and methods to communicate in the hallway.
And we realized that light sources can communicate messages over really far distances.
nextgenstorylines.org These materials were developed through with support from the Michigan Department of Education; the Gordon and Betty Moore Foundation, and support from the NGSX Project at Clark University, Tidemark Institute, and Northwestern University.
This work is licensed under a Creative Commons Attribution 4.0 License http://creativecommons.org/licenses/by/4.0/
97

Teacher Guide Lesson 10: Where else in the world do we see light and shadow? How Does Light Help Me See Things and Communicate With Others?
Getting Ready: Materials Preparation
Materials For Each Group
● Chart paper to capture “Rules for our Lightand Shadow Walk”
Preparation of Materials (15 min.)
● Prepare any materials from Lesson 6 to which students can refer to remember what theylearned about light sources.
● The first portion of this lesson should be conducted in preparation for the second portion, giving students experience using the data collector in a controlled environment before goingon the light and shadow hunt outside of the school building.
● Prepare 2 sets of materials for each student, one for the test run, and another for the actual light and shadow hunt.
● For the test run, identify a portion of the school building that might have some observableuses of light and shadow to communicate a message. Some examples might be:
○ A gym with a scoreboard○ A theater with stage lighting○ An emergency exit sign
● Prepare a piece of chart paper with the title “Light and Shadow Hunt Plan”● Prepare a piece of chart paper with the title “Rules for our Light and Shadow Walk.”
Safety
● Remind students of safety rules related to walking outside of the school building.
● Practice pausing before writing things downon the clipboard.
● Practice “Stop, look, and listen.”
Materials For Each Student
● Lesson 10 -Student Activity Sheet (to be used on the hunt if no technology is available,otherwise save this for the debrief after the hunt)
● Clipboard (to be used on the hunt if no technology is available.)● If devices are available, allow students to carry them to record photos of their experience,
rather than writing down observations.
nextgenstorylines.org These materials were developed through with support from the Michigan Department of Education; the Gordon and Betty Moore Foundation, and support from the NGSX Project at Clark University, Tidemark Institute, and Northwestern University.
This work is licensed under a Creative Commons Attribution 4.0 License http://creativecommons.org/licenses/by/4.0/
98

Teacher Guide Lesson 10: Where else in the world do we see light and shadow? How Does Light Help Me See Things and Communicate With Others?
Getting Ready: Teacher Preparation
Background Knowledge
PS4-4 from the FRAMEWORK: “People also use a variety of devices to communicate (send and receive information) over long distances.”
Up to this point, students have been constructing knowledge of how light interacts with different materials, how shadows are formed, and what is required to be able to see an object. In this lesson, we build toward PS4-4 by bringing students into the real world to observe light and shadow and seek out patterns. Light and shadow are used in many ways in the real world, but often they are used to communicate a particular message over a distance.
Alternative Student Conceptions
Students may not have considered that light and shadow are used frequently in the world to communicate universal messages. Examples may need to be provided for students to begin to make the connection between the use of light and shadow and a pattern of communication.
Linking Our Understanding to Scientific Terminology
● Communication● Pattern
nextgenstorylines.org These materials were developed through with support from the Michigan Department of Education; the Gordon and Betty Moore Foundation, and support from the NGSX Project at Clark University, Tidemark Institute, and Northwestern University.
This work is licensed under a Creative Commons Attribution 4.0 License http://creativecommons.org/licenses/by/4.0/
99

Teacher Guide Lesson 10: Where else in the world do we see light and shadow? How Does Light Help Me See Things and Communicate With Others?
Learning Plan: Where else in the world do we see light and shadow?
( 4 x 45 min)
Teacher Supports & Notes
PART 1
1. (15 min) Begin with a Consensus Building Discussion to help students connect to today’slesson. You may want to refer students back to materials from Lesson 6 to jog their memories.
Suggested Prompts: ➔ What did we learn about light sources in Lesson 6?
Listen for student responses that refer to what we figured out last time, such as: ➔ We learned that some light sources are natural, and some are artificial, or man-made. We
learned that when things get hot, they can sometimes produce light. We also learned that some animals and insects have light sources, like fireflies.
Next, engage students in a Sharing Initial Ideas Discussion to brainstorm ideas about how they think light and shadow are used in the world.
Suggested Prompts: ➔ How are light and shadow used in our world? Let’s brainstorm some ways.➔ What could we do to figure out other ways that light and shadow are used in our world?
Listen for student responses A- such as: ➔ We have lights in our room so we can see. We also have stop lights so people know when to drive
and when to slow down and when to stop. ➔ We could go look for light in our school or outside of our school. It would be like a scavenger hunt!
Strategies for this Sharing Initial Ideas Discussion
A Students may generate several ideas, or may only think about light as something that lights a room. It is not necessary to probe too much here, as we want students to be motivated to seek light sources on their Light and Shadow Hunt.
nextgenstorylines.org These materials were developed through with support from the Michigan Department of Education; the Gordon and Betty Moore Foundation, and support from the NGSX Project at Clark University, Tidemark Institute, and Northwestern University.
This work is licensed under a Creative Commons Attribution 4.0 License http://creativecommons.org/licenses/by/4.0/
100

Teacher Guide Lesson 10: Where else in the world do we see light and shadow? How Does Light Help Me See Things and Communicate With Others?
2. (15 min) Shift the topic of the Sharing Initial Ideas Discussion to address specifics for theLight and Shadow Hunt. Use the following prompts to guide students to articulate what theythink they should do on a Light and Shadow Hunt.
Suggested Prompts: ➔ If we went on a Light and Shadow Hunt to find examples of light in our world, what would we
want to be sure to do as we noticed each example?➔ How do scientists keep track of things they notice?➔ What should we do with our notes and observations when we are finished with our light hunt?
B-
Listen for student responses that brainstorm ideas such as: ➔ On our hunt, we will want to write the examples down or draw pictures of the light and shadows
we see. We could also use a phone or an iPad to take pictures of the examples when we see them. ➔ Scientists record their observations and write down details about what they see. Sometimes they
take pictures. ➔ We can learn things when we look back at our data. Sometimes we notice patterns and we can
learn from them.
3. (15 min) Now that students have decided the path of the lesson, gather students around thechart paper titled “Light and Shadow Hunt Plan” and set the stage for the test run. If studentdevices are available, be sure to explain to students that they will take pictures of the examplesthey find on the hunt, then they will look back at their pictures to record their results later in thelesson. If no devices are available, students will carry a clipboard with Student Activity Sheet10(a).1. Record students’ ideas on the chart paper
Scientists, before we go on our Light and Shadow Hunt, we need to think about what we will look for, how we will record it, and which rules we should follow while we are out on our hunt.
Additional Guidance
B Students may struggle to articulate that scientists look back at the data they collect to look for patterns and to draw conclusions about phenomena. One way to support them in this thinking might be to share an anecdote such as, “when I was growing up, my mom used to measure my height by marking it on the wall in the pantry. When I look back at those marks, I notice patterns, like that I grew faster between the ages of 5 and 8 than I did when I was older.”
nextgenstorylines.org These materials were developed through with support from the Michigan Department of Education; the Gordon and Betty Moore Foundation, and support from the NGSX Project at Clark University, Tidemark Institute, and Northwestern University.
This work is licensed under a Creative Commons Attribution 4.0 License http://creativecommons.org/licenses/by/4.0/
101

Teacher Guide Lesson 10: Where else in the world do we see light and shadow? How Does Light Help Me See Things and Communicate With Others?
Suggested Prompts: ➔ What should we look for when we are out on our hunt?➔ What kind of information should we record about what we see?
Listen for student responses such as: ➔ We should look for any objects that use a light source. We should look up, down, and all around us
to see the objects that use light and shadow. ➔ We should record what we see, how it uses light, and anything we notice or wonder about the
object. We might also want to sketch the object or take a photo of it.
Next, capture students’ ideas on the chart paper titled “Rules for our Light and Shadow Hunt.”
Suggested Prompts: ➔ What rules should we be sure to follow when we go on our hunt to make sure that we are safe?
Listen for student responses C- such as: ➔ We need to watch where we are walking. ➔ Stop before you take a picture or write something down ➔ Stay to the right ? ➔ Pay attention to other people around you or trying to get by in the hallway or on the sidewalk
4. (30 min) Prepare students to go on the test run of the Light and Shadow Hunt. Explain tostudents: Today we will do a test run of our Light and Shadow Hunt so we can practice being safewhen we record our observations. We will walk around our school to look for light sources. Wewill use our devices to take photos of what we see. Then, when we return to the classroom, wewill choose some of our favorite examples and reflect on them D-.
Take students on the pre-planned route around the school E-. Because there will be fewer obvious uses of light as a communication device in a school, you may have to point out examples if students do not notice them at first. As you walk on the route, be sure to observe students and
Additional Guidance
C If students have trouble generating ideas, try role playing the scenario as it would play out if you were walking in the hallway or on the sidewalk. Ask students to close their eyes and visualize what it might be like.
Alternate Activity
D If students do not have access to mobile devices that can be used to take photographs of the light sources they find on the light hunt, they should carry a copy of Student Activity Sheet 10(a) on a clipboard and record what they see along with a sketch and some notes.
If devices are available, students will take pictures of the light sources they find and reflect on them upon their return to the classroom, using Student Activity Sheet 10(a)
nextgenstorylines.org These materials were developed through with support from the Michigan Department of Education; the Gordon and Betty Moore Foundation, and support from the NGSX Project at Clark University, Tidemark Institute, and Northwestern University.
This work is licensed under a Creative Commons Attribution 4.0 License http://creativecommons.org/licenses/by/4.0/
102

Teacher Guide Lesson 10: Where else in the world do we see light and shadow? How Does Light Help Me See Things and Communicate With Others?
correct any behaviors that might pose safety concerns if they are repeated when you are outside of the school building.
5. Upon completion of the walk, return back to the classroom. If students have been usingdevices, ask them to choose 2-4 examples of light sources from their photos and reflect on whatthey notice and wonder about them on Student Activity Sheet 10(a). If students have alreadybeen using Student Activity Sheet 10(a), give them time to add in any details they need to beforecoming together for the group discussion.
6. (5 min) When students have completed their reflection, bring them back together as a wholegroup. In this Building Understandings Discussion F-, use the following prompts to help studentsdebrief what they observed on the Light and Shadow Hunt.
Suggested Prompts: ➔ What did we do well on our Light and Shadow Hunt test run today?➔ What do we want to improve when we go on our real Light and Shadow Hunt?
Listen for student responses that accurately reflect students’ success on the test run of the Light and Shadow Hunt. If needed, practice or role-play situations you want to fix for the actual Light and Shadow Hunt.
7. (45 min) Gather students to review the expectations and procedures they settled on for theLight and Shadow Hunt. Ensure that students have their materials and are prepared to leave theschool building.
Take students on the Light and Shadow HuntG, pointing out uses of light in the real world. Pay
Additional Guidance
E As you plan a route throughout the school, try to take students to locations where they might see items that use light to communicate such as:
- Exit Signs- Marquees- Blinking “slow down” signal lights
near a crosswalk - School Access card reader whose
lights turn from red to green whencard is swiped
- Library Card or Book Scanner in thelibrary
Strategies for this Building Understandings Discussion
F If students bring up ideas such as light sending a message, try to reframe it using the term “communication.” Seek out opportunities to name patterns, such as a flashing light being something that is designed to draw our attention, or a particular color of light designed to send a specific message.
Alternate Activity
G If the local conditions in your area do
nextgenstorylines.org These materials were developed through with support from the Michigan Department of Education; the Gordon and Betty Moore Foundation, and support from the NGSX Project at Clark University, Tidemark Institute, and Northwestern University.
This work is licensed under a Creative Commons Attribution 4.0 License http://creativecommons.org/licenses/by/4.0/
103

Teacher Guide Lesson 10: Where else in the world do we see light and shadow? How Does Light Help Me See Things and Communicate With Others?
special attention to examples such as:
● Car lights (tail lights, signal lights, head lights)● Stop Lights● Neon signs - particularly flashing● Crosswalk Signals● Emergency Vehicle Lights● Train Crossing Lights
When you return, repeat steps 5 and 6 using the data students collected on the Light and Shadow Hunt.
PART 2 H-
7. (20 min) Gather students for a Building Understandings Discussion. Use the followingprompts to generate ideas about the patterns we notice about light and shadow in the realworld. If possible, illustrate the conversation with photos taken while on the Hunt.
Suggested Prompts: ➔ What examples of light did you notice on the Light and Shadow Hunt?➔ What was the light doing in each situation? What was its purpose?➔ How did you know what the light meant?➔ Did you need sound to know what the light was telling you to do?➔ What did you notice about shadows on your hunt?
Listen for student responses such as:
➔ We noticed many examples of light sources (see above). ➔ The light was sending us a message, like slow down or stop, or look at me!
not allow for students to conduct a successful light and shadow hunt around your school building or during the school day, consider these alternate activities. Using a phone or camera, collect video as you drive around your town or neighborhood both during the day and at night. Or, you can record this same video walking around your town. It is important that students see examples of things like train signal lights, brake lights, stop lights, crosswalk signals, and emergency vehicle lights so that they can come to the conclusion that we can use light to send messages across a distance.
Additional Guidance
H Lesson 10(a) will likely need to be split into multiple class periods. The two parts of the lesson separate the actual Light and Shadow Hunt from the debrief of that Hunt. If you do split up the steps in this lesson over a number of days, it is important to try to maintain coherence from one day to the next. You can do this by kicking off each day
nextgenstorylines.org These materials were developed through with support from the Michigan Department of Education; the Gordon and Betty Moore Foundation, and support from the NGSX Project at Clark University, Tidemark Institute, and Northwestern University.
This work is licensed under a Creative Commons Attribution 4.0 License http://creativecommons.org/licenses/by/4.0/
104

Teacher Guide Lesson 10: Where else in the world do we see light and shadow? How Does Light Help Me See Things and Communicate With Others?
➔ I guess we just know! A red light always means stop, and a flashing light always gets your attention. Light is used this way all the time.
➔ No, we didn’t need sound. We could tell just by the color or style of the light. ➔ Shadows were used to make the lights brighter. The stop lights had a piece of metal that blocked
out the sun so we can see the light better I-.
7. (15 min) Pose a new challenge to students: Now that you’ve figured out that you can use lightto send messages without sound, I have a problem for you to solve. We have a problem in ourschool that too many kids and teachers make noise when they walk in the hallways. I challengeyou to figure out a way to use light to send silent messages so that we can eliminate our hallwaynoise. Use the following prompts to help students brainstorm ideas of what they would need todo to be able to tackle the challenge you set out for them.
Suggested Prompts: ➔ What should we make sure to do in our next science class so that we can start fixing the
hallway noise problem?➔ How can we use what we learned on our Light and Shadow Hunt to solve our problem?
Listen for student responses such as: ➔ We need to start planning how to use light to create signals that we can use in the hallways. ➔ We can model our light signals off of the ones we saw outside!
with the question, “What did we figure out yesterday?” and ending each lesson with, “What do you think we should do in the next lesson?”
Additional Guidance
I Students may not bring this up on their own. If they don’t recognize that light and shadow are working together, such as with a stoplight, bring up a photo or drawing from one of the students of a stoplight. You may wish to recreate a stoplight in the classroom by using a piece of black construction paper to create a shade over the top of a flashlight. Ask students to observe the brightness of the flashlight in a lit room with and without the paper, and discuss how the paper casts a shadow to make the light appear brighter.
nextgenstorylines.org These materials were developed through with support from the Michigan Department of Education; the Gordon and Betty Moore Foundation, and support from the NGSX Project at Clark University, Tidemark Institute, and Northwestern University.
This work is licensed under a Creative Commons Attribution 4.0 License http://creativecommons.org/licenses/by/4.0/
105

Teacher Guide Lesson 10: Where else in the world do we see light and shadow? How Does Light Help Me See Things and Communicate With Others?
Alignment With Standards
Building Toward Target NGSS PE
● 1-PS4-2. Make observations to construct an evidence-based account thatobjects in darkness can be seen only when illuminated.
● 1-PS4-3 Plan and conduct investigations to determine the effect ofplacing objects made with different materials in the path of a beam of light.
● 1-PS4-4 Use tools and materials to design and build a device that uses light or sound to solve the problem of communicating over a distance.
● K-2-ETS1-1 Ask questions, make observations, and gather information about a situation people want to change to define a simple problem that can be solved through the development of a new or improved object ortool.
Building Toward Common Core Standard(s)
ELA standards: CCSS.ELA-LITERACY.SL.1.1 -Participate in collaborative conversations with diverse partners about grade 1 topics and texts with peers and adults in small and larger groups.
● CCSS.ELA-LITERACY.SL.1.1.A - Follow agreed-upon rules fordiscussions (e.g., listening to others with care, speaking one at a time about the topics and texts under discussion).
● CCSS.ELA-LITERACY.SL.1.1.B - Build on others' talk inconversations by responding to the comments of others throughmultiple exchanges.
● CCSS.ELA-LITERACY.SL.1.1.C - Ask questions to clear up anyconfusion about the topics and texts under discussion.
CCSS.ELA-LITERACY.SL.1.4 Describe people, places, things, and events with relevant details, expressing ideas ….clearly.
nextgenstorylines.org These materials were developed through with support from the Michigan Department of Education; the Gordon and Betty Moore Foundation, and support from the NGSX Project at Clark University, Tidemark Institute, and Northwestern University.
This work is licensed under a Creative Commons Attribution 4.0 License http://creativecommons.org/licenses/by/4.0/
106

Lesson 11(a): How can we use light to communicate without making any noise? Teacher Guide-
1st Grade Unit: How Does Light Help Me See Things and Communicate With Others?
This Lesson….What we are doing now: You will help students identify a potential need for an engineering solution and investigate whether the need they identified matches actual problems that need to be solved in their school. You will help students identify criteria and constraints that emerge in this process. Students will use these to design possible solutions on paper that they want to construct and test. They will build devices, and test their solutions and record evidence of their relative effectiveness. Students will return to repeating a round of this design process after the next lesson.
Lesson Question
Phenomena Lesson Performance Expectation(s)
What We Figure Out (CCCs & DCIs), New Question s and Next Steps
L11(a-c) How can we use light to communicate without making any noise?
2 rounds of (4 x 45 min)
Building toward
⬇ NGSS PEs:
1-PS4-3,1-PS4-4,
K-2-ETS1-1,K-2-ETS1-2,K-2-ETS1-3,
School hallway communication problem.
Give students a mystery bag of materials so that all students have different materials to work with. This will encourage students to manipulate the materials.
Defining problems where there may be a need for designing a way to use light to communicate messages over a large distance to a group of people in our school without making a sound.
Design a solution including both the tool and the code (the structure and its function) to communicate messages to other students in our school down the hall using light , without making a sound.
Plan and Conduct Investigations with partners to gather data to serve as the basis for evidence for the argument below related to the solution above.
Now that we realized that light might help us communicate over really large distances without making a sound, we thought about some potential problem places in our school where it would be helpful to communicate with other people without making a sound and/or needing to communicate over a large distance.
We brainstormed some possibilities and identified some possible situations: ● In the cafeteria where it is already too loud● Down the halls where we don’t want to disturb other classes● In the library where we don’t want to disturb people reading● Outside for P.E. or recess when we are far away from other people
We also identified possible messages that people might want to send in to other people or groups of people in those settings. We wondered if these are real problems or only made up ones, so we decided we wanted to talk to people around the school and interview them to better define what if any problem might exists.
From the interviews we determined some places where it could be useful to design a solution. We identified the criteria for that solution based on the interviews and what we decided counts as a successful communication device that uses light.
We identified constraints such as 1) the materials available, where and how we can test our devices & methods
We begin to wonder what we can do with our bodies and other materials to make light and shadows that send a message?
We began to design solutions on paper - both in terms of devices and communication codes.
Each person tested at least two (some more than two) different method/device for sending messages, recording evidence regarding the effectiveness of each design change along the way. Some groups try using simple light signals (on/off for yes/no), others use patterns of light (rudimentary morse code), others use shadows, some use materials to cast a colored light.
Next Steps: As we saw others working on their designs we thought they were cool too and wanted to check them out and we wanted to share what we discovered in our own designs with others, so we decided we wanted to share the results of initial design tests to our classmates.
nextgenstorylines.org These materials were developed through with support from the Michigan Department of Education; the Gordon and Betty Moore Foundation, and support from the NGSX Project at Clark University, Tidemark Institute, and Northwestern University.
This work is licensed under a Creative Commons Attribution 4.0 License http://creativecommons.org/licenses/by/4.0/ 107

Teacher Guide Lesson 11(a): How can we use light to communicate without making any noise? How Does Light Help Me See Things and Communicate With Others?
Getting Ready: Materials Preparation
Materials For Each Pair
● Various materials to build and test light communication devices(cardboard, fabric, paper, tissue paper, construction paper,transparencies, wax paper, mylar, plastic wrap, cardstock, etc.)
● Flashlight
Preparation of Materials (15 min.)
● Reopen the “Materials Station” used in previous lessons wherestudents can have access to multiple samples of each material thatcan be used in their light communication devices (cardboard, fabric,paper, tissue paper, etc.) in a central location for students to use.Make sure you have multiple pieces of each material so that as the supply runs low, you can easily replenish it.
● Create a piece of chart paper with the design challenge from Lesson10 written at the top.
Materials For Each Student
● Activity Sheet 11.1 (Brainstorming Light Communication Devices) ● Activity Sheet 11.2 (Plan for Light Communication Devices, at least 2
for each student)● Activity Sheet 11.3 (Light Communication Device Reflection Tool)● Activity Sheet 11.4 (Comparing Light Communication Devices)● Activity Sheet 11.5 (Using the Engineering Design Process for a New
Message--only copy IF completing Part 6, Extension)● Scissors● Glue● Tape
Safety
● Remind students how to use and transition with scissors; if studentsare unable to cut cardboard on their own, cut it for them.
nextgenstorylines.org These materials were developed through with support from the Michigan Department of Education; the Gordon and Betty Moore Foundation, and support from the NGSX Project at Clark University, Tidemark Institute, and Northwestern University.
This work is licensed under a Creative Commons Attribution 4.0 License http://creativecommons.org/licenses/by/4.0/
108

Teacher Guide Lesson 11(a): How can we use light to communicate without making any noise? How Does Light Help Me See Things and Communicate With Others?
Getting Ready: Teacher Preparation
Background Knowledge
PS4-4: People also use a variety of devices to communicate (send and receive information) over long distances.
ETS1.A: Defining and Delimiting Engineering Problems : A situation that people want to change or create can be approached as a problem to be solved through engineering Asking questions, making observations, and gathering information are helpful in thinking about problems. Before beginning to design a solution, it is important to clearly understand the problem.
ETS1.B: Developing Possible Solutions: Designs can be conveyed through sketches, drawings, or physical models. These representations are useful in communicating ideas for a problem’s solutions to other people. (K-2-ETS1-2)
ETS1.C Optimizing the Design Solution: Because there is always more than one possible solution to a problem, it is useful to compare and test designs. (K-2-ETS1-3)
At this point in the unit, students most recently observed how light and show are used in the real world to communicate over a distance. Students will take this knowledge, combining it with the knowledge gained for how various materials interact with light, to design and build a device that solves a problem with light in communicating over a distance. Through the use of the engineering design process, students will analyze the data gathered from various tests to recommend the best-performing light communication tool to an audience.
Alternative Student Conceptions
Through the Light and Shadow Hunt, students were exposed to various ways in which light is used to communicate over a distance in their school’s neighborhood. Students may find it a challenge to create their own designs to communicate over a distance with light, knowing the materials available to them are drastically different than those used in the devices seen on their Light and Shadow Hunt. Special attention will need to be made to reviewing what was discovered about how light interacts with the materials made available to them from earlier lessons in the unit.
Linking Our Understanding to Scientific Terminology
● Communication● Patterns● Engineering
nextgenstorylines.org These materials were developed through with support from the Michigan Department of Education; the Gordon and Betty Moore Foundation, and support from the NGSX Project at Clark University, Tidemark Institute, and Northwestern University.
This work is licensed under a Creative Commons Attribution 4.0 License http://creativecommons.org/licenses/by/4.0/
109

Teacher Guide Lesson 11(a): How can we use light to communicate without making any noise? How Does Light Help Me See Things and Communicate With Others?
Learning Plan: How can we use light to communicate without making any noise?
2 rounds of ( 4 x 45 min) for 11a-11d
Teacher Supports & Notes
PART 1 (11a)
1. (15 min) Begin with a Consensus Building Discussion to help students connect to today’slesson. Post the chart paper with the design challenge from Lesson 10. Engage students in thefollowing prompts about what patterns they noticed on the light and shadow hunt.
Suggested Prompts: ➔ What did we learn from our Light and Shadow Hunt?➔ What did we see, and what message was it communicating?
Listen for student responses that refer to what we figured out last time, such as: ➔ We learned that there are many different examples of light sources beyond what we found out in
Lesson 9, like lights on cars in the front/back, traffic lights at intersections, various signs, emergency vehicles, crosswalk signs, and train crossing lights.
➔ We also learned that lights can be different colors or styles (solid stream of light vs. flashing) and as a result of this, can communicate different messages like stop, slow down, or be careful!
➔ We also learned that shadows play an important role in making lights brighter so that we could see a light more clearly.
➔ We saw that lights sent messages. For example, we noticed that when a train was coming there were flashing lights that meant STOP or LOOK OUT! And the lights turned off when it was safe to cross. We also noticed the crosswalk signal. When it was white and not flashing it was safe to go, but red and flashing meant to be careful or stop walking.
Next, engage students in a Sharing Initial Ideas Discussion to brainstorm places in the school
nextgenstorylines.org These materials were developed through with support from the Michigan Department of Education; the Gordon and Betty Moore Foundation, and support from the NGSX Project at Clark University, Tidemark Institute, and Northwestern University.
This work is licensed under a Creative Commons Attribution 4.0 License http://creativecommons.org/licenses/by/4.0/ 4
110

Teacher Guide Lesson 11(a): How can we use light to communicate without making any noise? How Does Light Help Me See Things and Communicate With Others?
where there are issues with too much noise.
Suggested Prompts: ➔ What are some places in our school were it would be helpful for us to be able to communicate
without making any noise?➔ Who would be sending the message, and who would be receiving the message? What would
the message be?
Listen for student responses such as: ➔ The library; The hallways while other classes are in session; During an assembly; While our
teacher is teaching us something or others are talking ➔ In the library, the librarian would send a message to students that they were being too loud or just
right. In the hallways, the teacher could tell the students if they were being too loud or just right. Or the teacher could tell us which direction to turn next. In an assembly, students would send a question message to the teacher about leaving to go the bathroom, and the teacher could respond with a yes or a no. During class, a student might want to ask the teacher if they can go to the bathroom or get a drink without interrupting.
Continue the discussion by asking students to explain why it is important to be quiet in these situations, and explain what kinds of messages we might want to communicate in these situations.
Suggested Prompts: ➔ Why is it important to communicate silently in the places you mentioned?➔ When might we need to communicate a message in these situations to someone who is not
right next to us (far away)?➔ What types of messages would you need to communicate in those situations you mentioned?
Listen for student responses such as: ➔ In the library, we have to be quiet because people are trying to read and work. In the hallways, we
nextgenstorylines.org These materials were developed through with support from the Michigan Department of Education; the Gordon and Betty Moore Foundation, and support from the NGSX Project at Clark University, Tidemark Institute, and Northwestern University.
This work is licensed under a Creative Commons Attribution 4.0 License http://creativecommons.org/licenses/by/4.0/
111

Teacher Guide Lesson 11(a): How can we use light to communicate without making any noise? How Does Light Help Me See Things and Communicate With Others?
have to be quiet because other classes are going on and we don’t want to disturb them. In an assembly, we don’t want to interrupt the speaker. In our classroom, we don’t want to interrupt our teacher or disturb our classmates.
➔ Our library is big, so we might have to get someone’s attention who is on the other side of the room and tell them something without shouting out. In the hallways, there are a lot of kids in our line and it gets pretty long. Sometimes you are far away from your teacher and you might want to tell them something. In an assembly we usually sit pretty far away from our teacher and wouldn’t be able to talk to them without shouting. In our classroom we could be on the other side of the room and need to send a message.
➔ If we were in the library, we might want to communicate with someone about a book we’re reading or something about checking out books. We also might want to ask our teacher for help with those things. If we were in the hallway, we might want to communicate about when and where to stop and when to keep going. If we were in an assembly, we might want to communicate about when we needed to leave to go to the bathroom, or maybe to share something we thought was interesting or confusing. If we were in the classroom while our teacher was teaching, we might want to ask a question or tell our teacher we needed to leave the room to go to the bathroom or to another teacher’s room.
Ask students, Which of the situations that you mentioned do you think is the biggest problem with noise in our school? Which of these noise problems do we most want to solve? After students engage in some discussion and weigh the pros and cons of each option, go with what students choose.
Before moving on, have students pause to reflect on all of the things they have learned so far in the unit that could be relevant to this design challenge. Use this opportunity to take stock of what students have figured out, and how that might help them as they start to work on solving the school-wide problem they identified. Create a T-Chart and label one side, “What we’ve figured out so far,” and the other “How this helps our design.” You may want to go back to anchor charts from previous lessons, particularly lessons 6-10. Tease out ideas such as:
nextgenstorylines.org These materials were developed through with support from the Michigan Department of Education; the Gordon and Betty Moore Foundation, and support from the NGSX Project at Clark University, Tidemark Institute, and Northwestern University.
This work is licensed under a Creative Commons Attribution 4.0 License http://creativecommons.org/licenses/by/4.0/
112

Teacher Guide Lesson 11(a): How can we use light to communicate without making any noise? How Does Light Help Me See Things and Communicate With Others?
What we’ve figured out so far How this helps our design
We need a source of light in order to see. We will need to use a light source in order to send our message. We should use one that is small enough and safe enough to bring inside of school - like a flashlight
Some light sources are natural and others are man made.
Some light sources, like the flashlight, are small and safe enough to bring into a box.
Some materials, like tissue paper or construction paper, block some of the light
Maybe we could figure out a way to block or not block light using different materials to communicate different messages.
Some materials, like cardboard or wood, block all the light.
Some materials, like plastic wrap, don’t block the light.
Materials that block some or all of the light make shadows on different surfaces.
Maybe we could figure out a way to make different shadows with different materials to communicate different messages.
Different shaped materials make different shaped shadows when we shine light on them.
Light sources that are certain colors, are certain shapes, are in certain locations, and that go on and off in certain patterns, communicate certain messages to us.
Maybe we could figure out a way to change the color, shape, location, or the on and off pattern of the light source, to communicate different messages.
Next, engage students in a Sharing Initial Ideas Discussion A- to brainstorm ideas about how they could help solve the school-wide problem of there being too much noise in the hallway using
Additional Guidance
A It is assumed from this point on in the lesson that students will have elected to focus on the problem of noise in the hallways for the remainder of the unit. If your students select another area, such as the library, please note that you will need to slightly adjust the language in the following lesson plans to meet their needs.
Students may struggle with coming up with ideas to design a device with the available materials, and this is normal the first time they engage in the engineering design process. If this is the case, you may want to suggest that they need to create two communication signals: one to communicate when students are making noise and another when they are not. Revisit the devices seen on the Light and Shadow Hunt, thinking about how each one communicated a message. This will help students see how a message was communicated with others.
nextgenstorylines.org These materials were developed through with support from the Michigan Department of Education; the Gordon and Betty Moore Foundation, and support from the NGSX Project at Clark University, Tidemark Institute, and Northwestern University.
This work is licensed under a Creative Commons Attribution 4.0 License http://creativecommons.org/licenses/by/4.0/
113

Teacher Guide Lesson 11(a): How can we use light to communicate without making any noise? How Does Light Help Me See Things and Communicate With Others?
light.
Suggested Prompts: ➔ Our school hallways can get very noisy, and everyone knows we should be quiet in the halls to
respect everyone who is learning and working around us. We could easily tell everyone to bequiet, but that would be making more noise. How could we use what we’ve learned about lightand shadows to communicate that the hallways need to be more quiet?
➔ We don’t have materials like metal and giant lights like we saw in the many of the devices onour Light and Shadow Hunt. We do have access to everyday materials, though, like plasticwrap, tissue paper, cardboard, aluminum foil, and flashlights. How could we use these kinds ofmaterials to make a device to communicate that students are too loud in the hallway? Or thatthey’re moving “just right” in the hallways?
Listen for student responses A- such as: ➔ We could use light somehow to tell people they’re being too loud, like a car turn signal tells
someone behind them they’re turning right or left. Maybe we can flash a light as a warning that they’re being too loud. Maybe we can keep the light off when they’re making no noise like they’re supposed to.
➔ There were lots of different materials we tested in front of the flashlights. Maybe we could put them in front of the flashlight when it’s on to send a message depending on what the light does with the material. For example, the plastic wrap doesn’t block any light, so when it’s put in front of the flashlight, that could mean “You’re too loud!” The tissue paper lets some light through, so that could mean “You’re starting to get noisy!” And the cardboard doesn’t let any light through so that could mean “You’re being quiet! Good job!
2. (15 min) Shift the topic of the Sharing Initial Ideas Discussion to having students beginthinking about how they would design their own devices. Show students all the availablematerials, going over each one’s name and how it interacted with light. Tell students that they
Additional Guidance
B In order to have a constructive discussion that addresses the strengths and weaknesses of each other's’ devices, a classroom culture of positivity and openness must already be established. It is your goal to have students giving each other constructive criticism which will ultimately allow students to optimize their solutions throughout the design process.
If students have not engaged in this practice of offering constructive criticism to one another, model a think-aloud to the class using the suggested prompts. Students will feel much more comfortable with the teacher leading this question/answer session. As students feel more comfortable with the type of answers they should offer, especially as you discuss weaknesses of a device, they will be more inclined to not only share their thoughts respectfully with their classmates, but graciously accept their classmates’ feedback to improve their work.
nextgenstorylines.org These materials were developed through with support from the Michigan Department of Education; the Gordon and Betty Moore Foundation, and support from the NGSX Project at Clark University, Tidemark Institute, and Northwestern University.
This work is licensed under a Creative Commons Attribution 4.0 License http://creativecommons.org/licenses/by/4.0/
114

Teacher Guide Lesson 11(a): How can we use light to communicate without making any noise? How Does Light Help Me See Things and Communicate With Others?
also have access to various tools to help manipulate the available materials, like scissors, glue, and tape.
Take a moment to discuss any constraints relevant to this design. You may want to post these constraints in the room so that you can refer back as needed:
● Designs must use light to communicate a message.● Messages have to be silent.● We need to design a tool that can communicate multiple messages with different
meanings.● We are limited to the materials in our materials station.● Our message has to be clear enough that someone else can tell the difference between
one signal and another.● Out message has to be seen across long distances (down the hallway, across the room /
cafeteria)
Once students are clear on the materials available, and the constraints, pass out Student Activity Sheet 11.1 to have individual students brainstorm their own devices to communicate with light. Insist that students sketch out and label their ideas BEFORE they are allowed to use any of the materials.
3. (15 min) Once students have created their own brainstorming ideas, bring the class togetherfor students to share individual ideas. Ask various students to share their work for how they’dcommunicate that students were being too loud in the hallway or that they were being “justright.” Discuss strengths and weaknesses B- of each student’s devices.
Suggested Prompts: ➔ What do you think will work well about this student’s device? Remember that our goal is to
communicate to students that are being too loud to quiet down and to praise students who arebeing quiet in the halls. We have to do this without making noise and only use light.
Classroom Artifact
C Note that this is an actual artifact, not the individual brainstorm that the student created in her notebook to share with the class..
Additional Guidance
D Each “Part” can be split into a separate lesson. Try to maintain coherence from one day to the next by kicking off each day with the question, “What did we figure out yesterday?” and ending each lesson with, “What do you think we should do in the next lesson?”
Part 2 also initiates students working through the engineering design process. During this iterative process, students will be in various stages at different times (one student pair may be planning their design while another pair has completed this step and is ready to test). There will be high mobility in the classroom as students will be gathering materials, moving to a designated testing area, or comparing ideas with
nextgenstorylines.org These materials were developed through with support from the Michigan Department of Education; the Gordon and Betty Moore Foundation, and support from the NGSX Project at Clark University, Tidemark Institute, and Northwestern University.
This work is licensed under a Creative Commons Attribution 4.0 License http://creativecommons.org/licenses/by/4.0/
115

Teacher Guide Lesson 11(a): How can we use light to communicate without making any noise? How Does Light Help Me See Things and Communicate With Others?
➔ What might not work really work well? Are you confused in any way about how they willcommunicate their message to either quiet down or that they’re being “just right?” Does thedevice look too complicated to make? Will it last and not fall apart after many uses?
Listen for student responses such as C-: ➔ I think this student’s device will work well because I see that it uses the flashlight and doesn’t
make any sounds, which is what our goal is. I see that they have two different things that the flashlight will shine through--pink tissue paper and green tissue paper. It also doesn’t look to hard to make.
➔ We’d have to test it to see if their message gets understood by the students in the hallway, but I am thinking that the green tissue paper means they’re being “just right” and the pink tissue paper means “you’re too loud!” Tissue paper is pretty weak, so it may rip over time.
If you elect to close the lesson at this point, use the following prompts to help students reflect on the work they’ve done so far D-. Otherwise, you can continue with the Teacher Learning Plan in Lesson 11b.
Suggested Prompts: ➔ What should we be sure to do in our next lesson?
Listen for student responses such as: ➔ We should keep working on our ideas for devices that will help us communicate a message in the
hallway.
classmates. Students will also be creating multiple devices, recognizing failures and/or improvements from one design to the next.
nextgenstorylines.org These materials were developed through with support from the Michigan Department of Education; the Gordon and Betty Moore Foundation, and support from the NGSX Project at Clark University, Tidemark Institute, and Northwestern University.
This work is licensed under a Creative Commons Attribution 4.0 License http://creativecommons.org/licenses/by/4.0/
116

Teacher Guide Lesson 11(a): How can we use light to communicate without making any noise? How Does Light Help Me See Things and Communicate With Others?
Alignment With Standards
Building Toward Target NGSS PE
● 1-PS4-2. Make observations to construct an evidence-based account thatobjects in darkness can be seen only when illuminated.
● 1-PS4-3 Plan and conduct investigations to determine the effect ofplacing objects made with different materials in the path of a beam of light.
● 1-PS4-4 Use tools and materials to design and build a device that uses light or sound to solve the problem of communicating over a distance.
● K-2-ETS1-1 Ask questions, make observations, and gather information about a situation people want to change to define a simple problem that can be solved through the development of a new or improved object ortool.
● K-2-ETS1-2 Develop a simple sketch, drawing, or physical model toillustrate how the shape of an object helps it function as needed to solve agiven problem.
● K-2-ETS1-3 Analyze data from tests of two objects designed to solvethe same problem to compare the strengths and weaknesses of how eachperforms.
Building Toward Common Core Standard(s)
ELA standards: CCSS.ELA-LITERACY.SL.1.1 -Participate in collaborative conversations with diverse partners about grade 1 topics and texts with peers and adults in small and larger groups.
● CCSS.ELA-LITERACY.SL.1.1.A - Follow agreed-upon rules fordiscussions (e.g., listening to others with care, speaking one at a time about the topics and texts under discussion).
● CCSS.ELA-LITERACY.SL.1.1.B - Build on others' talk inconversations by responding to the comments of others throughmultiple exchanges.
● CCSS.ELA-LITERACY.SL.1.1.C - Ask questions to clear up anyconfusion about the topics and texts under discussion.
CCSS.ELA-LITERACY.SL.1.4 Describe people, places, things, and events with relevant details, expressing ideas ….clearly.
nextgenstorylines.org These materials were developed through with support from the Michigan Department of Education; the Gordon and Betty Moore Foundation, and support from the NGSX Project at Clark University, Tidemark Institute, and Northwestern University.
This work is licensed under a Creative Commons Attribution 4.0 License http://creativecommons.org/licenses/by/4.0/
117
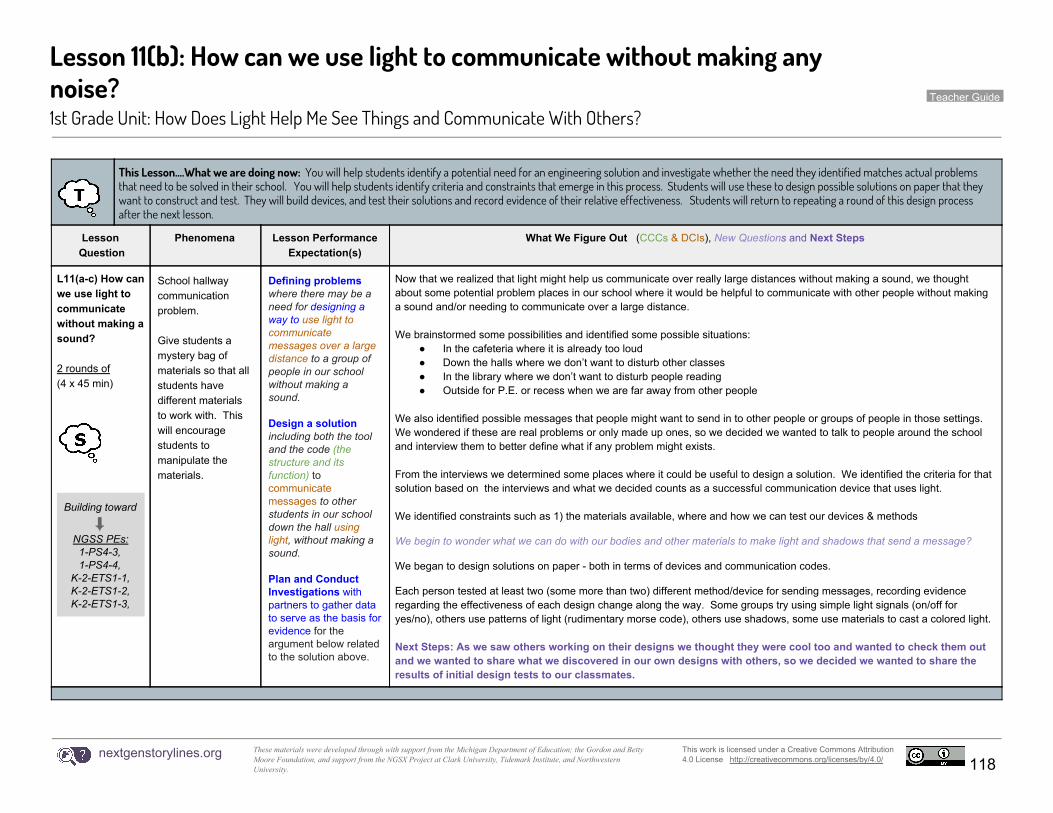
Lesson 11(b): How can we use light to communicate without making any noise? Teacher Guide-
1st Grade Unit: How Does Light Help Me See Things and Communicate With Others?
This Lesson….What we are doing now: You will help students identify a potential need for an engineering solution and investigate whether the need they identified matches actual problems that need to be solved in their school. You will help students identify criteria and constraints that emerge in this process. Students will use these to design possible solutions on paper that they want to construct and test. They will build devices, and test their solutions and record evidence of their relative effectiveness. Students will return to repeating a round of this design process after the next lesson.
Lesson Question
Phenomena Lesson Performance Expectation(s)
What We Figure Out (CCCs & DCIs), New Question s and Next Steps
L11(a-c) How can we use light to communicate without making a sound?
2 rounds of (4 x 45 min)
Building toward
⬇ NGSS PEs:
1-PS4-3,1-PS4-4,
K-2-ETS1-1,K-2-ETS1-2,K-2-ETS1-3,
School hallway communication problem.
Give students a mystery bag of materials so that all students have different materials to work with. This will encourage students to manipulate the materials.
Defining problems where there may be a need for designing a way to use light to communicate messages over a large distance to a group of people in our school without making a sound.
Design a solution including both the tool and the code (the structure and its function) to communicate messages to other students in our school down the hall using light , without making a sound.
Plan and Conduct Investigations with partners to gather data to serve as the basis for evidence for the argument below related to the solution above.
Now that we realized that light might help us communicate over really large distances without making a sound, we thought about some potential problem places in our school where it would be helpful to communicate with other people without making a sound and/or needing to communicate over a large distance.
We brainstormed some possibilities and identified some possible situations: ● In the cafeteria where it is already too loud● Down the halls where we don’t want to disturb other classes● In the library where we don’t want to disturb people reading● Outside for P.E. or recess when we are far away from other people
We also identified possible messages that people might want to send in to other people or groups of people in those settings. We wondered if these are real problems or only made up ones, so we decided we wanted to talk to people around the school and interview them to better define what if any problem might exists.
From the interviews we determined some places where it could be useful to design a solution. We identified the criteria for that solution based on the interviews and what we decided counts as a successful communication device that uses light.
We identified constraints such as 1) the materials available, where and how we can test our devices & methods
We begin to wonder what we can do with our bodies and other materials to make light and shadows that send a message?
We began to design solutions on paper - both in terms of devices and communication codes.
Each person tested at least two (some more than two) different method/device for sending messages, recording evidence regarding the effectiveness of each design change along the way. Some groups try using simple light signals (on/off for yes/no), others use patterns of light (rudimentary morse code), others use shadows, some use materials to cast a colored light.
Next Steps: As we saw others working on their designs we thought they were cool too and wanted to check them out and we wanted to share what we discovered in our own designs with others, so we decided we wanted to share the results of initial design tests to our classmates.
nextgenstorylines.org These materials were developed through with support from the Michigan Department of Education; the Gordon and Betty Moore Foundation, and support from the NGSX Project at Clark University, Tidemark Institute, and Northwestern University.
This work is licensed under a Creative Commons Attribution 4.0 License http://creativecommons.org/licenses/by/4.0/ 118

Teacher Guide Lesson 11(b): How can we use light to communicate without making any noise? How Does Light Help Me See Things and Communicate With Others?
Getting Ready: Materials Preparation
Materials For Each Pair
● Various materials to build and test light communication devices (cardboard, fabric, paper, tissue paper, construction paper, transparencies, wax paper, mylar, plastic wrap, cardstock, etc.)
● Flashlight
Safety
● Remind students how to use and transition withscissors; if students are unable to cut cardboard ontheir own, cut it for them.
Materials For Each Student
● Activity Sheet 11a(● Activity Sheet 11b● Activity Sheet 11.c● Activity Sheet 11.d● Activity Sheet 11.e● Scissors● Glue● Tape
Preparation of Materials (15 min.)
● Reopen the “Materials Station” used in previous lessons where students can have access to multiplesamples of each material that can be used in theirlight communication devices (cardboard, fabric,paper, tissue paper, etc.) in a central location forstudents to use. Make sure you have multiple piecesof each material so that as the supply runs low, youcan easily replenish it.
nextgenstorylines.org These materials were developed through with support from the Michigan Department of Education; the Gordon and Betty Moore Foundation, and support from the NGSX Project at Clark University, Tidemark Institute, and Northwestern University.
This work is licensed under a Creative Commons Attribution 4.0 License http://creativecommons.org/licenses/by/4.0/ 119

Teacher Guide Lesson 11(b): How can we use light to communicate without making any noise? How Does Light Help Me See Things and Communicate With Others?
Getting Ready: Teacher Preparation
Background Knowledge
PS4-4 from the FRAMEWORK:
● People also use a variety of devices to communicate (send and receive information) over long distances.
ETS1.A from the FRAMEWORK
● Defining and Delimiting Engineering Problems : A situation that people want to change or create can be approached as a problem to be solved through engineering
● Asking questions, making observations, and gathering information are helpful in thinking about problems.
● Before beginning to design a solution, it is important to clearly understand the problem.
ETS1.B: From the Framework
Developing Possible Solutions: Designs can be conveyed through sketches, drawings, or physical models. These representations are useful in communicating ideas for a problem’s solutions to other people. (K-2-ETS1-2)
ETS1.C From the Framework
Optimizing the Design Solution: Because there is always more than one possible solution to a problem, it is useful to compare and test designs. (K-2-ETS1-3)
At this point in the unit, students most recently observed how light and show are used in the real world to communicate over a distance. Students will take this knowledge, combining it with the knowledge gained for how various materials interact with light, to design and build a device that solves a problem with light in communicating over a
Alternative Student Conceptions
Through the Light and Shadow Hunt, students were exposed to various ways in which light is used to communicate over a distance in their school’s neighborhood. Students may find it a challenge to create their own designs to communicate over a distance with light, knowing the materials available to them are drastically different than those used in the devices seen on their Light and Shadow Hunt. Special attention will need to be made to reviewing what was discovered about how light interacts with the materials made available to them from earlier lessons in the unit.
Linking Our Understanding to
Scientific Terminology
● Communication● Patterns● Engineering
nextgenstorylines.org These materials were developed through with support from the Michigan Department of Education; the Gordon and Betty Moore Foundation, and support from the NGSX Project at Clark University, Tidemark Institute, and Northwestern University.
This work is licensed under a Creative Commons Attribution 4.0 License http://creativecommons.org/licenses/by/4.0/ 120

Teacher Guide Lesson 11(b): How can we use light to communicate without making any noise? How Does Light Help Me See Things and Communicate With Others?
distance. Through the use of the engineering design process, students will analyze the data gathered from various tests to recommend the best-performing light communication tool to an audience.
nextgenstorylines.org These materials were developed through with support from the Michigan Department of Education; the Gordon and Betty Moore Foundation, and support from the NGSX Project at Clark University, Tidemark Institute, and Northwestern University.
This work is licensed under a Creative Commons Attribution 4.0 License http://creativecommons.org/licenses/by/4.0/ 121

Teacher Guide Lesson 11(b): How can we use light to communicate without making any noise? How Does Light Help Me See Things and Communicate With Others?
Learning Plan: How can we use light to communicate without making any noise?
2 rounds of ( 4 x 45 min) for 11a-11d
Teacher Supports & Notes
Lesson 11b A-
1. (5 min) Review the problem the school is having regarding students being too loud in thehalls. Revisit the goal for the lesson, which is to create a device only using light to communicatethat students are being too loud in the halls.
Suggested Prompts: ➔ What did we figure out yesterday?➔ What should we be sure to do in today’s class?
Listen for student responses such as: ➔ Yesterday we started to come up with ideas for how to communicate a message using light and
our materials. ➔ We should keep working on our designs today and get some more feedback from our classmates.
2. (20 min) Once pairs B- have their teacher’s approval, they can begin building and testing theirdevices. C- Students can visit the Materials Station to gather their needed materials. In order totest their devices, students will need to get assistance from another pair that is also ready to test.Using Activity Sheet 11.3, students will give feedback to the group they helped with testing. Thisfeedback will be important to each student group as they either make improvements to theirexisting designs or make a new design to build and test._______________________________________________________________________________________________________________________
3. (10 min) Gather students together to share out various designs in a Building Understandings
Additional Guidance
A Lesson 11b initiates students working through the engineering design process. During this iterative process, students will be in various stages at different times (one student pair may be planning their design while another pair has completed this step and is ready to test). There will be high mobility in the classroom as students will be gathering materials, moving to a designated testing area, or comparing ideas with classmates. Students will also be creating multiple devices, recognizing failures and/or improvements from one design to the next.
Additional Guidance
B Students of this age can find it challenging to work in pairs as they design something. It’s important to have strategies in place to help students with compromise and collaboration. Students can each share their ideas and the pair can decide which device has a better design. If the pair agrees
nextgenstorylines.org These materials were developed through with support from the Michigan Department of Education; the Gordon and Betty Moore Foundation, and support from the NGSX Project at Clark University, Tidemark Institute, and Northwestern University.
This work is licensed under a Creative Commons Attribution 4.0 License http://creativecommons.org/licenses/by/4.0/ 122

Teacher Guide Lesson 11(b): How can we use light to communicate without making any noise? How Does Light Help Me See Things and Communicate With Others?
Discussion D-. Have students share ideas regarding their design’s strengths and weaknesses, allowing student pairs that evaluated another group’s work to offer the initial feedback.
Suggested Prompts: ➔ How did you and your partner communicate with light to show students passing in the halls
that they were too loud? That they were passing in “just the right way?”➔ Did the group you shared your design with understand what you were trying to communicate?
How did you know?➔ If they didn’t understand what you were trying to communicate (that they were either too loud
or that they were passing “just right”), what can you do to try and communicate this messagewith them?
Listen for student responses such as: ➔ Student answers will vary based on the devices they built and tested with the available materials. ➔ Student answers will vary based on how successful they were able to communicate, but if their
designs are successful, they’ll know because a group can distinguish between the message being communicated to be quiet or that they’re being quiet enough.
➔ We can change something about our design (the materials, the shape, the size, the way light interacts with a material, etc.) so that they can more clearly understand what we are trying to communicate.
If you elect to close the lesson at this point, use the following prompts to help students reflect on the work they’ve done so far. Otherwise, you can continue with the Teacher Learning Plan in Lesson 11c.
Suggested Prompts: ➔ What should we be sure to do in our next lesson?
Listen for student responses such as: ➔ We should go back to our devices and see what we can do to make them better.
that both designs are equally good, they can use a game like “Rock-Paper -Scissors” to determine who’s device gets built and tested. If there are both strengths and weaknesses to each design, encourage students to create a new design using aspects of each individual design in the one they build and test together.
Also, because students will be transitioning to and from the Materials Station, it is important to establish the procedures for getting supplies (walking, taking only what is needed, leaving the Materials Station neat/organized, notifying the teacher when the supplies run low, etc). Successful classrooms will have students model this to the whole class so the expectations are clear. Consider asking for a parent volunteer to assist with this to ease all the transitions.
The testing area should also be well defined so students know who is ready to test their designs. Successful classrooms will model how to test with another pair prior to the actual testing. Students should know how to find an available pair (i.e. they are sitting on the rug, they’ve written their names on the board, they’ve lined up at a marker in the testing area, etc.) and how to test with them in the testing area (quietly, walking, etc.).
nextgenstorylines.org These materials were developed through with support from the Michigan Department of Education; the Gordon and Betty Moore Foundation, and support from the NGSX Project at Clark University, Tidemark Institute, and Northwestern University.
This work is licensed under a Creative Commons Attribution 4.0 License http://creativecommons.org/licenses/by/4.0/ 123

Teacher Guide Lesson 11(b): How can we use light to communicate without making any noise? How Does Light Help Me See Things and Communicate With Others?
Sample Classroom Set-Up:
Additional Guidance
C Teachers will need to look for the following in student plans in order to approve them: use of the available materials, distinguishing method for communicating hallway noise is too loud, and a distinguishing method for communicating the hallway noise is “just right!”
Strategies for this Building Understandings Discussion
D As students evaluate the engineering of a device to communicate with light, know that this initial discussion is an integral part
nextgenstorylines.org These materials were developed through with support from the Michigan Department of Education; the Gordon and Betty Moore Foundation, and support from the NGSX Project at Clark University, Tidemark Institute, and Northwestern University.
This work is licensed under a Creative Commons Attribution 4.0 License http://creativecommons.org/licenses/by/4.0/ 124

Teacher Guide Lesson 11(b): How can we use light to communicate without making any noise? How Does Light Help Me See Things and Communicate With Others?
of the iterative and systematic engineering design process. Engineers work with criteria and constraints as they design solutions to a problem, develop a plan, produce and test prototypes, and then select an optimal solution based on the prototype’s performance. As you carry out this discussion with students, they will begin to evaluate the success of their designs. The success/failure of their device is part of the optimization process, and it is important for students to see that they will ultimately need to compare devices to see which best meets the criteria of communicating with light.
As students reflect upon the changes they should make in order to improve their communication devices, teachers should be looking for changes in the actual materials used, the shape, the size, the configuration, or any other variable that allows for a communicable difference between the messages “ You’re too loud!” and “You’re just right!”
nextgenstorylines.org These materials were developed through with support from the Michigan Department of Education; the Gordon and Betty Moore Foundation, and support from the NGSX Project at Clark University, Tidemark Institute, and Northwestern University.
This work is licensed under a Creative Commons Attribution 4.0 License http://creativecommons.org/licenses/by/4.0/ 125

Teacher Guide Lesson 11(b): How can we use light to communicate without making any noise? How Does Light Help Me See Things and Communicate With Others?
Alignment With Standards
Building Toward Target NGSS PE
● 1-PS4-3 Plan and conduct investigations to determine the effect ofplacing objects made with different materials in the path of a beam of light.
● 1-PS4-4 Use tools and materials to design and build a device that uses light or sound to solve the problem of communicating over a distance.
● K-2-ETS1-1 Ask questions, make observations, and gather information about a situation people want to change to define a simple problem that can be solved through the development of a new or improved object ortool.
● K-2-ETS1-2 Develop a simple sketch, drawing, or physical model toillustrate how the shape of an object helps it function as needed to solve agiven problem.
● K-2-ETS1-3 Analyze data from tests of two objects designed to solvethe same problem to compare the strengths and weaknesses of how eachperforms.
Building Toward Common Core Standard(s)
ELA standards: CCSS.ELA-LITERACY.SL.1.1 -Participate in collaborative conversations with diverse partners about grade 1 topics and texts with peers and adults in small and larger groups.
● CCSS.ELA-LITERACY.SL.1.1.A - Follow agreed-upon rules fordiscussions (e.g., listening to others with care, speaking one at a time about the topics and texts under discussion).
● CCSS.ELA-LITERACY.SL.1.1.B - Build on others' talk inconversations by responding to the comments of others throughmultiple exchanges.
● CCSS.ELA-LITERACY.SL.1.1.C - Ask questions to clear up anyconfusion about the topics and texts under discussion.
CCSS.ELA-LITERACY.SL.1.4 Describe people, places, things, and events with relevant details, expressing ideas ….clearly.
nextgenstorylines.org These materials were developed through with support from the Michigan Department of Education; the Gordon and Betty Moore Foundation, and support from the NGSX Project at Clark University, Tidemark Institute, and Northwestern University.
This work is licensed under a Creative Commons Attribution 4.0 License http://creativecommons.org/licenses/by/4.0/ 126

Lesson 11(c): How can we use light to communicate without making any noise? Teacher Guide-
1st Grade Unit: How Does Light Help Me See Things and Communicate With Others?
This Lesson….What we are doing now: You will help students identify a potential need for an engineering solution and investigate whether the need they identified matches actual problems that need to be solved in their school. You will help students identify criteria and constraints that emerge in this process. Students will use these to design possible solutions on paper that they want to construct and test. They will build devices, and test their solutions and record evidence of their relative effectiveness. Students will return to repeating a round of this design process after the next lesson.
Lesson Question
Phenomena Lesson Performance Expectation(s)
What We Figure Out (CCCs & DCIs), New Question s and Next Steps
L11(a-c) How can we use light to communicate without making a sound?
2 rounds of (4 x 45 min)
Building toward
⬇ NGSS PEs:
1-PS4-2,1-PS4-3,1-PS4-4,
K-2-ETS1-1,K-2-ETS1-2,K-2-ETS1-3,
School hallway communication problem.
Give students a mystery bag of materials so that all students have different materials to work with. This will encourage students to manipulate the materials.
Defining problems where there may be a need for designing a way to use light to communicate messages over a large distance to a group of people in our school without making a sound.
Design a solution including both the tool and the code (the structure and its function) to communicate messages to other students in our school down the hall using light , without making a sound.
Plan and Conduct Investigations with partners to gather data to serve as the basis for evidence for the argument below related to the solution above.
Now that we realized that light might help us communicate over really large distances without making a sound, we thought about some potential problem places in our school where it would be helpful to communicate with other people without making a sound and/or needing to communicate over a large distance.
We brainstormed some possibilities and identified some possible situations: ● In the cafeteria where it is already too loud● Down the halls where we don’t want to disturb other classes● In the library where we don’t want to disturb people reading● Outside for P.E. or recess when we are far away from other people
We also identified possible messages that people might want to send in to other people or groups of people in those settings. We wondered if these are real problems or only made up ones, so we decided we wanted to talk to people around the school and interview them to better define what if any problem might exists.
From the interviews we determined some places where it could be useful to design a solution. We identified the criteria for that solution based on the interviews and what we decided counts as a successful communication device that uses light.
We identified constraints such as 1) the materials available, where and how we can test our devices & methods
We begin to wonder what we can do with our bodies and other materials to make light and shadows that send a message?
We began to design solutions on paper - both in terms of devices and communication codes.
Each person tested at least two (some more than two) different method/device for sending messages, recording evidence regarding the effectiveness of each design change along the way. Some groups try using simple light signals (on/off for yes/no), others use patterns of light (rudimentary morse code), others use shadows, some use materials to cast a colored light.
Next Steps: As we saw others working on their designs we thought they were cool too and wanted to check them out and we wanted to share what we discovered in our own designs with others, so we decided we wanted to share the results of initial design tests to our classmates.
nextgenstorylines.org These materials were developed through with support from the Michigan Department of Education; the Gordon and Betty Moore Foundation, and support from the NGSX Project at Clark University, Tidemark Institute, and Northwestern University.
This work is licensed under a Creative Commons Attribution 4.0 License http://creativecommons.org/licenses/by/4.0/ 127

Teacher Guide Lesson 11(c): How can we use light to communicate without making any noise? How Does Light Help Me See Things and Communicate With Others?
Getting Ready: Materials Preparation
Materials For Each Pair
● Various materials to build and test light communication devices(cardboard, fabric, paper, tissue paper, construction paper,transparencies, wax paper, mylar, plastic wrap, cardstock, etc.)
● Mirrors (to be used in the Extension, Part 6)● Flashlight
Preparation of Materials (15 min.)
● Reopen the “Materials Station” used in previous lessons wherestudents can have access to multiple samples of each material thatcan be used in their light communication devices (cardboard, fabric,paper, tissue paper, etc.) in a central location for students to use.Make sure you have multiple pieces of each material so that as the supply runs low, you can easily replenish it.
Materials For Each Student
● Activity Sheet 11.1 (Brainstorming Light Communication Devices) ● Activity Sheet 11.2 (Plan for Light Communication Devices, at least 2
for each student)● Activity Sheet 11.3 (Light Communication Device Reflection Tool)● Activity Sheet 11.4 (Comparing Light Communication Devices)● Activity Sheet 11.5 (Using the Engineering Design Process for a New
Message--only copy IF completing Part 6, Extension)● Scissors● Glue● Tape
Safety
● Remind students how to use and transition with scissors; if studentsare unable to cut cardboard on their own, cut it for them.
nextgenstorylines.org These materials were developed through with support from the Michigan Department of Education; the Gordon and Betty Moore Foundation, and support from the NGSX Project at Clark University, Tidemark Institute, and Northwestern University.
This work is licensed under a Creative Commons Attribution 4.0 License http://creativecommons.org/licenses/by/4.0/ 128

Teacher Guide Lesson 11(c): How can we use light to communicate without making any noise? How Does Light Help Me See Things and Communicate With Others?
Getting Ready: Teacher Preparation
Background Knowledge
PS4-4 from the FRAMEWORK: People also use a variety of devices to communicate (send and receive information) over long distances.
ETS1.A from the FRAMEWORK
Defining and Delimiting Engineering Problems : A situation that people want to change or create can be approached as a problem to be solved through engineering
Asking questions, making observations, and gathering information are helpful in thinking about problems.
Before beginning to design a solution, it is important to clearly understand the problem.
ETS1.B: From the Framework
Developing Possible Solutions: Designs can be conveyed through sketches, drawings, or physical models. These representations are useful in communicating ideas for a problem’s solutions to other people. (K-2-ETS1-2)
ETS1.C From the Framework
Optimizing the Design Solution: Because there is always more than one possible solution to a problem, it is useful to compare and test designs. (K-2-ETS1-3)
At this point in the unit, students most recently observed how light and show are used in the real world to communicate over a
Alternative Student Conceptions
Through the Light and Shadow Hunt, students were exposed to various ways in which light is used to communicate over a distance in their school’s neighborhood. Students may find it a challenge to create their own designs to communicate over a distance with light, knowing the materials available to them are drastically different than those used in the devices seen on their Light and Shadow Hunt. Special attention will need to be made to reviewing what was discovered about how light interacts with the materials made available to them from earlier lessons in the unit.
Linking Our Understanding to Scientific Terminology
● Communication● Patterns● Engineering
nextgenstorylines.org These materials were developed through with support from the Michigan Department of Education; the Gordon and Betty Moore Foundation, and support from the NGSX Project at Clark University, Tidemark Institute, and Northwestern University.
This work is licensed under a Creative Commons Attribution 4.0 License http://creativecommons.org/licenses/by/4.0/ 129
Teacher Guide Lesson 11(c): How can we use light to communicate without making any noise? How Does Light Help Me See Things and Communicate With Others?
distance. Students will take this knowledge, combining it with the knowledge gained for how various materials interact with light, to design and build a device that solves a problem with light in communicating over a distance. Through the use of the engineering design process, students will analyze the data gathered from various tests to recommend the best-performing light communication tool to an audience.
nextgenstorylines.org These materials were developed through with support from the Michigan Department of Education; the Gordon and Betty Moore Foundation, and support from the NGSX Project at Clark University, Tidemark Institute, and Northwestern University.
This work is licensed under a Creative Commons Attribution 4.0 License http://creativecommons.org/licenses/by/4.0/ 130
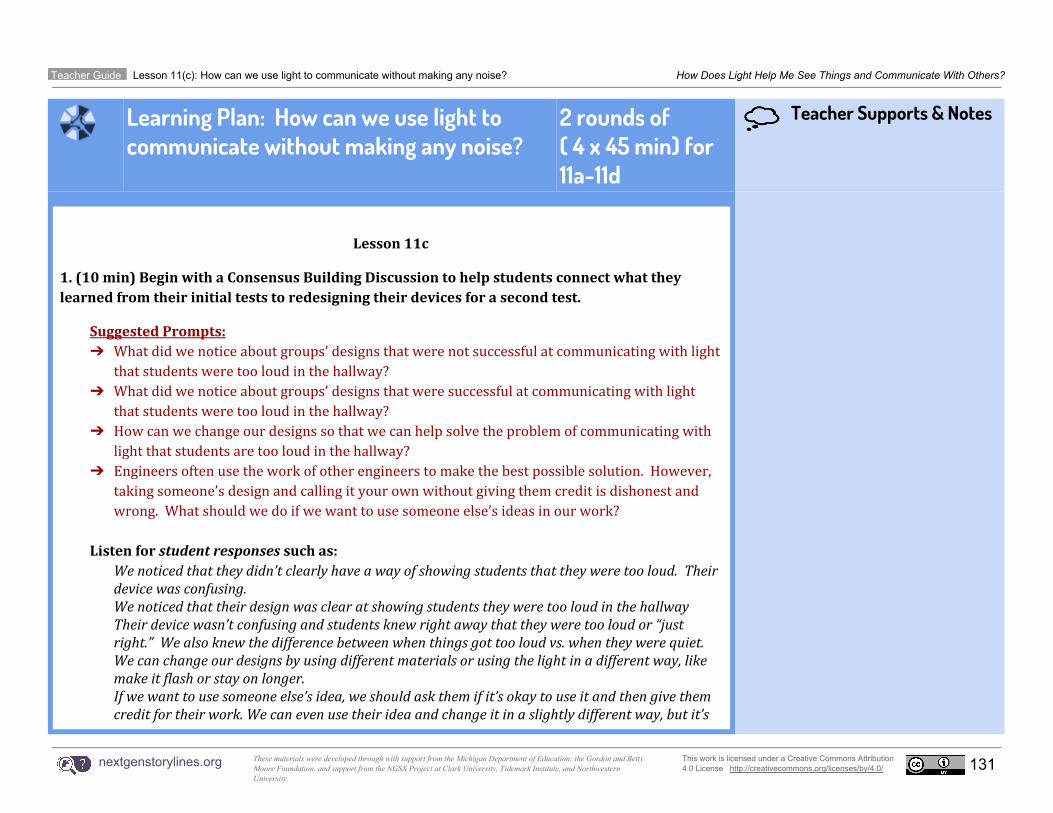
Teacher Guide Lesson 11(c): How can we use light to communicate without making any noise? How Does Light Help Me See Things and Communicate With Others?
Learning Plan: How can we use light to communicate without making any noise?
2 rounds of ( 4 x 45 min) for 11a-11d
Teacher Supports & Notes
Lesson 11c
1. (10 min) Begin with a Consensus Building Discussion to help students connect what theylearned from their initial tests to redesigning their devices for a second test.
Suggested Prompts: ➔ What did we notice about groups’ designs that were not successful at communicating with light
that students were too loud in the hallway?➔ What did we notice about groups’ designs that were successful at communicating with light
that students were too loud in the hallway?➔ How can we change our designs so that we can help solve the problem of communicating with
light that students are too loud in the hallway?➔ Engineers often use the work of other engineers to make the best possible solution. However,
taking someone’s design and calling it your own without giving them credit is dishonest andwrong. What should we do if we want to use someone else’s ideas in our work?
Listen for student responses such as: ➔ We noticed that they didn’t clearly have a way of showing students that they were too loud. Their
device was confusing. ➔ We noticed that their design was clear at showing students they were too loud in the hallway
Their device wasn’t confusing and students knew right away that they were too loud or “just right.” We also knew the difference between when things got too loud vs. when they were quiet.
➔ We can change our designs by using different materials or using the light in a different way, like make it flash or stay on longer.
➔ If we want to use someone else’s idea, we should ask them if it’s okay to use it and then give them credit for their work. We can even use their idea and change it in a slightly different way, but it’s
nextgenstorylines.org These materials were developed through with support from the Michigan Department of Education; the Gordon and Betty Moore Foundation, and support from the NGSX Project at Clark University, Tidemark Institute, and Northwestern University.
This work is licensed under a Creative Commons Attribution 4.0 License http://creativecommons.org/licenses/by/4.0/ 131

Teacher Guide Lesson 11(c): How can we use light to communicate without making any noise? How Does Light Help Me See Things and Communicate With Others?
important to still acknowledge the idea came from their work and not our own.
2. (25 min) Allow students to redesign their devices, requiring them to complete a second plan oftheir devices using additional copies of Activity Sheet 11.2. Give students access to the MaterialsCenter and to additional copies of Activity Sheet 11.3, where students will continue to givefeedback to groups they help with testing.
_______________________________________________________________________________________________________________________
3. (10 min) Gather students together to share out the results of their second designs in aBuilding Understandings Discussion, similar to the Building Understandings Discussion they hadafter the building and testing of their first designs. Continue to have students share ideasregarding their design’s strengths and weaknesses, allowing student pairs that evaluatedanother group’s work offer the initial feedback.
Suggested Prompts: ➔ How did you and your partner communicate with light to show students passing in the halls
that they were too loud? That they were passing in “just the right way?”➔ Did the group you shared your design with understand what you were trying to communicate?
How did you know?➔ If they didn’t understand what you were trying to communicate (that they were either too loud
or that they were passing “just right”), what could you do to communicate this message withthem?
Listen for student responses such as: ➔ Student answers will vary based on the devices they built and tested with the available materials. ➔ Student answers will vary based on how successful they were able to communicate, but if their
designs are successful, they’ll know because a group can distinguish between the message being communicated to be quiet or that they’re being quiet enough.
nextgenstorylines.org These materials were developed through with support from the Michigan Department of Education; the Gordon and Betty Moore Foundation, and support from the NGSX Project at Clark University, Tidemark Institute, and Northwestern University.
This work is licensed under a Creative Commons Attribution 4.0 License http://creativecommons.org/licenses/by/4.0/ 132

Teacher Guide Lesson 11(c): How can we use light to communicate without making any noise? How Does Light Help Me See Things and Communicate With Others?
➔ We can change something about our design so that they can more clearly understand what we are trying to communicate.
If you elect to close the lesson at this point, use the following prompts to help students reflect on the work they’ve done so far. Otherwise, you can continue with the Teacher Learning Plan in Lesson 11d.
Suggested Prompts: ➔ What should we be sure to do in our next lesson?
Listen for student responses such as: ➔ We should go back to our devices another time to see if we can continue to improve them.
nextgenstorylines.org These materials were developed through with support from the Michigan Department of Education; the Gordon and Betty Moore Foundation, and support from the NGSX Project at Clark University, Tidemark Institute, and Northwestern University.
This work is licensed under a Creative Commons Attribution 4.0 License http://creativecommons.org/licenses/by/4.0/ 133

Teacher Guide Lesson 11(c): How can we use light to communicate without making any noise? How Does Light Help Me See Things and Communicate With Others?
Alignment With Standards
Building Toward Target NGSS PE
● 1-PS4-3 Plan and conduct investigations to determine the effect ofplacing objects made with different materials in the path of a beam of light.
● 1-PS4-4 Use tools and materials to design and build a device that uses light or sound to solve the problem of communicating over a distance.
● K-2-ETS1-1 Ask questions, make observations, and gather information about a situation people want to change to define a simple problem that can be solved through the development of a new or improved object ortool.
● K-2-ETS1-2 Develop a simple sketch, drawing, or physical model toillustrate how the shape of an object helps it function as needed to solve agiven problem.
● K-2-ETS1-3 Analyze data from tests of two objects designed to solvethe same problem to compare the strengths and weaknesses of how eachperforms.
Building Toward Common Core Standard(s)
ELA standards: CCSS.ELA-LITERACY.SL.1.1 -Participate in collaborative conversations with diverse partners about grade 1 topics and texts with peers and adults in small and larger groups.
● CCSS.ELA-LITERACY.SL.1.1.A - Follow agreed-upon rules fordiscussions (e.g., listening to others with care, speaking one at a time about the topics and texts under discussion).
● CCSS.ELA-LITERACY.SL.1.1.B - Build on others' talk inconversations by responding to the comments of others throughmultiple exchanges.
● CCSS.ELA-LITERACY.SL.1.1.C - Ask questions to clear up anyconfusion about the topics and texts under discussion.
CCSS.ELA-LITERACY.SL.1.4 Describe people, places, things, and events with relevant details, expressing ideas ….clearly.
nextgenstorylines.org These materials were developed through with support from the Michigan Department of Education; the Gordon and Betty Moore Foundation, and support from the NGSX Project at Clark University, Tidemark Institute, and Northwestern University.
This work is licensed under a Creative Commons Attribution 4.0 License http://creativecommons.org/licenses/by/4.0/ 134

Lesson 11(d): How can we use light to communicate without making any noise? Teacher Guide-
1st Grade Unit: How Does Light Help Me See Things and Communicate With Others?
This Lesson….What we are doing now: Students will go public with the results of their different designs. You will facilitate a discussion to help audience members articulate a design features in other people’s devices that they might want to incorporate in their own devices and ideas for possible ways to improve the performance of other’s devices and make a public record of student’s design ideas for them to (re)use and incorporate in a new round of redesign, returning to the previous lesson one more time.
Lesson question
Phenomena Lesson Performance Expectation(s)
What We Figure Out (CCCs & DCIs), New Question s and Next Steps
L11(d-f) How can we evaluate our designs and use the results of everyone’s tests to improve our own design?
2-3 rounds of(60-75 min)
Building toward
⬇ NGSS PEs:
1-PS4-31-PS4-4
K-2-ETS1-1 K-2-ETS1-2 K-2-ETS1-3
School hallway communication problem.
Give students a mystery bag of materials so that all students have different materials to work with. This will encourage students to manipulate the materials.
Communicate information about the design solutions (structure & function) tried and the results generated (patterns), to make evidence-based claims ( argument from evidence), about which solutions are more effective at solving the original problem (see previous lesson).
Evaluate alternate solutions that other people tried to identify new design features (possible causes and effects & structure / function relationships) that may help make our own designs more effective at solving the original problem (see previous lesson) if we incorporated them into a redesign of them.
Student groups share their design ideas with the class in order to get feedback on their designs. As they present and receive feedback,we notice patterns in what everyone is including in their designs.
We decide it would be helpful to draw a model of what should definitely be included in our designs to make sure the design is effective at communicating the intended message.
We each identified designs/design features from our classmates might be useful to incorporate in a final design. And we argued that we should try to improve the design in another round of engineering.
Students go back to their designs and apply the feedback they got from classmates. When everyone is finished, we evaluate a different prototype to start using when we move through the hallways to send messages to people in long lines and in the cafeteria in our grade.
nextgenstorylines.org These materials were developed through with support from the Michigan Department of Education; the Gordon and Betty Moore Foundation, and support from the NGSX Project at Clark University, Tidemark Institute, and Northwestern University.
This work is licensed under a Creative Commons Attribution 4.0 License http://creativecommons.org/licenses/by/4.0/ 135

Teacher Guide Lesson 11(d): How can we use light to communicate without making any noise? How Does Light Help Me See Things and Communicate With Others?
Getting Ready: Materials Preparation
Materials For Each Pair
● Various materials to build and test light communication devices(cardboard, fabric, paper, tissue paper, construction paper,transparencies, wax paper, mylar, plastic wrap, cardstock, etc.)
● Mirrors (to be used in the Extension, Part 6)● Flashlight
Preparation of Materials (15 min.)
● Reopen the “Materials Station” used in previous lessons wherestudents can have access to multiple samples of each material thatcan be used in their light communication devices (cardboard, fabric,paper, tissue paper, etc.) in a central location for students to use.Make sure you have multiple pieces of each material so that as the supply runs low, you can easily replenish it.
● This lesson is also split into six parts, each of which can be its own standalone lesson based on the time available. Lesson 6 is anoptional extension.
Materials For Each Student
● Activity Sheet 11.1 (Brainstorming Light Communication Devices) ● Activity Sheet 11.2 (Plan for Light Communication Devices, at least 2
for each student)● Activity Sheet 11.3 (Light Communication Device Reflection Tool)● Activity Sheet 11.4 (Comparing Light Communication Devices)● Activity Sheet 11.5 (Using the Engineering Design Process for a New
Message--only copy IF completing Part 6, Extension)● Scissors● Glue● Tape
Safety
● Remind students how to use and transition with scissors; if studentsare unable to cut cardboard on their own, cut it for them.
nextgenstorylines.org These materials were developed through with support from the Michigan Department of Education; the Gordon and Betty Moore Foundation, and support from the NGSX Project at Clark University, Tidemark Institute, and Northwestern University.
This work is licensed under a Creative Commons Attribution 4.0 License http://creativecommons.org/licenses/by/4.0/ 136

Teacher Guide Lesson 11(d): How can we use light to communicate without making any noise? How Does Light Help Me See Things and Communicate With Others?
Getting Ready: Teacher Preparation
Background Knowledge
PS4-4 from the FRAMEWORK: People also use a variety of devices to communicate (send and receive information) over long distances.
ETS1.A from the FRAMEWORK
Defining and Delimiting Engineering Problems : A situation that people want to change or create can be approached as a problem to be solved through engineering
Asking questions, making observations, and gathering information are helpful in thinking about problems.
Before beginning to design a solution, it is important to clearly understand the problem.
ETS1.B: From the Framework
Developing Possible Solutions: Designs can be conveyed through sketches, drawings, or physical models. These representations are useful in communicating ideas for a problem’s solutions to other people. (K-2-ETS1-2)
ETS1.C From the Framework
Optimizing the Design Solution: Because there is always more than one possible solution to a problem, it is useful to compare and test designs. (K-2-ETS1-3)
At this point in the unit, students most recently observed how light and show are used in the real world to communicate over a
Alternative Student Conceptions
Through the Light and Shadow Hunt, students were exposed to various ways in which light is used to communicate over a distance in their school’s neighborhood. Students may find it a challenge to create their own designs to communicate over a distance with light, knowing the materials available to them are drastically different than those used in the devices seen on their Light and Shadow Hunt. Special attention will need to be made to reviewing what was discovered about how light interacts with the materials made available to them from earlier lessons in the unit.
Linking Our Understanding to Scientific Terminology
● Communication● Patterns● Engineering
nextgenstorylines.org These materials were developed through with support from the Michigan Department of Education; the Gordon and Betty Moore Foundation, and support from the NGSX Project at Clark University, Tidemark Institute, and Northwestern University.
This work is licensed under a Creative Commons Attribution 4.0 License http://creativecommons.org/licenses/by/4.0/ 137

Teacher Guide Lesson 11(d): How can we use light to communicate without making any noise? How Does Light Help Me See Things and Communicate With Others?
distance. Students will take this knowledge, combining it with the knowledge gained for how various materials interact with light, to design and build a device that solves a problem with light in communicating over a distance. Through the use of the engineering design process, students will analyze the data gathered from various tests to recommend the best-performing light communication tool to an audience.
nextgenstorylines.org These materials were developed through with support from the Michigan Department of Education; the Gordon and Betty Moore Foundation, and support from the NGSX Project at Clark University, Tidemark Institute, and Northwestern University.
This work is licensed under a Creative Commons Attribution 4.0 License http://creativecommons.org/licenses/by/4.0/ 138

Teacher Guide Lesson 11(d): How can we use light to communicate without making any noise? How Does Light Help Me See Things and Communicate With Others?
Learning Plan: How can we use light to communicate without making any noise?
2 rounds of ( 4 x 45 min) for 11a-11d
Teacher Supports & Notes
Lesson 11d
1. (5 min.) Review the goal of trying to design a device to communicate with light and the workthe students have done of engineers. Discuss how they may have failed in their first attempts attrying to communicate with light, but that with each additional plan/creation of design, theyimproved on their ability to communicate their hallway message to others.
2. (30 min.) Allow students to refine and improve any of their devices A-, working with othergroups to offer feedback regarding strengths and weakness with their designs. Encouragestudents to create new and unique devices that manipulate the given materials in ways in whichother groups haven’t used them.
3. (10 min.) Gather students together to share out various designs in a Building UnderstandingsDiscussion. Have students share ideas regarding their additional designs’ strengths andweaknesses, allowing student pairs that evaluated another group’s work offer the initialfeedback.
If you elect to close the lesson at this point, use the following prompts to help students reflect on the work they’ve done so far. Otherwise, you can continue with the Teacher Learning Plan in Lesson 11e.
Additional Guidance
A While it may seem redundant to give students an additional class period to design and test their light communication devices, this additional time allows students to use the same iterative process engineers use when optimizing a solution. With time, students will begin to manipulate the materials in additional ways beyond “copying” the successful ideas they see in their classmates’ work.
Some students may even generate the idea that they want to communicate more than if a class is too loud or “just right” in the halls, an idea that will surface in PART 6 of this lesson as an optional extension. Students may want to communicate a daily message to students or teachers passing in the halls, a safety message that another class is coming around a corner, or that students need to slow down in the halls. With this additional testing day, students who are ready for this challenge can begin to explore this new way of communicating while students who are still struggling with their initial ideas can
nextgenstorylines.org These materials were developed through with support from the Michigan Department of Education; the Gordon and Betty Moore Foundation, and support from the NGSX Project at Clark University, Tidemark Institute, and Northwestern University.
This work is licensed under a Creative Commons Attribution 4.0 License http://creativecommons.org/licenses/by/4.0/ 139

Teacher Guide Lesson 11(d): How can we use light to communicate without making any noise? How Does Light Help Me See Things and Communicate With Others?
Suggested Prompts: ➔ We’ve gotten a lot of feedback and used it to revise our designs. What can we do to make a
decision about which one we want to recommend to our principal?
Listen for student responses such as: ➔ We should pick a device that always communicates our message in a way that everyone can
understand it.
have ample time to build and test.
Alignment With Standards
Building Toward Target NGSS PE
● 1-PS4-3 Plan and conduct investigations to determine the effect of placingobjects made with different materials in the path of a beam of light.
● 1-PS4-4 Use tools and materials to design and build a device that uses light or sound to solve the problem of communicating over a distance.
● K-2-ETS1-1 Ask questions, make observations, and gather information about a situation people want to change to define a simple problem that can be solvedthrough the development of a new or improved object or tool.
● K-2-ETS1-2 Develop a simple sketch, drawing, or physical model to illustratehow the shape of an object helps it function as needed to solve a given problem.
● K-2-ETS1-3 Analyze data from tests of two objects designed to solve thesame problem to compare the strengths and weaknesses of how each performs.
Building Toward Common Core Standard(s)
ELA standards: CCSS.ELA-LITERACY.SL.1.1 -Participate in collaborative conversations with diverse partners about grade 1 topics and texts with peers and adults in small and larger groups.
● CCSS.ELA-LITERACY.SL.1.1.A - Follow agreed-upon rules fordiscussions (e.g., listening to others with care, speaking one ata time about the topics and texts under discussion).
● CCSS.ELA-LITERACY.SL.1.1.B - Build on others' talk inconversations by responding to the comments of others through multiple exchanges.
● CCSS.ELA-LITERACY.SL.1.1.C - Ask questions to clear up anyconfusion about the topics and texts under discussion.
CCSS.ELA-LITERACY.SL.1.4 Describe people, places, things, and events with relevant details, expressing ideas ….clearly.
nextgenstorylines.org These materials were developed through with support from the Michigan Department of Education; the Gordon and Betty Moore Foundation, and support from the NGSX Project at Clark University, Tidemark Institute, and Northwestern University.
This work is licensed under a Creative Commons Attribution 4.0 License http://creativecommons.org/licenses/by/4.0/ 140

Lesson 11(e): How can we use light to communicate without making any noise? Teacher Guide-
1st Grade Unit: How Does Light Help Me See Things and Communicate With Others?
This Lesson….What we are doing now: Students will go public with the results of their different designs. You will facilitate a discussion to help audience members articulate a design features in other people’s devices that they might want to incorporate in their own devices and ideas for possible ways to improve the performance of other’s devices and make a public record of student’s design ideas for them to (re)use and incorporate in a new round of redesign, returning to the previous lesson one more time.
Lesson Question
Phenomena Lesson Performance Expectation(s)
What We Figure Out (CCCs & DCIs), New Question s and Next Steps
L11(d-f) How can we evaluate our designs and use the results of everyone’s tests to improve our own design?
2-3 rounds of(60-75 min)
Building toward
⬇ NGSS PEs:
1-PS4-21-PS4-31-PS4-4
K-2-ETS1-1 K-2-ETS1-2 K-2-ETS1-3
School hallway communication problem.
Give students a mystery bag of materials so that all students have different materials to work with. This will encourage students to manipulate the materials.
Communicate information about the design solutions (structure & function) tried and the results generated (patterns), to make evidence-based claims ( argument from evidence), about which solutions are more effective at solving the original problem (see previous lesson).
Evaluate alternate solutions that other people tried to identify new design features (possible causes and effects & structure / function relationships) that may help make our own designs more effective at solving the original problem (see previous lesson) if we incorporated them into a redesign of them.
Student groups share their design ideas with the class in order to get feedback on their designs. As they present and receive feedback,we notice patterns in what everyone is including in their designs.
We decide it would be helpful to draw a model of what should definitely be included in our designs to make sure the design is effective at communicating the intended message.
We each identified designs/design features from our classmates might be useful to incorporate in a final design. And we argued that we should try to improve the design in another round of engineering.
Students go back to their designs and apply the feedback they got from classmates. When everyone is finished, we evaluate a different prototype to start using when we move through the hallways to send messages to people in long lines and in the cafeteria in our grade.
nextgenstorylines.org These materials were developed through with support from the Michigan Department of Education; the Gordon and Betty Moore Foundation, and support from the NGSX Project at Clark University, Tidemark Institute, and Northwestern University.
This work is licensed under a Creative Commons Attribution 4.0 License http://creativecommons.org/licenses/by/4.0/ 141

Teacher Guide Lesson 11(e): How can we use light to communicate without making any noise? How Can We Make It Dark (and Use Light To Communicate With Others)?
Getting Ready: Materials Preparation
Materials For Each Pair
● Devices built by students in previous lessons● Flashlight
Preparation of Materials (15 min.)
● Reopen the “Materials Station” used in previous lessons wherestudents can have access to multiple samples of each material thatcan be used in their light communication devices (cardboard, fabric,paper, tissue paper, etc.) in a central location for students to use.Make sure you have multiple pieces of each material so that as the supply runs low, you can easily replenish it.
Materials For Each Student
● Lesson 11a -Activity Sheets(Brainstorming Light CommunicationDevices)
● Lesson 11b -Activity Sheets (Plan for Light Communication Devices, at least 2 for each student)
● Lesson 11c -Activity Sheets (Light Communication Device Reflection Tool)
● Lesson 11d -Activity Sheets (Comparing Light CommunicationDevices)
● Lesson 11e -Activity Sheets (Using the Engineering Design Processfor a New Message--only copy IF completing Part 6, Extension)
● Scissors● Glue● Tape
Safety
● Remind students how to use and transition with scissors; if studentsare unable to cut cardboard on their own, cut it for them.
nextgenstorylines.org These materials were developed through with support from the Michigan Department of Education; the Gordon and Betty Moore Foundation, and support from the NGSX Project at Clark University, Tidemark Institute, and Northwestern University.
This work is licensed under a Creative Commons Attribution 4.0 License http://creativecommons.org/licenses/by/4.0/ 142

Teacher Guide Lesson 11(e): How can we use light to communicate without making any noise? How Can We Make It Dark (and Use Light To Communicate With Others)?
Getting Ready: Teacher Preparation
Background Knowledge
PS4-4 from the FRAMEWORK:
● People also use a variety of devices to communicate (send andreceive information) over long distances.
ETS1.A from the FRAMEWORK
● Defining and Delimiting Engineering Problems : A situation thatpeople want to change or create can be approached as a problem to besolved through engineering
● Asking questions, making observations, and gathering informationare helpful in thinking about problems.
● Before beginning to design a solution, it is important to clearlyunderstand the problem.
ETS1.B: From the Framework
● Developing Possible Solutions: Designs can be conveyed throughsketches, drawings, or physical models. These representations areuseful in communicating ideas for a problem’s solutions to otherpeople. (K-2-ETS1-2)
ETS1.C From the Framework
● Optimizing the Design Solution: Because there is always more than one possible solution to a problem, it is useful to compare and test
Alternative Student Conceptions
Through the Light and Shadow Hunt, students were exposed to various ways in which light is used to communicate over a distance in their school’s neighborhood. Students may find it a challenge to create their own designs to communicate over a distance with light, knowing the materials available to them are drastically different than those used in the devices seen on their Light and Shadow Hunt. Special attention will need to be made to reviewing what was discovered about how light interacts with the materials made available to them from earlier lessons in the unit.
Linking Our Understanding to
Scientific Terminology
● Communication● Patterns● Engineering
nextgenstorylines.org These materials were developed through with support from the Michigan Department of Education; the Gordon and Betty Moore Foundation, and support from the NGSX Project at Clark University, Tidemark Institute, and Northwestern University.
This work is licensed under a Creative Commons Attribution 4.0 License http://creativecommons.org/licenses/by/4.0/ 143

Teacher Guide Lesson 11(e): How can we use light to communicate without making any noise? How Can We Make It Dark (and Use Light To Communicate With Others)?
designs. (K-2-ETS1-3)
At this point in the unit, students most recently observed how light and show are used in the real world to communicate over a distance. Students will take this knowledge, combining it with the knowledge gained for how various materials interact with light, to design and build a device that solves a problem with light in communicating over a distance. Through the use of the engineering design process, students will analyze the data gathered from various tests to recommend the best-performing light communication tool to an audience.
nextgenstorylines.org These materials were developed through with support from the Michigan Department of Education; the Gordon and Betty Moore Foundation, and support from the NGSX Project at Clark University, Tidemark Institute, and Northwestern University.
This work is licensed under a Creative Commons Attribution 4.0 License http://creativecommons.org/licenses/by/4.0/ 144

Teacher Guide Lesson 11(e): How can we use light to communicate without making any noise? How Can We Make It Dark (and Use Light To Communicate With Others)?
Learning Plan: How can we use light to communicate without making any noise?
2 rounds of ( 4 x 45 min) for 11a-11d
Teacher Supports & Notes
Lesson 11e
1. (10 min) Begin with a Consensus Building Discussion to help students connect what theylearned from each of their tests to now recommending a solution to the school’s principal.
Suggested Prompts: ➔ Let’s share some devices that we noticed worked well.➔ What did we discover about light communication devices that worked really well?➔ How should we decide which of our communication devices we should recommend to our
school’s principal to use in solving this school-wide problem?
Listen for student responses
➔ Student responses will vary. ➔ We noticed that they clearly have a way of showing students that they were too loud. Their device
wasn’t confusing and it was easy to know when things got too loud in the halls. ➔ We should decide which of our communication devices was the clearest and best at
communicating our intended message.
2. (25 min) Show students Lesson 11e Activity Sheets, which has students comparing two of thelight communication devices they built and tested. Upon reviewing the expectations for thecomparison, allow students time to work and compare their designs. If students argue that bothdevices communicate when the hallway was too loud and “just right,” consider a discussionabout the amount of materials used, the feasibility of making the device, or its ability towithstand lots of use.
nextgenstorylines.org These materials were developed through with support from the Michigan Department of Education; the Gordon and Betty Moore Foundation, and support from the NGSX Project at Clark University, Tidemark Institute, and Northwestern University.
This work is licensed under a Creative Commons Attribution 4.0 License http://creativecommons.org/licenses/by/4.0/ 145

Teacher Guide Lesson 11(e): How can we use light to communicate without making any noise? How Can We Make It Dark (and Use Light To Communicate With Others)?
3. (10 min.) Have individual students share their work from Activity Sheet 11.4, communicatingwhich of their devices they would recommend to the principal to use in their school’s hallways.
Alignment With Standards
Building Toward Target NGSS PE
● 1-PS4-3 Plan and conduct investigations to determine the effect of placingobjects made with different materials in the path of a beam of light.
● 1-PS4-4 Use tools and materials to design and build a device that uses light or sound to solve the problem of communicating over a distance.
● K-2-ETS1-1 Ask questions, make observations, and gather information about a situation people want to change to define a simple problem that can be solvedthrough the development of a new or improved object or tool.
● K-2-ETS1-2 Develop a simple sketch, drawing, or physical model to illustratehow the shape of an object helps it function as needed to solve a given problem.
● K-2-ETS1-3 Analyze data from tests of two objects designed to solve thesame problem to compare the strengths and weaknesses of how each performs.
Building Toward Common Core Standard(s)
ELA standards: CCSS.ELA-LITERACY.SL.1.1 -Participate in collaborative conversations with diverse partners about grade 1 topics and texts with peers and adults in small and larger groups.
● CCSS.ELA-LITERACY.SL.1.1.A - Follow agreed-upon rules fordiscussions (e.g., listening to others with care, speaking one ata time about the topics and texts under discussion).
● CCSS.ELA-LITERACY.SL.1.1.B - Build on others' talk inconversations by responding to the comments of others through multiple exchanges.
● CCSS.ELA-LITERACY.SL.1.1.C - Ask questions to clear up anyconfusion about the topics and texts under discussion.
CCSS.ELA-LITERACY.SL.1.4 Describe people, places, things, and events with relevant details, expressing ideas ….clearly.
nextgenstorylines.org These materials were developed through with support from the Michigan Department of Education; the Gordon and Betty Moore Foundation, and support from the NGSX Project at Clark University, Tidemark Institute, and Northwestern University.
This work is licensed under a Creative Commons Attribution 4.0 License http://creativecommons.org/licenses/by/4.0/ 146
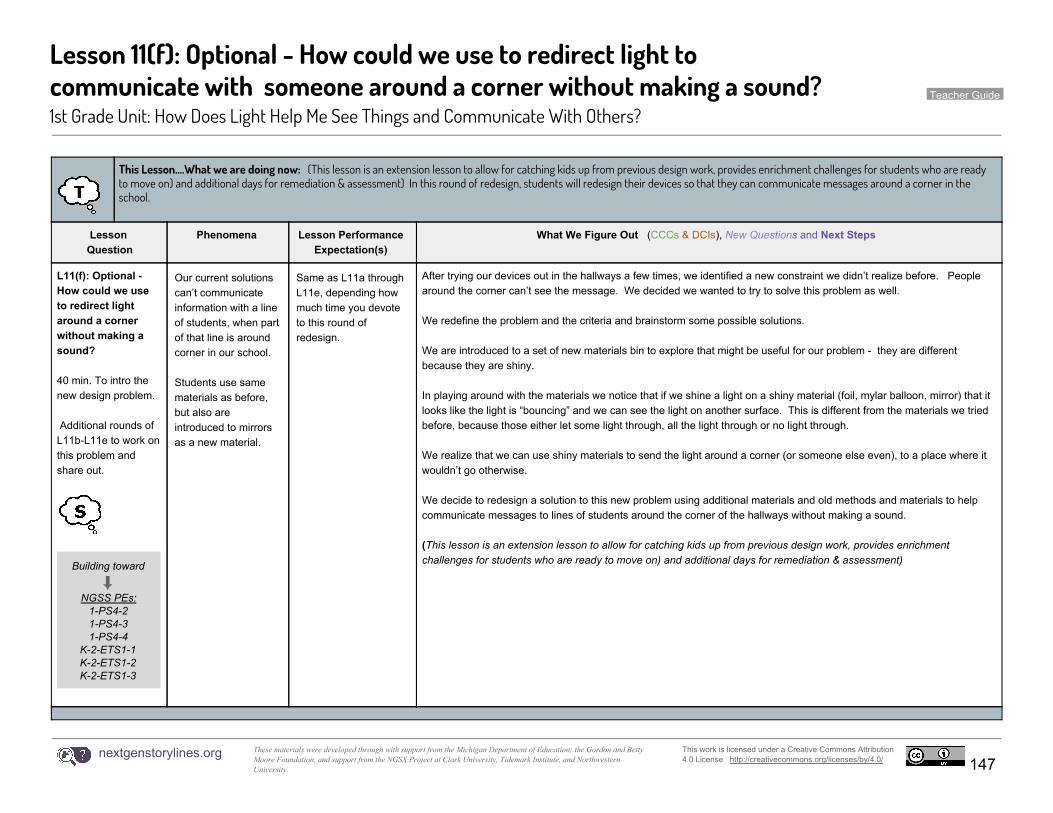
Lesson 11(f): Optional - How could we use to redirect light to communicate with someone around a corner without making a sound? Teacher Guide-
1st Grade Unit: How Does Light Help Me See Things and Communicate With Others?
This Lesson….What we are doing now: (This lesson is an extension lesson to allow for catching kids up from previous design work, provides enrichment challenges for students who are ready to move on) and additional days for remediation & assessment) In this round of redesign, students will redesign their devices so that they can communicate messages around a corner in the school.
Lesson Question
Phenomena Lesson Performance Expectation(s)
What We Figure Out (CCCs & DCIs), New Question s and Next Steps
L11(f): Optional - How could we use to redirect light around a corner without making a sound?
40 min. To intro the new design problem.
Additional rounds of L11b-L11e to work on this problem and share out.
Building toward
⬇ NGSS PEs:
1-PS4-21-PS4-31-PS4-4
K-2-ETS1-1 K-2-ETS1-2 K-2-ETS1-3
Our current solutions can’t communicate information with a line of students, when part of that line is around corner in our school.
Students use same materials as before, but also are introduced to mirrors as a new material.
Same as L11a through L11e, depending how much time you devote to this round of redesign.
After trying our devices out in the hallways a few times, we identified a new constraint we didn’t realize before. People around the corner can’t see the message. We decided we wanted to try to solve this problem as well.
We redefine the problem and the criteria and brainstorm some possible solutions.
We are introduced to a set of new materials bin to explore that might be useful for our problem - they are different because they are shiny.
In playing around with the materials we notice that if we shine a light on a shiny material (foil, mylar balloon, mirror) that it looks like the light is “bouncing” and we can see the light on another surface. This is different from the materials we tried before, because those either let some light through, all the light through or no light through.
We realize that we can use shiny materials to send the light around a corner (or someone else even), to a place where it wouldn’t go otherwise.
We decide to redesign a solution to this new problem using additional materials and old methods and materials to help communicate messages to lines of students around the corner of the hallways without making a sound.
(This lesson is an extension lesson to allow for catching kids up from previous design work, provides enrichment challenges for students who are ready to move on) and additional days for remediation & assessment)
nextgenstorylines.org These materials were developed through with support from the Michigan Department of Education; the Gordon and Betty Moore Foundation, and support from the NGSX Project at Clark University, Tidemark Institute, and Northwestern University.
This work is licensed under a Creative Commons Attribution 4.0 License http://creativecommons.org/licenses/by/4.0/ 147

Teacher Guide Lesson 11(f): How could we use to redirect light to communicate with someone around a corner without making a sound? How Does Light Help Me See Things and Communicate With Others?
Getting Ready: Materials Preparation
Materials For Each Pair
● Various materials to build and test light communication devices(cardboard, fabric, paper, tissue paper, construction paper,transparencies, wax paper, mylar, plastic wrap, cardstock, etc.)
● Mirrors ● Flashlight
Preparation of Materials (15 min.)
● Reopen the “Materials Station” used in previous lessons wherestudents can have access to multiple samples of each material thatcan be used in their light communication devices (cardboard, fabric,paper, tissue paper, etc.) in a central location for students to use.Make sure you have multiple pieces of each material so that as the supply runs low, you can easily replenish it.
● Add mirrors to the materials station for this lesson
Materials For Each Student
● Activity Sheet 11.1 (Brainstorming Light Communication Devices) ● Activity Sheet 11.2 (Plan for Light Communication Devices, at least 2
for each student)● Activity Sheet 11.3 (Light Communication Device Reflection Tool)● Activity Sheet 11.4 (Comparing Light Communication Devices)● Activity Sheet 11.5 (Using the Engineering Design Process for a New
Message--only copy IF completing Part 6, Extension)● Scissors● Glue● Tape
Safety
● Remind students how to use and transition with scissors; if studentsare unable to cut cardboard on their own, cut it for them.
nextgenstorylines.org These materials were developed through with support from the Michigan Department of Education; the Gordon and Betty Moore Foundation, and support from the NGSX Project at Clark University, Tidemark Institute, and Northwestern University.
This work is licensed under a Creative Commons Attribution 4.0 License http://creativecommons.org/licenses/by/4.0/ 148
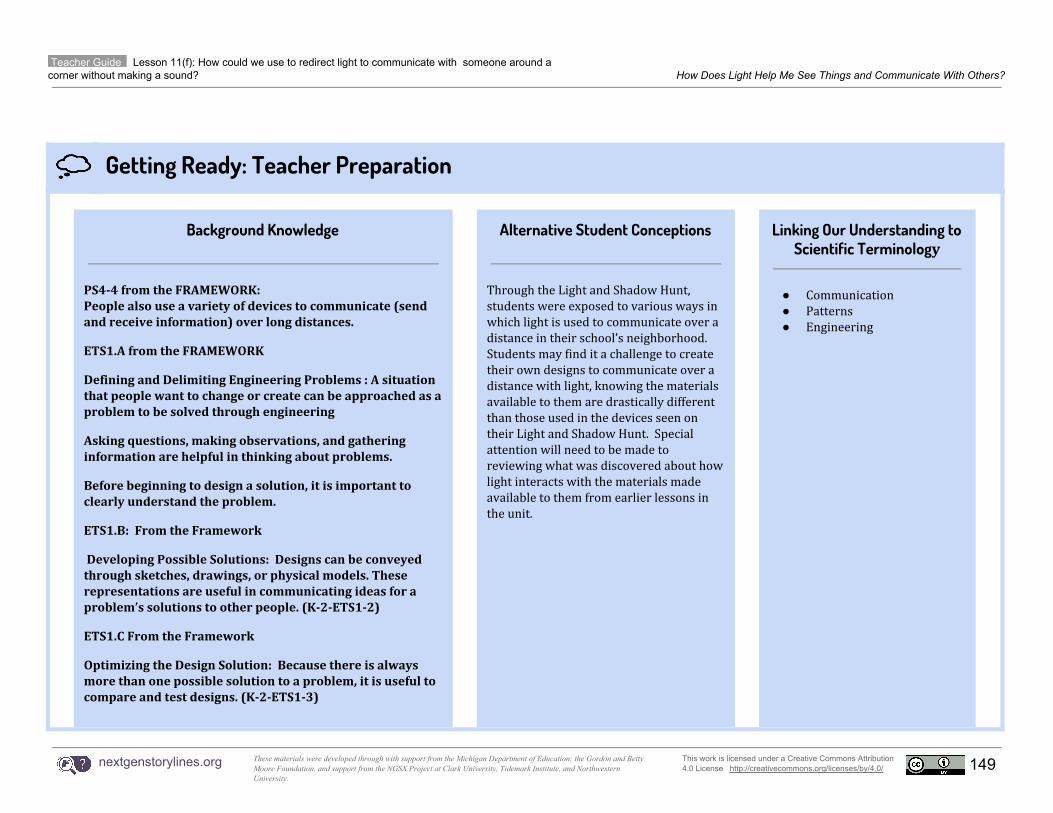
Teacher Guide Lesson 11(f): How could we use to redirect light to communicate with someone around a corner without making a sound? How Does Light Help Me See Things and Communicate With Others?
Getting Ready: Teacher Preparation
Background Knowledge
PS4-4 from the FRAMEWORK: People also use a variety of devices to communicate (send and receive information) over long distances.
ETS1.A from the FRAMEWORK
Defining and Delimiting Engineering Problems : A situation that people want to change or create can be approached as a problem to be solved through engineering
Asking questions, making observations, and gathering information are helpful in thinking about problems.
Before beginning to design a solution, it is important to clearly understand the problem.
ETS1.B: From the Framework
Developing Possible Solutions: Designs can be conveyed through sketches, drawings, or physical models. These representations are useful in communicating ideas for a problem’s solutions to other people. (K-2-ETS1-2)
ETS1.C From the Framework
Optimizing the Design Solution: Because there is always more than one possible solution to a problem, it is useful to compare and test designs. (K-2-ETS1-3)
Alternative Student Conceptions
Through the Light and Shadow Hunt, students were exposed to various ways in which light is used to communicate over a distance in their school’s neighborhood. Students may find it a challenge to create their own designs to communicate over a distance with light, knowing the materials available to them are drastically different than those used in the devices seen on their Light and Shadow Hunt. Special attention will need to be made to reviewing what was discovered about how light interacts with the materials made available to them from earlier lessons in the unit.
Linking Our Understanding to Scientific Terminology
● Communication● Patterns● Engineering
nextgenstorylines.org These materials were developed through with support from the Michigan Department of Education; the Gordon and Betty Moore Foundation, and support from the NGSX Project at Clark University, Tidemark Institute, and Northwestern University.
This work is licensed under a Creative Commons Attribution 4.0 License http://creativecommons.org/licenses/by/4.0/ 149

Teacher Guide Lesson 11(f): How could we use to redirect light to communicate with someone around a corner without making a sound? How Does Light Help Me See Things and Communicate With Others?
At this point in the unit, students most recently observed how light and show are used in the real world to communicate over a distance. Students will take this knowledge, combining it with the knowledge gained for how various materials interact with light, to design and build a device that solves a problem with light in communicating over a distance. Through the use of the engineering design process, students will analyze the data gathered from various tests to recommend the best-performing light communication tool to an audience.
nextgenstorylines.org These materials were developed through with support from the Michigan Department of Education; the Gordon and Betty Moore Foundation, and support from the NGSX Project at Clark University, Tidemark Institute, and Northwestern University.
This work is licensed under a Creative Commons Attribution 4.0 License http://creativecommons.org/licenses/by/4.0/ 150

Teacher Guide Lesson 11(f): How could we use to redirect light to communicate with someone around a corner without making a sound? How Does Light Help Me See Things and Communicate With Others?
Learning Plan: How could we use to redirect light to communicate with someone around a corner without making a sound?
40 min. For intro. + additional time for rounds of redesign
Teacher Supports & Notes
Lesson 11f (Optional Extension)
(Extension; Add mirrors to the Materials Station)
1. (10 min) Begin with a Sharing Initial Ideas Discussion to help students connect what theylearned from creating their light communication devices to extending their tools tocommunicating another message.
Suggested Prompts: ➔ Just recently, we created light communication devices to communicate when students were too
loud in the hallway. This was one message we wanted to communicate with others. When wewent on our Light and Shadow Hunt, we saw that there were many messages communicated tous by using light. What might be some other messages we want to communicate in ourhallways?
➔ How do you think we could go about communicating these messages with light to otherstudents and teachers in our school?
➔ How will we know if the messages we want to communicate reach the students and teacherswho see them?
Listen for student responses: ➔ We may want to communicate that there is another class coming around the corner and we
should watch out for them so we don’t bump into them. We may want to tell students that are running in the hall to slow down so they don’t get hurt. We also may to communicate if recess is held outside or inside because of inclimate weather. Or maybe we want to communicate a
nextgenstorylines.org These materials were developed through with support from the Michigan Department of Education; the Gordon and Betty Moore Foundation, and support from the NGSX Project at Clark University, Tidemark Institute, and Northwestern University.
This work is licensed under a Creative Commons Attribution 4.0 License http://creativecommons.org/licenses/by/4.0/ 151

Teacher Guide Lesson 11(f): How could we use to redirect light to communicate with someone around a corner without making a sound? How Does Light Help Me See Things and Communicate With Others?
message to teachers that the copier in the office is broken and they should find another one that’s working.
➔ We can build and test them just like we did with our light communication tools that we designed to communicate that students were too loud in the hallway.
➔ If the students and teachers see the messages and respond to them accordingly, we know we’ve communicated our message. If they don’t, then we know we need to redesign them so we can clearly communicate our message. For example, if we use our device to warn a class coming around a corner that another class is there and they don’t move out of the way, then we know the device didn’t work. But if the class sees the message and responds to get out of the way, then we will know our device worked!
______________________________________________________________________________________________________________________
2. (30 min.) Allow students time to plan, get teacher approval, build, and test their new lightcommunication devices based on the new messages they want to communicate A-. With thefeedback from other groups, students can create iteration after iteration to strengthen theirdevices and ultimately, communicate a new message based on the feedback from other groups.Use Activity Sheet 11.5 to guide student thinking throughout the process.
______________________________________________________________________________________________________________________
3. (In future rounds of 11b, 11c, 11d, etc..) Gather students together to share out variousdesigns in a Building Understandings Discussion. Have students share ideas regarding their newlight communication devices’ strengths and weaknesses, allowing students to determine themessage being communicated.
Additional Guidance
A During this part of the lesson, students will feel more comfortable using the engineering design process and will be much more efficient in their work planning, building,and testing their light communication devices. If you find that students are engaged in this process, you may allot more than one class period above what is suggested in order for students to improve their devices.
nextgenstorylines.org These materials were developed through with support from the Michigan Department of Education; the Gordon and Betty Moore Foundation, and support from the NGSX Project at Clark University, Tidemark Institute, and Northwestern University.
This work is licensed under a Creative Commons Attribution 4.0 License http://creativecommons.org/licenses/by/4.0/ 152

Teacher Guide Lesson 11(f): How could we use to redirect light to communicate with someone around a corner without making a sound? How Does Light Help Me See Things and Communicate With Others?
Alignment With Standards
Building Toward Target NGSS PE
● 1-PS4-3 Plan and conduct investigations to determine the effect ofplacing objects made with different materials in the path of a beam of light.
● 1-PS4-4 Use tools and materials to design and build a device that uses light or sound to solve the problem of communicating over a distance.
● K-2-ETS1-1 Ask questions, make observations, and gather information about a situation people want to change to define a simple problem that can be solved through the development of a new or improved object ortool.
● K-2-ETS1-2 Develop a simple sketch, drawing, or physical model toillustrate how the shape of an object helps it function as needed to solve agiven problem.
● K-2-ETS1-3 Analyze data from tests of two objects designed to solvethe same problem to compare the strengths and weaknesses of how eachperforms.
Building Toward Common Core Standard(s)
ELA standards: CCSS.ELA-LITERACY.SL.1.1 -Participate in collaborative conversations with diverse partners about grade 1 topics and texts with peers and adults in small and larger groups.
● CCSS.ELA-LITERACY.SL.1.1.A - Follow agreed-upon rules fordiscussions (e.g., listening to others with care, speaking one at a time about the topics and texts under discussion).
● CCSS.ELA-LITERACY.SL.1.1.B - Build on others' talk inconversations by responding to the comments of others throughmultiple exchanges.
● CCSS.ELA-LITERACY.SL.1.1.C - Ask questions to clear up anyconfusion about the topics and texts under discussion.
CCSS.ELA-LITERACY.SL.1.4 Describe people, places, things, and events with relevant details, expressing ideas ….clearly.
nextgenstorylines.org These materials were developed through with support from the Michigan Department of Education; the Gordon and Betty Moore Foundation, and support from the NGSX Project at Clark University, Tidemark Institute, and Northwestern University.
This work is licensed under a Creative Commons Attribution 4.0 License http://creativecommons.org/licenses/by/4.0/ 153

Lesson 12: How can we share our design solutions and what we figure out with others? Teacher Guide-
1st Grade Unit: How Does Light Help Me See Things and Communicate With Others?
This Lesson….What we are doing now: You will test the communication device in field trials (with your students in the hallways and other settings for a couple days in real school setting). From these experiences you help students identify a new problem that emerges from the field trials - students in line around a corner can’t see the message. You will use this new problem to motivate need for designing a new solution. Students will explore the behavior of some new materials (reflective ones) and share ideas for how they might be used in the design of a solution. Then students return to the design process to draft, create, and test two or more solutions to the problem.
Lesson Question
Phenomena Lesson Performance Expectation(s)
What We Figure Out (CCCs & DCIs), New Question s and Next Steps
L12 How can we share our design solutions and what we figure out with others?
L12a: 45 min. L12b: 45 min. L12c: 45-60 min.
Building toward
⬇ NGSS PEs:
1-PS4-2,1-PS4-3,1-PS4-4
K-2-ETS1-1 K-2-ETS1-2 K-2-ETS1-3
All of our solutions to all of our design problems.
Communicate information about the design solutions (structure & function) tried and the results generated (patterns), to make evidence-based claims ( argument from evidence), about which solutions are more effective at solving the original problem (see previous lesson).
L12a: We realize we have made a lot discoveries about light and learned many important lessons about what it means to be a scientist in over our storyline. We took stock of all things that we figured out during this unit including: ● Certain materials block ALL of the light, certain materials block SOME of the light, and certain materials let ALL light
through. ● We need LIGHT to see! Without light we can’t see objects that are there.● There are a lot of inventions in the world that help us block light.● Some material block all the light, some block some of the light, and some don’t block light.● When light is blocked, it creates a shadow beyond the material blocking the light.● There are a lot of light sources in our world, both natural and man-made (artificial)● Light can be used to communicate in many different ways and send many different kinds of messages.● We know ways to do a fair test● We know some ways to design investigations● Sometimes you have to redesign an investigation to get more information or better information.● We can "simulate" a space by making it smaller (CD Case, Shoebox)● We learned how to create a model of a scientific concept● We used the engineering design process to create communication devices to solve lots of design problems. ● We worked together to give and get feedback so we could apply it and make our designs even better!
We brainstormed ways we could share what we have learned over the course of the unit with others who visit the classroom, by transforming it into a museum.
We argued that Most museum exhibits have something to look at, something to read, and sometimes there is something you can do or interact with. And we brainstormed ways we could show off the tools we designed to communicate using light as well as the other designs we created on our Design board for other problems we encountered in our storyline.
L12b: We prepared our exhibits and practices answering questions that people might have about our exhibits.
L12c: Visitors came to our classroom, and we shared what we learned, and felt very proud of accomplishments.
nextgenstorylines.org These materials were developed through with support from the Michigan Department of Education; the Gordon and Betty Moore Foundation, and support from the NGSX Project at Clark University, Tidemark Institute, and Northwestern University.
This work is licensed under a Creative Commons Attribution 4.0 License http://creativecommons.org/licenses/by/4.0/
154
Teacher Guide Lesson 12: How can we share our design solutions and what we figure out with others? How Does Light Help Me See Things and Communicate With Others?
Getting Ready: Materials Preparation
Materials For Each Group
● Poster board● Printed photos of students’ designs from Lesson 11● Glue Sticks● Crayons, Colored Pencils, or Markers for decorating
posters
Preparation of Materials (15 min.)
● Prepare a materials station in the classroom that is easilyaccessible by students that includes decorating supplies fortheir Museum Exhibit poster and previously used suppliesfrom prior investigations.
● Organize the room so that students can display their designsin a Museum Exhibit format. Be sure to create space so thatvisitors can conduct a gallery walk.
● Draft and send a letter inviting school staff and parents toattend the Museum Exhibit
● Prepare chart paper to capture students’ responses aboutwhat they have learned in this unit.
Materials For Each Student
● Party favor (optional)● Snack (optional)
Safety
● Clear any obstacles in the room that may impede visitors’ability to conduct a Gallery Walk
nextgenstorylines.org These materials were developed through with support from the Michigan Department of Education; the Gordon and Betty Moore Foundation, and support from the NGSX Project at Clark University, Tidemark Institute, and Northwestern University.
This work is licensed under a Creative Commons Attribution 4.0 License http://creativecommons.org/licenses/by/4.0/ 155

Teacher Guide Lesson 12: How can we share our design solutions and what we figure out with others? How Does Light Help Me See Things and Communicate With Others?
Getting Ready: Teacher Preparation
Background Knowledge
from the FRAMEWORK:
“Communicate information or design ideas and/or solutions with others in oral and/or written forms using models, drawings, writing, or numbers that provide detail about scientific ideas, practices, and/or design ideas.”
In grades K-2, students learn how to communicate the results of their investigations with others. In this lesson, students will present their designs and explain their solutions to the design problem to visitors in a Museum Exhibit format.
Alternative Student Conceptions Linking Our Understanding to Scientific Terminology
nextgenstorylines.org These materials were developed through with support from the Michigan Department of Education; the Gordon and Betty Moore Foundation, and support from the NGSX Project at Clark University, Tidemark Institute, and Northwestern University.
This work is licensed under a Creative Commons Attribution 4.0 License http://creativecommons.org/licenses/by/4.0/ 156

Teacher Guide Lesson 12: How can we share our design solutions and what we figure out with others? How Does Light Help Me See Things and Communicate With Others?
Learning Plan: How can we share what we’ve learned?
Flexible timing
Teacher Supports & Notes
Day 1 - Lesson 12a
1. (25 min) Gather students together for a celebration of all that they have learned in the unit.Make this lesson stand out from the rest by integrating some type of party favor, decorations, orsnacks. The object of the lesson is to recognize the hard work students have done and to getthem excited about their journey as scientists.
Begin with a Consensus Building Discussion A- to help students reflect on all that they have learned in this unit.
Scientists, you have so much to be proud of! Over the course of this unit you have made many discoveries about light and learned many important lessons about what it means to be a scientist. Let’s make a list of all of the things that we figured out during this unit:
Suggested Prompts: ➔ What did we learn about light in this unit?➔ We did we learn about being a scientist in this unit?
Listen for student responses that celebrate what students have learned about light: ➔ Certain materials block ALL of the light, certain materials block SOME of the light, and certain
materials let ALL light through. ➔ We need LIGHT to see! ➔ There are a lot of inventions in the world that help us block light. ➔ When light is blocked, it creates a shadow beyond the material blocking the light. ➔ There are a lot of light sources in our world, both natural and man-made (artificial)
Strategies for this Consensus Building Discussion
A Capture students’ responses on chart paper to be displayed during the Museum Exhibit.
nextgenstorylines.org These materials were developed through with support from the Michigan Department of Education; the Gordon and Betty Moore Foundation, and support from the NGSX Project at Clark University, Tidemark Institute, and Northwestern University.
This work is licensed under a Creative Commons Attribution 4.0 License http://creativecommons.org/licenses/by/4.0/ 157

Teacher Guide Lesson 12: How can we share our design solutions and what we figure out with others? How Does Light Help Me See Things and Communicate With Others?
➔ We discovered that light can be used to communicate in many different ways on our light hunt and from the devices we designed to communicate different messages in Lesson 11!
Listen for student responses B- that celebrate what students have learned about being a scientist:
➔ We learned how to do a fair test ➔ We learned how to design an investigation ➔ We learned that sometimes you have to redesign an investigation to get more information or
better information. ➔ We can "simulate" a space by making it smaller (CD Case, Shoebox) ➔ We learned how to create a model of a scientific concept ➔ We used the engineering design process to create communication devices to solve a design
problem. ➔ We worked together to give and get feedback so we could apply it and make our designs even
better!
2. (20 min) Next, shift to a Sharing Initial Ideas Discussion. Use the following prompts to guidestudents to articulate ideas about how they could share what they have learned over the courseof the unit with others who visit the classroom. Say to students, We are going to transform ourclassroom into a Museum so that we can share our work with others!
Suggested Prompts: ➔ What do most museum exhibits have in them?➔ What should we put into our exhibits to show what we learned in this unit?
Listen for student responses that share ideas such as: ➔ Most museum exhibits have something to look at, something to read, and sometimes there is
something you can do or interact with. ➔ We should show the tools we used to communicate using light. We could also show our CD Case
windows and have people guess which ones will block out the most light. We could put out our
Additional Guidance
B If students do not generate any of the responses on this list, suggest them to students. It is critical that students have the opportunity to reflect on all of the learning they have done in the entire unit. Be sure to use a celebratory tone so that students are energized by their accomplishments and motivated to continue science learning.
Differentiation Strategies and Alternate Activities
C When you consider which students should work on each exhibit, take the opportunity to differentiate for writers and non-writers. Those that struggle with writing will be best suited to activities in which they can physically demonstrate and orally explain a concept, where writers may be better suited to exhibits that can be accompanied by a written explanation.
nextgenstorylines.org These materials were developed through with support from the Michigan Department of Education; the Gordon and Betty Moore Foundation, and support from the NGSX Project at Clark University, Tidemark Institute, and Northwestern University.
This work is licensed under a Creative Commons Attribution 4.0 License http://creativecommons.org/licenses/by/4.0/ 158

Teacher Guide Lesson 12: How can we share our design solutions and what we figure out with others? How Does Light Help Me See Things and Communicate With Others?
light boxes and let people look inside.
Generate a list of exhibit ideas and assign students C- to groups to work on each of the exhibits. Ask students to sketch out what they want their exhibit to look like. Students should also generate a list D- of the materials they want to include in their exhibit (light box, CD case, test fabrics, etc.).
This is a natural breaking point. You may wish to continue the work of creating the exhibit in another class period.
Day 2 - Lesson 12b
3. (45 min) Provide students with access to materials so that they can carry out their plans fortheir museum exhibits. Circulate and assist as needed.
This is a natural breaking point. You may wish to continue the work of creating the exhibit in another class period.
Day 3 - Lesson 12c
4. (15 min) Say to students, Today we will have visitors in our classroom to explore our museumexhibits! What do we need to be sure to do when visitors are exploring our exhibits today?
Listen for student responses such as: ➔ We need to be ready to answer any questions people might have about our exhibits. ➔ We should be ready to show people how to use the materials at our exhibits.
Once you have established students’ responsibilities, ask for a volunteer group to engage in a role playing activity. Have students stand at their exhibit, and you should act as a visitor to the classroom who comes to their exhibit. Work with the student volunteers to demonstrate
Additional Guidance
D As students sketch out their ideas for their exhibits, circulate through the groups and assist as needed. In particular, focus on non-writers who may need assistance generating a list of materials. If possible, groups writers and non-writers together to ensure that students can work independently through the planning task.
nextgenstorylines.org These materials were developed through with support from the Michigan Department of Education; the Gordon and Betty Moore Foundation, and support from the NGSX Project at Clark University, Tidemark Institute, and Northwestern University.
This work is licensed under a Creative Commons Attribution 4.0 License http://creativecommons.org/licenses/by/4.0/ 159

Teacher Guide Lesson 12: How can we share our design solutions and what we figure out with others? How Does Light Help Me See Things and Communicate With Others?
examples and non-examples of what we should do when visitors approach our exhibit.
5. (30-45 min) As visitors enter your classroom, circulate and assist students with answeringquestions and demonstrating what they have learned. Take every opportunity to celebratelearning and emphasize that students have truly become experts by engaging in all of thescientific practices.
Alignment With Standards
Building Toward Target NGSS PE
● 1-PS4-3 Plan and conduct investigations to determine theeffect of placing objects made with different materials in the path of a beam of light.
● 1-PS4-4 Use tools and materials to design and build a devicethat uses light or sound to solve the problem of communicatingover a distance.
● K-2-ETS1-1 Ask questions, make observations, and gatherinformation about a situation people want to change to define asimple problem that can be solved through the development of anew or improved object or tool.
● K-2-ETS1-2 Develop a simple sketch, drawing, or physicalmodel to illustrate how the shape of an object helps it function asneeded to solve a given problem.
● K-2-ETS1-3 Analyze data from tests of two objects designed to solve the same problem to compare the strengths and weaknesses of how each performs.
Building Toward Common Core Standard(s)
ELA standards: CCSS.ELA-LITERACY.SL.1.1 -Participate in collaborative conversations with diverse partners about grade 1 topics and texts with peers and adults in small and larger groups.
● CCSS.ELA-LITERACY.SL.1.1.A - Follow agreed-upon rules for discussions (e.g., listening to others with care, speaking one at a time about the topics and texts under discussion).
● CCSS.ELA-LITERACY.SL.1.1.B - Build on others' talk in conversations byresponding to the comments of others through multiple exchanges.
● CCSS.ELA-LITERACY.SL.1.1.C - Ask questions to clear up any confusion aboutthe topics and texts under discussion.
CCSS.ELA-LITERACY.SL.1.4 Describe people, places, things, and events with relevant details, expressing ideas ….clearly.
nextgenstorylines.org These materials were developed through with support from the Michigan Department of Education; the Gordon and Betty Moore Foundation, and support from the NGSX Project at Clark University, Tidemark Institute, and Northwestern University.
This work is licensed under a Creative Commons Attribution 4.0 License http://creativecommons.org/licenses/by/4.0/ 160