Embed Size (px)
Citation preview
2010
How to make a sci-fi
texture with a circuitry
inset A Genetica tutorial
Käy Vriend [email protected]
How to make a sci-fi texture Genetica tutorial K.Vriend
2 [email protected] Permission required to use my work
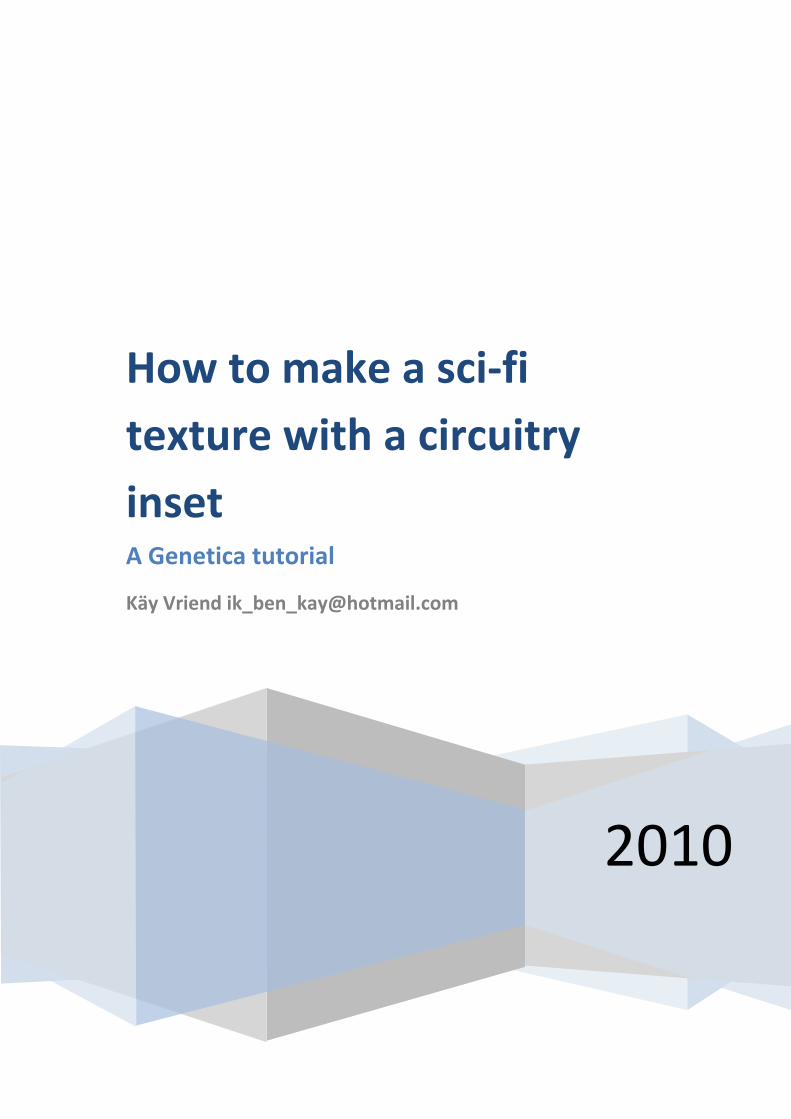
Contents Introduction ....................................................................................................................................................... 3
Let’s begin! ........................................................................................................................................................ 4
Where to start ............................................................................................................................................... 5
Making a group .............................................................................................................................................. 5
Setting number of references needed .......................................................................................................... 5
Making a gradient .......................................................................................................................................... 6
Using the noise lab ........................................................................................................................................ 6
Editing a noise lab .......................................................................................................................................... 7
Generating a noise ....................................................................................................................................... 10
Making circuitry with the noise lab ............................................................................................................. 10
Making an environment .............................................................................................................................. 13
Editing gradients .......................................................................................................................................... 16
Entering a group .......................................................................................................................................... 18
Using the frequency node ........................................................................................................................... 18
Using the tone curve ................................................................................................................................... 18
Placing references ....................................................................................................................................... 20
Using Gaussian blur ..................................................................................................................................... 21
Using the combine node .............................................................................................................................. 23
Using the point light node ........................................................................................................................... 26
Copying and pasting .................................................................................................................................... 28
Blending masks/noises ................................................................................................................................ 31
Using the colorize node ............................................................................................................................... 31
Using the full light node .............................................................................................................................. 33
Storing effect maps ..................................................................................................................................... 34

3
Introduction
There was some confusion on the forums on how to composite and blend maps with the current edition of
Genetica. Whilst a dedicated node for compositing might be a neat addition to Genetica, I believe most
combinations of maps (additive, subtractive, based on selection masks) are already possible. In this tutorial
we will make a variety of masks and we will blend them in several manners. I hope you like this tutorial; it
took me 3 days to make.
Enjoy!
-Käy Vriend (also known as Funkdude on the forums)

How to make a sci-fi texture Genetica tutorial K.Vriend
4 [email protected] Permission required to use my work
Let’s begin!
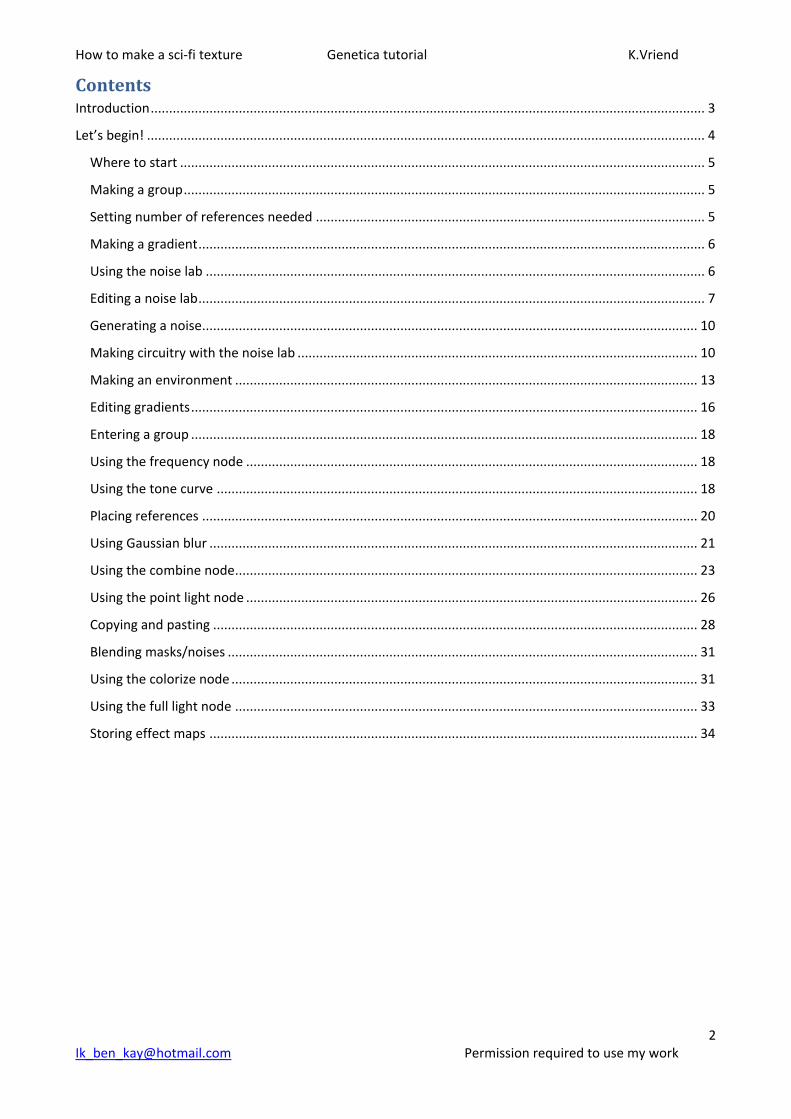
Boot up your pc and start Genetica, start a new texture. This is the texture we'll be making:
What we need:
1. A panel noise/mask (a gradient will be the foundation for the panel and inset)
2. A inset noise/mask
3. Some grime and smudges, the noise lab will help us with this
4. A nice metallic noise with scratches, again with the noise lab
5. And a noise that takes care of dents in the metal
6. A noise for the circuitry
7. A environment for reflections

5
That’s a total of 7 so far.
Where to start At first we have this:
Making a group Now right click on the empty node and go to the insert -> group -> group. Like so:
You’ll now have this:
Setting number of references needed We determined we need 7 inputs so far so at the inputs slider type 7, or use the slider.
We will use a horizontal gradient to set up the panels and a pyramidal gradient for the inset and metallic
bars.

How to make a sci-fi texture Genetica tutorial K.Vriend
6 [email protected] Permission required to use my work
Making a gradient Select the first input and right click. Then go to insert -> generate -> gradient.
By default its set at horizontal which is neat. Insert a pyramidal gradient in the 2nd slot in the same manner.
(Or copy the gradient from input 1 to input 2, and set it at pyramidal with the selection box)
Using the noise lab Now it’s time for the smudges! Select the 3rd input and right click. Then insert -> advanced -> noise lab.

7
Like so:
It should look like this:
Now that isn’t a bad smudge noise, but I think it’s best to tweak it a bit and add another layer. So that it
would appear more weathered and more interesting later on (now we are just arranging nodes, later on
you can swap, edit and change nodes to make your own version based on this setup)
Editing a noise lab Click the edit tab or double click the noise lab to open a menu where you can select noises and use sliders
to tweak them.

How to make a sci-fi texture Genetica tutorial K.Vriend
8 [email protected] Permission required to use my work
Click the select type button to see what noises are available. Then select the fluid ridges.
Now click the select type button in the empty slot (that says none). Select the drips noise (left of the fluid
ridges noise)
At the top of the noise lab set the combine mode at multiply, you should have something like this now

9
Tweak the noise so it looks as you think it should. I used these settings:
Now click the nodes tab to go out of the noise lab again and put a new noise lab in input slot 3
Select the metallic noise, and in the 2nd layer of the noise lab put a scratches noise. Set the combine mode
at subtract. Now tweak it until you think it looks right. I used these settings:

How to make a sci-fi texture Genetica tutorial K.Vriend
10 [email protected] Permission required to use my work
Be sure to set mix bias at 25.
Generating a noise Next is the noise for the dents in the metal, so it would look like things got bumped into it.
Select the next empty input slot for the group and insert -> generate -> noise.
Set the number of iterations to 10 and W and H to 2. This way we will have smaller dents. I set the seed at
8. You should have something like this:
Making circuitry with the noise lab Now we only need a circuitry noise and an environment for the final look. Go to the next empty slot and
insert a noise lab like we did before. In the noise lab select the melt noise, and for its input select the
circuitry noise. It should look like this.

11

How to make a sci-fi texture Genetica tutorial K.Vriend
12 [email protected] Permission required to use my work
Here comes a more tricky part, we will invert the noise and make it smoother. Use these settings:
Now we will place a similar noise in the second noise lab slot (not the one of the melt noise, but the one
with the NONE label). Use these settings:

13
Set the level at 100, mix bias at 50 and the combine mode to greatest. Like so:
Now we have a neat circuitry noise with plate like detail and small indented lines. Nice!
Making an environment Now select the last empty input for the group and use the right click menu. Go to insert -> environment ->
make environment and click it.
Double click the node to enter the magical environment lab. You can use any of the presets, but here we
will make our own super neat sci-fi metal reflection environment (well, not entirely, well expand on one
from the library).

How to make a sci-fi texture Genetica tutorial K.Vriend
14 [email protected] Permission required to use my work
You’ll notice that the environment is a soft light by default. Click the image button to make it use an image
instead. You’ll now see a grey white checkered environment which means that no image is used by the
environment lab:
Click the select button and a pop-up will appear where you can choose a preset from the library. Choose
this one:
It already has some nice sci-fi like highlights and can be a neat base for our reflections.

15
We’re not done however, set the settings to the ones in the image below to smoothen it out a bit and
make it more contrasted.
Now add a soft light by clicking new in the layers part of the lab, and set it to soft light. This will be the base
for the highlights:

How to make a sci-fi texture Genetica tutorial K.Vriend
16 [email protected] Permission required to use my work
Editing gradients Now in the color tab click the edit button to show the edit gradient menu:
Select the white label of the gradient, and set the RGB values to R 25, G 50 and B 50 to make it really really
(REALLY!) light blue. This is where Genetica’s hdri capabilities start to show:

17
Now select the black label and set it to 0.990 in the position box like so:
Now we are nearly done with the environment, only a few steps left.
Place a new label by clicking in the gradient, and set its position at 0.500, then place another label at 0.501
and make its color the same as the first label we edited (R 25, G 50, B 50). Then place another label at 0.502
and make it black. It should look like this:
Now comes some smart blending tricks along with cranking up the exposure for the environment.
First set the blend mode of the layer called light (the one with the gradient) to soft light, so it will blend in a
soft way, setting it to add would make the environment too “hard”. Now the bottom layer will be visible
through the top layer.
Now set the exposure at 1.00 at the top left part of the environment lab.
It should look like this:

How to make a sci-fi texture Genetica tutorial K.Vriend
18 [email protected] Permission required to use my work
It might look a bit underwhelming now, and we don’t have a texture yet, but that is about to change, stick
with me.
Entering a group Double click the group to enter it, and drag the first reference in the empty slot.
Using the frequency node Now place a frequency node underneath, insert below -> filter -> frequency. And set it to sinusoid and set
frequency at 1.000:
Using the tone curve Now insert a tone curve below the reference, insert below -> color -> tone curve.
Double click the tone curve node to enter the tone curve “lab” (I like the idea of a lab, me being a crazy
texture professor making all kinds of neat stuff :P)
Set the type from arc to custom:

19
Now comes a tricky part, we are going to make the shape for the panel, in the custom curve the plating will
be viewed from the side. By clicking a place on the curve you can add a point, set if it’s linear or curved and
specify its vertical and horizontal location. Here is the curve I made for this:
Here are the settings for it:
Point Location X Location Y Linear L/Curve C Left
Linear L/Curve C Right
1 0 0 L L
2 5 0 L L
3 5.5 -5 L L
4 6 -5 L L
5 7 5 L L
6 8 5 L L
7 9 -5 L L
8 9.5 -5 L L
9 10 0 L C
10 20 75 C C
11 40 100 C L
12 100 100 L L

How to make a sci-fi texture Genetica tutorial K.Vriend
20 [email protected] Permission required to use my work
To save your curve click the preset tab, and type a name next to the custom tag and then press add to add
this curve to your library.
If you place all the points according to the table, you will have made the bevel/silhouette as seen in the
image above. With the curve editor you can make all sorts of effects and bevels.
Now place another group underneath with the right mouse button: insert below -> group -> group.
Add another input by setting the number of inputs at 2, or scrolling with the mouse.
Placing references Drag and drop the 2nd reference into the empty slot we just created. It should look like this:
This branch will be the beams/grating to surround the panel. To make it narrower insert a tone curve
below. Insert below -> color -> tone curve.

21
Set the curve type to linear, the direction to down, and the repeat delay to 85:
It should look like the image above.
Using Gaussian blur Now place a Gaussian blur underneath to give it a smoother shape. Insert below -> filter -> Gaussian blur.
Set the blur value at 0.500:
Now place a tone curve node underneath and select the bevel we made earlier, or copy and paste the node
with the curve we made underneath the Gaussian blur node. It should look like this:

How to make a sci-fi texture Genetica tutorial K.Vriend
22 [email protected] Permission required to use my work
Now select the group again and add another input. Drag the 2nd reference into it and put another tone
curve node underneath or copy the tone curve node we used before and paste it below with the right
mouse button.
Select the same tech panel bevel we used before, but set the initial delay in the curve lab at 25.
Now we have the mask for the circuitry:

23
Now we have 5 references left to place, set the number of inputs for the group at 8 and drag and drop the
references into the empty slots:
Using the combine node Double click the group to enter it, and then insert a combine node in the empty slot. Insert -> combine ->
combine.
Drag the 5th and 6th reference into the first and second slot of the combine node:

How to make a sci-fi texture Genetica tutorial K.Vriend
24 [email protected] Permission required to use my work
Insert a tone curve node underneath the top input for the combine node, and set the initial delay at 70:
Then place an invert node underneath the tone curve node. Insert -> color -> invert. Now we have made
the height-map for the dents in the metal.
Set the combine node at multiply and the opacity at 0.750, now we have made a nice metallic texture with
some scratches and dents:
Click the combine node with the right mouse button and select group branch to pack it in a group. This
makes it easier to navigate around the nodes. Name it metallic noise for example.

25
Now you’ll see that instead of a branch of nodes, there is a group with 2 references. You can name the
group “Weathered metal noise” if you like:
Place another group below the group we just made and set the number of inputs at 2:
In the second input place a combine node. Place the 4th reference (the smudges) in the first slot and the 3rd
reference (circuitry mask) in the selector slot:

How to make a sci-fi texture Genetica tutorial K.Vriend
26 [email protected] Permission required to use my work
Insert a combine node beneath the square and drag the circuitry in the other slot. Use these settings to
blend the mask with the circuitry for a height-map we will use a few steps later.
Using the point light node Now comes a more tricky part. We are going to use a point light to make the smudges appear on all upward
facing sides of the texture. Insert a point light below the selector node (with the square mask).
Insert below -> 3d -> point light.
Use these settings. (Be sure to turn “Skip for color only” OFF! Otherwise the smudges won’t appear on the
color only renders).
Now we have a nice texture for the smudges on the circuitry.

27
The next step is making the smudges map a bit more contrasted. Place a tone curve underneath and use
these settings:
Here’s what we have now:

How to make a sci-fi texture Genetica tutorial K.Vriend
28 [email protected] Permission required to use my work
Now place a combine node beneath the tone curve node and group the first input. Here is how it should
look. Name the group Smudges 1 for example.
Copying and pasting Now copy and paste the smudges 1 group into the 2nd slot of the combine node and replace the square
reference with the beams/grate reference. Name it Smudges 2. Then delete the 3rd input of the group and
set the number of inputs at 2. Then set the combine mode of the combine node to add (TIP: you can clean
up the Smudges 2 group by deleting the combine node inside it with only 1 input, the combine node
doesn’t add to the texture, it just passes the reference to the node below, which isn’t needed):

29
Now right click the combine node, copy it and paste it below itself:
Name the second group called “Smudges 2” Smudges 3 and replace the 1st input with the first reference
(the panel noise) (we do this because when you edit the panel shape, its top facing edges will too have
smudges):

How to make a sci-fi texture Genetica tutorial K.Vriend
30 [email protected] Permission required to use my work
Group the entire branch with the smudge groups and name it “Add Smudges”:
Select the empty group and set its inputs to 6. Place the remaining references in the slots like so:
Now place a combine node beneath the 3rd reference (the square), place the circuitry noise in the second
slot of the combine node and set it to multiply. Then set the first input to input 2 and the opacity at 0.250:

31
Blending masks/noises Now it’s time to make the height-map for the texture. Double click the empty group or click the edit label.
Insert a combine node in the empty slot and place the plate noise in the first slot, then place the square
circuitry noise in the second and third slot:
Using the colorize node Now place a colorize node underneath the second input. Insert below -> color -> colorize.
Set the white label at 0.500 red, and the G and B values both at 0.000:
Now we made a neat inset inside the panel. Now it’s time to add the grate to the height-map. Place
another combine node beneath the colorize node and put the 5th reference (the grate noise) inside the 2nd
input and the selector. That’s all there is to it:

How to make a sci-fi texture Genetica tutorial K.Vriend
32 [email protected] Permission required to use my work
Now place another combine node underneath and place the weathered metallic noise in the second slot.
Then set the opacity of the combine node at 0.997:
Now place an empty group beneath the branch and set its inputs at 3. Put the smudges noise and the
environment in the second and third slot. Now enter the group. Drag the first reference in the empty slot
and place a colorize node underneath. Set the most left value at dark grey (R 0.250, G 0.250, and B 0.250)
and the most right value at light grey. (R 0.750, G 0.740 B 0.750):
Now place a combine node underneath and place the smudges noise in the selector and copy the first input
to the second input of the combine node:

33
Now we can edit the second colorize node to determine the color of the smudges. You can play around a
bit with the settings, but here are the settings I used:
Far left Far right
Red 0.462 0.094
Green 0.392 0.099
Blue 0.285 0.125
Here is how my version looks.
Using the full light node Now place a full light node underneath (insert below -> 3d -> full light), and place the 1st reference in the
height-map slot, the 2nd reference in the reflectivity slot and the 3rd reference in the environment slot.

How to make a sci-fi texture Genetica tutorial K.Vriend
34 [email protected] Permission required to use my work
Place a tone curve node beneath the smudges noise (the 2nd reference in the reflectivity slot) then place an
invert node underneath:
Storing effect maps Now it’s nearly done, to save the height-map for use as normal map place a store map node beneath the
nodes you’d like to save. Insert below -> effect map -> store map. Do this for the height-map input and the
reflectivity map. That way you can use them with your 3d app.
All that is left now is tweaking the full light node and then we are done! I used these settings:
35