Embed Size (px)
Citation preview

Not for resale. Permission granted to print or photocopy this document for personal use only.
Harried in Hillsfar In the village of Elventree, near the oppressive city of Hillsfar, a recent string of strange occurrences has the locals on edge. The factions have gathered here on the borders of the forest of Cormanthor to determine what’s happening. Is this the machinations of Hillsfar, or something more? Five one-hour mini-adventures for 1st-2nd level characters.
Adventure Code: DDEX3-1
Credits
Adventure Design: Shawn Merwin
Development and Editing: Claire Hoffman, Chris Tulach, Travis Woodall
Organized Play: Chris Tulach
D&D Adventurers League Wizards Team: Adam Lee, Chris Lindsay, Matt Sernett, Chris Tulach
D&D Adventurers League Administrators: Robert Adducci, Bill Benham, Travis Woodall, Claire Hoffman, Greg Marks, Alan Patrick
Debut: July 30, 2015
Release: September 1, 2015
DUNGEONS & DRAGONS, D&D, Wizards of the Coast, Forgotten Realms, the dragon ampersand, Player’s Handbook, Monster Manual, Dungeon
Master’s Guide, D&D Adventurers League, D&D Encounters, D&D Expeditions, D&D Epics, all other Wizards of the Coast product names, and
their respective logos are trademarks of Wizards of the Coast in the USA and other countries. All characters and their distinctive likenesses are
property of Wizards of the Coast. This material is protected under the copyright laws of the United States of America. Any reproduction or
unauthorized use of the material or artwork contained herein is prohibited without the express written permission of Wizards of the Coast.
©2015 Wizards of the Coast LLC, PO Box 707, Renton, WA 98057-0707, USA. Manufactured by Hasbro SA, Rue Emile-Boéchat 31, 2800
Delémont, CH. Represented by Hasbro Europe, 4 The Square, Stockley Park, Uxbridge, Middlesex, UB11 1ET, UK.

Harried in Hillsfar Not for resale. Permission granted to print or photocopy this document for personal use only. 2
Introduction Welcome to Harried in Hillsfar, a D&D ExpeditionsTM adventure, part of the official D&D Adventurers LeagueTM organized play system and the Rage of DemonsTM storyline season. This adventure consists of five mini-adventures, and is designed for three to seven 1st-2nd level characters, and is optimized for five 1st-level characters. Characters outside this level range cannot participate in this adventure. A player with an ineligible character can create a new 1st-level character or use a pregenerated character. The adventure is set in the Moonsea region of the Forgotten Realms, in and around the city of Hillsfar.
The D&D Adventurers League This adventure is official for D&D Adventurers League play. The D&D Adventurers League is the official organized play system for DUNGEONS & DRAGONS®. Players can create characters and participate in any adventure allowed as a part of the D&D Adventurers League. As they adventure, players track their characters’ experience, treasure, and other rewards, and can take those characters through other adventures that will continue their story. D&D Adventurers League play is broken up into storyline seasons. When players create characters, they attach those characters to a storyline season, which determines what rules they’re allowed to use to create and advance their characters. Players can continue to play their characters after the storyline season has finished, possibly participating in a second or third storyline with those same characters. A character’s level is the only limitation for adventure play. A player cannot use a character of a level higher or lower than the level range of a D&D Adventurers League adventure. If you’re running this adventure as a part of a store event or at certain conventions, you’ll need a DCI number. This number is your official Wizards of the Coast organized play identifier. If you don’t have a number, you can obtain one at a store event. Check with your organizer for details. For more information on playing, running games as a Dungeon Master, and organizing games for the D&D Adventurers League, please visit the D&D Adventurers League home.
Preparing the Adventure Before you show up to Dungeon Master this adventure for a group of players, you should do the following to prepare. • Make sure to have a copy of the most current version
of the D&D basic rules or the Player’s HandbookTM. • Read through the adventure, taking notes of anything
you’d like to highlight or remind yourself while running the adventure, such as a way you’d like to portray an NPC or a tactic you’d like to use in a combat.
• Get familiar with the monster statistics in the Appendix.
• Gather together any resources you’d like to use to aid you in Dungeon Mastering, such as notecards, a DM screen, miniatures, battlemaps, etc.
• If you know the composition of the group beforehand, you can make adjustments as noted throughout the adventure.
Before Play at the Table Ask the players to provide you with relevant character information. This includes: • Character name and level • Character race and class • Passive Wisdom (Perception)—the most common
passive ability check • Anything notable as specified by the adventure (such
as backgrounds, traits, flaws, and so on) Players that have characters outside the adventure’s level range cannot participate in the adventure with those characters. Players can play an adventure they previously played or ran as a Dungeon Master, but not with the same character (if applicable). Ensure that each player has an official adventure logsheet for his or her character (if not, get one from the organizer). The player will fill out the adventure name, session number, date, and your name and DCI number. In addition, the player also fills in the starting values for XP, gold, downtime, renown, and number of permanent magic items. He or she will fill in the other values and write notes at the conclusion of the session. Each player is responsible for maintaining an accurate logsheet. If you have time, you can do a quick scan of a player’s character sheet to ensure that nothing looks out of order. If you see magic items of very high rarities or strange

Harried in Hillsfar Not for resale. Permission granted to print or photocopy this document for personal use only. 3
arrays of ability scores, you can ask players to provide documentation for the irregularities. If they cannot, feel free to restrict item use or ask them to use a standard ability score array. Point players to the D&D Adventurers League Player’s Guide for reference. If players wish to spend downtime days and it’s the beginning of an adventure or episode, they can declare their activity and spend the days now, or they can do so at the end of the adventure or episode. Players should select their characters’ spells and other daily options prior to the start of the adventure, unless the adventure specifies otherwise. Feel free to reread the adventure description to help give players hints about what they might face.
Adjusting the Adventure Throughout this adventure, you may see sidebars to help you make adjustments to this adventure for smaller/larger groups and characters, of higher/lower levels that the optimized group size. Most of the time, this is used for combat encounters. You may adjust the adventure beyond the guidelines given in the adventure, or for other reasons. For example, if you’re playing with a group of inexperienced players, you might want to make the adventure a little easier; for very experienced players, you might want to make it a little harder. Therefore, five categories of party strength have been created for you to use as a guide. Use these as a guide, and feel free to use a different adjustment during the adventure if the recommended party strength feels off for the group. This adventure is optimized for a party of five 1st-level characters. To figure out whether you need to adjust the adventure, do the following: • Add up the total levels of all the characters • Divide the total by the number of characters • Round fractions of .5 or greater up; round frations of
less than .5 down You’ve now determined the average party level (APL) for the adventure. To figure out the party strength for the adventure, consult the following table.
Determining Party Strength Party Composition Party Strength 3-4 characters, APL equivalent Weak
3-4 characters, APL greater than Average
5 characters, APL equivalent Average
5 characters, APL greater than Strong
6-7 characters, APL equivalent Strong
6-7 characters, APL greater than Very strong Average party strength indicates no recommended adjustments to the adventure. Each sidebar may or may not offer suggestions for certain party strengths. If a particular recommendation is not offered for your group, you don’t have to make adjustments.
Dungeon Mastering the Adventure As the DM of the session, you have the most important role in facilitating the enjoyment of the game for the players. You help guide the narrative and bring the words on these pages to life. The outcome of a fun game session often creates stories that live well beyond the play at the table. Always follow this golden rule when you DM for a group: Make decisions and adjudications that enhance the fun of the adventure when possible. To reinforce this golden rule, keep in mind the following: • You are empowered to make adjustments to the
adventure and make decisions about how the group interacts with the world of this adventure. This is especially important and applicable outside of combat, but feel free to adjust the adventure for groups that are having too easy or too hard of a time.
• Don’t make the adventure too easy or too difficult for a group. Never being challenged makes for a boring game, and being overwhelmed makes for a frustrating game. Gauge the experience of the players (not the characters) with the game, try to feel out (or ask) what they like in a game, and attempt to give each of them the experience they’re after when they play D&D. Give everyone a chance to shine.

Harried in Hillsfar Not for resale. Permission granted to print or photocopy this document for personal use only. 4
• Be mindful of pacing, and keep the game session moving along appropriately. Watch for stalling, since play loses momentum when this happens. At the same time, make sure that the players don’t finish too early; provide them with a full play experience. Try to be aware of running long or short. Adjust the pacing accordingly.
• Read-aloud text is just a suggestion; feel free to modify the text as you see fit, especially when dialogue is present.
• Give the players appropriate hints so they can make informed choices about how to proceed. Players should be given clues and hints when appropriate so they can tackle puzzles, combat, and interactions without getting frustrated over lack of information. This helps to encourage immersion in the adventure and gives players “little victories” for figuring out good choices from clues.
In short, being the DM isn’t about following the adventure’s text word-for-word; it’s about facilitating a fun, challenging game environment for the players. The Dungeon Master’s Guide TM has more information on the art of running a D&D game.
Downtime and Lifestyle
At the beginning of each play session, players must declare whether or not they are spending any days of downtime. The player records the downtime spent on the adventure logsheet. The following options are available to players during downtime (see the D&D basic rules or the D&D Adventurers League Player’s Guide for more information): • Catching up • Crafting (exception: multiple characters cannot
commit to crafting a single item) • Practicing a profession • Recuperating • Spellcasting services (end of the adventure only) • Training Other downtime options might be available during adventures or unlocked through play, including faction-specific activities. In addition, whenever a character spends downtime days, that character also spends the requisite expense for his or her lifestyle. Costs are per day, so a character that spends ten days of downtime also spends ten days of expenses maintaining his or her lifestyle. Some downtime
activities help with lifestyle expenses or add lifestyle expenses.
Spellcasting Services
Any settlement the size of a town or larger can provide some spellcasting services. characters need to be able to travel to the settlement to obtain these services. Alternatively, if the party finishes an adventure, they can be assumed to return to the settlement closest to the adventure location. Spell services generally available include healing and recovery spells, as well as information-gathering spells. Other spell services might be available as specified in the adventure. The number of spells available to be cast as a service is limited to a maximum of three per day total, unless otherwise noted.
Spellcasting Services Spell Cost Cure wounds (1st level) 10 gp Identify 20 gp
Lesser restoration 40 gp
Prayer of healing (2nd level) 40 gp
Remove curse 90 gp
Speak with dead 90 gp
Divination 210 gp
Greater restoration 450 gp
Raise dead 1,250 gp
Acolyte Background A character possessing the acolyte background requesting spellcasting services at a temple of his or her faith may request one spell per day from the Spellcasting Services table for free. The only cost paid for the spell is the base price for the consumed material component, if any. Faiths that can call upon spellcasting services in and around Hillsfar include the following: Chauntea, Lliira, Mielikki, and Tempus.
Character Disease, Death, and Recovery
Sometimes bad things happen, and characters get poisoned, diseased, or die. Since you might not have the same characters return from session to session, here are the rules when bad things happen to characters.

Harried in Hillsfar Not for resale. Permission granted to print or photocopy this document for personal use only. 5
Disease, Poison, and Other Debilitating Effects A character still affected by diseases, poisons, and other similar effects at the conclusion of an adventure can spend downtime days recuperating until such time as he or she resolves the effect to its conclusion (see the recuperating activity in the D&D basic rules). If a character doesn’t resolve the effect between sessions, that character begins the next session still affected by the debilitating effect.
Death A character who dies during the course of the adventure has a few options at the end of the session (or whenever arriving back in civilization) if no one in the adventuring party has immediate access to a raise dead or revivify spell, or similar magic. A character subject to a raise dead spell is affected negatively until all long rests have been completed during an adventure. Alternatively, each downtime day spent after raise dead reduces the penalty to attack rolls, saving throws, and ability checks by 1, in addition to any other benefits the downtime activity might provide. Create a New 1st-Level Character. If the dead character is unwilling or unable to exercise any of the other options, the player creates a new character. The new character does not have any items or rewards possessed by the dead character. Dead Character Pays for Raise Dead. If the character’s body is recoverable (it’s not missing any vital organs and is mostly whole) and the player would like the character to be returned to life, the party can take the body back to civilization and use the dead character’s funds to pay for a raise dead spell. A raise dead spell cast in this manner costs the character 1,250 gp. Character’s Party Pays for Raise Dead. As above, except that some or all of the 1,250 gp for the raise dead spell is paid for by the party at the end of the session. Other characters are under no obligation to spend their funds to bring back a dead party member. Faction Charity. If the character is of level 1 to 4 and a member of a faction, the dead character’s body can be returned to civilization and a patron from the faction ensures that he or she receives a raise dead spell. However, any character invoking this charity forfeits all XP and rewards from that session (even those earned prior to death during that session), and cannot replay that episode or adventure with that character again. Once a character reaches 5th level, this option is no longer available.
Adventure Background
Like many of the other towns and cities on the Moonsea, Hillsfar has seen its share of warfare and turmoil. Hostilities with the elves of Cormanthor, with Zhentil Keep, with the Shadovar, and with their own morally questionable leadership have plagued Hillsfar for more than a century. For the first time in a long time, the people of Hillsfar can look outside their walls and not see a dire threat looming at their gates. Or at least, none that are obvious. Rampant xenophobia, steeped in years of misdirected fear and outrage, have led to not just a citizenry distrustful of any non-humans, but also to a series of laws outright forbidding anyone other than humans to become citizens of Hillsfar. The laws of the government and the attitudes of the human citizens mean that the only non-humans allowed into the city are slaves, most of whom fight for their lives at the Arena--to the delighted jeers of the human populace. The outskirts and rural lands around Hillsfar, because of these laws, are littered with non-human refugees, many who lost everything when they were evicted from their homes and businesses within the city. Some of these refugees plot against the authorities of their former home, but most simply try to survive through commerce, farming, or other legal (or illegal) pursuits. When rumors of strange happenings around Hillsfar reached the ears of the five factions, representatives of each established camps near the village of Elventree. From these bases, the factions send out agents to investigate these strange tales, hoping to prevent any major calamities--or profit from them.
Overview
Harried in Hillsfar is broken into five mini-adventures, each designed for one to two hours of play. Therefore if you are attempting to run all five missions in one session, you need a minimum of five hours to do so (and probably much more). If running this adventure as part of an event that cycles players through quickly, the DMs should be familiar with the mini-adventures they are running. At public events, time is often the most important factor. Get the players into the mini-adventure as quickly as possible, keep an eye on the clock, and take whatever shortcuts are necessary to stay on schedule. Remind the players of the time limits, and encourage them to take the adventures at face value rather than looking for any hidden plots or side quests. If time is not an issue, let the characters spend more
Harried in Hillsfar Not for resale. Permission granted to print or photocopy this document for personal use only. 6
time interacting with the non-player characters within the mini-adventures. It is not required that the missions be played in order, although some equipment found in earlier missions might help more in later ones. If an adventurer complete all five missions, they should have collected the entire secret message that provides a hint about a secret in this season of Expedition adventures.
Adventure Hook If you are running this adventure as a longer play experience rather than as individual missions, you might want to use the long adventure hook introduction, which provides some additional roleplaying and information-gathering opportunities. If you are running individual missions rather than the entire adventure, consider using the short adventure hook introduction. Using the long adventure hook introduction for an individual mission might take longer than desired. With the factions invested in finding the source of the strange occurrences in the lands around Hillsfar, each faction established a faction camp near the village of Elventree, on the edge of the Cormanthor Forest near Hillsfar. Each camp serves as a base of operations for the corresponding faction. Characters already enrolled in a faction received word from a representative of their group that assistance was needed in the Hillsfar area. The instructions were simple: spend some time exploring near Hillsfar and investigate anything strange you might encounter. After investigating completely, return to the faction camp and report. The faction members are also told not to interrupt or hinder the investigations of the other factions under any circumstance. In fact, since assisting another faction often provides better information, be as cooperative as possible toward other factions. Characters not already a member of a faction can join one at any time, and they get the chance to interact with a representative of each faction during one of the missions. It is assumed that these "factionless" characters are simply traveling or adventuring in the area around Hillsfar, following rumors of strange occurrences.
Short Introduction
When the players are ready to being, read:
Vague and bizarre rumors brought you to Hillsfar. The rumors
ranged from leprechauns showering travelers with gold to
undead armies terrorizing the Hillsfar farmsteads.
Perhaps the wildest rumor you heard turned out to be true: all
the non-human citizens within the walls of the city-state of
Hillsfar have been evicted. The only non-humans left in the city
are the slaves who fight at the Arena. Fights to the death, it is
said. Anyone not obviously human is turned away at the Hillsfar
Gate, which is the only way into and out of the walled city.
In your travels, you and your group found a poor, suffering
human on the road. Dirty, emaciated, and obviously mad, his
ranting at first seemed like the gibberish of a shattered mind.
But as the man died at your feet, something about his words
struck a chord. They seemed more prophecy than prattle. After
some investigation, you learned that the madman's words
corresponded to five locations in the Hillsfar area. Certainly it
cannot hurt to investigate, right?
Present the players with Handout 1, which contains the mad-man's words and some notes about the locations associated with each of the five verses of the prophecy. The players might have questions about these five areas. If you are running the game in a venue where time is a factor, don't feel the need to provide information other than the location. Get the characters into the mission, and let them investigate from there. If you are not in a timed environment, provide any information you wish about the locations based on details found in the mission location.
Harried in Hillsfar Not for resale. Permission granted to print or photocopy this document for personal use only. 7
Long Introduction
When the players are ready to begin, read:
Rumors of strange occurrences brought you to the Hillsfar
region. The vague and bizarre rumors ranged from leprechauns
showering travelers with gold to undead armies terrorizing the
many farmsteads.
The one rumor that turned out to be true was perhaps the
wildest of all. All the non-human citizens within the walls of the
city-state of Hillsfar were evicted. The only non-humans left in
the city are the slaves who fight at the Arena. Fights to the
death. Anyone not obviously human is turned away at the
Hillsfar Gate, the only way into and out of the walled city.
You travel north on the Moonsea Ride, the often-used
merchant road south of Hillsfar, which also navigates through
expansive Cormanthor Forest. Others [the other characters]
travel with or near you.
A muffled shout bursts from a copse of trees off the road, and
an old human man wearing torn and bloody clothes staggers
into view. The blood on his clothes comes from small cuts and
scratches rather than any large wound. His charge toward you is
slow, ponderous, and shaky. Before you can even draw weapons
or ready spells, he collapses in the grass. He still shouts,
however, although the words grow fainter and fainter with each
passing moment.
Anyone approaching the man can see he is old but not elderly, injured but not fatally, and appears to be suffering but for no apparent reason. He keeps shouting the same words, like a mantra, over and over. His sentences are long and rambling. For some reason, the words burn themselves into the players' memories. Neither Medicine checks nor magical healing assuages the man's pain or madness, and he dies at the feet of the characters after repeating his message several times. The man carries no belongings nor has any distinguishing features. A successful DC 20 Intelligence (Arcana or Religion) check shows the lingering effect of possible infernal magic on the man. Here you have a choice as the DM. If you would prefer the characters get directly into the adventure, provide the players with Handout 1. This handout contains the text of the madman's prophecy, as well as notes that the characters collect "off-screen" through gathering rumors, interviewing locals, and drawing upon their own knowledge. These notes allow you to jump straight into each of the missions.
If you would prefer to roleplay the collecting of information concerning the madman's words, you can provide Handout 2, which contains just the text of the madman's prophecy. Then you can create NPCs based on the actions of the characters, getting the information piecemeal.
Harried in Hillsfar Not for resale. Permission granted to print or photocopy this document for personal use only. 8
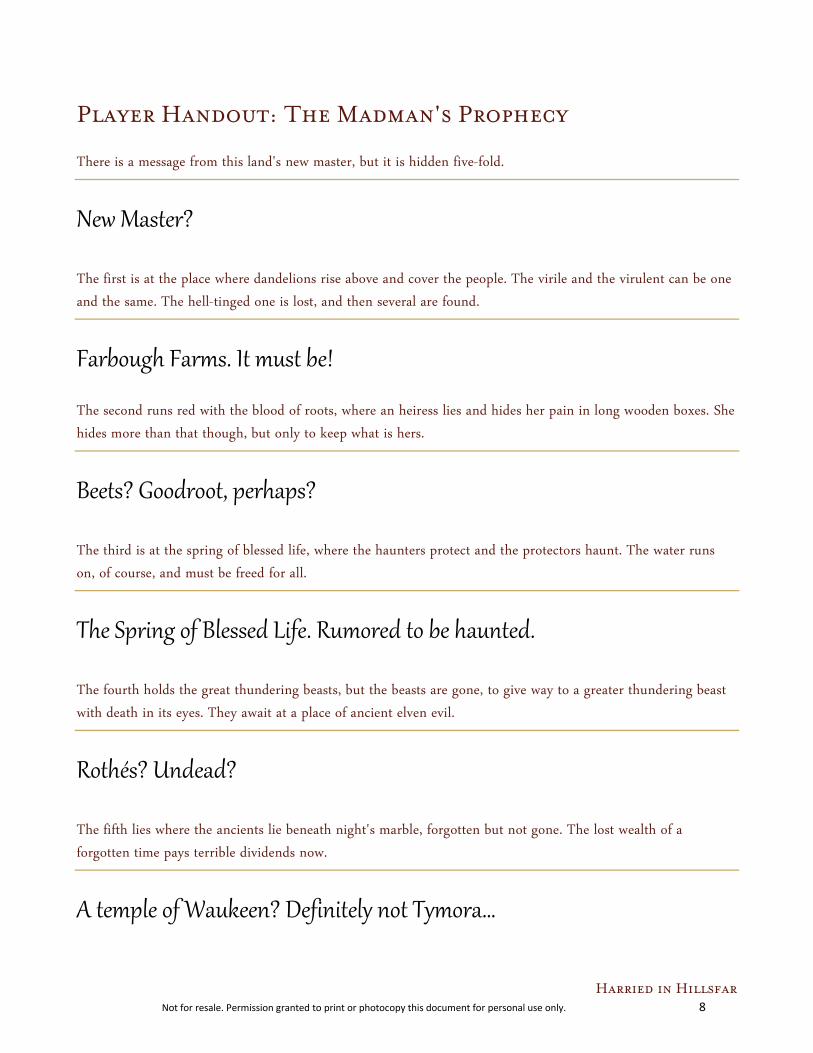
Player Handout: The Madman's Prophecy There is a message from this land's new master, but it is hidden five-fold.
New Master?
The first is at the place where dandelions rise above and cover the people. The virile and the virulent can be one and the same. The hell-tinged one is lost, and then several are found.
Farbough Farms. It must be!
The second runs red with the blood of roots, where an heiress lies and hides her pain in long wooden boxes. She hides more than that though, but only to keep what is hers.
Beets? Goodroot, perhaps?
The third is at the spring of blessed life, where the haunters protect and the protectors haunt. The water runs on, of course, and must be freed for all.
The Spring of Blessed Life. Rumored to be haunted.
The fourth holds the great thundering beasts, but the beasts are gone, to give way to a greater thundering beast with death in its eyes. They await at a place of ancient elven evil.
Rothés? Undead?
The fifth lies where the ancients lie beneath night's marble, forgotten but not gone. The lost wealth of a forgotten time pays terrible dividends now.
A temple of Waukeen? Definitely not Tymora…

Harried in Hillsfar Not for resale. Permission granted to print or photocopy this document for personal use only. 9
Mission 1: The Birth
The first clue contained in the madman's ravings leads the characters to the farmstead of Ebenz and Bea Farbough, a married couple who run a farm on the outskirts of Hillsfar where they raise goats and chickens, primarily. As the characters approach the farm, read:
The madman's words spoke of Farbough Farms. The
farmhouse, sheds, and barns on the road ahead match the
description in the madman's prophecy. Their green-painted
walls and yellow roofs make the buildings look like huge
dandelions sprouting in the fields.
A pair of short figures carries sloshing buckets from a nearby
stream toward one of the barns. A significant amount of noise
emanates from inside the farmhouse itself, as if a crowd of
angry people are all shouting at once.
When the characters approach, they realize the two small figures carrying buckets are a young female half-orc and a young female dwarf. The two young girls shy away from the characters if spoken to but do not flee. They give no information other than their names: the half-orc is Grona, and the dwarf is Bridd. Any other queries are answered by the pair with a brief, "Ask Ma and Pa" while nodding toward the noisy farmhouse. After the pair deals with the characters, they continue their chores--watering the livestock and mucking out the barn. If any characters attempt to follow them or otherwise harass them, the pair nervously retreat to the farmhouse and the safety of their foster parents. Humans in the party make the pair even more nervous, which is noticed by any character succeeding on a DC 10 Wisdom (Insight) check.
The Farmhouse
When the characters look into the farmhouse, read:
The farmhouse door is propped open with a hay fork, revealing a
tumultuous scene. More than 20 people mill about a bustling
kitchen. At least 10 are children of various races--none human.
The adults, on the other hand, are all human.
A woman of middle years shouts above the din. In one arm she
cradles an infant human, while second rests in a sling at her
waist. Three other adult humans and a young non-human hold
other human newborns. Between the woman and those helping
her, there are a total of six human infants.
The two oldest humans in the farmhouse are Ebenz and
Bea Farbough, the owners of this farm. The 10 non-human youngsters are their adopted children, and the human babies are a set of sextuplets that Bea recently gave birth to. The other adult humans are farmhands and servants. The non-human children (there are 12 total at the farm) lived at Madame Delilah's Home for Orphaned Children in Hillsfar until a couple years ago. With the passing of the law banishing all non-humans from the city, the Red Plumes forcibly removed the youths from Madame Delilah's care. The Farboughs, then unable to have children of their own, happily agreed to take in the ousted orphans.
The Great Law of Humanity During his reign, the original First Lord of Hillsfar, Maalthiir, dictated that only humans were to be permitted within the city proper. With his death, the Second Great Law fell out of practice until recently when the current First Lord, Torin Nomerthal, revived the aged practice. Currently, the only non-humans inside the walls of Hillsfar are found within the Arena; fodder for the crowd's pleasure. A year after the mass adoption, however, Bea found herself pregnant with not just one child, but six. All of the sextuplets, miraculously, were born healthy and are thriving--although each of the babies has an extra finger on each hand and extra toe on each foot. The chaos of mealtime within the farmhouse subsides momentarily when the farm's inhabitants notice the characters. Bea, waving a wooden spoon at the room, addresses the characters:
"If you're here for a meal, grab some taters from the bin and
peel them and we'll cook them up for you. You'll have to catch
and dress your own chicken though.”
“But before we eat, make yourselves useful. Someone needs to
go and fetch Pynroth: ask the two girls outside where that boy
has got off to. If any of you have any skill in husbandry, run out
to the goat barn and see if Jovee's kids are ready to pop yet.
Verner, take these folks out and introduce them to Jovee. When
you're done, come back for a meal."
Before Bea or anyone else at the farm answers questions from the characters, they expect the characters to do the chores assigned to them by Bea. Verner is a young halfling lad--short and sickly looking, even for a halfling. He is sullen at being made to do more chores before getting supper. He answers adventurer questions with grunts and eye-rolling, although his attitude changes when he sees the state Jovee is in.

Harried in Hillsfar Not for resale. Permission granted to print or photocopy this document for personal use only. 10
Where is Pynroth? Pynroth is a tiefling boy--one of the orphans. He is currently going through a rebellious streak. He was told to stay out of the furthest pasture because of dangerous creatures have been seen there as of late. So naturally--like any rebellious youth would--he headed there immediately. The two girls that the characters encountered earlier know where their foster brother went, but are afraid of getting scolded for not stopping him or telling the Farboughs about his transgressions sooner. When asked directly, the girls lie--albeit poorly; saying they do not know his whereabouts. A successful DC 5 Wisdom (Insight) check reveals their falsehood. A successful DC 10 Charisma (Deception, Intimidation, or Persuasion) check convinces them to reveal the truth. Humans have disadvantage on Persuasion checks made in this fashion, but advantage on Intimidation checks since the girls are wary of humans due to past mistreatment. Similarly, checks made by creatures of the same race (dwarf or half-orc, respectively) are also made with advantage. If the Charisma check succeeds on the first attempt, the characters have advantage on initiative checks in the combat with the wild dogs. They also learn that the boy went to the far pasture for no other reason than because he was told not to. The farmhands have run across strange and terrible creatures there: beasts that look like normal creatures but with unusual features and eyes that glow red in the dark of night. If the original Charisma check fails by more than 5, it takes a long time for the characters to convince the girls to talk. When they finally do, they only tell Pynroth's location and make no mention of the strange creatures. Any initiative checks made by the characters in the encounter with the wild dogs are made with disadvantage. Regardless of their checks, they eventually learn the location of Pynroth and may seek him out.
What’s Wrong with Jovee? When Verner leads the characters into the goat barn, read:
High-pitched shrieks of fear and panic greet you as you enter the
barn. A couple dozen goats fill the barn, but most huddle in the
corners, shying away from a single goat in the center. The
hideously distended belly of that goat shows the nanny is
pregnant, but she is quite large. Even those of you who have
dealt with animal births in the past have likely never seen
anything like this.
No check is needed to realize this is something unusual. Verner starts crying and runs over to the suffering goat, but stops in horror before reaching her. He tells the characters that when he was tending to her this morning, she was big but not like this. He begs the characters to help Jovee. Jovee is in labor, but is having problems for reasons that are about to become apparent. Characters must make a DC 10 Wisdom (Medicine) or Intelligence (Nature) check to get the first kid out of Jovee successfully. If the characters think to try to calm Jovee, they can attempt a DC 10 Wisdom (Animal Handling) check. Success gives the adventurer making the birthing check advantage on that check. If this first check succeeds, the first kid is wrestled from Jovee--who survives the experience (so far). If not, Jovee dies during the birthing process. Regardless of whether she lives or dies, her kids are born healthy but "different."
The firstborn goat comes out, and it is instantly clear what the
problem was. The kid is much larger than a normal newborn
goat, with bright red fur, and two heads that stare at you with a
mix of curiosity and scorn. It immediately stands and wobbles
away with a dismissive "baaaaah" that is deep and long and
more than a little unsettling.
Before you can react, another red-furred kid emerges from
Jovee. You know it is not uncommon for goats to have twins.
Then another kid slides out. Then another. Before you know it,
five more kids lie on the ground near their mother; for a total of
six--a peculiar feat.
Jovee, if she is still alive, collapses and starts convulsing. Verner cries in alarm and runs over to her; once more begging the characters to intercede. Jovee will not survive unless the characters succeed immediately at a DC 15 Wisdom (Medicine) check or use healing magic on the goat. If the characters save the ailing mother goat, they find their later combat with the demon goats easier. Characters wishing to examine the newborn goats don't need any check to tell them that the kids are definitely extraordinary. A DC 20 Intelligence (Arcana or Religion) check reveals that the goats definitely are imbued some sort of unholy essence. A successful DC 20 Intelligence (Arcana or Religion) check shows the lingering effect of possible infernal magic on the goats. Abilities such as detect magic or divine sense reveal this without the need of a check.

Harried in Hillsfar Not for resale. Permission granted to print or photocopy this document for personal use only. 11
If the characters talk about killing the goats aloud, or move as there are going to do so, Verner throws himself between the characters and their prey and begs the characters not to hurt the goats. If the characters refuse to heed the young halfling's pleas, proceed to the combat in Demon Goats, below. In this case, the characters have to fight all the goats, even if they saved Jovee's life.
XP Award If the characters save Jovee, award each character 25 XP.
Rescuing Pynroth
After learning where Pynroth has gone, the characters must find the young tiefling if they want to get their questions answered (and get the meal, promised above). Following the mile-long trail where the young tiefling went, the characters soon arrive at the far pasture. When they arrive, read:
Rounding a thicket of large willows, you see the pasture. The
normally bucolic setting is marred by a pack of wild dogs
surrounding two figures, huddling together in fear. The larger
figure is half-elven, wearing leather armor and clumsily
brandishing a sickle to keep the yipping, growling dogs at bay.
The half-elf has his other arm around a tiefling boy, presumably
Pynroth. Tears in the half-elf's cloak and blood on his arm show
that the wild dogs mean business.
The young tiefling hides behind Beralt, a member of the Emerald Enclave. Beralt wears the stag symbol of the Emerald Enclave on his armor which members of the faction immediately recognize. He fends off the wild dogs with his sickle while protecting the youngster. Five wild dogs circle the pair until they get an opening to attack. They also are trying to trap their prey until their leader; a wild dog alpha arrives. The wild dog alpha hides among the low-hanging branches of a copse of weeping willows. It waits until the characters have engaged the smaller wild dogs before it charges forward and attacks. The alpha attacks at the end of the first round, or whichever round the characters first engage the other dogs. The large wild dog is hidden until it attacks unless the characters succeed on a Wisdom (Perception) check. On a failed check, the creature has advantage on its first attack.
Adjusting the Encounter Here are recommendations for adjusting this combat encounter. These are not cumulative. • Weak party: Remove 3 wild dogs, and large wild dog is not
hiding at start of combat. • Strong or very strong party: Add 3 wild dogs.
Tactics The dogs harry the half-elf and tiefling until the characters engage the dogs by either attacking them or moving adjacent to one of the dogs or their quarry. At that point all the dogs attack the characters, leaving the pair alone. The half-elf does not attack the dogs; instead he focuses his efforts on protecting the boy. If an adventurer falls and is in danger of dying, Beralt uses a potion of healing to revive that adventurer. If the large wild dog and at least 50% of the other dogs are defeated, the remaining dogs disengage and flee.
Developments Once the dogs have been dealt with, the half-elf introduces himself to the characters as Beralt--an initiate in the Emerald Enclave. The half-elf is training to be a druid, and he was sent by his master to investigate rumors that some of the local wildlife has been behaving strangely. He was tracking this pack of wild dogs when he found them attacking the boy. If the characters provide information about the strange goats (or even the children with extra digits) at the farm, Beralt confirms that he has seem similar phenomena locally; multiple births, creatures growing to enormous sizes, creatures born with extra digits or limbs, etc. A few have even shown traces of some sort of infernal heritage. For rescuing him and the boy, Beralt gives the characters a potion of healing (if he did not use it in the combat) and a vial of alchemist's fire. He also offers a silver sickle worth 50 gp, and he puts in a good word for them with the Emerald Enclave if they would like to join. After that, he leaves Pynroth in the characters' care and goes on his way. Finally, if any unaffiliated characters wish to join the Emerald Enclave, Beralt happily sponsors their membership.
Treasure Beralt gives the characters a potion of healing (if it wasn't used during the fight) and a silver sickle.
Harried in Hillsfar Not for resale. Permission granted to print or photocopy this document for personal use only. 12
Demon Goats
This encounter assumes that the characters do not kill the goats immediately after they are born. If they attempted to do so, the goats seem to grow right before their eyes. Run the encounter as is, but give the characters advantage on their first attacks as the goats get their legs. The characters can accompany Pynroth back to the farm. When they arrive, they find the mutated wildlife in the area has one more surprise for the party: The scene at the farm looks much as you left it. That is, until a
scream erupts from the goat barn. Verner sprints from the barn,
limping on an injured leg. Two red-furred goats chase him,
making tortured, raspy sounds you might expect to hear in the
Abyss. Moments later, the rest of the goats' red-furred brother
and sisters emerge. Behind the lot comes the two-headed goat
that since you left the barn has grown to the size of a horse. It
newly sprouted horns look like curved pitchforks.
If the characters were able to save Jovee from dying, remove 3 of the goats from the encounter, as they would rather be with their mother than fighting. Otherwise, the characters walk into the barnyard to face one giant two-headed goat and six goats. The characters start roughly 40 feet away from the goats after the beasts have exited the barn.
Adjusting the Encounter Here are recommendations for adjusting this combat encounter. These are not cumulative. • Weak party: Remove 4 goats. • Strong or very strong party: Double the giant two-headed
goat's hit points.
Tactics The goats, including the large goat, charge as much as they can to take advantage of their butt attacks. During the battle, the large goat continually brays with a voice that sounds like a low, demonic growl.
Developments Hearing the ruckus, the people inside the farmhouse run outside to witness the battle. Obviously, they do not blame the characters for dealing with the obviously corrupted demon goats.
Treasure For helping out and rescuing them all from the problems on the farm, Bea offers the characters various homemade goods, 15 total items, ranging from beautiful quilts, a couple kegs of homemade cider, to an heirloom necklace, to basket full of fresh raspberries and other fruits and vegetables. The whole lot can be sold for 150 gp, but each item is worth 10 gp if the characters wish to keep some of them for themselves.

Harried in Hillsfar Not for resale. Permission granted to print or photocopy this document for personal use only. 13
Rewards Make sure the players note their rewards on their adventure log sheets. Give your name and DCI number (if applicable) so players can record who ran the session. If you are playing all of the missions as a single adventure, or playing multiple missions in one session, you can wait and give the rewards for all missions played at the end of the session.
Experience
Total up all combat experience earned for defeated foes, and divide by the number of characters present in the combat. For non-combat experience, the rewards listed are per character. Give all characters in the party non-combat experience awards unless otherwise noted.
Combat Awards Name of Foe XP per Foe Wild dog 25
Wild dog alpha 200
Goat 10
Giant two-headed goat 100
Non-Combat Awards Task or Accomplishment XP per Character Save Jovee 25 The minimum total award for each character participating in this adventure is 75 experience points. The maximum total award for each character participating in this adventure is 100 experience points.
Treasure
The characters receive the following treasure, divided up amongst the party. Characters should attempt to divide treasure evenly whenever possible. Gold piece values listed for sellable gear are calculated at their selling price, not their purchase price. Consumable magic items should be divided up however the group sees fit. If more than one character is interested in a specific consumable magic item, the DM can determine who gets it randomly should the group be unable to decide. Permanent magic items are divided up according to a system. See the sidebar if the adventure awards permanent magic items.
Treasure Awards Item Name GP Value Silver sickle 50
Items from the Farboughs 150
Potion of Healing A description of this item can be found in the basic rules or the Player’s Handbook. Alchemist’s Fire A description of this item can be found in the basic rules or the Player’s Handbook.
Renown
Emerald Enclave characters only receive one renown point for defeating the wild dogs.
Downtime
Each character receives five downtime days at the conclusion of this mini-adventure.
DM Rewards
You receive 100 XP, 50 gp, and five downtime days for each session you run of this mini-adventure.

Harried in Hillsfar Not for resale. Permission granted to print or photocopy this document for personal use only. 14
Appendix: Monster/NPC Statistics
Goat Medium beast, unaligned Armor Class 10 Hit Points 4 (1d8) Speed 40 ft. STR DEX CON INT WIS CHA 12 (+1) 10 (+0) 11 (+0) 2 (−4) 10 (+0) 5 (−3) Senses passive Perception 10 Languages — Challenge 0 (10 XP) Charge. If the goat moves at least 20 feet straight toward a target and then hits it with a ram attack on the same turn, the target takes an extra 2 (1d4) bludgeoning damage. If the target is a creature, it must succeed on a DC 10 Strength saving throw or be knocked prone.
Sure-Footed. The goat has advantage on Strength and Dexterity saving throws made against effects that would knock it prone.
Actions Ram. Melee Weapon Attack: +3 to hit, reach 5 ft., one target. Hit: 3 (1d4 + 1) bludgeoning damage.
Giant Two-Headed Goat Large beast, unaligned Armor Class 11 (natural armor) Hit Points 19 (3d10 + 3) Speed 40 ft. STR DEX CON INT WIS CHA 17 (+3) 11 (+0) 12 (+1) 3 (−4) 12 (+1) 6 (−2) Senses passive Perception 11 Languages — Challenge 1/2 (100 XP) Charge. If the goat moves at least 20 feet straight toward a target and then hits it with a ram attack on the same turn, the target takes an extra 5 (2d4) bludgeoning damage. If the target is a creature, it must succeed on a DC 13 Strength saving throw or be knocked prone.
Sure-Footed. The goat has advantage on Strength and Dexterity saving throws made against effects that would knock it prone.
Actions Multiattack. The two-headed goat makes two ram attacks. These attacks must be against different targets.
Ram. Melee Weapon Attack: +5 to hit, reach 5 ft., one target. Hit: 8 (2d4 + 3) bludgeoning damage.
Wild Dog Medium beast, unaligned Armor Class 12 Hit Points 5 (1d8 + 1) Speed 40 ft. STR DEX CON INT WIS CHA 13 (+1) 14 (+2) 12 (+1) 3 (−4) 12 (+1) 7 (−2) Skills Perception +3 Senses passive Perception 13 Languages — Challenge 1/8 (25 XP) Keen Hearing and Smell. The wild dog has advantage on Wisdom (Perception) checks that rely on hearing or smell.
Actions Bite. Melee Weapon Attack: +3 to hit, reach 5 ft., one target. Hit: 4 (1d6 + 1) piercing damage.
Wild Dog Alpha Large beast, unaligned Armor Class 12 Hit Points 26 (4d10 + 4) Speed 50 ft. STR DEX CON INT WIS CHA 17 (+3) 15 (+2) 13 (+1) 3 (−4) 12 (+1) 8 (−1) Skills Perception +3 Senses passive Perception 13 Languages — Challenge 1 (200 XP) Keen Hearing and Smell. The wild dog alpha has advantage on Wisdom (Perception) checks that rely on hearing or smell.
Pack Tactics. The wild dog alpha has advantage on an attack roll against a creature if at least one of the wild dog alpha’s allies is within 5 feet of the creature and the ally isn’t incapacitated.
Pounce. If the wild dog alpha moves at least 20 feet straight toward a creature and then hits it with a bite attack on the same turn, that target must succeed on a DC 13 Strength saving throw or be knocked prone. If the target is prone, the lion can make one additional bite attack against it as a bonus action.
Running Leap. With a 10-foot running start, the wild dog alpha can long jump up to 25 feet.
Actions Bite. Melee Weapon Attack: +5 to hit, reach 5 ft., one target. Hit: 7 (1d8 + 3) piercing damage.

Harried in Hillsfar Not for resale. Permission granted to print or photocopy this document for personal use only. 15
DM Appendix: NPC Summary This section is provided to the Dungeon Master to help keep track of the various NPCs present in the adventure. Ebenz and Bea Farbough (EE-benz and BEE FAHR-bo). Married human couple. Bea recently gave birth to sextuplets. The couple has a mess of adopted children. Pynroth (PINE-roth). Young, male tiefling. Rebelious. Jovee (JOE-vee). Female goat. Pregnant. Beralt (ber-ALT). Male half-elf. Member of the Emerald Enclave. Investigating corrupted creatures in the area of Farbough's Farm.

Harried in Hillsfar Not for resale. Permission granted to print or photocopy this document for personal use only. 16
Map: Demon Goats…?

Harried in Hillsfar Not for resale. Permission granted to print or photocopy this document for personal use only. 17
Mission 2: The Growth The second clue of the madman's ravings leads the characters to the Goodroot Farm, a place famous for its prodigious beet crop. Right now, with her parents "absent," the farm is being supervised by their half-elven daughter Constance. As the characters approach the farm, read:
The madman's words spoke of the Goodroots. The fields
surrounding this farm teem with laborers, mostly non-humans,
picking beets. Some of the beets you see being harvested are
twice as large as a halfling's head. And that's saying something!
On the porch of the farmhouse, four human soldiers dressed
in red cloaks, chain shirts, and helmets with red feathers
decorating them surround a half-elven girl. She is definitely not
an adult, but she nonetheless stands defiantly with hands on her
hips, giving the four humans a piece of her mind, despite their
spears and shields.
The human soldiers, led by a tall, muscular captain named Dessandra, are Red Plumes, the official guards and police force of the city of Hillsfar. They are feared and loathed by many citizens of Hillsfar, particularly the non-human population. Currently, the four Red Plume guards are here to retrieve eight casks of the red dye that the Goodroots produce from the beet juice harvested on this farm. The half-elven girl, Constance Goodroot, is the daughter of the farm's owners. When the characters approach, making their presence known, they hear the end of the argument.
The girl finishes speaking as you approach. The leader of the
human guards spits out a blunt warning. "You tell your parents
that they have been legally ordered to have eight barrels of dye
ready for us by sunrise tomorrow. If the shipment is not ready,
the First Lord has demanded that the Red Plumes take
possession of the farm due to this breach of contract." With
that, the four guards turn and leave the porch.
Dealing with the Red Plumes The Red Plumes and their leader Dessandra ignore the characters unless the characters insert themselves into the conflict. Dessandra ignores most comments or questions from the characters. If she is forced to speak to them, her reply is something along these lines: "Unless you are a legal representative of the Goodroot Beet Farm, I have nothing to say to you. Move along or you will be arrested."
The Red Plumes The mercenary army of Hillsfar's original First Lord, Lord Maalthiir, the Red Plumes were ousted from the city following his flight and subsequent disappearance. Following the defeat of the Netherese at Hillsfar's gates, its survivors along with the Tower Guard--the former military force of Hillsfar--were rebranded as the new Red Plumes. To that end, they have been empowered by now First Lord Torin Nomerthal to enforce the Great Law of Humanity both within the city and in the area surrounding it. They are considered little more than officially-sanctioned bullies by the populace. However, as Hillsfar is a rather wealthy city (due to the large amount of trade it conducts), they are many in number and exceptionally well-equipped; most trouble-makers know to leave them well enough alone. As long as the characters do nothing that could be interpreted as assaulting (not including threatening) the Red Plumes, they leave without incident. Should one of the adventurers assault or threaten the soldiers attempt to arrest the character--peacefully at first. Any others that attempt to assist the offending character is similarly arrested. If the characters react with force, the guards defend themselves similarly. Be sure to explain to the player, before an adventurer performs an action that could lead to arrest, that these soldiers are the police force of Hillsfar, and they do not tolerate disrespect or aggressive behavior toward them. If a player still wishes his or her adventurer to behave in such a manner, let that player learn with the consequences at the business end of a cudgel or, worst, a longsword. The Red Plumes treat those who cooperate with brusque words, but otherwise fairly; they do not penalize compliance from those who simply chose poor company. If there is a battle, and the characters kill or subdue the soldiers, Constance is horrified. She knows that the rulers of Hillsfar are looking for any excuse to seize the farm, and this will undoubtedly lead to that. Since this assault takes place in the open, several farm workers see the attack. One of them fetches a squad of nearly two-dozen Red Plume soldiers (see Returning Plumes, below), who appear at the end of the mission.
Questioning Constance Based on the prophecy, the characters should have a good idea that something is wrong at the farm, and it's clear that Constance is in over her head. When they question her, she tries to tell them that her parents are simply visiting relatives in Daggerdale, but her statements are obviously false. If the characters challenge her story, however, she breaks down in tears.

Harried in Hillsfar Not for resale. Permission granted to print or photocopy this document for personal use only. 18
The girl sobs for a moment, looking broken and lost. Then a
look of hope plays across her face. "Perhaps you are the answer
to my prayers. Does Chauntea work in such a manner?" She
looks past you, out into the fields where the beet harvesting
continues unabated. "If you follow me, maybe we can help each
other."
Constance leads the characters into the farmhouse and then down a set of steep wooden stairs into a large cellar. Many doors lead to other rooms from the main cellar. The place is filled with casks, barrels, and containers filled with a variety of substances useful in either farming, preserving food, or making dye. Constance has something terrible to show the characters:
Constance lights a lantern and leads you down into the huge
cellar beneath the farmhouse, which looks to hold preserved
food, equipment for farming and making dye, and casks full of
substances used in those endeavors.
She walks to a corner of the cellar, to a pair of long wooden
boxes. She hesitates and levels a serious gaze at you all. "I'm
sorry," she says and opens the box. In it are two half-elven
bodies wrapped in tarps. They look peaceful, except their faces
wear unsightly growths, bulging beneath the skin--and in some
places breaking through in horrible purple ulcers.
"I know this looks terrible, but it is not what you think. I found
them in this condition. I hid them because they told me to. You
see, I am not currently old enough to inherit the farm from
them. If the authorities learn they are dead, Hillsfar will seize the
farm and turn me out. If I can hide their deaths for just a few
months, I will be old enough to inherit the farm." She bites her
lip. "There's something else."
Leading you to another door in the cellar, Constance removes a
sturdy oaken bar. Before she opens the door, she says, "When I
found my parents down here in the cellar, they were not alone.
He was with them." She opens the door and shines her lantern
into a darkened room. The room contains empty casks and
barrels pushed to the walls. In the far corner, slumped again the
far wall, is a drow elf. The grotesque growths cover his face and
arms, just as Constance's parents. He is still alive, but his
breathing is weak.
The Drow
Ceilings. The ceilings are approximately 10 feet high. Light. Only Constance's lantern lights the room. No other light exists other than what the characters have brought with them.
The drow is unconscious, and has most definitely seen better days. He is obviously suffering from the same disease as the Goodroots. Constance does not know who he is. She never saw him prior to coming upon her dying parents and his unconscious body three days ago. Her parents have contracts with many people, but no drow that she is aware of. She has been giving him water and trying to talk to him, but so far he has not regained consciousness. A successful DC 15 Wisdom (Nature) check reveals that the disease is darkborne rot--a fungal infection that rapidly overtakes the victim. It originates from the Underdark, and it has no natural cure--even lesser restorative magic and abilities have no effect. The victim's body either fights the infection, or it doesn't. Otherwise removing the infection requires a greater restoration or greater magic. Thankfully, none of the characters or Constance are at risk. A successful DC 10 Intelligence (Investigate) check finds a rolled up parchment in the coat pocket of the drow. Written in Common, the parchment is a contract between the beet farm and the drow, apparently named Arrizz, who resides in the area and is acting as a liaison with an unnamed svirfneblin city in the Underdark. The contract is for an exchange of gold for beets and beet-byproducts. There is nothing strange or illegal about the contract itself or the terms. A successful DC 15 Wisdom (Medicine) check can bring Arrizz the drow to consciousness, and he can answer questions. He basically provides the same information as the contract describes. He is a smuggler who brokers deals between interested parties both above and below ground. He was meeting secretly with the Goodroots about bringing beet products to some of his customers. Over the two days he was here, staying in the basement out of the sunlight, he and the Goodroots came down with this terrible malady. The drow remains awake for five minutes before lapsing back into unconsciousness. After the characters have the opportunity to inspect the drow (and question him if they are able to wake him)--they are interrupted.
Harried in Hillsfar Not for resale. Permission granted to print or photocopy this document for personal use only. 19
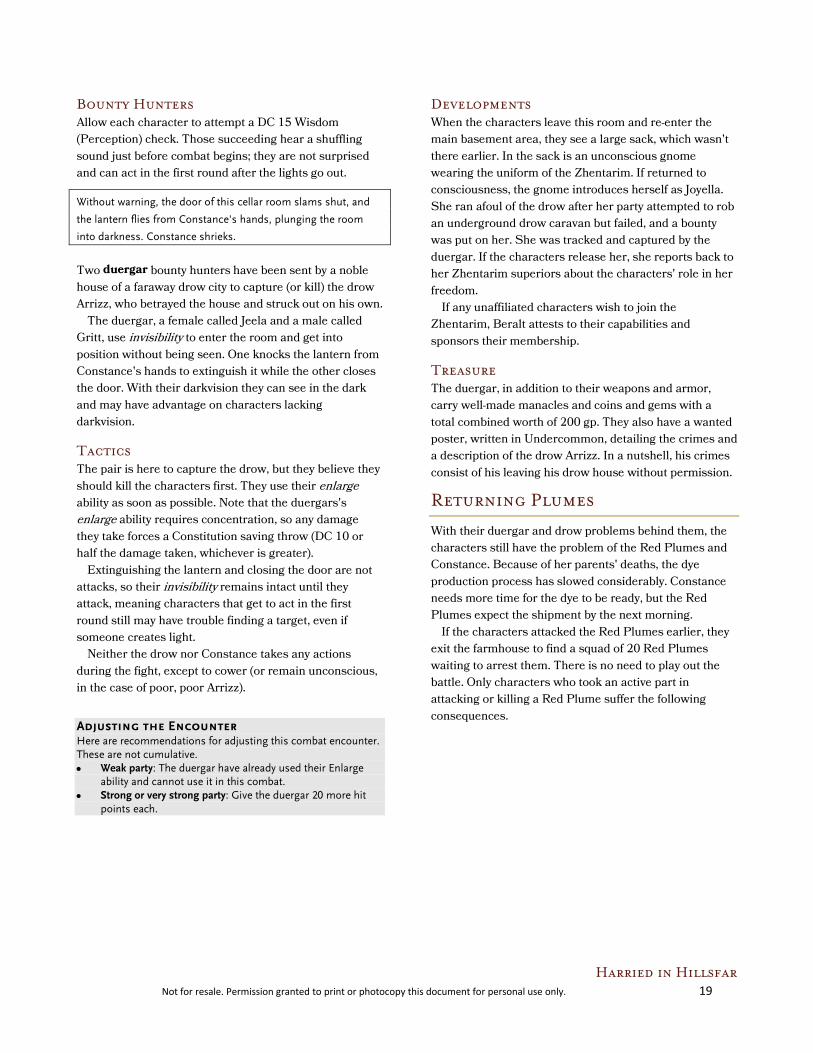
Bounty Hunters Allow each character to attempt a DC 15 Wisdom (Perception) check. Those succeeding hear a shuffling sound just before combat begins; they are not surprised and can act in the first round after the lights go out.
Without warning, the door of this cellar room slams shut, and
the lantern flies from Constance's hands, plunging the room
into darkness. Constance shrieks.
Two duergar bounty hunters have been sent by a noble house of a faraway drow city to capture (or kill) the drow Arrizz, who betrayed the house and struck out on his own. The duergar, a female called Jeela and a male called Gritt, use invisibility to enter the room and get into position without being seen. One knocks the lantern from Constance's hands to extinguish it while the other closes the door. With their darkvision they can see in the dark and may have advantage on characters lacking darkvision.
Tactics The pair is here to capture the drow, but they believe they should kill the characters first. They use their enlarge ability as soon as possible. Note that the duergars's enlarge ability requires concentration, so any damage they take forces a Constitution saving throw (DC 10 or half the damage taken, whichever is greater). Extinguishing the lantern and closing the door are not attacks, so their invisibility remains intact until they attack, meaning characters that get to act in the first round still may have trouble finding a target, even if someone creates light. Neither the drow nor Constance takes any actions during the fight, except to cower (or remain unconscious, in the case of poor, poor Arrizz).
Adjusting the Encounter Here are recommendations for adjusting this combat encounter. These are not cumulative. • Weak party: The duergar have already used their Enlarge
ability and cannot use it in this combat. • Strong or very strong party: Give the duergar 20 more hit
points each.
Developments When the characters leave this room and re-enter the main basement area, they see a large sack, which wasn't there earlier. In the sack is an unconscious gnome wearing the uniform of the Zhentarim. If returned to consciousness, the gnome introduces herself as Joyella. She ran afoul of the drow after her party attempted to rob an underground drow caravan but failed, and a bounty was put on her. She was tracked and captured by the duergar. If the characters release her, she reports back to her Zhentarim superiors about the characters' role in her freedom. If any unaffiliated characters wish to join the Zhentarim, Beralt attests to their capabilities and sponsors their membership.
Treasure The duergar, in addition to their weapons and armor, carry well-made manacles and coins and gems with a total combined worth of 200 gp. They also have a wanted poster, written in Undercommon, detailing the crimes and a description of the drow Arrizz. In a nutshell, his crimes consist of his leaving his drow house without permission.
Returning Plumes
With their duergar and drow problems behind them, the characters still have the problem of the Red Plumes and Constance. Because of her parents' deaths, the dye production process has slowed considerably. Constance needs more time for the dye to be ready, but the Red Plumes expect the shipment by the next morning. If the characters attacked the Red Plumes earlier, they exit the farmhouse to find a squad of 20 Red Plumes waiting to arrest them. There is no need to play out the battle. Only characters who took an active part in attacking or killing a Red Plume suffer the following consequences.
Harried in Hillsfar Not for resale. Permission granted to print or photocopy this document for personal use only. 20
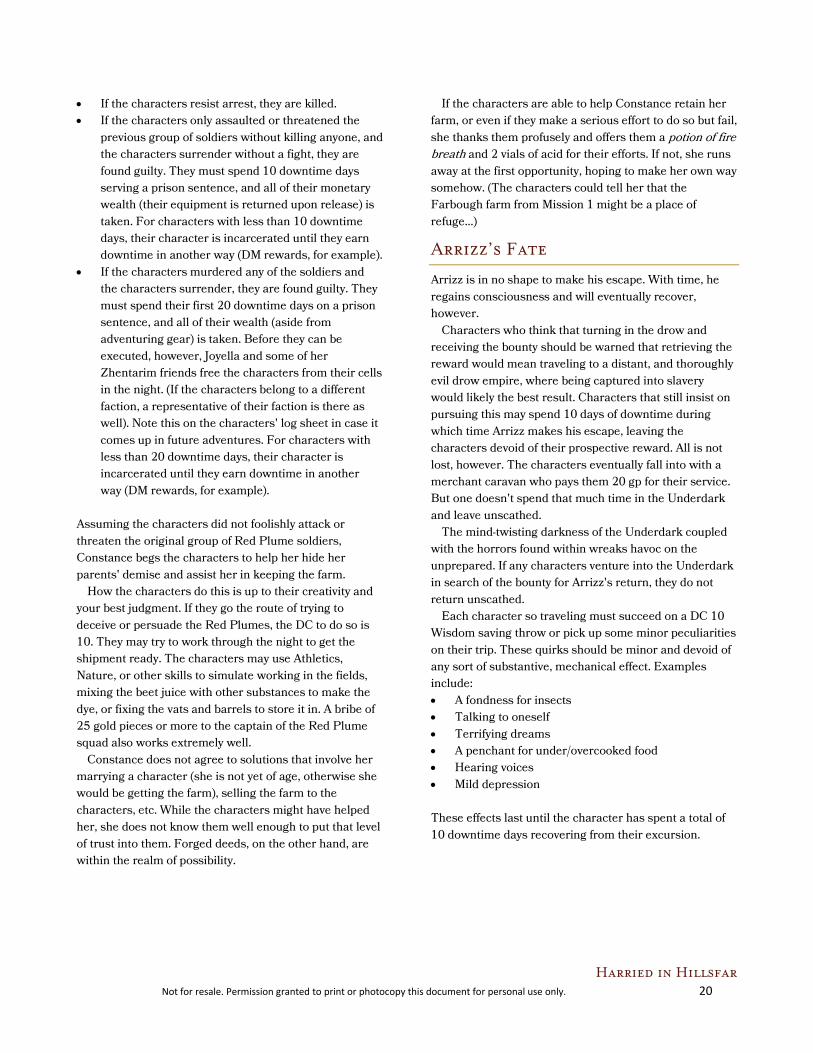
• If the characters resist arrest, they are killed. • If the characters only assaulted or threatened the
previous group of soldiers without killing anyone, and the characters surrender without a fight, they are found guilty. They must spend 10 downtime days serving a prison sentence, and all of their monetary wealth (their equipment is returned upon release) is taken. For characters with less than 10 downtime days, their character is incarcerated until they earn downtime in another way (DM rewards, for example).
• If the characters murdered any of the soldiers and the characters surrender, they are found guilty. They must spend their first 20 downtime days on a prison sentence, and all of their wealth (aside from adventuring gear) is taken. Before they can be executed, however, Joyella and some of her Zhentarim friends free the characters from their cells in the night. (If the characters belong to a different faction, a representative of their faction is there as well). Note this on the characters' log sheet in case it comes up in future adventures. For characters with less than 20 downtime days, their character is incarcerated until they earn downtime in another way (DM rewards, for example).
Assuming the characters did not foolishly attack or threaten the original group of Red Plume soldiers, Constance begs the characters to help her hide her parents' demise and assist her in keeping the farm. How the characters do this is up to their creativity and your best judgment. If they go the route of trying to deceive or persuade the Red Plumes, the DC to do so is 10. They may try to work through the night to get the shipment ready. The characters may use Athletics, Nature, or other skills to simulate working in the fields, mixing the beet juice with other substances to make the dye, or fixing the vats and barrels to store it in. A bribe of 25 gold pieces or more to the captain of the Red Plume squad also works extremely well. Constance does not agree to solutions that involve her marrying a character (she is not yet of age, otherwise she would be getting the farm), selling the farm to the characters, etc. While the characters might have helped her, she does not know them well enough to put that level of trust into them. Forged deeds, on the other hand, are within the realm of possibility.
If the characters are able to help Constance retain her farm, or even if they make a serious effort to do so but fail, she thanks them profusely and offers them a potion of fire breath and 2 vials of acid for their efforts. If not, she runs away at the first opportunity, hoping to make her own way somehow. (The characters could tell her that the Farbough farm from Mission 1 might be a place of refuge…)
Arrizz’s Fate
Arrizz is in no shape to make his escape. With time, he regains consciousness and will eventually recover, however. Characters who think that turning in the drow and receiving the bounty should be warned that retrieving the reward would mean traveling to a distant, and thoroughly evil drow empire, where being captured into slavery would likely the best result. Characters that still insist on pursuing this may spend 10 days of downtime during which time Arrizz makes his escape, leaving the characters devoid of their prospective reward. All is not lost, however. The characters eventually fall into with a merchant caravan who pays them 20 gp for their service. But one doesn't spend that much time in the Underdark and leave unscathed. The mind-twisting darkness of the Underdark coupled with the horrors found within wreaks havoc on the unprepared. If any characters venture into the Underdark in search of the bounty for Arrizz's return, they do not return unscathed. Each character so traveling must succeed on a DC 10 Wisdom saving throw or pick up some minor peculiarities on their trip. These quirks should be minor and devoid of any sort of substantive, mechanical effect. Examples include: • A fondness for insects • Talking to oneself • Terrifying dreams • A penchant for under/overcooked food • Hearing voices • Mild depression These effects last until the character has spent a total of 10 downtime days recovering from their excursion.

Harried in Hillsfar Not for resale. Permission granted to print or photocopy this document for personal use only. 21
Rewards Make sure the players note their rewards on their adventure log sheets. Give your name and DCI number (if applicable) so players can record who ran the session. If you are playing all of the missions as a single adventure, or playing multiple missions in one session, you can wait and give the rewards for all missions played at the end of the session.
Experience
Total up all combat experience earned for defeated foes, and divide by the number of characters present in the combat. For non-combat experience, the rewards listed are per character. Give all characters in the party non-combat experience awards unless otherwise noted.
Combat Awards Name of Foe XP per Foe Guard 25
Duergar 200
Non-Combat Awards Task or Accomplishment XP per Character Help Constance Keep Farm 25 The minimum total award for each character participating in this adventure is 75 experience points. The maximum total award for each character participating in this adventure is 100 experience points.
Treasure
The characters receive the following treasure, divided up amongst the party. Characters should attempt to divide treasure evenly whenever possible. Gold piece values listed for sellable gear are calculated at their selling price, not their purchase price. Consumable magic items should be divided up however the group sees fit. If more than one character is interested in a specific consumable magic item, the DM can determine who gets it randomly should the group be unable to decide. Permanent magic items are divided up according to a system. See the sidebar if the adventure awards permanent magic items.
Treasure Awards Item Name GP Value Duergar's gold 200
Potion of Fire Breath A description of this item can be found in the Dungeon Master’s Guide.
Vial of Acid A description of this item can be found in the basic rules or the Player’s Handbook.
Renown
Zhentarim characters only receive one renown point for releasing Joyella from the duergar bounty hunters.
Downtime
Each character receives five downtime days at the conclusion of this mini-adventure.
DM Rewards
You receive 100 XP, 50 gp, and five downtime days for each session you run of this mini-adventure.

Harried in Hillsfar Not for resale. Permission granted to print or photocopy this document for personal use only. 22
Appendix: Monster/NPC Statistics
Duergar Medium humanoid (dwarf), lawful evil Armor Class 16 (scale mail, shield) Hit Points 26 (4d8 + 8) Speed 25 ft. STR DEX CON INT WIS CHA 14 (+2) 11 (+0) 14 (+2) 11 (+0) 10 (+0) 9 (−1) Damage Resistances poison Senses darkvision 120 ft., passive Perception 10 Languages Dwarvish, Undercommon Challenge 1 (200 XP) Duergar Resilience. The duergar has advantage on saving throws against poison, spells, and illusions, as well as to resist being charmed or paralyzed.
Sunlight Sensitivity. While in sunlight, the duergar has disadvantage on attack rolls, as well as on Wisdom (Perception) checks that rely on sight.
Actions Enlarge (Recharges after a Short or Long Rest). For 1 minute, the duergar magically increases in size, along with anything it is wearing or carrying. While enlarged, the duergar is Large, doubles its damage dice on Strength-based weapon attacks (included in the attacks), and makes Strength checks and Strength saving throws with advantage. If the duergar lacks the room to become Large, it attains the maximum size possible in the space available.
War Pick. Melee Weapon Attack: +4 to hit, reach 5 ft., one target. Hit: 6 (1d8 + 2) piercing damage, or 11 (2d8 + 2) piercing damage while enlarged.
Javelin. Melee or Ranged Weapon Attack: +4 to hit, reach 5 ft. or range 30/120 ft., one target. Hit: 5 (1d6 + 2) piercing damage, or 9 (2d6 + 2) piercing damage while enlarged.
Invisibility (Recharges after a Short or Long Rest). The duergar magically turns invisible until it attacks, casts a spell, or uses its Enlarge, or until its concentration is broken, up to 1 hour (as if concentrating on a spell). Any equipment the duergar wears or carries is invisible with it.
Guard Medium humanoid (any race), any alignment Armor Class 16 (chain shirt, shield) Hit Points 11 (2d8 + 2) Speed 30 ft. STR DEX CON INT WIS CHA 13 (+1) 12 (+1) 12 (+1) 10 (+0) 11 (+0) 10 (+0) Skills Perception +2 Senses passive Perception 12 Languages any one language (usually Common) Challenge 1/8 (25 XP)
Actions Spear. Melee or Ranged Weapon Attack: +3 to hit, reach 5 ft. or range 20/60 ft., one target. Hit: 4 (1d6 + 1) piercing damage.
Harried in Hillsfar Not for resale. Permission granted to print or photocopy this document for personal use only. 23
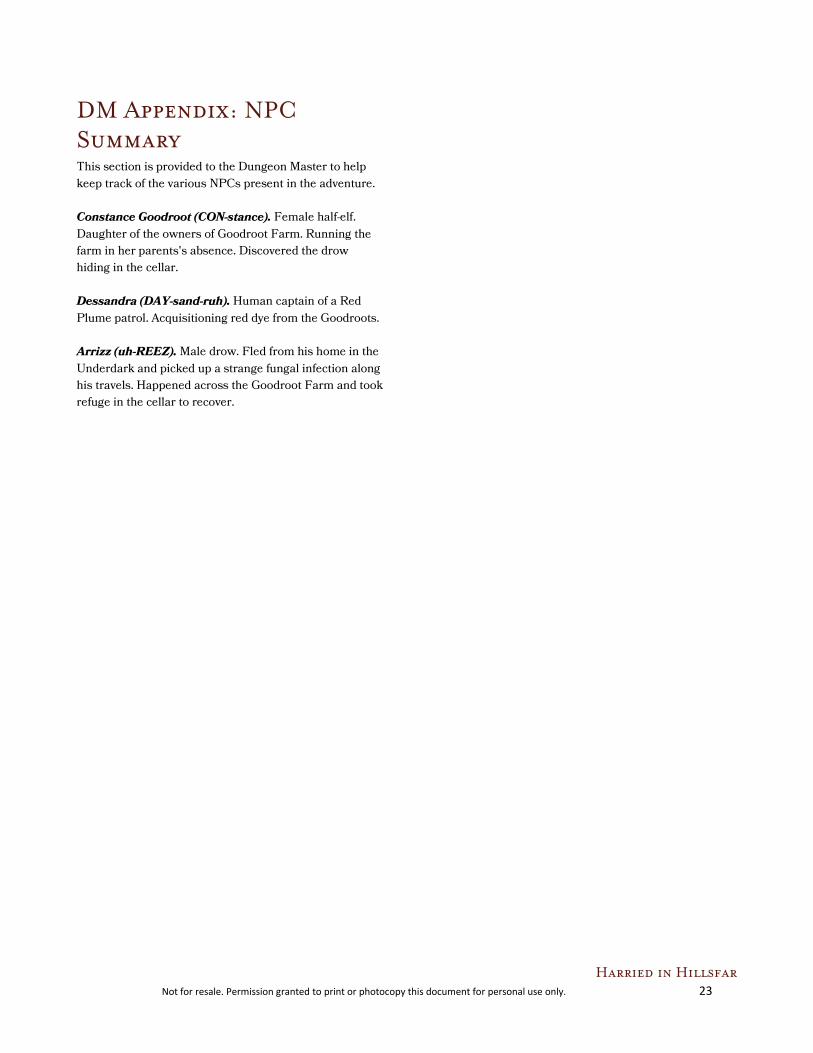
DM Appendix: NPC Summary This section is provided to the Dungeon Master to help keep track of the various NPCs present in the adventure. Constance Goodroot (CON-stance). Female half-elf. Daughter of the owners of Goodroot Farm. Running the farm in her parents's absence. Discovered the drow hiding in the cellar. Dessandra (DAY-sand-ruh). Human captain of a Red Plume patrol. Acquisitioning red dye from the Goodroots. Arrizz (uh-REEZ). Male drow. Fled from his home in the Underdark and picked up a strange fungal infection along his travels. Happened across the Goodroot Farm and took refuge in the cellar to recover.

Harried in Hillsfar Not for resale. Permission granted to print or photocopy this document for personal use only. 24
Map: The Growth
Harried in Hillsfar Not for resale. Permission granted to print or photocopy this document for personal use only. 25
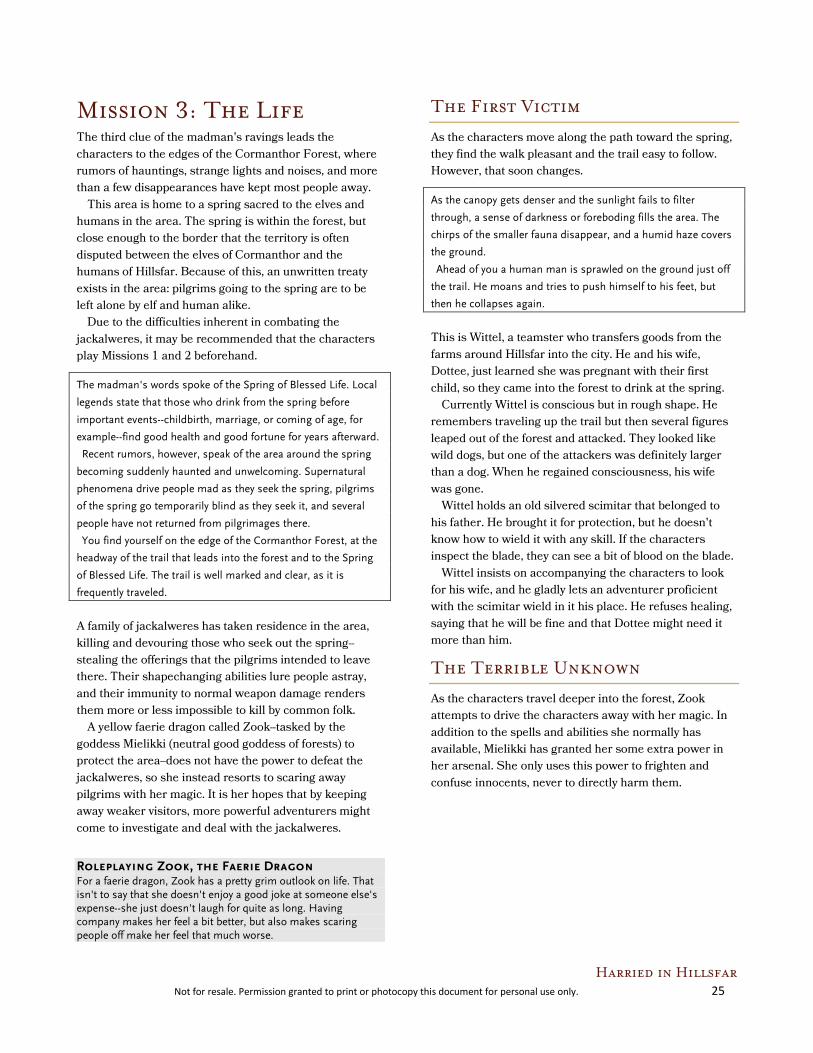
Mission 3: The Life The third clue of the madman's ravings leads the characters to the edges of the Cormanthor Forest, where rumors of hauntings, strange lights and noises, and more than a few disappearances have kept most people away. This area is home to a spring sacred to the elves and humans in the area. The spring is within the forest, but close enough to the border that the territory is often disputed between the elves of Cormanthor and the humans of Hillsfar. Because of this, an unwritten treaty exists in the area: pilgrims going to the spring are to be left alone by elf and human alike. Due to the difficulties inherent in combating the jackalweres, it may be recommended that the characters play Missions 1 and 2 beforehand.
The madman's words spoke of the Spring of Blessed Life. Local
legends state that those who drink from the spring before
important events--childbirth, marriage, or coming of age, for
example--find good health and good fortune for years afterward.
Recent rumors, however, speak of the area around the spring
becoming suddenly haunted and unwelcoming. Supernatural
phenomena drive people mad as they seek the spring, pilgrims
of the spring go temporarily blind as they seek it, and several
people have not returned from pilgrimages there.
You find yourself on the edge of the Cormanthor Forest, at the
headway of the trail that leads into the forest and to the Spring
of Blessed Life. The trail is well marked and clear, as it is
frequently traveled.
A family of jackalweres has taken residence in the area, killing and devouring those who seek out the spring--stealing the offerings that the pilgrims intended to leave there. Their shapechanging abilities lure people astray, and their immunity to normal weapon damage renders them more or less impossible to kill by common folk. A yellow faerie dragon called Zook--tasked by the goddess Mielikki (neutral good goddess of forests) to protect the area--does not have the power to defeat the jackalweres, so she instead resorts to scaring away pilgrims with her magic. It is her hopes that by keeping away weaker visitors, more powerful adventurers might come to investigate and deal with the jackalweres.
Roleplaying Zook, the Faerie Dragon For a faerie dragon, Zook has a pretty grim outlook on life. That isn't to say that she doesn't enjoy a good joke at someone else's expense--she just doesn't laugh for quite as long. Having company makes her feel a bit better, but also makes scaring people off make her feel that much worse.
The First Victim
As the characters move along the path toward the spring, they find the walk pleasant and the trail easy to follow. However, that soon changes.
As the canopy gets denser and the sunlight fails to filter
through, a sense of darkness or foreboding fills the area. The
chirps of the smaller fauna disappear, and a humid haze covers
the ground.
Ahead of you a human man is sprawled on the ground just off
the trail. He moans and tries to push himself to his feet, but
then he collapses again.
This is Wittel, a teamster who transfers goods from the farms around Hillsfar into the city. He and his wife, Dottee, just learned she was pregnant with their first child, so they came into the forest to drink at the spring. Currently Wittel is conscious but in rough shape. He remembers traveling up the trail but then several figures leaped out of the forest and attacked. They looked like wild dogs, but one of the attackers was definitely larger than a dog. When he regained consciousness, his wife was gone. Wittel holds an old silvered scimitar that belonged to his father. He brought it for protection, but he doesn't know how to wield it with any skill. If the characters inspect the blade, they can see a bit of blood on the blade. Wittel insists on accompanying the characters to look for his wife, and he gladly lets an adventurer proficient with the scimitar wield in it his place. He refuses healing, saying that he will be fine and that Dottee might need it more than him.
The Terrible Unknown
As the characters travel deeper into the forest, Zook attempts to drive the characters away with her magic. In addition to the spells and abilities she normally has available, Mielikki has granted her some extra power in her arsenal. She only uses this power to frighten and confuse innocents, never to directly harm them.

Harried in Hillsfar Not for resale. Permission granted to print or photocopy this document for personal use only. 26
Moving deeper into the forest, you begin to realize something
isn't quite right here. The sun appears briefly to guide your
travels toward the spring, only to appear later in the wrong
place, showing that you somehow got turned around despite
your best efforts and expert navigation. Magic is at play here for
sure.
Sudden unearthly shrieks ring out from behind trees, but
investigation shows nothing there. Strange lights draw you
down a side path, only to disappear just before you are close
enough to find their source.
Pit Traps Allow any characters in the lead as the group moves through the forest to make a DC 15 Wisdom (Perception) check. Success find a 20-foot-deep pit trap in the middle of the trail, cleverly covered with twigs, leaves, and grass. If not found, the characters in the lead must make a DC 15 Dexterity saving throw or fall into the pit for 2d6 bludgeoning damage. At the bottom of the pit is an elven skeleton that has no treasure. It is centuries old, placed in the pit by Zook to make it seem more scary. The jackalweres dug the pit (and others) to capture prey. As the characters are dealing with the pit, either climbing from it or investigating it, Zook invisibly flies up to the character that appears to be the most susceptible to his euphoria gas (targeting a big dumb fighter type) and breathes. If the adventurer fails the saving throw, he or she has visions of a terrible wave of death coursing toward the group. The adventurer takes off in a random direction through the forest to escape the death. The affected adventurer runs directly toward another 20-foot-deep pit trap, and must attempt the DC 15 Dexterity saving throw with no chance of seeing the pit beforehand. Any characters chasing the affected adventurer must make the same Dexterity saving throw to avoid the pit trap, but with advantage.
The Next Victims
As the characters move deeper into the forest, closer to the Spring of Blessed Life, the odd phenomena increase in scope and frequency.
The strange lights, sounds, and unnatural effects increase the
further you travel into the Cormanthor Forest. Spectral shapes
occasionally float at the edge of the mist-shrouded path, only to
melt away upon closer inspection. It is difficult to tell even what
direction you are traveling now.
Unexpectedly, the trail opens into a small clearing. The center
of the cleared area contains a grisly scene of dead and mutilated
bodies, all human. Their wounds look like a multitude of bite
marks made by small canine creatures.
Just as you start to investigate, a noise interrupts you. Coming
into the clearing from a different direction are two humans, a
male and a female. They are covered in sweat, are breathing as if
having run, and have a look of panic in their eyes.
The couple are shapechanged jackalweres, calling themselves Francesca and Voltz, and hoping to earn the trust of the characters while leading them into a trap containing the whole jackalwere clan a few miles away. A few hours ago they slew these pilgrims, dragged two of the bodies away to feast on, donned their clothes, and then returned to search the rest of the bodies. With the characters now present, the jackalweres pretend to be survivors of the attack. If the characters investigate the bodies on the ground, they find that these people all wear symbols of Mielikki, but carry none of the equipment typical of adventurers. They have nothing of true value, instead bearing items of natural beauty or significance that would be offered as a sacrifice to the nature god: exotic flowers and plants, animal bones, etc. However, one of the bodies still clutches a lantern, and there are 10 flasks of oil in a sack near the body. This oil might come in handy to fight the jackalweres later. If the characters question the couple, they tell a convincing story: the six of them are followers of Mielikki, and they came to leave offerings at the Spring of Blessed Life. Some dog-like creatures attacked, but the couple escaped into the fog. The characters must succeed at a DC 15 Wisdom (Insight) check to even get a hint that something is amiss--the pilgrims only seem nervous, which is natural for the current situation. Only on a DC 20 Wisdom (Insight) check do the characters sense that the couple is being inordinately sly. If the characters don't catch on to the deception, the two claim to know the way to the spring, begging the characters to accompany them there. They also said that they heard a woman crying for help in that direction, which makes Wittel even more desperate to get there quickly

Harried in Hillsfar Not for resale. Permission granted to print or photocopy this document for personal use only. 27
In this case, the jackalweres lead the party deeper into the woods toward the spring, but also toward the waiting trap of the full jackalwere clan. Sensing what is going to happen, Zook intervenes. She begins to invisibly harass the jackalweres, causing them to start waving their hand and cursing--and then snarling and immediately changing into their hybrid forms in rage and frustration. In this case, combat starts with the jackalweres already in hybrid form and getting a round of surprise on the characters.
Battling the Jackalweres If their ruse is detected by the characters before Zook must intervene, the two jackalweres must use the first round of combat to change form. This takes an action, so they cannot attack that round. During the second round, the jackalweres snarl and hiss loudly, calling three jackals to the battle. At the end of the second round, these three jackals arrive and attack. At the end of the third round, three more jackals arrive and join the battle.
Sleep Gaze and Fey Ancestry The jackalweres's sleep gaze is a magical sleep effect. As such, characters with fey ancestry are immune to its effects.
Tactics The jackalweres cannot be hurt by normal weapons. This is going to be challenging to players without access to silvered weapons or ways to damage the monsters using magic. If these missions are played in order, the characters should have a vial of alchemist's fire and silvered sickle from Mission 1, and a potion of fire breath and 2 vials of acid from Mission 2. With Wittel's silvered scimitar found earlier (see The First Victim, above), plus any magical attacks the characters might have and the flasks of oil, the characters should be able to mount a successful fight. Rather than rising to the challenge and thinking outside the box when challenged like this, some players may sulk and complain. If this happens, remind the players of other tactics they can use: helping other characters to give them advantage on attacks, grappling and pinning the jackalweres, or attacking the normal jackals instead to keep them off any spellcasters who can actually harm the jackalweres.
Adjusting the Encounter Here are recommendations for adjusting this combat encounter. These are not cumulative. • Weak party: One jackalwere flees at the start of combat and
returns at the end of the third round. • Strong or very strong party: Add a jackalwere and three
jackals. All of these appear at the end of the third round.
Using Wittel and Zook You have other wildcards at your disposal as a DM if the combat goes poorly for the characters: Zook and Wittel. If the battle is looking bad for the characters, Zook can aid them. The faerie dragon should not become the heroine of the story, but she can assist the characters by blinding the jackalweres with her color spray, distracting them with magic, or even performing some other type of assistance that you can insert. For example, using the power conferred onto her by Mielikki, she could make a fighter's nonmagical sword glow with radiance for 1 round if the fighter sacrifices 2 (1d4) hit points. This would allow the fighter to do radiant damage on a hit for one round. Wittel is less effective as a threat than Zook, but he is desperate to rescue his wife and would be willing to sacrifice himself to save her. In the event that an adventurer succumbs to the jackalwere's sleep gaze, Wittel wakes that adventurer using his action. In more dire situations, he can stabilize a dying adventurer or even throw himself into the path of an incoming attack, though he is likely to be slain in the event of the latter.
Developments The jackalweres have 4 golden earrings worth 25 gp each but no other gear or treasure. When the battle concludes, Zook shows herself and flits around the characters, trying to get them to follow her to the spring, where Wittel's wife can be found, unconscious. If any of the characters speak Draconic or Sylvan, Zook explains the situation. She warns the characters against trying to fight the entire jackalwere clan, since there are many of them spread out in the woods. It would take a larger force to clear them out.
Harried in Hillsfar Not for resale. Permission granted to print or photocopy this document for personal use only. 28
At the Spring
When the characters arrive at the Spring of Blessed Life, they find Wittel's wife Dottee unconscious on a patch of moss. She can be revived with healing magic or a DC 5 Wisdom (Medicine) check. Zook keeps a small cache of treasure here that she has collected over the years. The stash contains 100 gp worth of trinkets, baubles, and coins. There is also a scroll of comprehend languages in the stash that Zook allows the characters to take. By saying a prayer to Mielikki and drinking the water of the spring, any non-evil adventurer gains a small boon. They begin the next mission (or their next adventure) with inspiration. Evil-aligned characters only receive this boon if they did or said nothing that could be construed as evil while in the forest (DM's discretion). This inspiration should be noted on the adventure log as it lasts until used or until the character has completed all of the missions of this adventure, whichever happens first. Zook is also an ally of the Harpers, and she gives a glowing report to her contacts in that group regarding any characters who are members or who want to become members.
Rewards Make sure the players note their rewards on their adventure log sheets. Give your name and DCI number (if applicable) so players can record who ran the session. If you are playing all of the missions as a single adventure, or playing multiple missions in one session, you can wait and give the rewards for all missions played at the end of the session.
Experience
Total up all combat experience earned for defeated foes, and divide by the number of characters present in the combat. For non-combat experience, the rewards listed are per character. Give all characters in the party non-combat experience awards unless otherwise noted.
Combat Awards Name of Foe XP per Foe Jackal 10
Jackalwere 100
Non-Combat Awards Task or Accomplishment XP per Character Survive the Pit Traps 50
The minimum total award for each character participating in this adventure is 75 experience points. The maximum total award for each character participating in this adventure is 100 experience points.
Treasure
The characters receive the following treasure, divided up amongst the party. Characters should attempt to divide treasure evenly whenever possible. Gold piece values listed for sellable gear are calculated at their selling price, not their purchase price. Consumable magic items should be divided up however the group sees fit. If more than one character is interested in a specific consumable magic item, the DM can determine who gets it randomly should the group be unable to decide. Permanent magic items are divided up according to a system. See the sidebar if the adventure awards permanent magic items.
Treasure Awards Item Name GP Value Jackalwere's Earrings 100
Zook's Stash 100
Scroll of Comprehend Languages A description of this item can be found in the Dungeon Master’s Guide.
Renown
Harper characters only receive one renown point for defeating the jackalweres.
Downtime
Each character receives five downtime days at the conclusion of this mini-adventure.
DM Rewards
You receive 100 XP, 50 gp, and five downtime days for each session you run of this mini-adventure.
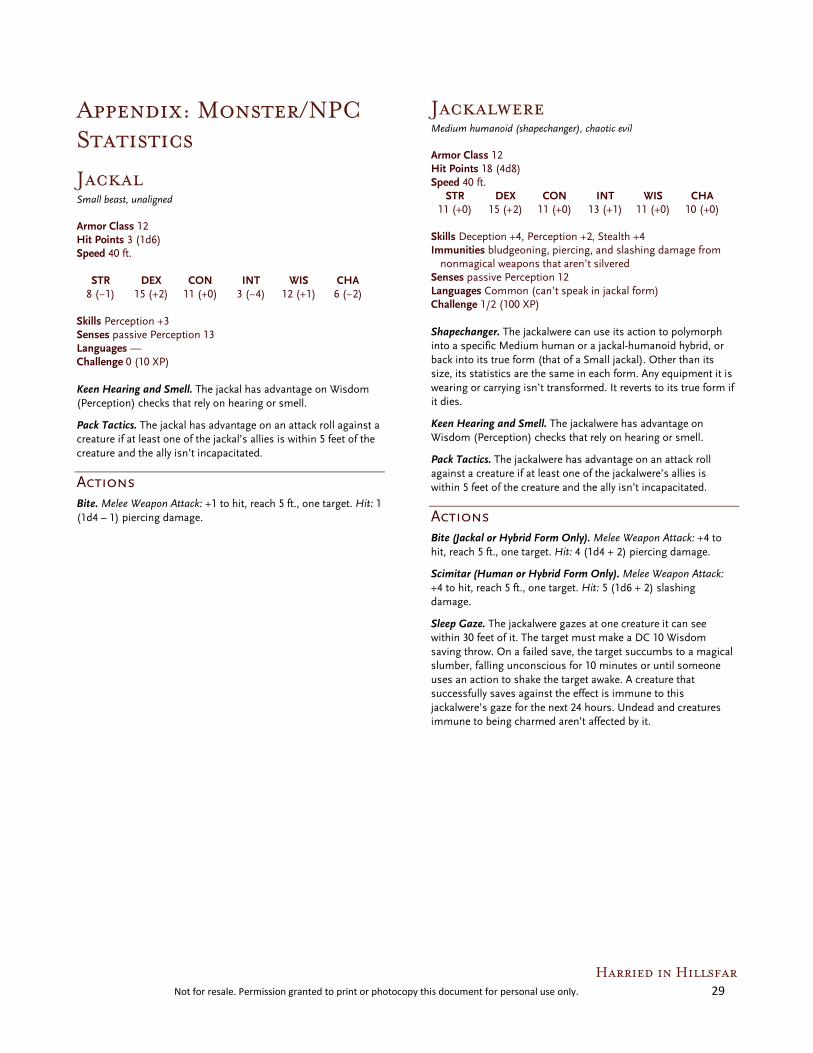
Harried in Hillsfar Not for resale. Permission granted to print or photocopy this document for personal use only. 29
Appendix: Monster/NPC Statistics
Jackal Small beast, unaligned Armor Class 12 Hit Points 3 (1d6) Speed 40 ft. STR DEX CON INT WIS CHA 8 (−1) 15 (+2) 11 (+0) 3 (−4) 12 (+1) 6 (−2) Skills Perception +3 Senses passive Perception 13 Languages — Challenge 0 (10 XP) Keen Hearing and Smell. The jackal has advantage on Wisdom (Perception) checks that rely on hearing or smell.
Pack Tactics. The jackal has advantage on an attack roll against a creature if at least one of the jackal’s allies is within 5 feet of the creature and the ally isn’t incapacitated.
Actions Bite. Melee Weapon Attack: +1 to hit, reach 5 ft., one target. Hit: 1 (1d4 – 1) piercing damage.
Jackalwere Medium humanoid (shapechanger), chaotic evil Armor Class 12 Hit Points 18 (4d8) Speed 40 ft. STR DEX CON INT WIS CHA 11 (+0) 15 (+2) 11 (+0) 13 (+1) 11 (+0) 10 (+0) Skills Deception +4, Perception +2, Stealth +4 Immunities bludgeoning, piercing, and slashing damage from
nonmagical weapons that aren’t silvered Senses passive Perception 12 Languages Common (can’t speak in jackal form) Challenge 1/2 (100 XP) Shapechanger. The jackalwere can use its action to polymorph into a specific Medium human or a jackal-humanoid hybrid, or back into its true form (that of a Small jackal). Other than its size, its statistics are the same in each form. Any equipment it is wearing or carrying isn’t transformed. It reverts to its true form if it dies.
Keen Hearing and Smell. The jackalwere has advantage on Wisdom (Perception) checks that rely on hearing or smell.
Pack Tactics. The jackalwere has advantage on an attack roll against a creature if at least one of the jackalwere’s allies is within 5 feet of the creature and the ally isn’t incapacitated.
Actions Bite (Jackal or Hybrid Form Only). Melee Weapon Attack: +4 to hit, reach 5 ft., one target. Hit: 4 (1d4 + 2) piercing damage.
Scimitar (Human or Hybrid Form Only). Melee Weapon Attack: +4 to hit, reach 5 ft., one target. Hit: 5 (1d6 + 2) slashing damage.
Sleep Gaze. The jackalwere gazes at one creature it can see within 30 feet of it. The target must make a DC 10 Wisdom saving throw. On a failed save, the target succumbs to a magical slumber, falling unconscious for 10 minutes or until someone uses an action to shake the target awake. A creature that successfully saves against the effect is immune to this jackalwere’s gaze for the next 24 hours. Undead and creatures immune to being charmed aren’t affected by it.
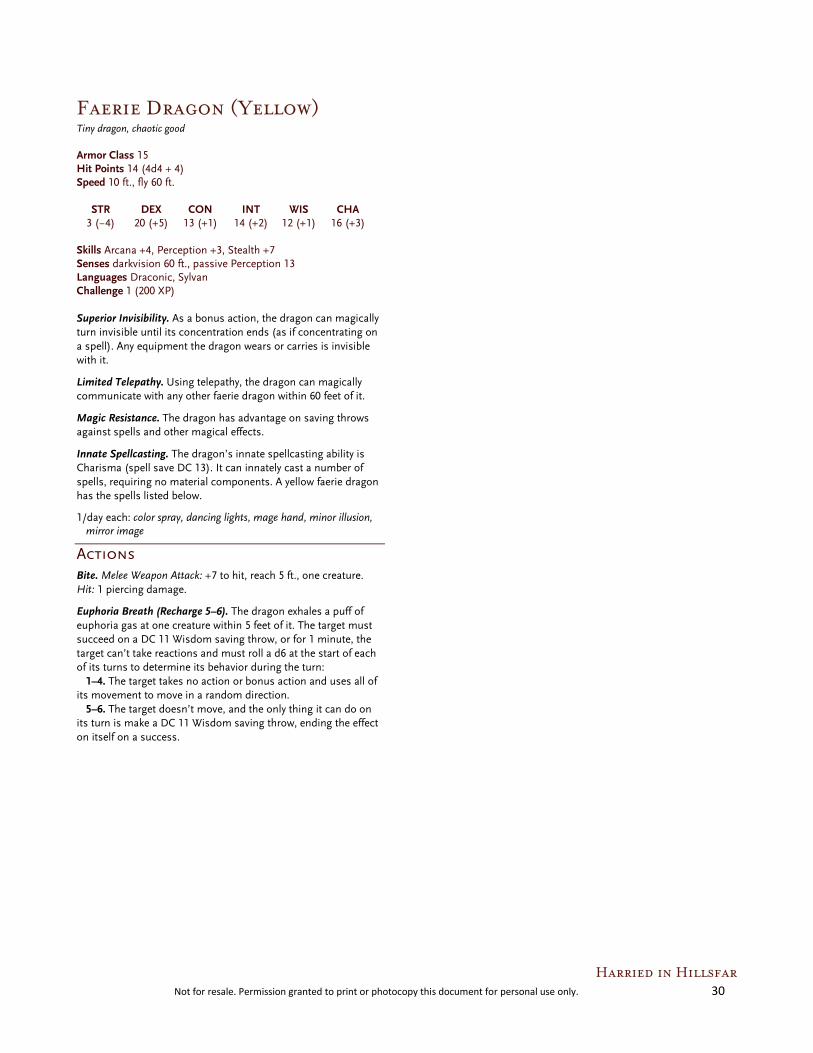
Harried in Hillsfar Not for resale. Permission granted to print or photocopy this document for personal use only. 30
Faerie Dragon (Yellow) Tiny dragon, chaotic good Armor Class 15 Hit Points 14 (4d4 + 4) Speed 10 ft., fly 60 ft. STR DEX CON INT WIS CHA 3 (−4) 20 (+5) 13 (+1) 14 (+2) 12 (+1) 16 (+3) Skills Arcana +4, Perception +3, Stealth +7 Senses darkvision 60 ft., passive Perception 13 Languages Draconic, Sylvan Challenge 1 (200 XP) Superior Invisibility. As a bonus action, the dragon can magically turn invisible until its concentration ends (as if concentrating on a spell). Any equipment the dragon wears or carries is invisible with it.
Limited Telepathy. Using telepathy, the dragon can magically communicate with any other faerie dragon within 60 feet of it.
Magic Resistance. The dragon has advantage on saving throws against spells and other magical effects.
Innate Spellcasting. The dragon’s innate spellcasting ability is Charisma (spell save DC 13). It can innately cast a number of spells, requiring no material components. A yellow faerie dragon has the spells listed below.
1/day each: color spray, dancing lights, mage hand, minor illusion, mirror image
Actions Bite. Melee Weapon Attack: +7 to hit, reach 5 ft., one creature. Hit: 1 piercing damage.
Euphoria Breath (Recharge 5–6). The dragon exhales a puff of euphoria gas at one creature within 5 feet of it. The target must succeed on a DC 11 Wisdom saving throw, or for 1 minute, the target can’t take reactions and must roll a d6 at the start of each of its turns to determine its behavior during the turn: 1–4. The target takes no action or bonus action and uses all of its movement to move in a random direction. 5–6. The target doesn’t move, and the only thing it can do on its turn is make a DC 11 Wisdom saving throw, ending the effect on itself on a success.
Harried in Hillsfar Not for resale. Permission granted to print or photocopy this document for personal use only. 31
DM Appendix: NPC Summary This section is provided to the Dungeon Master to help keep track of the various NPCs present in the adventure. Zook. A somewhat morose yellow faerie dragon. Entrusted by Mielikki to guard the area, she found the jackalweres beyond her capabilities. She instead resorted to frightening away the creatures's potential victims. Wittel (WHIT-uhl). Male human teamster. He and his wife Dottee were attacked by creatures. Wittel was left for dead, but his wife was taken by the attackers. Dottee (DOT-ee). Female human. Pregnant wife of Wittel. Taken by the jackalweres. Francesca and Voltz (fran-CHESS-kuh and VOLTS). Jackalweres. Bad news.
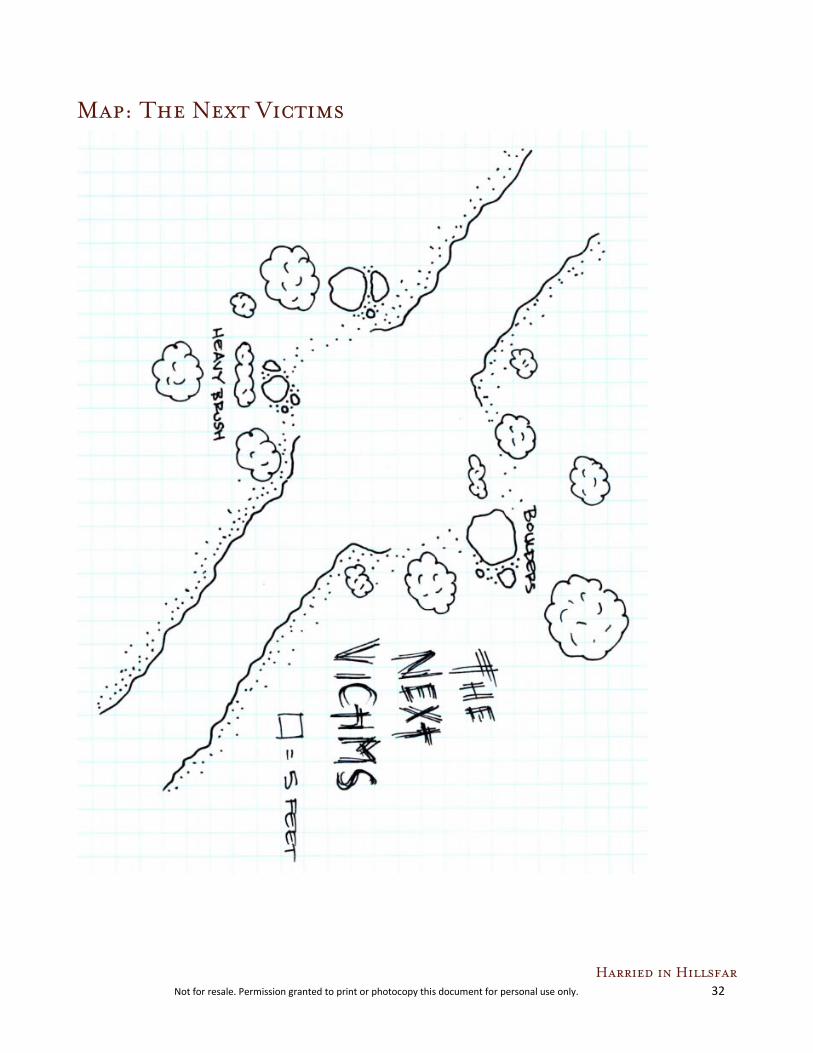
Harried in Hillsfar Not for resale. Permission granted to print or photocopy this document for personal use only. 32
Map: The Next Victims

Harried in Hillsfar Not for resale. Permission granted to print or photocopy this document for personal use only. 33
Mission 4: The Death The fourth clue of the madman's ravings leads the characters to the Allano rothé farm. A rothé is a large beast popular in the area as beasts of burden, a source of meat, and occasionally as mounts. This particular farm is one of the largest rothé-raising establishments in the Hillsfar area. Unfortunately, the farm was built above a place of ancient evil. One of the farmhands, a high elf named Seppremis, learned that there was once an outpost here used by the fey'ri, creatures of elven lineage (primarily sun elves of House Dlardrageth) who consorted with infernal creatures to strengthen their bloodline. After searching, he found a secret entrance to the underground complex used by the fey'ri to perform rituals. He explored the place and learned some of its secret. With this vile knowledge, he decided to attempt the rituals that he believes can bring him great power and wealth. He murdered everyone and slaughtered the rothé to carry out the rituals. The characters are about to see those rituals in progress.
The madman's words spoke of rothé and the possibility of the
undead. The unmistakable stench of death assaults your senses
as you approach the Allano rothé farm, where the madman's
prophetic words led you. In the pastures beyond the barns and
farmhouse, large furry lumps lie rotting. Dozens of rothé, old
and young, litter the fields. A few are missing heads and legs.
A thorough inspection of the farm and surrounding area shows
no sign of any of the residents, living or dead. Approximately 20
people must live and work on the farm, and there are signs of
struggle but no blood in the living areas or barns.
Just as you are about to give up on your investigation regarding
what happened here because of a lack of evidence, you notice a
few fresh scuff marks that end in the middle of the floor in one
of the larger barns.
No check is needed to find and open the trapdoor in the barn floor. Opening it reveals a vertical shaft and wooden rungs staked into the walls, forming a ladder. The wood is fresh and not aged at all. The shaft descends several hundred feet, ending in an unlit passageway. The floor at the bottom of the shaft is sticky with blood. Since it has not completely dried yet, it must be relatively fresh. The passageway runs almost a mile before ending in a large room.
Lady Ineddra As the characters prepare to descend, a voice calls out. An elven woman dressed in scholar's garb addresses them. She introduces herself as Lady Ineddra, and she tells them she is from the forest of Cormanthor. She recently heard that an elf who worked on this farm was rumored to be investigating the history of the fey'ri--foolish elves who consorted with demons and devils a long time ago in order to gain strength and power. She fears investigating these creatures and their history can lead to nothing but misery. She also believe this area once held a fey'ri outpost, so she came to investigate. Although she does not wish to accompany the characters (she is no adventurer), she offers 100 gold pieces if the characters will investigate and report back to her. She also wears a pin showing she is a member of the Lord's Alliance.
Guardian Statues
Light. This room is unlit.
The room ahead of you is decorated in a very strange motif. The
bas-relief carvings and other stonework is delicate and finely
crafted, seeming elven in nature. However, the scenes depicted
are quite terrible and shocking: "demonic" is the best word to
describe it.
Six massive statues dominate the center of the room. The three
northernmost statues depict elves, while the three
southernmost are carved to represent demons. The two sets of
statues face each other, and each pair share certain features.
The first pair wield wicked swords, the second pair highlight
spiders and snakes, and the last pair wield scourges and arcane
wands.
Etched onto the floor in Elven is a phrase that was apparently
also translated recently into Common in chalk: "To pass, you
must speak the titles of each of the three, divided by three."
Then etched into the floor is a long string of letters:
TLLHOAERDSDYLVAAEGYNOEONRMY
The easternmost and westernmost squares in the room are safe for characters to enter. If they step into the other squares, however, they trigger the trap.
Statue Trap If a characters steps between any of the pairs of statues without first speaking title of that particular statue, the statue animate and attack. Each statue requires a different saving throw. Those who succeed take only half damage.
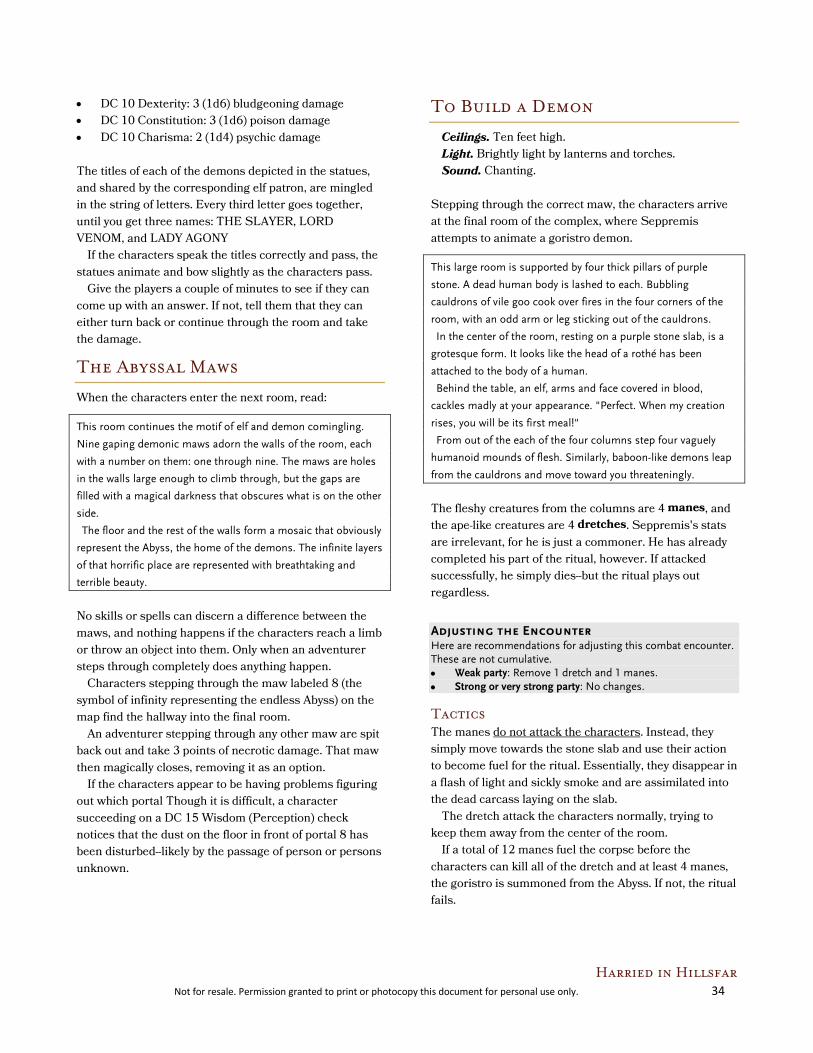
Harried in Hillsfar Not for resale. Permission granted to print or photocopy this document for personal use only. 34
• DC 10 Dexterity: 3 (1d6) bludgeoning damage • DC 10 Constitution: 3 (1d6) poison damage • DC 10 Charisma: 2 (1d4) psychic damage The titles of each of the demons depicted in the statues, and shared by the corresponding elf patron, are mingled in the string of letters. Every third letter goes together, until you get three names: THE SLAYER, LORD VENOM, and LADY AGONY If the characters speak the titles correctly and pass, the statues animate and bow slightly as the characters pass. Give the players a couple of minutes to see if they can come up with an answer. If not, tell them that they can either turn back or continue through the room and take the damage.
The Abyssal Maws
When the characters enter the next room, read:
This room continues the motif of elf and demon comingling.
Nine gaping demonic maws adorn the walls of the room, each
with a number on them: one through nine. The maws are holes
in the walls large enough to climb through, but the gaps are
filled with a magical darkness that obscures what is on the other
side.
The floor and the rest of the walls form a mosaic that obviously
represent the Abyss, the home of the demons. The infinite layers
of that horrific place are represented with breathtaking and
terrible beauty.
No skills or spells can discern a difference between the maws, and nothing happens if the characters reach a limb or throw an object into them. Only when an adventurer steps through completely does anything happen. Characters stepping through the maw labeled 8 (the symbol of infinity representing the endless Abyss) on the map find the hallway into the final room. An adventurer stepping through any other maw are spit back out and take 3 points of necrotic damage. That maw then magically closes, removing it as an option. If the characters appear to be having problems figuring out which portal Though it is difficult, a character succeeding on a DC 15 Wisdom (Perception) check notices that the dust on the floor in front of portal 8 has been disturbed--likely by the passage of person or persons unknown.
To Build a Demon
Ceilings. Ten feet high. Light. Brightly light by lanterns and torches. Sound. Chanting. Stepping through the correct maw, the characters arrive at the final room of the complex, where Seppremis attempts to animate a goristro demon.
This large room is supported by four thick pillars of purple
stone. A dead human body is lashed to each. Bubbling
cauldrons of vile goo cook over fires in the four corners of the
room, with an odd arm or leg sticking out of the cauldrons.
In the center of the room, resting on a purple stone slab, is a
grotesque form. It looks like the head of a rothé has been
attached to the body of a human.
Behind the table, an elf, arms and face covered in blood,
cackles madly at your appearance. "Perfect. When my creation
rises, you will be its first meal!"
From out of the each of the four columns step four vaguely
humanoid mounds of flesh. Similarly, baboon-like demons leap
from the cauldrons and move toward you threateningly.
The fleshy creatures from the columns are 4 manes, and the ape-like creatures are 4 dretches. Seppremis's stats are irrelevant, for he is just a commoner. He has already completed his part of the ritual, however. If attacked successfully, he simply dies--but the ritual plays out regardless.
Adjusting the Encounter Here are recommendations for adjusting this combat encounter. These are not cumulative. • Weak party: Remove 1 dretch and 1 manes. • Strong or very strong party: No changes.
Tactics The manes do not attack the characters. Instead, they simply move towards the stone slab and use their action to become fuel for the ritual. Essentially, they disappear in a flash of light and sickly smoke and are assimilated into the dead carcass laying on the slab. The dretch attack the characters normally, trying to keep them away from the center of the room. If a total of 12 manes fuel the corpse before the characters can kill all of the dretch and at least 4 manes, the goristro is summoned from the Abyss. If not, the ritual fails.
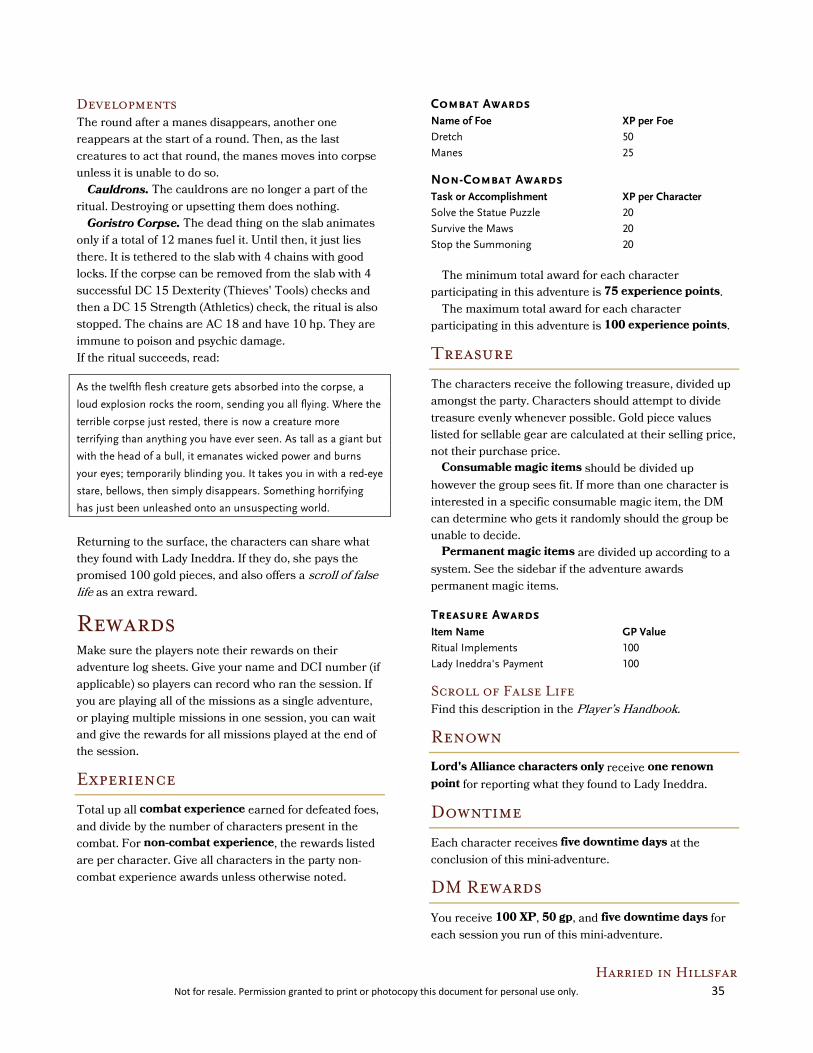
Harried in Hillsfar Not for resale. Permission granted to print or photocopy this document for personal use only. 35
Developments The round after a manes disappears, another one reappears at the start of a round. Then, as the last creatures to act that round, the manes moves into corpse unless it is unable to do so. Cauldrons. The cauldrons are no longer a part of the ritual. Destroying or upsetting them does nothing. Goristro Corpse. The dead thing on the slab animates only if a total of 12 manes fuel it. Until then, it just lies there. It is tethered to the slab with 4 chains with good locks. If the corpse can be removed from the slab with 4 successful DC 15 Dexterity (Thieves' Tools) checks and then a DC 15 Strength (Athletics) check, the ritual is also stopped. The chains are AC 18 and have 10 hp. They are immune to poison and psychic damage. If the ritual succeeds, read:
As the twelfth flesh creature gets absorbed into the corpse, a
loud explosion rocks the room, sending you all flying. Where the
terrible corpse just rested, there is now a creature more
terrifying than anything you have ever seen. As tall as a giant but
with the head of a bull, it emanates wicked power and burns
your eyes; temporarily blinding you. It takes you in with a red-eye
stare, bellows, then simply disappears. Something horrifying
has just been unleashed onto an unsuspecting world.
Returning to the surface, the characters can share what they found with Lady Ineddra. If they do, she pays the promised 100 gold pieces, and also offers a scroll of false life as an extra reward.
Rewards Make sure the players note their rewards on their adventure log sheets. Give your name and DCI number (if applicable) so players can record who ran the session. If you are playing all of the missions as a single adventure, or playing multiple missions in one session, you can wait and give the rewards for all missions played at the end of the session.
Experience
Total up all combat experience earned for defeated foes, and divide by the number of characters present in the combat. For non-combat experience, the rewards listed are per character. Give all characters in the party non-combat experience awards unless otherwise noted.
Combat Awards Name of Foe XP per Foe Dretch 50
Manes 25
Non-Combat Awards Task or Accomplishment XP per Character Solve the Statue Puzzle 20
Survive the Maws 20
Stop the Summoning 20
The minimum total award for each character participating in this adventure is 75 experience points. The maximum total award for each character participating in this adventure is 100 experience points.
Treasure
The characters receive the following treasure, divided up amongst the party. Characters should attempt to divide treasure evenly whenever possible. Gold piece values listed for sellable gear are calculated at their selling price, not their purchase price. Consumable magic items should be divided up however the group sees fit. If more than one character is interested in a specific consumable magic item, the DM can determine who gets it randomly should the group be unable to decide. Permanent magic items are divided up according to a system. See the sidebar if the adventure awards permanent magic items.
Treasure Awards Item Name GP Value Ritual Implements 100
Lady Ineddra's Payment 100
Scroll of False Life Find this description in the Player’s Handbook.
Renown
Lord's Alliance characters only receive one renown point for reporting what they found to Lady Ineddra.
Downtime
Each character receives five downtime days at the conclusion of this mini-adventure.
DM Rewards
You receive 100 XP, 50 gp, and five downtime days for each session you run of this mini-adventure.
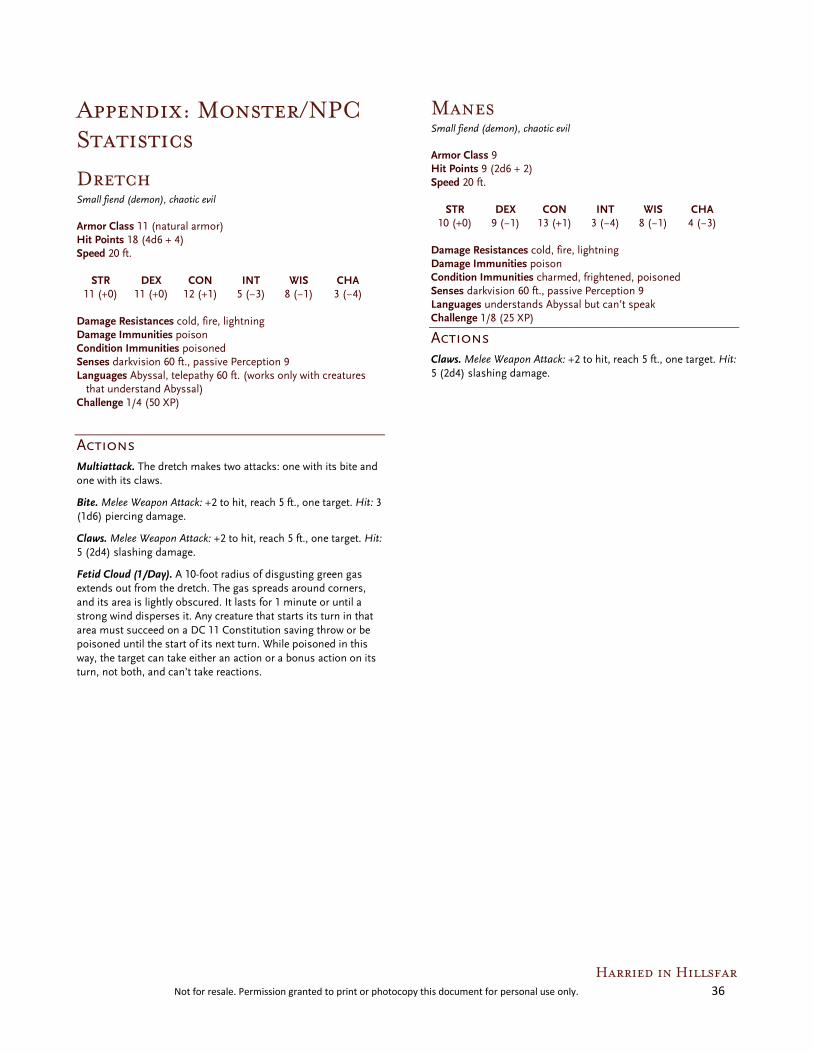
Harried in Hillsfar Not for resale. Permission granted to print or photocopy this document for personal use only. 36
Appendix: Monster/NPC Statistics
Dretch Small fiend (demon), chaotic evil Armor Class 11 (natural armor) Hit Points 18 (4d6 + 4) Speed 20 ft. STR DEX CON INT WIS CHA 11 (+0) 11 (+0) 12 (+1) 5 (−3) 8 (−1) 3 (−4) Damage Resistances cold, fire, lightning Damage Immunities poison Condition Immunities poisoned Senses darkvision 60 ft., passive Perception 9 Languages Abyssal, telepathy 60 ft. (works only with creatures
that understand Abyssal) Challenge 1/4 (50 XP)
Actions Multiattack. The dretch makes two attacks: one with its bite and one with its claws.
Bite. Melee Weapon Attack: +2 to hit, reach 5 ft., one target. Hit: 3 (1d6) piercing damage.
Claws. Melee Weapon Attack: +2 to hit, reach 5 ft., one target. Hit: 5 (2d4) slashing damage.
Fetid Cloud (1/Day). A 10-foot radius of disgusting green gas extends out from the dretch. The gas spreads around corners, and its area is lightly obscured. It lasts for 1 minute or until a strong wind disperses it. Any creature that starts its turn in that area must succeed on a DC 11 Constitution saving throw or be poisoned until the start of its next turn. While poisoned in this way, the target can take either an action or a bonus action on its turn, not both, and can’t take reactions.
Manes Small fiend (demon), chaotic evil Armor Class 9 Hit Points 9 (2d6 + 2) Speed 20 ft. STR DEX CON INT WIS CHA 10 (+0) 9 (−1) 13 (+1) 3 (−4) 8 (−1) 4 (−3) Damage Resistances cold, fire, lightning Damage Immunities poison Condition Immunities charmed, frightened, poisoned Senses darkvision 60 ft., passive Perception 9 Languages understands Abyssal but can’t speak Challenge 1/8 (25 XP)
Actions Claws. Melee Weapon Attack: +2 to hit, reach 5 ft., one target. Hit: 5 (2d4) slashing damage.

Harried in Hillsfar Not for resale. Permission granted to print or photocopy this document for personal use only. 37
DM Appendix: NPC Summary This section is provided to the Dungeon Master to help keep track of the various NPCs present in the adventure. Seppremis (SEP-rim-iss). Male high elf. Farmhand on the Allano rothé farm. Plotting to retrace the footsteps of the fey'ri and consort with demons for his own personal power. Lady Ineddra (ih-NED-druh). Female high elf from Cormanthor. In search of an elf who has been investigat-ing the fey'ri.

Harried in Hillsfar Not for resale. Permission granted to print or photocopy this document for personal use only. 38
Map: The Death

Harried in Hillsfar Not for resale. Permission granted to print or photocopy this document for personal use only. 39
Mission 5: The Afterlife The fifth clue of the madman's ravings leads the characters to an abandoned graveyard and neglected church of Waukeen (neutral deity of commerce, trade and wealth). The church was established by some of the first humans to settle in this area, and a priest of Jergal (lawful neutral deity of fatalism and proper burial) named Erve recently arrived to take an inventory of the dead buried in the church's graveyard and crypt. Unfortunately, the old church holds a terrible secret. Some of the original church founders secretly revered the demon lord Graz'zt, the Dark Prince. The soul of their leader remained trapped in the crypts beneath the church. Recent events have released the soul, which possessed the priest of Jergal. The possessed priest, with the help of other followers of Graz'zt drawn to the area, prepare to raise the inhabitants of the crypts and graveyard and march out in search of Graz'zt.
The abandoned church and overgrown graveyard are exactly
where you were told. The madman's final prophetic words have
led you here.
Surprisingly, the place is not uninhabited. Two humans in
loose-fitting peasant garb move among the gravestones, which
are made of a black marble. They lead two lumbering rothé,
which are attached to harnesses. It is hard to tell whether these
caretakers are trying to fix gravestones, pull them up, or do
something else entirely.
Among the Tombstones
The "caretakers" are two cultists who are exhuming bodies. The rothé they drive are two rothé zombies created by the possessed Erve. When the characters approach, allow each adventurer at attempt a DC 10 Wisdom (Perception) check. Those who make the check notice that the rothé are sewn together and have pure white eyes. Also, the caretakers hide scimitars beneath their clothes. Those who fail the check are surprised and cannot act in the first round, when the cultists and rothé zombies turn and attack.
Adjusting the Encounter Here are recommendations for adjusting this combat encounter. These are not cumulative. • Weak party: Remove one rothé zombie. • Strong or very strong party: Add two cultists.
Tactics The combat should begin when the first adventurer gets within 40 feet of the monsters. This allows the rothé zombies to charge. The cultists do not expect visitors and fear their enterprise will be reported if the characters aren't permanently silenced.
Developments Although the cultists have no treasure, one of them holds a set of keys that look recently used. The only building nearby is the abandoned church, so the characters can make the logical leap that the keys have something to do with the church. If the characters capture and question the cultists, they happily reveal that they have been sent here by their "Dark Prince," and soon the land of light will bend to the might of their master. They give no more information, however, being respectable cultists, and more than a little insane.
The Crypts of Waukeen Ceilings. All ceilings in the crypt are 10 feet high. Light. The rooms of the crypt are brightly lit by torches, lanterns, and braziers. Sound. Other than the occasional echoing of stone on stone, as the cultists and Erve work, the crypts are silent.
The church is in terrible repair. Much of the stonework is crumbling, and the fine appointments that usually decorate a temple of Waukeen have long since been looted. However, at the back of the abandoned church, a set of marble stairs descend to a great iron door with a newly oiled lock. The keys that the characters found on the cultists outside fit the lock. Upon opening the door, the characters see the crypts:
The large iron door opens onto a massive crypt. Every wall
contains multiple niches in which rest skeletons long dead.
Smaller stone rooms with stone doors fill the crypt as well,
obviously the final resting places of more wealthy and influential
members of the church.
Immediately in front of you stands a human wearing the garb
of a priest of Jergal, the god of burial and interment, the keeper
of the Book of the Dead. His glasses are askew, and there is a
strange dark glow on him that makes him look blurry to you.
"More fleshy bodies for my master's army," says a voice that
comes from the priest but is definitely not the priest's. "Protect
the braziers!" he calls to someone or something that you cannot
see deeper in the room.
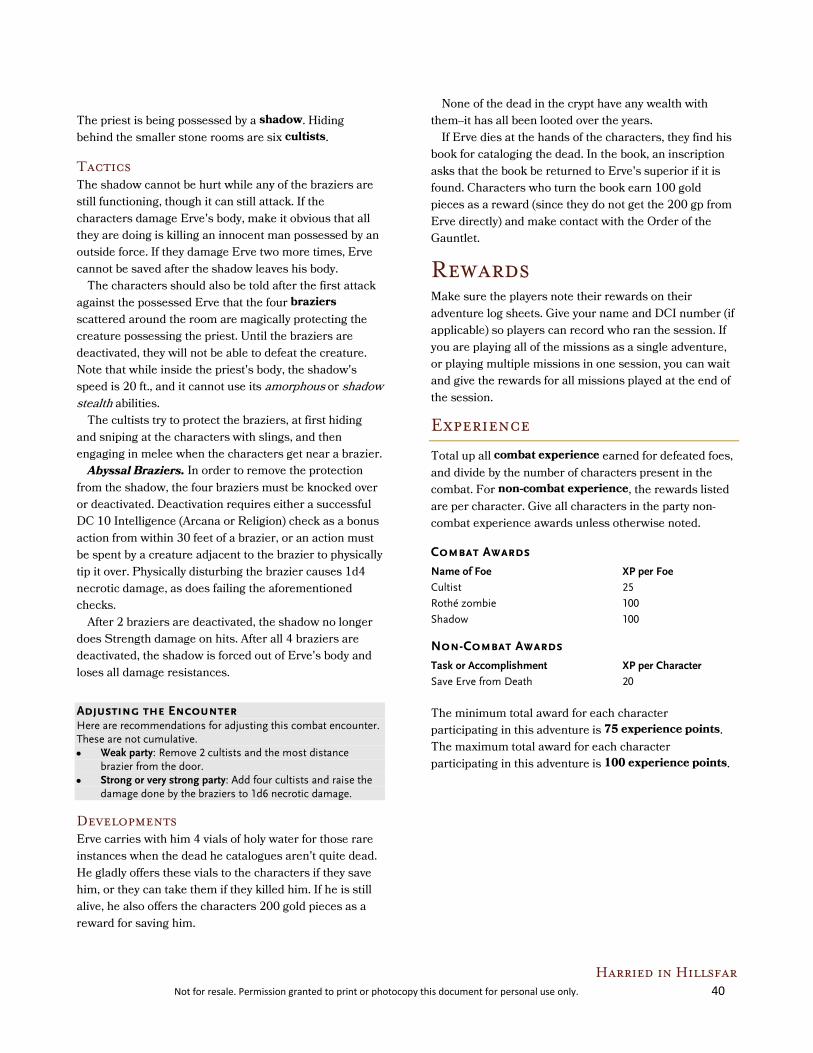
Harried in Hillsfar Not for resale. Permission granted to print or photocopy this document for personal use only. 40
The priest is being possessed by a shadow. Hiding behind the smaller stone rooms are six cultists.
Tactics The shadow cannot be hurt while any of the braziers are still functioning, though it can still attack. If the characters damage Erve's body, make it obvious that all they are doing is killing an innocent man possessed by an outside force. If they damage Erve two more times, Erve cannot be saved after the shadow leaves his body. The characters should also be told after the first attack against the possessed Erve that the four braziers scattered around the room are magically protecting the creature possessing the priest. Until the braziers are deactivated, they will not be able to defeat the creature. Note that while inside the priest's body, the shadow's speed is 20 ft., and it cannot use its amorphous or shadow stealth abilities. The cultists try to protect the braziers, at first hiding and sniping at the characters with slings, and then engaging in melee when the characters get near a brazier. Abyssal Braziers. In order to remove the protection from the shadow, the four braziers must be knocked over or deactivated. Deactivation requires either a successful DC 10 Intelligence (Arcana or Religion) check as a bonus action from within 30 feet of a brazier, or an action must be spent by a creature adjacent to the brazier to physically tip it over. Physically disturbing the brazier causes 1d4 necrotic damage, as does failing the aforementioned checks. After 2 braziers are deactivated, the shadow no longer does Strength damage on hits. After all 4 braziers are deactivated, the shadow is forced out of Erve's body and loses all damage resistances.
Adjusting the Encounter Here are recommendations for adjusting this combat encounter. These are not cumulative. • Weak party: Remove 2 cultists and the most distance
brazier from the door. • Strong or very strong party: Add four cultists and raise the
damage done by the braziers to 1d6 necrotic damage.
Developments Erve carries with him 4 vials of holy water for those rare instances when the dead he catalogues aren't quite dead. He gladly offers these vials to the characters if they save him, or they can take them if they killed him. If he is still alive, he also offers the characters 200 gold pieces as a reward for saving him.
None of the dead in the crypt have any wealth with them--it has all been looted over the years. If Erve dies at the hands of the characters, they find his book for cataloging the dead. In the book, an inscription asks that the book be returned to Erve's superior if it is found. Characters who turn the book earn 100 gold pieces as a reward (since they do not get the 200 gp from Erve directly) and make contact with the Order of the Gauntlet.
Rewards Make sure the players note their rewards on their adventure log sheets. Give your name and DCI number (if applicable) so players can record who ran the session. If you are playing all of the missions as a single adventure, or playing multiple missions in one session, you can wait and give the rewards for all missions played at the end of the session.
Experience
Total up all combat experience earned for defeated foes, and divide by the number of characters present in the combat. For non-combat experience, the rewards listed are per character. Give all characters in the party non-combat experience awards unless otherwise noted.
Combat Awards Name of Foe XP per Foe Cultist 25
Rothé zombie 100
Shadow 100
Non-Combat Awards Task or Accomplishment XP per Character Save Erve from Death 20 The minimum total award for each character participating in this adventure is 75 experience points. The maximum total award for each character participating in this adventure is 100 experience points.

Harried in Hillsfar Not for resale. Permission granted to print or photocopy this document for personal use only. 41
Treasure
The characters receive the following treasure, divided up amongst the party. Characters should attempt to divide treasure evenly whenever possible. Gold piece values listed for sellable gear are calculated at their selling price, not their purchase price. Consumable magic items should be divided up however the group sees fit. If more than one character is interested in a specific consumable magic item, the DM can determine who gets it randomly should the group be unable to decide. Permanent magic items are divided up according to a system. See the sidebar if the adventure awards permanent magic items.
Treasure Awards Item Name GP Value Erve's Reward 200 (or 100)
Holy Water A description of this item can be found in the Player’s Handbook.
Renown
Order of the Gauntlet characters only receive one renown point for saving Erve or returning his book to the faction if he died.
Downtime
Each character receives five downtime days at the conclusion of this mini-adventure.
DM Rewards
You receive 100 XP, 50 gp, and five downtime days for each session you run of this mini-adventure.

Harried in Hillsfar Not for resale. Permission granted to print or photocopy this document for personal use only. 42
Appendix: Monster/NPC Statistics
Cultist Medium humanoid (any race), any non-good alignment Armor Class 12 (leather armor) Hit Points 9 (2d8) Speed 30 ft. STR DEX CON INT WIS CHA 11 (+0) 12 (+1) 10 (+0) 10 (+0) 11 (+0) 10 (+0) Skills Deception +2, Religion +2 Senses passive Perception 10 Languages any one language (usually Common) Challenge 1/8 (25 XP) Dark Devotion. The cultist has advantage on saving throws against being charmed or frightened.
Actions Scimitar. Melee Weapon Attack: +3 to hit, reach 5 ft., one creature. Hit: 4 (1d6 + 1) slashing damage.
Shadow Medium undead, chaotic evil Armor Class 12 Hit Points 16 (3d8 + 3) Speed 40 ft. STR DEX CON INT WIS CHA 6 (−2) 14 (+2) 13 (+1) 6 (−2) 10 (+0) 8 (−1) Skills Stealth +4 (+6 in dim light or darkness) Damage Vulnerabilities radiant Damage Resistances acid, cold, fire, lightning, thunder;
bludgeoning, piercing, and slashing from nonmagical weapons Damage Immunities necrotic, poison Condition Immunities exhaustion, frightened, grappled,
paralyzed, petrified, poisoned, prone, restrained Senses darkvision 60 ft., passive Perception 10 Languages — Challenge 1/2 (100 XP) Amorphous. The shadow can move through a space as narrow as 1 inch wide without squeezing.
Shadow Stealth. While in dim light or darkness, the shadow can take the Hide action as a bonus action.
Sunlight Weakness. While in sunlight, the shadow has disadvantage on attack rolls, ability checks, and saving throws.
Actions Strength Drain. Melee Weapon Attack: +4 to hit, reach 5 ft., one creature. Hit: 9 (2d6 + 2) necrotic damage, and the target’s Strength score is reduced by 1d4. The target dies if this reduces its Strength to 0. Otherwise, the reduction lasts until the target finishes a short or long rest. If a non-evil humanoid dies from this attack, a new shadow rises from the corpse 1d4 hours later.
Rothé Zombie Large undead, neutral evil Armor Class 8 Hit Points 22 (3d8 + 9) Speed 30 ft. STR DEX CON INT WIS CHA 17 (+3) 6 (−2) 16 (+3) 2 (−5) 6 (−2) 6 (−2) Saving Throws Wis +0 Damage Immunities poison Condition Immunities poisoned Senses darkvision 60 ft., passive Perception 8 Challenge 1/2 (100 XP) Charge. If the rothé zombie moves at least 20 feet straight toward a target and then hits it with a ram attack on the same turn, the target takes an extra 5 (2d4) bludgeoning damage. If the target is a creature, it must succeed on a DC 13 Strength saving throw or be knocked prone.
Undead Fortitude. If damage reduces the rothé zombie to 0 hit points, it must make a Constitution saving throw with a DC of 5 + the damage taken, unless the damage is radiant or from a critical hit. On a success, the rothé zombie drops to 1 hit point instead.
Actions Ram. Melee Weapon Attack: +5 to hit, reach 5 ft., one target. Hit: 8 (2d4 + 3) bludgeoning damage.
Harried in Hillsfar Not for resale. Permission granted to print or photocopy this document for personal use only. 43
DM Appendix: NPC Summary This section is provided to the Dungeon Master to help keep track of the various NPCs present in the adventure. Erve (ERF). Male human priest of Jergal. Possessed by a shadow.
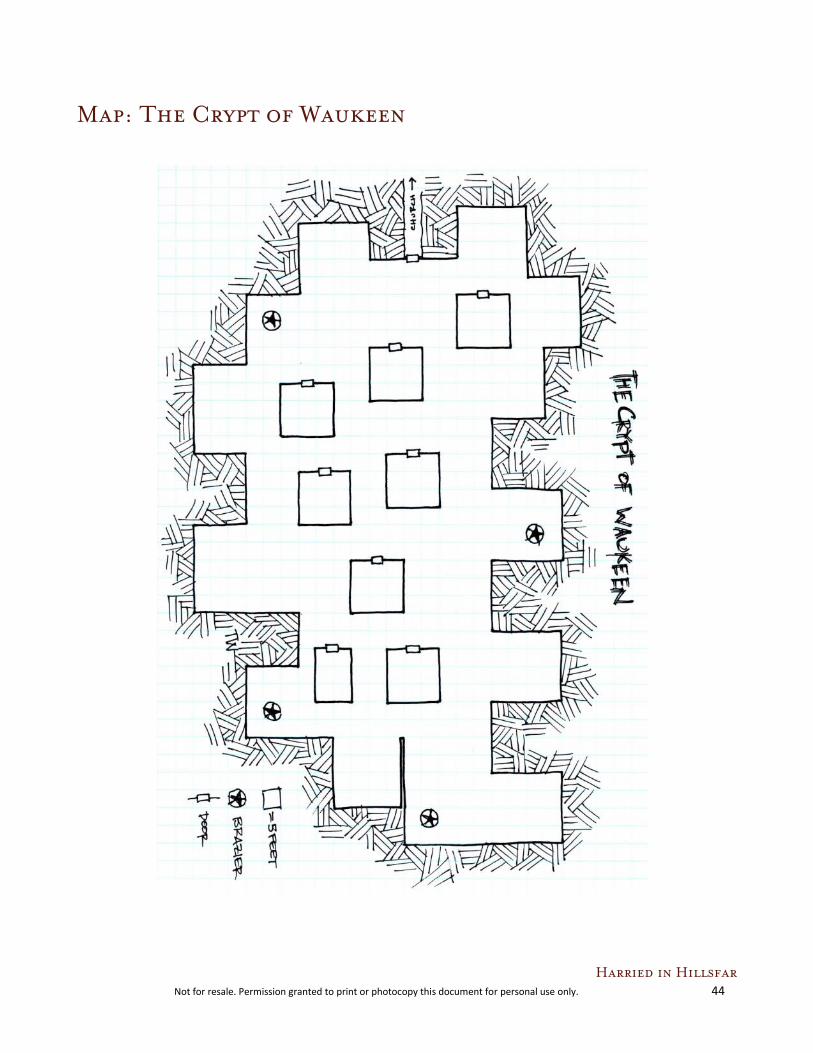
Harried in Hillsfar Not for resale. Permission granted to print or photocopy this document for personal use only. 44
Map: The Crypt of Waukeen

Harried in Hillsfar Not for resale. Permission granted to print or photocopy this document for personal use only. 45
Results Code: August-September 2015 If you are DMing this adventure during the months of August or September 2015, please show your players this page. The QR code below can be scanned, and will allow them to give feedback and results on the adventure to influence the storyline in the future! If a player does not have a mobile device, please tell them to head to dndadventurersleague.org/results to enter their results.


![The Wrathful Deity of Khurovogo & Dragons [multi]/5th... · 2018. 9. 15. · The Wrathful Deity of Khurovogo While traveling to Hillsfar, the adventuring party is approached by goblins](https://img.dokumen.tips/doc/110x75/60bb00f927d5993a0d78fd1d/the-wrathful-deity-of-khurovogo-dragons-multi5th-2018-9-15-the.jpg)