Embed Size (px)
Citation preview

by Monica Solorio-Snow
Happy Zombie
FABRICS
CUTTING
4) 9'' x 13 '' of assorted fabrics. Four fabrics will yield four Pennie Pockets. Four yards of 40 width fabric will yieldtwelve Pennie Pockets.
From each 9'' x 13 '' fabric: Cut: 2) 4 '' x 4 '' squares (for prairie point and yo-yo)Cut: 1) 9'' x 9'' square, cut diagonally for inner and outer pieces of the pocket
ASSEMBLY1. Make a prairie point by diagonally folding the wrong sides together of a 4 '' square. Press. Fold over again. Press.
2. Center prairie point's raw edge on to the center of the outer pocket fabric's edge. Pin.
3. Layer the inner pocket fabric, right sides together, over the outer pocket fabric and prairie point. Join with a '' seam.
4. Press seams open.
2a. If making a hanging Pennie Pocket, before joining seams - pin each end of a 16'' length of ric-rac or ribbon to each side of the prairie point.
5. Fold over diagonally, right sides together. Stitch a '' seam around edge, stopping '' just past the turn. Leave a 3'' opening for turning and continue stitching the edge.
6. Turn inside out. Top-stitch a seam over your outer fabric's opening. Stitch as close as possible to the edge. Hand whip if your prefer... though this seam will not be visible once pocket is completed.
Make little pennant pockets of happiness. String them on ric-rac or ribbon for decoration... or add a handleto make a nosegay to hang on a door-knob or tree branch... or pin to a bulletin board/design wall and fill withtreasures, notes, coupons, pens/pencils, etc. Be mischievous and sweet all at the same time... ding-dong-ditchsomeone you love with a little Pennie Pocket nosegay filled with goodies, or flowers, or cookies, or, or, or...
3'' opening
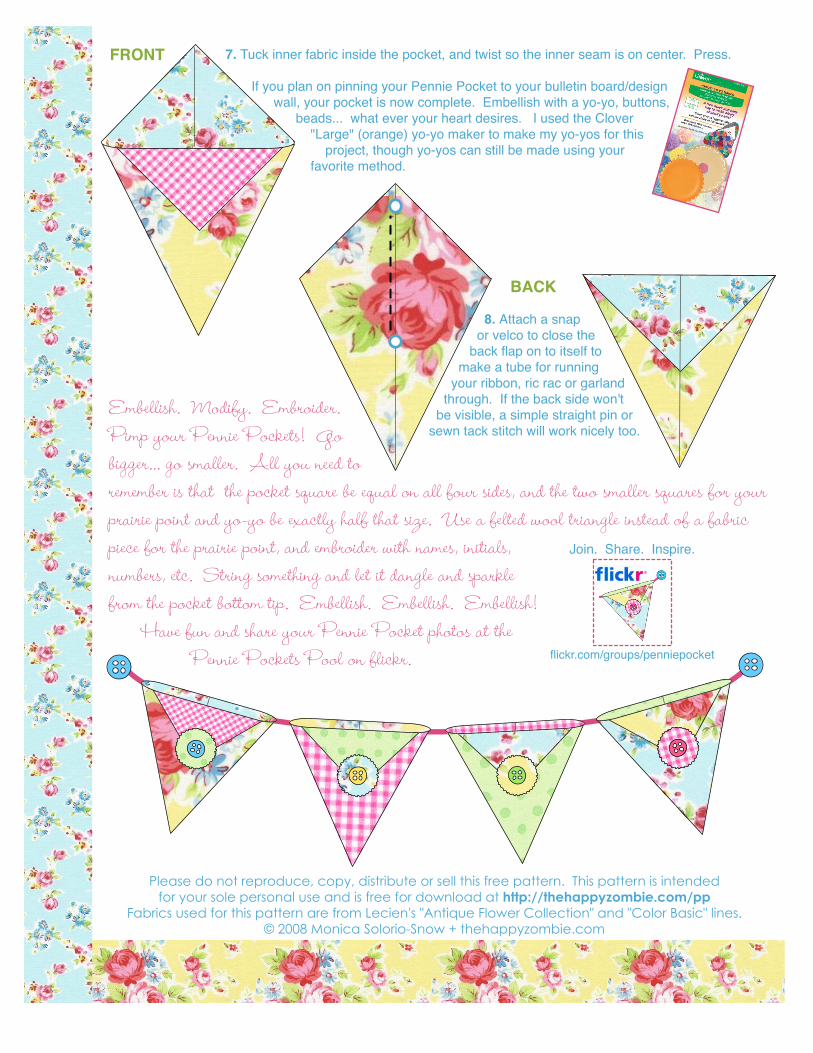
FRONT
BACK
7. Tuck inner fabric inside the pocket, and twist so the inner seam is on center. Press.
If you plan on pinning your Pennie Pocket to your bulletin board/design
wall, your pocket is now complete. Embellish with a yo-yo, buttons,
beads... what ever your heart desires. I used the Clover
"Large" (orange) yo-yo maker to make my yo-yos for this
project, though yo-yos can still be made using your
favorite method.
8. Attach a snap
or velco to close the
back flap on to itself to
make a tube for running
your ribbon, ric rac or garland
through. If the back side won't
be visible, a simple straight pin or
sewn tack stitch will work nicely too.
Please do not reproduce, copy, distribute or sell this free pattern. This pattern is intended
for your sole personal use and is free for download at http://thehappyzombie.com/pp
Fabrics used for this pattern are from Lecien's "Antique Flower Collection" and "Color Basic" lines.
© 2008 Monica Solorio-Snow + thehappyzombie.com
Embellish. Modify. Embroider. Pimp your Pennie Pockets! Gobigger... go smaller. All you need toremember is that the pocket square be equal on all four sides, and the two smaller squares for your prairie point and yo-yo be exactly half that size. Use a felted wool triangle instead of a fabric piece for the prairie point, and embroider with names, initials,numbers, etc. String something and let it dangle and sparklefrom the pocket bottom tip. Embellish. Embellish. Embellish! Have fun and share your Pennie Pocket photos at the Pennie Pockets Pool on flickr.
Join. Share. Inspire.
flickr.com/groups/penniepocket