Embed Size (px)
Citation preview

1
Greetings Go Baby Go nation! Thank you for seeking out more information about the project. In this document you will find the following:
General Documents:
Modification Manual: pg. 4
Driver Training Manual: pg. 36
Research Documents:
Parent Activity Log: pg. 49
Coding Measures: pg. 52
This document is a compilation of our individual experiences with ride-on cars. The contents of this document are meant to provide general information and specific examples of how this information has been used in our research. Ride-on cars are NOT medical devices. They are simply toys that are used by millions of children across the globe. We are NOT responsible for any action, result, consequence, malfunction, etc. that you experience as a result of using this information.

2
This document is a work in progress. As we continue to make advances we will update the document accordingly. If you have not done so previously, please take a few minutes to complete our survey:
Family Version:
https://delaware.qualtrics.com/SE/?SID=SV_293YiZrW4iqLc3P
Professional Version:
http://survey.qualtrics.com/SE/?SID=SV_77mKGj7Cz9RouXj
Please check out our Facebook page and ‘like’ us:
http://www.facebook.com/UDGoBabyGo
View our YouTube channel for step-by-step instructions on how-to-modify a Mater ride-on car:
http://www.youtube.com/channel/UCUJvxs5-iv1MDkL3WL9lN0Q/videos?flow=grid&view=0

3
ADDITIONAL DISCLAIMER: Special Considerations: Limitations and Safety Issues
It is critically important that any electrical and structural modifications to a ride-on car be
fully tested and checked by an engineer with the appropriate expertise to determine the safety of
the car. Before a child uses a modified ride-on car, it should be tested to determine that it is safe
to use for an amount of time equal to the amount of time the car will be used during a given
session. For example, if a child is expected to use the car for up to 30 minutes during a driving
session, then the activation switch should be pressed and the car should used continuously on
for 30 minutes. This is possible by placing a block of wood underneath the car so that the back
wheels are raised. This will prevent the car from moving. Then, depending on an activation
switch, use a weight, tape, or some other means to activate the switch. This will allow the car to
be tested for a continuous amount of time without a child in the car. During this time, it is
important to feel any wires to ensure that they are not heating up. If the car passes this initial
testing, it is important for an engineer to check all of the modifications to ensure safety.

4
Modification Manual: How-to-Modify Ride-on Cars for Use by Children with Special Needs
A Low-Cost Approach to Powered Mobility for Infants and Toddlers
Cole Galloway, PT, PhD (Cell #: 443-466-8821) and Sam Logan, PhD (Cell #: 443-553-2342)
Office: 63 East Delaware Ave., Newark, DE 19716 (Phone: 302-831-3214)
Ride-on Car Workshop: 5 Innovation Way, Suite 300, Newark, DE 19711

5
Table of Contents:
Overview
Seated Car Modifications:
Seating System
Steering system
Drive System
Standing Car Modifications:
Activation switch
Other modifications
Powered Walker Modifications:
Activation switch
Other modifications
Thomas the Tank Prototype
Sit-to-stand-to-powered walker: All in one device!
Activation switch
Other modifications
Other Considerations:
Wiring issues

6
Switch options
AMP capacity of switch
Safety considerations
Conference Workshops and Presentations:
Utah
SOPAC 2012 (with picture)
Upcoming: SOPAC 2013 Sit/stand versions
Other resources:
Facebook (i.e. parents/clinicians sharing pictures and ideas)
YouTube (i.e. 8 how-to videos from our lab and other clinicians)

7
Overview (See Huang & Galloway, 2012 for more details)
Ride-on toy cars: General Features
Table 1 briefly summarizes the basic features of toy cars. Four categories are of particular interest: cost,
accessibility, aesthetics and adjustability. First, toy cars cost less than $400 and often under $200, which is comparable or
less than most mobility devices. Second, most are relatively light weight, small and easily transported without additional
transportation costs unlike power chairs. Third, the child-friendly, colorful toy designs and the various toy functions (e.g.,
headlights, radio, car noise) make these cars more approachable by adults and children than some of other assitive
devices. This may be an important aspect for clinicians wanting to start early power mobility training with families hesitant
to discuss power chair options. Fourth, a toy car is not a complex electro-machanical device and, as outlined below, can
be modified quickly and easily for a range of customized accessories that match the child’s changing capabilitites and the
clinician’s various goals.

8
Ride-on toy cars: Modifications
Ride-on cars will likely require electrical and/or mechanical modifications for use with children with mobility
impairments. Two interesting aspects of modifying these cars are 1) modifications can be constructed to be permanent
(i.e., relatively fixed) or temporary (i.e., interchangeable), and 2) with creative design and planning, clinicians can
construct a range of custom modifications to address goals at one or more of the International Classification of
Functioning, Disability and Health (ICF) levels while the child and family focus on the fun of driving.

9
The initial decision is often which of the various car types and sizes are appropriate based on child’s body size and
capabilities. Cars can be purchased in most major stores carrying toys or ordered online from distributors worldwide. Each
car has an unmodified, original design with features that inherently fit certain children. Thus, the type and degree of
modification of that original design becomes child and goal specific. For example, the original design of a Fisher Price
Lightening McQueen TM (Fisher-Price Headquarters, East Aurora, NY) may fit a taller or larger child than a Fisher Price
‘Mater TM (Fisher-Price Headquarters, East Aurora, NY) given the greater leg room. The McQueen however will require
more seating modifications for children with less trunk control than ‘Mater (Figure a & b). The original design of a Fisher
Price Thomas Train TM (Fisher-Price Headquarters, East Aurora, NY) may fit a child with small body size and good trunk
control given its small seat size and minimal seat supports (Figure c & d). Two-seat cars (Fisher-Price Headquarters, East
Aurora, NY) can also be used if a child has a larger body size, wants to drive with siblings and peers, or needs a place for
additional equipment such as a ventilator (e & f).

10
Next we introduce a few basic modifications involving a) seating, b) steering systems and c) the drive system.
These modification examples were specifically chosen as they are simple, low cost and appropriate for clinicians and/or
families to construct. These modifications use readily available materials including PVC pipes, carriage bolts and nuts,
pipe insulation foam, Velcro, commercial switches, electrical wire and wire connecters. The total cost of these
modifications is typically less than $150 per car (see appendix I for a sample hardware list).

11
Seated Car Modifications
Seating System
A modified seating system should augment a child’s postural control such that she can efficiently activate the
steering and drive systems. In addition, various permanent and temporary modifications allow clinicians to address one or
more ICF levels – even within the same session. Conceptually, tighter or more extensive trunk support may help a child to
reach the steering wheel and grasp toys during car movement to address an activity or participation goal. By loosening or
lessening the trunk support modifications in combination with a basic drive system (e.g., pressing large switch), clinicians
address ICF body functions and structure goals by providing a challenging, dynamic postural control task during driving.
Specific examples of permanent seating modifications include a roll cage, a seat belt and hip strap. A basic roll
cage can be built from connecting different lengths of PVC pipes mounted around the car frame (Figure a). Seat belts
and/or hip straps constructed from an off-the-shelf product (see ‘Walking Wing’ in appendix) and/or Velcro (Figure b). Both
function similar to a roll cage for stability and safety. Specific examples of temporary modifications include a T-bar, a seat
or back cushions, body side-supports and head supports. A T-bar constructed of PVC pipes can limit lower extremity
adduction and excessive forward trunk motion (Figure c). Cushions, trunk supports (Figure d) and head supports
constructed of foam sheets, towels and/or pipe insulation foam can be adjusted, removed or replaced within minutes to
address various ICF level goals within a session while maintaining the child’s motivation to drive.

12
Steering System
As with seating systems, modified steering and drive systems should accommodate each child’s capabilities,
interests and session goals, and can be permanent or temporary. The drive system refers to the means by which power is

13
delivered to the wheels. Standard drive system includes a gearbox (aka transmission) in the rear wheels. Modifications of
the steering and drive system can be made separately but are often considered in combination. A useful permanent
modification of the drive system without involving the steering is to install an on-off power switch (Figure a). A Toggle
switch can be connected with one of the wires coming from the car to control the power (see appendix for specifics).
Basic steering-drive system options include a round shape style wheel (Figure b) with push-button switches of
various sizes and a bar handle style with different sizes of PVC pipe (Figure c). A bar handle-small push-button switch
combination will be easy for children with functional upper extremities (UE) and thus allow other body function, activity
and/or participation goals to be addressed without the child having to focus on a challenging steering and drive system.
For children with UE impairments, this same modification will present a challenge and thus can be used to focus directly
on UE goals. In contrast, a steering wheel covered with a large push-button switch decreases the focus on steering and
drive system, and allows successful mobility. Switches with vibration, light and music may further enhance the attention
and motivation of children with lower response rates. The adaption of a Phono Plug Y-adapter cable is a useful connecter
for steering-drive system modifications. After connecting the wires of the toy car to the adapter cable (Figure d), various
push-button switches can be plugged into the connector directly allowing the use of various steering systems (Figure e).
More complicated steering-drive system modifications can be constructed such as a ‘standing car’. A Fisher Price
QuadTM (Fisher-Price Headquarters, East Aurora, NY) for example can be modified to be driven while standing by
installing a two tiered handle bar steering system with PVC pipes and modifying the drive system to encourage standing
by reversing the wiring of a push-button switch placed on the seat (Figure f & g). An example of an advanced steering-
drive system modification requiring an electrical expert would be to electrically and mechanically connect a joystick for use

14
on a remote-controlled ride-on car (Figure h) (ZP Toys, 1 Floor Khairani Road Sakinaka, Andheri (E), Andheri East ,
Mumbai). These remote controlled cars allow either the child or an adult to drive the car via separate controls. We
anticipate more toy cars with remote-control circuitry in the future, which should allow modifications for driving via other
interfaces beside standard steering wheels and handle bars, such as head arrays. It is important to note that these types
of advanced electrical modifications should be inspected by if not completed by an electrical expert.

15
Conclusion: Modified ride-on cars provide a low-cost approach to powered mobility for children diagnosed with mobility
impairments. The modifications are meant to be low-cost using readily available materials that can be found at popular
websites or local hardware stores. The below picture is a snap shot of the basic modifications of Mater, our most popular
modified ride-on car.

16
OTHER MODELS:
Standing Car Modifications:
Activation switch:
The activation switch of the standing car is different from the seated car. In the standing car version, the activation
switch is mounted underneath the seat. It is wired so that when the switch is released (i.e. child stands up), the switch is
activated and the car moves forward. Thus, a child must stand up in order for the car to move forward. The car will stop
once the child sits down on the seat.
Other modifications:
All of the other modifications are similar to the seated car modifications. All modifications are completed based on
the individual needs of a child. The amount of support required for safety should inform caregivers/clinicians as to the
types of modifications required.

17
Powered Walker Modifications:
Activation switch:
Same as standing car.
Other notes:
The only difference between this version and the standing car is that a child’s feet are on the ground. When they
stand up to activation the switch, they must take supported steps. It is especially important for direct and close supervision
of a child when using this version.
Thomas the Tank Prototype:
In our first attempt to convert a ride-on car to a powered walker device, we cut Thomas the Tank in half to allow
space for a child’s feed to make contact with the ground. Next, we reinforced the seat by installing a large PVC pipe in
between the two halves of the car. This pipe supports the seat to provide enough stability for a child to sit down. PVC pipe

18
was also installed between the two halves of the car in order to provide handrails for additional support. The activation
switch was installed on the seat was wired identical to the standing car previously described.
Sit-to-stand-to-powered walker: All in one device!
Once we had built several version of each type of car, we decided to try to modify one ride-on car that could easily
be converted from a seated to standing to powered walker version.
Activation Switch:
A three-pronged toggle switch was installed and included three modes: 1) Seated car (push switch for activation), 2)
Standing/powered walker car (release switch [i.e. stand up] for activation, and 3) off switch (no power).
Other modifications:
The PVC support system remains intact for each version of the car. There is only one other major medication
required to convert the car from a standing car to a powered walker. The footplates were removed and reattached using

19
two hinges. While the footplates are installed, the device is a standing car. Upon removal of the footplates, a child’s feet
are on the ground and the device is a powered walker car.
SEATED VERSION
STANDING VERSION

20
POWERED WALKER VERSION

21
Other Considerations:
Wiring Issues
The diameter, or thickness of a wire is known as the gauge. An important consideration when making any
modifications to a ride-on car is to ensure that the wire gauge of any new wires added matches the gauge of the wires
used by the manufacturer. If new wires are added that are less thick than the original wires, a likely result is an
overheating of the new wires that may cause the wires to smoke or even catch on fire. To determine the wire gauge, look
closely at the wire and find the number directly before the abbreviation “AWG” (American Wire Gauge). The larger the
ride-on car battery (i.e. 6 v vs 12 v), the thicker gauge the manufacturer is likely to use for wiring throughout the ride-on
car.
When modifying a ride-on car, it is important that any new wire connections are securely fastened in a safe and
appropriate manner. This includes connecting two different wires or connecting one wire to a switch terminal. There are
several three methods that are considered safe and secure. First, wires can be soldered together or to a terminal. The
tools required include a soldering iron and rosin-core solder that are each available at any local hardware store. It is
beyond the scope of this report to provide step-by-step guidelines for safe soldering techniques. Second, a method is to
use “blade connectors” These are typically available in three different sizes indicated by the colors red, blue, and yellow
(smallest to largest). The size to use depends upon the gauge of the wire you need to connect. The only tool required is a
wire crimping tool which is often included as part of wire strippers. The blade connectors and crimping tool are available at
any local hardware store. Wire nuts can also be used to secure two wires together, but not to connect a wire to a switch
terminal. To use wire nuts, you simply twist the two sets of wires together that you want to connect then insert the wires

22
into a wire nut and continue to twist until secure. Wire nuts are also available at any local hardware store. Finally, it is
advised to NOT use electrical tape as the sole means of connecting wires together. This is not a secure method and is not
recommended.
Types of Switches
There are many different types of switches available to use when modifying a ride-on car. It is always important to
keep in mind the abilities of a child the car is intended for when choosing a switch. There are advantages and
disadvantages associated with the different type of switch options available.
The most common switch we have used in our modifications is the Big Red switch
(http://webstore.ablenetinc.com/big-red-twist/p/10033500/; see below). The main advantage of this switch is that it is
specifically designed for children with special needs to use. The switch has a large surface area for contact and the

23
slightest pressure will activate the switch. These characteristics are especially important for children that have significant
issues with reaching and applying force with their hand. There are disadvantages to using this switch. It is relatively
expensive ($59 before shipping) and the wire gauge that is used is too small to be used with even smallest (6v) ride-on
cars. Rather than disassembling these switches to make them compatible with manufacturer’s standards, we explored
other options.
Direct from an electronics distribution website, we ordered a switch that is essentially the same as those found in
Big Red (see below). The main advantage is the cost ($5 before shipping). However, there are several disadvantages.
The switch does not come with any wires connected to the terminals. Thus, the appropriate gauge of wire needs to be
connected via blade connectors or soldering. Another disadvantage is that the switch does not come with push-button
interface (i.e. the red top of Big Red). The contact area to activate the switch is very small and is not very practical unless
a housing is fabricated. We have been unable to create a push-button interface that is feasible for use with children with
special needs.

24
Another option is to purchase the switch shown below. This switch was purchased directly from an electronics store
in California (jkelectronics.com). There are advantages to using this switch. It is inexpensive ($3.50 before shipping) and
already includes a push-button interface (the red top). This design allows the switch to easily be mounted inside of an
electrical junction box (< $10; see below) to serve as a housing unit. By placing industrial strength Velcro on the housing
unit, the switch can be mounted in a variety of locations providing flexibility (on the floorboard, steering wheel, or head rest
for foot, hand, or head activation, respectively). There are also disadvantages of using this switch. The push-button
interface is smaller and requires more force to push down for activation compared to the Big Red. However, this switch
may be appropriate for children with sufficient upper extremity control and strength or it can be used as the activation
switch for a standing car. Another disadvantage is that wires do not come preinstalled to the terminals. However, this
allows for flexibility depending on the gauge of the wire that needs to be connected to the switch.

25
A joystick activation switch is an additional option. There are many advantages to installing a joystick. First, it
allows a car to be driven with a zero turn radius. Second, it allows a child to control the speed of the car. With traditional
push-button switches, it is all-or-nothing activation. That is, pushing the switch activates the car at the maximum speed
possible. This can lead to a somewhat ‘jerky’ motion that may be unpleasant to a child. However, a joystick allows the
amount of pressure applied to relate to the speed output of the car. This allows a child to control the speed of a car and
allows the possibility of a gradual increase in speed as pressure is applied to the joystick. Third, by installing other

26
components to complement the joystick such as a potentiometer, Arduino Uno microcontroller, microSD card, and
software programming will result in the recording of high-quality driving data such as joystick activation time and distance
traveled during each driving session.

27
Sabertooth dual 12A motor driver
Price: $79.99
http://www.dimensionengineering.com/products/sabertooth2x12
Analog 2-Axis Joystick with Plastic boot
Price: $19.99
http://www.superdroidrobots.com/shop/item.aspx?itemid=1265

28
*****The below motors were NOT used to modify the red radio-flyer car. These are just examples of what the motors
would potentially look like. The exact size of the motors influences how well they do or not fit to an existing car. In
modifying the radio-flyer, the back wheels and motors were taken off of another ride-on car and placed onto the radio-
flyer.
AME 210-series 12V 88in-lb RH gearmotor-pinion
Price: $39.49
http://www.robotmarketplace.com/products/AME-210-1009.html

29
AME 210-series 12V 88in-lb LH gearmotor-pinion
Price: $39.49
http://www.robotmarketplace.com/products/AME-210-1010.html
AMP Capacity of Switch
When considering which switch to use, it is also important to match the “amperage” (AMP) capacity of the new
switch to the battery specifications of a given car. This information is typically found in the user manual provided by the
manufacturer. For example, most of the 6v and 12v cars we have modified include a 20 amp battery fuse. This indicates
that if the current running through the battery exceeds 20 amps, the fuse will be tripped and power will be cut off. The Big
Red switch is rated for 15.1 amps. Thus, it is not safe to use this switch with most ride-on cars. There is a possibility that if
this switch is used to activate a ride-on car for an extended period of time, it may heat up and break down. The AMP
rating can be found in text on the switch itself or in a technical specifications report for a given switch. As always, it is
important to match the amp capacity of any new switch used with the amp capacity of the switch that is being replaced
that was used by the manufacturer.

30
Special Considerations: Limitations and Safety Issues
It is critically important that any electrical and structural modifications to a ride-on car be fully tested and checked
by an engineer with the appropriate expertise to determine the safety of the car. Before a child uses a modified ride-on
car, it should be tested to determine that it is safe to use for an amount of time equal to the amount of time the car will be
used during a given session. For example, if a child is expected to use the car for up to 30 minutes during a driving
session, then the activation switch should be pressed and the car should used continuously on for 30 minutes. This is
possible by placing a block of wood underneath the car so that the back wheels are raised. This will prevent the car from
moving. Then, depending on an activation switch, use a weight, tape, or some other means to activate the switch. This will
allow the car to be tested for a continuous amount of time without a child in the car. During this time, it is important to feel
any wires to ensure that they are not heating up. If the car passes this initial testing, it is important for an engineer to
check all of the modifications to ensure safety.
Creating a GoBabyGo Community
Utah Physical Therapy Association Fall 2012 Conference
In Fall of 2012, the GoBabyGo team delivered the pediatric seminar for the Utah Physical Therapy Association Fall
Conference. This included an all-day seminar focused on providing early powered mobility, in the form of modified ride-on
cars, to children with mobility impairments.
SOPAC 2012
On September 27th, 2012 the GoBabyGo team delivered a pre-conference workshop to the Section on Pediatrics
Annual Conference (SOPAC). This was a four-hour workshop that led 30 physical therapists, in groups of six, step-by-

31
step through the modification process of 5 Mater ride-on cars. The construction portion of the workshop lasted 2 hours.
For the remaining 2 hours, the GoBabyGo team led a discussion about the potential uses and benefits of ride-on car use
by children diagnosed with mobility impairments.
SOPAC Pre-Conference Workshop- Disney World
Recently, the GoBabyGo team had a proposal accepted for the 2013 SOPAC meeting in Anaheim, CA to provide a
similar workshop that leads a group of physical therapists in the modifications of a seated ride-on car into a
seated/standing/powered walker version…all in the same device!
Other resources:
Facebook:
The GoBabyGo Facebook page is an additional resource for those interested in modifying a ride-on car. This page serves
as an online community for clinicians and caregivers to share ideas, pictures, and instructions of how-to-modify ride-on

32
cars. We have posted several technical updates through this page including instructions for basic modifications and
additional activation switch options. Our page has received over 200 ‘likes’ and our post popular post was viewed by over
292 people.
http://www.facebook.com/UDGoBabyGo

33
34
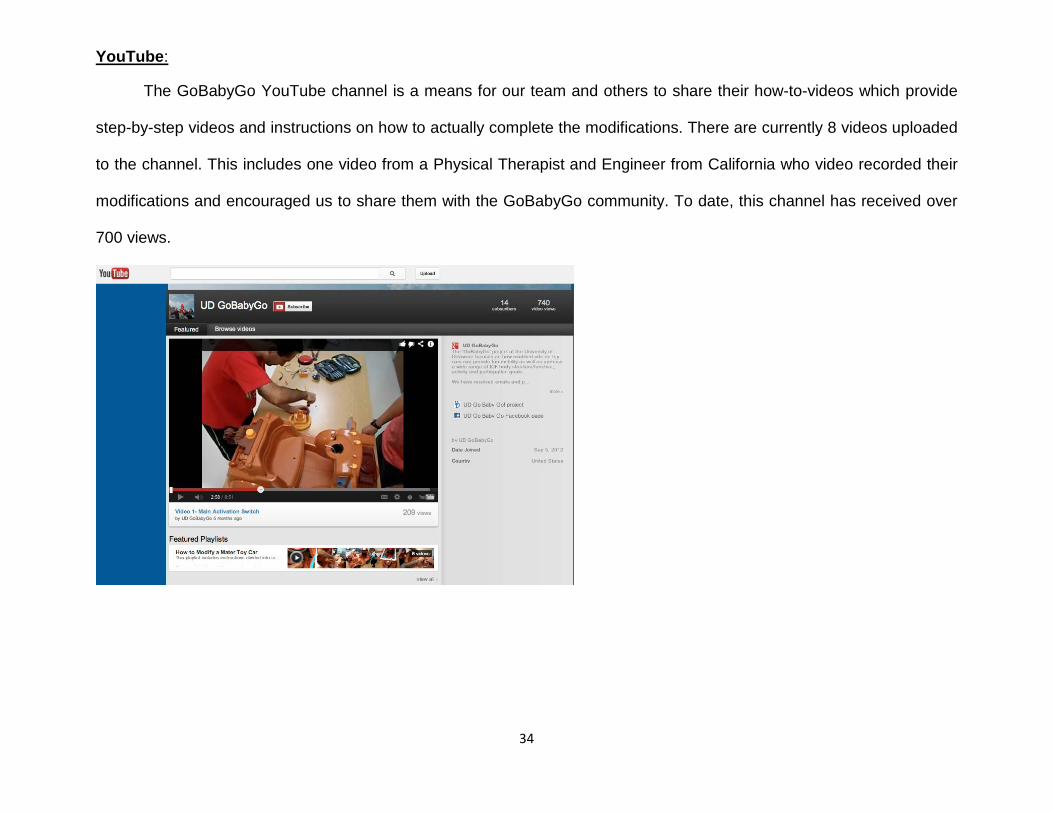
YouTube:
The GoBabyGo YouTube channel is a means for our team and others to share their how-to-videos which provide
step-by-step videos and instructions on how to actually complete the modifications. There are currently 8 videos uploaded
to the channel. This includes one video from a Physical Therapist and Engineer from California who video recorded their
modifications and encouraged us to share them with the GoBabyGo community. To date, this channel has received over
700 views.

35
http://www.youtube.com/channel/UCUJvxs5-iv1MDkL3WL9lN0Q/videos?flow=grid&view=0

36
Modified Ride-on Car Driver Intervention Training Manual Trial of Targeted Early Powered Mobility for Infants with Down Syndrome
Cole Galloway, PT, PhD (Cell #: 443-466-8821) and Sam Logan, PhD (Cell #: 443-553-2342)
Office: 63 East Delaware Ave., Newark, DE 19716 (Phone: 302-831-3214)
Ride-on Car Workshop: 5 Innovation Way, Suite 300, Newark, DE 19711

37
Table of Contents:
General Guidelines of Intervention
Driving Prescription Principles
Frequency and duration
Types of activities
Learning to Drive- Seated Car Overview
Device Overview
Qualification to start
Learning to Drive- Standing Car Overview
Device Overview
Qualification to start
Learning to Drive- Powered Walker Overview
Device Overview
Qualification to start
Overall Guidelines of Ride-on Car Use
Driver Training- Phase I- Switch activation
Driver Training- Phase 2- Learning how to stop
Driver Training- Phases 3, 4, and 5- Prompted driving
Driver Training- Phase 6- Socialization

38
General Guidelines for Intervention
The following guidelines should be followed by parents throughout the duration of the intervention and should be taught to
caregivers to guide their activities with their child is driving the ride-on car.
1. Encourage participants to be active movers and explorers. This means you should give them ample time to move,
make errors, and to correct their errors as independently as possible. It also means that when they require your
assistance to transition between postures, to maintain postures, or to interact with objects, you should focus on
providing them the least amount of assistance required.
2. Provide a “just right” challenge for participants. In order for participants to make continual gains in a safe, timely,
and positive manner, it is important to know how much assistance they need to perform an activity and to
understand ways you can adapt the activity to make it just challenging enough that the child will need to work
harder but can achieve success. This can involve altering the level of assistance you provide, changing the child’s
posture, or adapting aspects of the task such as object placement.
3. Make activities fun and meaningful for participants. In order to elicit best performance from participants it will be
necessary to understand their interests, likes, and dislikes. You will use this information to determine the objects
you will utilize and ways you can structure tasks and rewards.
4. Development is nonlinear, and there are individual differences between children so that each child may take a
slightly different path to the same endpoint. Do not have a “correct pattern” of movement in mind for early reaching
or sitting; rather, let the child’s strategy emerge. The exploration of strategies is important in training a new skill.

39
Driving Prescription Principles
A critical component of early intervention is caregiver education and involvement. Just as a diet followed 2 times per week
for an hour is not likely to result in weight loss, activity practice performed 2 times per week is not likely to result in
developmental changes. Caregivers will play an important role in this intervention.
Three important aspects of driving prescription are the following:
• Frequency and Dosage: It is important for caregivers to provide 30 minutes of daily driving for their child at least
five times per week.
• Types of activities: It is important for children to have many opportunities to drive the ride-on car in various
environments (i.e. inside the home, outside in the driveway, sidewalks, local playground, and other community
spaces). A variety of activities should also be provided during driving sessions (general exploration, driving to a
specific goal, playing games with peers).
• Provide feedback: It is important for caregivers to provide written and verbal feedback to the therapist to report
on performance of the driving, on the infant’s progress, on any changes in the infant’s medical or developmental
state, and on any family changes that could affect the intervention.

40
Seated Version of Ride-on Car: Dynamic Sitting
Age of Start: 3 months
Device Overview: The seated car functions by pressing an activation switch with his/her hand. The switch will be
placed on the steering wheel to allow easy access. The switch will include a large surface area and a high-sensitivity to
pressure. This provides an easy-to-use switch for an infant.
Qualification to Start: An infant will first be placed in the seated ride-on car at three months of age. It is important to
intervene prior to any significant motor delays are present. The seated version of the ride-on car will provide dynamic
sitting to an infant. The infant will be sitting yet the car will have the ability to move by switch activation. It is important to
start early and allow infants to explore the environment through ride-on car use as much as possible during this time.
Standing Version of Ride-on Car: Static Standing
Age of Start: 5 months
Device Overview: The activation switch of the standing car is different from the seated car. In the standing car
version, the activation switch is mounted underneath the seat. It is wired so that when the switch is released (i.e. infant
stands up), the switch is activated and the car moves forward. Thus, an infant must stand up in order for the car to move
forward. The car will stop once the infant sits down on the seat.
Qualification to Start: The transition from the seated car to the standing car will be based on a progression of motor
performance. Once an infant can pull sit-to-stand with assistance from a caregiver, the infant will begin to transition to the
standing car. At the start of this transition, the infant will continue to spend 50% of driving sessions in the seated car and
50% of the time in the standing car. This will allow the infant to continue to explore the environment using the sitting car,
but we will begin to work on advancement of independent standing.

41
As an infant can pull him/herself from sit-to-stand independently, he/she will spend 25% of driving sessions in the
seated car and 75% of the time in the standing car.
Standing Version of Ride-on Car: Dynamic Standing
Age of Start: 7 months
Device Overview: N/A (same as above- standing version)
Qualification to Start: As an infant can stand independently for at least 30 seconds, he/she will fully transition to the
standing car. He/she will spend 100% of the time in the standing car. At this point, caregivers will encourage their child to
march in place while on the standing car and to provide driving opportunities that challenge the postural system (i.e.
driving on rough surfaces to promote instability).
Powered Walker Version of Ride-on Car: Dynamic and Supported Walking
Age of Start: 10 months
Device Overview: The activation switch is identical to the standing car version. However, in this version, an infant’s
feet are on the ground and he/she will be encouraged to take supported steps while using the ride-on car.
Qualification to Start: As an infant displays the ability to take 3 supported steps (outside of a ride-on car), then
he/she will begin the transition to the powered walker version of the ride-on car. At this point, an infant will use the
standing car 50% of the time and the powered walker 50% of the time. Once he/she can take at least 10 supported steps
(outside of a ride-on car), then he she will use the standing car 25% of the time and the powered walker 75% of the time.
Once he/she can take at least 20 supported steps (outside of a ride-on car), then he she will use the powered walker
100% of the time.

42
Training Manual-Overall Guidelines
Suggestions for Training a Child to Use a Ride-on Car
• Encourage your child to explore the following: 1. Switch 2. Movement (e.g., reaching, grasping, pressing) 3. The car itself 4. Moving within the home
• Learn by doing.
• Give your child time to learn and react.
• Provide positive feedback (e.g., “You found the ______ [object your child ran into]” rather than “Oops, you
crashed”).
• If your child looks distressed (e.g., crying, losing attention), then intervene immediately.
• Help your child by using simple words such as “come closer”, ”turn”, or “go back” rather than “push the switch and come here”.
NOTE: The following guidelines can be applied to all versions of the ride-on car (seated, standing, and powered walker versions). These guidelines are meant for new drivers to scaffold the goals of learning to drive over time.
Young children in ride-on cars must be supervised at all times. Adults should be close by to monitor all activities and to ensure safety.

43
Training Manual Phase I-Car Exploration (start)
Suggestions for Training a Child to Use a Ride-on Car
Young children in ride-on cars must be supervised at all times. Adults should be close by to monitor all activities and to ensure safety. Do Do Not 1. Encourage your child to explore the car first. Introduce the car to your child briefly before sitting in. For example, let him/her look at the car and say “Here is Mater. We will play with him now”. 2. After sitting into the car, you can touch the switch once and see how your child reacts. Give your child time to react. If there is no reaction, demonstrate it again. 3. If your child does not react after three times of demonstration from you, guide his/her hand to touch the switch directly. Once his/her hand touches the switch, lift your hand off the switch and see if your child will drive independently. 4. If your child can not independently drive the car after you place his/her hand on the switch, place your hand on top of his/her hand and drive the car with him/her for a while. 5. Provide positive feedback every time when the car moves.
1. Expect your child will know how to control the car within few days. It may require some time for him/her to get familiar with this new device. 2. Directly guide your child’s movement through your own movement from beginning. Unless he/she does not have any exploratory behaviors (e.g., touch or look at different parts of the car), you can guide some of his/her movements by placing your hand on his/hers. 3. Provide direct physical guidance all the time. Try to encourage your child explore the driving possibilities (e.g., hit the switch and go) by himself/herself. 4. Intervene your child’s exploration of car and body movements all the time. Give him/her time to figure it out. 5. Give the positive feedback only when your child purposefully hits the switch. Every time when he/she hits the switch, you should give positive feedback whether the movement occurs purposefully or accidently.

44
Training Manual Phase II-Car Exploration (stop)
Suggestions for Training a Child to Use a Ride-on Car
Young children in ride-on cars must be supervised at all times. Adults should be close by to monitor all activities and to ensure safety. Do Do Not 1. Encourage your child to drive around in the appropriate areas at home. Direct physical guidance could be provided depending on your child’s responses. For example, hand over hand driving (i.e., directly physical guidance) can be provided when your child does not press the switch after you place his/her hand on the switch. 2. Tell your child “let go” (i.e., hands off) when he/she drives to you or the car hits some things (e.g., wall or sofa). If he/she cannot lift his/her hands off the switch, provide manual guidance. 3. Provide positive feedback when he/she hits the switch and moves the hands away from it.
1. Expect your child will start the movements immediately. Give him/her time to initiate the movements. 2. Expect your child will understand “let go” (i.e., hands off) and connect it to the car motion within a few days or a week. It is a gradual learning process. 3. Give the positive feedback only when your child purposefully hits the switch. Every time when he/she hits the switch, you should give positive feedback whether the movement occurs purposefully or accidently.

45
Training Manual Phase III-Prompted Driving (no specific direction/distance)
Suggestions for Training a Child to Use a Ride-on Car
Young children in ride-on cars must be supervised at all times. Adults should be close by to monitor all activities and to ensure safety. Do Do Not 1. Encourage your child to drive to you for the rewards (e.g., toy). Stand in front of the child with some distances and tell him/her to drive to you for the rewards. 2. Give your child time to drive to you even it takes a long time. 3. Make sure your child has eye contact with you and the rewards.
1. Expect your child will start the movements immediately. Give him/her time to initiate the movements. 2. Intervene your child’s driving movements immediately when he/she does not move immediately after your verbal or gestural prompt. 3. Provide the rewards directly to your child without any eye contact. Give him/her time to actively move toward the rewards and have eye contact on the target (i.e., you or reward).
46
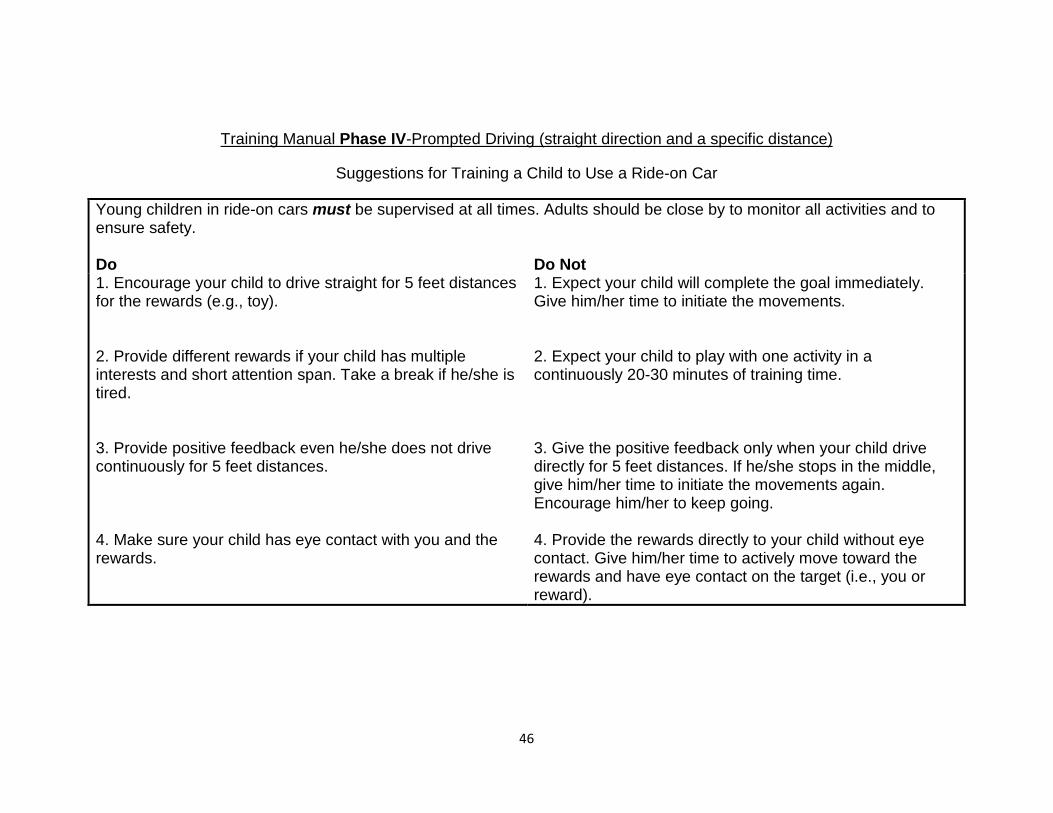
Training Manual Phase IV-Prompted Driving (straight direction and a specific distance)
Suggestions for Training a Child to Use a Ride-on Car
Young children in ride-on cars must be supervised at all times. Adults should be close by to monitor all activities and to ensure safety. Do Do Not 1. Encourage your child to drive straight for 5 feet distances for the rewards (e.g., toy). 2. Provide different rewards if your child has multiple interests and short attention span. Take a break if he/she is tired. 3. Provide positive feedback even he/she does not drive continuously for 5 feet distances. 4. Make sure your child has eye contact with you and the rewards.
1. Expect your child will complete the goal immediately. Give him/her time to initiate the movements. 2. Expect your child to play with one activity in a continuously 20-30 minutes of training time. 3. Give the positive feedback only when your child drive directly for 5 feet distances. If he/she stops in the middle, give him/her time to initiate the movements again. Encourage him/her to keep going. 4. Provide the rewards directly to your child without eye contact. Give him/her time to actively move toward the rewards and have eye contact on the target (i.e., you or reward).

47
Training Manual Phase V-Prompted Driving (different directions and a specific distance)
Suggestions for Training a Child to Use a Ride-on Car
Young children in ride-on cars must be supervised at all times. Adults should be close by to monitor all activities and to ensure safety. Do Do Not 1. Encourage your child to drive to you at different directions for 5 feet distances for the rewards (e.g., toy). 2. Provide different rewards if your child has multiple interests and short attention span. Take a break if he/she is tired. 3. Provide positive feedback even he/she does not drive continuously for different locations for 5 feet distances. 4. Make sure your child has eye contact with you and the rewards.
1. Expect your child will complete the goal immediately. Give him/her time to initiate the movements. 2. Expect your child to play with one activity in a continuously 20-30 minutes of training time. 3. Give the positive feedback only when your child drive directly for different locations for 5 feet distances. If he/she stops in the middle, give him/her time to initiate the movements again. Encourage him/her to keep going. 4. Provide the rewards directly to your child without eye contact. Give him/her time to actively move toward the rewards and have eye contact on the target (i.e., you or reward).

48
Training Manual Phase VI-Driving and Socialization (different directions/distances)
Suggestions for Training a Child to Use a Ride-on Car
Young children in ride-on cars must be supervised at all times. Adults should be close by to monitor all activities and to ensure safety. Do Do Not 1. Encourage your child to drive to you, other adults, or other children for the rewards (e.g., toy). 2. Make sure your child has eye contact with you and the target. 3. Provide positive feedback and eye contact when your child reaches a toy/other reward.
1. Expect your child will complete the goal immediately. Give him/her time to initiate the movements. 2. Expect your child to complete the goal when he/she does not pay attention on it. 3. Give positive feedback without any eye contact. Let your child see your facial expression while providing feedback.

49
Ride on Toy Car Parents Log Sheet
Participant’s Initials___ __Week ____
Date ____ _____
Please choose the item(s) that apply:
1. How much time do you play with your child? (with the ride-on car)
Duration: ____________minutes
2. Where do you play with your child?
____ Basement _____ Living Room _____ Kitchen _____ Bed Rooms
____ Community Space : _______ _________ (please specify where, e.g.,
playground)
____ Others :________ ________ (please specify where)
3. From 1 (the least fun) to 10 (the most fun), how fun did you/your child have?
1 2 3 4 5 6 7 8 9 10
4. Assistance and Type of activity
How much and what type of assistance did you provide your child?

50
____ Drive without your assistances
____ Drive around the house with your assistances, assisting in:
____ pressing the switch, the percentages of time you helped:
100% 75% 50% 25% less than 10% None
____ lifting the hand off the switch, the percentages of time you helped:
100% 75% 50% 25% less than 10% None
____ steering the wheel, the percentages of time you helped:
100% 75% 50% 25% less than 10% None
____ others: _______ _____ (please specify)
Specific Activity:
Drive anywhere and play:
____ Drive any direction and touch: furniture others ____ ___
____ Drive any direction and play: toy(s) _____________ others _________
Drive to a specific person or place and play:
____ Drive to you
____ Drive to you/others and touch/get toys ________
____ Drive to you/others and do __ ___ __
The percentages of driving to each direction was:
____ Drive straight 100% 75% 50% 25% less than 10% None

51
____ Drive right 100% 75% 50% 25% less than 10% None
____ Drive left 100% 75% 50% 25% less than 10% None
5. Is there any special note (e.g., something new: first time to press the switch by himself/herself or first time to turn the wheel) you would like to take regarding your child’s performance and play activity today? Yes No
a. If yes, what is it?

52
Car Project: Coding Manuel
• All coding templates can be found filed in the large car project Tupperware with the participants’ files, or saved on the hard drive if none are left.
• On top of every template, write your name, the child’s name, and the phase of the trial (Baseline, intervention, retention).
• For every video, write down its visit number, clip number and time within the clip you are recording.
• All data is to be recorded on both the paper template, and then entered into their individual excel sheets and saved onto the USB.
o To find excel sheets: Plug in the USB, and open the “finder” icon on the desktop. Click under “devices” for the USB and select it. Double click “Racecar Project” and select the folder for the child you are
coding for.
Measure 1- Natural Play:
*For natural play, you will code a 10-minute time frame of the child prior to when they begin driving the car.
• Start the ten minutes after the two minutes of natural play with the toy guitar. (If guitar play was not included, is used throughout natural play, or there was not enough time following guitar play for a full 10-minutes, simply begin the 10-minute time frame at the start of the video).
• Fill out the template to include your name, child’s name, and phase they are in at the top.
• For each video, fill out the template to include the visit number, the clip number, and the time frame within the video you are coding.
Coding for Natural Play will include 5 different elements:
1. Reaching for the Toy (# of times):
A. Tally the amount of times the child reaches for a toy while seated. ONLY count the same toy once. However, if there are several components to the toy (ex. Different balls, a hammer and the workbench, different blocks) you can count those touches individually when they are reached for. Again, if the child reaches for that individual toy again, you will not recount it.
B. Example: The child is playing with the cookie jar. They reach for the blue cookie and put it in the jar. That counts as 1 touch for the blue cookie and another touch if they touched the cookie jar. If they reach for the red cookie next, that counts as another reach for toy. However, if the child again reaches for the cookie jar, that will not count as another reach, since you only count a reach for a specific toy once.
2. Positive Facial Expressions:

53
A. Tally the amount of times the child makes positive facial expressions, for example, they smile. If the child remains smiling over a period of time, that still remains the same tally. Allow at least 3 seconds between two positive facial expressions before tallying it as a second.
B. Example: The child is smiling for several seconds and then her face goes neutral. If the smile begins again immediately, count that as the same tally. However, if a full 3 seconds pass between the expressions, it can be counted as a second.
3. Negative Facial Expressions:
A. Apply the same rules for positive facial expressions to this measure, as well. However, this time record negative facial expressions such as frowning.
4. Vocalization:
A. Whenever the child expresses a desire verbally, cries, or makes another sound that demonstrates they are trying to express something, tally that under vocalization. Again, observe a three second rule between the vocalizations before tallying it as a second.
5. Gesture:
A. When the child points or motions for something, this will be considered a gesture. When they are continually gesturing for the same thing, that will still only be considered one tally.
B. Example: Child is pointing at a toy. That will be considered a gesture. If the child is continuing to point at the toy because someone doesn’t understand what he or she are asking for, it is still only considered one tally.
Measure 2- Car Play:
* Car play is again a 10-minute time frame starting from the beginning of the clip.
For car play, there will be several elements to tally.
1. Prompted Mobility:
A. Total #: For every time someone encourages the child to drive (ex. By saying, “come here,” “press the button,” “get the toy”) tally that under the total number for prompted mobility. Allow at least 5 seconds between these commands for the child to decide whether to respond before counting them as separate tally’s.
B. # Successful: For every time the child responds to the command by doing as told (ex. By pushing the button, driving to the car), this will be tallied under # successful.
2. Facial Expressions: (Determined exactly the same as for natural play)
A. Positive Facial Expressions: Tally the amount of times the child makes positive facial expressions, for example, they smile. If the child remains smiling over a period of time, that still remains the same tally. Allow at least 3 seconds between two positive facial expressions before tallying it as a second.

54
B. Negative Facial Expressions: Apply the same rules for positive facial expressions to this measure, as well. However, this time record negative facial expressions such as frowning.
3. Vocalizations: (Again, the same as for natural play)
A. Whenever the child expresses a desire verbally, cries, or makes another sound that demonstrates they are trying to express something, tally that under vocalization. Again, observe a three second rule between the vocalizations before tallying it as a second.
4. Gesture: (Again, same for natural play)
A. When the child points or motions for something, this will be considered a gesture. When they are continually gesturing for the same thing, that will still only be considered one tally.
5. Reach for Toy:
A. As the child drives, tally the amount of times he or she reaches for a toy. Again, only count a reach for the same toy once. In some instances, toys are not used as motivation throughout the driving process or even present during the driving (especially while outside). For this reason, we count a reach for a leaf, another car, or any particular object as a reach for toy.
Measure 3- Mobility:
*Mobility is the 10-minute time frame while the child is driving the car.
1. Independent Joystick Contacts:
A. For every time the child touched the joystick or button without assistance, that is considered an independent contact.
a. If the child is repeatedly hitting the switch (Ex. If there is spasticity) only count that as one touch.
b. Allow at least 3 seconds between these touches before counting a second touch.
2. Assisted Joystick Contact:
B. For every time the child touched the switch with assistance (ex. Someone putting his or her hand on it) that counts as an assisted contact.
3. Visual Attention to the Joystick:
A. Whenever the child makes eye contact with the switch, this is considered visual attention to the joystick. Subsequent visual attentions can be tallied as soon as the child breaks eye contact and then maintains it again.

55
4. Independent Mobility:
A. Independent mobility is the amount of time the child is driving after an independent joystick contact. If the child places his or her hand on the switch independently and begins to drive, count the amount of seconds of driving that ensues.
5. Caregiver Mobility:
A. Caregiver mobility is the amount of time the child is driving after an assisted joystick contact. However, during this type of driving, someone holds the child’s hand on the switch the entire time to help them drive. Again, count the seconds the driving ensues from this interaction.
6. Assisted Mobility:
A. Assisted mobility again follows an assisted joystick contact. This time, though, the person removes their hand and the child is able to drive without additional help. In summary, someone puts their hand on the switch, but then removes their hand and the child is able to drive independently
Measure 4- Goal Oriented Driving:
*This is again a 10-minute period of driving. It determines the amount of time the child accomplishes stopping at their goal.
1. Assisted (giving hints):
A. With Verbal Cue- In this case, tally the amount of times the child stops at a given goal after only being told verbally to stop at that spot.
a. Example: A child is told to drive to a toy and stop there. If the child is driving and is told to stop right now, that is considered assisted with verbal cue.
B. With verbal + Tactile Contact: Tally the amount of times the child stops at a goal after both verbally being told to stop and someone tapping their hand to initiate stopping. This type of goal oriented driving will be considered “Assisted with verbal + tactile contact.”
a. Example: Child is driving to a goal but needs someone saying “stop,” or “take your hand of the switch” combined with someone tapping their hand in order to actually stop at the goal.
2. Independent:
A. The child is either given a goal to stop at in advance or goes over to an object they are interested in and stops without being told to and without any tactile contact to their hand.
a. Example: A child sees a toy and begins driving toward it. If they stop at that toy without being told and without anyone’s hand on their hand, this would be considered independent.
3. Caregiver:
B. If the child is driving to a goal but needs someone to physical take his or her hand off the switch in order to stop, this would be considered “Caregiver Goal-oriented Driving”