Embed Size (px)
Citation preview
GreenStar™2 AutoTrac™ RowSense™ Universal Quick Reference GuideGreenStar™2 AutoTrac™ RowSense™ Universal Quick Reference Guide
1. Select Menu
2. Select GreenStar 2 Pro
3. Push Button B (Guidance icon)
4. Push the Guidance Settings tab
5. Select desired Tracking mode
6. Push Row Sense Settings Button and enable the sensor
GreenStar 2Pro
To setup AutoTrac RowSense Universal follow the steps below
on your GS2 2600 Display The field below is an example of when to use Adaptive Curves. You can use Adaptive Curves in all fields, but we highly recommend using it when you know the path will change while going through the field, you know heading will change significantly or the curve is U-shaped. Continuous changes throughout the field.
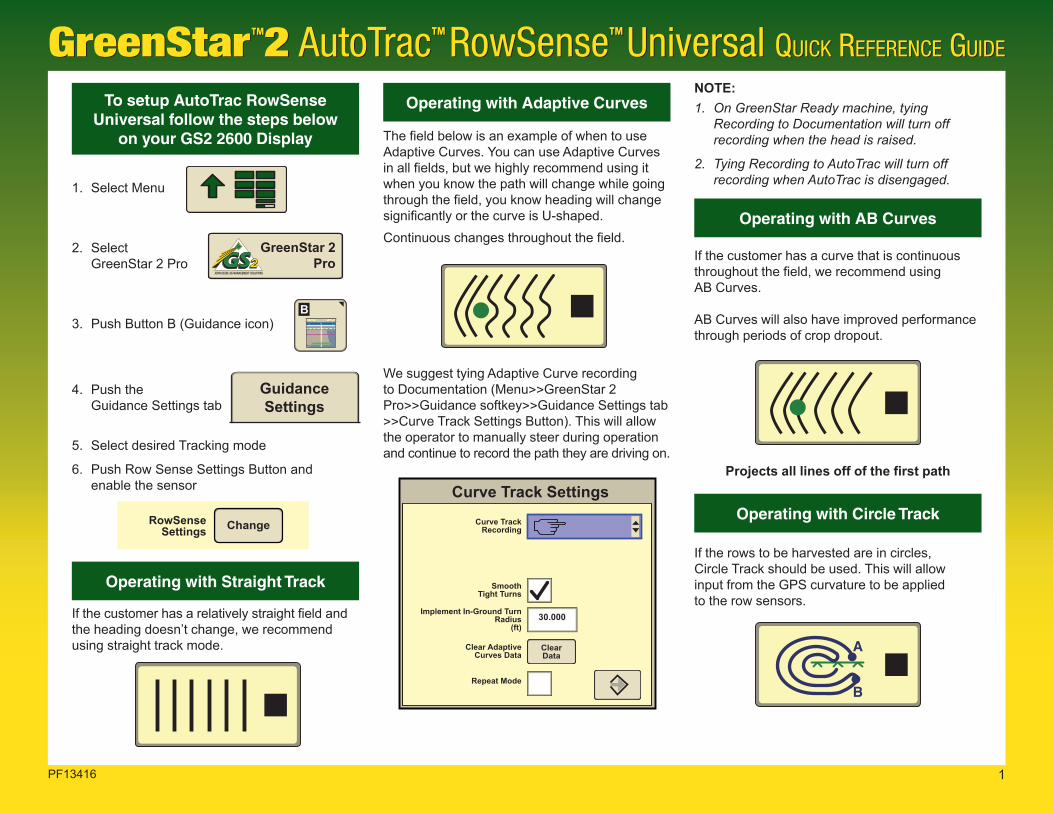
We suggest tying Adaptive Curve recording to Documentation (Menu>>GreenStar 2 Pro>>Guidance softkey>>Guidance Settings tab >>Curve Track Settings Button). This will allow the operator to manually steer during operation and continue to record the path they are driving on.
Operating with Adaptive CurvesNOTE: 1. On GreenStar Ready machine, tying
Recording to Documentation will turn off recording when the head is raised.
2. Tying Recording to AutoTrac will turn off recording when AutoTrac is disengaged.
If the customer has a curve that is continuous throughout the field, we recommend using AB Curves.
AB Curves will also have improved performance through periods of crop dropout.
Projects all lines off of the first path
If the rows to be harvested are in circles, Circle Track should be used. This will allow input from the GPS curvature to be applied to the row sensors.
Operating with AB Curves
If the customer has a relatively straight field and the heading doesn’t change, we recommend using straight track mode.
Operating with Straight Track
Operating with Circle Track
B
GuidanceSettings
A
B
PF13416 1
Curve TrackRecording
Clear AdaptiveCurves Data
Repeat Mode
Curve Track Settings
ClearData
SmoothTight Turns
Implement In-Ground TurnRadius
(ft)30.000
RowSenseSettings Change
PF13416 2
GreenStar™2 AutoTrac™ RowSense™ Universal Quick Reference GuideGreenStar™2 AutoTrac™ RowSense™ Universal Quick Reference Guide
When using your AutoTrac RowSense Universal you will see the following icons on the screen. Each one of them indicates what is happening on your combine at that moment.
1.
System Installed
2.
System Active, Operating with both row sensor and GPS
3.
Lost GPS, Operating with row sensor data only
4.
Lost row Sensor Signal, operating with GPS only
NOTE: On 3 and 4 your guidance accuracy will be diminished.
AutoTrac RowSense Universal Icons
Row Finder can be used when:1. Operating in adaptive curves, and
2. Needingtofindarowthatistwoormore passes away.
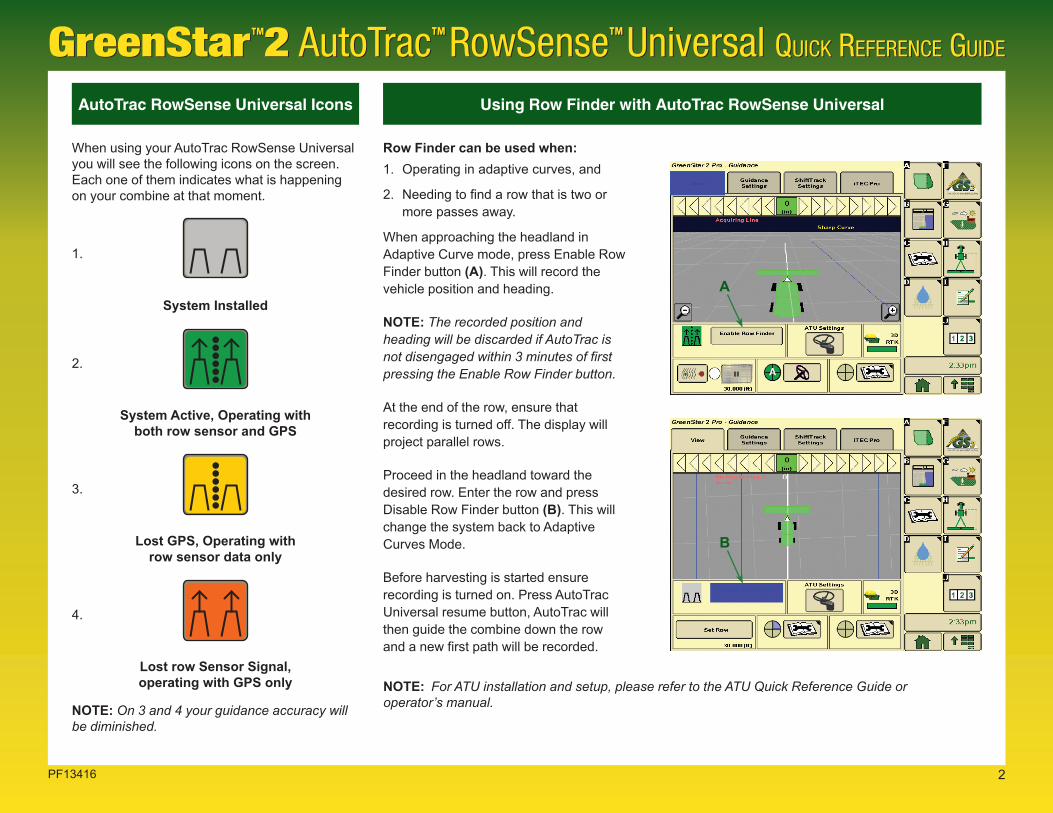
When approaching the headland in Adaptive Curve mode, press Enable Row Finder button (A). This will record the vehicle position and heading.
NOTE: The recorded position and heading will be discarded if AutoTrac is not disengaged within 3 minutes of first pressing the Enable Row Finder button.
At the end of the row, ensure that recording is turned off. The display will project parallel rows.
Proceed in the headland toward the desired row. Enter the row and press Disable Row Finder button (B). This will change the system back to Adaptive Curves Mode.
Before harvesting is started ensure recording is turned on. Press AutoTrac Universal resume button, AutoTrac will then guide the combine down the row and a new first path will be recorded.
NOTE: For ATU installation and setup, please refer to the ATU Quick Reference Guide or operator’s manual.
Using Row Finder with AutoTrac RowSense Universal
A
B