Embed Size (px)
Citation preview
Feature Article
Tamiya
Supermarine Spitfire MK.IXc (DB build)
1:32 scale
with Daniel Baxter (June 2019)
Copyright www.scalemodellingnow.com 2019

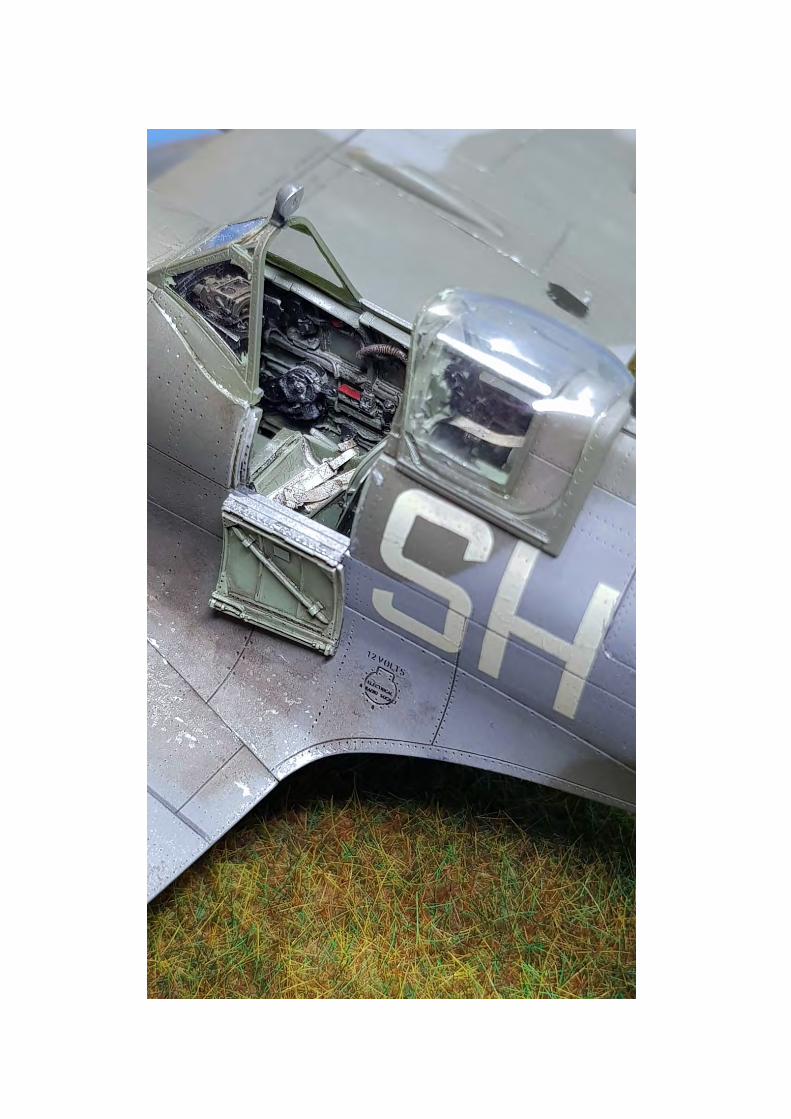
A note from Geoff C… If I have pictures of a completed project at the start, I like to bring you a quick look right up front and so here’s one of Daniel’s impressively finished project…
Over to you Dan… Despite this being a well known and well documented kit thanks to builds by Julian Seddon and Dave Coward in SMN, both had their own approach from Dave's more out of the box build to Julian’s scratch built added details.

So to bring something different to to table as it were I’m going to throw a considerable amount of aftermarket at it.
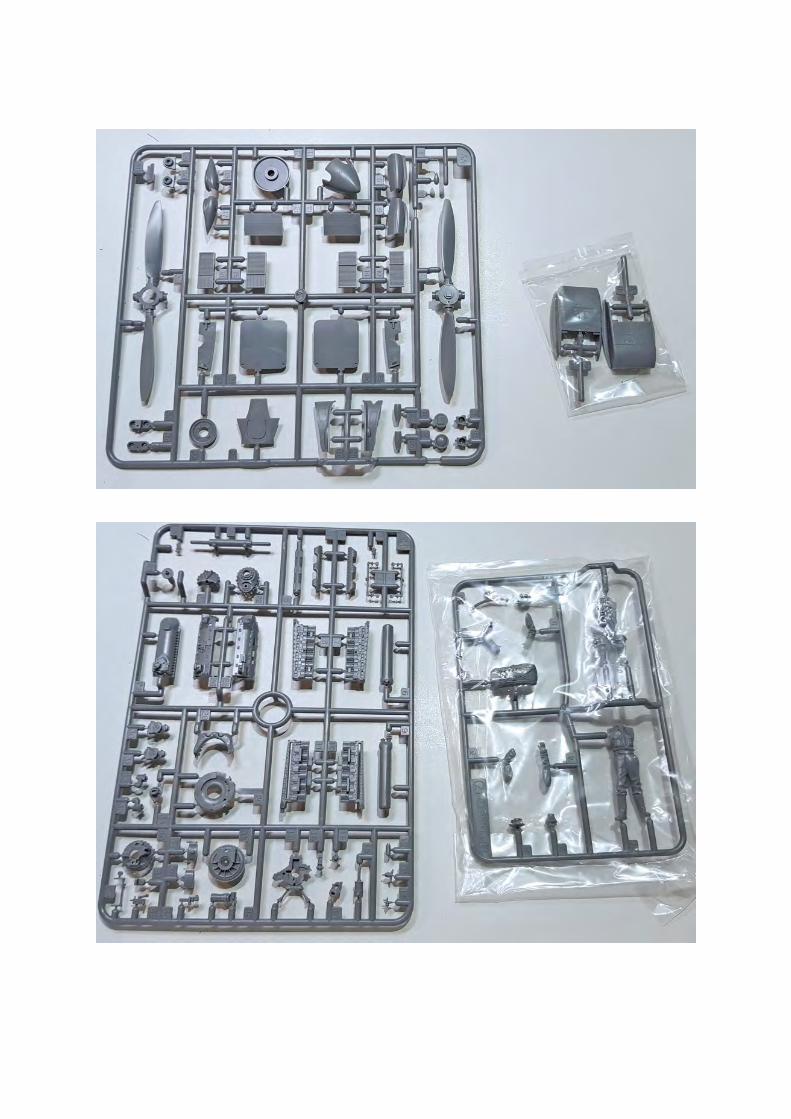
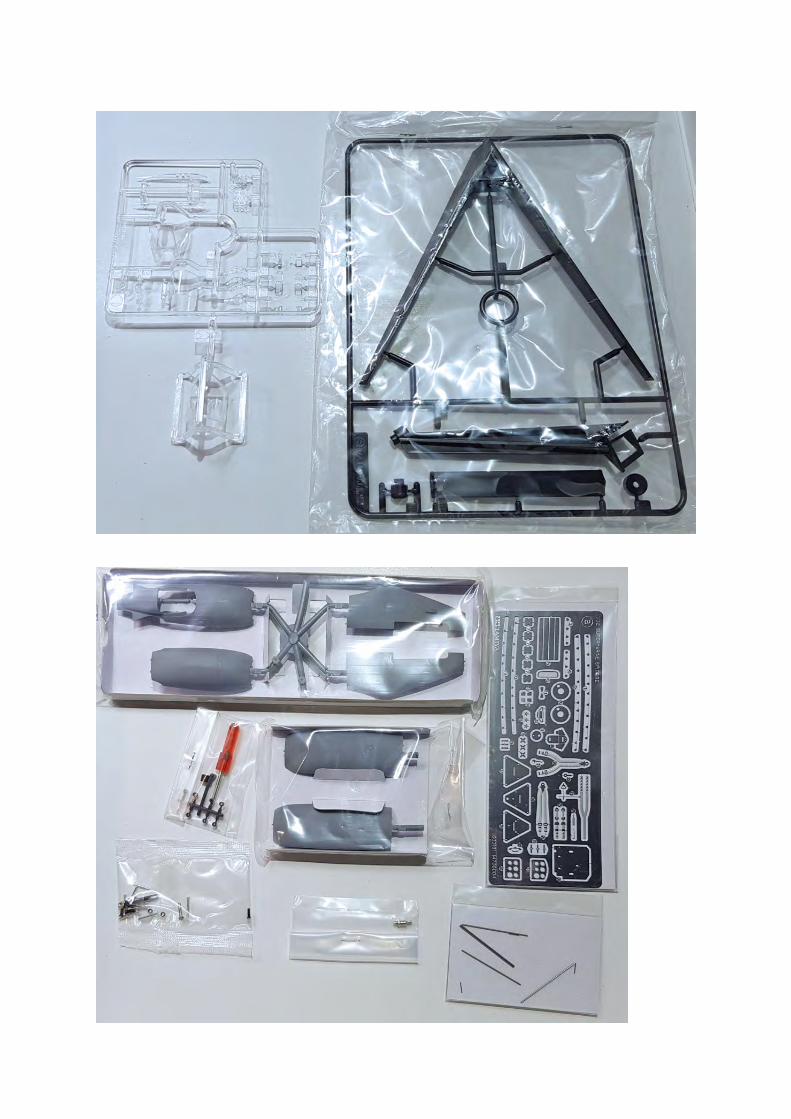
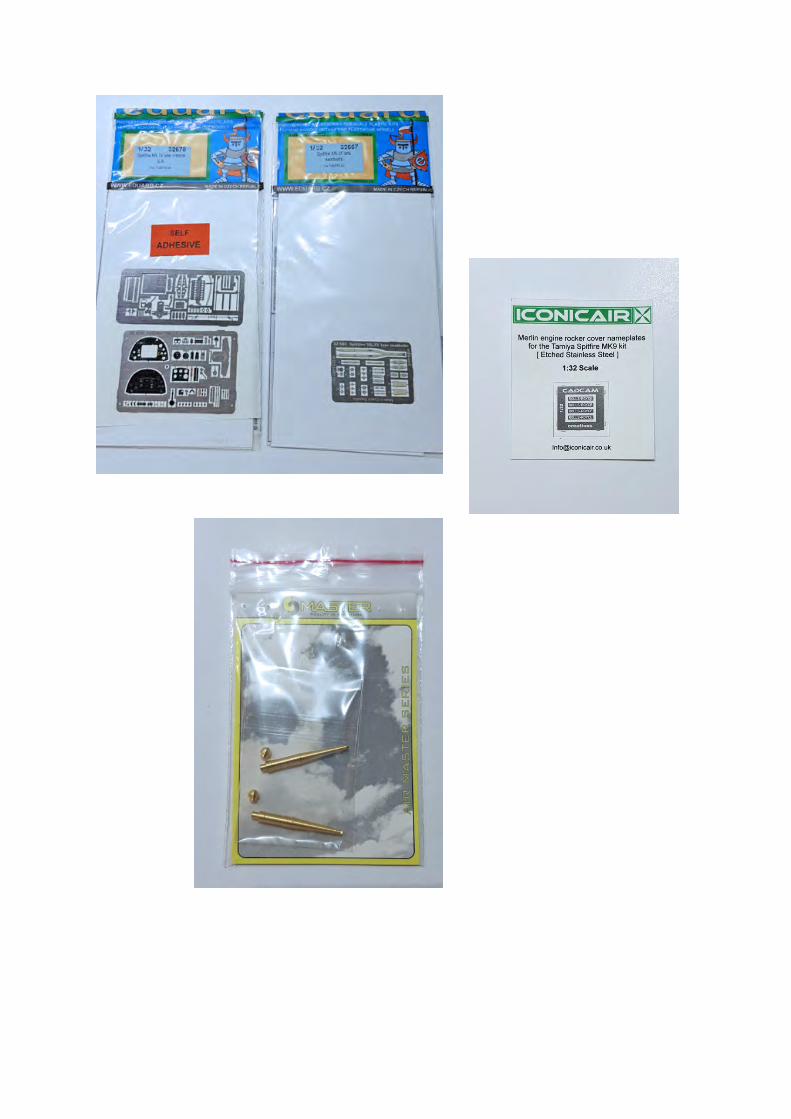
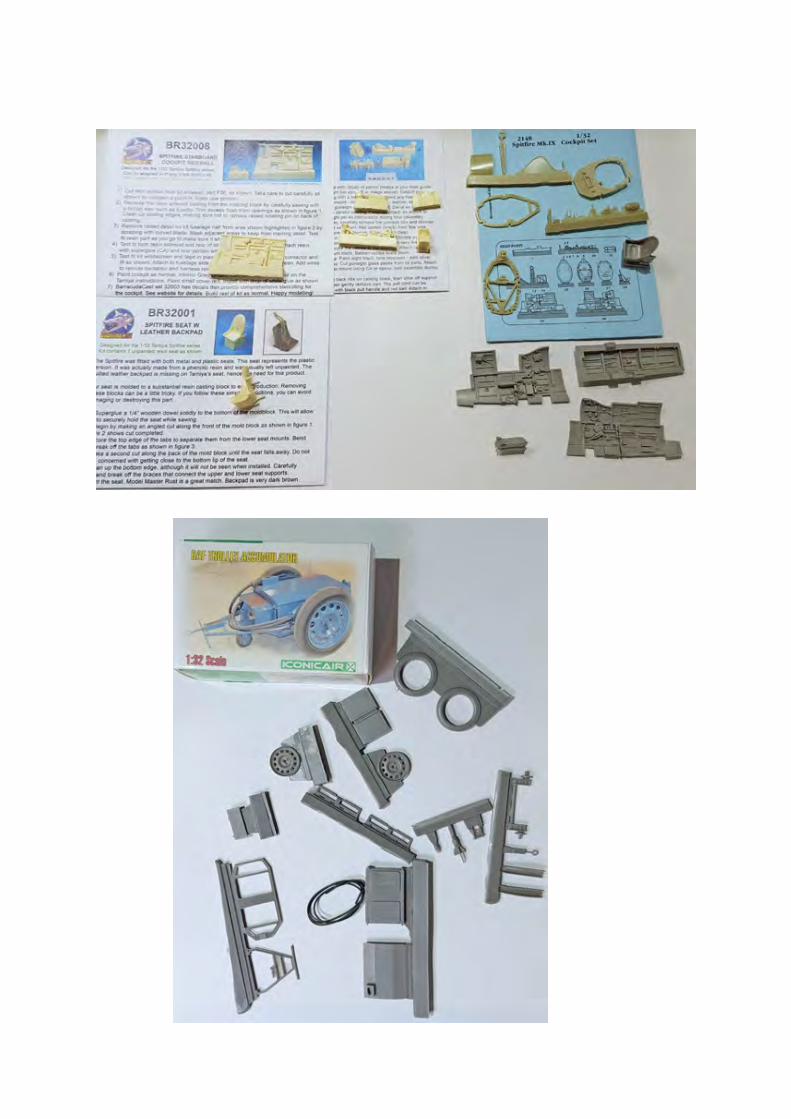
I don’t think the aircraft or kit needs any background as they are well documented by others already on SMN, but I will show the sprues and aftermarket so here we go.


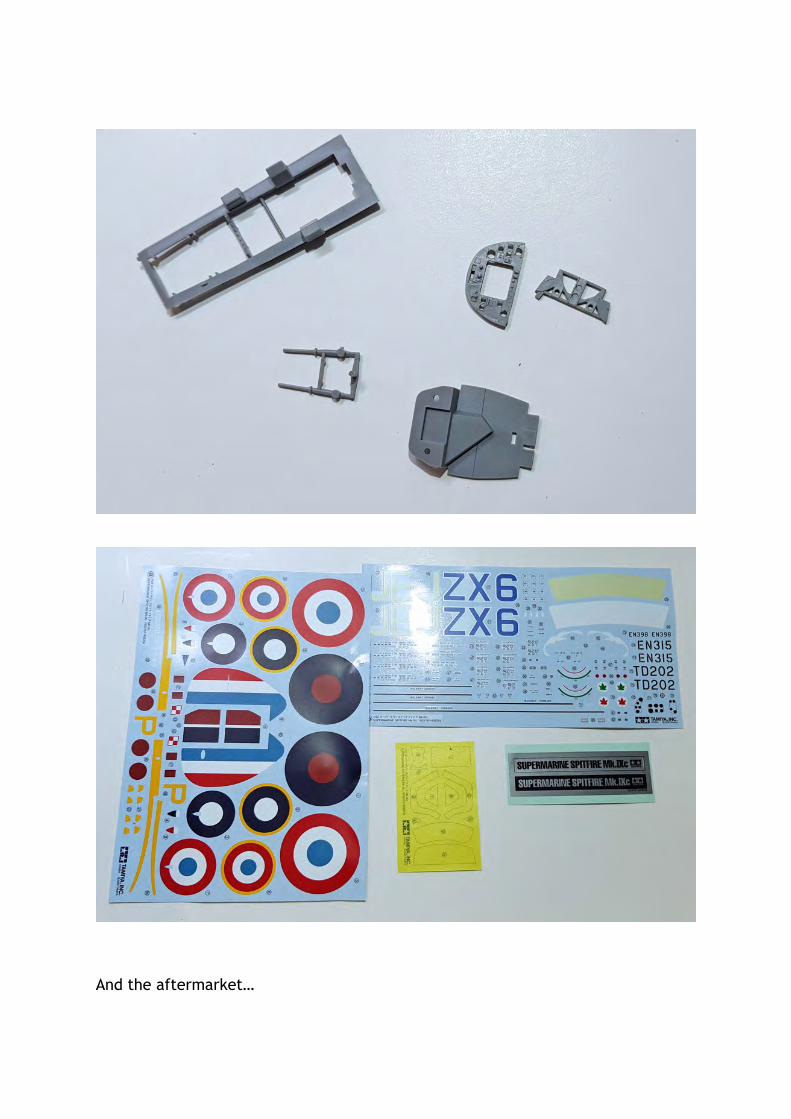
And the aftermarket…
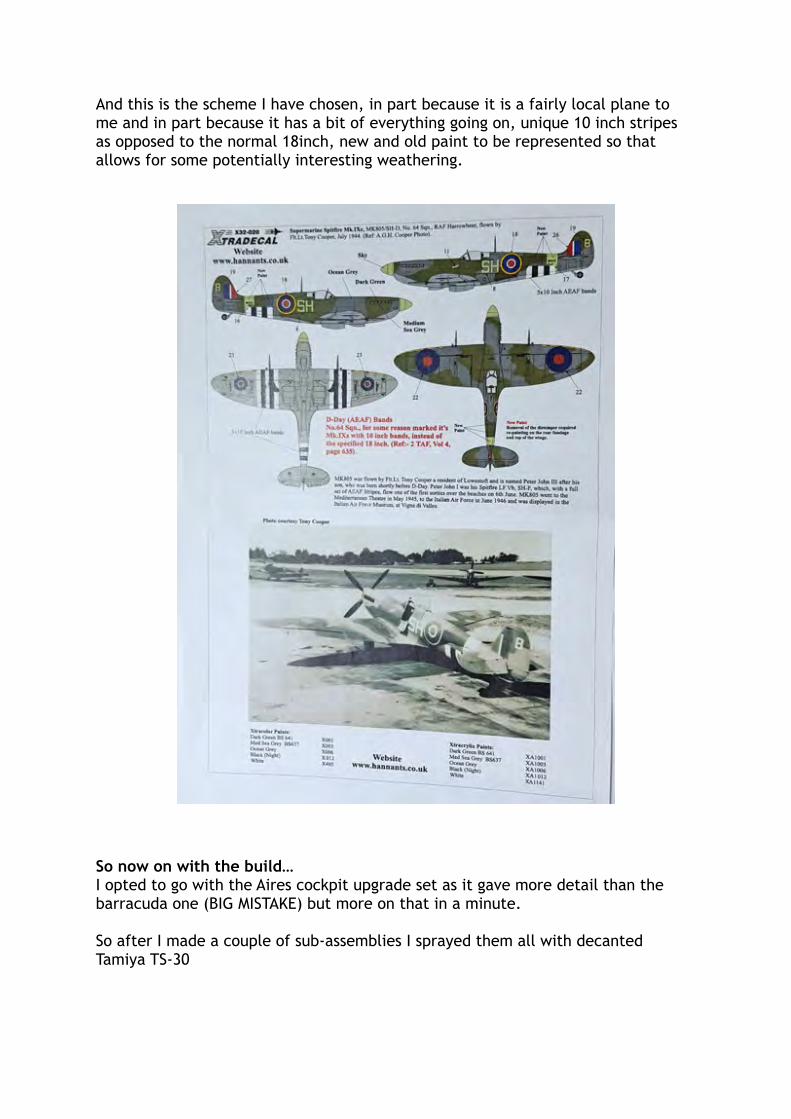
And this is the scheme I have chosen, in part because it is a fairly local plane to me and in part because it has a bit of everything going on, unique 10 inch stripes as opposed to the normal 18inch, new and old paint to be represented so that allows for some potentially interesting weathering.
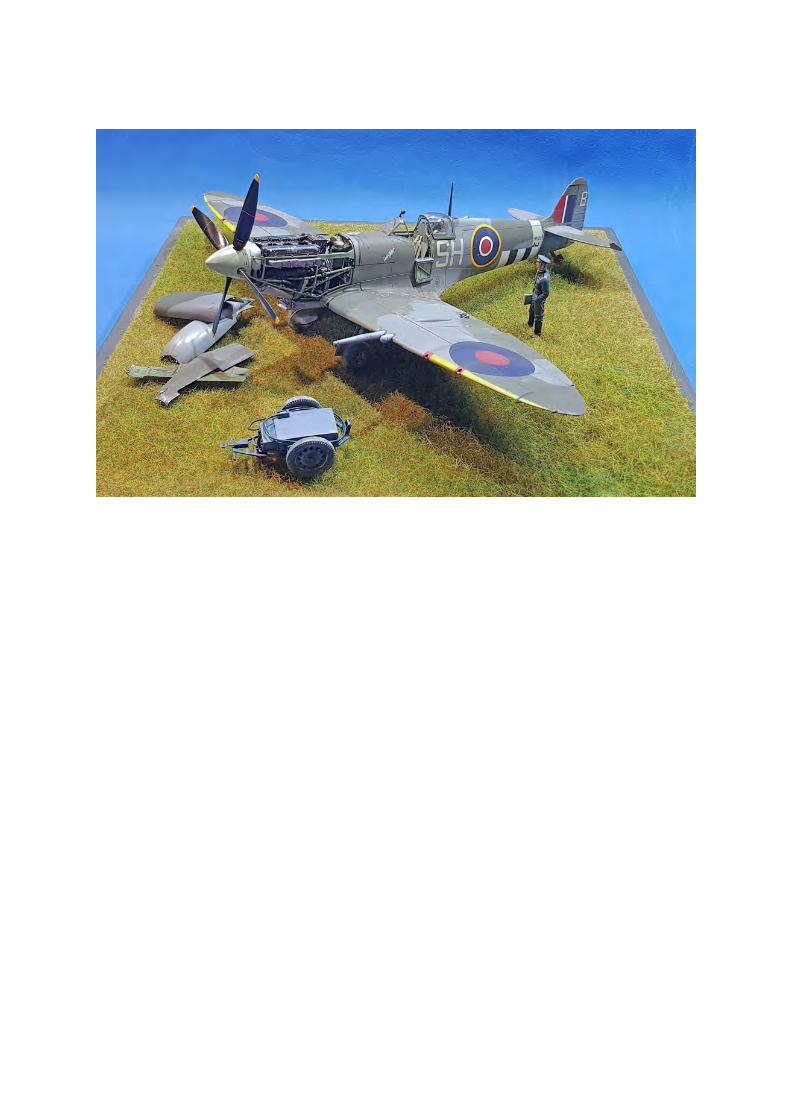
So now on with the build… I opted to go with the Aires cockpit upgrade set as it gave more detail than the barracuda one (BIG MISTAKE) but more on that in a minute.
So after I made a couple of sub-assemblies I sprayed them all with decanted Tamiya TS-30
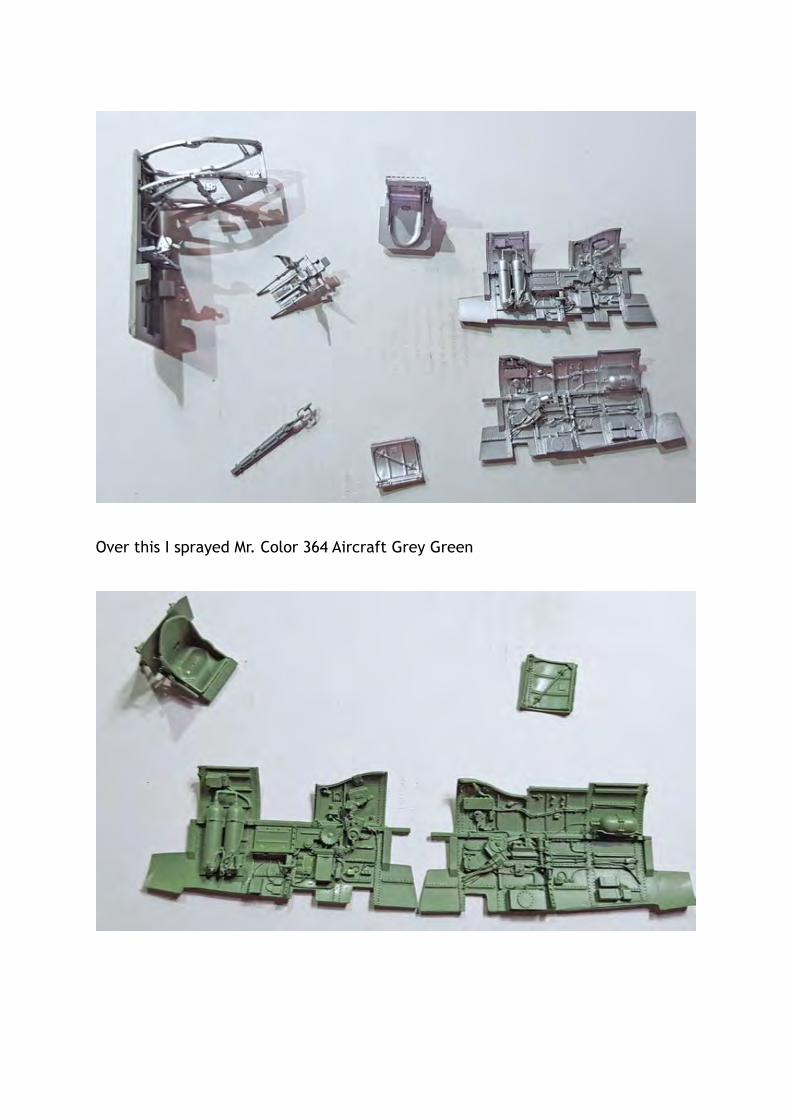
Over this I sprayed Mr. Color 364 Aircraft Grey Green

Next was some brush painting of the details, I used Revell Aqua Color for this, and you can see the Eduard colour photo-etch instrument panel. At this point I started chipping the cockpit, this was done with a fibre glass pen and a tooth pick.
Then to grime it up some I went over the internals with Tamiya Panel Line Accent Color (Dark Brown) I then used lighter fluid (the type for zippos) on a cotton bud and paint brush to remove the excess.

Then it was on with the fitting on the very nice Eduard seat belts, though not up to the standard of the fabric ones available they a still an improvement over the kit provided ones.
Once fitted the belts were given a coat of brown enamel wash then this was knocked back with thinners.
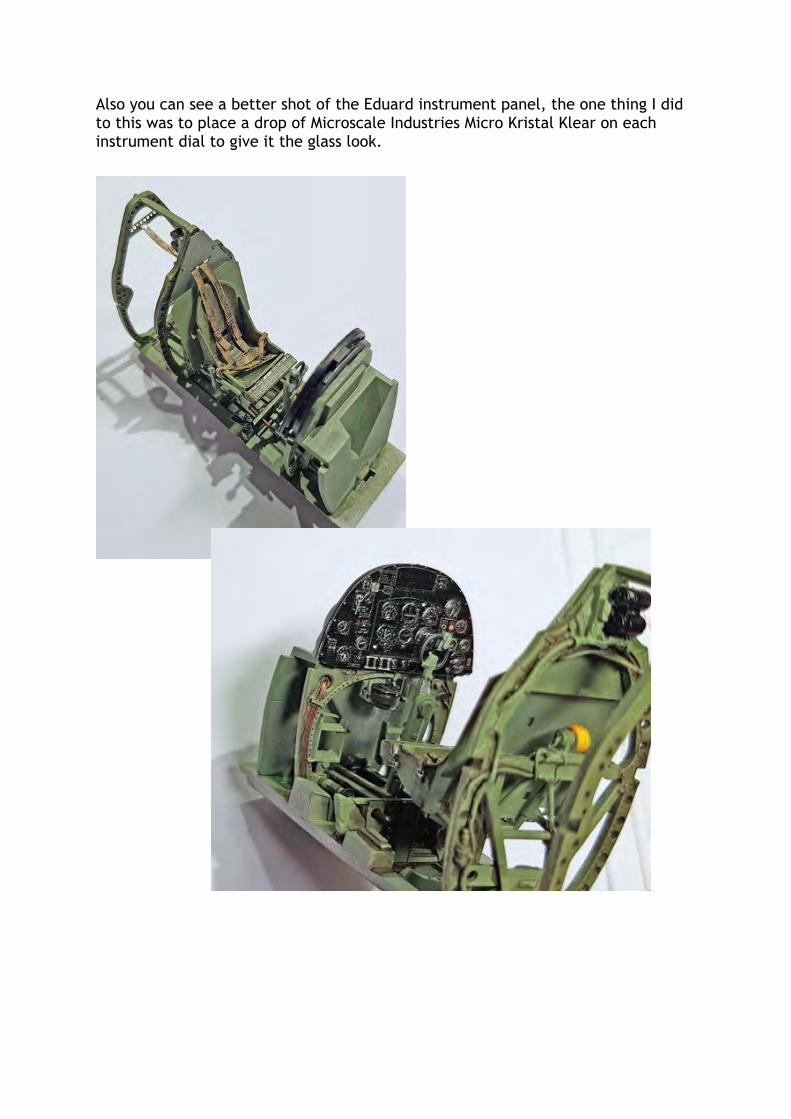
Also you can see a better shot of the Eduard instrument panel, the one thing I did to this was to place a drop of Microscale Industries Micro Kristal Klear on each instrument dial to give it the glass look.
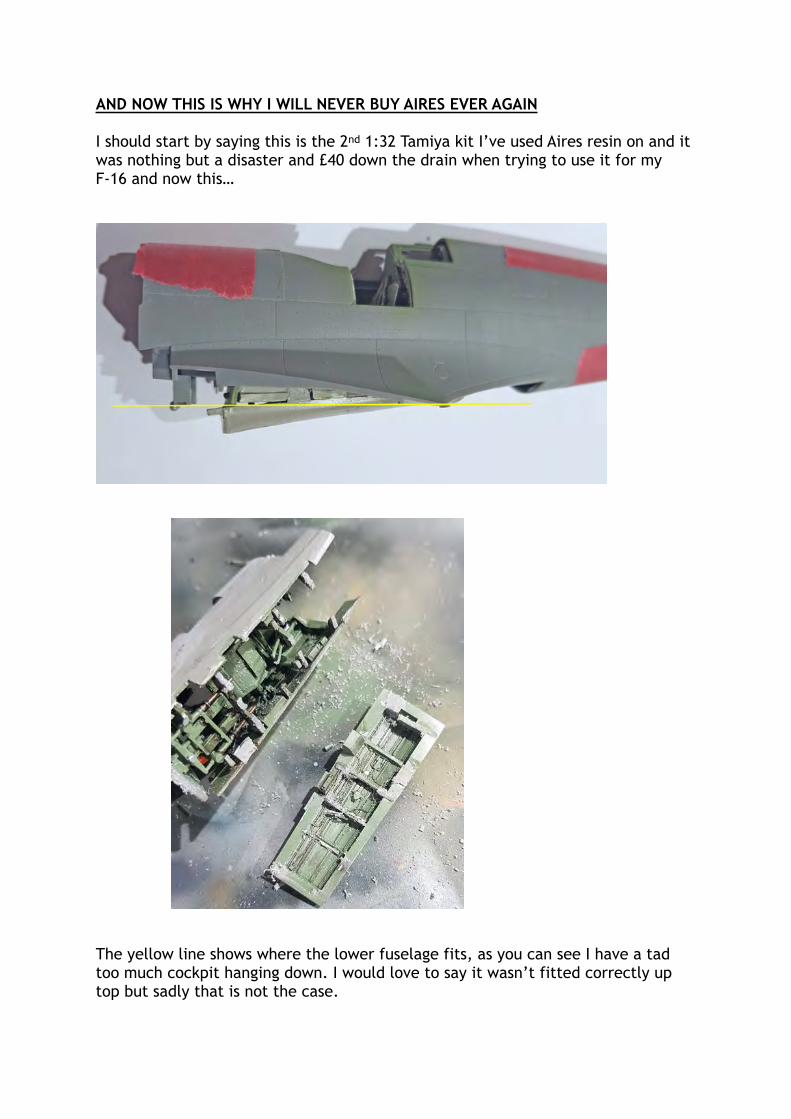
AND NOW THIS IS WHY I WILL NEVER BUY AIRES EVER AGAIN
I should start by saying this is the 2nd 1:32 Tamiya kit I’ve used Aires resin on and it was nothing but a disaster and £40 down the drain when trying to use it for my F-16 and now this…
The yellow line shows where the lower fuselage fits, as you can see I have a tad too much cockpit hanging down. I would love to say it wasn’t fitted correctly up top but sadly that is not the case.
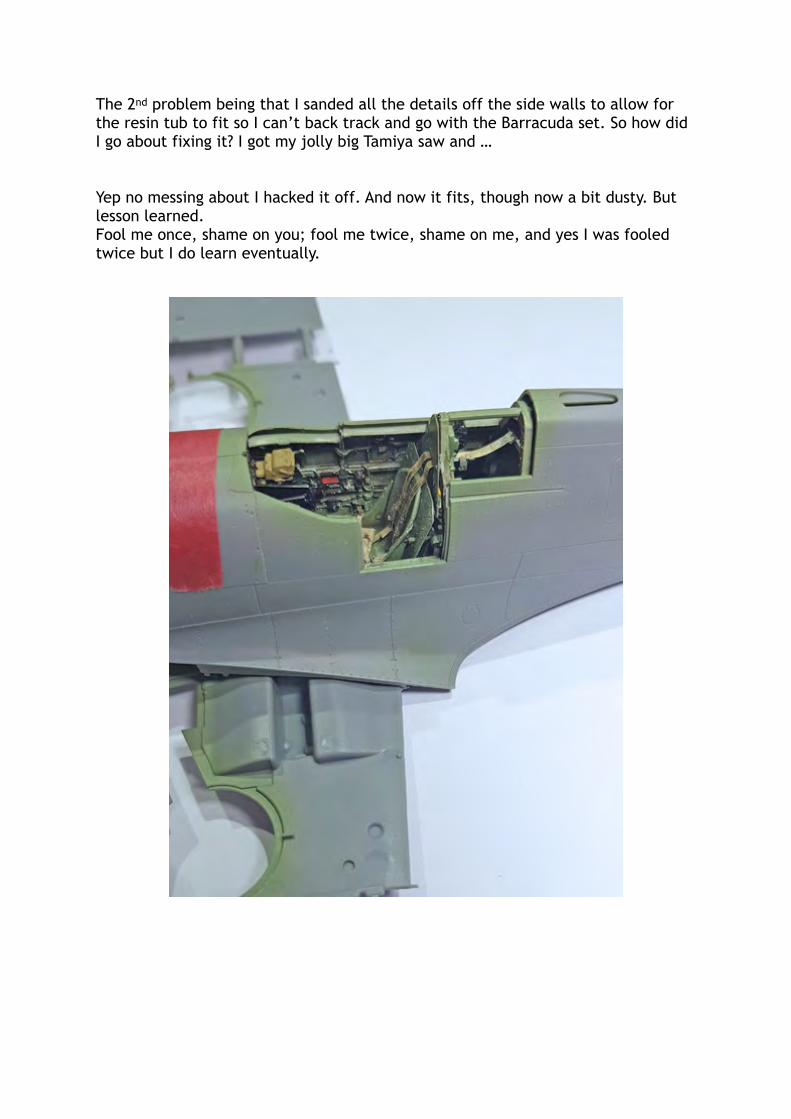
The 2nd problem being that I sanded all the details off the side walls to allow for the resin tub to fit so I can’t back track and go with the Barracuda set. So how did I go about fixing it? I got my jolly big Tamiya saw and …
Yep no messing about I hacked it off. And now it fits, though now a bit dusty. But lesson learned. Fool me once, shame on you; fool me twice, shame on me, and yes I was fooled twice but I do learn eventually.
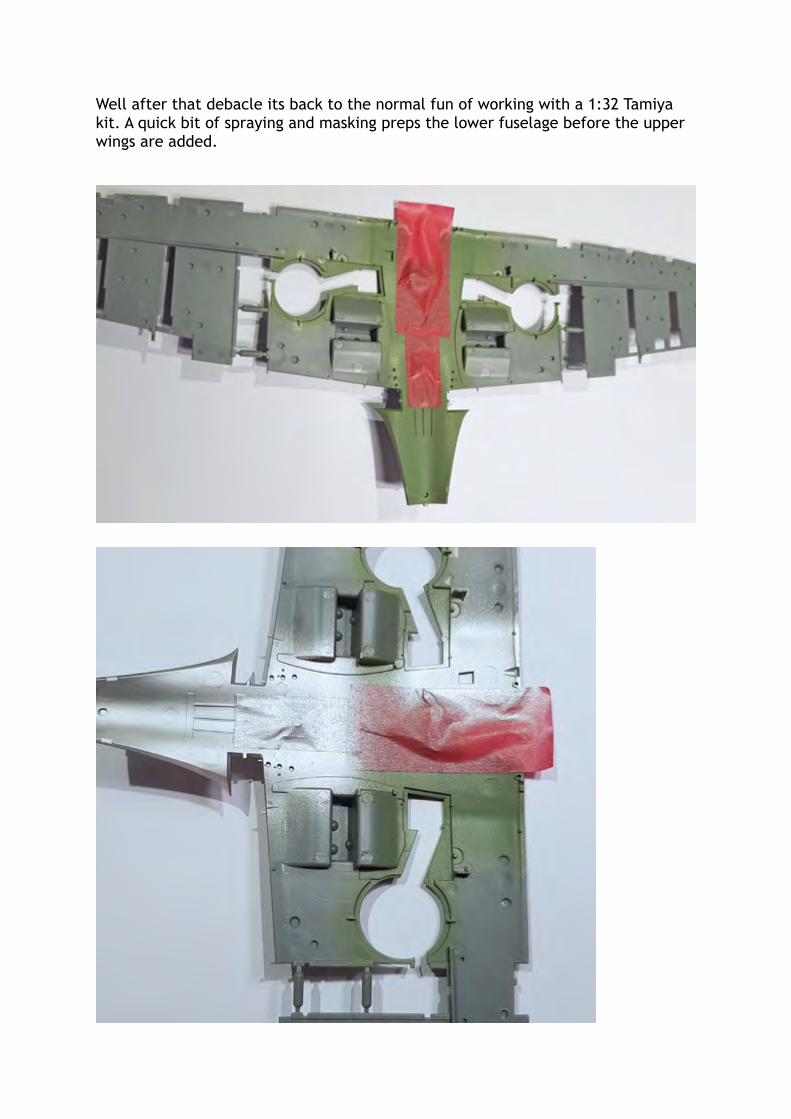
Well after that debacle its back to the normal fun of working with a 1:32 Tamiya kit. A quick bit of spraying and masking preps the lower fuselage before the upper wings are added.
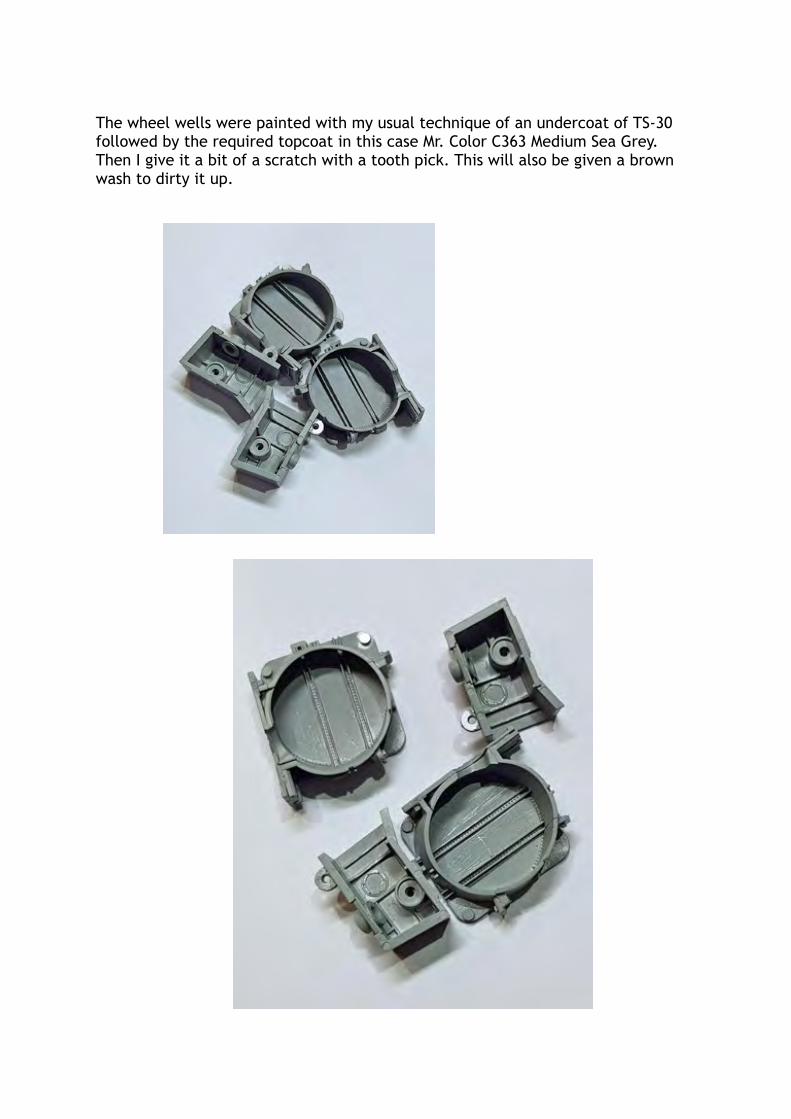
The wheel wells were painted with my usual technique of an undercoat of TS-30 followed by the required topcoat in this case Mr. Color C363 Medium Sea Grey. Then I give it a bit of a scratch with a tooth pick. This will also be given a brown wash to dirty it up.
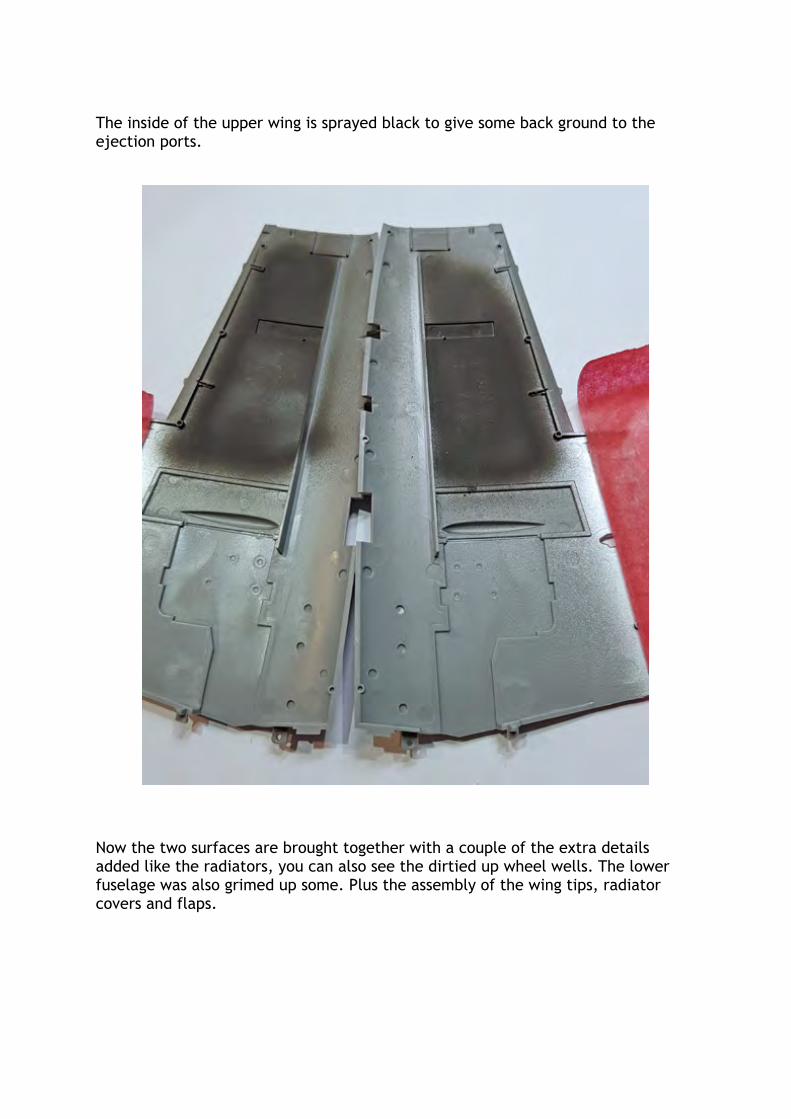
The inside of the upper wing is sprayed black to give some back ground to the ejection ports.
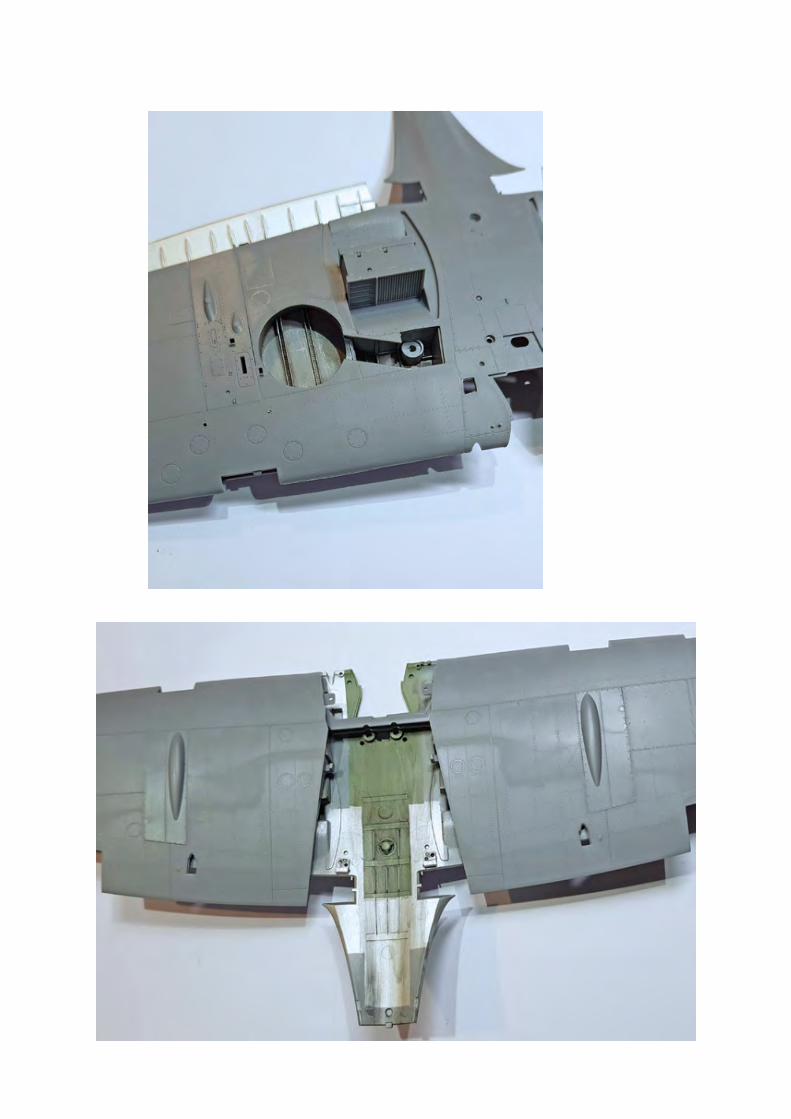
Now the two surfaces are brought together with a couple of the extra details added like the radiators, you can also see the dirtied up wheel wells. The lower fuselage was also grimed up some. Plus the assembly of the wing tips, radiator covers and flaps.

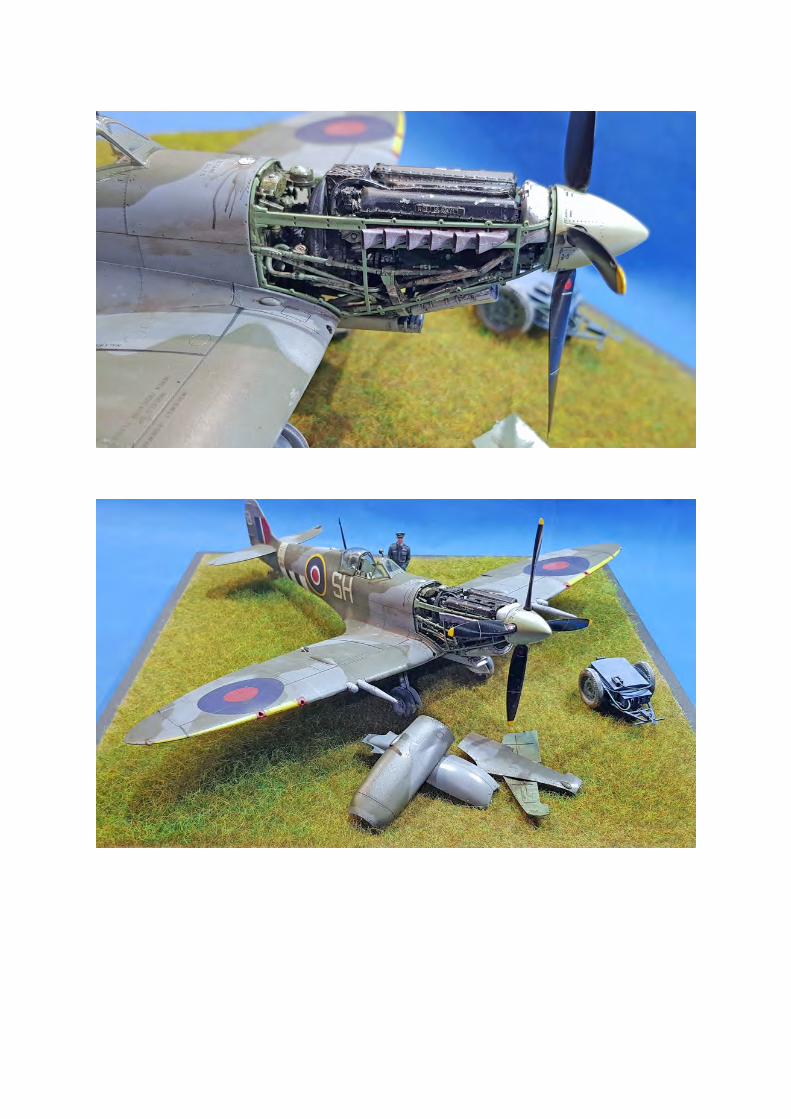
Now one of what I think is a stand out part of this kit, the engine. Construction is extremely simple and the result is brilliant.
Despite how great the engine is I did decide to try a little bit of detailing. I added the Rolls-Royce plates and drilled some holes to add some wiring.

I also added a bit of rubber tube from my spares box, the same tube was added to the top and some more lead wire added.


Next I painted the whole engine block silver and used some Mr.Masking SOL R applied with a tooth pick to mask off some areas for chipping. Once dry I then top coated with Mr. Surfacer 1500 black. I find it gives a very nice satin finish that for this application it works great.
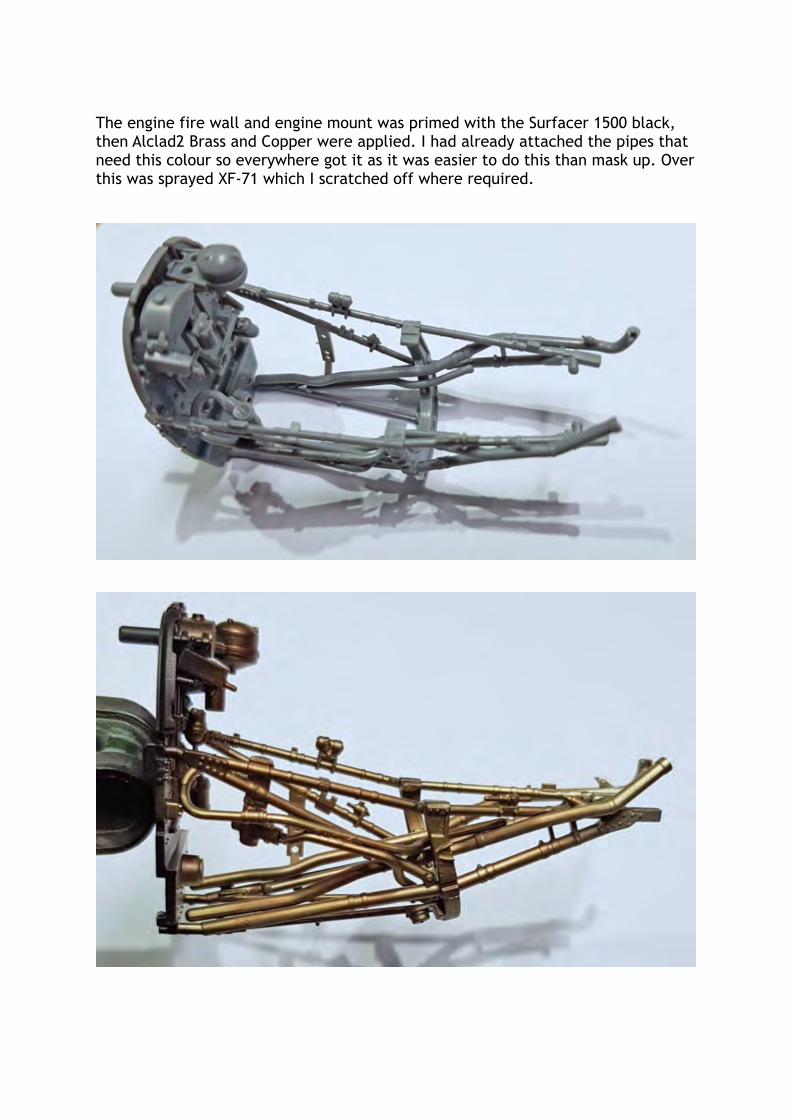
The engine fire wall and engine mount was primed with the Surfacer 1500 black, then Alclad2 Brass and Copper were applied. I had already attached the pipes that need this colour so everywhere got it as it was easier to do this than mask up. Over this was sprayed XF-71 which I scratched off where required.

To weather the engine I used various Ammo by Mig enamel products. I have found thinning them with lighter fluid meant for Zippo type lighters works wonders, it helps with the flow and gives a rapid drying time. At first it looks like the engine has a catastrophic oil leak but this will be toned down.

Next - fitting the engine mounting brackets. A very easy and nice fit (unlike some etch ones I’ve used). The exhausts were also painted with a pre-mixed Hull Red and Gunmetal with some heavily thinned Tan over the top.
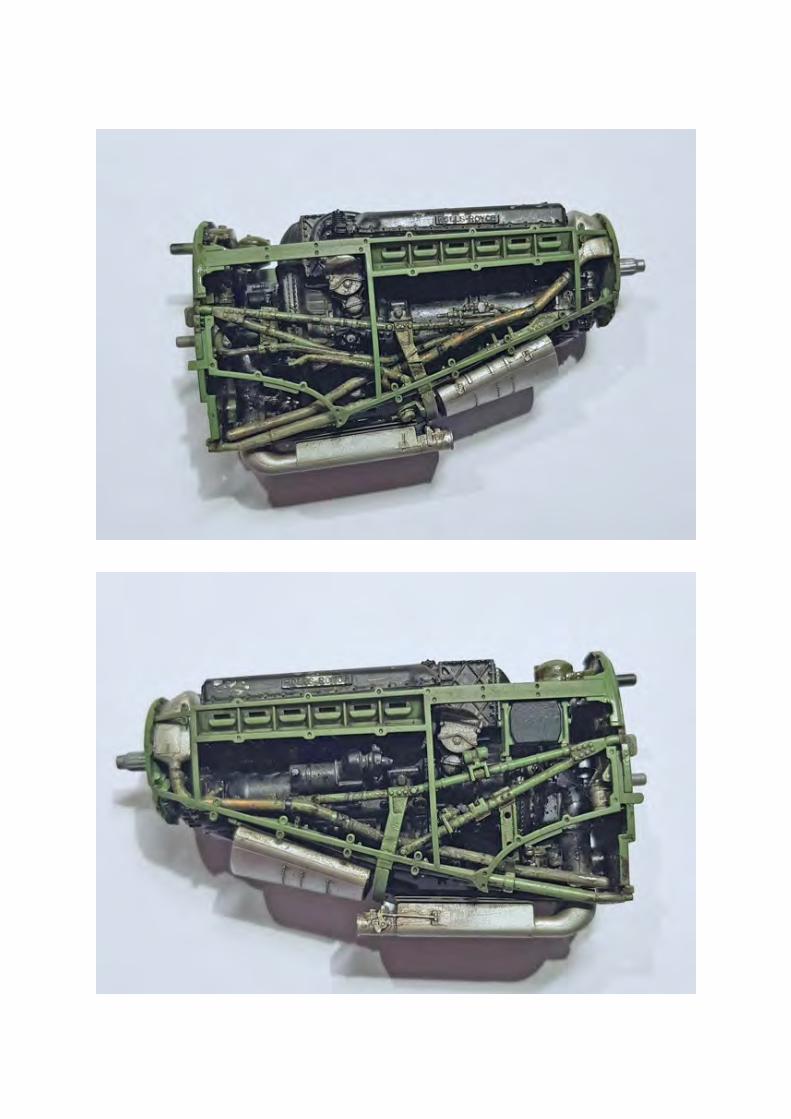
And that is pretty much it for the engine for now.
Painting next…
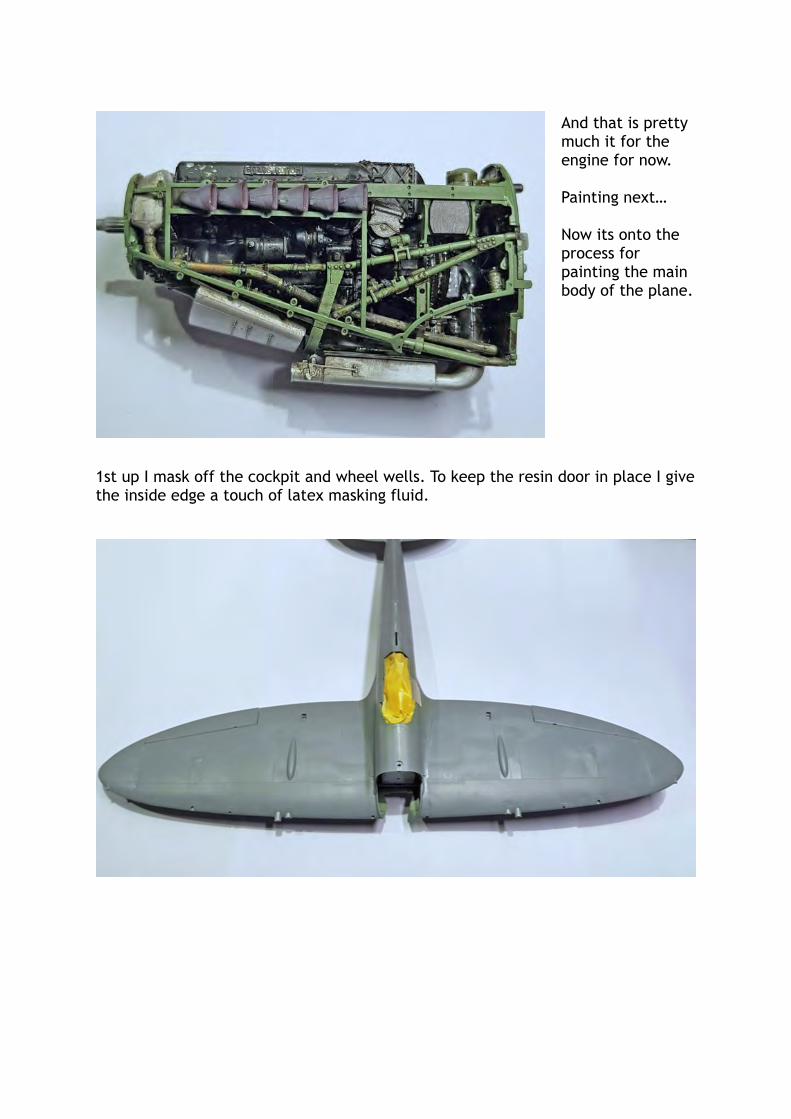
Now its onto the process for painting the main body of the plane.
1st up I mask off the cockpit and wheel wells. To keep the resin door in place I give the inside edge a touch of latex masking fluid.
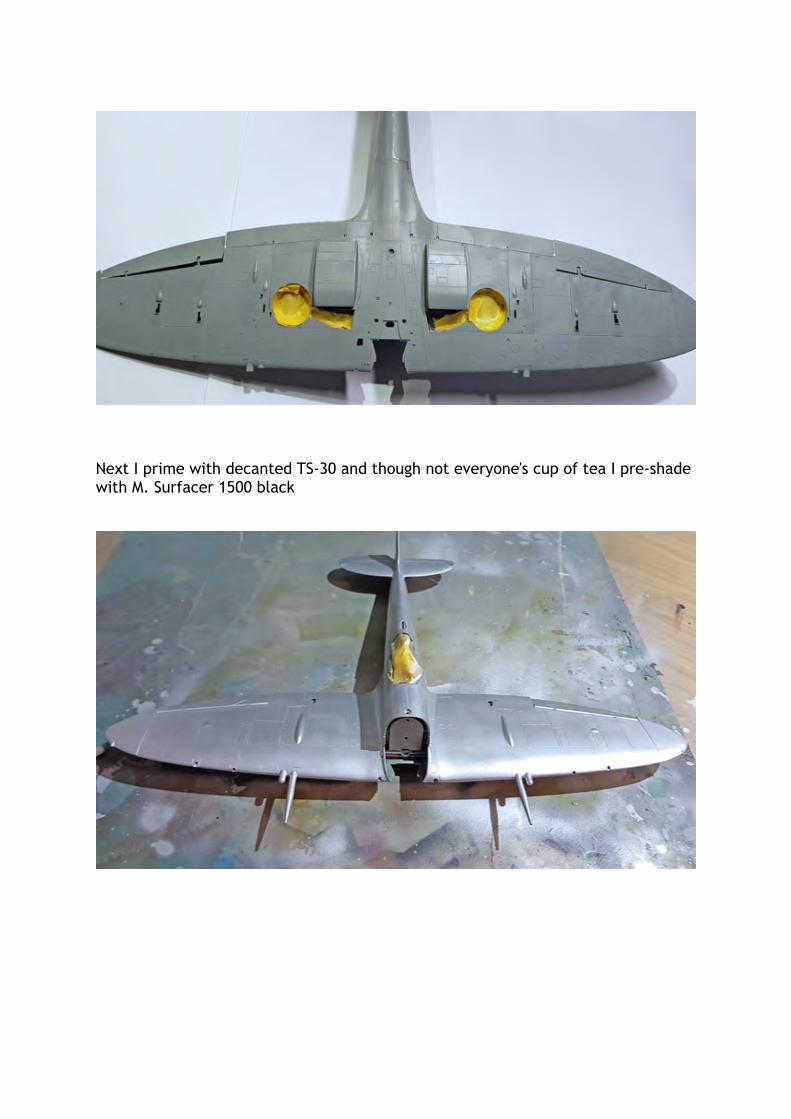
Next I prime with decanted TS-30 and though not everyone's cup of tea I pre-shade with M. Surfacer 1500 black

Now I do some prep for later chipping. I use Mr. Masking Sol R for this. What I do is use the brush to dab some fluid onto my cutting matt then use a small bit of sponge to dab the fluid over the area I want - for this plane it will be the gun bay covers and the wing roots with more on the pilot’s access side.
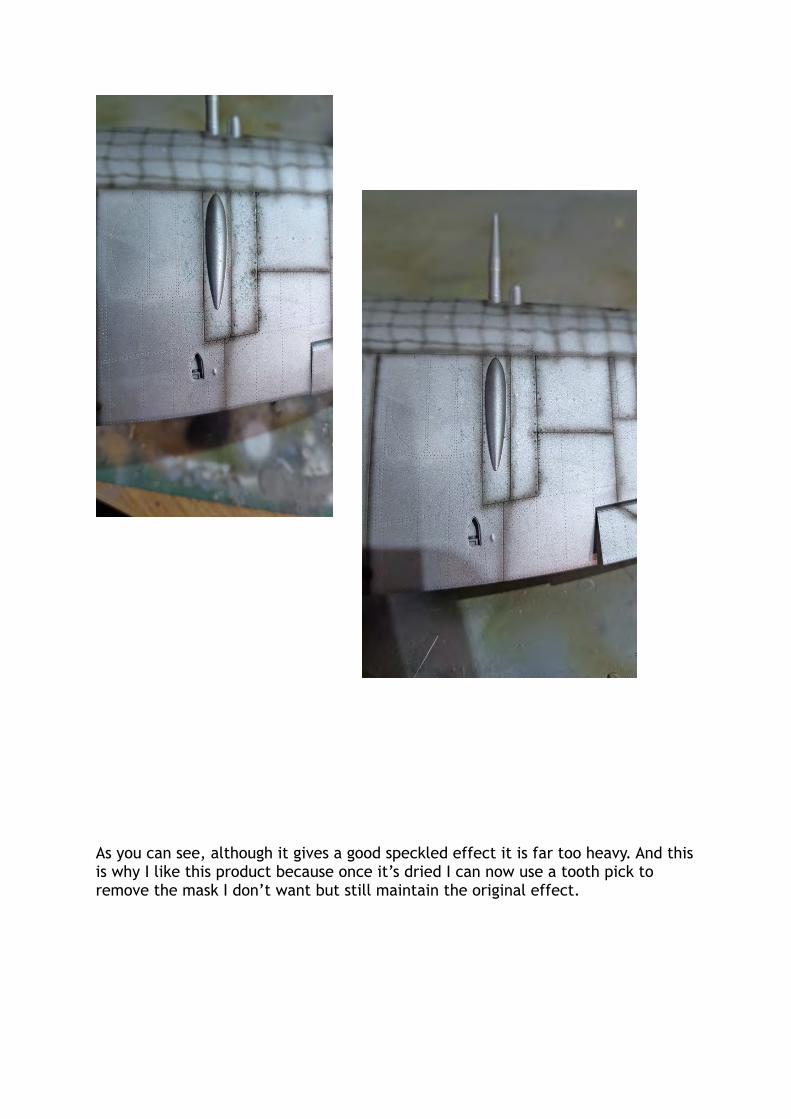
As you can see, although it gives a good speckled effect it is far too heavy. And this is why I like this product because once it’s dried I can now use a tooth pick to remove the mask I don’t want but still maintain the original effect.
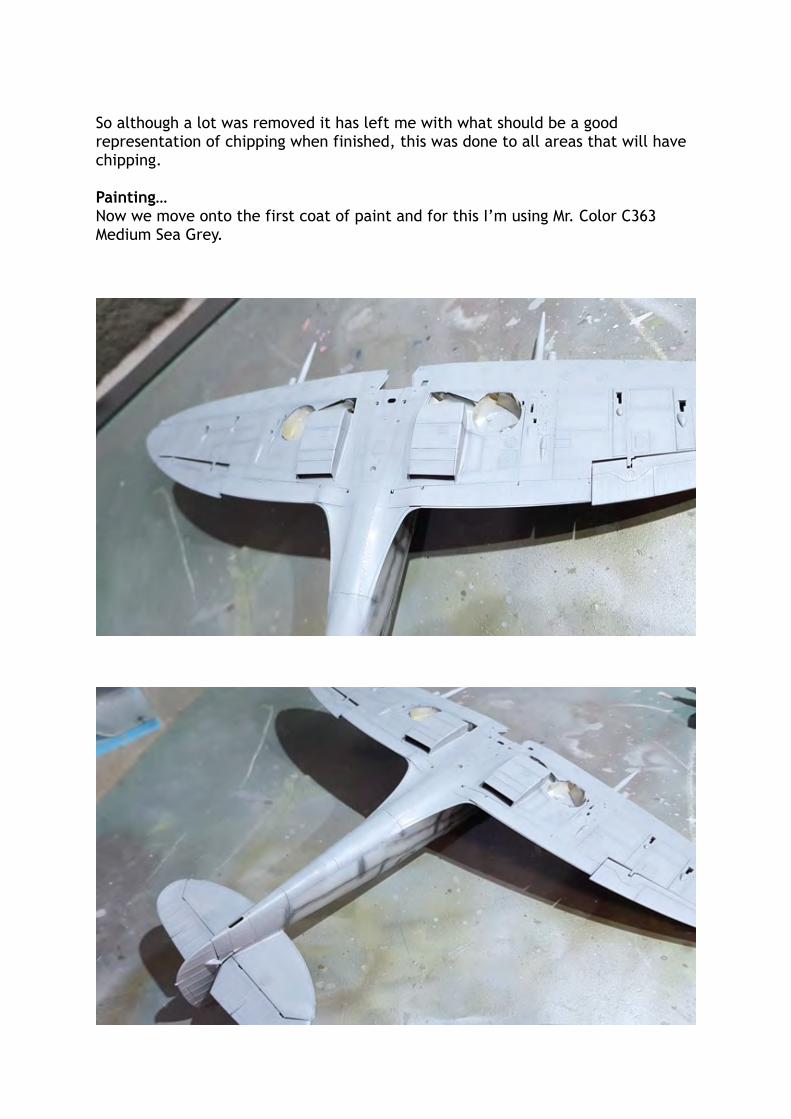
So although a lot was removed it has left me with what should be a good representation of chipping when finished, this was done to all areas that will have chipping.
Painting… Now we move onto the first coat of paint and for this I’m using Mr. Color C363 Medium Sea Grey.
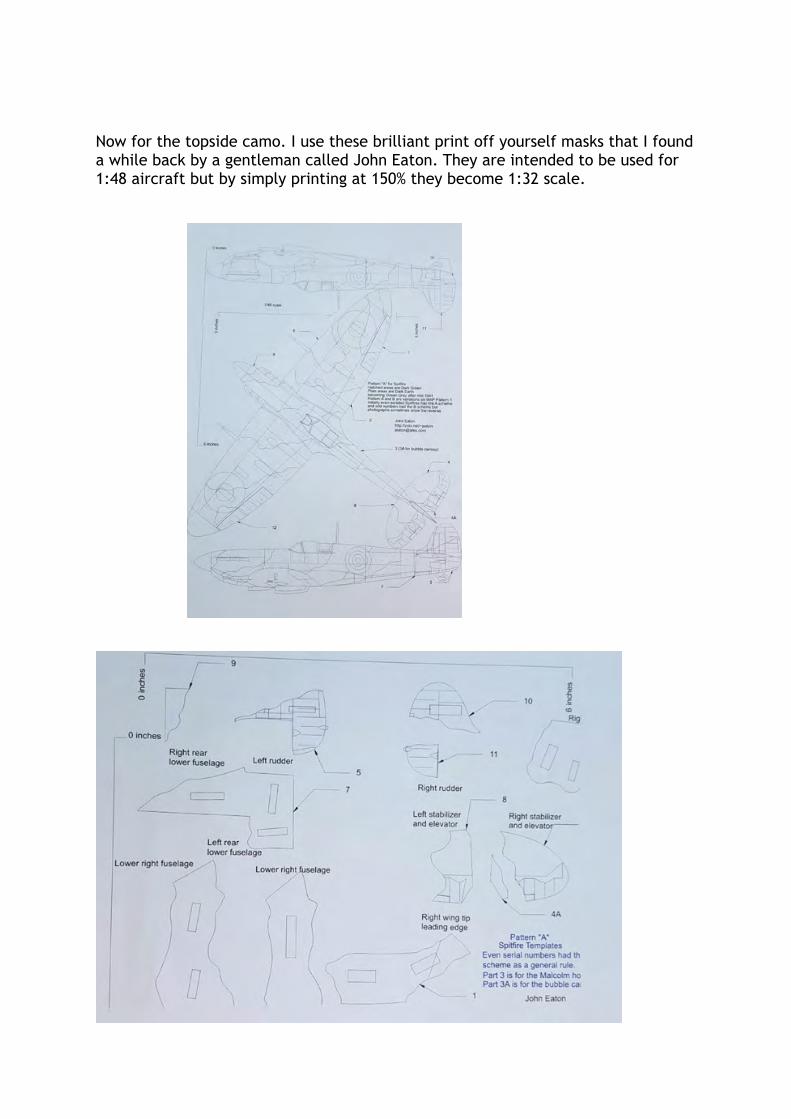
Now for the topside camo. I use these brilliant print off yourself masks that I found a while back by a gentleman called John Eaton. They are intended to be used for 1:48 aircraft but by simply printing at 150% they become 1:32 scale.
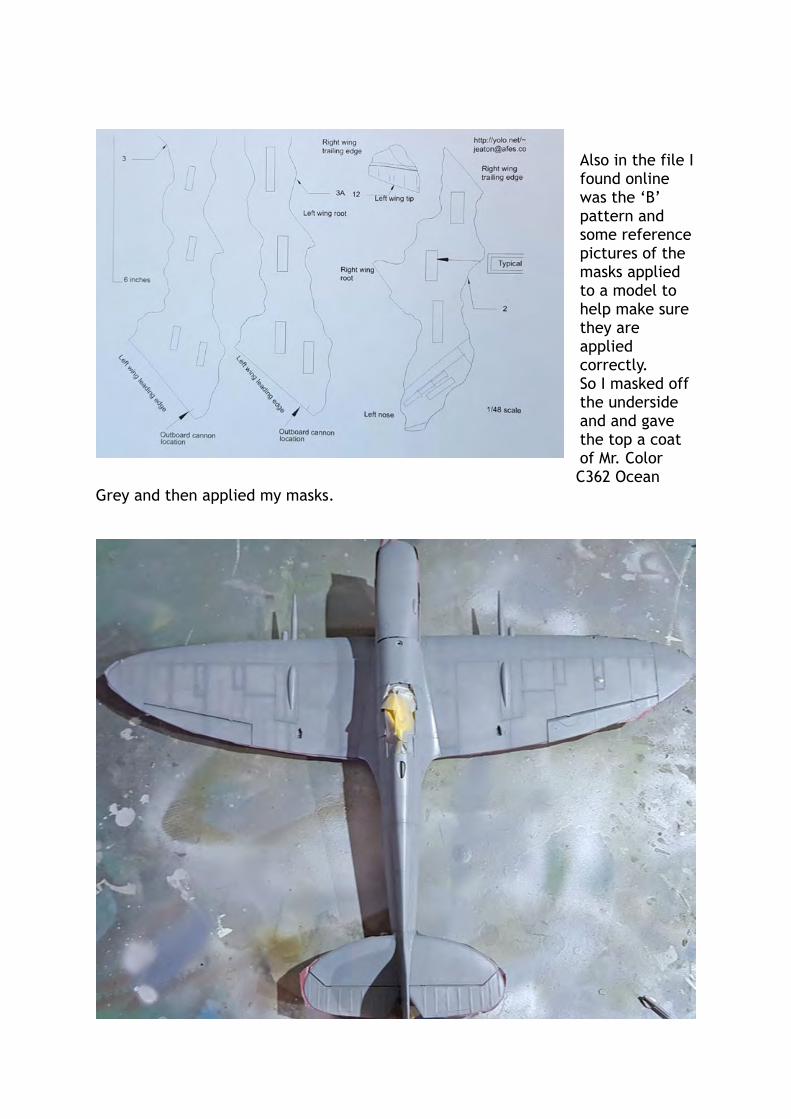
Also in the file I found online was the ‘B’ pattern and some reference pictures of the masks applied to a model to help make sure they are applied correctly. So I masked off the underside and and gave the top a coat of Mr. Color C362 Ocean
Grey and then applied my masks.
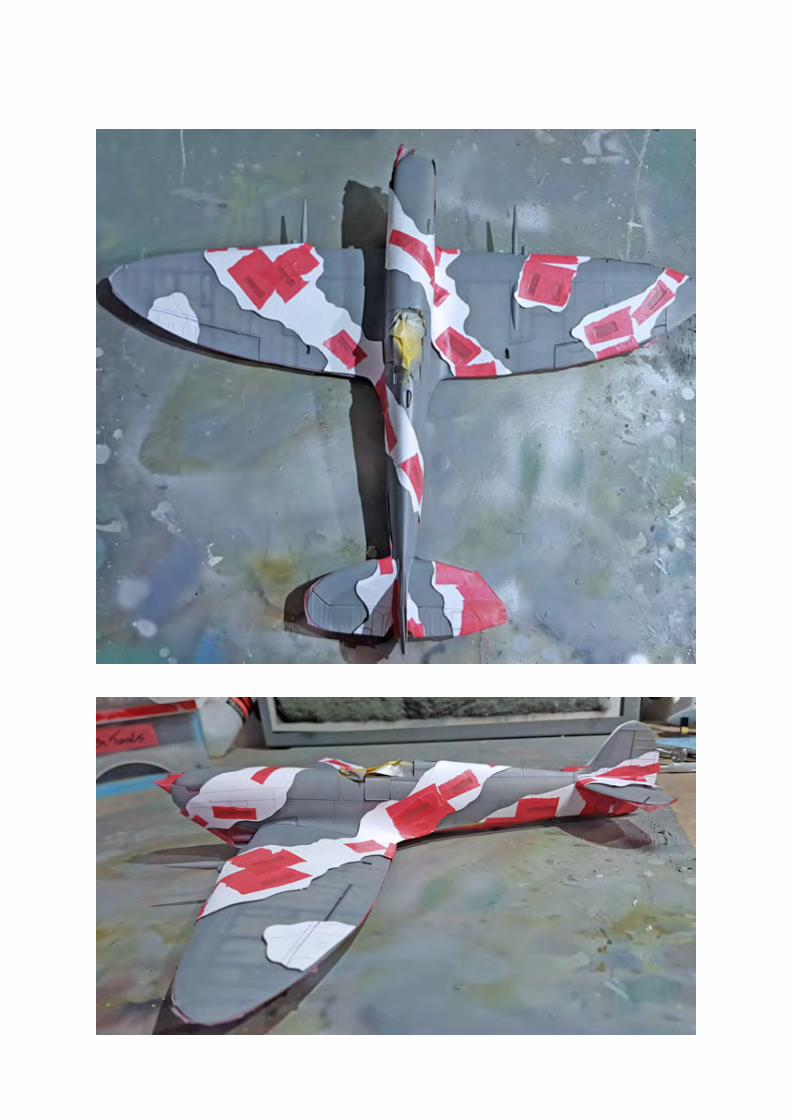

Then the Mr Color C361 dark green was applied.
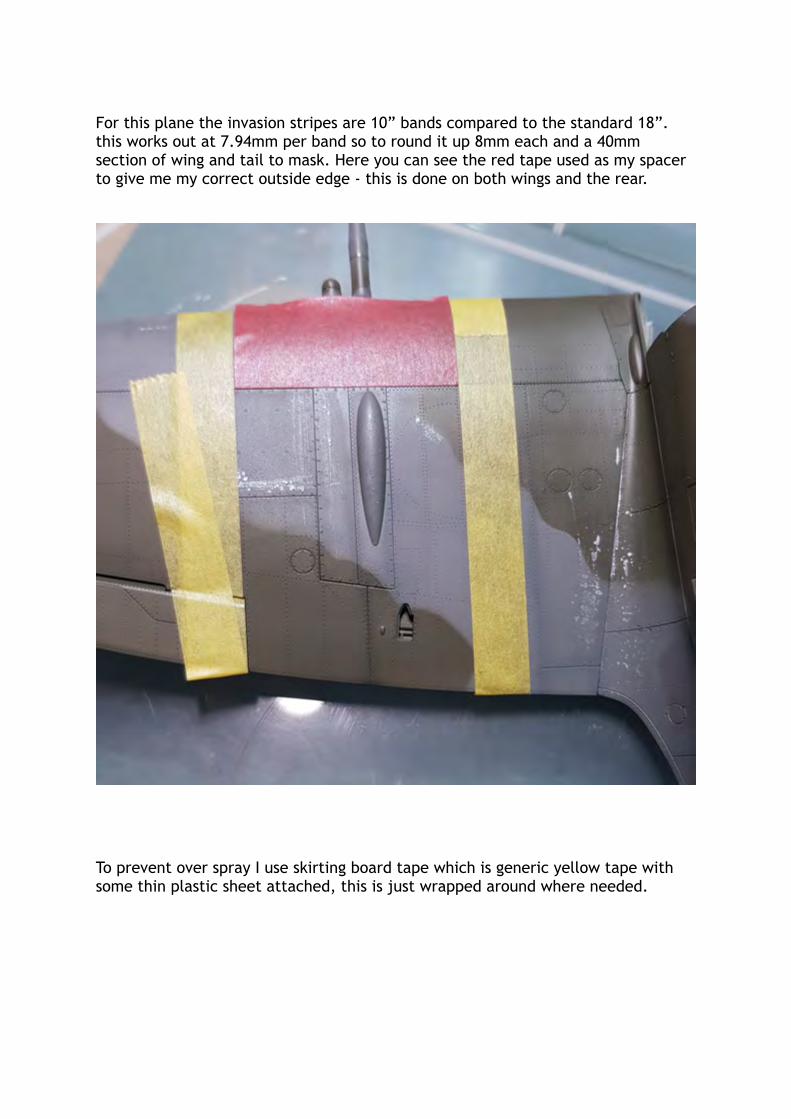
For this plane the invasion stripes are 10” bands compared to the standard 18”. this works out at 7.94mm per band so to round it up 8mm each and a 40mm section of wing and tail to mask. Here you can see the red tape used as my spacer to give me my correct outside edge - this is done on both wings and the rear.
To prevent over spray I use skirting board tape which is generic yellow tape with some thin plastic sheet attached, this is just wrapped around where needed.
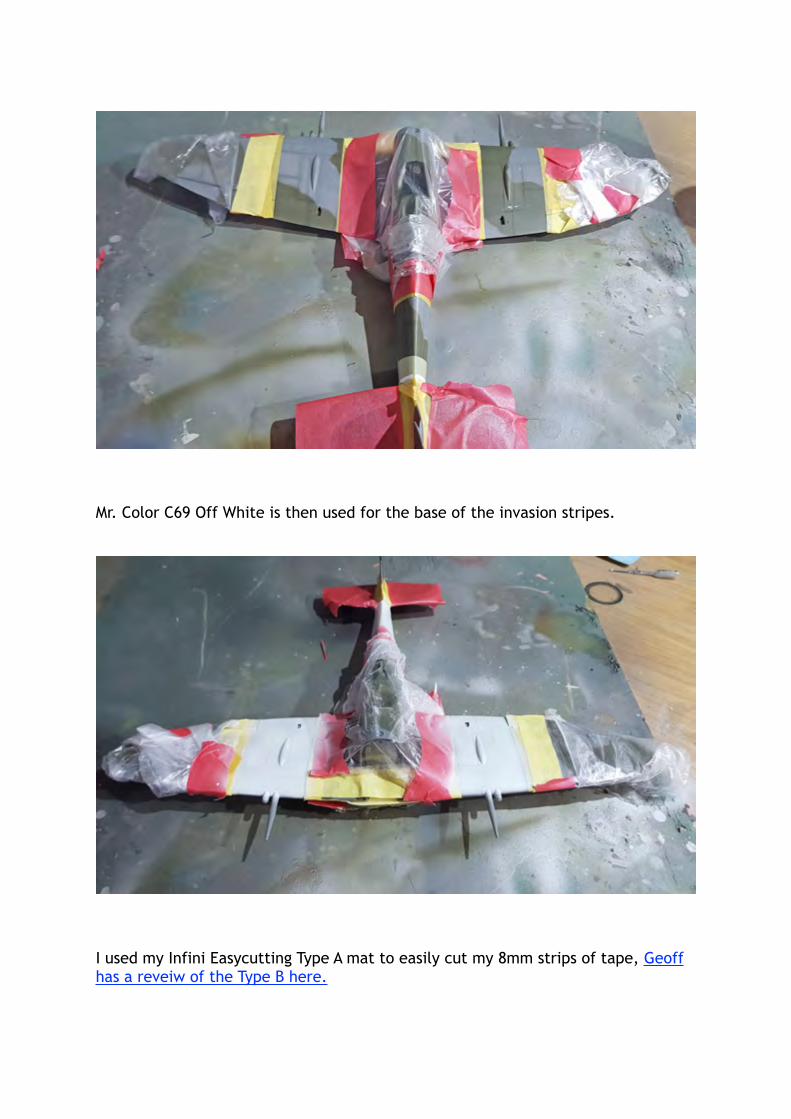
Mr. Color C69 Off White is then used for the base of the invasion stripes.
I used my Infini Easycutting Type A mat to easily cut my 8mm strips of tape, Geoff has a reveiw of the Type B here.

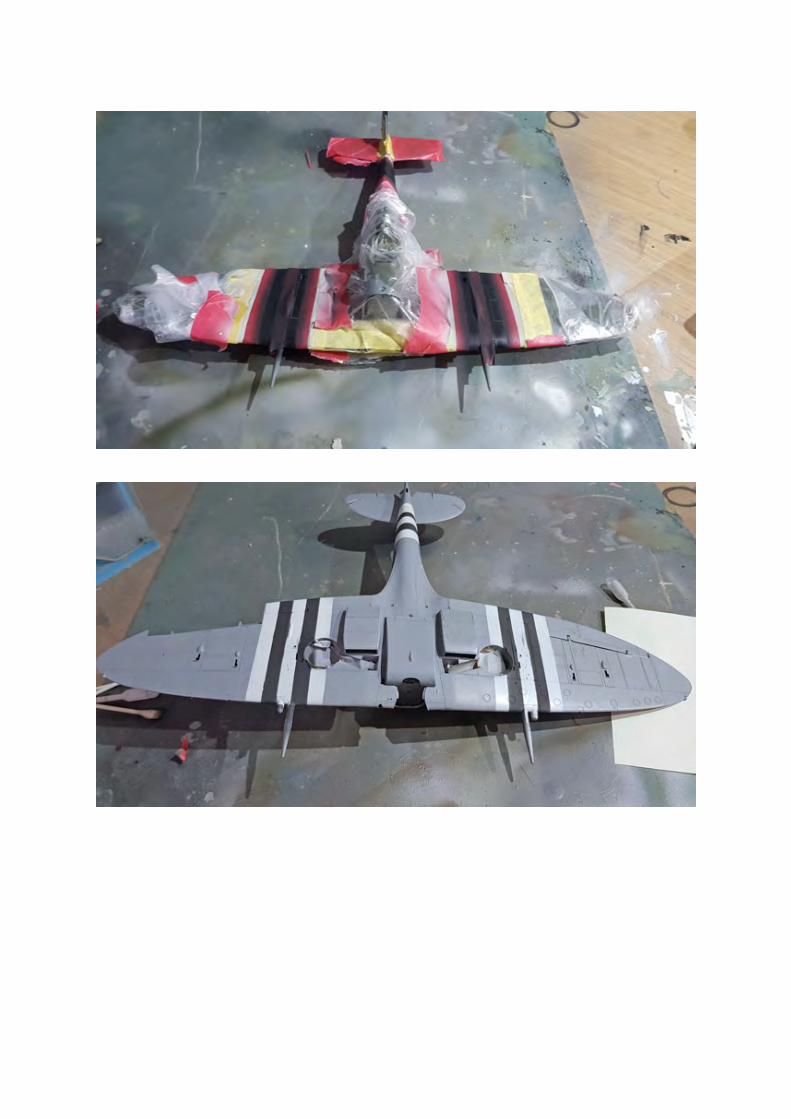
Tamiya Rubber Black was used for painting the black stripes. I really like this colour as it works brilliantly for giving a “scale black look”.
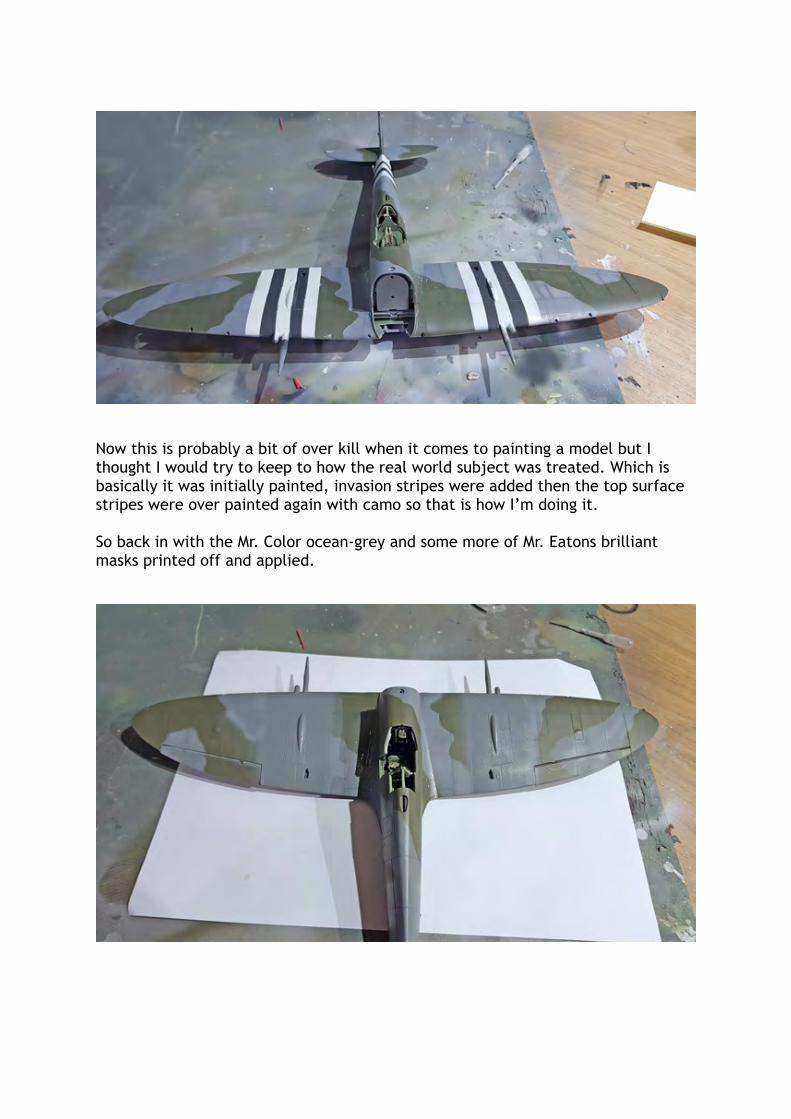
Now this is probably a bit of over kill when it comes to painting a model but I thought I would try to keep to how the real world subject was treated. Which is basically it was initially painted, invasion stripes were added then the top surface stripes were over painted again with camo so that is how I’m doing it.
So back in with the Mr. Color ocean-grey and some more of Mr. Eatons brilliant masks printed off and applied.
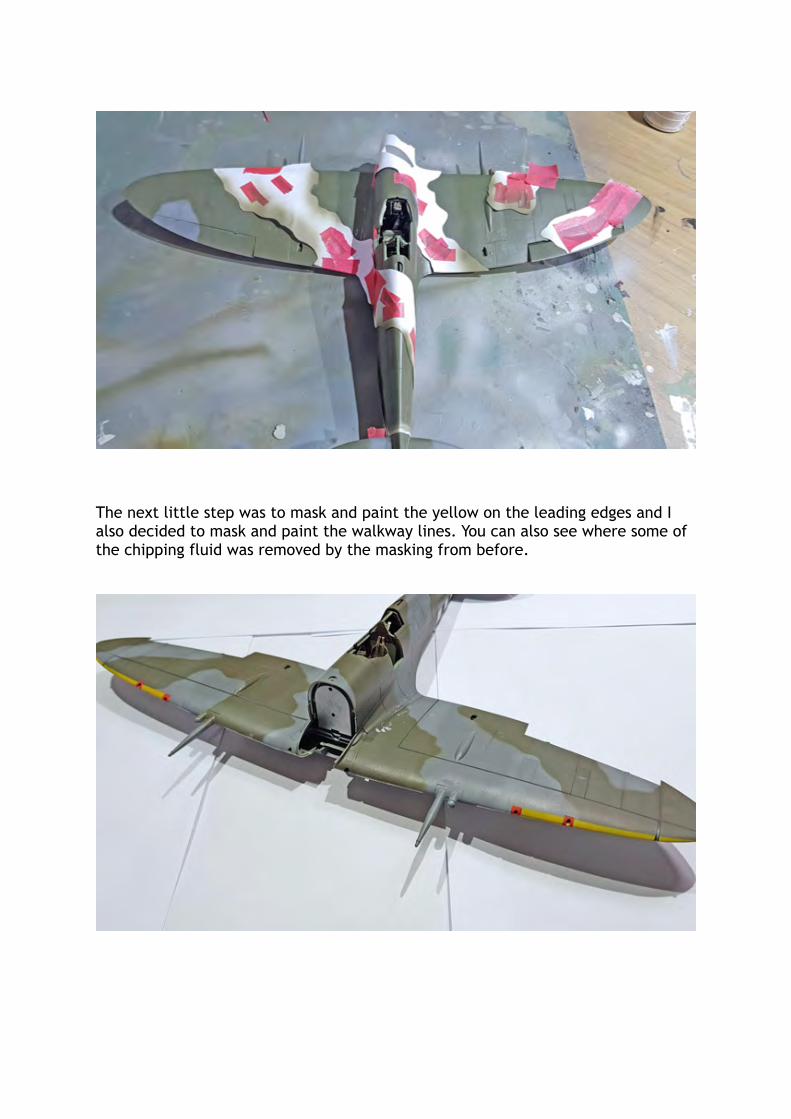
The next little step was to mask and paint the yellow on the leading edges and I also decided to mask and paint the walkway lines. You can also see where some of the chipping fluid was removed by the masking from before.
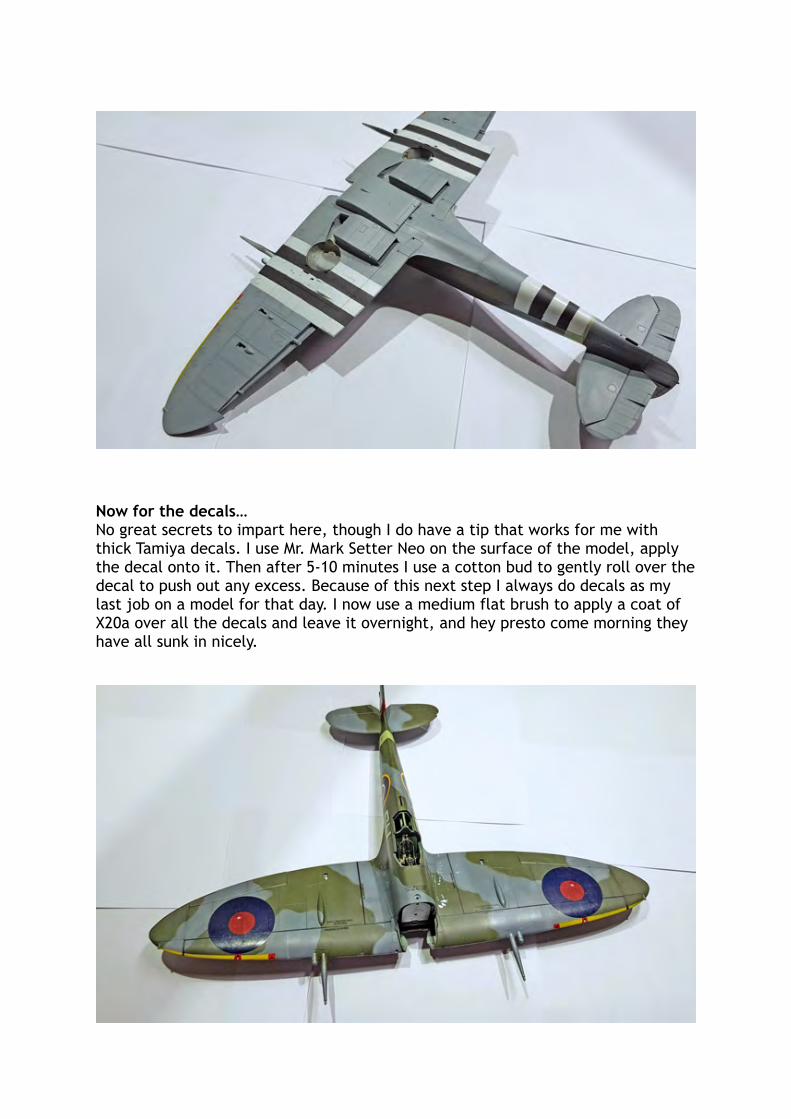
Now for the decals… No great secrets to impart here, though I do have a tip that works for me with thick Tamiya decals. I use Mr. Mark Setter Neo on the surface of the model, apply the decal onto it. Then after 5-10 minutes I use a cotton bud to gently roll over the decal to push out any excess. Because of this next step I always do decals as my last job on a model for that day. I now use a medium flat brush to apply a coat of X20a over all the decals and leave it overnight, and hey presto come morning they have all sunk in nicely.
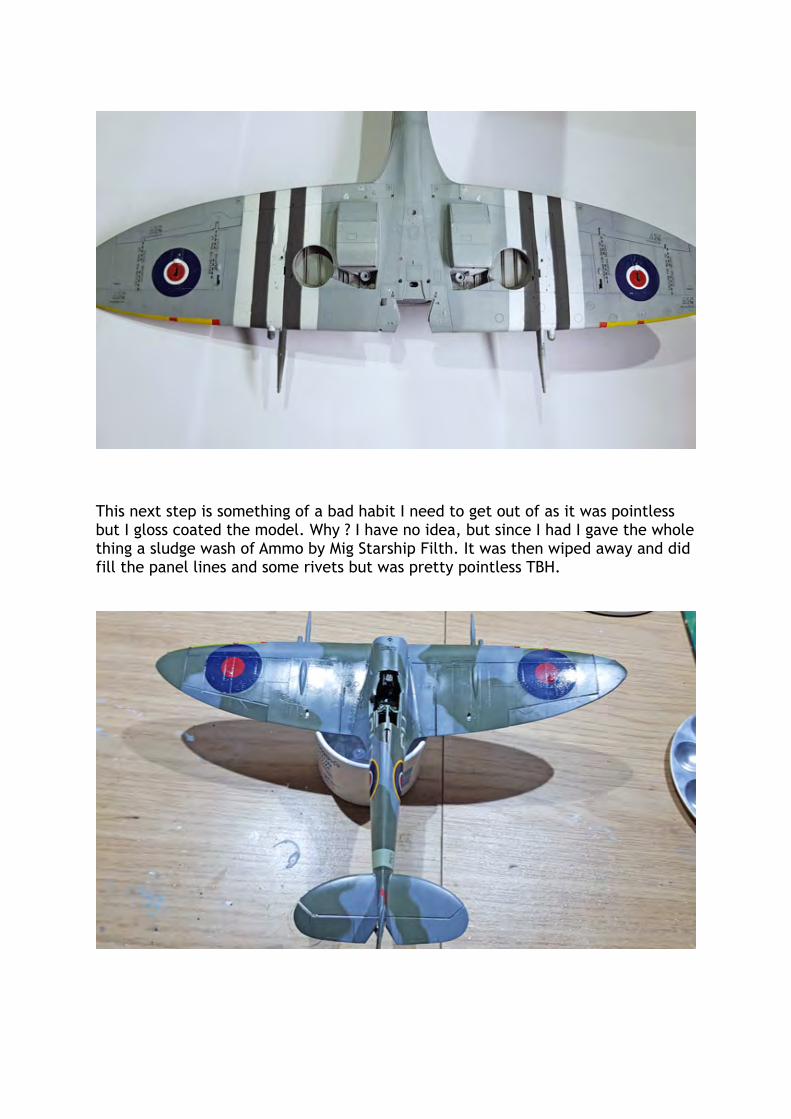
This next step is something of a bad habit I need to get out of as it was pointless but I gloss coated the model. Why ? I have no idea, but since I had I gave the whole thing a sludge wash of Ammo by Mig Starship Filth. It was then wiped away and did fill the panel lines and some rivets but was pretty pointless TBH.
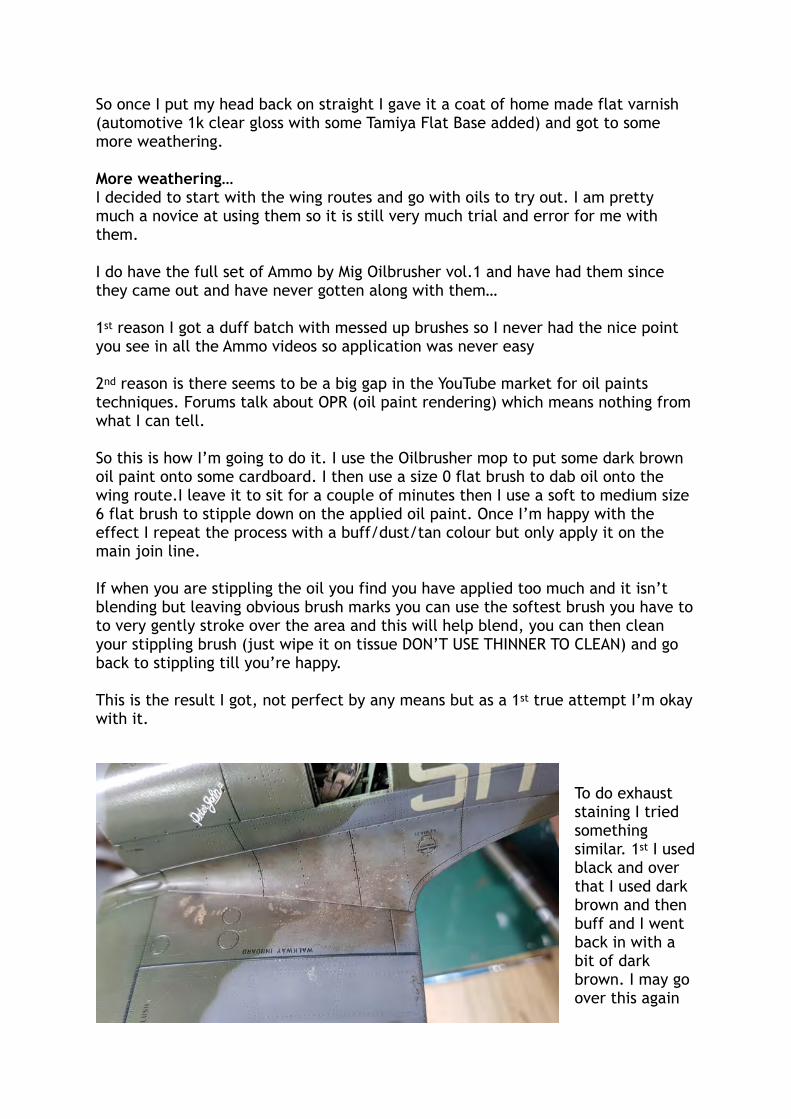
So once I put my head back on straight I gave it a coat of home made flat varnish (automotive 1k clear gloss with some Tamiya Flat Base added) and got to some more weathering.
More weathering… I decided to start with the wing routes and go with oils to try out. I am pretty much a novice at using them so it is still very much trial and error for me with them.
I do have the full set of Ammo by Mig Oilbrusher vol.1 and have had them since they came out and have never gotten along with them… 1st reason I got a duff batch with messed up brushes so I never had the nice point you see in all the Ammo videos so application was never easy
2nd reason is there seems to be a big gap in the YouTube market for oil paints techniques. Forums talk about OPR (oil paint rendering) which means nothing from what I can tell.
So this is how I’m going to do it. I use the Oilbrusher mop to put some dark brown oil paint onto some cardboard. I then use a size 0 flat brush to dab oil onto the wing route.I leave it to sit for a couple of minutes then I use a soft to medium size 6 flat brush to stipple down on the applied oil paint. Once I’m happy with the effect I repeat the process with a buff/dust/tan colour but only apply it on the main join line.
If when you are stippling the oil you find you have applied too much and it isn’t blending but leaving obvious brush marks you can use the softest brush you have to to very gently stroke over the area and this will help blend, you can then clean your stippling brush (just wipe it on tissue DON’T USE THINNER TO CLEAN) and go back to stippling till you’re happy.
This is the result I got, not perfect by any means but as a 1st true attempt I’m okay with it.
To do exhaust staining I tried something similar. 1st I used black and over that I used dark brown and then buff and I went back in with a bit of dark brown. I may go over this again
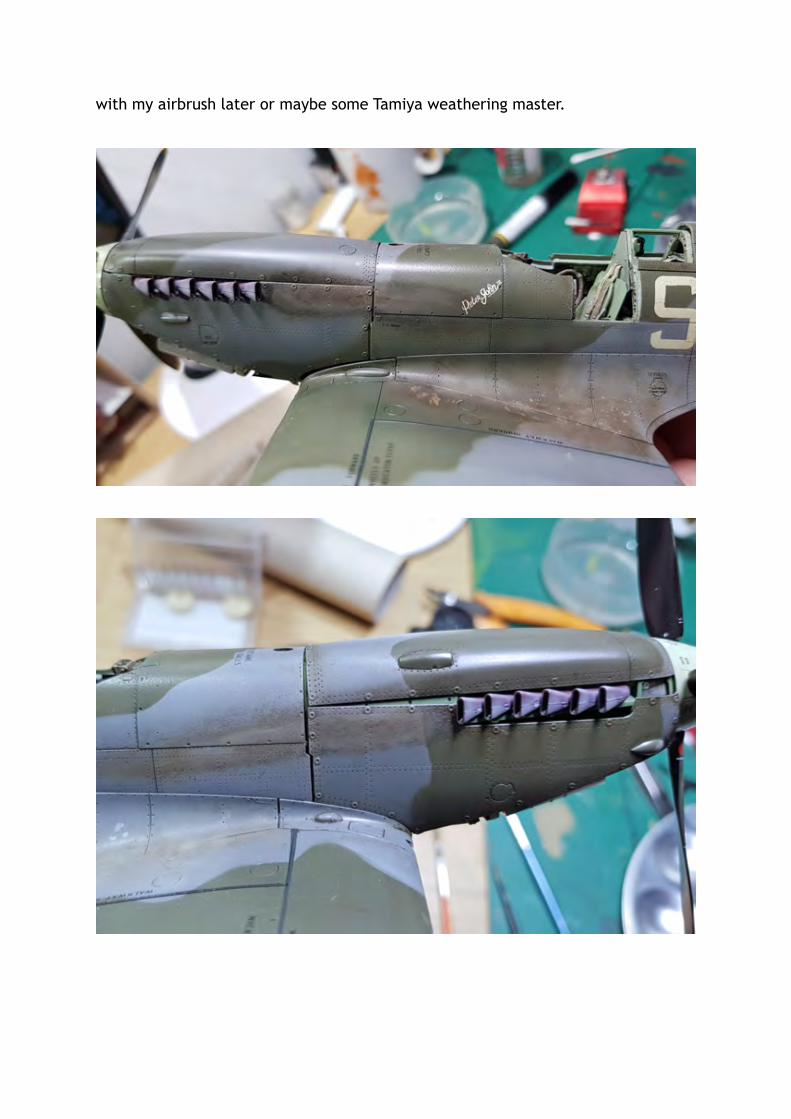
with my airbrush later or maybe some Tamiya weathering master.

So now it’s the home straight… The wheels and some of the finer details to do.
For the wheels I found some resin 5 spoke ones in my aftermarket box so that was a happy bonus. They were primed with Mr. Surfacer 1500 black then the hubs were painted with the medium grey underside colour. Then I used my circle cutter to make hub masks and then sprayed the wheels with Mr. Color C137 Tire black.
A little bit of weathering for the fuel cap. This is just some thin black and brown enamel paint touched on with a paint brush then I blow air though my airbrush to make it streak.
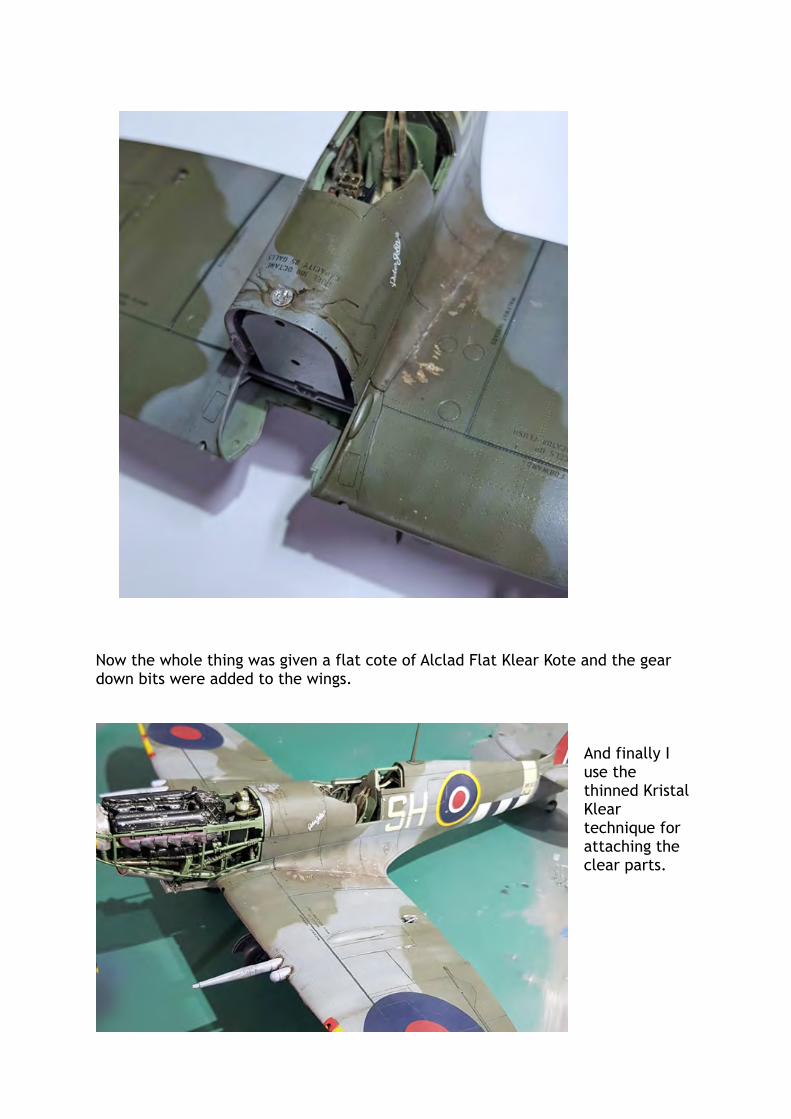
Now the whole thing was given a flat cote of Alclad Flat Klear Kote and the gear down bits were added to the wings.
And finally I use the thinned Kristal Klear technique for attaching the clear parts.
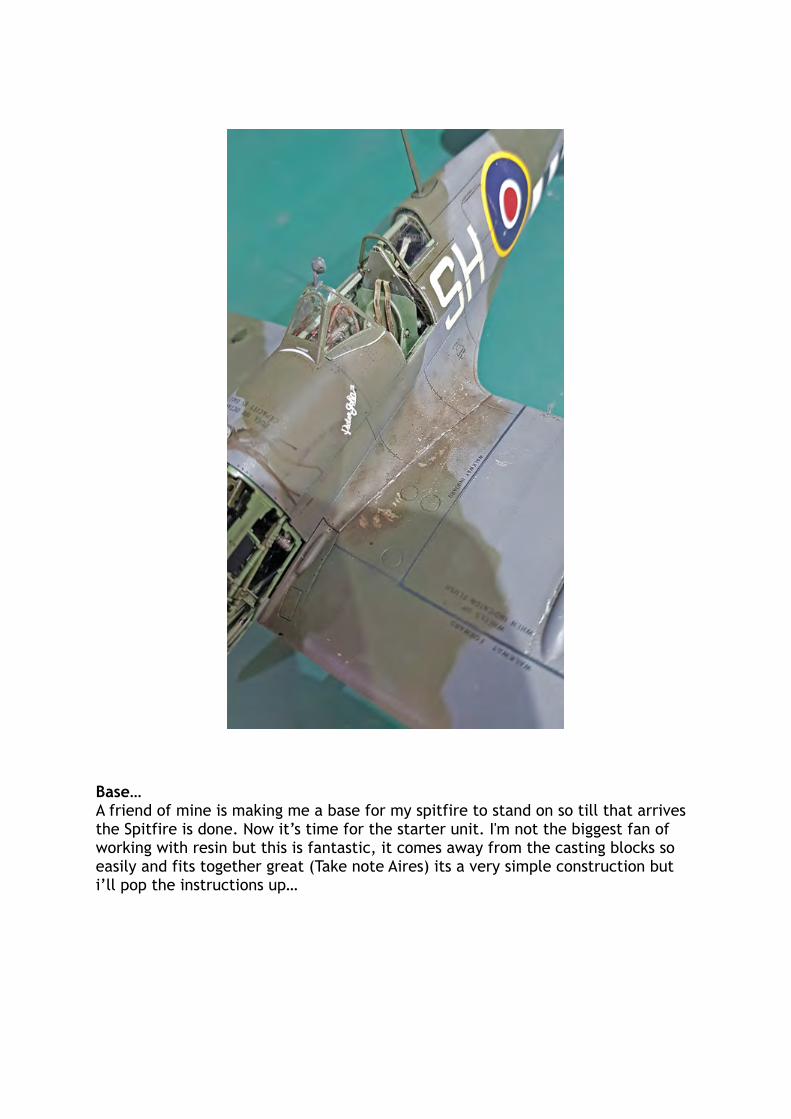
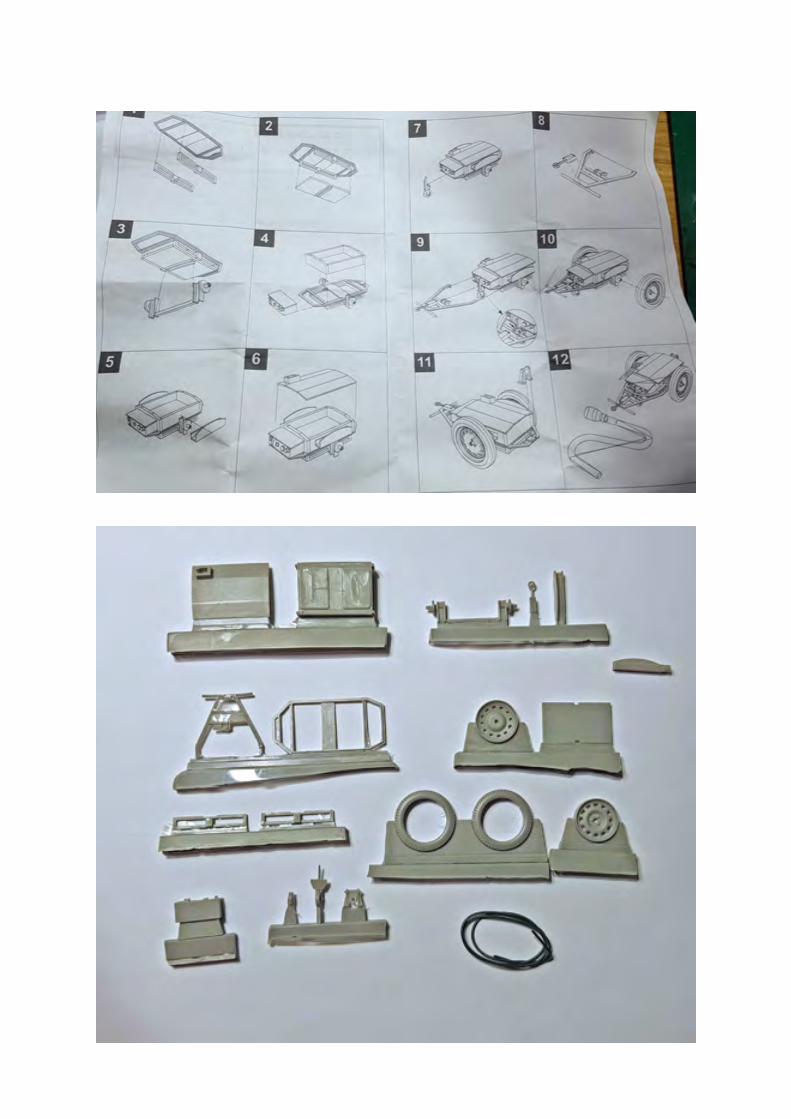
Base… A friend of mine is making me a base for my spitfire to stand on so till that arrives the Spitfire is done. Now it’s time for the starter unit. I'm not the biggest fan of working with resin but this is fantastic, it comes away from the casting blocks so easily and fits together great (Take note Aires) its a very simple construction but i’ll pop the instructions up…
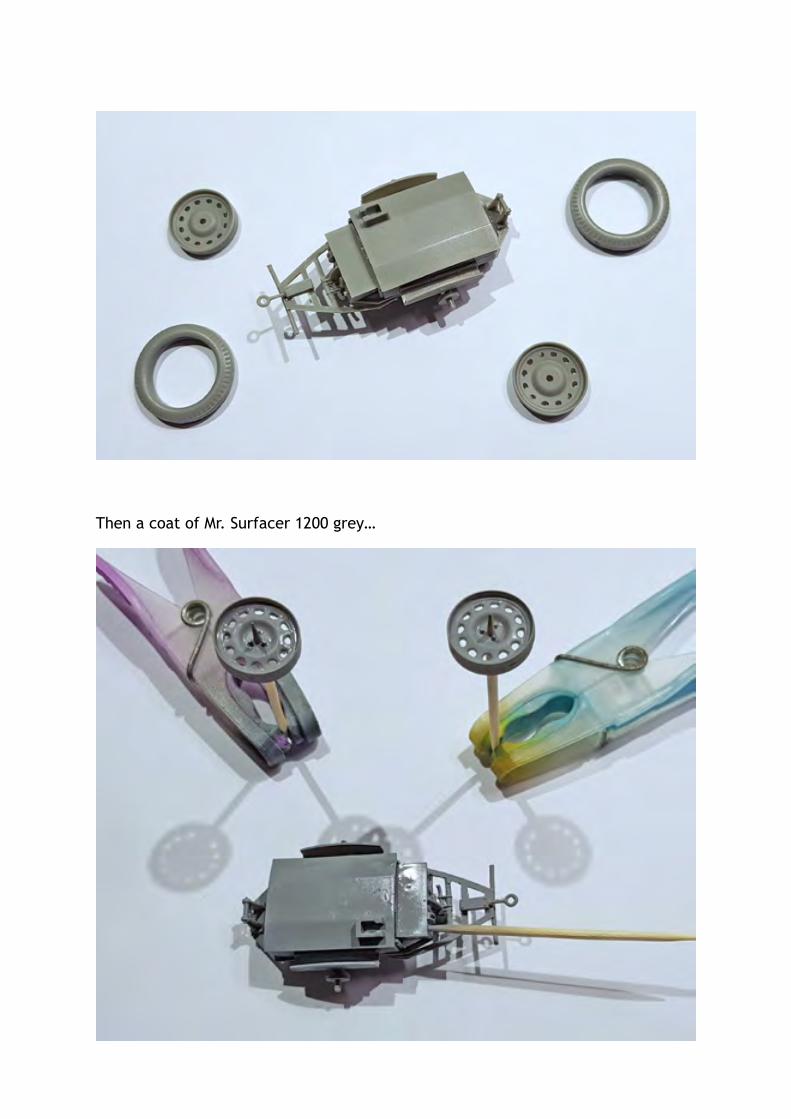
Then a coat of Mr. Surfacer 1200 grey…
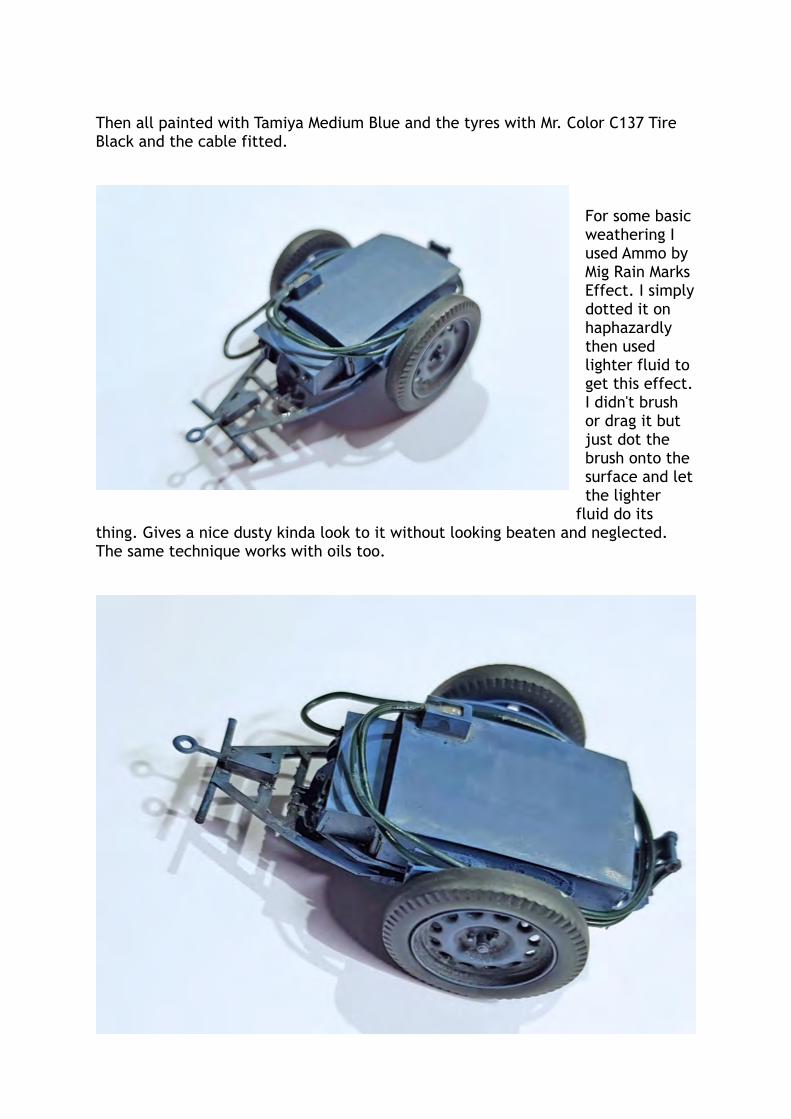
Then all painted with Tamiya Medium Blue and the tyres with Mr. Color C137 Tire Black and the cable fitted.
For some basic weathering I used Ammo by Mig Rain Marks Effect. I simply dotted it on haphazardly then used lighter fluid to get this effect. I didn't brush or drag it but just dot the brush onto the surface and let the lighter
fluid do its thing. Gives a nice dusty kinda look to it without looking beaten and neglected. The same technique works with oils too.
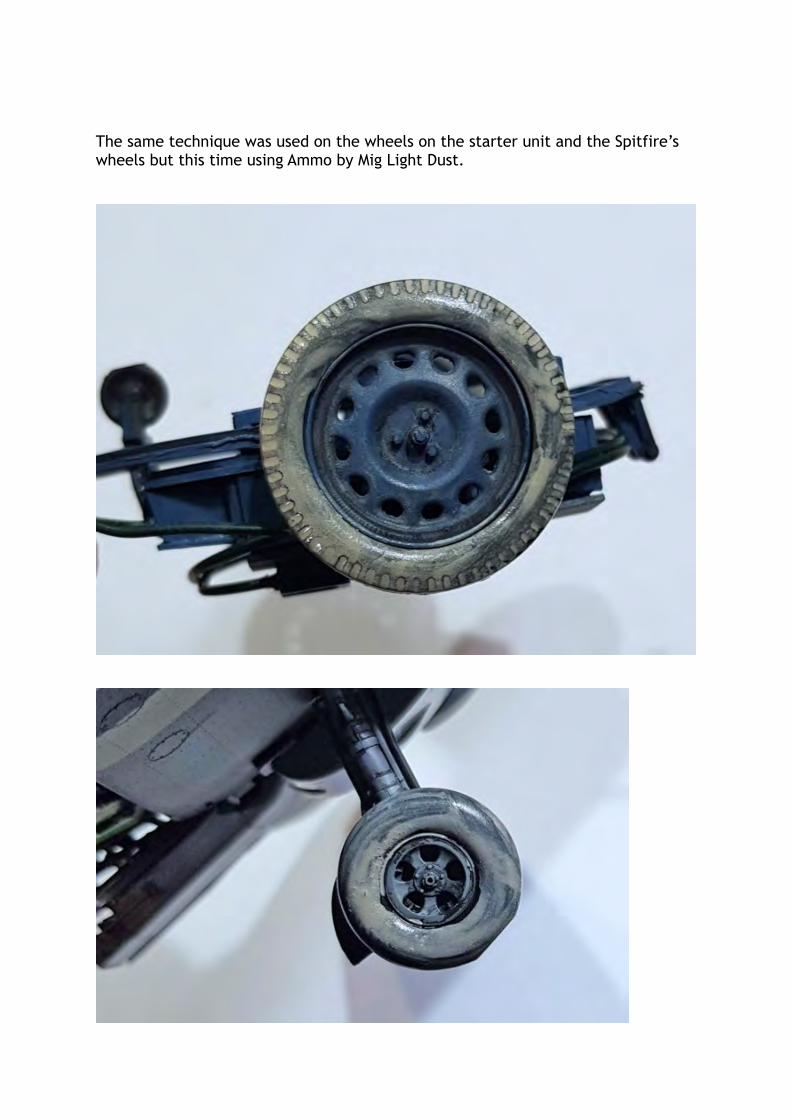
The same technique was used on the wheels on the starter unit and the Spitfire’s wheels but this time using Ammo by Mig Light Dust.
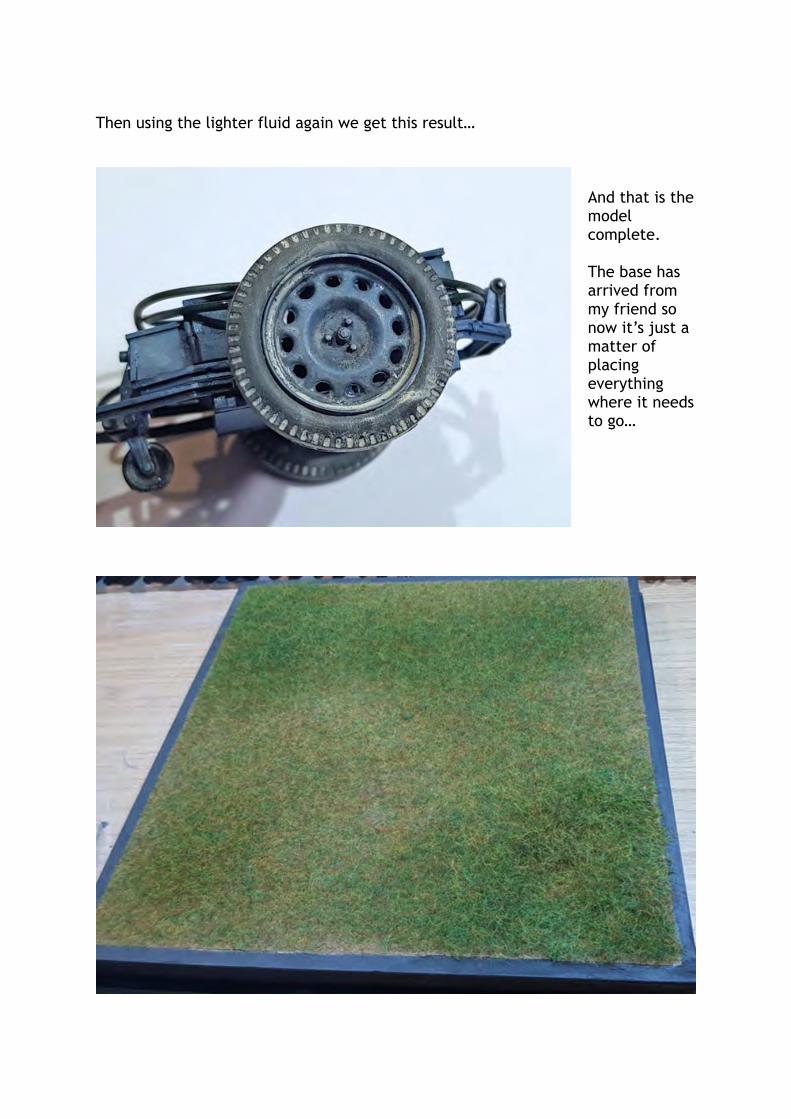
Then using the lighter fluid again we get this result…
And that is the model complete.
The base has arrived from my friend so now it’s just a matter of placing everything where it needs to go…

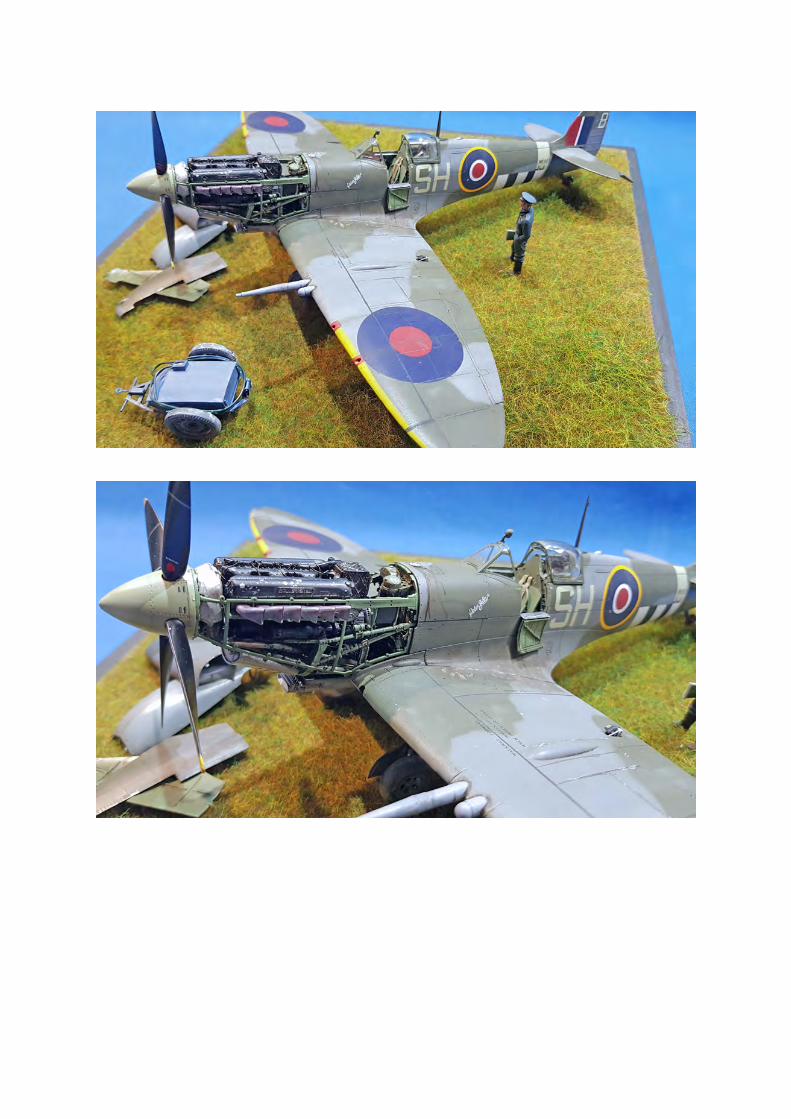
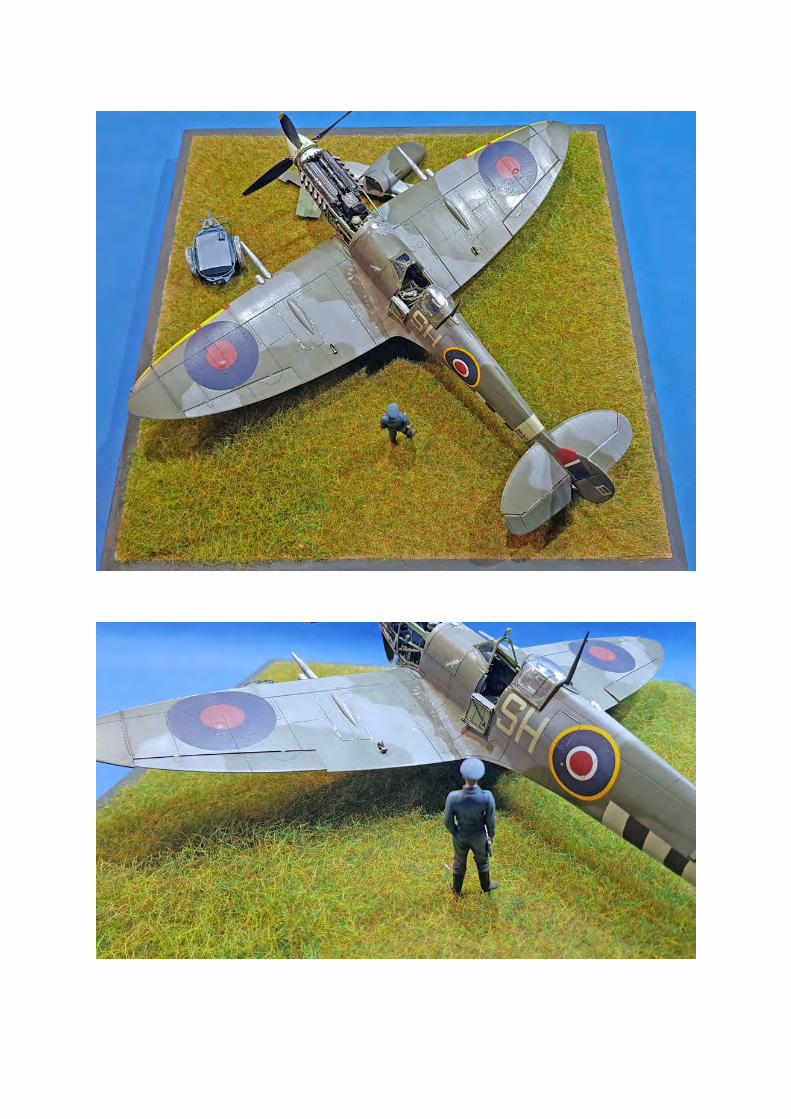
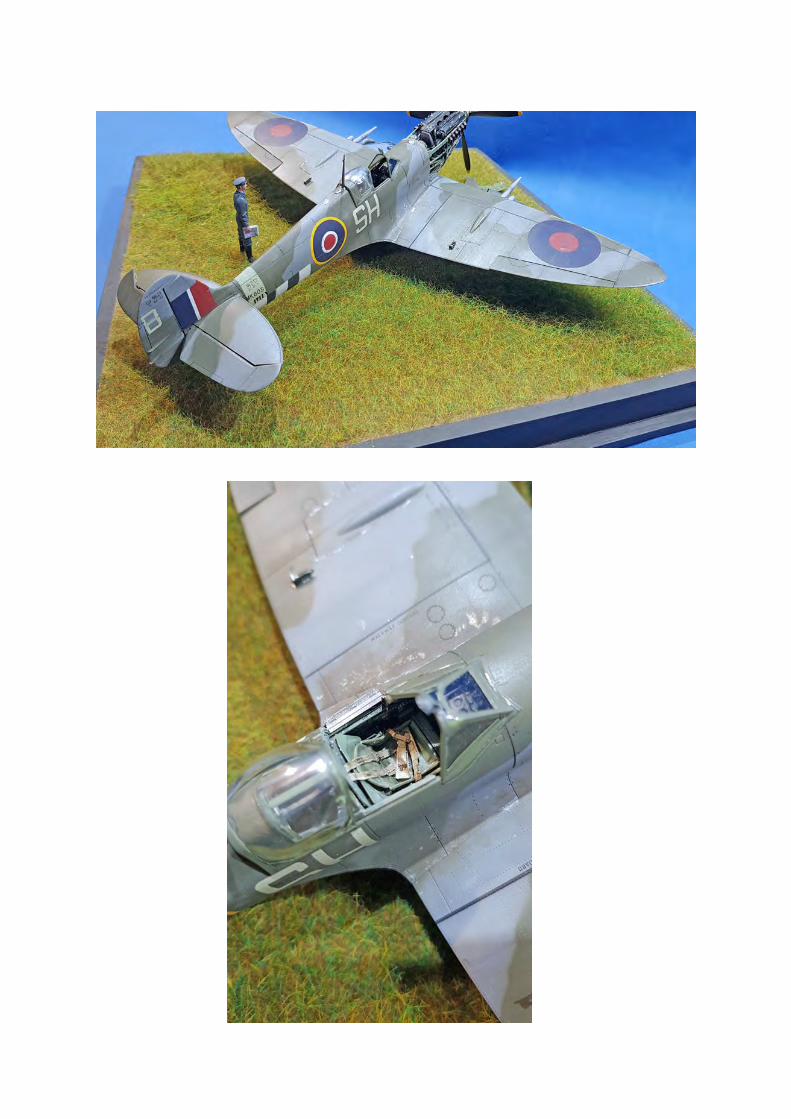
So in a very quick summary… Well it’s a Tamiya 1:32 kit so we know its going to be great! Aftermarket wise the barrels are very nice as are the resin wheels; the Aires cockpit looks beautiful but is a horrendous fit. The colour etch is OK but not really necessary in this scale and with the details Tamiya provide on their parts. The Iconiair RAF trolley accumulator is just lovely and the Roll Royce name plates add a nice touch.
And that, as they say is that - hope you like the finished result…
Daniel B.


![[Crowood Press] [Aviation Series] Supermarine Seafire](https://img.dokumen.tips/doc/110x75/55cf9d38550346d033acbbfc/crowood-press-aviation-series-supermarine-seafire.jpg)