Embed Size (px)
Citation preview

EMC® Documentum®
Federated Search ServicesVersion 7.3
Administration Guide
EMC CorporationCorporate Headquarters
Hopkinton, MA 01748-91031-508-435-1000www.EMC.com

Legal Notice
Copyright © 1999-2016 EMC Corporation. All Rights Reserved.
EMC believes the information in this publication is accurate as of its publication date. The information is subject to changewithout notice.
THE INFORMATION IN THIS PUBLICATION IS PROVIDED “AS IS.” EMC CORPORATIONMAKES NO REPRESENTATIONSOR WARRANTIES OF ANY KINDWITH RESPECT TO THE INFORMATION IN THIS PUBLICATION, AND SPECIFICALLYDISCLAIMS IMPLIED WARRANTIES OF MERCHANTABILITY OR FITNESS FOR A PARTICULAR PURPOSE.
Use, copying, and distribution of any EMC software described in this publication requires an applicable software license.
For the most up-to-date listing of EMC product names, see EMC Corporation Trademarks on EMC.com. Adobe and Adobe PDFLibrary are trademarks or registered trademarks of Adobe Systems Inc. in the U.S. and other countries. All other trademarksused herein are the property of their respective owners.
Documentation Feedback
Your opinion matters. We want to hear from you regarding our product documentation. If you have feedbackabout how we can make our documentation better or easier to use, please send us your feedback directly [email protected]
Table of Contents
Preface ................................................................................................................................ 7
Chapter 1 Introduction ................................................................................................. 9
Chapter 2 Integrating Federated Search Services with Documentum .......................... 11Enabling External Searches at the DFC Level ...................................................... 11Configuring the Connection to the Search Server ............................................ 11Configuring the Connection to the Backup Search Server ................................ 12Configuring Additional DFC Properties for Searching ExternalSources ........................................................................................................ 12Searching Multiple Repositories with Webtop ................................................ 13
Exposing External Results in Documentum Applications .................................... 13Importing External Results in Documentum Applications ................................... 14Common Behavior........................................................................................ 14Import Specifics with CenterStage ................................................................. 15Import Specifics with Webtop........................................................................ 15
Chapter 3 Accessing Admin Center ............................................................................. 17Connecting to Admin Center............................................................................. 17Logging in to Admin Center.............................................................................. 17Admin Center Home Page ................................................................................ 18
Chapter 4 Information Source Configuration and Organization ................................... 19Managing Domains .......................................................................................... 19Creating Domains......................................................................................... 20Selecting Existing Domains ........................................................................... 20Editing Domains .......................................................................................... 20Deleting Domains......................................................................................... 21
Managing Information Sources.......................................................................... 21Creating Information Sources ........................................................................ 21Selecting Existing Information Sources........................................................... 22Editing Information Sources .......................................................................... 23Deleting Information Sources ........................................................................ 24
Chapter 5 Information Source Status .......................................................................... 25Setting Preferences ........................................................................................... 25Scheduling ................................................................................................... 25Notifying ..................................................................................................... 25Setting Priorities for Information Sources ....................................................... 26
Monitoring Information Sources ........................................................................ 26Results of Information Sources ...................................................................... 26Information Sources...................................................................................... 27
Chapter 6 Servers Configuration ................................................................................. 29
3

Table of Contents
Integration Server ............................................................................................. 29Server Configuration .................................................................................... 29Proxy Settings .......................................................................................... 29Proxy Authentication Settings ................................................................... 30Alert Service Settings ................................................................................ 30Adapters Settings ..................................................................................... 31RMI Settings ............................................................................................ 32Security Settings ....................................................................................... 33Configuring the SSL Communication ..................................................... 34
SSL CA Certificate Settings........................................................................ 36Diagnose Settings ..................................................................................... 36Server UI Settings ..................................................................................... 37Other Settings .......................................................................................... 38
Guest Account.............................................................................................. 38
Chapter 7 Logs Reporting ............................................................................................ 41Integration Server ............................................................................................. 41Admin Center Server ........................................................................................ 42
Chapter 8 Servers Operation ....................................................................................... 45Federated Search Services Console..................................................................... 45
Chapter 9 Uploading .................................................................................................... 47
Chapter 10 Updating Adapters ...................................................................................... 49How Is an Adapter Updated? ............................................................................ 49Configuring the Adapter Updater...................................................................... 49Update Messages in Log Files............................................................................ 50Compatibility Rules .......................................................................................... 51Signed Adapters ............................................................................................... 52
Chapter 11 Configuring Admin Center .......................................................................... 53web.xml ........................................................................................................... 53Login and Password ..................................................................................... 53Upload Feature ............................................................................................ 54Size of the Uploaded File .............................................................................. 54Maximum Size of the Visible Part of Log Files ................................................ 54Command to Launch Servers ........................................................................ 55
admin.xml ....................................................................................................... 55Configuration Files ....................................................................................... 55Log Files ...................................................................................................... 56Uploaded Files ............................................................................................. 56
Chapter 12 Customizing Admin Center ......................................................................... 57Customization without Editing JSP Pages........................................................... 57Customization Using JSP Pages ......................................................................... 57
Chapter 13 Upgrading JDK ............................................................................................ 59
Appendix A Troubleshooting .......................................................................................... 61Connection Issues with Client Applications........................................................ 61The Host Machine Has Several NICs.............................................................. 62Force RMI Detection on Client Side................................................................ 62
4

Table of Contents
Connection to FS2 Server Fails When Host Name Contains anUnderscore .................................................................................................. 62Managing a Server with an External Name Different from theDefault Machine Name ................................................................................. 62Testing the RMI Connection .......................................................................... 63Incorrect Proxy Configuration ....................................................................... 63
Issues Related to Adapter Backends................................................................... 64Cannot Add an Adapter Backend in Admin Center ........................................ 64Testing Communication with an Adapter Backend ......................................... 65Testing Adapter Backend Configuration......................................................... 67
SMTP Configuration Not Working as Expected .................................................. 69Getting Status Information on Server Internals ................................................... 69Handling Low-Memory Conditions ................................................................... 70Managing Timeouts.......................................................................................... 71
5

Table of Contents
6

Preface
This guide contains procedures and information for setting up and managing EMC DocumentumFederated Search Services. This guide assumes that you have already installed Federated SearchServices components by following the instructions in the EMC Documentum Platform And PlatformExtensions Installation and Deployment Guide. WDK-based client applications, such as Webtop, orCenterStage clients cannot be configured using the Admin Center, refer to their own documentationfor more details about possible configurations. Similarly, user accounts for WDK-based clientapplications or CenterStage clients cannot be managed using the Admin Center.
Intended AudienceThis guide is intended for administrators who are responsible for managing Federated SearchServices. This guide serves as a reference for configuring the server and organizing the sources ofinformation within the domains tree. This guide assumes a working knowledge of HTML and Java.
This guide contains several references to ECIS, Xtrim, and askOnce files or programs. Xtrim is thedevelopment and runtime foundation of Federated Search Services, which was formerly namedaskOnce and then ECI Services. Xtrim is included as a part of the filename in many circumstances.For easy understanding, you can assume that Federated Search Services, ECI Services, ECIS, askOnce,and Xtrim are synonymous.
If not otherwise specified, relative paths in this guide refer to <FS2 installation directory>. Forexample, on Windows systems, the default installation directory for Federated Search Services isC:\Documentum\fs2.
Revision History
Revision date Description
November 2016 Initial publication.
7

Preface
8

Chapter 1Introduction
EMC Documentum Federated Search Services is EMC Documentum federated search technology.Federated Search Services enables users to search securely an unlimited number of informationsources inside and outside the organization.
Federated Search Services consists of the following components:• Federated Search Services Server— The backend server that brokers user requests on variouscontent sources
• Federated Search Adapters— Software components for querying specific content sources
• Adapter Development Kit—APIs for creating custom client applications and adapters
Federated Search Services is available to WDK-based clients such as Webtop, DAM, WCM, as wellas through DFC and DFS, and in CenterStage clients. The documentation of the client applicationsdescribes which features are supported.
The following features of the federated search functionality are available in most client applications:
• Single interface to access heterogeneous content
• Secure access using security in place
• Multi-repository-attribute display
• Results ranking and filtering
• Intelligent query conversion and query language compensation
• Saved queries including the result set
• Viewing content from any repository
• Importing results from any application
• Results clustering by grouping results into dynamic concept categories to ease navigation
• Search templates
• Real-time monitoring of the query status
9

Introduction
10
Chapter 2Integrating Federated Search Serviceswith Documentum
This chapter contains the following information about integrating Federated Search Services withDocumentum:• Enabling External Searches at the DFC Level, page 11
• Exposing External Results in Documentum Applications, page 13
• Importing External Results in Documentum Applications, page 14
Enabling External Searches at the DFC LevelTo search external sources from a client application, make sure that you set the connection to theFederated Search Services server through the DFC correctly. If the connection is not configured,you cannot include external sources in searches.
Configuring the Connection to the Search Server
Complete the following steps to enable the Federated Search Services server to query external sources:
1. Unpack the client application WAR file.
2. Open the dfc.properties file in WEB-INF/classes.
3. Enable the Federated Search Services server by setting the following parameter:dfc.search.external_sources.enable=true
4. Specify the RMI Registry host for the Federated Search Services server by setting the followingparameters:dfc.search.external_sources.host=host_IP
dfc.search.external_sources.port=port
11

Integrating Federated Search Services with Documentum
where• host_IP is the IP address or machine name of the Federated Search Services server.
• port is the port number that accesses the Federated Search Services server. The default portnumber is 3005.
Configuring the Connection to the Backup SearchServer
You can set a backup server in case the primary Federated Search Services server is unreachable. If theclient application cannot connect to the primary Federated Search Services server to query externalsources, the backup server is contacted. You can define the time period after which the applicationtries to connect again to the primary server. To define the backup server, specify the RMI host andport in the dfc.properties file:• dfc.search.external_sources.backup.host: Host of the backup Federated Search Services server.The default value is localhost.
• dfc.search.external_sources.backup.port: Port of the backup Federated Search Services server.The default value is 3005.
• dfc.search.external_sources.retry.period: Waiting period before retrying to connect to the primaryFederated Search Services server. The time is in milliseconds and the default value is 300000.
Configuring Additional DFC Properties for SearchingExternal Sources
Configure the following parameters in dfc.properties as needed to customize external sourceswith Federated Search Services:
• dfc.search.external_sources.adapter.domain: Subdomain containing the source available toDFC. By default, DFC uses the default domain of the standalone Federated Search Service webclient. The default value is JSP.
• dfc.search.external_sources.broker_count: Number of broker threads supporting execution of theFederated Search Services part of a query. One broker supports the execution of the query forall external sources selected for this query. The minimum value is 0 and the maximum value is1000. The default value is 30.
• dfc.search.external_sources.request_timeout: Time in milliseconds to wait for the answer fromthe Federated Search Services server. The minimum value is 0 and the maximum value is10000000. The default value is 180000.
• dfc.search.external_sources.rmi_name: RMI registry symbolic name associated with theFederated Search Services API. The default value is xtrim.RmiApi.
• dfc.search.external_sources.ssl.enable: Enable the encryption of results and content sent from theFederated Search Services server to the DFC client. The default value is false.
12

Integrating Federated Search Services with Documentum
• dfc.search.external_sources.ssl.keystore: Define a keystore where to find DFC client certificateand keys and Federated Search Services server trusted certificate. This keystore is a file availablelocally on the machine where the DFC resides.
• dfc.search.external_sources.ssl.keystore_password: Define the password for the keystore fileused for communication with the Federated Search Services server.
Searching Multiple Repositories with Webtop
With Webtop clients, you do not need to define any Documentum adapter to search additionalrepositories if these repositories are visible in Webtop.
Add the connection broker of the repository in the dfc.properties file used by Webtopconfiguration. Then add the repository in Webtop with the required credentials.
Exposing External Results in DocumentumApplicationsWhen you enable Federated Search Services for a Documentum client application, you can searchexternal sources by using the adapter technology. The results returned by external sources arecalled external results.
Each external source exposes attributes different from regular Documentum type attributes. Toprovide a consistent view of all result entries in the result set, external source attributes are unified asFederated Search Services attributes then mapped into Documentum types attributes. By default, aresult from an external source is considered of type dm_document.
To support a custom Documentum type, configure the client.dfc.types parameter as describedin the EMC Documentum Platform And Platform Extensions Installation and Deployment Guide.
Attributes from external sources that do not match the expected Documentum type are still returnedin the results.
The following table describes the mapping between Federated Search Services attributes andDocumentum attributes.
FS2 Attribute Documentum Attribute (in the result set)
title object_name
author authors
modifier r_modifier
date r_modify_date
creation date r_creation_date
size (in kilobytes) r_full_content_size (transformed into bytes)
body summary
keywords keywords
13

Integrating Federated Search Services with Documentum
FS2 Attribute Documentum Attribute (in the result set)
format (MIME type) a_content_type
URL url
source r_source
The following Federated Search Services attributes are kept with the corresponding name for theresult entries:• score
• rank
• abstract
• site
• collection
• all custom FS2 attributes
Importing External Results in DocumentumApplicationsThe import of external results in a Documentum client application is implemented at various levels.While the DFC implementation is shared by all Documentum client applications, the implementationat the client application level can be different.
When you import an external result, an object of type dm_document is created in the repository.The attributes of this new object are updated based on the mapping between Federated SearchServices and Documentum.
Common Behavior
The following are the common mapping behavior:• The attributes r_modifier and r_modify_date are automatically updated by Content Serverwith the name of the currently logged user and the import date, respectively. The original value ofr_modifier is then added to the authors attribute.
• The attributes r_creation_date and r_full_content_size are also computed by ContentServer and cannot be modified by the DFC.
• The values for the object_name and authors attributes are kept as they were in the result entry.
• Some attributes are only available in the search context, such as score, rank, and url. Thereforethey are discarded during the import.
14

Integrating Federated Search Services with Documentum
Import Specifics with CenterStage
In CenterStage, when you import an external result, the following mappings are applied in additionto the common behavior:• The attributes r_source, site, collection, and the matching terms are mapped to the
keywords attribute of the created object.
• The abstract attribute is mapped to the subject attribute.
• The summary attribute is mapped to the title attribute.
• All custom Federated Search Services attributes are available in the result entries with the samename, but they are lost during the import.
Import Specifics with Webtop
In Webtop or in any WDK-based application that supports Federated Search Services, when youimport an external result, the following mappings are applied in addition to the common behavior:• The attributes abstract, site, collection, and the matching terms are mapped to the
keywords attribute of the created object.
• All custom Federated Search Services attributes are available in the result entries with the samename and they are mapped to the keywords attribute during the import.
• The r_source attribute is lost during the import.
• The summary attribute is mapped to the subject attribute.
15

Integrating Federated Search Services with Documentum
16

Chapter 3Accessing Admin Center
The Admin Center is the Federated Search Services administration interface for configuring adaptersand monitoring the activities of the adapter backends and Federated Search Services server.
Connecting to Admin CenterTo launch the Admin Center web server in Windows, start the Documentum FS2 AdminCenterservice in theWindows Computer Management interface. You can also navigate to <FS2installation directory>\bin and launch the aOAdmin script to run the Admin Center webserver.
The Admin Center web server is accessible through a particular server port number, which isautomatically computed from the Federated Search Services port server number, as follows:
<admin center port number> = <FS2 port number> + 3
The default Federated Search Services port number is 3000, which means the default Admin Centerport number is 3003.
Logging in to Admin CenterTo access the Admin Center login page, enter the following URL in a web browser:https://<server name>:<admin center port number>/AdminCenter
If the web browser prompts certificate errors, accept the certificate.
Enter the administrator login ID and password to log in to the Admin Center. The default loginID and password are admin and ecis, respectively. You can change the values when you installFederated Search Services. You can also change the values by editing web.xml located at <FS2installation directory>\admin\webapps\AdminCenter\WEB-INF\.
If you have not logged out and attempt to access the Admin Center from another machine, you aredenied access unless you perform a force login. When you perform a force login, you can log in butyou are logged out of the previous machine.
To perform a force login:1. Enter the administrator login ID and password.
17

Accessing Admin Center
2. Select the Force login checkbox.
3. Click OK.The Admin Center home page appears.
Admin Center Home PageThe Admin Center home page contains the following links:
Link Description
Information Source Configuration andOrganization
Add, edit, and delete domains and informationsources.
Set preferences for managing and configuringinformation sources.
Information Source Status Monitor results and information sources.
Servers Configuration Configure server operations.
Logs Reporting Understand and diagnose misconfigurations andruntime problems in FS2 Server and Admin Center.
Servers Operation Stop and restart the server.
Uploading Upload information sources and libraries.
Admin Center Logout Log out.
18

Chapter 4Information Source Configuration andOrganization
This chapter describes how to create, select, edit, and delete domains and information sources.
Domains are not visible in client applications, you can use them to manage the information sources.In DFC- or DFS- based client applications, such as Webtop or CenterStage, all sources, whatever thedomain they pertain to, are displayed as a flat list, with no hierarchy. A domain can consist of othersubdomains and individual backends defined by the administrator.
Information sources are also called adapter backends. An information source created using thedefault configuration is called an implicit backend, which means all the default configuration valuesdefined in the bundle apply as they are. In contrast, an explicit backend uses a corresponding backendfile that defines some specific configuration values.
An adapter consists of a bundle file and an optional backend file. An adapter bundle file holds allgeneric mechanisms, such as code and configuration, to communicate with a remote source of a giventype. An adapter backend file extends the adapter bundle to work with a specific information source.
Managing DomainsThis section contains the following topics:• Creating Domains, page 20
• Selecting Existing Domains, page 20
• Editing Domains, page 20
• Deleting Domains, page 21
Create all the domains and information sources for Webtop andWDK-based client applications underthe JSP domain. However, create information sources for CenterStage under the CenterStage domain.
The domain selection is also defined at the DFC level, in the dfc.properties file:
# Domain for Webtop or WDK-based applicationsdfc.search.external_sources.adapter.domain = JSP# Domain for CenterStagedfc.search.external_sources.adapter.domain = CenterStage
19

Information Source Configuration and Organization
Creating Domains
Create domains to group information sources. Two domains at the same level must have a differentname. The domain created contains no information sources.
Complete the following steps to create a domain:
1. Click Information source configuration and organization in the home page of the Admin Center.
2. Click Add. The Add a new domain or a new information source page appears.
3. Click Create new domain. The Create a new domain page appears.
4. Enter a domain name.
5. Click Next. The Localized settings page appears.
6. Enter the name and description for the localization information.
7. Click Finish. The Submit the domain or the information source page appears.
8. Click Next.
9. Select Servers operation in the home page and restart the Federated Search Services server.
Selecting Existing Domains
When you add an existing domain to a currently selected domain, the domain is copied with all theinformation sources it contains. You cannot select a domain if another domain at the same level hasthe same name.
Complete the following steps to select an existing domain:
1. Click Information source configuration and organization in the home page of the Admin Center.
2. Click Add for the selected domain. The Add a new domain or a new information source pageappears.
3. Click Select existing domain. The Select an existing domain page appears.
4. Select the domain from the list.
5. Click Finish.
6. Click Next.
7. Select Servers operation in the home page and restart the Federated Search Services server.
Editing Domains
Edit a domain to modify its name or description.
Complete the following steps to edit a domain:
20

Information Source Configuration and Organization
1. Click Information source configuration and organization in the home page of the Admin Center.
2. Select the domain you want to edit.
3. Click Edit. The Localized settings page appears.
4. Edit the required information.
5. Click Finish.
6. Click Next.
7. Select Servers operation in the home page and restart the Federated Search Services server.
Deleting Domains
Complete the following steps to delete a domain:
1. Click Information source configuration and organization in the home page of the Admin Center.
2. Select the domain to delete. Do not delete the All, JSP, and CenterStage domains.
3. Click Delete.
4. Click Next.
5. Click Next.
6. Select Servers operation in the home page and restart the Federated Search Services server.
Managing Information SourcesThis section contains the following topics:• Creating Information Sources, page 21
• Selecting Existing Information Sources, page 22
• Editing Information Sources, page 23
• Deleting Information Sources, page 24
Note: The EMC Documentum Platform And Platform Extensions Installation and Deployment Guideprovides more information about the creation of adapter backends on these information sources, forcore adapters like DocumentumFC, eRoom, ApplicationXtender, and JDBC.
Creating Information Sources
Create information sources for Webtop, and WDK-based client applications under the JSP domain.Create information sources for CenterStage under the CenterStage domain.
21

Information Source Configuration and Organization
You create an information source by configuring an existing adapter bundle. If the adapter bundle isnot available in the list of existing bundles, you can upload a new adapter bundle as described inChapter 9, Uploading.
To create an information source:1. Click Information source configuration and organization in the home page of the Admin Center.
2. Select the domain to which you want to add the information source. If you do not select adomain, the information source is added to all the domains.
3. Click Add. The Add a new domain or a new information source page appears.
4. Click Create new information source. The Create a new information source page appears.
5. Enter the name of the information source. Only ASCII characters are allowed. In clientapplications, this name is displayed as the source name.
6. Select the type of the information source from the Intranet list or Internet source list.
7. Click Next. The Localized settings page appears.
8. Enter the information source name and description.
Note: These settings are currently not exposed at the client application level.
9. Click Next. The Properties page appears. Refer to the EMC Documentum Platform And PlatformExtensions Installation and Deployment Guide for more information about the adapter properties.
10. Click Finish after you specify the properties. The page appears with the settings and propertiesdetails of the new information source.
11. Click Test. The Test of the information source page appears.
12. Provide the required details to test the information source:• Test constraint: From left to right, type the attribute, the operator, and the value of theconstraint.
• Login Options: If a login ID and password are required to authenticate with the source, typethem in the corresponding fields.
• Debug Option: Select Display with more information/debug traces to identify possibleerrors in the configuration of the information source.
13. Click Test. The test results appear below the test parameters. If the test fails, click Back to modifythe configuration. If the test passes, proceed to the next step.
14. Click Submit.
15. Click Next.
16. Select Servers operation in the home page and restart the Federated Search Services server.
Selecting Existing Information Sources
Select an existing information source to make it available to end users.
22

Information Source Configuration and Organization
If the information source is not available in the list of existing information sources, you can uploada new configuration file as described in Chapter 9, Uploading.
To select an existing information source:1. Click Information source configuration and organization in the home page of the Admin Center.
2. Select the domain to which you want to add the information source. If you do not select adomain, the information source is added to all the domains.
3. Click Add. The Add a new domain or a new information source page appears.
4. Click Select existing information source. The Select an existing information source pageappears.
5. Select the name of the information source from the list.
6. Click Finish.
7. Click Next.
8. Select Servers operation in the home page and restart the Federated Search Services server.
Editing Information Sources
Edit an information source to modify its settings.
To edit an information source:1. Click Information source configuration and organization in the home page of the Admin Center.
2. Select the information source you want to edit.
3. Click Edit. The Localized settings page appears.
4. Edit the required information.
5. Click Next. The Properties page appears. Refer to the EMC Documentum Platform And PlatformExtensions Installation and Deployment Guide for more information about the adapter properties.
6. Click Finish after you finish editing the properties. The page appears with the settings andproperties details of the new information source.
7. Click Test. The Test of the information source page appears.
8. Provide the required details to test the information source:• Test constraint: From left to right, type the attribute, the operator, and the value of theconstraint.
• Login Options: If a login ID and password are required to authenticate with the source, typethem in the corresponding fields.
• Debug Option: Select Display with more information/debug traces to identify possibleerrors in the configuration of the information source.
9. Click Test. The test results appear below the test parameters. If the test failed, click Back tomodify the configuration. If the test passes, proceed to the next step.
23

Information Source Configuration and Organization
10. Click Submit.
11. Click Next.
12. Select Servers operation in the home page and restart the Federated Search Services server.
Deleting Information Sources
Delete information sources that are no longer useful to end users. If you want to add back aninformation source, refer to Selecting Existing Information Sources, page 22.
To delete an information source:1. Click Information source configuration and organization in the home page of the Admin Center.
2. Select the information source to delete.
3. Click Delete.
4. Click Next.
5. Select Servers operation in the home page and restart the Federated Search Services server.
24

Chapter 5Information Source Status
You can set preferences and monitor information sources on the Information source status page.
Setting PreferencesThis section contains the following topics:• Scheduling, page 25
• Notifying, page 25
• Setting Priorities for Information Sources, page 26
Scheduling
You can schedule daily, weekly, and monthly analyses:
• None: Do not schedule analyses.
• Daily: Schedule the analysis once in a certain number of days.
• Weekly: Schedule the analysis on a specific day of every week.
• Monthly: Schedule the analysis on a specific day of every certain number of months.
You can also specify the time that an analysis starts.
Notifying
You can use the Notifying options to send email notifications of scheduled analyses.
To send an email notification:1. Select Send an e-mail after each scheduled analysis.
2. In the Recipient’s E-mail field, type the email address of the recipient.
3. Click Add to add the recipient.You can add multiple recipients.
25

Information Source Status
4. Click OK.
Setting Priorities for Information Sources
You can use theManaging information sources option to set the priorities of the listed adapters andempty the history details. You can view the priorities you set in the Information Sources section oftheMonitoring page. To set the default priorities of the adapters, select Use auto priority. To specifythe priority for a particular adapter, select Low,Medium, or High from the Priorities list.
To delete the history details for a particular adapter, select Empty history for that adapter.
If you want to set the priority or empty history for all listed adapters, click Select all. To clear theselection of all the adapters in the list, click Unselect. ClickOK to save the changes made in this page.
Monitoring Information SourcesTheMonitoring page enables you to monitor information sources. TheMonitoring page is availableonly when the logging strategy (xtrim.log.strategy) is set to legacy. As described in , the defaultlogging strategy is logback. Change the logging strategy to legacy to access theMonitoring page.
Results of Information Sources
The Results of information sources section displays specific details and generates statistics andanalyses on information sources.
The following information is available for cumulated or last analysis:• Latest request date
• Latest good result date
• Total number of requests
• Total number of results
• Average time to retrieve data
• Average results by request
• Requests with at least one result
• Occurred exceptions for the configuration, the network, the query, and the parser
The Beginning date of the cumulated analysis and the Analysis date of the last analysis are alsoindicated.
To see the analysis for one information source, click the name of the information source.
To get back to the list of all information sources, clickMain.
ClickingOccurred exceptions opens the analysis page for an information source that has logged someexceptions. At the bottom of the analysis page, some examples of occurred exceptions are displayed.
26

Information Source Status
Information Sources
The Information sources section displays the list of adapters along with status and priority as set inthe Preferences page.
The status of information sources is calculated on error types and priority. By default, priority isset according to the number of queries that are run on information sources. The priority can behigh, medium, or low.
There are four levels to describe the status:• Reliable—Designates an excellent work, even if it includes some errors.
• Satisfying—Designates a good work.
• Defective—Indicates that many errors occurred.
• Broken—Means that information sources cannot be used because of errors.
27

Information Source Status
28

Chapter 6Servers Configuration
This chapter describes how to configure server operations in the Servers configuration page of theAdmin Center. The file locations indicated in this chapter are relative to the installation directory ofFederated Search Services.
Integration ServerThis section of the Servers configuration page allows you to perform the following actions:• Server Configuration, page 29
• Chapter 10, Updating Adapters
Server Configuration
In this part of the Servers configuration page, you can configure the following settings:• Proxy Settings, page 29
• Proxy Authentication Settings, page 30
• Alert Service Settings, page 30
• Adapters Settings, page 31
• RMI Settings, page 32
• Security Settings, page 33
• SSL CA Certificate Settings, page 36
• Diagnose Settings, page 36
• Server UI Settings, page 37
The server configuration settings are stored in www\docs\conf\server.conf.
Proxy Settings
You can set the proxy host and proxy port to allow users to go outside the firewall.
29

Servers Configuration
Property Description DefaultValue
xtrim.proxySet Specifies whether to allow users to go outside thefirewall.
false
xtrim.proxyHost Specifies the name of the proxy host. None
xtrim.proxyPort Specifies the proxy port. 80
Proxy Authentication Settings
The following settings authenticate the user to go outside the firewall.
Property Description DefaultValue
xtrim.proxyAuthenticationSet Specifies an authenticated user ID and password onthe proxy for the user to go outside the firewall.
If you set the value to true, enter a user IDand password in the xtrim.proxyUserID andxtrim.proxyUserPassword fields to allow the userto go outside the firewall.
false
xtrim.proxyUserID Specifies the user ID when the proxy authenticationmode is activated.
Do not include any domain name.
None
xtrim.proxyUserPassword Specifies the password to associate with the user IDfor authentication when the proxy authenticationmode is activated.
None
Alert Service Settings
The following settings let you specify an email address and the alert services.
Property Description DefaultValue
xtrim.adminMailAddress Specifies the email address of the administrator. None
xtrim.userAgentIdentification Includes the email address of the administratorin every HTTP request as a courtesy to externalwebsites. If privacy is a concern, disable thisproperty.
No
30

Servers Configuration
Property Description DefaultValue
xtrim.mailServer Specifies the name of the mail server that the alertservice uses.
None
xtrim.sendInitializationMailToAdmin
Specifies whether you want to receive a test emailwhile initializing the alert service.
true
Adapters Settings
The following tables describe the properties for the adapter settings.
Property Description DefaultValue
xtrim.brokers Specifies the maximum number of brokers to launch.When you specify a greater number of brokers,the server handles a greater number of searchesconcurrently.
10
xtrim.maxActionFailure Specifies the maximum number of times to try aprocess action that keeps failing. The retry timeincreases exponentially with each retry.
For example, if the value is set to 5 and the adapterreports a network error, it retries the action fourtimes. The retry time is 4 seconds, 8 seconds, 16seconds, and 32 seconds.
The value must not exceed 30, in which case, thereare no retries. If you do not want any retry, set thevalue to 1.
5
xtrim.adapterReloadDelay Specifies the minimum time, in milliseconds,between two checks of the adapters changes on disk.
60000
jwrap.classifier.repairingLevel Indicates the policy to use for repairing adapters,such as saving repaired grammar on disk. When thisproperty is set to 1, repairing is enabled only for thecurrent page. Specify 0 if you do not want repairingto occur.
1
31

Servers Configuration
Property Description DefaultValue
xtrim.http.resolveDNSHostName
Specifies whether to control the amount of DNSactivities the server performs. By default, it preventsthe server from performing any DNS resolution,which results in better performance. If you set thisproperty to on, the server performs a lookup, ifnecessary, to transform the IP address of the clientinto a DNS host name.
off
xtrim.httpDataMaxSize Specifies the maximum size of the data that can beloaded. If the server returns the data supportedby the Federated Search Services server, whichexceeds the size specified, the data retrieved fromthe source is truncated. However, the adapter caneither truncate the data from processing or allow thedata to be processed.
2097152(2 MB)
RMI Settings
The following table describes the properties for the RMI settings.
It is possible to launch two Federated Search Services servers on the same host. The second servercreates an RMI registry overriding the first one.
Property Description Default Value
xtrim.server.rmi.bindingName
Binds the RmiApiImpl into the RMI registry.To control two Federated Search Servicesservers on the same host, set the value toxtrim.rmiApi2.
xtrim.RmiApi
xtrim.server.rmi.registryHost Specifies the name of the machine that hoststhe RMI registry. Use this setting when twoFederated Search Services servers sharethe same registry. If the name contains anunderscore, specify the IP address.
localhost
xtrim.server.rmi.registryPort Specifies the port number of the RMIregistry. Use this setting when the defaultport 1099 is not available. Make sure thatthis value corresponds to the one used inbin\aODatabase.
1099
xtrim.server.RmiSessionTimeOut
Specifies the length, in seconds, of RMIsession timeouts. This setting controls howthe Federated Search Services server RMIsessions get automatically discarded after agiven inactivity time.
3900 (= 65 minutes)
32

Servers Configuration
Property Description Default Value
xtrim.server.allowRemoteShutdown
Specifies whether to allow remote shutdownof the server.
false
xtrim.server.remoteShutdownPassword
Specifies the password required to shutdown the server remotely. If this propertyis not present, the server ignores any remoteshutdown command.
None
xtrim.server.rmi.codebase Specifies the codebase URL, where the RMIclasses that are registered into the RMIregistry can be downloaded. This propertyis set as the java.rmi.server.codebaseproperty. The RMI specification has moredetails. By default, this property points tothe local Federated Search Services built-inHTTP server. For load-balanced systems,you can modify the URL to point to aunique load-balanced HTTP server. Forexample, http://centralUrl/xtrim-stubs.jar
http://<FS2 Serverhost>:<FS2 Serverport>/class/xtrim-stubs.jar
xtrim.server.rmi.forceBinding Specifies whether to have the FederatedSearch Services Server to force the bindingof the RMI API even if another server isdetected in the registry.
false
xtrim.server.rmi.embeddedObjectBufferSize
Specifies the size, in bytes, of the buffer usedwhen returning embedded object contentto clients. The value can be adapted to theaverage speed of information sources andembedded object size. This property affectsperceived rate of embedded object transfer.If the embedded objects are perceived asbeing transferred by a few large blocks,decrease this value to provide a smootherdownload experience.
32768 (= 32 KB)
Security Settings
The following table describes the properties for the security settings.
33

Servers Configuration
Property Description DefaultValue
xtrim.security.providers Specifies the list of authentication providers. Thisproperty is used to load a custom authenticationplug-in instead of or in addition to the built-inmechanism. This property must contain a listof comma-separated class names. In addition,it supports aliases for the default plug-in: ldapand jdbc. Defining ldap here is redundant withproperty xtrim.directory.provider.ldap (thisproperty is only kept for compatibility).
To support the SiteMinder plug-in,add the following property value:xtrim.securityapi.siteminder.server.SiteminderAuthenticationProvider.
For CenterStage clients, this property must be setto empty.
jdbc
xtrim.security.credentialStore Specifies to load a custom credential storageplug-in instead of or in addition to the built-inmechanism. This property must contain a uniqueclass name.
None
xtrim.rmi.ssl.enabled Specifies to enable encryption (SSL) of requestsent to the server, including credentials forsources, for data exchanged through RMI.
false
xtrim.rmi.ssl.keyStore Specifies a keystore that stores the FederatedSearch Services server certificate and keys aswell as all the remote client trusted certificates.This keystore is a file available locally on themachine where the Federated Search Servicesserver resides.
The defaultJVM keystorefile
xtrim.rmi.ssl.keyStorePassword
Specifies the password for the keystore file. None
Configuring the SSL Communication
To secure communication between Federated Search Services and DFC, you can enable SSLcommunication. You first generate a certificate to use for the authentication. You then configure SSLon the server side (Federated Search Services) and on the client side (DFC) .
To configure SSL communication:1. Generate a self-signed certificate. This certificate is generated in a keystore file using the
following command:<JDK_path>\bin\keytool -selfcert -genkey -alias myAlias -keyalg RSA -validity10000 -keystore <FS2 installation directory>/www/docs/conf/rmiKeyStore
34

Servers Configuration
The command asks for the password and information to store in the certificate:Enter keystore password: <password>What is your first and last name?[Unknown]: First Last
What is the name of your organizational unit?[Unknown]: EMC
What is the name of your organization?[Unknown]: Documentum
What is the name of your City or Locality?[Unknown]: Meylan
What is the name of your State or Province?[Unknown]: Isere
What is the two-letter country code for this unit?[Unknown]: FR
Is CN=First Last, OU=EMC, O=Documentum, L=Meylan, ST=Isere, C=FR correct?[no]: yes
Enter key password for <myAlias>(RETURN if same as keystore password):
The JVM keytool is described on Sun website: http://java.sun.com/j2se/1.5.0/docs/tooldocs/windows/keytool.html.
2. Modify the Federated Search Services server configuration using the Admin Center. Go toServers configuration > Integration Server > Server configuration (server.conf) > Securitysettings and set the following properties:xtrim.rmi.ssl.enabled=truextrim.rmi.ssl.keyStore=<FS2 installation directory>/www/docs/conf/rmiKeyStorextrim.rmi.ssl.keyStorePassword=<password>
The properties are described in more details in Security Settings, page 33.
3. Copy the certificate generated from the Federated Search Services host to the client host. Thefile is located in the <FS2 installation directory>\www\docs\conf\rmiKeyStoredirectory.
4. Modify the DFC configuration. Set the following properties in dfc.properties:dfc.search.ecis.ssl.enable=truedfc.search.ecis.ssl.keyStore=<DFC client host path>\fs2.ksdfc.search.ecis.ssl.keyStore_password=<password>
The password is not the authentication word that is used by the client and server to communicate. Itis only the key to read the keystore file.
Generating a self-signed certificate enables to use the same file and share the certificate between theserver and the client. Normally you generate one certificate for the server and one for the client.You then export each certificate and import them using keytool. The client imports the certificategenerated for the server and the server imports the certificate generated for the client.
The export command for the keytool is the following:keytool -export -alias myAlias -file <certificate_file> -keystore<keystore_location>
The import command for the keytool is the following:keytool -import -alias <another_alias> -file <certificate_file> -keystore<keystore_location>
35

Servers Configuration
In both cases, you are prompted for the keystore password.
Note: To have more debug level information on SSL communication, you can set the followingstandard Java property before starting the application: -Djavax.net.debug=ssl,handshake
SSL CA Certificate Settings
The following table describes the properties for the SSL CA Certificate settings.
Property Description Default Value
xtrim.ssl.trustStore Specifies the path to the trustedcertificates store.
<FS2 installation directory>\www\docs\conf\trustedCerts.cer.
xtrim.ssl.trustStoreType Specifies the type of the trustStore. jks
xtrim.ssl.trustStorePassword
Specifies the password of the trustStore. None
xtrim.ssl.keystore Specifies the path to the local certificatesstore.
None
xtrim.ssl.keyStoreType Specifies the type of the keystore. jks
xtrim.ssl.keyStorePassword
Specifies the password of the keystore. None
Diagnose Settings
You can use logs for troubleshooting and to help you understand and diagnose misconfigurationsand runtime problems.
The following table describes the properties for the diagnose settings.
Property Description Default Value
xtrim.log.strategy Specifies whether to use the LOGBack framework forlog files (logback) or the legacy framework (legacy)to display server messages.
logback
The following properties are only applicable if the legacy strategy is used (xtrim.log.strategy=legacy).
Property Description Default Value
xtrim.log.mode Specifies whether to use log files (file option) orstandard out (screen) to display server messages.
file
xtrim.log.singleTrace Specifies whether to have a single log file with all themessages in chronological order or to have one file pertype of event.
off
36

Servers Configuration
Property Description Default Value
xtrim.log.access If the xtrim.log.mode property is defined to a file, thisproperty defines the storage location of the access logfile. To avoid creating the file, leave the property empty.
\..\logs\access.log
xtrim.log.error If the xtrim.log.mode property is defined to a file, thisproperty defines the storage location of the access logfile. To avoid creating the file, leave the property empty.
\..\logs\error.log
xtrim.log.trace If the xtrim.log.mode property is defined to a file, thisproperty defines the storage location of the access logfile. To avoid creating the file, leave the property empty.
xtrim.log.trace path is <FS2 installationdirectory>\www\docs\
If the path is incorrect, the log file prints in the currentdirectory.
\..\logs\trace.log
The following properties are not related to the selected log strategy:
Property Description Default Value
xtrim.wrapperDebug Use this property to keep the HTML documents inxtrim.wrapperDebugPath, if a parse error occurs. Thisproperty is useful for debugging parsers.
no
xtrim.wrapperDebugPath
Use this property to store HTML documents.
If the path is incorrect, the log file prints in the currentdirectory.
\..\logs
Server UI Settings
The following table describes the properties for the server UI settings.
Property Description Default Value
xtrim.serverGUI.icon Specifies the path of the search servericon relative to <FS2 installationdirectory>\www\docs\.
None
xtrim.serverGUI.logo Specifies the path of the small search serverlogo relative to <FS2 installationdirectory>\www\docs\.
None
xtrim.serverGUI.aboutlogo Specifies the path of the search serverlogo relative to <FS2 installationdirectory>\www\docs\.
None
37

Servers Configuration
Property Description Default Value
xtrim.serverGUI.showSearches
Use this property to display search terms in theserver console. You can monitor activity andsuggest additional information sources to bettersupport users.
No, for privacyconsiderations,only displaybackends.
xtrim.serverGUI.shutDownWait
Specifies the number of seconds the server waitsbefore shutting down. Increase this value if theshutdown is not completed.
10
xtrim.server.multiServerMode
Use this property to control the system, whichis configured to use multiple servers with loadbalancing settings.
false
xtrim.defaultWrapperUpdateURL
Specifies the default URL for the adapter updatercontaining updated adapters.
None
Other Settings
The following table describes the property for the Localization settings.
Property Description Default Value
xtrim.extraLocales Specifies to list the additional supported localesby the system. You must use this property on theserver side to prepare the properties for the clientsin each supported locale.
The format of the locale must follow the ISOLanguage Code—lowercase two-letter abbreviationdefined by ISO-639.
The supported values are en, fr, de, it, ja, ko, and es.
en
Guest Account
The following table describes the property for the guest account.
38

Servers Configuration
Property Description Default Value
xtrim.user.cachedLoginName
Specifies the name of the guest account. Thisoptional property is used to optimize authenticationfor guest account.
None
39

Servers Configuration
40

Chapter 7Logs Reporting
This chapter helps you understand and diagnose misconfigurations and runtime problems.
In Admin Center, click Logs reporting to view the list of log files. Click View to see the content ofthe various log files.
Integration ServerThe Integration Server provides the following types of log files in the \www\logs\ directory:
• The trace.log file traces the system interaction.
• The error.log file traces errors, such as errors encountered during source wrapping.
• The access.log file stores the information on client access to the Federated Search Servicesserver.
You can customize the log files by modifying the LogBack configuration files located at: <FS2installation directory>\www\docs\conf\logback.xml.
Example 7-1. Tracing system interactions—trace.log
ActionTimer: exiting... - [Jan 17, 2006 12:42:12 PM]Broker (3): BaseBroker shutting down - [Jan 17, 2006 12:42:12 PM]Broker (4): BaseBroker shutting down - [Jan 17, 2006 12:42:12 PM]Broker (5): BaseBroker shutting down - [Jan 17, 2006 12:42:12 PM]Broker (6): BaseBroker shutting down - [Jan 17, 2006 12:42:12 PM]Broker (7): BaseBroker shutting down - [Jan 17, 2006 12:42:12 PM]Broker (8): BaseBroker shutting down - [Jan 17, 2006 12:42:12 PM]
Example 7-2. Tracing errors—error.log
------------xtrim.adapter.AdapterException: Adapter [computer/Microsoft] raisederror of type [PARSER] with message [unable to parse [{'full-text'CONTAINS 'graphium ab'} => {general/AltaVista, general/AltaVista-France,france/Ecila, general/Excite, general/Excite-France, general/Infoseek,general/Yahoo, general/YahooInktomi, Documentum/ComputerInsite,computer/Microsoft, computer/Netscape, computer/Sun, Documentum/DocumentumInt, Documentum/Documentum, computer/CMPnet, computer/Acm,computer/Calliope, computer/DBLP, computer/Ncstrl, computer/Springer,computer/Usenix, library/BL-Social, library/BL-Science, library/BL-Music, library/BL-Old, library/BL-Books, library/BL-Journals,library/BL-Conf, library/LoC, Documentum/TechLib, Documentum/NutsLib,
41

Logs Reporting
bsb/BSBOpac}] at level:1 custom.computer.Microsoft.rule.ParseException:Encountered "<" at line 1, column 1.Was expecting: " {general/AltaVista,general/AltaVista-France, france/Ecila, general/Excite, general/Excite-France,general/Infoseek, general/Yahoo, general/YahooInktomi, Documentum/ComputerInsite, computer/Microsoft, computer/Netscape, computer/Sun, Documentum/DocumentumInt, Documentum/Documentum, computer/CMPnet, computer/Acm,computer/Calliope, computer/DBLP, computer/Ncstrl, computer/Springer,computer/Usenix, library/BL-Social, library/BL-Science, library/BL-Music, library/BL-Old, library/BL-Books, library/BL-Journals, library/BL-Conf,library/LoC, Documentum/TechLib, Documentum/NutsLib, bsb/BSBOpac}] at level:1custom.computer.Acm.rule.ParseException: Encountered "<" at line 1, column 1.Was expecting:
"<html>" ...]
-----------
Example 7-3. Storing information on client access to the Integration Server—access.log
13.202.222.66 - RmiSurrogate (Client Id:-1 From:13.202.222.66 state:connected) - [Jan 17, 2006 12:41:30 PM] "CONNECT -1 HTTP/1.0" 200 013.202.222.66 - RmiSurrogate (Client Id:-1 From:13.202.222.66 state:connected) - [Jan 17, 2006 12:41:34 PM] "QUERY Query/-274877906943from account:-1, name:Query-1, definition:{'full-text' CONTAINS 'test tool'}=> {Google, OpenDirectory} HTTP/1.0" 200 0Query/-274877906943 - general/OpenDirectory:processing - [Jan 17, 200612:41:37 PM]"FOUND general/OpenDirectory returned 20 results in 1968ms XTRIM/1.5" 200 0Query/-274877906943 - general/Google:processing - [Jan 17, 2006 12:41:39 PM]"FOUND general/Google returned 30 results in 3797ms XTRIM/1.5" 200 0Query/-274877906943 - general/OpenDirectory:processing - [Jan 17, 200612:41:41 PM]"FOUND general/OpenDirectory returned 20 results in 4016ms XTRIM/1.5" 200 0Query/-274877906943 - general/OpenDirectory:processing - [Jan 17, 200612:41:43 PM]"FOUND general/OpenDirectory returned 20 results in 2219ms XTRIM/1.5" 200 0Query/-274877906943 - general/OpenDirectory:processing - [Jan 17, 200612:41:46 PM]"FOUND general/OpenDirectory returned 20 results in 2672ms XTRIM/1.5" 200 013.202.222.66 - RmiSurrogate (Client Id:-1 From:13.202.222.66 state:connected) - [Jan 17, 2006 12:42:12 PM] "SHUTDOWN -1 HTTP/1.0" 200 013.202.222.66 - RmiSurrogate (Client Id:-1 From:13.202.222.66 state:disconnected) - [Jan 17, 2006 12:42:12 PM] "DISCONNECT -1 HTTP/1.0" 200 0
Note: Additional files that contain adapter names can appear in the \www\logs\ directory. Thesefiles are generally HTML files, stored when parsing errors occur. The information in these files isuseful for adapter developers to modify the parser grammar specifications. Send these files to theadapter developer to make appropriate corrections.
Admin Center ServerThe Admin Center Server provides the following types of log files in the \admin\logs\ directory:
• System interactions and exceptions log (localhost_log.txt)
• Web server access log (localhost_access_log.<date>.txt)
42

Logs Reporting
• Admin Center webapps log (adminCenter_log.txt)
• Adapter Updater log (updater_log.txt)
You can customize the log files by modifying the log4j.xml configuration file located in <FS2installation directory>\admin\lib\.
43

Logs Reporting
44
Chapter 8Servers Operation
This chapter provides information about starting and stopping the Federated Search Services serverand about the Federated Search Services console.
The Servers operation page in the Admin Center allows you to start or stop the Federated SearchServices server. You can perform the following actions:
• Start/Restart FS2 with a graphic user interface—Starts or restarts the aOServer command(aOServer batch file on Windows), and displays the Federated Search Services console.
• Start/Restart FS2 without graphic user interface—Starts or restarts the aOServer command(aOServer batch file on Windows), without displaying the Federated Search Services console.
• Start/Restart FS2 in service mode—Starts or restarts the Documentum FS2 Server service inWindows Services.
• Stop FS2—Stops aOServer and Documentum FS2 ServerWindows service.
Note: If you cannot start or restart Federated Search Services with the links in this page, make surethat the Task Scheduler service is enabled and started.
Federated Search Services ConsoleWhen Federated Search Services is not run as a Windows service, that is, when you use the aOServercommand to start Federated Search Services, the Federated Search Services console is displayed. Thisconsole enables you to monitor Federated Search Services activities, such as the number of activebrokers, the number of queries and results, and so on.
45

Servers Operation
46
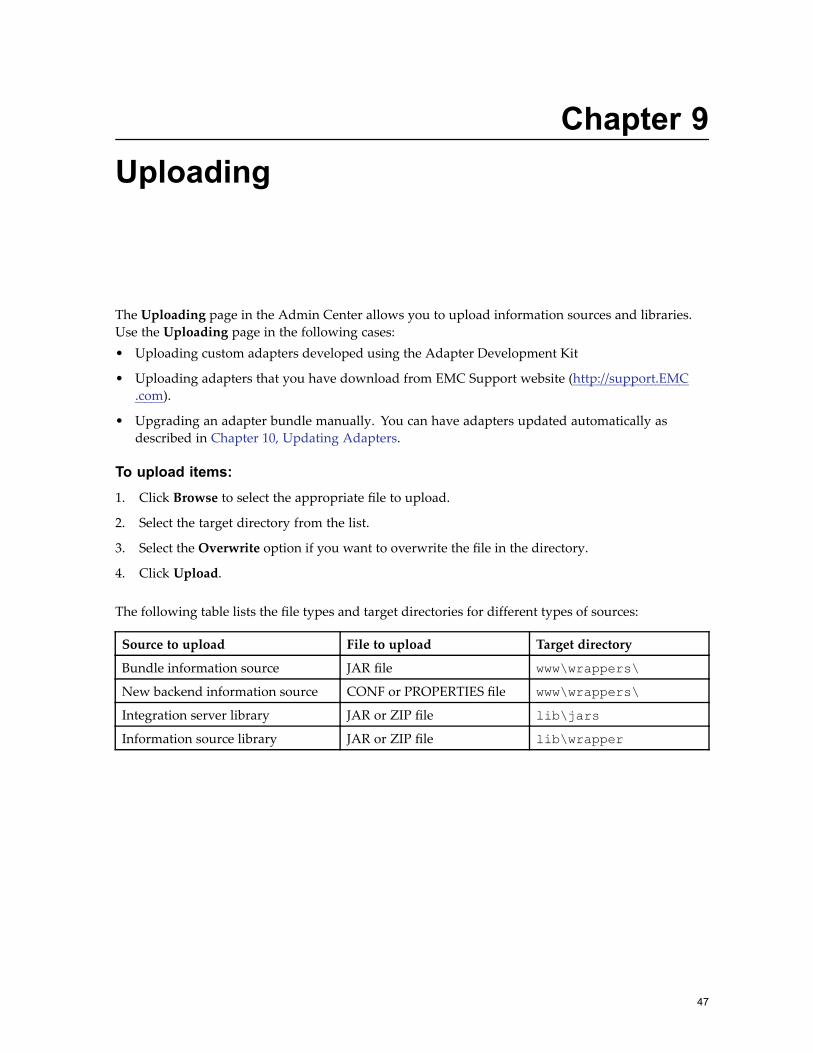
Chapter 9Uploading
The Uploading page in the Admin Center allows you to upload information sources and libraries.Use the Uploading page in the following cases:• Uploading custom adapters developed using the Adapter Development Kit
• Uploading adapters that you have download from EMC Support website (http://support.EMC.com).
• Upgrading an adapter bundle manually. You can have adapters updated automatically asdescribed in Chapter 10, Updating Adapters.
To upload items:1. Click Browse to select the appropriate file to upload.
2. Select the target directory from the list.
3. Select the Overwrite option if you want to overwrite the file in the directory.
4. Click Upload.
The following table lists the file types and target directories for different types of sources:
Source to upload File to upload Target directory
Bundle information source JAR file www\wrappers\
New backend information source CONF or PROPERTIES file www\wrappers\
Integration server library JAR or ZIP file lib\jars
Information source library JAR or ZIP file lib\wrapper
47

Uploading
48

Chapter 10Updating Adapters
You can configure Federated Search Services to check regularly for adapter updates, downloadthem, and upgrade adapters.
This chapter describes the configuration settings of the Adapter Updater option. You may haveenabled this option during the installation, if not, you can configure it whenever you want asdescribed in this chapter.
Only the adapters listed in the www\docs\conf\domains.conf file are updated.
How Is an Adapter Updated?1. When the Adapter Updater option is enabled, it checks for updates on EMC FTP web site
(ftp://ftp.emc.com/FS2Adapters) according to the defined schedule (using default settings or yoursettings) or every time Admin Center starts.
2. A comparison is made between the version of the adapters on the update site and the adapterslisted in domains.conf. The version of an adapter is indicated in its JAR file.
3. If a newer adapter is available and compatible (see compatibility rules), an archive file containingthe adapter files is downloaded to a temporary directory.
4. A backup for each original adapter is created.
5. The archive file is uncompressed and overwrites the original adapter files.
If an error occurs during the uncompression, for example: a file cannot be overwritten because itis locked by a process, the backup files are restored and a new update will be tried next time.
You do not need to restart FS2 server after an adapter update.
Configuring the Adapter UpdaterThere are two configuration files for the Adapter updater functionality:• AdapterUpdater.conf
• updateUrl.conf
in the <FS2 installation directory>\admin\webapps\AdminCenter\conf\ directory.
49

Updating Adapters
The following table describes the parameters available in the AdapterUpdater.conf file.
Parameter Description DefaultValue
isEnabled Specifies whether to enable the Adapter Updateroption.
true
frequency Specifies the frequency on which the server checksfor updates. The frequency is set every n days.
1
startHour Specifies the start hour for the update check. Thestart hour must be from 0 through 23. The updatecheck starts during the next half hour after thespecified start hour to avoid any connection orbandwidth issue.
4
ftpProxyConnector Specifies the proxy type. You can specify thefollowing values:
• NONE
• HTTPTunnel
• FTPProxy
• SOCKS4
• SOCKS5
NONE
ftpProxyConnectorHost Specifies the proxy host IP. None
ftpProxyConnectorPort Specifies the proxy port number. None
ftpProxyAuthenticationSet Specifies whether to enable authentication. None
ftpProxyAuthenticationLogin Specifies the login for proxy authentication. None
ftpProxyAuthenticationPassword Specifies the password for proxy authentication. None
The updateUrl.conf file only contains one parameter, which is the URL of the update website.By default, the URL is:updateUrl=ftp://9rJJ1AzjW:[email protected]/FS2Adapters/V5
Update Messages in Log FilesYou can view the list of the updated adapters as well as other traces or errors in theadmin/logs/updater_log.txt file.
The following table lists the Typical messages after an automatic adapter update:
50

Updating Adapters
Message Cause and solution
Updater: Adapter <local_adapter> TO BEUPDATED (current version=<old_version>version on update site: <new_version>
After checking the versions of the adapters onthe update site and the versions of the adapterslisted in your domain.conf file, the AdapterUpdater identifies which adapters need to beupdated.
Updater: Adapter <local_adapter> NO UPDATEAVAILABLE on update site: <update_site_Url>
The adapter bundle is not available on theupdate site. This may be to avoid anycompatibility issue. Check EMC Supportwebsite for new versions of the adapter.
Updater: update DONE <local_adapter>"updated to version: <new_version>
The adapter has been updated successfully.
Updater: update FAILED during backupof <local_adapter> to be updated to version:<new_version>
The backup of the old version of the adapterfailed, so queries are still processed with the oldversion of the adapter.
Updater: update FAILED <local_adapter> to beupdated to version: <new_version> backup fileswill be restored
The update of the adapter failed, backup filesare restored and queries can still be processedwith the old version of the adapter.
AdapterUpdater: unable to find updateUrlproperty
The URL of the update site cannot be loaded.This may occur if the configuration fileadmin\webapps\AdminCenter\conf\adapterUpdater.conf is missing or theproperty updateUrl is not set in this file.
Warning paramater ADAPTER_UPDATER_<param_name> isn’t a valid property, defaultvalue is used instead: <default_value>
Check the property in Admin Center and set itas described in the previous section.
Updater: (FTP 550 File not found)
or
Updater: (HTTP 404 File not found)
These errors may be due to a connection issue.Check it the update URL is accessible or if afirewall or a locked port prevent the AdapterUpdater to access the update site.
Compatibility RulesThe update mechanism only replaces the adapter bundle and the backends that are provided withthe bundles. As a consequence, if you modified the default backends, they are overwritten. If youhave defined your own backends, the compatibility is ensured but you may need to make somesmall configuration changes. If there is an important change in the new version of an adapter, thebundle is released with a new name, for example, the eRoom adapter has two bundles (eRoom.jarand ERoomWS.jar) for the two eRoom APIs.
Adapters have a major and a minor version number. The automatic update is performed to upgradeto a higher minor version or to a higher major version, but, in this case, only if there is no risk to breakthe compatibility. Some adapters may be incompatible because they embed third-party libraries that
51

Updating Adapters
have different versions. To avoid any issue, these adapters are not available on the update site,download them and deploy them manually.
Signed AdaptersThe adapter authenticity is ensured by a certificate-based authentication. The Federated SearchServices Admin Center is installed with its own certificate. Similarly, each adapter bundle is signedby EMC certificate. The Adapter Updater checks the party identity (“EMC”), the validity duration ofthe adapter certificate, and whether it comes from a trusted certificate authority.
52
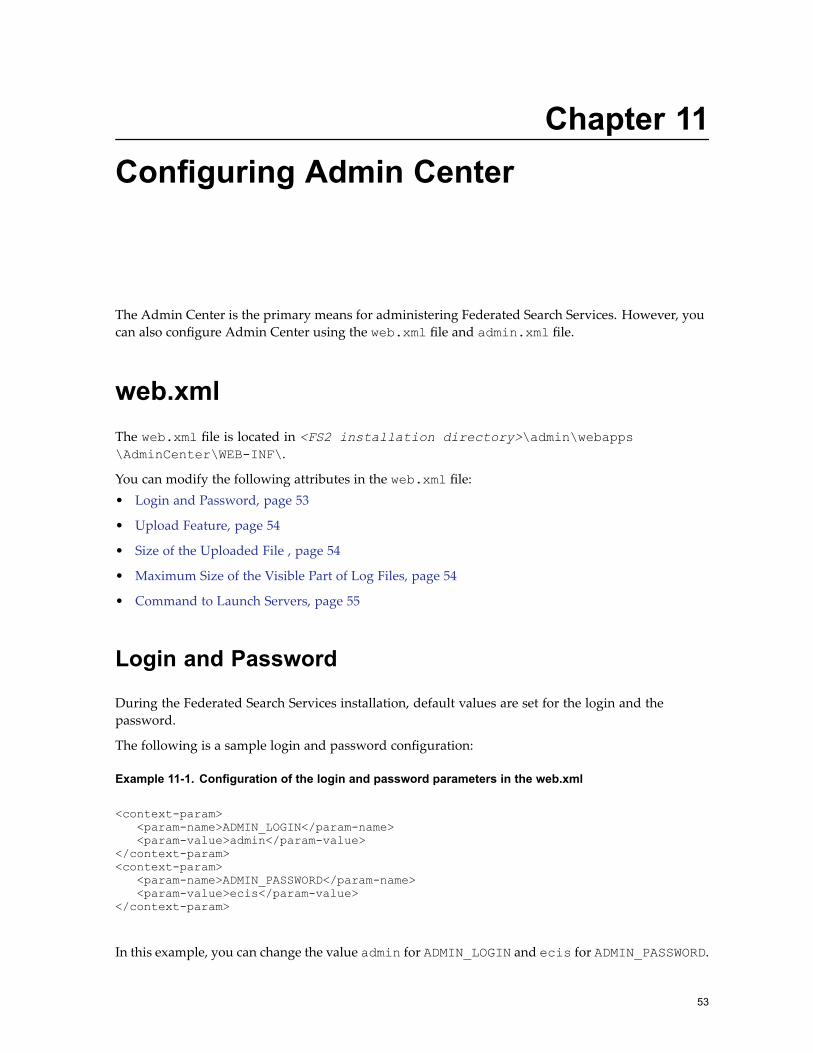
Chapter 11Configuring Admin Center
The Admin Center is the primary means for administering Federated Search Services. However, youcan also configure Admin Center using the web.xml file and admin.xml file.
web.xmlThe web.xml file is located in <FS2 installation directory>\admin\webapps\AdminCenter\WEB-INF\.
You can modify the following attributes in the web.xml file:• Login and Password, page 53
• Upload Feature, page 54
• Size of the Uploaded File , page 54
• Maximum Size of the Visible Part of Log Files, page 54
• Command to Launch Servers, page 55
Login and Password
During the Federated Search Services installation, default values are set for the login and thepassword.
The following is a sample login and password configuration:
Example 11-1. Configuration of the login and password parameters in the web.xml
<context-param><param-name>ADMIN_LOGIN</param-name><param-value>admin</param-value>
</context-param><context-param>
<param-name>ADMIN_PASSWORD</param-name><param-value>ecis</param-value>
</context-param>
In this example, you can change the value admin for ADMIN_LOGIN and ecis for ADMIN_PASSWORD.
53
Configuring Admin Center
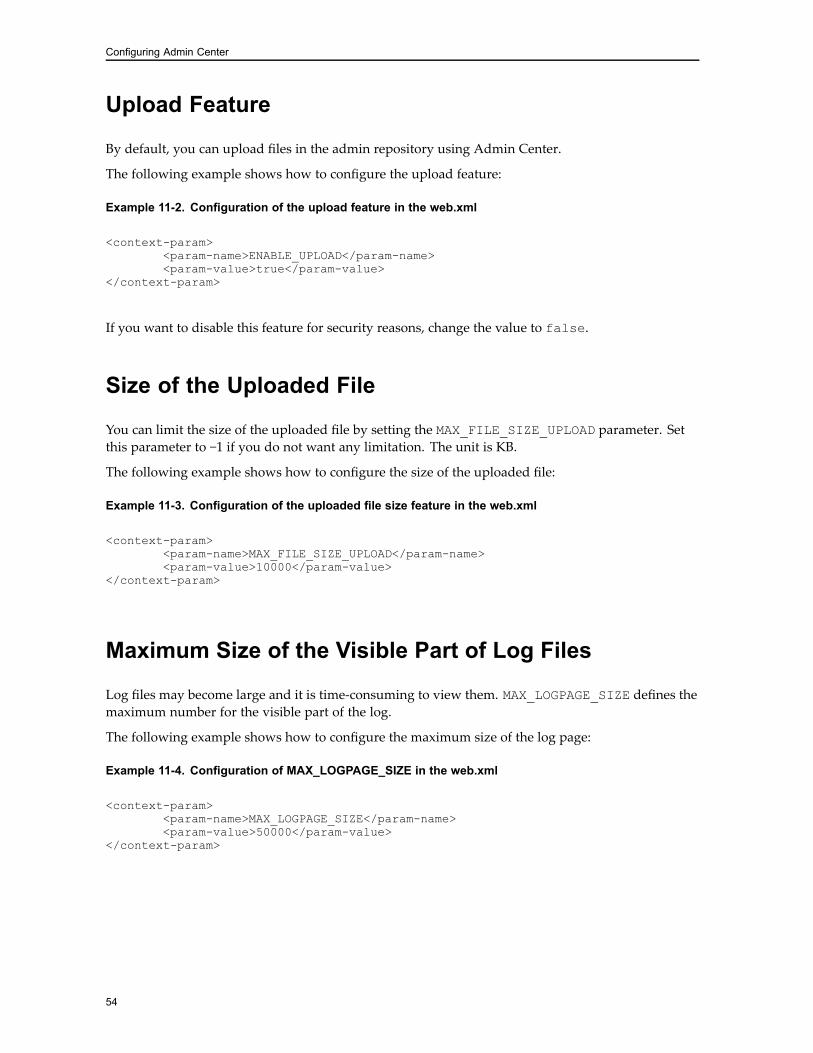
Upload Feature
By default, you can upload files in the admin repository using Admin Center.
The following example shows how to configure the upload feature:
Example 11-2. Configuration of the upload feature in the web.xml
<context-param><param-name>ENABLE_UPLOAD</param-name><param-value>true</param-value>
</context-param>
If you want to disable this feature for security reasons, change the value to false.
Size of the Uploaded File
You can limit the size of the uploaded file by setting the MAX_FILE_SIZE_UPLOAD parameter. Setthis parameter to −1 if you do not want any limitation. The unit is KB.
The following example shows how to configure the size of the uploaded file:
Example 11-3. Configuration of the uploaded file size feature in the web.xml
<context-param><param-name>MAX_FILE_SIZE_UPLOAD</param-name><param-value>10000</param-value>
</context-param>
Maximum Size of the Visible Part of Log Files
Log files may become large and it is time-consuming to view them. MAX_LOGPAGE_SIZE defines themaximum number for the visible part of the log.
The following example shows how to configure the maximum size of the log page:
Example 11-4. Configuration of MAX_LOGPAGE_SIZE in the web.xml
<context-param><param-name>MAX_LOGPAGE_SIZE</param-name><param-value>50000</param-value>
</context-param>
54

Configuring Admin Center
Command to Launch Servers
This section applies only to Solaris and Linux systems. Uncomment LAUNCH_SERVERS_CMD if youwant to define the complete path of the executable to launch servers on Solaris and Linux. By default,the OPENWINHOME system property and xterm are used.
The following example shows how to configure the command to launch servers:
Example 11-5. Configuration of the LAUNCH_SERVERS_CMD in the web.xml
<context-param><param-name>LAUNCH_SERVERS_CMD</param-name><param-value>/bin/sh</param-value>
</context-param>
admin.xmlThe admin.xml file is located in <FS2 installation directory>\admin\webapps\AdminCenter\conf\. You can define the following items using the admin.xml file:
• Reference to integration server configuration file: server.conf, that you want to configurethrough Admin Center.
• Reference to integration server log files that you want to view through Admin Center.
• File types that can be uploaded. You can also specify the admin repository.
Configuration Files
By default, a Module is defined for the integration server and another one for the web server. Youmust provide a localized description for each of them.
Each Module contains several Items. An Item defines the name and location of a configuration fileand its localized description. You can remove an Item if you do not want to edit its configuration file.It is not possible to add a new Item.
Example 11-6. Integration server configuration files setup in admin.xml
<AdminConfiguration>…
<Group name="conf"><Module><description lang="en">Integration Server</description><description lang="fr">Serveur d’intégration</description><item name="server.conf" path="www/docs/conf"><description lang="en">Options of the 'Integration Server'
(HTTP options, traces, persistent queries options,...)</description><description lang="fr">Options du ‘Serveur d’intégration'
(options HTTP, traces, requêtes persistantes,...)</description></item><item …
55

Configuring Admin Center
Log Files
The log file structure in admin.xml is like the structure of configuration files but applied to log files.
You can remove or add an Item depending on whether you want to view its log file.
The following example shows the integration log files configuration:
Example 11-7. Integration server log files configuration in admin.xml
<AdminConfiguration>…
<Group name="log"><Module><description lang="en">Integration Server</description><description lang="fr">Serveur d’intégration</description><item name="trace.log" path="www/logs"><description lang="en">Trace system interactions</description><description lang="fr">Trace les interactions systèmes</description>
</item><item …
Uploaded Files
The uploaded file structure in admin.xml is like the structure of configuration files but applied to filetypes that can be uploaded.
You can remove or add an Item depending whether you want to enable the upload a file type. TheUploaded files section of web.xml configuration provides details on disabling this feature.
Example 11-8. Uploaded files configuration in the admin.xml
<AdminConfiguration>…
<Group name="Upload"><Module><description lang="en">Integration Server</description><description lang="fr">Serveur d’intégration</description><item name="*.conf, *.jar" path="www/wrappers"><description lang="en">Upload an information source </description><description lang="fr">Télécharger une source d’information
</description></item><item …
56

Chapter 12Customizing Admin Center
This chapter describes the Admin Center customization.
You can customize the interface with the colors and text font in the data style sheets and the home,logo, and login pages. You can customize the Admin center using one of the following methods:• Customization without Editing JSP Pages, page 57
• Customization Using JSP Pages, page 57
Customization without Editing JSP PagesYou can customize the interface by changing styles for the logo and colors of pictures defined inthe style sheet and in a JavaScript file.
The style.css file is located in <FS2 installation directory>\admin\webapps\AdminCenter\data\.
The tooltip.script file is located in <FS2 installation directory>\admin\webapps\AdminCenter\data\xml\xsl\, contains only the definition of tooltip background colors.
Pictures such as logo, buttons, are located in <FS2 installation directory>\admin\webapps\AdminCenter\data\.
Note: When you change a color in style.css, you must update the colors of pictures included inthe standard JSP client.
Customization Using JSP PagesJSP source pages provide home, logo, and login pages that are located in <FS2 installationdirectory>\admin\webapps\AdminCenter\.
When using JSP pages, comply to the following requirements:• Compile JSP pages with Tomcat as soon as you modify them.
• Stop and restart Tomcat for your changes to take effect.
• Use a Java Development Kit (JDK).
57

Customizing Admin Center
To enable Tomcat to compile JSP pages1. Add tools.jar (from a JDK) in the classpath of aOAdmin scripts.
Note: You can also copy the tools.jar library in the <FS2 installationdirectory>\admin\lib\ repository.
2. Edit web.xml in <FS2 installation directory>\admin\webapps\AdminCenter\WEB-INF\ to comment the ‘definition of compiled jsp pages’ and the ‘servlet URL-mapping’ forthese three JSP.
3. Restart the Documentum FS2 AdminCenter Windows service. Tomcat compiles thejsp pages. The Java and compiled versions are located in the <FS2 installationdirectory>\admin\work\ directory.
58

Chapter 13Upgrading JDK
Federated Search Services 7.2 ships with JDK 1.7_72, which is located in <FS2_installtion_directory>/java64. You can replace the default JDK with a new version. To do this, followthese steps:1. Download a newer version of JDK from the Oracle website.
2. Install or extract the JDK to <FS2_installtion_directory>/java64, for example,C:\Documentum\fs2\java64\1.7.0_79.
3. Stop all FS2 services.
4. Modify the following scripts and configuration files so that FS2 uses the downloaded JDK. To dothis, replace all occurrences of the original JDK release with the new JDK release in these files. Forexample, replace all occurrences of 1.7.0_72with 1.7.0_79.
Files to update in Windows:• <FS2_installtion_directory>\ant_me.bat
• <FS2_installtion_directory>\bin\aOAdmin.bat
• <FS2_installtion_directory>\bin\aOBuilder.bat
• <FS2_installtion_directory>\bin\aOServer.bat
• <FS2_installtion_directory>\bin\aOVerboseWrapperTester.bat
• <FS2_installtion_directory>\bin\aOWrapperTester.bat
• <FS2_installtion_directory>\bin\RmiClient.bat
• <FS2_installtion_directory>\serviceConfig\admin\conf\wrapper.conf
• <FS2_installtion_directory>\serviceConfig\server\conf\wrapper.conf
Files to update in Linux:• <FS2_installtion_directory>/sourceant_me
• <FS2_installtion_directory>/bin/aOAdmin
• <FS2_installtion_directory>/bin/aOWrapperTester
• <FS2_installtion_directory>/bin/aOVerboseWrapperTester
• <FS2_installtion_directory>/bin/aOServer
Note: You may need to backup all these files before making the changes.
59

Upgrading JDK
5. (Optional) To make sure FS2 does not use the original JDK, rename the original JDK folder, forexample, rename 1.7.0_72 to 1.7.0_72.old.
6. Restart all FS2 services.
60

Appendix A
Troubleshooting
This appendix deals with the following issues:• Connection Issues with Client Applications, page 61
• Issues Related to Adapter Backends, page 64
• SMTP Configuration Not Working as Expected, page 69
• Getting Status Information on Server Internals, page 69
• Handling Low-Memory Conditions, page 70
• Managing Timeouts, page 71
Connection Issues with Client ApplicationsThe following are the common causes and solutions for connection issues with client applications:• Firewalls: Make sure the ports used by Federated Search Services, and more specifically theRMI ports are opened.
• Network Interface Cards (NICs): If the host machine has two NICs, it can cause connection issues.The Host Machine Has Several NICs, page 62 describes how to make sure that the FederatedSearch Service server and the client application communicate on the same NIC.
• RMI connection: The Federated Search Service server uses the Remote Method Invocation (RMI)protocol to communicate with the client applications. When the client application launches arequest against the Federated Search Service server, it indicates the IP address that the FederatedSearch Service server must use to respond. However, if the client has multiple IPs, it can send anIP address that the Federated Search Service server cannot use to respond. The solution is to forceRMI detection as described in Force RMI Detection on Client Side, page 62.
• Hosts files: Make sure the hosts files on the Federated Search Service server host and on theclient application host are correctly set. You may need to comment any line like: 127.0.0.1localhost.
61

Troubleshooting
The Host Machine Has Several NICs
If the Federated Search Service host machine has several NICs, the following procedure enables youto set the connection between the Federated Search Service server and the client application:
1. Disable one of the NICs.
2. Start the Federated Search Service server.
3. Enable the NIC.
Force RMI Detection on Client Side
A solution to RMI connection issues is to force the detection of the RMI server hostnameon the client side. To do so, modify the command that launches the client by setting theDjava.rmi.server.hostname property in the Java options. The following example describeshow to update the catalina.bat script that launches the WDK application and forces the RMI IPto connect:set JAVA_OPTS=%JAVA_OPTS% -Djava.rmi.server.hostname=<hostname>
where <hostname> can be the DNS name or the IP address of the Federated Search Service host.
Connection to FS2 Server Fails When Host NameContains an Underscore
When you try to connect a client such as Webtop to the Federated Search Service server using the RMIconnection, the connection fails if the hostname contains an underscore.
To resolve this issue, you can specify the IP address instead of the host name for the followingparameters:• xtrim.server.rmi.registryHost in www\docs\conf\server.conf on the FederatedSearch Service server machine
• dfc.search.external_sources.host in dfc.properties on the client machine
Managing a Server with an External Name Differentfrom the Default Machine Name
If the server on which Federated Search Services is installed has an external name that is differentfrom its internal name, some of the links in the HTML pages may not work. To solve this problem,modify the following two configuration files:• server.conf—Edit the xtrim.server.rmi.registryHost parameter, for example,
xtrim.server.rmi.registryHost=demo.askOnce.com.
• web.xml—Edit the RMI_REGISTRY_HOST parameter, for example, <param-name>RMI_REGISTRY_HOST</param-name><param-value>python</param-value>.
62

Troubleshooting
Testing the RMI Connection
You can test the RMI connection between the Federated Search Service server and the client with theRmiClient.bat script. This script also enables you to test whether the Federated Search Serviceserver retrieves results from an adapter.
Note: This script is only available on Windows operating systems.
To test the RMI connection:Prerequisite: The Federated Search Service server is running.
1. Edit the script <FS2 installation directory>\bin\RmiClient.bat.
2. Set the following parameters:
Property name Description
RmiClient.source The path for the adapter, as specified in theDomains.conf file.
RmiClient.query The query constraint sent to retrieve results.
Query syntax is like the one used whendeveloping adapters, refer to the EMCDocumentum Federated Search ServicesDevelopment Guide for more information.
RmiClient.output Set to stdout to get the result in a console orspecify a file path for a log file.
RmiClient.embeddedPath Set to no if there is no embedded mechanismor specify the directory path where embeddedfiles are stored.
Example A-1. Sample RmiClient script file
set RmiClient.xtrimhome=%XTRIMHOME_NT%
REM set RmiClient.source=core/DocumentumFCbackends/MSSQL53SP4ECI10set RmiClient.source=general/Google
REM set RmiClient.query={object_name,CONTAINS,'web'}set RmiClient.query={full-text,CONTAINS,'titi'}
REM set RmiClient.output=file:%XTRIMHOME_NT%/RmiClient/RmiClientOutput.txtset RmiClient.output=stdout
REM set RmiClient.embeddedPath=%XTRIMHOME_NT%/RmiClientset RmiClient.embeddedPath=no
Incorrect Proxy Configuration
If your server relies on an HTTP proxy to cross a corporate firewall and the proxy is not available,the following error appears:
63

Troubleshooting
general/AltaVista-France: unable to reach or to get data from[/cgi-bin/query] through the proxy [foo.Documentum.fr:80]Make sure that the proxy hostname and the proxy port are valid
-------------------------------------------------------xtrim.adapter.AdapterException: Adapter [general/AltaVista-France] raisederror of type [NETWORK] with message [failed to get data from[http://www.altavista.com:80/cgi-bin/query], [/cgi-bin/query]
To resolve this issue, make sure that you are using the correct hostname and port number.
Issues Related to Adapter Backends
Cannot Add an Adapter Backend in Admin Center
This section describes how to configure adapters manually when the Admin Center service does notstart.
To add a new backend manually:1. Create a backend configuration file (for example, www\wrappers\acme\ExternalDocuShare
.conf) that describes the technical aspect of your information sources (network location andparameters) and that associates it with the corresponding standard adapter. For example, to addyour local DocuShare document server running on the host http://docuShare.acme.com, youcan create the following backend file. The EMC Documentum Platform And Platform ExtensionsInstallation and Deployment Guide provides more information about adding other types ofstandard information sources.
bundle=core/Docushare.jarhost=docuShare.acme.com
# Geographical location: Rochester, NY, USA Lat, Lon: 43.169, -77.616# Note: thanks to UIUC (http://cello.cs.uiuc.edu/cgi-bin/slamm/ip2ll/)# for the IP address to Latitude/Longitude servicelocation=38,-75
2. Edit the www/docs/conf/domains.conf file and check the adapter backend as follows:xtrim.domains=JSP,CenterStagextrim.domain.JSP=Acme,General,Press,Tech,Internationalxtrim.domain.Acme=acme/marketingDocuShare, acme/financeDocuShare,acme/ExternalDocuShare[…]
3. Optional—Create a backend description file to describe the information source and how to useit. For example, create a file named www\wrappers\acme\DocuShare_en.propertieswith the following contents:description=DocuShare repository for ACME headquarter based in Grenoble,France
4. Optional—Update the domainDescription_en.properties file with a description for thenewly created acme domain:
64
Troubleshooting
DomainDescription.Acme=Local sites for the whole Acme headquarters(public site, marketing intranet, and finance intranet)
5. Optional—Create a customized image for this source. To do so, you can use your favoriteimage editor to create a 50*25 pixels image. You can change this size but the ratio betweenheight and width must be kept under two for best display. Then, save your image into theTomcat application directory www\tomcat\webapps\ao\data\sources, with the namesource-<your_backendName>.gif if the property image of the backend was left unchanged.Otherwise, define this property to the name of your modified image.
6. Restart the Federated Search Service server. The next client to connect automatically sees theupdated information source hierarchy.
Testing Communication with an Adapter Backend
You can test the network connection with a backend using the command aOWrapperTester:aOWrapperTester -n <backend> [-a <attribute> -q <pattern>] [-s <query string>][-login <backendLogin> <>] [-p <home path>] [-silent] [-empty] [-loadingtrace][-CLIRSourceLanguage <sourceLanguage>]
where
-n <backend> is the fully-qualified name of the backend, for example, general/AltaVista.
-a <attribute> is the attribute to search against, for example, title, body, "full-text".
-q <pattern> is a Boolean expression the search attribute must match, for example, "knowledge andsharing".
-s <query string> is a complex search expression combining multiple attributes, for example,"{title,contains,’billy’}{keyword,equals,’novel’}{date,after,’1997-07-20’}{price,<,’29’}".
-login <backendLogin> <backendPassword> name and password to use during login step (simulatesearch with access control).
-valid is used to validate the property for the client side.
-loadingtrace shows all the properties found in the configuration file of your backend.
-CLIRSourceLanguage <sourceLanguage> enables the query translation in the backend language.<sourceLanguage> must specify the language of the query.
Additional options for developers of adapters:[-p <path>] [[-local/-localArchive/-fetch/-fetchArchive] -f <filename>][-tokenArchive <token> -z <zipname>] [-embeddedArchive -z <zipname> -d<dirname>] [-silent] [-empty]
where
-p <home path> is the root directory containing the configuration files, for example, C:\fs2\www\docs.
-local tests the first-level of the results using a sample HTML file available locally.
-fetch collects a sample HTML file (to be used with option -local).
-localArchive tests the results response using a set of sample HTML files organized by level.
-fetchArchive collects a set of sample HTML files (to be used with -localArchive) and organizedthem by level.
65

Troubleshooting
-f <filename> is the name of the file used to load or store the search results, for example,test/knowledge.html (option -local), test/sharing.zip (option -localArchive).
-silent does not print performance information.
-empty specifies that no results are expected from this test search.
-loadingtrace prints loading information of bundles and backends.
-tokenArchive <token> -z <zipname> collects a set of sample token files (to be used with-embeddedArchive) and organized them by result number.
-embeddedArchive -z <zipname> -d <dirname> tests the adapter using a set of sample embeddedtokens organized by result number, for example, <zipname>=test/tokens1.zip.
-z <zipname> is the name of the archive file used to load or store the embedded tokens, for example,test/tokens1.zip (options -tokenArchive, -embeddedArchive).
-d <dirname> is the name of the file used to store the embedded objects, for example,test/embeddedobject (option -embeddedArchive).
-emptyToken specifies that no tokens are expected from this test embedded object response.
-iterate <number> executes several times the search sequence and allows you to see whether clean-upis well performed.
-stopAfter <number> stops the current executed adapter after <number> milliseconds and allowsyou to test if the adapter really stops.
-n option is mandatory.
For example, to send a query to the source AcmeDocushare, run the following command:aOWrapperTester –n acme/AcmeDocushare –a author –q conan
The following results appear:
acme/Docushare: search results =1: [source = Doc-XRCE] [title = Meeting Minutes - February 16th, 1999][summary = ] [abstract = ] [keywords = KB Xtrim] [owner_href =http://docushare.acme.com/ViewProps/User-42] [author = conan][owner = conan] [date = 1999-03-01] [last_modified_date = 1999-03-01][site = docushare.acme.com] [href = http://docushare.acme.com/Get/File-2245/WeeklyMeeting.htm] [type = text/html] [size = 6K][collection_href = http://docushare.acme.com/View/Collection-527][collection = Internal Meeting Minutes]2: [source = Doc-XRCE] [title = Meeting Minutes - January 12th 1999][summary =] [abstract = ] [keywords = KB Annual Plans] [owner_href =http://docushare.acme.com/ViewProps/User-42] [author = conan][owner = conan] [date = 1999-01-19] [last_modified_date = 1999-01-19][site = docushare.acme.com] [href = http://docushare.acme.com/Get/File-2017/WeeklyMeeting.html] [type = text/html] [size = 6K][collection_href = http: //docushare.acme.com/View/Collection-527][collection = Internal Meeting Minutes]3: [source = Doc-XRCE] [title = KB Adapter Service Specification(PS version)] [summary = ] [abstract = ] [keywords = adapter serviceranking summarization query language sumbsumption] [owner_href =http://docushare.acme.com/ViewProps/User-42] [author = conan][owner = conan] [date = 1999-01-08] [last_modified_date = 1999-01-08][site = docushare.acme.com] [href = http://docushare.acme.com/Get/File-1954/WS.ps] [type = application/postscript] [size = 996K][collection_href = http://docushare.acme.com/View/Collection-524][collection = Adapter Service]
66

Troubleshooting
Note: The aOWrapperTester tool displays the number of discarded results (usually because they werereturned by the source but were filtered not matching the query constraints), but not the content ofthose results. In some cases, it is interesting to know why those results were discarded. In such cases,use the filter property in the adapter backend configuration file to disable temporarily the filtering onthe source . Then, all results are displayed. By comparing the list of results when filtering is enabledor disabled, you can deduce which results where discarded.
For web sources, it is possible to get a trace of the HTTP protocol using the second commandaOVerboseWrapperTester.aOVerboseWrapperTester –n acme/AcmeDocushare –a author –q conanECIS: progress report mode is onECIS: debug adapter mode is on [C:\ECIS\www\logs]ECIS: redirect logs to consoleConn: Creating Socket: docushare.acme.com:80Demux: Initializing Stream Demultiplexor (2027311)Demux: Timeout Thread[SocketTimeout-1-2027311,10,main] starting (2027311)Conn: Sending Request:
POST /ApplySearch HTTP/1.1Host: docushare.acme.comConnection: Keep-Alive, TETE: gzip, deflate, compress, chunkedUser-Agent: ECIS (Documentum Research Centre Europe; Java-1.1.6; October 1997)RPT-HTTP Client/0.3Accept-Encoding: gzip, deflate, compressContent-type: application/x-www-form-urlencodedContent-length: 400
Demux: Opening stream 2027111 (Thread[main,5,main])Conn: Request sentResp: Reading Response headers 2027111 (Thread[main,5,main])Demux: Setting timeout to 390000 msResp: Parsing Response headers from Request "POST /ApplySearch":(2027111)(Thread[main,5,main])
Testing Adapter Backend Configuration
Some configuration mistakes in adapter backends can be subtle, such as a typing mistake in afilename. Therefore the Federated Search Services adapter testing tool provides a diagnosis modethat helps you detect such mistakes. To troubleshoot with invalid adapter bundle configuration usingthe aOWrapperTester command, use the “–loadingtrace” as follows:aOWrapperTester –n acme/AcmeDocushare -loadingtrace
This displays the following traces that show the files that were loaded in the order in which theywere loaded.| Load the explicit backend <Doc-Public> in:C:\ECIS\www\adapters\core\
docushareBackends\Doc-Public.conf.| Load CONF : C:\ECIS\www\adapters\core\docushareBackends\Doc-Public.conf| ___________________________________________________________| | <bundle>=<core/DSWebDAV.jar>| | <image>=<docushare>| | <location>=<41,-78>| | <host>=<docushare.Documentum.com>| |___________________________________________________________| ___________________________________________________________
67

Troubleshooting
| | Load the bundle <DSWebDAV> in:C:\ECIS\www\adapters\core\DSWebDAV.jar.| | Load class :custom/core/DSWebDAV/
DSWebDAVTranslator.class| | Load class :custom/core/DSWebDAV/rule/
LogonParser.class| | Load class :custom/core/DSWebDAV/DSWebDAV.class| | Load unlocalized properties file:custom/core/DSWebDAV/DSWebDAV.conf| | ___________________________________________________________| | | <Collection.ViewCommand>=</dscgi/ds.py/View>| | | <supportsLogin>=<true>| | | <trusted>=<body>| | | <query>=<title,owner,abstract,keywords,date,object_type,
full-text,body>| | | <File.ViewCommand>=</dscgi/ds.py/Get>| | | <location>=<41,-78>| | | <result>=<title,URL,abstract,description,keywords,owner,
date,last_modified_date,| | | collection,collection-URL,object_type,type,author,
size,file_name,modified_by>| | | <host>=<docushare.Documentum.com>| | | <method2>=<post>| | | <method1>=<post>| | | <dateformat>=<yyyy-mm-dd'T'HH:mm:ss'Z'>| | | <action2>=</dscgi/ds.py/Search>| | | <action1>=</dscgi/ds.py/Login>| | | <modified_dateformat>=<EEE, dd MMM yyyy HH:mm:ss zzz>| | | <port>=<80>| | ___________________________________________________________| | Load localized properties file :custom/core/DSWebDAV/DSWebDAV_
en.properties| | ___________________________________________________________| | | <description>=<DocuShare 2.0 HTTP/XML adapter>| | ___________________________________________________________| | Load class :custom/core/DSWebDAV/rule/
DSWebDAVParser.class| | Entry class of this bundle is :custom.core.DSWebDAV.DSWebDAV| | QML file of this bundle is :DSWebDAV.qml| | Mandatory property :| | ___________________________________________________________| | | <query>=<title,owner,abstract,keywords,date,object_type,
full-text,body>| | | <result>=<title,URL,abstract,description,keywords,owner,
date,last_modified_date,| | | collection,collection-URL,object_type,type,
author,size,file_name,modified_by>| | |__________________________________________________________| ___________________________________________________________| Load PROPERTIES: C:\ECIS\www\adapters\core\docushareBackends/
Doc-Public_en.properties| ___________________________________________________________| | <description>=<DocuShare Live! - Documentum DocuShare official site >| |___________________________________________________________| Load PROPERTIES: C:\ECIS\www\adapters\core\docushareBackends/
Doc-Public_fr.properties| ___________________________________________________________| | <description>=<DocuShare Live! - Le site officiel de Documentum DocuShare>| |___________________________________________________________| Bundle of this backend is :C:\ECIS\www\adapters\core\DSWebDAV.jar| Mandatory property :| __________________________________________________________| | <query>=<title,owner,abstract,keywords,date,object_type,full-text,body>| | <result>=<title,URL,abstract,description,keywords,owner,date,
last_modified_date,| | collection,collection-URL,object_type,type,author,
size,file_name,modified_by,source,site>
68

Troubleshooting
| |___________________________________________________________|___________________________________________________________
SMTP Configuration Not Working as ExpectedFederated Search Services SMTP configuration does not allow the following:• DNS alias
• SMTP port different from 25
• SMTP with authentication
Symptoms:• The computer hosting the SMTP (mail) server has a DNS alias.
• In error logs, the trace "... could not connect to SMTP <address> port 25..." appears.
Work around:
Define the real DNS name of the SMTP server and enter it in the server.conf configuration file.
Getting Status Information on Server InternalsThe File/List thread menu of the Federated Search Service server can help troubleshooting bydisplaying server internal status on the server text console, as the following example shows. Itprovides the exact list of connected clients and the list of active and stopping adapters.
Example A-2. Typical output of the server internal status
-------------------------------------------------------java.lang.ThreadGroup[name=main,maxpri=10]
Thread[main,1,main]Thread[AWT-EventQueue-0,5,main]Thread[AWT-Windows,5,main]Thread[Httpd: waiting... ( about 1 pending requests, and 20 free workers),5,
main]Thread[Thread-1,10,main]Thread[Screen Updater,4,main]java.lang.ThreadGroup[name=HttpWorkers,maxpri=5]
Thread[HttpWorker (1):waiting,5,HttpWorkers]Thread[HttpWorker (2):waiting,5,HttpWorkers]Thread[HttpWorker (3):waiting,5,HttpWorkers]Thread[HttpWorker (4):waiting,5,HttpWorkers]Thread[HttpWorker (5):waiting,5,HttpWorkers]Thread[HttpWorker (6):waiting,5,HttpWorkers]Thread[HttpWorker (7):waiting,5,HttpWorkers]
[…]Thread[HttpWorker (20):waiting,5,HttpWorkers]
java.lang.ThreadGroup[name=Surrogates,maxpri=5]Thread[Surrogate ( Id:-1 From:127.0.0.1 ),5,Surrogates]
java.lang.ThreadGroup[name=Brokers,maxpri=1]Thread[Broker (1),1,Brokers]Thread[Broker (2),1,Brokers]
[…]
69

Troubleshooting
Thread[Broker (24),1,Brokers]Thread[computer/Netscape:processing,1,Brokers]Thread[general/AltaVista:processing,1,Brokers]Thread[Documentum/Documentum:processing,1,Brokers]Thread[computer/Sun:processing,1,Brokers]Thread[Documentum/Documentum:processing,1,Brokers]Thread[computer/Sun:processing,1,Brokers]Thread[computer/Netscape:processing,1,Brokers]Thread[computer/Sun:stopping,1,Brokers]Thread[computer/Netscape:stopping,1,Brokers]Thread[general/AltaVista:processing,1,Brokers]Thread[Broker (49),1,Brokers]Thread[computer/Netscape:stopping,1,Brokers]Thread[SocketTimeout,1,Brokers]
-------------------------------------------------------
Handling Low-Memory ConditionsIn some cases, a low-memory condition might occur when the Federated Search Service server cannotobtain enough memory to handle its processing. The following message appears on the serverconsole and in logs when this condition occurs:Low memory error condition detected. Please check the logs to verify normalbehavior of the system. If this error reproduces, please get the list ofactive adapters and report it to your adapter provider and Documentumsupport. Check the troubleshooting section in the ECIS Administrator’sguide for more details.
The following table summarizes the causes, diagnosis, and actions to take when encounteringlow-memory conditions.
Cause How to diagnose How to fix the problem
The number of concurrentthreads (called brokers andHTTP workers) was set to avery large number.
Check the server configurationfile (server.conf) properties
xtrim.http.workers andxtrim.brokers for valuesmuch higher than defaultvalues (x3 or x4).
Increase themaximummemoryallocated to the server processor reduce the values of thoseproperties.
The number of adaptersis higher than defaultconfiguration (for example, 100different adapters).
Check the number of backendsin the domains.confconfiguration file.
Increase themaximummemoryallocated to the server processor reduce the number ofadapters.
70

Troubleshooting
Cause How to diagnose How to fix the problem
An adapter needs an unusualamount of memory to workproperly.
Check the error log files forerrors with that adapter.Increase memory for the serverand check that the problemdisappears. If it does notsolve the problem, contact theadapter provider for completediagnosis.
Increase themaximummemoryallocated to the server process.
An adapter has a flaw, causingit to consume too muchmemory.
The adapter cannot be stopped:it always appears in the list ofactive threads and takes a longtime to return or never stopsproperly.
Contact the adapter provider.
To allocate more memory to Federated Search Server, edit manually aOServer.bat (aOServer onSolaris and Linux). The -mx option controls the maximum amount of memory that Federated SearchServer can request to the system as the following example shows. The default value (Xmx512m)specifies that Federated Search Services can consume up to 512 MB of RAM on the host system.Change this option to a higher value to increase memory allocated to Federated Search Services.
Example A-3. Extract from aOServer.bat startup file
:launch%JAVACMD% -Xms64m –Xmx512m -Xbootclasspath/a:%XTRIMHOME_NT%\lib\Cryptix-classpath %PREFIXPATH%%CPATH% %OTHERCMD% xtrim.server.control.ServerStartUp-d %CONFHOME% %*
Note: To avoid swapping of the host system, the maximum amount of memory allocated to FederatedSearch Services must be smaller than the amount of physical memory of the host machine. Whilenot dangerous for the system stability, swapping can cause performances to drop and FederatedSearch Server response time to be unusually high.
Managing TimeoutsTo manage efficiently sessions and communications between the Federated Search Services client,Federated Search Service server, and sources, there are several timeouts that you can configure. Thefollowing figure shows an asterisk beside each step for which a timeout has been implemented.
71

Troubleshooting
The following are the main timeout parameters implemented in Federated Search Services:• Connection timeout—This timeout is not configurable; it applies when the source does not replyor send any error message. For example, it can occur when a firewall is active and the requiredports have not been opened. By default, the timeout is set to 5 minutes.
• Query timeout and repeated attempts—When the source replies, even if it is an error message,two parameters apply to the query sent by the Federated Search Server.— First, a 180-second timeout applies: you can modify this default timeout in the configurationfile (.conf) of each adapter if the adapter has been developed to take it into account. TheexpirationTime parameter is the expiration time of the adapter until it should abort itsexecution.
— The second parameter is the number of successive trials when the source returns a networkerror. By default, the server tries five times to send the query. It waits 4 seconds before thesecond attempt, and then the delay is doubled between each attempt, 8 seconds before the thirdattempt, 16 seconds before the fourth attempt and finally 32 seconds before the fifth attempt.To modify this parameter, in Admin Center, edit the www\docs\conf\server.conf file,locate the property xtrim.maxActionFailure in the Adapters settings section and updateits value.
• Results timeout—At the DFC level, you can also set a timout to wait for a reply from theFederated Search Service server. By default, this timeout dfc.search.external_sources.request_timeout is set to 180000 (milliseconds).
72