Embed Size (px)
Citation preview
Energy Efficiency andHistoric Buildings
Early cavity walls
This guidance note is one of a series which explain ways of improving the energy efficiency of roofs, walls and floors in historic buildings. The full range of guidance is available from the English Heritage website:
www.english-heritage.org.uk/partL

Introduction to the series
This guidance note is one of a series of thirteen documents providing advice on the principles, risks, materials and methods for improving the energy efficiency of various building elements such as roofs, walls and floors in older buildings. The complete series includes the following publications:
ROOFS Insulating pitched roofs at rafter level/warm roofs Insulating pitched roofs at ceiling level/cold roofs Insulating flat roofs Insulating thatched roofs Open fires, chimneys and flues Insulating dormer windows
WALLSInsulating timber framed walls Insulating solid walls Early cavity walls
WINDOWS AND DOORSDraught-proofing windows and doors Secondary glazing
FLOORSInsulation of suspended ground floors Insulating solid ground floors
All these documents can be downloaded free from: www.english-heritage.org.uk/partL
This series of guidance documents provide more detailed information to support our principle publication:
Energy Efficiency and Historic Buildings: Application of Part L of the Building Regulations to historic and traditionally constructed buildings
This publication has been produced to help prevent conflicts between the energy efficiency requirements in Part L of the Building Regulations and the conservation of historic and traditionally constructed buildings. Much of the advice is also relevant where thermal upgrading is planned without the specific need to comply with these regulations.
The advice acts a ‘second tier’ supporting guidance in the interpretation of the Building Regulations that should be taken into account when determining appropriate energy performance standards for works to historic buildings.
COVER IMAGES top left Page from Gwilt’s Encyclopaedia of Architecture 1899 bottom left © EH/David Pickles bottom right Page from Building Construction by Prof Henry Adams 1906
Energy Efficiency and Historic BuildingsApplication of Part L of the Building Regulations to historic and traditionally constructed buildings
This advice acts as supporting guidance in the interpretation of Approved Documents L1B and L2B that should be taken into account when determining appropriate energy performance standards for works to historic and traditionally constructed buildings
www.english-heritage.org.uk/partL
02
CONSERVATION PLANNING
Before contemplating measures to enhance the thermal performance of a historic building it is important to assess the building and its users to understand:
• the heritage values (significance) of the building• the construction and condition of the building fabric and building services• the existing hygrothermal behaviour of the building• the likely effectiveness and value for money of measures to improve energy performance• the impact of the measures on heritage values• the technical risks associated with the measures
This will help to identify the measures best suited to an individual building or household, taking behaviour into consideration as well as the building envelope and services
TECHNICAL RISKS POSED BY THERMAL UPGRADING OF OLDER BUILDINGS
Altering the thermal performance of older buildings is not without risks. The most significant risk is that of creating condensation which can be on the surface of a building component or between layers of the building fabric, which is referred to as ‘interstitial condensation’. Condensation can give rise to health problems for occupants as it can lead to mould forming and it can also damage the building fabric through decay. Avoiding the risk of condensation can be complex as a wide range of variables come into play.
Where advice is given in this series of guidance notes on adding insulation into existing permeable construction we generally consider that insulation which has hygroscopic properties is used as this offers a beneficial ‘buffering’ effect during fluctuations in temperature and vapour pressure, thus reducing the risk of surface and interstitial condensation occurring. However, high levels of humidity can still pose problems even when the insulation is hygroscopic. Insulation materials with low permeability are not entirely incompatible with older construction but careful thought needs to be given to reducing levels of water vapour moving through such construction either by means of ventilated cavities or through vapour control layers.
The movement of water vapour through parts of the construction is a key issue when considering thermal upgrading but many other factors need to be considered to arrive at an optimum solution such as heating regimes and the orientation and exposure of the particular building.
More research is needed to help us fully understand the passage of moisture through buildings and how certain forms of construction and materials can mitigate these risks. For older buildings though there is no ‘one size fits all’ solution, each building needs to be considered and an optimum solution devised.
TECHNICAL ILLUSTRATIONS GENERALLY
The technical drawings included in this guidance document are diagrammatic only and are used to illustrate general principles. They are not intended to be used as drawings for purposes of construction.
Older buildings need to be evaluated individually to assess the most suitable form of construction based on a wide variety of possible variables.
English Heritage does not accept liability for loss or damage arising from the use of this information.
03
Content
Introduction 05
01 Early cavity wall construction 06
02 Insulating early cavity walls - issues to consider 11
03 Adding insulation to an early cavity wall 14
04 Effects of insulation on dampness in cavity walls 18
05 Cavity wall insulation and the Building Regulations 19
06 Summary 20
07 Further information 21
English Heritage Local Offices 22
04
Introduction
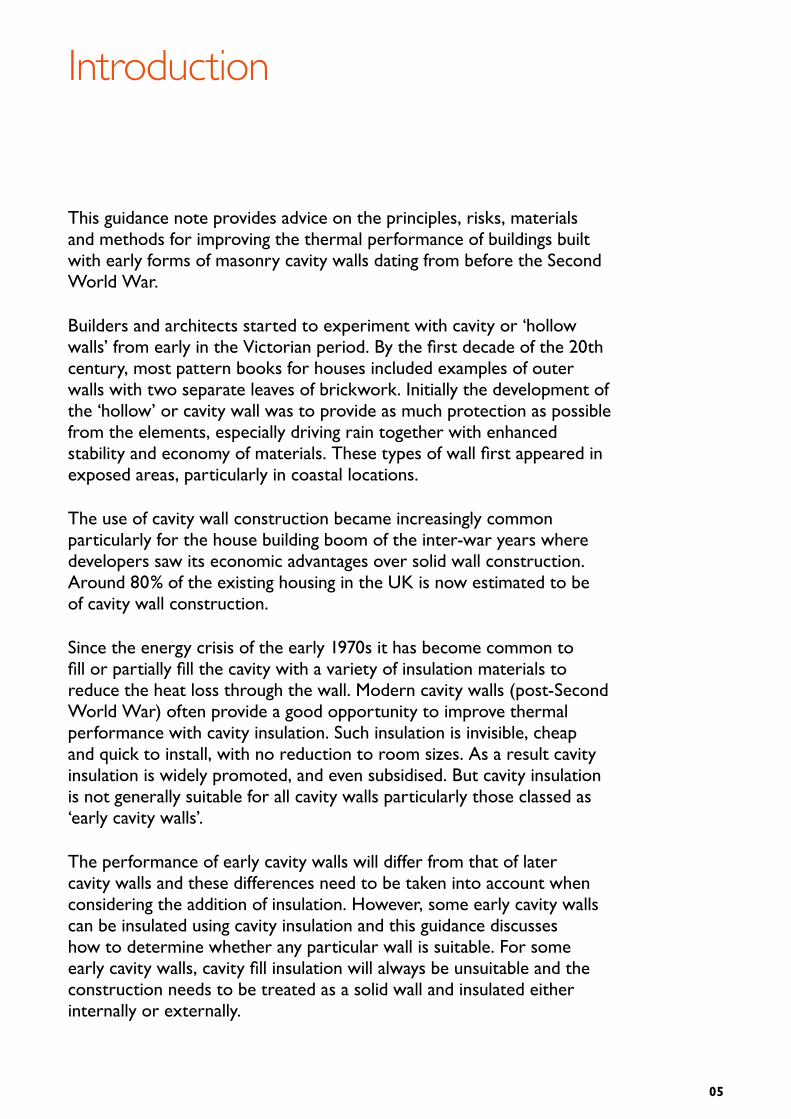
This guidance note provides advice on the principles, risks, materials and methods for improving the thermal performance of buildings built with early forms of masonry cavity walls dating from before the Second World War.
Builders and architects started to experiment with cavity or ‘hollow walls’ from early in the Victorian period. By the first decade of the 20th century, most pattern books for houses included examples of outer walls with two separate leaves of brickwork. Initially the development of the ‘hollow’ or cavity wall was to provide as much protection as possible from the elements, especially driving rain together with enhanced stability and economy of materials. These types of wall first appeared in exposed areas, particularly in coastal locations.
The use of cavity wall construction became increasingly common particularly for the house building boom of the inter-war years where developers saw its economic advantages over solid wall construction. Around 80% of the existing housing in the UK is now estimated to be of cavity wall construction.
Since the energy crisis of the early 1970s it has become common to fill or partially fill the cavity with a variety of insulation materials to reduce the heat loss through the wall. Modern cavity walls (post-Second World War) often provide a good opportunity to improve thermal performance with cavity insulation. Such insulation is invisible, cheap and quick to install, with no reduction to room sizes. As a result cavity insulation is widely promoted, and even subsidised. But cavity insulation is not generally suitable for all cavity walls particularly those classed as ‘early cavity walls’.
The performance of early cavity walls will differ from that of later cavity walls and these differences need to be taken into account when considering the addition of insulation. However, some early cavity walls can be insulated using cavity insulation and this guidance discusses how to determine whether any particular wall is suitable. For some early cavity walls, cavity fill insulation will always be unsuitable and the construction needs to be treated as a solid wall and insulated either internally or externally.
05

01 Early cavity wall construction
A cavity or ‘hollow’ wall consists of two masonry leaves tied together but separated by a continuous airspace. The outer leaf acts as a ‘protective skin’ against the elements, principally driving rain. It works in conjunction with the inner leaf which serves as a dry construction to carry the interior finishes. The two leaves need to be tied together for structural stability and to help carry the loads imposed on them by upper floors and the roof.
The cavity serves to keep the two leaves apart, preventing damp from passing through from the outside to the inside of the wall. The cavity can therefore protect any woodwork or other decorative linings in contact with the inner leaf from damp and decay. It also allows for the evaporation of any condensation or rainwater which penetrates the outer leaf and ensures a more even temperature inside the building.
With early cavity construction the two leaves of walling were often tied together with bricks bonded into both leaves of the wall. These early cavity walls may not be easy to recognise by the brick bond alone as the ends of the brick ties cannot be easily distinguished from face-work. ‘Headers’ visible on the elevation may either be specials tying the two leaves together or ‘snapped headers’ put in to imitate solid construction. Measurement of the wall thickness together with a careful assessment of the construction needs to be carried out to ensure the wall has a continuous cavity.
EARLY CAVITY WALL WITH BRICKS USED TO BOND LEAVES
Snapped headers used to give appearance of solid wall
Special bonding brick used to bond two leaves
Internal plaster finish
Overall thickness will give a clueas to type of construction
POTENTIAL MOISTURE PATHAND THERMAL BRIDGE
01 This shows an early cavity of two brick leaves with a special bonding brick crossing the cavity. Often the bonding brick would be disguised on the face-work with a snapped header matching the rest of the facing brickwork. It is only therefore by looking at the overall depth of the wall that will give a clue as whether there is a cavity.
06
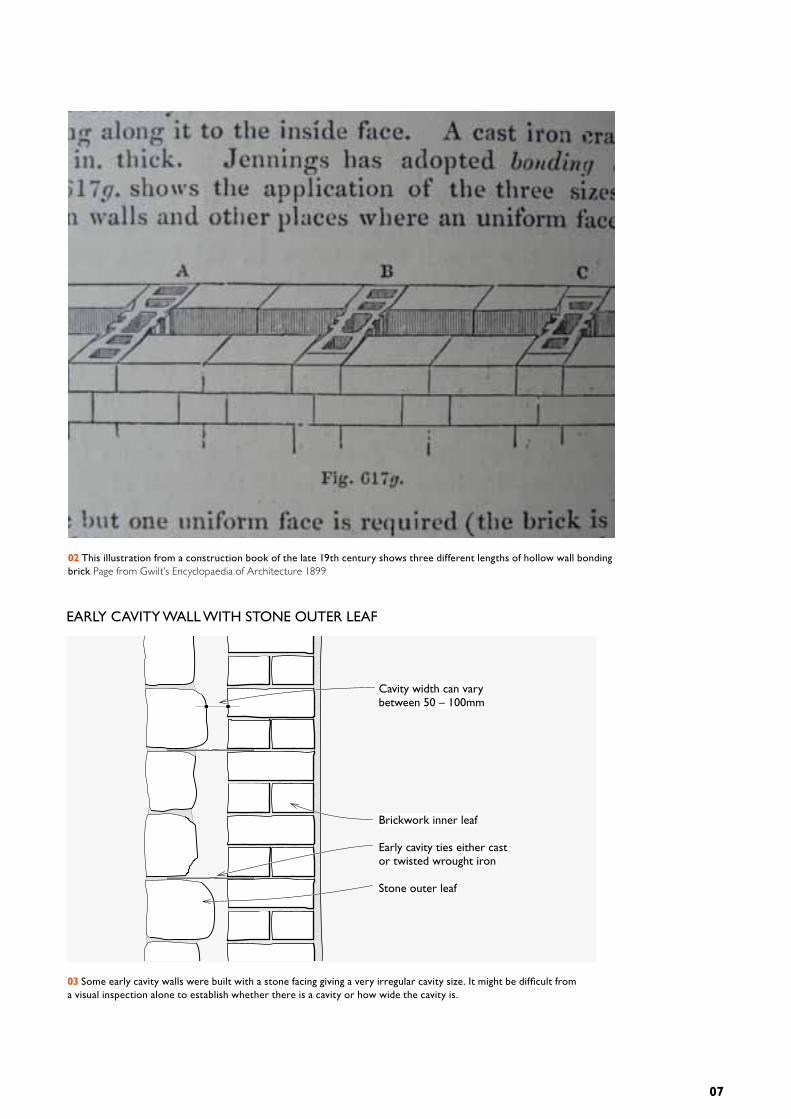
02 This illustration from a construction book of the late 19th century shows three different lengths of hollow wall bonding brick Page from Gwilt’s Encyclopaedia of Architecture 1899
EARLY CAVITY WALL WITH STONE OUTER LEAF
Brickwork inner leaf
Early cavity ties either cast or twisted wrought iron
Stone outer leaf
Cavity width can vary between 50 – 100mm
03 Some early cavity walls were built with a stone facing giving a very irregular cavity size. It might be difficult from a visual inspection alone to establish whether there is a cavity or how wide the cavity is.
07
Where bricks are used as ties the cavity cannot be continuous as the bricks create direct contact by bridging between the two leaves. Moisture is therefore able to transfer across the cavity and for this reason these walls are analogous to solid wall construction rather than modern cavity wall construction where metal or plastic ties are used to prevent capillary transfer of moisture across the cavity.
In certain areas early cavity walls can consist of a stone outer leaf and a cheaper brick inner leaf. In particularly exposed locations they are sometimes found with an outer brick skin erected to give extra protection to an earlier solid stone building.
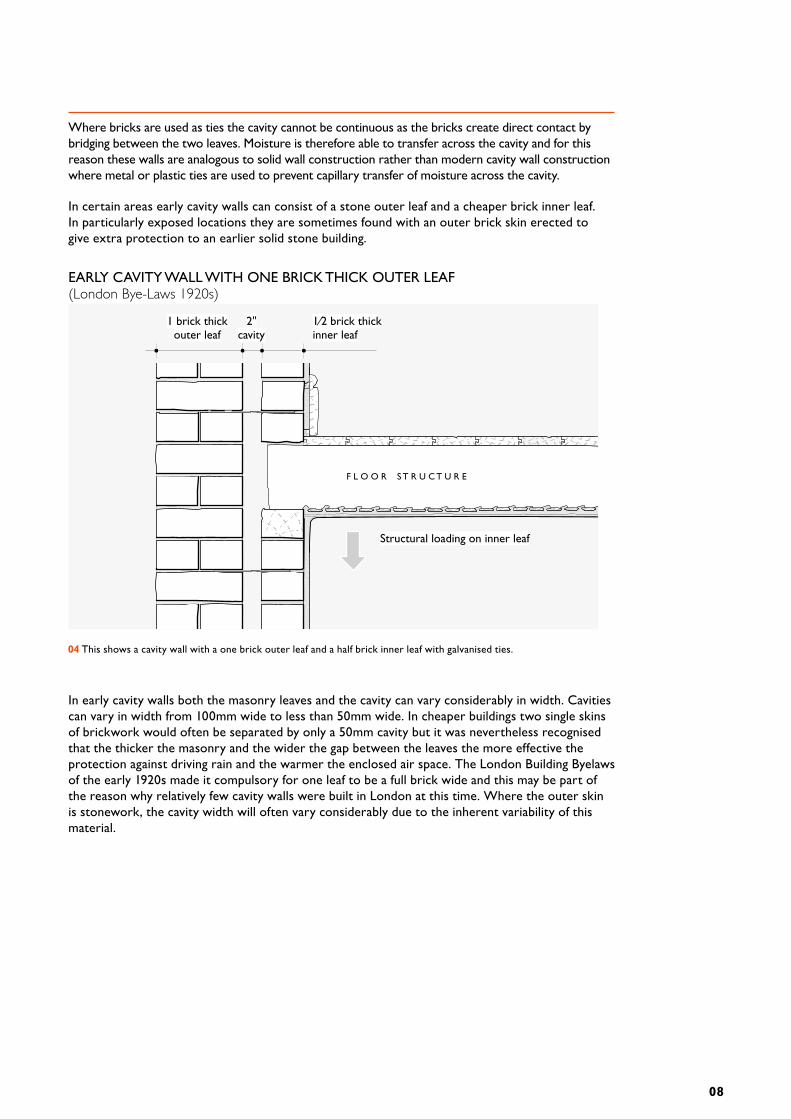
EARLY CAVITY WALL WITH ONE BRICK THICK OUTER LEAF(London Bye-Laws 1920s)
Structural loading on inner leaf
1 brick thickouter leaf
2"cavity
1⁄2 brick thick inner leaf
F L O O R S T R U C T U R E
04 This shows a cavity wall with a one brick outer leaf and a half brick inner leaf with galvanised ties.
08
In early cavity walls both the masonry leaves and the cavity can vary considerably in width. Cavities can vary in width from 100mm wide to less than 50mm wide. In cheaper buildings two single skins of brickwork would often be separated by only a 50mm cavity but it was nevertheless recognised that the thicker the masonry and the wider the gap between the leaves the more effective the protection against driving rain and the warmer the enclosed air space. The London Building Byelaws of the early 1920s made it compulsory for one leaf to be a full brick wide and this may be part of the reason why relatively few cavity walls were built in London at this time. Where the outer skin is stonework, the cavity width will often vary considerably due to the inherent variability of this material.

The structural loads from the upper floors and roof were usually carried on the inner leaf of the wall as this enabled structural timbers to be kept clear of the damp external leaf, but in partially masonry-bonded construction the load is much more likely to be shared between both leaves. In all cases it was necessary to ensure that the leaves continued to be well tied together to prevent differential movement, detachment of the outer skin and/or water penetration at openings.
The presence of rendered or plastered finishes is no guarantee of the absence of a cavity. The outer leaf of a cavity wall would in many cases still be rendered with a cement/lime or earth based render to give extra protection against driving rain and the internal finishes would also be plastered in just the same way as was usual with older solid walls.
As already noted the earliest cavity walls were tied together with through stones or brick headers placed at sufficient intervals to give the wall enough strength. These were quite rapidly superseded by patented brick, stone and metal ties which were concealed by the outer facing. These were all as impervious as practicable, and designed to throw water off thus preventing capillary or surface transmission to the inner leaf. Early metal ties were typically cast or wrought iron either untreated or dipped in tar and sand before being put in the wall. These were later replaced by galvanised mild steel ties. All these early metal ties are liable to corrosion if the right damp conditions persisted, particularly if the ties were embedded in an acidic mortar such as one containing ash.
Some of these walls will have been built with a damp proof course above ground level often with weep-holes to allow water that penetrated the outer skin to drain outwards. At openings in early walls either the timber window or door itself may be found closing but as techniques developed it became more usual for either the outer or inner leaf to be returned to close the cavity more effectively. Lintels for the inner and outer leaves would usually be separate, sometimes with a timber lintel to the inner leaf and a brick relieving arch to the outer. The inner leaf may contain numerous bonding timbers.
In the early days of cavity construction there was much debate about whether or not the cavity should be ventilated. However, by the end of the 19th century a prevailing consensus had developed that there should be a small amount of ventilation, similar to that provided under floors, but that the cavity should be closed effectively at openings and beneath the roof line. This provided a degree of air movement to help any moisture which did penetrate the cavity to evaporate away.
09
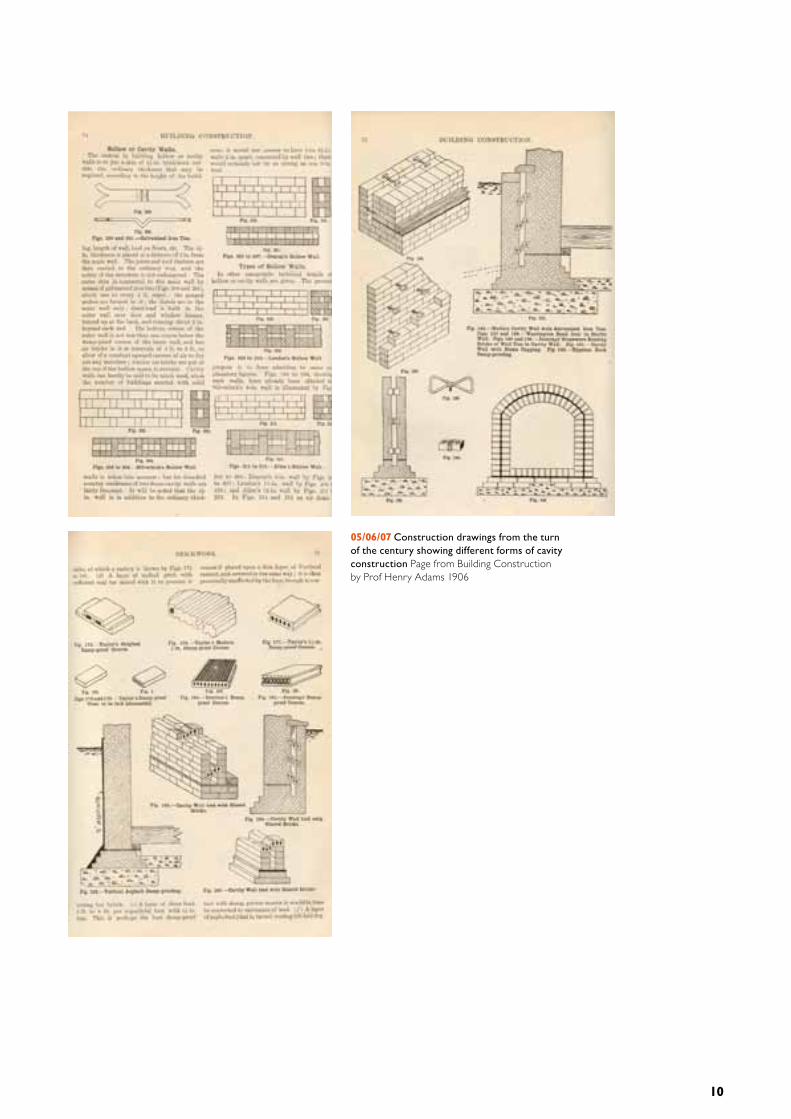
05/06/07 Construction drawings from the turn of the century showing different forms of cavity construction Page from Building Construction by Prof Henry Adams 1906
10
02 Insulating early cavity walls - issues to consider
Before adding insulation, the first step is to identify the materials and construction used for the wall. Many older buildings may have three or four different types of wall construction, reflecting their development over a long period.
The process of assessing the movement of heat, water and salts through early cavity walls is primarily based on theoretical calculations. However, accurate calculation data is not available for many traditional materials; and even where data is available it is usually based upon idealised, homogenous wall construction made of flawless materials, perfectly assembled and in as new condition. This very rarely represents the actual state of affairs in any old building. The variations that are typically found in actual historic buildings mean that the application in reality of such calculations must be carried out with significant margins for error. Because of this potential for inaccuracy it is important that whenever any theoretically modelled performance is used as a basis for the design of improvements, the actual building performance should be closely monitored after installation.
BREATHING PERFORMANCE
Early cavity walled buildings, particularly those built with softer, lime-based mortars and renders are ‘breathing’ structures in that they exchange moisture readily with the indoor and outdoor environment. Where insulation is introduced it is important for the durability and long-term performance of the building that this ‘breathability’ is taken into consideration.
Materials used in repair and maintenance must be selected with care. Modern impermeable materials – not just vapour control layers but cement renders, plasters and pointing and many modern paints will impair the breathable performance and will tend to trap moisture. Often this will increase problems of damp and associated decay.
In early cavity wall construction of permeable masonry water is firstly absorbed into the outer leaf and then freely evaporates out again when drier conditions prevail. It is only under severe and prolonged driving rain that water tends to saturate the wall to the extent that it runs down the inner face of the outer leaf.
THERMAL MASS
As many early cavity walled buildings have individual leaves which are thicker than those in a modern wall they have a significant thermal mass which helps to stabilise the internal environment.
Thermal mass in external walls can take up heat during the day from the interior and then re-release it at night, thus balancing out the need for artificial heating and reducing overall energy use. This effect will be significantly reduced by the addition of internal insulation, but can be greatly enhanced by external insulation.
In summer, strong sun can cause overheating and the thermal mass of the walls cools the interior by day and then gives off the heat during the night. This helps reduce solar overheating and therefore the need for mechanical cooling.
11
ENVIRONMENTAL INFLUENCES
Location, aspect, and the differing exposure of individual elevations to direct sunlight and wind driven rain have important influences on a building’s condition and performance. These must be taken into account when making alterations.
Different parts of a building are affected by very different micro-climates. For example, north facing elevations can be subject to prolonged damp, as they do not receive the benefit of a drying sun and are often also sheltered from drying winds. However, they receive little driving rain from the prevailing south-westerly winds, so conditions are more stable. This can mean that though consistently damp north-facing walls may deteriorate less than south and south-west facing walls which tend to suffer from accelerated rates of decay through the fluctuations in temperature and wetting and drying cycles.
Each building’s exposure to the elements is influenced by the proximity and position of surrounding buildings. It is also influenced by its own projections and extensions as well as the general exposure of the site. For example, a terrace of houses can exhibit widely varied levels of exposure and shelter.
DAMP
Problems with dampness in walls include:
• decay in timbers in contact with wet masonry
• deterioration of the external fabric of the wall due to freezing and thawing
• movement of salts
• movement of tars and other chemicals through the walls, causing staining at the surface
• growth of mould on the inside surfaces of walls
• corrosion of metallic compounds in contact with, or buried within, the wall
Before making any improvements, it is therefore important to understand how masonry buildings ‘manage’ the movement of water, in vapour and liquid form. This is not only complex in itself, but is also significantly affected by the presence of salts. Unfortunately many insulation systems are designed and developed solely to limit heat loss and to avoid interstitial condensation from water vapour generated internally. They simply do not take account of the extent to which they can affect the movement of water and salts already in an existing traditional wall. So they can easily:
• exacerbate existing problems
• create new problems, such as the displacement of damp and salts and the decay of timbers in contact with the walls
• create health risks for the occupants, e.g. from mould growth
• be themselves affected by the moisture, reducing their performance and sometimes failing entirely
Where walls have been damp for a long period of time it can sometime take years for them to dry out. The selection and design of insulation must therefore take account of the drying-out process (both before and after installation) and the presence of any residual damp and salts in the walls.
12

SALTS
Buildings without a damp-proof course can be prone to damp and salt contamination, particularly at low level, where ground salts are carried up into the wall in solution. Salts are also commonly found around fireplaces and chimney breasts where they originated as by-products of combustion. They can also originate from a previous use of a building, for example from animal excrement and storage of fertilisers in agricultural buildings. Salts may also have been present in the original building materials (stone transported by sea) or from the use of chemicals such as caustic soda to remove paint.
Many of these salts are hygroscopic and so exacerbate the problems of damp by attracting and holding moisture directly from the atmosphere. They may also re-crystallise with changing moisture levels, and the resulting expansion within the pores of permeable materials can gradually turn masonry into powder. The interfaces between existing walls and added layers of insulation are susceptible to cycles of evaporation, condensation and salt crystallisation. Since it is hidden from view, major deterioration can easily take place before anybody becomes aware that there is a problem.
08 Many salts are hygroscopic and so exacerbate the problems of damp by attracting and holding moisture © Tobit Curteis Associates
13
BATS AND WILDLIFE
Several species of bird and bat make their homes in cavity walls. For example the predominant summer and winter roosts of Serotine bats are in buildings with high gables and cavity walls. Natural England should be consulted before any works that might disturb nests or roosts of any protected species.

03 Adding insulation to an early cavity wall
There are three main ways to insulate an early cavity wall. In some situations it may be beneficial to use a combination of these methods.
• external insulation
• internal insulation
• insulation within the cavity
Regardless of the type and position of the insulation used, the wall should be in good repair and all defects (particularly those involving dampness) remedied prior to carrying out any form of insulating work.
Insulating walls in older buildings can be problematic. Insulation applied either externally or internally can detrimentally affect the building’s appearance and character. For listed buildings, any form of wall insulation is likely to require Listed Building Consent. External insulation will often require planning permission and require adjustments and adaptations to the building, for example to the eaves and verges of roofs, rainwater goods, and window and door reveals. This makes it more disruptive and less cost-effective than most other improvements.
Wall insulation will also alter the performance of traditional buildings, and can exacerbate existing moisture-related problems or create new ones. Any application of insulation requires caution particularly where walls may be damp. Modern methods of protection including vapour barriers and materials that are highly resistant to the passage of water vapour are not normally appropriate for older buildings as they will tend to trap moisture and significantly increase the risk of decay to the fabric.
EXTERNAL INSULATION
Most external insulation systems comprise an insulation layer fixed to the existing wall covered by a protective render or cladding.
Fixing external insulation will add more thermal mass to the structure as well as contributing to the weather protection capability of the walling. This can help to increase the building’s weather resistance and the effect of the thermal mass on the inside.
For further details on solid wall insulation see Insulating solid walls in this series.
14

INTERNAL INSULATION
A simple way of insulating flat, even walls internally is to fix insulating boards directly to the internal wall and then apply a finishing skim coat of plaster on the surface if required.
For less even walls an alternative approach is to fix timber battens to the wall and pack the space between the battens tightly with insulation. The inner face can then be finished with plasterboard or more traditional alternatives, such as lath and plaster. Sometimes a ventilated cavity is provided between the insulation and the wall.
The addition of internal insulation can present significant technical risks. The resulting reduction in external wall temperature can cause increased dampness, mould and frost damage.
For further details on solid wall insulation see Insulating solid walls in this series.
INSULATING THE CAVITY
As the insulation of the cavity can enhance the thermal performance of a wall without detrimentally affecting its appearance or character this is the preferred alternative wherever the technical risks can be adequately overcome.
The available techniques for insulating existing cavity walls generally involve injecting or blowing an insulating material into the cavity. This works by entrapping and combining with the air in the cavity. There are three generic types of cavity wall insulation that can be injected or blown into the cavity:
• mineral wool
• beads or granules
• foamed insulation
EARLY CAVITY WALL WITH INSULATION
If cavity width is less than 50mm, there is a danger moisture will bridge the cavity when full-fill insulation is added
Three generic types of insulants:– Mineral wool– hollow beads or granules– foamed insulation
CHECK EXPOSURE OF WALL
BEFORE DECIDING WHICH
TYPE OF FILL MATERIAL
09 Before deciding to fill an early cavity, check the cavity size and establish whether there is any material within the cavity itself. The type of insulation material used to fill the cavity will be partly determined by the exposure of the wall.
15

There are no natural or recyclable materials available currently which are suitable for use as cavity fill insulation. The products that are available for cavity insulation are not in themselves very high performance insulators, particularly if the cavity is narrow. For this reason it is not normally cost effective to install insulation in cavities of less than 50mm width. In addition with such narrow cavities there is an increased danger of the insulation itself allowing water to cross the cavity to the inner-leaf.
However, cavity wall insulation in suitable situations can be a highly cost effective measure although there are certain technical risks in using this method to insulate an early cavity wall. The suitability depends mainly on the local exposure to driving rain and the condition of the existing construction. As many early cavity walls were built in areas with severe exposure to driving rain this makes many of them particularly susceptible to damp bridging the cavity through the insulation even at widths greater than 50mm. Urea formaldehyde foam should only be used in areas of moderate exposure unless the wall is protected by some form of rain-screen cladding such as slate hanging.
The condition of the existing wall is critical as the addition of insulation to a wall in poor condition not only exacerbates the situation but may well hamper later repairs.
Any cracking to the wall needs investigation. If the cracks are due to wall tie corrosion it must be remedied first as cavity insulation will only make the situation worse. Cavity walls with widespread spalling to the face-work should not be filled. All mortar joints should be full and the pointing in good repair. Where bricks or stones have been used for tying between the leaves or there is debris or mortar blocking the cavity these may well cause sufficiently serious local problems to make cavity fill unwise.
Cavity wall insulation must always be carried out by a certified installer who is required to carry out a thorough survey of the cavity with a boroscope (in accordance with BS8208) prior to the work being carried out. The purpose of this survey is to check the cavity meets the stringent requirements of the standard. There are a wide range of potential problems which can make pre-1930s houses unsuitable for insulation and which such inspection will be likely to identify. Problems can occur, for example, when the cavity is not closed off at the head and the insulation material connects into the loft space.
Filling the cavity with insulation introduces the risk that moisture will be able to find its way across to the inside leaf, whatever the insulation material used. There is also the possibility that the installation will be less than perfect, leaving unfilled air pockets creating cold bridging to the inside walls which may attract condensation.
Although the least visually intrusive of the three methods, retrofitting cavity insulation still necessitates drilling a considerable number of reasonably large holes in the brick or stone façade. These can require some skill to make good to a sufficient standard which the cavity wall installers may not have. It may be preferable to take out bricks or stones and then replace on completion.
16
PHYSICAL ADAPTATION OF THE BUILDINGCavity insulation will mean that services, ventilation ducts and flues need to be sleeved where they pass through walls. Insulation must be very carefully isolated from hot flues, particularly if it is not completely incombustible. Any electrical wiring within the cavity needs to be relocated to prevent overheating. Polystyrene insulation can also cause significant damage to the cable sheathing with which it comes into contact.
INCREASED DAMPNESS DUE TO IMPERVIOUS MATERIALSThe influence of added insulation on the movement of moisture in buildings with early cavity walls is complicated and not always fully understood. There may as a result be unforeseen risks, particularly where incompatible materials and systems are used. Practical experience of the repair and conservation of historic buildings shows that the introduction of materials and systems that are not compatible with the traditional ‘breathing’ performance can exacerbate existing problems and/or create new ones. Examples include vapour barriers, cement-based renders, and insulation which cannot easily absorb and release moisture.
The only materials suitable for use within a cavity wall are modern impervious materials which will not in themselves transmit moisture across a cavity via capillary attraction. The intention is that any moisture should make its way through the material and drain out of the bottom of the cavity. However, foams can crack under shrinkage stresses giving pathways for moisture transfer. Mineral fibre can hold moisture against vulnerable elements such as built in timber lintels. If the cavity is bridged in any way either with mortar rubble or through stones, filling it will also encourage the passage of damp from the outer to inner leaf.
THERMAL BRIDGESA large number of thermal bridges may already exist in an early cavity wall construction particularly when the leaves are tied together with bricks or ceramic ties. Cavities closed by masonry at wall heads and around windows and doors will also provide a path where heat can be easily conducted across the cavity. The addition of insulation can exacerbate the resulting problems and increase the danger of localised condensation on the inside of the inner leaf. It is not always easy to distinguish this condensation from rainwater bridging the cavity and it is possible that both effects can combine.
Well-intentioned improvements can easily lead to the introduction of new risks; either because of poor detailing at the design stage or inadequate care during installation. Very minor errors can lead to serious problems such as vapour control layers with small perforations which can lead to severe local problems of dampness, particularly in kitchens and bathrooms where large amounts of water vapour are produced.
17
04 Effects of insulation on dampness in cavity walls
EXTERNAL INSULATION
Insulation applied to the external face can provide increased protection against driving rain and thus reduce the exposure of the wall to a source of damp. However, external insulation will also protect the wall from drying by solar heat and wind and so could impair the evaporation of moisture from the walls. The walls can thus become even damper, especially where they are in contact with ground moisture.
In a cavity wall where no cavity fill has been inserted and the two leaves thus remain separate this risk would only affect the outer leaf. Evaporation would still be taking place into the cavity but this would be warmer and so the risk to the inner leaf would be lessened.
Adding external insulation would also reduce the risk of wall tie corrosion from the continuous wetting of the ties.
INTERNAL INSULATION
For most of the year, internal temperatures will be higher than external temperatures, so internal insulation will reduce the amount of heat passing into the walls.
The cavity temperature can drop considerably and research has indicated that such cavities particularly on north facing walls can be permanently damp. This can increase the risk of wall tie corrosion, frost damage and mould.
CAVITY INSULATION
There are reasonable concerns that adding insulation to a cavity can reduce the temperature of the outer leaf to the point where the exposure of the masonry to freeze-thaw cycles becomes significant. This will accelerate damage to bricks, stones and mortar, particularly where soft masonry walls have been re-pointed using inappropriately hard mortars. It is very difficult to accurately calculate the likelihood that this may happen.
MONITORING CAVITY WALL INSULATION
In any building where the existing fabric is of significance the installation of insulation should be carefully monitored afterwards as little is known about long-term performance. Routine maintenance will be important to prevent the walls being subjected to excessive damp, for example from defective roof coverings, rainwater gutters and down-pipes and any build up of external ground levels.
The covering of walls with insulation, either externally or internally, can also conceal maintenance problems which would be easily and cheaply resolved if spotted at an early stage.
18

05 Cavity wall insulation and the Building Regulations
The Approved Document that accompanies Part L of the Building Regulations for existing dwellings, ADL1B (2010), calls for the insulation of existing walls to be improved when a building undergoes a change of use or when the wall concerned is being renovated. Renovation, which could include re-plastering, re-rendering, is sufficient to trigger a requirement for the entire wall to be upgraded.
Target U-values for cavity walls are 0.55 W/m²K when cavity wall insulation can be added and 0.30 W/m²K when it cannot. Either of these levels will be difficult to achieve in older buildings.
Cavity walls are not expected to meet these targets if it is not economically or technically feasible to do so. The test of economic feasibility is a payback period of fifteen years or less – this will rarely be achievable in traditional buildings where insulation will have to be carefully detailed and will have widespread knock-on effects.
The test of technical feasibility is not given. It will not be technically feasible to insulate a wall if the only insulation methods available are likely to damage the wall by increasing dampness or exacerbating salt migration, or if the insulation is likely to fail because of its incompatibility with the substrate.
When a change of use is taking place, walls do not have to be upgraded if their U-value is already below 0.70 W/m²K, though this is unlikely in traditional buildings.
EXEMPTIONS / SPECIAL CONSIDERATION
EXEMPTION FOR HISTORIC BUILDINGS
The energy efficiency requirements of the Building Regulations do not apply to:
• buildings which are listed
• in a conservation area
• scheduled monuments
where compliance would unacceptably alter their character or appearance and without conditions to:
• buildings which are used primarily or solely as places of worship.
It is important to remember that changes which unacceptably altered the character or appearance of a listed building may not in any case be granted Listed Building Consent.
19
SPECIAL CONSIDERATION The Approved Document also allows for several lesser categories of historic buildings to be accorded ‘special considerations’. These ‘considerations’ however are not fully defined although it is noted that the Conservation Officer’s advice should be taken into account.
APPROPRIATE MEASURES IN OTHER TRADITIONAL BUILDINGS
The Approved Document also notes that ‘special considerations’ are to be taken into account for buildings constructed with permeable fabric. This operates as a requirement that the particular technical behaviour of permeable (also known as ‘breathable’) fabric in traditional buildings needs to be recognised.
The Building Regulations are clear that work to meet the regulations must be carried out with adequate and proper materials which are appropriate for the circumstances in which they are used. It is clearly not appropriate to use materials in traditional buildings that are incompatible with their performance.
06 Summary
There are instances where early cavity walls can be insulated. However, such work should only be carried out by a certified installer and after a thoroughly detailed assessment has been made of the particular building and its performance characteristics. Any solutions may need to be varied to take account of the location, orientation, exposure, construction and condition of an individual section of wall.
The aesthetic, practical and technical impacts of insulating an early cavity wall externally or internally are comparable with those of insulating a solid wall. Where the tie between the two leaves of a cavity wall is of a porous material, cavity insulation is not usually a suitable option although it could be used in conjunction with external wall insulation and further weather protection to increase the thermal insulation value of a wall.
Monitoring should be undertaken before, during and after any such insulation to ensure that the work is not only done on an informed basis but that lessons can be learned from any successes and failures. This will enable future practice to be made more robust and effective.
20
07 Further information
Brunskill, R.W & Clifton-Taylor, A: 1977, English Brickwork, Hyperion
Hollis, M; 2005 Surveying Buildings (Fifth Edition); RICS Books; Coventry
Inbuilt Ltd + Davis Langdon 2010; Study on hard to fill cavity walls in domestic dwellings in Great Britain, DECC ref CESA EE0211
Lynch, G, 1994; Brickwork History, Technology and Practice Volume 2; Donhead, London
Melville, I.A & Gordon I.A; 1997, The Repair and Maintenance of Houses (Second Edition); Estates Gazette, London
British Standards Institution, 1985 Guide to assessment of suitability of external wall cavity walls for filling with thermal insulants – existing traditional cavity construction (BS 8208-1) British Standards Institution
21

English Heritage Local Offices
NORTH EASTEnglish Heritage Bessie Surtees House 41 - 44 Sandhill Newcastle upon Tyne NE1 3JF Tel: 0191 269 1200 E-mail: [email protected]
NORTH WESTEnglish Heritage 3rd floor Canada House 3 Chepstow Street Manchester M1 5FW Tel: 0161 242 1400 E-mail: [email protected]
YORKSHIRE AND THE HUMBEREnglish Heritage 37 Tanner Row York YO1 6WP Tel: 01904 601901 E-mail: [email protected]
WEST MIDLANDSEnglish Heritage The Axis 10 Holliday Street Birmingham B1 1TG Tel: 0121 625 6820 E-mail: [email protected]
EAST MIDLANDSEnglish Heritage 44 Derngate Northampton NN1 1UH Tel: 01604 735400 E-mail: [email protected]
EAST OF ENGLANDEnglish Heritage Brooklands 24 Brooklands Avenue Cambridge CB2 8BU Tel: 01223 582700 E-mail: [email protected]
LONDONEnglish Heritage 1 Waterhouse Square 138 - 142 Holborn London EC1N 2ST Tel: 020 7973 3000 E-mail: [email protected]
SOUTH WESTEnglish Heritage 29 Queen Square Bristol BS1 4ND Tel: 0117 975 0700 E-mail: [email protected]
SOUTH EASTEnglish Heritage Eastgate Court 195-205 High Street Guildford GU1 3EH Tel: 01483 252000 E-mail: [email protected]
CONSERVATION DEPARTMENTEnglish Heritage The Engine House Fire Fly Avenue Swindon SN2 2EH Tel: 01793 414963 E-mail: [email protected]
22

English Heritage is the Government’s statutory adviser on the historic environment. English Heritage provides expert advice to the Government about all matters relating to the historic environment and its conservation.
The Conservation Department promotes standards, provides specialist technical services and strategic leadership on all aspects of the repair, maintenance and management of the historic environment and its landscape.
This guidance has been prepared on behalf of English Heritage by Oxley Conservation under the direction of Phil Ogley and has been edited by David Pickles, Ian Brocklebank and Chris Wood
Illustrations by Simon Revill
First published by English Heritage, September 2010.
This edition published March 2012
Product code: 51678
www.english-heritage.org.uk
If you would like this document in a different format, please contact our Customer Services Department:
Telephone: 0870 333 1181 Fax: 01793 414926 Textphone: 01793 414878
E-mail: [email protected]
23