Embed Size (px)
Citation preview

Digital and Analog Versions
Owner’s Manual Revision D
ACU Firmware v1.13
RCU Firmware v1.13
XMOS Firmware v1.13

2
1 WelcomeWelcome and thanks for purchasing the Grace Design m905 reference monitor controller. We build all of our products to be completely reliable and straightforward to use, so you can concentrate on doing great work. While you will find the m905 is fairly straightforward to use, it is a very powerful unit and a great deal of user configuration is possible, so we recommend that you spend some time reading this manual to help avoid any common user difficulties.
In the event that you do encounter any technical difficulties with this or any of our products, feel free to call us at 303-823-8100. Our office hours are 9:00 to 5:00, Monday through Friday, MST, or you may e-mail any technical questions to: [email protected]. Also, please check out our website for complete product information, owner’s manuals and technical documents http://www.gracedesign.com
Grace Design has been building audiophile quality products for the recording industry for over 20 years. The technology in the m905 is the result of extensive research, listening, testing and careful refinement. Your m905 represents a combination of absolutely pristine audio performance, robust mechanical construction and complete reliability. We sincerely hope it helps you achieve a new level of excellence in your work!
Contents
1 WELCOME 22 IMPORTANT SAFETY INFORMATION 33 SAFETY MARKING SYMBOLS 34 SERVICE INFORMATION 35 M905 FEATURES 4
m905 Audio Control Unit Rear Panel 5
Audio Control Unit Front Panel 6
Remote Control Unit (RCU) 6
m905 Graphical User Interface 7
7 UNPACKING AND INSTALLING 8Your m905 Box Will Contain 8
Open and Inspect the Box 8
Register Your Unit 8
8 CONNECTING THE M905 8Power Connections 8
Power-Up Sequence 8
System Connections 9
9 NORMAL OPERATION MODE 11Input Selection 11
Volume Control, Preset & Headphone Mute 11
Speaker Output Selection 12
Monitoring Option Controls 12
Display 14
Save / Recall of User Configuration 15
Optional IR (infrared) Remote Control Operation 15
Analog Only Option 17
10 SETUP MODE 17Entering and Exiting Setup Mode 17
Input Setup 18
Speaker Setup 20
Dim Setup 21
SUB / DAC / METER setup 21
CUE Output Setup 22
Headphone Setup 23
Talkback Setup 24
Mute / (solo) 24
11 GENERAL SETUP 25Display Setup 25
IR (infrared) Remote Setup 25
DIGI LOOP Setup 26
Digital Input Setup 26
System Setup 27
SPL Meter Setup 27
12 ABOUT CROSS-FEED 2813 COMMUNICATION ERROR HANDLING 2914 COMPUTER AUDIO SETUP 29
Asynchronous USB Audio 29
USB Up Channel Setup 30
Computer Audio Requirements 31
Using the m905 for DAW playback 32
15 UPDATING FIRMWARE 32Updating RCU Firmware 33
Updating ACU Firmware 34
Updating XMOS Firmware 35
16 SPECIFICATIONS 3717 BLOCK DIAGRAM 3918 PCB JUMPER LOCATIONS 4019 WIRING DIAGRAMS 4120 CLEANING AND MAINTENANCE 4221 WARRANTY INFORMATION 4222 MANUAL REVISIONS 43
3
2 Important Safety Information• Indoor use only
• Ordinary Protection: This equipment should not be exposed to dripping or splashing
• Avoid placing objects filled with liquids, such as vases or glasses, on this equipment
• Class I Equipment (grounded type)
• Electrical rating: 100-240V~ 50-60Hz 60W
• Mains supply voltage fluctuations are not to exceed ±10% of the nominal supply voltage
• Pollution Degree 2
• Installation (Overvoltage) Category II for transient overvoltages
• Maximum Relative Humidity: <80%
• Operation temperature range: 10 °C to 40 °C
• Storage and transportation temperature range –40 °C to 70 °C
• Maximum altitude: 3000m (9843 ft)
• Equipment suitable for continuous operation
• Weight: ACU 7.8lbs, RCU 2.2lbs
3 Safety Marking SymbolsCAUTION: READ ACCOMPANYING DOCUMENTS - This symbol, located on the equipment and in this manual, refers to important instructions. Read this manual thoroughly before operating this equipment.
WARNING: ELECTRICAL SHOCK HAZARD - This symbol, located on the equipment and in this manual, indicates the potential for electrical shock hazard.
4 Service InformationThe Grace Design m905 contains no user serviceable components. Contact Grace Design for repair and upgrade information. In the event that your Grace Design m905 needs to be returned to the factory, contact us for a return authorization number.

4
5 m905 features• Analog inputs - unbalanced, balanced (2nd pair balanced available on m905 Analog) , CUE, talkback mic
• Digital inputs - 2x AES3, 1 S/PDIF, 1 TOSLINK, ADAT (selectable in 4 pairs, or 2 pairs in S/MUX), USB, AES3 Dual Wire mode. AES and S/PDIF connectors support DSD64 or DSD128 via DoP Version 1.1
• Audio circuitry designed for completely transparent and musical playback performance
• Asynchronous Class 2 USB playback supports up to 24bit /196kHz and DSD64 or DSD128 via DoP Version 1.1, configured for two channels down from computer and 10 channels up to computer
• Mastering quality DAC circuitry with configurable de-emphasis filtering
• s-lock dual-stage Phase Lock Loop for ultra low jitter clock regeneration
• Hybrid RCU with hardware switches, large level encoder and graphical LCD
• LCD display shows input, level, output, SPL and DAC status plus a full calibration menu
• RCU includes built in microphone for talkback and onboard SPL meter
• SPL meter features include level, peak, fast and slow modes, A & C weighting
• Precision .5 dB step level control for speakers and headphones, volume displayed in absolute or custom reference level
• Reference headphone amplifier circuitry, with outputs on both the RCU and ACU
• Dedicated mono, dim, mute and sub mute switches
• Mono mode can be set to L+R summed, L only in both channels, or R only in both channels
• L solo, R solo, L-R and sub solo modes are available
• 3 available stereo speaker outputs, with two assignable mono sub outputs (or single stereo sub output)
• Multi-mode SUB/ DAC/ METER out
• Optional IR (infrared) remote control via Grace Design Remote, Apple Remote or iOS and Andriod with the Logitech Harmony Hub Remote
• SUB out mode for stereo or multiple mono subwoofer outputs
• DAC out mode for a fixed DAC output fed by the selected digital input
• METER out mode fed by selected input signal (digital or analog), configurable with a fixed level or to fol-
low the monitor level
• Detachable RCU tilt base
• Five year transferrable warranty

5
� M905 AUDIO CONTROL UNIT REAR PANEL
24
REMOTE TALKBACK SWITCH CUE INSPEAKER 1 BALANCED IN
L R
TALKBACK MIC IN
S/PDIF AES3 AES 2AES 1 S/PDIF TOSLINK
UNBAL IN
WORDCLOCK
UPGRADE
ADAT USB 2
SPEAKER 2 SPEAKER 3
1M
75
TALKBACK OUTSUB/
DAC OUT CUE OUTL R
L R
DIGITAL IN DIGITAL OUT
RoHSCOMPLIANT
Pb
100-240 VAC / 50-60Hz 60 Watts Max
OUT
IN
L R L R L R L R
L
R
GRACE DESIGN LYONS, CO USA
1 2 3 4 5 6 7 8 9 10 11
20 21 23
12
16 17 18 19
13
14 15 22
BALANCED IN 2L R
REMOTE TALKBACK SWITCH CUE INSPEAKER 1 BALANCED IN
L R
TALKBACK MIC INUNBAL INUPGRADE SPEAKER 2 SPEAKER 3
TALKBACK OUTSUB/
DAC OUT CUE OUTL R
L R
RoHSCOMPLIANT
Pb
100-240 VAC / 50-60Hz 60 Watts Max
L R L R L R L R
L
R
GRACE DESIGN LYONS, CO USA
1 AC mains input universal 100-240 VAC, 50-60Hz, 60 Watts max. This connects m905 (with the supplied AC power) cable to AC power source.
2 Word Clock termination switch used to properly ter-minate a connection from an external clock reference source to the m905 Word Clock input.
3 Word Clock input for incoming word clock signals from a master clock or other equipment passing a master clock signal.
4 Word Clock output for sending or passing word clock signals from the m905 to other equipment.
5 Two AES3 input XLR connectors used to receive stereo AES3, Dual Wire AES3, and DSD64 or DSD128 via DoP V1.1
6 */PDIF INPUT RCA jack input accepts a S/PDIF format digital stereo signal or DSD64 or DSD128 via DoP V1.1
7 TOSLINK INPUT Optical connector accepts a TOSLINK format digital stereo signal.
8 ADAT INPUT LIGHTPIPE™ connector provides a 2 chan-nel input selectable in 4 pairs (or 2 pair S/MUX) of an ADAT format digital source.
9 USB Class 2 interface provides an asynchronous mode computer interface PCM up to 24bit/196kHz and DSD64 and DSD128 via DoP V1.1. Configured for two channels down from computer and 10 channels up to computer.
10 Digital out provides a buffered digital loop-through of a selected source via AES or S/PDIF.
11 Multi-mode SUB / DAC / Meter output can be used as either a subwoofer output (mono or stereo), a fixed level DAC output, or a dedicated meter output. Con-figurable in the setup menu.
12 Cue out stereo output includes sum of the CUE input signal with talkback mic signal.
13 Talkback output mono output of talkback microphone signal.
14 USB upgrade port for future ACU firmware revisions.15 DB15 Remote connector connects the m905 ACU and
RCU with supplied 15 pin serial remote cable16 Talkback switch input, momentary or latching opera-
tion, configured in the setup menu.Speaker 1 output stereo balanced
17 Speaker 1 output stereo balanced18 Speaker 2 output stereo balanced19 Speaker 3 output stereo balanced 20 Cue input for studio headphone mixes, sums with
talkback mic signal for CUE output.21 Analog Balanced Input via XLR connectors.22 Analog Unbalanced input via RCA connectors.23 External Talkback mic input, for any type of external
microphone, 7-70dB gain, 48V configurable in the setup menu.
24 m905 Analog Rear panel - digital inputs are not avail-able - a second set of balanced Analog inputs via XLR is installed.

6
� AUDIO CONTROL UNIT FRONT PANEL
REFERENCE MONITOR CONTROLLER
GRACE DESIGN USA
1 2
1 HEADPHONE OUTPUT standard TRS 1/4” jack for head-phones. Wired in parallel with the jack on the RCU. Connection to headphones should be made using standard ¼” TRS stereo connectors.
2 AC mains power standby switch Illuminates green when m905 system is powered on. ALL SYSTEMS GO!
� REMOTE CONTROL UNIT (RCU)
TALKBACK
VOLUMEpush for phones
SPEAKER 1
MUTE SETUP
MON > CUESPEAKER 2
SPEAKER 3
MONOx-feed
SUB MUTEsolo
DIMspl clear
sub solo
L - R
1 2 3 4 5
6 7 8 9
10 11 12 16
17
13 14 15
18
19 20 21 Note: for all the dual function buttons on the RCU, the primary push release function illuminates solid, and the push and hold function flashes.
1 Graphical user interface (GUI) This color LCD displays all operating parameters and setup menus.
2 Analog input unbalanced selects input source con-nected to the unbalanced RCA analog input.
3 Analog input balanced selects input source connected to the balanced XLR analog input.
4 CUE input selects input source connected to the bal-anced XLR CUE input.
5 TOSLINK input selects input source connected to the
TOSLINK optical input.6 ADAT / AES DW INPUT When ADAT mode is active se-
lects ADAT format digital stereo signal. Once selected, pushing the switch toggles through available input pairs. When AES Dual Wire mode is active, AES DW selects the Dual Wire source connected to the AES1 and AES2 inputs.
7 S/PDIF selects input source connected to the S/PDIF RCA style connector

7
8 AES selects the last used AES source. Once selected, pushing the switch toggles between AES1 and AES2.
9 USB selects computer input source connected to the USB connector.
10 Speakers 1, 2, 3 illuminated switches select any one pair of the three available speaker outputs.
11 Mute / solo switch mutes the speakers or press and hold to toggle solo channel.
12 Dim / x-feed reduces the monitoring level by a prescribed amount. Press and hold to toggle on / off cross-feed in headphones.
13 Sub-mute / sub-solo button mutes the subwoofer. Press and hold solos the subwoofer.
14 MONO sums to mono (L+R) the current signal being monitored. Press and hold subtracts the right channel from the left channel (L-R).
15 SETUP enters the setup menu.
16 MON>CUE routes currently selected monitor source to the CUE output. Press and hold to clear SPL peak level.
17 Volume adjusts speaker and headphone levels. Push to toggle between either level. On speaker, press and hold recalls volume preset. On headphones if level is 0.0, push and hold recalls headphone preset. If head-phones are on, press and hold toggles headphone mute.
18 Talkback activates the talkback microphone, either built in or external.
19 DB15 serial connector connects RCU to ACU with sup-plied 15 pin serial cable.
20 1/4” TRS headphone jack wired in parallel to head-phone jack on frontpanel of ACU. Note: this output is not connected on standard m905 Analog units unless RCU cable upgrade is purchased
21 USB upgrade port for future RCU firmware revisions.
� m905 GRAPHICAL USER INTERFACE
1
2
3
4
5
1 6
6
1 Input buttons - these 2 rows at the top and the bottom of the screen represent the available system inputs. Each button directly corresponds to its particular input select switch and its corresponding input source. Custom labeling is available via the setup menu. Active input button is a friendly shade of blue.
2 Main speaker level and speaker set - this area shows the current speaker set selected and the current monitoring level in 0.5dB steps. When the standard level display mode is active (configured in SETUP) the range is 0-100. When reference level display mode is configured the display range is user defined. See Speaker SETUP for more information. Level numbers highlight green when selected and are adjustable via the volume encoder.
3 SPL meter - this area shows the current SPL level, me-tering mode, and peak level. Setup menu allows user to select between A and C weighting, fast and slow mode. Resetting peak level is done by pushing and holding the ‘MON>CUE’ hardware switch.
4 Headphone level and x-feed status - this area shows the current headphone monitoring level (0-100dB in
.5dB steps) and cross feed status (push and hold ‘DIM’ hardware switch to activate / deactivate crosssfeed). Level numbers highlight green when selected and are adjustable via the volume encoder.
5 DAC clock status - this area displays the main clock-ing functions and status of the m905’s DAC. Top row displays the selected digital input source, S/MUX (if enabled) and de-emphasis (if enabled). Second row displays the DAC’s operating sampling rate and s-Lock status if active. Third row displays the selected clocksource and selected clocksource lock status. Fourth row displays the bitstream status: pro/cons (for TOSLINK, S/PDIF AND AES), S/MUX (for ADAT) and de-emphasis (for TOSLINK, S/PDIF AND AES).
6 m905 Analog screen showing digital inputs are not available. Available analog inputs are automatically shifted the the bottom row.

8
7 Unpacking and Installing � YOUR m905 BOX WILL CONTAIN
• The Audio Control Unit (ACU)
• The Remote Control Unit (RCU)
• The RCU tilt base and accompanying hardware, premounted to the RCU
• 25’ serial cable to connect the RCU and ACU
• m905 Analog comes with an ethernet cable and 2 serial adapter jacks . For RCU headphone operation a RCU cable ugrade is required. This is available from youe dealer or from the Grace Design factory)
• 6’ AC power cable which connects to the ACU’s universal power supply
• A bag with rubber feet and rack screws
• The owner’s manual and warranty registration
� OPEN AND INSPECT THE BOX
Please take care when removing the m905 from its OEM packaging. Our packaging is designed with ‘Korrvu©’ suspension inserts, which provide the best protection from the dubious underworld of freight handling – so save your packaging material. Inner boxes will contain all the items listed above. If you think you are missing anything, give your dealer or us a call and we’ll get you taken care of right away.
� REGISTER YOUR UNIT
Also, we strongly urge you to fill out your warranty registration card. We provide a 5 year transferable warranty on all of our products, but without your registration it’s hard for us to help you if and when help becomes necessary. So please take a few minutes to complete and send in the enclosed card, or simply fill out the warranty registration form on our website. We always keep your information private. Thank you!
8 Connecting the m905Okay, let’s get started in making the necessary connections to get your m905 up and running. First thing to do is mount the m905 in a rack. If you’re not rack mounting the unit, you should attach the supplied rubber feet on each corner of the bottom cover so you won’t scratch it or the surface you place it on. If you are installing the ACU in a rack, use the supplied rack screws and nylon washers which prevent the rack ears from getting marred. The ACU will not run terribly hot, so it can be mounted with other gear directly above or below. However, you should avoid mounting equipment that can radiate noise near the m905 (ie power amp, power conditioners, etc).
� POWER CONNECTIONS
The m905 ACU has a built-in universal power supply which accepts line voltages of 100 to 240VAC. We include power cable specified for the country where it was ordered, so it should be supplied correctly. If not, please contact your dealer or distributor for help. For safety, it is recommended that the AC power cable be connected to a grounded outlet.
� POWER-UP SEQUENCE

9
Before powering up your m905, make sure your monitor speakers or power amps connected to your monitors are turned OFF. Once the m905 and the rest of your audio system are powered up, turn on the power to your speakers. When powering down, we recommend that you first power off your speaker system and then power down the m905.
� SYSTEM CONNECTIONS
The m905 input, output and interface connections are detailed here. Pinout diagrams for various con-nectors are located in the cable and connector wiring diagrams (page 41) section of this manual. If you have an m905 Analog system, all digital inputs, digital loop thru outputs and wordclock will be unavail-able.
UNBALANCED ANALOG INPUT - This stereo input is for interfacing with consumer level (-10dBv) unbalanced analog sources. Connections are made using standard RCA cables.
BALANCED ANALOG INPUT - The balanced stereo analog input is via female XLR. Connections are made us-ing standard balanced XLR cables, wired to the pin 1 shield, pin 2 positive, pin 3 negative.
CUE ANALOG INPUT - The balanced stereo analog CUE input is via female XLR. Connections are made using standard balanced XLR cables, wired pin 1 shield, pin 2 positive, pin 3 negative.
TALKBACK MIC INPUT- A standard microphone input which can be used with dynamic or condenser mi-crophones. Phantom power (+48V) is available (see Setup Mode). Wired pin 1 shield, pin 2 positive, pin 3 negative.
AES3 DIGITAL INPUTS 1 & 2 - Two stereo AES3 inputs are provided via female XLR connectors. Each of these conforms to the AES3 standard. In AES Dual Wire mode, the AES1 input is used for the left channel and the AES2 input is used for the right channel. Note that AES Dual Wire mode requires moving a jumper on the m905 digital PCBA inside the unit. See AES DW Setup in section 9 of this manual for details. Use of a high quality 110 Ohm balanced cable is recommended.
S/PDIF COAXIAL INPUT - Standard coaxial stereo digital input. The input impedance is 75 Ohms. Use of a high quality 75 Ohm cable is recommended.
TOSLINK INPUT - Standard stereo optical input connector for use with consumer devices. Use a standard TOSLINK optical cable for connections to this input.
ADAT INPUT -This input accepts a standard 8 channel ADAT optical input. 44.1kHz - 192kHz sample rates are supported (S/MUX for 96kHz-192kHz). The user can select any of the four channel pairs for monitoring. Use a standard optical / LIGHTPIPE cable for connections to this input.
USB CLASS 2 AUDIO INTEFACE. - USB input for streaming audio to and from a host computer. Use a standard USB type A -to- type B cable (included with your m905). The type A connector is to be plugged in to the HOST computer and the type B connector to the m905 input. PCM 44.1kHz – 192kHz/24 bit and DSD (64x 2.8224MHz via DoP V1.1) are supported. Please refer to ‘computer audio setup’ for further details about using this input.
SPEAKER OUT 1 / 2 / 3 - Balanced stereo analog speaker outputs are provided via male XLR connectors, which connect to your stereo monitor systems (power amps or powered speakers). Connections are made with standard balanced XLR cables. These inputs are wired to the pin 1 shield, pin 2 positive pin 3 negative. Note: See the unbalanced termination wiring diagram for connecting any of these outputs to unbalanced equipment. (p.37)
CUE OUTPUT - A balanced stereo CUE output is provided via male XLR connectors. Normally, this output is fed by the CUE input signal and would typically be wired to your studio’s headphone cue system. Connec-tions are made with standard balanced XLR cables. These inputs are wired pin 1 shield, pin 2 positive pin 3 negative. Note: See the unbalanced termination wiring diagram for connecting these outputs to unbal-

10
anced equipment. (p.37)
SUB / DAC / METER OUTPUT - Meter OUTPUT – Can be configured as either two mono balanced subwoofer outputs, one stereo subwoofer output, a stereo balanced fixed DAC output, or a stereo balanced con-figurable meter output.. These output options are configurable in the setup menu. Subwoofer outputs settings are configured with each speaker output. As a DAC out, the last selected digital input is converted and sent to this output at all times. Typically this output is used to utilize the high performance m905 DAC when connected to an analog mastering deck or other analog outboard gear. The meter output can be configured at a fixed level or to follow the speaker monitoring level. Connections are made with standard balanced XLR cables. Connectors are wired pin 1 shield, pin 2 positive pin 3 negative.
STEREO HEADPHONE OUTPUTS - HEADPHONE outputs are provided via ¼” TRS (Tip, Ring, Sleeve) jacks, one on the frontpanel of the ACU and the other on the RCU (RCU cable upgrade required for m905 Analog units). These outputs are wired in parallel. The headphone output amplifier is capable of delivering very high cur-rents to the headphones and can drive loads down to 25 Ohms.
DIGITAL OUTPUTS (AES3, S/PDIF) - Two stereo digital (loop-thru) outputs are provided via AES3 XLR and S/PDIF RCA connectors. These provide a buffered output of a user selectable digital input. Use of high qual-ity 110 Ohm balanced cable for the AES3 out 75 Ohm cable for the S/PDIF out is highly recommended.
WORDCLOCK IN - The m905 can accept a Word Clock signal from an external clock generating unit via this BNC connector. This might be a stand-alone clock source or via, for example, the Word Clock output from your digital audio workstation. It should be noted that referencing the m905 from an external Word Clock is not necessary for the unit to function properly as the m905 will also function very well by stripping embedded clock data from a connected digital audio source. However, you may have your entire digital audio system referenced from a single master clock, hence the ability for the m905 to receive and lock itself to this clock.
WORDCLOCK OUT - The Word Clock output allows the user to synchronize other digital audio equipment to the m905. It functions in two modes: When monitoring a digital input with the clock source set to “word clock” the word clock output will be a buffered copy of the word clock input. If the input being monitored is not set to have word clock as the clock source then the word clock output will be the clock recovered from the the incoming digital audio data stream. In the case of USB the word clock output will be derived from the m905 internal clock. The output is buffered and is designed to drive a 75 Ohm line.
WORD CLOCK LOAD SWITCH - The switch labeled 1M Ohm/75 Ohm is used to terminate the Word Clock input. If the Word Clock signal in your studio is being daisy-chained from unit to unit (including the m905), you’ll want to set the switch to 1M Ohm, which is essentially an unloaded setting. If the m905 is the only device being clock referenced (or the last unit in a daisy-chain of other high impedance units), you’ll want to select the 75 Ohm load position for proper termination. NOTE: Selecting the 75 Ohm load position when there is already another device on the line that has a 75 Ohm load will create a total load of 37 Ohms, which will attenuate the signal to a point where the m905 may not lock.
REMOTE CONNECTOR - The m905 RCU handles all system control. Connection to the m905 RCU is via this DB15 connector, which carries RS422 serial data, DC power and headphone signals. The m905 ships with a high quality 25’ cable. While the serial data can travel over 1000 feet we do not recommend cables longer than 50’ for headphone use. Be sure to use the supplied DB15 cable. If you need a longer, cable contact your Grace Design dealer or us directly. Do not use an off the shelf DB15 cable as the pinout will be incompatable. Important Note: The m905 Analog ships with a standard ethernet cable for connecting the RCU. This cable does not carry the headphone signal to the RCU, so the headphone jack on the RCU will be deactivated and a small jack plug will be installed. If you wish to use the headphone jack on the RCU, a cable upgrade is available for purchase from your Grace Design Dealer or directly from the Grace Design Factory.
TALKBACK SWITCH - The talkback switch input allows the connection of an external switch, such as a footswitch, for remotely activating the talkback mic input, or the built in talkback mic on the RCU. The input is a TRS jack and is used with a “normally open” switching device. Note that when using this jack the

11
talkback function can be activated at both the RCU and the remote switch. See the remote talkback cable diagram at the end of this manual for connection details.
9 Normal Operation Modem905 operation is categorized in two different modes: normal operation mode and setup mode. Once the RCU and ACU are connected and power is turned on, the system boots up into normal operation mode.
In normal operation mode, all of the ACU controls are active and the LCD display shows the main oper-ating screen with input, level, SPL and DAC status. Setup mode is entered by pushing the ‘setup’ button, which switches the LCD display to the setup menu. Upon entering setup mode, current monitoring function is preserved, but the display and controls will be dedicated to setup menu navigation and input.
The m905 is a closed loop control system to ensure that the status reported on the RCU matches the ac-tual hardware setting in the ACU. Any changes made to the configuration of the system are transmitted to the ACU where they are processed and reported back to the RCU for confirmation. In the following sections all of the controls and features of the normal operation mode are detailed.
� INPUT SELECTION
The RCU features 8 dedicated input select buttons, in 2 rows of 4, above and below the LCD display. The m905 Analog has 4 dedicated input select buttons along the bottom of the LCD display. Pressing any of these buttons will select the associated input source and connect it to the main monitor path. The currently selected input source is indicated by the blue input icon on the LCD, while inactive inputs are indicated by the gray input icons. NOTE: The displayed name is user configurable in setup mode. The names used here are the defaults.
UNBALANCED - Selects the unbalanced analog input for the monitoring path.
BALANCED - Selects the balanced analog input for the monitoring path.
BALANCED 2 - (m905 Analog only) Selects the second balanced analog input for the monitoring path.
CUE - Selects the balanced cue analog input for the monitoring path.
TOSLINK - Selects the TOSLINK digital input for the monitoring and DAC path.
ADAT / AES DW - When ADAT mode is active - Selects the ADAT digital input for the monitoring and DAC path. Once selected, pressing the ADAT input button again increments sequentially through the channel pairs (1-2, 3-4. 5-6, 7-8 for regular ADAT and 1-2, 3-4 for S/MUX ADAT). When AES Dual Wire mode is active (configured in SETUP), selects the AES Dual Wire input for monitoring and DAC path. Note that AES Dual Wire mode requires moving a jumper on the m905 digital PCBA inside the unit. See AES DW Setup in sec-tion 9 of this manual for details.
S/PDIF - Selects the S/PDIF digital input for the monitoring and DAC path.
AES1 / AES2 - Selects the AES1 or AES2 digital input for the monitoring and DAC path. Once selected, pressing the AES input button again toggles the AES1 or AES2 selection. The system remembers the last AES input that was selected (as indicated by the input icon display).
USB - Selects the USB digital input for the monitoring and DAC path.
� VOLUME CONTROL, PRESET & HEADPHONE MUTE
12
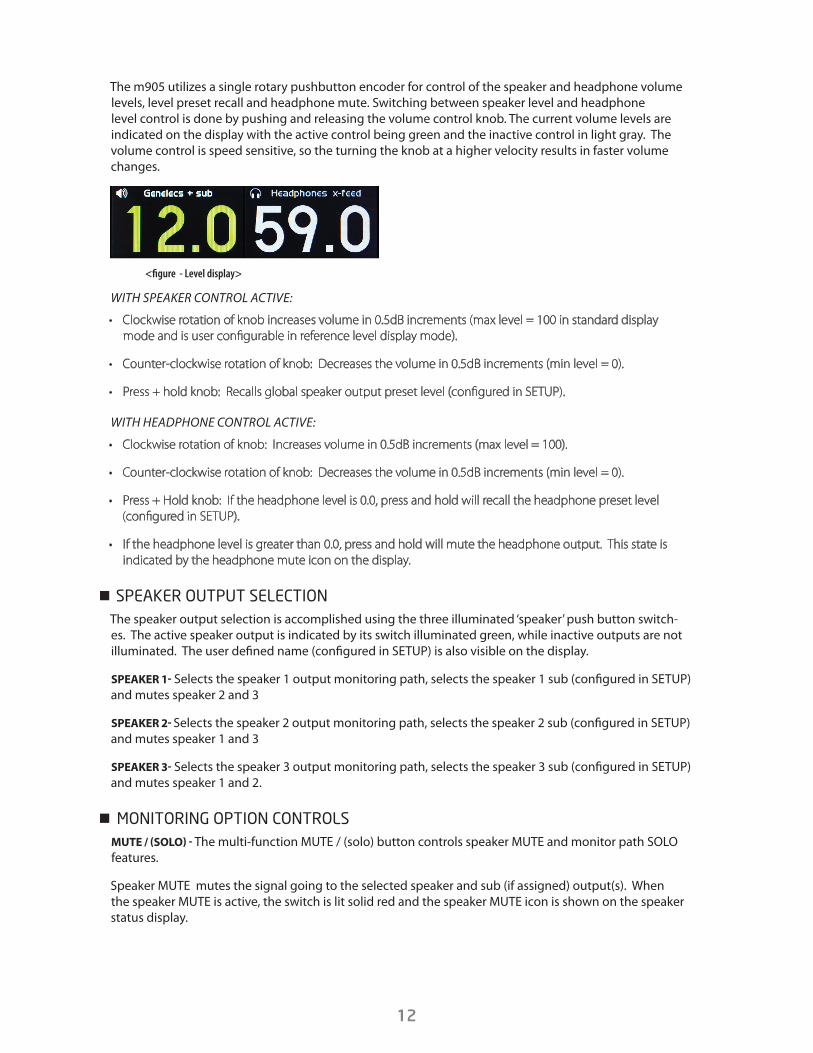
The m905 utilizes a single rotary pushbutton encoder for control of the speaker and headphone volume levels, level preset recall and headphone mute. Switching between speaker level and headphone level control is done by pushing and releasing the volume control knob. The current volume levels are indicated on the display with the active control being green and the inactive control in light gray. The volume control is speed sensitive, so the turning the knob at a higher velocity results in faster volume changes.
<figure - Level display>
WITH SPEAKER CONTROL ACTIVE:
• Clockwise rotation of knob increases volume in 0.5dB increments (max level = 100 in standard display mode and is user configurable in reference level display mode).
• Counter-clockwise rotation of knob: Decreases the volume in 0.5dB increments (min level = 0).
• Press + hold knob: Recalls global speaker output preset level (configured in SETUP).
WITH HEADPHONE CONTROL ACTIVE:
• Clockwise rotation of knob: Increases volume in 0.5dB increments (max level = 100).
• Counter-clockwise rotation of knob: Decreases the volume in 0.5dB increments (min level = 0).
• Press + Hold knob: If the headphone level is 0.0, press and hold will recall the headphone preset level (configured in SETUP).
• If the headphone level is greater than 0.0, press and hold will mute the headphone output. This state is indicated by the headphone mute icon on the display.
� SPEAKER OUTPUT SELECTION
The speaker output selection is accomplished using the three illuminated ‘speaker’ push button switch-es. The active speaker output is indicated by its switch illuminated green, while inactive outputs are not illuminated. The user defined name (configured in SETUP) is also visible on the display.
SPEAKER 1- Selects the speaker 1 output monitoring path, selects the speaker 1 sub (configured in SETUP) and mutes speaker 2 and 3
SPEAKER 2- Selects the speaker 2 output monitoring path, selects the speaker 2 sub (configured in SETUP) and mutes speaker 1 and 3
SPEAKER 3- Selects the speaker 3 output monitoring path, selects the speaker 3 sub (configured in SETUP) and mutes speaker 1 and 2.
� MONITORING OPTION CONTROLS
MUTE / (SOLO) - The multi-function MUTE / (solo) button controls speaker MUTE and monitor path SOLO features.
Speaker MUTE mutes the signal going to the selected speaker and sub (if assigned) output(s). When the speaker MUTE is active, the switch is lit solid red and the speaker MUTE icon is shown on the speaker status display.

13
SOLO mode provides a means to monitor left or right channel program material exclusively. When SOLO mode is active, the button flashes red. The active SOLO channel is indicated on the speaker and head-phone status display. In left channel SOLO mode, the right channel is muted in the speaker and head-phone outputs.* In right channel SOLO mode, the left channel is muted in the speaker and headphone outputs.* (NOTE: Enabling MONO during SOLO mode routes the active solo channel to both left and right outputs.
* The operation of the sub output in SOLO mode depends on the selected sub configuration. In L + R stereo sub mode, the left and right solo feature is available and follows the speaker / headphone solo. For any other sub configuration, the sub output mutes when SOLO is active.
PRESS AND RELEASE BUTTON:
• Toggles the speaker output mute on and off (if solo mode is off ).
• Disables speaker / headphone solo if solo mode was active.
PRESS AND HOLD BUTTON:
• Enables the solo mode if solo mode was inactive. The last used solo mode (left or right) is activated upon entering solo mode.
• Toggles the left / right channel solo mode if solo mode is already active.
SUB MUTE / (sub-solo) - The multi-function SUB MUTE / (sub-solo) button controls the sub-mute and sub -solo features. NOTE: These features are only available when the SUB/DAC/METER is configured for sub output mode in SETUP.
SUB-MUTE mode mutes the signal going to the sub output (if assigned). When the SUB-MUTE is active, the switch is lit solid red.
Sub-solo mode provides a means to monitor the sub output program material exclusively. In Sub-solo mode, the speaker output is muted and only the sub output is on. When Sub-solo mode is active, the button flashes red.
PRESS AND RELEASE BUTTON:
• Toggles the sub output mute on and off (if sub-solo is disabled).
• Disables sub-solo if sub-solo mode was active.
PRESS AND HOLD BUTTON:
• Toggles sub-solo mode on and off.
DIM / (x-feed) - The multi-function DIM / (x-feed) button controls the speaker DIM and headphone x-feed features.
Speaker DIM attenuates the speaker and sub (if assigned) by the preset attenuation level configured in SETUP. When speaker dim is active, the switch is lit solid yellow.
Headphone x-feed engages the cross-feed circuit in the headphone output. When x-feed is active it is indicated on the headphone status display. X-feed (cross-feed) simulates the acoustics of a loudspeaker listening environment which can significantly improve imaging while reducing listening fatigue when using headphones. This feature employs carefully designed signal cross-feed, filtering and delay circuits to simulate hrtf (head related transfer functions).
PRESS AND RELEASE BUTTON:
• Toggles the speaker DIM function on and off.

14
PRESS AND HOLD BUTTON:
• Toggles the headphone x-feed mode on and off.
MONO / (L-R) - The multi-function MONO / (L-R) button controls the MONO and the LEFT minus RIGHT features.
MONO sums the left and right channels and provides this signal to both the left and right channels of the speaker and sub outputs (if stereo sub is configured). The headphone output also becomes MONO if the headphone mono control is enabled (configured in SETUP). When speaker / headphone MONO is active, the switch is lit solid yellow.
L-R subtracts the right channel from the left channel and provides this signal to both the left and right channels of the speaker, sub (if assigned) and headphone outputs. When L-R is active, the button flashes yellow.
PRESS AND RELEASE BUTTON:
• Toggles the speaker / headphone MONO (if L- R is disabled). Headphone MONO can be disabled in SETUP.
• Disables L- R if L- R mode was active.
PRESS AND HOLD BUTTON:
• Toggles the L- R monitor mode on and off.
MON>CUE (SPL CLEAR) - The multi-function MON>CUE/(SPL CLEAR) button controls the MONITOR TO CUE and the SPL PEAK CLEAR features of the system. Normally, the CUE output is sourced via the CUE input. Engaging MON>CUE routes selected control room monitor source to the CUE output. When MON>CUE is active, this switch is lit solid green. When mon>cue is active, this switch is lit solid green.
The type 2 SPL meter in the m905 RCU can hold the peak SPL measurement level (configured in SETUP). The SPL CLEAR function resets the displayed peak level.
PRESS AND RELEASE BUTTON:
• Toggles MON>CUE on and off.
PRESS AND HOLD BUTTON:
• Resets the SPL peak meter reading on the display.
TALKBACK - The talkback button controls the summing of the talkback mic signal with the cue output. The talkback system of the m905 has many options that are configured in setup. One option changes the op-eration of the talkback switch between a momentary and latching control. In momentary operation, the talkback will be engaged only as long as the talkback switch is pressed. In latching control, pressing and releasing the talkback switch toggles the talkback on and off, so you can leave talkback engaged without holding the switch.
Another configuration option selects the talkback mic source as the RCU mic, external mic or either. When either the RCU or the external mic talkback are enabled, the talkback switch is lit solid red. While the RCU talkback mic is active, the SPL meter is disabled. This is indicated on the SPL meter display.
� DISPLAY
DAC STATUS - In addition to displaying the monitoring features detailed above, the m905 RCU display also provides the current DAC status and a real-time SPL readout. DAC status is not shown on m905 Analog display.
<figure - DAC status>

15
THE DAC STATUS PROVIDES THE FOLLOWING INFORMATION:
• Selected digital input source / demphasis (if enabled) / s/mux (if enabled)
• Sample rate (PCM or DSD) / s-lock status (if active)
• Selected clocksource / selected clocksource lock status. If the system is unable to lock to the selected clocksource (other than the recovered clock), the dac will be clocked of the recovered clock and selected clocksource will flash red.
• Bitstream status: pro/cons (for TOSLINK, S/PDIF and AES), s/mux (for ADAT) and demphasis (for TOSLINK, S/PDIF and AES)
SPL MEASUREMENT - Using the internal m905 RCU microphone, the m905 computes the real-time sound pressure level based on the system configuration. The current and peak SPL levels are displayed along with the filter mode in this section of the display. The SPL measurement settings are configured in setup.
<figure - SPL meter>
� SAVE / RECALL OF USER CONFIGURATION
After a 10 minute period of inactivity, the m905 saves the current user configuration to non-volatile memory. Upon power-up the m905 recalls the last saved configuration. The following parameters are saved as part of the user configuration:
• INPUT SELECT
• SPEAKER SELECT
• SELECTED ADAT INPUT PAIR
• DAC SOURCE
• LAST SELECTED AES INPUT
• MON>CUE STATUS
• CROSS-FEED STATUS
� OPTIONAL IR (INFRARED) REMOTE CONTROL OPERATION
The optional IR receiver allows certain features of the m905 to be controlled via wireless IR remote control units. To activate an m905 for use with a remote control please refer to the ‘IR Remote SETUP’ section. The following section will detail the available features for each remote platform. All changes made from IR remote controls are reflected on the m905 RCU.
GRACE DESIGN IR REMOTE CONTROL OPERATION - An optional high quality Grace Design wireless remote control is available for control of the m905. Several of the buttons on the remote have dual functions, ac-cessed by either a ‘press and release’ or a ‘press and hold’ action, and are described below:
Grace IR Remote Button m905 Press & Release function (m905 Press & Hold function)MUTE Toggles MUTE of selected output (Toggles SOLO mode)
X-FEED Toggles x-feedOUTPUT Toggles selected output (Recalls preset level for selected output)
BALANCE Toggles MONOVOLUME UP/DOWN Volume UP/DOWN for selected output (Continuous Volume UP/DOWN)

16
APPLE IR REMOTE CONTROL OPERATION - In addition to the Grace Design wireless remote control, the m905 can also be controlled by an Apple IR Remote Control. The following section details all of the features available from the Apple IR Remote Control. Several of the buttons on the remote have dual functions, ac-cessed by either a ‘press and release’ or a ‘press and hold’ action, and are described below.
Apple Remote Button m905 Press & Release function (m905 Press & Hold function)CENTER Toggles selected output (Recalls preset level for selected output)
UP / DOWN Volume UP/DOWN for selected output (Continuous Volume UP/DOWN)LEFT << Scroll left through inputs / Scroll down through speakers
RIGHT >> Scroll right through inputs / Scroll up through speakersPLAY / PAUSE Toggles MUTE of selected output (Toggles SOLO mode)
MENU Toggles x-feed (Toggles L/R control for inputs / speakers)
LOGITECH HARMONY HUB / IOS OR ANDROID SMARTPHONE CONTROL - Using a Logitech Harmony WIFI-to-IR hub, the m905 can also be controlled an iOS or Android smartphone running the Logitech Harmony App. The following section details all of the features available from the Logitech control. Several of the buttons on the remote have dual functions, accessed by either a ‘press and release’ or a ‘press and hold’ action, and are described below.
Logitech Button m905 Press & Release function (m905 Press & Hold function)VOLUME UP / DOWN
ICONSVolume UP/DOWN for selected output (Continuous Volume UP/DOWN)
OP TOG / PRESET Toggles selected output (Recalls preset level for selected output)MUTE/SOLO Toggles MUTE of selected output (Toggles SOLO mode)
SUBMUTE/SOLO Toggles SUBMUTE (Toggles SUB SOLO mode)DIM Toggles DIM
MONO/L-R Toggles MONO (Toggles L-R)MON>CUE Toggles Mon->Cue
X-FEED Toggles x-feedADAT Selects ADAT input or scrolls to next ADAT input pair if already selected
AES Selects last active AES input or toggles between AES1 / AES2 if already se-lected
BAL Selects balanced analog inputCUE Selects cue input
S/PDIF Selects s/pdif inputTOSLINK Selects toslink input
UNBAL Selects unbalanced analog inputUSB Selects usb input
SPKR 1 Selects Speaker 1 outputSPKR 2 Selects Speaker 2 outputSPKR 3 Selects Speaker 3 output
TALK In momentary talkback mode, press and hold this button to enable talkback, release to disable. In latching talkback mode press and release to toggle talk-back state. Functions as a duplicate of the talkback button on the m905 RCU.
PAIR Enables remote pairing for the Logitech remoteUNPAIR Disables remote pairing

17
� ANALOG ONLY OPTION
The m905 is now available without the built in Digital to Analog converter section. The Analog version may updated to the Digital version at any time.
• Inputs are shown across the bottom and are (in this order) balanced, balanced 2, unbalanced and cue
• Inputs across the top are dark gray and pressing the associated input button has no response.
• The first input button in the upper left indicates “no dac”
• In SUB/DAC/MTR SETUP, the “dac output” option for output mode is removed
• DIGILOOP SETUP is removed
• DIGITAL I/P SETUP is removed
Important Note: The m905 Analog ships with a standard ethernet cable for connecting the RCU. This cable does not carry the headphone signal to the RCU, so the headphone jack on the RCU will be deactivated and a small jack plug will be installed. If you wish to use the headphone jack on the RCU, you will need to buy the remote cable upgrade from your Grace Design Dealer or directly from the Grace Design Factory.
10 Setup Mode � ENTERING AND EXITING SETUP MODE
Pushing the ‘setup’ button enters the m905 into setup mode. This is indicated by the display showing the m905 setup mode screen and the setup button flashing white. In this mode, the user can configure all of the adjustable system parameters, while still having access to most of the normal mode features.
<figure - Setup Screen>
From this screen, pushing any hardware switch will enter that features individual setup menu. From here, rotating the knob clockwise moves the white highlighted selection down. Rotating it counter-clockwise moves the white highlighted selection up. In some cases there may be more parameters than can be displayed at one time on the screen. If this is the case, the display indicates this by placing a little up or down arrow on the right edge of the display.
<figure setup screen selection >
Unless otherwise noted, pressing the knob enters the parameter edit mode. This is indicated by the parameter changing from black to red on the display. Rotating the knob in edit mode modifies the se-lected parameter. Pressing the knob again exits edit mode and returns to the parameter selection menu.

18
The system remembers the last selected parameter in each setup mode and returns to that setting when each setup mode is entered.
In the following sections, each of the controls and features of the setup mode will be detailed.
All system setup parameters are stored in non-volatile memory. At any point the setup mode can be exited with the following actions:
TO EXIT AND SAVE CHANGES:
• Press and release the setup button to save all setup parameters, exit setup mode and return to normal operation.
TO EXIT WITHOUT SAVING CHANGES:
• Press and hold the setup button to cancel all setup changes, exit setup mode and return to normal opera-tion.
� INPUT SETUP
While in setup mode, pressing any of the input buttons selects that input source for the monitoring path (exactly as it does in normal mode) and also brings up the setup information for that input source. The following details each of the input source setup parameters.
INPUT NAME - This parameter allows the user to customize the displayed name for each input source. For this parameter, the control is a little different, but you will remember how to do this from getting the high score on asteroids.
• Pressing the encoder once brings up the character cursor. From here, rotate the knob to position the cur-sor under the character you wish to edit.
• Press the encoder again to enter edit. Rotate the knob until the desired character is displayed. Press the encoder again to enter the desired character and get back to the cursor.
• Once all of the desired changes are complete, move the cursor back to the “<” and press the encoder to initiate the name change.
<figure - editing the input name>
If the setup mode is changed or exited prior to selecting the “<”, any modifications to the name will be ignored.
LEVEL OFFSET - The volume level of each input can be matched by adjusting the level offset on each input. When an input is selected, this offset is added to the to all the signal paths using this input.
The input level offset range is +/- 20dB in 0.5dB steps. This setting allows for precise matching of loud-nes between various input sources.
METER OUTPUT - This parameter allows the meter output (when the dac/sub/mtr output is configured as the meter output) to be enabled or disabled based on input source. The default is enabled.

19
CLOCKSOURCE - The clocksource can be independently selected for each digital input. Available options are current input and wordclock. When the clock source matches the input name, the DAC is clocked off the recovered digital audio clock. When wordclock is selected, the DAC is clocked off the wordclock input.
The USB input provides the clocksource options of internal, wordclock, ADAT and TOS/S/PDIF/AES. The clocksource for the USB input from either of the TOS/S/DIF/AES options will be the last of those three previously selected. So with the USB input selected, select one of those 3 inputs (TOS/S/DIF/AES), then return to the USB input to enter that input as the clocksource.
NOTE ON USB CLOCKING - The USB controller in the m905 is configured for two channels of audio from the host computer and 10 channels to the host computer. All channels in both directions must be at the same sample rate. The sample rate is requested by the host computer but the m905 can be locked to one of the available clock sources (listed above). When the m905 is monitoring a USB source the internal clock circuitry is used for the USB. However, when the m905 is monitoring a digital input other than the USB input, the internal clock circuitry is switched to that input and the USB controller is kept “alive” with an auxilary clock. This ensures that the computer continues to recognize the m905 as an audio device. In this situation the USB clock and the s-Lock clock will not be synchronous and the 10 channels going to the computer will not be synchronous with the ADAT or AES/TOSLINK/SPDIF source, which will result in data corruption on those channels. If it is required that the 10 channels to the computer not be interrupted in any way, then the m905 must be monitoring the USB without being changed to other digital inputs. It is possible to switch the m905 to an analog source, since that will not cause a change in clocking in the digital sec-tion.
s-LOCK - In a situation where a digital input is outside the lock range of the s-lock pll, it can be helpful to disable the s-lock circuit. This parameter allows the s-lock to be independently disabled for each digital input. Available options are enabled and disabled.
DEMPHASIS - The DAC de-emphasis filter can be configured independently for each digital input. Avail-able options are: off, on and auto.
When off is selected, no de-emphasis filtering is applied. When on, the de-emphasis filter is engaged for that input. The auto setting uses the de-emphasis bit in the digital audio stream to control the de-emphasis filter. Auto de-emphasis is only available on the S/PDIF, TOSLINK, and AES3 inputs. When de-emphasis is on, it is indicated in the top row of the DAC display.
S/MUX - The ADAT input supports 88.2/96kHz sample rate S/MUX decoding. When enabled, the available channels switch from 1-8 to 1-4. Available options are off, on and auto. The auto setting uses the S/MUX bit in the ADAT audio stream to control the s/mux decoding. When S/MUX is on, it is indicated in the top row of the DAC display.
Available setup parameters for each input. Default values are in parenthesis.
UNBALANCED input name (unbalanced) level offset (0dB)
BALANCED input name (balanced) level offset (0dB)
CUE input name (cue) level offset (0dB)
TOSLINK input name (TOSLINK) level offset (0dB) clocksource (TOSLINK) s-lock (enabled) demphasis (auto)
ADAT(1-8) input name (ADAT) level offset (0dB) clocksource (ADAT) s-lock (enabled) demphasis (off ) s/mux (off )
AES DW input name (aes dw) level offset (0dB) clocksource (aes dw) s-lock (enabled) demphasis (auto)
S/PDIF input name (S/PDIF) level offset (0dB) clocksource (S/PDIF) s-lock (enabled) demphasis (auto)
AES1 input name (AES1) level offset (0dB) clocksource (AES1) s-lock (enabled) demphasis (auto)
AES2 input name (AES2) level offset (0dB) clocksource (AES2) s-lock (enabled) demphasis (auto)
USB input name (USB) level offset (0dB) clocksource (internal) s-lock (enabled) demphasis (off )

20
� SPEAKER SETUP
Pressing any of the speaker buttons selects that output for the monitoring path (exactly as it does in normal mode) and brings up the setup information for that speaker output. The following are the de-tails of each of the speaker setup parameters.
SPEAKER NAME - This parameter allows the user to customize the displayed name for each speaker output. For this parameter, the control is a little different, but again, you will remember how to do this from get-ting the high score on Asteroids. Or Centipede.
• Pressing the encoder once brings up the character cursor. From here, rotate the knob to position the cur-sor under the character you wish to edit.
• Press the encoder again to enter edit. Rotate the knob until the desired character is displayed. Press the encoder again to enter the desired character and get back to the cursor.
• Once all of the desired changes are complete, move the cursor back to the “<” and press the encoder to initiate the name change.
If the setup mode is changed or exited prior to selecting the “<”, any modifications to the name will be ignored.
LEVEL OFFSET - The volume level of each speaker system can be matched by adjusting the level offset on each speaker output. When a speaker output is selected, this offset is added to the speaker and sub (if applicable) output levels.
The level offset range is +/- 20dB in 0.5dB steps.
BALANCE - The balance of each speaker output can be independently adjusted. The available balance range is -10dB to the left or right in 0.5dB steps. When no balance adjustment is present on the speaker output, the parameter displays “center”.
SUB OUTPUT - The sub output can be configured for each speaker output. Available options are disabled, L+R Stereo, L+R Mono, Mono->L and Mono->R. NOTE: For the sub output to be active, the SUB/DAC/METER output must be configured for sub output mode (see SUB/DAC/METER setup section below). The function of each of these settings is as follows:
• disabled – the sub output is turned off when this spearker system is selected
• L+R Stereo – the sub output is on for this speaker system and functions as a stereo output
• L+R Mono – the sub output is on for this speaker system and is summed mono on both output connec-tors
• Mono ->L – the left sub output is on for this speaker system and is the mono signal
• Mono ->R – the right sub output is on for this speaker system and is the mono signal
SUB OFFSET - The sub output can have a programmed level offset to match each speaker system. When a speaker output is selected, this offset is added to the sub output level when the sub output is enabled.
The sub offset range is +/- 20dB in 0.5dB steps.
PRESET LEVEL (GLOBAL) - This parameter sets the speaker output preset level. This parameter is the same for all speaker outputs. Available range corresponds to the standard level display and is 0-100 in 0.5dB steps.
PWR UP LEVEL (GLOBAL) - This parameter sets the speaker output level that is set when the system is pow-ered on. Available range is 0-100 in 0.5dB steps. This parameter is the same for all speaker outputs. The

21
default is 0.0.
DISPLAY MODE (GLOBAL) - This parameter sets the speaker output display mode. When standard level is selected, the speaker level is displayed as a 0-100 range in 0.5dB steps. When reference level is selected, the speaker level is displayed as a 100dB range in 0.5dB steps based on the ref. level setting (see below). This parameter is the same for all speaker outputs.
REFERENCE LEVEL (GLOBAL) - This parameter represents the reference level that is displayed (when display mode = reference level) at the current volume setting. Available range is the current volume setting +/- 100 in 0.5 steps. This parameter is the same for all speaker outputs.
The following is an example of how the reference level may be configured for an 82dBSPL reference listening level:
• Play and monitor a nominal level noise source.
• Adjust the speaker level until the SPL measurement at the listening position equals 82dBSPL.
• Enter SETUP and navigate to the REF. LEVEL (GLOBAL) parameter and adjust it to 82.
• Navigate to the DISPLAY MODE (GLOBAL) and set the parameter to reference level.
• Exit SETUP. The speaker level will now display 82.0 to correlate with the reference level. An increase or decrease in the volume setting now corresponds to the listening SPL given a nominal input signal.
At anytime the display mode can be adjusted or changed back to the standard level (0-100) display in SETUP.
Available setup parameters for each speaker output. Default values are in parenthesis.
SPEAKER 1 speaker name (speaker 1) level offset (0dB) balance (center) sub output (L+R Stereo) sub offset (0dB) preset level global (0.0) display mode global (standard level) reference level global (0.0)
SPEAKER 2 speaker name (speaker 2) level offset (0dB) balance (center) sub output (L+R Stereo) sub offset (0dB)preset level global (0.0) display mode global (standard level) reference level global (0.0)
SPEAKER 3 speaker name (speaker 3) level offset (0dB) balance (center) sub output (L+R Stereo) sub offset (0dB)preset level global (0.0) display mode global (standard level) reference level global (0.0)
VOLUME KNOB (GLOBAL) - This parameter configures the volume knob for standard or coarse/fine opera-tion. In standard operation the volum e control starts with 0.5dB steps when turned slow and increases with the rate the volume knob is turned. In coarse/fine mode, the volume control covers the entire range in a single rotation. Pressing the volume knob down while changing volume enables fine 0.5dB step changes. This parameter is global for speaker and headphone volume control. The default is ‘standard’.
� DIM SETUP
From the setup screen, pressing the dim button enters dim setup mode. Once dim setup mode is active, pressing the dim button will toggle the dim setting (exactly as it does in normal mode). The dim attenu-ation level controls how much the speaker/sub outputs attenuate when dim is active. The available dim range is -35dB to -5dB in 0.5dB steps. The default is -20dB.
� SUB / DAC / METER SETUP
The m905 features a multi-funciton SUB/DAC/METER output. From the setup screen, pressing the sub mute button enters SUB/DAC/METER setup mode. Once this setup mode is active, pressing or holding the sub-mute / (sub-solo) button functions exactly as it does in normal mode.

22
The SUB/DAC/METER setup parameters are as follows:
OUTPUT MODE - This parameter configures the SUB/DAC/METER output function. Available options are sub output, DAC output and meter output. The default is sub output. Note: DAC output mode and settings not available on m905 Analog units.
When sub output is selected, this output acts as the dedicated subwoofer output and is configured based on the speaker sub output settings in the speaker setup.
When DAC output is selected, this output acts as a dedicated digital to analog converter output. The last selected digital source is continuously output at a fixed DAC level (see below). This setting can be useful for utilizing the m905 DAC for digital to analog transfers.
When meter output is selected, this output acts as a dedicated analog meter output. The selected monitoring source is either output at a fixed meter level or post fader speaker level (see ‘meter mode’ below). The meter output follows speaker output mono, L-R and solo settings. NOTE: When solo and mono are active only the mono signal is provided to the active solo channel on the meter output.
DAC LEVEL (0dBFS) - This controls the fixed output level of the DAC output when DAC output mode is se-lected above. The setting is the equivalent balanced analog output level given a 0dB full-scale digital input level. Available range is -76.0dBu to +24.0dBu in 0.5dB steps. The default is -76.0dBu.
DAC BALANCE - The balance of the DAC output can be adjusted. The available balance range is -10dB to the left or right in 0.5dB steps. When no balance adjustment is present on the DAC output, the parameter displays “center”. The default is center.
DAC FILTER - This parameter configures the response of the digital filter used by the DAC when monitor-ing PCM sources. Fast rolloff is the classic linear phase brick-wall filter. It has steep roll-off preventing any high frquency signals from causing aliasing artifacts. It also causes a con-siderable amount of pre-ringing and post-ringing at the Nyquist frequency when passing transient information. This filter is great for looking at converter performance on a test bench where it might be subject to artificially high amplitude signals near 20kHz. Slow rolloff is also a linear phase filter but with a much slower roll off. This filter has much less ringing and overshoot on transient material but can cause alias-ing distortion when presented with high amplitude high frequency material. The idea here is that in real music there is very little energy in the high frequency area of the spectrum so aliasing distortion will be negligible. This filter is more musi-cal than the fast rolloff filter. The default is ‘fast rolloff’.
METER MODE - This selects the type of meter output when the meter mode is selected above. Available options are fixed meter level and follow speaker. When fixed meter level is selected, the output level is controlled by the meter level parameter below. When follow speaker is selected, the output level follows the speaker volume level (including any input offset). The default is fixed meter level.
METER LEVEL - This controls the fixed output level of the meter output when meter output mode and fixed meter level are selected above. The setting is equivalent to the overall system gain. Available range is
-100dB to +18.5 in 0.5dB steps. The default is -100dB.
� CUE OUTPUT SETUP
The m905 features a dedicated cue output. From the setup screen, pressing the MON >CUE button en-ters cue setup mode. Once this setup mode is active, pressing the mon > cue button functions exactly as it does in normal mode. The cue output setup parameters are as follows:
OUTPUT LEVEL - This controls the fixed output level of the cue output. Available range is 0 – 120 in 0.5dB steps. The default is 100.
BALANCE - The balance of the cue output can be adjusted. The available balance range is -10dB to the left or right in 0.5dB steps. When no balance adjustment is present on the cue output, the parameter displays

23
“center”. The default is center.
DIM ON TALKBACK - Both the internal m905 RCU talkback mic signal or the external talkback mic signal can be summed with the cue output. When the talkback is active, the source material can be attenuated to make the talkback easier to hear. The available dim on talkback range is -35dB to 0dB in 0.5dB steps. The default is -20dB.
� HEADPHONE SETUP
From the setup screen, press and hold the knob to enter headphone setup mode. Headphone setup parameters are as follows:
BALANCE - The balance of the headphone output can be adjusted. The available balance range is -10dB to the left or right in 0.5dB steps. When no balance adjustment is present on the headphone output, the parameter displays “center”. The default is center.
GAIN - This parameter sets the gain of the headphone output. The available settings are 0dB, +10dB and +20dB. The default is 0dB.
PRESET LEVEL - This parameter sets the headphone output preset level. Available range is 0-100 in 0.5dB steps. The default is 0.0.
PWR UP LEVEL (GLOBAL) - This parameter sets the headphone output level that is set when the system is powered on. Available range is 0-100 in 0.5dB steps. The default is 0.0.
EXCLUSIVE OUTPUT MODE - The exclusive output mode allows the user to easily switch between speaker and headphone monitoring without having to mute the unused output. When the exclusive output mode is enabled, the output (speaker or headphones) that is in green on the normal mode display is active and the other output is muted. Pressing the knob toggles the active / muted output. Available op-tions for exclusive output are disabled and enabled. The default is disabled.
MONO CONTROL - When mono is turned on, all monitor paths sum the left and right channels to mono. There may be a case where the user wishes to keep the headphone signal stereo even when mono is en-gaged for the main speaker systems. Available options are to disable the mono control (headphones stay stereo even when mono is turned on) and enabled (headphones sum to mono when mono is turned on). The default is mono control enabled.
HEADPHONE SOURCE SELECT - From the factory, the headphone output is configured to follow the input monitor source. Internal jumpers can be configured to feed the headphone output with the CUE signal (post talkback summing). This allows the m905 headphone amplifier to be used as a headphone monitor-ing system for the studio. To listen to input sources other than the CUE input pres the MON>CUE button. To configure the headphone source, move jumpers JP1 and JP2 on the main pcb inside the m905 (see m905 MAIN PCB Jumper Locations, page 40)
Disconnect the m905 from its AC power by unplugging the AC power cable. Use a #2 Phillips screw-driver to remove the top cover from the m905. There are 8 screws to remove on the top cover, 4 on the top and 2 on each side. Be careful to discharge any static electricity on the outside of the chassis before touching any of the jumpers inside the m905.
VOLUME KNOB (GLOBAL) - This parameter configures the volume knob for standard or coarse/fine opera-tion. In standard operation the volume control starts with 0.5dB steps when turned slow and increases with the rate the volume knob is turned. In coarse/fine mode, the volume control covers the entire range in a single rotation. Pressing the volume knob down while changing volume enables fine 0.5dB step changes. This parameter is global for speaker and headphone volume control. The default is ‘standard’.

24
� TALKBACK SETUP
From the setup screen, pressing the talkback button enters talkback setup mode. Once talkback setup mode is active, pressing the talkback button will have the same function as it does in normal mode.
The m905 features a flexible talkback system for communicating with the performers. Two different talkback sources are available - 1) Built-in mic on the RCU and 2) external mic input on the ACU. Each of these have independent controls and setup. When talkback is active, the talkback signal is summed into the cue output. In addition, a dedicated balanced analog talkback output is available on the ACU that allows the talkback signal to be routed to other systems. Talkback setup parameters are as follows:
RCU MIC GAIN - This parameter sets the gain of the internal RCU talkback mic. The available range is 0dB to +63dB in 1dB steps. The default is 0dB.
EXT. MIC GAIN - This parameter sets the gain of the external ACU talkback mic. The available range is +15dB to +70dB in 1dB steps with one gain setting of +7dB. The default is +7dB.
EXT. MIC PHANTOM POWER - This parameter controls the +48V phantom power for the external ACU talk-back mic. This should only be turned on when using an external microphone that requires +48V phantom power. The available settings are off and +48V. The default is off.
TALKBACK ENABLE - This parameter controls the different talkback modes. Available options are as follows:
• rcu or ext. mic – In this mode, the RCU talkback button enables the RCU talkback mic and the remote talkback switch on the ACU enables the external talkback mic.
• rcu mic only - In this mode, either the RCU talkback button or the remote talkback switch on the ACU enables the RCU talkback mic.
• ext. mic only - In this mode, either the RCU talkback button or the remote talkback switch on the ACU enables the external ACU talkback mic.
• The default is rcu or ext. mic.
CONTROL MODE - This parameter configures how the RCU talkback button and the remote talkback switch on the ACU operate. Available options are as follows:
• momentary – talkback is enabled only when the switch is pressed and held (closed)
• latch – talkback is toggled with each press of the switch
• The default is momentary.
DIM ON TALKBACK - This parameter controls how much the speaker / sub output attenuates when talkback is active. Available range is -30dB to 0dB in 0.5dB steps. The default is -20dB.
Nifty fact: The Talkback output connector on the m905 comes configured such that it outputs the talkback signal only when the talkback switch has been pressed. By moving J3 and J4 on the main pcb inside the m905, the Talkback output connector can continously output the signal from the external Talkback microphone amplifier. This allows the user to utilize the external microphone input amplifier as a high quality stand-alone preamplifier (!)
To set the Talkback output mode: Disconnect the m905 from its AC power by unplugging the AC power cable. Use a #2 Phillips screwdriver to remove the top cover from the m905. There are 8 screws to re-move on the top cover, 4 on the top and 2 on each side. Be careful to discharge any static electricity on the outside of the chassis before touching any of the jumpers inside the m905. Refer to “Figure m905 Main PCB Jumper locations” page 40, to locate J3 and J4.
� MUTE / (SOLO)

25
There are no setup parameters associated with the mute / (solo) control. In setup mode, the mute / (solo) button functions exactly as it does in normal operation mode.
11 General SetupOther general setup options and information are accessed from the setup screen by pressing the MONO button. Once in any of the general setup modes, pressing the MONO button again advances to the next general setup screen (pressing repeatedly will scroll through all the different modes and wrap to the beginning once the last mode has been reached). General setup parameters are as follows:
� DISPLAY SETUP
This mode adjusts the RCU display settings. The parameters are:
BACKLIGHT - this parameter adjusts the RCU display brightness. Available range is 0 (min) to 9 (max). The default is max.
AUTO OFF TIME - This controls the auto-dim function of the display. When the system does not have any user activity for the displayed amount of time, the display automatically dims to the minimum brightness. Any user activity turns the display back on to the chosen brightness above and the timeout restarts. Avail-able settings are 5 minute, 15 minutes and 30 minutes. The default is 30 minutes.
� IR (INFRARED) REMOTE SETUP
IR REMOTE- This parameter allows the user to disable the optional infrared remote control operation of the m905. The m905 IR remote control uses command codes that are quite obscure, but they are not propri-etary. Should interference occur from another manufacturer’s remote control unit, the IR remote control operation of the m905 can be turned off to prevent improper operation. Available options are:
• enabled – In this mode the m905 will respond to compatible IR remote control units when the IR reciever option is installed
• disabled – In this mode the m905 will NOT respond to compatible IR remote control units.
The default is enabled.
REMOTE PAIRED - The Apple IR Remote provides a pairing feature that allows devices to only respond to specific remote controls. To pair an Apple IR Remote, press and hold the MENU and RIGHT buttons or the MENU and CENTER buttons ( Pressing MENU and CENTER also increments the Apple IR Remote ID ) for ap-proximately 5 seconds. The m905 will indicate that the remote is paired by displaying “yes’ in this param-eter field. To unpair this a remote, change this paramter to ‘no’. The default is ‘no’.
In the event you do not want the m905 to respond to an Apple IR remote simply pair the remote to the m905 with your other devices turned off. Turn off the m905 and press and hold the MENU and CENTER buttons on Apple remote for approximately 5 seconds. This increments the remote ID and it will no lon-ger control the m905. (Note: you may need to re-pair your remote to your other device(s) if they have pairing enabled. Turn off the m905 when doing this.)
In the event you have multiple Apple remote controls and wish to control the m905 with only one of them, simply pair the remote to the m905 with your other devices turned off. Pairing your other remote(s) to your other device(s) with the m905 turned off allows you to have dedicated IR remotes for each device.

26
REMOTE ID - this is a read-only parameter that displays the id number of the paired Apple IR remote (if remote pairing = yes). This can be usful when trying to identify multiple remotes in your environment.
L/R CONTROLS - This parameter selects the function for the left / right arrows on the Apple remote. Avail-able options are:
• input – in this mode the left and right buttons on the Apple remote scroll through each input.
• speaker – in this mode the left and right buttons on the Apple remote scroll through each speaker output.
The default is input.
THIS PARAMETER CAN ALSO BE MODIFIED VIA THE APPLE IR REMOTE CONTROL BY PRESSING AND HOLDING THE MENU BUTTON.
� DIGI LOOP SETUP
The m905 features an AES and S/PDIF digital audio loop through output. This allows a digital source to be looped through the m905 to another piece of equipment. The m905 provides several routing op-tions for routing and format conversion on the digital loop through output. Digi-loop setup parameters are as follows:
LOOP SOURCE - This parameter selects the source for the AES and S/PDIF loop through outputs. Available options are:
• off – digi loop is disabled
• follow dac input (DEFAULT) – the dac input source feeds the digi-loop output. For ADAT, the loop chan-nels can be selected (see below). For ADAT and USB, the format can be selected (see below)
• TOSLINK – the TOSLINK input is always routed to the digi-loop output regardless of dac source
• S/PDIF – the S/PDIF input is always routed to the digi-loop output regardless of dac source
• AES1– the AES1 input is always routed to the digi-loop output regardless of dac source
• AES2 – the AES2 input is always routed to the digi-loop output regardless of dac source
ADAT LOOP CHANNELS - This parameter allows the user to select what ADAT channels are looped to the digi-loop output. Available options are ch:1-2, ch:3-4, ch:5-6, ch:7-8 and follow ADAT input. The default is follow ADAT input.
ADAT/USB LOOP FORMAT - When the loop source is ADAT or USB, the digital audio format on the digi-loop output can be configured. Available options are consumer and professional. The default is professional.
� DIGITAL INPUT SETUP
ADAT / AES DUALWIRE - This parameter controls the system configuration to use either the ADAT input or the AES DW input. Available options are:
• ADAT ACTIVE (DEFAULT) - the adat input is configured and available as a digital input source.*
• AES DUALWIRE ACTIVE - the aes dualwire input is configured and available as a digital input source.*

27
*In addition to the ADAT / AES DUALWIRE configuration in SETUP, hardware jumper J7 on the AT166 pcb must be placed in the correct position for proper operation. The default position selects the ADAT input. These jumpers are shown in the ‘m905 DIGITAL I/O PCB Jumper Locations’ diagram, page 40.
To set the ADAT/AES Dual Wire mode:
• Disconnect the m905 from its AC power by unplugging the AC power cable.
• Use a #2 Phillips screwdriver to remove the top cover from the m905. There are 8 screws to remove on the top cover, 4 on the top and 2 on each side.
• Be careful to discharge any static electricity on the outside of the chassis before touching any of the jump-ers inside the m905.
• Refer to ‘m905 DIGITAL I/O PCB Jumper Locations’ diagram, page 40.
� SYSTEM SETUP
RCU FIRMWARE VER. - This is a read-only parameter that indicates the current firmware revision of the m905 RCU. Attempts to edit this parameter will be ignored.
ACU FIRMWARE VER. - This is a read-only parameter that indicates the current firmware revision of the m905 ACU. Attempts to edit this parameter will be ignored.
XMOS FIRMWARE VER. - This is a read-only parameter that indicates the current firmware revision of the m905 XMOS processor. Attempts to edit this parameter will be ignored.
RESTORE DEFAULTS - This menu item is used to restore the system to factory defaults. Executing the follow-ing sequence will erase all user defined setup data and return values to their default states.
Once restore defaults is the selected parameter, press the knob. The parameter “no” will turn red. Rotate the knob clockwise to change the value to “yes”. Press the knob again and the restore defaults se-quence will execute. If you do not wish to execute this, instead rotate the knob counter clockwise back to “no” and press the knob to exit edit mode.
� SPL METER SETUP
The m905 provides a real-time type IEC Type 2 SPL measurement display. This setup mode allows the user to configure the different SPL meter parameters. SPL meter setup parameters are as follows:
SPL METER - This parameter is used to turn the SPL meter on and off. The default is on. When the SPL mea-surement is on, it is displayed in the normal and setup screens. An off status is indicated on both screens as well.
FILTER TYPE - The SPL measurement is calculated based on the desired filter type. Available options are unweighted, A-weighted and C-weighted. The default is A-weighted. The selected filter is displayed on both the normal and setup screens.
For more information about SPL filtering, see: http://en.wikipedia.org/wiki/A-weighting
PEAK MODE - This controls the behavior of the SPL peak measurement. Available options are decay (3s), decay (5s), decay (10s) and hold. The default is hold. When decay is selected, the peak will decay after the selected time. When hold is selected, the peak is held until the user clears it by pressing and holding the MON>CUE /spl clear button.
28
RESPONSE - The response controls the ballistics of the SPL meter. Available options are slow and fast. The default is fast.
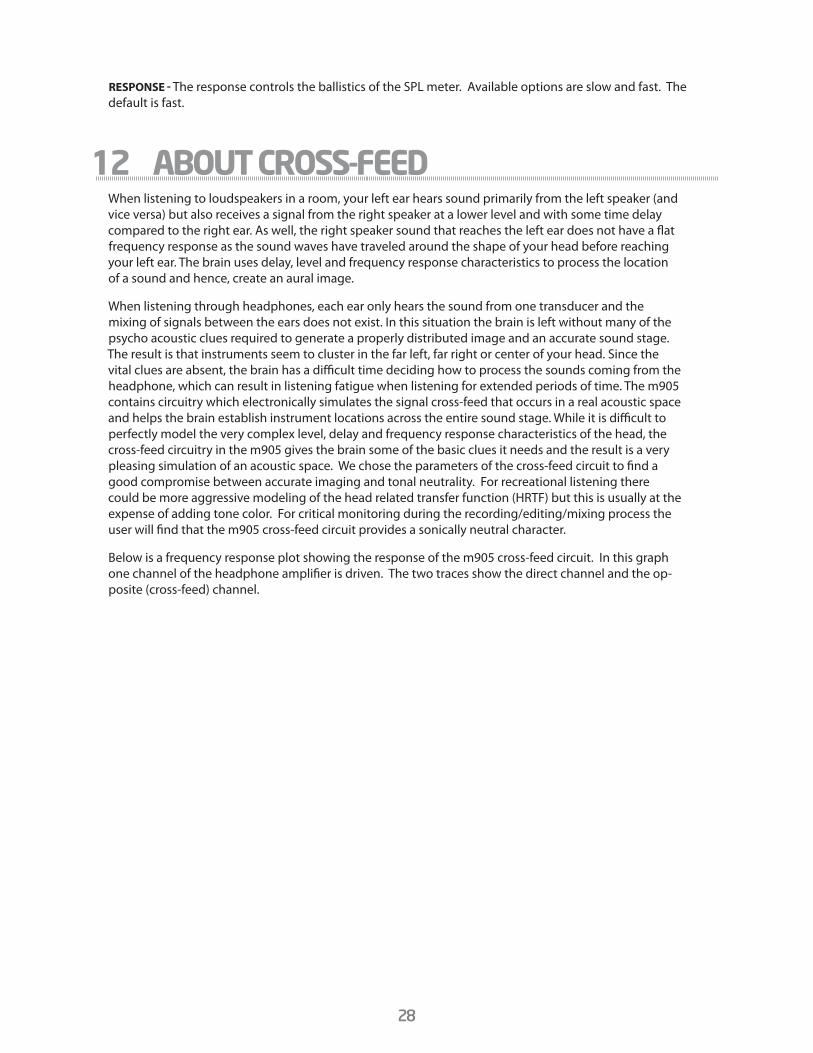
12 ABOUT CROSS-FEEDWhen listening to loudspeakers in a room, your left ear hears sound primarily from the left speaker (and vice versa) but also receives a signal from the right speaker at a lower level and with some time delay compared to the right ear. As well, the right speaker sound that reaches the left ear does not have a flat frequency response as the sound waves have traveled around the shape of your head before reaching your left ear. The brain uses delay, level and frequency response characteristics to process the location of a sound and hence, create an aural image.
When listening through headphones, each ear only hears the sound from one transducer and the mixing of signals between the ears does not exist. In this situation the brain is left without many of the psycho acoustic clues required to generate a properly distributed image and an accurate sound stage. The result is that instruments seem to cluster in the far left, far right or center of your head. Since the vital clues are absent, the brain has a difficult time deciding how to process the sounds coming from the headphone, which can result in listening fatigue when listening for extended periods of time. The m905 contains circuitry which electronically simulates the signal cross-feed that occurs in a real acoustic space and helps the brain establish instrument locations across the entire sound stage. While it is difficult to perfectly model the very complex level, delay and frequency response characteristics of the head, the cross-feed circuitry in the m905 gives the brain some of the basic clues it needs and the result is a very pleasing simulation of an acoustic space. We chose the parameters of the cross-feed circuit to find a good compromise between accurate imaging and tonal neutrality. For recreational listening there could be more aggressive modeling of the head related transfer function (HRTF) but this is usually at the expense of adding tone color. For critical monitoring during the recording/editing/mixing process the user will find that the m905 cross-feed circuit provides a sonically neutral character.
Below is a frequency response plot showing the response of the m905 cross-feed circuit. In this graph one channel of the headphone amplifier is driven. The two traces show the direct channel and the op-posite (cross-feed) channel.

29
<figure - cross-feed response graph>
13 Communication Error HandlingIf at any point communication is lost between the RCU and ACU, the remote will display the communi-cation error message and begin attempting to re-establish communication. During this time, the ACU remains in the last configured state. Once communication is restored, the remote retrieves the system status from the ACU and normal operation resumes.
14 Computer Audio Setup � ASYNCHRONOUS USB AUDIO
The asynchronous mode USB controller in the m905 represents significant improvement over any previ-ous type of USB DAC. Previously, a USB DAC worked under standard adaptive mode USB audio, which means the DAC’s clock would have to sync to the non-audio related computer USB buss master clock. As you can imagine, the computer has a lot else to do, so the incoming clock signal to which the DAC’s clock would have to sync was not ideal and would result in unwanted jitter.
With asynchronous mode USB, the m905’s USB DAC becomes the master to which the computer’s USB buss gets synced. So the computer is now synced to a crystal-based audio clock signal and the system works with dramatically lower jitter. No phase-lock loop or sample rate conversion is necessary, which means bit-perfect playback from a computer with zero interface-induced jitter.

30
� USB UP CHANNEL SETUP
In addition to playback, the m905’s USB interface allows for up to 10 channels to be transmitted back to the computer. These ‘up channels’ allow the user to use the m905 as a simple I/O computer interface.
Up channel operation is configured in the PC’s USB Audio Driver Control Panel or Apple OSX Audio MIDI Setup. Two modes are available. The first option configures the device for 10 input channels and 2 output playback channels. Input channels 1-2 are derived from the last selected digital input and input channels 3-10 from the ADAT input. For stereo digital sources, PCM sample rates up to 192kHz are supported as is DSD64. For the ADAT inputs, the m905 will send 8 channels of audio at 44.1/48kHz or 4 channels SMUX.
The second option limits the device to 2 input channels 2 playback channels. This configuration sup-ports playback of PCM sample rates up to 192kHz, DSD64 and DSD128 (not currently available on Mac). Input channels 1-2 are derived from the last selected digital input.
For Mac OSX, the input stream format is selected in the Audio Midi setup window as shown:

31
For PC, the input stream format is selected in the USB Audio Driver Control panel as shown:
Note: If your application does not require more than 2 input channels, the 2 input/2output setting is recom-mended as it requires less over all bandwidth of the USB connection.
� COMPUTER AUDIO REQUIREMENTS
Regardless of the type of computer you will use to playback audio from, it must have at least one avail-able USB port. The m905 ships with a standard USB type A to type B cable. The type A connector plugs in to the computer and the type B connector to the USB m905 input.
The m905’s asynchronous mode USB DAC supports standard driverless operation on Mac OSX since version 10.x.x. Sample rates up to 192kHz are supported. For Windows PC computers, users will need to download and install a free driver on their computer. This driver can be found on our website:
http://www.gracedesign.com/support/support.htm
On Mac computers driverless operation is supported by the OS. The m905 will automatically show up in your computer’s list of supported audio devices as ‘Grace Audio Device’. In most cases, simply choose that as your audio playback device and the system will work.

32
Different operating systems may pose their own set of complications in setting up the m905 as the audio playback device. In the event that ‘plug and play’ operation does not occur, you will need to look at some specific setup variables for your OS. In this case, we will direct you to a very well written and comprehensive docu ment by our friend and colleague Charlie Hanson from Ayre Acoustics.
http://www.ayre.com/usb.htm
This is an invaluable resource for computer/USB audio setup information for most all current operat-ing systems, and we strongly urge you to familiarize yourself with the information pertaining to your specific OS.
Another excellent resource is Wavelength Audio’s website: http://www.USBdacs.com
In the event that you have any setup issues which aren’t addressed by these resources, feel from to contact us directly at 303.443.7454 Monday through Friday 9 – 5, MST.
� USING THE m905 FOR DAW PLAYBACK
With the extremely high quality audio playback achieved with this USB interface, the m905 can be great option as an stereo output device directly from your digital audio workstation. For playback only, this will work very well. However, using it in conjunction with other USB audio devices connected to your workstation computer’s USB will require some adjustments to your computers audio settings and for best results, some external clock routing between audio devices.
For Mac OS X, this is achieved by setting up the m905 in an ‘aggregate audio device’ setup, with the m905 as the output device.
For Win 98 – Win 7, you must use ‘asio4all’ drivers- http://www.asio4all.com/. There is currently no sup-port yet for windows 8.
With both of these setups, if you are using multiple I/O devices, you will need to pay careful attention to clocking. In Mac / Core audio aggregate setups, you are able to set which device is the clock master. However, this means that other devices will be sample rate converted, which we do not recommend.
15 Updating FirmwareThe m905 utilizes three different unique processors for system and digital audio control. As indicated in the system SETUP menu, the three processors are RCU (remote control unit processor), ACU (audio control unit processor) and XMOS (digital audio control processor). Over time firmware updates may become available. These can be found and downloaded from the Grace Design website at http://www.gracedesign.com/support/support.htm. Each processor firmware is independent of the other and may or may not be at the same revision level (check the website for the latest revision information). When-ever firmware is updated on the system, the user should confirm that all three firmware sets are the most current. In the event that incompatible firmware revisions are accidentally loaded on the system, the m905 RCU will display an error message instructing to update the system firmware. The currently loaded firmware revisions will be displayed on this message screen for reference.
Important note: Our bootloader is currently NOT compatatble with Mac OSX computers. So the upgrade process can only be done using a Windows computer.

33
� UPDATING RCU FIRMWARE
TO UPDATE THE FIRMWARE ON THE m905 RCU PERFORM THE FOLLOWING STEPS:
• Download the m905 RCU firmware package from the Grace Design website and unzip it on your com-puter.
• Turn off the m905 and connect your computer via USB to the USB upgrader port on the m905 RCU.
• Turn on the m905. The setup button will illuminate solid white on the remote control to indicate USB upgrader mode is active. Note that the LCD display will be dark.
• Once the m905 initializes it will ap-pear on your computer as a ‘mass storage class’ device with the name m905_RCU.
• Open the folder. It will contain a single file named “READY.TXT”
• This indicates that m905 RCU is now ready for the firmware update. Sim-ply locate the firmware file that was downloaded (filename starts with m905_RCU), drag and drop the file to the folder containing READYTXT.
• Once the file appears in the folder, it has been copied and the m905 RCU begins updating its flash memory. DO NOT DISCONNECT THE DEVICE OR INTERRUPT POWER TO THE m905 WHILE THIS IS IN PROCESS.
• Once the reprogramming is com-plete, the m905 RCU will disconnect/reconnect itself from the computer. Open the folder again. A file named
“SUCCESS.TXT” should be in the folder. This is your indication that the firm-ware update process has completed successfully.

34
• If the m905 RCU encounters any problems during the USB upgrade process, the folder will contain a file named “ERROR.TXT”.
• The type of problem encountered is reported on the Status line in ERROR.TXT. In this example, a firmware file for the ACU was accidentally uploaded as indicated by the “Invalid Device” error. Should an error occur, restart the firmware upgrade process.
• Disconnect the USB cable from the RCU and then cycle the power to the m905.
� UPDATING ACU FIRMWARE
TO UPDATE THE FIRMWARE ON THE m905 ACU PERFORM THE FOLLOWING STEPS:
• Download the m905 firmware package from the Grace Design Website and unzip it on your computer.
• Turn off the m905 and connect your computer via USB to the USB upgrader port on the m905 ACU.
• Turn on the m905. The m905 will enter USB upgrader mode instead of communicating with the m905 RCU. (the m905 RCU will display a communication error.)
• Once the m905 initializes it will appear on your computer as a ‘mass storage class’ device with the name m905_ACU.
• Open the folder. It will contain a single file named “READY.TXT”. This indicates that m905 ACU is now ready for the firmware update. Simply locate the firmware file that was downloaded (filename starts with m905_ACU), drag and drop the file to the folder containing READY.TXT.
• Once the file appears in the folder, it has been copied and the m905 ACU begins updating its flash memory. DO NOT DISCONNECT THE DEVICE OR INTERRUPT POWER TO THE m905 WHILE THIS IS IN PROCESS.

35
• Once the reprogramming is complete, the m905 RCU will disconnect/reconnect itself from the computer. Open the folder again. The file named “SUCCESS.TXT” should be in the folder. This is your indication that the firmware update process has completed successfully.
• If the m905 ACU encounters any prob-lems during the USB upgrade process, the folder will contain a file named “ERROR.TXT”.
• The type of problem encountered is reported on the Status line in ERROR.TXT. In this example, a firmware file for the RCU was accidentally uploaded as indicated by the “Incorrect file for this device” error.
• Disconnect the USB cable from the ACU and then cycle the power to the m905.
� UPDATING XMOS FIRMWARE
TO UPDATE THE FIRMWARE ON THE M905 XMOS PERFORM THE FOLLOWING STEPS:
• Download the m905 firmware package from the Grace Design Website and unzip it on your computer.
• Turn off the m905 and connect your PC via USB to the USB 2 port on the m905 ACU.
• Turn on the m905.
• Open the USB Audio Class Driver Control Panel which is located in the system tray of your PC.

36
• Select Firmware Upgrade from the menu:
• Click the Browse button and locate the m905_XMOS_DFU_xxx.bin file and select it.
• Click on Start Firmware Upgrade to begin the XMOS firmware upgrade process.
• The progress of the upgrade will be indicated in a pop-up dialog box. DO NOT DISCONNECT THE DEVICE OR INTERRUPT POWER TO THE m905 WHILE THIS IS IN PROCESS. Once completed, power cycle the system. Should the firmware upgrade fail, start the XMOS firmware upgrade process over again.

37
16 Specifications
ANALOG I/O all specifications are subject to changeTHD+N at Maximum Volume, 1kHz, 22Hz-22kHz BW+20dBu out <0.0008% +10dBu out <0.0008% 0dBu out <0.002%Intermodulation Distortion SMTPE/DIN 4:1 50Hz, 7kHz@+20dBu out <0.002%@ 0dBu out <0.0015%Frequency ResponseBalanced Inputs +/-3dB 3Hz to 1.25MHzUnbalanced Input +/-3dB 3Hz to 275kHzDynamic Range20-22kHz bandwidth 118dB20-22kHz bandwidth and A weighting filter 121dBOutput Noise20-22kHz bandwidth, at -20dB gain -99dBu20-22kHz bandwidth and A weighting filter, at -20dB Gain -102dBuPhase Deviation20Hz to 20kHz <10 degrees10Hz to 100kHz < 19 degreesCrosstalk any channel100Hz <104dB1kHz <100dB20kHz <79dBBalanced Input CMRR60Hz >70dB1kHz >70dB10kHz >70dBGain Range
-104dB to +13dBChannel Tracking AccuracyAny channel +/-0.1dBMaximum Output Level+26dBuMaximum Input LevelBalanced inputs +25dBuUnbalanced inputs +21dBuImpedancesBalanced inputs 88k OhmsUnbalanced inputs 53k OhmsBalanced outputs 300 OhmsMinimum load impedance 300 OhmsExternal Talkback Mic Preamp Gain+7dB to +70dB in 1dB steps
continued >

38
DIGITAL TO ANALOG CONVERTER FIXED OUTPUTS all specifications are subject to changeOutput LevelsUser selectable (0dBFS) -76dBu to +24dBu in 0.5dB stepsFixed output trim range (0.5dB steps)THD+N1kHz, -1dBFS, (0dBFS = +20dBu), 20-22kHz bandwidth 0.0006%Dynamic Range20-22kHz bandwidth, 0dBFS = +20dBu (AES17 filter) 117dB20-22kHz bandwidth, 0dBFS = +20dBu (A-weighted) 119dBInput Lock RangeAES3/SPDIF44.1kHz +/-400Hz48kHz +/-700Hz88.2kHz +/-1200Hz96kHz +/-1300Hz176.4kHz +/-2000Hz192kHz +/-2000HzADAT LIGHTPIPE™44.1kHz +/-400Hz48kHz +/-700Hz88.2kHz +/-1200Hz96kHz +/-1300HzADAT LIGHTPIPE™44.1kHz +/-50Hz48kHz +/-70Hz 88.2kHz +/-50Hz96kHz +/-70Hzs-Lock™ Capture Range44.1kHz +/- 6Hz48 kHz +/- 7Hz88.2 kHz +/- 14Hz96 kHz +/- 20Hz176.4 kHz +/- 24Hz192 kHz +/- 30HzWord Clock / Superclock InputImpedance (switchable) 75 ohm / 1Meg ohmMinimum Voltage 3V peak to peakMaximum Voltage 5V peak to peakWord clock frequencies supported 44.1, 48, 88.2, 96, 176.4, 192kHzSuperclock frequencies supported N/AUSB Supported Sample Rates 44.1, 48, 88.2, 96, 176.4, 192kHz, DSD64 2.8224MHz, DSD128 5.6448MHz
POWER SUPPLY / GENERALPower consumption 60WInput Voltage 100VAC – 240VAC / 50-60HzDimensionsMain chassis IEC 2U 3.5” x 10.5” x 17”Remote control unit 8.9” x 5.1” x 2.2”WeightMain chassis 7.8lbsRemote control unit 2.2lbs

39
17 Block Diagram
UN
BALA
NC
ED
2-C
H B
ALAN
CED
1
CU
E BA
LAN
CED
AES3
2
ADATAN
ALO
G IN
PUTS
ADAT
SPEA
KER
1
SPEA
KER
2
CO
NTR
OL
RO
OM
HEA
DPH
ON
E
DIG
ITAL
INPU
TS/O
UTP
UTS
SPD
IF
CU
EC
UE
+ TB
SU
MM
ING
HEA
DPH
ON
E O
UT
ANAL
OG
OU
TPU
TS
BALA
NC
ED IN
PUT
AMP
MU
TE
HEA
DPH
ON
EAM
PLIF
IER
TALK
BAC
K M
IC
TOSL
INK
WO
RD
CLO
CK/
LOO
PSYN
C IN
WO
RD
CLO
CK
INPU
T SE
LEC
TOR
S
DIM
MO
NO
(L+R
)
SPEA
KER
SEL
ECT
DAC
AES3
RX
s-Lo
ck P
LL
TALK
BAC
K G
AIN
CU
ETA
LKB
ACK
MIC
PR
EAM
P
BALA
NC
ED IN
PUT
AMP
UN
BALA
NC
ED
INPU
T AM
P
BALA
NC
ED
OU
TPU
T D
RIV
ER
OU
TPU
T D
RIV
ERBA
LAN
CED
MO
N T
O C
UE
WO
RD
CLO
CK
PLL
LEVE
L C
ON
TRO
L
LEVE
L C
ON
TRO
L
LEVE
L C
ON
TRO
L
AES3
1
THR
OU
GH
/OU
T
AES3
OU
T
SPD
IF O
UT
DIG
ITAL
LO
OP
THR
OU
GH
USB
2D
AC/S
UB/
MET
ER
BALA
NC
ED
OU
TPU
T D
RIV
ER
LEVE
L C
ON
TRO
L
DAC
/SU
B/M
ETER
OU
T
SPEA
KER
3
MO
NO
(L+R
)
TALK
BAC
K O
UT
X-FE
ED
DE-
EMPH
ASI
S
REM
OTE
CO
NTR
OL
UN
IT
TALK
BAC
K SE
LEC
T
DAC
/SU
B
TALK
BAC
KO
UTP
UT
DR
IVER
BALA
NC
ED
REM
OTE
CO
NTRO
L UN
IT
TALK
BAC
K M
IC
USB
-2.0
(PC
B JU
MPE
R)
8 CH
2 C
H
HEA
DPH
ON
E SO
UR
CE
SEL
EC
T
MO
NO
(L+R
)L-
R
m90
5 SR
# 95
001-
9503
4C
ON
NEC
TED
HER
E
DIF
FER
ENC
E (L
-R)
RC
U T
ALKB
ACK
MIC
PR
EAM
P
RC
U T
ALK
BAC
K G
AIN
(PC
B JU
MPE
R)
AES3
DU
AL
WIR
ESE
LEC
T
AES3
DU
AL
WIR
E
10 C
H2
CH
MO
N T
O C
UE

40
18 PCB Jumper Locations
P165 Rev Bm905 MAIN PCB JUMPER LOCATIONS
REAR PANEL
J7: AES DUAL WIRE / ADAT SELECT
ADAT
AES 2 WIRE
P165 Rev Am905 DIGITAL I/O PCB JUMPER LOCATION
REAR PANEL

41
19 Wiring Diagrams
SHIELD
HOT
GND
TIP
SLEEVE
Normally open switch
Talkback remote switch diagram
Do not use an o� the shelf DB15 cable as the pinout will be incompatable. If you need a longer cable contact your Grace Design dealer or us directly.
DB15 15 pin RCU connector, RS485 operation
Connector back side veiw. Both cable ends are identical.
PIN 1 RX-
PIN 2 GND
PIN 3* TX-
PIN 4* +5VDC
PIN 5* GPIO
PIN 6 TALKBACK-
PIN 7 HEADPHONE LEFT
PIN 8 HEADPHONE GND
PIN 9 RX+
PIN 10* TX+
PIN 11 +6.5VDC
PIN 12* +3.3VDC
PIN 13 TALKBACK
PIN 14 GND
PIN 15 HEADPHONE RIGHT
* presently unconnected,
provisional for RS422 operation
12
3
SHIELD
HOT
GROUND
(OPEN)
Unbalanced 1/4” Balanced Output XLR
Balanced XLR output to unbalanced 1/4” input
TALLYTALKBACK CONTROL
GND 1/4" TRS PLUG
TIP
SLEEVE
LED
Talkback remote switch diagram with LED indicator
To m905 Remote Talkback Jack
Normally open switch
To m905 Remote Talkback Jack

42
20 Cleaning and Maintenance Your m905 system chassis is constructed out of high quality anodized T6 aluminium. Under normal circumstances, virtually no maintenance is required to keep the unit looking shiny and new. However, if you unit becomes smudged or dirty, here are some cleaning tips: Apply windex to a clean lint free cloth and gently wipe all surfaces, taking care not to allow the cleaning product to build up around any panel switches or knobs.
21 Warranty Information• Grace Design warrants all of our products to be free of defective parts and workmanship for a period of
five years.
• This warranty period begins at the original date of purchase and is transferable to any person who may subsequently purchase the product during this time.
• This warranty excludes the following conditions: normal wear and tear, misuse, customer negligence, accidental damage, unauthorized repair or modification, cosmetic damage and damage incurred during shipment.
• During the time of this warranty, Grace Design will repair or replace, at its option, any defective parts or repair defective workmanship without charge, provided the customer has appropriate proof of purchase and that the product has its original factory serial number.
• Customers within the US are responsible for all inbound freight charges to Grace Design’s facility, while Grace Design will pay for return freight charges via ground service. Customers outside the US must con-tact their distributor for warranty / product return details.
• In order for Grace Design to provide efficient and timely warranty service, it is important that you mail the completed warranty registration card enclosed with all of our products within 10 days of the original date of purchase. You may also register your product directly with Grace Design by telephone, 303-823-8100 Monday-Friday 9:00am to 5:00pm MST, or you can register your product online at www.gracedesign.com.
• This warranty is in lieu of all other warranties whether written, expressed, or implied, INCLUDING ANY WAR-RANTIES OF MERCHANTABILITY OR FITNESS FOR A PARTICULAR PURPOSE. In no event will Grace Design be liable for lost profits or any other incidental, consequential or Exemplary damages, even if Grace Design is aware of the possibility of such damages.
• In no event will Grace Design’s liability exceed the purchase price of the product. This warranty gives the customer specific legal rights. The customer may also have other rights, which vary from state to state. Some states do not allow limitations on implied warranties or consequential damages, so some of the limitations of the above may not apply to a particular customer.

43
22 Manual RevisionsREVISION PAGE CHANGE DATE INITIALS
A all initial release 1/30/2013 edg
B all added DSD references
added reference level information
added dual wire AES operation
3/26/2013 edg
C 1 changed ACU, RCU & XMOS firmware Rev to 1.12, 7/18/2013 edg
C 14 included display window showing DSD input present 7/18/2013 edg
C 4, 5, 34 added DSD128 references, 7/18/2013 edg
C 26, 27 added USB up channel information 7/18/2013 edg
D all added m905 Analog information 12/10/2014 edg
D all added m905 IR remote information 12/10/2014 edg