Embed Size (px)
Citation preview


Some examples…when records are:
saved in Metadata editor
imported via import profile
imported from external search resource
edited via “enhance the record” function
4

5

6


This presentation will not discuss the specific syntax of the normalization rules. The focus will be specifically on creating the rules as well as how and where the rules may be used.
These operations may be performed
unconditionally
conditionally
8

May be tested and edited until satisfactory outcome achieved
9

Here is an example of a MARC Normalization Rule.
10

Here is a second example of a MARC Normalization Rule.
11

Here is a third example of a MARC Normalization Rule.
12

These screenshots show the first steps in the path to creating a new normalization rule.
13

After establishing the rule, we add the snippet which gives us…
14

…a template that we need to modify for the specific purposes of this normalization rule.
Any existing normalization rules may be viewed via the Normalization Rules tab in the Metadata Editor.
15

Normalization rules are created in the metadata editor via menu File > New > Normalization rules.
16

In the window that opens enter the text of the normalization rule and then click “Save”
A simpler approach is to copy the text of the normalization rule from an examples in the online help and then modify it as necessary.
17

Let’s create a new Normalization Rule together.
1. open the Metadata editor and go to File > New > Normalization Rules
i. for both Name and Description, add descriptive entry such as “Delete 906 field when importing records”
ii. choose Shared
iii. choose to Enable
iv. click on the Save button to be taken to the next step
18
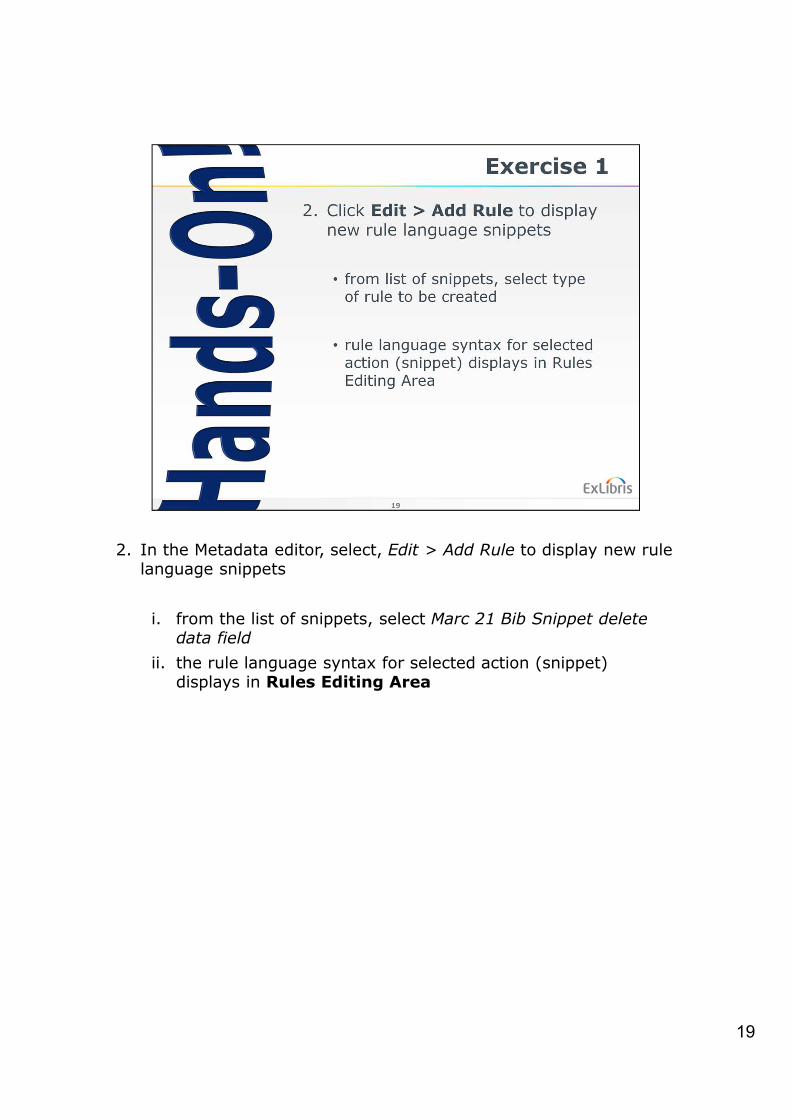
2. In the Metadata editor, select, Edit > Add Rule to display new rule language snippets
i. from the list of snippets, select Marc 21 Bib Snippet delete data field
ii. the rule language syntax for selected action (snippet) displays in Rules Editing Area
19

3. Edit placeholder text (placeholder indicated by –characteristic–) in snippet
• replace -field- with 906
• replace -condition- with exists
• click on Save to store the rule
While in the Metadata editor, take the opportunity to test the rule. To do this…
1. perform an external search at Library of Congress for the title, Nature’s metropolis (by William Cronon) or any item of your choosing
2. view the record to confirm the presence of a 906 field
3. import and save the record to the repository
4. view the record now saved to your repository and confirm the absence of a 906 field
20

21


Before actually running the normalization rule in a real process or import, it is recommended to test it. The normalization rule may be easily tested in the metadata editor.
23

24

Now we see that the normalization rule did make a change
25

The normalization rule open in the right pane with “preview” and “save” options.
Preview allows user to test it
Save allows for saving additional edits to the rule
26

27


Requires Catalog Administrator role to create process
29

30

31

From the Profile Details page switch to the Normalization tab and choose “Add Process”
Give a name and description to the new process
Click “Next” to arrive to the next screen
32

In the “Task List” column select “MarcDroolNormalization” and click “Add to Selection”
33

Now in the “task parameters” tab we have three options to add the normalization rules. One option exists for each time we added “MarcDroolNormalization” in the “Task List” tab.
34


36

37

User can then choose from the various processes
38

39

40

Catalog Manager or Administrator roles may run process
41

Select the desired process and click “Next”
Select the set on which you want to run the process and click “Next”
42

Choose the normalization routine(s) and click “next”
Give a name for the process of the job and click next
43

When the job completes you will see that the records which have a g in pos. 6 of the LDR have a 245 subfield h with [Video]
44

Use behavior -> behaviour as an example.
45

The process we created can also be placed in the import profile.
Via the “Normalization & Validation” tab of the import profile it can be chosen in the “Correct the data using” field
46

The first record in the input file, with title “Top technologies”, does have a “g” in position 6 of the LDR
47

The second record in the input file, with title “AICPA's top technologies 2004”, does not have a “g” in position 6 of the LDR
48

The input file is uploaded using the import profile which includes process “Add 245 sf h [Video]”
The second record correctly did not get the subfield added
49

We have another normalization rule called “Copied from WorldCat” It adds a 900 field with text “Copied from WorldCat”
It has been added to a process called “Add 900 copied from WorldCat”
50

Now we want this process to take effect when we copy a record from WorldCat via “search external resources” and copy it to the metadata editor
51

First we will see which external resource is used in the external search profile called “WorldCat” This is accessed via Resource Configuration Menu > Search Configuration > External Search profile
In the Resources List tab of the External Search profile we see that the name of Resource is “WorldCat”
52

Let’s edit the resource “WorldCat” so that it will use the process called “Add 900 copied from WorldCat” This may be accessed via Resource Configuration Menu > Search Configuration > External Search Resources. Then we will edit the resource.
53

Now we can choose the normalization process to run for this search
54

Now we perform a search in WorldCat
55

View a record from results
And see the field added to the “view”
56

And if we choose “Import” …
The field is added to “import” in the metadata editor
57


59

Examples of the different rules and the syntax is included in the online help
60

61