Embed Size (px)
Citation preview

Contents© Paradigm Publishing, Inc. 1
Contents© Paradigm Publishing, Inc. 2
Word 2010
Level 1
Unit 1 Editing and Formatting Documents
Chapter 2 Formatting Characters and Paragraphs
Contents© Paradigm Publishing, Inc. 3
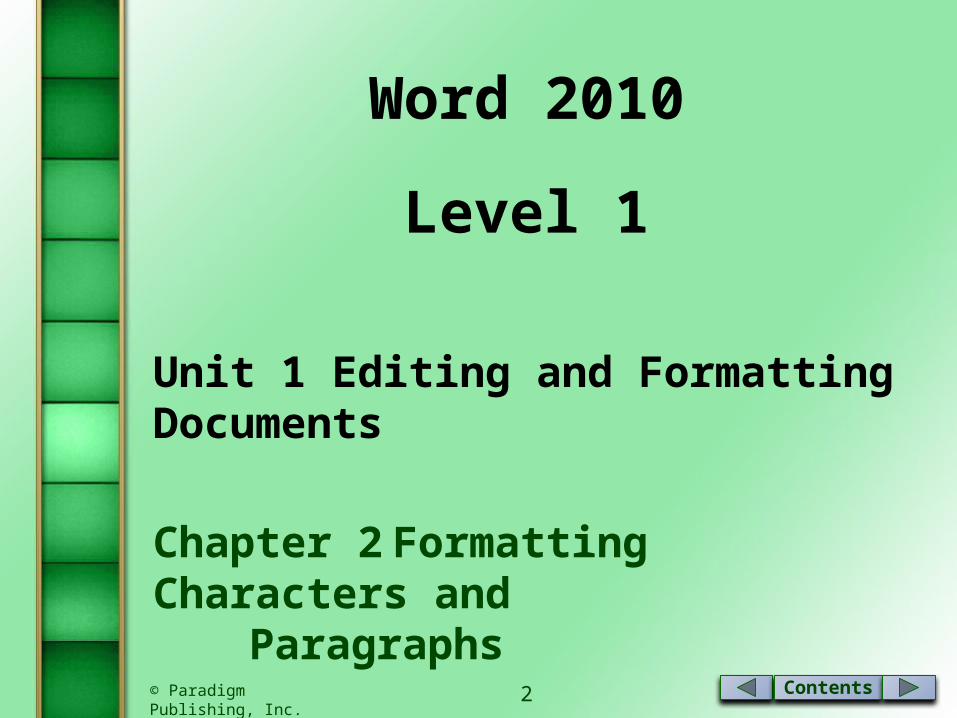
Formatting Characters and Paragraphs
Change Fonts Apply Styles from a Quick Styles Set CHECKPOINT 1 Apply a Theme Change Paragraph Alignment Indent Text in Paragraphs Space Before and After Paragraphs Repeat the Last Action Format with Format Painter Change Line Spacing Change Paragraph Spacing with the Change Styles Button Reveal Formatting CHECKPOINT 2
Quick Links to Presentation Contents
Contents© Paradigm Publishing, Inc. 4
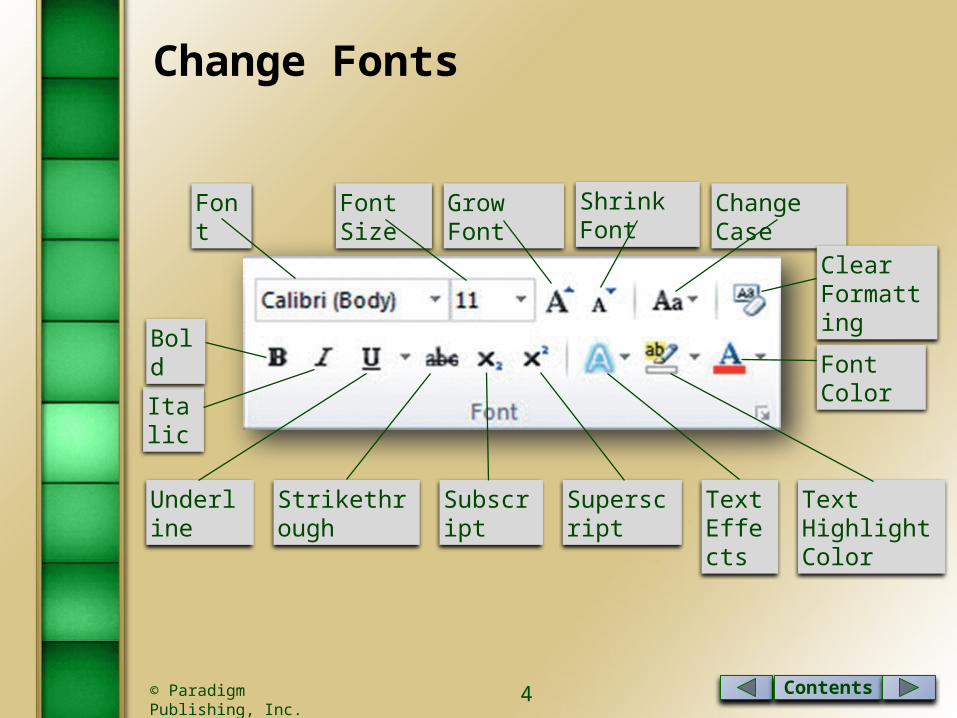
Change Fonts
Font Font Size Grow Font Shrink Font Change Case
Clear Formatting
Font Color
Text Highlight Color
Text Effects
SuperscriptSubscriptStrikethroughUnderline
Italic
Bold

Contents© Paradigm Publishing, Inc. 5
Change Fonts…continued
A typeface is a set of characters with a common design and shape and can be decorative or plain and either monospaced or proportional.
Proportional typefaces are divided into two main categories: serif and sans serif.

Contents© Paradigm Publishing, Inc. 6
Change Fonts…continued
A font consists of three elements—typeface, type size, and typestyle. Word refers to typeface as font. Type size is generally set in proportional size. Within a typeface, characters may have a varying
style.
Contents© Paradigm Publishing, Inc. 7
Change Fonts…continued
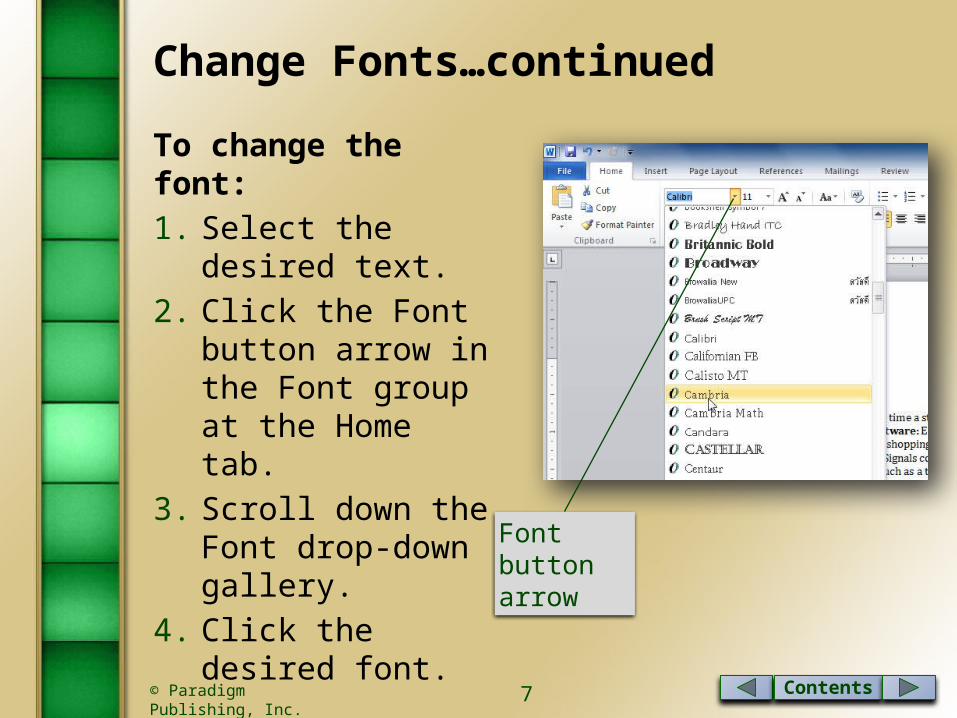
To change the font:1. Select the desired text.2. Click the Font button
arrow in the Font group at the Home tab.
3. Scroll down the Font drop-down gallery.
4. Click the desired font.
Font button arrow
Contents© Paradigm Publishing, Inc. 8
Change Fonts…continued
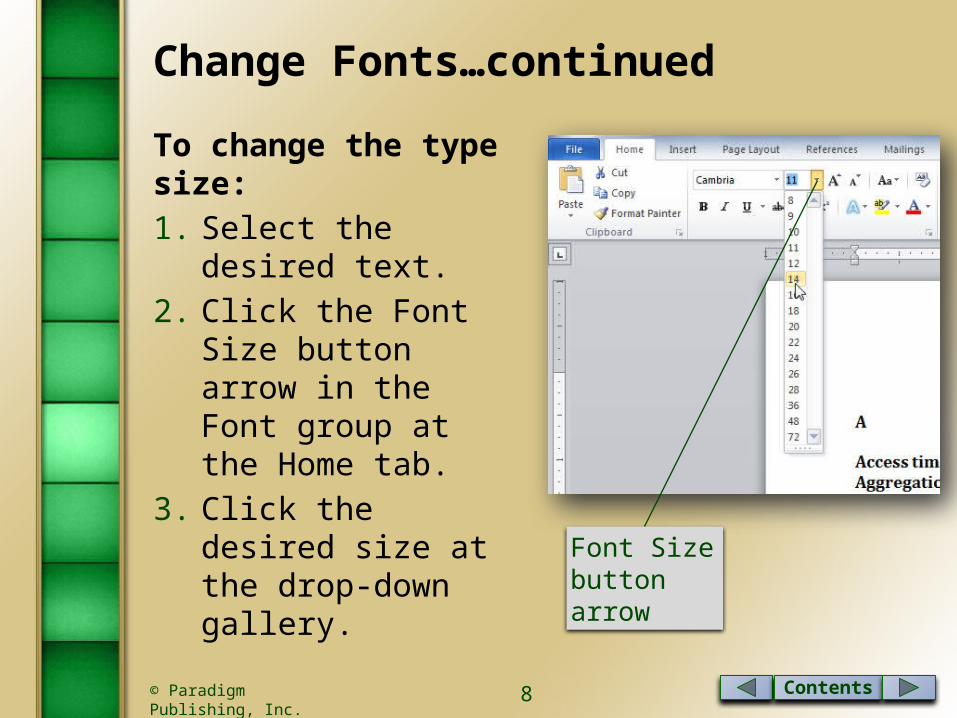
To change the type size:1. Select the desired text.2. Click the Font Size
button arrow in the Font group at the Home tab.
3. Click the desired size at the drop-down gallery.
Font Size button arrow

Contents© Paradigm Publishing, Inc. 9
Change Fonts…continued
To change the type size using the Grow Font or Shrink Font buttons:1. Select the desired text.2. Click the Grow Font button or the Shrink Font button in
the Font group at the Home tab the desired number of times.
Grow Font button
Shrink Font button
Contents© Paradigm Publishing, Inc. 10
Change Fonts…continued
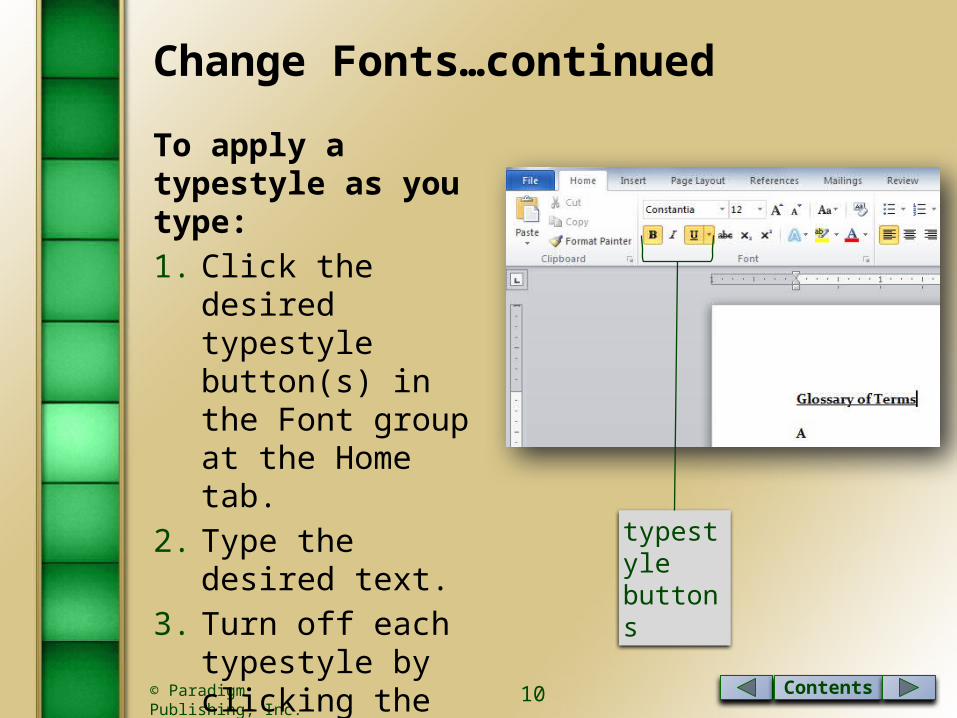
To apply a typestyle as you type:1. Click the desired
typestyle button(s) in the Font group at the Home tab.
2. Type the desired text.3. Turn off each
typestyle by clicking the button you clicked to turn it on. typestyle
buttons

Contents© Paradigm Publishing, Inc. 11
Change Fonts…continued
To change the underlining:1. Select the underlined
text.2. Click the Underline
button arrow in the Font group at the Home tab.
3. Click the desired underline option from the drop-down gallery. Underline button
arrow

Contents© Paradigm Publishing, Inc. 12
Change Fonts…continued
To change the underlining:1. Select the underlined
text.2. Click the Underline
button arrow in the Font group at the Home tab.
3. Point to the Underline Color option.
4. Click the desired color.
Underline Color option

Contents© Paradigm Publishing, Inc. 13
Change Fonts…continued
To clear the formatting of text:1. Select the desired
text.2. Click the Clear
Formatting button in the Font group at the Home tab.
Clear Formatting button
Contents© Paradigm Publishing, Inc. 14
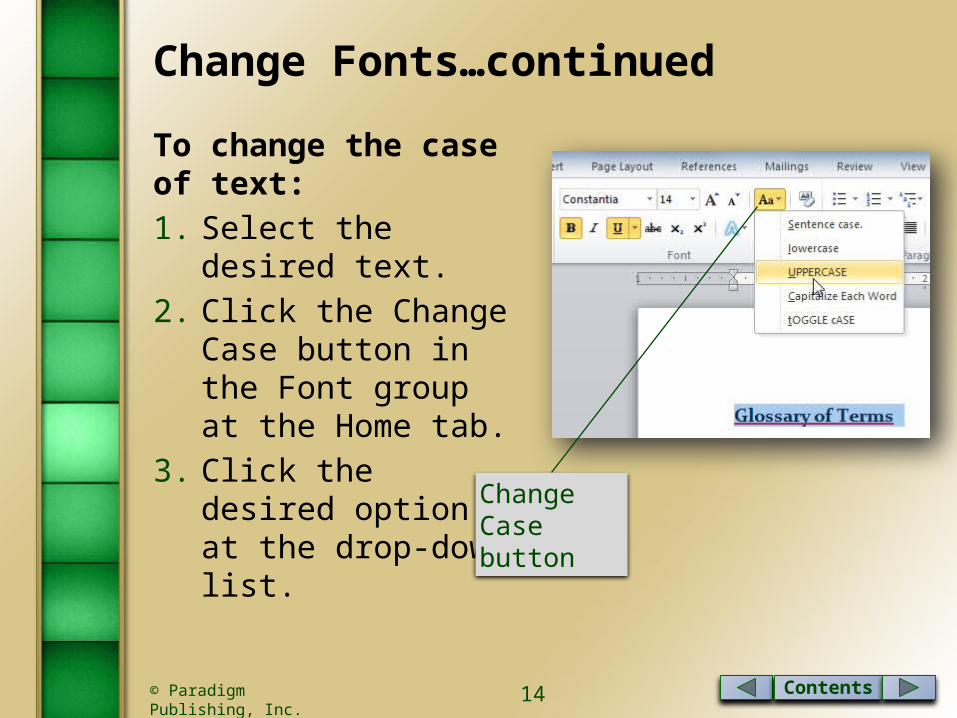
Change Fonts…continued
To change the case of text:1. Select the desired text.2. Click the Change Case
button in the Font group at the Home tab.
3. Click the desired option at the drop-down list.
Change Case button
Contents© Paradigm Publishing, Inc. 15
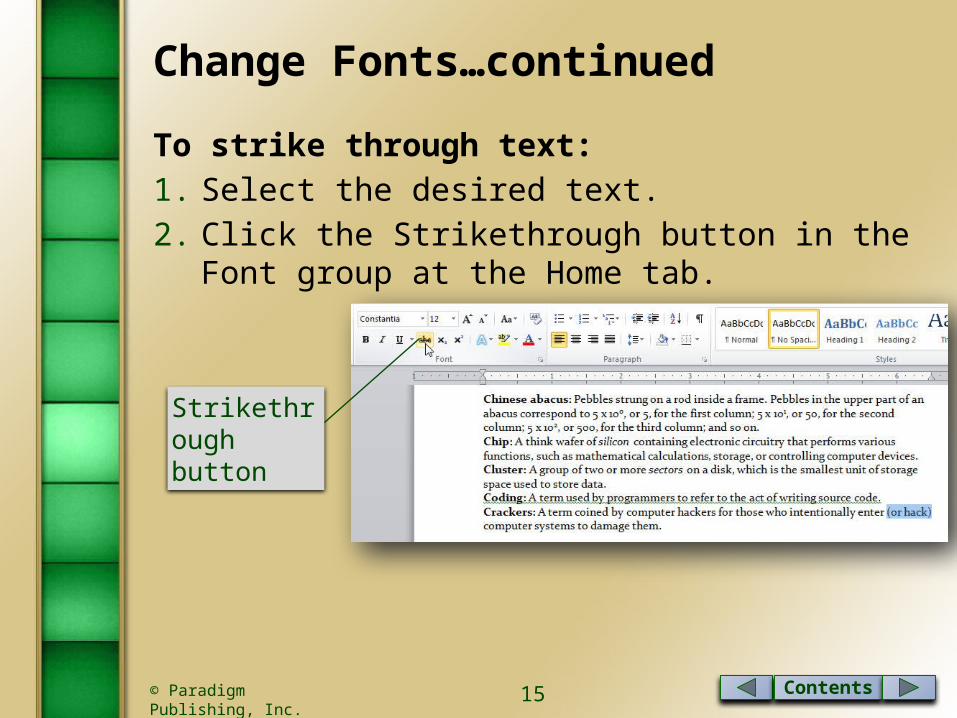
Change Fonts…continued
To strike through text:1. Select the desired text.2. Click the Strikethrough button in the Font group at the
Home tab.
Strikethrough button

Contents© Paradigm Publishing, Inc. 16
Change Fonts…continued
To create text that is lowered slightly below the text line:1. Select the desired
text.2. Click the Subscript
button in the Font group at the Home tab.
Subscript button

Contents© Paradigm Publishing, Inc. 17
Change Fonts…continued
To create text that is raised slightly above the text line:1. Select the desired text.2. Click the Superscript
button in the Font group at the Home tab.
Superscript button
Contents© Paradigm Publishing, Inc. 18
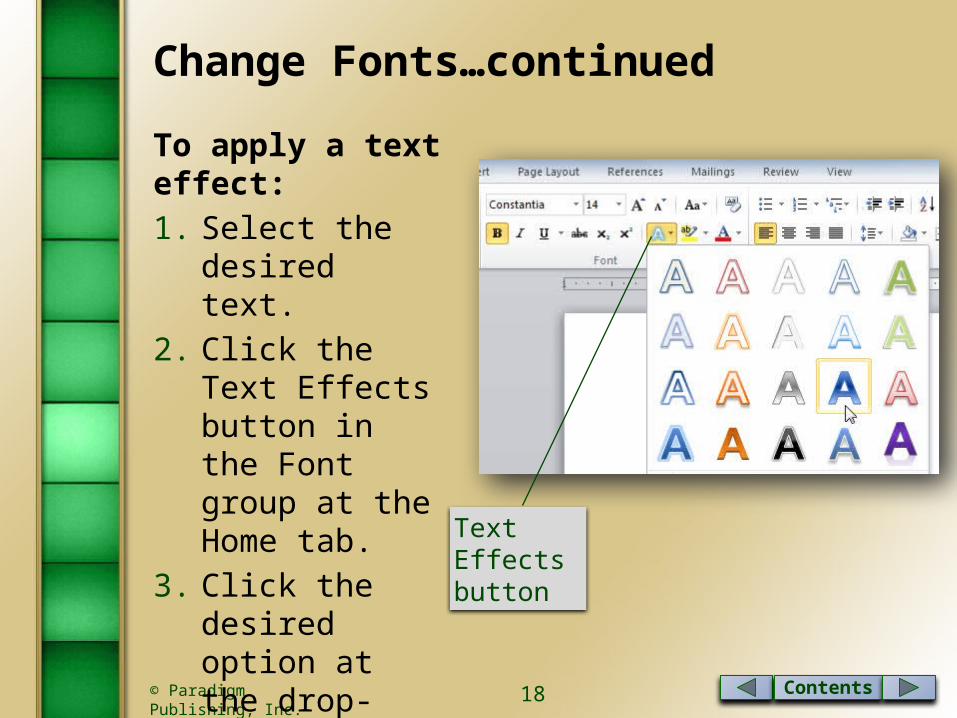
Change Fonts…continued
To apply a text effect:1. Select the desired
text.2. Click the Text
Effects button in the Font group at the Home tab.
3. Click the desired option at the drop-down gallery.
Text Effects button

Contents© Paradigm Publishing, Inc. 19
Change Fonts…continued
To highlight text:1. Click the Text Highlight Color button arrow in the Font
group at the Home tab.2. Click the desired color at the drop-down palette.3. Select the desired text.
Text Highlight Color button arrow

Contents© Paradigm Publishing, Inc. 20
Change Fonts…continued
To change the font color:1. Select the desired text.2. Click the Font Color
button arrow in the Font group at the Home tab.
3. Click the desired color at the drop-down gallery.
Font Color button arrow

Contents© Paradigm Publishing, Inc. 21
Change Fonts…continuedFont Group Button Keyboard ShortcutFont Ctrl + Shift + F
Font Size Ctrl + Shift + P
Grow Font Ctrl + Shift + >
Shrink Font Ctrl + Shift + <
Bold Ctrl + B
Italic Ctrl + I
Underline Ctrl + U
Subscript Ctrl + =
Superscript Ctrl + Shift + +
Change Case Shift + F3
Contents© Paradigm Publishing, Inc. 22
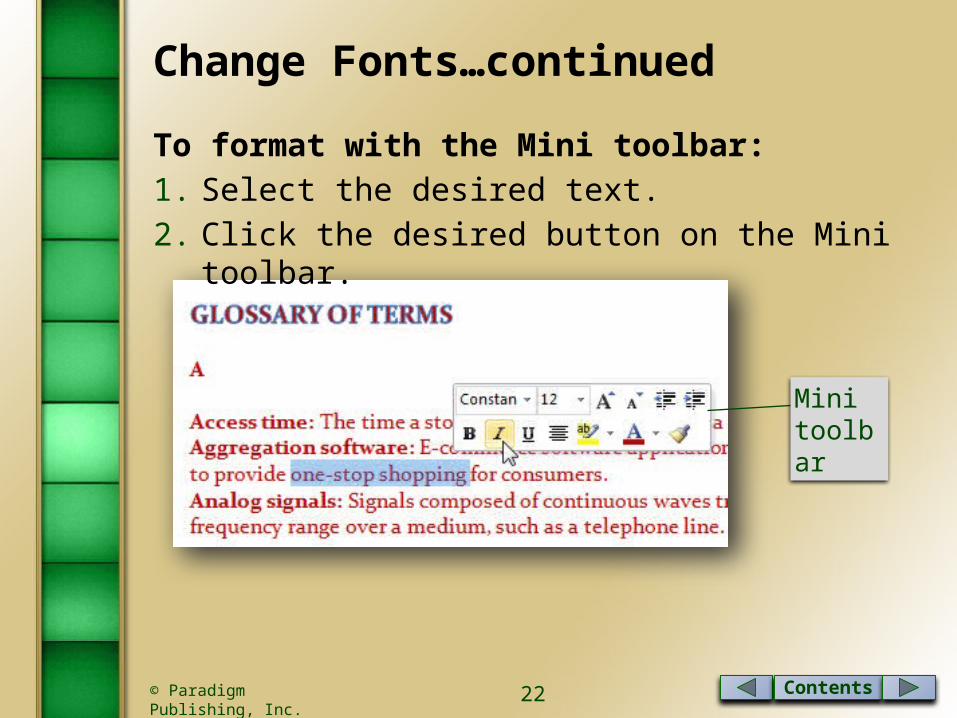
Change Fonts…continued
To format with the Mini toolbar:1. Select the desired text.2. Click the desired button on the Mini toolbar.
Mini toolbar
Contents© Paradigm Publishing, Inc. 23
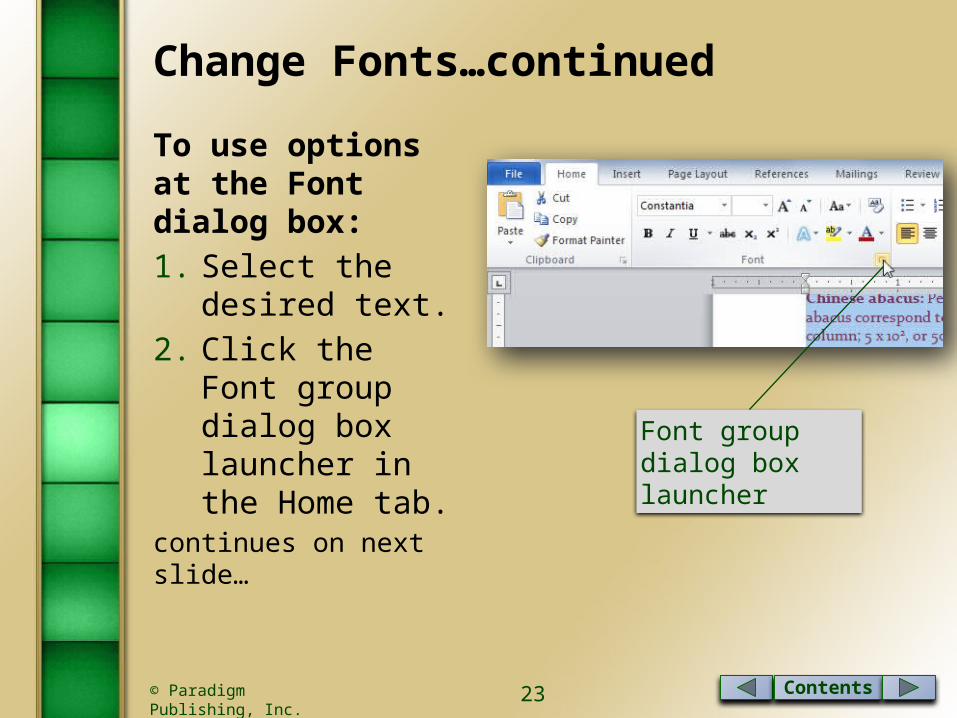
Change Fonts…continued
To use options at the Font dialog box:1. Select the desired
text.2. Click the Font group
dialog box launcher in the Home tab.
continues on next slide… Font group dialog box launcher
Contents© Paradigm Publishing, Inc. 24
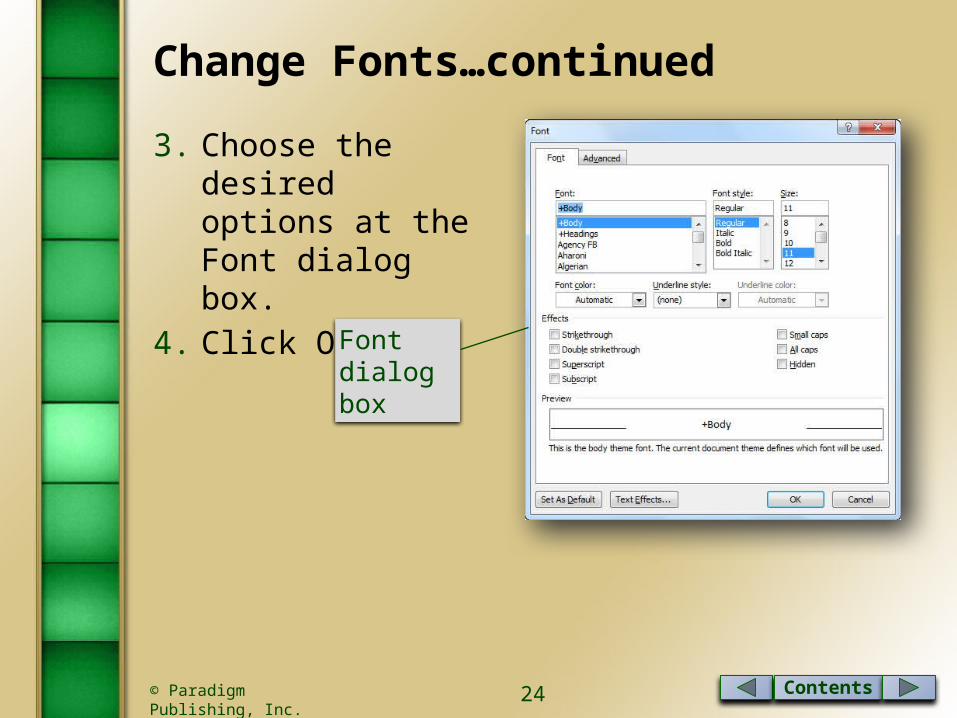
Change Fonts…continued
3. Choose the desired options at the Font dialog box.
4. Click OK.
Font dialog box

Contents© Paradigm Publishing, Inc. 25
Apply Styles from a Quick Styles Set
To apply a style:1. Position the insertion point in the desired paragraph
of text.2. Click the More button in the Styles group in the
Home tab.3. Click the desired style.
Styles group
Contents© Paradigm Publishing, Inc. 26
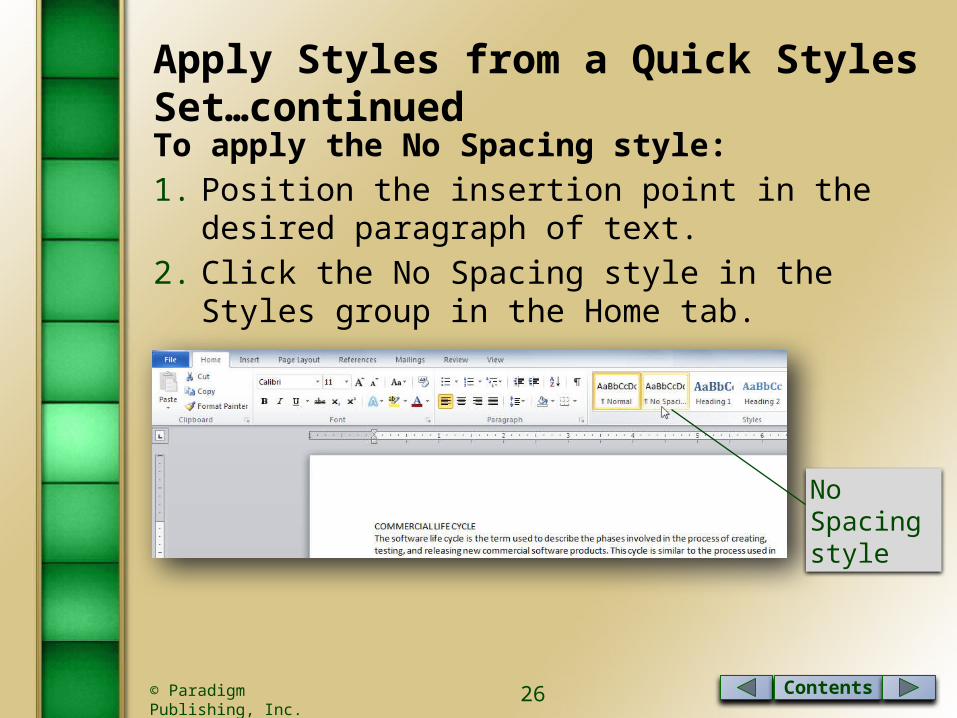
Apply Styles from a Quick Styles Set…continued
To apply the No Spacing style:1. Position the insertion point in the desired paragraph
of text.2. Click the No Spacing style in the Styles group in the
Home tab.
No Spacing style
Contents© Paradigm Publishing, Inc. 27
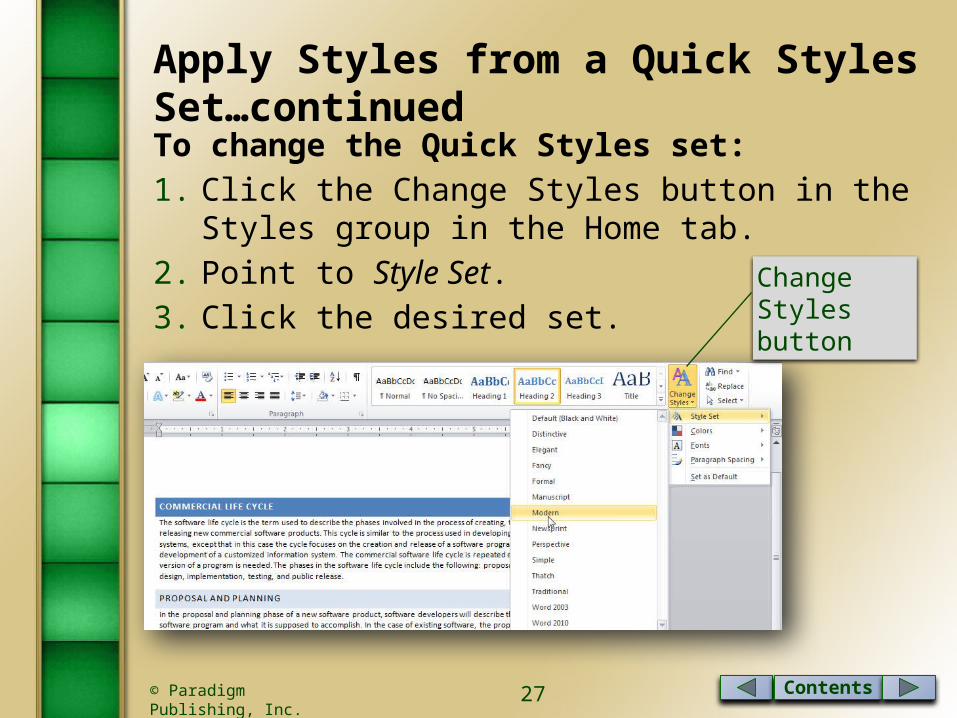
Apply Styles from a Quick Styles Set…continued
To change the Quick Styles set:1. Click the Change Styles button in the Styles group in
the Home tab.2. Point to Style Set.3. Click the desired set.
Change Styles button

Contents© Paradigm Publishing, Inc. 28
CHECKPOINT 11) This is a small line at the end of a
character stroke.a. strikeb. siloc. serifd. stet
3) Use this button to create text that is lowered slightly below the line.a. Superscriptb. Subscriptc. Grow Fontd. Shrink Font
2) You can change the case of selected text with this keyboard shortcut.a. Shift + F1b. Shift + F3c. Ctrl + F1d. Ctrl + F3
4) Click this style to remove the default formatting as well as any character formatting.a. No Formattingb. No Spacingc. Remove Formattingd. Remove Spacing
Next Question
Next Question
Next Question
Next Slide
Answer
Answer
Answer
Answer
Contents© Paradigm Publishing, Inc. 29
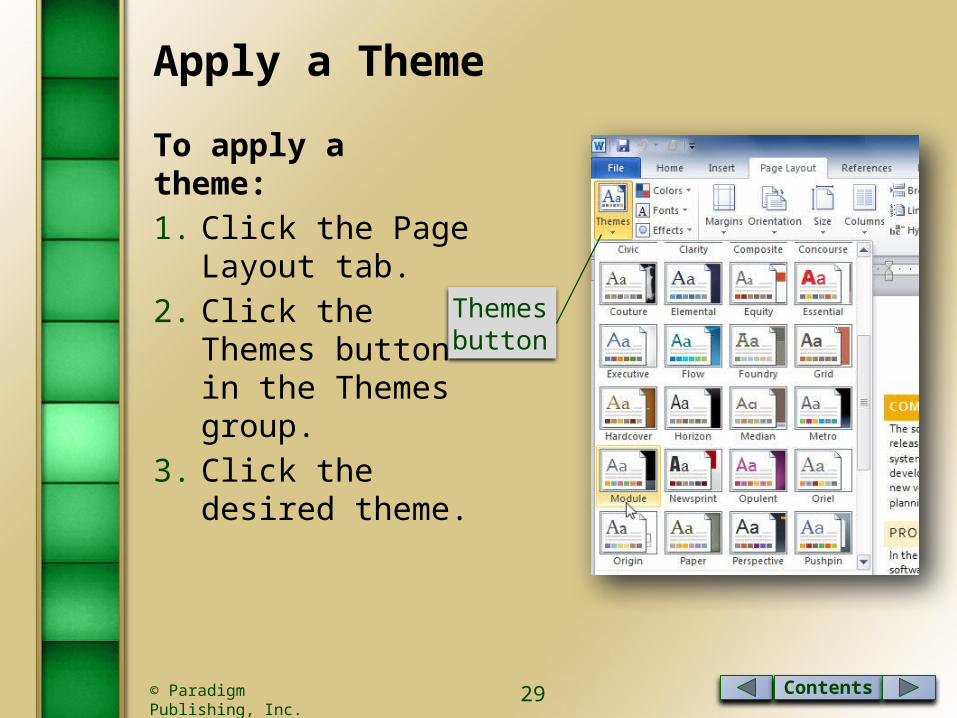
Apply a Theme
To apply a theme:1. Click the Page Layout
tab.2. Click the Themes
button in the Themes group.
3. Click the desired theme.
Themes button

Contents© Paradigm Publishing, Inc. 30
Apply a Theme…continued
To change the theme color:1. Click the Page
Layout tab.2. Click the Theme
Colors button in the Themes group.
3. Click the desired theme color.
Theme Colors button
Contents© Paradigm Publishing, Inc. 31
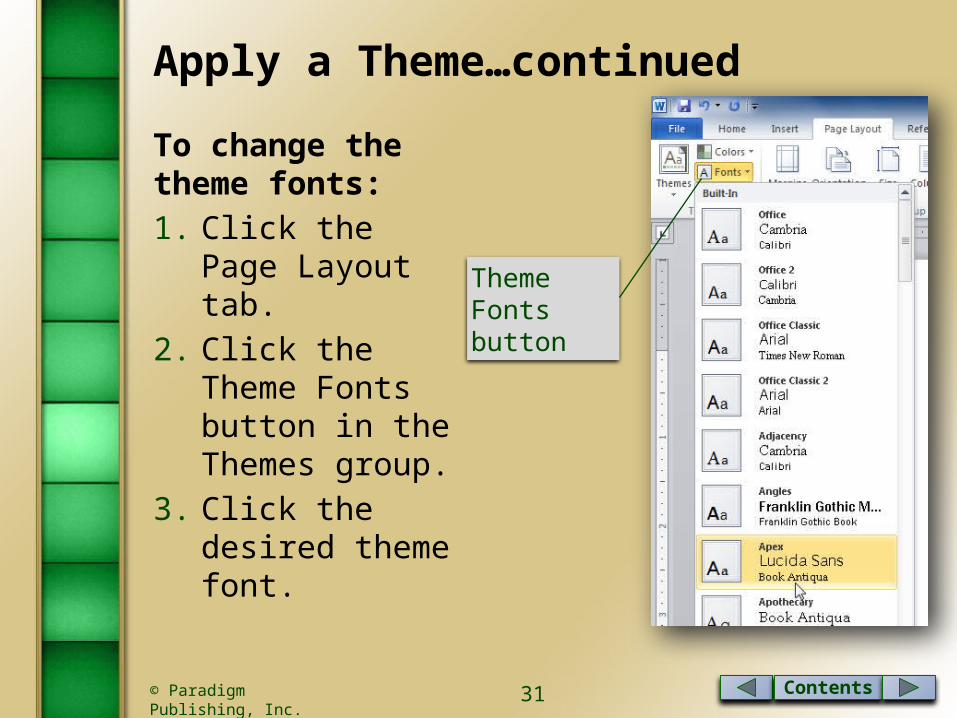
Apply a Theme…continued
To change the theme fonts:1. Click the Page
Layout tab.2. Click the Theme
Fonts button in the Themes group.
3. Click the desired theme font.
Theme Fonts button
Contents© Paradigm Publishing, Inc. 32
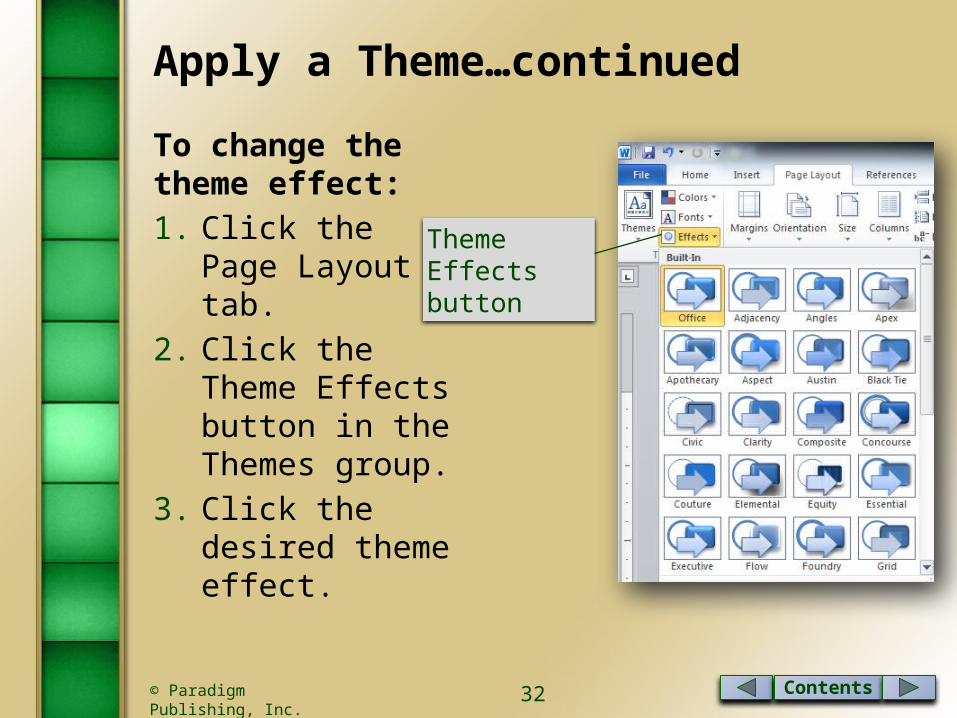
Apply a Theme…continued
To change the theme effect:1. Click the Page
Layout tab.2. Click the Theme
Effects button in the Themes group.
3. Click the desired theme effect.
Theme Effects button

Contents© Paradigm Publishing, Inc. 33
Change Paragraph AlignmentTo align text Paragraph
Group ButtonKeyboard Shortcut
At the left margin Ctrl + L
Between margins Ctrl + E
At the right margin Ctrl + R
At the left and right margins
Ctrl + J
Contents© Paradigm Publishing, Inc. 34
Change Paragraph Alignment…continued
You can change the alignment of text in paragraphs before you type the text or you can change the alignment of existing text. If you change the alignment before typing text, the alignment formatting is inserted in the paragraph mark.
To return paragraph alignment to the default (left-aligned), click the Align Text Left button in the Paragraph group.

Contents© Paradigm Publishing, Inc. 35
Change Paragraph Alignment…continued
To display nonprinting formatting symbols:1. Click the Show/Hide ¶ button in the Paragraph group
in the Home tab.
Show/Hide ¶ button

Contents© Paradigm Publishing, Inc. 36
Change Paragraph Alignment…continued
To change paragraph alignment at the Paragraph dialog box:1. Click the Paragraph
group dialog box launcher in the Home tab.
continues on next slide…
Paragraph group dialog box launcher

Contents© Paradigm Publishing, Inc. 37
Change Paragraph Alignment…continued
2. Click the Alignment option down-pointing arrow.
3. Click the desired alignment.
4. Click OK.
Alignment option down-pointing arrow
Contents© Paradigm Publishing, Inc. 38
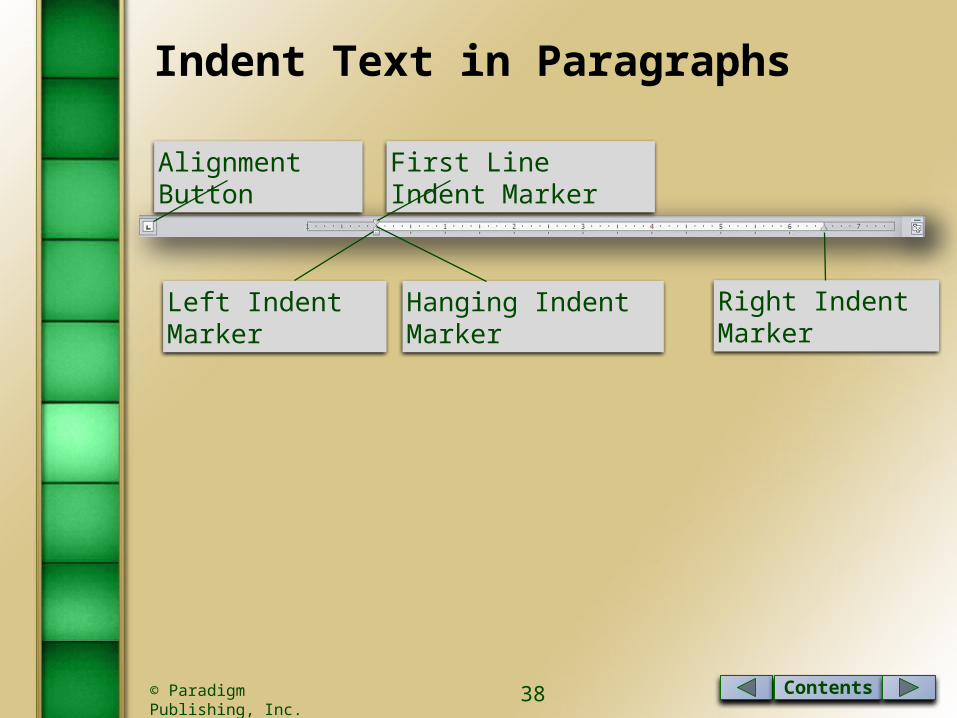
Indent Text in Paragraphs
Right Indent MarkerHanging Indent MarkerLeft Indent Marker
Alignment Button First Line Indent Marker
Contents© Paradigm Publishing, Inc. 39
Indent Text in Paragraphs…continued
continues on next slide…
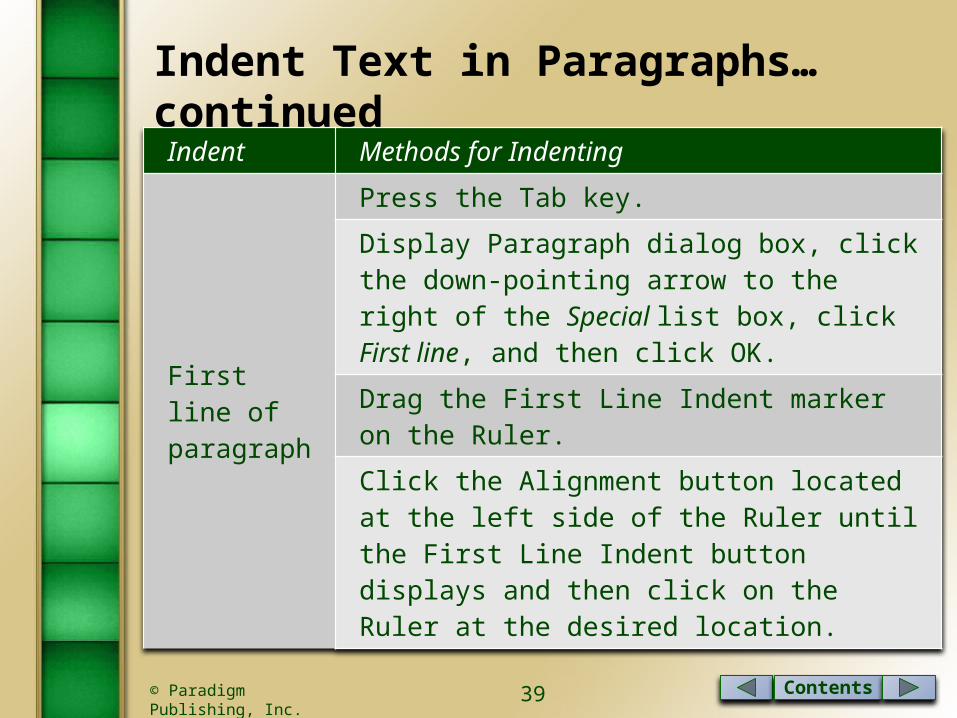
Indent Methods for Indenting
First line of paragraph
Press the Tab key.Display Paragraph dialog box, click the down-pointing arrow to the right of the Special list box, click First line, and then click OK.Drag the First Line Indent marker on the Ruler.Click the Alignment button located at the left side of the Ruler until the First Line Indent button displays and then click on the Ruler at the desired location.

Contents© Paradigm Publishing, Inc. 40
Indent Text in Paragraphs…continued
continues on next slide…
Indent Methods for Indenting
Text from left margin
Click the Increase Indent button in the Paragraph group in the Home tab to increase the indent or click the Decrease Indent button to decrease the indent.Insert a measurement in the Indent Left measurement button in the Paragraph group in the Page Layout tab.Press Ctrl + M to increase the indent or press Ctrl + Shift + M to decrease the indent.Display the Paragraph dialog box, type the desired indent measurement in the Left measurement box, and then click OK.Drag the left indent marker on the Ruler.
Contents© Paradigm Publishing, Inc. 41
Indent Text in Paragraphs…continued
continues on next slide…
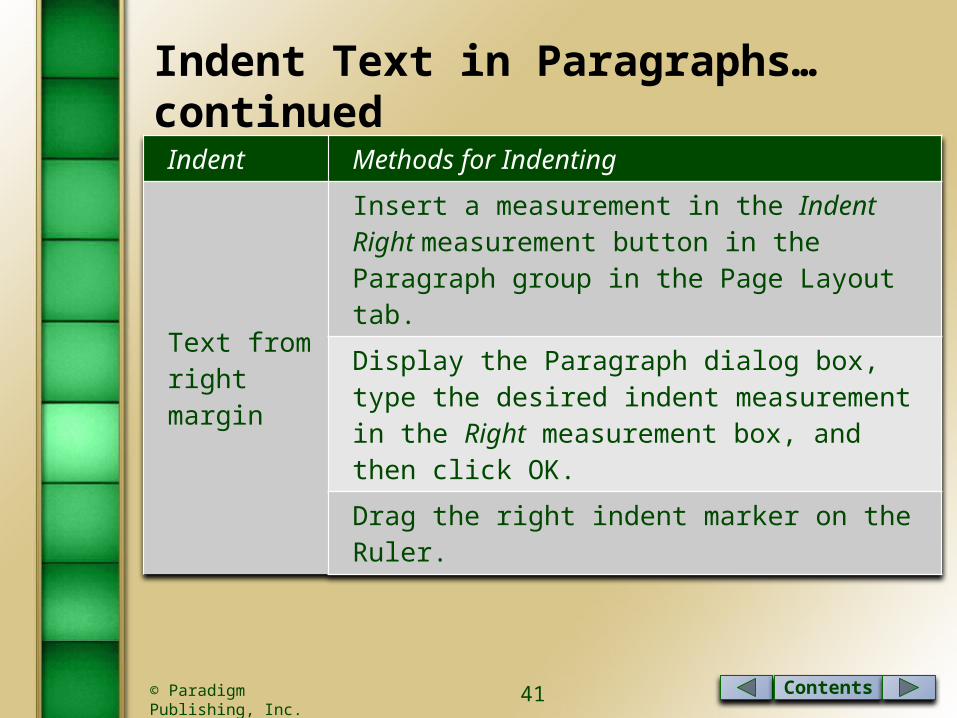
Indent Methods for Indenting
Text from right margin
Insert a measurement in the Indent Right measurement button in the Paragraph group in the Page Layout tab.Display the Paragraph dialog box, type the desired indent measurement in the Right measurement box, and then click OK.Drag the right indent marker on the Ruler.

Contents© Paradigm Publishing, Inc. 42
Indent Text in Paragraphs…continued
continues on next slide…
Indent Methods for Indenting
All lines of text except the first (called a hanging indent)
Press Ctrl + T. (Press Ctrl + Shift + T to remove hanging indent.)Display the Paragraph dialog box, click the down-pointing arrow to the right of the Special list box, click Hanging, and then click OK.Click the Alignment button located at the left side of the Ruler until the Hanging Indent button displays and then click on the Ruler at the desired location.
Contents© Paradigm Publishing, Inc. 43
Indent Text in Paragraphs…continued
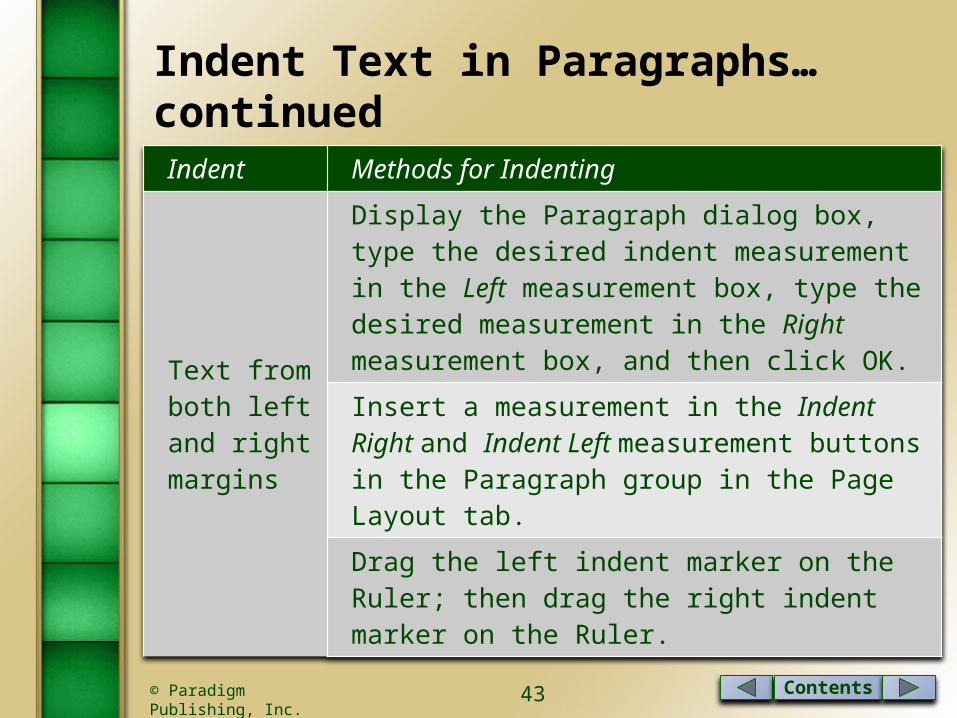
Indent Methods for Indenting
Text from both left and right margins
Display the Paragraph dialog box, type the desired indent measurement in the Left measurement box, type the desired measurement in the Right measurement box, and then click OK.Insert a measurement in the Indent Right and Indent Left measurement buttons in the Paragraph group in the Page Layout tab.Drag the left indent marker on the Ruler; then drag the right indent marker on the Ruler.
Contents© Paradigm Publishing, Inc. 44
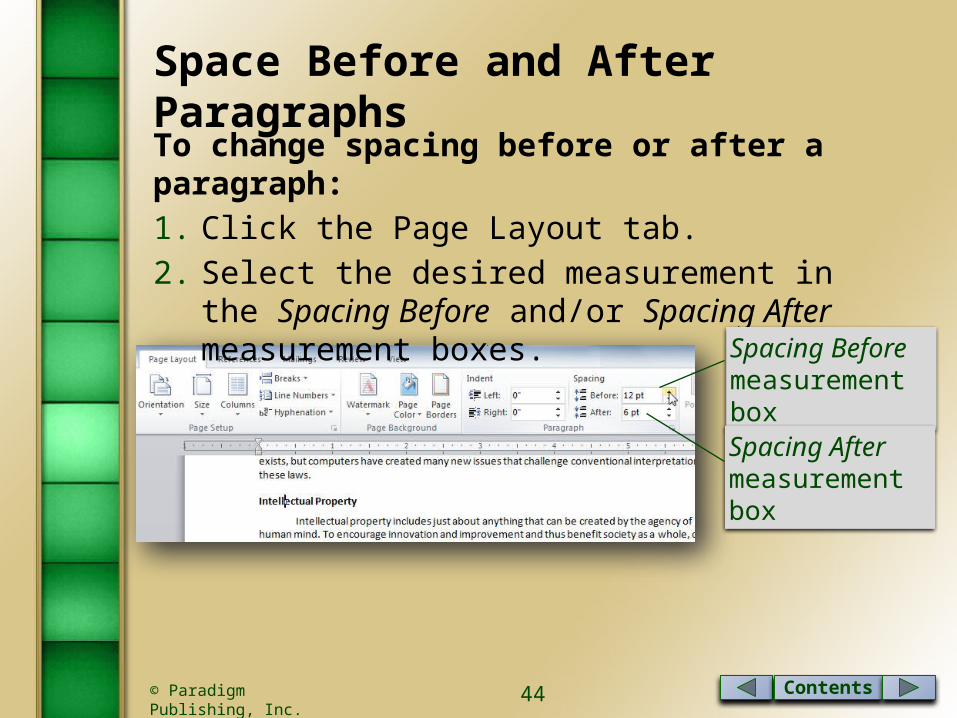
Space Before and After Paragraphs
To change spacing before or after a paragraph:1. Click the Page Layout tab.2. Select the desired measurement in the Spacing
Before and/or Spacing After measurement boxes.
Spacing Before measurement box
Spacing After measurement box

Contents© Paradigm Publishing, Inc. 45
Space Before and After Paragraphs…continued
Spacing before or after a paragraph is part of the paragraph and will be moved, copied, or deleted with the paragraph.
Spacing before or after paragraphs is added in points. A vertical inch contains approximately 72 points.

Contents© Paradigm Publishing, Inc. 46
Repeat the Last Action
If you apply formatting to text and then want to apply the same formatting to other text in the document, consider using the Repeat command.

Contents© Paradigm Publishing, Inc. 47
Format with Format Painter
To format with the Format Painter:1. Format the text.2. Double-click the Format Painter button.3. Select the text you would like to copy the format to.4. Click the Format Painter button to turn it off.
Format Painter button
Contents© Paradigm Publishing, Inc. 48
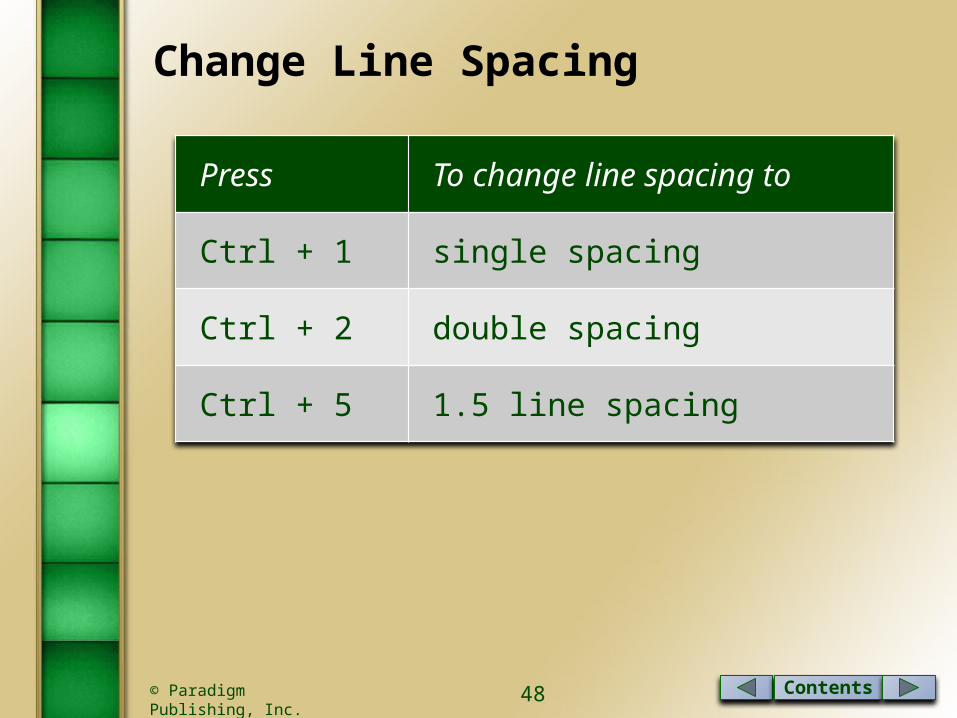
Change Line Spacing
Press To change line spacing to
Ctrl + 1 single spacing
Ctrl + 2 double spacing
Ctrl + 5 1.5 line spacing

Contents© Paradigm Publishing, Inc. 49
Change Line Spacing…continued
To change line spacing using the Line and Paragraph Spacing button:1. Position the insertion
point or select the desired text.
2. Click the Line and Paragraph Spacing button in Paragraph group in the Home tab.
3. Click the desired option at the drop-down list.
Line and Paragraph Spacing button

Contents© Paradigm Publishing, Inc. 50
Change Line Spacing…continued
To change line spacing at the Paragraph dialog box:1. Click the Paragraph
group dialog box launcher in the Home tab.
2. Click the Line Spacing option down-pointing arrow.
3. Click the desired line spacing option.
4. Click OK.Line Spacing option down-pointing arrow

Contents© Paradigm Publishing, Inc. 51
Change Paragraph Spacing with the Change Styles ButtonTo change paragraph spacing with the Change Styles button:1. Click the Change Styles
button in the Styles group in the Home tab.
2. Point to Paragraph Spacing at the drop-down list.
3. Click the desired option in the side menu.
Change Styles button
Contents© Paradigm Publishing, Inc. 52
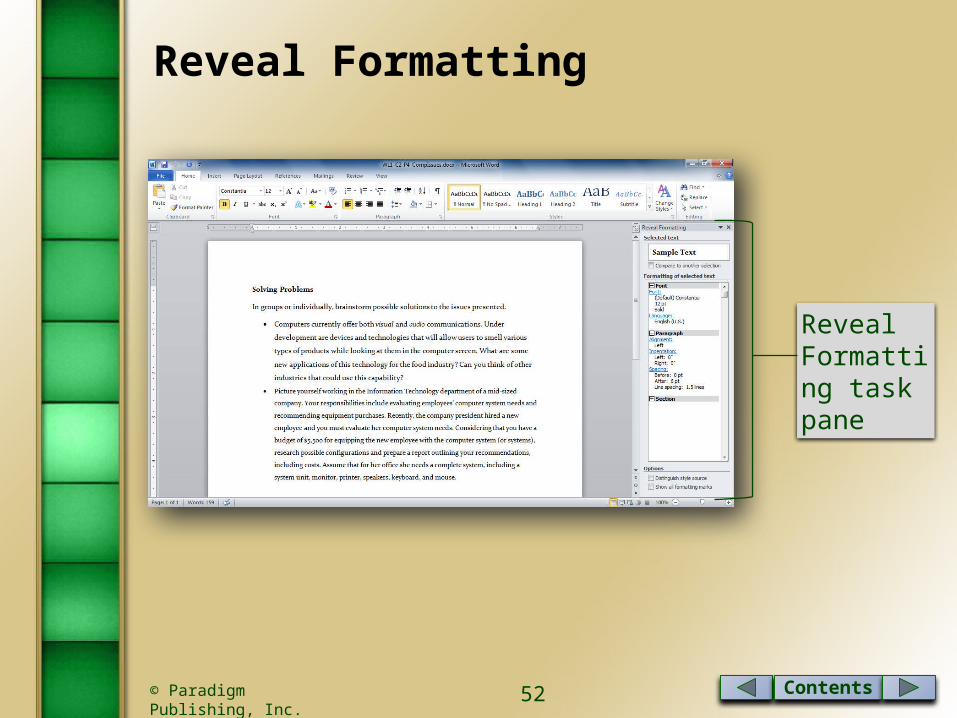
Reveal Formatting
Reveal Formatting task pane
Contents© Paradigm Publishing, Inc. 53
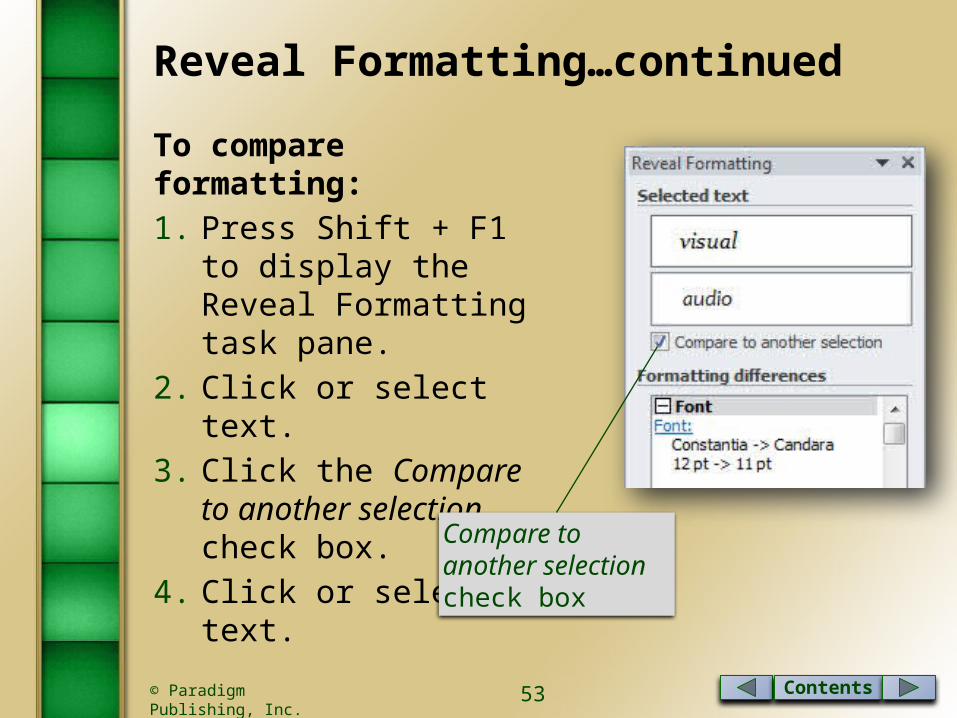
Reveal Formatting…continued
To compare formatting:1. Press Shift + F1 to display
the Reveal Formatting task pane.
2. Click or select text.3. Click the Compare to
another selection check box.
4. Click or select text.
Compare to another selection check box

Contents© Paradigm Publishing, Inc. 54
CHECKPOINT 21) This is a set of formatting choices
that include colors, fonts, and effects.a. stylesb. fontsc. effectsd. themes
3) This is the default spacing after a paragraph.a. 1 pointb. 5 pointc. 10 pointd. 15 point
2) This is the default line spacing setting.a. 1b. 1.10c. 1.15d. 1.5
4) Press these keys to display the Reveal Formatting task pane.a. Shift + F1b. Ctrl + F1c. Alt + F1d. F1
Next Question
Next Question
Next Question
Next Slide
Answer
Answer
Answer
Answer

Contents© Paradigm Publishing, Inc. 55
Change the font and font effects Format selected text with buttons on the Mini toolbar Apply styles from Quick Styles sets Apply themes Change the alignment of text in paragraphs Indent text in paragraphs Increase and decrease spacing before and after paragraphs Repeat the last action Automate formatting with Format Painter Change line spacing in a document Reveal and compare formatting
Summary of Presentation Concepts
Formatting Characters and Paragraphs