Embed Size (px)
Citation preview

XTSTM 3000 ASTRO®
Digital Portable RadioModel III User Guide


✁
��&���$
B45�IP��3DJH�L��7XHVGD\��-XQH����������������$
0
D
igit
al X
TS
300
0
Mo
del
III
Po
rtab
le R
adio
Qu
ick-
Ref
eren
ce C
ard
:ULWH�\RXU�UDGLR¶V�SURJUDPPHG�IHDWXUHV�RQ�WKH�GRWWHG�
OLQH�
GE
NE
RA
L7XUQLQJ�WKH�5DGLR�2Q��5RWDWH�WKH�2Q�2II�9ROXPH�
&RQWURO�NQRE�FORFNZLVH�
0RQLWRULQJ��&RQYHQWLRQDO�&KDQQHOV�2QO\���
0RPHQWDULO\�SUHVV�WKH�0
RQLWRU�EXWWRQ�DQG�OLVWHQ�IRU�
YRLFH�DFWLYLW\�
7UDQVPLWWLQJ��3UHVV�DQG�KROG�WKH�377�EXWWRQ�
5HFHLYLQJ��5HOHDVH�WKH�377�EXWWRQ�
Sel
ecti
ng
a Z
on
e an
d C
han
nel
:1
Pre
ss .
unt
il th
e =21(
sof
tkey
app
ears
.
2P
ress
m d
irect
ly b
elow
=21(.
3P
ress
. u
ntil
the
desi
red
zone
nam
e ap
pear
s.
47R�VHOHFW�WKH�]RQH��S
ress
o o
r th
e P
TT
bu
tto
n.
25
,I�\RX�ZRXOG�OLNH�D�GLIIHUHQW�FKDQQHO��SUHVV� .
�XQWLO�WKH�&+$1�VRIWNH\�DSSHDUV�
25
5RWDWH�WKH�=RQH�&KDQQHO�6HOHFW�NQRE�WR�WKH�
GHVLUHG�FKDQQHO��WKHQ�JR�WR�VWHS���
5P
ress
m d
irect
ly b
elow
&+$1.
6P
ress
. u
ntil
the
desi
red
chan
nel n
ame
appe
ars.
7P
ress
o o
r th
e P
TT
bu
tto
n.
CO
MM
ON
RA
DIO
FE
AT
UR
E
Mak
ing
an
Ind
ivid
ual
Cal
l1
Pre
ss .
unt
il on
e of
the
follo
win
g so
ftkey
s ap
pear
s:
3+21�IRU�7HOHSKRQH�&DOO
&$//�IRU�D�3ULYDWH�&
RQYHUVDWLRQ�&DOO
3$*(�IRU�D�&DOO�$OHUW�3DJH
25
3UHVV�WKH�3+21(��&$//��RU�3$*(�EXWWRQ��WKHQ�
JR�WR�VWHS���
2P
ress
m d
irect
ly b
elow
the
desi
red
softk
ey.
3If
you
wis
h to
cal
l the
last
num
ber
dial
ed, p
ress
th
e P
TT
bu
tto
n.
25
3UHVV�,
�RU�.�XQWLO�\RX�ORFDWH�WKH�GHVLUHG�
PHPEHU�,'��7KHQ��SUHVV�WKH�377�EXWWRQ�
TM
12
3
45
6
78 0
9
AB
C
DE
F
GH
I
JKL
MN
O
PR
S
TUV
WX
Y
HO
ME
XTS
3000
AB
C
���3RVLWLRQ
6HOHFW�.QRE
��3RVLWLRQ
6ZLWFK
�B�B�B�B�B�B
6SHDNHU�
0LFURSKRQH
7RS�%XWWRQ
_ _
_ _
_ _
_
&RQFHQWULF�
6ZLWFK
B�B�B�B�B
_
'LVSOD\
6RIWNH\�
$UURZ��DQG
+RPH�.H\V
7RS�6LGH�
%XWWRQ
_ _
_ _
_ _
_
2Q�2II�
9ROXPH�.QRE
6LGH�%XWWRQ��
_ _
_ _
_ _
_
6LGH�%XWWRQ��
_ _
_ _
_ _
_
377�%XWWRQ
FOLD
FOLD

��&���$
B45�IP
��3DJH�LL��7
XHVG
D\��-X
QH��
����
������
����$
0
���������
����
��� ���
��� ����
0RVW�R
I�\RXU�UD
GLR�IH
DWXUHV�FDQ�EH�DFFHVVHG�E\�
SHUIR
UPLQJ�WK
H�IR
OORZLQJ�VWHSV��IR
U�PRUH�GHWDLO��UH
IHU�
WR�WK
H�IH
DWXUH�GHVFULS
WLRQ�LQ
�\RXU�P
DQXDO��
1P
ress . until the desired softkey appears (see
“Softkey F
eature List” at right).
25
3UHVV��R
U�URWDWH��WK
H�SUHSURJUDPPHG�IH
DWXUH�
EXWWR
Q�VZLWFK��V
HH�IUR
QW�R
I�FDUG��
2P
ress m directly below
the desired softkey.
7KH�GLVSOD\�VKRZV�WK
H�FXUUH
QW�V
WDWH�RI�WK
H�
IHDWXUH�DQG�WK
H�DYDLODEOH�VRIWN
H\�FKRLFHV�
3If you w
ant to change the feature state, press m
directly below the desired softkey choice.
25�
,I�\RX�GR�QRW�Z
DQW�WR
�FKDQJH�WK
H�IH
DWXUH�VWDWH��
SUHVV�o
�RU�WK
H�377�EXWWR
Q�WR
�H[LW�WK
H�IH
DWXUH�
��������
��������
���
So
ftkey
Featu
re
&$//
Individual Private-C
onversation Call
or Selection C
all
&+$1
Channel S
election
',5�
Bypass R
epeater (Talkaround) and Talk D
irectly to Another R
adio
(5$6
Erasure of E
ncryption Key(s)
/2*)
Radio Lock (Log O
ff)
,1';
Encryption K
ey(s) Index Grouping
06*�
0HVVDJH�/LVW�6
HOHFWLR
Q
087(
.H\SDG�7RQHV�0
XWLQ
J
3$*(
&DOO�$
OHUW�3
DJH
3+21
7HOHSKRQH�&DOO�
352*
/LVW�3
URJUDPPLQJ�RI�,Q
GLYLGXDO�&
DOO�
1XPEHUV�DQG�6FDQ�&KDQQHOV
3:5�
7;�3RZHU�/
HYHO�6
HOHFWLR
Q
53*0
1HZ�'\QDPLF�5
HJURXSLQJ�5HTXHVW
6&$1
6FDQ�2
SHUDWLR
Q
6,7(
0XOWLS
OH�6LWH
�6HOHFWLR
Q
676�
6WDWXV�/LVW�6
HOHFWLR
Q
7*53�
Talkgroup Selection
9,(:
List View
ing
=21(
Zone S
election
So
ftkey
Featu
re
FOLD
FOLD

���������������
��� ������ ������������������������������
���������������������� ����������������������������������������������

����������� �������������������������
�����������7KLV�UDGLR�LV�UHVWULFWHG�WR�RFFXSDWLRQDO�XVH�RQO\�WR�VDWLVI\�)&&�5)�HQHUJ\�
H[SRVXUH�UHTXLUHPHQWV��%HIRUH�XVLQJ�WKLV�SURGXFW��UHDG�WKH�5)�HQHUJ\�
DZDUHQHVV�LQIRUPDWLRQ�DQG�RSHUDWLQJ�LQVWUXFWLRQV�LQ�WKH�3URGXFW�6DIHW\�DQG�5)�
([SRVXUH�ERRNOHW�HQFORVHG�ZLWK�\RXU�UDGLR��0RWRUROD�3XEOLFDWLRQ�SDUW�QXPEHU�
�������&����WR�HQVXUH�FRPSOLDQFH�ZLWK�5)�HQHUJ\�H[SRVXUH�OLPLWV��
������������������� �� !��7KH�0RWRUROD�SURGXFWV�GHVFULEHG�LQ�WKLV�PDQXDO�PD\�LQFOXGH�FRS\ULJKWHG�0RWRUROD�
FRPSXWHU�SURJUDPV�VWRUHG�LQ�VHPLFRQGXFWRU�PHPRULHV�RU�RWKHU�PHGLD��/DZV�LQ�WKH�
8QLWHG�6WDWHV�DQG�RWKHU�FRXQWULHV�SUHVHUYH�IRU�0RWRUROD�FHUWDLQ�H[FOXVLYH�ULJKWV�IRU�
FRS\ULJKWHG�FRPSXWHU�SURJUDPV��LQFOXGLQJ��EXW�QRW�OLPLWHG�WR��WKH�H[FOXVLYH�ULJKW�WR�FRS\�
RU�UHSURGXFH�LQ�DQ\�IRUP�WKH�FRS\ULJKWHG�FRPSXWHU�SURJUDP��$FFRUGLQJO\��DQ\�
FRS\ULJKWHG�0RWRUROD�FRPSXWHU�SURJUDPV�FRQWDLQHG�LQ�WKH�0RWRUROD�SURGXFWV�GHVFULEHG�
LQ�WKLV�PDQXDO�PD\�QRW�EH�FRSLHG��UHSURGXFHG��PRGLILHG��UHYHUVH�HQJLQHHUHG��RU�
GLVWULEXWHG�LQ�DQ\�PDQQHU�ZLWKRXW�WKH�H[SUHVV�ZULWWHQ�SHUPLVVLRQ�RI�0RWRUROD��
)XUWKHUPRUH��WKH�SXUFKDVH�RI�0RWRUROD�SURGXFWV�VKDOO�QRW�EH�GHHPHG�WR�JUDQW�HLWKHU�
GLUHFWO\�RU�E\�LPSOLFDWLRQ��HVWRSSHO��RU�RWKHUZLVH��DQ\�OLFHQVH�XQGHU�WKH�FRS\ULJKWV��
SDWHQWV�RU�SDWHQW�DSSOLFDWLRQV�RI�0RWRUROD��H[FHSW�IRU�WKH�QRUPDO�QRQ�H[FOXVLYH�OLFHQVH�
WR�XVH�WKDW�DULVHV�E\�RSHUDWLRQ�RI�ODZ�LQ�WKH�VDOH�RI�D�SURGXFW�
"��������������� �� !��1R�GXSOLFDWLRQ�RU�GLVWULEXWLRQ�RI�WKLV�GRFXPHQW�RU�DQ\�SRUWLRQ�WKHUHRI�VKDOO�WDNH�SODFH�
ZLWKRXW�WKH�H[SUHVV�ZULWWHQ�SHUPLVVLRQ�RI�0RWRUROD��1R�SDUW�RI�WKLV�PDQXDO�PD\�EH�
UHSURGXFHG��GLVWULEXWHG��RU�WUDQVPLWWHG�LQ�DQ\�IRUP�RU�E\�DQ\�PHDQV��HOHFWURQLF�RU�
PHFKDQLFDO��IRU�DQ\�SXUSRVH�ZLWKRXW�WKH�H[SUHVV�ZULWWHQ�SHUPLVVLRQ�RI�0RWRUROD�
"��������7KH�LQIRUPDWLRQ�LQ�WKLV�GRFXPHQW�LV�FDUHIXOO\�H[DPLQHG��DQG�LV�EHOLHYHG�WR�EH�HQWLUHO\�
UHOLDEOH��+RZHYHU��QR�UHVSRQVLELOLW\�LV�DVVXPHG�IRU�LQDFFXUDFLHV��)XUWKHUPRUH��0RWRUROD�
UHVHUYHV�WKH�ULJKW�WR�PDNH�FKDQJHV�WR�DQ\�SURGXFWV�KHUHLQ�WR�LPSURYH�UHDGDELOLW\��
IXQFWLRQ��RU�GHVLJQ��0RWRUROD�GRHV�QRW�DVVXPH�DQ\�OLDELOLW\�DULVLQJ�RXW�RI�WKH�
DSSOLFDWLRQV�RU�XVH�RI�DQ\�SURGXFW�RU�FLUFXLW�GHVFULEHG�KHUHLQ��QRU�GRHV�LW�FRYHU�DQ\�
OLFHQVH�XQGHU�LWV�SDWHQW�ULJKWV��QRU�WKH�ULJKWV�RI�RWKHUV��
027252/$��WKH�6W\OL]HG�0�/RJR�DQG�$6752�DUH�UHJLVWHUHG�LQ�WKH�8�6��3DWHQW��
7UDGHPDUN�2IILFH��$OO�RWKHU�SURGXFW�RU�VHUYLFH�QDPHV�DUH�WKH�SURSHUW\�RI�WKHLU�
UHVSHFWLYH�RZQHUV�
3���UDGLRV�FRQWDLQ�WHFKQRORJ\�SDWHQWHG�E\�'LJLWDO�9RLFH�6\VWHPV��,QF�
��0RWRUROD��,QF��������$OO�5LJKWV�5HVHUYHG��3ULQWHG�LQ�WKH�8�6�$�������
%HIRUH�XVLQJ�WKLV�SURGXFW��UHDG�WKH�RSHUDWLQJ�LQVWUXFWLRQV�IRU�VDIH�
XVDJH�FRQWDLQHG�LQ�WKH�3URGXFW�6DIHW\�DQG�5)�([SRVXUH�ERRNOHW�
HQFORVHG�ZLWK�\RXU�UDGLR�
!C a u t i o n

��������
���������� � � � � � � � � � � � � � � � � � � � � � � ������������� ���������������� ��������������������������������������������������������� ��������� ��� !�������� ������������������������������������������������������������������ "��������������� ��������������������������������������������������������������������� ���#������$ ���� ���%��� ������������ ������������ ������������������������� &���'��((�)� ���������� �������������������������������������������������������������������� &*��+��'��� ������������������������������������������������������������������������������������������� !,-.������������ ���������������������������������������������������������������������������������� !������������������ ������������������������������������������������������������������������������� /�� ������ �� ���������������������������������������������������������������������������������������� 0������������ ����� �� ��������������������������������������������������������������������� ����� ����������������������������������������������������������������������������������������������� � * ������1�������������������������������������������������������������������������������������������� �/��������������������#� ���������������������������������������������������������������� �2
���������������������� � � � � � � � � � � � ��������'��� �������������%%� ��������������������������������������������������������� �3�� ����������� ��� ����������������������������������������������������������������������� �����(�����'������ � �4��'�������������������������������������������������������������� &����'�,�������������������������������������������������������������������������������������������� /5 � ����������$ ���� �������������������������������������������������������������������� ��
�������������������� � � � � � � � � � � �����4 ���������6� ����1�������������������������������������������������������������� �0.����������7���������������� ���' ������8� ������������������������������������ �9-( �' ��#����� ������������������������������������������������������������������������������ �2���+'���1�������7���� ��� !����������#8� ��������������������������������������� &�����4������������ �������������������������������������������������������������������������������� &!�,�. % ��� ���������������������������������������������������������������������������������������� !�� 1 �� ����� �������������������������������������������������������������������������������� !�� 1 �� �:.�� ��� ������������������������������������������������������������������������������� ! ����������������������������������������������������������������������������������������������������� !�� � ����'��6� ����1 ������� ���������������������������������������������������������� !9�(����������������������������������������������������������������������������������������������� !9
�������������������� � � � � � � � � � � � � ��.#��(���� '���1��'� ���������������������������������������������������������������������� /����;�.�� � �4 �������������������������������������������������������������������������������� /�
���������������� ����� ���

���;�.������(��� ������������������������������������������������������������������������������/�� ��� �1 ������� ����������������������������������������������������������������������������/&� � ���)� ���< ��, 4 �� �������������������������������������������������������������������/2����+��'��#�� (���������� ���������������������������������������������������������������0�
�������������������� � � � � � � � � � � � � � ������)� �������'� �������������������������������������������������������������������������������0!��������� � ��������������������������������������������������������������������������������������0/� �4�� ����������������������������������������������������������������������������������������������00*��� �#� ���������������������������������������������������������������������������������������������00
��� � � � � � � � � � � � � � � � � � � � � � � � � � � � �!
�4 /99��9��0!;�

,QWURGXFWLRQ�IP��3DJH����7XHVGD\��-XQH����������������$0
�����������
������������� ����� ����������� ��� ���������������������70������� � ������� ������!������ ������"
������������������� ���� �#��������$
• General Radio Operation
• Common Radio Features
• Special Radio Features
• Helpful Tips
%� ����������������� ��� �#������������� ��������������"
������� ���� � ��� ������������������� �� &���������������������'� ������������� ��� ��� ��#�������'��������'���������"��� � ������������� ��� ����� ������( ��������# � ���(����� &���'������� ���� ������������ ���) �������� �* �"
�� ���������� ���������� �������� �� �������� ����� ���� ��� ������ � � ��� �� ����� ! ��� ����!���� �"���#���
����� ������������� ��� '�������� '�������������'� ��"'��������� �� ������������� ������ � +���� ����#�������� #��� ���� �* �"
���$ ����� ������������� ��� '�������� '�������������'� ��"'���������� �� ��������� ������( "
!W A R N I N G
!
!C a u t i o n
���������������� ����� �

������������
,QWURGXFWLRQ�IP��3DJH����7XHVGD\��-XQH����������������$0
�� �#����������� ����������������� ���# �� �������� ��$
APCO Project 25 Radios������������������������������� �������#��������3��!��4 ���,1�����������������"�5� ������������� +���� ��������� ��������������/���������'���������� ��������!/�!��4 ���,1�����������������* �����������2�� �������� �� �������/������������� �#�� �6/��7����������������) ��� �� ��"�8������ ��� ���� ��������������/���������������� �!��4 ���,1���� ��� ���� �*��� �# ���� �'�������� ��!��4 ���,1�������������*��� ������������������������������� ������ ��"
�!/�!��4 ���,1������ ��� �������#��� ��������������#�!��������# � �/�������������##�� ���6�!/7"�������������� �� ��� �� � �����* ���#�*��������� ������������ *����� �������� �������� �������*��� ������������ �����������#������������������������� ���� �* ��� ����) ����� "
������� ����� ���
%&�� "����� 9��������� ���� ��������������������"
m ������) ���������������� ������������ ���� �������� ������"
���� � &����� ����������� ������� ����������������������#���"
, -..��.�/012�

������������
,QWURGXFWLRQ�IP��3DJH����7XHVGD\��-XQH����������������$0
'��� (�� )*** ����� ��� ����
Note: Physical features are denoted by number (see Table 1 on page 4). Programmable controls are denoted by alphabet lettering (see Table 2 on page 4).
12
3
45
6
78
0
9
ABC
DEF
GHI
JKL
MNO
PRS
TUV
WXY
HOME
XTS 3000
AB
C
FIRE D
ISP NW
CH
AN
PAGE
DIR
2
1
34
A
5
6
9
10
11
12
13
14
8
7
15
B
C
D
E
F
���������������� ����� �

������������
,QWURGXFWLRQ�IP��3DJH����7XHVGD\��-XQH����������������$0
+������ ,������� �! ��� (�� )*** ����� ��� ����
+��&�����"�� ���������� �#����������������������������� ��������� ���������*�� �� ��������#���� �# ���� �"�
�� �# ���� ������������ ������� ������� � ����������� ���+����#� ��������� ��������'������� ���� ���� � ��� � �# ���� ������� �#������� ����� ��������� ��������� 1"
Note: Any references in this manual to controls that are preprogrammed mean that a qualified radio technician must use the radio’s programming software to assign a feature to a control. Contact your system administrator for details.
��"�� -$ +������ ,�������
��������� ��� ���� ��������� ��� ����
- ��� ��� �, . �� �) �
/ �-2!��������� � ���;��� ,� -* <�+����/� ����������� �6</�7
) <=� 1 -- ��#��; ��6�������,���� ���#�</�7
0 �>##>?���� �/�������;���
,� -/ ��#��) �� � �������������
1 �������� -) ������; �
2 %��* �����/��� �����/�* � �0 -0 @�� �;
3 !���6!���2��2���)7�9����� ,: -1 �������� ����; ���
4 9��� � ��
Table 2: Programmable Controls
��������� ��� ��������� ���
� ,2!��������/��� ������������ 5 ������� �6� � ��7�9�����
6 ���� �����9����� 7 ��� �9�������
� �2!���������>9>/������� , ��� �9������,
: -..��.�/012�

������������
,QWURGXFWLRQ�IP��3DJH����7XHVGD\��-XQH����������������$0
Backlight�#�������������������������) ��� ������ ������ ���6��������� �-28+����� ������ 9��"7���##���������� ��'����������� ������3�����)������� ��� �������� ��� �������� ��%&�� "�������#���������� "�
�� � ��������� ��������#������� �������� ����� �� #�� ��� �������##������������� '���� �������������� ���##���� ���� � �� ��� �������� �%&�� "�����������"�
LED Indicators�� �<=����������#��� �������������� ���� ������3���� �������������$�
Table 3: +��&�����"�� ,�������
��� ��� ���� ��� ��� ���� ��� ��� ����
/����� ����� 1� 8������ �� � � 11 � ��� >/� �� -:
/���� � ,� !<�� # �� 1� ��� �<��)>%����)
0�
� ������!������ 11 � � �� �>��� �� 1, ��� �� ���� 0,
=� �� �� �A � ��������� +� ��
-, ?���� �� � ,1
<����>9��)����� 1 ������>## 1� B�� ,,
������ ,1 �����<����!����������
1-
Table 4: LED Indicators
LED Indicator What it Means
Red Radio transmitting
Flashing red Channel busy, orLow battery (while transmitting)
Double flashing red Receiving encrypted audio
Flashing green Receiving an individual call
���������������� ����� 1

������������
,QWURGXFWLRQ�IP��3DJH����7XHVGD\��-XQH����������������$0
������ ���������9 ������ �������������� ���� ������*���������� ����� ���������3�������� $
SymbolIndicator
NameDescription
B Battery Status Flashes when the battery is low.
C Carrier Squelch
Indicates the radio is operating in the carrier-squelch mode.
D
Secure Operation
Appears when your radio is operating in secure mode. Does not appear when your radio is operating in clear mode. Flashes when an encrypted voice call is being received.
F Call Received Flashes an individual call is received.
G Scan Indicates the radio is scanning.
H (Dot Flashing)
Priority 1Channel Scan
Indicates the radio is scanning the priority-one channel.
H (Dot Steady)
Priority 2Channel Scan
Indicates the radio is scanning the priority-two channel.
I
View/Programming
Indicates the radio is in list view or programming mode; lights steady in view mode and flashes in programming mode.
J
Direct Indicates whether you are talking directly to another radio (talkaround) or through a repeater; on = direct; off = repeater. Appears when you are talking directly to another radio instead of through a repeater (that is, your radio is in talkaround mode).
- -..��.�/012�

������������
,QWURGXFWLRQ�IP��3DJH����7XHVGD\��-XQH����������������$0
����� ���������� ������ ����������������������#�������"�C������������ ���� ������ �������#���� ����#� ���������3������������"��� �#������������� ��������� � ���� �������� ���� ������"
Sound Tone Name Occurs:
Invalid Key-Press When the wrong key is pressed.
Radio Self-Test Fail
When the radio fails its power-up self test.
Short,Low-Pitched
Tone
No ACK Received
When the radio fails to receive an acknowledgement from the dispatcher.
Reject When an unauthorized request is made.
Time-Out Timer Warning
Four seconds before time out.
Time-Out TimerTimed Out
After time out.
Talk Prohibit/PTT Inhibit
When the PTT button is pressed and transmissions are not allowed.
Continuous, Low-Pitched
Tone
Out-of-Range When the PTT button is pressed and the radio is out of range of the system.
Invalid Mode When the radio is on a channel that is not programmed.
Individual CallWarning Tone
When the radio is in an individual call for greater than six seconds without any activity.
A Group of Low-Pitched
Tones(Busy Tone)
Busy When a channel, phone line, or system is unavailable due to high traffic volume.
���������������� ����� 0

������������
,QWURGXFWLRQ�IP��3DJH����7XHVGD\��-XQH����������������$0
Short,Medium-Pitched
Tone
Valid Key-Press When the correct key is pressed.
Radio Self-Test Pass
When radio passes its power-up self test.
Clear Voice At the beginning of a non-coded communication.
Priority ChannelReceived
Upon receipt of activity on a priority channel.
Emergency AlarmEntry
Upon entering emergency state.
Central Echo When the central controller has received a request from a radio.
Continuous,Medium-Pitched
Tone
Volume Set Sounds when volume level is adjusted on a quiet channel.
Emergency Exit Upon exiting emergency state
PTT Sidetone When data is sent by pressing the PTT button, but the user must wait to talk.
A Group ofMedium-PitchedTones
Failsoft When system fails.
Automatic Call Back
When voice channel becomes available in response to a previous request.
Talk Permit Upon pressing the PTT button; verifying system accepting transmissions.
Dispatcher-Interrupter
Upon receipt of a dispatcher-interrupt call.
Keyfail When an encryption key has been lost.
ConsoleAcknowledge
When a status, message, emergency alarm, or reprogram request ACK is received.
Received Individual Call
When a Call Alert or Private Conversation call is received.
Call Alert Sent When a Call Alert is received by the target radio.
Short,High-Pitched
Tone(Chirp)
Low-Battery Chirp
When battery level is below preset threshold value
Phone Dekey Chirp
When switching from radio to phone line upon releasing the PTT button.
Sound Tone Name Occurs:
. -..��.�/012�

������������
,QWURGXFWLRQ�IP��3DJH����7XHVGD\��-XQH����������������$0
Continuous,High-Pitched
Tone
Quik-Call™ Group Call
When a Quik-Call group call is received
A Group ofHigh-Pitched
Tones
Quik-Call Individual Call
When a Quik-Call individual call is received
RingingPhone Ringing When a phone call is received
Enhanced CallReceived
When originator receives ACK from an enhanced private call
Gurgle
Dynamic Regrouping/Over-The-Air Programming
When a dynamic ID has been received and the PTT button is pressed and the reprogrammed group has not been selected and when the radio is successfully re-keyed
Sound Tone Name Occurs:
���������������� ����� A

������������
,QWURGXFWLRQ�IP��3DJH�����7XHVGD\��-XQH����������������$0
Standard Accessories
6������
Battery Life
9��� � ���# ����� � ���� ��� �� * ����#������"��������� ���� ������������ ��� �� �������* ������ ��#����� �� �������� ��* ��� �� �����#��������� ������ ����� �� "�� ������ '��� ��� �� ���� ��* ������ ������� �� � ���� ��* ��� ��������� '��� �# � ��� �� �������� � ����������"�D��� &���� '������� � �����������* ������ �������������� �����E�� * ������� ������ '�������# � ��� �� ������������� � ������� � �* ��� ����#�����* ������ ���������������� �����1�E�� ���� "�D���� �'������� � �������� � �* �����������* ���������������* ��� ����� �,1E�
�������� '������� * ������ �"
�� �#�� � ����"�� �:������$
• DO NOT replace the battery in any area labeled “hazardous atmosphere.”
• DO NOT discard batteries in a fire.
�#� ��������������������� �������*������ 2) �� � ������6�������� ����� �*�� �� ��������7'� ��� ������) ���� �� ���� ��#��������&���� � ����� �������#� ������ � �� ��*��"
���� ������ "� ��9�� �� �#�� �:������ ����� ������& �! ��� "������� � �������� �&�8���� ������&� ;!�� �:������ � ����� ��� ������ ����������� ������ ��� "������ ��������< ��� ����������� ����&� ��� "������� #�� ��� "������ ��������� ��� ������ � "��� �� !�� ��=����
!W A R N I N G
!
!C a u t i o n
!W A R N I N G
!
�� -..��.�/012�

������������
,QWURGXFWLRQ�IP��3DJH�����7XHVGD\��-XQH����������������$0
Charging the Battery
������������ �� ���� �� ���� ���� ��#����� ����� ��� ���������������������� ������*�� �* ���"�/��������������2�������� +���� ����� �� ���������� � ������ �����*������ ����� � �������� "�
�� ����� � ��������� ����������00FD�6,1F/7�6������ �� ����� 7'��� � * ��������� "�/������������������� � �6� ����1�F�D�G��F/H7��� �� ��������� �)�� ��#� � ����� � ������������ � ����#����� ��#��� ����� � "�/������������������ � �6���* �A1FD�G�1F/H7�� ���������� ��� ���������� �������� '��## �������� �� �#������ ��#��� ������"��������������2��� ����� � ������ �������������� �� ����� 2� ����������������� ���� ���������� �� ���� ������ ����������� �� �� ����� ������������ �����* "
�������� ��� ����� � '����� ��� ����� � �6������������������ ������7�������������2�����* ������� �"��� ������ �3��<=��������� ���� ��������������� ��I�� � ��������� ���� ������ �#���� �����"�
�������& ��� 6������
������������ ����� � $
5� ��� ������� �� ����&� �� ����&� ��� "������ � � ��=������ �����������
- ������##��� �������������������������� ����)��#��� �������#������������"
2 Align the three slots at the top of the battery with the three tabs on the back of the radio.
) !������ ����� � ��������������� ��������������� ����� � �����)����������� "
!W A R N I N G
!
���������������� ����� ��

������������
,QWURGXFWLRQ�IP��3DJH�����7XHVGD\��-XQH����������������$0
����#� ��� 6������
���� ��* ��� ����� � $
�������
Radio Operating FrequenciesBefore installing the antenna, ensure that the antenna you have can be used with your radio. Your radio’s model number is on a label attached to the back of your radio. A typical model number might be H09UCC9PW5AN. The fourth position of the model number (in this example, U) identifies the operating-frequency band of the radio. The following table lists all fourth-position alpha characters and corresponding frequency band.
- ������� ��������##"
2 Hold the radio with the back of the radio facing upward.
3 To release the battery from the radio, push the battery release button located on the bottom of the battery.
4 Lift the battery away from the radio and remove.
���$ �#� ��������������������� �������*������ 2) �� � �����'� ��� ������) ���� �� ���� ��#��������&���� � ����� �������#� ������ � �� ��*��"�/���������+����#� ��������� ���������#���� �����"
Radio Operating-Frequency Table
Fourth Position
Operating Frequency Fourth Position
Operating Frequency
K 136-178MHz R 403-470MHz
S 450-512MHz U 806-870MHz
�, -..��.�/012�

������������
,QWURGXFWLRQ�IP��3DJH�����7XHVGD\��-XQH����������������$0
Antennas are frequency sensitive and are color coded according to the frequency range of the antenna. The color code indicator is in the center of the base of the antenna. The following illustrations and table helps identify the antenna, antenna frequency range, and corresponding color code.
VHFWide Band
Helical
VHFHelical
UHFHelical
UHF800 MHz
Whip
800 MHzStubby
800 MHzDipole
���������������� ����� ��

������������
,QWURGXFWLRQ�IP��3DJH�����7XHVGD\��-XQH����������������$0
Antenna Identification Table
Antenna Type Approx. Length Insulator Color Code
Frequency Range
AntennaKit No.
in. mm
VHF Wide Band Helical
8.1 203 RED 136-174MHz
NAD6563
VHF Helical 7.87.36.9
195 183172
YELLOWBLACKBLUE
136-151MHz 151-162MHz 162-174MHz
NAD6566NAD6567NAD6568
UHF Helical 3.33.23.2
838079
REDGREENBLACK
403-435 MHz435-470MHz470-512MHz
NAE6546NAE6547NAE6548
UHF Wide Band Whip
5.2 130 GREY 403-512MHz
NAE6549
800MHz Whip 7 175 RED 806-870MHz
NAF5037
800MHz Dipole 8 200 RED 806-870MHz
NAF5039
800MHz Stubby, Quarterwave
3.3 83 WHITE 806-870MHz
NAF5042
�: -..��.�/012�

������������
,QWURGXFWLRQ�IP��3DJH�����7XHVGD\��-XQH����������������$0
������ ��� �������
����#� ��� �������
5������ ����������� ���##'�������� ���� ��������)��� ������������������� ������"
5������ ����������� ���##'�������� ���� ��������� �2����)��� ����� ��* ����#������ ������"
XTS 3000
AB
C
XTS 3000
AB
C
���������������� ����� �1

������������
,QWURGXFWLRQ�IP��3DJH�����7XHVGD\��-XQH����������������$0
Belt ClipNote: The battery must be removed from the radio before the belt
clip can be installed or removed.
������ ��� 6��� ���
����#� ��� 6��� ���
1 Holding the battery in one hand so that the top of the battery faces upward and the back of the battery faces you, hold the belt clip in the other hand with its top facing upward.
2 Align the slide assembly on the front of the belt clip with the slots on the back of the battery. Slide the belt clip downward toward the bottom of the battery until the belt clip clicks in place.
1 Hold the battery in one hand so that the top of the battery faces upward, and the front (radio side) of the battery faces you.
2 At the top of the battery, press down on the belt clip’s metal tab and slide the belt clip upward. Continue to slide the belt clip upward until it is free from the battery.
Slide Assembly
Slots
Belt Clip
Battery
MetalTab
�- -..��.�/012�

������������
,QWURGXFWLRQ�IP��3DJH�����7XHVGD\��-XQH����������������$0
��#����� ��������� ��#���� ����* ��������� ������������� ������� ���� ������� ��#��� ������"��������� ��������� ������ ����� ������� ������"
����#� ��� ��������� ��#��
5� ���� �%��* �����/��� ����������������� '�) �������* � ��������� �%��* �����/��� �������* ������� * �������� "
- ������� ��������##"
2 While holding the cover’s top (flat) end in place with your thumb, pry upward on the cover’s lower end until it disengages from the radio.
!C a u t i o n
���������������� ����� �0

������������
,QWURGXFWLRQ�IP��3DJH�����7XHVGD\��-XQH����������������$0
������ ��� ��������� ��#��
- ������� ��������##"
2 Insert the top, hooked end of the cover into the top of the connector slot.
) While holding the top end, swing the rounded end into place at the bottom of the connector. Press firmly until it snaps into place.
TopSlot
BottomSlot
TopHooked End
BottomHooked End
�. -..��.�/012�

������������
,QWURGXFWLRQ�IP��3DJH�����7XHVGD\��-XQH����������������$0
XTS 3000 R Radios OnlyNote: In XTS 3000 R radios, the “R” signifies the radio is a Rugged-
type radio designed to withstand adverse field conditions such as being submersed in water.
Note:
1 If the radio has been submersed in water, shake the radio well to remove any water that may be trapped inside the speaker grille and microphone port. Otherwise, the water could cause decreased audio capabilities.
2 If the radio’s battery contact area has been exposed to water, dry and clean battery contacts on both the radio and the battery before attaching the battery to the radio. Otherwise, the water could short-circuit the radio.
3 If the radio has been submersed in a corrosive medium (such as salt water), rinse the radio and battery in fresh water and dry the radio and battery.
4 To clean the exterior surfaces of the radio, use a diluted solution of mild dish washing detergent and fresh water (one teaspoon of detergent to one gallon of water).
• The XTS 3000 R radio casting has a vent hole that allows for pressure equalization in the radio. Never poke this vent with any objects, such as needles, tweezers or screwdrivers. This creates a leak path into the radio and the radio’s submersibility is lost.
• The pressure equalization vent is located on the chassis, just below the battery contact. Never obstruct or cover the two slots with any object, including a label. Ensure that no oily substances come in contact with this vent.
• The XTS 3000 R radio is designed to be submersed to a maximum depth of 6 feet and a maximum submersion time of 4 hours. Exceeding either maximum limit may result in damage to the radio.
!C a u t i o n
���������������� ����� �A

������������
,QWURGXFWLRQ�IP��3DJH�����7XHVGD\��-XQH����������������$0
5 Do not disassemble the radio. This could damage radio seals and result in leak paths into the radio. Radio maintenance should be performed only by a qualified service person.
6 Elastomer technology materials used for seals in rugged portable radios can age with time and environmental exposure. Therefore, Motorola recommends that rugged radios be checked annually to assure the water-tight integrity of the radio. Radio disassembly and reassembly procedures and information regarding test equipment necessary to inspect, maintain and troubleshoot radio seals can be found in the XTS 3000 basic service manual.
,� -..��.�/012�

*QO5DGLR2SHUDWLRQ�IP��3DJH�����7XHVGD\��-XQH����������������$0
������������� ������
��������������� ���������� ���� �������������� ���� ��������� ������! �� ������ � �� �� � ������"�� � �� ��#�� ��� �� ���� �����$#� ���� �� ���������� � ������%����� ��������������� ���"����� � �����&�� !� '� � �(���� �����������$� ���)�� � ����� �� �������#�� �*+"
������������������������
���������������
����������������
����� � �������������������������������������"��� �������# ����$����#�' ���#�� ��� � ��������'����� � ����#������� �������'�����������"�,� �� � �������#��� �� � �� ��� � &���$ ���$�#� �� �� �� �������"������ �� ����#�����$$��� ������������ $�$���� ����������� ���������������������� �!�� ���� '�� ����$�� �����"
��� � ������������� � �� ��� � &������ �������'�#� �� �� �� ���������$ ���� �������� ��## ������� � ����#���"���������� � ������&��� �-� � ��� ��&����� ���� � ���������"���� � ������������� � �#�' ���#� � ������&�� ����� � � �������� �������� �� ��������� $���$���� �� ����������� ����. �������� ��������"
����� � ��������������������������������������������� �������� ���������-"
XTS 3000
On
AB
C
Off
AB
C
���������������� ����� ��

2 � ����������# �� ���
*QO5DGLR2SHUDWLRQ�IP��3DJH�����7XHVGD\��-XQH����������������$0
�������������������.�� ����������#������������ ��"�������� �����������#���������������� ��� ������������ ����$� 3� � �! ��� 4� ����#����"��� ������ �����������������&�� � � � � �� ��� ��.�� ���������� �"
���������������1 5� ���. �� ��� � ����#�������'�� � ������� - �"�6�� � 7�� �
���� ���������� - ���!������� ���#�������!������������#�����$$���"8
OR
Place the Zone switch (see page 4) in the desired position. ����� �- ��������� � ��� �� � �� ��� ���� � ��� �����# ���� ������ #��.
� �5� ���m���� � ���� ��'���"
The display shows the current zone name (flashing) and the channel name (on steady).
3 Press . until the desired zone name appears on the display.
OR
Using the alphanumeric keypad, enter the number of the desired zone.
Note: If the selected zone is not programmed, the display shows ��� �������� until a valid programmed zone is selected. This does not mean your radio is not programmed; only that the zone you selected is not programmed.
4 ���� � � � � ����#��� ��.�� 3����� ����$���� ���&�#� ���o&
OR
To transmit on the displayed zone/channel combination, press the PTT button.
���������
������������� ��� ����������
�� /00��0�1*+��

2 � ����������# �� ���
*QO5DGLR2SHUDWLRQ�IP��3DJH�����7XHVGD\��-XQH����������������$0
������������������Note: Consult your service technician to determine which one of the
following methods to use for channel selection.
Method 1 Channel Selection
������1���� ��� � � ��������� ��'� �� � �� !"���������������������#�����$$ ����������� ��� � � ���"
Method 2 Channel Selection
������1���� ��� � � ��������� ��'� ������� - �����#�����$$ ����������� ��� � � ���"
1 Press . until the display shows the �������� - �"
2 Press n directly below ����.
The display shows the zone name (on steady) and the current channel name (flashing).
3 Press . until the desired channel name appears on the display.
OR
Using the alphanumeric keypad, enter the number of the desired channel.
�� � � �� ��� ��.�� ��## ������� � ����#����6� #�9����.�� �� � � ���8&��� � � � �#� #�����$$ ��� !"������������������ �� � �� ��� ������� �"��� �� '���$ ��## ������� � ����#���"
SelectChannel
A
��� �������
����������� ������������
��� �������
����
���������������� ����� ��

2 � ����������# �� ���
*QO5DGLR2SHUDWLRQ�IP��3DJH�����7XHVGD\��-XQH����������������$0
Note: If the selected channel is not programmed, the display shows ��� �������� until a valid programmed channel is selected. This does not mean your radio is not programmed; only that the channel you selected is not programmed.
4 To exit the channel selection menu, press o.
OR
To transmit on the displayed zone/channel combination, press the PTT button.
������������������#��Note: Radio users who switch from analog to digital radios often
assume that the lack of static on a digital channel is an indication that the radio is not working properly. This is not the case. Digital technology quiets the transmission by removing the noise from the signal and allowing only the clear voice or data information to be heard.
������ � ���� $#����. �� � ��$#�� ��� ����-��'������'� ��$��� ���������� ������ �������� ��� �- ������#� ��� ����� ����$������"
XTS 3000
AB
C
�9 /00��0�1*+��

2 � ����������# �� ���
*QO5DGLR2SHUDWLRQ�IP��3DJH�����7XHVGD\��-XQH����������������$0
$������%������������������&������'������1 Select the desired zone/channel.
� :�� �����������������! ��� ����;���� � ������ ��� ��$ ���� ��&�#��� �� ��� #��"
( 5� ������������ � �"���������� �� ����$� �����'�� ����� � ����-�5 �$� � �� �6������#����$ ���$�#� �� �� �� �8"��� �:<=����� ��� �"�,� ���# �-���&�- #� � �$����#��� ��� � �� '������ �����$������$�� �"
Note: If you do not hear a Talk Permit tone, your system administrator has preprogrammed the tone to be off.
%�������"�� ��������������������'�����1 Turn the radio on and select the desired zone and channel.
� ���� ��� � �!���$ �� � �� &�#� ������������ � ������������������"
( ��>�� � � ������������������������� � �����"
) � � �� � � ������������������"
* ��� ����$� &�#� ������������ � �"��������������� � �� �� � ����� �"��� �:<=����� ���<=�'��� � ����$� ���"
%�������"�� ���������&������'�����1 Turn the radio on and select the desired zone and channel.
2 To listen for activity, press the preprogrammed Monitor button (see page 4).
Note: If the channel on which you are transmitting is programmed to
receive Private-Line� (PL), ensure that the channel is not in use by momentarily pressing the preprogrammed Monitor button (see page 4) to listen for activity. To put the radio in permanent monitor operation (squelch defeat), press and hold the preprogrammed Monitor button for five seconds (programmed by your system administrator or radio technician). To return the radio to its original squelch state, tap the Monitor button again or press the PTT button.
���������������� ����� �+

2 � ����������# �� ���
*QO5DGLR2SHUDWLRQ�IP��3DJH�����7XHVGD\��-XQH����������������$0
If you try to transmit on a channel that is programmed for receive only, an invalid tone sounds until you release the PTT button.
( ��>�� � � ������������������������� � �����"
) 5� ������������ � �"���������� �� ����$� ������ � �� �� � ����� �"��� �:<=����� ���<=�'��� � ����$� ���"�
Using Lists�� ���� �� � �� �������������������'������ ��� �� ���$$������� ����$� ���'� ������� � ������ ���$ "�?��� 7�$#� &� � � � #��� �� � �� ��������������� ����� ������$ ������ � #��� ���$� ��"
�/ /00��0�1*+��

2 � ����������# �� ���
*QO5DGLR2SHUDWLRQ�IP��3DJH�����7XHVGD\��-XQH����������������$0
�� ������'����� � �����# �� ������� ��!������ ���������� �@
• a preprogrammed list can be viewed,
• a number in a list can be changed,
• a specific member in a list can be selected.
Viewing a List1 5� ���.��� ��� � ����#�������'�� � ��������� - �"�
Note: The exact location of softkeys vary based upon individual radio programming.
2 5� ���m���� � ���� ��'�����"
3 �� ����#�������'���!������ ���� ��6 7�$#� @� ���&� ��&�����8;��� �,����.� ��� �� � ���!������ ���� �
.
4 5� ���m���� � ���� ��'� � ���� �����'���� ��!� '"�?��� 7�$#� &� ��!� '� � ���� ���� � #��� ���$� ���� �� ���������������&�#� ���m���� � ���� ��'� ��"
5 �� ����#�������'�� � ����� �$ $� ����� � ���� �6��$ ���� � ��## ����� &���$� ����� � ���' ����� 8"��� �� ����I�� � ��������� ����## ���������� ���������� ����!� '�$�� "
Changing a ListNote: Only numbers can be changed or reprogrammed in a list.
Names on a list can be changed by your system administrator or radio technician.
If your radio is programmed to use the scan feature, refer to page 56 for information on changing the scan list.
1 Press > until the display shows the �� softkey.
Note: The exact location of softkeys will vary based upon individual radio programming.
2 Press m directly below ��.
��� �� ��� �
��������� ���������
���������������� ����� �*

2 � ����������# �� ���
*QO5DGLR2SHUDWLRQ�IP��3DJH�����7XHVGD\��-XQH����������������$0
The display shows the lists that can be changed ( ���, ��, ����, etc.).
3 Press m directly below the list you wish to change. For example, to change a telephone number press m directly below ��.
The display shows the first member in the list (name on the upper line, number on the lower line). The flashing I status indicator appears, indicating you are in the programming mode.
4 To locate the member’s number you wish to change, press , or . to scroll through the list.
OR
To go directly to a specific member in the list, enter the number (1-19) that corresponds to that member’s placement in the list.
The display shows the member’s name on the upper line and the number on the lower line.
5 To edit the member’s number, press the Select button.
6 To edit the member’s number, press any of the numeric keys (0 through 9) and special function keys (*, #).
The blinking cursor indicates the position of the next number to be added.
The cursor disappears when the maximum amount of characters have been added. The maximum amount of characters allowed for a telephone number is 16 and 8 for an ID number.
If you try to add any more digits, you hear an invalid tone.
Note: In the number-edit mode, , functions as a backspace key. To erase the previously entered digit on the display and move the cursor to the left, press this key. If you erase the entire number, and continue to press , or press ., the radio exits the number-edit mode and returns to step 4.
�0 /00��0�1*+��

2 � ����������# �� ���
*QO5DGLR2SHUDWLRQ�IP��3DJH�����7XHVGD\��-XQH����������������$0
Note: Some telephone systems require a pause to be entered as part of the number dialed (for example, dialing “9” to access an outside line). To enter a pause in the number (shown as a “P” on the display), press * followed by #.
7 To save your changes, press the Select button. This returns you to the list (step 4) and you can make any additional changes as necessary.
OR
To cancel the change, press o. The radio exits reprogramming mode and returns you to the home display without modifying the list.
Selecting From a List1 Press . until the display shows the desired feature as a softkey.
For example, to select from the telephone list stored in your radio, press . until the display shows the �� softkey. The exact location of softkeys are programmed by your system administrator or radio technician.
2 Press m directly below the desired feature. Using the same example in step 1, press m directly below ��.
3 The display shows the last telephone number dialed or the last ID number transmitted/received. The ���� softkey also appears.
4 To access the preprogrammed list, press m directly below ����.
5 Scroll through the preprogrammed list by pressing , or . until you locate the desired member’s name/number.
OR
To go directly to a specific member in the list, enter the number using your alphanumeric keypad (1 through 19) that corresponds to that member’s placement in the list.
��������
����
���������
����
���������������� ����� �A

2 � ����������# �� ���
*QO5DGLR2SHUDWLRQ�IP��3DJH�����7XHVGD\��-XQH����������������$0
Note: If you are using the telephone feature ( ��), a call is made to the displayed number when you press the PTT button.
The display alternately shows the name and number (phone or ID) of a member in the list.
Note: Press m directly below the ���� softkey to access the Last telephone NUMber dialed or the Last ID NUMber transmitted/received.
General Radio Features
Radio Lock (Non-Secure Radios)�� ����������-�� � �� � ���� ������ ��� � � ������4� ���$ ����#���'���"���� � �� � �� ���� ���� �&� � ����#�������'�������������'� �� � ���������� ��� ����"�
������ � �� ����#�����$$ ������������� $���$���� �� ������������ ��������"
1 Turn your radio ON.
2 Enter your numeric password (1 to 8 characters).
As you enter the password digits, the display shows dashes.
If a digit mistakenly entered, , functions as a backspace key. Once the correct password is entered, the radio unlocks.
����������������������� ���� �
�����������
���������
�������
����
��������
����
�� /00��0�1*+��

2 � ����������# �� ���
*QO5DGLR2SHUDWLRQ�IP��3DJH�����7XHVGD\��-XQH����������������$0
�������� ������#���'���@
1 Press . until the display shows the ��� softkey.
2 Press m directly below ���.
The display shows ��� ������.
3 Enter the current password.
4 If the password entered is correct, the display shows ���� ������.
5 Enter the new password and press the Select button.
Note: If you forget the numeric password, you must have the radio’s coreplug replaced by a qualified service technician and a new password programmed at that time by your system administrator or radio technician.
Radio Lock (Secure Radios Only)������ � �� ������ ������������� ����$�� ������ �� ���� ����� $� �� �#�� � �� � ��� ���� � �� ��� � ����# ����- ��"������������������#� #�����$$ �� �������� � ����� � �� &� � ����#�������'�������������'� ������ ���� � ���������"
������ � �� ����#�����$$ ������������� $���$���� �� ������������ ��������"
1 Turn your radio ON.
2 Enter your numeric password (1 to 8 characters).
As you enter the password digits, the display shows dashes.
In the event you make a mistake, , functions as a backspace key. Once the correct password is entered, the radio unlocks.
3 Press the Select button.
4 If the password is correct, the radio unlocks.
OR
If the password is incorrect, the radio remains locked. If the wrong password is entered three times, the display shows �����
���������������� ����� ��

2 � ����������# �� ���
*QO5DGLR2SHUDWLRQ�IP��3DJH�����7XHVGD\��-XQH����������������$0
����� and you must turn the radio off and on again in order to enter another password.
If you enter a total of 15 consecutive incorrect passwords (turning the radio on and off does not reset the number of incorrect tries), the radio automatically erases all of its encryption keys and the display shows ����������.
Note: If you forget the password or enter an incorrect password 15 or more times, enter in eight asterisks (��������) and press the Select button (see page 2).
This action:
• unlocks your radio,
• erases all encryption keys, and
• the password will revert to the factory default password of ���� !"#.
�������� ������#���'���@
1 Press . until the display shows the ��� softkey.
2 Press m directly below ���.
The display shows ��� ������.
3 Enter the current password.
4 If the password entered is correct, the display shows ���� ������.
5 Enter the new password and press m directly below ���.
The display shows ��$���.
6 Re-enter the new password and press m directly below ���.
7 If the two new passwords match, the radio unlocks.
OR
If the two new passwords do not match, the display shows ���� ������. This takes you to the result of the action described in step 3.
�� /00��0�1*+��

2 � ����������# �� ���
*QO5DGLR2SHUDWLRQ�IP��3DJH�����7XHVGD\��-XQH����������������$0
Note: You cannot change your password if you enter three incorrect old passwords. The radio exits the radio-lock feature and will not allow you to press the ��� softkey until the radio is turned off and on again.
Radio-Lock Enable/Disable (Secure Radios Only)������ � �� �����'������ �� ���� 3������ � � ����������-�� � �� ������� � ������%����#����$ ����- �#��"
������ � �� ����#�����$$ ������������� $���$���� �� ������������ ��������"
��� ���� ���������� � � �������:��-�� � �� @
1 Press > until the display shows the ��$ softkey.
2 Press m directly below ��$.
3 The display shows the current password state. ��������%�� indicates that the Radio-Lock feature is enabled and ��������%�� indicates that Radio-Lock feature is disabled.
4 To enable the Radio-Lock feature, press m directly below ���%.
OR
To disable the Radio-Lock feature, press m directly below ���%.
Muting the Keypad Tones�� ������%��- �#��� �� �&����$������ ���� ���� �$ ���- �#���- �����#� �� �&������ � ��� ������6$� �8�������6�� �$� �8�� ����������� ���"���������$� � � � �� ����������#� #�����$$ ���'� �������##������ ���������� � ���� - �"
���$� �- �#��� �� �������� � �+�, �!&�����-���@
��� ���� � �- �#��� �� �����&�#� � � �+�, �!&�����-������� � �( �� �����)�#��� ���"�
��� ���� � �- �#��� �� ������������$����# �� ���&�#� � � �+�, �!&�����-������� � �( �� ����)�#��� ���"
���������������� ����� ��

2 � ����������# �� ���
*QO5DGLR2SHUDWLRQ�IP��3DJH�����7XHVGD\��-XQH����������������$0
���$� �- �#��� �� �������� � ���� - ��� � �� @
1 Press . until the display shows the ���� softkey.
2 Press m directly below ����.
3 The display shows the current mute state. ������ indicates tones are not muted and �����$$ indicates tones are muted.
4 Press m below the desired mute state (��or $$).
Note: Press o or the PTT button to exit this menu without modifying the existing setting.
Time-Out Timer�� �� '������#�� ��� ���������� 4��## ��'� ����#�����$$��� � �$ ��� � �$ ��'����&��#��� 7#��� ���&� ��������� � � ����$� �"������ �$ �����#�����$$��� ������������ $�$���� ������ �!�� � ������������������ �� ����$���� ������6���8� ��*"*+�$��� ��69/+�� �����8&�� ��+�� ��������� $ � �"���������������! �� ��#�����$$ ��� ����#$ � �'� ����� ���� � �$ ��� � �$ ������ �������/��� �����"
�� �$ ��� � �$ ��'���������������##��7�$� ��������� ������� ��� � � ������� �� �$ ��� � �$ �� 7#�� �"��� �'���������������� &���'�#� �� �� �� "�
��� � �"�������������� �����'������ �� ���� � � �$ ��� � �$ �%������ �� �$ &������ ������&���'�#� �� �� �� ������������ � �:<=�� �#������ ����� �&������� ���� �� ������ ����$������������ ���� ����"������ �� ���� ��� �� ���������� ��� � �"�������������� � �� �"�
1 Release the PTT button to silence the warning.
2 To transmit another message, press the PTT button.
��� ����
������������
��� �����
������������
��
�9 /00��0�1*+��

2 � ����������# �� ���
*QO5DGLR2SHUDWLRQ�IP��3DJH�����7XHVGD\��-XQH����������������$0
Low-Battery Indication��� � ��� ���!�� �� �������� ��'� � ���'�!�� �� �� ! �&������������B�� � ��������� ����## ������� � ����#���.
�������'��� ��������� ����������&�� #��� � � ��� ��"�
�������� $���$���� �� ���$�����! �#�����$$ ������������� �������� �����'��� ���� � �������� ���� � ������'����'���@
• When the PTT button is pressed, the bi-color LED blinks red to indicate a low-battery condition.
• When the PTT button is released following a transmission, you hear a short, high-pitched tone (chirp) to indicate a low-battery condition.
• When the radio is in the standby mode and a low-battery condition occurs, you hear an alert tone for 30 to 930 seconds at 30-second increments. This duration is programmed by your system administrator or radio technician.
Keypad Lock�� �B �#���:��-�� � �� �����'������ �����-����������-� � �������- �#������� � ���������#� ������ � �#� #�����$$ ���� ������$�!���� � �#� #�����$$ ���'� ��� �� � ����- ��#��� ����6� �#�� 98"������� � �� ����#�����$$ ������������� $���$���� �� ������������ ��������"
Note: If the Keypad Lock feature is programmed to a switch and the switch is moved to the ON position, Keypad Lock remains on after powering off and on again. If the Keypad Lock feature is assigned to a button, default settings are restored when the radio is turned off.
B ?��������C�:�'�D� ����� ���� ���������
B
���������������� ����� �+

2 � ����������# �� ���
*QO5DGLR2SHUDWLRQ�IP��3DJH�����7XHVGD\��-XQH����������������$0
Channel Selector Lock1���� ��� � � ���:��-�����'������ �����-� � ������������ ������ �������� �� ��#� ! � ����� � ����������� ������� �"������� � �� ����������!������ ����B �#���:��-���� ���� �"
1 Select a channel (see page 23 for instructions on selecting a channel).
2 Press the preprogrammed Channel Lock button or move the preprogrammed Channel Lock switch to the locked position (see page 4).
Once the Channel Selector Lock feature is ON, you hear a chirp tone if you try to change the channel.
Note: If the Channel Selector Lock feature is programmed on a switch and the switch is set to ON, the radio channel remains locked after powering off and on again.
��������-� � ������ ��� � � ��&���>�� ��'� ��� �� � �??�#��� �������#� ��� � �#� #�����$$ ���� ��������"
Note: The Channel Selector Lock does not block a channel change command such as in the event of Dynamic Regrouping.
�/ /00��0�1*+��

&RPPRQ5DGLR)HDWXUHV�IP��3DJH�����7XHVGD\��-XQH����������������$0
��������������� ���
Conventional Squelch Options��� ������� ���� ��������������������� ���� ��������� ���� ���������!���� ��"#$ �!%��& ������"��� �����������'� �����% �"�( ������������& ��!%��� ��'�"�")
Note: Network ID is only available on ASTRO digital channels consult your service technician for details.
In carrier squelch operation, all traffic on the channel is heard. However, in PL, DPL, or network ID operation, your radio responds only to those messages intended for you. PL, DPL, network ID, and carrier squelch can be programmed for each channel.
Whenever the radio is operating in carrier squelch mode, the display shows the C status indicator.
Project 25 Digital Squelch OptionsEach conventional personality may be programmed by your system administrator or radio technician for one of the following squelch options in digital mode:
Digital Carrier-Operated Squelch (COS)
This option allows the radio to respond to any received digital Project 25 signal.
Normal SquelchThis option allows the radio to respond to any digital Project 25 signal that has the correct Network access code.
Selective SquelchThis option allows the radio to respond to any digital Project 25 signal that has the correct Network access code and the correct talkgroup.
Data and Squelch
This option allows the radio to respond to any digital Project 25 signal that has the correct Network access code and is addressed to a specific radio. The radio responds to selective calls only.
�����������
CC 2Q�6WHDG\� �&DUULHU�6TXHOFK
2SHUDWLRQ
���������������� ����� ��

-�((���������/ ��$� "
&RPPRQ5DGLR)HDWXUHV�IP��3DJH�����7XHVGD\��-XQH����������������$0
Non-Project 25 Digital Squelch OptionsEach conventional personality may be programmed for one of the following squelch options in digital mode (consult your service technician).
Data Calls (Status Calls or Message Calls)This feature allows you to send data calls (status calls or message calls) from your radio to the dispatcher to indicate a predefined condition. Each defined status or message can have a 12-character alias. You can have a maximum of conditions 16 pre-defined message conditions, 16 pre-defined status conditions for conventional and 8 pre-defined status conditions for trunking.
Sending a Status Call or Message Call1 Press . until the display shows the ��� or ��� softkey,
OR
Press the preprogrammed Status button or Message button (see page 4). This takes you to the result of the action described in step 2.
2 Press m directly below the type of data call you wish to make.
The last acknowledged status call or the first message in the message list is displayed.
Note: If no status has been acknowledged, the first status in the status list is displayed.
No SquelchThis option allows the radio to respond to any ASTRO digital signal that has the correct Network access code.
Data or Squelch
This option allows the radio to respond to any ASTRO digital signal that has the correct Network access code and the correct talkgroup.
Data and Squelch
This option allows the radio to respond to any ASTRO digital signal that has the correct Network access code and is addressed to a specific radio (the radio responds to selective calls only).
�* +**,�*�-�.��

-�((���������/ ��$� "
&RPPRQ5DGLR)HDWXUHV�IP��3DJH�����7XHVGD\��-XQH����������������$0
3 Press , or .�to scroll through the list until you locate the predefined status you wish to send.
4 When you locate the appropriate status, press the PTT button.
5 Upon receipt of the data call, the dispatcher transmits an acknowledgement to your radio. Your radio beep four times, displays ������� , and returns to normal dispatch operation.
If the system does not acknowledge the data call, the display alternately shows ���������� � and the currently selected predefined condition.
6 Press o to exit the data call feature and return to the home display.
Note: While the data call feature is selected, you do not hear normal radio communication on trunked channels.
If the data call feature (��� or ���) is selected and no activity occurs for six seconds, you hear an alert tone indicating that the data call feature is active. The alert tone stops when o or the PTT button is pressed.
Emergency StateYour radio may have been programmed by your system administrator or radio technician with the Emergency State feature.
Press the preprogrammed Emergency button (see page 4) to send out an emergency signal that takes precedence over any other signalling activity in progress on the selected channel. There are two types of emergency signals:
• Emergency Alarm sends a data transmission to alert the dispatcher to an emergency condition and identifies the radio sending the emergency signal.
���������� ����������� �
���������������� ����� �0

-�((���������/ ��$� "
&RPPRQ5DGLR)HDWXUHV�IP��3DJH�����7XHVGD\��-XQH����������������$0
• Emergency Call is a type of dispatch operation that gives your radio priority access to channels. This feature is not available on conventional radios.
Note: Entering Emergency State signals a critical situation. It should never be used for any other reason.
If you change channels during emergency operation, the emergency alarm or call is moved to, and continue on, the new channel if the new channel is also programmed for emergency operation. If the new channel is not programmed for emergency operation, you hear a continuous, low-pitched invalid mode tone until the radio exits emergency state or you change to a channel programmed for emergency operation.
For emergency-alarm with emergency-call signals, once an acknowledgment is received from the dispatcher, your radio enters emergency call state.
While your radio is in emergency-call state, it operates in the usual dispatch manner or returns to one of the following operations if programmed to do so:
• Tactical/Non-Revert Operation — you talk on the channel selected before entering the emergency state.
• Non-Tactical/Revert Operation — you talk on a preprogrammed emergency channel, and the emergency alarm is sent to this preprogrammed emergency channel.
Entering the Emergency State1 Press and hold the preprogrammed Emergency button (see
page 4). The length of the press-and-hold time required is programmed by your system administrator or radio technician.
2 The display alternately shows ����� and the current zone/channel combination (except during silent emergency alarm).
1� +**,�*�-�.��

-�((���������/ ��$� "
&RPPRQ5DGLR)HDWXUHV�IP��3DJH�����7XHVGD\��-XQH����������������$0
When you receive the dispatcher’s acknowledgment, the display shows ������� , four tones sound, the alarm ends, and the radio exits the emergency mode. If no acknowledgment is received, the display shows ���������� �, the alarm ends, and the radio exits the emergency mode.
During emergency alarm state:
• The display alternately shows the current zone/channel and �����,
• The LED lights red, and
• You hear a group of short, medium-pitched tones.
Note: If the selected channel does not support emergency, the display shows ��������. Select a channel that is programmed for emergency calls.
During a silent-emergency call:
• The display does not light.
• You do not hear tones.
• The display does not change.
• The audio is muted (turned off) and remains so until you exit the emergency alarm state, and
• The silent-emergency state continues until you press the PTT button.
During an emergency call, press the PTT button to cancel the alert.
���������
���������������� ����� 1,

-�((���������/ ��$� "
&RPPRQ5DGLR)HDWXUHV�IP��3DJH�����7XHVGD\��-XQH����������������$0
�������������������������It is important that you exit emergency state when it is no longer necessary.
1 To exit Emergency State, press the preprogrammed Emergency button for approximately one second.
This duration is programmed by your system administrator or radio technician.
The way you exit Emergency State may vary based on how your radio was programmed by your system administrator or radio technician.
If your radio is programmed with emergency alarm only, the radio automatically exits emergency state after receiving an acknowledgment from the dispatcher or if the alarms are exhausted when no acknowledgment is received. This method applies to non-silent emergency alarm radios.
Note: If your radio is programmed for silent-emergency, your radio does not automatically exit Emergency State. One of the above methods must be used.
Emergency Keep-AliveWhen this feature is enabled, moving the On/Off Control knob to the off position does not turn your radio off if it is in an emergency state. Your radio continues normal emergency operation as if the power is on. The radio will not turn power off until it exits emergency state.
If your radio is programmed for emergency alarm,
Press the PTT button. The alarm is cancelled (without an emergency-exit tone), and you may begin transmitting your voice call.
OR
If your radio is programmed for emergency alarm with call,
press the PTT button while the radio is in emergency-alarm operation to place the radio in emergency-call operation.
12 +**,�*�-�.��

-�((���������/ ��$� "
&RPPRQ5DGLR)HDWXUHV�IP��3DJH�����7XHVGD\��-XQH����������������$0
Emergency Channel Selector LockWhen this feature is enabled, your radio Channel Selector is automatically locked upon entering Emergency State preventing the channel from being changed during an emergency. Upon exiting Emergency State, the channel remains on the channel selected prior to entering Emergency State.
This feature is only available if the Channel Selector Lock feature is programmed by your system administrator or radio technician (see page 4).
Talkgroup Calls (Project 25 Radios Only)Project 25 replaces Motorola’s group selective calls with talkgroup calls. This feature allows you to define talkgroups for your conventional system. Talkgroups, combined with selective squelch operation, allow groups of users to transparently share a conventional channel. Talkgroups may be slaved to a personality by your system administrator or you may select them.
Encryption keys are slaved to talkgroups. When talkgroups are enabled, encryption keys are changed by changing the active talkgroup.
Talkgroup Selection 1 �� ""�.�$������% ���"&��3�"%��"��% �����"�4� 3)
2 Press m directly below ���.
�% ���"&��3�"%��"��% ���"��$" ��" � !� ������"��� ����� ���$&������% �������'� �"�4� 3�" � !����")
3 �� ""�,����.����"!������%��$�%��% ���� ���$&")
OR
Enter the number of the desired index.
���������
��������������
���������������� ����� 1�

-�((���������/ ��$� "
&RPPRQ5DGLR)HDWXUHV�IP��3DJH�����7XHVGD\��-XQH����������������$0
� To select the preset or programmed talkgroup, p� ""�m���� !��3�' �������)
OR
To save the currently displayed talkgroup and return to the home display p� ""�m���� !��3�' ������.
If the encryption key slaved to the new talkgroup is erased, the display shows ������� and you hear a group of medium-pitched tones.
If the encryption key that is slaved to the new talkgroup is not allowed, the display shows ��������� and you hear a momentary tone.
5 Press o or the PTT button or turn the 16-Position Select knob to exit this menu.
�������
����������
11 +**,�*�-�.��

-�((���������/ ��$� "
&RPPRQ5DGLR)HDWXUHV�IP��3DJH�����7XHVGD\��-XQH����������������$0
Individual Calls�������$���!���"��� �� 4�� ���"�4�����"5
Note: In the following procedures, any reference to Private-Conversation (Private Call) represents both Private-Conversation II calls and Enhanced Private-Conversation calls, unless otherwise specified.
Telephone CallsSimilar to standard telephone calls, except you use your radio. These can be landline-to-radio or radio-to- landline calls.
Private-Conversation™ II Calls (Private Calls) (Trunked Channels Only)
One-on-one calls involving two specific radios in which the conversation is not heard by others in the current radio talkgroup.
Enhanced Private-Conversation Calls (Enhanced Private Calls) (Trunked Channels Only)
Same as Private Conversation II calls except the radio automatically verifies that the target radio is active on the system. The target radio user can also view the ID of the calling radio before answering.
Selective Calls (Conventional Channels Only)
Used to selectively call an individual radio on Project 25 systems, or an individual radio or group of radios on non-Project 25 systems. It is intended to provide privacy and to eliminate the annoyance of having to listen to conversations that are of no interest to you.
Call-Alert™ Pages Your radio functions like a pager; Call Alert pages provide a means to signal other radio users that you wish to get in touch with them (even if they are away from their radio or in a noisy environment). Call Alert pages also allow you to verify that the radio they are calling is active on the system.
���������������� ����� 1.

-�((���������/ ��$� "
&RPPRQ5DGLR)HDWXUHV�IP��3DJH�����7XHVGD\��-XQH����������������$0
������������������ ����������� ��Note: On conventional channels, you must monitor the channel for
activity before making an individual call (see page 25 for details).
� /������ � &%�� �!�����&� ""�.�$������% ���"&��3�"%��"������
��
For a Private-Conversation Call or a Selective Call, &� ""�.�$������% ���"&��3�"%��" �����
For a Call-Alert Page, &� ""�.�$������% ���"&��3�"%��" ���.
OR
�4�3�$��������%�"�' ��&�����(( ��'3�3�$��"3"� (���(���"����������������� !%��!����4���#$�! ��!! ""������� ���$!%���&� ""��% �� "����� ��'$�����4��� ��% ���% ��%�� �������� �-������ � !��� �-��������-������ ���4 ��$� )��%�"��� "�3�$���� !��3�����% �� "$����4��% ��!�����"& !�4� �����"� &�2)
2 Press m directly below the desired softkey feature. For example, to make a telephone call, press m directly below ����.
The display shows the last telephone number dialed or the ID number of the last call/page transmitted/received.
����������
��������
� ��������
��������
1+ +**,�*�-�.��

-�((���������/ ��$� "
&RPPRQ5DGLR)HDWXUHV�IP��3DJH�����7XHVGD\��-XQH����������������$0
�������������� ����������� ��With regard to telephone calls, your radio may be programmed by your system administrator to automatically access the telephone system in one of four ways:
1 If the display shows ������� or you do not hear a dial tone in any of the above situations, press o or the designated quick-access button (Phone, Private Call, Selective Call, or Call Alert button) to end the call.
If the display shows ���������, your call is placed in queue until a line is available. When a line becomes available, the display shows ��������� and a dial tone is heard.
2 If the party you are calling answers the call, press the PTT button to talk and release it to listen.
Immediate Access If your radio is programmed for Immediate Access and you access the Phone function (through a softkey or using a preprogrammed button), the radio tries to access the telephone system. The display shows ���������. If the attempt is successful, you hear a dial tone. The display shows the last number dialed.
Auto-Access (Conventional Channels Only)
Your radio may be programmed to auto-access the telephone system via a radio-to-landline phone patch during Conventional operation.
Manual Access (Conventional Channels Only)
If your radio is programmed for Manual Access, to access the telephone system via a radio-to-landline phone patch, enter a special telephone system access code using your alphanumeric keypad.
Delayed Access If your radio is programmed for Delayed Access, enter a new phone number or ID number using your alphanumeric keypad and press the PTT button to send.
���������������� ����� 1�

-�((���������/ ��$� "
&RPPRQ5DGLR)HDWXUHV�IP��3DJH�����7XHVGD\��-XQH����������������$0
Note: After reaching the number you are calling, you may need to dial an extension number before you are can reach your party.
Radios operating on trunked systems generate a high-pitched tone when the PTT button is released. This is heard by the landline party and is an indicator to begin talking.
3 When you have finished your conversation, or if the display shows ������� or ���������� �, disconnect by pressing o or the Phone button. The radio returns to the home display.
Calling the Last Number Dialed or Last ID Number Transmitted/Received
For Telephone Calls Only
Press the PTT button. You hear either ringing or a busy tone. On a trunking system, if you hear a busy tone, press the PTT button to try again. Otherwise, press o to exit the Telephone Call feature.
For Private-Conversation Calls Only
Press the PTT button. Begin talking.
For Enhanced Private-Conversation Calls Only
Press the PTT button. If the radio you are calling is in service, you hear ringing and, if the target-radio user responds to the call, the individual’s voice.
For Selective Calls Press the PTT button. Begin talking.
For Call-Alert Pages Only
Press the PTT button. If the page is accepted, you hear four beeps, the display shows ������� , and the radio returns to the home display. If the page is not accepted, the display shows ���������� �; press the PTT button to try again or press o to exit the Call Alert Page feature.
1* +**,�*�-�.��

-�((���������/ ��$� "
&RPPRQ5DGLR)HDWXUHV�IP��3DJH�����7XHVGD\��-XQH����������������$0
Calling a Number From a ListUse the List feature to select a specific number from your radio’s memory list:
1 Scroll through the list by pressing , or . until you locate the member’s number you wish to call.
OR
To go directly to a specific member in the list, enter the number (1 through 19) that corresponds with that member’s placement in the list.
2 Press the PTT button.
If the system does not acknowledge the call, your radio alternately displays ���������� � and the currently selected number.
Calling a New NumberThis feature is programmed by your system administrator or radio technician.
1 Enter a new telephone number using your alphanumeric keypad (1 through 9).
The display shows a cursor appears indicating the position of the next number to be added.
When the maximum number of characters are entered (sixteen on non-Project 25 radios or 34 on Project 25 radios for a telephone number, six for a trunking ID number and four for a conventional MDC ID number or 8 for a conventional ASTRO ID number), the cursor disappears. If you try to add more digits, you hear an invalid tone.
2 Press the PTT button.
���������������� ����� 10

-�((���������/ ��$� "
&RPPRQ5DGLR)HDWXUHV�IP��3DJH�����7XHVGD\��-XQH����������������$0
Note: This action does not program a new number in your radio’s memory list.
Your radio may be programmed for either live dial or buffered dial. Live dial sends out each digit as the key is pressed, similar to a regular desktop telephone. Buffered dial requires that you enter all digits and press the PTT button. Consult your system administrator or radio technician for details.
To enter a pause in the number, press * followed by #. A “P” appears on the display.
To erase incorrect characters, < functions as a backspace key.
Answering an Individual Call1 When an individual call is being received, you hear and/or see:
• a telephone-type ringing if it is a telephone call;
• two alert tones if it is a Private-Conversation call or Selective call;
• a continuous cycle of four tones if it is a Call-Alert page;
• a blinking green signal on the LED;
• the F indicator flashing;
• and the display shows one of the following:
2 Telephone Calls Only — Press the Call Response button.
OR
Private-Conversation Calls and Call-Alert Pages with Private-Conversation — Within twenty seconds, press the Call Response button.
The display shows the caller’s ID number. Press the PTT button to talk privately.
�����������������
����������������
�����������������
F F F
.� +**,�*�-�.��

-�((���������/ ��$� "
&RPPRQ5DGLR)HDWXUHV�IP��3DJH�����7XHVGD\��-XQH����������������$0
Selective Call — The display remains active for two seconds and then the speaker is no longer muted.
OR
Call-Alert Pages Only — To see the caller’s ID, press the Select button.
If you wish to respond, press the PTT button and your conversation is heard by the entire talkgroup.
3 Press the PTT button to talk and release it to listen.
4 When you have finished your conversation, disconnect by pressing o. The radio returns to the home display.
PL DefeatThe PL defeat feature allows you to override any coded squelch (DPL, PL, or network ID) that may be programmed to a channel. To activate this feature, place the preprogrammed PL Defeat switch if applicable (see page 4) in the PL Defeat position. You are able to hear any activity on the channel; if no activity is present, the radio is muted.
Repeater AccessRepeater access allows you to selectively activate repeaters, which is especially useful in areas where repeaters are placed close together to ensure total coverage. Repeater access can operate automatically or manually and can be enabled or disabled by your system administrator or radio technician for specific channels as required. During automatic repeater access, you hear a sidetone to indicate that the repeater access code is being transmitted to discourage you from talking over the data transmission.
In radios programmed with manual repeater access, you can activate the repeater access code transmission by pressing the preprogrammed Repeater Access button if your radio has one (see page 4). You do not hear a sidetone. On radios with MDC-1200™ signalling, when the repeater access is acknowledged, the radio
���������������� ����� .,

-�((���������/ ��$� "
&RPPRQ5DGLR)HDWXUHV�IP��3DJH�����7XHVGD\��-XQH����������������$0
sounds an acknowledge alert tone. The acknowledge alert tone can be programmed by your system administrator or radio technician.
Repeater/DirectThe repeater/direct feature allows you to bypass the repeater and talk directly to another radio. This is known as DIRECT operation or talkaround operation. The transmit frequency is the same as the receive frequency.
In REPEATER operation, you talk through the repeater, which increases the radio’s operating range. The transmit frequency is not the same as the receive frequency.
Selecting Repeater or Direct Operation1 Press . until the display shows �.
OR
���! ��% �&� &�����(( ���������� !������"�����" �&�� 1������% �� & �� ��&�"����������% ���� !��&�"�����)
2 Press n directly below �.
The display shows the current operation for a few seconds and then the two possible operations.
3 Press m below the desired softkey ( � or ��).
Note: Press o or the PTT button to exit the menu without changing the existing setting.
�� �������� �
�����������
��������� �
�����������
.2 +**,�*�-�.��

-�((���������/ ��$� "
&RPPRQ5DGLR)HDWXUHV�IP��3DJH�����7XHVGD\��-XQH����������������$0
Scan
Scanning allows you to monitor different channels automatically through the use of scan lists. If there is activity on a channel, the Scan feature automatically takes you to that channel.
Each radio can have up to twenty unique scan lists. These scan lists are programmed by your system administrator or radio technician either manually or using radio service software.
Three types of scan lists are available (consult your service technician for additional information):
Trunking Priority Monitor
Comprises channels that are all from the same trunking system (10 different channels maximum). This feature only works on systems that support it.
ConventionalComprises only conventional channels (15 different channels, maximum).
Talkgroup Scan
Comprises conventional and trunked channels from more than one trunking system (10 different channels maximum). Priority operation is not available in this type of list.
����� ������
������������������
H
���������������� ����� .�

-�((���������/ ��$� "
&RPPRQ5DGLR)HDWXUHV�IP��3DJH�����7XHVGD\��-XQH����������������$0
There are also several types of scanning available:
Turning Scan On and Off1 Press . until the display shows ����.
2 Press m directly below ����.
The display shows the current scan state.
3 Press m below the desired scan state (�� or ���). When the scan feature is on (active), the display shows the scan indicator (G).
Note: Press o or the PTT button to exit this menu without changing the current setting.
Priority 1 Scanning
With Priority 1 scanning enabled, one member of the scan list is chosen as the Priority 1 member. Any activity on the Priority 1 channel is heard on the speaker even if another channel in the scan list has activity on it.
Priority 2 and Non-Priority Scanning
In addition to the Priority 1 channel being the number one priority, a second channel can be assigned as a Priority 2 channel, if desired. The remaining members in the scan list can be programmed as non-priority members of the scan list.
Automatic Scanning (Autoscan)
With this feature, the radio begins scanning whenever you select a channel to which a scan list is assigned (strapped). The radio continues auto scanning until you select a channel that does not have autoscan enabled.
Operator-Selectable Scan
Scan can be programmed by your system manager or service technician to be activated by a softkey related button or a Scan On/Off switch (see page 4).
������
�������������
�������
�������������
.1 +**,�*�-�.��

-�((���������/ ��$� "
&RPPRQ5DGLR)HDWXUHV�IP��3DJH�����7XHVGD\��-XQH����������������$0
Deleting Nuisance ChannelsWhen the radio scans a channel that you do not wish to hear (nuisance channel), you can temporarily delete the channel from the scan list.
1 When the radio is locked onto the channel to be deleted, press the Nuisance-Delete button (see page 4). Repeat this step to delete additional nuisance channels.
Note: Priority channels and the selected channel cannot be deleted using the nuisance-delete feature.
The radio continues scanning the remaining channels in the list. To resume scanning the deleted channel, you can change channels or exit and re-enter scan operation.
Dynamic Priority Change (Conventional Operation Only)While the radio is scanning, the dynamic priority change feature lets you temporarily change any channel in a scan list (except the Priority 1 channel) to the Priority 2 channel. The present Priority 2 channel becomes a non-priority channel. This change remains in effect until scan is turned off. Scanning then reverts to the preprogrammed state.
To change a channel to a Priority 2 channel:
1 Press the preprogrammed Dynamic Priority button (see page 4) when the radio is locked onto the channel to be designated as a Priority 2 channel.
Note: The Priority 1 channel cannot be changed to Priority 2 channel.
2 The radio continues scanning the remaining channels in the list. To resume scanning the preprogrammed Priority 2 channel, you must exit and re-enter scan operation.
���������������� ����� ..

-�((���������/ ��$� "
&RPPRQ5DGLR)HDWXUHV�IP��3DJH�����7XHVGD\��-XQH����������������$0
Viewing a Scan ListThe View Scan List feature allows you to view the members of the scan list associated with the currently selected channel. You view a scan list the same way you view other lists (see “Viewing a List” on page 27).
Programming a Scan List1 Press . until the display shows the ��� softkey.
2 Press m directly below ���.
The display shows the lists (����, ����, ����, etc.) that can be changed; use , or . to see other available lists.
3 Press m directly below ����.
The display shows the first member in the list. The display shows a flashing I status indicator, indicating you are in the programming mode.
4 Press m below �� to add the currently displayed channel to the scan list.
OR
Press m below ������ � � ��% �!$�� ���3���"&��3 ��!%��� ��4��(��% �"!�����"�)
OR
Press the Select button (the Top Side button) to change the scan-list status of the currently displayed channel.
�����������
������������������
.+ +**,�*�-�.��
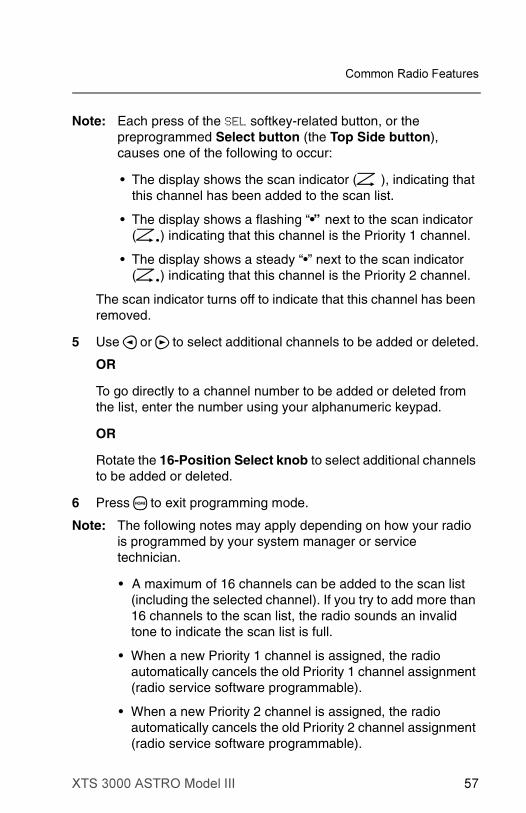
-�((���������/ ��$� "
&RPPRQ5DGLR)HDWXUHV�IP��3DJH�����7XHVGD\��-XQH����������������$0
Note: Each press of the �� softkey-related button, or the preprogrammed Select button (the Top Side button), causes one of the following to occur:
• The display shows the scan indicator (G), indicating that this channel has been added to the scan list.
• The display shows a flashing “•” next to the scan indicator (H) indicating that this channel is the Priority 1 channel.
• The display shows a steady “•” next to the scan indicator (H) indicating that this channel is the Priority 2 channel.
The scan indicator turns off to indicate that this channel has been removed.
5 Use , or . to select additional channels to be added or deleted.
OR
To go directly to a channel number to be added or deleted from the list, enter the number using your alphanumeric keypad.
OR
Rotate the 16-Position Select knob to select additional channels to be added or deleted.
6 Press o to exit programming mode.
Note: The following notes may apply depending on how your radio is programmed by your system manager or service technician.
• A maximum of 16 channels can be added to the scan list (including the selected channel). If you try to add more than 16 channels to the scan list, the radio sounds an invalid tone to indicate the scan list is full.
• When a new Priority 1 channel is assigned, the radio automatically cancels the old Priority 1 channel assignment (radio service software programmable).
• When a new Priority 2 channel is assigned, the radio automatically cancels the old Priority 2 channel assignment (radio service software programmable).
���������������� ����� .�

-�((���������/ ��$� "
&RPPRQ5DGLR)HDWXUHV�IP��3DJH�����7XHVGD\��-XQH����������������$0
Selecting Squelch OperationTone Private Line® (PL), Digital Private LineTM (DPL), network ID, and carrier squelch operations are all available in the same radio on a per channel basis.
Note: Network ID is only available on ASTRO digital channels programmed by your system administrator or radio technician.
When in carrier squelch operation, all traffic on the channel is heard. When in PL, DPL or network ID operation, your radio responds to only those messages intended for you. PL, DPL, network ID and carrier squelch can be programmed by your system administrator or radio technician.
When the radio is operating in carrier squelch, the display shows the I status indicator.
Smart PTTSmart PTT is a feature used in conventional radio systems to keep radio users from talking over other radio conversations. Smart PTT is programmed by your system administrator or radio technician.
When Smart PTT is enabled in your radio, you are unable to transmit on an active channel. If you try to transmit (press the PTT button) on an active Smart PTT channel, you hear an alert tone, and the transmission is inhibited. The LED blinks red to indicate that the channel is busy.
.* +**,�*�-�.��

-�((���������/ ��$� "
&RPPRQ5DGLR)HDWXUHV�IP��3DJH�����7XHVGD\��-XQH����������������$0
Three radio-wide variations of Smart PTT are available:
Transmit Inhibit on Busy Channel with Carrier
With this feature enabled, you are prevented from transmitting if any activity is detected on the channel.
Transmit Inhibit on Busy Channel with Wrong Squelch Code
With this feature enabled, you are prevented from transmitting on an active channel with a squelch code or (if secure-equipped) encryption key other than your own. If the PL code is the same as yours, the transmission is allowed.
Quick-Key Override
This feature can work in conjunction with either of the two above variations. With this feature enabled, you are able to override the transmit-inhibit state by quick-keying the radio; in other words, two PTT button presses within the time programmed through radio service software (RSS) for Smart PTT Quick-Key Timer (default value is 1/2 second).
���������������� ����� .0

-�((���������/ ��$� "
&RPPRQ5DGLR)HDWXUHV�IP��3DJH�����7XHVGD\��-XQH����������������$0
Notes
+� +**,�*�-�.��

��������������� ����
Dynamic RegroupingThe dynamic regrouping feature allows the dispatcher to temporarily reassign selected radios to a single special channel so that they can communicate with each other. This feature, enabled in each radio by your system manager or service technician, is typically used during special operations. You will not notice whether your radio has this feature enabled until a dynamic regrouping command is sent by the dispatcher.
Note: If you select the dynamic-regrouping zone/channel using softkeys or other radio controls without being dynamically regrouped, you hear an short, low-pitched invalid tone.
When your radio has been dynamically regrouped, you hear a gurgle tone (unless you are already on the dynamic-regrouping zone/channel), and your radio automatically switches to the dynamic-regrouping channel. The display shows the name assigned to the dynamic-regrouping channel.
Note: When you use a radio-control knob or switch to select the zone or channel, you are not be able to scan or initiate a private conversation call until you select the dynamic regrouping position. You also hear a gurgle tone each time you press the PTT button. This is a reminder to you that you are transmitting on the dynamic-regrouping channel, not the zone or channel indicated by the position of the radio control.
However, in some cases the radio is programmed as a select-enabled radio: see page 63 for details.
1 Press the PTT button to talk and release it to listen.
���������������� ����� ��

�� ������������ ����
2 For radios using only softkeys for zone and channel selection — When the dynamic regrouping is cancelled by the dispatcher, the radio automatically returns to the original softkey zone and channel before the radio was dynamically regrouped.
OR
For Radios Using Knobs or Switches for Zone and/or Channel Selection — Your radio automatically returns to the present knob/switch zone and/or channel position and the original softkey zone or channel selection when the dynamic regrouping is cancelled by the dispatcher.
Reprogram RequestThis feature allows you to notify the dispatcher that you want a new dynamic-regrouping assignment.
1 Press . until the display shows the ���� softkey.
OR
!� ��" ��� ���#��$$ ���������������� ��� ���% ���# &'(��"� ���) �*�������" �� �����+��" ������,�� ���- ���,� � ���.�
2 Press m directly below ����.
The display shows �����������, indicating that the reprogram request has been sent to the dispatcher.
If you hear five beeps, the reprogram request was acknowledged by the dispatcher. Your radio returns to the home display.
Note: If the dispatcher fails to acknowledge the reprogram request within six seconds, you hear a low-pitched alert tone and the display shows ��� ������. Try again or press o to return to the home display.
3 Press the PTT button to resend the reprogram request again, or press o to hang up and return to the home display.
�����������
�� ������������

�� ������������ ����
Select Enable/DisableThe dispatcher may classify regrouped radios into either of the following two categories:
• Select-enabled radios are free to make channel changes to any available channel, including the dynamic-regrouping channel.
• Select-disabled radios cannot change channels since the dispatcher has specifically chosen to force the radio to remain on the dynamic-regrouping channel.
Note: You cannot use the scan and private conversation call features when your radio is select disabled.
PTT-ID ReceiveThe PTT-ID receive feature allows you to see the Unit ID number of the radio you are currently receiving transmissions from. This ID can be a maximum of eight characters and can be viewed by both the
receiving radio and the dispatcher. On trunking radios, press , or . to replace the displayed ID with the softkey menu selections; press o to return to the ID display.
PTT-ID TransmitThe PTT-ID transmit feature is a per-channel feature in which your radio’s ID number is automatically sent every time the PTT button is pressed. For analog voice transmissions, depending upon how your radio was programmed, your radio’s ID can be transmitted at the beginning of a transmission, at the end of a transmission, or at the beginning and ending of a transmission. For digital voice transmissions, your radio’s ID is sent continuously during the voice message.
If your radio has MDC-1200™ signalling and the ID is sent before the voice transmission, you hear a continuous low-pitched tone until the ID transmission is completed; this helps you avoid talking while the ID code is being transmitted.
���������������� ����� ��

�� ������������ ����
To view your radio’s ID number:
1 Press . until the display shows the ��� or ���� softkey.
�
!� ��" ��� ���#��$$ ��������� ������������� ���% ���# &'.��"� ���) �*�������" �� �����+��" ������,�� ���- ���,� � ���.
2 Press m directly below ��� or ����.
3 Press ,.
The display shows your radio’s ID.
Secure OperationIf your radio is programmed with secure operation, you may transmit in either clear or secure mode. Transmitting in secure mode ensures that no users other than the intended recipient(s) are able to decode your encrypted message.
Selecting Secure or Clear TransmissionsUse the Secure/Clear switch (see page 4) to select secure or clear operation of the radio before initiating a transmission using the PTT button. This selection cannot be made when a transmission is in progress.
If a channel is programmed for secure-only operation, and the Secure/Clear switch is in the clear (E) position, when the PTT button is pressed, the display shows �� �������, you hear a continuous, low-pitched invalid-mode tone, and the radio does not transmit until the Secure/Clear switch is set to the secure (D) position.
���� ����
������������
����������
�& ������������

�� ������������ ����
OR
�+����"�,, ��� ����#��$$ ��+����� ����,�*��� �����,/��,���" ����������������� ���� ��,��" � ��� �%D'��� ����,/�0" ,��" ������� ���� ��� �/��" ��� ���*� "�0 � ��������/�*���" ����,��,1�����$�� ���, /��,���" ��������� �,������, $����,�����" ����������������� ���� � ������" ��� ���%E'��� ����,
Managing EncryptionYour radio may be programmed for either single key or multikey encryption. If your radio is programmed for single key encryption, your radio has a single encryption key and supports one encryption algorithm. The multikey feature allows your radio to be equipped with as many as 16 different encryption keys and supports up to two different encryption algorithms simultaneously (for example, DVP-
XL™ and DES-XL; or DVP™ and DVI-XL™ or DES-OFB).
KEY Loading
To load encryption keys into the radio:
1 Set up the radio and equipment as specified in the key-variable loader (KVL) manual.
2 When the KVL is attached to your radio, the display shows ���������, and all other radio functions are locked out.
3 Press the KVL’s PTT button to load the encryption keys into your radio. When the key has been loaded successfully, single-key radios sound a short tone and multi-key radios sound an alternate tone.
Key Erasure (KEY Zeroization) - Method 1 (Multikey Only)
1 Press , or . until the display shows the ���� softkey.
2 Press m directly below ����.
The display shows the last user-selected and stored encryption key and the available softkey selections.
���������
���������������� ����� ��

�� ������������ ����
Note: The scan, telephone call or Private Conversation call feature cannot be selected while your radio is select disabled.
3 To erase all the encryption keys in the radio, press m directly below the ��� softkey.
The display shows ������������ and ��� and � for erase confirmation.
OR
To exit this menu and return to the home display, press m directly below the ��� softkey.
OR
To select the displayed encryption key to be erased, press m directly below the ��� softkey.
The display shows ������������ and ��� and � for erase confirmation.
Press , or . to scroll through the encryption keys or use the alphanumeric keypad to enter the encryption key’s placement in the list. The display shows the new selection on the upper line.
4 To exit the menu, press o, the PTT button the ��� softkey, or turn the 16-Position Select knob.
KEY Erasure (All KEYS Erased) - Method 2
1 Turn the radio on.
2 Press the Top Side button and Emergency button simultaneously.
Note: DO NOT press the Emergency button before pressing the Top Side button unless you are in an emergency situation. This sends an emergency alarm.
3 When all the encryption keys are erased, the display shows ������.
�� ������������

�� ������������ ����
MultiKEY
The multikey feature must be configured based on whether or not your radio is used for conventional applications or both conventional and trunked applications as described below:
KEY Selection
1 Press . until the display shows the ����softkey.
2 Press m directly below ���.
The display shows the last user-selected and stored encryption key and the available softkey selections.
3 Press , or . to scroll through the encryption keys.
OR
Enter the number of the desired index.
Note: If an erased key is selected, the display alternately shows ���������� and the key name.
4 To select the preset or default encryption key, press m directly below the ��� or ����� softkey.
Multikey
The encryption keys can be tied (strapped), on a one-per-channel basis by your system administrator or radio technician. In addition, you can have operator-selectable keys, operator-selectable indices, and operator-selectable key erasure. If talkgroups are enabled in conventional, then the encryption keys are strapped to the talkgroups.
Trunked Multikey
If you use your radio for both conventional and trunked applications, you have to strap your encryption keys for trunking on a per talkgroup or announcement-group basis. In addition, you may strap a different key to other features for example, dynamic regrouping, failsoft, emergency talkgroup, or emergency-announcement group.
�������
�����������������
���������������� ����� ��

�� ������������ ����
OR
To save the newly-selected key and return to the home display, press m directly below the ��� softkey.
5 Press o, the PTT button, the ��� softkey-related button, or turn the 16-Position Select knob to exit this menu. If the selected key is erased, the display shows �������� and you hear a group of medium-pitched key fail tones.
If the selected key is not allowed, the display shows ����������� and you hear a short, low-pitched illegal key tone.
Index Selection
The select-an-index feature allows you to select one or more groups of several encryption keys from among the available keys stored in the radio. For example, you may have a group of three keys structured to one index, and another group of three different keys structured to another index; by changing indices, you automatically switch from one set of keys to the other. Every channel to which one of the original keys was tied to now has the equivalent new key instead. Indexing allows the key-management controller to remotely change the keys within the index that is not currently being used without disrupting the operation of the radio.
1 Press . until the display shows ���.
2 Press m directly below ���.
The display shows the last user-selected and stored index and the available index softkey selections.
3 Press m directly below the desired index.
�������
����������
�������
��������������������
�� ������������

�� ������������ ����
OR
Enter the number of the desired index.
4 To save the newly selected index, press m below ���. The radio exits index selection and returns to the home display.
Note: Press o or the PTT button or turn the 16-Position Select knob to exit this menu without modifying existing settings.
Selectable Power LevelThis feature allows you to select the power level at which your radio transmits messages.
Note: When the radio is powered on, it defaults to the programmed setting.
1 Press . until the display shows ���.
OR
!� ��" ��� ���#��$$ ������������� ������ ���% ���# &'.��"� ���) �*������ ���*�����" �� �����+��" ������,� � ��+� ���,� � ���.
2 Press m directly below ���.
The display shows the current power-level state.
3 For shorter transmitting distance, press m directly below ���. This conserves battery life.
OR
For longer transmitting distance, press m directly below ����. This transmission mode utilizes more battery power.
The new transmit power level is saved and your radio returns to the home display.
����������
����������������
���������������� ����� �2

�� ������������ ����
Note: Press o or the PTT button to exit this menu without modifying existing settings.
Trunking System Controls
Busy OverrideWhen a talkgroup call is placed in a SmartZone™ system and the system is not able to obtain voice channels at all necessary sites, you hear a group of low-pitched busy tones. If preprogrammed, you may override the busy status by performing the following steps:
1 Press the PTT button; you hear a busy tone.
2 Release the PTT button.
3 Press and hold the PTT button a second time. The busy tone is heard again. After a few seconds, you hear a preprogrammed busy-override chirp and the radio sends in a busy-override request.
The talkgroup call is placed at all sites that have voice channel resources available. Other sites are added to the call as channels become available.
Note: Not all members of the talkgroup are able to hear a call when a busy override is requested.
Dispatcher InterruptThe dispatcher-interrupt feature allows the dispatcher to interrupt your radio and places you in a Private Conversation call with the dispatcher.
1 When your radio receives a dispatcher-interrupt call, you hear a repeating sequence of four, short, medium-pitched tones until you answer the call. The display shows ��������� on the first line and ���������� on the second line. The green LED flashes indicating that a call is being received.
��������������������
�� ������������

�� ������������ ����
2 When the second line displays the ID of the dispatcher who has initiated the dispatcher-interrupt, press the PTT button to talk and release it to listen.
3 When you are finished with your conversation, hang up by pressing o. The radio returns to the home display.
FailsoftIf a trunking system experiences a complete failure, the radio reverts to Failsoft operation and automatically switches to its Failsoft channel. During Failsoft, the trunking repeaters transmit a medium-pitched tone every 10 seconds. When the trunking system returns to normal operation, your radio automatically exits the Failsoft operation and returns to trunked operation.
Out-of-RangeIf you go out of range of the system and can no longer lock onto a control channel, the display alternately shows ���������� and the currently selected zone/channel combination, and/or you hear a low-pitched tone. Your radio remains in this out-of-range condition until it (1) locks onto a control channel, (2) locks onto a failsoft channel, or (3) the radio is turned off.
Site LockThis feature allows your radio to lock onto a specific site and not roam among wide-area talkgroup sites. This is particularly useful when operating at the fringe of a system’s coverage.
������������ �������
�������
�����������
���������������� ����� ��

�� ������������ ����
1 Press . until the display shows ���.
OR
Press the preprogrammed Site Lock/Unlock button (see page 4).
• If the preprogrammed Site Lock/Unlock button is a side button, the site-lock state changes, and the new state is displayed momentarily.
• If the preprogrammed Site Lock/Unlock button is the top button. �"� ���) �*������ ���*�����" �� �����+��" ������,� � ��+� ���,� � ���.
2 Press m directly below ���.
The display shows the current lock state.
3 Press m directly below the desired condition (�� � or ���). The new site-lock state is saved, and your radio returns to the home display.
Site TrunkingIf the zone dispatcher loses communication with any site, that site reverts to what is known as site trunking. Your radio alternately displays �������� and the currently selected zone/channel combination. You are only able to communicate with other radios within your trunking site.
Site View and Change
Viewing the Current Site1 Momentarily press the preprogrammed Site Search button (see
page 4).
����������
����������������
����������
�� ������������

�� ������������ ����
The display shows the number of the current site, or if the radio is scanning for a new site, the display shows � ������� until it locks onto a new site and then shows the number of the new site.
Changing the Current Site1 Press and hold down the preprogrammed Site Search button
(see page 4) to manually force the change to a new site.
You hear a tone, and the display shows � ������� while the radio scans for a new site. Then, the radio automatically returns to the home display.
�����������
���������������� ����� ��

�� ������������ ����
Notes
�& ������������

$GGLWLRQDO,QIRUPDWLRQ�IP��3DJH�����7XHVGD\��-XQH����������������30
�������������� �����
���������������If you suspect a radio problem, check the following items before requesting service:
1 Radio Checks
• Be sure the radio is turned on and the 16-Position Select knob is in the proper position.
• Replace or recharge the battery. The first time a new battery is used, it should charge a minimum of 16 hours.
• The antenna must be attached properly with its base flush against the top of the radio.
• Check that any accessories in use are properly connected.
• Test the radio from several different locations (especially if the problem occurs when the radio is used inside a building).
• Check the transmitter by transmitting to an alternate portable radio.
2 Operating Instructions
Review your operating instructions and ensure that you are using the radio properly.
3 If, after following steps 1 and 2, your radio still has a problem, contact your system manager or review your service agreement and call your Motorola service representative as applicable.
If you do not have a service agreement on your radio, contact your nearest authorized Motorola service shop for guidance toward a prompt and expedient evaluation and/or repair.
�������������� ����� ��

����������������������
$GGLWLRQDO,QIRUPDWLRQ�IP��3DJH�����7XHVGD\��-XQH����������������30
���������
��������� ������� �!��"���� "�����#��$��# �������!�� % &&����'(�) * ��%���'�
�# �������+'��# ���� ���(
� �*����&!+, %���-��# ������������� .% &&������/!��&(��������&!+� �- ��# �������!�� &&�����&����!-- ��0 �"������������ �(
� �*����&!+, %���-��# ����������%����&�* &"�&��* ��&����& ����&(
� ���������&�&& �+� ��# ������(
� 1 ��# ��%% &&��'�%��� %����%�* ����� ��% �!�����'�!��� �� ��'����!& ��# �%��� %���(�� ��% ��# �%�* ����� ���� �'���% ��# ��%% &&��'�#�&�+ ����&%��� %� �(
�����������%� ����# � .� �����&!���% &����'�!�������2
� ���+�� ��� �� �& ��������������&#$�&#��-�� � �- �������� �-���������$�� ��3(�4�&��!����5(
� � �'��# �&��!�����& ����-�'�$��#���&����"������ �����%"�&#����+��&�� ��+�!&#"���6��-�&!� � .% &&�� � �- ����� &�����- �� ���� ��� ����# �%��� %���&"�%������&����%� *�% &(���'��# ��������#���!-#�'�$��#���&���"�������� �%���#(
� �� ���+��� �'�%����%�&�$��#���������� �%���#����� ��* ���������-� �& (
��������������������������������� !����� ��!�� ��������� �������������������
�������� �����������������������������������
!C a u t i o n
�� �����������

����������������������
$GGLWLRQDO,QIRUPDWLRQ�IP��3DJH�����7XHVGD\��-XQH����������������30
������7�� ��� ������������� ���% � ��% �!� &��&&!� &� ���%� ���� ��������������-���� ������#�&� ���!%�(���������������� ���% ��-� � ��� ��*�� &� . ���& �*�% ����6 ��#�&�����������# ��%���!��%������ /!� � ������ �� %��� �����-�%��������(���������$�� �& �*�% ���-���0�������&� ��*�� ��+'������������&! ��������� ���% �& �*�% &(��#��!-#���&������ ���% �������&���������� ��-���"�����������6 &��*����+� ��# ���� &��& �*�% �����#�& �� &����-�� ���+� "�%�����!�!&�%���!��%�����&������%�����%��+�&�&(�8�����%�����%��& �*�% ��-� � ��"� � �& �%����%��'�!��� �� &����������& �*�% ����&�� &�� � & �����* "��������!�#���0 ����������� �� �(
9. � &&�� �*�% �7�!&�39�75��&����� ������� .� �� ��& �*�% �%�* ��- � ���"�$#�%#� ��*�� &������# �� ��������#�&� ���!%�������������������� �������� ��# ���� �����$��' ��&�+ '�����# �������� . ����������� �����# �&��������$������'(�8������ ��������������+�!��9�7"�%����%���# ����������������! ����� �� �������: &���!���& �;�!� *���"�8�(�<�!� ���� "�8<����==(
"������
"������������ �����
>�!��������%�������%�� �'�!��+��� �'?&�%#��- �&���!&��#��!-#����<9�����@����� ������ &(
Refer to “Low-Battery Indication” on page 35.
"���������������������!����� %#��- �+� �+��� �� &���'�+ �� %'%� �(�A�$ * �"�� %'%���-���%����� &���'�����+ ��*����+� ���������� �&(�B�� ��*����!&�B(�(�&��� ���$&������# ���$&����& * ������# ��%�!���� &"�+��� �� &��!&��+ �� %'%� ������%������+ ���& �& ����������������&������%�� �����&(������%��'�!����%���$�&� �����- � ����- �%'�����& %���%�� /!�� � ��&��������������������'�!���� �(�
�������������� ����� ��

����������������������
$GGLWLRQDO,QIRUPDWLRQ�IP��3DJH�����7XHVGD\��-XQH����������������30
���������!��'� ����& &����� �%�!��- &��# �� %'%���-����+��� �� &(�����# �B(�(�����������"��������� ����%� �� &�����# �������$�� �� %#��- �+� �;��� �'�� %'%���-���� ��������3�;��5� ��-��������+��� �'�%��� %���������� %'%���-(���'�� ���� �&������ �� �&� ����%� �� �����#�&� ��-���(
8����# ���%����������# ���� �������%����'�%��& &�����'�!"��%% &&��;��C&���� �� ��$ +�&�� ����$$$(�+�%(%������%����������;���9�>(��#�&���� �� ��&�� ������ � #�� ��!�+ ����&�� ��*�� ���# ��!& �!��������������%��% ����-�� %'%���-�� ����&�����%��&!� �&"�+!&�� && &"�����-�* ��� ������- �%� &(
�� �����������

Index
A�� ������ �� ����������������������������������������� ���� ������������������������������������������������ ������������������������������������������������ ��������� ! ��� ��������"� #�$ � ��������������������������������������
B%��&�����������������������������������������������%��� �'� �������������������������������(���(���������� ����������������������������������������%��� �'���� ���������������������������������������� �����!���������������������������������������� ��������������������������������������)*%��� �'����������� ������������������� �'������������������� ���������������� #�$ � �������������������������������������"
% �������������������������������������������������+������� ���������������������������������������+� #�$ � �������������������������������������+
%!�'��$ ���� � ��������������������������������
C���������$��!��� ���������������������������������,����) ����� �����������������������������������������!#% �����#����������,���������������!#% ������ �-�.��!#% ��������������������������������,/
� � ������ ������������������������������,+!����� ������������������������������������,�
���&���!�� ���������������������������������,�� � ������ ������������������������������,�
0���� ��� � �����1��&������������������+����� ��� � ��������&� �������������������+��##���������� ��!� �� �����������������
D�������������������������������������������������/� �������������������������������������������/
�������� ����� ��!��� �����������������������
E # �� ��'� ������ # �� ��'�����#� ������ ��
# �� ��'������ ��� � ��������&�,� # �� ��'����� � ������������������������� �� �� ����� ����������������������������������� ,� 2������ ������������������������������������� ,"& �*���$ � ������������������������������� ,"
G� � ������������ ������� �������������� "�
K& '�������&� �������������������������������� ��& '������� �#!����� ������������������������������������� ��
L13.������������ �������������������������� �(�+������ ��������������������������������������������� "+� � ���������#� ������������������������� "�$� )����������� ��������������������������� "�
N����������!� ����������#��!��� ������� �
O�!�*��*���� � �������������������������������� ��
P41�� � ��� ������������������������������������ ����) ��� $ �� � ���%� ��������������������������������� +�
������##�%� ��������������������������� ,4��*�.� � �$ � ������������������������������������ +������#��� ����������������������������������� +�
R�����
���������������� ����� ��

��� 2
��� � ������������������������������������������+�����������$���������������������������+
�� ������ ������������������������������������+� � ����� ��!� �� ��������������������������# *�!����# �� ������������������������,
��������� ������������������������������������+����������� ��������������������������������"�� �$�� � ����������������������������������������!������� �������������������������������������"��!������ �������������������������������������"�
� � �$ �-������#��!� ��� ������## ��#�������%!����� �������������������������������������"�!� ��� ������## ��$��!# �� ��%!����� �������������������������������������"�)����!��!�����$��!# �� ������#�������%!������ ����������������������"�
� � �$ -�����#������������������������������",� � �� ����� ��������������������������������� � �� �-��� ��� ������������������������������"� � ������ �����������������������������������"
S����� ����������������������������������������������� � ������!����� ������ ��� ��������'��#����������'������ ���������������!��������-���� ����������������������������,$� )��������� ��������������������������������+
� �!� ��� ������� �������������������������+,� � ������ ����������������������������������+,
� �!� ��� ������� ���'������ ��������������������������������+���� 2�� � ������ ���������������������+/& '�� � ������ ������������������������+�#!���& '���������������������������������+�
� � ��������� �� ���������������������������������"���5�� ���������������������������������������""
��� ����&� ������������������������������������������#����4���������������������������������������/�� ������������ ��!� �� ������������������+��'��#���� ���!����� �����������������+� ��%� -����%� �����������������������+�
� ������#�� ! ��� ���������������+"� ! ������$ ��������� ! ������ ������������*���6 ���"����������� ! ������������ ������������������������������������/���6 ���"����������� ! ��������������
������������ ����� ����������������������
T���!%� ��������� ������������������������������!�&�����'�� #���������� ���������(������������������������������������������������������� ���!�&����������������������������������"
U!��$ ��������� �������$ ���������������������� ���������������������������������������/� #�$ � ��������������������������������������
X���������#�� ���������� �������������������'������� ��!� �� �����������������������,
Z5�� ����������� �����������������������""
/�


6881083C75-A
*6881083C75*
MOTOROLA, the Stylized M Logo, and ASTRO are registered
in the U.S. Patent and Trademark Office. All other product or
service names are the property of their respective owners.
© Motorola, Inc. 2004
All rights reserved. Printed in U.S.A.
Motorola, Inc.
8000 West Sunrise Boulevard
Ft. Lauderdale, FL 33322


