Embed Size (px)
Citation preview
Using Avaya CS1000 Advanced DiagnosticTool
Release 1.0January 2014
© 2014 Avaya Inc.
All Rights Reserved.
Notice
While reasonable efforts have been made to ensure that theinformation in this document is complete and accurate at the time ofprinting, Avaya assumes no liability for any errors. Avaya reserves theright to make changes and corrections to the information in thisdocument without the obligation to notify any person or organization ofsuch changes.
Documentation disclaimer
“Documentation” means information published by Avaya in varyingmediums which may include product information, operating instructionsand performance specifications that Avaya may generally makeavailable to users of its products and Hosted Services. Documentationdoes not include marketing materials. Avaya shall not be responsiblefor any modifications, additions, or deletions to the original publishedversion of documentation unless such modifications, additions, ordeletions were performed by Avaya. End User agrees to indemnify andhold harmless Avaya, Avaya's agents, servants and employees againstall claims, lawsuits, demands and judgments arising out of, or inconnection with, subsequent modifications, additions or deletions tothis documentation, to the extent made by End User.
Link disclaimer
Avaya is not responsible for the contents or reliability of any linkedwebsites referenced within this site or documentation provided byAvaya. Avaya is not responsible for the accuracy of any information,statement or content provided on these sites and does not necessarilyendorse the products, services, or information described or offeredwithin them. Avaya does not guarantee that these links will work all thetime and has no control over the availability of the linked pages.
Warranty
Avaya provides a limited warranty on Avaya hardware and software.Refer to your sales agreement to establish the terms of the limitedwarranty. In addition, Avaya’s standard warranty language, as well asinformation regarding support for this product while under warranty isavailable to Avaya customers and other parties through the AvayaSupport website: http://support.avaya.com or such successor site asdesignated by Avaya. Please note that if you acquired the product(s)from an authorized Avaya Channel Partner outside of the United Statesand Canada, the warranty is provided to you by said Avaya ChannelPartner and not by Avaya.
Licenses
THE SOFTWARE LICENSE TERMS AVAILABLE ON THE AVAYAWEBSITE, HTTP://SUPPORT.AVAYA.COM/LICENSEINFO ORSUCH SUCCESSOR SITE AS DESIGNATED BY AVAYA, AREAPPLICABLE TO ANYONE WHO DOWNLOADS, USES AND/ORINSTALLS AVAYA SOFTWARE, PURCHASED FROM AVAYA INC.,ANY AVAYA AFFILIATE, OR AN AVAYA CHANNEL PARTNER (ASAPPLICABLE) UNDER A COMMERCIAL AGREEMENT WITH AVAYAOR AN AVAYA CHANNEL PARTNER. UNLESS OTHERWISEAGREED TO BY AVAYA IN WRITING, AVAYA DOES NOT EXTENDTHIS LICENSE IF THE SOFTWARE WAS OBTAINED FROMANYONE OTHER THAN AVAYA, AN AVAYA AFFILIATE OR ANAVAYA CHANNEL PARTNER; AVAYA RESERVES THE RIGHT TOTAKE LEGAL ACTION AGAINST YOU AND ANYONE ELSE USINGOR SELLING THE SOFTWARE WITHOUT A LICENSE. BYINSTALLING, DOWNLOADING OR USING THE SOFTWARE, ORAUTHORIZING OTHERS TO DO SO, YOU, ON BEHALF OFYOURSELF AND THE ENTITY FOR WHOM YOU ARE INSTALLING,DOWNLOADING OR USING THE SOFTWARE (HEREINAFTERREFERRED TO INTERCHANGEABLY AS “YOU” AND “END USER”),AGREE TO THESE TERMS AND CONDITIONS AND CREATE ABINDING CONTRACT BETWEEN YOU AND AVAYA INC. OR THEAPPLICABLE AVAYA AFFILIATE (“AVAYA”).
Avaya grants you a license within the scope of the license typesdescribed below, with the exception of Heritage Nortel Software, forwhich the scope of the license is detailed below. Where the orderdocumentation does not expressly identify a license type, theapplicable license will be a Designated System License. The applicablenumber of licenses and units of capacity for which the license is grantedwill be one (1), unless a different number of licenses or units of capacityis specified in the documentation or other materials available to you.“Software” means Avaya’s computer programs in object code, providedby Avaya or an Avaya Channel Partner, whether as stand-aloneproducts, pre-installed , or remotely accessed on hardware products,and any upgrades, updates, bug fixes, or modified versions thereto.“Designated Processor” means a single stand-alone computing device.“Server” means a Designated Processor that hosts a softwareapplication to be accessed by multiple users. “Instance” means a singlecopy of the Software executing at a particular time: (i) on one physicalmachine; or (ii) on one deployed software virtual machine (“VM”) orsimilar deployment.
License types
Designated System(s) License (DS). End User may install and useeach copy or an Instance of the Software only on a number ofDesignated Processors up to the number indicated in the order. Avayamay require the Designated Processor(s) to be identified in the orderby type, serial number, feature key, Instance, location or other specificdesignation, or to be provided by End User to Avaya through electronicmeans established by Avaya specifically for this purpose.
Concurrent User License (CU). End User may install and use theSoftware on multiple Designated Processors or one or more Servers,so long as only the licensed number of Units are accessing and usingthe Software at any given time. A “Unit” means the unit on which Avaya,at its sole discretion, bases the pricing of its licenses and can be,without limitation, an agent, port or user, an e-mail or voice mail accountin the name of a person or corporate function (e.g., webmaster orhelpdesk), or a directory entry in the administrative database utilizedby the Software that permits one user to interface with the Software.Units may be linked to a specific, identified Server or an Instance of theSoftware.
Database License (DL). End User may install and use each copy or anInstance of the Software on one Server or on multiple Servers providedthat each of the Servers on which the Software is installedcommunicates with no more than an Instance of the same database.
CPU License (CP). End User may install and use each copy or Instanceof the Software on a number of Servers up to the number indicated inthe order provided that the performance capacity of the Server(s) doesnot exceed the performance capacity specified for the Software. EndUser may not re-install or operate the Software on Server(s) with alarger performance capacity without Avaya’s prior consent andpayment of an upgrade fee.
Named User License (NU). You may: (i) install and use the Softwareon a single Designated Processor or Server per authorized NamedUser (defined below); or (ii) install and use the Software on a Server solong as only authorized Named Users access and use the Software.“Named User”, means a user or device that has been expresslyauthorized by Avaya to access and use the Software. At Avaya’s solediscretion, a “Named User” may be, without limitation, designated byname, corporate function (e.g., webmaster or helpdesk), an e-mail orvoice mail account in the name of a person or corporate function, or adirectory entry in the administrative database utilized by the Softwarethat permits one user to interface with the Software.
Shrinkwrap License (SR). You may install and use the Software inaccordance with the terms and conditions of the applicable licenseagreements, such as “shrinkwrap” or “clickthrough” licenseaccompanying or applicable to the Software (“Shrinkwrap License”).
Heritage Nortel Software
“Heritage Nortel Software” means the software that was acquired byAvaya as part of its purchase of the Nortel Enterprise SolutionsBusiness in December 2009. The Heritage Nortel Software currently
2 Using Avaya CS1000 Advanced Diagnostic Tool January 2014Comments? [email protected]
available for license from Avaya is the software contained within the listof Heritage Nortel Products located at http://support.avaya.com/LicenseInfo/ under the link “Heritage Nortel Products”, or suchsuccessor site as designated by Avaya. For Heritage Nortel Software,Avaya grants Customer a license to use Heritage Nortel Softwareprovided hereunder solely to the extent of the authorized activation orauthorized usage level, solely for the purpose specified in theDocumentation, and solely as embedded in, for execution on, or (in theevent the applicable Documentation permits installation on non-Avayaequipment) for communication with Avaya equipment. Charges forHeritage Nortel Software may be based on extent of activation or useauthorized as specified in an order or invoice.
Copyright
Except where expressly stated otherwise, no use should be made ofmaterials on this site, the Documentation, Software, Hosted Service,or hardware provided by Avaya. All content on this site, thedocumentation, Hosted Service, and the Product provided by Avayaincluding the selection, arrangement and design of the content isowned either by Avaya or its licensors and is protected by copyrightand other intellectual property laws including the sui generis rightsrelating to the protection of databases. You may not modify, copy,reproduce, republish, upload, post, transmit or distribute in any way anycontent, in whole or in part, including any code and software unlessexpressly authorized by Avaya. Unauthorized reproduction,transmission, dissemination, storage, and or use without the expresswritten consent of Avaya can be a criminal, as well as a civil offenseunder the applicable law.
Third Party Components
“Third Party Components” mean certain software programs or portionsthereof included in the Software or Hosted Service may containsoftware (including open source software) distributed under third partyagreements (“Third Party Components”), which contain termsregarding the rights to use certain portions of the Software (“Third PartyTerms”). As required, information regarding distributed Linux OSsource code (for those Products that have distributed Linux OS sourcecode) and identifying the copyright holders of the Third PartyComponents and the Third Party Terms that apply is available in theDocumentation or on Avaya’s website at: http://support.avaya.com/Copyright or such successor site as designated by Avaya. You agreeto the Third Party Terms for any such Third Party Components
Note to Service Provider
The Product or Hosted Service may use Third Party Componentssubject to Third Party Terms that do not allow hosting and require aService Provider to be independently licensed for such purpose. It isyour responsibility to obtain such licensing.
Preventing Toll Fraud
“Toll Fraud” is the unauthorized use of your telecommunicationssystem by an unauthorized party (for example, a person who is not acorporate employee, agent, subcontractor, or is not working on yourcompany's behalf). Be aware that there can be a risk of Toll Fraudassociated with your system and that, if Toll Fraud occurs, it can resultin substantial additional charges for your telecommunications services.
Avaya Toll Fraud intervention
If you suspect that you are being victimized by Toll Fraud and you needtechnical assistance or support, call Technical Service Center TollFraud Intervention Hotline at +1-800-643-2353 for the United Statesand Canada. For additional support telephone numbers, see the AvayaSupport website: http://support.avaya.com or such successor site asdesignated by Avaya. Suspected security vulnerabilities with Avayaproducts should be reported to Avaya by sending mail to:[email protected].
Trademarks
The trademarks, logos and service marks (“Marks”) displayed in thissite, the Documentation, Hosted Service(s), and Product(s) providedby Avaya are the registered or unregistered Marks of Avaya, its
affiliates, or other third parties. Users are not permitted to use suchMarks without prior written consent from Avaya or such third partywhich may own the Mark. Nothing contained in this site, theDocumentation, Hosted Service(s) and Product(s) should be construedas granting, by implication, estoppel, or otherwise, any license or rightin and to the Marks without the express written permission of Avaya orthe applicable third party.
Avaya is a registered trademark of Avaya Inc.
All non-Avaya trademarks are the property of their respective owners.Linux® is the registered trademark of Linus Torvalds in the U.S. andother countries.
Downloading Documentation
For the most current versions of Documentation, see the AvayaSupport website: http://support.avaya.com, or such successor site asdesignated by Avaya.
Contact Avaya Support
See the Avaya Support website: http://support.avaya.com for Productor Hosted Service notices and articles, or to report a problem with yourAvaya Product or Hosted Service. For a list of support telephonenumbers and contact addresses, go to the Avaya Support website: http://support.avaya.com (or such successor site as designated byAvaya), scroll to the bottom of the page, and select Contact AvayaSupport.
Using Avaya CS1000 Advanced Diagnostic Tool January 2014 3

4 Using Avaya CS1000 Advanced Diagnostic Tool January 2014Comments? [email protected]
Contents
Chapter 1: Introduction...................................................................................................... 7Purpose..................................................................................................................................................... 7Intended audience.................................................................................................................................... 7Support...................................................................................................................................................... 7
Chapter 2: Avaya CS1000 Advanced Diagnostic Tool..................................................... 9Overview................................................................................................................................................... 9Prerequisites............................................................................................................................................. 10
Chapter 3: Call Register Analyzer..................................................................................... 11Call Register Analyzer overview............................................................................................................... 11Collecting logs for Call Register Analyzer................................................................................................. 12Using Call Register Analyzer.................................................................................................................... 12
Chapter 4: MGC VGW Log Analyzer.................................................................................. 15MGC VGW Log Analyzer overview........................................................................................................... 15Collecting logs for MGC VGW Log Analyzer............................................................................................. 16Using MGC VGW Log Analyzer................................................................................................................ 16
Chapter 5: RAS Decoders.................................................................................................. 19RAS Decoders overview........................................................................................................................... 19
Decode TDB..................................................................................................................................... 20Collecting logs for the TDB decoder................................................................................................. 20Decode RD logs............................................................................................................................... 21Collecting logs for RD logs decoder................................................................................................. 21Decode bug messages..................................................................................................................... 22
Using RAS Decoders................................................................................................................................ 22Chapter 6: SIP GW Log Analyzer....................................................................................... 25
SIP GW Log Analyzer overview................................................................................................................ 25Collecting logs for SIP GW Analyzer......................................................................................................... 26Using SIP GW Log Analyzer..................................................................................................................... 26
Chapter 7: SNAP Decoder.................................................................................................. 29SNAP Decoder overview........................................................................................................................... 29Collecting logs for SNAP Decoder............................................................................................................ 30Using SNAP Decoder................................................................................................................................ 31
Chapter 8: CS Lookup Address......................................................................................... 33CS Lookup Address overview................................................................................................................... 33Using CS Lookup Address........................................................................................................................ 33
Chapter 9: TN Translator.................................................................................................... 35TN Translator overview............................................................................................................................. 35Using TN Translator.................................................................................................................................. 35
Using Avaya CS1000 Advanced Diagnostic Tool January 2014 5

6 Using Avaya CS1000 Advanced Diagnostic Tool January 2014
Chapter 1: Introduction
PurposeThis document describes a web-based tool, Avaya CS1000 Advanced Diagnostic Tool. AvayaProfessional Services associates and BusinessPartners use this tool to integrate a host ofdiagnostic tools for debugging Avaya Communication Server 1000.
Intended audienceThis document is intended for Avaya Professional Services associates and BusinessPartnerswho use Avaya Communication Server 1000.
SupportVisit the Avaya Support website at http://support.avaya.com for the most up-to-datedocumentation, product notices, and knowledge articles. You can also search for releasenotes, downloads, and resolutions to issues. Use the online service request system to createa service request. Chat with live agents to get answers to questions, or request an agent toconnect you to a support team if an issue requires additional expertise.
Using Avaya CS1000 Advanced Diagnostic Tool January 2014 7
Chapter 2: Avaya CS1000 AdvancedDiagnostic Tool
OverviewAvaya CS1000 Advanced Diagnostic Tool is a web-based tool that integrates a host ofdiagnostic tools for debugging Avaya Communication Server 1000 in a single web program.You can navigate to the tool from the Avaya Support site using any of the three options on theAvaya Diagnostic Portal page:
• The Products button
Displays a list of products and the tools that support these products. For example, youcan see Avaya CS1000 Advanced Diagnostic Tool next to Avaya Communication Server1000and other products that the tool supports.
• The Tools button
Displays a list of tools and the products that these tools support. For example, you cansee Avaya Communication Server 1000under Avaya CS1000 Advanced DiagnosticTool.
• The Filter search
Displays the tool that matches the key words that you enter in search. For example, if youtype Avaya CS1000 Advanced Diagnostic Tool, the system displays CS1K ADT.
Avaya CS1000 Advanced Diagnostic Tool consists of the following categories of diagnostictools:
Analyzers:
The following tools scan log files to decode, segregate, and analyze data:
• Call Register Analyzer
• SNAP Decoder
• RAS Decoders
• SIP GW Log Analyzer
• MGC VGW Log Analyzer
Utilities:
Using Avaya CS1000 Advanced Diagnostic Tool January 2014 9
The following tools find a single address and to convert TN addresses:
• TN Translator
• CS Lookup Address
The diagnostic tools display output in the Intel HEX format so that you can decode the contentin a readable format and save the output.
PrerequisitesTo use Avaya CS1000 Advanced Diagnostic Tool, you must have the following:
• Permission to gain access to the Avaya Support site.
Note:Use the following supported browsers to gain access to all the Avaya Support sitefeatures:
- Microsoft Internet Explorer (IE) version 7, 8, and 9
- Google Chrome
- Mozilla Firefox
- Safari (for Mac)
To avail the full functionality of the Avaya Support website, ensure that the cookies andJavaScript are enabled and supported on your browser.
• An Avaya single sign-on (SSO) account
Avaya CS1000 Advanced Diagnostic Tool
10 Using Avaya CS1000 Advanced Diagnostic Tool January 2014Comments? [email protected]
Chapter 3: Call Register Analyzer
Call Register Analyzer overviewUse Call Register Analyzer in Avaya CS1000 Advanced Diagnostic Tool to debug issuesrelated to call processing. This tool decodes and provides an analyzed version of the callregister content printed with the pdt> crg <TN> command. While troubleshooting liveissues, you can use the crg values to determine the different values in the call register for aparticular time.
Using the Call Register Analyzer tool, you can save time on decoding the content of the callregister output manually. The tool provides feedback based on the current call status, such ascall state, call origin, call for SIP Lines, conference call, and call transfer.
The output contains the fields of the call register with the corresponding values.
You can also save the output of the call register content for future use. You can save the outputusing any of the following options:
• Only the important call register content
• The complete decoded call register content
Supported Avaya Communication Server 1000 releasesThe Call Register Analyzer tool supports the following releases of Avaya CommunicationServer 1000 (CS 1000):
• 7.6• 7.5• 7.0• 6.0• 5.5
You must collect log files corresponding to the supported CS 1000 release to decode a log fileusing the Call Register Analyzer tool.
Using Avaya CS1000 Advanced Diagnostic Tool January 2014 11
Collecting logs for Call Register AnalyzerAbout this taskUse this task to collect log files for decoding in the Call Register Analyzer tool.
Procedure
Use the pdt> crg <l s c u> command in Call Server.
Note:This procedure applies to collecting logs from Avaya Communication Server 1000releases 5.5, 6.0, 7.0, 7.5, and 7.6.
The webpage prints the logs in the Call Server tty.
Next stepsCopy these logs and paste the logs in the Call Register Analyzer text box for decoding.
Using Call Register AnalyzerBefore you beginGet the following:
• An Avaya registered, single sign-on (SSO) account• A log file corresponding to the selected Avaya Communication Server 1000 release
About this taskUse this procedure to generate a report to troubleshoot issues related to call processing in CS1000CS 1000.
Procedure
1. Log on to the Avaya Support site at support.avaya.com.
2. In the Tools list in the lower-left corner, click All Tools and select Avaya CS1000Advanced Diagnostic Tool.
3. On the login page, type your SSO credentials.The system displays the Avaya Diagnostic Portal page.
Call Register Analyzer
12 Using Avaya CS1000 Advanced Diagnostic Tool January 2014Comments? [email protected]
4. To navigate to the Avaya CS1000 Advanced Diagnostic Tool, use one of thefollowing:
• Click Products.
The webpage displays a list of products and the tools that support theseproducts. Click CS1K ADT .
• Click Tools.
The webpage displays a list of tools and a summary of the products that thesetools support. Click CS1K ADT.
• In the Filter field, type CS1K ADT and click Filter.
The webpage displays a list of tools based on the search key words.
To clear the search results, delete the key words in the Filter field, and clickFilter.
The webpage displays the Avaya CS1000 Advanced Diagnostic Tool home page.
5. Click Enter Location ID.
6. Type the Functional Location number or the Sold To number of the customer andclick Lookup Now.
Note:In case, you want to enter a different location ID, then click Change LocationID.
7. Click Analyzers > Call Register Analyzer.
8. On the CALL REGISTER ANALYZER page, perform the following:
• Select the required CS 1000 version and click Browse.
• Select the required file and click UPLOAD FILE.
You can also copy and paste the complete crg output, which starts with pdt>crg <tn>, in the text box.
• Select View Important Fields or View All Fields depending on the requiredoutput type.
9. (Optional) To cancel the file upload, click CLEAR UPLOAD .
10. Click DECODE.The text box displays the detailed report in a readable format.
11. Click SAVE OUTPUT.The webpage saves the call register content output in a Microsoft Word format.
Using Call Register Analyzer
Using Avaya CS1000 Advanced Diagnostic Tool January 2014 13

Call Register Analyzer
14 Using Avaya CS1000 Advanced Diagnostic Tool January 2014Comments? [email protected]
Chapter 4: MGC VGW Log Analyzer
MGC VGW Log Analyzer overviewUse MGC VGW Log Analyzer to decode the VGW logs from the selected MGC log file contentin Avaya Communication Server 1000 (CS 1000) into a readable format. You can use the reportto analyze the MGC VGW log file, which is otherwise difficult to view because of scrambledlogs during heavy call traffic.
You can also use the tool to regularize the message flow for all the calls in the log file. Thisflow is used to analyze issues related to speech path and DTMF and Fax.
You can select a particular channel ID to view the VGW logs for the corresponding channelID.
You must collect debug logs from CS 1000 to use the MGC VGW Log Analyzer tool. The debuglogs are not captured as a part of the RPT logs. If you are using applications such as PUTTYor Hyper terminal to log in to MGC, then ensure that the captures or logging mechanism isenabled. The captures or logging mechanism must be enabled to capture the print of the debuglogs from MGC. You can then use the captured file in MGC VGW Log Analyzer to decode thedebug prints.
Supported CS 1000 releasesYou can use the MGC VGW Log Analyzer tool for the following CS 1000 releases:
• 7.6• 7.5• 7.0• 6.0• 5.5
You must collect log files corresponding to the supported CS 1000 release to decode a log fileusing the MGC VGW Log Analyzer tool.
Using Avaya CS1000 Advanced Diagnostic Tool January 2014 15
Collecting logs for MGC VGW Log AnalyzerAbout this taskUse this procedure to collect logs for decoding in MGC VGW Log Analyzer.
Procedure
1. To enable VGW traces, perform the following:
a. Log in to MGC.b. To log in to the LDB prompt, press Control l d b.c. To change to the Super User mode, run the following command:
ldb> sud. To enable the VGW logs, run the following command:
syslogLevelSet tVGW, 7
Caution: Enabling the debug logs in MGC results in huge output when the logsare enabled in a system that hosts high traffic. You must enable these logs basedonly on requests from Avaya Engineers and during low or zero traffic hours.
2. (Optional) To disable the VGW traces, perform the following:
a. To change to the Super User mode, run the following command:ldb> su
b. To disable the VGW logs, run the following command:syslogLevelSet tVGW, 6
Note:This procedure applies to collect logs from Avaya Communication Server 1000releases 5.5, 6.0, 7.0, 7.5, and 7.6.
Using MGC VGW Log Analyzer Before you beginGet the following:
• An Avaya registered, single sign-on (SSO) account• A log file corresponding to the selected Avaya Communication Server 1000 release
MGC VGW Log Analyzer
16 Using Avaya CS1000 Advanced Diagnostic Tool January 2014Comments? [email protected]
About this taskUse this procedure to decode the VGW logs from the selected MGC log file contents in AvayaCommunication Server 1000.
Procedure
1. Log on to the Avaya Support site at support.avaya.com .
2. On the Tools list in the lower-left corner, click All Tools and select Avaya CS1000Advanced Diagnostic Tool.
3. On the login page, type your SSO credentials.The webpage displays the Avaya CS1000 Advanced Diagnostic Tool page.
4. To navigate to the Avaya CS1000 Advanced Diagnostic Tool, use one of thefollowing:
• Click Products.
The webpage displays a list of products and the tools that support theseproducts. Click CS1K ADT .
• Click Tools.
The webpage displays a list of tools and a summary of the products that thesetools support. Click CS1K ADT.
• In the Filter field, type CS1K ADT and click Filter.
The webpage displays a list of tools based on the search key words.
To clear the search results, delete the key words in the Filter field, and clickFilter.
The webpage displays the Avaya CS1000 Advanced Diagnostic Tool home page.
5. Click Enter Location ID.
6. Type the Functional Location number or the Sold To number of the customer andclick Lookup Now.
Note:In case, you want to enter a different location ID, then click Change LocationID.
7. Click Analyzers > MGC VGW Log Analyzer.
8. On the MGC VGW LOG ANALYZER page, click Browse and select the requiredfile and then, click UPLOAD FILE.You can also copy and paste the complete output file in the text box.
9. (Optional) To clear the uploaded file, click CLEAR UPLOAD.
10. Click DECODE.
Using MGC VGW Log Analyzer
Using Avaya CS1000 Advanced Diagnostic Tool January 2014 17
11. On the page that contains the decoded output, in the Channel ID Filter field, clickthe required option for the Channel ID.
12. Click FILTER OUTPUT.The webpage displays the log file in a readable format, depending on your filteroption.
13. To remove the filter, click REMOVE FILTER.
14. To save the report, click SAVE OUTPUT.
MGC VGW Log Analyzer
18 Using Avaya CS1000 Advanced Diagnostic Tool January 2014Comments? [email protected]
Chapter 5: RAS Decoders
RAS Decoders overviewUse the RAS Decoders tool integrated with Avaya CS1000 Advanced Diagnostic Tool todecode the Trap Data Block (TDB) process, bug messages, and RD logs in AvayaCommunication Server 1000 (CS 1000) .
The RAS Decoders tool contains the following three options of decoding the debug log files inCS 1000:
• Decode TDB
• Decode Bug messages
• Decode RD logs
Supported CS 1000 releases:
• 7.6
• 7.5
• 7.0
• 6.0
• 5.5
• 5.0
• 4.5
You must collect log files corresponding to the supported CS 1000 release to decode a log fileusing the RAS Decoders tool.
Related topics:Decode TDB on page 20Collecting logs for the TDB decoder on page 20Decode RD logs on page 21Collecting logs for RD logs decoder on page 21Decode bug messages on page 22
Using Avaya CS1000 Advanced Diagnostic Tool January 2014 19
Decode TDBTrap Data Block (TDB) decoding is required as a part of an Root Cause Analysis (RCA) whenan Avaya Communication Server 1000 system reboots. The RAS Decoders tool reduces thetime required for manual decoding of the TDB process. Use this tool when a call server rebootsfor an unknown reason and the system creates a TDB.
Caution:To analyze the correct TDB report, ensure that the TDB creation time stamp is the same asthe time stamp of the Call Server INI.
Use the RAS Decoders tool to search the corresponding solution for the decoded TBD processon the Avaya Support site or Avaya Knowledge Base.
Collecting logs for the TDB decoderAbout this taskUse this procedure to collect log files for decoding in the TDB decoder.
Procedure
To collect log files for Avaya Communication Server 1000 perform the followingdepending on the release number:
• For releases from 4.5 to 7.5, run tdb from the pdt prompt as follows:pdt>tdb
• For releases from 7.5, view the contents of the TDB files using the PDT commandØ tdb<f1|f2|f3|fa>, where f1 is for file tdb001, f2 for file tdb002, f3 fortdb003, and fa to print all the files.
Note:The system generates these files when a Call server restarts. The files arestored in the /e/trace directory as tdb001, tdb002, and tdb003. For the firstrestart, the system saves the TDB content in tdb001. For the next restart, thesystem saves content in tdb002 and then in tdb003 before cycling back to thetdb0001 file.
Important:Do not edit the output copied from the system. Instead, save the output in a fileor copy and paste the file in the tool.
RAS Decoders
20 Using Avaya CS1000 Advanced Diagnostic Tool January 2014Comments? [email protected]
Decode RD logsUse the RD Log decoder to decode the RDS command output of the Report Log files in AvayaCommunication Server 1000 (CS 1000).
Report Log files are system history files, which keep track of the system messages printedduring an error or of debug prints. This file is a circular file of maximum 1000K bytes, that is,1231 report records.
The file name is rpt.log . You can find the file for CS 1000 release 4.5 at c:/u/rpt andfor later releases at /e/rpt.
You must collect log files corresponding to the supported CS 1000 release to decode a log fileusing the RD log decoder tool.
If you have all patches in the Call server from the customer site, then paste the informationwith the BUG message in the tool for decoding.
Collecting logs for RD logs decoderAbout this taskUse this procedure to collect log files for decoding using the RD logs decoder.
Procedure
1. Make a list of the RD logs stored in the in /e/rpt path.
2. Select a file and run the following command:rdopen <filename>The webpage displays the RD log details.
3. Run the following commands to print records from the file:
• To print all the records from the file, run Rdall.
• To print a particular record specified by record number, Rdgo <recordnumber>
• To print records from a particular record number to another record number,run Rds <number of records>For example, when you run the command Rds <20>, the system prints 20records from record number 1 to record number 20.
• To print records starting with a particular number to the end, run rdgo <thenumber> rds.
RAS Decoders overview
Using Avaya CS1000 Advanced Diagnostic Tool January 2014 21
For example, when you run the command rdgo 10 rds, the system prints the recordsfrom 10 to 1053.
Decode bug messagesUse BUG Message Decoder to decode the BUG messages printed in the Call server TTY.
BUG messages reflect illegal software states, such as a NIL pointer or INVALID TN. You canstructure the message to present various types of information which highlights the BUGcondition, which is used to determine the BUG source. If you configure the TTY as USER MTCSCH BUG, then the system prints the BUG messages on the Call server TTY,
Save the BUG messages to a notepad or directly copy the BUG messages decoder tool.
If you have all the patches in the Call server from the customer site, then paste the informationwith the BUG message in the tool for decoding.
Using RAS DecodersBefore you beginGet the following:
• An Avaya registered, single sign-on (SSO) account• A log file corresponding to the selected Avaya Communication Server 1000 release
About this taskUse this procedure to decode a Track Data Block (TDB) process, which is required when AvayaCommunication Server 1000 reboots.
Procedure
1. Log on to the Avaya Support site at support.avaya.com site.
2. On the Tools list in the lower-left corner, click All Tools and select Avaya CS1000Advanced Diagnostic Tool.
3. On the login page, type your SSO credentials.The webpage displays the Avaya Diagnostic Portal page that containsAvaya CS1000 Advanced Diagnostic Tool.
4. To navigate to the Avaya CS1000 Advanced Diagnostic Tool, use one of thefollowing:
RAS Decoders
22 Using Avaya CS1000 Advanced Diagnostic Tool January 2014Comments? [email protected]

• Click Products.
The webpage displays a list of products and the tools that support theseproducts. Click CS1K ADT .
• Click Tools.
The webpage displays a list of tools and a summary of the products that thesetools support. Click CS1K ADT.
• In the Filter field, type CS1K ADT and click Filter.
The webpage displays a list of tools based on the search key words.
To clear the search results, delete the key words in the Filter field, and clickFilter.
The webpage displays the Avaya CS1000 Advanced Diagnostic Tool home page.
5. Click Enter Location ID.
6. Type the Functional Location number or the Sold To number of the customer andclick Lookup Now.
Note:In case, you want to enter a different location ID, then click Change LocationID.
7. Click Analyzers > RAS Decoders.
8. On the RAS DECODERS page, perform the following:
• Select the required Avaya Communication Server 1000 version and clickBrowse.
• Select the required file and click UPLOAD FILE.
Or, you can also copy and paste the complete output on the text box.
Note:For TDB decoding, if the patch list information is available on the website,paste the information with the TDB output in the tool for decoding.
• Select Decode TDB Data, Decode RD Logs , or Decode BUG Messagedepending on your required output type.
• Select the required Machine Type from the drop-down list box.
9. (Optional) To cancel the upload, click CLEAR UPLOAD.
10. Click DECODE.The text box displays the detailed report in a readable format.
11. (Optional) Click SEARCH SOLUTION to search for solutions related to thedecoded data.
Using RAS Decoders
Using Avaya CS1000 Advanced Diagnostic Tool January 2014 23
The webpage redirects you to the Avaya Support website. If you are an Avayaassociate or BusinessPartner with Avaya Knowledge Base (KB) access, the systemredirects you to Avaya KB for related search solutions.
12. To save the report, click SAVE OUTPUT.
RAS Decoders
24 Using Avaya CS1000 Advanced Diagnostic Tool January 2014Comments? [email protected]
Chapter 6: SIP GW Log Analyzer
SIP GW Log Analyzer overviewUse SIP GW Log Analyzer to generate a visual report of an ss_common.log file. Use this fileto analyze a specific SIP call and the respective ACM message flow in Avaya CommunicationServer 1000. You can use the visual report to get a readable display of the message flow inthe ss_common.log file. This file is otherwise difficult to view because of the scrambledmessage flow during heavy call traffic. The report consists of message flow output either forSIP Call ID or Channel ID based on the filter you select.
You can filter your output using the following options:
• All messages for gaining access to SIP and ACM message flow for all available SIPcalls.
• Filter with Channel ID for gaining access to SIP and ACM message flow for a selectedChannel ID.
If Channel ID processes more than one call, the system displays a regularized call flowfor each Call ID.
• Filter with SIP Call ID for gaining access to SIP and ACM message flow for a selectedSIP Call ID.
Note:You can select the Channel ID and SIP Call ID from a drop-down list box on the SIP GWLog Analyzer page.
You can use this tool to analyze speech path issues in VOIP calls. The signaling protocol canbe SIP, but ACM flow that has Filter_with_chid is also applicable for H.323 protocols.
Supported Avaya Communication Server 1000 releases
• 7.6• 7.5• 7.0• 6.0
You must collect log files corresponding to the supported CS 1000 release to decode a log fileusing the SIP GW Log Analyzer tool.
Using Avaya CS1000 Advanced Diagnostic Tool January 2014 25
Collecting logs for SIP GW AnalyzerAbout this taskUse this procedure to collect log files for decoding in the SNAP Decoder tool.
Procedure
1. To enable the debug logs in Avaya Communication Server 1000 releases 6.0, 7.0,and 7.5, use the following command:syslogLevelSet vtrk tSSG 7vxShell vtrk sipNpmAppDebugSet tSSG sipMsgPrint 1vxShell vtrk sipNpmAppDebugSet tSSG acpDebug 1
2. (Optional) To disable Avaya Communication Server 1000 releases 6.0, 7.0, and7.5, use the following command:syslogLevelSet vtrk tSSG 6vxShell vtrk sipNpmAppDebugSet tSSG sipMsgPrint 0vxShell vtrk sipNpmAppDebugSet tSSG acpDebug 0
3. To enable Avaya Communication Server 1000 releases 7.6, use the followingcommand:syslogLevelSet vtrk tSSG 7
Note:When you enable release 7.6, tSSG debug enables sipMsgPrint and acpDebug.Use tSSG for SIP Gw and tSLG for SIPLine Gw.
4. (Optional) To disable release 7.6, use the following command:syslogLevelSet vtrk tSSG 6
ResultThe system saves the log file at /var/log/nortel/ss_common.log.
Using SIP GW Log AnalyzerBefore you beginGet the following:
• An Avaya registered single sign-on (SSO) account.• A log file corresponding to the selected Avaya Communication Server 1000 release.
SIP GW Log Analyzer
26 Using Avaya CS1000 Advanced Diagnostic Tool January 2014Comments? [email protected]
About this taskUse this procedure to generate a visual report of an ss_common.log file. Use this file toanalyze a specific SIP call and the respective ACM message flow in Avaya CommunicationServer 1000.
Procedure
1. Log on to the Avaya Support site at support.avaya.com.
2. On the Tools list in the lower-left corner, click All Tools and select Avaya CS1000Advanced Diagnostic Tool.
3. On the login page, type your SSO credentials.The webpage displays the Avaya Diagnostic Portal page that containsAvaya CS1000 Advanced Diagnostic Tool.
4. To navigate to the Avaya CS1000 Advanced Diagnostic Tool, use one of thefollowing:
• Click Products.
The webpage displays a list of products and the tools that support theseproducts. Click CS1K ADT .
• Click Tools.
The webpage displays a list of tools and a summary of the products that thesetools support. Click CS1K ADT.
• In the Filter field, type CS1K ADT and click Filter.
The webpage displays a list of tools based on the search key words.
To clear the search results, delete the key words in the Filter field, and clickFilter.
The webpage displays the Avaya CS1000 Advanced Diagnostic Tool home page.
5. Click Enter Location ID.
6. Type the Functional Location number or the Sold To number of the customer andclick Lookup Now.
Note:In case, you want to enter a different location ID, then click Change LocationID.
7. Click Analyzers > SIP GW Log Analyzer.
8. On the SIP GW LOG ANALYZER page, click Browse, select the required file, andclick UPLOAD .LOG OR .ZIP FILE.
Using SIP GW Log Analyzer
Using Avaya CS1000 Advanced Diagnostic Tool January 2014 27
Note:Upload the .zip file if your .log file is large.
You can also copy and paste the complete ss_common.log file output in the SIPGW Log Analyzer text box.
9. (Optional) To cancel the file upload, click CLEAR UPLOAD.
10. Click DECODE.The text box displays the detailed report in a readable format.
11. On the page that contains the decoded output, perform the following:
• Select Filter with Channel ID or Filter with SIP Call ID.
• Select the required option from the Channel ID drop-down list box for filteringChannel ID output.
• Select the required option from the SIP Call ID drop-down list box for filteringSIP Call ID output.
12. Click FILTER OUTPUT.The text box displays the detailed report in a readable format, depending on yourfilter option.
13. To remove the filter and choose a different filter option, click REMOVE FILTER.
14. To save the report, click SAVE OUTPUT.
SIP GW Log Analyzer
28 Using Avaya CS1000 Advanced Diagnostic Tool January 2014Comments? [email protected]
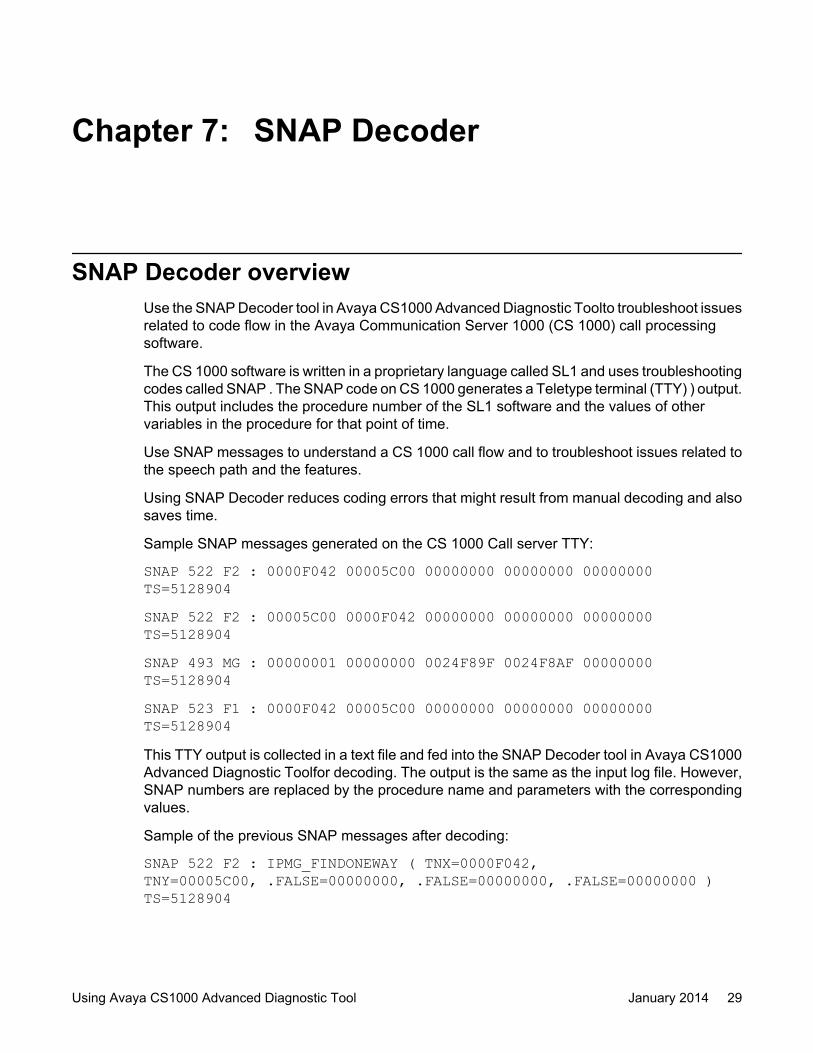
Chapter 7: SNAP Decoder
SNAP Decoder overviewUse the SNAP Decoder tool in Avaya CS1000 Advanced Diagnostic Toolto troubleshoot issuesrelated to code flow in the Avaya Communication Server 1000 (CS 1000) call processingsoftware.
The CS 1000 software is written in a proprietary language called SL1 and uses troubleshootingcodes called SNAP . The SNAP code on CS 1000 generates a Teletype terminal (TTY) ) output.This output includes the procedure number of the SL1 software and the values of othervariables in the procedure for that point of time.
Use SNAP messages to understand a CS 1000 call flow and to troubleshoot issues related tothe speech path and the features.
Using SNAP Decoder reduces coding errors that might result from manual decoding and alsosaves time.
Sample SNAP messages generated on the CS 1000 Call server TTY:
SNAP 522 F2 : 0000F042 00005C00 00000000 00000000 00000000TS=5128904SNAP 522 F2 : 00005C00 0000F042 00000000 00000000 00000000TS=5128904SNAP 493 MG : 00000001 00000000 0024F89F 0024F8AF 00000000TS=5128904SNAP 523 F1 : 0000F042 00005C00 00000000 00000000 00000000TS=5128904 This TTY output is collected in a text file and fed into the SNAP Decoder tool in Avaya CS1000Advanced Diagnostic Toolfor decoding. The output is the same as the input log file. However,SNAP numbers are replaced by the procedure name and parameters with the correspondingvalues.
Sample of the previous SNAP messages after decoding:
SNAP 522 F2 : IPMG_FINDONEWAY ( TNX=0000F042,TNY=00005C00, .FALSE=00000000, .FALSE=00000000, .FALSE=00000000 )TS=5128904
Using Avaya CS1000 Advanced Diagnostic Tool January 2014 29
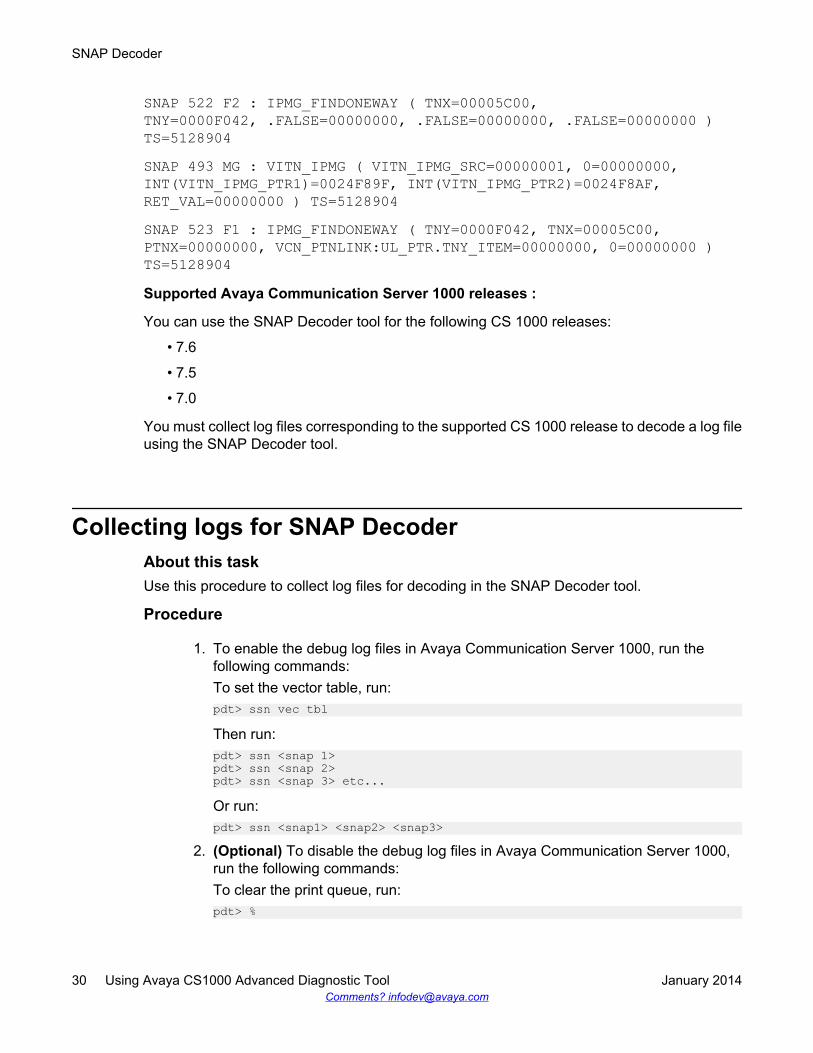
SNAP 522 F2 : IPMG_FINDONEWAY ( TNX=00005C00,TNY=0000F042, .FALSE=00000000, .FALSE=00000000, .FALSE=00000000 )TS=5128904SNAP 493 MG : VITN_IPMG ( VITN_IPMG_SRC=00000001, 0=00000000,INT(VITN_IPMG_PTR1)=0024F89F, INT(VITN_IPMG_PTR2)=0024F8AF,RET_VAL=00000000 ) TS=5128904SNAP 523 F1 : IPMG_FINDONEWAY ( TNY=0000F042, TNX=00005C00,PTNX=00000000, VCN_PTNLINK:UL_PTR.TNY_ITEM=00000000, 0=00000000 )TS=5128904Supported Avaya Communication Server 1000 releases :
You can use the SNAP Decoder tool for the following CS 1000 releases:
• 7.6
• 7.5
• 7.0
You must collect log files corresponding to the supported CS 1000 release to decode a log fileusing the SNAP Decoder tool.
Collecting logs for SNAP DecoderAbout this taskUse this procedure to collect log files for decoding in the SNAP Decoder tool.
Procedure
1. To enable the debug log files in Avaya Communication Server 1000, run thefollowing commands:To set the vector table, run:pdt> ssn vec tbl
Then run:pdt> ssn <snap 1>pdt> ssn <snap 2>pdt> ssn <snap 3> etc...
Or run:pdt> ssn <snap1> <snap2> <snap3>
2. (Optional) To disable the debug log files in Avaya Communication Server 1000,run the following commands:To clear the print queue, run:pdt> %
SNAP Decoder
30 Using Avaya CS1000 Advanced Diagnostic Tool January 2014Comments? [email protected]
To clear all the activated SNAP, run:pdt> csn all
To close the tool, run:pdt> @
Using SNAP DecoderBefore you beginGet the following:
• An Avaya registered single sign-on (SSO) account.• A log file corresponding to the selected CS 1000 release.
About this taskUse this procedure to generate a report to troubleshoot issues related to code flow in the CS1000 call processing software.
Procedure
1. Log on to the Avaya Support site at support.avaya.com .
2. On the Tools list in the lower-left corner, click All Tools and select Avaya CS1000Advanced Diagnostic Tool
3. On the login page, type your SSO credentials.The webpage displays the Avaya Diagnostic Portal page that containsAvaya CS1000 Advanced Diagnostic Tool.
4. To navigate to the Avaya CS1000 Advanced Diagnostic Tool, use one of thefollowing:
• Click Products.
The webpage displays a list of products and the tools that support theseproducts. Click CS1K ADT .
• Click Tools.
The webpage displays a list of tools and a summary of the products that thesetools support. Click CS1K ADT.
• In the Filter field, type CS1K ADT and click Filter.
The webpage displays a list of tools based on the search key words.
To clear the search results, delete the key words in the Filter field, and clickFilter.
Using SNAP Decoder
Using Avaya CS1000 Advanced Diagnostic Tool January 2014 31
The webpage displays the Avaya CS1000 Advanced Diagnostic Tool home page.
5. Click Enter Location ID.
6. Type the Functional Location number or the Sold To number of the customer andclick Lookup Now.
Note:In case, you want to enter a different location ID, then click Change LocationID.
7. Click Analyzers > SNAP Decoder.
8. On the SNAP DECODER page, perform the following:
• Select the required CS 1000 release, and click Browse.
• Select the required file and click UPLOAD FILE.
You can also copy and paste the complete SNAP output in the text box.
9. (Optional) To cancel the file upload, click CLEAR UPLOAD.
10. Click DECODE.The text box displays the detailed report in a readable format.
11. To save the report, click SAVE OUTPUT.The webpage saves the call register content output in a Microsoft Word format.
SNAP Decoder
32 Using Avaya CS1000 Advanced Diagnostic Tool January 2014Comments? [email protected]
Chapter 8: CS Lookup Address
CS Lookup Address overviewUse the CS Lookup Address tool to determine the Call Server software procedure details fromthe corresponding memory address. The tool converts the Avaya Communication Server1000(CS 1000) Call server memory address into the corresponding software procedure orfunction or symbol. This tool performs the same function as the CS 1000 Call server command-> lkAddr.
Supported Avaya Communication Server 1000 releasesThe CS Lookup Address tool supports the following releases of Avaya Communication Server1000:
• 7.6• 7.5• 7.0• 6.0• 5.5• 5.0• 4.5
Using CS Lookup AddressBefore you beginYou must have an Avaya registered single sign-on (SSO) account.
About this taskUse this procedure to determine the Call Server software procedure details from memoryaddress.
Procedure
1. Log on to the Avaya Support site at support.avaya.com .
Using Avaya CS1000 Advanced Diagnostic Tool January 2014 33
2. On the Tools list in the lower-left corner, click All Tools and select Avaya CS1000Advanced Diagnostic Tool
3. On the login page, type your SSO credentials.The system displays the Avaya Diagnostic Portal page that contains Avaya CS1000Advanced Diagnostic Tool.
4. To navigate to the Avaya CS1000 Advanced Diagnostic Tool, use one of thefollowing:
• Click Products.
The webpage displays a list of products and the tools that support theseproducts. Click CS1K ADT .
• Click Tools.
The webpage displays a list of tools and a summary of the products that thesetools support. Click CS1K ADT.
• In the Filter field, type CS1K ADT and click Filter.
The webpage displays a list of tools based on the search key words.
To clear the search results, delete the key words in the Filter field, and clickFilter.
The webpage displays the Avaya CS1000 Advanced Diagnostic Tool home page.
5. Click Enter Location ID.
6. Type the Functional Location number or the Sold To number of the customer andclick Lookup Now.
Note:In case, you want to enter a different location ID, then click Change LocationID.
7. Click Utilities > CS Lookup Address.
8. On the CS LOOKUP ADDRESS page, perform the following:
• Select the required release of Avaya Communication Server 1000 from thedrop-down list box.
• Select the required CPP value from the drop-down list box.
• Copy the Call Server memory address to be decoded into the text box.
9. Click DECODE.The system displays the output in a readable format.
10. To save the report, click SAVE OUTPUT.
CS Lookup Address
34 Using Avaya CS1000 Advanced Diagnostic Tool January 2014Comments? [email protected]
Chapter 9: TN Translator
TN Translator overviewUse the TN Translator tool to convert the Terminal number (TN) from a short format to a longformat and vice versa. Use this conversion to debug issues related to call processing andspeech path.
In an Avaya Communication Server 1000 system, you can represent the terminal number fora station in any of the following formats:
• Long format: Administrators use this format to provision the phone in the systemrepresented as <l s c u> for example, 104 0 1 14.
• Short format: You can use this format to store WHAT in TN in the internal memory systemfor call processing. This format is a 4–digit, hexadecimal value for example, 0x6004.
Using TN TranslatorBefore you beginYou must have an Avaya registered single sign-on (SSO) account.
About this taskUse this procedure to convert the Terminal number (TN) from a short format to a long formatand vice versa.
Procedure
1. Log on to the Avaya Support site at support.avaya.com
2. On the Tools list in the lower-left corner, click All Tools and select Avaya CS1000Advanced Diagnostic Tool.
3. On the login page, type your SSO credentials.The webpage displays the Avaya Diagnostic Portal page that containsAvaya CS1000 Advanced Diagnostic Tool.
4. To navigate to the Avaya CS1000 Advanced Diagnostic Tool, use one of thefollowing:
Using Avaya CS1000 Advanced Diagnostic Tool January 2014 35
• Click Products.
The webpage displays a list of products and the tools that support theseproducts. Click CS1K ADT .
• Click Tools.
The webpage displays a list of tools and a summary of the products that thesetools support. Click CS1K ADT.
• In the Filter field, type CS1K ADT and click Filter.
The webpage displays a list of tools based on the search key words.
To clear the search results, delete the key words in the Filter field, and clickFilter.
The webpage displays the Avaya CS1000 Advanced Diagnostic Tool home page.
5. Click Enter Location ID.
6. Type the Functional Location number or the Sold To number of the customer andclick Lookup Now.
Note:In case, you want to enter a different location ID, then click Change LocationID.
7. Click Utilities > TN Translator.
8. On the TN TRANSLATOR page, perform the following:
• Select Convert Long TN or Convert Packed TN.
• In the TN value field, type the required value.
9. Click CONVERT.The webpage displays a value in the Results section.
TN Translator
36 Using Avaya CS1000 Advanced Diagnostic Tool January 2014Comments? [email protected]