Embed Size (px)
Citation preview
February 2015$5.00 US $6.00 Canada
Bus Conversion MagazineBCM
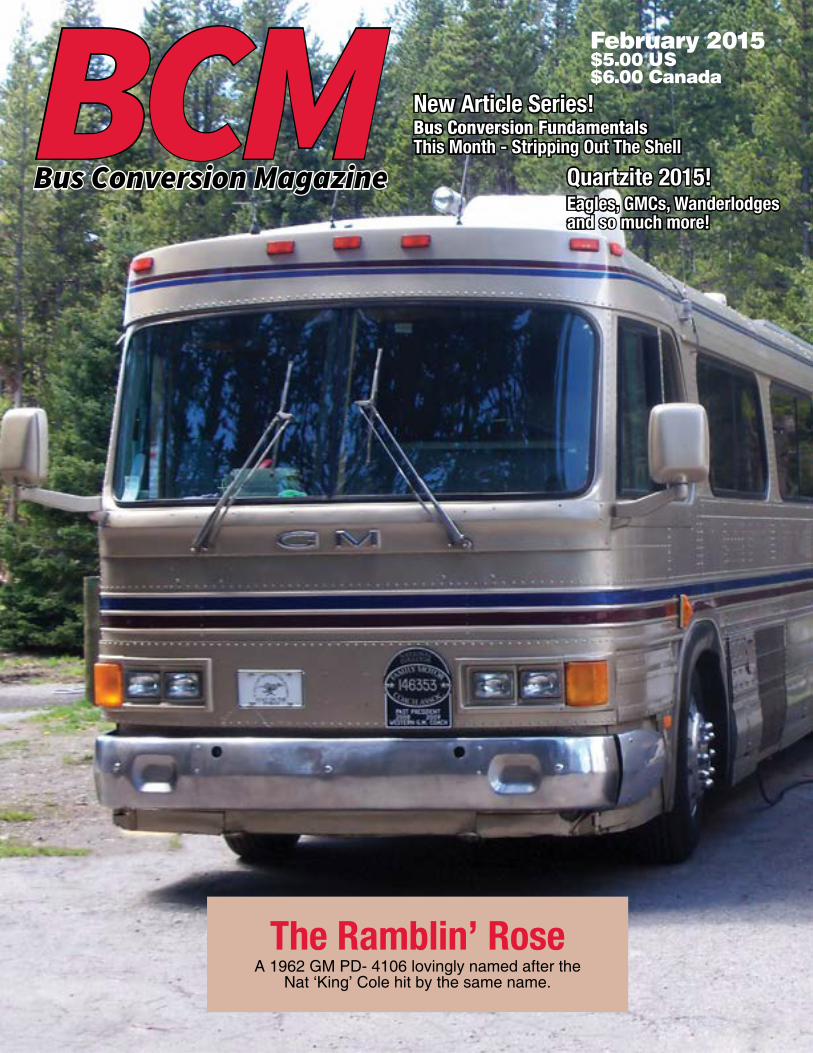
The Ramblin’ RoseA 1962 GM PD- 4106 lovingly named after the
Nat ‘King’ Cole hit by the same name.
Quartzite 2015!Eagles, GMCs, Wanderlodgesand so much more!
New Article Series!Bus Conversion FundamentalsThis Month - Stripping Out The Shell
2 Bus Conversion Magazine
PUBLISHED BYBus Conversion Magazine 9852 Katella Ave STE 361
Anaheim, CA 92804(657) 221-0432
PUBLISHER Gary Hatt
Stacy Held - Office [email protected]
ACCOUNTING/SUBSCRIPTIONSLinda Sohn
EDITORMike Sullivan
Chris Barnes - Art Director
WEBSITEwww.BusConversions.com
Questions/Feedback:[email protected]
ONLINE BBS/DISCUSSION FORUM www.BusConversions.com/bbs/
Phil Lyons - Forum [email protected]
MODERATORSNick Badame Jack Conrad
K.J.. “Frank” Franklin Paul LawryMike Sullivan
CONTRIBUTORS
Bruce Fay
Clarence Holcomb
Opinions and techniques expressed herein are those of the authors and do not necessarily represent those endorsed by the Publisher. Bus Conversion Magazine and the authors respectively accept no responsibility or liability for any errors, omissions or alterations, or for any consequences ensuing upon the use of, or reliance upon, any information contained herein. Tasks performed in maintaining, altering and using vehicles may require specialized skills and involve inherent risks to the person doing the work or to the safe operation of the vehicle. It is the reader’s responsibility to assess their own skills to determine if they can perform any such task and to seek professionally trained assistance if needed.
Publisher’s Note Gary Hatt
1967 Eagle Update - Number 1
On The Cover:The Ramblin’ Rose
Owned by: Clarence & Charlene Holcomb
I have now owned my 1967 Eagle for about three months. It has come a long way but I still haven’t moved into it as of yet. I have no problem living in my MC-9 as I am very comfortable in there. I am in no hurry to move. I swing to sleep every night in my hammock while watching Andy Griffith. After I move my hammock into the Eagle someone will get a heck of a deal on a Log Cabin bus.
Soon after we arrived back home from Phoenix after picking up the bus, we had some rain here in Southern California. That is when I discovered six different leaks in the Eagles’ roof. I also found another leak in one of the three roof A/C units and a leak near the front driver’s side window trim that had come loose. The bus has been sitting in the hot Phoenix sun for almost three years before I purchased it and it baked away some of the roof paint and sealant causing it to leak.
So the first thing we had to do is to paint the roof with the white Plas-T-Cote roof coating. I bought two gallons of the stuff but had to keep going back for more and I think we ended up using about eight gallons to cover the entire roof. The paint goes on as thick as silicone and ends up being up to an eighth of an inch thick in some places. Unfortunately it has not rained yet so we are not sure if it leaks or not. But I am pretty sure we covered every square inch. If it doesn’t rain soon I will take my hose to it. Until then I have plenty of other things to work on.
Rather than trying to repair the leaking cover on the A/C unit, I decided to replace the entire roof A/C unit as it was not cooling anyway. I called Blair with Pacific RV Parts in Garden Grove, CA and discussed the different options with him. He recommended an Atwood Air Command with a Heat Pump unit which provides 15K BTU’s of heat or air conditioning. He said the heat pump is much better than having an A/C unit with a heat strip that will only take the chill off. Not only that, but it includes a wireless remote control so I can turn it on and off and adjust the temperature while driving down the road from the Captain’s Chair.
With the Eagles large windshield, the heat from the sun can bake the driver and co-pilot in the afternoon if you are driving westbound in the south according to the previous owner. I frequently travel alone so it will be nice to be able to adjust the temperature while driving by tapping a couple of buttons on the wireless remote rather than having to set my beer down, pull off onto an exit ramp and walk back to adjust the temperature. If this unit works out well, I plan to buy two more units just like it as my budget allows.
We work on the Eagle most weekends so stay tuned for more updates and articles in future issues!
ADVERTISINGLisa Garcia
Bus Conversion MagazineBCM
February 2015 3
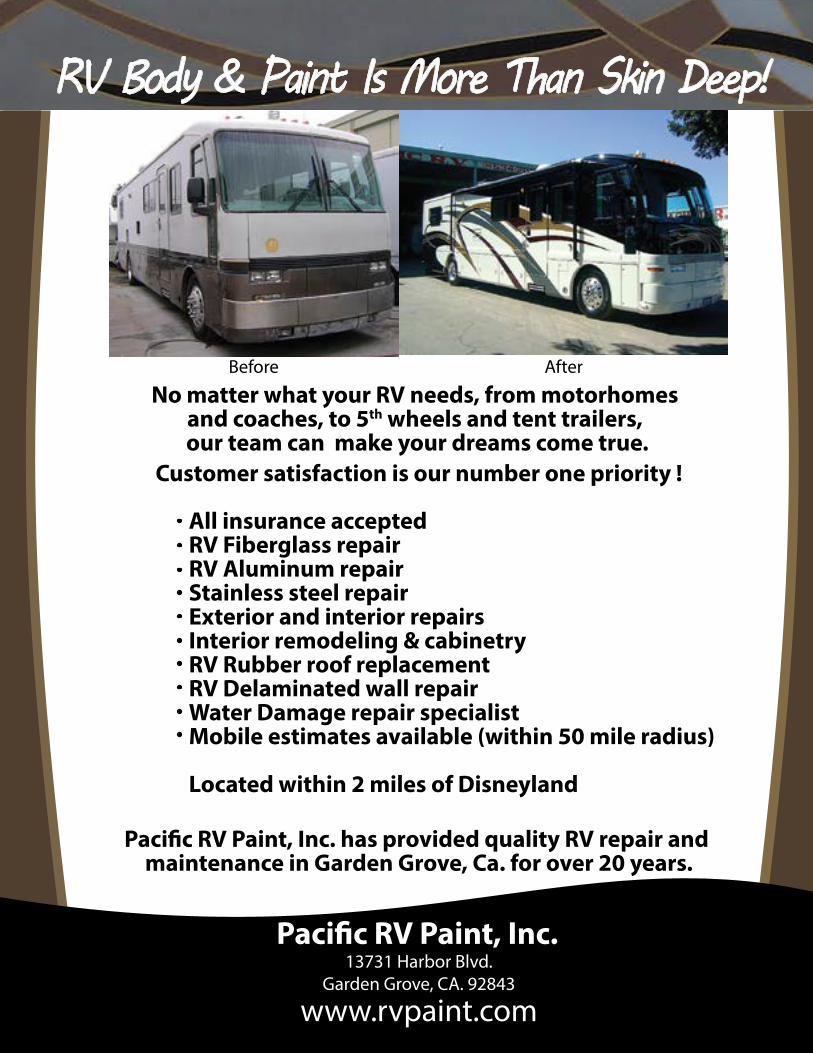
RV Body & Paint Is More Than Skin Deep!
Before After
Paci�c RV Paint, Inc.13731 Harbor Blvd.
Garden Grove, CA. 92843
www.rvpaint.com
Paci�c RV Paint, Inc. has provided quality RV repair and maintenance in Garden Grove, Ca. for over 20 years.
Customer satisfaction is our number one priority !
No matter what your RV needs, from motorhomes and coaches, to 5th wheels and tent trailers, our team can make your dreams come true.
All insurance acceptedRV Fiberglass repairRV Aluminum repairStainless steel repairExterior and interior repairsInterior remodeling & cabinetryRV Rubber roof replacementRV Delaminated wall repairWater Damage repair specialistMobile estimates available (within 50 mile radius)
Located within 2 miles of Disneyland
4 Bus Conversion Magazine
Bus Conversion Magazine February 2015
Index of AdvertisersArdemco ............................................................................. 31
Atlantic Custom Coach ............................................................. 7
Autex ..................................................................................... 9
B & B Coachworks ................................................................. 9
Balance Masters .................................................................... 18
Byler Rivet Supply .................................................................... 6
Custom Instrument Panels ..................................................... 19
Engine Heat Protection .......................................................... 10
Engine Power Source .............................................................. 8
Fastening Systems International ............................................ 22
Hitching Post ......................................................................... 13
Mobile RV Glass .................................................................... 21
Pacific RV Paint, Inc. ........................................................ 3 & 25
Pacific RV Parts ...................................................................... 14
RV LED Bulbs .................................................................. 7 & 32
Sure Marine Service ............................................................... 21
Tommy Kaylor’s Bus and Truck Service .................................. 15
Wrico International ................................................................. 11
Thanks to our advertisers for supporting Bus Conversion Magazine.
5
12
20
Exclusively in the February Digital Edition of BCM
Additional photos from Bruce Fay’s article on the Quartzite 2015 rallies and the points of interest in the region are included in the Digital Edition.
Additional photos from The Ramblin’ Rose article, and an exclusive Blast From The Past article. Plus the Bus Chat feature brings you high interest discussions from the BCM Online Discussion Forum.
Also additional bus related classifieds and potentially other late breaking info. Plus most photos can be clicked to open a much larger view of them.
Do you receive only a Print Edition subscription and would like to add access to the Online Digital Edition? It is easy to upgrade your subscription for absolutely FREE. Just go online to:
www.BusConversions.com/UpgradeMeThen click the Online Add-On from the
bottom of the list to order it.
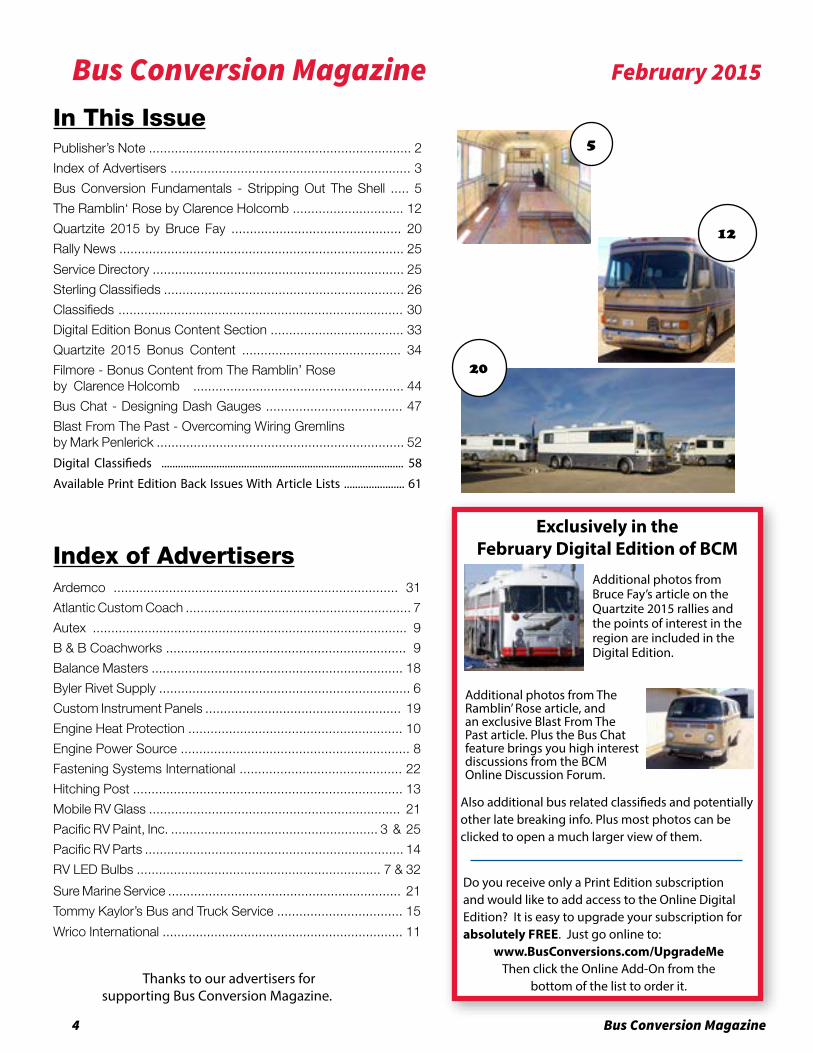
In This IssuePublisher’s Note ....................................................................... 2
Index of Advertisers ................................................................. 3
Bus Conversion Fundamentals - Stripping Out The Shell ..... 5
The Ramblin‘ Rose by Clarence Holcomb .............................. 12
Quartzite 2015 by Bruce Fay .............................................. 20
Rally News ............................................................................. 25
Service Directory .................................................................... 25
Sterling Classifieds ................................................................. 26
Classifieds ............................................................................. 30
Digital Edition Bonus Content Section .................................... 33
Quartzite 2015 Bonus Content ........................................... 34
Filmore - Bonus Content from The Ramblin’ Rose by Clarence Holcomb ......................................................... 44
Bus Chat - Designing Dash Gauges ..................................... 47
Blast From The Past - Overcoming Wiring Gremlinsby Mark Penlerick ................................................................... 52
Digital Classifieds ........................................................................................ 58
Available Print Edition Back Issues With Article Lists ...................... 61
February 2015 5
Bus Conversion Fundamentals is a new BCM original series of articles that will take you through the process of converting a bus, covering the basics of each phase of conversion and the major house systems. In the upcoming installments we will cover topics such as tanks and plumbing systems, house electrical systems, heating/cooling/ventilation, insulation, framing, finishing, cabinetry, appliances, entertainment electronics, furnishings, decor and window treatments. Incorporating bus conversion knowledge from many sources, our goal is to make this the most comprehensive conversion guide in existance. You will definitely not want to miss a single issue of this series.
Bus Conversion FundamentalsStripping Out The Shell
You’ve found your bus and you’ve taken it home – now what? The first phase is to gut it out and remove the commercial interior to make it ready for your interior. For this article, we will mainly use MCI buses as examples, but the concepts presented will be easily adaptable to most buses you will encounter.
Before you start the stripping on any bus, you should acquire the maintenance manual for your specific bus. This book will tell and show how all systems and parts were installed, how they work, and how to remove them. It’s the best $45 to $125 that you will spend. While you’re at it, purchase a parts book as well. It gives you all the part numbers, which is a very useful thing to have when you need to order replacement parts for repairs or alterations.
It also helps to have a few tools on hand. As with every task, there are other tools you may want or prefer for making things easier. However, these will be necessary or at least extremely helpful.
• A 1/2” cordless drill with an extra battery pack and a wide variety of screwdriver, nut driver, and security screw bits. In addition, a set of good quality drill bits designed for drilling metal. Another handy accessory to have is a Drill Doctor sharpener for drill bits.
• A good assortment of wrenches (box-end, open-end, etc.) A handy variant of the box-end wrench to have in addition (not instead of ) is the ratcheting box-end wrench. They cost more, but will save you a lot of stress in situations where you have a limited range of motion for the wrench handle. Break the nut loose with a regular box-end wrench and then use the ratcheting box-end to do the tedious run out of the nut.
• A hammer and chisel set. Over time the head of a chisel will become “mushroomed.” That can be
dangerous. If you have a bench grinder, you can very easily restore the chisel head to its original shape and restore a damaged chisel tip.
• At least one good mid-size pry bar. Better yet, an assortment of pry bars in a variety of shapes and sizes. We probably all have misused screwdrivers and other tools as pry tools, but this can damage your tools or even result in injury.
• A small electric angle grinder and a couple packs of abrasive cutting disks for it. These small angle grinders are inexpensive (under $20), and handy for many tasks.
• A Sawzall or similar reciprocating saw. Reciprocating saws such as these can be very handy for quick cuts of many materials.
• A circular saw and a general-purpose blade. It will be most useful when doing the woodworking later. But if you need to cut out a section of flooring, a circular saw with the blade depth set to exactly the thickness of the wood can get the job done without damaging the framing that the wood is attached to or pipes, conduits, wires the other side of it.
• An air compressor will be helpful. Air tools can save time in the stripping phase and other conversion tasks later. If you will be doing your own maintenance work on your bus then it is virtually a necessity. This is a good time to think about what work you will potentially do on your bus. Then buy a compressor that meets the needs of all the tools you will use. It is a good idea to buy more capacity than you expect to need. If your budget supports it, after you determine the demands of the tools, select an air compressor that will exceed those demands by at least 25%.
• Air hammer w/chisel bits (a.k.a. air chisel). This is an extremely handy tool to have when stripping
6 Bus Conversion Magazine
Bus Conversion Fundamentals - Stripping Out The Shellout the interior. It will make short work of seized nuts and bolts and rivet removal. Be aware though, they can easily make a mess of the surface adjacent to the fastener being removed. Therefore, if you are reselling the seats, then you may want to use other methods. However, if the materials are headed to a recycler, an air chisel can save you a lot of time and frustration.
• One or more pairs of safety glasses. Safety glasses are essential when using power tools. This is even more important when the material being cut is metal. Sparks and bits of metal will fly. Just one particle of metal can do a lot of damage to your eye. Even the low cost ones found at the registers in most tool and home improvement stores can save your eyes. There are also higher quality versions that provide added comfort, scratch resistance, and other added features.
• A good pair of safety gloves. Leather gloves have been a long time standard for this and do an impressive job. However, the newer Kevlar safety gloves are an even better investment. There are many varieties out there, each with its own features and advantages. Take a little time to see what feels best and gives you the most protection.
• A welder’s apron – A welder’s apron will protect you and your clothes from a lot of the sparks and flying metal when using an angle grinder.
• Welder’s blanket – A welder’s blanket is very useful at preventing flying sparks from your angle grinder from damaging various surfaces. For example, if you are keeping the original windows, you do not want those hot sparks hitting Lexan windows.
• Penetrating oil – When delicate surrounding materials or a difficult to replace bolt or stud make it impractical to power out a seized nut, penetrating lubricant can save the day. PB Blaster is very effective. Liquid Wrench is also commonly used.
• Cutting oil – When drilling metals, cutting oil combined with the right drill RPM and pressure can speed up the process while also protecting your drill bits. It is especially important when drilling stainless steel or other hardened metals.
• A good fire extinguisher is important. When drilling, cutting, or grinding metal, large numbers of glowing hot pieces of metal are sprayed everywhere. If all of your other safety measures fail and a fire starts, a good quality fire extinguisher can stop a fire before it gets out of control.
The first thing to go is usually the seats. All of the major models have the seats bolted to the floor with a track system, which lets the commercial operators slide
February 2015 7
We Can Help You With:
» Aluminum Race Decks & Stair systems » Coach Chassis & House Systems » Custom Stainless & Aluminum Metal Work » Electrical Systems » Lateral Arm Awning Installation & Repair » Heating & Cooling Systems » KVH Satellite Systems » Audio & Video Systems » Bodywork & Graphics
Your satisfaction is our highest priority!
Atlantic Custom Coach
609-465-32851505 Route 9 North, Cape May Court House, N.J. 08210
the seats forward or backward to allow for a minimum or maximum number of passenger seats. This makes it technically easy to remove the seats by removing the two nuts (9/16” hex head) from the bolts mounted in the floor track system and then removing the two nuts on each corner of the seat along the wall mounting tracks or rails. Once the four nuts are removed, the seat can be lifted up and carried out the passenger door.
As you can see, from a technical standpoint they are easy to remove. In actual practice though, the bolts are often rusted, corroded, coated with floor wax, chewing gum, candy, etc. Sometimes nuts have been replaced with ones of varying materials which can result in bi-metal interactions that sieze the nut and bolt together.
A BCM Exclusive Article SeriesAngle grinders and/or air chisels are common ways to overcome this obstacle. Just be sure to use protective gloves and eye protection. There will be lots of sparks and flying metal particles.
Older coaches may have the seats bolted directly through the floor. Coaches manufactured after 1978 may have what is called a center pedestal seat in which there is one leg in the center of the seat going to the floor. It is removed the same way as the aisle mounted seats.
The seats in most of the older coaches have little or no value, depending on the condition. If they are newer seats with the pedestal mounts, they may have some value if you can find the right buyer. On the newer seats, you might be able to sell them for $500 to $1,000 or more ,if they are in great shape. Check with bus dealers, charter operators, colleges, and churches in your community to see if they have an interest in your used seats. If not, they might still be willing to take them just to help you get rid of them. The last thing you need is a neighbor complaining about 50 bus seats piled up at the side of your house. So once they’re out, get rid of them. You might want to keep one for the co-pilot seat. Some
SafetyEveryone takes shortcuts sometimes. Admit it,
you’ve hammered nails without putting on safety glasses. We all have. Usually we can get away with it. But sometimes we don’t. I personally cut my thumb down to the bone with a knife while working on my bus without safety gloves. It hurt for weeks, and some severed nerves took over a year to grow back. Another bus nut I know slipped with a large angle grinder, cutting a deep gash in his forearm that did a lot of damage including severed muscles and tendons. It was extremely painful and took many months in a cast to heal.
Chances are you are about to start working with tools you haven’t used before. Unless you are a heavy duty equipment mechanic, you likely have never worked on a vehicle this heavy. As you start this work, begin with a heightened awareness that you are working with tools and forces that can seriously injure you or even kill you. Make it a habit to use the proper safety practices and equipment. This includes wearing safety glasses and gloves. It also means constantly thinking of fire safety, electrical safety, power tool safety, as well as safety practices for jacking or otherwise elevating your bus to work under it.
8 Bus Conversion Magazine
people have used sets for their dinette as well. They may not be custom or luxurious, but they work.
After the seats are out of your way, the next things to remove are the luggage racks. The MCI’s are the easiest of all coaches because they are bolted on and not riveted in place. As a result, you unbolt them and lower them to the floor of the bus. A second person can be very helpful on this project to prevent injury. If you have no choice but to do it alone, be extra careful.
Once on the floor, you can use a Sawzall to cut them into smaller sizes to remove from the bus. It may be easiest to open one of the side windows (hinged from the top) and hand them out in larger pieces. Be careful when you come across your wiring looms. You may cut and remove your reading and interior lights, but keep a lookout for the wires that lead to your marker lights. The luggage racks in some models are aluminum or stainless steel and have a scrap value. Check with your local recycler to see what they pay for them, you could be surprised. Also, remove all the reading light bulbs. You may be able to use them in your marker lights, taillights or other areas of your bus. If they’re 24 Volt, and you have to go buy them, they are hard to find and cost up to $3.50 each! For that matter, if you are doing a low budget conversion, save some of the lighting fixtures, you may find ways to reuse them.
With the seats and luggage racks out of the way, your bus is starting to look empty. Now it’s time to remove the restroom if it is equipped with one. First, remove the forward wall, side wall and door. All of these pieces come out relatively easily with just a Phillips screwdriver, a hammer, and a chisel to knock off rivets and a 9/16 box-end wrench. After that, you can start in on the back wall with the mirror and sink. These come out with a little more work and a lot more time, but you’re still working in the somewhat clean area.
NOTE: Before starting on the bathroom removal (better yet, before bringing the bus home), make sure you dump the holding tank and rinse it out. Thoroughly rinse out the holding tank and restroom area. Consider using a good germ killing cleaner to ensure you are not exposing yourself to dangerous bacteria or viruses. Rinse it well afterward to prevent exposure to excessive chemical fumes while removing the restroom.
Once these parts are removed, you’ll see a freshwater holding tank, some plumbing, and a few other items of interest behind the wall. Take them all out; being careful to close off any air-lines you cut. (Some buses used an air flush system.) You might also come across some electrical wires used for the bathroom light, fan and door lock light that need to be removed. Check your maintenance
Bus Conversion Fundamentals - Stripping Out The Shell
February 2015 9
B&B Coachworks
15 years of COMPLETE custom fabricationexperience. Conversions on any make.
• Coach widening - 96” -> 102”• Slide Outs• Remodel & Repair on ANY motorhome or bus.
We WILL SHIP:• Radiator spray systems• Engine door louvers• Air steps for entry door• And much more!
4350 S. Arville, Unit 6Las Vegas, NV 89103
Call today for conversion specs and photos.
(702) 873-4415
Specializing In:
book wiring diagrams and disconnect the wires in the appropriate fuse or electrical panel first.
Your next project in this area is to remove the toilet. Seriously consider hiring someone to do it. Whatever he charges, it’s worth double! Different models had the toilets and holding tanks installed in different ways. You’re going to have to look in the maintenance or parts book for your model to see how it actually comes out, but it’s usually not easy.
In a MCI bus, the holding tank can be removed from the engine compartment by taking off the strapping system that holds it in place. However, on the GMC buses you have to remove the transmission to get the tank out in some models. If that’s the case, you might consider just covering over the tank from the inside of the coach with plywood. Seal it tight so you won’t have any air seepage. The tank won’t bother anything by being left in below floor level.
You’ll want to remove the dump system pipe and valve located in the engine area to give you a cleaner looking engine compartment and surrounding area. In some of the MCI models, the bathroom has a stainless steel floor that has a lip coming up about two inches above the floor line. This lip and stainless steel pan
was used to keep the water inside the bathroom and prevent it from running into the passenger area in case of a mishap. Some people resort to cutting this lip out with a torch, but you can get the floor out with the lip by using a pry bar and sliding it under the floor about three inches and prying it forward and up. This might do some damage to the plywood floor, but you’re going to have to recover that area anyway.
Another solution is to use a circular or skill saw and cut the floor away around three inches forward of the lip of the pan. By doing this, it’ll come out relatively easy, and you’ll have to place new flooring in that area anyway. Again, many of the materials you’ll be pulling out have a salvage value for their metal content. The MCI’s use a lot of stainless steel in the restroom area. You’ll find that you’ll get even more money for the scrap if it’s brought in clean that is, the aluminum without steel screws in it and stainless with aluminum or steel screws or rivets in it. Don’t get too caught up in the recycling side of the project. Remember, you’ve got a long way to go and you don’t want to waste too much time trying to save a dollar.
Moving forward, now that the restroom is out, start taking out the ceiling panels. They come out easily. First, pull out the gray rubber seal running down the inside of each trim piece. Then, with an electric screwdriver,
A BCM Exclusive Article Series
10 Bus Conversion Magazine
39250 Green Meadow Road, Temecula, CA 92592(951) 302-2212
EngineHeatProtection.com
Easy installationNo special tools • No mess • No heat storage
Cuts down heat by 50%Used by Airstream Mfg. and professional coach builders
Engine Heat ProtectionReduce that unwanted heat with
an EHP rollboard.
Stops heat and noise dead · E�cient · Economical
remove the Phillips screws and each panel will come down with just a little work. On some of the buses these panels are aluminum and therefore worth taking to a scrap metal dealer for recycling.
Beneath the panels you will find speakers and speaker wire, wires for your marker lights. You might have two of them in the middle of each side as well as in front and rear. You also can remove the fiberglass insulation if you’re planning to use spray foam or another type of insulation. If not, leave the factory insulation in. It’s not the best, but it’s not bad either and is better than nothing at all. In fact, if you’re planning on a low cost conversion, you might want to keep the bus ceiling in place. By not taking it down, you’ll have the bus insulation in place. This is not recommended, but it can be done this way.
Below the windows, you’ll find upholstered panels. When these panels are removed, it will expose another aluminum panel that is riveted to the bus framework. MCI’s official position is to leave these panels in and put your plywood wall cover on top of them. They are a load bearing structural part of the bus. We’ve never heard of anyone having a structural body failure due to the removal of these panels, but technically, removing them could weaken the wall.
When you get to the windows, you need to decide if you’re going to keep in the factory windows or reskin
the entire side of the coach and cut in RV windows where you want them. Many people choose to remove all the side windows and reskin over them with aluminum. By doing this, you don’t have to design your bus around the existing windows and you will have much more flexibility; more on this topic in a future installment.
If you elect to keep the bus windows in, you can remove the emergency release lock system, and screw them in place using sheet metal screws going through the track area and into the side of the coach. The screws will never be seen and yet you will still be able to seal the window or remove it should it become necessary. A big concern with keeping the original windows in buses with slider style windows is that they may not all slide open and replacement sliders for some models are expensive if you can even find them. Another problem is that the bus windows do not have screens and it’s difficult to make screens for them. Locking them securely may also be a problem.
Getting down to the floor level, you will encounter the air conditioning and heating ductwork. Most people remove the original over-the-road air conditioning system. If you choose to do that, then you will want to remove the bus air conditioning and heating ductwork along each side. There are many screws, but a cordless drill with screwdriver bits will make short work of it. Be sure to use the right size bit for the screws or it can strip the screw’s head and/or damage the bit. Again, save your scrap metal to recycle.
Some people choose to keep the bus air conditioning system in place and use it going down the road. While the system is certainly capable, there are several significant reasons not to. One is the challenges and compromises involved in designing your conversion around the duct systems. In the walls it will restrict, or even eliminate, the insulation you can install. Perhaps most importantly, it’s expensive to maintain the bus air conditioning. Replacement parts are costly, as well as the cost of recharging the system if needed. Third, the bus air conditioning works only when the bus is moving down the road being powered by the main engine, which means you still need another system to use while you’re parked and camping.
Some people will disagree on this issue, but that’s OK. That’s why people do bus conversions to begin with: to have their own way. Before you decide to keep it, check to see what the refrigerant for the system in your bus costs as well as the labor charges for shops doing the charging and maintaining of the system. Some of the older coaches used Freon 12, which is no longer available or extremely expensive when you do find it. Refrigerant leaks are quite common. Some leaks are fast, losing all your refrigerant in a very short time but at least are relatively easy to find and repair. But others are very slow
Bus Conversion Fundamentals - Stripping Out The Shell
February 2015 11
We carry a full line of Coach ConversionParts & Accessories, to list a few:• Wrico Generators• Magnum Inverters• Webasto Hot Water Heating Systems• Cooktops & Water Heaters• Automatic Transfer Switches• Generator Autostart System
Call the people with the Coach ConversionExperience and Know-how.
Made Speci�cally For Bus ConversionsKubota Powered • Water Cooled • 1800 RPM
Direct Drive • Easy To Service Rugged and Trouble Free
Buy direct and save. Call the Generator Man(541) 744-4333
WRICO INTERNATIONALPO Box 41555 • Eugene, Oregon 97404
Wrico International
The Generator man
WI
leaks that slowly deplete your refrigerant and require service every year. It’s easy to spend a $1,000 per year or more to check and charge a bus A/C system without any repairs being made. On the other hand, roof airs cost about $900 apiece, work for years without major service, and with the right power provisions can operate while you’re parked or moving down the road. In addition, when they do develop problems, they are easy to replace or repair.
Over-the-road driver’s air conditioning is an option many people do choose. You can purchase a unit at most auto stores or mail order through JC Whitney catalog. You will have to extend the Freon line from the rear to the front, but the rest of the system will fit into the dash OK.
Once the ducting is removed, all that’s left is the passenger modesty panel and the driver’s rail. They normally just unbolt from the floor and wall.
If you did elect to remove the bus air conditioning system, you’ll want to remove the components underneath the bus as well. They are the condenser, evaporator, compressor, and related components. By removing them, you gain more room in the belly of the bus for your generator or anything else you wish to place in that area. The compressor is located in the engine compartment and may be replaced with a 12-volt alternator for the house batteries, or anything else you might want to drive off a fan belt. Some people relocate their start batteries to this area, and put the house batteries where the bus batteries used to be. One advantage of moving the start batteries to the engine compartment is the power transfer efficiency of shorter battery cables.
Next, the evaporator and condenser should be removed. When doing so, I recommend that the main bus heater core be removed as well. When removing the heater core, leave the water lines going to the front driver’s area heater and defroster. You can tap into the heater water lines from the main heater inside the coach in the living area. This is where you can build in another heater core inside the coach. Place a 12-volt fan behind it to provide bus heat in the main coach area while driving down the road. You may want to put an additional heater core in the bathroom and/or the bedroom area.
Most of the parts you remove from below the bus are heavy and contain a lot of copper. Again, recycle and maybe get a few dollars for your efforts. You might want to talk to a local bus dealer to see if he wants to remove these items for you at no cost in exchange for keeping the used parts. Again, this all depends on how old your bus is and if someone is operating similar buses.
My recommendation is to ask the bus company or dealer you buy it from if they will strip it for you. Some
charge from $500 to $1,500 for the work, but it is well worth it. By paying them, you don’t have to get mentally or physically burned out and bruise your hands on the dirty part of a bus conversion. They know exactly what to remove and what to leave in, and they can get rid of all the parts and scrap that come out of your bus. This way you get it done and over with so you can get on with the fun part of putting things into the coach instead of removing them. Either way you go, be careful and have fun doing it.
Once you have all the parts out, sweep the floor. You may want to put in a new plywood floor on top of the old one. If you have the headroom, 3/4 tongue and groove is best. You can glue it as well as screw it down. Use the right size screws so they go down through both layers of plywood and show up in the roof of your underbays.
Once you have your plywood down, you have one more crucial step to do Get your partner, bring in two chairs, your favorite beverages, sit down, relax, and dream.
A BCM Exclusive Article Series
BCM
12 Bus Conversion Magazine
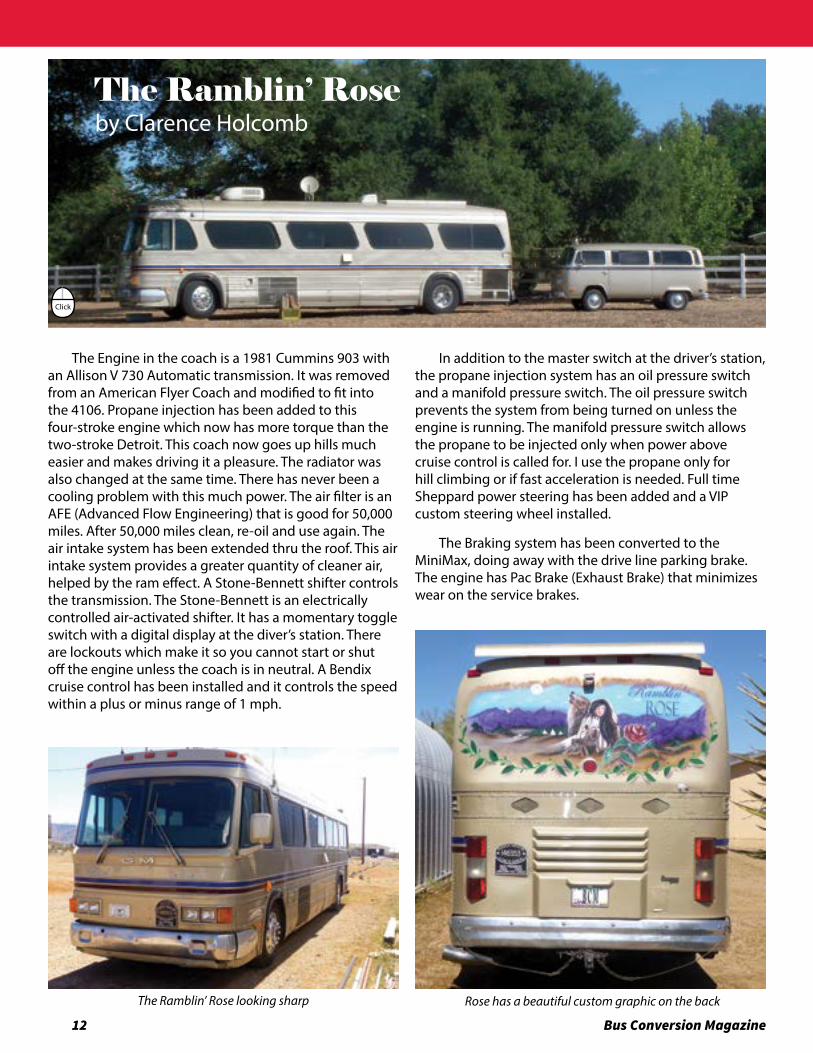
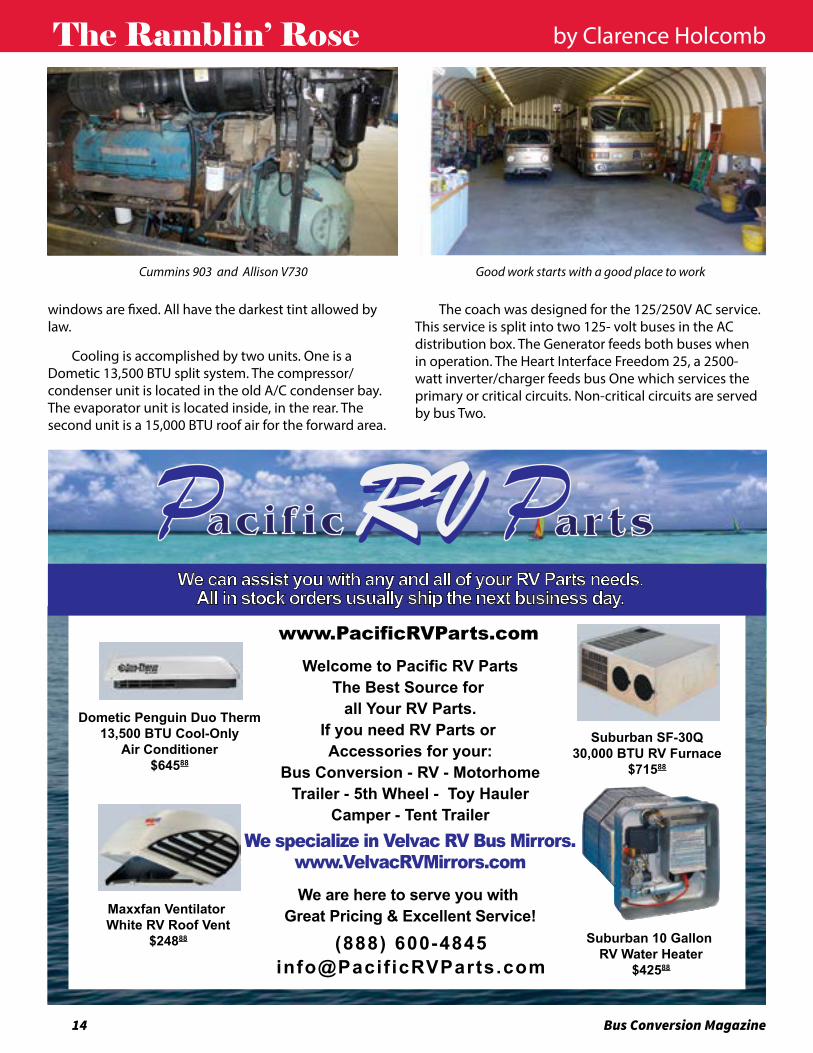
The Engine in the coach is a 1981 Cummins 903 with an Allison V 730 Automatic transmission. It was removed from an American Flyer Coach and modified to fit into the 4106. Propane injection has been added to this four-stroke engine which now has more torque than the two-stroke Detroit. This coach now goes up hills much easier and makes driving it a pleasure. The radiator was also changed at the same time. There has never been a cooling problem with this much power. The air filter is an AFE (Advanced Flow Engineering) that is good for 50,000 miles. After 50,000 miles clean, re-oil and use again. The air intake system has been extended thru the roof. This air intake system provides a greater quantity of cleaner air, helped by the ram effect. A Stone-Bennett shifter controls the transmission. The Stone-Bennett is an electrically controlled air-activated shifter. It has a momentary toggle switch with a digital display at the diver’s station. There are lockouts which make it so you cannot start or shut off the engine unless the coach is in neutral. A Bendix cruise control has been installed and it controls the speed within a plus or minus range of 1 mph.
In addition to the master switch at the driver’s station, the propane injection system has an oil pressure switch and a manifold pressure switch. The oil pressure switch prevents the system from being turned on unless the engine is running. The manifold pressure switch allows the propane to be injected only when power above cruise control is called for. I use the propane only for hill climbing or if fast acceleration is needed. Full time Sheppard power steering has been added and a VIP custom steering wheel installed.
The Braking system has been converted to the MiniMax, doing away with the drive line parking brake. The engine has Pac Brake (Exhaust Brake) that minimizes wear on the service brakes.
The Ramblin’ Roseby Clarence Holcomb
The Ramblin’ Rose looking sharp Rose has a beautiful custom graphic on the back
Click
February 2015 13
TRAILER HITCHES WIRINGBRAKES
TRAILER REPAIRSBRAKE CONTROLS
RV TOW BARSTOW CAR LUBE PUMPSTRUCK ACCESSORIES
800-241-2122352-629-0756
Towing Systems for Cars,Trucks, RVs, Scooters,and Bus Conversions.
5th Wheel Gooseneck Receiver Hitches
www.OcalaHitch.com
Reese®
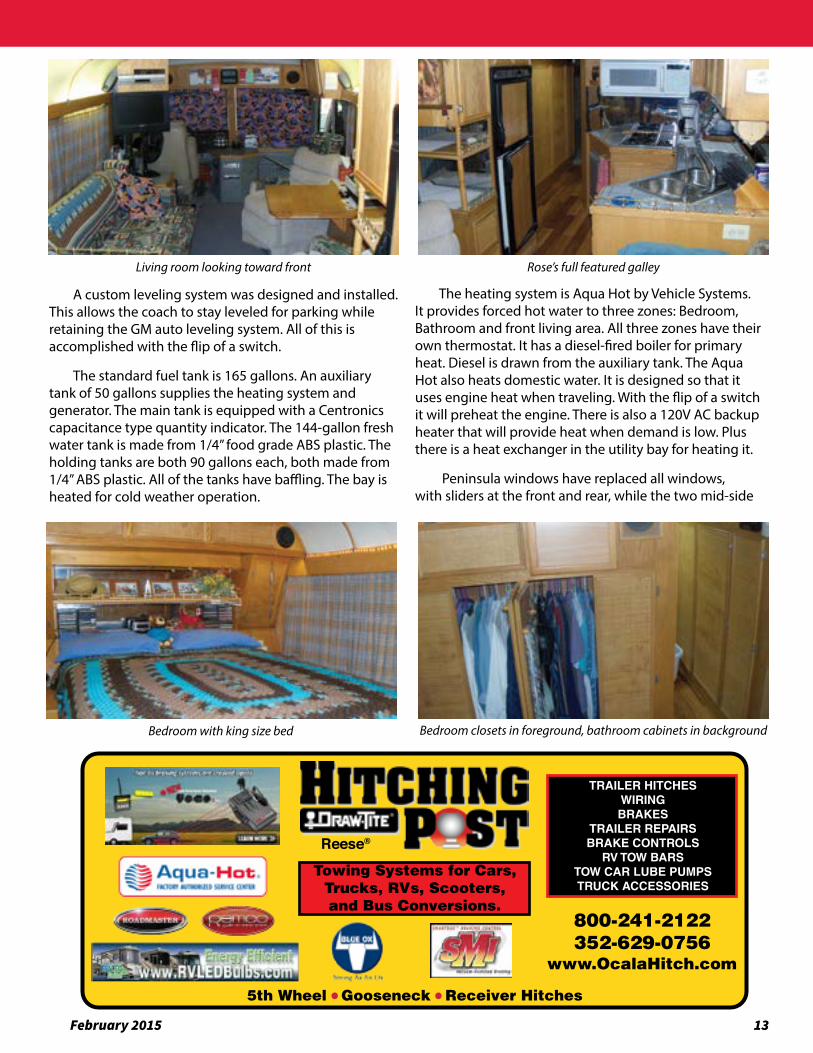
A custom leveling system was designed and installed. This allows the coach to stay leveled for parking while retaining the GM auto leveling system. All of this is accomplished with the flip of a switch.
The standard fuel tank is 165 gallons. An auxiliary tank of 50 gallons supplies the heating system and generator. The main tank is equipped with a Centronics capacitance type quantity indicator. The 144-gallon fresh water tank is made from 1/4” food grade ABS plastic. The holding tanks are both 90 gallons each, both made from 1/4” ABS plastic. All of the tanks have baffling. The bay is heated for cold weather operation.
The heating system is Aqua Hot by Vehicle Systems. It provides forced hot water to three zones: Bedroom, Bathroom and front living area. All three zones have their own thermostat. It has a diesel-fired boiler for primary heat. Diesel is drawn from the auxiliary tank. The Aqua Hot also heats domestic water. It is designed so that it uses engine heat when traveling. With the flip of a switch it will preheat the engine. There is also a 120V AC backup heater that will provide heat when demand is low. Plus there is a heat exchanger in the utility bay for heating it.
Peninsula windows have replaced all windows, with sliders at the front and rear, while the two mid-side
Living room looking toward front Rose’s full featured galley
Bedroom with king size bed Bedroom closets in foreground, bathroom cabinets in background
14 Bus Conversion Magazine
P PRVRVacific arts
Welcome to Pacific RV PartsThe Best Source for
all Your RV Parts.If you need RV Parts or Accessories for your:
Bus Conversion - RV - MotorhomeTrailer - 5th Wheel - Toy Hauler
Camper - Tent TrailerWe specialize in Velvac RV Bus Mirrors.
www.VelvacRVMirrors.comWe are here to serve you with
Great Pricing & Excellent Service!
Dometic Penguin Duo Therm 13,500 BTU Cool-Only
Air Conditioner$64588
Suburban SF-30Q30,000 BTU RV Furnace
$71588
Suburban 10 Gallon RV Water Heater
$42588
Maxxfan Ventilator White RV Roof Vent
$24888
www.PacificRVParts.com
(888) 600-4845info@Pacif icRVParts.com
We can assist you with any and all of your RV Parts needs.All in stock orders usually ship the next business day.
The Ramblin’ Rose by Clarence Holcomb
windows are fixed. All have the darkest tint allowed by law.
Cooling is accomplished by two units. One is a Dometic 13,500 BTU split system. The compressor/condenser unit is located in the old A/C condenser bay. The evaporator unit is located inside, in the rear. The second unit is a 15,000 BTU roof air for the forward area.
The coach was designed for the 125/250V AC service. This service is split into two 125- volt buses in the AC distribution box. The Generator feeds both buses when in operation. The Heart Interface Freedom 25, a 2500-watt inverter/charger feeds bus One which services the primary or critical circuits. Non-critical circuits are served by bus Two.
Cummins 903 and Allison V730 Good work starts with a good place to work

February 2015 15
The Generator is a Wrico 8 KW diesel powered with a Kubota Engine with the current hours of operation housed in a sound deadened compartment and has its own starting battery. The house battery system consists of 2 Trojan L-16HC, 6-volt batteries connected in series-parallel to provide 12 volt DC power. The batteries are located on a slide-out tray.
The chassis or engine batteries are two Group 31 batteries mounted on a slide-out located just forward of the radiator in the old A/C compressor compartment. This provides a short run to the starter with a 4/0 welding cable. We have never had any problem starting even in sub-freezing weather. The two battery systems are tied together by an 850-amp solenoid for charging whenever the alternator is on line.
Also located in the house battery compartment are the AC & DC distribution boxes.
Both of these are Square D brand, which gives you a common circuit breaker system. The 65 foot ground power cord is also located in that compartment. The forward baggage compartment is for storage and contains a drawer toolbox.
R & M Fiberglass caps have been installed on both front and rear. The Engine Door has also been replaced with an R & M door. The modern rectangular four-headlight system has also been installed. A deflector is installed on the back edge of the rear cap directing air down onto the rear of the coach. This minimizes the vacuum drag and reduces the road grime that accumulates on the rear of the coach. The coach has Ramco remote control heated mirrors. There is a large flat plate mirror and a convex (wide angle) mirror on each side. Each of these four mirrors can be controlled individually. There are also “docking lights” on each side of the coach individually controlled by switches on the driver’s center panel. Four 75-watt solar panels are mounted toward the rear of the roof. A BestMade Satellite dish is also mounted on top.
The Ramblin’ Rose by Clarence Holcomb
Where did the dash console go? This looks promising
A lot of work putting it all together
Nice looking completed dashboard
16 Bus Conversion Magazine
Bus Conversion MagazineBCM
February 2015 17
February 2015
Click
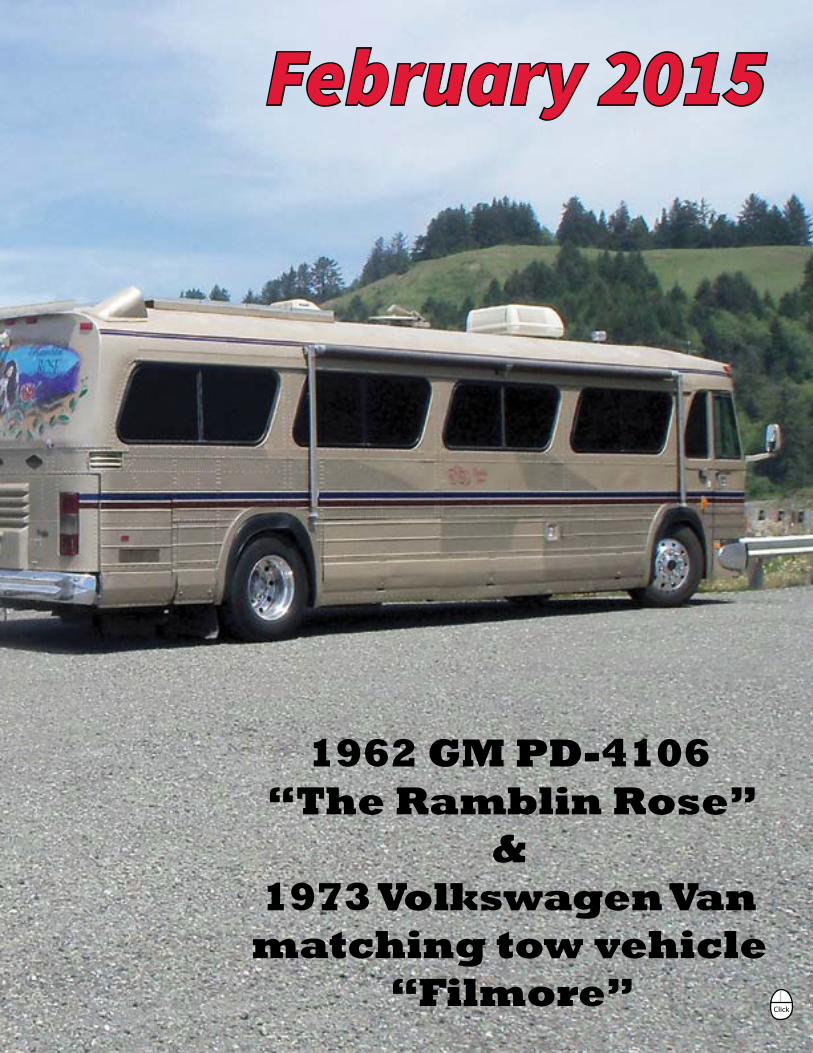
1962 GM PD-4106“The Ramblin Rose”
&1973 Volkswagen Van
matching tow vehicle“Filmore”
18 Bus Conversion Magazine
All cabinets are made from solid red oak, stained to a light honey oak color and sealed with multiple coats of Varithane. The cabinet doors have a rattan or caning material covering. The walls and ceiling were gutted to the outside skin and 1” Thermax foam was installed and then covered with 1/4” plywood. Walls are covered with a light gray padded, tuck and roll vinyl. The ceiling is white Naugahyde over 1/4” foam rubber. Ceiling seams are covered with oak trim.
The bed is a standard king size which consists of two twin size mattresses inside an island. Under the bed are four large drawers on each side. There are cabinets overhead and on each side of the head of the bed. Each night stand contains a storage compartment. The front wall of the bedroom is made up of two cedar lined closets, each of which is 30” wide by 20” deep. Located in one of the closets is the rear A/C evaporator that is ducted to provide cooling to both the bedroom and the bath.
The side aisle Bath is located right in front of the closets. It is approximately 5’ by 5’. The Stool is a Sealand Ceramic bowl toilet. The Shower has a 34” neo-angle pan with ceramic tile surrounding it and a custom made tempered glass enclosure. The counter top is also ceramic tile. There is a Fantastic Vent with a thermostat and rain
sensor. The floor of the bath, hall, and galley are Oak plank hardwood. This hardwood has the impregnated finish throughout. The floor of the bedroom and the living room has Berber carpet stretched over a 1/2” 6 lb. rebond pad.
Along the passenger side of the hallway are cabinets including a linen closet and can pantry. The Larsen Electronics tank level monitor panel is located at the top of these cabinets. It uses capacitance sensors that do not have the traditional problems of the other easily clogging types. Further down the hallway on the passenger side is a pair of large pantries. Next is the Norcold 8 cubic foot electric refrigerator. There are storage compartments both above and below the refrigerator. In front of the refrigerator is a small cabinet with two large drawers.
On the driver side, before the bath is the galley area. Hanging on the wall of the bath is a GE Spacemaker convection microwave oven along with a couple of smaller cabinets. Overhead cabinets are above the counter along the driver side of the galley. Under the convection microwave is a two burner JennAir Cooktop. The galley is “L” shaped and has a stainless steel double sink which is located at the front end of the tile counter. The kitchen faucet has the retractable combination spray head hose which is made by Delta. Total counter space is
The Ramblin’ Rose by Clarence Holcomb
www.BalanceMasters.com
One Time Investment!NEVER BALANCE
YOUR TIRES AGAIN
Balance Masters will stop tire cuppingand increase tire life up to 50% or more!
LIFETIMEFACTORY WARRANTY
with proofof purchase
FITS MOST HEAVY-DUTYTRUCKS, MOTOR COACHESBUSES, MOTOR HOMES, VANSAND CARS FROM 2” TO 5 5/8”DIAMETER DRIVESHAFTS
NO STEEL BALLSNO SANDS OR OILSNO PREBALANCING
Active Balancing Systemsare the Ultimate in on-board
balancing devices!
SUN-TECH INNOVATIONS, LLCP.O. Box 9154
Canoga Park, CA 91309(877) 826 -9127 ·(818) 882-8431
Fax (818) 882-7859OVER 30 YEARS IN BUSINESS
THE ONLY PRODUCT OFIT’S KIND ON THE MARKET THAT
HAS BEEN TESTED AND APPROVEDBY THE U.S. MILITARY
February 2015 19
approximately eight feet long. A built in Nutone blender is located inside the counter. A cutting board slides out under the counter adding to available space. A duplex electrical outlet is located above the counter next to the microwave. There is also another duplex electrical outlet in front of the counter. Together they provide plenty of room to plug in accessories.
The living room consists of a sofa bed on the driver’s side with a standing cabinet between the driver’s seat and sofa. Above the cabinet is the TV/Satellite/VCR. On
the passenger side are two reclining swivel rocking chairs, each with proprietary slide out tables on both sides of them. The table has two leaves that extend out to the sofa seating six adults around the table at once. The table is made of solid oak with the slides made from rock maple. The front chair is mounted on an eccentric that allows it to move forward and backwards by as much as 12”. When moved to the front it becomes the passenger/navigator chair.
All windows are covered with custom made to fit curtains. Above the front two windows are two six-foot fluorescent LED lights. There are cabinets overhead the passenger seat, entry door and across the front. Above the Driver’s seat is the electrical monitor panel containing the inverter remote control, the generator controls/gauges, and meters for monitoring AC power.
The old instrument panel was completely gutted and a new panel constructed. The instrument panel contains complete instrumentation. The side panel was also rebuilt. It contains the start switch, master switch, Stone-Bennett control for the transmission, cruise control, controls for the mirrors, Exhaust brake and propane master switches. The side panel contains controls for all functions and is laid out to be easily utilized while underway. The center cabinet also contains the Cobra 40 channel CB along with a 250-watt linear amplifier. In addition there is a remote controlled wireless doorbell that plays the theme from the Lone Ranger (“William Tell Overture”). Additions and upgrades are always in planning and fabrication.
The Ramblin’ Rose by Clarence Holcomb
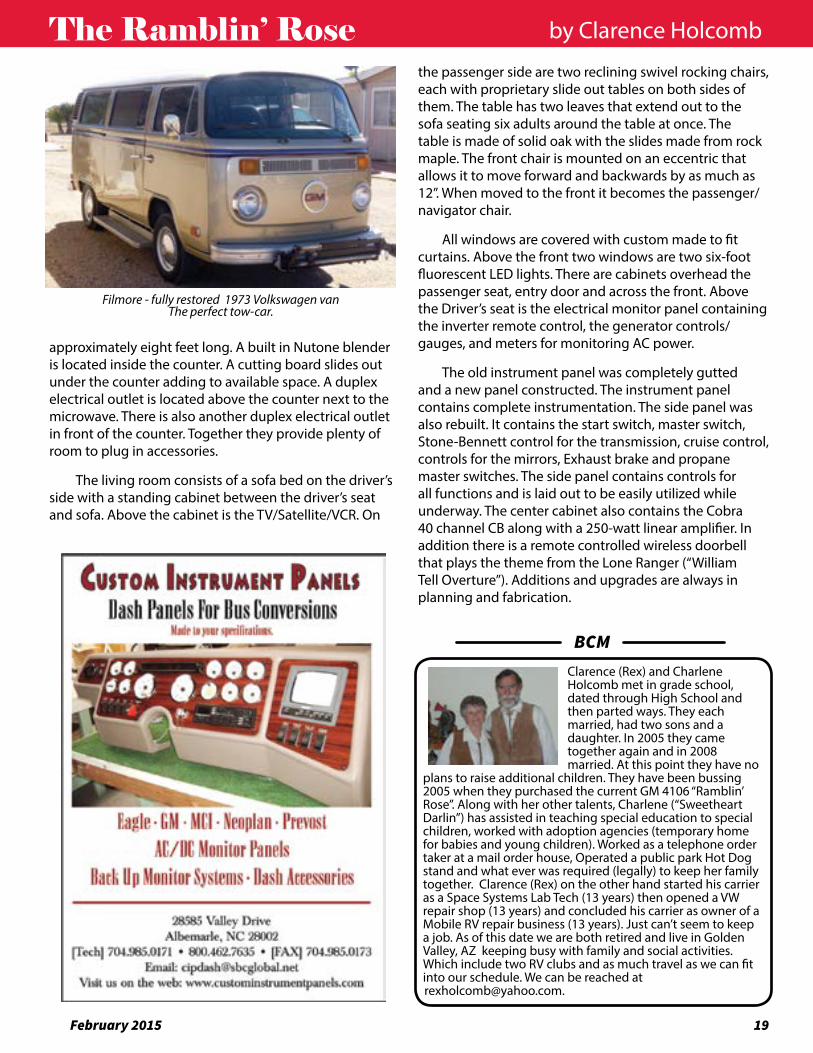
Filmore - fully restored 1973 Volkswagen van The perfect tow-car.
BCMClarence (Rex) and Charlene Holcomb met in grade school, dated through High School and then parted ways. They each married, had two sons and a daughter. In 2005 they came together again and in 2008 married. At this point they have no
plans to raise additional children. They have been bussing 2005 when they purchased the current GM 4106 “Ramblin’ Rose”. Along with her other talents, Charlene (“Sweetheart Darlin”) has assisted in teaching special education to special children, worked with adoption agencies (temporary home for babies and young children). Worked as a telephone order taker at a mail order house, Operated a public park Hot Dog stand and what ever was required (legally) to keep her family together. Clarence (Rex) on the other hand started his carrier as a Space Systems Lab Tech (13 years) then opened a VW repair shop (13 years) and concluded his carrier as owner of a Mobile RV repair business (13 years). Just can’t seem to keep a job. As of this date we are both retired and live in Golden Valley, AZ keeping busy with family and social activities. Which include two RV clubs and as much travel as we can fit into our schedule. We can be reached at [email protected].
20 Bus Conversion Magazine
This was only our second winter as snowbirds, and our first winter in the desert southwest. There are lots of places in the southwest to spend the winter in an RV, but for our first experience it was clearly going to be Quartzsite, Arizona. We left Michigan on November 30th, and arrived in Quartzsite on December 12th. There were already plenty of rigs in the RV Parks in town and plenty more on the BLM lands north and south of town. There were vendors set up along Kuehn Street (south of, and parallel to, I-10) and large flea market areas already operating on Main Street (north of, and parallel to, I-10). The place was “alive” with people but it wasn’t crazy hectic like it was going to be a few weeks later.
As January approached and then arrived so did the RVs; all day, every day, and often into the night. They came from the north, the south, the east, and the west (because these were, literally, the only ways to get here). Big rigs, small rigs, new rigs, old rigs, and some folks in no rigs at all, not even a tent. The pace quickened, the traffic slowed, and the markets were abuzz with shoppers. It seemed that much of this activity was a crescendo leading up to the “Big Tent” Sports, Vacation, and RV Show, commonly referred to as the “RV Show,” but there was a lot more than that going on here. The thing that put Quartzsite “on the map” many years ago, long before it was discovered by winter season RVers, was the rock, gem, and mineral shows. If you are “into” RGMs then you have known about Quartzsite for a long time and you probably have been here. If you are not into RGMs, or you are not good friends with someone who is, you cannot quite imagine what it is like here.
The RV Show ran from Saturday January 17 through Sunday January 25, but the RGM shows (there are multiple “shows” located in different venues) and the flea markets started as early as October and ran through March. The week of the RV Show, however, is peak season here. Most of the RV Parks in town had their “NO VACANCY” signs out and there were a lot of rigs in all of the BLM areas. There are two kinds of BLM camping areas here: 1) The Short-Term Visitor Areas (STVAs, 14 days, free, no facilities), and 2) The Long-Term Visitor Areas (LTVAs, up to 180 days, fee-based, with dump, fresh water, and out houses). Not surprisingly it is mostly an older (retired?) crowd but it also a very active one.
In Arizona you can put a license plate on just about anything that has a motor and people do. ATVs and golf carts are a common site on the city streets here, and the desert surrounding Quartzsite is an off-road playground for ATVers and also a treasure trove for rock hounds and prospectors. We never got over the delight of seeing an ATV pull up and the driver taking off their helmet (if they were wearing one), and being 80+ years old. Either that or they had spent way too much time in the sun. The best way I can summarize Quartzsite in the winter is the world’s largest flea market meets the world’s largest, and most informal, RV rally meets the world’s largest outdoor market meets the “old west” meets the 1960s. Indeed, it seems to be the place where the 1960’s moved when they ended and have never left.
The folks that come to Quartzsite come to be active and, by and large, to be social. RVillage founder and CEO Curtis Coleman was in town for a few days and hosted an RVillage get-together at the Quartzsite Yacht Club (which claims to be the largest yacht club in the world with over 9,000 members). Chris Dunphy and Cherie Ve Ard of Technomadia were also here and used RVillage to schedule a get-together at Beer Belly’s Adult Day Care center. Although plenty of people were parked in the desert far away from other people, what really personified Quartzsite in my mind were all of the large, but loosely organized, gatherings that took place. Many of these gatherings are annual events that have been
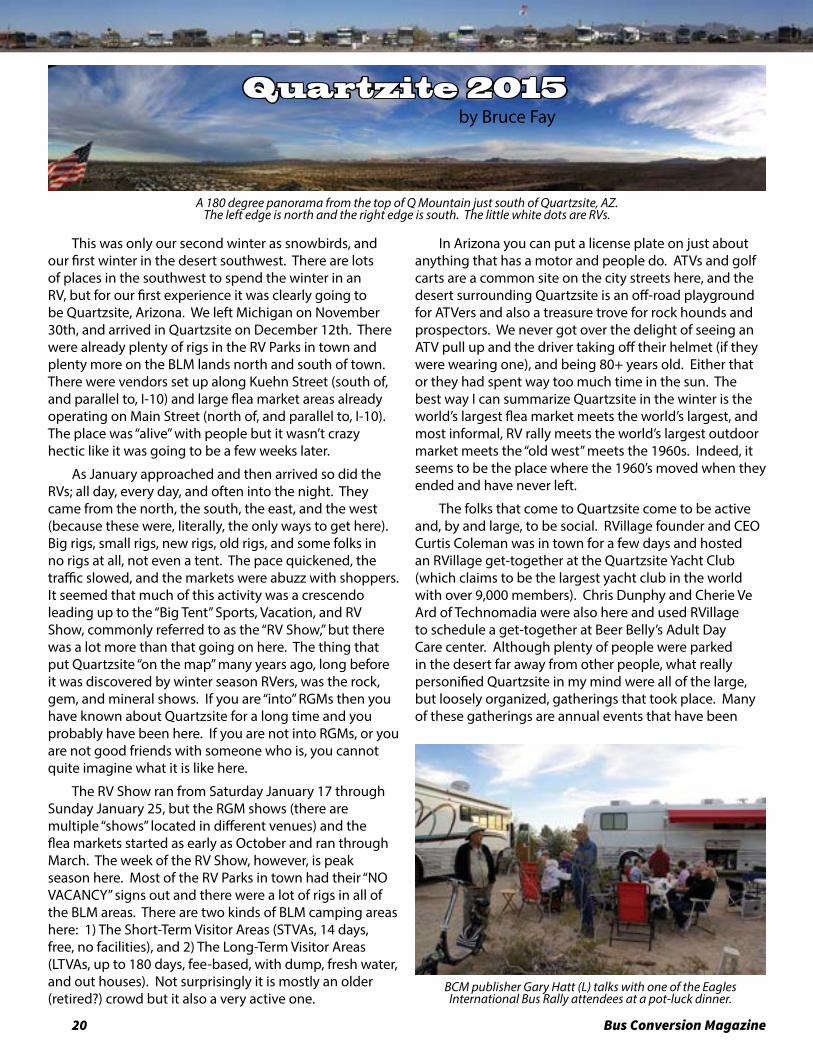
A 180 degree panorama from the top of Q Mountain just south of Quartzsite, AZ. The left edge is north and the right edge is south. The little white dots are RVs.
Quartzite 2015by Bruce Fay
BCM publisher Gary Hatt (L) talks with one of the Eagles International Bus Rally attendees at a pot-luck dinner.
February 2015 21
going on for years. And this year, for the first time, many of them used RVillage to schedule get-togethers. The Escapees RV Club had a spot in the desert as did several of their chapters and Birds of a Feather (BOFs) including the Boomers, Chapters 6 (Great Lakes, Michigan) & 21 (Saguaro, southern Arizona), and the Solos. The Wandering Individuals Network (WINs) also had a big group and I’m sure there were many others I never heard about. Quartzfest, a gathering of RVing amateur (ham) radio operators, took place at the BLM RoadRunner STVA the same week as the RV Show. This gathering alone often draws 250+ rigs! In fact, a lot of the “groups” selected dates for their gatherings that overlapped the RV Show.
Besides Quartzsite, and all of its activity, Blythe, California is 20 miles away to the west in the Palo Verde Valley and just beyond the Colorado River which is the border between Arizona and California. A city of 25,590 residents Blythe has several supermarkets, a K-Mart, and a NAPA Auto Parts Store. It is also the site of a large annual bluegrass festival each January. About two hour’s drive to the west, you can access Joshua Tree National Park, Palm Springs, Indio, the Salton Sea (including The Slabs), and the Anza Borrego Desert State Park. We took two days to drive over and back, visiting the national park the first day, dining in Palm Springs, and spending the night in
Indio. We spent the second day at Borrego Springs and met up with fellow FMCA chapter members who were boondocking at the Liar Peg Leg Smith monument area. We also toured Galleta Meadows to see the large metal sculptures for which the area is well known.
Parker, Arizona is 38 miles to the north of Quartzsite on the Colorado River. It has a casino and a Wal-Mart and is the gateway to The Desert Bar. More on that later. With 3,027 residents its permanent population is similar to Quartzsite but its shopping amenities are quite different. It is the La Paz County seat and also the headquarters of
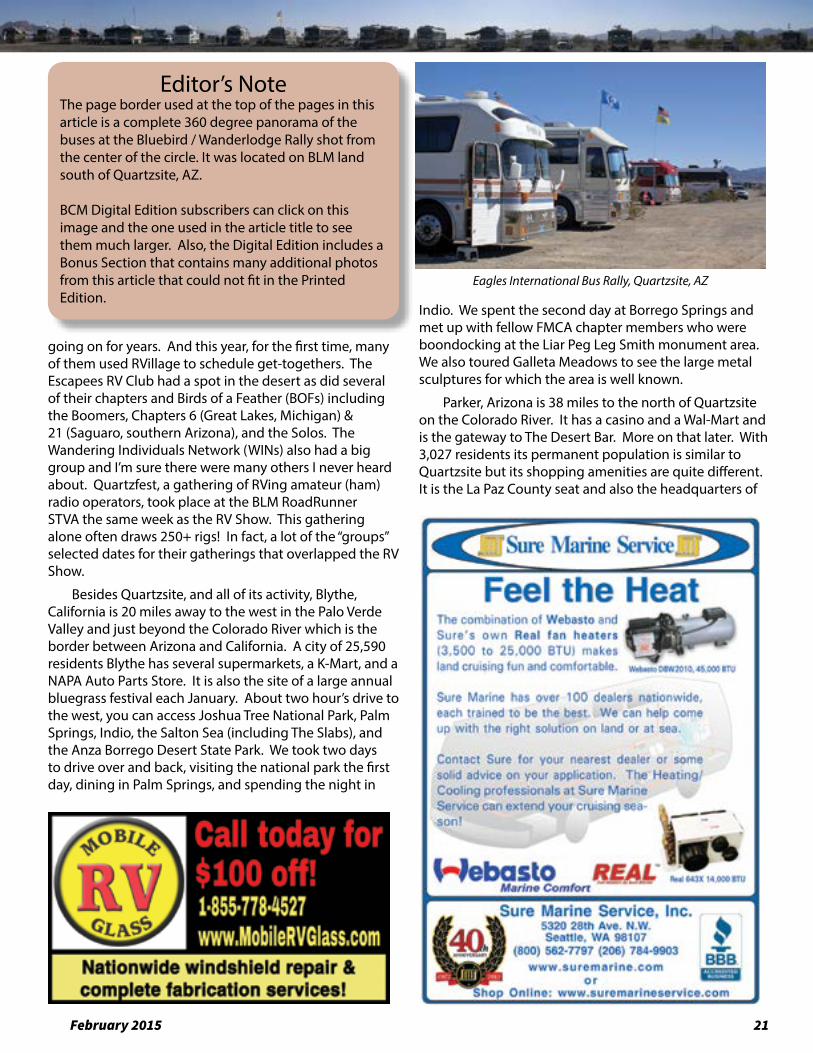
Editor’s NoteThe page border used at the top of the pages in this article is a complete 360 degree panorama of the buses at the Bluebird / Wanderlodge Rally shot from the center of the circle. It was located on BLM land south of Quartzsite, AZ.
BCM Digital Edition subscribers can click on this image and the one used in the article title to see them much larger. Also, the Digital Edition includes a Bonus Section that contains many additional photos from this article that could not fit in the Printed Edition.
Eagles International Bus Rally, Quartzsite, AZ
22 Bus Conversion Magazine
The Colorado River Indian Tribes whose reservations line the Colorado River on both sides for many miles north and south. Parker is also the beginning and ending point for the Parker 425, a 425 mile off-road race that extends out into the desert southeast of Parker as far as the little town of Bouse. There are actually several off-road racing events that take place over January and February. We drove out to Bouse to catch part of the Parker 425.
Thirty-five miles north of Parker is Lake Havasu City with a population of 58,819. A very upscale community on a beautiful lake ringed by mountains it is an active place for water sports. It is also the site of an annual hot air balloon festival each January and the annual Western
Pyrotechnic Association convention in February. We drove up for both events and had a great time.
Yuma, Arizona is 85 miles south and a little west of Quartzsite. The drive down the valley, accompanied by the rugged KOFA Mountains to the east and the Dome Rock Mountains to the west, is worth it by itself. Two of the main attractions in Yuma are the 1875 Territorial Prison State Park and the Quartermaster Deport State Park. Another attraction is that it is the closest place to Quartzsite with a wide selection of “big city” retail stores supported by the resident population of 95,429 plus a large number of winter RV visitors. For many, however, the really big attraction is Los Algodones, Mexico just
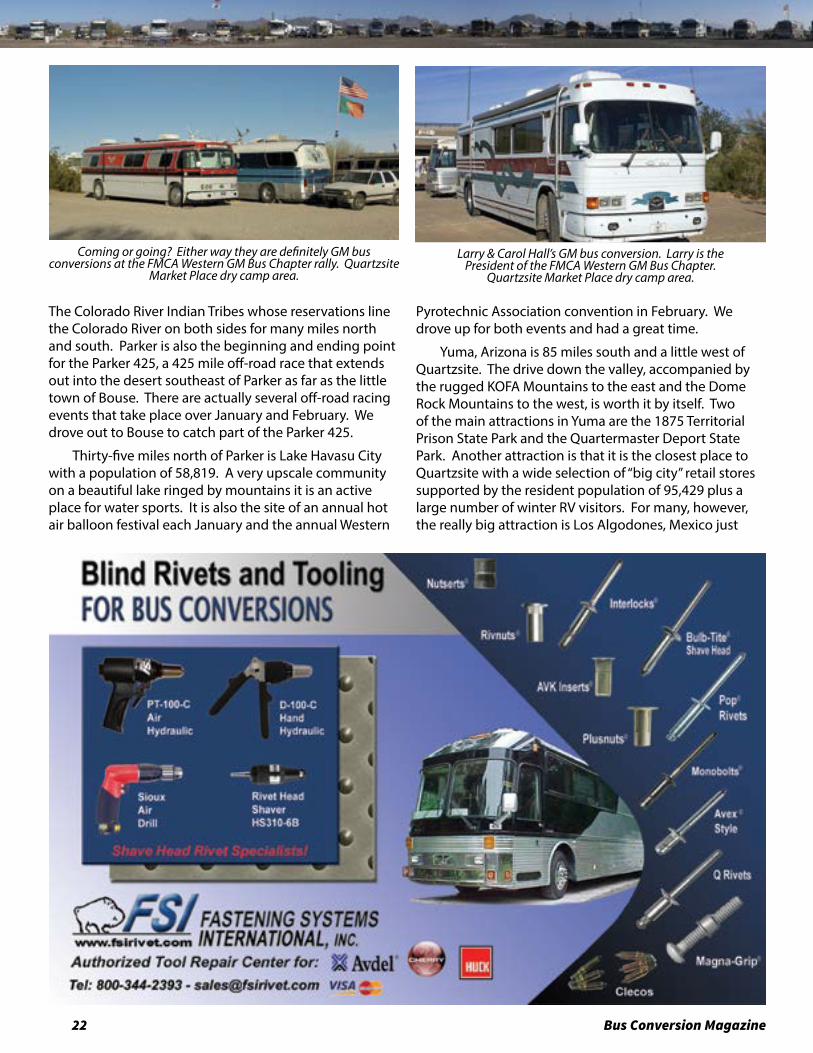
Coming or going? Either way they are definitely GM bus conversions at the FMCA Western GM Bus Chapter rally. Quartzsite
Market Place dry camp area.
Larry & Carol Hall’s GM bus conversion. Larry is the President of the FMCA Western GM Bus Chapter.
Quartzsite Market Place dry camp area.
February 2015 23
eight miles farther west and then a bit south. The road to Los Algodones runs through a Quechan Indian reservation and the tribe operates a large parking lot right at the Port of Entry. For $6 (at the time of this writing) we were able to park our car and walk across the border into a different country and a different culture. Los Algodones is famous for its dental services, optical services, and pharmacies, and both U. S. and Canadian snowbirds have flocked here for years to take advantage of the high quality, low price, goods and service. If you go to Los Algodones you must have two acceptable forms of photo identification. At the time of this writing the driver license style U. S. Passport card and a driver’s license was all that we needed to get back into the U. S. A. Whether driving or walking, be prepared for a wait when re-entering the U. S. A.
Of special interest to Bus Conversion Magazine readers, however, were the annual Western GM bus gathering and the Eagles International bus gathering. These rallies were located adjacent to one another at the Quartzsite Market Place dry-camp area northeast of Central Avenue and Kuehn Street. This intersection is the epicenter of seasonal commerce during the winter season in Quartzsite. Also of note was the Bluebird/Wanderlodge gathering that took place south of town in one of the BLM areas. I was out there one day and took a lot of photographs but there wasn’t anyone around to talk to. I guess they were all off in the desert with their ATVs having the time of their lives, or at the market area buying all of the “can’t live without” RV toys that were for sale. The Bluebird gathering is unique in that they stake out a large area in the desert and park their rigs in a huge circle with the front of their buses pointing towards the center. The center point of the circle is where they have their fire circle surrounded by a circle of chairs. It’s a neat setup and Quartzsite is one of the few places where that kind of space is available.
BCM publisher Gary Hatt brought his MCI MC-9 Moose Creek Motor Cabin and his newly acquired 1967 Model 08 Eagle bus conversion to Quartzsite and
parked with the Eagle/GMC rallies. (Think about it, he brought two buses.) I visited those rallies several times to meet and talk with Gary and to take photos. We were not “camped” there, however, so I cannot do justice to the great time everyone obviously had as we were not there to experience it. I did get photos for some future “featured bus” articles, however, so look for those in the months to come.
In the meantime, here is a selection of photos from the Western GMC, Eagles International, and Bluebird/Wanderlodge rallies, along with some images of Quartzsite and all of the surrounding areas mentioned previously. One of the treats of January was the Hi Jolly Days Parade that included a live camel. Do a Google search on “Hi Jolly” and find out who he was and what camels have to do with the history of this area. Oh, and The Desert Bar (Nellie E. Saloon). If you are ever in Quartzsite, Parker, or Lake Havasu City during the winter you have got to go to The Desert Bar. Off road, and off-grid, it is a unique, old west, happening place with decent food, and soda beverages (in case you are not into beer, wine, or cocktails). Open weekends, noon to 6 PM, from the first weekend in October through the last weekend in April with live music. It is cash only, there’s no ATM, and forget about making cell phone calls out here. I plan to do a separate travel article just on The Desert Bar. Ya gotta go to Quartzsite, and ya gotta go to The Desert Bar.
We had a great time in Quartzsite and we will be back, but probably not next year. After only our second season as snowbirds there are too many other places we still need to see and experience. The warm, dry climate, scenic mountains, and beautiful 360 degree sunsets will be hard to beat so future experiences will be about “different” rather than better. When we do return to this area there is a lot more to the southwest than Quartzsite, and we want to see and experience as much of it as we can.
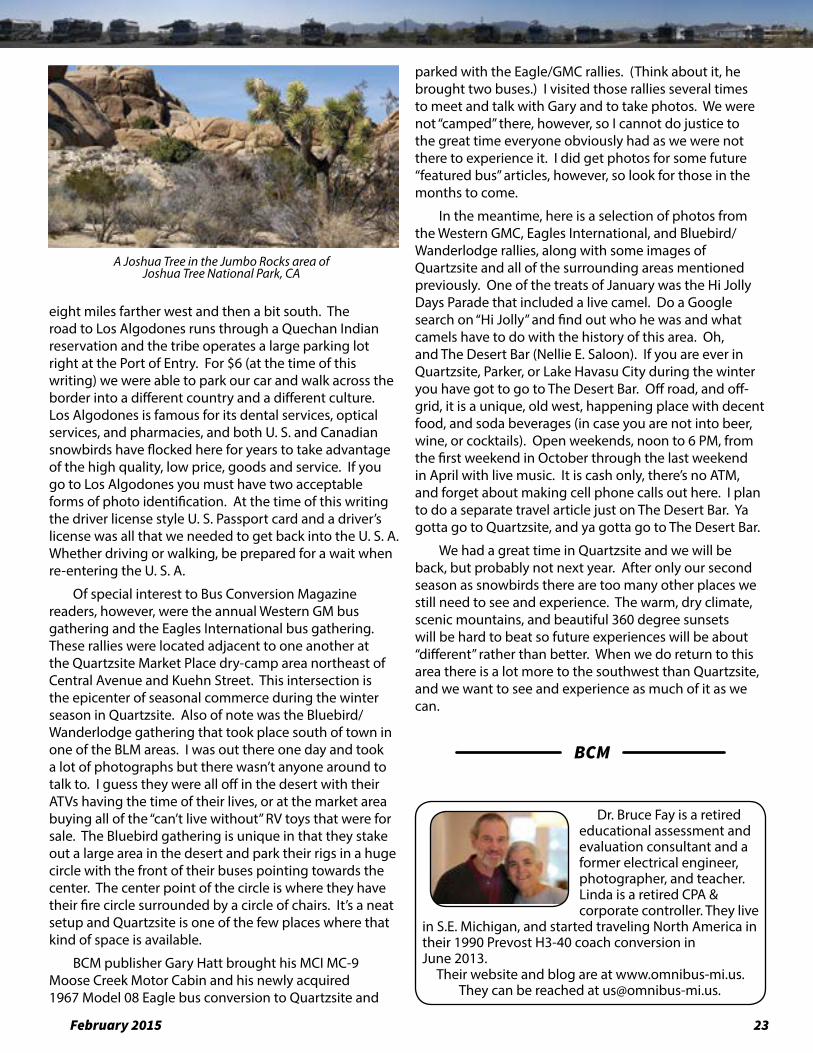
A Joshua Tree in the Jumbo Rocks area of Joshua Tree National Park, CA
Dr. Bruce Fay is a retired educational assessment and evaluation consultant and a former electrical engineer, photographer, and teacher. Linda is a retired CPA & corporate controller. They live
in S.E. Michigan, and started traveling North America in their 1990 Prevost H3-40 coach conversion in June 2013.
Their website and blog are at www.omnibus-mi.us. They can be reached at [email protected].
BCM
24 Bus Conversion Magazine
Payment Method:Check Enclosed Check #Credit Card: Visa MasterCard Amex
Name:
Address:
City, ST, Zip:
Phone:
Email:
Qty of Magazines: X Rate based on chart below: $
Shipping & Handling based on chart below: $
California Residents Add 8% Sales Tax: $
Total: $ Please indicate format desired:
Printed PDF(s) on USB Thumb Drive ($9.95 Total S&H, any Qty. )
Name: Phone:
Firm/Organization: Year/Make of Bus:
Address: Email Address: (Email Address is required for the free Digital Edition) City: State/Province: ZIP/Postal Code: Country:
Payment Method:Check Enclosed Check #Credit Card Visa MasterCard Amex
Total Amount: $
Name on Card:
Card #: Exp. Date:
Signature:
Mail To: Bus Conversion Magazine Attn: Subscriptions 661 E. Main St. #200-313 Midlothian, TX. 76065
Or Call To Place Order: 657-221-0432
California ResidentsAdd 8% Sales Tax
Digital Editions (PDF) Online Access
1-Year $25.00 2-Year $45.00 3-Year $60.00
Print Magazine: Std Class Mail U.S. Addresses Only
1-Year $38.00 2-Year $70.00 3-Year $99.00
Print Magazine: First Class Mail
U.S. $68.00/Yr Canada $68.00/Yr Intl. $99.00/Yr
This is a New Subscription
This is a Renewal
This is aGift
Don’t Miss the Bus! Subscribe/Renew Today!You can subscribe/renew at BusConversions.com or mail this form with payment to the address below.
Take a Bus Trip Down Nostalgia Road .... Order Back Issues of BCM Using This Form
Mail to: Bus Conversion MagazineAttn: Back Issue Orders661 E. Main St. #200-313Midlothian, TX. 76065 Or Call To Place Order: 657-221-0432
Magazine Prices and Shipping/HandlingQuantity of Magazines Cost Each Shipping & Handling
1-2 $5.00 $4.003-8 $4.50 $8.00
9-30 $4.00 $15.0031+ $3.00 $25.00
1 ea of All in Stock $2.00 $50.00PDF on USB Thumb Drive Same as Printed $9.95
Shipping for U.S. Only. For orders out of the U.S. contact us for S&H prices.
Name on Card:
Card #:
Exp. Date:
Signature:
1999Jan Mar Jun Aug Sep Oct
Nov
2000Feb Apr May Jun Jul Aug
Sep Oct
2001Jan Feb Mar Apr Jun Jul
Aug Nov
2002Mar Aug Sep
Nov Dec
2003Apr May Jul Aug Oct Nov
Dec
2004Jan Feb Mar Apr May Jul
Aug Oct
2005Jan Jun Oct
Nov Dec
2006Feb MarApr MayJul Nov
2007Feb Mar Apr May Jul AugNov Dec
2008Sep Nov
2009Jan Mar May Jun Jul Aug Sep Oct Nov
Dec
2010Jan Feb Mar Apr May Jun Jul Aug Sep Oct Nov Dec
2011Jan FebMar May
Jun
2012OctNovDec
2013Jan Feb Mar Apr May JunJul Aug Sep Oct Nov Dec
2014Jan Feb Mar Apr May Jun Jul Aug Sep Oct Nov Dec
2015Jan Feb
Circle The Issues You Are Ordering
Rev. 02/15
Rev. 02/15
Downloadable back issues are available for 2008 to present in the BCM Online Store: www.BusConversions.com/store/
SPECIAL!New and Renewal Print Subscriptions include
the Online Edition
AbsolutelyFree!
February 2015 25
Rally News
Having a rally? Let us know! We will help you spread the word.
If you or someone you know is hosting a bus rally, we invite you to send us the information so that we can announce it here in THE magazine for bus nuts. Please send it to us at least three months before the rally date so that we have the time needed to get news of your rally out there. Then after the rally, send us photos and a story about the rally - we’ll make your rally famous.
Southeast Bus NutsSpring Rally
April 30 - May 2, 2015St. Augustine, FL
For more information contact:Ed and Anke Fisher
Northeast Bus GatheringJune 26 - 29, 2015
Lake George, NY areaExact campground TBDThis rally is being organized by
Bruce FagleyTo see latest information go to:
Goo.gl/GndY80
When you contact our advertisers, please let them know you saw their ad in Bus Conversion Magazine. We want to hear from you! Write to us. Email us, call us. Tell us what you like and don’t like. What types of information would you like to see in the magazine? Send us a story! Do you have Before and After photos of your conversion project? During? Maybe a story about adventures while traveling, or a wonderful place to camp that you found. Contact [email protected] to learn more or discuss your article idea.
Thank You
Complete Body & Paint Facility
For RV’s and Commercial
Vehicles
Paci�c RV Paint, Inc.
www.rvpaint.com(714) 534-2024
Customer satisfaction is our number one priority!
BusesOnline.com Largest Online Marketplace
Buses/Parts/Collectibles
Sandblasting and Rustproofing No Job Too Big or Too Small
773-858-3473 / MenAtWorkSCS.com
Mobile Internet Information for RVers by RVers
RVMobileInternet.com
Montainview Off Grid Living Compost Toilets and Kimberly Stoves
MountainViewOffGridLiving.com
Winlock Galey Books for Bus Conversions
WinlockGaley.com 951-943-0014
The Kimberly StoveYour Off Grid Living Solution
UnforgettableFireLLC.com855-USA-STOVE
St Cloud Estates Lots Near Blue Ridge Parkway
StCloudEstates.com 407-948-0613
Cox Woodworking Custom Cabinetry for 35 Years
CoxWoodWorkingInc.com 603-399-7704
Aqua-Hot, Hydro-Hot, WebastoMobile Service Center 501-258-8426
Coming to an Event Near Youwww.lloyddegerald.com/locate-me-calendar
For information about placing your ad in our Service Directory either email [email protected] or call the office at (657) 221-0432.
Ads start as little as $17/month.
Bus Conversion Service Directory
26 Bus Conversion Magazine
Sterling Classifieds
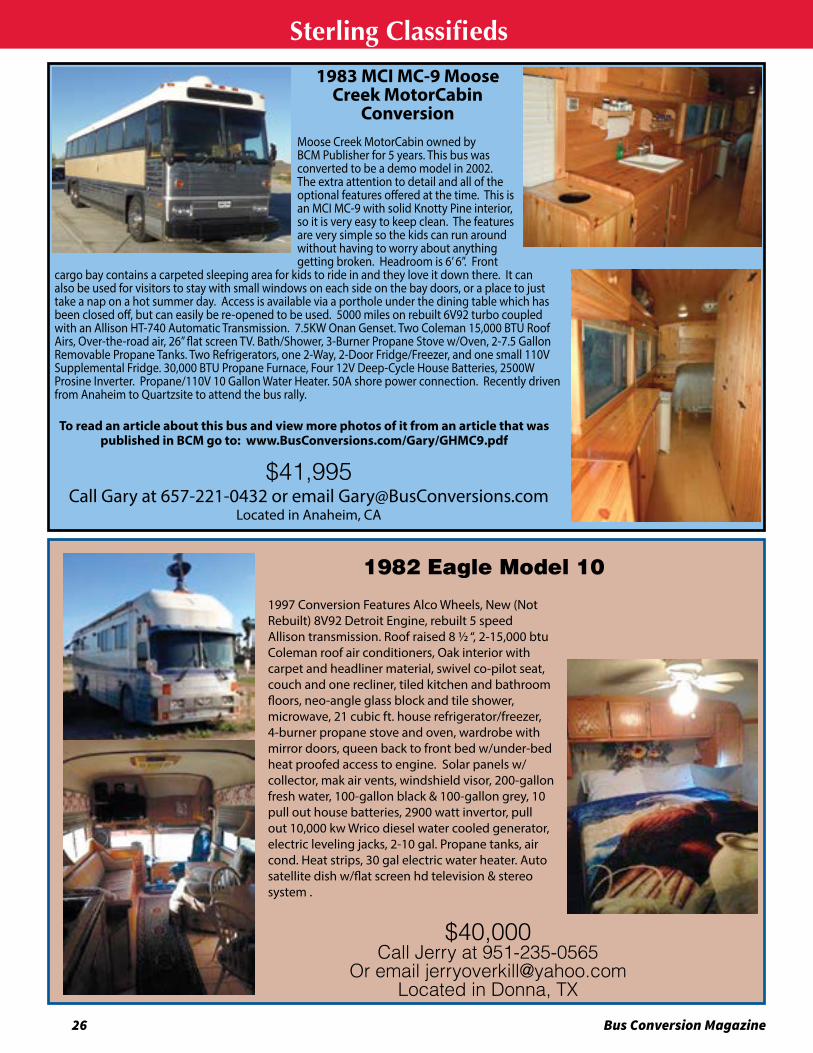
Moose Creek MotorCabin owned by BCM Publisher for 5 years. This bus was converted to be a demo model in 2002. The extra attention to detail and all of the optional features offered at the time. This is an MCI MC-9 with solid Knotty Pine interior, so it is very easy to keep clean. The features are very simple so the kids can run around without having to worry about anything getting broken. Headroom is 6’ 6”. Front
cargo bay contains a carpeted sleeping area for kids to ride in and they love it down there. It can also be used for visitors to stay with small windows on each side on the bay doors, or a place to just take a nap on a hot summer day. Access is available via a porthole under the dining table which has been closed off, but can easily be re-opened to be used. 5000 miles on rebuilt 6V92 turbo coupled with an Allison HT-740 Automatic Transmission. 7.5KW Onan Genset. Two Coleman 15,000 BTU Roof Airs, Over-the-road air, 26” flat screen TV. Bath/Shower, 3-Burner Propane Stove w/Oven, 2-7.5 Gallon Removable Propane Tanks. Two Refrigerators, one 2-Way, 2-Door Fridge/Freezer, and one small 110V Supplemental Fridge. 30,000 BTU Propane Furnace, Four 12V Deep-Cycle House Batteries, 2500W Prosine Inverter. Propane/110V 10 Gallon Water Heater. 50A shore power connection. Recently driven from Anaheim to Quartzsite to attend the bus rally. Read two different articles about this bus from previous BCM issues at http:/BusConversions.com/GarysMoosecreekCabin
1983 MCI MC-9 Moose Creek MotorCabin
Conversion
To read an article about this bus and view more photos of it from an article that was published in BCM go to: www.BusConversions.com/Gary/GHMC9.pdf
$41,995 Call Gary at 657-221-0432 or email [email protected]
Located in Anaheim, CA
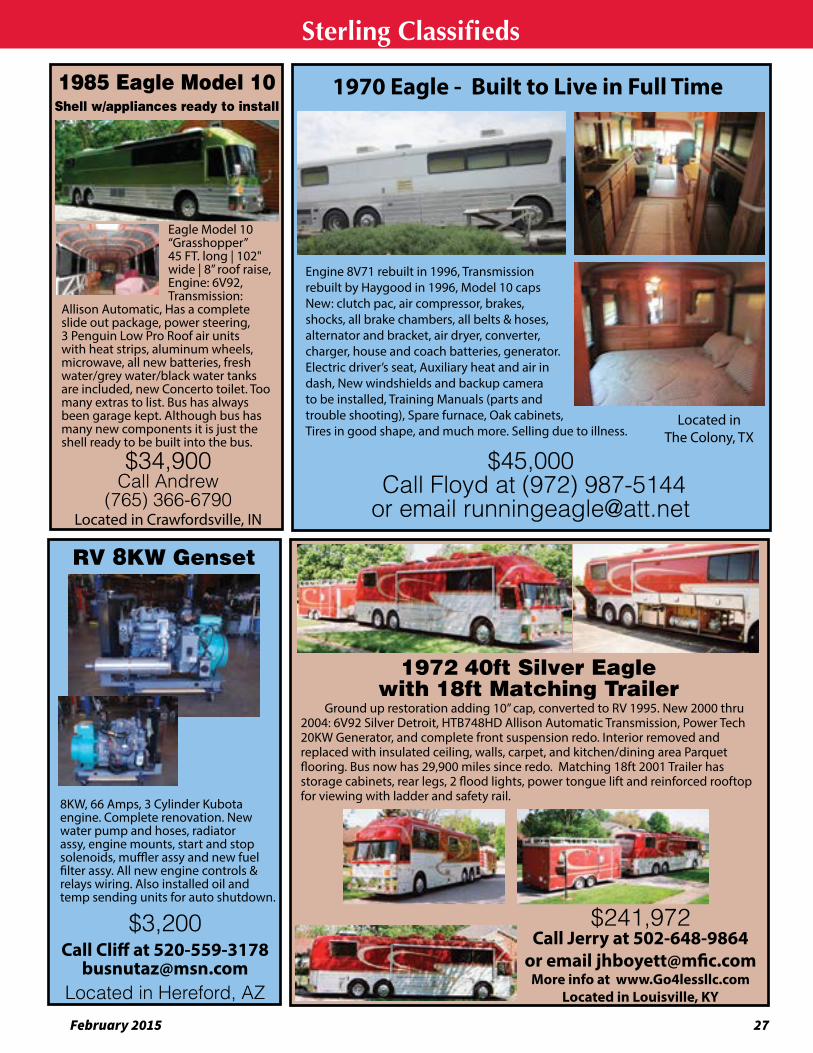
1997 Conversion Features Alco Wheels, New (Not Rebuilt) 8V92 Detroit Engine, rebuilt 5 speed Allison transmission. Roof raised 8 ½ “, 2-15,000 btu Coleman roof air conditioners, Oak interior with carpet and headliner material, swivel co-pilot seat, couch and one recliner, tiled kitchen and bathroom floors, neo-angle glass block and tile shower, microwave, 21 cubic ft. house refrigerator/freezer, 4-burner propane stove and oven, wardrobe with mirror doors, queen back to front bed w/under-bed heat proofed access to engine. Solar panels w/collector, mak air vents, windshield visor, 200-gallon fresh water, 100-gallon black & 100-gallon grey, 10 pull out house batteries, 2900 watt invertor, pull out 10,000 kw Wrico diesel water cooled generator, electric leveling jacks, 2-10 gal. Propane tanks, air cond. Heat strips, 30 gal electric water heater. Auto satellite dish w/flat screen hd television & stereo system .
1982 Eagle Model 10
$40,000Call Jerry at 951-235-0565
Or email [email protected] in Donna, TX
February 2015 27
Sterling Classifieds
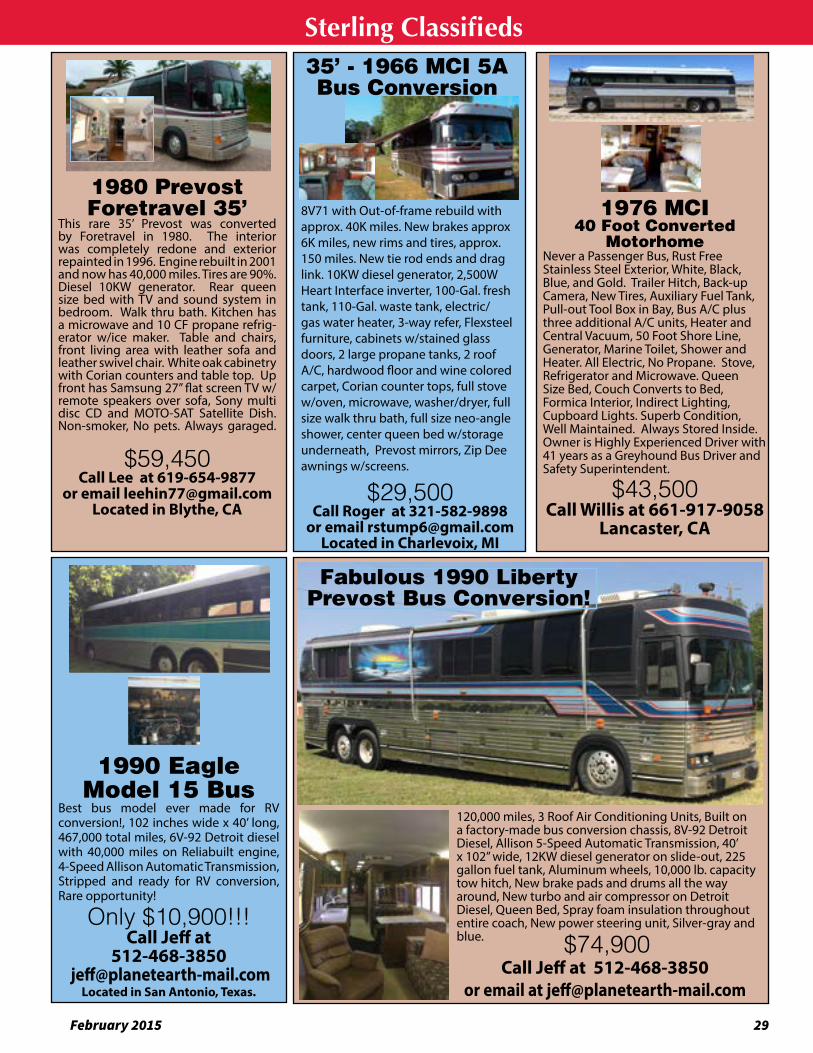
1972 40ft Silver Eagle with 18ft Matching Trailer
Ground up restoration adding 10” cap, converted to RV 1995. New 2000 thru 2004: 6V92 Silver Detroit, HTB748HD Allison Automatic Transmission, Power Tech 20KW Generator, and complete front suspension redo. Interior removed and replaced with insulated ceiling, walls, carpet, and kitchen/dining area Parquet flooring. Bus now has 29,900 miles since redo. Matching 18ft 2001 Trailer has storage cabinets, rear legs, 2 flood lights, power tongue lift and reinforced rooftop for viewing with ladder and safety rail.
$241,972 Call Jerry at 502-648-9864
or email [email protected] More info at www.Go4lessllc.com
Located in Louisville, KY
1970 Eagle - Built to Live in Full Time
Engine 8V71 rebuilt in 1996, Transmission rebuilt by Haygood in 1996, Model 10 caps New: clutch pac, air compressor, brakes, shocks, all brake chambers, all belts & hoses, alternator and bracket, air dryer, converter, charger, house and coach batteries, generator. Electric driver’s seat, Auxiliary heat and air in dash, New windshields and backup camera to be installed, Training Manuals (parts and trouble shooting), Spare furnace, Oak cabinets, Tires in good shape, and much more. Selling due to illness.
$45,000 Call Floyd at (972) 987-5144 or email [email protected]
Located in The Colony, TX
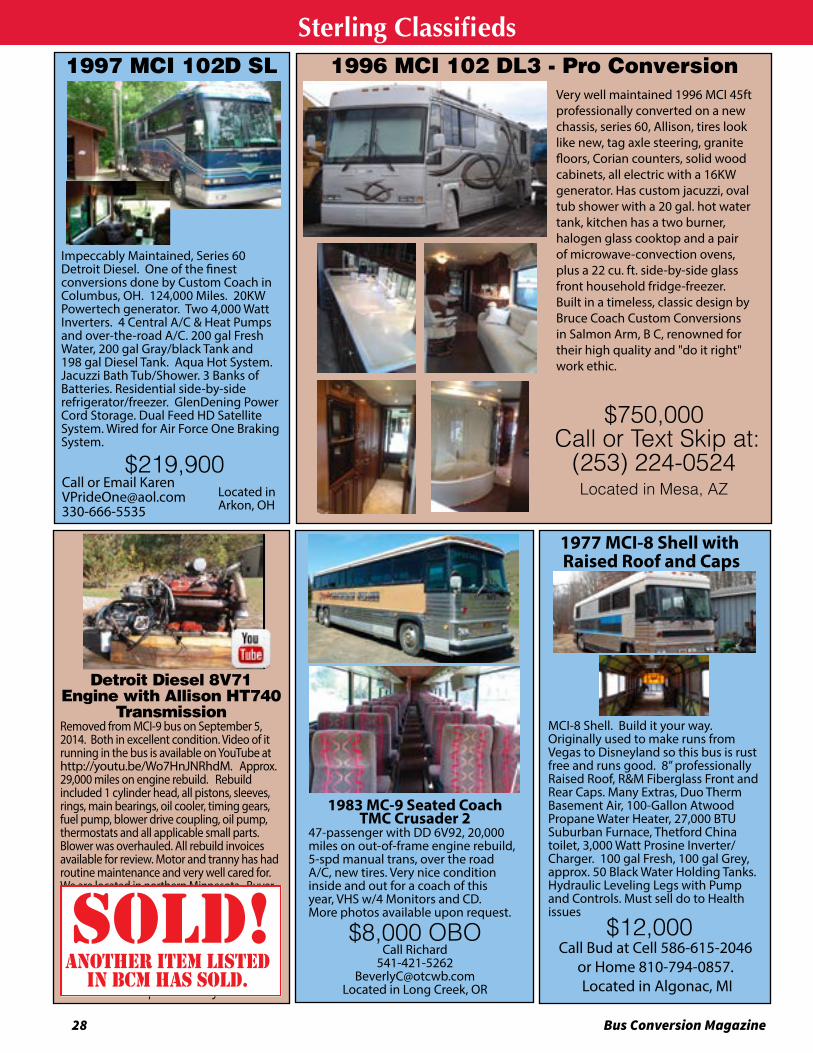
1985 Eagle Model 10Shell w/appliances ready to install
Eagle Model 10 “Grasshopper” 45 FT. long | 102" wide | 8” roof raise, Engine: 6V92, Transmission:
Allison Automatic, Has a complete slide out package, power steering, 3 Penguin Low Pro Roof air units with heat strips, aluminum wheels, microwave, all new batteries, fresh water/grey water/black water tanks are included, new Concerto toilet. Too many extras to list. Bus has always been garage kept. Although bus has many new components it is just the shell ready to be built into the bus.
$34,900Call Andrew
(765) 366-6790Located in Crawfordsville, IN
8KW, 66 Amps, 3 Cylinder Kubota engine. Complete renovation. New water pump and hoses, radiator assy, engine mounts, start and stop solenoids, muffler assy and new fuel filter assy. All new engine controls & relays wiring. Also installed oil and temp sending units for auto shutdown.
RV 8KW Genset
$3,200Call Cliff at 520-559-3178
[email protected] in Hereford, AZ
28 Bus Conversion Magazine
Removed from MCI-9 bus on September 5, 2014. Both in excellent condition. Video of it running in the bus is available on YouTube at http://youtu.be/Wo7HnJNRhdM. Approx. 29,000 miles on engine rebuild. Rebuild included 1 cylinder head, all pistons, sleeves, rings, main bearings, oil cooler, timing gears, fuel pump, blower drive coupling, oil pump, thermostats and all applicable small parts. Blower was overhauled. All rebuild invoices available for review. Motor and tranny has had routine maintenance and very well cared for. We are located in northern Minnesota. Buyer will be responsible for cost of shipping and the arrangements to pick it up. References available.
Detroit Diesel 8V71Engine with Allison HT740
Transmission
PRICE REDUCED! $6,200 O.B.O. 218-759-9713
Sterling Classifieds
1983 MC-9 Seated Coach TMC Crusader 2
47-passenger with DD 6V92, 20,000 miles on out-of-frame engine rebuild, 5-spd manual trans, over the road A/C, new tires. Very nice condition inside and out for a coach of this year, VHS w/4 Monitors and CD. More photos available upon request.
$8,000 OBOCall Richard
Located in Long Creek, OR
Click
Impeccably Maintained, Series 60 Detroit Diesel. One of the finest conversions done by Custom Coach in Columbus, OH. 124,000 Miles. 20KW Powertech generator. Two 4,000 Watt Inverters. 4 Central A/C & Heat Pumps and over-the-road A/C. 200 gal Fresh Water, 200 gal Gray/black Tank and 198 gal Diesel Tank. Aqua Hot System. Jacuzzi Bath Tub/Shower. 3 Banks of Batteries. Residential side-by-side refrigerator/freezer. GlenDening Power Cord Storage. Dual Feed HD Satellite System. Wired for Air Force One Braking System.
1997 MCI 102D SL
$219,900Call or Email Karen [email protected] 330-666-5535
Located in Arkon, OH
1996 MCI 102 DL3 - Pro ConversionVery well maintained 1996 MCI 45ft professionally converted on a new chassis, series 60, Allison, tires look like new, tag axle steering, granite floors, Corian counters, solid wood cabinets, all electric with a 16KW generator. Has custom jacuzzi, oval tub shower with a 20 gal. hot water tank, kitchen has a two burner, halogen glass cooktop and a pair of microwave-convection ovens, plus a 22 cu. ft. side-by-side glass front household fridge-freezer. Built in a timeless, classic design by Bruce Coach Custom Conversions in Salmon Arm, B C, renowned for their high quality and "do it right" work ethic.
$750,000 Call or Text Skip at:
(253) 224-0524
Located in Mesa, AZ
1977 MCI-8 Shell with Raised Roof and Caps
MCI-8 Shell. Build it your way. Originally used to make runs from Vegas to Disneyland so this bus is rust free and runs good. 8” professionally Raised Roof, R&M Fiberglass Front and Rear Caps. Many Extras, Duo Therm Basement Air, 100-Gallon Atwood Propane Water Heater, 27,000 BTU Suburban Furnace, Thetford China toilet, 3,000 Watt Prosine Inverter/Charger. 100 gal Fresh, 100 gal Grey, approx. 50 Black Water Holding Tanks. Hydraulic Leveling Legs with Pump and Controls. Must sell do to Health issues
$12,000Call Bud at Cell 586-615-2046
or Home 810-794-0857. Located in Algonac, MI
sold!another item listed
in bcm has sold.
February 2015 29
1980 Prevost Foretravel 35’
This rare 35’ Prevost was converted by Foretravel in 1980. The interior was completely redone and exterior repainted in 1996. Engine rebuilt in 2001 and now has 40,000 miles. Tires are 90%. Diesel 10KW generator. Rear queen size bed with TV and sound system in bedroom. Walk thru bath. Kitchen has a microwave and 10 CF propane refrig-erator w/ice maker. Table and chairs, front living area with leather sofa and leather swivel chair. White oak cabinetry with Corian counters and table top. Up front has Samsung 27” flat screen TV w/remote speakers over sofa, Sony multi disc CD and MOTO-SAT Satellite Dish. Non-smoker, No pets. Always garaged.
$59,450Call Lee at 619-654-9877
or email [email protected] Located in Blythe, CA
1976 MCI40 Foot Converted
MotorhomeNever a Passenger Bus, Rust Free Stainless Steel Exterior, White, Black, Blue, and Gold. Trailer Hitch, Back-up Camera, New Tires, Auxiliary Fuel Tank, Pull-out Tool Box in Bay, Bus A/C plus three additional A/C units, Heater and Central Vacuum, 50 Foot Shore Line, Generator, Marine Toilet, Shower and Heater. All Electric, No Propane. Stove, Refrigerator and Microwave. Queen Size Bed, Couch Converts to Bed, Formica Interior, Indirect Lighting, Cupboard Lights. Superb Condition, Well Maintained. Always Stored Inside. Owner is Highly Experienced Driver with 41 years as a Greyhound Bus Driver and Safety Superintendent.
$43,500 Call Willis at 661-917-9058
Lancaster, CA
Sterling Classifieds
120,000 miles, 3 Roof Air Conditioning Units, Built on a factory-made bus conversion chassis, 8V-92 Detroit Diesel, Allison 5-Speed Automatic Transmission, 40’ x 102” wide, 12KW diesel generator on slide-out, 225 gallon fuel tank, Aluminum wheels, 10,000 lb. capacity tow hitch, New brake pads and drums all the way around, New turbo and air compressor on Detroit Diesel, Queen Bed, Spray foam insulation throughout entire coach, New power steering unit, Silver-gray and blue.
Fabulous 1990 Liberty Prevost Bus Conversion!
$74,900Call Jeff at 512-468-3850
or email at [email protected]
1990 Eagle Model 15 Bus
Best bus model ever made for RV conversion!, 102 inches wide x 40’ long, 467,000 total miles, 6V-92 Detroit diesel with 40,000 miles on Reliabuilt engine, 4-Speed Allison Automatic Transmission, Stripped and ready for RV conversion, Rare opportunity!
Only $10,900!!!Call Jeff at
512-468-3850 [email protected]
Located in San Antonio, Texas.
8V71 with Out-of-frame rebuild with approx. 40K miles. New brakes approx 6K miles, new rims and tires, approx. 150 miles. New tie rod ends and drag link. 10KW diesel generator, 2,500W Heart Interface inverter, 100-Gal. fresh tank, 110-Gal. waste tank, electric/gas water heater, 3-way refer, Flexsteel furniture, cabinets w/stained glass doors, 2 large propane tanks, 2 roof A/C, hardwood floor and wine colored carpet, Corian counter tops, full stove w/oven, microwave, washer/dryer, full size walk thru bath, full size neo-angle shower, center queen bed w/storage underneath, Prevost mirrors, Zip Dee awnings w/screens.
$29,500Call Roger at 321-582-9898
or email [email protected] Located in Charlevoix, MI
35’ - 1966 MCI 5A Bus Conversion
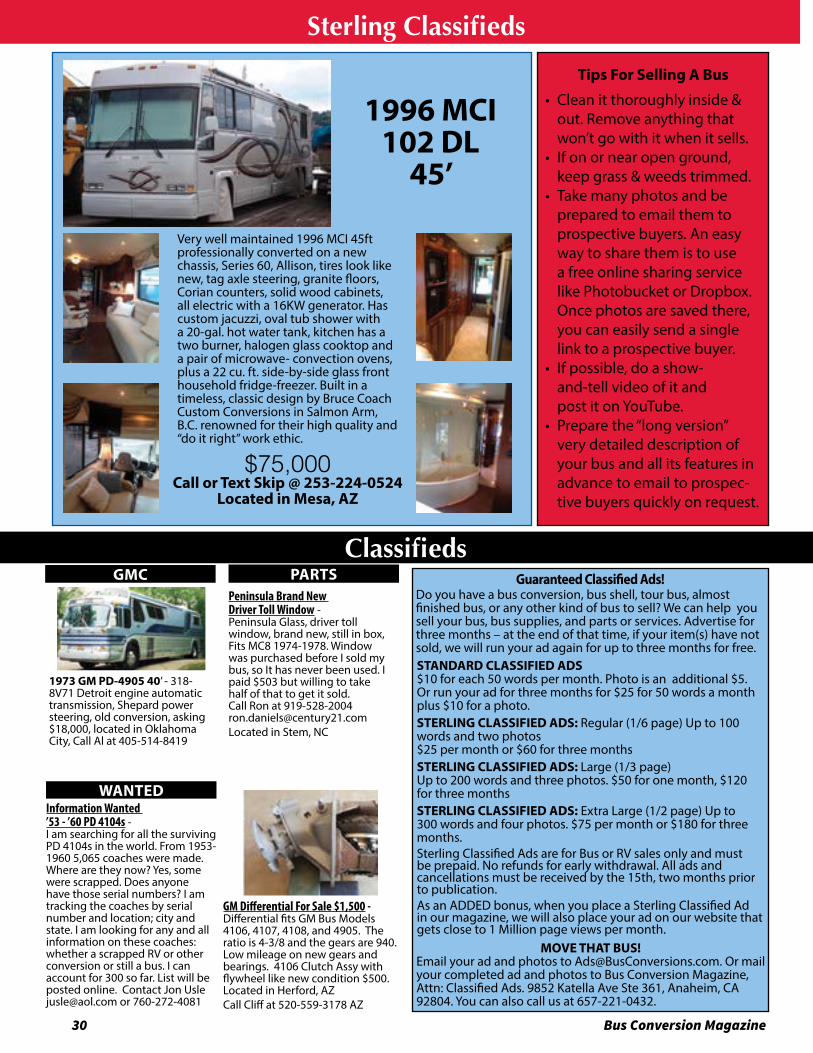
30 Bus Conversion Magazine
ClassifiedsPARTS
WANTEDInformation Wanted ’53 - ’60 PD 4104s - I am searching for all the surviving PD 4104s in the world. From 1953-1960 5,065 coaches were made. Where are they now? Yes, some were scrapped. Does anyone have those serial numbers? I am tracking the coaches by serial number and location; city and state. I am looking for any and all information on these coaches: whether a scrapped RV or other conversion or still a bus. I can account for 300 so far. List will be posted online. Contact Jon Usle [email protected] or 760-272-4081
GMC
GM Differential For Sale $1,500 - Differential fits GM Bus Models 4106, 4107, 4108, and 4905. The ratio is 4-3/8 and the gears are 940. Low mileage on new gears and bearings. 4106 Clutch Assy with flywheel like new condition $500.Located in Herford, AZCall Cliff at 520-559-3178 AZ
Guaranteed Classified Ads!Do you have a bus conversion, bus shell, tour bus, almost finished bus, or any other kind of bus to sell? We can help you sell your bus, bus supplies, and parts or services. Advertise for three months – at the end of that time, if your item(s) have not sold, we will run your ad again for up to three months for free.STANDARD CLASSIFIED ADS $10 for each 50 words per month. Photo is an additional $5. Or run your ad for three months for $25 for 50 words a month plus $10 for a photo.STERLING CLASSIFIED ADS: Regular (1/6 page) Up to 100 words and two photos $25 per month or $60 for three monthsSTERLING CLASSIFIED ADS: Large (1/3 page) Up to 200 words and three photos. $50 for one month, $120 for three monthsSTERLING CLASSIFIED ADS: Extra Large (1/2 page) Up to 300 words and four photos. $75 per month or $180 for three months.Sterling Classified Ads are for Bus or RV sales only and must be prepaid. No refunds for early withdrawal. All ads and cancellations must be received by the 15th, two months prior to publication.As an ADDED bonus, when you place a Sterling Classified Ad in our magazine, we will also place your ad on our website that gets close to 1 Million page views per month.
MOVE THAT BUS!Email your ad and photos to [email protected]. Or mail your completed ad and photos to Bus Conversion Magazine, Attn: Classified Ads. 9852 Katella Ave Ste 361, Anaheim, CA 92804. You can also call us at 657-221-0432.
1973 GM PD-4905 40’ - 318-8V71 Detroit engine automatic transmission, Shepard power steering, old conversion, asking $18,000, located in Oklahoma City, Call Al at 405-514-8419
Sterling Classifieds
Tips For Selling A Bus
• Clean it thoroughly inside & out. Remove anything that won’t go with it when it sells.
• If on or near open ground, keep grass & weeds trimmed.
• Take many photos and be prepared to email them to prospective buyers. An easy way to share them is to use a free online sharing service like Photobucket or Dropbox. Once photos are saved there, you can easily send a single link to a prospective buyer.
• If possible, do a show-and-tell video of it and post it on YouTube.
• Prepare the “long version” very detailed description of your bus and all its features in advance to email to prospec-tive buyers quickly on request.
Very well maintained 1996 MCI 45ft professionally converted on a new chassis, Series 60, Allison, tires look like new, tag axle steering, granite floors, Corian counters, solid wood cabinets, all electric with a 16KW generator. Has custom jacuzzi, oval tub shower with a 20-gal. hot water tank, kitchen has a two burner, halogen glass cooktop and a pair of microwave- convection ovens, plus a 22 cu. ft. side-by-side glass front household fridge-freezer. Built in a timeless, classic design by Bruce Coach Custom Conversions in Salmon Arm, B.C. renowned for their high quality and “do it right” work ethic.
1996 MCI102 DL
45’
$75,000Call or Text Skip @ 253-224-0524
Located in Mesa, AZ
Peninsula Brand New Driver Toll Window - Peninsula Glass, driver tollwindow, brand new, still in box,Fits MC8 1974-1978. Windowwas purchased before I sold mybus, so It has never been used. Ipaid $503 but willing to takehalf of that to get it sold.Call Ron at [email protected] in Stem, NC
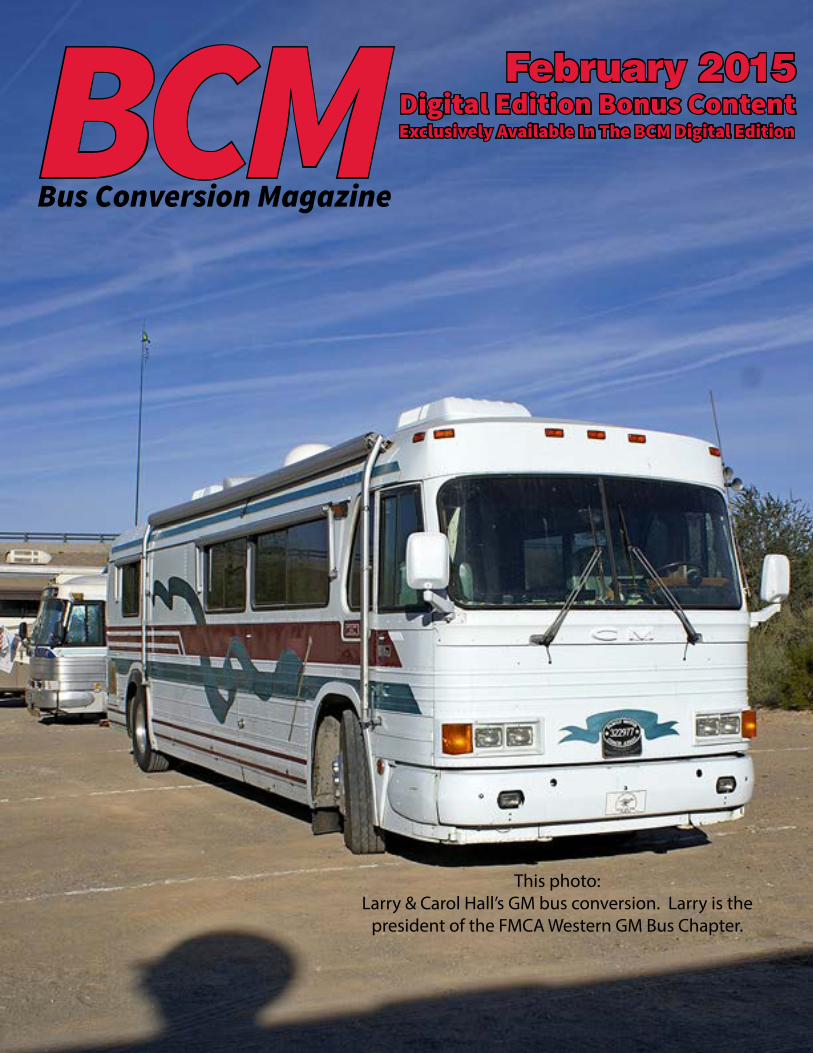
Digital Edition Bonus ContentExclusively Available In The BCM Digital Edition
February 2015
Bus Conversion MagazineBCM
This photo:Larry & Carol Hall’s GM bus conversion. Larry is the
president of the FMCA Western GM Bus Chapter.
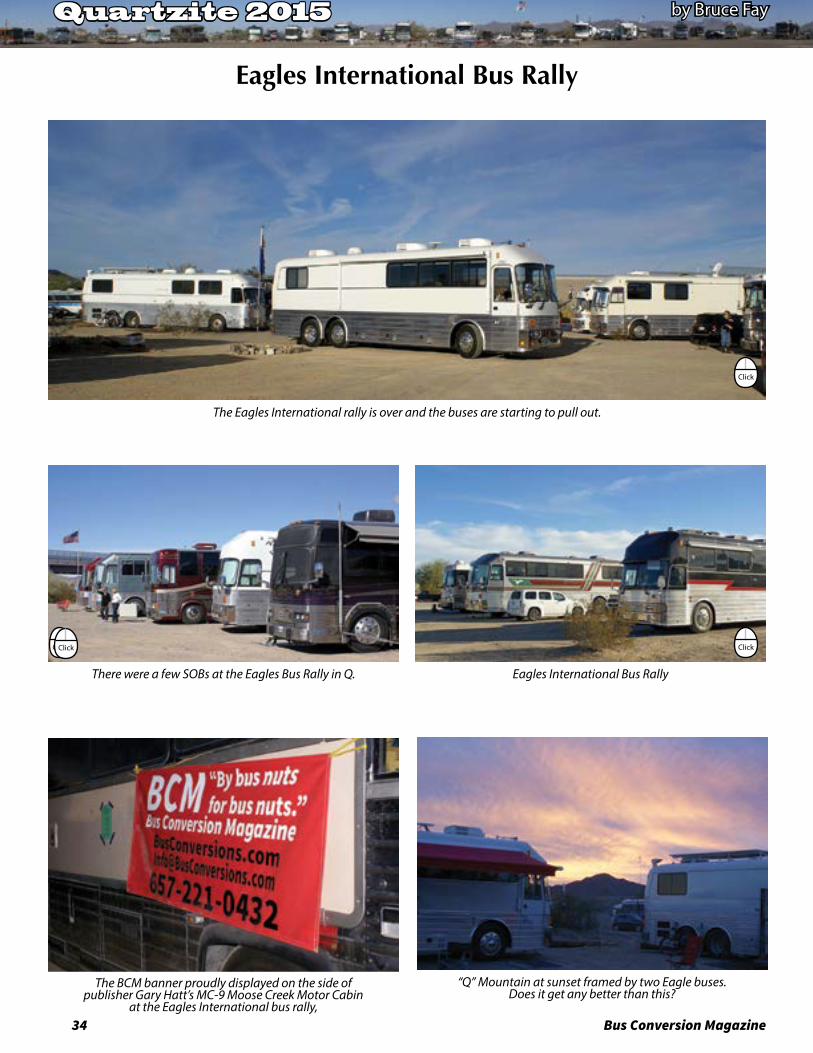
34 Bus Conversion Magazine
There were a few SOBs at the Eagles Bus Rally in Q. Eagles International Bus Rally
The Eagles International rally is over and the buses are starting to pull out.
ClickClick Click
Click Click
Quartzite 2015 by Bruce Fay
Eagles International Bus Rally
Click
“Q” Mountain at sunset framed by two Eagle buses. Does it get any better than this?
The BCM banner proudly displayed on the side of publisher Gary Hatt’s MC-9 Moose Creek Motor Cabin
at the Eagles International bus rally,
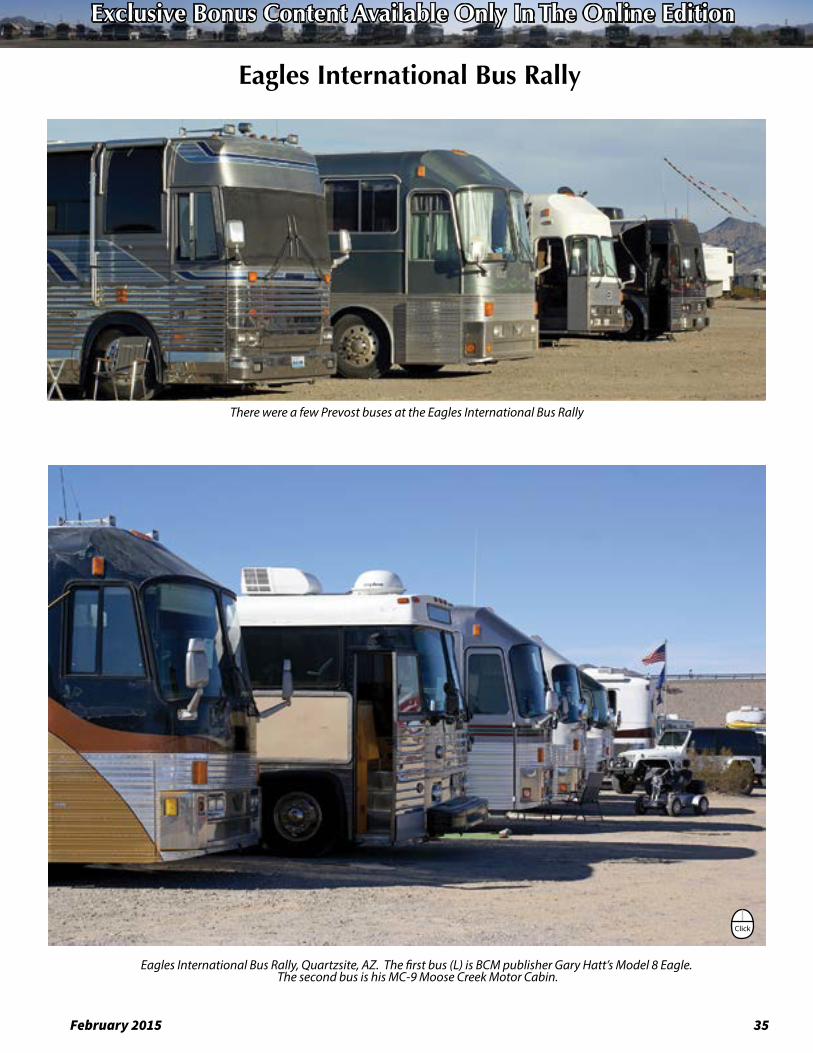
February 2015 35
Eagles International Bus Rally, Quartzsite, AZ. The first bus (L) is BCM publisher Gary Hatt’s Model 8 Eagle. The second bus is his MC-9 Moose Creek Motor Cabin.
Click
Click
Exclusive Bonus Content Available Only In The Online Edition
Eagles International Bus Rally
There were a few Prevost buses at the Eagles International Bus Rally
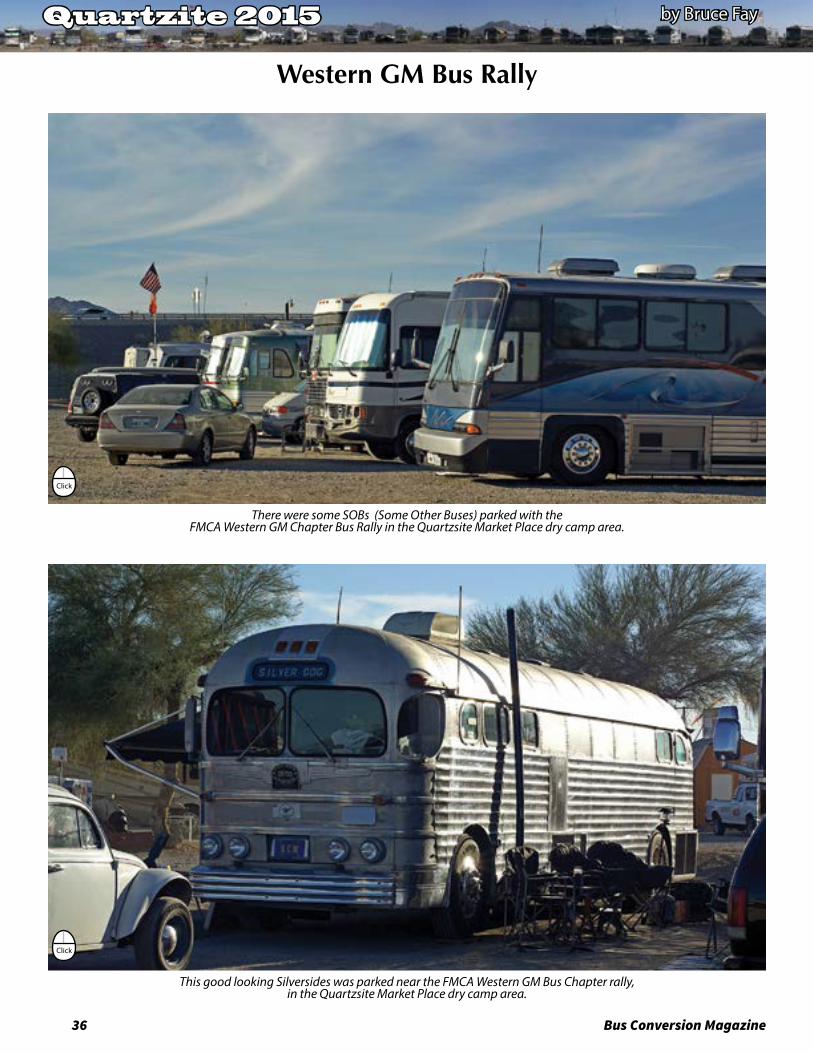
36 Bus Conversion Magazine
Exclusive Bonus Content Available Only In The Online EditionQuartzite 2015 by Bruce Fay
Western GM Bus Rally
This good looking Silversides was parked near the FMCA Western GM Bus Chapter rally, in the Quartzsite Market Place dry camp area.
There were some SOBs (Some Other Buses) parked with the FMCA Western GM Chapter Bus Rally in the Quartzsite Market Place dry camp area.
Click
Click
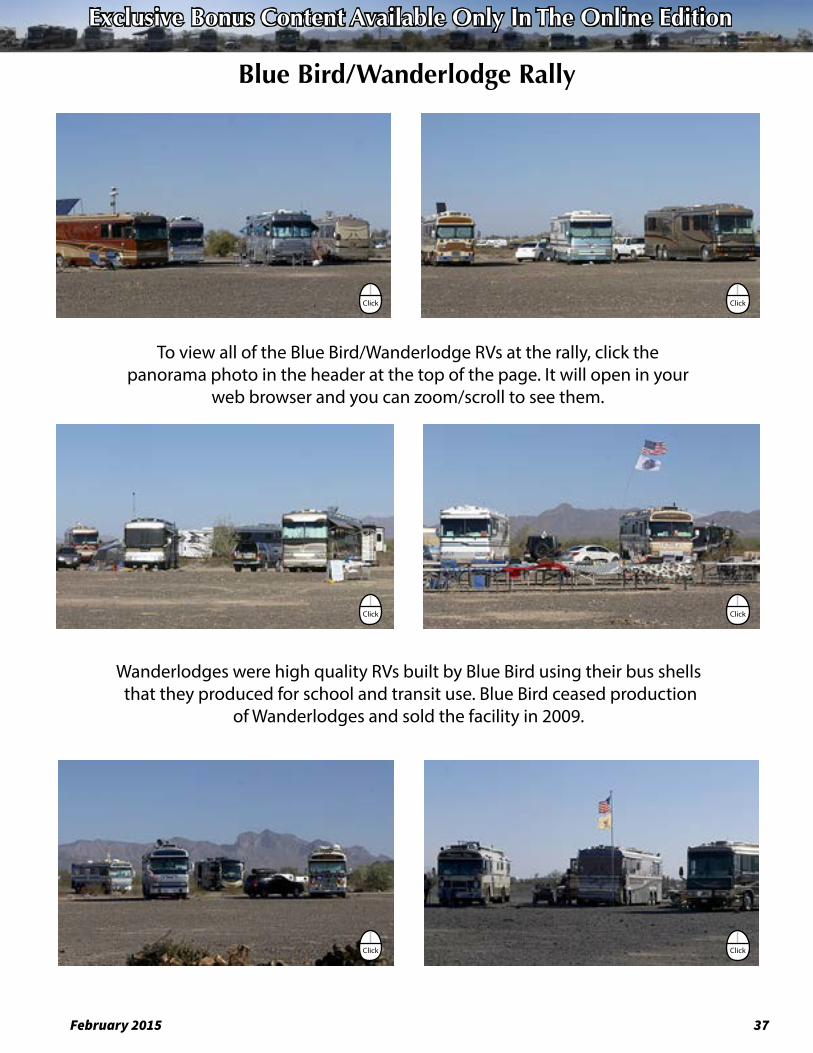
February 2015 37
Exclusive Bonus Content Available Only In The Online Edition
Blue Bird/Wanderlodge Rally
To view all of the Blue Bird/Wanderlodge RVs at the rally, click the panorama photo in the header at the top of the page. It will open in your
web browser and you can zoom/scroll to see them.
Wanderlodges were high quality RVs built by Blue Bird using their bus shells that they produced for school and transit use. Blue Bird ceased production
of Wanderlodges and sold the facility in 2009.
Click
Click
Click
Click
Click
Click
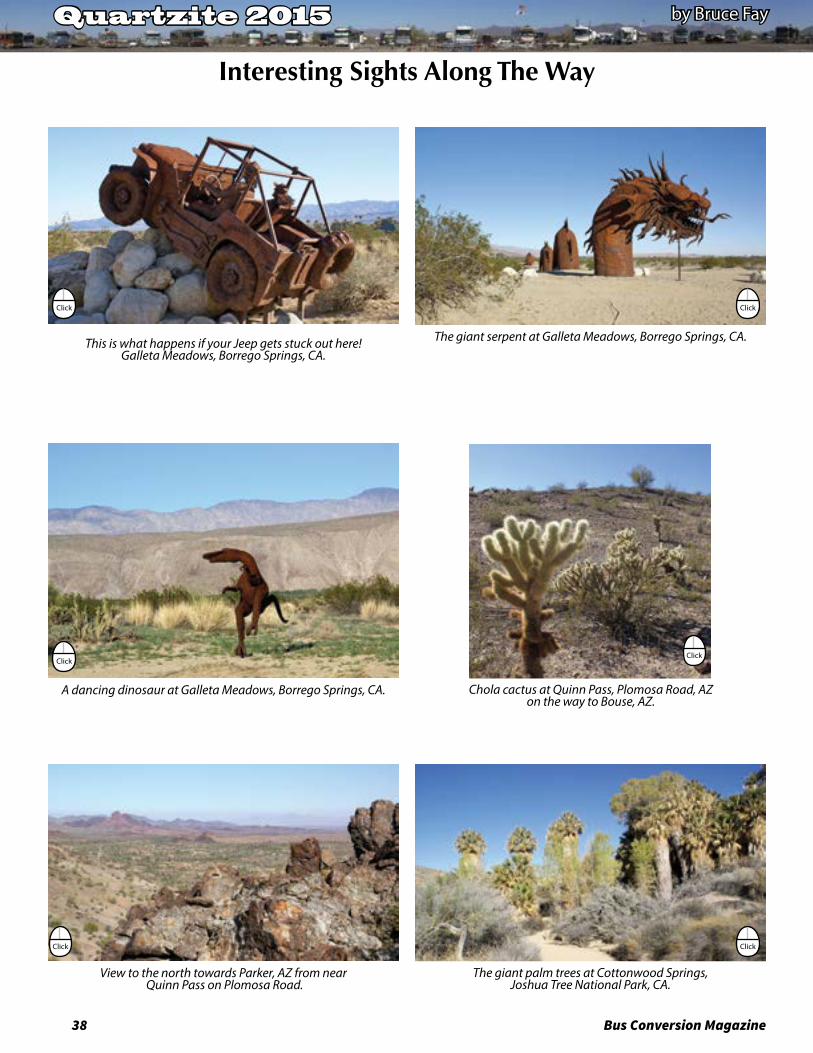
38 Bus Conversion Magazine
Quartzite 2015 by Bruce Fay
Interesting Sights Along The Way
This is what happens if your Jeep gets stuck out here! Galleta Meadows, Borrego Springs, CA.
The giant serpent at Galleta Meadows, Borrego Springs, CA.
A dancing dinosaur at Galleta Meadows, Borrego Springs, CA. Chola cactus at Quinn Pass, Plomosa Road, AZ on the way to Bouse, AZ.
View to the north towards Parker, AZ from near Quinn Pass on Plomosa Road.
The giant palm trees at Cottonwood Springs, Joshua Tree National Park, CA.
Click
Click
Click Click
Click
Click
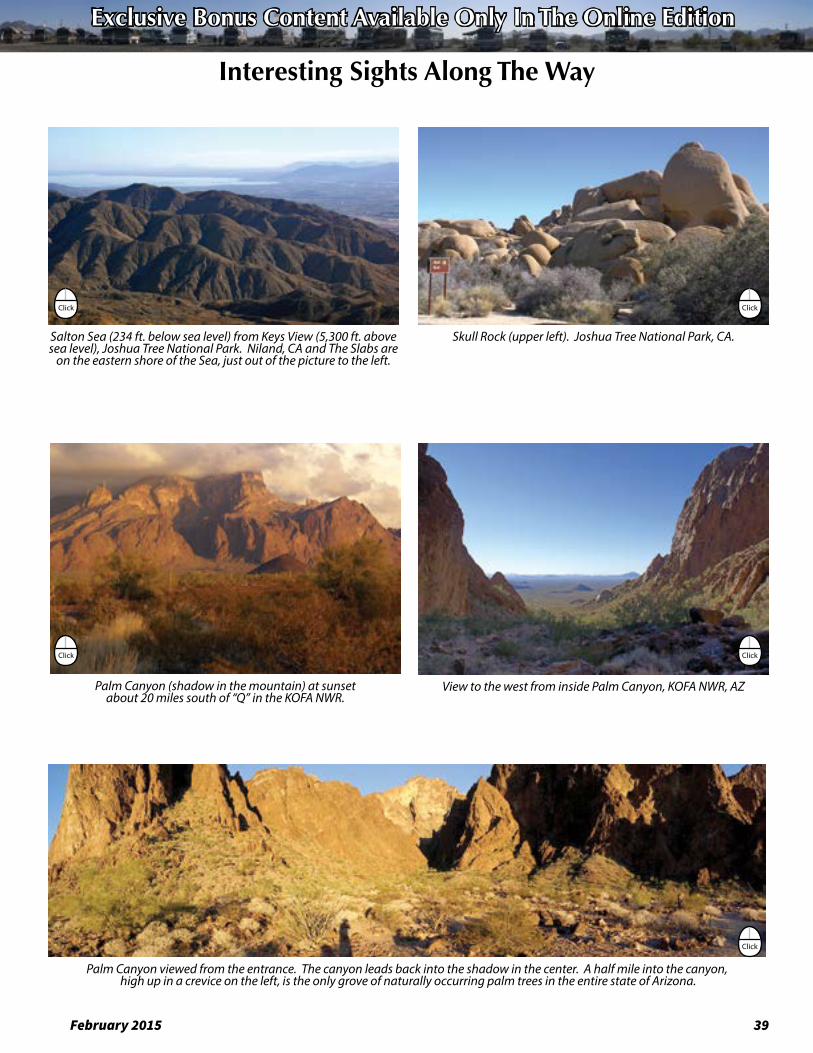
February 2015 39
Exclusive Bonus Content Available Only In The Online Edition
Interesting Sights Along The Way
Skull Rock (upper left). Joshua Tree National Park, CA.Salton Sea (234 ft. below sea level) from Keys View (5,300 ft. above sea level), Joshua Tree National Park. Niland, CA and The Slabs are
on the eastern shore of the Sea, just out of the picture to the left.
Click Click
Palm Canyon (shadow in the mountain) at sunset about 20 miles south of “Q” in the KOFA NWR.
View to the west from inside Palm Canyon, KOFA NWR, AZ
Palm Canyon viewed from the entrance. The canyon leads back into the shadow in the center. A half mile into the canyon, high up in a crevice on the left, is the only grove of naturally occurring palm trees in the entire state of Arizona.
Click Click
Click
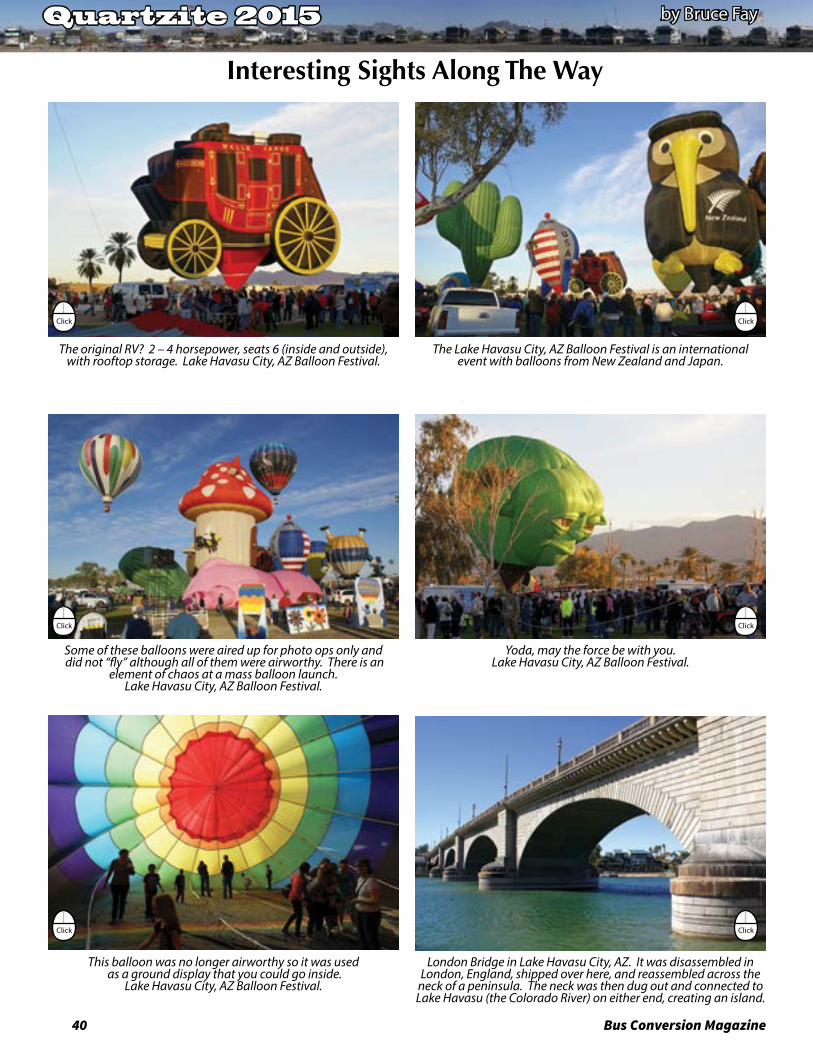
40 Bus Conversion Magazine
Exclusive Bonus Content Available Only In The Online EditionQuartzite 2015 by Bruce Fay
Interesting Sights Along The Way
Yoda, may the force be with you. Lake Havasu City, AZ Balloon Festival.
The original RV? 2 – 4 horsepower, seats 6 (inside and outside), with rooftop storage. Lake Havasu City, AZ Balloon Festival.
The Lake Havasu City, AZ Balloon Festival is an international event with balloons from New Zealand and Japan.
Some of these balloons were aired up for photo ops only and did not “fly” although all of them were airworthy. There is an
element of chaos at a mass balloon launch. Lake Havasu City, AZ Balloon Festival.
This balloon was no longer airworthy so it was used as a ground display that you could go inside.
Lake Havasu City, AZ Balloon Festival.
London Bridge in Lake Havasu City, AZ. It was disassembled in London, England, shipped over here, and reassembled across the
neck of a peninsula. The neck was then dug out and connected to Lake Havasu (the Colorado River) on either end, creating an island.
Click Click
Click Click
ClickClick
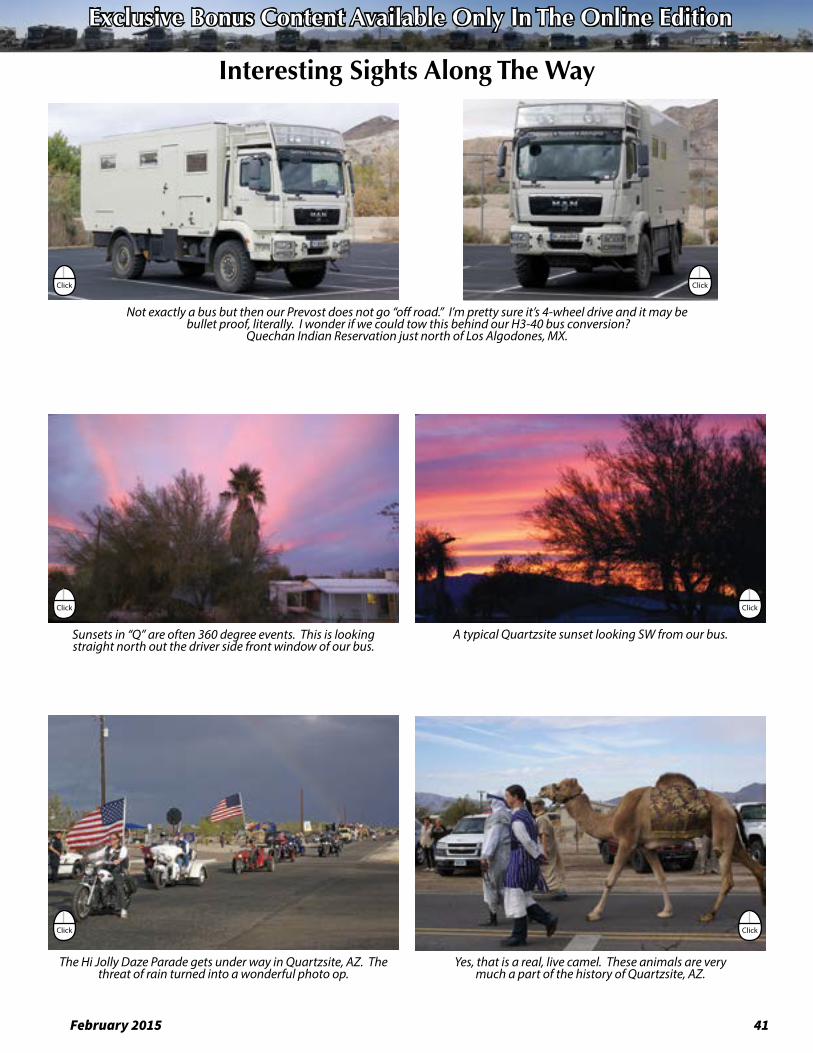
February 2015 41
Exclusive Bonus Content Available Only In The Online Edition
Interesting Sights Along The Way
Not exactly a bus but then our Prevost does not go “off road.” I’m pretty sure it’s 4-wheel drive and it may be bullet proof, literally. I wonder if we could tow this behind our H3-40 bus conversion?
Quechan Indian Reservation just north of Los Algodones, MX.
Sunsets in “Q” are often 360 degree events. This is looking straight north out the driver side front window of our bus.
A typical Quartzsite sunset looking SW from our bus.
The Hi Jolly Daze Parade gets under way in Quartzsite, AZ. The threat of rain turned into a wonderful photo op.
Yes, that is a real, live camel. These animals are very much a part of the history of Quartzsite, AZ.
Click Click
ClickClick
ClickClick
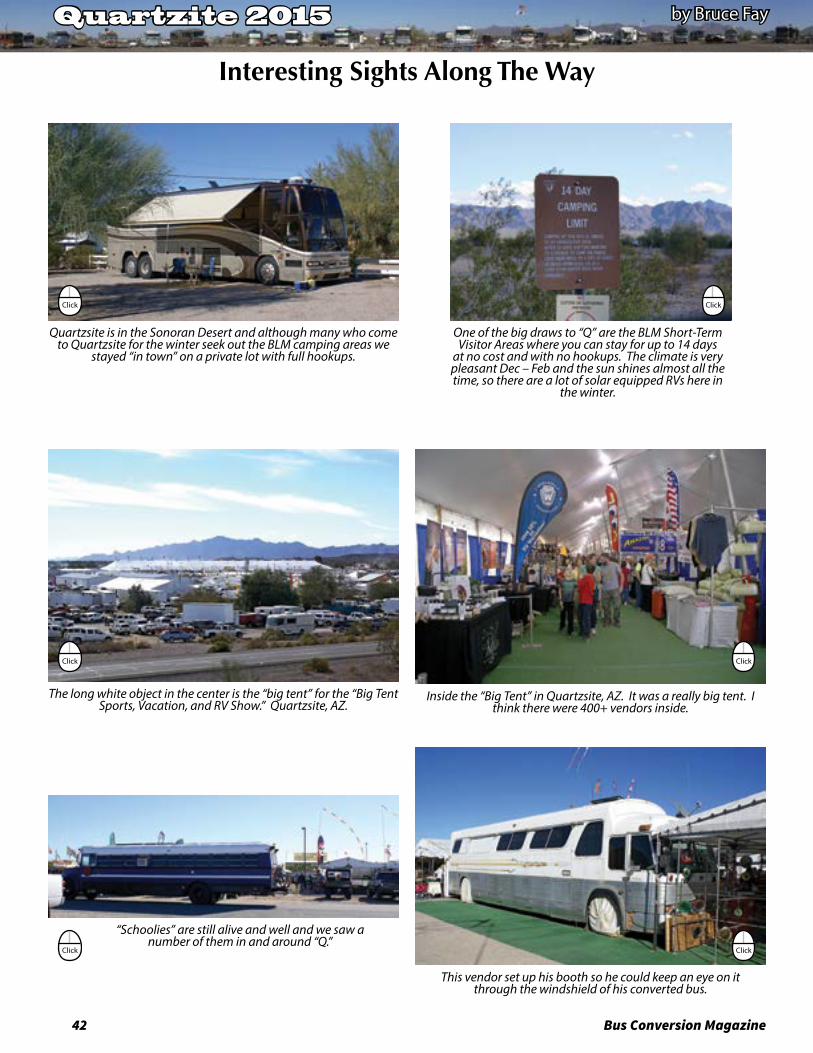
42 Bus Conversion Magazine
Quartzite 2015 by Bruce Fay
Interesting Sights Along The Way
Quartzsite is in the Sonoran Desert and although many who come to Quartzsite for the winter seek out the BLM camping areas we
stayed “in town” on a private lot with full hookups.
One of the big draws to “Q” are the BLM Short-Term Visitor Areas where you can stay for up to 14 days
at no cost and with no hookups. The climate is very pleasant Dec – Feb and the sun shines almost all the time, so there are a lot of solar equipped RVs here in
the winter.
The long white object in the center is the “big tent” for the “Big Tent Sports, Vacation, and RV Show.” Quartzsite, AZ.
Inside the “Big Tent” in Quartzsite, AZ. It was a really big tent. I think there were 400+ vendors inside.
“Schoolies” are still alive and well and we saw a number of them in and around “Q.”
This vendor set up his booth so he could keep an eye on it through the windshield of his converted bus.
Click Click
Click Click
Click Click
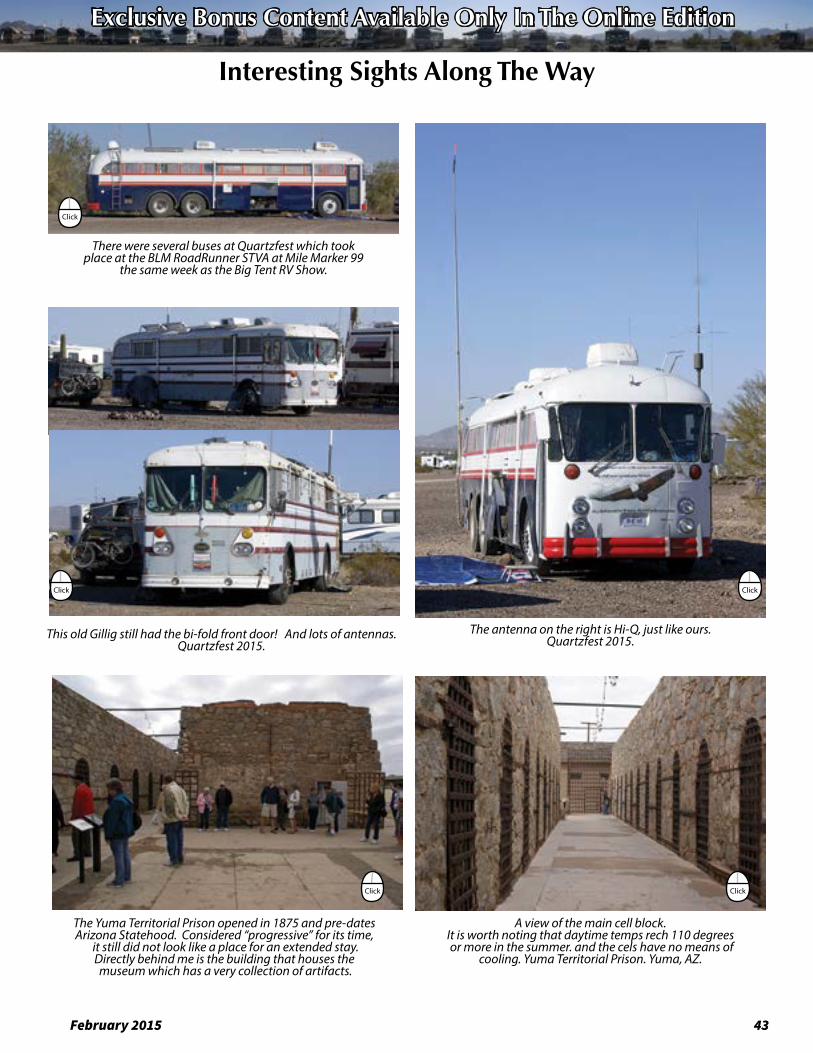
February 2015 43
Click
Exclusive Bonus Content Available Only In The Online Edition
Interesting Sights Along The Way
There were several buses at Quartzfest which took place at the BLM RoadRunner STVA at Mile Marker 99
the same week as the Big Tent RV Show.
This old Gillig still had the bi-fold front door! And lots of antennas. Quartzfest 2015.
The antenna on the right is Hi-Q, just like ours. Quartzfest 2015.
The Yuma Territorial Prison opened in 1875 and pre-dates Arizona Statehood. Considered “progressive” for its time,
it still did not look like a place for an extended stay. Directly behind me is the building that houses the museum which has a very collection of artifacts.
A view of the main cell block.It is worth noting that daytime temps rech 110 degrees or more in the summer. and the cels have no means of
cooling. Yuma Territorial Prison. Yuma, AZ.
Click Click
Click Click
Click

44 Bus Conversion Magazine
Exclusive Bonus Content Available Only In The Online EditionFilmore from The Ramblin’ Rose by Clarence Holcomb
“Filmore” is our tow car. A 1973 VW bus that we named after the VW bus in the Disney movie “Cars”. We found “Filmore” in waist high grass in Prescott, AZ where he had been for several years (with a blown up engine). We towed him home and began the restoration. Body work, New paint, New upholstery and a heart transplant. I installed a 2005 Chevy, Cobalt 2.2 Ecotec engine, (4 cylinder, water cooled) with 2 radiators.
Click Click
Click Click

February 2015 45
Exclusive Bonus Content Available Only In The Online Edition
Click Click
Click
ClickClick
Click
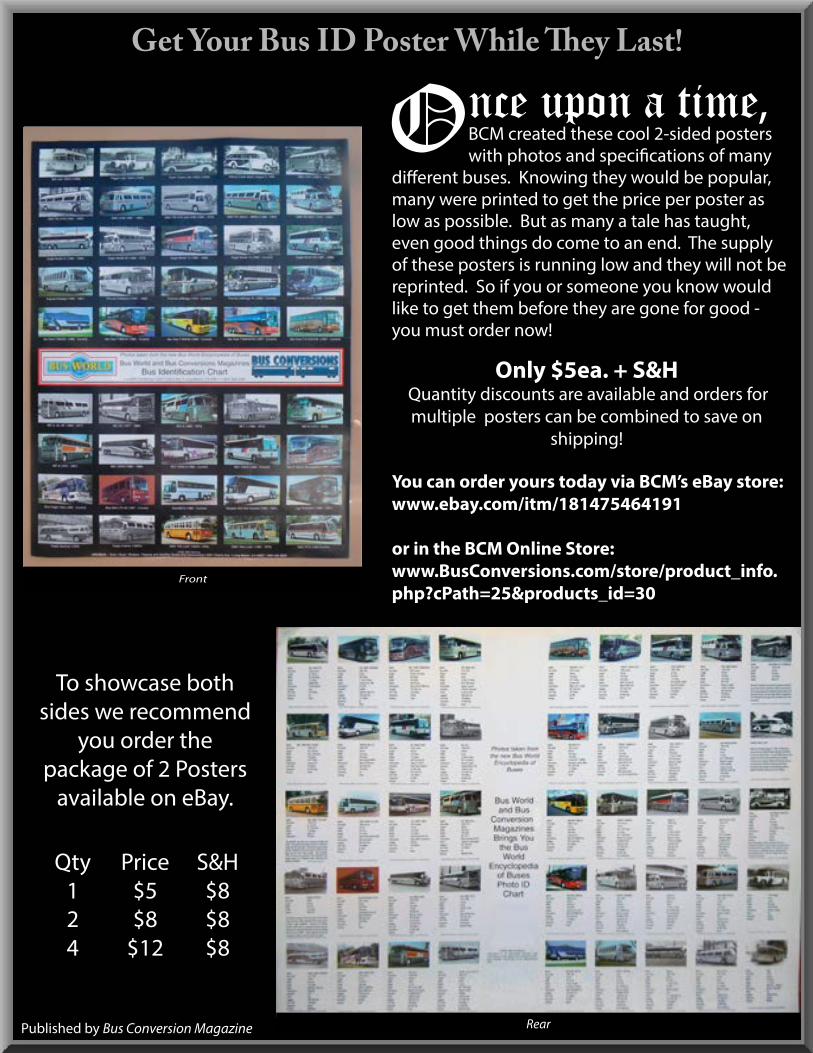
46 Bus Conversion Magazine
Get Your Bus ID Poster While They Last!
Front
Rear
Once upon a time, BCM created these cool 2-sided posters with photos and specifications of many
different buses. Knowing they would be popular, many were printed to get the price per poster as low as possible. But as many a tale has taught, even good things do come to an end. The supply of these posters is running low and they will not be reprinted. So if you or someone you know would like to get them before they are gone for good - you must order now!
You can order yours today via BCM’s eBay store:www.ebay.com/itm/181475464191
or in the BCM Online Store:www.BusConversions.com/store/product_info.php?cPath=25&products_id=30
To showcase both sides we recommend
you order the package of 2 Posters
available on eBay.
Qty Price S&H1 $5 $82 $8 $84 $12 $8
Only $5ea. + S&H Quantity discounts are available and orders for multiple posters can be combined to save on
shipping!
Published by Bus Conversion Magazine
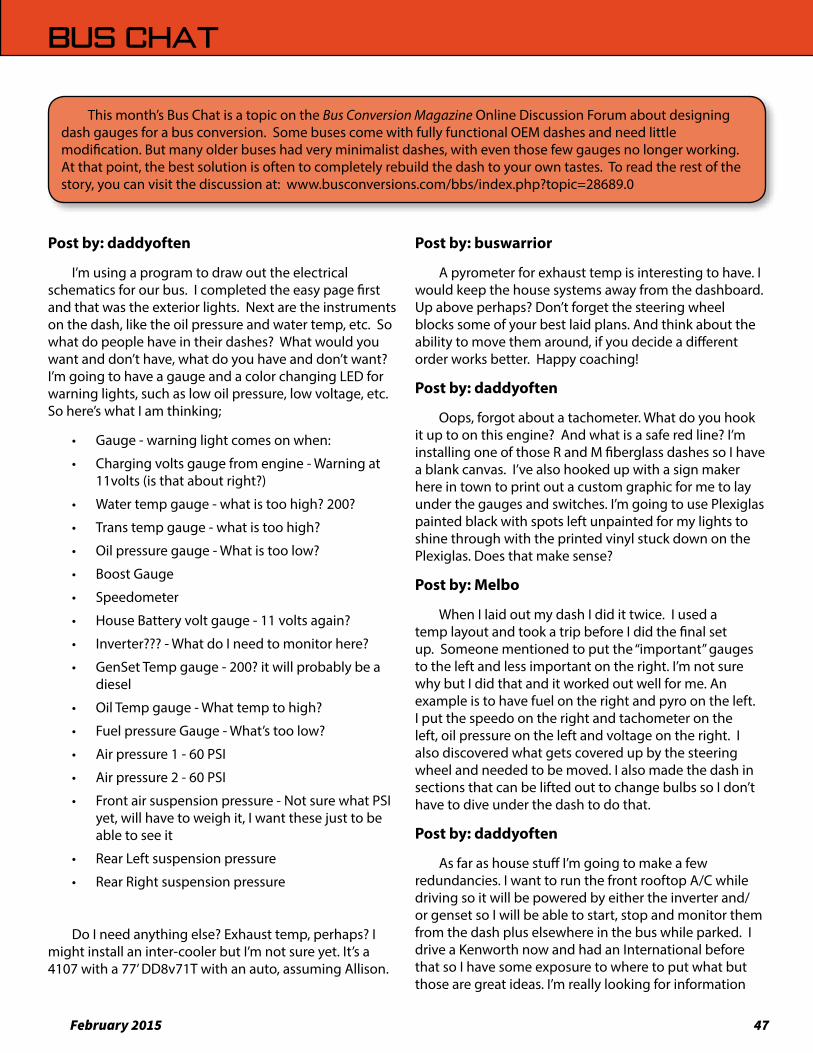
February 2015 47
Bus Chat
This month’s Bus Chat is a topic on the Bus Conversion Magazine Online Discussion Forum about designing dash gauges for a bus conversion. Some buses come with fully functional OEM dashes and need little modification. But many older buses had very minimalist dashes, with even those few gauges no longer working. At that point, the best solution is often to completely rebuild the dash to your own tastes. To read the rest of the story, you can visit the discussion at: www.busconversions.com/bbs/index.php?topic=28689.0
Post by: daddyoften
I’m using a program to draw out the electrical schematics for our bus. I completed the easy page first and that was the exterior lights. Next are the instruments on the dash, like the oil pressure and water temp, etc. So what do people have in their dashes? What would you want and don’t have, what do you have and don’t want? I’m going to have a gauge and a color changing LED for warning lights, such as low oil pressure, low voltage, etc. So here’s what I am thinking;
• Gauge - warning light comes on when:
• Charging volts gauge from engine - Warning at 11volts (is that about right?)
• Water temp gauge - what is too high? 200?
• Trans temp gauge - what is too high?
• Oil pressure gauge - What is too low?
• Boost Gauge
• Speedometer
• House Battery volt gauge - 11 volts again?
• Inverter??? - What do I need to monitor here?
• GenSet Temp gauge - 200? it will probably be a diesel
• Oil Temp gauge - What temp to high?
• Fuel pressure Gauge - What’s too low?
• Air pressure 1 - 60 PSI
• Air pressure 2 - 60 PSI
• Front air suspension pressure - Not sure what PSI yet, will have to weigh it, I want these just to be able to see it
• Rear Left suspension pressure
• Rear Right suspension pressure
Do I need anything else? Exhaust temp, perhaps? I might install an inter-cooler but I’m not sure yet. It’s a 4107 with a 77’ DD8v71T with an auto, assuming Allison.
Post by: buswarrior
A pyrometer for exhaust temp is interesting to have. I would keep the house systems away from the dashboard. Up above perhaps? Don’t forget the steering wheel blocks some of your best laid plans. And think about the ability to move them around, if you decide a different order works better. Happy coaching!
Post by: daddyoften
Oops, forgot about a tachometer. What do you hook it up to on this engine? And what is a safe red line? I’m installing one of those R and M fiberglass dashes so I have a blank canvas. I’ve also hooked up with a sign maker here in town to print out a custom graphic for me to lay under the gauges and switches. I’m going to use Plexiglas painted black with spots left unpainted for my lights to shine through with the printed vinyl stuck down on the Plexiglas. Does that make sense?
Post by: Melbo
When I laid out my dash I did it twice. I used a temp layout and took a trip before I did the final set up. Someone mentioned to put the “important” gauges to the left and less important on the right. I’m not sure why but I did that and it worked out well for me. An example is to have fuel on the right and pyro on the left. I put the speedo on the right and tachometer on the left, oil pressure on the left and voltage on the right. I also discovered what gets covered up by the steering wheel and needed to be moved. I also made the dash in sections that can be lifted out to change bulbs so I don’t have to dive under the dash to do that.
Post by: daddyoften
As far as house stuff I’m going to make a few redundancies. I want to run the front rooftop A/C while driving so it will be powered by either the inverter and/or genset so I will be able to start, stop and monitor them from the dash plus elsewhere in the bus while parked. I drive a Kenworth now and had an International before that so I have some exposure to where to put what but those are great ideas. I’m really looking for information
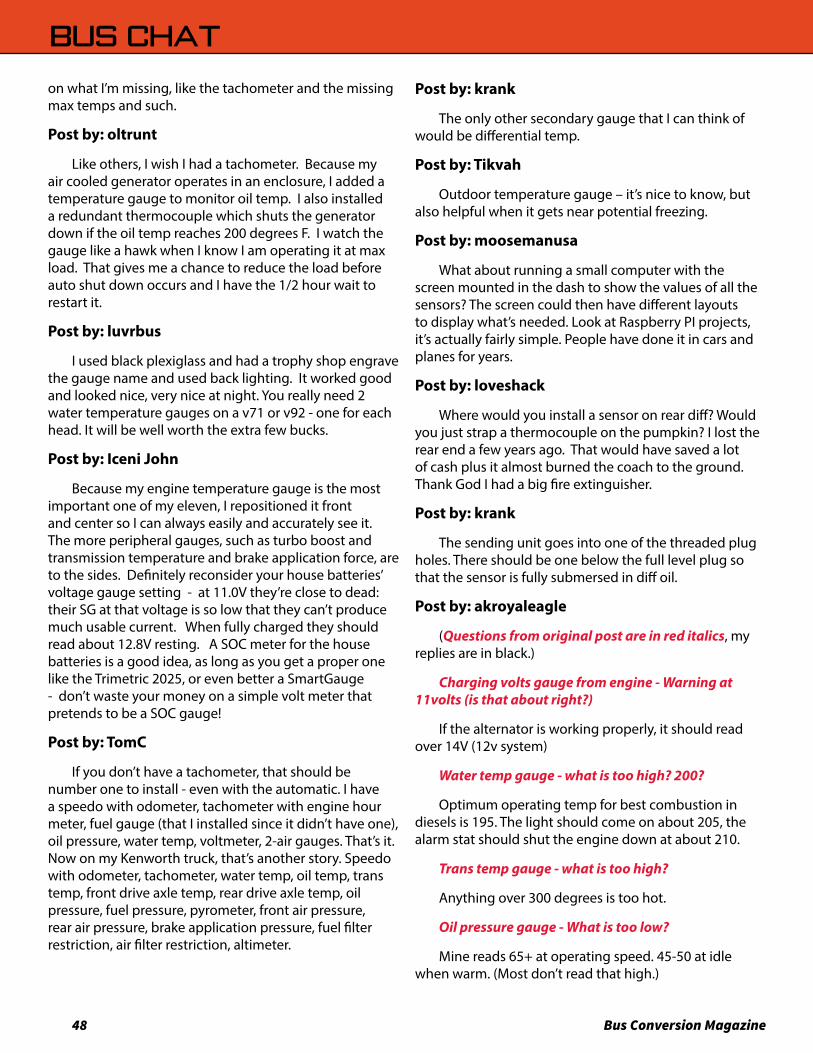
48 Bus Conversion Magazine
Exclusive Bonus Content Available Only In The Online Edition Bus Chat Exclusive Bonus Content Available Only In The Online Edition
on what I’m missing, like the tachometer and the missing max temps and such.
Post by: oltrunt
Like others, I wish I had a tachometer. Because my air cooled generator operates in an enclosure, I added a temperature gauge to monitor oil temp. I also installed a redundant thermocouple which shuts the generator down if the oil temp reaches 200 degrees F. I watch the gauge like a hawk when I know I am operating it at max load. That gives me a chance to reduce the load before auto shut down occurs and I have the 1/2 hour wait to restart it.
Post by: luvrbus
I used black plexiglass and had a trophy shop engrave the gauge name and used back lighting. It worked good and looked nice, very nice at night. You really need 2 water temperature gauges on a v71 or v92 - one for each head. It will be well worth the extra few bucks.
Post by: Iceni John
Because my engine temperature gauge is the most important one of my eleven, I repositioned it front and center so I can always easily and accurately see it. The more peripheral gauges, such as turbo boost and transmission temperature and brake application force, are to the sides. Definitely reconsider your house batteries’ voltage gauge setting - at 11.0V they’re close to dead: their SG at that voltage is so low that they can’t produce much usable current. When fully charged they should read about 12.8V resting. A SOC meter for the house batteries is a good idea, as long as you get a proper one like the Trimetric 2025, or even better a SmartGauge - don’t waste your money on a simple volt meter that pretends to be a SOC gauge!
Post by: TomC
If you don’t have a tachometer, that should be number one to install - even with the automatic. I have a speedo with odometer, tachometer with engine hour meter, fuel gauge (that I installed since it didn’t have one), oil pressure, water temp, voltmeter, 2-air gauges. That’s it. Now on my Kenworth truck, that’s another story. Speedo with odometer, tachometer, water temp, oil temp, trans temp, front drive axle temp, rear drive axle temp, oil pressure, fuel pressure, pyrometer, front air pressure, rear air pressure, brake application pressure, fuel filter restriction, air filter restriction, altimeter.
Post by: krank
The only other secondary gauge that I can think of would be differential temp.
Post by: Tikvah
Outdoor temperature gauge – it’s nice to know, but also helpful when it gets near potential freezing.
Post by: moosemanusa
What about running a small computer with the screen mounted in the dash to show the values of all the sensors? The screen could then have different layouts to display what’s needed. Look at Raspberry PI projects, it’s actually fairly simple. People have done it in cars and planes for years.
Post by: loveshack
Where would you install a sensor on rear diff? Would you just strap a thermocouple on the pumpkin? I lost the rear end a few years ago. That would have saved a lot of cash plus it almost burned the coach to the ground. Thank God I had a big fire extinguisher.
Post by: krank
The sending unit goes into one of the threaded plug holes. There should be one below the full level plug so that the sensor is fully submersed in diff oil.
Post by: akroyaleagle
(Questions from original post are in red italics, my replies are in black.)
Charging volts gauge from engine - Warning at 11volts (is that about right?)
If the alternator is working properly, it should read over 14V (12v system)
Water temp gauge - what is too high? 200?
Optimum operating temp for best combustion in diesels is 195. The light should come on about 205, the alarm stat should shut the engine down at about 210.
Trans temp gauge - what is too high?
Anything over 300 degrees is too hot.
Oil pressure gauge - What is too low?
Mine reads 65+ at operating speed. 45-50 at idle when warm. (Most don’t read that high.)
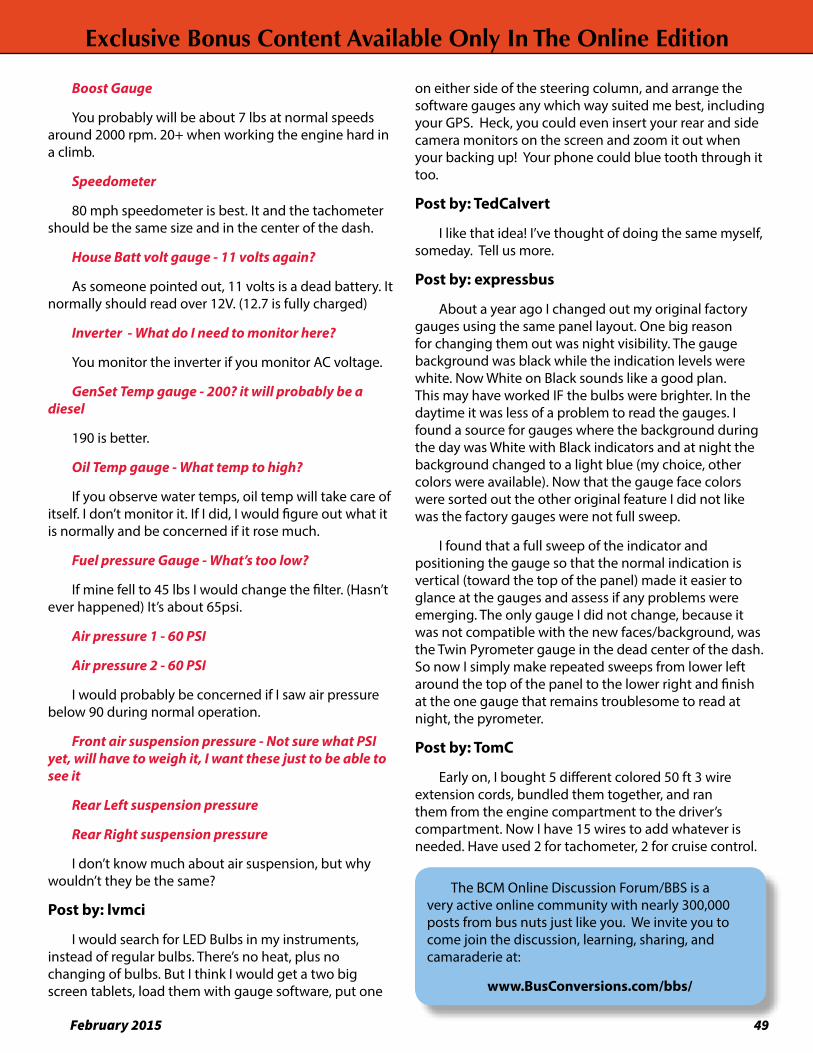
February 2015 49
Exclusive Bonus Content Available Only In The Online Edition Exclusive Bonus Content Available Only In The Online Edition
Boost Gauge
You probably will be about 7 lbs at normal speeds around 2000 rpm. 20+ when working the engine hard in a climb.
Speedometer
80 mph speedometer is best. It and the tachometer should be the same size and in the center of the dash.
House Batt volt gauge - 11 volts again?
As someone pointed out, 11 volts is a dead battery. It normally should read over 12V. (12.7 is fully charged)
Inverter - What do I need to monitor here?
You monitor the inverter if you monitor AC voltage.
GenSet Temp gauge - 200? it will probably be a diesel
190 is better.
Oil Temp gauge - What temp to high?
If you observe water temps, oil temp will take care of itself. I don’t monitor it. If I did, I would figure out what it is normally and be concerned if it rose much.
Fuel pressure Gauge - What’s too low?
If mine fell to 45 lbs I would change the filter. (Hasn’t ever happened) It’s about 65psi.
Air pressure 1 - 60 PSI
Air pressure 2 - 60 PSI
I would probably be concerned if I saw air pressure below 90 during normal operation.
Front air suspension pressure - Not sure what PSI yet, will have to weigh it, I want these just to be able to see it
Rear Left suspension pressure
Rear Right suspension pressure
I don’t know much about air suspension, but why wouldn’t they be the same?
Post by: lvmci
I would search for LED Bulbs in my instruments, instead of regular bulbs. There’s no heat, plus no changing of bulbs. But I think I would get a two big screen tablets, load them with gauge software, put one
on either side of the steering column, and arrange the software gauges any which way suited me best, including your GPS. Heck, you could even insert your rear and side camera monitors on the screen and zoom it out when your backing up! Your phone could blue tooth through it too.
Post by: TedCalvert
I like that idea! I’ve thought of doing the same myself, someday. Tell us more.
Post by: expressbus
About a year ago I changed out my original factory gauges using the same panel layout. One big reason for changing them out was night visibility. The gauge background was black while the indication levels were white. Now White on Black sounds like a good plan. This may have worked IF the bulbs were brighter. In the daytime it was less of a problem to read the gauges. I found a source for gauges where the background during the day was White with Black indicators and at night the background changed to a light blue (my choice, other colors were available). Now that the gauge face colors were sorted out the other original feature I did not like was the factory gauges were not full sweep.
I found that a full sweep of the indicator and positioning the gauge so that the normal indication is vertical (toward the top of the panel) made it easier to glance at the gauges and assess if any problems were emerging. The only gauge I did not change, because it was not compatible with the new faces/background, was the Twin Pyrometer gauge in the dead center of the dash. So now I simply make repeated sweeps from lower left around the top of the panel to the lower right and finish at the one gauge that remains troublesome to read at night, the pyrometer.
Post by: TomC
Early on, I bought 5 different colored 50 ft 3 wire extension cords, bundled them together, and ran them from the engine compartment to the driver’s compartment. Now I have 15 wires to add whatever is needed. Have used 2 for tachometer, 2 for cruise control.
The BCM Online Discussion Forum/BBS is a very active online community with nearly 300,000 posts from bus nuts just like you. We invite you to come join the discussion, learning, sharing, and camaraderie at:
www.BusConversions.com/bbs/
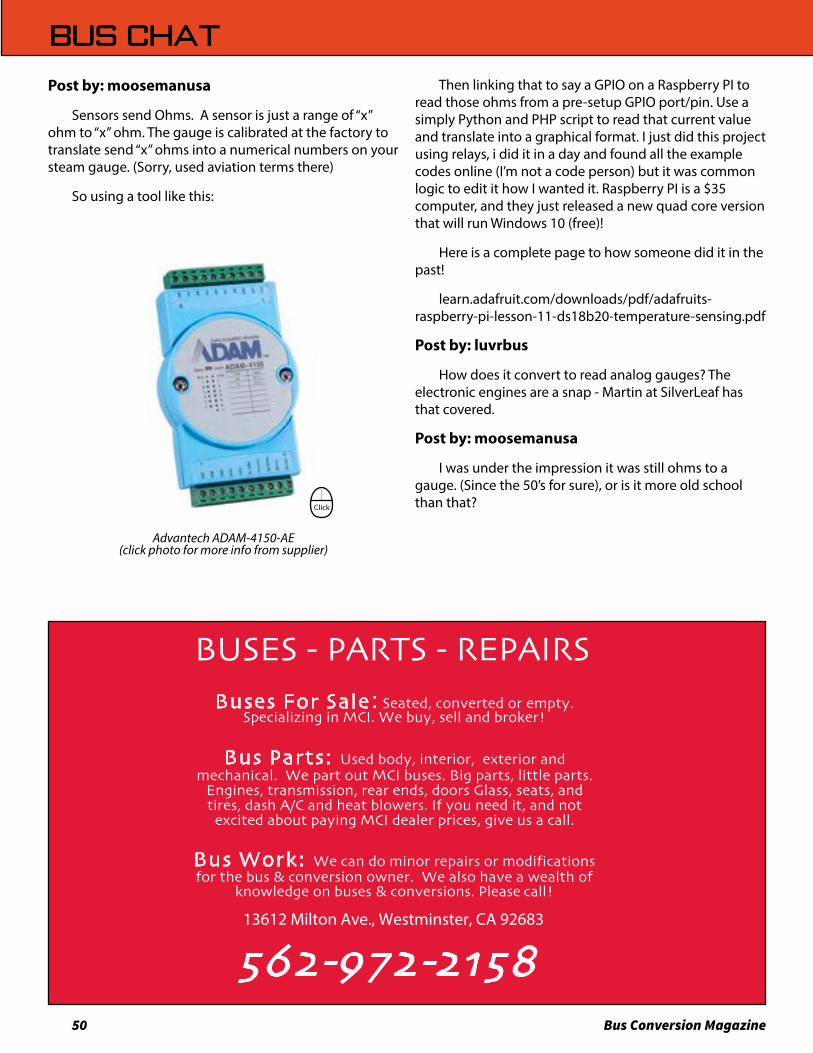
50 Bus Conversion Magazine
BUSES - PARTS - REPAIRS Buses For Sale: Seated, converted or empty.
Specializing in MCI. We buy, sell and broker!
Bus Parts: Used body, interior, exterior andmechanical. We part out MCI buses. Big parts, little parts.
Engines, transmission, rear ends, doors Glass, seats, and tires, dash A/C and heat blowers. If you need it, and not
excited about paying MCI dealer prices, give us a call.
Bus Work: We can do minor repairs or modificationsfor the bus & conversion owner. We also have a wealth of
knowledge on buses & conversions. Please call!
562-972-2158 13612 Milton Ave., Westminster, CA 92683
Bus Chat Exclusive Bonus Content Available Only In The Online Edition
Post by: moosemanusa
Sensors send Ohms. A sensor is just a range of “x” ohm to “x” ohm. The gauge is calibrated at the factory to translate send “x” ohms into a numerical numbers on your steam gauge. (Sorry, used aviation terms there)
So using a tool like this:
Then linking that to say a GPIO on a Raspberry PI to read those ohms from a pre-setup GPIO port/pin. Use a simply Python and PHP script to read that current value and translate into a graphical format. I just did this project using relays, i did it in a day and found all the example codes online (I’m not a code person) but it was common logic to edit it how I wanted it. Raspberry PI is a $35 computer, and they just released a new quad core version that will run Windows 10 (free)!
Here is a complete page to how someone did it in the past!
learn.adafruit.com/downloads/pdf/adafruits-raspberry-pi-lesson-11-ds18b20-temperature-sensing.pdf
Post by: luvrbus
How does it convert to read analog gauges? The electronic engines are a snap - Martin at SilverLeaf has that covered.
Post by: moosemanusa
I was under the impression it was still ohms to a gauge. (Since the 50’s for sure), or is it more old school than that?
Click
Advantech ADAM-4150-AE(click photo for more info from supplier)
Click
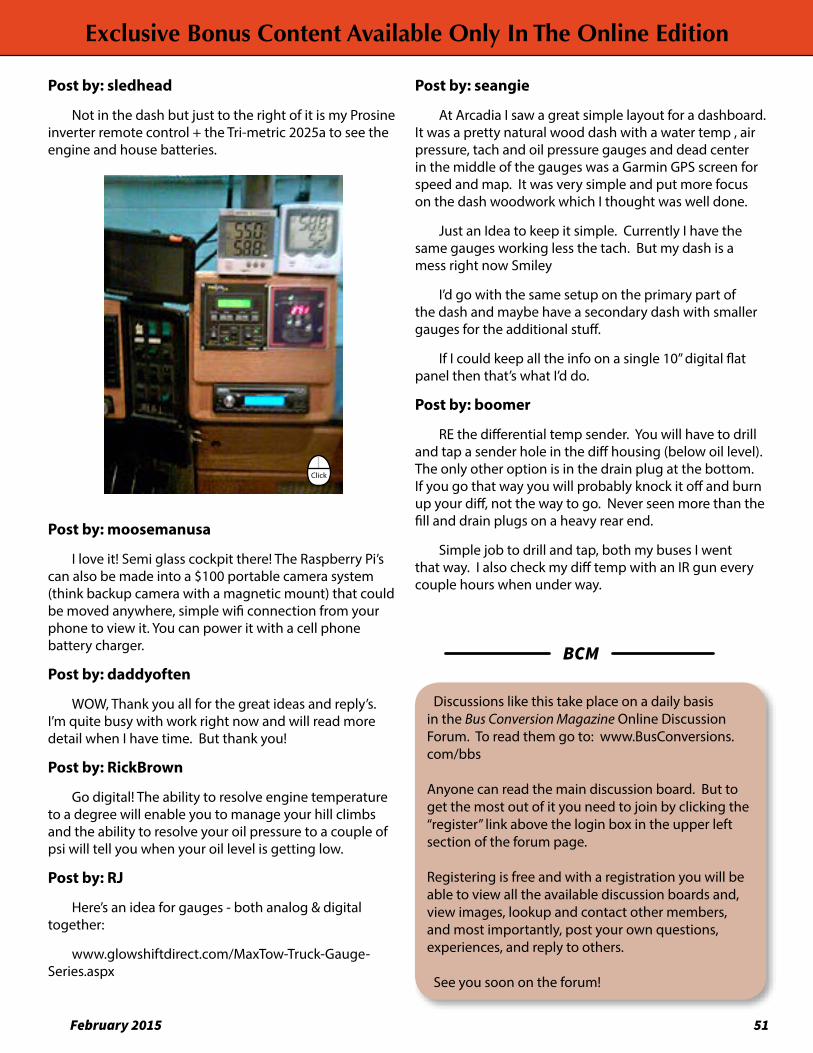
February 2015 51
Discussions like this take place on a daily basis in the Bus Conversion Magazine Online Discussion Forum. To read them go to: www.BusConversions.com/bbs
Anyone can read the main discussion board. But to get the most out of it you need to join by clicking the “register” link above the login box in the upper left section of the forum page.
Registering is free and with a registration you will be able to view all the available discussion boards and, view images, lookup and contact other members, and most importantly, post your own questions, experiences, and reply to others.
See you soon on the forum!
BCM
Exclusive Bonus Content Available Only In The Online Edition
Post by: sledhead
Not in the dash but just to the right of it is my Prosine inverter remote control + the Tri-metric 2025a to see the engine and house batteries.
Post by: moosemanusa
I love it! Semi glass cockpit there! The Raspberry Pi’s can also be made into a $100 portable camera system (think backup camera with a magnetic mount) that could be moved anywhere, simple wifi connection from your phone to view it. You can power it with a cell phone battery charger.
Post by: daddyoften
WOW, Thank you all for the great ideas and reply’s. I’m quite busy with work right now and will read more detail when I have time. But thank you!
Post by: RickBrown
Go digital! The ability to resolve engine temperature to a degree will enable you to manage your hill climbs and the ability to resolve your oil pressure to a couple of psi will tell you when your oil level is getting low.
Post by: RJ
Here’s an idea for gauges - both analog & digital together:
www.glowshiftdirect.com/MaxTow-Truck-Gauge-Series.aspx
Click
Post by: seangie
At Arcadia I saw a great simple layout for a dashboard. It was a pretty natural wood dash with a water temp , air pressure, tach and oil pressure gauges and dead center in the middle of the gauges was a Garmin GPS screen for speed and map. It was very simple and put more focus on the dash woodwork which I thought was well done.
Just an Idea to keep it simple. Currently I have the same gauges working less the tach. But my dash is a mess right now Smiley
I’d go with the same setup on the primary part of the dash and maybe have a secondary dash with smaller gauges for the additional stuff.
If I could keep all the info on a single 10” digital flat panel then that’s what I’d do.
Post by: boomer
RE the differential temp sender. You will have to drill and tap a sender hole in the diff housing (below oil level). The only other option is in the drain plug at the bottom. If you go that way you will probably knock it off and burn up your diff, not the way to go. Never seen more than the fill and drain plugs on a heavy rear end.
Simple job to drill and tap, both my buses I went that way. I also check my diff temp with an IR gun every couple hours when under way.
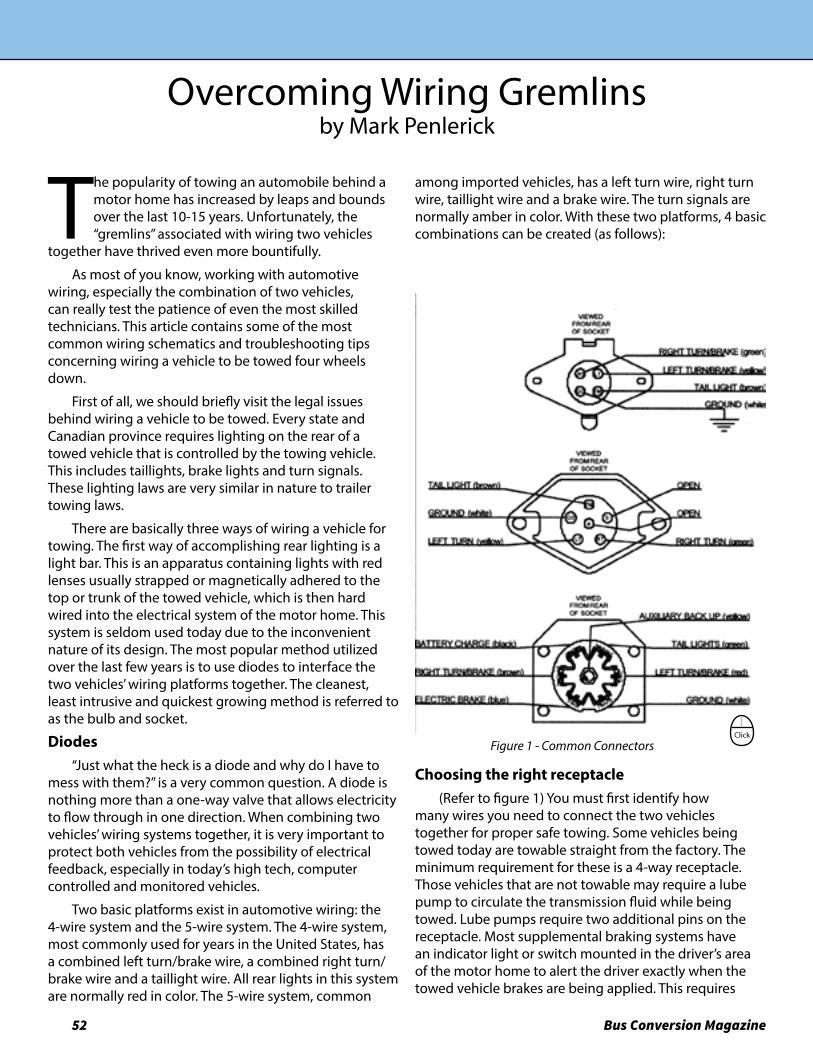
52 Bus Conversion Magazine
Blast From The Past - Only In The Online Edition
Overcoming Wiring Gremlinsby Mark Penlerick
The popularity of towing an automobile behind a motor home has increased by leaps and bounds over the last 10-15 years. Unfortunately, the “gremlins” associated with wiring two vehicles
together have thrived even more bountifully.
As most of you know, working with automotive wiring, especially the combination of two vehicles, can really test the patience of even the most skilled technicians. This article contains some of the most common wiring schematics and troubleshooting tips concerning wiring a vehicle to be towed four wheels down.
First of all, we should briefly visit the legal issues behind wiring a vehicle to be towed. Every state and Canadian province requires lighting on the rear of a towed vehicle that is controlled by the towing vehicle. This includes taillights, brake lights and turn signals. These lighting laws are very similar in nature to trailer towing laws.
There are basically three ways of wiring a vehicle for towing. The first way of accomplishing rear lighting is a light bar. This is an apparatus containing lights with red lenses usually strapped or magnetically adhered to the top or trunk of the towed vehicle, which is then hard wired into the electrical system of the motor home. This system is seldom used today due to the inconvenient nature of its design. The most popular method utilized over the last few years is to use diodes to interface the two vehicles’ wiring platforms together. The cleanest, least intrusive and quickest growing method is referred to as the bulb and socket.
Diodes“Just what the heck is a diode and why do I have to
mess with them?” is a very common question. A diode is nothing more than a one-way valve that allows electricity to flow through in one direction. When combining two vehicles’ wiring systems together, it is very important to protect both vehicles from the possibility of electrical feedback, especially in today’s high tech, computer controlled and monitored vehicles.
Two basic platforms exist in automotive wiring: the 4-wire system and the 5-wire system. The 4-wire system, most commonly used for years in the United States, has a combined left turn/brake wire, a combined right turn/brake wire and a taillight wire. All rear lights in this system are normally red in color. The 5-wire system, common
among imported vehicles, has a left turn wire, right turn wire, taillight wire and a brake wire. The turn signals are normally amber in color. With these two platforms, 4 basic combinations can be created (as follows):
Figure 1 - Common Connectors
Choosing the right receptacle(Refer to figure 1) You must first identify how
many wires you need to connect the two vehicles together for proper safe towing. Some vehicles being towed today are towable straight from the factory. The minimum requirement for these is a 4-way receptacle. Those vehicles that are not towable may require a lube pump to circulate the transmission fluid while being towed. Lube pumps require two additional pins on the receptacle. Most supplemental braking systems have an indicator light or switch mounted in the driver’s area of the motor home to alert the driver exactly when the towed vehicle brakes are being applied. This requires
Click
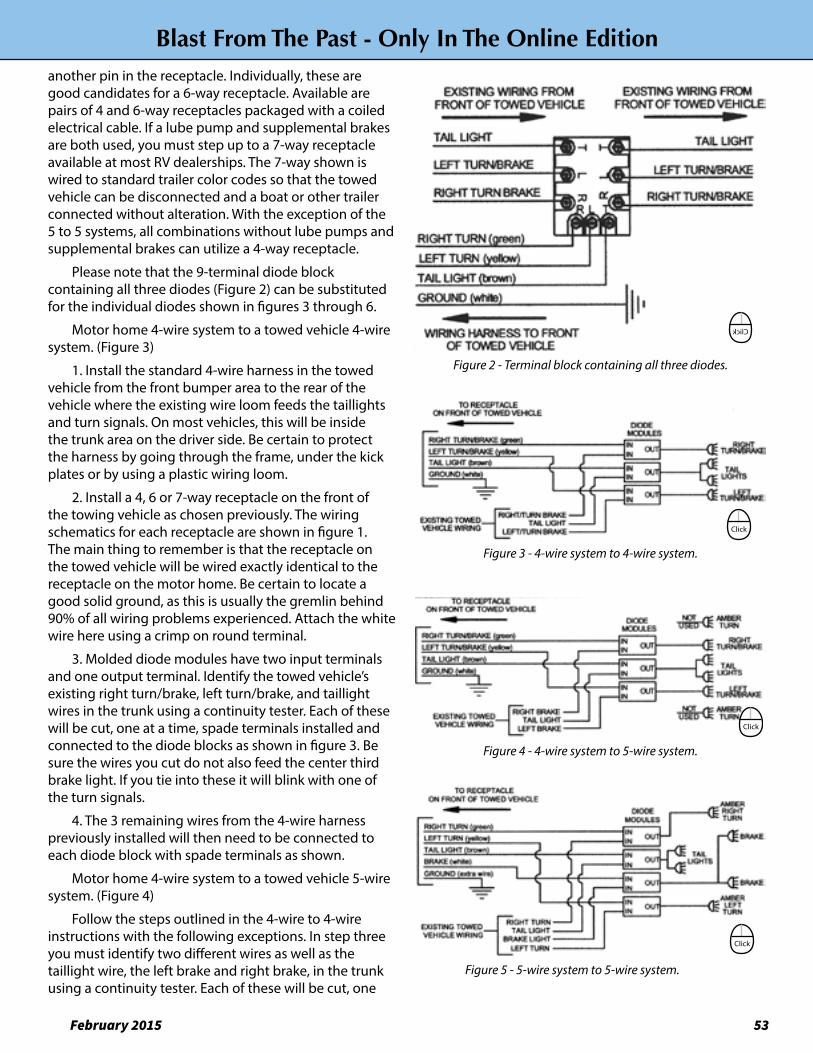
February 2015 53
Blast From The Past - Only In The Online Editionanother pin in the receptacle. Individually, these are good candidates for a 6-way receptacle. Available are pairs of 4 and 6-way receptacles packaged with a coiled electrical cable. If a lube pump and supplemental brakes are both used, you must step up to a 7-way receptacle available at most RV dealerships. The 7-way shown is wired to standard trailer color codes so that the towed vehicle can be disconnected and a boat or other trailer connected without alteration. With the exception of the 5 to 5 systems, all combinations without lube pumps and supplemental brakes can utilize a 4-way receptacle.
Please note that the 9-terminal diode block containing all three diodes (Figure 2) can be substituted for the individual diodes shown in figures 3 through 6.
Motor home 4-wire system to a towed vehicle 4-wire system. (Figure 3)
1. Install the standard 4-wire harness in the towed vehicle from the front bumper area to the rear of the vehicle where the existing wire loom feeds the taillights and turn signals. On most vehicles, this will be inside the trunk area on the driver side. Be certain to protect the harness by going through the frame, under the kick plates or by using a plastic wiring loom.
2. Install a 4, 6 or 7-way receptacle on the front of the towing vehicle as chosen previously. The wiring schematics for each receptacle are shown in figure 1. The main thing to remember is that the receptacle on the towed vehicle will be wired exactly identical to the receptacle on the motor home. Be certain to locate a good solid ground, as this is usually the gremlin behind 90% of all wiring problems experienced. Attach the white wire here using a crimp on round terminal.
3. Molded diode modules have two input terminals and one output terminal. Identify the towed vehicle’s existing right turn/brake, left turn/brake, and taillight wires in the trunk using a continuity tester. Each of these will be cut, one at a time, spade terminals installed and connected to the diode blocks as shown in figure 3. Be sure the wires you cut do not also feed the center third brake light. If you tie into these it will blink with one of the turn signals.
4. The 3 remaining wires from the 4-wire harness previously installed will then need to be connected to each diode block with spade terminals as shown.
Motor home 4-wire system to a towed vehicle 5-wire system. (Figure 4)
Follow the steps outlined in the 4-wire to 4-wire instructions with the following exceptions. In step three you must identify two different wires as well as the taillight wire, the left brake and right brake, in the trunk using a continuity tester. Each of these will be cut, one
Figure 2 - Terminal block containing all three diodes.
Figure 3 - 4-wire system to 4-wire system.
Figure 4 - 4-wire system to 5-wire system.
Figure 5 - 5-wire system to 5-wire system.
Click
Click
Click
Click
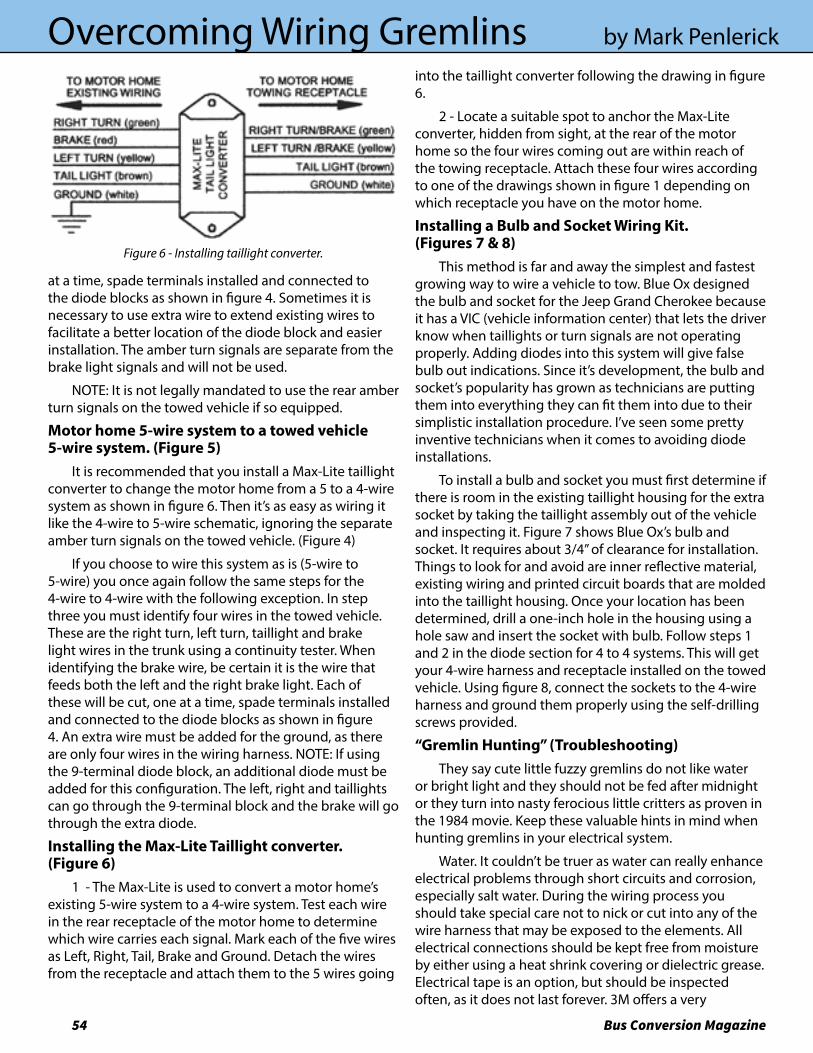
54 Bus Conversion Magazine
Blast From The Past - Only In The Online EditionOvercoming Wiring Gremlins by Mark Penlerick
at a time, spade terminals installed and connected to the diode blocks as shown in figure 4. Sometimes it is necessary to use extra wire to extend existing wires to facilitate a better location of the diode block and easier installation. The amber turn signals are separate from the brake light signals and will not be used.
NOTE: It is not legally mandated to use the rear amber turn signals on the towed vehicle if so equipped.
Motor home 5-wire system to a towed vehicle 5-wire system. (Figure 5)
It is recommended that you install a Max-Lite taillight converter to change the motor home from a 5 to a 4-wire system as shown in figure 6. Then it’s as easy as wiring it like the 4-wire to 5-wire schematic, ignoring the separate amber turn signals on the towed vehicle. (Figure 4)
If you choose to wire this system as is (5-wire to 5-wire) you once again follow the same steps for the 4-wire to 4-wire with the following exception. In step three you must identify four wires in the towed vehicle. These are the right turn, left turn, taillight and brake light wires in the trunk using a continuity tester. When identifying the brake wire, be certain it is the wire that feeds both the left and the right brake light. Each of these will be cut, one at a time, spade terminals installed and connected to the diode blocks as shown in figure 4. An extra wire must be added for the ground, as there are only four wires in the wiring harness. NOTE: If using the 9-terminal diode block, an additional diode must be added for this configuration. The left, right and taillights can go through the 9-terminal block and the brake will go through the extra diode.
Installing the Max-Lite Taillight converter. (Figure 6)
1 - The Max-Lite is used to convert a motor home’s existing 5-wire system to a 4-wire system. Test each wire in the rear receptacle of the motor home to determine which wire carries each signal. Mark each of the five wires as Left, Right, Tail, Brake and Ground. Detach the wires from the receptacle and attach them to the 5 wires going
Figure 6 - Installing taillight converter.
into the taillight converter following the drawing in figure 6.
2 - Locate a suitable spot to anchor the Max-Lite converter, hidden from sight, at the rear of the motor home so the four wires coming out are within reach of the towing receptacle. Attach these four wires according to one of the drawings shown in figure 1 depending on which receptacle you have on the motor home.
Installing a Bulb and Socket Wiring Kit. (Figures 7 & 8)
This method is far and away the simplest and fastest growing way to wire a vehicle to tow. Blue Ox designed the bulb and socket for the Jeep Grand Cherokee because it has a VIC (vehicle information center) that lets the driver know when taillights or turn signals are not operating properly. Adding diodes into this system will give false bulb out indications. Since it’s development, the bulb and socket’s popularity has grown as technicians are putting them into everything they can fit them into due to their simplistic installation procedure. I’ve seen some pretty inventive technicians when it comes to avoiding diode installations.
To install a bulb and socket you must first determine if there is room in the existing taillight housing for the extra socket by taking the taillight assembly out of the vehicle and inspecting it. Figure 7 shows Blue Ox’s bulb and socket. It requires about 3/4” of clearance for installation. Things to look for and avoid are inner reflective material, existing wiring and printed circuit boards that are molded into the taillight housing. Once your location has been determined, drill a one-inch hole in the housing using a hole saw and insert the socket with bulb. Follow steps 1 and 2 in the diode section for 4 to 4 systems. This will get your 4-wire harness and receptacle installed on the towed vehicle. Using figure 8, connect the sockets to the 4-wire harness and ground them properly using the self-drilling screws provided.
“Gremlin Hunting” (Troubleshooting)They say cute little fuzzy gremlins do not like water
or bright light and they should not be fed after midnight or they turn into nasty ferocious little critters as proven in the 1984 movie. Keep these valuable hints in mind when hunting gremlins in your electrical system.
Water. It couldn’t be truer as water can really enhance electrical problems through short circuits and corrosion, especially salt water. During the wiring process you should take special care not to nick or cut into any of the wire harness that may be exposed to the elements. All electrical connections should be kept free from moisture by either using a heat shrink covering or dielectric grease. Electrical tape is an option, but should be inspected often, as it does not last forever. 3M offers a very
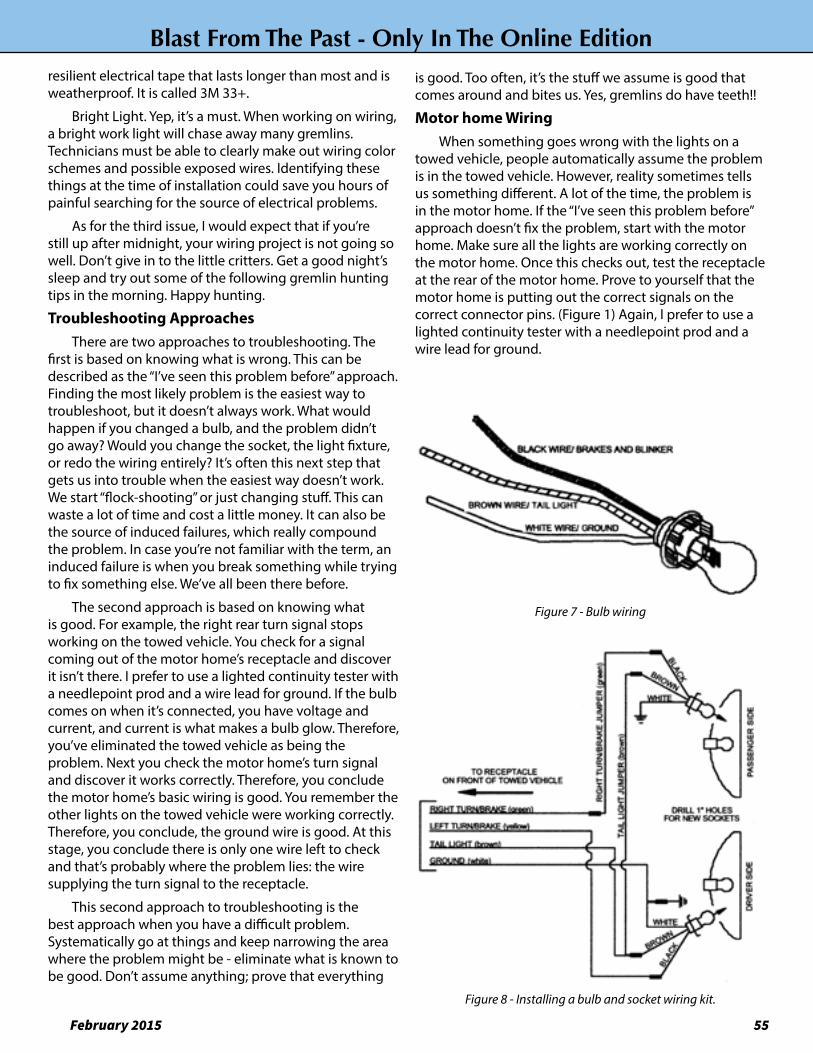
February 2015 55
Blast From The Past - Only In The Online Editionresilient electrical tape that lasts longer than most and is weatherproof. It is called 3M 33+.
Bright Light. Yep, it’s a must. When working on wiring, a bright work light will chase away many gremlins. Technicians must be able to clearly make out wiring color schemes and possible exposed wires. Identifying these things at the time of installation could save you hours of painful searching for the source of electrical problems.
As for the third issue, I would expect that if you’re still up after midnight, your wiring project is not going so well. Don’t give in to the little critters. Get a good night’s sleep and try out some of the following gremlin hunting tips in the morning. Happy hunting.
Troubleshooting ApproachesThere are two approaches to troubleshooting. The
first is based on knowing what is wrong. This can be described as the “I’ve seen this problem before” approach. Finding the most likely problem is the easiest way to troubleshoot, but it doesn’t always work. What would happen if you changed a bulb, and the problem didn’t go away? Would you change the socket, the light fixture, or redo the wiring entirely? It’s often this next step that gets us into trouble when the easiest way doesn’t work. We start “flock-shooting” or just changing stuff. This can waste a lot of time and cost a little money. It can also be the source of induced failures, which really compound the problem. In case you’re not familiar with the term, an induced failure is when you break something while trying to fix something else. We’ve all been there before.
The second approach is based on knowing what is good. For example, the right rear turn signal stops working on the towed vehicle. You check for a signal coming out of the motor home’s receptacle and discover it isn’t there. I prefer to use a lighted continuity tester with a needlepoint prod and a wire lead for ground. If the bulb comes on when it’s connected, you have voltage and current, and current is what makes a bulb glow. Therefore, you’ve eliminated the towed vehicle as being the problem. Next you check the motor home’s turn signal and discover it works correctly. Therefore, you conclude the motor home’s basic wiring is good. You remember the other lights on the towed vehicle were working correctly. Therefore, you conclude, the ground wire is good. At this stage, you conclude there is only one wire left to check and that’s probably where the problem lies: the wire supplying the turn signal to the receptacle.
This second approach to troubleshooting is the best approach when you have a difficult problem. Systematically go at things and keep narrowing the area where the problem might be - eliminate what is known to be good. Don’t assume anything; prove that everything
is good. Too often, it’s the stuff we assume is good that comes around and bites us. Yes, gremlins do have teeth!!
Motor home WiringWhen something goes wrong with the lights on a
towed vehicle, people automatically assume the problem is in the towed vehicle. However, reality sometimes tells us something different. A lot of the time, the problem is in the motor home. If the “I’ve seen this problem before” approach doesn’t fix the problem, start with the motor home. Make sure all the lights are working correctly on the motor home. Once this checks out, test the receptacle at the rear of the motor home. Prove to yourself that the motor home is putting out the correct signals on the correct connector pins. (Figure 1) Again, I prefer to use a lighted continuity tester with a needlepoint prod and a wire lead for ground.
Figure 7 - Bulb wiring
Figure 8 - Installing a bulb and socket wiring kit.
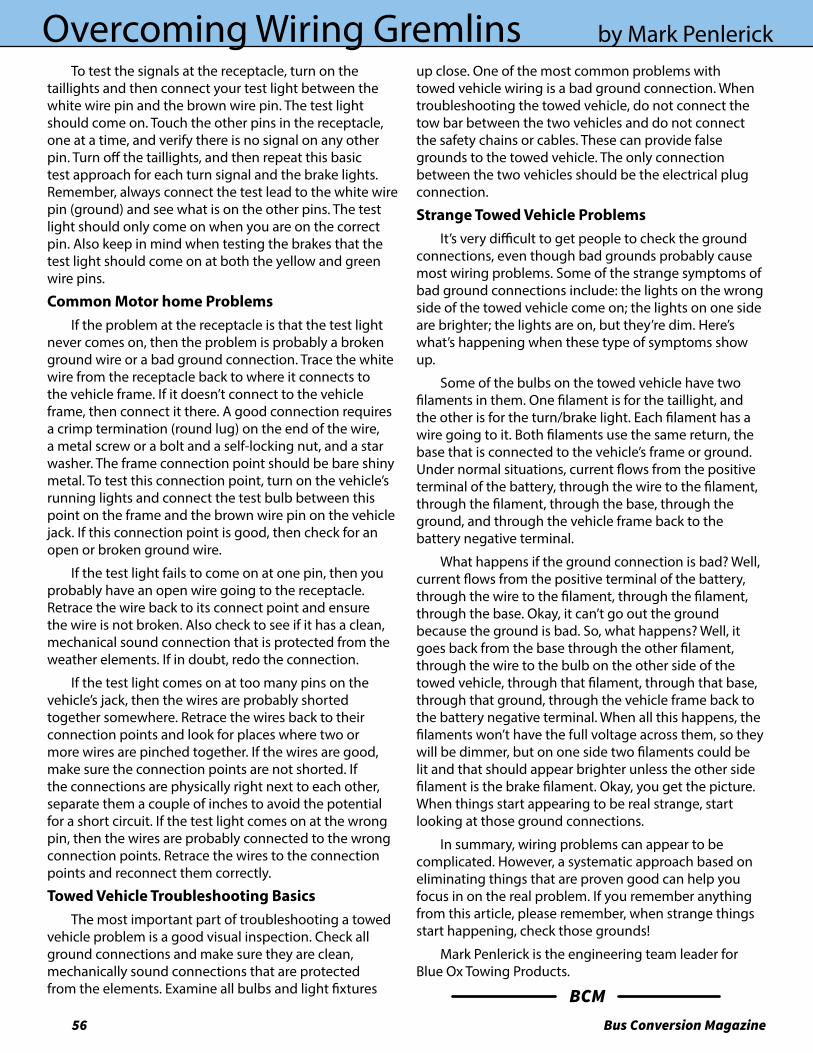
56 Bus Conversion Magazine
Overcoming Wiring Gremlins by Mark PenlerickTo test the signals at the receptacle, turn on the
taillights and then connect your test light between the white wire pin and the brown wire pin. The test light should come on. Touch the other pins in the receptacle, one at a time, and verify there is no signal on any other pin. Turn off the taillights, and then repeat this basic test approach for each turn signal and the brake lights. Remember, always connect the test lead to the white wire pin (ground) and see what is on the other pins. The test light should only come on when you are on the correct pin. Also keep in mind when testing the brakes that the test light should come on at both the yellow and green wire pins.
Common Motor home ProblemsIf the problem at the receptacle is that the test light
never comes on, then the problem is probably a broken ground wire or a bad ground connection. Trace the white wire from the receptacle back to where it connects to the vehicle frame. If it doesn’t connect to the vehicle frame, then connect it there. A good connection requires a crimp termination (round lug) on the end of the wire, a metal screw or a bolt and a self-locking nut, and a star washer. The frame connection point should be bare shiny metal. To test this connection point, turn on the vehicle’s running lights and connect the test bulb between this point on the frame and the brown wire pin on the vehicle jack. If this connection point is good, then check for an open or broken ground wire.
If the test light fails to come on at one pin, then you probably have an open wire going to the receptacle. Retrace the wire back to its connect point and ensure the wire is not broken. Also check to see if it has a clean, mechanical sound connection that is protected from the weather elements. If in doubt, redo the connection.
If the test light comes on at too many pins on the vehicle’s jack, then the wires are probably shorted together somewhere. Retrace the wires back to their connection points and look for places where two or more wires are pinched together. If the wires are good, make sure the connection points are not shorted. If the connections are physically right next to each other, separate them a couple of inches to avoid the potential for a short circuit. If the test light comes on at the wrong pin, then the wires are probably connected to the wrong connection points. Retrace the wires to the connection points and reconnect them correctly.
Towed Vehicle Troubleshooting BasicsThe most important part of troubleshooting a towed
vehicle problem is a good visual inspection. Check all ground connections and make sure they are clean, mechanically sound connections that are protected from the elements. Examine all bulbs and light fixtures
up close. One of the most common problems with towed vehicle wiring is a bad ground connection. When troubleshooting the towed vehicle, do not connect the tow bar between the two vehicles and do not connect the safety chains or cables. These can provide false grounds to the towed vehicle. The only connection between the two vehicles should be the electrical plug connection.
Strange Towed Vehicle ProblemsIt’s very difficult to get people to check the ground
connections, even though bad grounds probably cause most wiring problems. Some of the strange symptoms of bad ground connections include: the lights on the wrong side of the towed vehicle come on; the lights on one side are brighter; the lights are on, but they’re dim. Here’s what’s happening when these type of symptoms show up.
Some of the bulbs on the towed vehicle have two filaments in them. One filament is for the taillight, and the other is for the turn/brake light. Each filament has a wire going to it. Both filaments use the same return, the base that is connected to the vehicle’s frame or ground. Under normal situations, current flows from the positive terminal of the battery, through the wire to the filament, through the filament, through the base, through the ground, and through the vehicle frame back to the battery negative terminal.
What happens if the ground connection is bad? Well, current flows from the positive terminal of the battery, through the wire to the filament, through the filament, through the base. Okay, it can’t go out the ground because the ground is bad. So, what happens? Well, it goes back from the base through the other filament, through the wire to the bulb on the other side of the towed vehicle, through that filament, through that base, through that ground, through the vehicle frame back to the battery negative terminal. When all this happens, the filaments won’t have the full voltage across them, so they will be dimmer, but on one side two filaments could be lit and that should appear brighter unless the other side filament is the brake filament. Okay, you get the picture. When things start appearing to be real strange, start looking at those ground connections.
In summary, wiring problems can appear to be complicated. However, a systematic approach based on eliminating things that are proven good can help you focus in on the real problem. If you remember anything from this article, please remember, when strange things start happening, check those grounds!
Mark Penlerick is the engineering team leader for Blue Ox Towing Products.
BCM
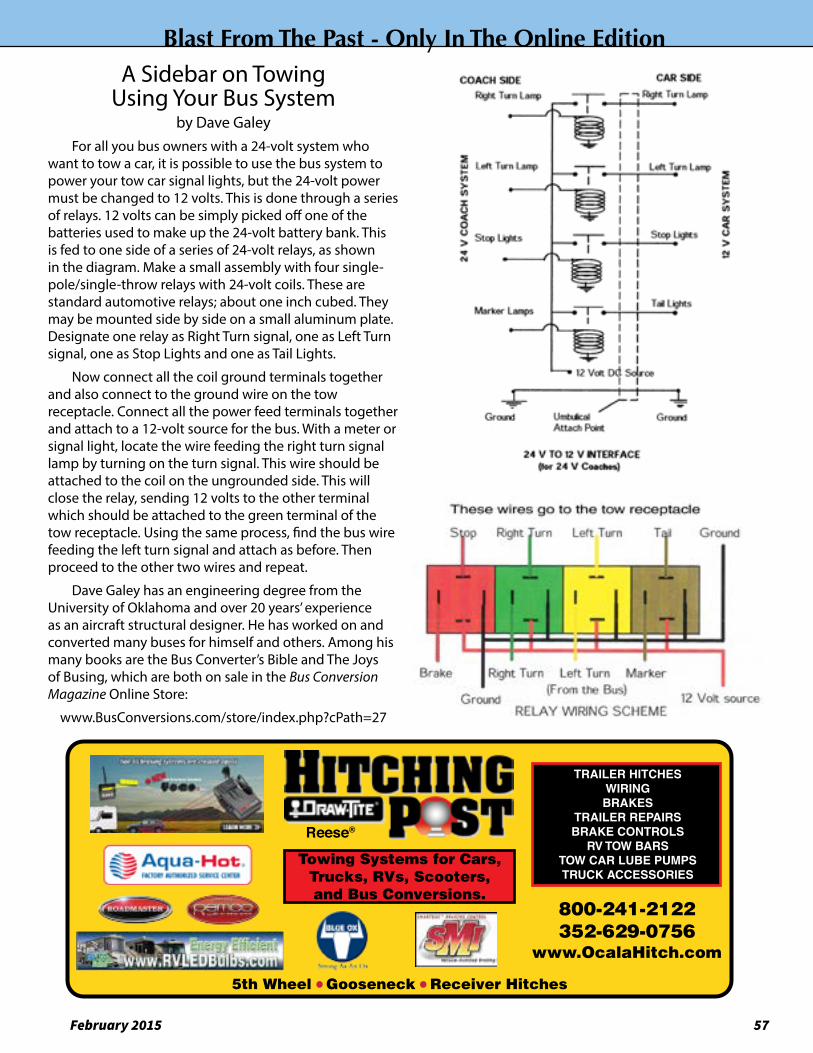
February 2015 57
Blast From The Past - Only In The Online EditionA Sidebar on Towing
Using Your Bus Systemby Dave Galey
For all you bus owners with a 24-volt system who want to tow a car, it is possible to use the bus system to power your tow car signal lights, but the 24-volt power must be changed to 12 volts. This is done through a series of relays. 12 volts can be simply picked off one of the batteries used to make up the 24-volt battery bank. This is fed to one side of a series of 24-volt relays, as shown in the diagram. Make a small assembly with four single-pole/single-throw relays with 24-volt coils. These are standard automotive relays; about one inch cubed. They may be mounted side by side on a small aluminum plate. Designate one relay as Right Turn signal, one as Left Turn signal, one as Stop Lights and one as Tail Lights.
Now connect all the coil ground terminals together and also connect to the ground wire on the tow receptacle. Connect all the power feed terminals together and attach to a 12-volt source for the bus. With a meter or signal light, locate the wire feeding the right turn signal lamp by turning on the turn signal. This wire should be attached to the coil on the ungrounded side. This will close the relay, sending 12 volts to the other terminal which should be attached to the green terminal of the tow receptacle. Using the same process, find the bus wire feeding the left turn signal and attach as before. Then proceed to the other two wires and repeat.
Dave Galey has an engineering degree from the University of Oklahoma and over 20 years’ experience as an aircraft structural designer. He has worked on and converted many buses for himself and others. Among his many books are the Bus Converter’s Bible and The Joys of Busing, which are both on sale in the Bus Conversion Magazine Online Store:
www.BusConversions.com/store/index.php?cPath=27
TRAILER HITCHES WIRINGBRAKES
TRAILER REPAIRSBRAKE CONTROLS
RV TOW BARSTOW CAR LUBE PUMPSTRUCK ACCESSORIES
800-241-2122352-629-0756
Towing Systems for Cars,Trucks, RVs, Scooters,and Bus Conversions.
5th Wheel Gooseneck Receiver Hitches
www.OcalaHitch.com
Reese®
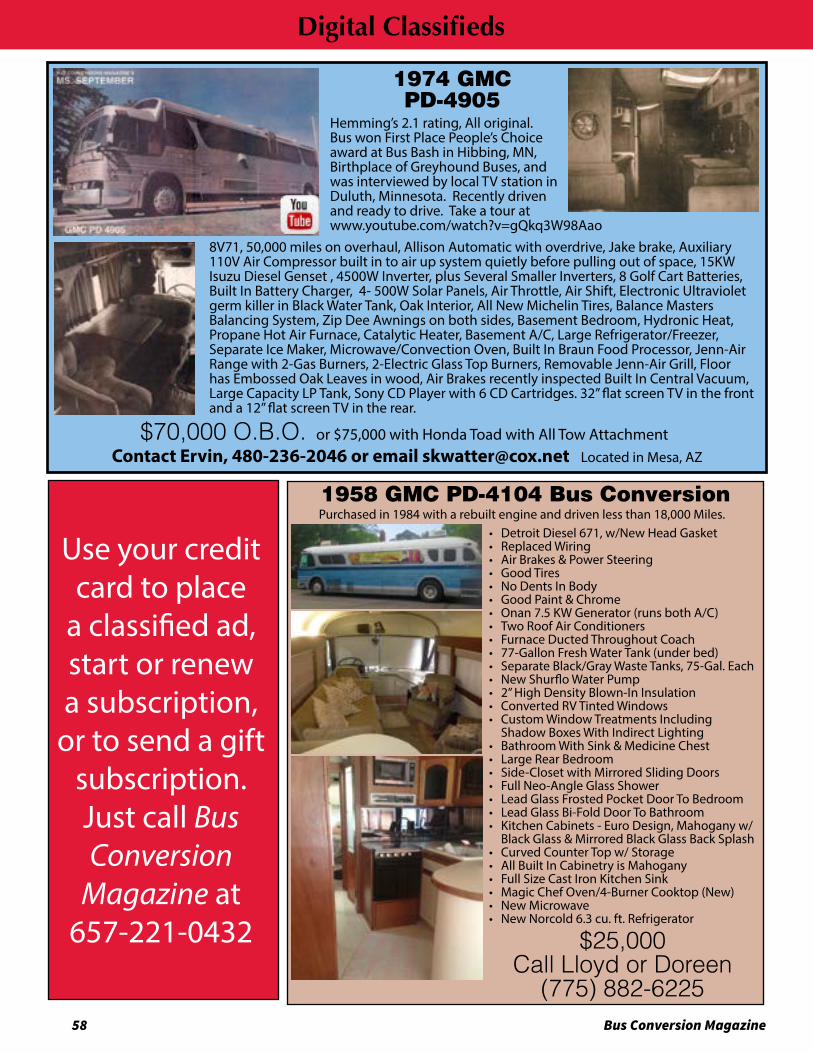
58 Bus Conversion Magazine
1958 GMC PD-4104 Bus ConversionPurchased in 1984 with a rebuilt engine and driven less than 18,000 Miles.
• Detroit Diesel 671, w/New Head Gasket• Replaced Wiring• Air Brakes & Power Steering• Good Tires• No Dents In Body• Good Paint & Chrome• Onan 7.5 KW Generator (runs both A/C) • Two Roof Air Conditioners• Furnace Ducted Throughout Coach• 77-Gallon Fresh Water Tank (under bed)• Separate Black/Gray Waste Tanks, 75-Gal. Each• New Shurflo Water Pump• 2” High Density Blown-In Insulation• Converted RV Tinted Windows• Custom Window Treatments Including
Shadow Boxes With Indirect Lighting• Bathroom With Sink & Medicine Chest• Large Rear Bedroom• Side-Closet with Mirrored Sliding Doors• Full Neo-Angle Glass Shower• Lead Glass Frosted Pocket Door To Bedroom• Lead Glass Bi-Fold Door To Bathroom• Kitchen Cabinets - Euro Design, Mahogany w/
Black Glass & Mirrored Black Glass Back Splash• Curved Counter Top w/ Storage• All Built In Cabinetry is Mahogany• Full Size Cast Iron Kitchen Sink• Magic Chef Oven/4-Burner Cooktop (New)• New Microwave• New Norcold 6.3 cu. ft. Refrigerator
$25,000Call Lloyd or Doreen
(775) 882-6225
1974 GMCPD-4905
Hemming’s 2.1 rating, All original. Bus won First Place People’s Choice award at Bus Bash in Hibbing, MN, Birthplace of Greyhound Buses, and was interviewed by local TV station in Duluth, Minnesota. Recently driven and ready to drive. Take a tour at www.youtube.com/watch?v=gQkq3W98Aao
$70,000 O.B.O. or $75,000 with Honda Toad with All Tow AttachmentContact Ervin, 480-236-2046 or email [email protected] Located in Mesa, AZ
8V71, 50,000 miles on overhaul, Allison Automatic with overdrive, Jake brake, Auxiliary 110V Air Compressor built in to air up system quietly before pulling out of space, 15KW Isuzu Diesel Genset , 4500W Inverter, plus Several Smaller Inverters, 8 Golf Cart Batteries, Built In Battery Charger, 4- 500W Solar Panels, Air Throttle, Air Shift, Electronic Ultraviolet germ killer in Black Water Tank, Oak Interior, All New Michelin Tires, Balance Masters Balancing System, Zip Dee Awnings on both sides, Basement Bedroom, Hydronic Heat, Propane Hot Air Furnace, Catalytic Heater, Basement A/C, Large Refrigerator/Freezer, Separate Ice Maker, Microwave/Convection Oven, Built In Braun Food Processor, Jenn-Air Range with 2-Gas Burners, 2-Electric Glass Top Burners, Removable Jenn-Air Grill, Floor has Embossed Oak Leaves in wood, Air Brakes recently inspected Built In Central Vacuum, Large Capacity LP Tank, Sony CD Player with 6 CD Cartridges. 32” flat screen TV in the front and a 12” flat screen TV in the rear.
Use your credit card to place
a classified ad, start or renew a subscription,
or to send a gift subscription. Just call Bus Conversion
Magazine at 657-221-0432
Digital Classifieds Exclusive Bonus Content Available Only In eMag & Online Edition
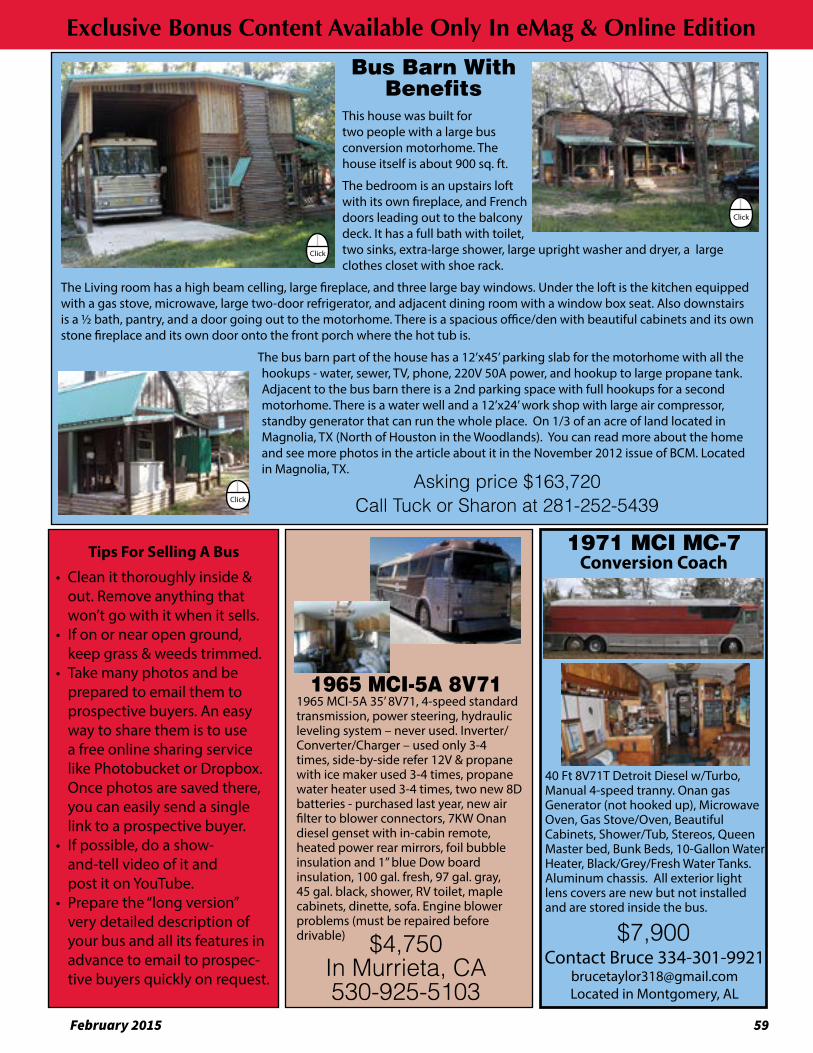
February 2015 59
This house was built for two people with a large bus conversion motorhome. The house itself is about 900 sq. ft.
The bedroom is an upstairs loft with its own fireplace, and French doors leading out to the balcony deck. It has a full bath with toilet, two sinks, extra-large shower, large upright washer and dryer, a large clothes closet with shoe rack.
The Living room has a high beam celling, large fireplace, and three large bay windows. Under the loft is the kitchen equipped with a gas stove, microwave, large two-door refrigerator, and adjacent dining room with a window box seat. Also downstairs is a ½ bath, pantry, and a door going out to the motorhome. There is a spacious office/den with beautiful cabinets and its own stone fireplace and its own door onto the front porch where the hot tub is.
The bus barn part of the house has a 12’x45’ parking slab for the motorhome with all the hookups - water, sewer, TV, phone, 220V 50A power, and hookup to large propane tank. Adjacent to the bus barn there is a 2nd parking space with full hookups for a second motorhome. There is a water well and a 12’x24’ work shop with large air compressor, standby generator that can run the whole place. On 1/3 of an acre of land located in Magnolia, TX (North of Houston in the Woodlands). You can read more about the home and see more photos in the article about it in the November 2012 issue of BCM. Located in Magnolia, TX.
Asking price $163,720Call Tuck or Sharon at 281-252-5439
Bus Barn With Benefits
Click
Click
Click
1965 MCI-5A 8V711965 MCI-5A 35’ 8V71, 4-speed standard transmission, power steering, hydraulic leveling system – never used. Inverter/Converter/Charger – used only 3-4 times, side-by-side refer 12V & propane with ice maker used 3-4 times, propane water heater used 3-4 times, two new 8D batteries - purchased last year, new air filter to blower connectors, 7KW Onan diesel genset with in-cabin remote, heated power rear mirrors, foil bubble insulation and 1” blue Dow board insulation, 100 gal. fresh, 97 gal. gray, 45 gal. black, shower, RV toilet, maple cabinets, dinette, sofa. Engine blower problems (must be repaired before drivable) $4,750
In Murrieta, CA 530-925-5103
Tips For Selling A Bus
• Clean it thoroughly inside & out. Remove anything that won’t go with it when it sells.
• If on or near open ground, keep grass & weeds trimmed.
• Take many photos and be prepared to email them to prospective buyers. An easy way to share them is to use a free online sharing service like Photobucket or Dropbox. Once photos are saved there, you can easily send a single link to a prospective buyer.
• If possible, do a show-and-tell video of it and post it on YouTube.
• Prepare the “long version” very detailed description of your bus and all its features in advance to email to prospec-tive buyers quickly on request.
1971 MCI MC-7Conversion Coach
40 Ft 8V71T Detroit Diesel w/Turbo,Manual 4‐speed tranny. Onan gas Generator (not hooked up), Microwave Oven, Gas Stove/Oven, Beautiful Cabinets, Shower/Tub, Stereos, Queen Master bed, Bunk Beds, 10-Gallon Water Heater, Black/Grey/Fresh Water Tanks. Aluminum chassis. All exterior light lens covers are new but not installed and are stored inside the bus.
$7,900Contact Bruce 334-301-9921
[email protected] in Montgomery, AL
Exclusive Bonus Content Available Only In eMag & Online Edition
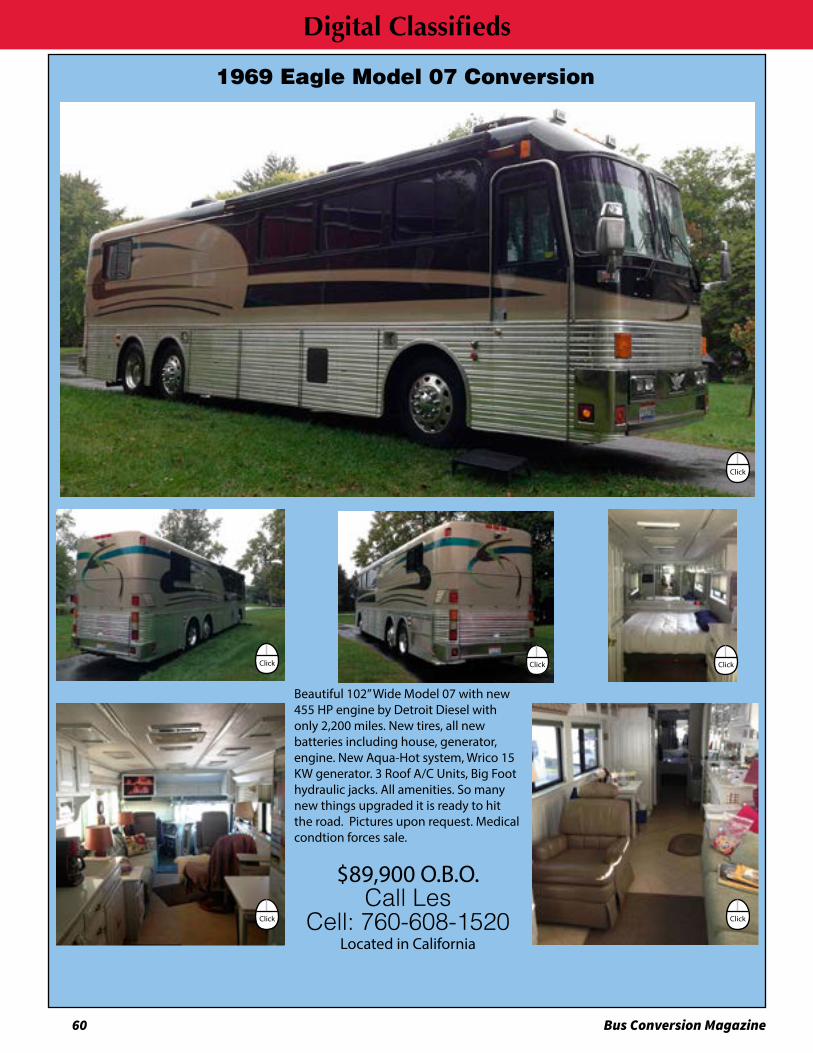
60 Bus Conversion Magazine
1969 Eagle Model 07 Conversion
Beautiful 102” Wide Model 07 with new 455 HP engine by Detroit Diesel with only 2,200 miles. New tires, all new batteries including house, generator, engine. New Aqua-Hot system, Wrico 15 KW generator. 3 Roof A/C Units, Big Foot hydraulic jacks. All amenities. So many new things upgraded it is ready to hit the road. Pictures upon request. Medical condtion forces sale.
$89,900 O.B.O.Call Les
Cell: 760-608-1520Located in California
Digital Classifieds
Click
Click Click Click
Click Click
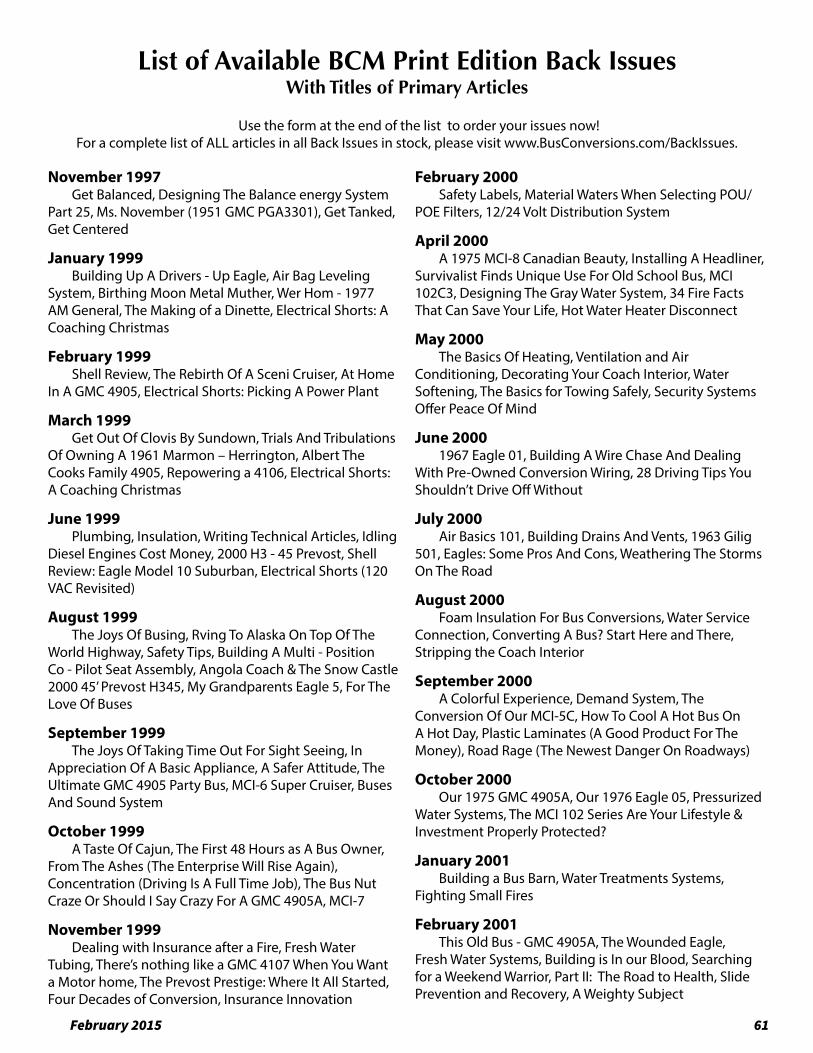
February 2015 61
Digital ClassifiedsList of Available BCM Print Edition Back Issues
With Titles of Primary Articles
Use the form at the end of the list to order your issues now! For a complete list of ALL articles in all Back Issues in stock, please visit www.BusConversions.com/BackIssues.
November 1997Get Balanced, Designing The Balance energy System
Part 25, Ms. November (1951 GMC PGA3301), Get Tanked, Get Centered
January 1999Building Up A Drivers - Up Eagle, Air Bag Leveling
System, Birthing Moon Metal Muther, Wer Hom - 1977 AM General, The Making of a Dinette, Electrical Shorts: A Coaching Christmas
February 1999Shell Review, The Rebirth Of A Sceni Cruiser, At Home
In A GMC 4905, Electrical Shorts: Picking A Power Plant
March 1999Get Out Of Clovis By Sundown, Trials And Tribulations
Of Owning A 1961 Marmon – Herrington, Albert The Cooks Family 4905, Repowering a 4106, Electrical Shorts: A Coaching Christmas
June 1999Plumbing, Insulation, Writing Technical Articles, Idling
Diesel Engines Cost Money, 2000 H3 - 45 Prevost, Shell Review: Eagle Model 10 Suburban, Electrical Shorts (120 VAC Revisited)
August 1999The Joys Of Busing, Rving To Alaska On Top Of The
World Highway, Safety Tips, Building A Multi - Position Co - Pilot Seat Assembly, Angola Coach & The Snow Castle 2000 45’ Prevost H345, My Grandparents Eagle 5, For The Love Of Buses
September 1999The Joys Of Taking Time Out For Sight Seeing, In
Appreciation Of A Basic Appliance, A Safer Attitude, The Ultimate GMC 4905 Party Bus, MCI-6 Super Cruiser, Buses And Sound System
October 1999A Taste Of Cajun, The First 48 Hours as A Bus Owner,
From The Ashes (The Enterprise Will Rise Again), Concentration (Driving Is A Full Time Job), The Bus Nut Craze Or Should I Say Crazy For A GMC 4905A, MCI-7
November 1999Dealing with Insurance after a Fire, Fresh Water
Tubing, There’s nothing like a GMC 4107 When You Want a Motor home, The Prevost Prestige: Where It All Started, Four Decades of Conversion, Insurance Innovation
February 2000Safety Labels, Material Waters When Selecting POU/
POE Filters, 12/24 Volt Distribution System
April 2000A 1975 MCI-8 Canadian Beauty, Installing A Headliner,
Survivalist Finds Unique Use For Old School Bus, MCI 102C3, Designing The Gray Water System, 34 Fire Facts That Can Save Your Life, Hot Water Heater Disconnect
May 2000The Basics Of Heating, Ventilation and Air
Conditioning, Decorating Your Coach Interior, Water Softening, The Basics for Towing Safely, Security Systems Offer Peace Of Mind
June 20001967 Eagle 01, Building A Wire Chase And Dealing
With Pre-Owned Conversion Wiring, 28 Driving Tips You Shouldn’t Drive Off Without
July 2000Air Basics 101, Building Drains And Vents, 1963 Gilig
501, Eagles: Some Pros And Cons, Weathering The Storms On The Road
August 2000Foam Insulation For Bus Conversions, Water Service
Connection, Converting A Bus? Start Here and There, Stripping the Coach Interior
September 2000A Colorful Experience, Demand System, The
Conversion Of Our MCI-5C, How To Cool A Hot Bus On A Hot Day, Plastic Laminates (A Good Product For The Money), Road Rage (The Newest Danger On Roadways)
October 2000Our 1975 GMC 4905A, Our 1976 Eagle 05, Pressurized
Water Systems, The MCI 102 Series Are Your Lifestyle & Investment Properly Protected?
January 2001Building a Bus Barn, Water Treatments Systems,
Fighting Small Fires
February 2001This Old Bus - GMC 4905A, The Wounded Eagle,
Fresh Water Systems, Building is In our Blood, Searching for a Weekend Warrior, Part II: The Road to Health, Slide Prevention and Recovery, A Weighty Subject
62 Bus Conversion Magazine
List of Available BCM Print Edition Back IssuesWith Titles of Primary Articles
March 2001Freeze Protection, Part 3: The Road to Health, Winter
of No Contents, What You Need to Know to Tow
April 2001How to Get Wired, The Man Who Could Have Any Bus
(The ABC’sof This ‘79 Eagle 05), Security on the Open Road
June 2001Showers, Water System Updates, The Road to Health,
Part V: The Repower
July 2001Baja 101, Toilets, Building your Bus on a Budget
August 2001Designer of World Class Motor coaches, Out of Fuel,
Sewage, The VanHool T800 Series, Dream catcher (The Story of the Allred’s 1960 GMC 4104, Is This the World’s Cheapest Motorized Transportation, Food Preparation and Storage
November 2001Be Flexible, A Cooling Shower, More Than a Five-Year
Mission (1972 Eagle Model 05 “Enterprise”), Eagle Owners Down Under (Or…), Waste System Accessories, Re-Selling your Conversion, An Ounce of Maintenance, Mobile Internet Access
December 2001Patriotic Offerings, Now is the Time to Winterize,
Alternative Plumbing Systems, Every Saga Has a Beginning, Coming Ashore to Tour the Countryside (Former Boat Builders Use Their Expertise to Convert a 1965 Bluebird School Bus)
March 2002Our Flying Bus Part 2, Musically, We Roll Along, LP
Stove Operation, Traveling with Propane, Art, Music & “A House that Has Everything” (Making a ‘55 Flxible VL 100 Roadworthy or Seaworthy)
April 2002Our Flying Bus, Part 3, LP Stove Installation, and
Camping Safety: It’s Up to You
August 2002Our Flying Bus(Part 5: Painting), Appliances for Bus
Conversions, Fun in the Sun: Heading for the Dunes in a 1979 MCI-5C, LP Furnaces, Security Systems
September 2002Preparing to Convert, Installing a Ready Brake,
Building the Eagle’s Nest (Converting a 1979 Bluebird), Securing Children in Your Bus
October 2002Chassis and Floor Rebuild, Floor Plan Layout,
Converting our 1970MCI-7, The Toad Connection
November 2002All about Toads, The Case for a Built-In Washer/Dryer,
The RV Code, Installing the Shower
December 2002The 2002 Acura MDX (Who Says You Can’t Have it
All?), Our Flying Bus - Part 7: Floor Plan and Framing, Slide-Out Room Controls, Radiator Revival, MAK’S Knotty Cabin Conversion Part 6: Lighting, Blame It on the Storms of Saskatoon (Traveling Comfortably in “Casamoto,” a 1980 Prevost Le Mirage), Visiting Canada in Your RV
April 2003Our Flying Bus - Part 9: Window Installation, Things
to Consider When Selecting Your Bus, Hot Water Heat - Installation and Testing, The MC-9, Work- Sweat and Planning - Building an MC-9 From the Shell Up, How to Build a Conversion in One Week: Looking Back at the 2003 Winter Workshop, 2003 Bus Converter’s Survey Results, Gathering at the Caverns (Bus Conversion Show April 11-13, 2003 - Calendar)
May 2003The Honda Accord (Plus Quick Toads), Adventure
Begins in “Adventures Unlimited” (A Family Project Building our MC-9), Hidden Hazards of the Road
July 2003Painless Dentistry, A Lot of Hot Air, TLC for a 1966 GM
PD 4107, Rearview TV, Tow Bars Do Wear Out, Travel Safe, Secure and Savvy
August 2003Our Flying Bus, Part 10: Lightweight Interior
Designing, Roof Air Conditioners, Seeing History Through the Windows of a Bus:Converting a 1988 Eagle Model 15
September 2003Raising the Roof, LP Storage Tanks, Preparing for a
Medical Emergency on the Road
October 2003Bus at 7,000 Feet and No Brakes – almost, Wipe out
Winter Worries, Enhancing Your Coach with Solar Power
November 2003Buying Bus Conversion Insurance: The Insider’s Guide,
Motor Oil in the Transmission, Paint Jobs
February 2015 63
December 2003Building the Lower Cabinets, The Conversion of
our 1988 Eagle Model 15, Graphics and Paint Systems, Accidents Happen
January 2004LP Overview, Installing New Steps in our 1973 MC-
8, From an Ugly Duckling to a Castle on Wheels (The Conversion of a 1989 Eagle 20), The Paint Job On Our 1975 GMC 4905A.
February 2004Building Cabinet Doors, Drawer Faces and the Upper
Cabinets, Radio Communications (Good Ol’ CBs Still Come in Handy on the Road)
March 2004Getting an Insulation R Greater Than 50, More Ideas
for Designing Beds, Installing a “Truck Type” Door Latch, Bus and Motor Home, Fires (Prevention, Detection and Suppression), Towing Physics 101
April 2004Locking the Engine, Service and Fuel Cap Doors,
Getting a Handle n Storage Slide-Outs, How to Maintain your Bus Wheels, How to Drive a Motor Home Safely (Or, How Commercial Bus Driving Helped me Become a Better Motor Home/Bus Conversion Driver)
May 2004Bending Sheet Aluminum, A Dashing Panel, Installing
and Using 120 Volts AC, Installing Toe Kick Drawers
July 2004MC-9 Engine Rail Repair, The Installation of a Solar
Charging System, How to Drive a Bus Conversion Safely, Part II
August 2004Bus Buying Made Simple, Keeping Your Cool in the
Summer Heat,120-Volt Wire Selection (Code, Legal, Liability, and Safety Issues),Time to Make Things Flow
October 2004Satellite TV Systems: Part III (Antennas), Hydrogen-
Fueled Buses(The Future of Busing), The “Jake” Brake (Ever Wish You Had Some Extra Braking Power?)
January 20051984 Eagle Model 10 (“Alotta”), A Graphic Experience,
Mt. Poodle, RTV Distribution Hardware, MCI 102 C3, The Under bay Sleeping Compartment
February 20051991 Blue Bird (Cabin Fever), Marvelous Minnesota,
Stripping the Bus
March 2005The Finger Lakes are Gorgeous, TV Distribution
Systems, Alarm Systems for Buses/Motorhomes, “Our Hilton”, A Bus for All Seasons, Window Removal & Skinning
May 2005Tanks for Your Bus, Moose less in Maine, Safer 120-Volt
Wiring, Load Centers, Insulation, The Twelve Year Journey Continues, Our “Odyssey” 1985 Neo-Plan
June 2005Propane for Bus Nuts, Floor Plans - The Basics, Heavy
Towing - Safely, The Bluegrass Special, Do-it-Yourself Bus Polishing, No Place Like Home: 1963 GM 4106, Bus Fever From Nova Scotia
July 2005Cabinetmaking for Bus Converters: Part I, Nothin’
Could Be Finer Than to Bus in Carolina: Part I, Floor Plans - Driving & Riding Area, A Bus Converter’s Work is Never Done, Interior Skinning,
August 2005Cabinetmaking for Bus Converters: Part II, Nothin’
Could Be Finer Than to Bus in Carolina: Part II, Floor Plans - Living & Dining Areas, Plumbing Your Bus, Tales from a Novice Bus Owner
September 2005Cabinetmaking for Bus Converters: Part III, Now is
the Time to Winterize, Busing on My Mind, Floor Plans - The Kitchen, The VanHoll T800 Series, Electrical Wiring, A Labor of Love - 1968 MCI MC-7
October 2005Floor Plans: The Bath, The Odyssey, 1982 Prevost
Marathon, Heating and Air Conditioning, What You Need to Know to Tow
November 2005Floor Plans: The Bedroom, The Odyssey, 1982 Eagle
Model 10, Installing a Headliner (A Bus Designer’s Riff)
December 2005Floor Plans: Shell Modifications, 1982 MCI MC-9.
February 20061970 GMC 4905, Key Weird, A Summer Of Moosn Fun
List of Available BCM Print Edition Back IssuesWith Titles of Primary Articles

64 Bus Conversion Magazine
March 20061984 Neo-Plan Spaceliner Floor Plans – Heating, The
Eagle: Pro’s and Con’s
April 2006Slide Prevention and Recovery, 1978 Eagle 03,
Building a Bus Barn, Floor Plans: Air Conditioning, The Man in Black’s Tour Bus Restoration
May 2006sKOOLies: They’re Not Just for Hippies, Installing a
Headliner, Floor plans: Electrical Layouts, 1990 Prevost Le Mirage XL, Stripping the Coach Interior
July 2006Building a 3-Dimensional Floor Plan, The Dentist
Comes To You,Busing in the Buff, 1971 MCI MC-7 Challenger
October 2006The Crown Super Coach, The Floor Plan Layout, Scania
Electric Self Driver Minibuses, At the End of the Stick … The “Green Carrot”, Busing in the Biggest Little City, Floor Plans: Equipment Review
November 2006Systems Analysis: Window and Window Treatments,
California Dreamin’ and Busin’, This Prevost XLs Not So Extreme Makeover, What Do the Springs Do On An Airbrake System, Coming Ashore to Tour the Countryside
February 2007Tow-Car Fun Times, The History of Van Hool: Part I,
America’s Last (Bus) Frontier: Part II, Systems Analysis: Lighting Options, The Dream of my Own Coach!
March 2007No Fuelin’ Around, Designing the Balanced Energy
System, The History of Van Hool: Part I, America’s Last ‘Bus’ Frontier: It’s Raining’Buses, Our 1977 GM 4905A ‘Dream Catcher’, Systems Analysis: Ventilation, Generator Fuel Change
April 2007Time to Re-Tire, Designing the Balanced Energy
System, The Seal You Never Want to See, The Eagle Soars Again in Europe, Systems Analysis: Ventilation Options, Generator Fuel Change
May 2007Fascinating Fastener Facts, Introduction: Part I,
Designing the Balanced Energy System: Part III, 102 VAC-System Safety
July 2007Fascinating Fastener Facts: Part III, Designing
the Balanced Energy System: Part IV, 120 VAC Source Connections
August 2007Fascinating Fastener Facts (Part IV), Designing the
Balanced Energy System, 120-VAC Distribution, Wayne’s ‘Woody’ Bus A Blast From the Past Returns`
November 2007Cabinetry for the Bus Converter: Part I, Designing the
Balanced Energy System: Part VIII, Safety Considerations, Installing an Air Throttle
December 2007Cabinetry for the Bus Converter: Woods, Designing
the Balanced Energy System: Part IX, Antenna-Up Alarm
September 2008Ebus: Is Electric the Future, ATM’s Thieves Cash Cow,
A Bus with 3 Lives And Counting, Fueling a Debate, Last Stop (for Now), Seminars: Toilets, Rid the Rust With Less Fuss, Electrical Reliability
November 2008The Red Rover, Bus Nut for Life, Air Suspension
Leveling, Mixing Water and Gas, Reliability, Traveling on a Budget, He Lives in a Garbage Truck
January 2009I Get Stupid Part 2 (How I clipped a sign and cracked
my curb side mirror), An Aquarium on Wheels, It’s 5 O’clock Somewhere, A Dream Fulfilled, Fire Truck: Road Ready, The Power of Windows
March 2009I Get Stupid Part 4 (I finally learn to think a bit
straighter), Toad Protection (Low Cost Rock Guard), Bus to Trailer Toad Wiring,
May 2009Now What? The First Trip Home, Bonding With Dave
(Adhesives), Filling the Shell (Cabinetry), The Orange Blossom Special ll, Life of a Love Bus
June 2009Bart and Judy’s Personal Adventure Vehicle, LCD
or Plasma, Bonding with Dave (Elastics, Sika, more), Troublesome Tow bar
July 2009Keeping It In The Family, Embark With Your Dog This
Summer, Watch Out For UFO’s, Travelling Along The North West Coast
List of Available BCM Print Edition Back IssuesWith Titles of Primary Articles
February 2015 65
August 2009Bus Bling! Stainless Steel Polishing, Converting a
Bus Radiator Fill System to Automotive Components, Recreational Vehicle Fire Safety
September 2009Lessons Learned: A Heart-Braking Tale, Electric Wiper
Motors and Wet Arm Washers, Antifreeze Requirements for Detroit Diesel and Other Heavy Duty Diesel Engines, This Should Have Been Easy Flooring
October 2009Eagle Suspension and Alignment Procedure, A
Quieter Generator for the Orange Blossom Special II, Thoughts About Engine Conversions or Re-Power Options for Buses.
November 2009Part 2: Eagle Suspension and Alignment Procedure,
Easy Low Cost Magazine Rack, Let There Be Light, Part 2: Thoughts about Engine Conversions or Re-Power Options for Buses, Lobsters and Lighthouses
December 2009Part 3: Thoughts About Engine Conversions or Re-
Power Options for Buses, Crack! Windshield Repair, The Odyssey, Rural and Rustic
January 2010You’ve Got To Be a Part of It, Bus Designer Q & A, CMI
Lights the Road
February 2010Step by Step, Hosting Your Own Bus Rally, The
Misadventures of Bryan, Rhonda, and Zeke, Building Your Own Custom Holding Tank, Bus Designer Q & A
March 2010The Foothills Flyer, Towing Safety connection
Hardware, Replacing OEM Air Bags with Rolling Lobe, Building a Bus Barn, Detecting Sneaky Leaks, House Calls,
April 2010The Best in the Bus, What a Tough Decision! Buying
Your First Bus, House Battery Systems: 12 volts or 24, Why Not an RTS, Geocaching
May 2010Dedicated to Twenty-Five Years of Busing, Building
a One Piece Door, Defensive Thinking, Snapshots from Thailand
June 2010Full Steam Ahead…The Steamin’ Eagle, Steam
Bending, Computers On The Road, you Do A Hoodoo? (Bryce Canyon National Park)
July 2010The Making of a Dream, Being the King of your Motor
coach, A Valve For Any Occasion, The making of a Door Hinge
August 2010On a Mission, Do It Yourself Alternative Fuel - WVO,
Part 1 - Introduction & WVO Collection, Choosing a Toilet, Adventures in Bus Ownership, HD TV and You, Let’s Do An Airbrake Test
September 2010Urge Part 3: The End of the Engine, Do It Yourself
Alternative Fuel 2: Building a Processor, Motor Coach Pre-trip Inspection Step 2: The Engine Compartment, Fresh Water Schematic
October 2010“The Emerald Dream”, Detector Systems That Can
Save Your Life, Wood Joining Techniques for Classy Cabinets, How to Fix an Eagle With a Weak Wing, Inspection of the Interior, Do It Yourself Alternative, Building a Slide out
November 2010Eleven Feet Tall and Bullet Proof, More Simple
Solutions, Replacing Air Wipers With Electric, Microsoft Streets and Trips, Inspection of the Interior 2, Installing Classy Cabinets,
December 2010More Misadventures With Bryan , Rhonda , And
Zeke (Rodeos And Bus’n USA), Heating a Bus, Fire Safety, Photo Journal (A New Floor For An 05XLII-DS), Building a Bed Slide Out, Shore Power Outlets, General Exterior Inspection
January 2011Paradise by the Dashboard LED, Convertors, Invertors,
and Chargers, Wheels and Tires
February 2011Making It Easier To Service The Air Dryer, Double
Stack, First Timers Perspective, Busses - They Leak
March 2011Engine Reconditioning, A Bus Barn With Benefits,
Keeping Inverters Cool, Fundamentals Of Bus Safety, Biodiesel Fuel
List of Available BCM Print Edition Back IssuesWith Titles of Primary Articles
66 Bus Conversion Magazine
May 2011From Transit To Community Emergency Response
Vehicle, Electrical Relays 101, Throwing Nothing Away
June 2011Tools For Classy Cabinets, Solar Battery Charging
System, The Importance Of PM, Slide Out Support
October 2012Installing A Generator In An MCI, The Cruiser, The $50
Bus Makeover, How it All Started, From Boat to Bus and Back
November 2012A Bus Barn with Benefits, Road Wars [California vs.
Arizona], Work Camping,
Euro Disco Neo-plan Spaceliner, How to Convert a Bus in to a Motorhome
December 2012The Search for the Technomadia Zephyr,Prevost
Le Mirage Review, No A/C on a Hot Summer Day, Homemade Fuel Gauge, Land Of Fire (Yellowstone), How to Convert a Bus in to a Motor Home
January 2013Preventing an Overheat Engine Shutdown, Integral
Power Steering, Fire Safety, My First Bus, cozy Wood Heat for bus Conversions, The Price of My Dream
February 2013Prevost H3-40 Conversion, Unforgettable Breakdown,
Engine Cooking, Installing an Air Throttle
March 2013When You Have An All Electric Coach All of Your
Electric Needs to Work, To Convert or Just Dream, Where I Take My Bus, An Off Grind Paradise on Wheels
April 2013“Belly Bomb” with “Wazoo Mobile”, Travel: Pike’s Peak,
Arcadia Rally, Foam Insulation
May 2013Pouring Rent in the Tank, Soundproofing the House,
My Log Cabin Bachelor Bus
June 2013Big Blue Bear Lake, Bus History Project, The $300 Paint
Job
July 2013Cooling Systems, Installing Ducted Roof Air,
Swapping Out a Rear End, Genset Air Bag Plumbing
August 2013Install a Composting Toilet in Your Bus, Why Convert a
Dina? Part Two, Build a Step Cover/Footrest,
September 2013Welding, Gardening at 60 MPH, Build a Generator
Slide Out, North to Alaska, The Angel Bus
October 2013King of Your Motor Coach, Driver/Passenger Air
Deflectors, Back to the Bricks Rally, Bus History (School Buses)
November 20131979 MCI 5C Conversion, MCI-8 History, Life on the
Road, It’s 5 O’clock Somewhere, Working with Wood
December 2013The Auxiliary Air System, World War II Buses, Walk
Around Inspection
January 2014The Best of Both Worlds - GLAMARAMA13 Rally,
Converting a Model 10 Eagle, Planning Your Cabinets, Building a rolling Scaffold, Balance Masters Wins 5-Year Contract for Government Vehicles
February 2014The Arcadia Rally 2014, Wi-Fi Ranger Go & Booster
Install, Inspection of the Interior Part 2, Rust and Old Buses, Upgrade MC-8 Tail Lights, LED Lighting for Bus Conversions
March 2014Upgrading Bus Headlights, Simple Fix For Leaking
MCI Air Suspension, Easy Access Wiring & Plumbing Channels, Call of the Eagle, 2nd Annual Dam Rally, Rebuilding a Bus From The Tires UP, Drawer Guides
April 2014Decision Time! Planning Your Conversion, Overhead
Drilling Made Easier, Converting the GMC/TMC RTS, Iron Horse - Wild West Elegance - Model 10 Eagle, Bay Floor Shoreline/Water Access Port, Fuel Efficiency Considerations
May 2014Building Your Own Custom Holding Tanks, Floor Plan
Design, Cool Engineering, A Labor of Flxible Love
June 2014Repairing the Generator Exhaust Pipe, The LED doctor
– Replace fixtures, Cool Cruiser, A Flxible Hobby
List of Available BCM Print Edition Back IssuesWith Titles of Primary Articles
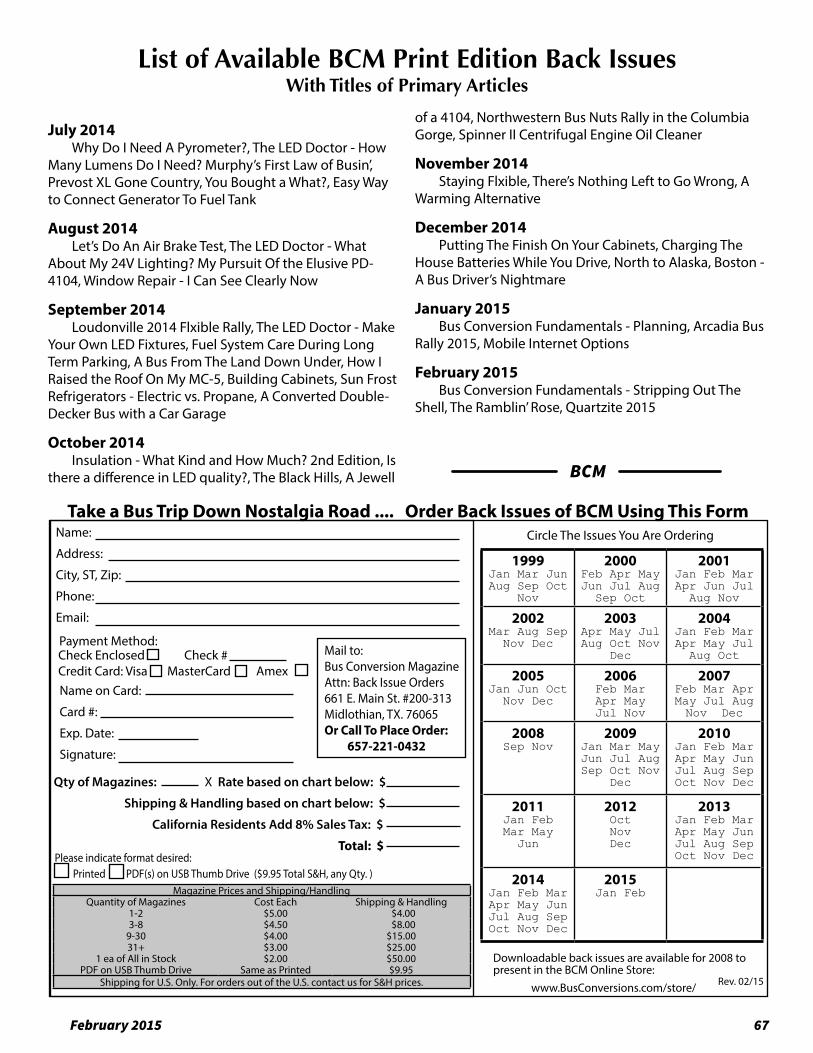
February 2015 67
July 2014Why Do I Need A Pyrometer?, The LED Doctor - How
Many Lumens Do I Need? Murphy’s First Law of Busin’, Prevost XL Gone Country, You Bought a What?, Easy Way to Connect Generator To Fuel Tank
August 2014Let’s Do An Air Brake Test, The LED Doctor - What
About My 24V Lighting? My Pursuit Of the Elusive PD-4104, Window Repair - I Can See Clearly Now
September 2014Loudonville 2014 Flxible Rally, The LED Doctor - Make
Your Own LED Fixtures, Fuel System Care During Long Term Parking, A Bus From The Land Down Under, How I Raised the Roof On My MC-5, Building Cabinets, Sun Frost Refrigerators - Electric vs. Propane, A Converted Double-Decker Bus with a Car Garage
October 2014Insulation - What Kind and How Much? 2nd Edition, Is
there a difference in LED quality?, The Black Hills, A Jewell
List of Available BCM Print Edition Back IssuesWith Titles of Primary Articles
of a 4104, Northwestern Bus Nuts Rally in the Columbia Gorge, Spinner II Centrifugal Engine Oil Cleaner
November 2014Staying Flxible, There’s Nothing Left to Go Wrong, A
Warming Alternative
December 2014Putting The Finish On Your Cabinets, Charging The
House Batteries While You Drive, North to Alaska, Boston - A Bus Driver’s Nightmare
January 2015Bus Conversion Fundamentals - Planning, Arcadia Bus
Rally 2015, Mobile Internet Options
February 2015Bus Conversion Fundamentals - Stripping Out The
Shell, The Ramblin’ Rose, Quartzite 2015
BCM
Payment Method:Check Enclosed Check #Credit Card: Visa MasterCard Amex
Name:
Address:
City, ST, Zip:
Phone:
Email:
Qty of Magazines: X Rate based on chart below: $
Shipping & Handling based on chart below: $
California Residents Add 8% Sales Tax: $
Total: $ Please indicate format desired:
Printed PDF(s) on USB Thumb Drive ($9.95 Total S&H, any Qty. )
Take a Bus Trip Down Nostalgia Road .... Order Back Issues of BCM Using This Form
Mail to: Bus Conversion MagazineAttn: Back Issue Orders661 E. Main St. #200-313Midlothian, TX. 76065 Or Call To Place Order: 657-221-0432
Magazine Prices and Shipping/HandlingQuantity of Magazines Cost Each Shipping & Handling
1-2 $5.00 $4.003-8 $4.50 $8.00
9-30 $4.00 $15.0031+ $3.00 $25.00
1 ea of All in Stock $2.00 $50.00PDF on USB Thumb Drive Same as Printed $9.95
Shipping for U.S. Only. For orders out of the U.S. contact us for S&H prices.
Name on Card:
Card #:
Exp. Date:
Signature:
1999Jan Mar Jun Aug Sep Oct
Nov
2000Feb Apr May Jun Jul Aug
Sep Oct
2001Jan Feb Mar Apr Jun Jul
Aug Nov
2002Mar Aug Sep
Nov Dec
2003Apr May Jul Aug Oct Nov
Dec
2004Jan Feb Mar Apr May Jul
Aug Oct
2005Jan Jun Oct
Nov Dec
2006Feb MarApr MayJul Nov
2007Feb Mar Apr May Jul AugNov Dec
2008Sep Nov
2009Jan Mar May Jun Jul Aug Sep Oct Nov
Dec
2010Jan Feb Mar Apr May Jun Jul Aug Sep Oct Nov Dec
2011Jan FebMar May
Jun
2012OctNovDec
2013Jan Feb Mar Apr May JunJul Aug Sep Oct Nov Dec
2014Jan Feb Mar Apr May Jun Jul Aug Sep Oct Nov Dec
2015Jan Feb
Circle The Issues You Are Ordering
Rev. 02/15
Downloadable back issues are available for 2008 to present in the BCM Online Store: www.BusConversions.com/store/