Embed Size (px)
Citation preview
Prepare to install the SnapCenter Plug-infor SAP HANA DatabaseSnapCenter Software 4.6NetAppJuly 19, 2022
This PDF was generated from https://docs.netapp.com/us-en/snapcenter/protect-hana/task_install_snapcenter_plug_in_for_sap_hana_database.html on July 19, 2022. Always checkdocs.netapp.com for the latest.

Table of Contents
Prepare to install the SnapCenter Plug-in for SAP HANA Database . . . . . . . . . . . . . . . . . . . . . . . . . . . . . . . . . . 1
Installation workflow of SnapCenter Plug-in for SAP HANA Database . . . . . . . . . . . . . . . . . . . . . . . . . . . . . . 1
Prerequisites for adding hosts and installing SnapCenter Plug-in for SAP HANA Database . . . . . . . . . . . . . 1
Host requirements to install SnapCenter Plug-ins Package for Windows . . . . . . . . . . . . . . . . . . . . . . . . . . . . 2
Host requirements for installing the SnapCenter Plug-ins Package for Linux . . . . . . . . . . . . . . . . . . . . . . . . . 3
Set up credentials for the SnapCenter Plug-in for SAP HANA Database . . . . . . . . . . . . . . . . . . . . . . . . . . . . 4
Configure gMSA on Windows Server 2012 or later . . . . . . . . . . . . . . . . . . . . . . . . . . . . . . . . . . . . . . . . . . . . . 6
Install the SnapCenter Plug-in for SAP HANA Databases . . . . . . . . . . . . . . . . . . . . . . . . . . . . . . . . . . . . . . . . 8
Configure CA Certificate. . . . . . . . . . . . . . . . . . . . . . . . . . . . . . . . . . . . . . . . . . . . . . . . . . . . . . . . . . . . . . . . . 14

Prepare to install the SnapCenter Plug-in for SAPHANA Database
Installation workflow of SnapCenter Plug-in for SAP HANADatabase
You should install and set up the SnapCenter Plug-in for SAP HANA Database if youwant to protect SAP HANA databases.
Prerequisites for adding hosts and installing SnapCenterPlug-in for SAP HANA Database
Before you add a host and install the plug-in packages, you must complete all therequirements. SnapCenter Plug-in for SAP HANA Database is available in both Windowsand Linux environments.
• You must have installed Java 1.8 64-bit on your host.
• You must have installed SAP HANA database interactive terminal (HDBSQL client) on the host.
• For Windows, plug-in Creator Service should be running using the “LocalSystem” windows user, which isthe default behavior when Plug-in for SAP HANA Database is installed as domain administrator.
• For Windows, user store keys should be created as SYSTEM user.
• When installing a plug-in on a Windows host, if you specify a credential that is not built-in or if the userbelongs to a local workgroup user, you must disable UAC on the host. SnapCenter Plug-in for MicrosoftWindows will be deployed by default with the SAP HANA plug-in on Windows hosts.
• For Linux host, HDB Secure User Store keys are accessed as HDBSQL OS user.
• SnapCenter Server should have access to the 8145 or custom port of Plug-in for SAP HANA Databasehost.
1
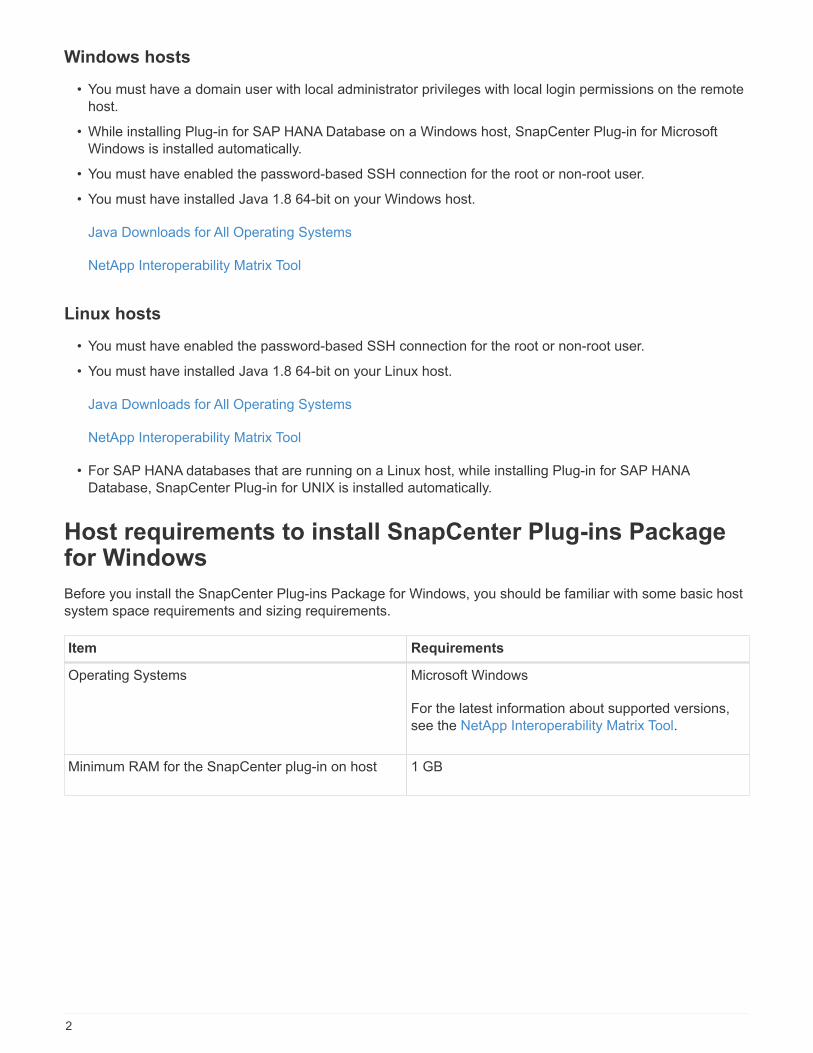
Windows hosts
• You must have a domain user with local administrator privileges with local login permissions on the remotehost.
• While installing Plug-in for SAP HANA Database on a Windows host, SnapCenter Plug-in for MicrosoftWindows is installed automatically.
• You must have enabled the password-based SSH connection for the root or non-root user.
• You must have installed Java 1.8 64-bit on your Windows host.
Java Downloads for All Operating Systems
NetApp Interoperability Matrix Tool
Linux hosts
• You must have enabled the password-based SSH connection for the root or non-root user.
• You must have installed Java 1.8 64-bit on your Linux host.
Java Downloads for All Operating Systems
NetApp Interoperability Matrix Tool
• For SAP HANA databases that are running on a Linux host, while installing Plug-in for SAP HANADatabase, SnapCenter Plug-in for UNIX is installed automatically.
Host requirements to install SnapCenter Plug-ins Packagefor Windows
Before you install the SnapCenter Plug-ins Package for Windows, you should be familiar with some basic hostsystem space requirements and sizing requirements.
Item Requirements
Operating Systems Microsoft Windows
For the latest information about supported versions,see the NetApp Interoperability Matrix Tool.
Minimum RAM for the SnapCenter plug-in on host 1 GB
2
Item Requirements
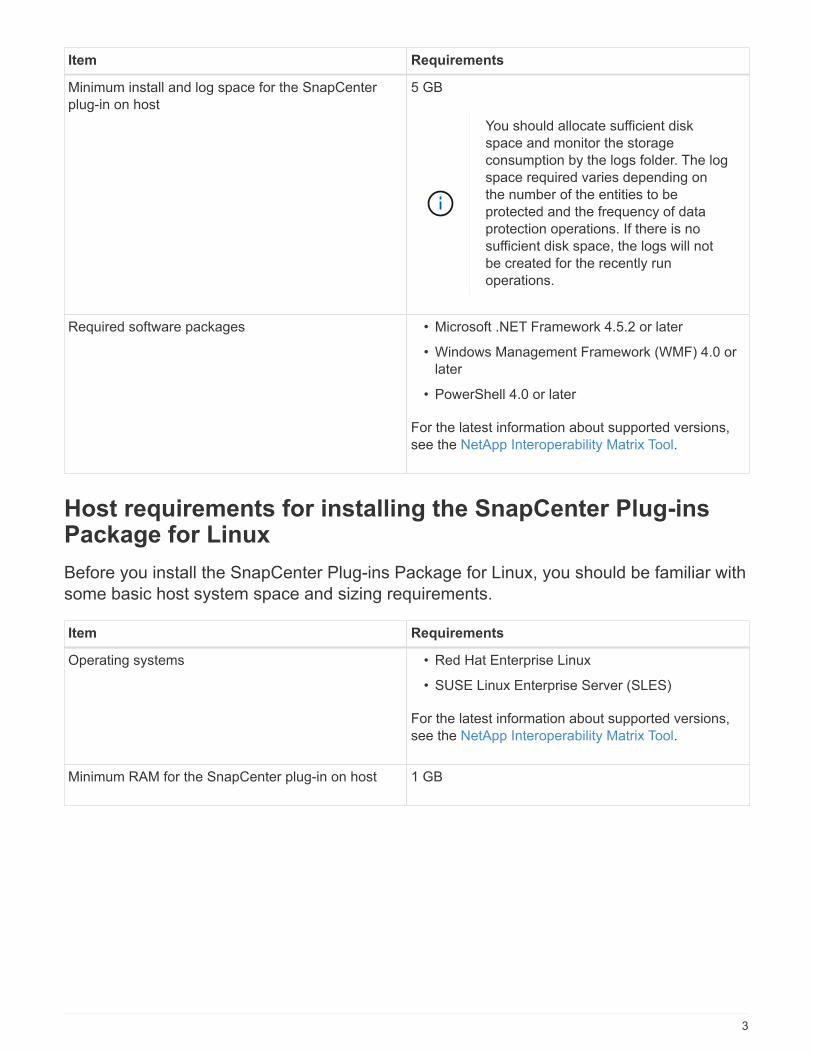
Minimum install and log space for the SnapCenterplug-in on host
5 GB
You should allocate sufficient diskspace and monitor the storageconsumption by the logs folder. The logspace required varies depending onthe number of the entities to beprotected and the frequency of dataprotection operations. If there is nosufficient disk space, the logs will notbe created for the recently runoperations.
Required software packages • Microsoft .NET Framework 4.5.2 or later
• Windows Management Framework (WMF) 4.0 orlater
• PowerShell 4.0 or later
For the latest information about supported versions,see the NetApp Interoperability Matrix Tool.
Host requirements for installing the SnapCenter Plug-insPackage for Linux
Before you install the SnapCenter Plug-ins Package for Linux, you should be familiar withsome basic host system space and sizing requirements.
Item Requirements
Operating systems • Red Hat Enterprise Linux
• SUSE Linux Enterprise Server (SLES)
For the latest information about supported versions,see the NetApp Interoperability Matrix Tool.
Minimum RAM for the SnapCenter plug-in on host 1 GB
3
Item Requirements
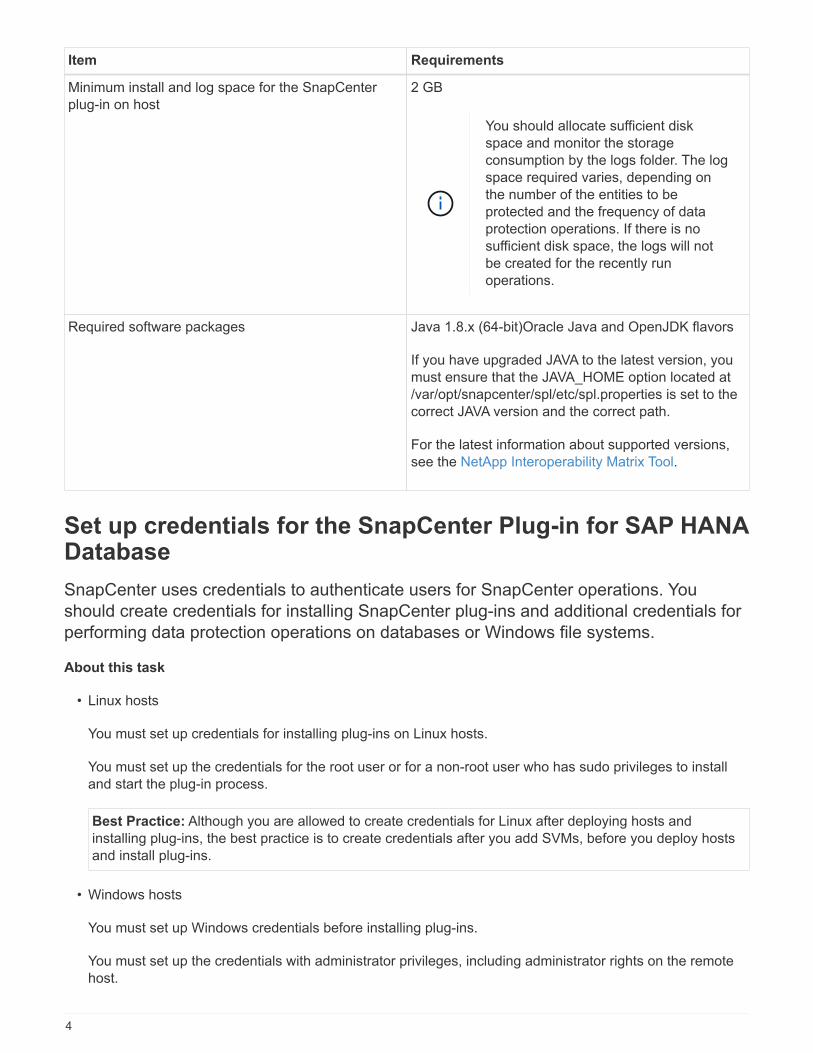
Minimum install and log space for the SnapCenterplug-in on host
2 GB
You should allocate sufficient diskspace and monitor the storageconsumption by the logs folder. The logspace required varies, depending onthe number of the entities to beprotected and the frequency of dataprotection operations. If there is nosufficient disk space, the logs will notbe created for the recently runoperations.
Required software packages Java 1.8.x (64-bit)Oracle Java and OpenJDK flavors
If you have upgraded JAVA to the latest version, youmust ensure that the JAVA_HOME option located at/var/opt/snapcenter/spl/etc/spl.properties is set to thecorrect JAVA version and the correct path.
For the latest information about supported versions,see the NetApp Interoperability Matrix Tool.
Set up credentials for the SnapCenter Plug-in for SAP HANADatabase
SnapCenter uses credentials to authenticate users for SnapCenter operations. Youshould create credentials for installing SnapCenter plug-ins and additional credentials forperforming data protection operations on databases or Windows file systems.
About this task
• Linux hosts
You must set up credentials for installing plug-ins on Linux hosts.
You must set up the credentials for the root user or for a non-root user who has sudo privileges to installand start the plug-in process.
Best Practice: Although you are allowed to create credentials for Linux after deploying hosts andinstalling plug-ins, the best practice is to create credentials after you add SVMs, before you deploy hostsand install plug-ins.
• Windows hosts
You must set up Windows credentials before installing plug-ins.
You must set up the credentials with administrator privileges, including administrator rights on the remotehost.
4
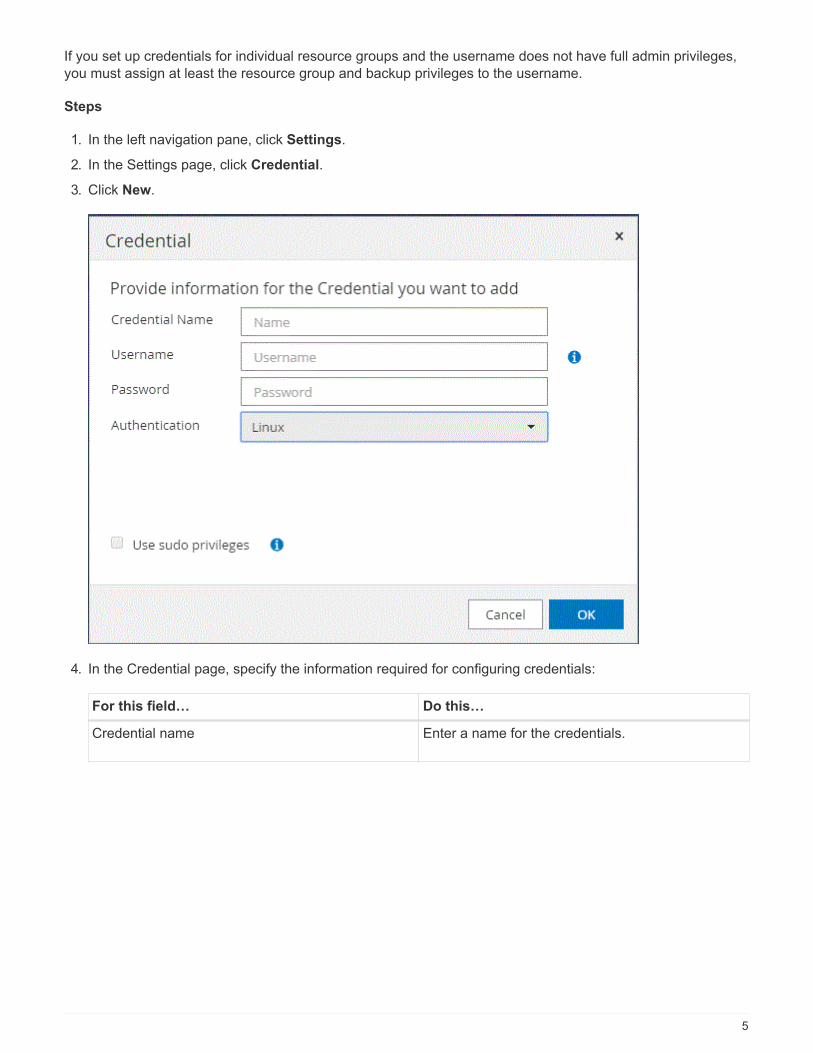
If you set up credentials for individual resource groups and the username does not have full admin privileges,you must assign at least the resource group and backup privileges to the username.
Steps
1. In the left navigation pane, click Settings.
2. In the Settings page, click Credential.
3. Click New.
4. In the Credential page, specify the information required for configuring credentials:
For this field… Do this…
Credential name Enter a name for the credentials.
5
For this field… Do this…
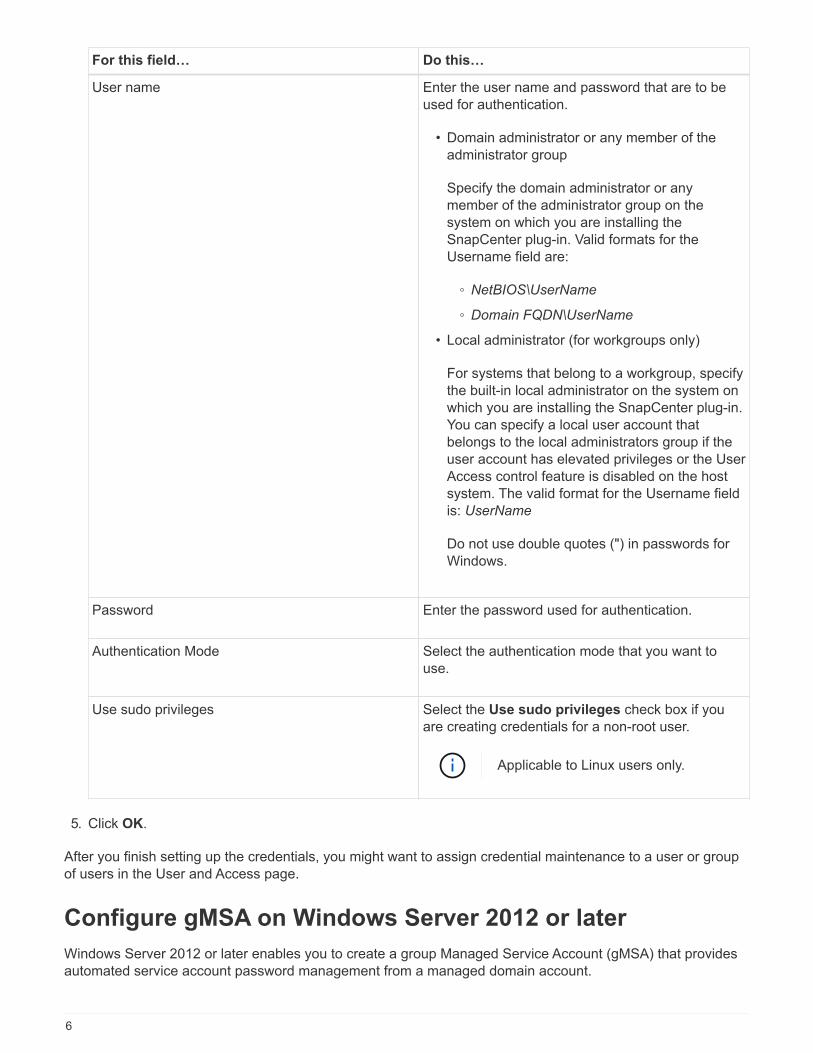
User name Enter the user name and password that are to beused for authentication.
• Domain administrator or any member of theadministrator group
Specify the domain administrator or anymember of the administrator group on thesystem on which you are installing theSnapCenter plug-in. Valid formats for theUsername field are:
◦ NetBIOS\UserName
◦ Domain FQDN\UserName
• Local administrator (for workgroups only)
For systems that belong to a workgroup, specifythe built-in local administrator on the system onwhich you are installing the SnapCenter plug-in.You can specify a local user account thatbelongs to the local administrators group if theuser account has elevated privileges or the UserAccess control feature is disabled on the hostsystem. The valid format for the Username fieldis: UserName
Do not use double quotes (") in passwords forWindows.
Password Enter the password used for authentication.
Authentication Mode Select the authentication mode that you want touse.
Use sudo privileges Select the Use sudo privileges check box if youare creating credentials for a non-root user.
Applicable to Linux users only.
5. Click OK.
After you finish setting up the credentials, you might want to assign credential maintenance to a user or groupof users in the User and Access page.
Configure gMSA on Windows Server 2012 or later
Windows Server 2012 or later enables you to create a group Managed Service Account (gMSA) that providesautomated service account password management from a managed domain account.
6

What you will need
• You should have a Windows Server 2012 or later domain controller.
• You should have a Windows Server 2012 or later host, which is a member of the domain.
Steps
1. Create a KDS root key to generate unique passwords for each object in your gMSA.
2. For each domain, run the following command from the Windows domain controller: Add-KDSRootKey-EffectiveImmediately
3. Create and configure your gMSA:
a. Create a user group account.
b. Add computer objects to the group.
c. Use the user group you just created to create the gMSA.
For example,
New-ADServiceAccount -name <ServiceAccountName> -DNSHostName <fqdn>
-PrincipalsAllowedToRetrieveManagedPassword <group>
-ServicePrincipalNames <SPN1,SPN2,…>
d. Run Get-ADServiceAccount command to verify the service account.
4. Configure the gMSA on your hosts:
a. Enable the Active Directory module for Windows PowerShell on the host where you want to use thegMSA account.
To do this, run the following command from PowerShell:
7
PS C:\> Get-WindowsFeature AD-Domain-Services
Display Name Name Install
State
------------ ----
-------------
[ ] Active Directory Domain Services AD-Domain-Services Available
PS C:\> Install-WindowsFeature AD-DOMAIN-SERVICES
Success Restart Needed Exit Code Feature Result
------- -------------- --------- --------------
True No Success {Active Directory Domain
Services, Active ...
WARNING: Windows automatic updating is not enabled. To ensure that
your newly-installed role or feature is
automatically updated, turn on Windows Update.
b. Restart your host.
c. Install the gMSA on your host by running the following command from the PowerShell command
prompt: Install-AdServiceAccount <gMSA>
d. Verify your gMSA account by running the following command: Test-AdServiceAccount <gMSA>
5. Assign the administrative privileges to the configured gMSA on the host.
6. Add the Windows host by specifying the configured gMSA account in the SnapCenter Server.
SnapCenter Server will install the selected plug-ins on the host and the specified gMSA will be used as theservice log on account during the plug-in installation.
Install the SnapCenter Plug-in for SAP HANA Databases
Add hosts and install plug-in packages on remote hosts
You must use the SnapCenter Add Host page to add hosts, and then install the plug-inspackages. The plug-ins are automatically installed on the remote hosts. You can add ahost and install plug-in packages either for an individual host or for a cluster.
What you will need
• You must be a user that is assigned to a role that has the plug-in install and uninstall permissions, such asthe SnapCenter Admin role.
• When installing a plug-in on a Windows host, if you specify a credential that is not built-in, or if the userbelongs to a local workgroup user, you must disable UAC on the host.
• You should ensure that the message queueing service is running.
8
• The administration documentation contains information about managing hosts.
• If you are using group Managed Service Account (gMSA), you should configure gMSA with administrativeprivileges.
Configure group Managed Service Account on Windows Server 2012 or later for SAP HANA
About this task
• You cannot add a SnapCenter Server as a plug-in host to another SnapCenter Server.
• For SAP HANA System Replication to discover resources on both primary and secondary systems, it isrecommended to add both the primary and the secondary systems using root or sudo user.
Steps
1. In the left navigation pane, click Hosts.
2. Verify that the Managed Hosts tab is selected at the top.
3. Click Add.
4. In the Hosts page, perform the following actions:
For this field… Do this…
Host Type Select the type of host:
• Windows
• Linux
The Plug-in for SAP HANA isinstalled on the HDBSQL clienthost, and this host can be oneither a Windows system or aLinux system.
Host name Enter the communication host name. Enter the fullyqualified domain name (FQDN) or the IP address ofthe host. SnapCenter depends on the properconfiguration of the DNS. Therefore, the bestpractice is to enter the FQDN.
You must configure the HDBSQL client andHDBUserStore on this host.
9
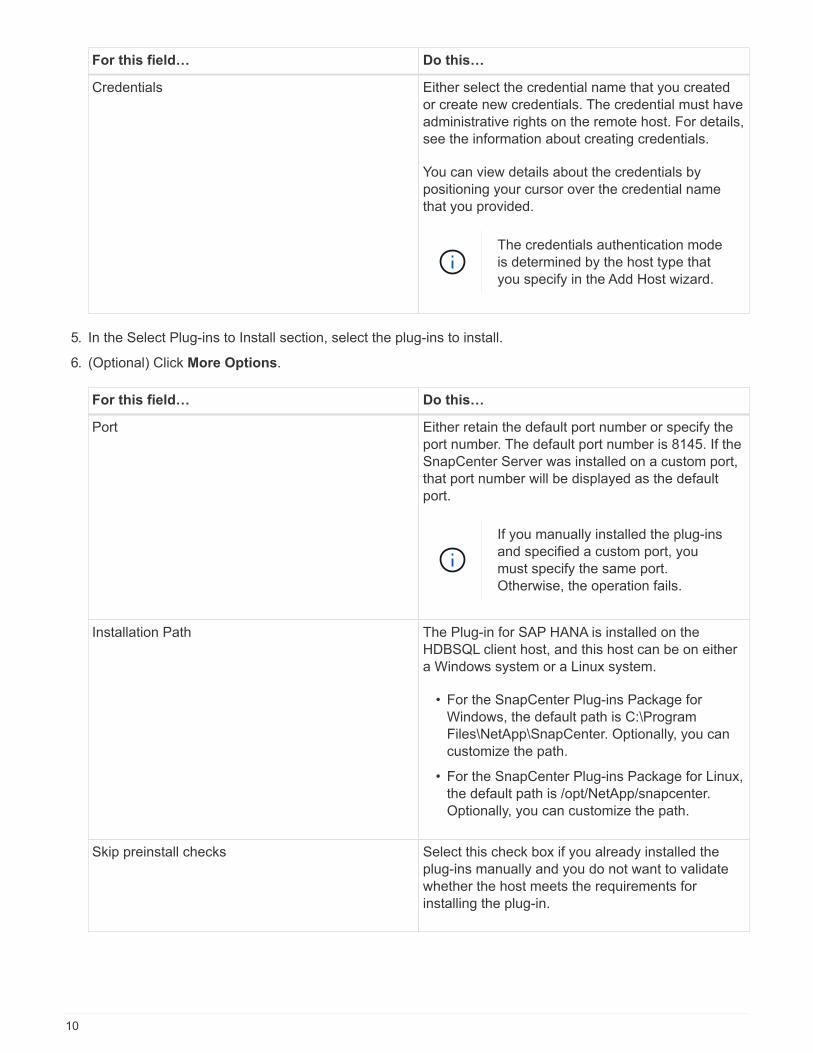
For this field… Do this…
Credentials Either select the credential name that you createdor create new credentials. The credential must haveadministrative rights on the remote host. For details,see the information about creating credentials.
You can view details about the credentials bypositioning your cursor over the credential namethat you provided.
The credentials authentication modeis determined by the host type thatyou specify in the Add Host wizard.
5. In the Select Plug-ins to Install section, select the plug-ins to install.
6. (Optional) Click More Options.
For this field… Do this…
Port Either retain the default port number or specify theport number. The default port number is 8145. If theSnapCenter Server was installed on a custom port,that port number will be displayed as the defaultport.
If you manually installed the plug-insand specified a custom port, youmust specify the same port.Otherwise, the operation fails.
Installation Path The Plug-in for SAP HANA is installed on theHDBSQL client host, and this host can be on eithera Windows system or a Linux system.
• For the SnapCenter Plug-ins Package forWindows, the default path is C:\ProgramFiles\NetApp\SnapCenter. Optionally, you cancustomize the path.
• For the SnapCenter Plug-ins Package for Linux,the default path is /opt/NetApp/snapcenter.Optionally, you can customize the path.
Skip preinstall checks Select this check box if you already installed theplug-ins manually and you do not want to validatewhether the host meets the requirements forinstalling the plug-in.
10
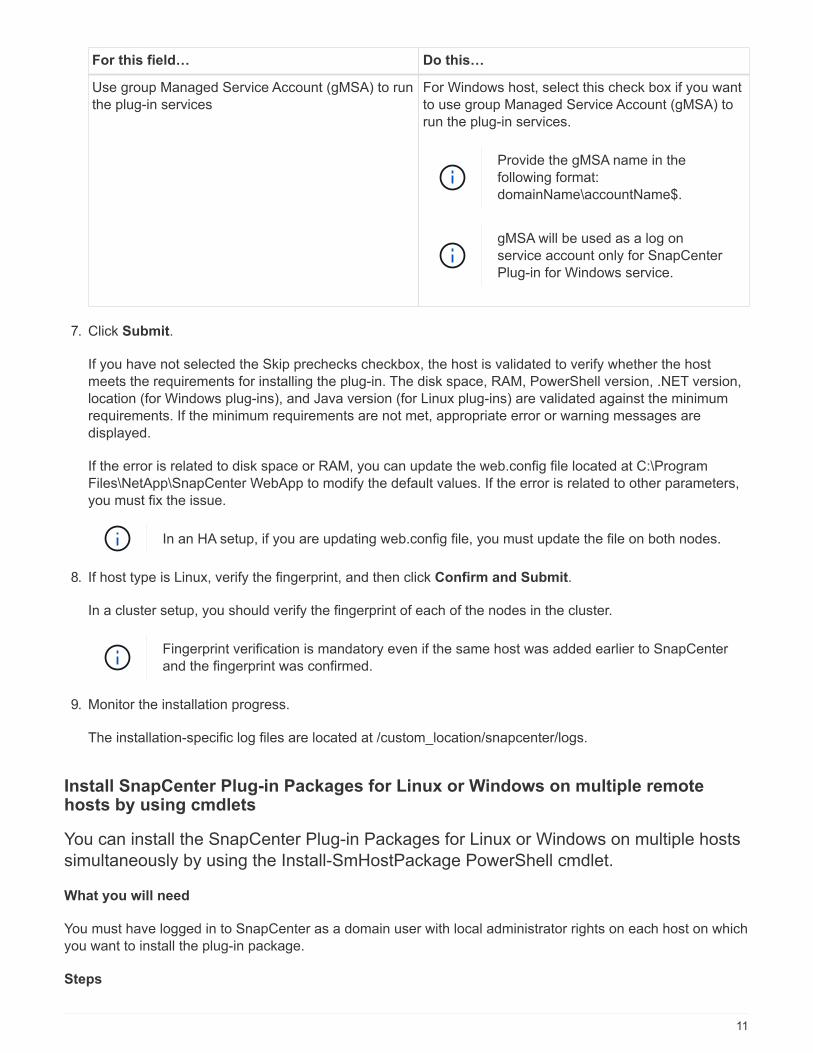
For this field… Do this…
Use group Managed Service Account (gMSA) to runthe plug-in services
For Windows host, select this check box if you wantto use group Managed Service Account (gMSA) torun the plug-in services.
Provide the gMSA name in thefollowing format:domainName\accountName$.
gMSA will be used as a log onservice account only for SnapCenterPlug-in for Windows service.
7. Click Submit.
If you have not selected the Skip prechecks checkbox, the host is validated to verify whether the hostmeets the requirements for installing the plug-in. The disk space, RAM, PowerShell version, .NET version,location (for Windows plug-ins), and Java version (for Linux plug-ins) are validated against the minimumrequirements. If the minimum requirements are not met, appropriate error or warning messages aredisplayed.
If the error is related to disk space or RAM, you can update the web.config file located at C:\ProgramFiles\NetApp\SnapCenter WebApp to modify the default values. If the error is related to other parameters,you must fix the issue.
In an HA setup, if you are updating web.config file, you must update the file on both nodes.
8. If host type is Linux, verify the fingerprint, and then click Confirm and Submit.
In a cluster setup, you should verify the fingerprint of each of the nodes in the cluster.
Fingerprint verification is mandatory even if the same host was added earlier to SnapCenterand the fingerprint was confirmed.
9. Monitor the installation progress.
The installation-specific log files are located at /custom_location/snapcenter/logs.
Install SnapCenter Plug-in Packages for Linux or Windows on multiple remotehosts by using cmdlets
You can install the SnapCenter Plug-in Packages for Linux or Windows on multiple hostssimultaneously by using the Install-SmHostPackage PowerShell cmdlet.
What you will need
You must have logged in to SnapCenter as a domain user with local administrator rights on each host on whichyou want to install the plug-in package.
Steps
11
1. Launch PowerShell.
2. On the SnapCenter Server host, establish a session using the Open-SmConnection cmdlet, and then enteryour credentials.
3. Install the plug-in on multiple hosts using the Install-SmHostPackage cmdlet and the required parameters.
The information regarding the parameters that can be used with the cmdlet and their descriptions can beobtained by running Get-Help command_name. Alternatively, you can also refer to the SnapCenterSoftware Cmdlet Reference Guide.
You can use the -skipprecheck option when you have installed the plug-ins manually and do not want tovalidate whether the host meets the requirements to install the plug-in.
4. Enter your credentials for remote installation.
Install the SnapCenter Plug-in for SAP HANA Database on Linux hosts by using thecommand-line interface
You should install the SnapCenter Plug-in for SAP HANA Database by using theSnapCenter user interface (UI). If your environment does not allow remote installation ofthe plug-in from the SnapCenter UI, you can install the Plug-in for SAP HANA Databaseeither in console mode or in silent mode by using the command-line interface (CLI).
What you will need
• You should install the Plug-in for SAP HANA Database on each of the Linux host where the HDBSQL clientresides.
• The Linux host on which you are installing the SnapCenter Plug-in for SAP HANA Database must meet thedependent software, database, and operating system requirements.
The Interoperability Matrix Tool (IMT) contains the latest information about the supported configurations.
NetApp Interoperability Matrix Tool
• The SnapCenter Plug-in for SAP HANA Database is part of SnapCenter Plug-ins Package for Linux.Before you install SnapCenter Plug-ins Package for Linux, you should have already installed SnapCenteron a Windows host.
Steps
1. Copy the SnapCenter Plug-ins Package for Linux installation file (snapcenter_linux_host_plugin.bin) fromC:\ProgramData\NetApp\SnapCenter\Package Repository to the host where you want to install the Plug-infor SAP HANA Database.
You can access this path from the host where the SnapCenter Server is installed.
2. From the command prompt, navigate to the directory where you copied the installation file.
3. Install the plug-in: path_to_installation_bin_file/snapcenter_linux_host_plugin.bin -i
silent -DPORT=port_number_for_host -DSERVER_IP=server_name_or_ip_address
-DSERVER_HTTPS_PORT=port_number_for_server
◦ -DPORT specifies the SMCore HTTPS communication port.
12
◦ -DSERVER_IP specifies the SnapCenter Server IP address.
◦ -DSERVER_HTTPS_PORT specifies the SnapCenter Server HTTPS port.
◦ -DUSER_INSTALL_DIR specifies the directory where you want to install the SnapCenter Plug-insPackage for Linux.
◦ DINSTALL_LOG_NAME specifies the name of the log file.
/tmp/sc-plugin-installer/snapcenter_linux_host_plugin.bin -i silent
-DPORT=8145 -DSERVER_IP=scserver.domain.com -DSERVER_HTTPS_PORT=8146
-DUSER_INSTALL_DIR=/opt
-DINSTALL_LOG_NAME=SnapCenter_Linux_Host_Plugin_Install_2.log
-DCHOSEN_FEATURE_LIST=CUSTOM
4. Edit the /<installation directory>/NetApp/snapcenter/scc/etc/SC_SMS_Services.properties file, and thenadd the PLUGINS_ENABLED = hana:3.0 parameter.
5. Add the host to the SnapCenter Server using the Add-Smhost cmdlet and the required parameters.
The information regarding the parameters that can be used with the command and their descriptions canbe obtained by running Get-Help command_name. Alternatively, you can also refer to the SnapCenterSoftware Cmdlet Reference Guide.
Monitor the status of installing Plug-in for SAP HANA
You can monitor the progress of SnapCenter plug-in package installation by using the Jobs page. You mightwant to check the progress of installation to determine when it is complete or if there is an issue.
About this task
The following icons appear on the Jobs page and indicate the state of the operation:
• In progress
• Completed successfully
• Failed
• Completed with warnings or could not start due to warnings
• Queued
Steps
1. In the left navigation pane, click Monitor.
2. In the Monitor page, click Jobs.
3. In the Jobs page, to filter the list so that only plug-in installation operations are listed, do the following:
a. Click Filter.
b. Optional: Specify the start and end date.
c. From the Type drop-down menu, select Plug-in installation.
d. From the Status drop-down menu, select the installation status.
13
e. Click Apply.
4. Select the installation job and click Details to view the job details.
5. In the Job Details page, click View logs.
Configure CA Certificate
Generate CA Certificate CSR file
You can generate a Certificate Signing Request (CSR) and import the certificate that can be obtained from aCertificate Authority (CA) using the generated CSR. The certificate will have a private key associated with it.
CSR is a block of encoded text that is given to an authorized certificate vendor to procure the signed CAcertificate.
For information to generate a CSR, see How to generate CA Certificate CSR file.
If you own the CA certificate for your domain (*.domain.company.com) or your system(machine1.domain.company.com), you can skip generating the CA Certificate CSR file. You candeploy the existing CA certificate with SnapCenter.
For cluster configurations, the cluster name (virtual cluster FQDN), and the respective host names should bementioned in the CA certificate. The certificate can be updated by filling the Subject Alternative Name (SAN)field before procuring the certificate. For a wild card certificate (*.domain.company.com), the certificate willcontain all the hostnames of the domain implicitly.
Import CA certificates
You must import the CA certificates to the SnapCenter Server and the Windows host plug-ins using theMicrosoft management console (MMC).
Steps
1. Go to the Microsoft management console (MMC), and then click File > Add/Remove Snapin.
2. In the Add or Remove Snap-ins window, select Certificates and then click Add.
3. In the Certificates snap-in window, select the Computer account option, and then click Finish.
4. Click Console Root > Certificates – Local Computer > Trusted Root Certification Authorities >Certificates.
5. Right-click on the folder “Trusted Root Certification Authorities”, and then select All Tasks > Import to startthe import wizard.
6. Complete the wizard, as follows:
In this wizard window… Do the following…
Import Private Key Select the option Yes, import the private key, andthen click Next.
Import File Format Make no changes; click Next.
14
In this wizard window… Do the following…
Security Specify the new password to be used for theexported certificate, and then click Next.
Completing the Certificate Import Wizard Review the summary, and then click Finish to startthe import.
Importing certificate should be bundled with the private key (supported formats are: *.pfx, *p12, *.p7b).
7. Repeat Step 5 for the “Personal” folder.
Get the CA certificate thumbprint
A certificate thumbprint is a hexadecimal string that identifies a certificate. A thumbprint is calculated from thecontent of the certificate using a thumbprint algorithm.
Steps
1. Perform the following on the GUI:
a. Double-click the certificate.
b. In the Certificate dialog box, click the Details tab.
c. Scroll through the list of fields and click Thumbprint.
d. Copy the hexadecimal characters from the box.
e. Remove the spaces between the hexadecimal numbers.
For example, if the thumbprint is: "a9 09 50 2d d8 2a e4 14 33 e6 f8 38 86 b0 0d 42 77 a3 2a 7b", afterremoving the spaces, it will be: "a909502dd82ae41433e6f83886b00d4277a32a7b".
2. Perform the following from PowerShell:
a. Run the following command to list the thumbprint of the installed certificate and identify the recentlyinstalled certificate by the subject name.
Get-ChildItem -Path Cert:\LocalMachine\My
b. Copy the thumbprint.
Configure CA certificate with Windows host plug-in services
You should configure the CA certificate with Windows host plug-in services to activate the installed digitalcertificate.
Perform the following steps on the SnapCenter Server and all the plug-in hosts where CA certificates arealready deployed.
Steps
1. Remove the existing certificate binding with SMCore default port 8145, by running the following command:
15
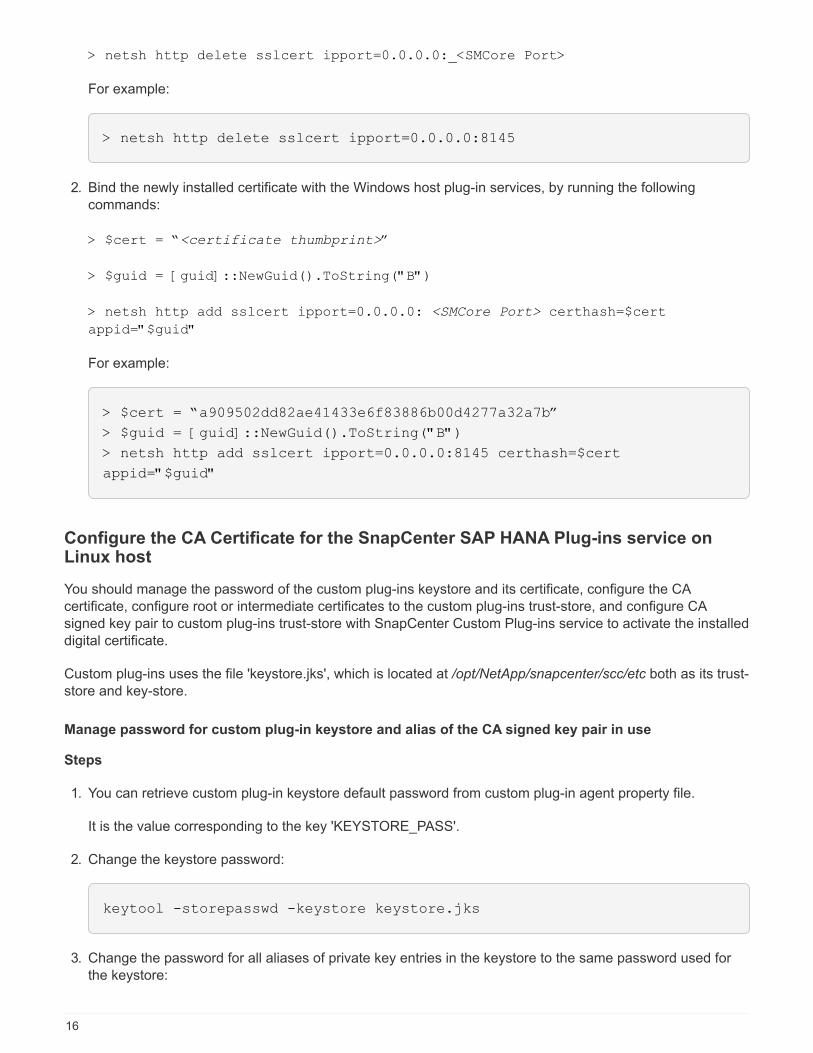
> netsh http delete sslcert ipport=0.0.0.0:_<SMCore Port>
For example:
> netsh http delete sslcert ipport=0.0.0.0:8145
2. Bind the newly installed certificate with the Windows host plug-in services, by running the followingcommands:
> $cert = “<certificate thumbprint>”
> $guid = [guid]::NewGuid().ToString("B")
> netsh http add sslcert ipport=0.0.0.0: <SMCore Port> certhash=$cert
appid="$guid"
For example:
> $cert = “a909502dd82ae41433e6f83886b00d4277a32a7b”
> $guid = [guid]::NewGuid().ToString("B")
> netsh http add sslcert ipport=0.0.0.0:8145 certhash=$cert
appid="$guid"
Configure the CA Certificate for the SnapCenter SAP HANA Plug-ins service onLinux host
You should manage the password of the custom plug-ins keystore and its certificate, configure the CAcertificate, configure root or intermediate certificates to the custom plug-ins trust-store, and configure CAsigned key pair to custom plug-ins trust-store with SnapCenter Custom Plug-ins service to activate the installeddigital certificate.
Custom plug-ins uses the file 'keystore.jks', which is located at /opt/NetApp/snapcenter/scc/etc both as its trust-store and key-store.
Manage password for custom plug-in keystore and alias of the CA signed key pair in use
Steps
1. You can retrieve custom plug-in keystore default password from custom plug-in agent property file.
It is the value corresponding to the key 'KEYSTORE_PASS'.
2. Change the keystore password:
keytool -storepasswd -keystore keystore.jks
3. Change the password for all aliases of private key entries in the keystore to the same password used forthe keystore:
16
keytool -keypasswd -alias "alias_name_in_cert" -keystore keystore.jks
Update the same for the key KEYSTORE_PASS in agent.properties file.
4. Restart the service after changing the password.
Password for custom plug-in keystore and for all the associated alias password of the privatekey should be same.
Configure root or intermediate certificates to custom plug-in trust-store
You should configure the root or intermediate certificates without the private key to custom plug-in trust-store.
Steps
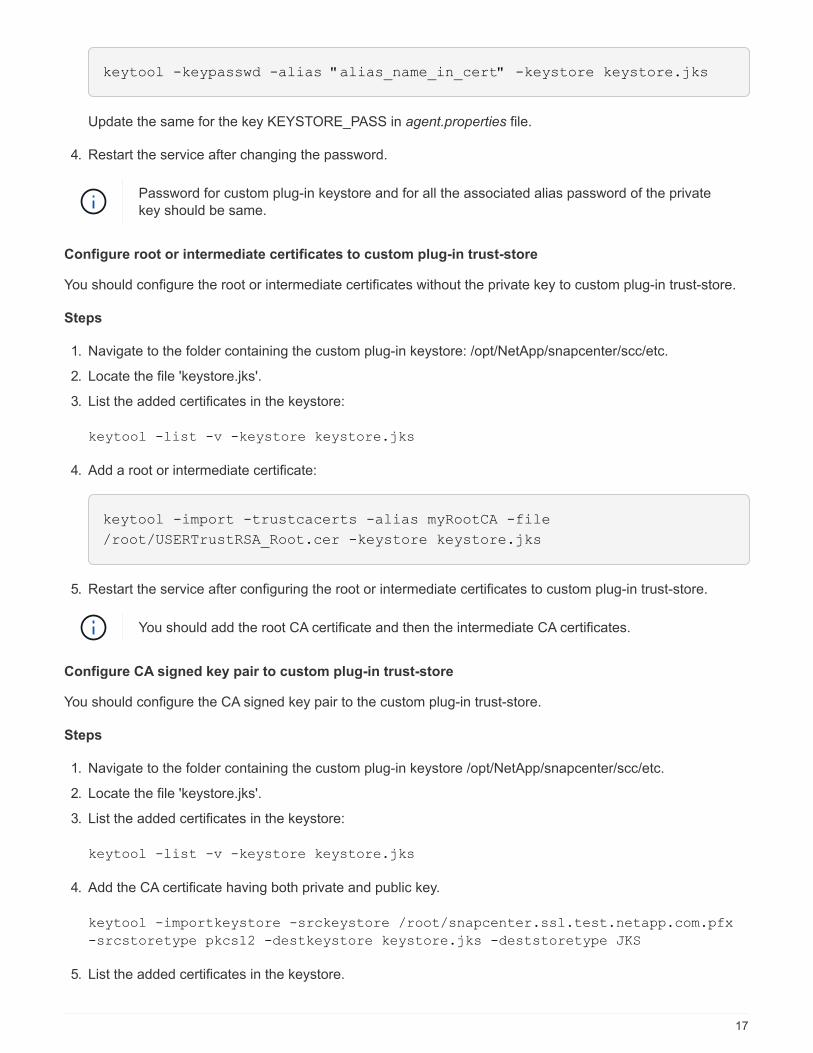
1. Navigate to the folder containing the custom plug-in keystore: /opt/NetApp/snapcenter/scc/etc.
2. Locate the file 'keystore.jks'.
3. List the added certificates in the keystore:
keytool -list -v -keystore keystore.jks
4. Add a root or intermediate certificate:
keytool -import -trustcacerts -alias myRootCA -file
/root/USERTrustRSA_Root.cer -keystore keystore.jks
5. Restart the service after configuring the root or intermediate certificates to custom plug-in trust-store.
You should add the root CA certificate and then the intermediate CA certificates.
Configure CA signed key pair to custom plug-in trust-store
You should configure the CA signed key pair to the custom plug-in trust-store.
Steps
1. Navigate to the folder containing the custom plug-in keystore /opt/NetApp/snapcenter/scc/etc.
2. Locate the file 'keystore.jks'.
3. List the added certificates in the keystore:
keytool -list -v -keystore keystore.jks
4. Add the CA certificate having both private and public key.
keytool -importkeystore -srckeystore /root/snapcenter.ssl.test.netapp.com.pfx
-srcstoretype pkcs12 -destkeystore keystore.jks -deststoretype JKS
5. List the added certificates in the keystore.
17
keytool -list -v -keystore keystore.jks
6. Verify that the keystore contains the alias corresponding to the new CA certificate, which was added to thekeystore.
7. Change the added private key password for CA certificate to the keystore password.
Default custom plug-in keystore password is the value of the key KEYSTORE_PASS in agent.propertiesfile.
keytool -keypasswd -alias "alias_name_in_CA_cert" -keystore keystore.jks
8. If the alias name in the CA certificate is long and contains space or special characters ("*",","), change thealias name to a simple name:
keytool -changealias -alias "long_alias_name" -destalias "simple_alias"
-keystore keystore.jks
9. Configure the alias name from CA certificate in agent.properties file.
Update this value against the key SCC_CERTIFICATE_ALIAS.
10. Restart the service after configuring the CA signed key pair to custom plug-in trust-store.
Configure certificate revocation list (CRL) for SnapCenter Custom Plug-ins
About this task
• SnapCenter Custom Plug-ins will search for the CRL files in a pre-configured directory.
• Default directory for the CRL files for SnapCenter Custom Plug-ins is ' opt/NetApp/snapcenter/scc/etc/crl'.
Steps
1. You can modify and update the default directory in agent.properties file against the key CRL_PATH.
You can place more than one CRL file in this directory. The incoming certificates will be verified againsteach CRL.
Configure the CA Certificate for the SnapCenter SAP HANA Plug-ins service onWindows host
You should manage the password of the custom plug-ins keystore and its certificate, configure the CAcertificate, configure root or intermediate certificates to the custom plug-ins trust-store, and configure CAsigned key pair to custom plug-ins trust-store with SnapCenter Custom Plug-ins service to activate the installeddigital certificate.
Custom plug-ins uses the file keystore.jks, which is located at C:\Program
Files\NetApp\SnapCenter\Snapcenter Plug-in Creator\etc both as its trust-store and key-store.
18
Manage password for custom plug-in keystore and alias of the CA signed key pair in use
Steps
1. You can retrieve custom plug-in keystore default password from custom plug-in agent property file.
It is the value corresponding to the key KEYSTORE_PASS.
2. Change the keystore password:
keytool -storepasswd -keystore keystore.jks
If the "keytool" command is not recognized on the Windows command prompt, replace thekeytool command with its complete path.
C:\Program Files\Java\<jdk_version>\bin\keytool.exe" -storepasswd -keystore keystore.jks
3. Change the password for all aliases of private key entries in the keystore to the same password used forthe keystore:
keytool -keypasswd -alias "alias_name_in_cert" -keystore keystore.jks
Update the same for the key KEYSTORE_PASS in agent.properties file.
4. Restart the service after changing the password.
Password for custom plug-in keystore and for all the associated alias password of theprivate key should be same.
Configure root or intermediate certificates to custom plug-in trust-store
You should configure the root or intermediate certificates without the private key to custom plug-in trust-store.
Steps
1. Navigate to the folder containing the custom plug-in keystore C:\Program
Files\NetApp\SnapCenter\Snapcenter Plug-in Creator\etc
2. Locate the file 'keystore.jks'.
3. List the added certificates in the keystore:
keytool -list -v -keystore keystore.jks
4. Add a root or intermediate certificate:
keytool -import -trustcacerts -alias myRootCA -file /root/USERTrustRSA_Root.cer -keystore keystore.jks
5. Restart the service after configuring the root or intermediate certificates to custom plug-in trust-store.
You should add the root CA certificate and then the intermediate CA certificates.
19
Configure CA signed key pair to custom plug-in trust-store
You should configure the CA signed key pair to the custom plug-in trust-store.
Steps
1. Navigate to the folder containing the custom plug-in keystore C:\Program
Files\NetApp\SnapCenter\Snapcenter Plug-in Creator\etc
2. Locate the file keystore.jks.
3. List the added certificates in the keystore:
keytool -list -v -keystore keystore.jks
4. Add the CA certificate having both private and public key.
keytool -importkeystore -srckeystore /root/snapcenter.ssl.test.netapp.com.pfx -srcstoretype pkcs12
-destkeystore keystore.jks -deststoretype JKS
5. List the added certificates in the keystore.
keytool -list -v -keystore keystore.jks
6. Verify that the keystore contains the alias corresponding to the new CA certificate, which was added to thekeystore.
7. Change the added private key password for CA certificate to the keystore password.
Default custom plug-in keystore password is the value of the key KEYSTORE_PASS in agent.propertiesfile.
keytool -keypasswd -alias "alias_name_in_CA_cert" -keystore keystore.jks
8. Configure the alias name from CA certificate in agent.properties file.
Update this value against the key SCC_CERTIFICATE_ALIAS.
9. Restart the service after configuring the CA signed key pair to custom plug-in trust-store.
Configure certificate revocation list (CRL) for SnapCenter Custom Plug-ins
About this task
• To download the latest CRL file for the related CA certificate see How to update certificate revocation listfile in SnapCenter CA Certificate.
• SnapCenter Custom Plug-ins will search for the CRL files in a pre-configured directory.
• Default directory for the CRL files for SnapCenter Custom Plug-ins is 'C:\Program
Files\NetApp\SnapCenter\Snapcenter Plug-in Creator\ etc\crl'.
Steps
1. You can modify and update the default directory in agent.properties file against the key CRL_PATH.
2. You can place more than one CRL file in this directory.
The incoming certificates will be verified against each CRL.
20
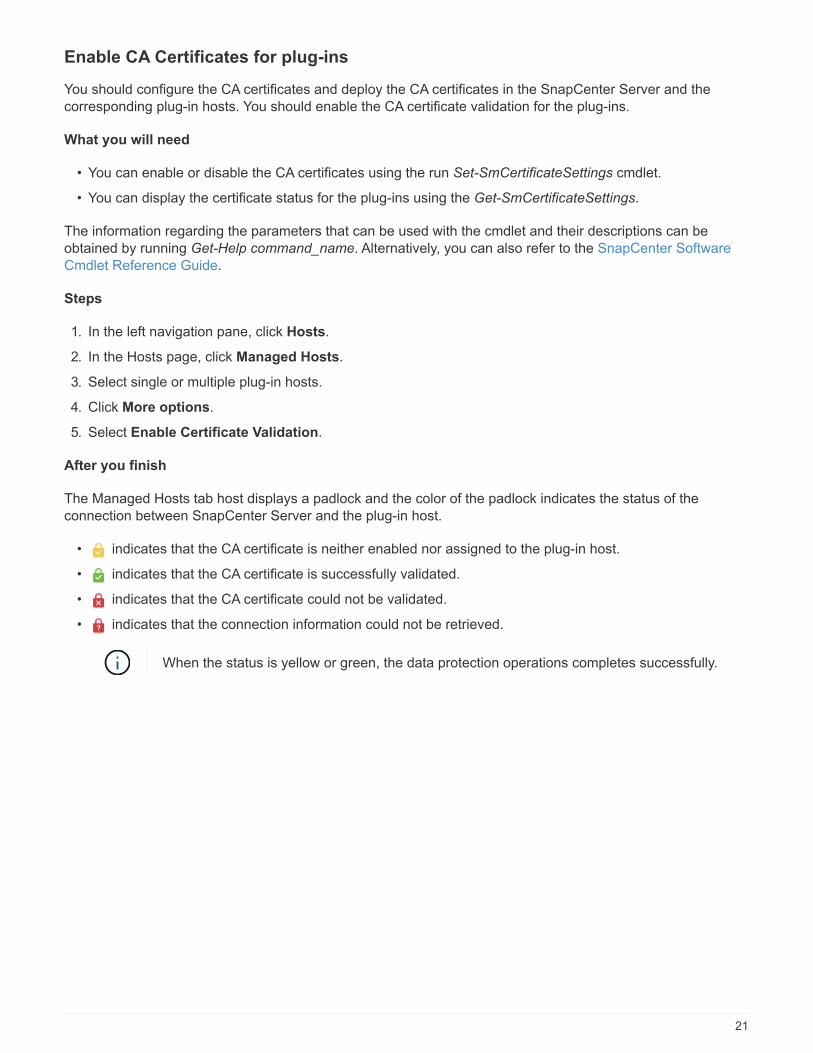
Enable CA Certificates for plug-ins
You should configure the CA certificates and deploy the CA certificates in the SnapCenter Server and thecorresponding plug-in hosts. You should enable the CA certificate validation for the plug-ins.
What you will need
• You can enable or disable the CA certificates using the run Set-SmCertificateSettings cmdlet.
• You can display the certificate status for the plug-ins using the Get-SmCertificateSettings.
The information regarding the parameters that can be used with the cmdlet and their descriptions can beobtained by running Get-Help command_name. Alternatively, you can also refer to the SnapCenter SoftwareCmdlet Reference Guide.
Steps
1. In the left navigation pane, click Hosts.
2. In the Hosts page, click Managed Hosts.
3. Select single or multiple plug-in hosts.
4. Click More options.
5. Select Enable Certificate Validation.
After you finish
The Managed Hosts tab host displays a padlock and the color of the padlock indicates the status of theconnection between SnapCenter Server and the plug-in host.
• indicates that the CA certificate is neither enabled nor assigned to the plug-in host.
• indicates that the CA certificate is successfully validated.
• indicates that the CA certificate could not be validated.
• indicates that the connection information could not be retrieved.
When the status is yellow or green, the data protection operations completes successfully.
21

Copyright Information
Copyright © 2022 NetApp, Inc. All rights reserved. Printed in the U.S. No part of this document covered bycopyright may be reproduced in any form or by any means-graphic, electronic, or mechanical, includingphotocopying, recording, taping, or storage in an electronic retrieval system- without prior written permission ofthe copyright owner.
Software derived from copyrighted NetApp material is subject to the following license and disclaimer:
THIS SOFTWARE IS PROVIDED BY NETAPP “AS IS” AND WITHOUT ANY EXPRESS OR IMPLIEDWARRANTIES, INCLUDING, BUT NOT LIMITED TO, THE IMPLIED WARRANTIES OF MERCHANTABILITYAND FITNESS FOR A PARTICULAR PURPOSE, WHICH ARE HEREBY DISCLAIMED. IN NO EVENT SHALLNETAPP BE LIABLE FOR ANY DIRECT, INDIRECT, INCIDENTAL, SPECIAL, EXEMPLARY, ORCONSEQUENTIAL DAMAGES (INCLUDING, BUT NOT LIMITED TO, PROCUREMENT OF SUBSTITUTEGOODS OR SERVICES; LOSS OF USE, DATA, OR PROFITS; OR BUSINESS INTERRUPTION) HOWEVERCAUSED AND ON ANY THEORY OF LIABILITY, WHETHER IN CONTRACT, STRICT LIABILITY, OR TORT(INCLUDING NEGLIGENCE OR OTHERWISE) ARISING IN ANY WAY OUT OF THE USE OF THISSOFTWARE, EVEN IF ADVISED OF THE POSSIBILITY OF SUCH DAMAGE.
NetApp reserves the right to change any products described herein at any time, and without notice. NetAppassumes no responsibility or liability arising from the use of products described herein, except as expresslyagreed to in writing by NetApp. The use or purchase of this product does not convey a license under anypatent rights, trademark rights, or any other intellectual property rights of NetApp.
The product described in this manual may be protected by one or more U.S. patents, foreign patents, orpending applications.
RESTRICTED RIGHTS LEGEND: Use, duplication, or disclosure by the government is subject to restrictionsas set forth in subparagraph (c)(1)(ii) of the Rights in Technical Data and Computer Software clause at DFARS252.277-7103 (October 1988) and FAR 52-227-19 (June 1987).
Trademark Information
NETAPP, the NETAPP logo, and the marks listed at http://www.netapp.com/TM are trademarks of NetApp, Inc.Other company and product names may be trademarks of their respective owners.
22


