Embed Size (px)
Citation preview

DX Classic Control Rigid Deck (FG245), Rev. A21 09-04-21 1
OPERATION AND MAINTENANCE MANUAL
LED (CLASSIC) DECK OVEN
Enter Serial No. here.____________________________
In the event of an enquiry please quote this serial number.
www.monoequip.com

DX Classic Control Rigid Deck (FG245), Rev. A21 09-04-21 3
SAFETY SYMBOLS The following safety symbols are used throughout this product documentation. Before using your new equipment, read the instruction manual carefully and pay special attention to information marked with the following symbols.
Indicates a hazardous situation which, if not avoided, will result in death or serious injury.
WARNING
Indicates a hazardous situation which, if not avoided, will result in electric shock. WARNING
Indicates a hazardous situation which, if not avoided, will result in minor or moderate injury. CAUTION

DX Classic Control Rigid Deck (FG245), Rev. A21 09-04-21 4
ELECTRICAL SAFETY AND ADVICE REGARDING SUPPLEMENTARY ELECTRICAL PROTECTION Commercial bakeries, kitchens and food service areas are environments where electrical appliances may be located close to liquids, or operate in and around damp conditions, or where restricted movement for installation and service is evident. The installation and periodic inspection of the appliance should only be undertaken by a qualified, skilled and competent electrician, and connected to the correct supply suitable for the load as stipulated by the appliance data label. The electrical installation and connections should meet the necessary requirements of the local electrical wiring regulations and any electrical safety guidelines. We Recommend: Supplementary electrical protection with the use of a residual current device (RCD) Fixed wiring appliances incorporate a locally situated switch disconnector to connect to,
which is easily accessible for switching off and safe isolation purposes. The switch disconnector must meet the specification requirements of IEC 60947.
Your attention is drawn to: BS 7671:2018 – Guidance Note 8 – 8.13 : Other locations of increased risk It is recognised that there may be locations of increased risk of electrical shock other than those specifically addressed in Part 7 of BS 7671. Examples of such locations could include laundries where there are washing and drying machines in close proximity, and water is present, and commercial kitchens with stainless steel units, where once again, water is present. Where, because of the perception of additional risks being likely, the installation designer decides that an installation or location warrants further protective measures, the options available includes:
Automatic Disconnection of Supply (ADS) by means of a residual current device having a residual operating current not exceeding 30 mA;
Supplementary protective equipotential bonding; and
Reduction of maximum fault clearance time.
The provision of RCDs and supplementary bonding must be specified by the host organisation’s appointed installation designer or electrical contractor and installed by a suitably qualified and competent electrician so as to comply with Regulations 419.2 and 544.2.
The supply to this machine must be protected by a 30mA RCD

DX Classic Control Rigid Deck (FG245), Rev. A21 09-04-21 5
Failure to adhere to the cleaning and maintenance instructions detailed in this booklet could affect the warranty of this
machine. The oven should only be used for baking bread, pastries and cakes
(for other products please contact your oven supplier)
WARNING LABEL, TO REDUCE RISK OF FIRE OR ELECTRIC SHOCK
DO NOT REMOVE COVER (OR BACK) NO USER SERVICEABLE PARTS INSIDE
REPAIR SHOULD BE DONE BY AUTHORISED PERSONNEL ONLY
DX Classic Control Rigid Deck (FG245), Rev. A21 09-04-21 6
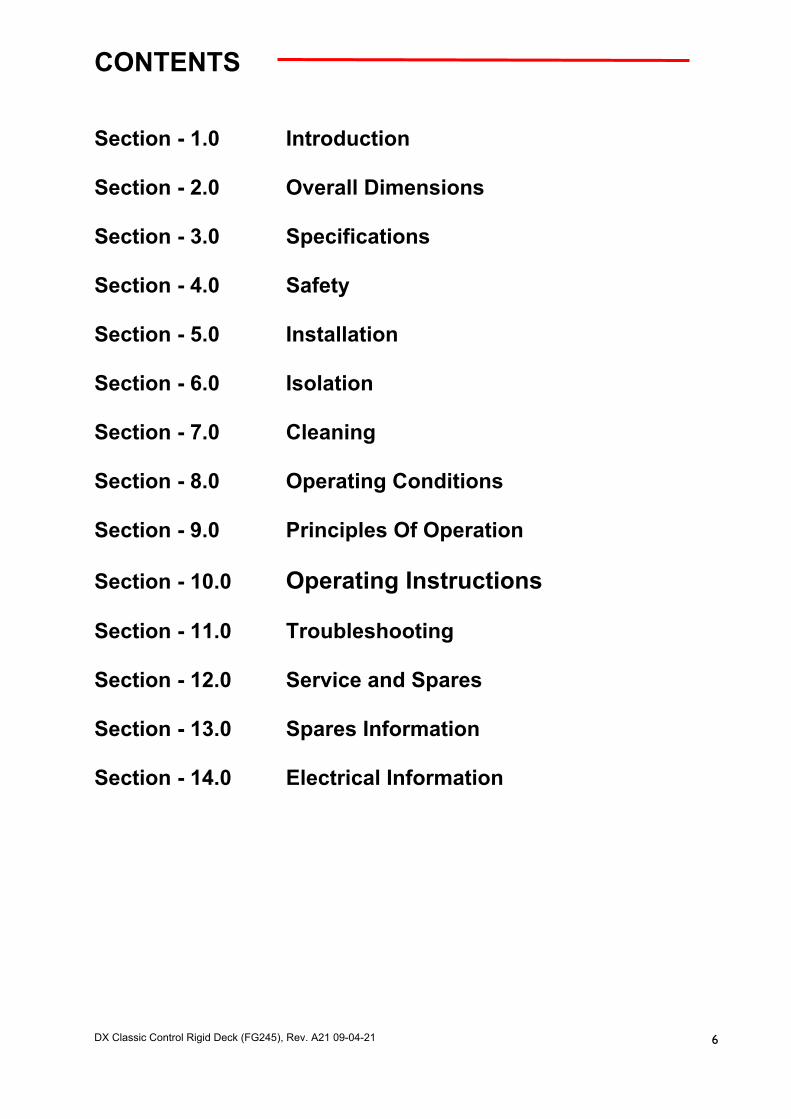
CONTENTS Section - 1.0 Introduction Section - 2.0 Overall Dimensions Section - 3.0 Specifications Section - 4.0 Safety Section - 5.0 Installation Section - 6.0 Isolation Section - 7.0 Cleaning Section - 8.0 Operating Conditions Section - 9.0 Principles Of Operation Section - 10.0 Operating Instructions Section - 11.0 Troubleshooting Section - 12.0 Service and Spares Section - 13.0 Spares Information Section - 14.0 Electrical Information

DX Classic Control Rigid Deck (FG245), Rev. A21 09-04-21 7
1.0 INTRODUCTION The MONO Electric Deck Oven is an easy to use practical, good-looking oven giving an excellent heat recovery rate and an even bake across a wide range of bread and confectionery products.
Good looking and totally reliable Conceived with the no nonsense requirements of both the independent and in-store baker in mind, and designed to visually please as well as give reliable service for many years, this oven will more than satisfy the most discerning customer.
Top quality specification The external and internal contact surfaces are stainless steel, so there’s no fear of deterioration even after many years of hard use; plus each deck is fitted with baking sheets manufactured from natural materials as a standard fitting. The oven comes with an integral steaming system resulting in a reduction in energy consumption and also a reduction in the overall size of the oven. The system produces real steam and because rapid recovery has been designed into the oven you can enjoy it time and time again. Fitted with hinged easy to clean doors, individual top and bottom heat controls and seven day bake timers for each deck, the oven gives the Master Baker a fast, even bake.
Clean design, easy to maintain Supplied with an LED screen. All programmable parameters have separate indicators for easy programming and extra bake time, if required. An energy saving 7-day timer is also standard. The simplified electrical circuits aid reliability with overheat protection (on controllers and oven) to ensure long life of controllers, all housed in splash-proof electrical enclosures. An “i” button can be used to upgrade firmware without the need of dismantling the panels.

DX Classic Control Rigid Deck (FG245), Rev. A21 09-04-21 8
2.0 OVERALL DIMENSIONS 5 DECK 3 TRAY HEIGHT 2040MM WIDTH 1890MM DEPTH 1120MM 5 DECK 2 TRAY HEIGHT 2040MM WIDTH 1410MM DEPTH 1120MM
4 DECK 3 TRAY HEIGHT 1890MM WIDTH 1890MM DEPTH 1120MM
4 DECK 2 TRAY HEIGHT 1890MM WIDTH 1410MM DEPTH 1120MM

DX Classic Control Rigid Deck (FG245), Rev. A21 09-04-21 9
3.0 SPECIFICATIONS NOISE LEVEL: Less than 80 dB
The supply to this machine must be protected by a 30mA RCD

DX Classic Control Rigid Deck (FG245), Rev. A21 09-04-21 10
4.0 SAFETY
All maintenance must be made with the oven disconnected from the power supply and then only by fully trained authorized persons.
Check all cover panels, and any pipe fittings are securely positioned. Check oven door handles are not damaged. Do not operate a deck's steaming system with oven door open. Always use oven gloves when loading the oven. When products are removed from the oven, ensure: (a) Tins are knocked out and stored directly onto a tin storage trolley or rack (Do not leave hot tins on the floor or on tables). (b)Trays are put into a rack and the rack is wheeled to a safe cooling area. Do not store items on top of the oven. Do not store items behind the oven. Beware of hot surfaces. Do not touch oven front or door with bare skin. All operatives must be fully trained People undergoing training must be under direct supervision The oven should only be used for baking bread, pastries and cakes (for other
products please contact MONO Equipment) No unauthorized modifications should be made to the oven. Do not walk on the roof of the oven DISPOSAL
Care should be taken when the oven comes to the end of its working life. All parts should be disposed of in the appropriate place either recycling or other means as the law permits at the time.
NOTE: BAKERY STAFF MUST NOT UNDER ANY CIRCUMSTANCES REMOVE PANELS TO ACCESS ANY PART OF THE DECK OVEN.
Panels should only be removed by a Mono maintenance engineer (or other fully trained maintenance contractor) for repairs or maintenance, after isolating oven from power supply.

DX Classic Control Rigid Deck (FG245), Rev. A21 09-04-21 11
5.0 INSTALLATION GENERAL
A smooth level floor is recommended on which to position the oven and
access for maintenance should be considered. It is recommended that an extraction hood be placed above the oven to
disperse excess steam, plus heat which could have an adverse effect on the bakery ceiling and ambient temperature.
It is recommended that a minimum gap of 75mm be left on the right hand side
of the oven to allow maximum cooling of the electrical chamber.
Installation must be made by a trained authorized engineer.
WATER SUPPLY All ovens with steam require a 15mm water supply at a pressure of 2 - 3 bar.
standard domestic water supplies are usually within these parameters. All connections should comply with local water regulations.
No drain is required for this oven. Customers are strongly advised to fit a water treatment device to all bakery
equipment requiring water. MONO can advise on a suitable water treatment unit. This is essential in hard water areas.
WATER SYSTEM SETUP PROCEDURE. It is imperative that the water delivery to the deck oven is checked. NOTE. DYNAMIC PRESSURE, NOT STATIC, IS BEING MEASURED. (SEE DRAWING ON NEXT PAGE) 1. Flush out the main feed pipe to be used until water runs clear and free from debris. 2. Connect main feed to oven. 3. Place a container under the test valve. 4. Slowly open drain valve and set the regulator to 0.5bar using the screw underneath. 5. When the pressure has stabilised shut the test valve. REPEAT 3, 4 AND 5 AT THE END OF INSTALLATION.
The supply to this machine must be protected by a 30mA RCD

DX Classic Control Rigid Deck (FG245), Rev. A21 09-04-21 12
REAR WATER CONNECTIONS USED FOR SET UP
TO 0.5bar

DX Classic Control Rigid Deck (FG245), Rev. A21 09-04-21 13
6.0 ISOLATION
A wall isolator rated for the specific model of oven installed must be available
in order to completely isolate the oven.
To stop the oven in an emergency Switch off at the main isolator
7.0 CLEANING DAILY CLEANING INSTRUCTIONS
ISOLATE OVEN FROM MAINS SUPPLY BEFORE CLEANING. Sweep any debris out of oven after it has been allowed to cool.
Use a vacuum cleaner with metal attachments (able to take heat) if available. Brush down and wipe oven front, back and sides with a damp cloth. Spot clean with a damp cloth, which has been soaked in a solution of mild
detergent, and hot water, paying particular attention to ensure excess water is not applied around the area of the electrical panels.
NOTE: ENSURE WATER DOES NOT ENTER CONTROL PANEL MOUNTING
OR ROOF MOUNTED FAN.
WEEKLY CLEANING INSTRUCTIONS ISOLATE OVEN FROM MAINS SUPPLY BEFORE CLEANING. Complete daily cleaning as above. Scrub oven wheels with a mild detergent and hot water using nylon cleaning
brush (excess water will rust metal). Ensure the oven roof area is clear of debris and dust build up.
(DO NOT STAND ON THE OVEN ROOF)

DX Classic Control Rigid Deck (FG245), Rev. A21 09-04-21 14
8.0 OPERATING CONDITIONS It is recommended that a space of at least 2 metres be left in front of the oven
for ease of operation and safety. Bakery utensils must not be used to operate the control panel buttons.
9.0 PRINCIPLE OF OPERATION NOTE: REFER TO YOUR OWN COMPANY’S RECIPE MANUAL FOR OVEN TEMPERATURE SETTINGS. Products are baked in an insulated heated chamber. The temperature is regulated by a thermocouple having an LED read-out on the front control panel. Baking heat is radiant with top and bottom heat being adjusted by means of separate controls. This enables heat to be “balanced” according to product requirement.
STEAM is provided from an integral boiler, and is introduced into the chamber on demand. This is automatically controlled by the programmed parameters. Once steamed the oven will not steam until the steam unit has recovered heat, typically 3-10 minutes depending on the program selected.
All ovens are fitted with a steam damper that evacuates steam humidity into a vent at the rear of the oven.

DX Classic Control Rigid Deck (FG245), Rev. A21 09-04-21 15
10.0 OPERATING INSTRUCTIONS
11
13
5
1 3
4
7
8
9
10
14 6 2
12
CLASSIC DECK OVEN CONTROLLER
“iButton”
STORAGE DEVICE CONNECTION
ON/OF
BAKE TIME
AUTO ON SET / ADD TIME
UP/DOWN BUTTONS
PROGRAM TEMPERATURE
TOP HEAT
BOTTOM HEAT
STEAM TIME
LIGHT
START
DAMPER STOP

DX Classic Control Rigid Deck (FG245), Rev. A21 09-04-21 16
1. ON/OFF Turns controller on from standby mode. Also used to exit setup mode.
2. STOP Stops bake cycle. Also used to go to function setup menu on power up (with button 3)
3. START Starts bake cycle. Also used to go to setup menu on power up (with button 2) Also silences “2 minutes from end of bake” alarm when sounding.
4. LIGHT
Interior light on/off. Red light shows when light is on. Press to turn on and press again to turn off.
5. BAKE TIME/ADD TIME
Used to access set bake time and current time and day setup. Also used to jump to day/hours/minutes when setting time and setting auto on time.
IF 7 DAY TIMER ENABLED During bake cycle, Used to add extra bake time (1 minute each press). At end of bake, press for two minutes and then once for each extra minute required.
6. DAMPER
Press to open damper. Press again to close damper. (only works during bake). Closes when “stop” pressed at end of bake and while steaming. Red light shows when in open position.
7. STEAM TIME Press to access steam time and pre-steam mode. If pre-steam function is enabled. Press once (reds dots appear).Use up/down keys (12) to change to required setting. P0 = no pre-steam, P1 = 1 second, P2 = 2 seconds. Press again to set steam time using up/down keys (12). Press button again to save or wait 10 seconds to auto-save. If pre-steam function is not enabled. Press to set steam time using up/down keys (12). Press button again to save or wait 10 seconds to auto-save.
8. BOTTOM HEAT Press to set the bottom heat cycle percentage. Use up/down keys (12) to adjust the value. Press button again to save or wait 10 seconds to auto-save.
9. TOP HEAT Press to set the top heat cycle percentage. Use up/down keys (12) to adjust the value. Press button again to save or wait 10 seconds to auto-save.

DX Classic Control Rigid Deck (FG245), Rev. A21 09-04-21 17
10. TEMPERATURE Press to set the bake temperature required. Use up/down keys (12) to adjust the value. Press button again to save or wait 10 seconds to auto-save.
11. PROGRAM Use up/down keys (12) to go to required program. Press “p” for 5 seconds and all displays will flash.(A beep confirms settings are now saved)
12. UP/DOWN BUTTONS
Used to adjust values when required.
13. AUTO ON SET / ADD TIME IF 7 DAY TIMER ENABLED Used to access auto switch on times.
IF 7 DAY TIMER DISABLED During bake cycle, Used to add extra bake time (1 minute each press). At end of bake, press for two minutes and then once for each extra minute required.
14. “i BUTTON” CONNECTION
Used with special “iButton” storage device to change firmware of control board.
(SEE NEXT PAGE FOR DETAILS)
NOTE Whenever power is connected to the board, 8 minutes
must elapse before the oven will steam. This allows the bottom elements to heat enough for steaming.
This will always happen if the power is disconnected and connected again,
even if the oven is hot.
“i Button” storage device
2”

DX Classic Control Rigid Deck (FG245), Rev. A21 09-04-21 18
FIRMWARE UPDATE USING IBUTTON Place unit into standby state so that the clock is displayed. Place iButton onto probe. Controller will upload data from iButton. The bake temperature window will display a countdown (from 128 down to 0) as data is uploaded. The top heat window displays the number of failed reads from the iButton. If this count reaches 08 then the upload will terminate (see Error conditions below). Once the data has been uploaded and checked, the unit will enter a programming state. The bake temperature window will display ‘Prg’. This process should take around 8 seconds to complete. Note: during this programming phase, power must not be removed from the unit, or the ibutton removed from the reader probe If the power is interrupted, the re-programming of the Flash memory will be incomplete and the unit will cease to function. The only way to recover from this is to re-program the unit via a pc with a programming cable. When the programming has completed, the unit will reset and display the new firmware version in the time window. This will be continuously displayed until the iButton is removed from the probe. The unit will then display the clock and continue to function as normal. Error conditions Error codes will be displayed in the bake temperature window if an upload fails. In all the following situations, no changes will be made to the unit. Firmware is only updated if the upload from the iButton has been successful. If an error is displayed and the iButton is still connected, the unit will wait for disconnection before resetting and functioning as normal. Another upload attempt may be made. If the iButton is removed from the probe whilst uploading is in progress, the upload will terminate and the unit will reset. E01: If the unit fails to successfully read the iButton eight times in succession, then an E01 fault will be displayed in the bake temperature window. This might be caused by poor contact between the probe and the iButton, or bad data on the iButton. Try cleaning the surface of the probe – any small amount of dirt can affect the connection. E02: This error will be displayed if the file information on the iButton is incorrect or the iButton is blank (unprogrammed). E03: This error will be displayed if the iButton file CRC (cyclical redundancy check) does not match that calculated by the unit following a download i.e. bad iButton file.

DX Classic Control Rigid Deck (FG245), Rev. A21 09-04-21 19
1. With oven in standby mode (power on) press “on” button (1). 2. Press program button (11)
Using up/down keys (12) choose the set program required. Oven will heat to the temperature required. Oven is ready for use when the display shows the temperature of the program chosen and if steam is required the display stops flashing.
Note: If the oven is already hot and the set temperature is lower than the current temperature of the oven, the door should be opened to allow the temperature to drop.
3. Load oven as required. To preserve heat, do not leave doors open more than needed to load oven. 4. Press start (3)
Press (13) at anytime during the bake to add 1 minute to the bake time.
5. IF ENABLED IN SETUP. 2 minutes from the end of the bake the buzzer will sound for 10 seconds. Press start (3) to silence if required.
6. At the end of the bake the buzzer will sound again. Press stop (2).
OPERATION
13
1 3
2
12
ON/OFF
BAKE TIME
UP/DOWN BUTTONS
START
STOP
6 DAMPER
11 PROGRAM
DAMPER (6) Press to open damper. Press again to close damper. Red light shows when in open position. (Closes if left open for 90 minutes)
DX Classic Control Rigid Deck (FG245), Rev. A21 09-04-21 20
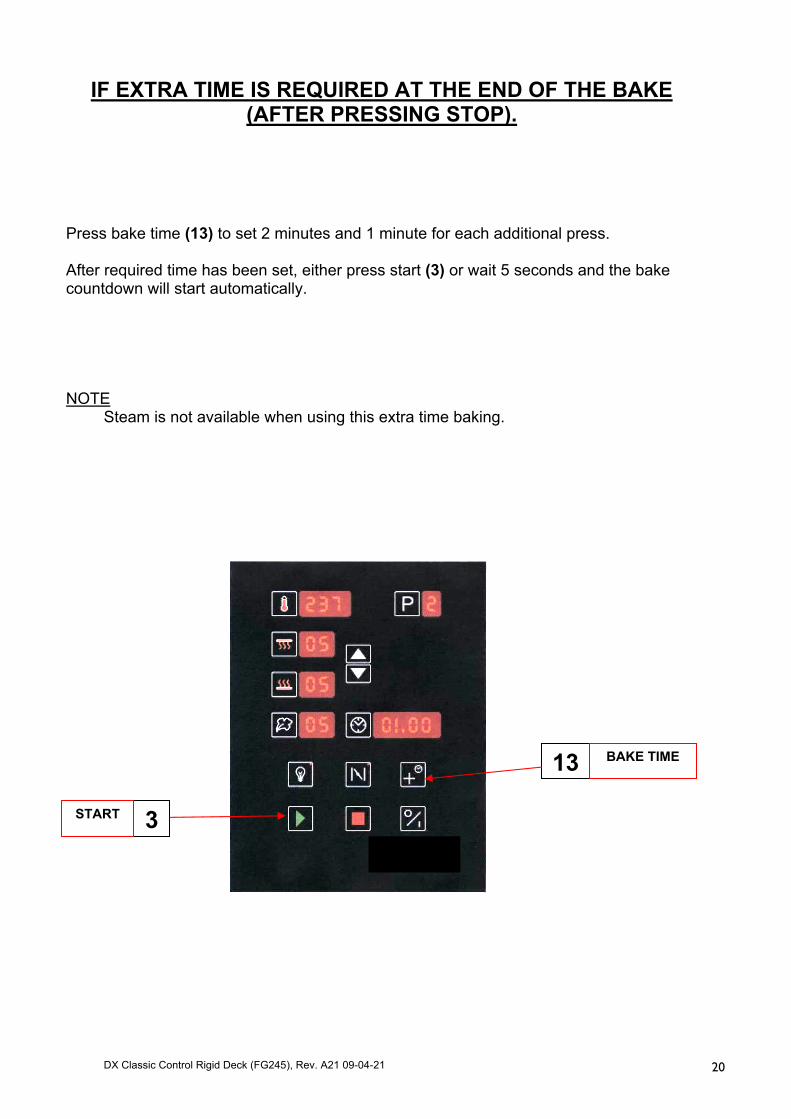
IF EXTRA TIME IS REQUIRED AT THE END OF THE BAKE (AFTER PRESSING STOP).
Press bake time (13) to set 2 minutes and 1 minute for each additional press. After required time has been set, either press start (3) or wait 5 seconds and the bake countdown will start automatically. NOTE
Steam is not available when using this extra time baking.
13
3
BAKE TIME
START

DX Classic Control Rigid Deck (FG245), Rev. A21 09-04-21 21
Turn the power supply on. This will put the oven in “standby mode” with only the clock showing. Press clock button (5) and dots will flash under the hours in the time window. Change value using up/down keys (12). Press clock button (5) again and dots will flash under the minutes in the time window. Change value using up/down keys (12). Press clock button (5) again and day number will show. Change value using up/down keys (12). (Usually day 1 is used as Monday) To save the settings press clock button (5) within 5 seconds. To set a timer event - 1.Switch the controller into standby( press the I/O button), I.e. only the current time displayed in the bake time window. 2.Press the bake time button (13) - timer day of week is displayed in temp window (dots appear next to day) to alter set day use the up/down arrow buttons (12) 3.Press the clock button (5), dots appear next to the hour display - to alter set hours use the up/down arrow button. 4.Press the clock button (5), dots appear next to the minute display - to alter set minutes use the up/down arrow buttons (12). note - if you do not alter the hours/minutes within 6 seconds of selecting, the timer setup will default back to day setting i.e. dots appear next to the P - in the temp window, just press the bake time button to get back to the time setup again. Setting a time of 00.00 in the timer setup is a non-event so will not switch on the controller. 5. Press the bake time button (13) to save and exit the timer setup .
DAY AND TIME SET UP
12
CLOCK BUTTON
UP/DOWN BUTTONS
5
CLOCK DISPLAY
. .
SETTING 7 DAY TIMER (if F15 enabled in parameters) 13 BAKE TIME

DX Classic Control Rigid Deck (FG245), Rev. A21 09-04-21 22
To enter set up mode press both start (3) and stop (2) buttons and then turn the power supply on at the same time. Change to the function required using up/down keys (12). (see next page for function list) Press clock button (5). (Dots appear on display) Change value using up/down keys (12). Press clock button (5) to save setting. To exit set up mode and save changes press on/off (1). NOTE Any changes to the functions are only saved when exiting using on/off (1)
SET UP MODE
3 START +
5 ADJUST VALUE
FUNCTION DISPLAY WINDOW F10
250
1 ON/OFF
PRESS TO SAVE AND EXIT
2
12 UP/DOWN BUTTONS
STOP
ENTER SET MODE + POWER ON

DX Classic Control Rigid Deck (FG245), Rev. A21 09-04-21 23
F1 - MONO CONSTANT (FACTORY SET AT 210)
F2 - TOP HEAT GAIN (FACTORY SET AT 50)
F3 - BOTTOM HEAT GAIN (FACTORY SET AT 50)
F4 - FRONT TOP ELEMENT OFFSET VALUE (0-50) (FACTORY SET AT 25)
F5 - DEG “C”, DEG”F”
F6 - “2 MINUTE FROM END OF BAKE ALARM (ENABLE=1,DISABLE=0)
F7 - PRE-STEAM - (ENABLE=1, DISABLE=0)
F8 - STEAM - (ENABLE=1, DISABLE=0)
F9 - BAKE TEMPERATURE OFF-SET (+ - 25 DEG C)(set to –10)
F10 - MAXIMUM SET TEMPERATURE LIMIT (250 DEG “C” DEFAULT) MAXIMUM TEMPERATURE 290 DEG “C”
F11 - BAKE CONTROLS LOCKOUT – (ENABLE=1, DISABLE=0) (TO PREVENT OPERATOR CHANGING SET BAKE PARAMETERS)
F12 SLEEP MODE DELAY TIME - 60 MINUTES MAX. 0 = DISABLED
F13 - INTERIOR LIGHT AUTO-TIMEOUT - ON/OFF. BETWEEN 1 AND 20 MINUTES (0 = disabled)
F14 - 0-9 PROGRAMS Sets the number of programs available to the operator
F15 - 7 DAY TIMER - (ENABLE=1, DISABLE=0) IF ENABLED, “SET BAKE” TIME ACTS AS EXTRA TIME BUTTON. IF DISABLED, “AUTO ON SET” ACTS AS EXTRA TIME BUTTON.
F16 - 8 HOUR COUNT DOWN TIMER - (ENABLE=1, DISABLE=0) AFTER 8 HOURS THE OVEN WILL TURN OFF (NOT DURING A BAKE CYCLE). BEFORE SWITCH OFF, DISPLAYS WILL FLASH AND ALARM WILL SOUND. IF ANY BUTTON IS PRESSED AT THIS TIME, AN HOUR WILL BE ADDED TO THE TIMER.
F17 - LAMP OUTPUT SOFT START - (ENABLE/DISABLE) F18 - STEAM TYPE - (PLATE = 0, TROUGH = 1) F19 - STEAM TARGET TEMPERATURE - (50 – 250 DEG C)
After switching on the controller, before the sleep delay time is initiated (if enabled in F12), the set bake temperature must be reached, steam recovery time elapsed and a bake cycle started and stopped.
Once the stop bake button (2) has been pressed at the end of a bake, the sleep delay timer counts down until it has timed out. At this point the controller switches into sleep mode (SLP displayed in temperature window) and the oven will drop to a pre-set fall back temperature of 170 deg c, which it will maintain. Note – damper closes when oven goes into sleep mode.
Pressing any button during the sleep mode delay time will not affect the countdown, apart from the O/I button which switches the controller off. Pressing the start/stop bake buttons will reset the countdown timer. Pressing any button while in sleep mode (apart from lights on/off(4) – which operates as normal and the panel O/I on/off(1), which will turn the controller off) will bring it out of sleep mode, at which point the oven will heat up to its previous set bake temperature (typical recovery time from 170 deg c to 230 deg c is 15 minutes approx) Note – if no buttons on the controller are pressed after exiting sleep mode, the controller will switch back into sleep mode, after the sleep delay time has expired.
SET UP PARAMETER FUNCTION LIST (“F” SETTINGS)
ANY CHANGES MADE WILL ONLY BE SAVED BY PRESSING THE ON/OFF BUTTON (1) WHEN EXITING
DX Classic Control Rigid Deck (FG245), Rev. A21 09-04-21 24
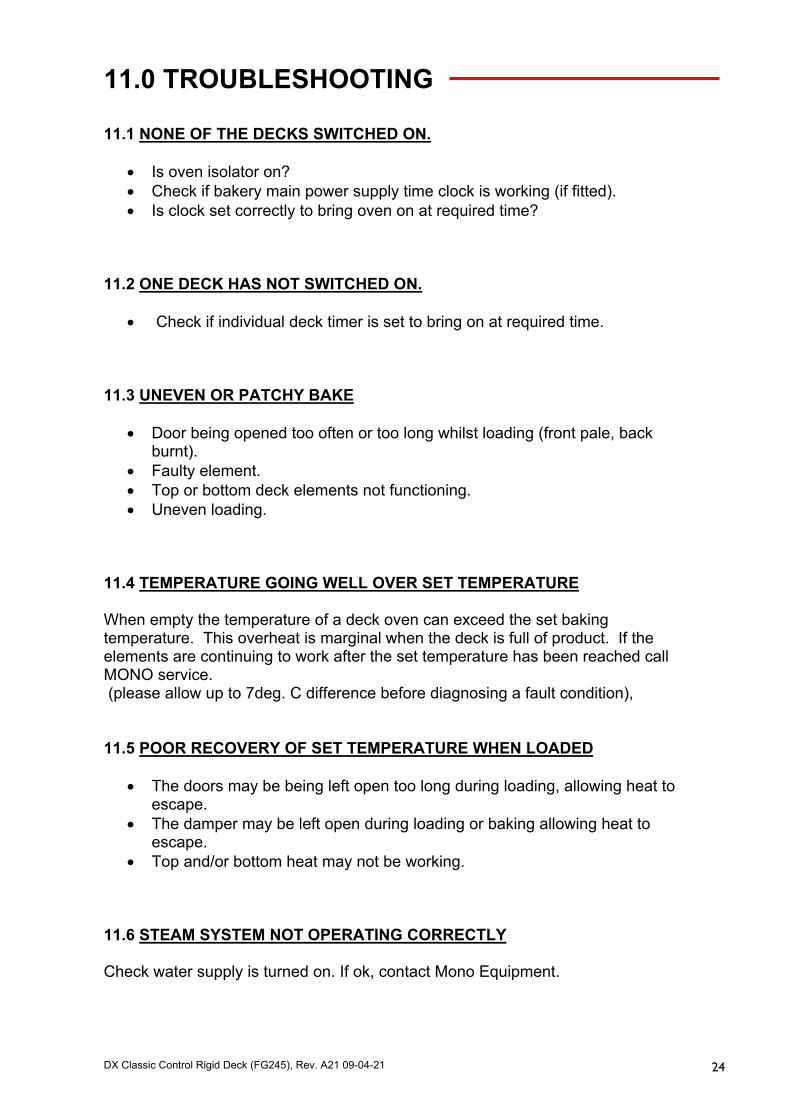
11.0 TROUBLESHOOTING 11.1 NONE OF THE DECKS SWITCHED ON.
Is oven isolator on? Check if bakery main power supply time clock is working (if fitted). Is clock set correctly to bring oven on at required time?
11.2 ONE DECK HAS NOT SWITCHED ON.
Check if individual deck timer is set to bring on at required time. 11.3 UNEVEN OR PATCHY BAKE
Door being opened too often or too long whilst loading (front pale, back burnt).
Faulty element. Top or bottom deck elements not functioning. Uneven loading.
11.4 TEMPERATURE GOING WELL OVER SET TEMPERATURE When empty the temperature of a deck oven can exceed the set baking temperature. This overheat is marginal when the deck is full of product. If the elements are continuing to work after the set temperature has been reached call MONO service. (please allow up to 7deg. C difference before diagnosing a fault condition), 11.5 POOR RECOVERY OF SET TEMPERATURE WHEN LOADED
The doors may be being left open too long during loading, allowing heat to escape.
The damper may be left open during loading or baking allowing heat to escape.
Top and/or bottom heat may not be working. 11.6 STEAM SYSTEM NOT OPERATING CORRECTLY Check water supply is turned on. If ok, contact Mono Equipment.

DX Classic Control Rigid Deck (FG245), Rev. A21 09-04-21 25
12.0 SERVICE AND SPARES
.
MONO Queensway
Swansea West Industrial Estate Swansea. SA5 4EB UK
email:[email protected] Web site:www.monoequip.com
Tel. 01792 561234
Spares +044(0)1792 564039 Fax. 01792 561016

DX Classic Control Rigid Deck (FG245), Rev. A21 09-04-21 26
13.0 SPARES INFORMATION
DX Classic Control Rigid Deck (FG245), Rev. A21 09-04-21 27
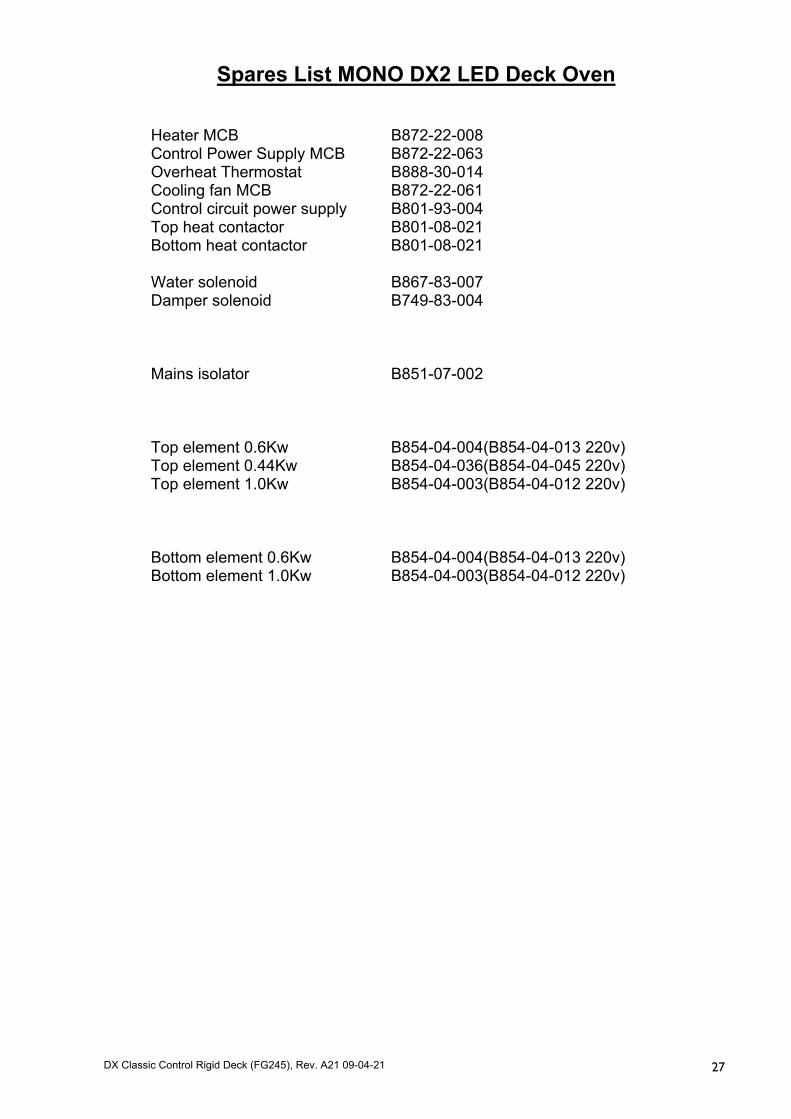
Spares List MONO DX2 LED Deck Oven
Heater MCB B872-22-008 Control Power Supply MCB B872-22-063 Overheat Thermostat B888-30-014 Cooling fan MCB B872-22-061 Control circuit power supply B801-93-004 Top heat contactor B801-08-021 Bottom heat contactor B801-08-021 Water solenoid B867-83-007 Damper solenoid B749-83-004
Mains isolator B851-07-002 Main LED PCB 245-25-00100 Interface PCB B728-93-014 Top element 0.6Kw B854-04-004(B854-04-013 220v) Top element 0.44Kw B854-04-036(B854-04-045 220v) Top element 1.0Kw B854-04-003(B854-04-012 220v) Bottom element 0.6Kw B854-04-004(B854-04-013 220v) Bottom element 1.0Kw B854-04-003(B854-04-012 220v)

DX Classic Control Rigid Deck (FG245), Rev. A21 09-04-21 28
14.0 ELECTRICS

DX Classic Control Rigid Deck (FG245), Rev. A21 09-04-21 29
Parts List : MONO DX2 LED Deck Oven (for use with following drawings)
F1 Heater MCB B872-22-008 F2 Heater MCB B872-22-008 F3 Heater MCB B872-22-008 F4 Control Power supply MCB B872-22-063 F5 Overheat Thermostat B888-30-014 F6 Cooling fan MCB B872-22-061 T1 Control circuit Power supply B801-93-004 K1 Top heat contactor B801-08-021 K2 Bottom heat contactor B801-08-021 Y1 Water solenoid B867-83-007 Y2 Damper solenoid B749-83-004 Q1 Mains isolator B851-07-002 U1 Main LED PCB 245-25-00100 U6 Interface PCB B728-93-014 R1 Top element 1.0Kw B854-04-003(B854-04-012 220v) R2 Top element 0.6Kw B854-04-004(B854-04-013 220v) R3 Top element 0.6Kw B854-04-004 R4 Top element 0.6Kw B854-04-004 R5 Top element 0.6Kw B854-04-004 R6 Top element 0.6Kw B854-04-004 R7 Top element 0.44Kw B854-04-036(B854-04-045 220v) R8 Bottom element 1.0Kw B854-04-003(B854-04-012 220v) R9 Bottom element 0.6Kw B854-04-004(B854-04-013 220v) R10 Bottom element 0.6Kw B854-04-004 R11 Bottom element 0.6Kw B854-04-004 R12 Bottom element 0.6Kw B854-04-004 R13 Bottom element 0.6Kw B854-04-004 R14 Bottom element 0.6Kw B854-04-004

DX Classic Control Rigid Deck (FG245), Rev. A21 09-04-21 30

DX Classic Control Rigid Deck (FG245), Rev. A21 09-04-21 31
OUTPUTS PIN 1 – 24v PIN 2 – TOP HEAT OUTPUT PIN 3 -- TOP FRONT HEAT OUTPUT PIN 4 – BOTTOM HEAT OUTPUT PIN 5 – STEAM OUTPUT PIN 6 – DAMPER OUTPUT PIN 7 – LIGHT OUTPUT PIN 8 – CANOPY FAN RELAY OUTPUT PIN 9 – 24v PIN 10 – 24v
CONTROLLER LAYOUT

DX Classic Control Rigid Deck (FG245), Rev. A21 09-04-21 32

DX Classic Control Rigid Deck (FG245), Rev. A21 09-04-21 33

DX Classic Control Rigid Deck (FG245), Rev. A21 09-04-21 34

DX Classic Control Rigid Deck (FG245), Rev. A21 09-04-21 35

DX Classic Control Rigid Deck (FG245), Rev. A21 09-04-21 36
CANOPY IF FITTED

DX Classic Control Rigid Deck (FG245), Rev. A21 09-04-21 37
If a fault arises, please do not hesitate to contact the
Customer Service Department, quoting the machine serial number on the silver information plate of the machine and on the front cover of this manual
MONO Queensway
Swansea West Industrial Estate Swansea. SA5 4EB UK
email:[email protected]
Spares +44(0)1792 56039 Web site:www.monoequip.com
Tel. 01792 561234 Fax. 01792 561016

DX Classic Control Rigid Deck (FG245), Rev. A21 09-04-21 38
MONO Equipment
Queensway, Swansea West Industrial Park, Swansea, SA5 4EB UK Tel. 01792 561234 Fax. 01792 561016
Email:[email protected]
www.monoequip.com
As it is our policy to improve our machines continuously, we reserve the right to change specifications without prior notice.
DISPOSAL Care should be taken when the machine comes to the end of its working life.
All parts should be disposed of in the appropriate place, either recycling or other means as the law permits at the time.
In the UK, The environmental protection act 1990 applies


