Embed Size (px)
Citation preview

infrared DocumentationRelease 2.0.1.dev4322
Yair Fried
Jun 01, 2020


Core
1 Welcome to infrared’s documentation! 31.1 Bootstrap . . . . . . . . . . . . . . . . . . . . . . . . . . . . . . . . . . . . . . . . . . . . . . . . . 31.2 Setup . . . . . . . . . . . . . . . . . . . . . . . . . . . . . . . . . . . . . . . . . . . . . . . . . . . 61.3 Configuration . . . . . . . . . . . . . . . . . . . . . . . . . . . . . . . . . . . . . . . . . . . . . . . 91.4 Workspaces . . . . . . . . . . . . . . . . . . . . . . . . . . . . . . . . . . . . . . . . . . . . . . . . 101.5 Plugins . . . . . . . . . . . . . . . . . . . . . . . . . . . . . . . . . . . . . . . . . . . . . . . . . . 131.6 Topology . . . . . . . . . . . . . . . . . . . . . . . . . . . . . . . . . . . . . . . . . . . . . . . . . 231.7 Interactive SSH . . . . . . . . . . . . . . . . . . . . . . . . . . . . . . . . . . . . . . . . . . . . . . 251.8 New In infrared 2.0 . . . . . . . . . . . . . . . . . . . . . . . . . . . . . . . . . . . . . . . . . . . . 251.9 Advance Features . . . . . . . . . . . . . . . . . . . . . . . . . . . . . . . . . . . . . . . . . . . . 291.10 Contact Us . . . . . . . . . . . . . . . . . . . . . . . . . . . . . . . . . . . . . . . . . . . . . . . . 321.11 Contribute . . . . . . . . . . . . . . . . . . . . . . . . . . . . . . . . . . . . . . . . . . . . . . . . 321.12 OVB deployment . . . . . . . . . . . . . . . . . . . . . . . . . . . . . . . . . . . . . . . . . . . . . 331.13 Troubleshoot . . . . . . . . . . . . . . . . . . . . . . . . . . . . . . . . . . . . . . . . . . . . . . . 361.14 Temporary Workarounds . . . . . . . . . . . . . . . . . . . . . . . . . . . . . . . . . . . . . . . . . 381.15 Baremetal deployment . . . . . . . . . . . . . . . . . . . . . . . . . . . . . . . . . . . . . . . . . . 391.16 Beaker . . . . . . . . . . . . . . . . . . . . . . . . . . . . . . . . . . . . . . . . . . . . . . . . . . 401.17 Foreman . . . . . . . . . . . . . . . . . . . . . . . . . . . . . . . . . . . . . . . . . . . . . . . . . 411.18 OpenStack . . . . . . . . . . . . . . . . . . . . . . . . . . . . . . . . . . . . . . . . . . . . . . . . 411.19 Virsh . . . . . . . . . . . . . . . . . . . . . . . . . . . . . . . . . . . . . . . . . . . . . . . . . . . 441.20 TripleO Undercloud . . . . . . . . . . . . . . . . . . . . . . . . . . . . . . . . . . . . . . . . . . . 481.21 TripleO Upgrade . . . . . . . . . . . . . . . . . . . . . . . . . . . . . . . . . . . . . . . . . . . . . 541.22 TripleO Overcloud . . . . . . . . . . . . . . . . . . . . . . . . . . . . . . . . . . . . . . . . . . . . 541.23 Cloud Config . . . . . . . . . . . . . . . . . . . . . . . . . . . . . . . . . . . . . . . . . . . . . . . 621.24 Tempest . . . . . . . . . . . . . . . . . . . . . . . . . . . . . . . . . . . . . . . . . . . . . . . . . . 641.25 Collect-logs . . . . . . . . . . . . . . . . . . . . . . . . . . . . . . . . . . . . . . . . . . . . . . . . 661.26 Gabbi Tester . . . . . . . . . . . . . . . . . . . . . . . . . . . . . . . . . . . . . . . . . . . . . . . 661.27 List builds . . . . . . . . . . . . . . . . . . . . . . . . . . . . . . . . . . . . . . . . . . . . . . . . 671.28 Pytest Runner . . . . . . . . . . . . . . . . . . . . . . . . . . . . . . . . . . . . . . . . . . . . . . . 671.29 OSPD UI tester . . . . . . . . . . . . . . . . . . . . . . . . . . . . . . . . . . . . . . . . . . . . . . 681.30 RDO deployment . . . . . . . . . . . . . . . . . . . . . . . . . . . . . . . . . . . . . . . . . . . . . 701.31 SplitStack deployment . . . . . . . . . . . . . . . . . . . . . . . . . . . . . . . . . . . . . . . . . . 731.32 Composable Roles . . . . . . . . . . . . . . . . . . . . . . . . . . . . . . . . . . . . . . . . . . . . 731.33 Tripleo OSP with Red Hat Subscriptions . . . . . . . . . . . . . . . . . . . . . . . . . . . . . . . . 801.34 Hybrid deployment . . . . . . . . . . . . . . . . . . . . . . . . . . . . . . . . . . . . . . . . . . . . 821.35 How to create a new plugin . . . . . . . . . . . . . . . . . . . . . . . . . . . . . . . . . . . . . . . 85
i

1.36 Controlling Node Placement . . . . . . . . . . . . . . . . . . . . . . . . . . . . . . . . . . . . . . . 881.37 Controller replacement . . . . . . . . . . . . . . . . . . . . . . . . . . . . . . . . . . . . . . . . . . 891.38 Standalone deployment . . . . . . . . . . . . . . . . . . . . . . . . . . . . . . . . . . . . . . . . . 901.39 In development . . . . . . . . . . . . . . . . . . . . . . . . . . . . . . . . . . . . . . . . . . . . . . 91
2 Indices and tables 93
ii

infrared Documentation, Release 2.0.1.dev4322
InfraRed is a plugin based system that aims to provide an easy-to-use CLI for Ansible based projects. It aims toleverage the power of Ansible in managing / deploying systems, while providing an alternative, fully customized, CLIexperience that can be used by anyone, without prior Ansible knowledge.
The project originated from Red Hat OpenStack infrastructure team that looked for a solution to provide an “easier”method for installing OpenStack from CLI but has since grown and can be used for any Ansible based projects.
Core 1

infrared Documentation, Release 2.0.1.dev4322
2 Core
CHAPTER 1
Welcome to infrared’s documentation!
1.1 Bootstrap
1.1.1 Setup
Clone infrared 2.0 from GitHub:
git clone https://github.com/redhat-openstack/infrared.git
Make sure that all prerequisites are installed. Setup virtualenv and install from source using pip:
cd infraredvirtualenv .venv && source .venv/bin/activatepip install --upgrade pippip install --upgrade setuptoolspip install .
Warning: It’s important to upgrade pip first, as default pip version in RHEL (1.4) might fail on dependencies
Note: infrared will create a default workspace for you. This workspace will manage your environment details.
1.1.2 Development
For development work it’s better to install in editable mode and work with master branch:
pip install -e .
Change default IR_HOME variable to point to Infrared directory:
3
infrared Documentation, Release 2.0.1.dev4322
export IR_HOME=/path/to/infrared/directory/
1.1.3 Provision
In this example we’ll use virsh provisioner in order to demonstrate how easy and fast it is to provision machines usinginfrared.
Add the virsh plugin:
infrared plugin add plugins/virsh
Print virsh help message and all input options:
infrared virsh --help
For basic execution, the user should only provide data for the mandatory parameters, this can be done in two ways:
1) CLI
2) Answers File
CLI
Notice the only three mandatory paramters in virsh provisioner are:
• --host-address - the host IP or FQDN to ssh to
• --host-key - the private key file used to authenticate to your host-address server
• --topology-nodes - type and role of nodes you would like to deploy (e.g: controller:3 == 3 VMsthat will act as controllers)
We can now execute the provisioning process by providing those parameters through the CLI:
infrared virsh --host-address $HOST --host-key $HOST_KEY --topology-nodes→˓"undercloud:1,controller:1,compute:1"
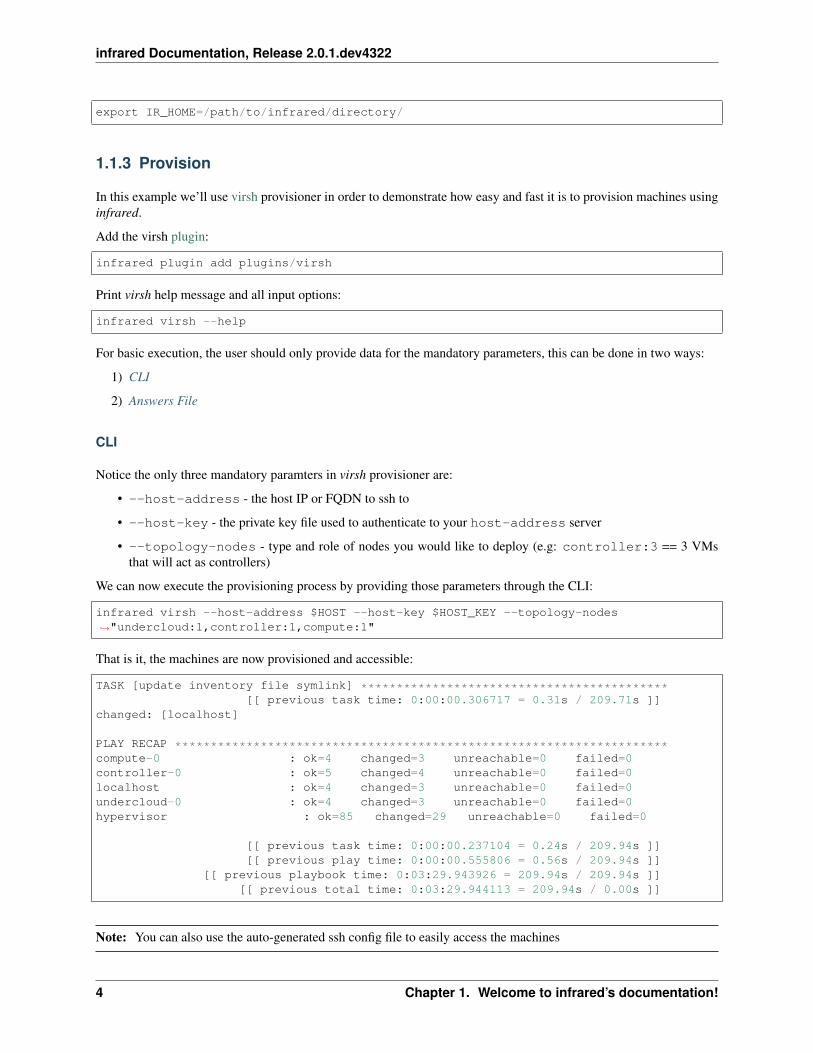
That is it, the machines are now provisioned and accessible:
TASK [update inventory file symlink] *******************************************[[ previous task time: 0:00:00.306717 = 0.31s / 209.71s ]]
changed: [localhost]
PLAY RECAP *********************************************************************compute-0 : ok=4 changed=3 unreachable=0 failed=0controller-0 : ok=5 changed=4 unreachable=0 failed=0localhost : ok=4 changed=3 unreachable=0 failed=0undercloud-0 : ok=4 changed=3 unreachable=0 failed=0hypervisor : ok=85 changed=29 unreachable=0 failed=0
[[ previous task time: 0:00:00.237104 = 0.24s / 209.94s ]][[ previous play time: 0:00:00.555806 = 0.56s / 209.94s ]]
[[ previous playbook time: 0:03:29.943926 = 209.94s / 209.94s ]][[ previous total time: 0:03:29.944113 = 209.94s / 0.00s ]]
Note: You can also use the auto-generated ssh config file to easily access the machines
4 Chapter 1. Welcome to infrared’s documentation!

infrared Documentation, Release 2.0.1.dev4322
Answers File
Unlike with CLI, here a new answers file (INI based) will be created. This file contains all the default & mandatoryparameters in a section of its own (named virsh in our case), so the user can easily replace all mandatory parameters.When the file is ready, it should be provided as an input for the --from-file option.
Generate Answers file for virsh provisioner:
infrared virsh --generate-answers-file virsh_prov.ini
Review the config file and edit as required:
Listing 1: virsh_prov.ini
[virsh]host-key = Required argument. Edit with any value, OR override with CLI: --host-key=→˓<option>host-address = Required argument. Edit with any value, OR override with CLI: --host-→˓address=<option>topology-nodes = Required argument. Edit with one of the allowed values OR override→˓with CLI: --topology-nodes=<option>host-user = root
Note: host-key, host-address and topology-nodes don’t have default values. All arguments can beedited in file or overridden directly from CLI.
Note: Do not use double quotes or apostrophes for the string values in the answers file. Infrared will NOT removethose quotation marks that surround the values.
Edit mandatory parameters values in the answers file:
[virsh]host-key = ~/.ssh/id_rsahost-address = my.host.addresstopology-nodes = undercloud:1,controller:1,compute:1host-user = root
Execute provisioning using the newly created answers file:
infrared virsh --from-file=virsh_prov.ini
Note: You can always overwrite parameters from answers file with parameters from CLI:
infrared virsh --from-file=virsh_prov.ini --topology-nodes="undercloud:1,controller:1,→˓compute:1,ceph:1"
Done. Quick & Easy!
1.1. Bootstrap 5

infrared Documentation, Release 2.0.1.dev4322
1.1.4 Installing
Now let’s demonstrate the installation process by deploy an OpenStack environment using RHEL-OSP on the nodeswe have provisioned in the previous stage.
Undercloud
First, we need to enable the tripleo-undercloud plugin:
infrared plugin add plugins/tripleo-undercloud
Just like in the provisioning stage, here also the user should take care of the mandatory parameters (by CLI or INI file)in order to be able to start the installation process. Let’s deploy a TripleO Undercloud:
infrared tripleo-undercloud --version 10 --images-task rpm
This will deploy OSP 10 (Newton) on the node undercloud-0 provisioned previously.
Infrared provides support for upstream RDO deployments:
infrared tripleo-undercloud --version pike --images-task=import \--images-url=https://images.rdoproject.org/pike/rdo_trunk/current-tripleo/
→˓stable/
This will deploy RDO Pike version (OSP 11) on the node undercloud-0 provisioned previously. Of course it ispossible to use --images-task=build instead.
Overcloud
Like previously, need first to enable the associated plugin:
infrared plugin add plugins/tripleo-overcloud
Let’s deploy a TripleO Overcloud:
infrared tripleo-overcloud --deployment-files virt --version 10 --introspect yes --→˓tagging yes --deploy yes
infrared cloud-config --deployment-files virt --tasks create_external_network,forward_→˓overcloud_dashboard,network_time,tempest_deployer_input
This will deploy OSP 10 (Newton) overcloud from the undercloud defined previously previously. Given the topologydefined by the Answers File earlier, the overcloud should contain: - 1 controller - 1 compute - 1 ceph storage
1.2 Setup
1.2.1 Supported distros
Currently supported distros are:
• Fedora 25, 26, 27
• RHEL 7.3, 7.4, 7.5
6 Chapter 1. Welcome to infrared’s documentation!
infrared Documentation, Release 2.0.1.dev4322
Warning: Python 2.7 and virtualenv are required.
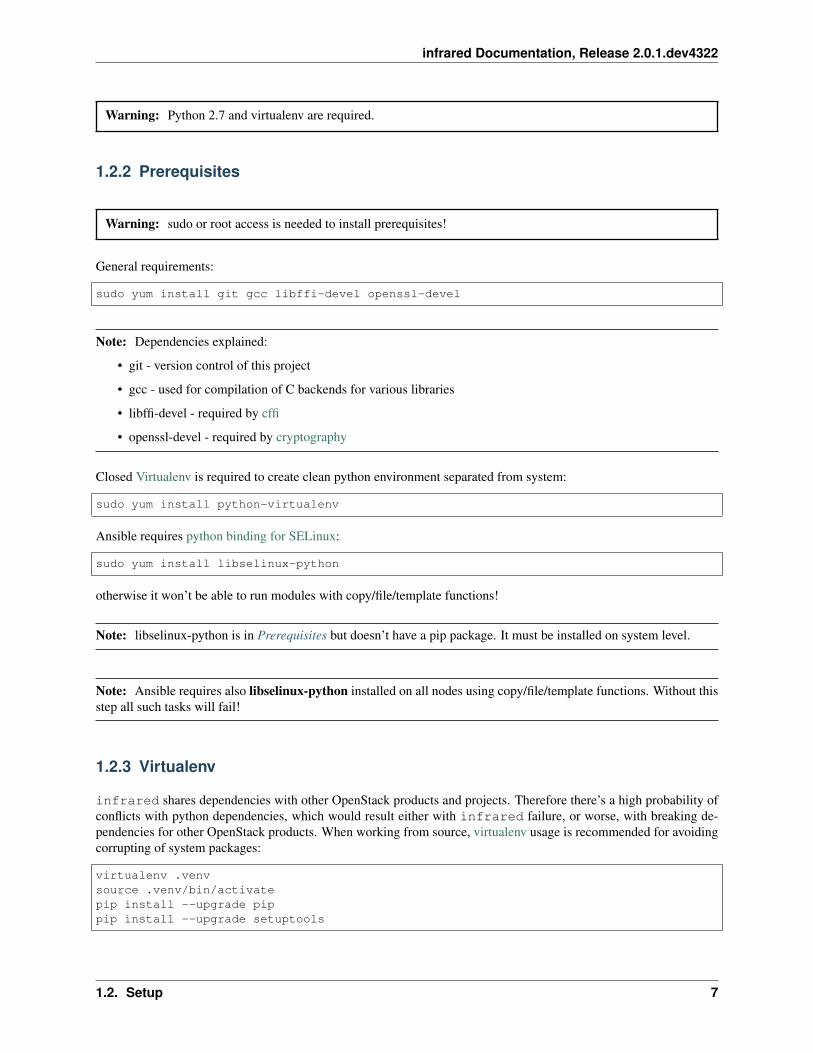
1.2.2 Prerequisites
Warning: sudo or root access is needed to install prerequisites!
General requirements:
sudo yum install git gcc libffi-devel openssl-devel
Note: Dependencies explained:
• git - version control of this project
• gcc - used for compilation of C backends for various libraries
• libffi-devel - required by cffi
• openssl-devel - required by cryptography
Closed Virtualenv is required to create clean python environment separated from system:
sudo yum install python-virtualenv
Ansible requires python binding for SELinux:
sudo yum install libselinux-python
otherwise it won’t be able to run modules with copy/file/template functions!
Note: libselinux-python is in Prerequisites but doesn’t have a pip package. It must be installed on system level.
Note: Ansible requires also libselinux-python installed on all nodes using copy/file/template functions. Without thisstep all such tasks will fail!
1.2.3 Virtualenv
infrared shares dependencies with other OpenStack products and projects. Therefore there’s a high probability ofconflicts with python dependencies, which would result either with infrared failure, or worse, with breaking de-pendencies for other OpenStack products. When working from source, virtualenv usage is recommended for avoidingcorrupting of system packages:
virtualenv .venvsource .venv/bin/activatepip install --upgrade pippip install --upgrade setuptools
1.2. Setup 7
infrared Documentation, Release 2.0.1.dev4322
Warning: Use of latest ‘‘pip‘‘ is mandatory, especially on RHEL platform!
Note: On Fedora 23 with EPEL repository enabled, RHBZ#1103566 also requires
dnf install redhat-rpm-config
1.2.4 Installation
Clone stable branch from Github repository:
git clone https://github.com/redhat-openstack/infrared.git
Install infrared from source:
cd infraredpip install .
1.2.5 Development
For development work it’s better to install in editable mode and work with master branch:
pip install -e .
Change default IR_HOME variable to point to Infrared directory:
export IR_HOME=/path/to/infrared/directory/
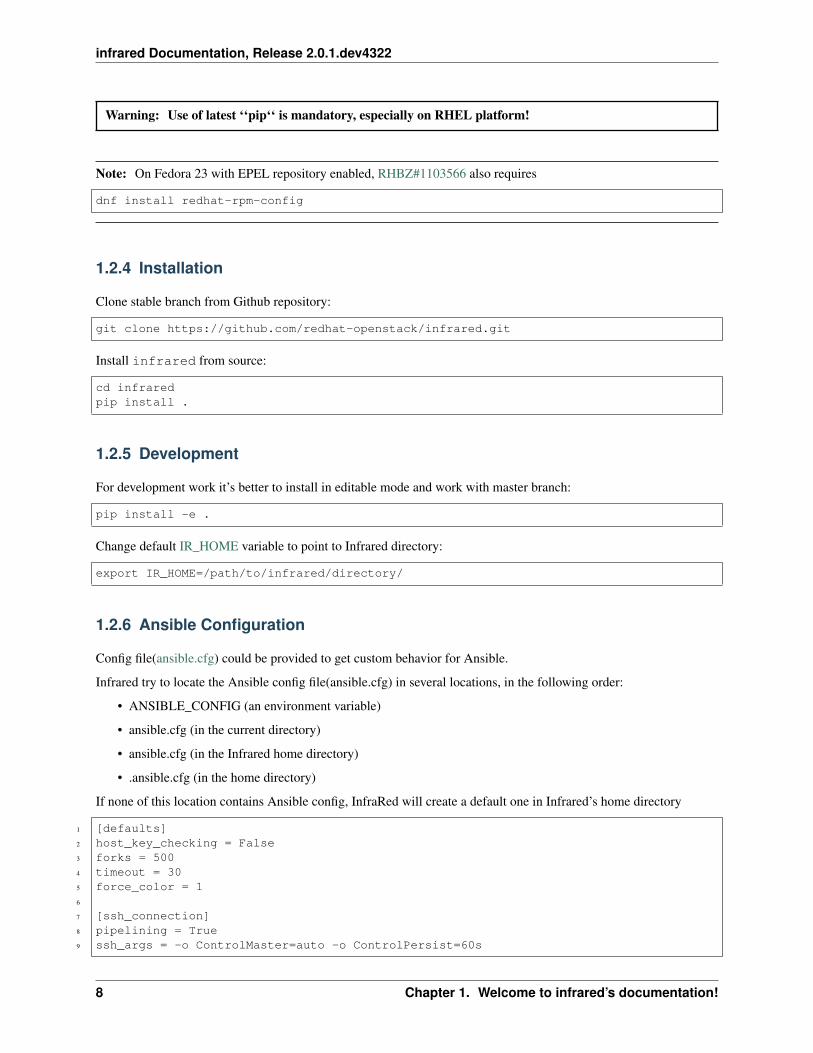
1.2.6 Ansible Configuration
Config file(ansible.cfg) could be provided to get custom behavior for Ansible.
Infrared try to locate the Ansible config file(ansible.cfg) in several locations, in the following order:
• ANSIBLE_CONFIG (an environment variable)
• ansible.cfg (in the current directory)
• ansible.cfg (in the Infrared home directory)
• .ansible.cfg (in the home directory)
If none of this location contains Ansible config, InfraRed will create a default one in Infrared’s home directory
1 [defaults]2 host_key_checking = False3 forks = 5004 timeout = 305 force_color = 16
7 [ssh_connection]8 pipelining = True9 ssh_args = -o ControlMaster=auto -o ControlPersist=60s
8 Chapter 1. Welcome to infrared’s documentation!
infrared Documentation, Release 2.0.1.dev4322
Note: Values for forks, host_key_checking and timeout have to be the same or greater.
1.2.7 Bash completion
Bash completion script is in etc/bash_completion.d directory of git repository. To enable global completion copy thisscript to proper path in the system (/etc/bash_completion.d):
cp etc/bash_completion.d/infrared /etc/bash_completion.d/
Alternatively, just source it to enable completion temporarily:
source etc/bash_completion.d/infrared
When working in virtualenv, might be a good idea to add import of this script to the virtualenv activation one:
echo ". $(pwd)/etc/bash_completion/infrared" >> ${VIRTUAL_ENV}/bin/activate
1.3 Configuration
Infrared uses the IR_HOME environment variable which points where infrared should keep all the internal configura-tion files and workspaces.
By default the IR_HOME points to ~/.infrared in user home directory. If it does not exist a new one will becreated.
To change that default location user can simply set IR_HOME, for example:
$ IR_HOME=/tmp/newhome ir workspace list
This will generate default configurations files in the specified directory.
1.3.1 Defaults from environment variables
Infrared will load all environment variables starting with IR_ and will transform them in default argument values thatare passed to all modules.
This means that IR_FOO_BAR=1 will do the same thing as adding --foo-bar=1 to infrared CLI.
Infrared uses the same precedence order as Ansible when it decide which value to load, first found is used:
• command line argument
• environment variable
• configuration file
• code (plugin spec default) value
1.3. Configuration 9
infrared Documentation, Release 2.0.1.dev4322
1.3.2 Ansible configuration and limitations
Usually infrared does not touch the settings specified in the ansible configuration file (ansible.cfg), with fewexceptions.
Internally infrared use Ansible environment variables to set the directories for common resources (callback plugins,filter plugins, roles, etc); this means that the following keys from the Ansible configuration files are ignored:
• callback_plugins
• filter_plugins
• roles_path
It is possible to define custom paths for those items setting the corresponding environment variables:
• ANSIBLE_CALLBACK_PLUGINS
• ANSIBLE_FILTER_PLUGINS
• ANSIBLE_ROLES_PATH
1.4 Workspaces
With workspaces, user can manage multiple environments created by infrared and alternate between them. All runtimefiles (Inventory, hosts, ssh configuration, ansible.cfg, etc. . . ) will be loaded from a workspace directory and all outputfiles (Inventory, ssh keys, environment settings, facts caches, etc. . . ) will be generated into that directory.
Create: Create new workspace. If name isn’t provided, infrared will generate one based on timestamp:
infrared workspace create example
Workspace 'example' added
Note: The create option will not switch to the newly created workspace. In order to switch to the newworkspace, the checkout command should be used
Inventory: Fetch workspace inventory file (a symlink to the real file that might be changed by infrared executions):
infrared workspace inventory
/home/USER/.infrared/workspaces/example/hosts
Checkout Switches to the specified workspace:
infrared workspace checkout example3
Now using workspace: 'example3'
Creates a new workspace if the --create or -c is specified and switches to it:
infrared workspace checkout --create example3
Workspace 'example3' addedNow using workspace: 'example3'
10 Chapter 1. Welcome to infrared’s documentation!

infrared Documentation, Release 2.0.1.dev4322
Note: Checked out workspace is tracked via a status file in workspaces_dir, which means checked outworkspace is persistent across shell sessions. You can pass checked out workspace by environment variableIR_WORKSPACE, which is non persistent
ir workspace list| Name | Is Active ||--------+-------------|| bee | True || zoo | |
IR_WORKSPACE=zoo ir workspace list| Name | Is Active ||--------+-------------|| bee | || zoo | True |
ir workspace list| Name | Is Active ||--------+-------------|| bee | True || zoo | |
Warning: While IR_WORKSPACE is set ir workspace checkout is disabled
export IR_WORKSPACE=zooir workspace checkout zooERROR 'workspace checkout' command is disabled while IR_WORKSPACE→˓environment variable is set.
List: List all workspaces. Active workspace will be marked.:
infrared workspace list
+-------------+--------+| Name | Active |+-------------+--------+| example | || example2 | * || rdo_testing | |+-------------+--------+
Note: If the --active switch is given, only the active workspace will be printed
Delete: Deletes a workspace:
infrared workspace delete example
Workspace 'example' deleted
Delete multiple workspaces at once:
1.4. Workspaces 11
infrared Documentation, Release 2.0.1.dev4322
infrared workspace delete example1 example2 example3
Workspace 'example1' deletedWorkspace 'example2' deletedWorkspace 'example3' deleted
Cleanup: Removes all the files from workspace. Unlike delete, this will keep the workspace namespace and keep itactive if it was active before.:
infrared workspace cleanup example2
Export:
Package workspace in a tar ball that can be shipped to, and loaded by, other infrared instances:
infrared workspace export
The active workspace example1 exported to example1.tar
To export non-active workspaces, or control the output file:
infrared workspace export -n example2 -f /tmp/look/at/my/workspace
Workspace example2 exported to /tmp/look/at/my/workspace.tgz
Note: If the -K/--copy-keys flag is given, SSH keys from outside the workspace directory, will be copiedto the workspace directory and the inventory file will be changed accordingly.
Import: Load a previously exported workspace (local or remote):
infrared workspace import /tmp/look/at/my/new-workspace.tgzinfrared workspace import http://free.ir/workspaces/newworkspace.tgz
Workspace new-workspace was imported
Control the workspace name:
infrared workspace import /tmp/look/at/my/new-workspace --name example3
Workspace example3 was imported
Node list: List nodes, managed by a specific workspace:
infrared workspace node-list| Name | Address | Groups→˓ ||--------------+-------------+----------------------------------------------------→˓---|| controller-0 | 172.16.0.94 | overcloud_nodes, network, controller, openstack_→˓nodes || controller-1 | 172.16.0.97 | overcloud_nodes, network, controller, openstack_→˓nodes |
infrared workspace node-list --name some_workspace_name
--group - list nodes that are member of specific group.
12 Chapter 1. Welcome to infrared’s documentation!

infrared Documentation, Release 2.0.1.dev4322
Group list: List groups and nodes in them, managed by a specific workspace:
infrared workspace group-list| Name | Nodes ||-----------------+------------------------------------|| overcloud_nodes | controller-0, compute-0, compute-1 || undercloud | undercloud-0 |
Note: To change the directory where Workspaces are managed, edit the workspaces_base_folder option.Check the Infrared Configuration for details.
1.5 Plugins
In infrared 2.0, plugins are self contained Ansible projects. They can still also depend on common items providedby the core project. Any ansible project can become an‘infrared‘ plugin by adhering to the following structure (seetests/example for an example plugin):
tests/examplemain.yml # Main playbook. All execution starts hereplugin.spec # Plugin definitionroles # Add here roles for the project to use
example_roletasks
main.yml
Note: This structure will work without any ansible.cfg file provided (unless common resources are used), asAnsible will search for references in the relative paths described above. To use an ansible.cfg config file, useabsolute paths to the plugin directory.
1.5.1 Plugin structure
Main entry
infrared will look for a playbook called main.yml to start the execution from.
Note: If you want to use other playbook to start from - simply add it into config section in plugin.spec:
config:plugin_type: otherentry_point: your-playbook.yml...
Plugins are regular Ansible projects, and as such, they might include or reference any item (files, roles, var files,ansible plugins, modules, templates, etc. . . ) using relative paths to current playbook. They can also use roles, callbackand filter plugins defined in the common/ directory provided by infrared core.
An example of plugin_dir/main.yml:
1.5. Plugins 13

infrared Documentation, Release 2.0.1.dev4322
1 - name: Main Play2 hosts: all3 vars_files:4 - vars/some_var_file.yml5 roles:6 - role: example_role7 tasks:8 - name: fail if no vars dict9 when: "provision is not defined"
10 fail:11
12 - name: fail if input calls for it13 when: "provision.foo.bar == 'fail'"14 fail:15
16 - debug:17 var: inventory_dir18 tags: only_this19
20 - name: Test output21 vars:22 output_file: output.example23 file:24 path: "{{ inventory_dir }}/{{ output_file }}"25 state: touch26 when: "provision is defined"
Plugin Specification
infrared gets all plugin info from plugin.spec file. Following YAML format. This file defines the CLI flags thisplugin exposes, its name and its type.
config:plugin_type: provisionentry_point: main.yml# roles_path: ../ # Optional, contains relative path to a role
subparsers:example:
description: Example provisioner plugininclude_groups: ["Ansible options", "Inventory", "Common options", "Answers
→˓file"]groups:
- title: Group Aoptions:
foo-bar:type: Valuehelp: "foo.bar option"default: "default string"
flag:type: Flaghelp: "flag option"
dictionary-val:type: KeyValueListhelp: "dictionary-val option"
(continues on next page)
14 Chapter 1. Welcome to infrared’s documentation!

infrared Documentation, Release 2.0.1.dev4322
(continued from previous page)
- title: Group Boptions:
iniopt:type: IniTypehelp: "Help for '--iniopt'"action: appendansible_variable: 'ini_file'
nestedlist:type: NestedListhelp: "Help for '--nestedlist'"action: append
- title: Group Coptions:
uni-dep:type: Valuehelp: "Help for --uni-dep"required_when: "req-arg-a == yes"
multi-dep:type: Valuehelp: "Help for --multi-dep"required_when:
- "req-arg-a == yes"- "req-arg-b == yes"
either-dep:type: Valuehelp: "Help for --either-dep"required_when:
- "req-arg-a == yes or req-arg-b == yes"
req-arg-a:type: Boolhelp: "Help for --req-arg-a"
req-arg-b:type: Boolhelp: "Help for --req-arg-b"
- title: Group Doptions:
deprecated-way:type: Valuehelp: "Deprecated way to do it"
new-way:deprecates: deprecated-waytype: Valuehelp: "New way to do it"
- title: Group Eoptions:
tasks:type: ListOfFileNameshelp: |
(continues on next page)
1.5. Plugins 15

infrared Documentation, Release 2.0.1.dev4322
(continued from previous page)
This is example for option which is with type→˓"ListOfFileNames" and has
auto propagation of "Allowed Values" in help. When we ask→˓for --help it
will look in plugin folder for directory name as 'lookup_→˓dir' value, and
will add all file names to "Allowed Values"lookup_dir: 'post_tasks'
Config section:
• Plugin type can be one of the following: provision, install, test, other.
• Entry point is the main playbook for the plugin. by default this will refer to main.yml file but canbe changed to ant other file.
• roles_path: This is optional and it might be used when the plugin refers to a role which is introducedby that plugin. The roles_path then relatively points (from plugin.spec location) to the role. Let’stake a look at the following example of an ansible role (can be as a standalone project) which is alsoan infrared plugin
my_roledefaults
main.ymlinfrared_plugin
main.yml # Main playbook. All execution starts hereplugin.spec # Plugin definition
tasks # Tasks of the rolemain.yml
In the above example main.yml calls my_role. In order to help infrared find the role, roles_path within configsection needs to be set to ../ to point to the ansible role called from infrared_plugin/main.yml
To access the options defined in the spec from your playbooks and roles use the plugin type with the option name. Forexample, to access dictionary-val use {{ provision.dictionary.val }}.
Note: the vars-dict defined by Complex option types is nested under plugin_type root key, and passed to Ansibleusing --extra-vars meaning that any vars file that has plugin_type as a root key, will be overriden by thatvars-dict. See Ansible variable precidence for more details.
Include Groups
A plugin can reference preset control arguments to be included in its CLI
Answers File: Instead of explicitly listing all CLI options every time, infrared plugins can read their input from INIanswers file, using --from-file switch. use --generate-answers-file switch to generate such file.It will list all input arguments a plugin accepts, with their help and defaults. CLI options still take precedence ifexplicitly listed, even when --from-file is used.
Common Options:
• --dry-run: Don’t execute Ansible playbook. Only write generated vars dict to stdout
• --output: Redirect generated vars dict from stdout to an explicit file (YAML format).
• --extra-vars: Inject custom input into the vars dict
16 Chapter 1. Welcome to infrared’s documentation!

infrared Documentation, Release 2.0.1.dev4322
Inventory: Load a new inventory to active workspace. The file is copied to workspace directory so all {{inventory_dir }} references in playbooks still point to workspace directory (and not to the input file’sdirectory).
Note: This file permanently becomes the workspace’s inventory. To revert to original workspace the workspacemust be cleaned.
Ansible options:
• --verbose: Set ansible verbosity level
• --ansible-args: Pass all subsequent input to Ansible as raw arguments. This is for power-userswishing to access Ansible functionality not exposed by infrared:
infrared [...] --ansible-args step;tags=tag1,tag2;forks=500
Is the equivalent of:
ansible-playbook [...] --step --tags=tag1,tag2 --forks 500
Complex option types
Infrared extends argparse with the following option types. These options are nested into the vars dict that is laterpassed to Ansible as extra-vars.
• Value: String value.
• Bool: Boolean value. Accepts any form of YAML boolean: yes/no, true/false on/off. Will fail if thestring can’t be resolved to this type.
• Flag: Acts as a flag, doesn’t parse any value. Will always return true.
• IniType: Value is in section.option=value format. append is the default action for this type, so userscan provide multiple args for the same parameter. .. warning:: The IniType option is deprecated, useNestedDict instead of.
• NestedDict: Value is in section.option=value format. append is the default action for this type, sousers can provide multiple args for the same parameter. Example:
infrared example --foo option1=value1 --foo option2=value2
{"foo": {"option1": "value1","option2": "value2"}}
• NestedList: The NestedList option inherits NestedDict attributes and differs from NestedDict by value format.It composes value as list of dictionaries. Example:
infrared example --foo option1=value1 --foo option1=value2
{"foo": [{"option1": "value1"},{"option1": "value2"}]}
• KeyValueList: String representation of a flat dict --options option1:value1,option2:value2becomes:
1.5. Plugins 17
infrared Documentation, Release 2.0.1.dev4322
{"options": {"option1": "value1","option2": "value2"}}
The nesting is done in the following manner: option name is split by - delimiter and each part is a key of a dict nestedin side the previous one, starting with “plugin_type”. Then value is nested at the inner-most level. Example:
infrared example --foo-bar=value1 --foo-another-bar=value2 --also_foo=value3
{"provision": {
"foo": {"bar": "value1","another": {
"bar": "value2"}
},"also_foo": "value3"
}}
• FileValue The absolute or relative path to a file. Infrared validates whether file exists and transform the path tothe absolute.
• VarFile
Same as the FileValue type but additionally Infrared will check the following locations for a file:
– argument/name/option_value
– <spec_root>/defaults/argument/name/option_value
– <spec_root>/var/argument/name/option_value
In the example above the CLI option name is --argument-name. The VarFile suites very well todescribe options which point to the file with variables.
For example, user can describe network topologies parameters in separate files. In that case, all these filescan be put to the <spec_root>/defaults/network folder, and plugin specification can look like:
config:plugin_type: provisionentry_point: main.yml
subparsers:my_plugin:
description: Provisioner virtual machines on a single Hypervisor using→˓libvirt
groups:- title: topologyoptions:
network:type: VarFilehelp: |
Network configuration to be used__LISTYAMLS__
default: defautl_3_nets
Then, the cli call can looks simply like:
18 Chapter 1. Welcome to infrared’s documentation!
infrared Documentation, Release 2.0.1.dev4322
infrared my_plugin --network=my_file
Here, the ‘my_file’ file should be present in the /{defaults|var}/network folder, otherwise anerror will be displayed by the Infrared. Infrared will transform that option to the absolute path and will putit to the provision.network variable:
provision.network: /home/user/..../my_plugin/defaults/my_file
That variable is later can be used in Ansible playbooks to load the appropriate network parameters.
Note: Infrared automatically checks for files with .yml extension. So the my_file and my_file.ymlwill be validated.
• ListOfVarFiles The list of files. Same as VarFile but represents the list of files delimited by comma (,).
• VarDir The absolute or relative path to a directory. Same as VarFile but points to the directory instead offile
Placeholders
Placeholders allow users to add a level of sophistication in options help field.
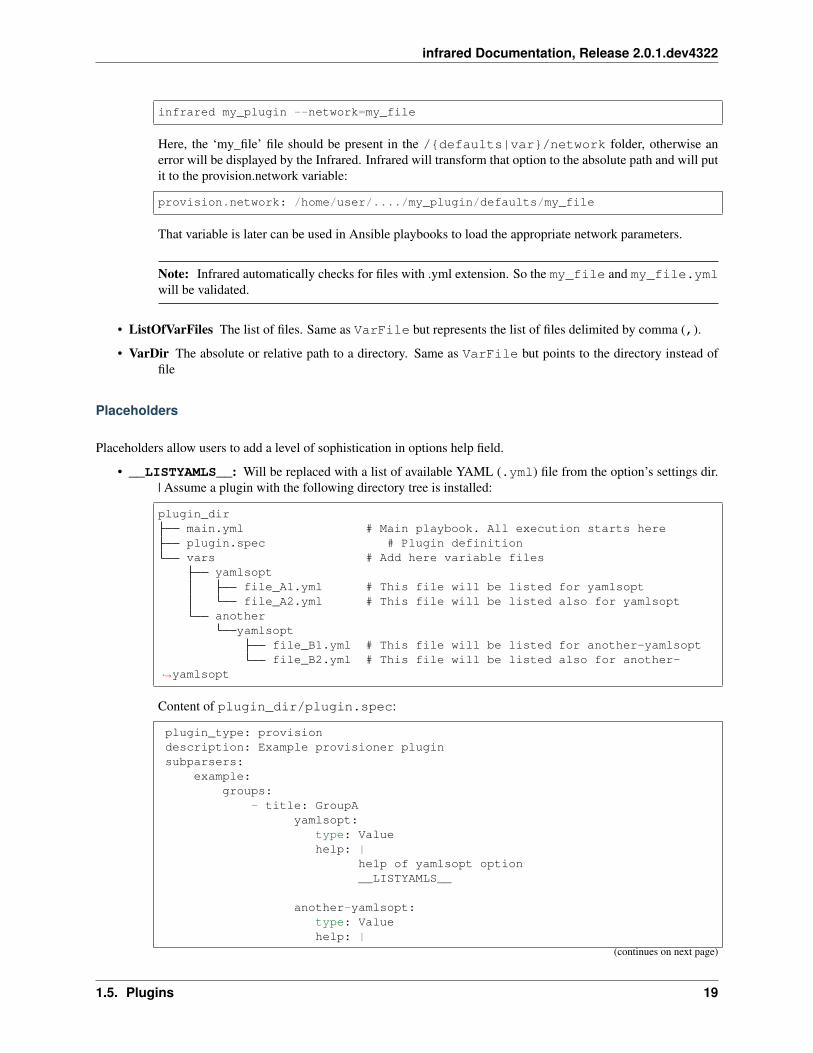
• __LISTYAMLS__: Will be replaced with a list of available YAML (.yml) file from the option’s settings dir.| Assume a plugin with the following directory tree is installed:
plugin_dirmain.yml # Main playbook. All execution starts hereplugin.spec # Plugin definitionvars # Add here variable files
yamlsoptfile_A1.yml # This file will be listed for yamlsoptfile_A2.yml # This file will be listed also for yamlsopt
anotheryamlsopt
file_B1.yml # This file will be listed for another-yamlsoptfile_B2.yml # This file will be listed also for another-
→˓yamlsopt
Content of plugin_dir/plugin.spec:
plugin_type: provisiondescription: Example provisioner pluginsubparsers:
example:groups:
- title: GroupAyamlsopt:
type: Valuehelp: |
help of yamlsopt option__LISTYAMLS__
another-yamlsopt:type: Valuehelp: |
(continues on next page)
1.5. Plugins 19

infrared Documentation, Release 2.0.1.dev4322
(continued from previous page)
help of another-yamlsopt option__LISTYAMLS__
Execution of help command (infrared example --help) for the ‘example’ plugin, will producethe following help screen:
usage: infrared example [-h] [--another-yamlsopt ANOTHER-YAMLSOPT][--yamlsopt YAMLSOPT]
optional arguments:-h, --help show this help message and exit
GroupA:--another-yamlsopt ANOTHER-YAMLSOPT
help of another-yamlsopt optionAvailable values: ['file_B1', 'file_B2']
--yamlsopt YAMLSOPT help of yamlsopt optionAvailable values: ['file_A1', 'file_A2']
Required Arguments
InfraRed provides the ability to mark an argument in a specification file as ‘required’ using two flags:
1. ‘required’ - A boolean value tell whether the arguments required or not. (default is ‘False’)
2. ‘required_when’ - Makes this argument required only when the mentioned argument is given and the condition is True.More than one condition is allowed with YAML list style. In this case the argument will be required if allthe conditions are True.
For example, take a look on the plugin.spec (‘Group C’) in Plugin Specification
Roles Dependencies
If a plugin depended on one or more Ansible role, it’s possible to mention them in a file. InfraRed makes use ofAnsible Galaxy to install the roles file, therefore, the requirements for it should be exactly the same like in AnsibleGalaxy:
1. The file need to be in YAML format.
2. The name of the file should be either requirements.yml or requirements.yaml
For more details, please take a look on Ansible Galaxy documentation.
Argument Deprecation
To deprecate an argument in InfraRed, you need to add flag ‘deprecates’ in newer argument
When we use a deprecated argument, InfraRed will warn you about that and it will add the new argument in Ansibleparameters with the value of the deprecated
For example, take a look on the plugin.spec (‘Group D’) in Plugin Specification
20 Chapter 1. Welcome to infrared’s documentation!
infrared Documentation, Release 2.0.1.dev4322
1.5.2 Plugin Manager
The following commands are used to manage infrared plugins
Add: infrared will look for a plugin.spec file in each given source and register the plugin under the given plugin-type(when source is ‘all’, all available plugins will be installed):
infrared plugin add tests/exampleinfrared plugin add example example2infrared plugin add <git_url> [--revision <branch/tag/revision>]infrared plugin add all
Note: “–revision” works with one plugin source only.
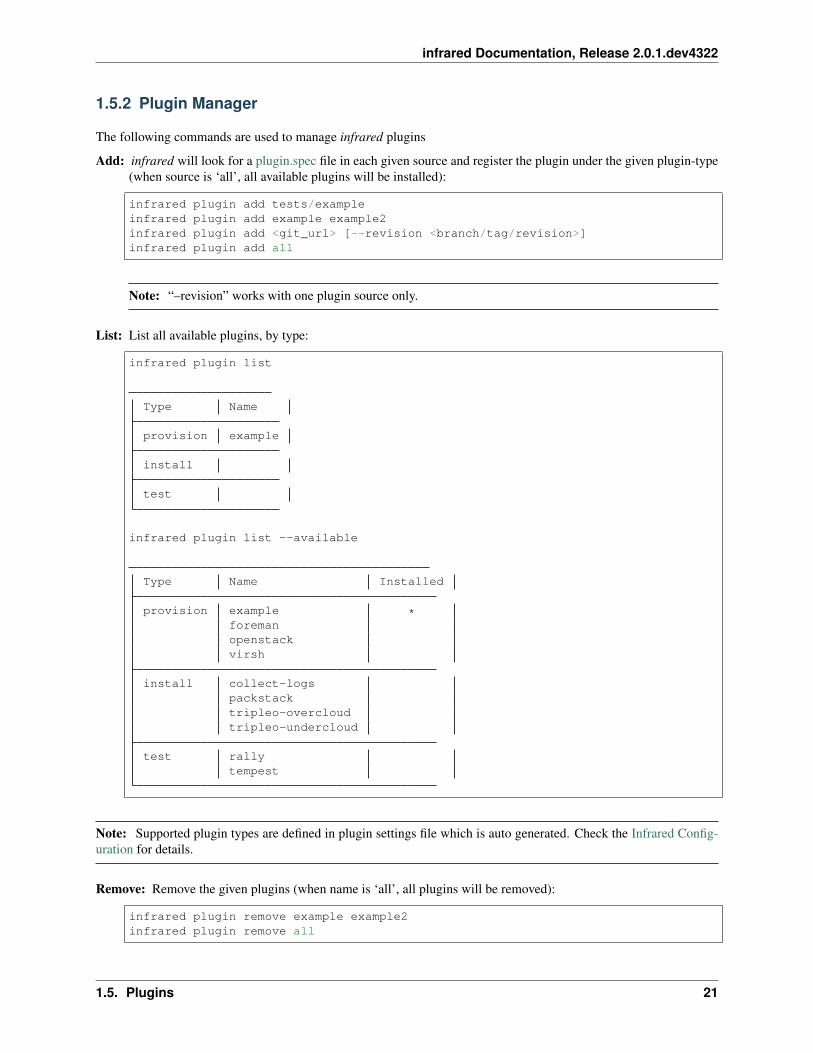
List: List all available plugins, by type:
infrared plugin list
Type Name
provision example
install
test
infrared plugin list --available
Type Name Installed
provision example *foremanopenstackvirsh
install collect-logspackstacktripleo-overcloudtripleo-undercloud
test rallytempest
Note: Supported plugin types are defined in plugin settings file which is auto generated. Check the Infrared Config-uration for details.
Remove: Remove the given plugins (when name is ‘all’, all plugins will be removed):
infrared plugin remove example example2infrared plugin remove all
1.5. Plugins 21
infrared Documentation, Release 2.0.1.dev4322
Freeze: Output installed plugins with their revisions in a registry file format. When you need to be able to installsomewhere else the exact same versions of plugins use freeze command:
infrared plugin freeze > registry.yaml
Import: Installs all plugins from the given registry file. The registry file can be either path to local file or to URL:
infrared plugin import plugins/registry.yamlinfrared plugin import https://url/to/registry.yaml
Update: Update a given Git-based plugin to a specific revision. The update process pulls the latest changes from theremote and checks out a specific revision if given, otherwise, it will point to the tip of the updated branch. If the“–skip_reqs” switch is set, the requirements installation will be skipped:
ir plugin update [--skip_reqs] [--hard-reset] name [revision]
Execute: Plugins are added as subparsers under plugin type and will execute the main playbook:
infrared example
1.5.3 Registry Files
Registry files are files containing a list of plugins to be installed using the infrared plugin import. These files are usedto hold the result from infrared plugin freeze for the purpose of achieving repeatable installations. The Registry filecontains a pinned version of everything that was installed when infrared plugin freeze was run.
Registry File Format
The registry file is following the YAML format. Each section of the registry file contains an object which specifies theplugin to be installed:
• src: The path to the plugin. It can be either local path or git url
• src_path: (optional) Relative path within the repository where infrared plugin can be found.
• rev: (optional) If the plugin source is git, this allows to specify the revision to pull.
• desc: The plugin description.
• type: Plugin type can be one of the following: provision, install, test, other.
Example of a registry file:
---
plugin_name:src: path/to/plugin/directoryrev: some_revision_hashsrc_path: /path/to/plugin/in/repodesc: Some plugin descriptiontype: provision/test/install/other
1.5.4 How to create a new plugin
22 Chapter 1. Welcome to infrared’s documentation!
infrared Documentation, Release 2.0.1.dev4322
Note: Check COOKBOOK for the quick guide on how to create a plugin.
1.6 Topology
A topology is a description of an environment you wish to provision. We have divided it into two, network topologyand nodes topology.
1.6.1 Nodes topology
Before creating our environment, we need to decide how many and what type of nodes to create. The following formatis used to provide topology nodes:
infrared <provisioner_plugin> --topology-nodes NODENAME:AMOUNT
where NODENAME refers to files under vars/topology/nodes/NODENAME.yml (or defaults/topology/nodes/NODENAME.yml) and AMOUNT refers to the amount of nodes from the NODENAME we wish to create.
For example, if we choose the Virsh provisioner:
infrared virsh --topology-nodes undercloud:1,controller:3 ...
The above command will create 1 VM of type undercloud and 3 VMs of type controller
For any node that is provided in the CLI --topology-nodes flag, infrared looks for the node first under vars/topology/nodes/NODENAME.yml and if not found, under default/topology/nodes/NODENAME.ymlwhere we supply a default set of supported / recommended topology files.
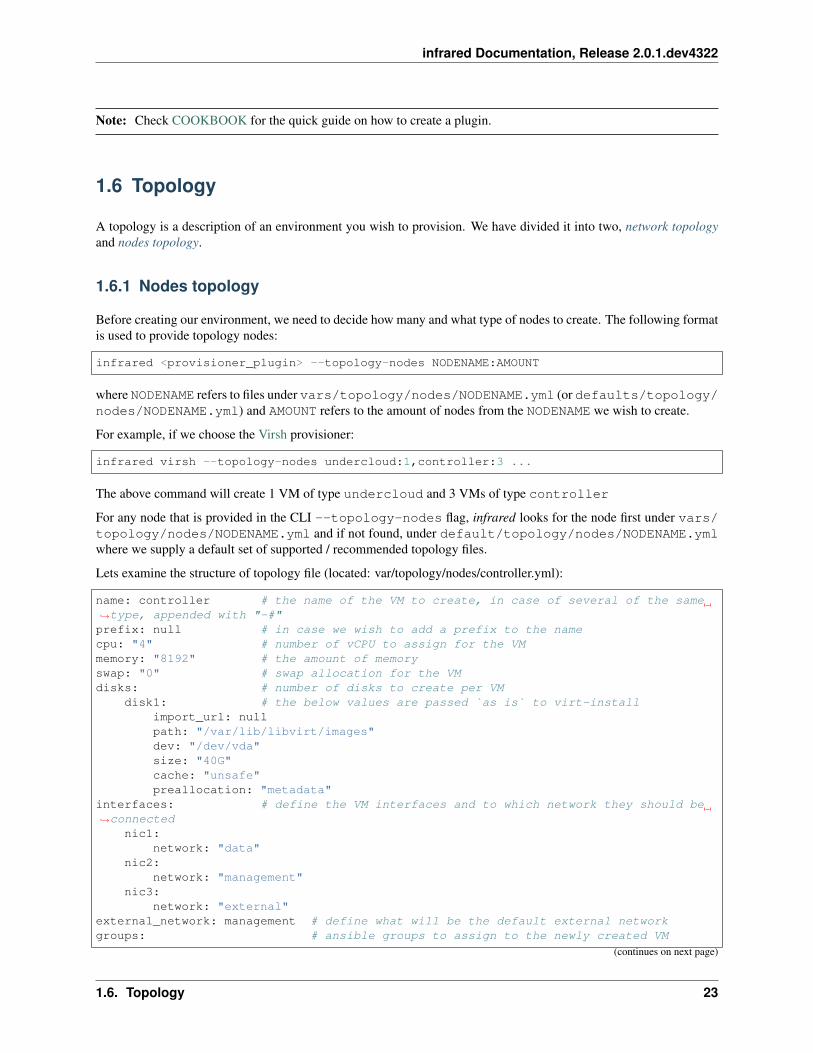
Lets examine the structure of topology file (located: var/topology/nodes/controller.yml):
name: controller # the name of the VM to create, in case of several of the same→˓type, appended with "-#"prefix: null # in case we wish to add a prefix to the namecpu: "4" # number of vCPU to assign for the VMmemory: "8192" # the amount of memoryswap: "0" # swap allocation for the VMdisks: # number of disks to create per VM
disk1: # the below values are passed `as is` to virt-installimport_url: nullpath: "/var/lib/libvirt/images"dev: "/dev/vda"size: "40G"cache: "unsafe"preallocation: "metadata"
interfaces: # define the VM interfaces and to which network they should be→˓connected
nic1:network: "data"
nic2:network: "management"
nic3:network: "external"
external_network: management # define what will be the default external networkgroups: # ansible groups to assign to the newly created VM
(continues on next page)
1.6. Topology 23

infrared Documentation, Release 2.0.1.dev4322
(continued from previous page)
- controller- openstack_nodes- overcloud_nodes- network
For more topology file examples, please check out the default available nodes
To override default values in the topology dict the extra vars can be provided through the CLI. For example, to addmore memory to the controller node, the override.controller.memory value should be set:
infrared virsh --topology-nodes controller:1,compute:1 -e override.controller.→˓memeory=30720
1.6.2 Network topology
Before creating our environment, we need to decide number and types of networks to create. The following format isused to provide topology networks:
infrared <provisioner_plugin> --topology-network NET_TOPOLOGY
where NET_TOPOLOGY refers to files under vars/topology/network/NET_TOPOLOGY.yml (or if notfound, defaults/topology/network/NET_TOPOLOGY.yml)
To make it easier for people, we have created a default network topology file called: 3_nets.yml (you can find itunder each provisioner plugin defaults/topology/network/3_nets.yml) that will be created automatically.
For example, if we choose the Virsh provisioner:
infrared virsh --topology-network 3_nets ...
The above command will create 3 networks: (based on the specification under defaults/topology/network/3_nets.yml)
# data network - an isolated network # management network - NAT based network with a DHCP # external network -NAT based network with DHCP
If we look in the 3_nets.yml file, we will see this:
networks:net1:
<snip>net2:
name: "management" # the network nameexternal_connectivity: yes # whether we want it externally accessibleip_address: "172.16.0.1" # the IP address of the bridgenetmask: "255.255.255.0"forward: # forward method
type: "nat"dhcp: # omit this if you don't want a DHCP
range: # the DHCP range to provide on that networkstart: "172.16.0.2"end: "172.16.0.100"
subnet_cidr: "172.16.0.0/24"subnet_gateway: "172.16.0.1"
floating_ip: # whether you want to "save" a range for→˓assigning IPs
(continues on next page)
24 Chapter 1. Welcome to infrared’s documentation!
infrared Documentation, Release 2.0.1.dev4322
(continued from previous page)
start: "172.16.0.101"end: "172.16.0.150"
net3:<snip>
To override default values in the network dict the extra vars can be provided through the CLI. For example, to changeip address of net2 network, the override.networks.net2.ip_address value should be set:
infrared virsh --topology-nodes controller:1,compute:1 -e override.networks.net2.ip_→˓address=10.0.0.3
1.7 Interactive SSH
This plugin allows users to establish interactive ssh session to a host managed by infrared. To do this use:
infrared ssh <nodename>
where ‘nodename’ is a hostname from inventory file.
For example
infrared ssh controller-0
1.8 New In infrared 2.0
1.8.1 Highlights
1. Workspaces: Added Workspaces. Every session must be tied to an active workspace. All input and out-put file are taken from, and written to, the active workspace directory. which allows easy migration ofworkspace, and avoids accidental overwrites of data, or corrupting the working directory. The deprecatesir-archive in favor of workspace import and workspace export
2. Stand-Alone Plugins: Each plugins is fully contained within a single directory. Plugin structure is fully definedand plugins can be loaded from any location on the system. “Example plugin” shows contributors how tostructure their Ansible projects to plug into infrared
3. SSH: Added ability to establish interactive ssh connection to nodes, managed by workspace using workspace’sinventory infrared ssh <hostname>
4. Single Entry-Point: ir-provisioner, ir-installer, ir-tester commands are deprecated in favorof a single infrared entry point (ir also works). Type infrared --help to get the full usagemanual.
5. TripleO:
ir-installer ospd was broken into two new plugins:
• TripleO Undercloud: Install undercloud up-to and including overcloud image creation
• TripleO Overcloud: Install overcloud using an exsiting undercloud.
6. Answers file: The switch --generate-conf-file is renamed --generate-answers-file to avoidconfusion with configuration files.
1.7. Interactive SSH 25

infrared Documentation, Release 2.0.1.dev4322
7. Topoloy: The topology input type has been deprecated. Use KeyValueList to define node types and amounts,and include_vars to add relevant files to playbooks, see Topology description for more information
8. Cleanup: the --cleanup options now accepts boolean values. Any YAML boolean is accpeted (“yes/no”,“true/false”, “on/off”)
9. Bootstrap: On virtual environmants, tripleo-undercloud can create a snapshot out of the undercloud VM thatcan later be used to bypass the installation process.
26 Chapter 1. Welcome to infrared’s documentation!

infrared Documentation, Release 2.0.1.dev4322
1.8. New In infrared 2.0 27

infrared Documentation, Release 2.0.1.dev4322
1.8.2 Example Script Upgrade
infrared v2 infrared v1
## CLEANUP ##infrared virsh -v -o cleanup.yml \
--host-address example.redhat.com \--host-key ~/.ssh/id_rsa \--kill yes
## PROVISION ##infrared virsh -v \
--topology-nodes undercloud:1,→˓controller:1,compute:1 \
--host-address example.redhat.com \--host-key ~/.ssh/id_rsa \--image-url http://www.images.com/
→˓rhel-7.qcow2
## UNDERCLOUD ##infrared tripleo-undercloud -v mirror→˓tlv \
--version 9 \--build passed_phase1 \--ssl true \--images-task rpm
## OVERCLOUD ##infrared tripleo-overcloud -v \
--version 10 \--introspect yes \--tagging yes \--deploy yes \--deployment-files virt \--network-backend vxlan \--overcloud-ssl false \--network-protocol ipv4
## POST TASKS ##infrared cloud-config -v \
-o cloud-config.yml \--deployment-files virt \--tasks create_external_network,
→˓forward_overcloud_dashboard,network_→˓time,tempest_deployer_input
## TEMPEST ##infrared tempest -v \
--config-options "image.http_→˓image=http://www.images.com/cirros.→˓qcow2" \
--openstack-installer tripleo \--openstack-version 9 \--tests sanity
# Fetch inventory from active workspaceWORKSPACE=$(ir workspace list | awk '/*/→˓{print $2}')ansible -i .workspaces/$WORKSPACE/hosts→˓all -m ping
## CLEANUP ##ir-provisioner -d virsh -v \--topology-nodes=undercloud:1,
→˓controller:1,compute:1 \--host-address=example.redhat.com \--host-key=~/.ssh/id_rsa \--image-url=www.images.com/rhel-7.
→˓qcow2 \--cleanup
## PROVISION ##ir-provisioner -d virsh -v \--topology-nodes=undercloud:1,
→˓controller:1,compute:1 \--host-address=example.redhat.com \--host-key=~/.ssh/id_rsa \--image-url=http://www.images.com/rhel-
→˓7.qcow2
## OSPD ##ir-installer --debug mirror tlv ospd -v -→˓o install.yml\--product-version=9 \--product-build=latest \--product-core-build=passed_phase1 \--undercloud-ssl=true \--images-task=rpm \--deployment-files=$PWD/settings/
→˓installer/ospd/deployment/virt \--network-backend=vxlan \--overcloud-ssl=false \--network-protocol=ipv4
ansible-playbook -i hosts -e @install.→˓yml \playbooks/installer/ospd/post_install/
→˓create_tempest_deployer_input_file.yml
## TEMPEST ##ir-tester --debug tempest -v \--config-options="image.http_
→˓image=http://www.images.com/cirros.→˓qcow2" \--tests=sanity.yml
ansible -i hosts all -m ping
28 Chapter 1. Welcome to infrared’s documentation!
infrared Documentation, Release 2.0.1.dev4322
1.9 Advance Features
1.9.1 Injection points
Different people have different use cases which we cannot anticipate in advance. To solve (partially) this need, westructured our playbooks in a way that breaks the logic into standalone plays. Furthermore, each logical play can beoverriden by the user at the invocation level.
Lets look at an example to make this point more clear. Looking at our virsh main playbook, you will see:
- include: "{{ provision_cleanup | default('cleanup.yml') }}"when: provision.cleanup|default(False)
Notice that the include: first tried to evaluate the variable provision_cleanup and afterwards defaults to ourown cleanup playbook.
This condition allows users to inject their own custom cleanup process while still reuse all of our other playbooks.
Override playbooks
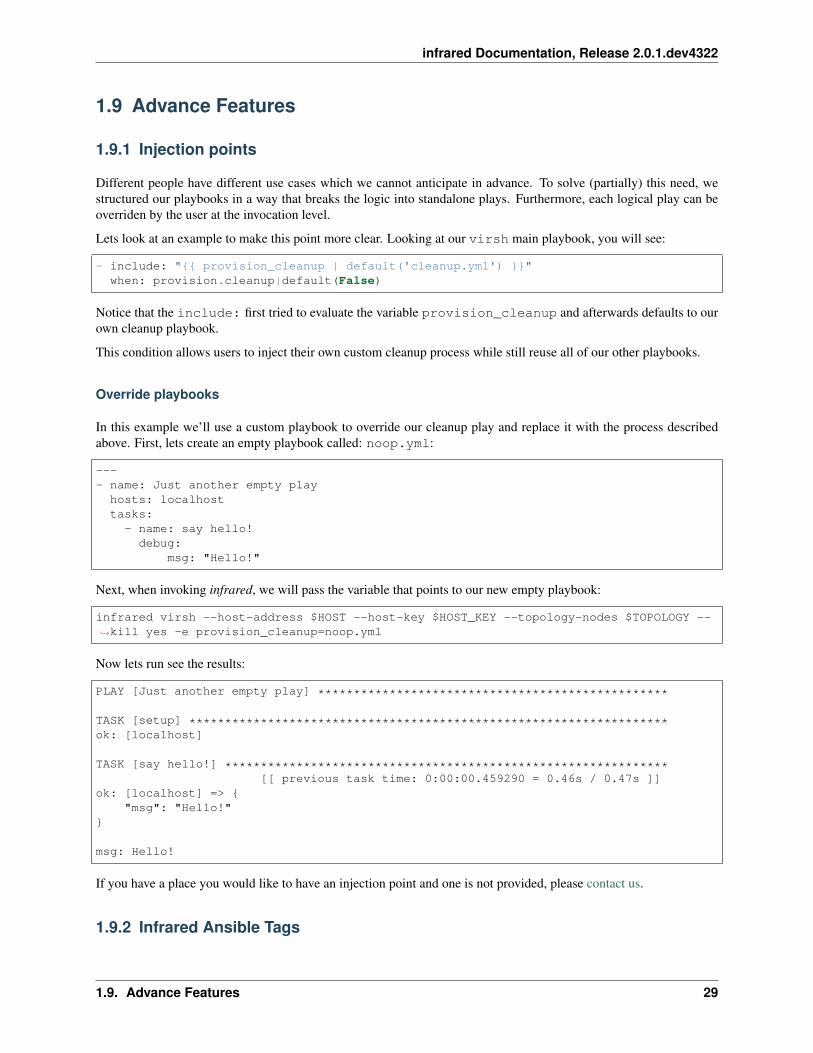
In this example we’ll use a custom playbook to override our cleanup play and replace it with the process describedabove. First, lets create an empty playbook called: noop.yml:
---- name: Just another empty play
hosts: localhosttasks:- name: say hello!
debug:msg: "Hello!"
Next, when invoking infrared, we will pass the variable that points to our new empty playbook:
infrared virsh --host-address $HOST --host-key $HOST_KEY --topology-nodes $TOPOLOGY --→˓kill yes -e provision_cleanup=noop.yml
Now lets run see the results:
PLAY [Just another empty play] *************************************************
TASK [setup] *******************************************************************ok: [localhost]
TASK [say hello!] **************************************************************[[ previous task time: 0:00:00.459290 = 0.46s / 0.47s ]]
ok: [localhost] => {"msg": "Hello!"
}
msg: Hello!
If you have a place you would like to have an injection point and one is not provided, please contact us.
1.9.2 Infrared Ansible Tags
1.9. Advance Features 29
infrared Documentation, Release 2.0.1.dev4322
Stages and their corresponding Ansible tags
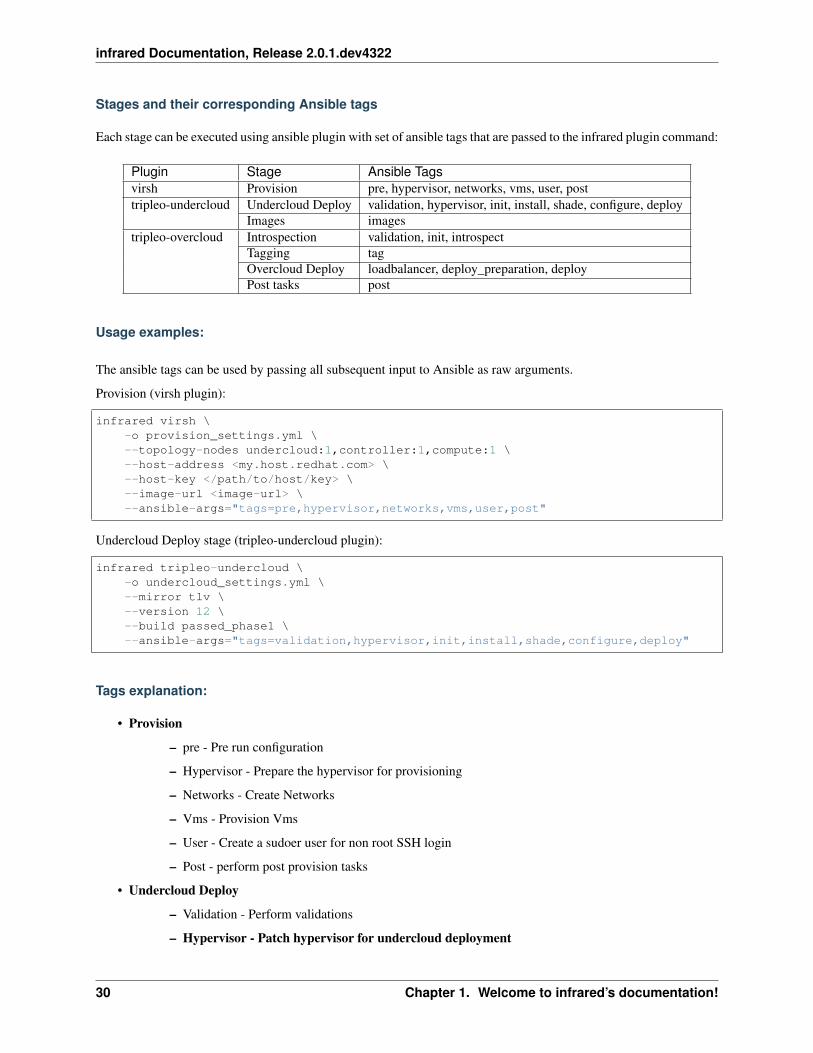
Each stage can be executed using ansible plugin with set of ansible tags that are passed to the infrared plugin command:
Plugin Stage Ansible Tagsvirsh Provision pre, hypervisor, networks, vms, user, posttripleo-undercloud Undercloud Deploy validation, hypervisor, init, install, shade, configure, deploy
Images imagestripleo-overcloud Introspection validation, init, introspect
Tagging tagOvercloud Deploy loadbalancer, deploy_preparation, deployPost tasks post
Usage examples:
The ansible tags can be used by passing all subsequent input to Ansible as raw arguments.
Provision (virsh plugin):
infrared virsh \-o provision_settings.yml \--topology-nodes undercloud:1,controller:1,compute:1 \--host-address <my.host.redhat.com> \--host-key </path/to/host/key> \--image-url <image-url> \--ansible-args="tags=pre,hypervisor,networks,vms,user,post"
Undercloud Deploy stage (tripleo-undercloud plugin):
infrared tripleo-undercloud \-o undercloud_settings.yml \--mirror tlv \--version 12 \--build passed_phase1 \--ansible-args="tags=validation,hypervisor,init,install,shade,configure,deploy"
Tags explanation:
• Provision
– pre - Pre run configuration
– Hypervisor - Prepare the hypervisor for provisioning
– Networks - Create Networks
– Vms - Provision Vms
– User - Create a sudoer user for non root SSH login
– Post - perform post provision tasks
• Undercloud Deploy
– Validation - Perform validations
– Hypervisor - Patch hypervisor for undercloud deployment
30 Chapter 1. Welcome to infrared’s documentation!
infrared Documentation, Release 2.0.1.dev4322
* Add rhos-release repos and update ipxe-roms
* Create the stack user on the hypervisor and allow SSH to hypervisor
– Init - Pre Run Adjustments
– Install - Configure and Install Undercloud Repositories
– Shade - Prepare shade node
– Configure - Configure Undercloud
– Deploy - Installing the undercloud
• Images
– Images - Get the undercloud version and prepare the images
• Introspection
– Validation - Perform validations
– Init - pre-tasks
– Introspect - Introspect our machines
• Tagging
– Tag - Tag our machines with proper flavors
• Overcloud Deploy
– Loadbalancer - Provision loadbalancer node
– Deploy_preparation - Environment setup
– Deploy - Deploy the Overcloud
• Post tasks
– Post - Perform post install tasks
1.9.3 Virthost packages/repo requirements
Virsh
UEFI mode related binaries
For Virthost with RHEL 7.3, OVMF package is available in the supplementary channel, please install the packagefrom there and rerun the command. If the Virthost use different OS or OS version, please check below.
According to usage UEFI with QEMU there is only one way to get the UEFI mode boot working with VMs, that oftenrequires by Ironic team due to lack of hardware or impossibility to automate mode switching on baremetal nodes.
1. Add repo with OVMF binaries:
yum-config-manager --add-repo http://www.kraxel.org/repos/firmware.repo
2. Install OVMF binaries:
yum install -y edk2.git-ovmf-x64
3. Update QEMU config adding the following to the end of the /etc/libvirt/qemu.conf file:
1.9. Advance Features 31
infrared Documentation, Release 2.0.1.dev4322
nvram = ["/usr/share/edk2.git/ovmf-x64/OVMF_CODE-pure-efi.fd:/usr/share/edk2.git/ovmf-
→˓x64/OVMF_VARS-pure-efi.fd"]
4. Restart libvirt service:
systemctl restart libvirtd
IPv6 related host adjustments, which will also be required by UEFI
When UEFI is in use, libvirt will require additional setup on the host, for IPv6 to be enabled:
1. Configure accept_ra = 2 in sysctl:
echo "net.ipv6.conf.all.accept_ra = 2" > /etc/sysctl.d/55-acceptra.conf
2. Enable the IPv6 related NAT modules:
modprobe nf_nat_ipv6
1.10 Contact Us
1.10.1 Team
Frank Jansen [email protected] Baranov [email protected] List [email protected]
1.10.2 GitHub
Issues are tracked via GitHub. For any concern, please create a new issue.
1.10.3 IRC
We are available on #infrared irc channel on freenode.
1.11 Contribute
1.11.1 Red Hatters
RedHat Employees should submit their changes via review.gerrithub.io. Only members of the rhosqeauto-coregroup on GerritHub can submit and approve patches, while members of rhosqeauto-contrib can submitpatches. You can ask any of the current members to be added to the appropriate group.
32 Chapter 1. Welcome to infrared’s documentation!
infrared Documentation, Release 2.0.1.dev4322
You can use git-review (dnf/yum/pip install). To initialize the directory of infrared execute git review -s.Every patch needs to have Change-Id in commit message (git review -s installs post-commit hook to automati-cally add one).
For some more info about git review usage, read GerritHub Intro and OpenStack Infra Manual.
1.11.2 Non Red Hatters
Non-RedHat Employees should file pull requests to the InfraRed project on GitHub.
1.11.3 Release Notes
Infrared uses reno tool for providing release notes. That means that a patch can include a reno file (release notes)containing detailed description what the impact is.
A reno file is a YAML file written in the releasenotes/notes directory which is generated using the reno tool this way:
$ tox -e venv -- reno new <name-your-file>
where <name-your-file> can be:
• bugfix-<bug_name_or_id>
• newfeature-<feature_name>
• apichange-<description>
• deprecation-<description>
Refer to the reno documentation for the full list of sections.
1.11.4 When a release note is needed
A release note is required anytime a reno section is needed. Below are some examples for each section. Any sectionsthat would be blank should be left out of the note file entirely.
upgrade A configuration option change (deprecation, removal or modified default), changes in core that can affectusers of the previous release. Any changes in the Infrared API.
security If the patch fixes a known vulnerability
features New feature in Infrared core or a new major feature in one of a core plugin. Introducing of the new APIoptions or CLI flags.
critical Bugfixes categorized as Critical and above in Jira.
fixes Bugs with high importance that have been fixed.
Three sections are left intentionally unexplained (prelude, issues and other). Those are targeted to be filledin close to the release time for providing details about the soon-ish release. Don’t use them unless you know exactlywhat you are doing.
1.12 OVB deployment
Deploy TripleO OpenStack on virtual nodes provisioned from an OpenStack cloud
1.12. OVB deployment 33
infrared Documentation, Release 2.0.1.dev4322
In a TripleO OpenStack deployment, the undercloud need to control the overcloud power management, as well asserve its nodes with an operating system. Trying to do that inside an OpenStack cloud requires some modificationfrom the client side as well as from the OpenStack cloud
The OVB (openstack virtual baremetal) project solves this problem and we strongly recommended to read its docu-mentation prior to moving next in this document.
1.12.1 OVB architecture overview
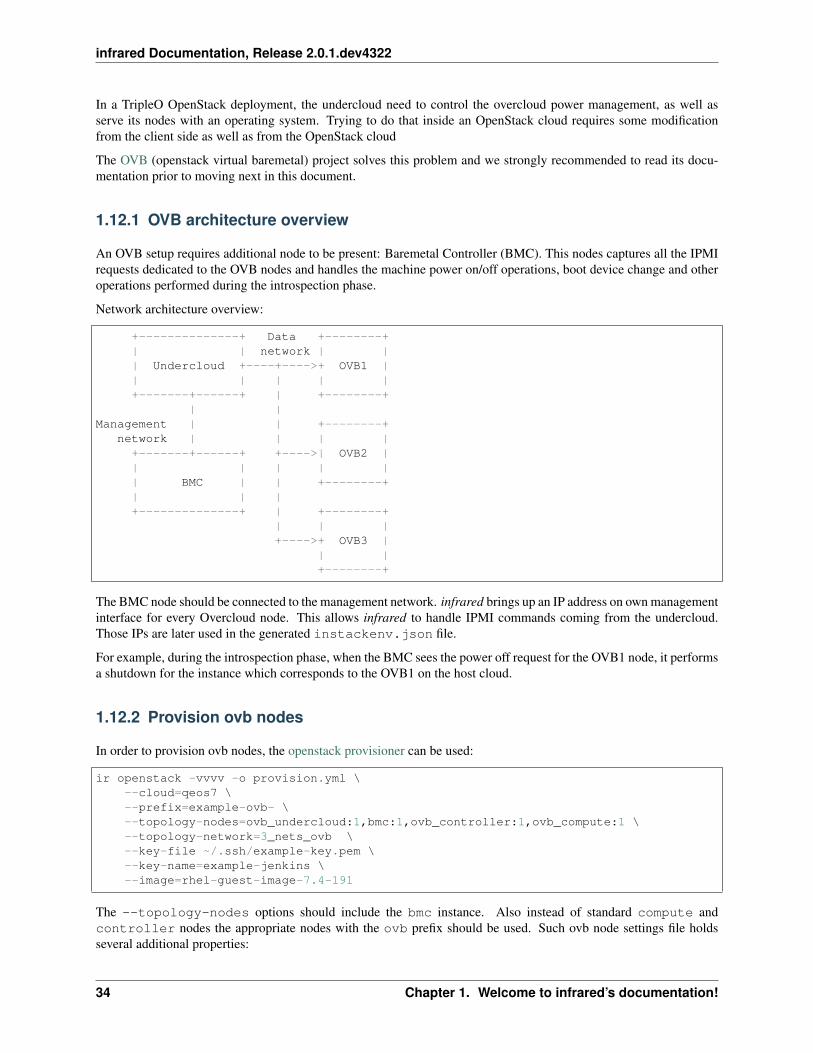
An OVB setup requires additional node to be present: Baremetal Controller (BMC). This nodes captures all the IPMIrequests dedicated to the OVB nodes and handles the machine power on/off operations, boot device change and otheroperations performed during the introspection phase.
Network architecture overview:
+--------------+ Data +--------+| | network | || Undercloud +----+---->+ OVB1 || | | | |+-------+------+ | +--------+
| |Management | | +--------+
network | | | |+-------+------+ +---->| OVB2 || | | | || BMC | | +--------+| | |+--------------+ | +--------+
| | |+---->+ OVB3 |
| |+--------+
The BMC node should be connected to the management network. infrared brings up an IP address on own managementinterface for every Overcloud node. This allows infrared to handle IPMI commands coming from the undercloud.Those IPs are later used in the generated instackenv.json file.
For example, during the introspection phase, when the BMC sees the power off request for the OVB1 node, it performsa shutdown for the instance which corresponds to the OVB1 on the host cloud.
1.12.2 Provision ovb nodes
In order to provision ovb nodes, the openstack provisioner can be used:
ir openstack -vvvv -o provision.yml \--cloud=qeos7 \--prefix=example-ovb- \--topology-nodes=ovb_undercloud:1,bmc:1,ovb_controller:1,ovb_compute:1 \--topology-network=3_nets_ovb \--key-file ~/.ssh/example-key.pem \--key-name=example-jenkins \--image=rhel-guest-image-7.4-191
The --topology-nodes options should include the bmc instance. Also instead of standard compute andcontroller nodes the appropriate nodes with the ovb prefix should be used. Such ovb node settings file holdsseveral additional properties:
34 Chapter 1. Welcome to infrared’s documentation!
infrared Documentation, Release 2.0.1.dev4322
• instance image details. Currently the ipxe-boot image should be used for all the ovb nodes. Only thatimage allows to boot from the network after restart.
• ovb group in the groups section
• network topology (NICs’ order)
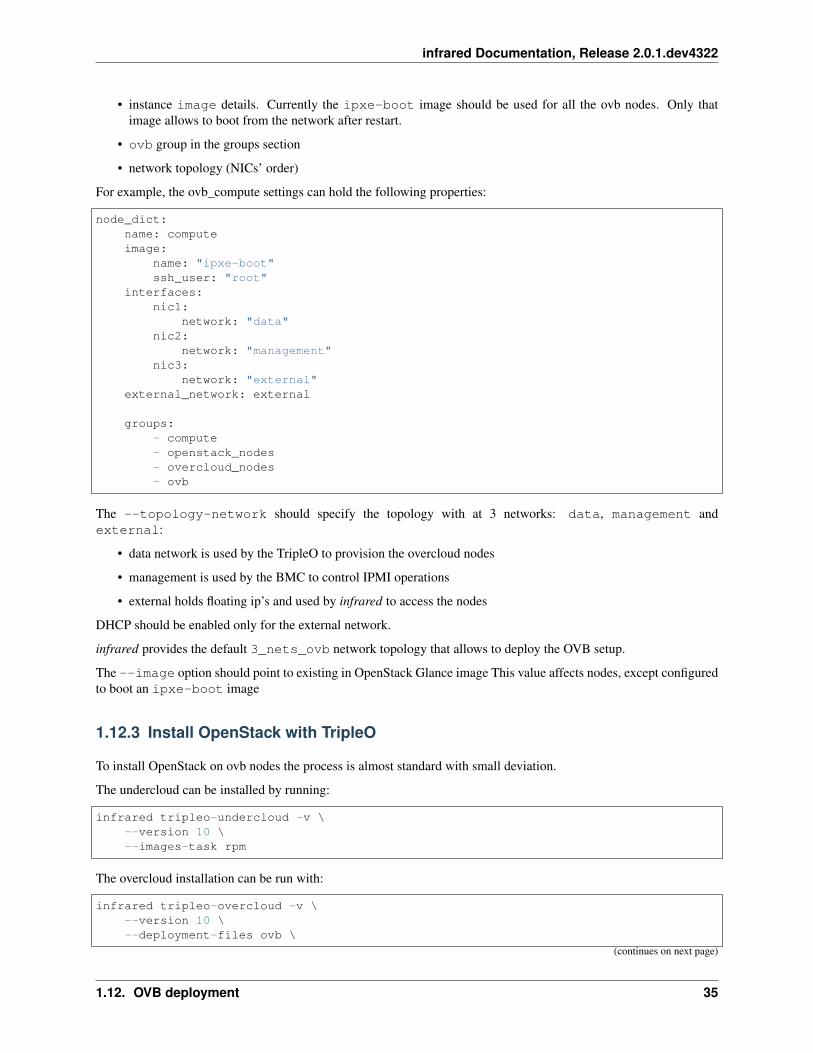
For example, the ovb_compute settings can hold the following properties:
node_dict:name: computeimage:
name: "ipxe-boot"ssh_user: "root"
interfaces:nic1:
network: "data"nic2:
network: "management"nic3:
network: "external"external_network: external
groups:- compute- openstack_nodes- overcloud_nodes- ovb
The --topology-network should specify the topology with at 3 networks: data, management andexternal:
• data network is used by the TripleO to provision the overcloud nodes
• management is used by the BMC to control IPMI operations
• external holds floating ip’s and used by infrared to access the nodes
DHCP should be enabled only for the external network.
infrared provides the default 3_nets_ovb network topology that allows to deploy the OVB setup.
The --image option should point to existing in OpenStack Glance image This value affects nodes, except configuredto boot an ipxe-boot image
1.12.3 Install OpenStack with TripleO
To install OpenStack on ovb nodes the process is almost standard with small deviation.
The undercloud can be installed by running:
infrared tripleo-undercloud -v \--version 10 \--images-task rpm
The overcloud installation can be run with:
infrared tripleo-overcloud -v \--version 10 \--deployment-files ovb \
(continues on next page)
1.12. OVB deployment 35
infrared Documentation, Release 2.0.1.dev4322
(continued from previous page)
--public-network=yes \--public-subnet=ovb_subnet \--network-protocol ipv4 \--post=yes \--introspect=yes \--tagging=yes
Here some ovb specific option should be considered:
• if host cloud is not patched and not configured for the OVB deployments the --deployment-files shouldpoint to the ovb templates to skip unsupported features. See the OVB limitations for details
• the --public_subnet should point to the subnet settings to match with the OVB network topology andallocation addresses
Fully functional overcloud will be deployed into the OVB nodes.
1.12.4 OVB limitations
The OVB approach requires a host cloud to be patched and configured. Otherwise the following features will NOT beavailable:
• Network isolation
• HA (high availability). Setup with more that 1 controller, etc is not allowed.
• Boot from network. This can be worked around by using the ipxe_boot image for the OVB nodes.
1.13 Troubleshoot
This page will list common pitfalls or known issues, and how to overcome them
1.13.1 Ansible Failures
Unreachable
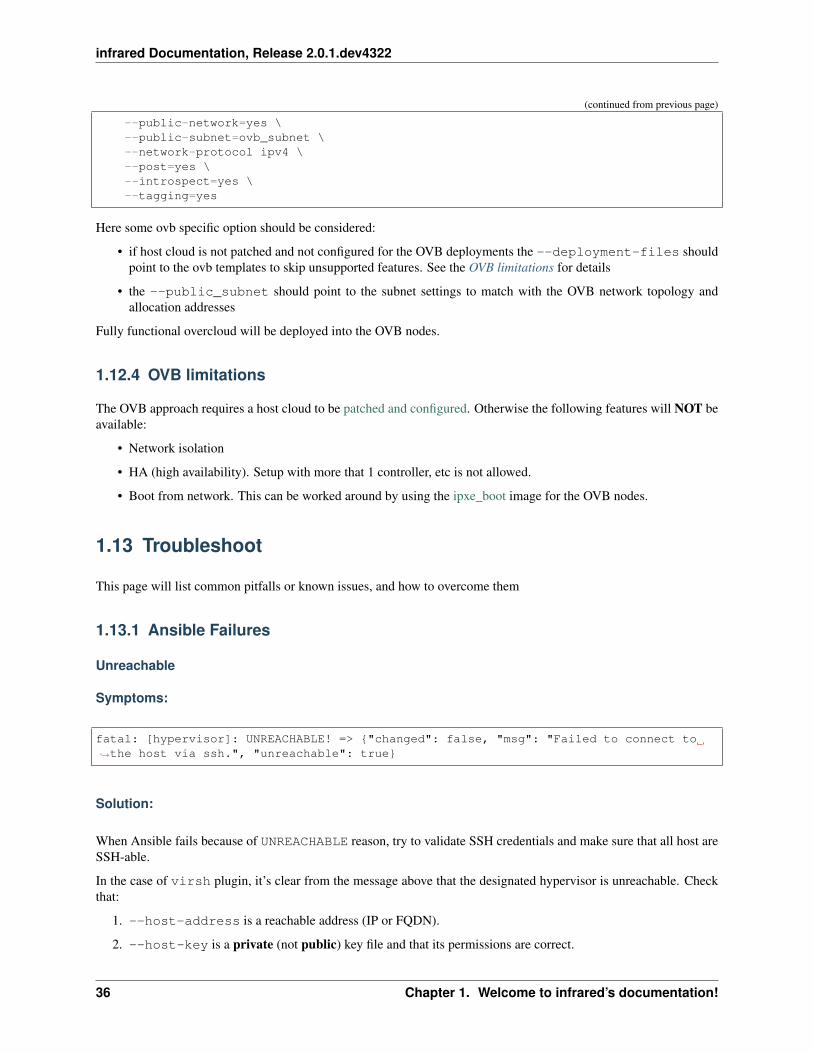
Symptoms:
fatal: [hypervisor]: UNREACHABLE! => {"changed": false, "msg": "Failed to connect to→˓the host via ssh.", "unreachable": true}
Solution:
When Ansible fails because of UNREACHABLE reason, try to validate SSH credentials and make sure that all host areSSH-able.
In the case of virsh plugin, it’s clear from the message above that the designated hypervisor is unreachable. Checkthat:
1. --host-address is a reachable address (IP or FQDN).
2. --host-key is a private (not public) key file and that its permissions are correct.
36 Chapter 1. Welcome to infrared’s documentation!
infrared Documentation, Release 2.0.1.dev4322
3. --host-user (defaults to root) exits on the host.
4. Try to manually ssh to the host using the given user private key:
ssh -i $HOST_KEY $HOST_USER@$HOST_ADDRESS
1.13.2 Virsh Failures
Cannot create VM’s
Symptoms:
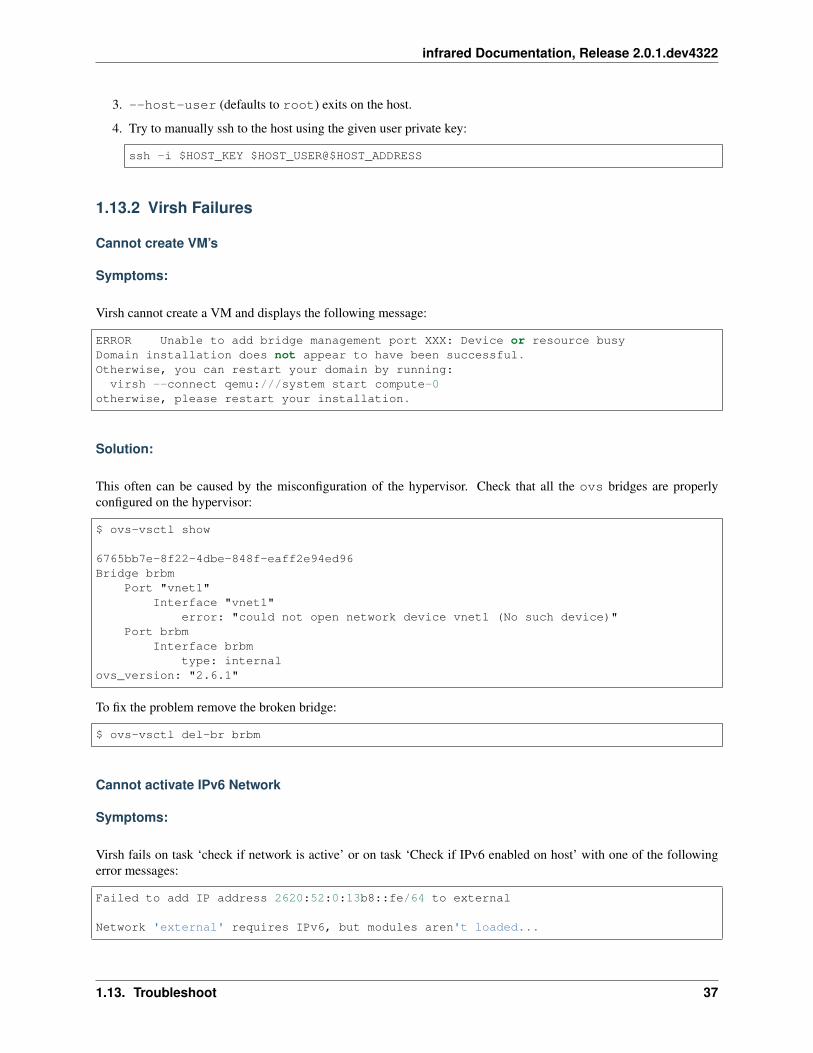
Virsh cannot create a VM and displays the following message:
ERROR Unable to add bridge management port XXX: Device or resource busyDomain installation does not appear to have been successful.Otherwise, you can restart your domain by running:
virsh --connect qemu:///system start compute-0otherwise, please restart your installation.
Solution:
This often can be caused by the misconfiguration of the hypervisor. Check that all the ovs bridges are properlyconfigured on the hypervisor:
$ ovs-vsctl show
6765bb7e-8f22-4dbe-848f-eaff2e94ed96Bridge brbm
Port "vnet1"Interface "vnet1"
error: "could not open network device vnet1 (No such device)"Port brbm
Interface brbmtype: internal
ovs_version: "2.6.1"
To fix the problem remove the broken bridge:
$ ovs-vsctl del-br brbm
Cannot activate IPv6 Network
Symptoms:
Virsh fails on task ‘check if network is active’ or on task ‘Check if IPv6 enabled on host’ with one of the followingerror messages:
Failed to add IP address 2620:52:0:13b8::fe/64 to external
Network 'external' requires IPv6, but modules aren't loaded...
1.13. Troubleshoot 37

infrared Documentation, Release 2.0.1.dev4322
Solution:
Ipv6 is disabled on hypervisor. Please make sure to enable IPv6 on the hypervisor before creating network with IPv6,otherwise, IPv6 networks will be created but will remain in ‘inactive’ state.
One possible solution on RH based OSes, is to enable IPv6 in kernel cmdline:
# sed -i s/ipv6.disable=1/ipv6.disable=0/ /etc/default/grub# grub2-mkconfig -o /boot/grub2/grub.cfg# reboot
1.13.3 Frequently Asked Questions
Where’s my inventory file?
I’d like to run some personal Ansible playbook and/or “ad-hoc” but I can’t find my inventory file
All Ansible environment files are read from, and written to, workspaces Use infrared workspace inventoryto fetch a symlink to the active workspace’s inventory or infrared workspace inventory WORKSPACE forany workspace by name:
ansible -i `infrared workspace inventory` all -m ping
compute-0 | SUCCESS => {"changed": false,"ping": "pong"
}compute-1 | SUCCESS => {
"changed": false,"ping": "pong"
}controller-0 | SUCCESS => {
"changed": false,"ping": "pong"
}localhost | SUCCESS => {
"changed": false,"ping": "pong"
}hypervisor | SUCCESS => {
"changed": false,"ping": "pong"
}undercloud-0 | SUCCESS => {
"changed": false,"ping": "pong"
1.14 Temporary Workarounds
The page displays temporary hacks that were merged to Infrared(IR) code. Since the core team is small and these fixesare tracked manually at the moment, we request the user to review the status of the hacks/BZs.
Plugin in which the hack is included Bugzilla/Issue User/#TODO =================================================== ==========
38 Chapter 1. Welcome to infrared’s documentation!

infrared Documentation, Release 2.0.1.dev4322
1.15 Baremetal deployment
Infrared allows to perform baremetal deployments.
Note: Overcloud templates for the deployment should be prepared separately.
1) Undercloud provision step. Foreman plugin will be used in this example.
infrared foreman -vv \-o provision.yml \--url foreman.example.com \--user foreman_user \--password foreman_password \--host-address name.of.undercloud.host \--host-key /path/to/host/key \--role baremetal,undercloud,tester
2) Deploy Undercloud.
infrared tripleo-undercloud -vv \-o undercloud-install.yml \--config-file path/to/undercloud.conf \--version 11 \--build 11 \--images-task rpm
3) Deploy Overcloud.
For baremetal deployments, in order to reflect the real networking, templates should be prepared by the userbefore the deployment, including instackenv.json file. All addition parameters like storage (ceph orswift) disks or any other parameters should be added to the templates as well.
..."cpu": "2","memory": "4096","disk": "0","disks": ["vda", "vdb"],"arch": "x86_64",...
infrared tripleo-overcloud -vv \-o overcloud-install.yml \--version 11 \--instackenv-file path/to/instackenv.json \--deployment-files /path/to/the/templates \--overcloud-script /path/to/overcloud_deploy.sh \--network-protocol ipv4 \--network-backend vlan \--public-network false \--introspect yes \--tagging yes \--deploy yes
infrared cloud-config -vv \-o cloud-config.yml \
(continues on next page)
1.15. Baremetal deployment 39
infrared Documentation, Release 2.0.1.dev4322
(continued from previous page)
--deployment-files virt \--tasks create_external_network,forward_overcloud_dashboard,network_time,
→˓tempest_deployer_input
1.16 Beaker
Provision baremetal machines using Beaker.
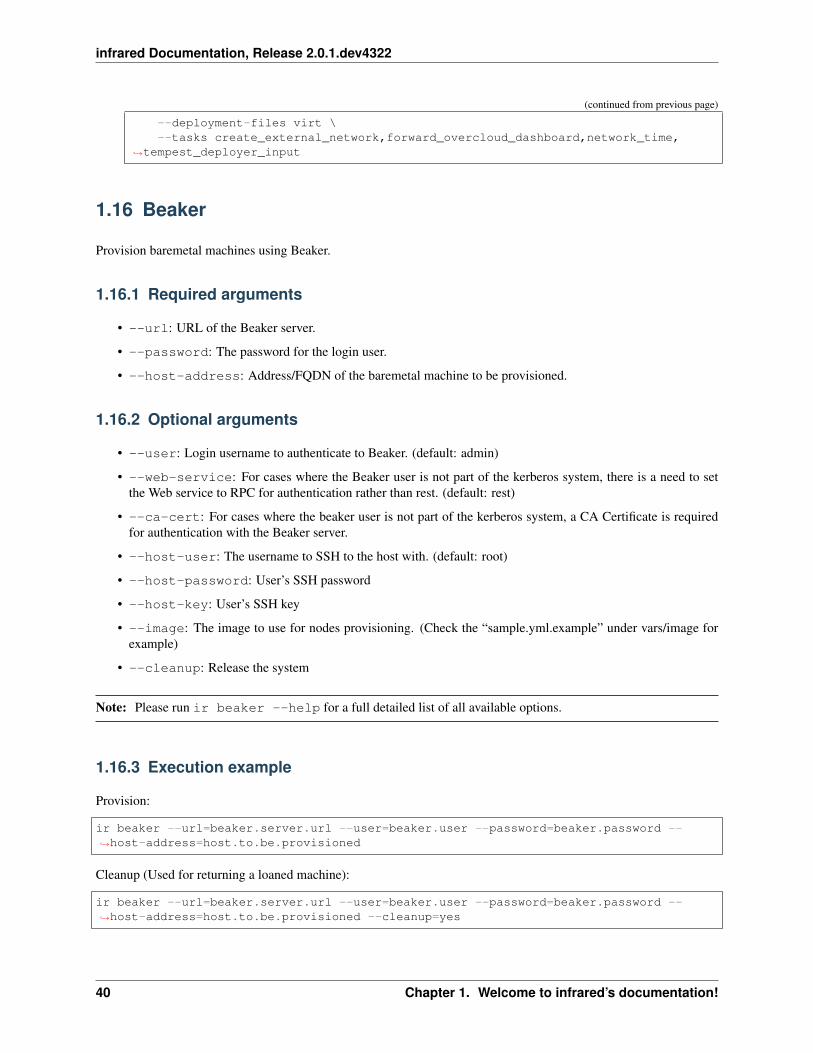
1.16.1 Required arguments
• --url: URL of the Beaker server.
• --password: The password for the login user.
• --host-address: Address/FQDN of the baremetal machine to be provisioned.
1.16.2 Optional arguments
• --user: Login username to authenticate to Beaker. (default: admin)
• --web-service: For cases where the Beaker user is not part of the kerberos system, there is a need to setthe Web service to RPC for authentication rather than rest. (default: rest)
• --ca-cert: For cases where the beaker user is not part of the kerberos system, a CA Certificate is requiredfor authentication with the Beaker server.
• --host-user: The username to SSH to the host with. (default: root)
• --host-password: User’s SSH password
• --host-key: User’s SSH key
• --image: The image to use for nodes provisioning. (Check the “sample.yml.example” under vars/image forexample)
• --cleanup: Release the system
Note: Please run ir beaker --help for a full detailed list of all available options.
1.16.3 Execution example
Provision:
ir beaker --url=beaker.server.url --user=beaker.user --password=beaker.password --→˓host-address=host.to.be.provisioned
Cleanup (Used for returning a loaned machine):
ir beaker --url=beaker.server.url --user=beaker.user --password=beaker.password --→˓host-address=host.to.be.provisioned --cleanup=yes
40 Chapter 1. Welcome to infrared’s documentation!
infrared Documentation, Release 2.0.1.dev4322
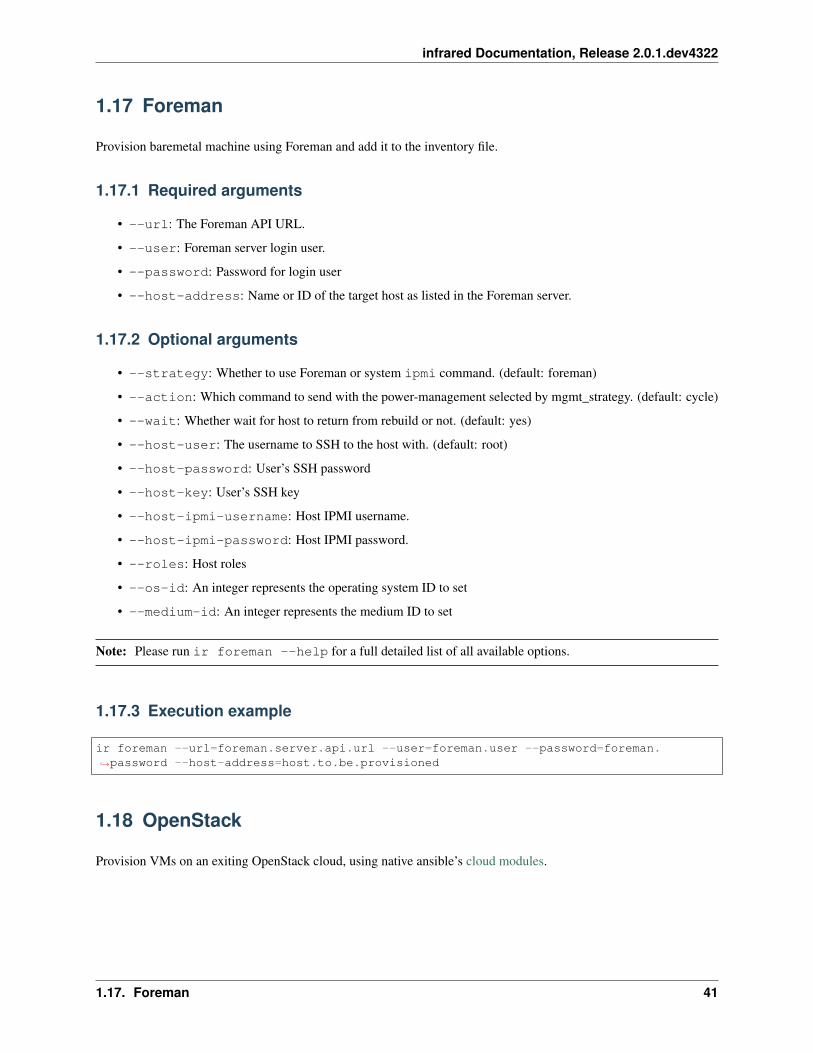
1.17 Foreman
Provision baremetal machine using Foreman and add it to the inventory file.
1.17.1 Required arguments
• --url: The Foreman API URL.
• --user: Foreman server login user.
• --password: Password for login user
• --host-address: Name or ID of the target host as listed in the Foreman server.
1.17.2 Optional arguments
• --strategy: Whether to use Foreman or system ipmi command. (default: foreman)
• --action: Which command to send with the power-management selected by mgmt_strategy. (default: cycle)
• --wait: Whether wait for host to return from rebuild or not. (default: yes)
• --host-user: The username to SSH to the host with. (default: root)
• --host-password: User’s SSH password
• --host-key: User’s SSH key
• --host-ipmi-username: Host IPMI username.
• --host-ipmi-password: Host IPMI password.
• --roles: Host roles
• --os-id: An integer represents the operating system ID to set
• --medium-id: An integer represents the medium ID to set
Note: Please run ir foreman --help for a full detailed list of all available options.
1.17.3 Execution example
ir foreman --url=foreman.server.api.url --user=foreman.user --password=foreman.→˓password --host-address=host.to.be.provisioned
1.18 OpenStack
Provision VMs on an exiting OpenStack cloud, using native ansible’s cloud modules.
1.17. Foreman 41

infrared Documentation, Release 2.0.1.dev4322
1.18.1 OpenStack Cloud Details
• --cloud: reference to OpenStack cloud credentials, using os-client-config This library expects properlyconfigured cloud.yml file:
Listing 2: clouds.yml
clouds:cloud_name:
auth_url: http://openstack_instance:5000/v2.0username: <username>password: <password>project_name: <project_name>
cloud_name can be then referenced with --cloud option:
infrared openstack --cloud cloud_name ...
clouds.yml is expected in either ~/.config/openstack or /etc/openstack directories ac-cording to documentation:
Note: You can also omit the cloud parameter, and infrared will sourced openstackrc file:
source keystonercinfrared openstack openstack ...
• --key-file: Private key that will be used to ssh to the provisioned VMs. Chosen matching public keywill be uploaded to the OpenStack account, unless --key-name is provided
• --key-name: Name of an existing keypair under the OpenStack account. keypair should hold the publickey that matches the provided private --key-file. Use openstack --os-cloud cloud_namekeypair list to list available keypairs.
• --dns: A Local DNS server used for the provisioned networks and VMs. If not provided, OpenStack willuse default DNS settings, which, in most cases, will not resolve internal URLs.
1.18.2 Topology
• --prefix: prefix all resources with a string. Use this with shared tenants to have unique resource names.
Note: --prefix "XYZ" will create router named XYZrouter. Use --prefix "XYZ-" to createXYZ-router
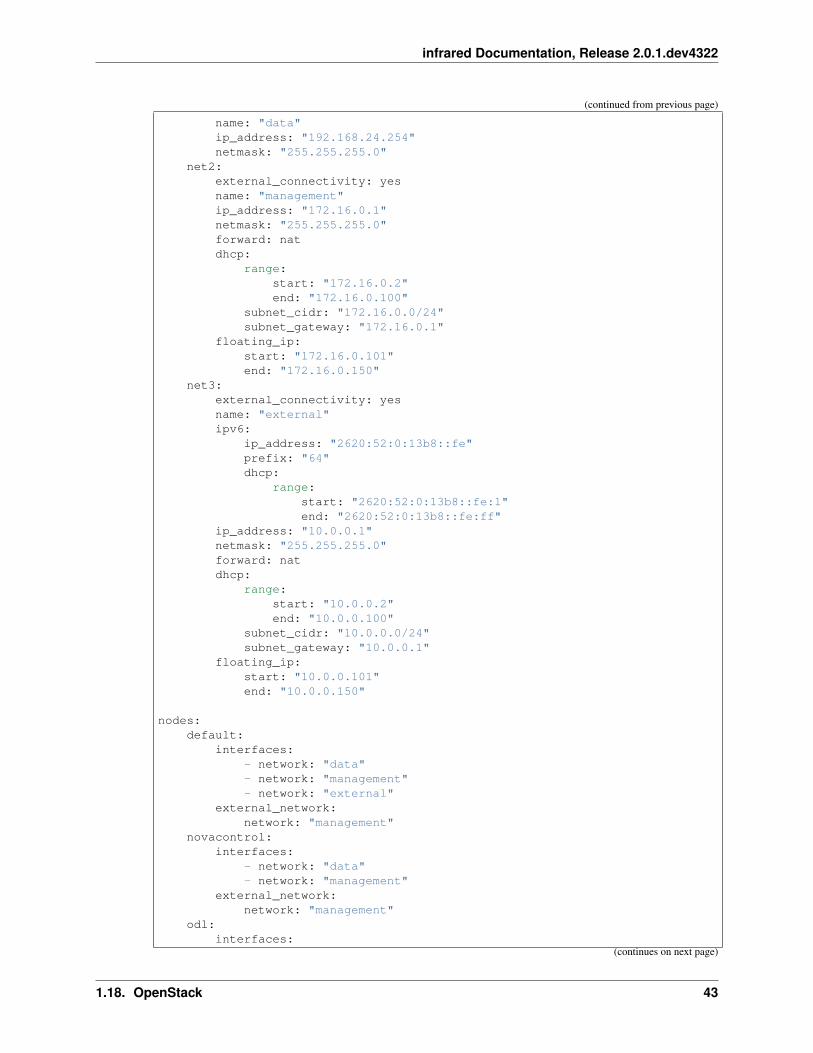
• --topology-network: Description of the network topology. By default, 3 networks will be provisionedwith 1 router. 2 of them will be connected via the router to an external network discovered automatically(when more than 1 external network is found, the first will be chosen).
The following is an example of a 3_nets.yml file:
---networks:
net1:external_connectivity: no
(continues on next page)
42 Chapter 1. Welcome to infrared’s documentation!
infrared Documentation, Release 2.0.1.dev4322
(continued from previous page)
name: "data"ip_address: "192.168.24.254"netmask: "255.255.255.0"
net2:external_connectivity: yesname: "management"ip_address: "172.16.0.1"netmask: "255.255.255.0"forward: natdhcp:
range:start: "172.16.0.2"end: "172.16.0.100"
subnet_cidr: "172.16.0.0/24"subnet_gateway: "172.16.0.1"
floating_ip:start: "172.16.0.101"end: "172.16.0.150"
net3:external_connectivity: yesname: "external"ipv6:
ip_address: "2620:52:0:13b8::fe"prefix: "64"dhcp:
range:start: "2620:52:0:13b8::fe:1"end: "2620:52:0:13b8::fe:ff"
ip_address: "10.0.0.1"netmask: "255.255.255.0"forward: natdhcp:
range:start: "10.0.0.2"end: "10.0.0.100"
subnet_cidr: "10.0.0.0/24"subnet_gateway: "10.0.0.1"
floating_ip:start: "10.0.0.101"end: "10.0.0.150"
nodes:default:
interfaces:- network: "data"- network: "management"- network: "external"
external_network:network: "management"
novacontrol:interfaces:
- network: "data"- network: "management"
external_network:network: "management"
odl:interfaces:
(continues on next page)
1.18. OpenStack 43
infrared Documentation, Release 2.0.1.dev4322
(continued from previous page)
- network: "management"external_network:
network: "management"
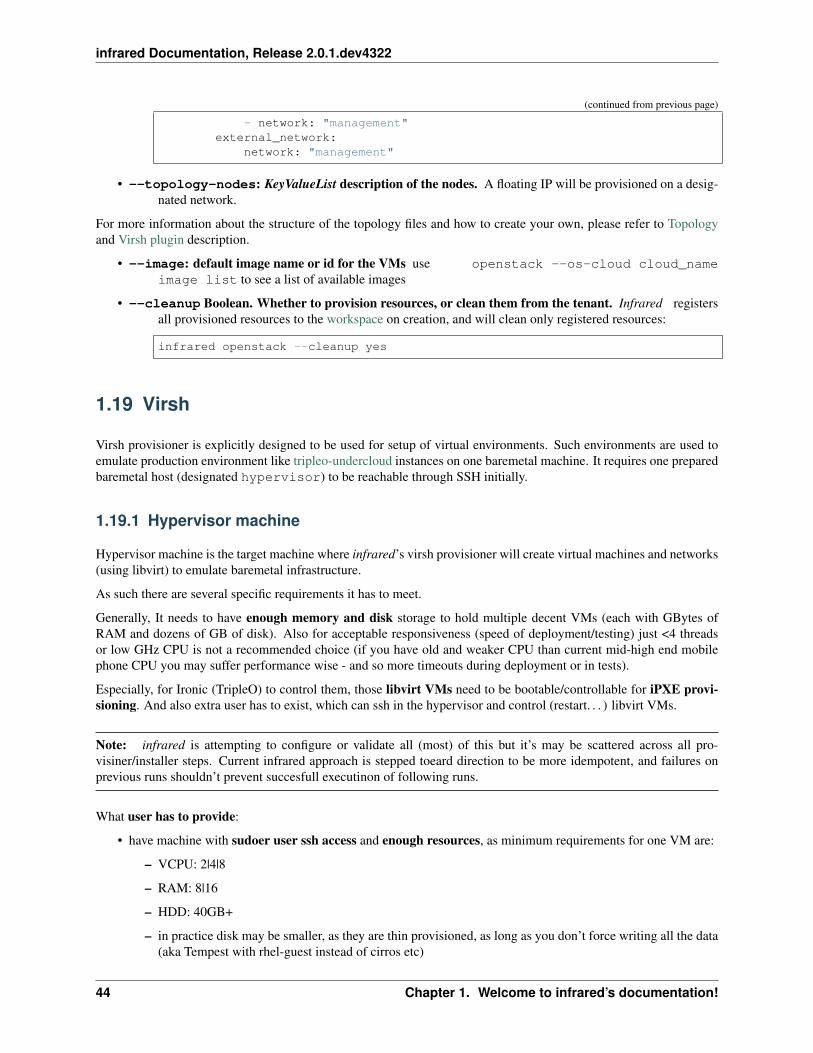
• --topology-nodes: KeyValueList description of the nodes. A floating IP will be provisioned on a desig-nated network.
For more information about the structure of the topology files and how to create your own, please refer to Topologyand Virsh plugin description.
• --image: default image name or id for the VMs use openstack --os-cloud cloud_nameimage list to see a list of available images
• --cleanup Boolean. Whether to provision resources, or clean them from the tenant. Infrared registersall provisioned resources to the workspace on creation, and will clean only registered resources:
infrared openstack --cleanup yes
1.19 Virsh
Virsh provisioner is explicitly designed to be used for setup of virtual environments. Such environments are used toemulate production environment like tripleo-undercloud instances on one baremetal machine. It requires one preparedbaremetal host (designated hypervisor) to be reachable through SSH initially.
1.19.1 Hypervisor machine
Hypervisor machine is the target machine where infrared’s virsh provisioner will create virtual machines and networks(using libvirt) to emulate baremetal infrastructure.
As such there are several specific requirements it has to meet.
Generally, It needs to have enough memory and disk storage to hold multiple decent VMs (each with GBytes ofRAM and dozens of GB of disk). Also for acceptable responsiveness (speed of deployment/testing) just <4 threadsor low GHz CPU is not a recommended choice (if you have old and weaker CPU than current mid-high end mobilephone CPU you may suffer performance wise - and so more timeouts during deployment or in tests).
Especially, for Ironic (TripleO) to control them, those libvirt VMs need to be bootable/controllable for iPXE provi-sioning. And also extra user has to exist, which can ssh in the hypervisor and control (restart. . . ) libvirt VMs.
Note: infrared is attempting to configure or validate all (most) of this but it’s may be scattered across all pro-visiner/installer steps. Current infrared approach is stepped toeard direction to be more idempotent, and failures onprevious runs shouldn’t prevent succesfull executinon of following runs.
What user has to provide:
• have machine with sudoer user ssh access and enough resources, as minimum requirements for one VM are:
– VCPU: 2|4|8
– RAM: 8|16
– HDD: 40GB+
– in practice disk may be smaller, as they are thin provisioned, as long as you don’t force writing all the data(aka Tempest with rhel-guest instead of cirros etc)
44 Chapter 1. Welcome to infrared’s documentation!

infrared Documentation, Release 2.0.1.dev4322
• RHEL-7.3 and RHEL-7.4 are tested, CentOS is also expected to work
– may work with other distributions (best-effort/limited support)
• yum repositories has to be preconfigured by user (foreman/. . . ) before using infrared so it can install depen-dencies
– esp. for infrared to handle ipxe-roms-qemu it requires either RHEL-7.{3|4}-server channel
What infrared takes care of:
• ipxe-roms-qemu package of at least version 2016xxyy needs to be installed
• other basic packages installed
– libvirt, libguestfs{-tools,-xfs}, qemu-kvm, wget, virt-install
• virtualization support (VT-x/AMD-V)
– ideally with nested=1 support
• stack user created with polkit privileges for org.libvirt.unix.manage
• ssh key with which infrared can authenticate (created and) added for root and stack user, ATM they are handleddifferently/separately:
– for root the infared/id_rsa.pub gets added to authorized_keys
– for stack infrared/id_rsa_undercloud.pub is added to authorized_keys, created/added laterduring installation
First, Libvirt and KVM are installed and configured to provide a virtualized environment. Then, virtual machines arecreated for all requested nodes.
1.19.2 Topology
The first thing you need to decide before you deploy your environment is the Topology. This refers to the numberand type of VMs in your desired deployment environment. If we use OpenStack as an example, a topology may looksomething like:
• 1 VM called undercloud
• 1 VM called controller
• 1 VM called compute
To control how each VM is created, we have created a YAML file that describes the specification of each VM. Formore information about the structure of the topology files and how to create your own, please refer to Topology.
Please see Bootstrap guide where usage is demonstrated.
• --host-memory-overcommit By default memory overcommitment is false and provision will fail if Hy-pervisor’s free memory is lower than required memory for all nodes. Use –host-memory-overcommit Trueto change default behaviour.
Network layout
Baremetal machine used as host for such setup is called hypervisor. The whole deployment is designed to work withinboundaries of this machine and (except public/natted traffic) shouldn’t reach beyond. The following layout is part ofdefault setup defined in plugins defaults:
1.19. Virsh 45

infrared Documentation, Release 2.0.1.dev4322
hypervisor|+--------+ nic0 - public IP|+--------+ nic1 - not managed|
... Libvirt VM's| |
------+--------+ data bridge (ctlplane, 192.0.2/24) +------+ data→˓(nic0)
| | |libvirt --+--------+ management bridge (nat, dhcp, 172.16.0/24) +------+→˓managementnt (nic1)
| | |------+--------+ external bridge (nat, dhcp, 10.0.0/24) +------+ external
→˓(nic2)
On hypervisor, there are 3 new bridges created with libvirt - data, management and external. Most important isdata network which does not have DHCP and NAT enabled. This network can later be used as ctlplane for OSPdirector deployments (tripleo-undercloud). Other (usually physical) interfaces are not used (nic0, nic1, . . . ) exceptfor public/natted traffic. External network is used for SSH forwarding so client (or Ansible) can access dynamicallycreated nodes.
NAT Forwarding
By default, all networks above are NATed, meaning that they private networks only reachable via the hypervisor node.infrared configures the nodes SSH connection to use the hypervisor host as proxy.
Bridged Network
Some use-cases call for direct access to some of the nodes. This is achieved by adding a network with forward:bridge in its attributes to the network-topology file, and marking this network as external network on the relevantnode files.
The result will create a virtual bridge on the hypervisor connected to the main NIC by default. VMs attached to thisbridge will be served by the same LAN as the hypervisor.
To specify any secondary NIC for the bridge, the nic property should be added to the network file under the bridgenetwork:
net4:name: br1forward: bridgenic: eth1
Warning: Be careful when using this feature. For example, an undercloud connected in this manner candisrupt the LAN by serving as an unauthorized DHCP server.
Fore example, see tripleo node used in conjunction with 3_net_1_bridge network file:
infrared virsh [...] --topology-nodes ironic:1,[...] --topology-network 3_net_1_→˓bridge [...]
46 Chapter 1. Welcome to infrared’s documentation!

infrared Documentation, Release 2.0.1.dev4322
1.19.3 Workflow
1. Setup libvirt and kvm environment
2. Setup libvirt networks
3. Download base image for undercloud (--image-url)
4. Create desired amount of images and integrate to libvirt
5. Define virtual machines with requested parameters (--topology-nodes)
6. Start virtual machines
Environments prepared such in way are usually used as basic virtual infrastructure for tripleo-undercloud.
Note: Virsh provisioner has idempotency issues, so infrared virsh ... --kill must be run before re-provisioning every time to remove libvirt resources related to active hosts form workspace inventory or infraredvirsh ... --cleanup to remove ALL domains and nettworks (except ‘default’) from hypervisor.
1.19.4 Topology Extend
• --topology-extend: Extend existing deployment with nodes provided by topology. If--topology-extend is True, all nodes from --topology-nodes will be added as new additional nodes
infrared virsh [...] --topology-nodes compute:1,[...] --topology-extend yes [...]
1.19.5 Topology Shrink
• --remove-nodes: Provide option for removing of nodes from existing topology:
infrared virsh [...] --remove-nodes compute-2,compute3
Warning: If try to extend topology after you remove node with index lower than maximum, extending will fail.For example, if you have 4 compute nodes (compute-0,compute-1,compute-2,compute-3), removal of any nodedifferent than compute-3, will cause fail of future topology extending.
1.19.6 Multiply environments
In some use cases it might be needed to have multiply environments on the same host. Virsh provisioner currently sup-ports that with --prefix parameter. Using it user can assign a prefix to created resources such as virtual instances,networks, routers etc.
Warning: --prefix shouldn’t be more than 4 characters long because of libvirt limitation on resources namelength.
infrared virsh [...] --topology-nodes compute:1,controller1,[...] --prefix foo [...]
Will create resource with foo prefix. Resources from different environments could be differebtiaited using prefix, andvirsh plugin will take care so they will not interfere with each other in terms of networking, virtual instances etc.
1.19. Virsh 47
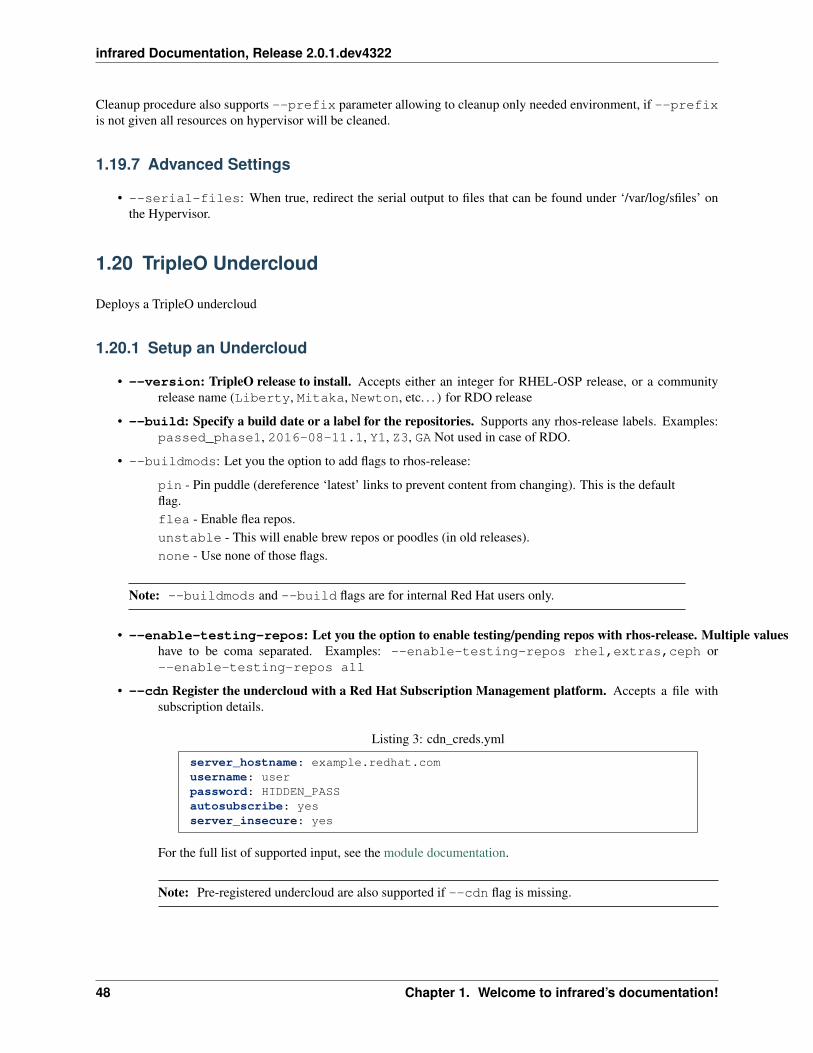
infrared Documentation, Release 2.0.1.dev4322
Cleanup procedure also supports --prefix parameter allowing to cleanup only needed environment, if --prefixis not given all resources on hypervisor will be cleaned.
1.19.7 Advanced Settings
• --serial-files: When true, redirect the serial output to files that can be found under ‘/var/log/sfiles’ onthe Hypervisor.
1.20 TripleO Undercloud
Deploys a TripleO undercloud
1.20.1 Setup an Undercloud
• --version: TripleO release to install. Accepts either an integer for RHEL-OSP release, or a communityrelease name (Liberty, Mitaka, Newton, etc. . . ) for RDO release
• --build: Specify a build date or a label for the repositories. Supports any rhos-release labels. Examples:passed_phase1, 2016-08-11.1, Y1, Z3, GA Not used in case of RDO.
• --buildmods: Let you the option to add flags to rhos-release:
pin - Pin puddle (dereference ‘latest’ links to prevent content from changing). This is the defaultflag.flea - Enable flea repos.unstable - This will enable brew repos or poodles (in old releases).none - Use none of those flags.
Note: --buildmods and --build flags are for internal Red Hat users only.
• --enable-testing-repos: Let you the option to enable testing/pending repos with rhos-release. Multiple valueshave to be coma separated. Examples: --enable-testing-repos rhel,extras,ceph or--enable-testing-repos all
• --cdn Register the undercloud with a Red Hat Subscription Management platform. Accepts a file withsubscription details.
Listing 3: cdn_creds.yml
server_hostname: example.redhat.comusername: userpassword: HIDDEN_PASSautosubscribe: yesserver_insecure: yes
For the full list of supported input, see the module documentation.
Note: Pre-registered undercloud are also supported if --cdn flag is missing.
48 Chapter 1. Welcome to infrared’s documentation!

infrared Documentation, Release 2.0.1.dev4322
Warning: The contents of the file are hidden from the logged output, to protect private accountcredentials.
• --from-source Build tripleo components from the upstream git repository. Accepts list of tripleo com-ponents. The delorean project is used to build rpm packages. For more information about delorean, visitDelorean documentation.
To deploy specific tripleo components from git repository:
infrared tripleo-undercloud --version 13 \--from-source name=openstack/python-tripleoclient \--from-source name=openstack/neutron,refs=refs/changes/REF_ID \--from-source name=openstack/puppet-neutron
Note:
– This feature is supported by OSP 13 or RDO queens versions.
– This feature is expiremental and should be used only for development.
Note:
In case of virsh deployment ipxe-roms-qemu will be installed on hypervisor node.This package can be found in a rhel-server repo in case of RedHat and in Base repo in case of CentOS
To deploy a working undercloud:
infrared tripleo-undercloud --version 10
For better fine-tuning of packages, see custom repositories.
1.20.2 Overcloud Images
The final part of the undercloud installation calls for creating the images from which the OverCloud will be latercreated.
• Depending on --images-task these the undercloud can be either:
– build images: Build the overcloud images from a fresh guest image. To use a different image than thedefault CentOS cloud guest image, use --images-url to define base image than CentOS. For OSPinstallation, you must provide a url of a valid RHEL image.
– import images from url: Download pre-built images from a given --images-url.
– Download images via rpm: Starting from OSP 8, TripleO is packages with pre-built images avialable viaRPM.
To use different RPM, use --images-url to define the location of the RPM. You need to provideall dependencies of the remote RPM. Locations have to be separated with comma
Note: This option is invalid for RDO installation.
1.20. TripleO Undercloud 49

infrared Documentation, Release 2.0.1.dev4322
• Use --images-packages to define a list of additional packages to install on the OverCloud image. Packagescan be specified by name or by providing direct url to the rpm file.
• Use --images-remove-packages to define a list of packages to uninstall from the OverCloud image.Packages must be specified by name.
• Use --images-remove-no-deps-packages to define a list of packages to force uninstall from the over-cloud image. Packages must be specified by name and seperated by a comma. This is useful in a scenario wherethere is a requirment to uninstall a certain RPM package without removing its dependencies.
Note: This task executes rpm -e –nodeps command which will cause RPM DB to be out of sync
• --images-cleanup tells infrared do remove the images files original after they are uploaded to the under-cloud’s Glance service.
To configure overcloud images:
infrared tripleo-undercloud --images-task rpm
Note: This assumes an undercloud was already installed and will skip installation stage because --version ismissing.
When using RDO (or for OSP 7), rpm strategy in unavailable. Use import with --images-url to downloadovercloud images from web:
infrared tripleo-undercloud --images-task import --images-url http://buildlogs.centos.→˓org/centos/7/cloud/x86_64/tripleo_images/mitaka/delorean
Note: The RDO overcloud images can be also found here: https://images.rdoproject.org
If pre-packaged images are unavailable, tripleo can build the images locally on top of a regular cloud guest image:
infrared tripleo-undercloud --images-task build
CentOS or RHEL guest images will be used for RDO and OSP respectively. To use a different image specify--images-url:
infrared tripleo-undercloud --images-task build --images-url http://cloud.centos.org/→˓centos/7/images/CentOS-7-x86_64-GenericCloud.qcow2
Note: building the images takes a long time and it’s usually quicker to download them.
In order to update default overcloud image kernel provided by sources (for example RPM), with the latest kernelpresent on overcloud image, specify overcloud-update-kernel.
Note: when installing kernel-rt inside overcloud guest image, the latest RealTime kernel will be used instead ofdefault kernel.
See the RDO deployment page for more details on how to setup RDO product.
50 Chapter 1. Welcome to infrared’s documentation!
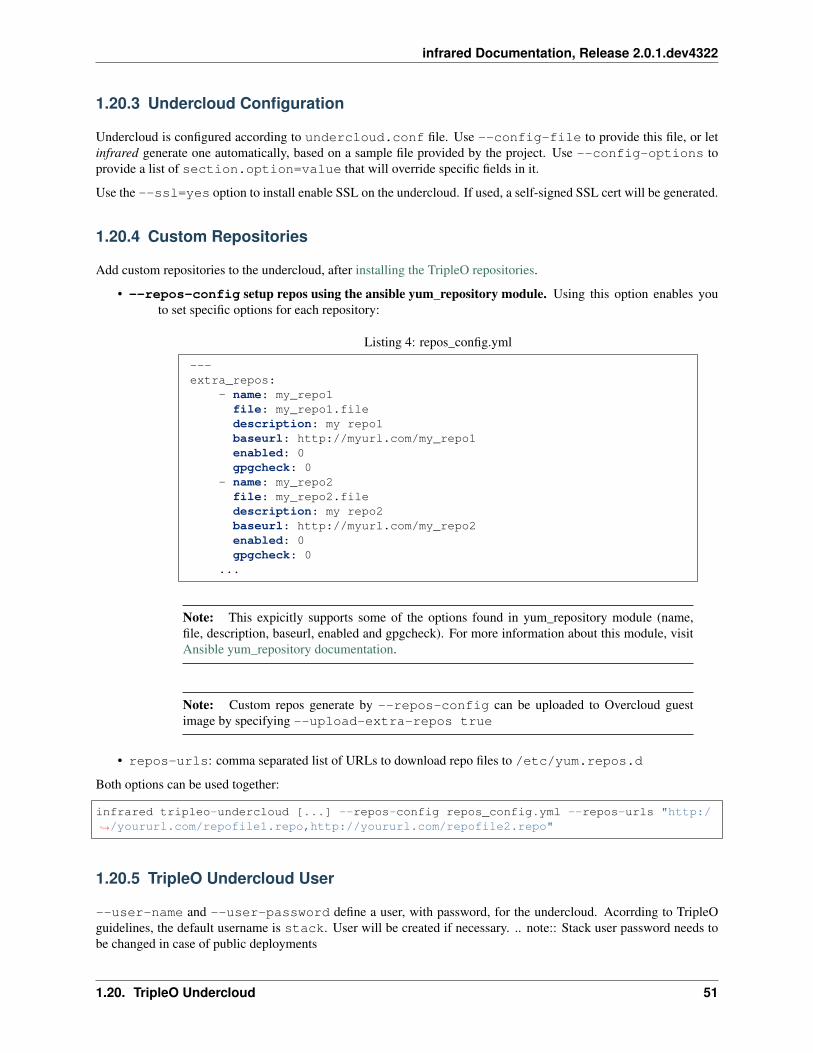
infrared Documentation, Release 2.0.1.dev4322
1.20.3 Undercloud Configuration
Undercloud is configured according to undercloud.conf file. Use --config-file to provide this file, or letinfrared generate one automatically, based on a sample file provided by the project. Use --config-options toprovide a list of section.option=value that will override specific fields in it.
Use the --ssl=yes option to install enable SSL on the undercloud. If used, a self-signed SSL cert will be generated.
1.20.4 Custom Repositories
Add custom repositories to the undercloud, after installing the TripleO repositories.
• --repos-config setup repos using the ansible yum_repository module. Using this option enables youto set specific options for each repository:
Listing 4: repos_config.yml
---extra_repos:
- name: my_repo1file: my_repo1.filedescription: my repo1baseurl: http://myurl.com/my_repo1enabled: 0gpgcheck: 0
- name: my_repo2file: my_repo2.filedescription: my repo2baseurl: http://myurl.com/my_repo2enabled: 0gpgcheck: 0
...
Note: This expicitly supports some of the options found in yum_repository module (name,file, description, baseurl, enabled and gpgcheck). For more information about this module, visitAnsible yum_repository documentation.
Note: Custom repos generate by --repos-config can be uploaded to Overcloud guestimage by specifying --upload-extra-repos true
• repos-urls: comma separated list of URLs to download repo files to /etc/yum.repos.d
Both options can be used together:
infrared tripleo-undercloud [...] --repos-config repos_config.yml --repos-urls "http:/→˓/yoururl.com/repofile1.repo,http://yoururl.com/repofile2.repo"
1.20.5 TripleO Undercloud User
--user-name and --user-password define a user, with password, for the undercloud. Acorrding to TripleOguidelines, the default username is stack. User will be created if necessary. .. note:: Stack user password needs tobe changed in case of public deployments
1.20. TripleO Undercloud 51
infrared Documentation, Release 2.0.1.dev4322
1.20.6 Backup
When working on a virtual environment, infrared can create a snapshot of the installed undercloud that can be laterused to restore it on a future run, thus saving installation time.
In order to use this feature, first follow the Setup an Undercloud section. Once an undercloud VM is up and ready, runthe following:
ir tripleo-undercloud --snapshot-backup yes
Or optionally, provide the file name of the image to create (defaults to “undercloud-snapshot.qcow2”). .. note:: thefilename refers to a path on the hypervisor.
ir tripleo-undercloud –snapshot-backup yes –snapshot-filename custom-name.qcow2
This will prepare a qcow2 image of your undercloud ready for usage with Restore.
Note: this assumes an undercloud is already installed and will skip installation and images stages.
1.20.7 Restore
When working on a virtual environment, infrared can use a pre-made undercloud image to quickly set up an environ-ment. To use this feature, simply run:
ir tripleo-undercloud --snapshot-restore yes
Or optionally, provide the file name of the image to restore from (defaults to “undercloud-snapshot.qcow2”). .. note::the filename refers to a path on the hypervisor.
1.20.8 Undercloud Upgrade
Upgrade is discovering current Undercloud version and upgrade it to the next major one. To upgrade Undercloud runthe following command:
infrared tripleo-undercloud -v --upgrade yes
Note: The Overcloud won’t need new images to upgrade to. But you’d need to upgrade the images for OC nodesbefore you attempt to scale out nodes. Example for Undercloud upgrade and images update:
infrared tripleo-undercloud -v --upgrade yes --images-task rpm
Warning: Currently, there is upgrade possibility from version 9 to version 10 only.
Warning: Upgrading from version 11 to version 12 isn’t supported via the tripleo-undercloud plugin anymore.Please check the tripleo-upgrade plugin for 11 to 12 upgrade instructions.
52 Chapter 1. Welcome to infrared’s documentation!

infrared Documentation, Release 2.0.1.dev4322
1.20.9 Undercloud Update
Update is discovering current Undercloud version and perform minor version update. To update Undercloud run thefollowing command:
infrared tripleo-undercloud -v --update-undercloud yes
Example for update of Undercloud and Images:
infrared tripleo-undercloud -v --update-undercloud yes --images-task rpm
Warning: Infrared support update for RHOSP from version 8.
1.20.10 Undercloud Workarounds
Allow injecting workarounds defined in an external file before/after the undercloud installation:
infrared tripleo-undercloud -v --workarounds 'http://server.localdomain/workarounds.→˓yml'
The workarounds can be either patches posted on review.openstack.org or arbitrary shell commands. Below is anexample of a workarounds file:
---pre_undercloud_deploy_workarounds:
- BZ#1623061:patch: falsebasedir: ''id: ''# patchlevel is optional and defaults to 1patchlevel: 2command: 'touch /home/stack/pre_workaround_applied'
post_undercloud_deploy_workarounds:
- BZ#1637589:patch: truebasedir: '/usr/share/openstack-tripleo-heat-templates/'id: '601277'command: ''
TLS Everywhere
Setup TLS Everywhere with FreeIPA.
tls-everywhere: It will install FreeIPA on first node from freeipa group and it will configure undercloud for TLSEverywhere.
1.20. TripleO Undercloud 53
infrared Documentation, Release 2.0.1.dev4322
1.21 TripleO Upgrade
Starting with OSP12 the upgrade/update of a TripleO deployment can be done via the tripleo-upgrade plugin. tripleo-upgrade comes preinstalled as an InfraRed plugin. After a successful InfraRed overcloud deployment you need to runthe following steps to upgrade the deployment:
Symlink roles path:
ln -s $(pwd)/plugins $(pwd)/plugins/tripleo-upgrade/infrared_plugin/roles
Set up undercloud upgrade repositories:
infrared tripleo-undercloud \--upgrade yes \--mirror ${mirror_location} \--ansible-args="tags=upgrade_repos"
Upgrade undercloud:
infrared tripleo-upgrade \--undercloud-upgrade yes
Set up overcloud upgrade repositories:
infrared tripleo-overcloud \--deployment-files virt \--upgrade yes \--mirror ${mirror_location} \--ansible-args="tags=upgrade_collect_info,upgrade_repos"
Upgrade overcloud:
infrared tripleo-upgrade \--overcloud-upgrade yes
1.22 TripleO Overcloud
Deploys a TripleO overcloud from an existing undercloud
1.22.1 Stages Control
Run is broken into the following stages. Omitting any of the flags (or setting it to no) will skip that stage
• --introspect the overcloud nodes
• --tag overcloud nodes with proper flavors
• --deploy overcloud of given --version (see below)
1.22.2 Containers
• --containers: boolean. Specifies if containers should be used for deployment. Default value: True
54 Chapter 1. Welcome to infrared’s documentation!

infrared Documentation, Release 2.0.1.dev4322
Note: Containers are supported by OSP version >=12.
• --container-images-packages: the pairs for container images and packages URL(s) to install into those images.Container images don’t have any yum repositories enabled by default, hence specifying URL of an RPMto install is mandatory. This option can be used multiple times for different container images.
Note: Only specified image(s) will get the packages installed. All images that depend on an updated image have tobe updated as well (using this option or otherwise).
Example:
--container-images-packages openstack-opendaylight-docker=https://kojipkgs.→˓fedoraproject.org//packages/tmux/2.5/3.fc27/x86_64/tmux-2.5-3.fc27.x86_64.rpm,→˓https://kojipkgs.fedoraproject.org//packages/vim/8.0.844/2.fc27/x86_64/vim-minimal-→˓8.0.844-2.fc27.x86_64.rpm
• --container-images-patch: comma, separated list of docker container images to patch using ‘/patched_rpm’ yum repository.Patching involves ‘yum update’ inside the container. This feature is not supported whenregistry-undercloud-skip is set to True. Also, if this option is not specified, InfraRedauto discovers images that should be updated. This option may be used to patch only a specific containerimage(s) without updating others that could be normally patched.
Example:
--container-images-patch openstack-opendaylight,openstack-nova-compute
• --registry-undercloud-skip: avoid using and mass populating the undercloud registry. The reg-istry or the registry-mirror will be used directly when possible, recommended using this optionwhen you have a very good bandwidth to your registry.
• --registry-mirror: the alternative docker registry to use for deployment.
• --registry-namespace: the alternative docker registry namespace to use for deployment.
• The following options define the ceph container: --registry-ceph-tag: tag used with the ceph con-tainer. Default value: latest --registry-ceph-namespace: namesapce for the ceph container
1.22.3 Deployment Description
• --deployment-files: Mandatory. Path to a directory, containing heat-templates describing the over-cloud deployment. Choose virt to enable preset templates for virtual POC environment (virsh or ovb).
• --instackenv-file: Path to the instackenv.json configuration file used for introspection. For virsh andovb deployment, infrared can generate this file automatically.
• --version: TripleO release to install. Accepts either an integer for RHEL-OSP release, or a communityrelease name (Liberty, Mitaka, Newton, etc. . . ) for RDO release
• The following options define the number of nodes in the overcloud: --controller-nodes,--compute-nodes, --storage-nodes. If not provided, will try to evaluate the exiting nodes anddefault to 1 for compute/controller or 0 for storage.
• --hybrid: Specifies whether deploying a hybrid environment. When this flag it set, the user should passto the --instackenv-file parameter a link to a JSON/YAML file. The file contains informationabout the bare-metals servers that will be added to the instackenv.json file during introspection.
1.22. TripleO Overcloud 55

infrared Documentation, Release 2.0.1.dev4322
• --environment-plan/-p: Import environment plan YAML file that details the plan to be deployed by TripleO.Beside specifying Heat environments and parameters, one can also provide parameters for TripleO Mistralworkflows.
Warning: This option is supported by RHOSP version 12 and greater.
Below are examples of a JSON & YAML files in a valid format:
Listing 5: bm_nodes.yml
---nodes:
- "name": "aaa-compute-0""pm_addr": "172.16.0.1""mac": ["00:11:22:33:44:55"]"cpu": "8""memory": "32768""disk": "40""arch": "x86_64""pm_type": "pxe_ipmitool""pm_user": "pm_user""pm_password": "pm_password""pm_port": "6230"
- "name": "aaa-compute-1""pm_addr": "172.16.0.1""mac": ["00:11:22:33:44:56"]"cpu": "8""memory": "32768""disk": "40""arch": "x86_64""pm_type": "pxe_ipmitool""pm_user": "pm_user""pm_password": "pm_password""pm_port": "6231"
Listing 6: bm_nodes.json
{"nodes": [{"name": "aaa-compute-0","pm_addr": "172.16.0.1","mac": ["00:11:22:33:44:55"],"cpu": "8","memory": "32768","disk": "40","arch": "x86_64","pm_type": "pxe_ipmitool","pm_user": "pm_user","pm_password": "pm_password","pm_port": "6230"
},{"name": "aaa-compute-1","pm_addr": "172.16.0.1",
(continues on next page)
56 Chapter 1. Welcome to infrared’s documentation!
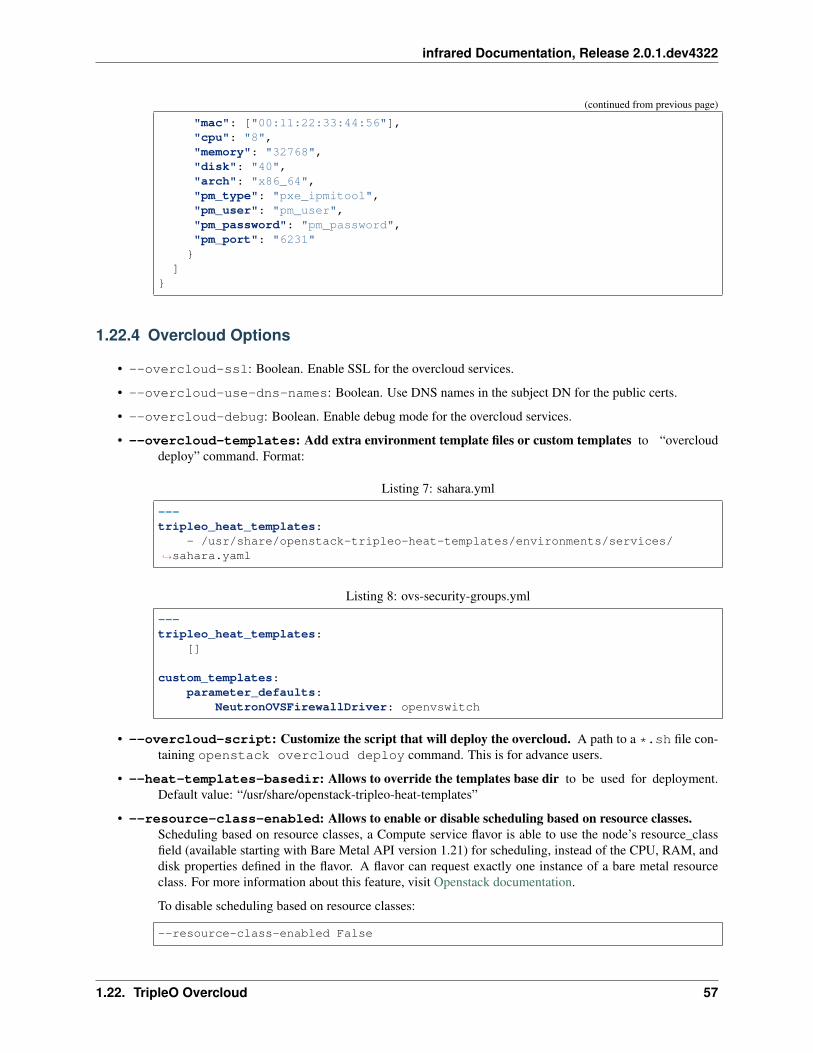
infrared Documentation, Release 2.0.1.dev4322
(continued from previous page)
"mac": ["00:11:22:33:44:56"],"cpu": "8","memory": "32768","disk": "40","arch": "x86_64","pm_type": "pxe_ipmitool","pm_user": "pm_user","pm_password": "pm_password","pm_port": "6231"
}]
}
1.22.4 Overcloud Options
• --overcloud-ssl: Boolean. Enable SSL for the overcloud services.
• --overcloud-use-dns-names: Boolean. Use DNS names in the subject DN for the public certs.
• --overcloud-debug: Boolean. Enable debug mode for the overcloud services.
• --overcloud-templates: Add extra environment template files or custom templates to “overclouddeploy” command. Format:
Listing 7: sahara.yml
---tripleo_heat_templates:
- /usr/share/openstack-tripleo-heat-templates/environments/services/→˓sahara.yaml
Listing 8: ovs-security-groups.yml
---tripleo_heat_templates:
[]
custom_templates:parameter_defaults:
NeutronOVSFirewallDriver: openvswitch
• --overcloud-script: Customize the script that will deploy the overcloud. A path to a *.sh file con-taining openstack overcloud deploy command. This is for advance users.
• --heat-templates-basedir: Allows to override the templates base dir to be used for deployment.Default value: “/usr/share/openstack-tripleo-heat-templates”
• --resource-class-enabled: Allows to enable or disable scheduling based on resource classes.Scheduling based on resource classes, a Compute service flavor is able to use the node’s resource_classfield (available starting with Bare Metal API version 1.21) for scheduling, instead of the CPU, RAM, anddisk properties defined in the flavor. A flavor can request exactly one instance of a bare metal resourceclass. For more information about this feature, visit Openstack documentation.
To disable scheduling based on resource classes:
--resource-class-enabled False
1.22. TripleO Overcloud 57
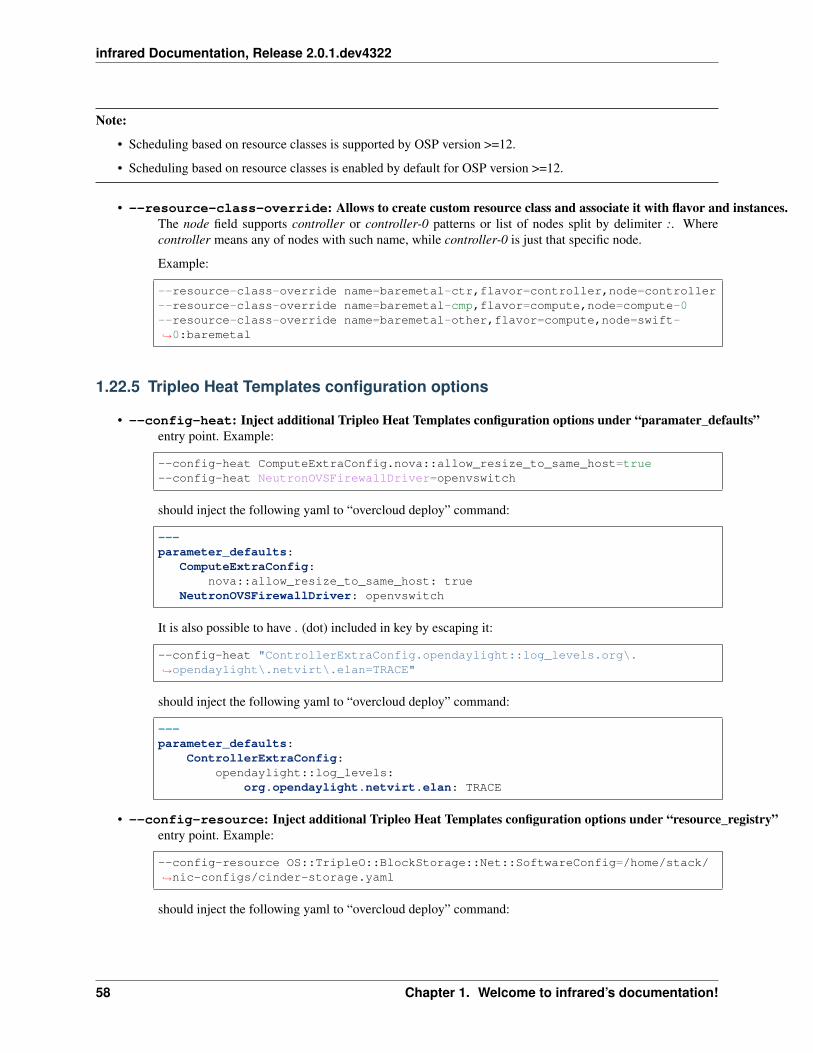
infrared Documentation, Release 2.0.1.dev4322
Note:
• Scheduling based on resource classes is supported by OSP version >=12.
• Scheduling based on resource classes is enabled by default for OSP version >=12.
• --resource-class-override: Allows to create custom resource class and associate it with flavor and instances.The node field supports controller or controller-0 patterns or list of nodes split by delimiter :. Wherecontroller means any of nodes with such name, while controller-0 is just that specific node.
Example:
--resource-class-override name=baremetal-ctr,flavor=controller,node=controller--resource-class-override name=baremetal-cmp,flavor=compute,node=compute-0--resource-class-override name=baremetal-other,flavor=compute,node=swift-→˓0:baremetal
1.22.5 Tripleo Heat Templates configuration options
• --config-heat: Inject additional Tripleo Heat Templates configuration options under “paramater_defaults”entry point. Example:
--config-heat ComputeExtraConfig.nova::allow_resize_to_same_host=true--config-heat NeutronOVSFirewallDriver=openvswitch
should inject the following yaml to “overcloud deploy” command:
---parameter_defaults:
ComputeExtraConfig:nova::allow_resize_to_same_host: true
NeutronOVSFirewallDriver: openvswitch
It is also possible to have . (dot) included in key by escaping it:
--config-heat "ControllerExtraConfig.opendaylight::log_levels.org\.→˓opendaylight\.netvirt\.elan=TRACE"
should inject the following yaml to “overcloud deploy” command:
---parameter_defaults:
ControllerExtraConfig:opendaylight::log_levels:
org.opendaylight.netvirt.elan: TRACE
• --config-resource: Inject additional Tripleo Heat Templates configuration options under “resource_registry”entry point. Example:
--config-resource OS::TripleO::BlockStorage::Net::SoftwareConfig=/home/stack/→˓nic-configs/cinder-storage.yaml
should inject the following yaml to “overcloud deploy” command:
58 Chapter 1. Welcome to infrared’s documentation!
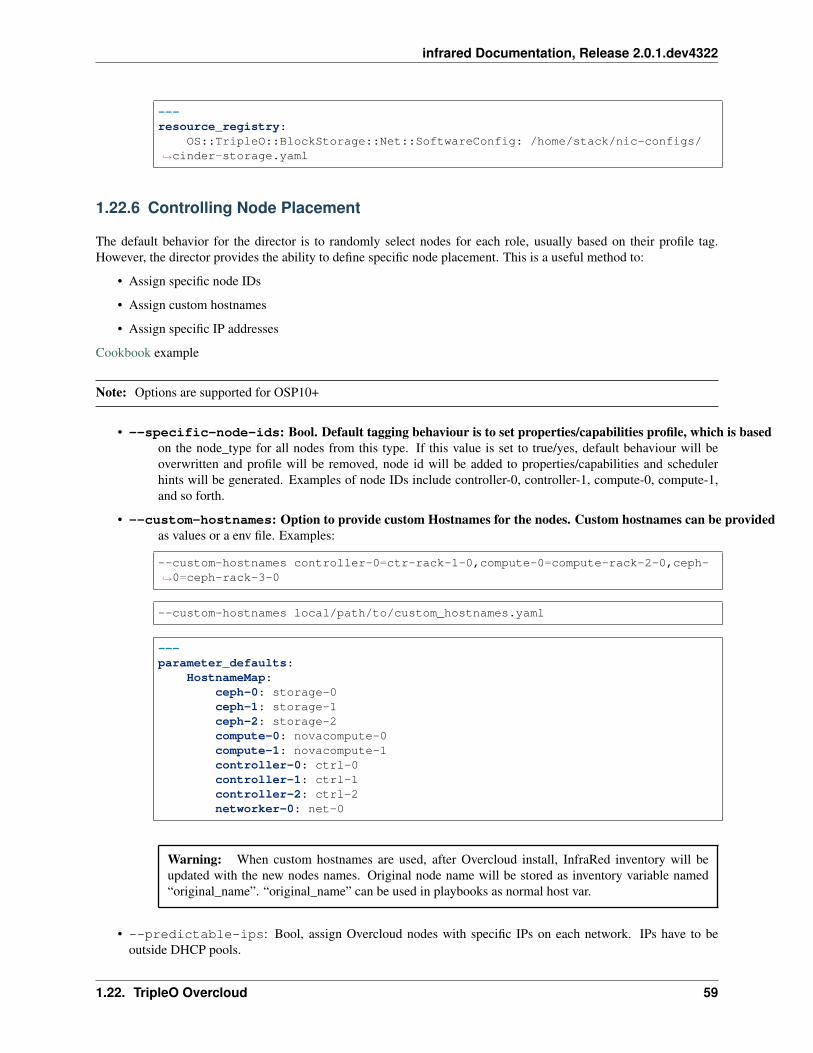
infrared Documentation, Release 2.0.1.dev4322
---resource_registry:
OS::TripleO::BlockStorage::Net::SoftwareConfig: /home/stack/nic-configs/→˓cinder-storage.yaml
1.22.6 Controlling Node Placement
The default behavior for the director is to randomly select nodes for each role, usually based on their profile tag.However, the director provides the ability to define specific node placement. This is a useful method to:
• Assign specific node IDs
• Assign custom hostnames
• Assign specific IP addresses
Cookbook example
Note: Options are supported for OSP10+
• --specific-node-ids: Bool. Default tagging behaviour is to set properties/capabilities profile, which is basedon the node_type for all nodes from this type. If this value is set to true/yes, default behaviour will beoverwritten and profile will be removed, node id will be added to properties/capabilities and schedulerhints will be generated. Examples of node IDs include controller-0, controller-1, compute-0, compute-1,and so forth.
• --custom-hostnames: Option to provide custom Hostnames for the nodes. Custom hostnames can be providedas values or a env file. Examples:
--custom-hostnames controller-0=ctr-rack-1-0,compute-0=compute-rack-2-0,ceph-→˓0=ceph-rack-3-0
--custom-hostnames local/path/to/custom_hostnames.yaml
---parameter_defaults:
HostnameMap:ceph-0: storage-0ceph-1: storage-1ceph-2: storage-2compute-0: novacompute-0compute-1: novacompute-1controller-0: ctrl-0controller-1: ctrl-1controller-2: ctrl-2networker-0: net-0
Warning: When custom hostnames are used, after Overcloud install, InfraRed inventory will beupdated with the new nodes names. Original node name will be stored as inventory variable named“original_name”. “original_name” can be used in playbooks as normal host var.
• --predictable-ips: Bool, assign Overcloud nodes with specific IPs on each network. IPs have to beoutside DHCP pools.
1.22. TripleO Overcloud 59
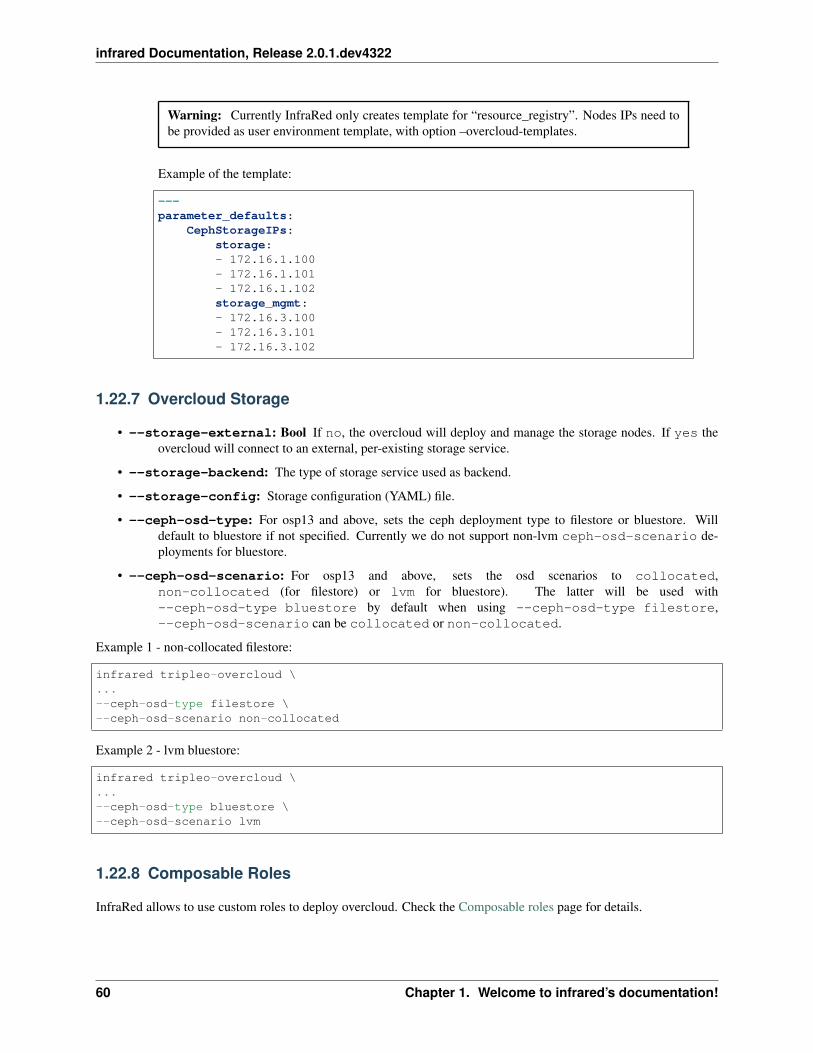
infrared Documentation, Release 2.0.1.dev4322
Warning: Currently InfraRed only creates template for “resource_registry”. Nodes IPs need tobe provided as user environment template, with option –overcloud-templates.
Example of the template:
---parameter_defaults:
CephStorageIPs:storage:- 172.16.1.100- 172.16.1.101- 172.16.1.102storage_mgmt:- 172.16.3.100- 172.16.3.101- 172.16.3.102
1.22.7 Overcloud Storage
• --storage-external: Bool If no, the overcloud will deploy and manage the storage nodes. If yes theovercloud will connect to an external, per-existing storage service.
• --storage-backend: The type of storage service used as backend.
• --storage-config: Storage configuration (YAML) file.
• --ceph-osd-type: For osp13 and above, sets the ceph deployment type to filestore or bluestore. Willdefault to bluestore if not specified. Currently we do not support non-lvm ceph-osd-scenario de-ployments for bluestore.
• --ceph-osd-scenario: For osp13 and above, sets the osd scenarios to collocated,non-collocated (for filestore) or lvm for bluestore). The latter will be used with--ceph-osd-type bluestore by default when using --ceph-osd-type filestore,--ceph-osd-scenario can be collocated or non-collocated.
Example 1 - non-collocated filestore:
infrared tripleo-overcloud \...--ceph-osd-type filestore \--ceph-osd-scenario non-collocated
Example 2 - lvm bluestore:
infrared tripleo-overcloud \...--ceph-osd-type bluestore \--ceph-osd-scenario lvm
1.22.8 Composable Roles
InfraRed allows to use custom roles to deploy overcloud. Check the Composable roles page for details.
60 Chapter 1. Welcome to infrared’s documentation!

infrared Documentation, Release 2.0.1.dev4322
1.22.9 Overcloud Upgrade
Warning: Before Overcloud upgrade you need to perform upgrade of Undercloud
Warning: Upgrading from version 11 to version 12 isn’t supported via the tripleo-overcloud plugin anymore.Please check the tripleo-upgrade plugin for 11 to 12 upgrade instructions.
Upgrade will detect Undercloud version and will upgrade Overcloud to the same version.
• --upgrade: Bool If yes, the overcloud will be upgraded.
Example:
infrared tripleo-overcloud -v --upgrade yes --deployment-files virt
• --build: target build to upgrade to
• --enable-testing-repos: Let you the option to enable testing/pending repos with rhos-release. Multiple valueshave to be coma separated. Examples: --enable-testing-repos rhel,extras,ceph or--enable-testing-repos all
Example:
infrared tripleo-overcloud -v --upgrade yes --build 2017-05-30.1 --deployment-files→˓virt
Note: Upgrade is assuming that Overcloud Deployment script and files/templates, which were used during the initialdeployment are available at Undercloud node in home directory of Undercloud user. Deployment script location isassumed to be “~/overcloud_deploy.sh”
1.22.10 Overcloud Update
Warning: Before Overcloud update it’s recommended to update Undercloud
Warning: Overcloud Install, Overcloud Update and Overcloud Upgrade are mutually exclusive
Note: InfraRed supports minor updates from OpenStack 7
Minor update detects Undercloud’s version and updates packages within same version to latest available.
• --ocupdate: Bool deprecates: –updateto If yes, the overcloud will be updated
• --build: target build to update to defaults to None, in which case, update is disabled. possible values: build-date, latest, passed_phase1, z3 and all other labels supported by rhos-release When specified,rhos-release repos would be setup and used for minor updates.
1.22. TripleO Overcloud 61
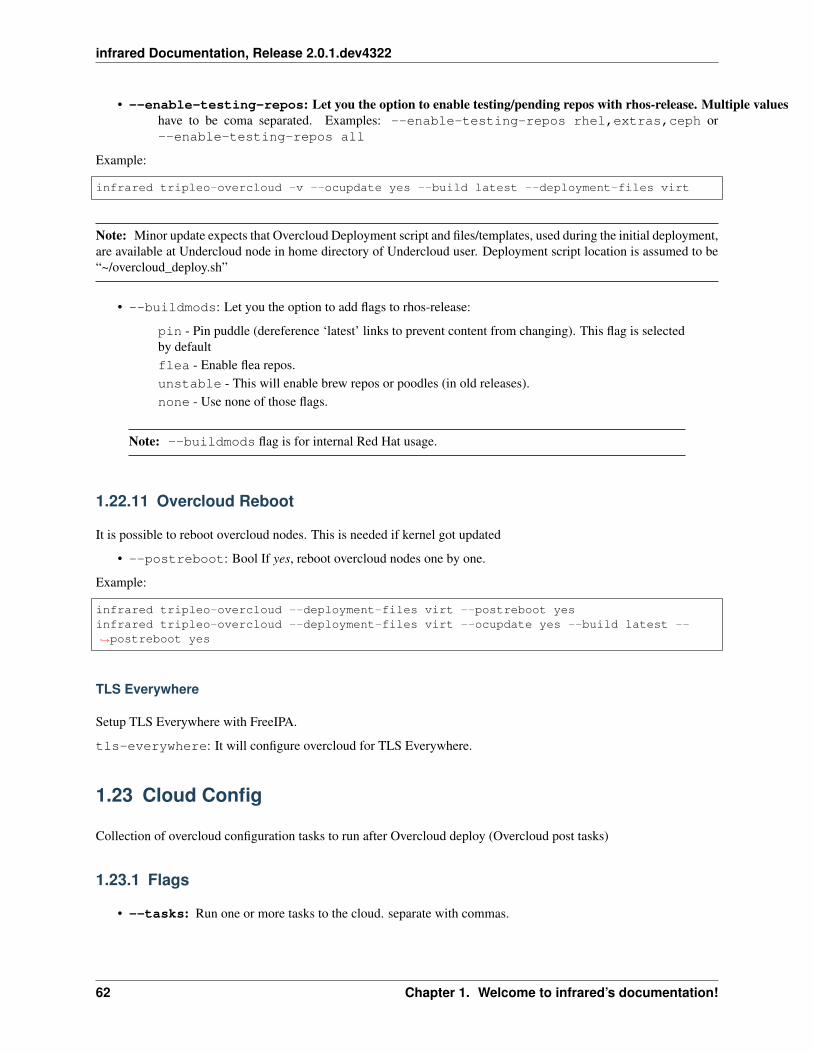
infrared Documentation, Release 2.0.1.dev4322
• --enable-testing-repos: Let you the option to enable testing/pending repos with rhos-release. Multiple valueshave to be coma separated. Examples: --enable-testing-repos rhel,extras,ceph or--enable-testing-repos all
Example:
infrared tripleo-overcloud -v --ocupdate yes --build latest --deployment-files virt
Note: Minor update expects that Overcloud Deployment script and files/templates, used during the initial deployment,are available at Undercloud node in home directory of Undercloud user. Deployment script location is assumed to be“~/overcloud_deploy.sh”
• --buildmods: Let you the option to add flags to rhos-release:
pin - Pin puddle (dereference ‘latest’ links to prevent content from changing). This flag is selectedby defaultflea - Enable flea repos.unstable - This will enable brew repos or poodles (in old releases).none - Use none of those flags.
Note: --buildmods flag is for internal Red Hat usage.
1.22.11 Overcloud Reboot
It is possible to reboot overcloud nodes. This is needed if kernel got updated
• --postreboot: Bool If yes, reboot overcloud nodes one by one.
Example:
infrared tripleo-overcloud --deployment-files virt --postreboot yesinfrared tripleo-overcloud --deployment-files virt --ocupdate yes --build latest --→˓postreboot yes
TLS Everywhere
Setup TLS Everywhere with FreeIPA.
tls-everywhere: It will configure overcloud for TLS Everywhere.
1.23 Cloud Config
Collection of overcloud configuration tasks to run after Overcloud deploy (Overcloud post tasks)
1.23.1 Flags
• --tasks: Run one or more tasks to the cloud. separate with commas.
62 Chapter 1. Welcome to infrared’s documentation!

infrared Documentation, Release 2.0.1.dev4322
# Example:infrared cloud-config --tasks create_external_network,compute_ssh,instance_ha
• --overcloud-stack: The overcloud stack name.
• --resync: Bool. Whether we need to resync services.
1.23.2 External Network
To create external network we need to specify in --tasks the task create_external_network and then usethe flags above:
• --deployment-files: Name of folder in cloud’s user on undercloud, which containing the templates ofthe overcloud deployment.
• --network-protocol: The overcloud network backend.
• --public-net-name: Specifies the name of the public network. .. note:: If not provided it will use thedefault one for the OSP version.
• --public-subnet: Path to file containing different values for the subnet of the network above.
• --external-vlan: An Optional external VLAN ID of the external network (Not the Public API network).Set this to yes if overcloud’s external network is on a VLAN that’s unreachable from the undercloud.This will configure network access from UnderCloud to overcloud’s API/External(floating IPs) network,creating a new VLAN interface connected to ovs’s br-ctlplane bridge. .. note:: If your UnderCloud’snetwork is already configured properly, this could disrupt it, making overcloud API unreachable For moredetails, see: VALIDATING THE OVERCLOUD
# Example:ir cloud-config --tasks create_external_network --deployment-files virt --public-→˓subnet default_subnet --network-protocol ipv4
1.23.3 Scale Up/Down nodes
• --scale-nodes: List of compute nodes to be added.
# Example:ir cloud-config --tasks scale_up --scale-nodes compute-1,compute-2
• --node-name: Name of the node to remove.
# Example:ir cloud-config --tasks scale_down --node-name compute-0
1.23.4 Ironic Configuration
• vbmc-username: VBMC username.
• vbmc-password: VBMC password.
Note: Necessary when Ironic’s driver is ‘pxe_ipmitool’ in OSP 11 and above.
1.23. Cloud Config 63
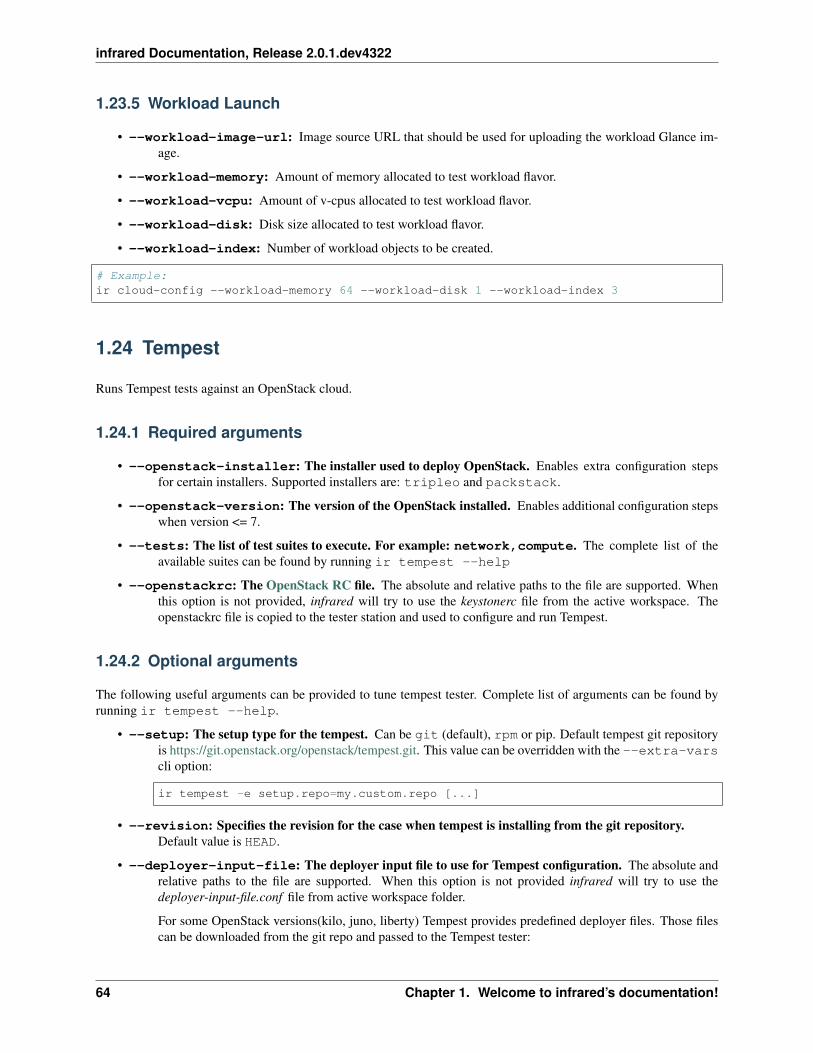
infrared Documentation, Release 2.0.1.dev4322
1.23.5 Workload Launch
• --workload-image-url: Image source URL that should be used for uploading the workload Glance im-age.
• --workload-memory: Amount of memory allocated to test workload flavor.
• --workload-vcpu: Amount of v-cpus allocated to test workload flavor.
• --workload-disk: Disk size allocated to test workload flavor.
• --workload-index: Number of workload objects to be created.
# Example:ir cloud-config --workload-memory 64 --workload-disk 1 --workload-index 3
1.24 Tempest
Runs Tempest tests against an OpenStack cloud.
1.24.1 Required arguments
• --openstack-installer: The installer used to deploy OpenStack. Enables extra configuration stepsfor certain installers. Supported installers are: tripleo and packstack.
• --openstack-version: The version of the OpenStack installed. Enables additional configuration stepswhen version <= 7.
• --tests: The list of test suites to execute. For example: network,compute. The complete list of theavailable suites can be found by running ir tempest --help
• --openstackrc: The OpenStack RC file. The absolute and relative paths to the file are supported. Whenthis option is not provided, infrared will try to use the keystonerc file from the active workspace. Theopenstackrc file is copied to the tester station and used to configure and run Tempest.
1.24.2 Optional arguments
The following useful arguments can be provided to tune tempest tester. Complete list of arguments can be found byrunning ir tempest --help.
• --setup: The setup type for the tempest. Can be git (default), rpm or pip. Default tempest git repositoryis https://git.openstack.org/openstack/tempest.git. This value can be overridden with the --extra-varscli option:
ir tempest -e setup.repo=my.custom.repo [...]
• --revision: Specifies the revision for the case when tempest is installing from the git repository.Default value is HEAD.
• --deployer-input-file: The deployer input file to use for Tempest configuration. The absolute andrelative paths to the file are supported. When this option is not provided infrared will try to use thedeployer-input-file.conf file from active workspace folder.
For some OpenStack versions(kilo, juno, liberty) Tempest provides predefined deployer files. Those filescan be downloaded from the git repo and passed to the Tempest tester:
64 Chapter 1. Welcome to infrared’s documentation!
infrared Documentation, Release 2.0.1.dev4322
BRANCH=libertywget https://raw.githubusercontent.com/redhat-openstack/tempest/$BRANCH/etc/→˓deployer-input-$BRANCH.confir tempest --tests=sanity \
--openstack-version=8 \--openstack-installer=tripleo \--deployer-input-file=deployer-input-$BRANCH.conf
• --image: Image to be uploaded to glance and used for testing. Path have to be a url. If image is not pro-vided, tempest config will use the default.
Note: You can specify image ssh user with --config-options compute.image_ssh_user=
1.24.3 Tempest results
infrared fetches all the tempest output files, like results to the tempest_results folder under the active workspacefolder:
ll .workspace/my_workspace/tempest_results/tempest-*
-rw-rw-r--. tempest-results-minimal.xml-rw-rw-r--. tempest-results-neutron.xml
1.24.4 Downstream tests
The tempest plugin provides the --plugin cli option which can be used to specify the plugin url to install. Thisoption can be used, for example, to specify a downstream repo with tempest tests and run them:
ir tempest --tests=neutron_downstream \--openstack-version=12 \--openstack-installer=tripleo \--plugin=https://downstrem.repo/tempest_neutron_plugin \--setup rpm
The plugin flag can also specify version of plugin to clone by separating the url and version with a comma:
ir tempest --tests=neutron_downstream \--openstack-version=12 \--openstack-installer=tripleo \--plugin=https://downstrem.repo/tempest_neutron_plugin,osp10 \--setup rpm
The neutron_downstream.yml file can reference the upstream project in case the downstream repo is dependant orimports any upstream modules:
---test_dict:
test_regex: ''whitelist:
- "^neutron_plugin.tests.scenario.*"blacklist:
- "^tempest.api.network.*"
(continues on next page)
1.24. Tempest 65
infrared Documentation, Release 2.0.1.dev4322
(continued from previous page)
- "^tempest.scenario.test_network_basic_ops.test_hotplug_nic"- "^tempest.scenario.test_network_basic_ops.test_update_instance_port_admin_
→˓state"- "^tempest.scenario.test_network_basic_ops.test_port_security_macspoofing_
→˓port"plugins:
upstream_neutron:repo: "https://github.com/openstack/neutron.git"
1.25 Collect-logs
Collect-logs plugin allows the user to collect files & directories from hosts managed by active workspace. A listof paths to be archived is taken from vars/default_archives_list.yml in the plugin’s dir. Logs are beingpacked as .tar files by default, unless the user explicitly use the --gzip flag that will instruct the plugin to compressthe logs with gzip. Also it supports ‘sosreport’ tool to collect configuration and diagnostic information from system.It is possible to use both logger facilities, log files from the host and sosreport.
Note: All nodes must have yum repositories configured in order for the tasks to work on them.
Note: Users can manually edit the default_archives_list.yml if need to add/delete paths.
Note: All nodes must have yum repositories configured in order for the tasks to work on them.
Note: To enable logging using all available faclilties, i.e. host and sosreport use parameter –logger=all
Usage example:
ir collect-logs --dest-dir=/tmp/ir_logs
ir collect-logs --dest-dir=/tmp/ir_logs --logger=sosreport
1.26 Gabbi Tester
Runs telemetry tests against the OpenStack cloud.
1.26.1 Required arguments
• --openstack-version: The version of the OpenStack installed. That option also defines the list oftests to run against the OpenStack.
• --openstackrc: The OpenStack RC file. The absolute and relative paths to the file are supported. Whenthis option is not provided, infrared will try to use the keystonerc file from the active workspace. Theopenstackrc file is copied to the tester station and used to run tests
66 Chapter 1. Welcome to infrared’s documentation!

infrared Documentation, Release 2.0.1.dev4322
• --undercloudrc: The undercloud RC file. The absolute and relative paths to the file are supported. Whenthis option is not provided, infrared will try to use the stackrc file from the active workspace.
1.26.2 Optional arguments
• --network: Network settings to use. Default network configuration includes the protocol (ipv4 or ipv6)and interfaces sections:
network:protocol: ipv4interfaces:
- net: managementname: eth1
- net: externalname: eth2
• --setup: The setup variables, such as git repo name, folders to use on tester and others:
setup:repo_dest: ~/TelemetryGabbitsgabbi_venv: ~/gbrgabbits_repo: <private-repo-url>
1.26.3 Gabbi results
infrared fetches all the output files, like results to the gabbi_results folder under the active workspace folder.
1.27 List builds
The List Builds plugin is used to list all the available puddles (builds) for the given OSP version.
Usage:
$ ir list-builds --version 12
This will produce output in ansible style.
Alternatively you can have a clean raw output by saving builds to the file and printing them:
$ ir list-builds --version 12 --file-output builds.txt &> /dev/null && cat builds.txt
Output:
2017-08-16.1 # 16-Aug-2017 05:48latest # 16-Aug-2017 05:48latest_containers # 16-Aug-2017 05:48passed_phase1 # 16-Aug-2017 05:48......
1.28 Pytest Runner
Pytest runner provide option to execute test on Tester node
1.27. List builds 67
infrared Documentation, Release 2.0.1.dev4322
Usage:
$ ir pytest-runner
This will run default tests for container sanity
Optional arguments::
• --run: Whether to run the test or only to prepare for it. Default value is ‘True’.
• --repo: Git repo which contain the test. Default value is ‘https://code.engineering.redhat.com/gerrit/rhos-qe-core-installer’
• --file: Location of the pytest file in the git repo. Default value is ‘tripleo/container_sanity.py’
1.29 OSPD UI tester
OSPD UI tests against the undercloud UI and works with RHOS10+.
1.29.1 Environment
To use the OSPD UI tester the following requirements should be met:
1) Undercloud should be installed
2) Instackenv.json should be generated and put into the undercloud machine.
3) A dedicated machine (uitester) should be provisioned. This machine will be used to run all the tests.
InfraRed allows to setup such environment. For example, the virsh plugin can be used to provision required machines:
ir virsh -vvvv -o provision.yml \--topology-nodes=ironic:1,controller:3,compute:1,tester:1 \--host-address=example.host.redhat.com \--host-key ~/.ssh/example-key.pem
Note: Do not include undercloud machine into the tester group by using the ironic node.
To install undercloud use the tripleo undercloud plugin:
ir tripleo-undercloud -vvvv \--version=10 \--images-task=rpm
To deploy undercloud with the ssl support run tipleo-undercloud plugin with the --ssl yes option or use specialtemplate which sets generate_service_certificate to true and sets the undercloud_public_vip to allowexternal access to the undercloud:
ir tripleo-undercloud -vvvv \--version=10 \--images-task=rpm \--ssl yes
The next step is to generate instackenv.json file. This step can be done using the tripleo overcloud plugin:
68 Chapter 1. Welcome to infrared’s documentation!
infrared Documentation, Release 2.0.1.dev4322
ir tripleo-overcloud -vvvv \--version=10 \--deployment-files=virt \--ansible-args="tags=init,instack" \--introspect=yes
For the overcloud plugin it is important to specify the instack ansible tag to limit overcloud execution only by thegeneration of the instackenv.json file.
1.29.2 OSPD UI tester options
To run OSPD UI tester the following command can be used:
ir ospdui -vvvv \--openstack-version=10 \--tests=login \--ssl yes \--browser=chrome
Required arguments::
• --openstack-version: specifies the version of the product under test.
• --tests: the test suite to run. Run ir ospdui --help to see the list of all available suites to run.
Optional arguments::
• --ssl: specifies whether the undercloud was installed with ssl enabled or not. Default value is ‘no’.
• --browser: the webdriver to use. Default browser is firefox
• --setup: specifies the config parameters for the tester. See Advanced configuration for details
• --undercloudrc: the absolute or relative path to the undercloud rc file. By default, the ‘stackrc’ filefrom the workspace dir will be used.
• --topology-config: the absolute or relative path to the topology configuration in json format. Bydefault the following file is used:
{"topology": {"Controller": "3","Compute": "1","Ceph Storage": "3","Object Storage": "0","Block Storage": "0"
},"network": {"vlan": "10","allocation_pool_start": "192.168.200.10","allocation_pool_end": "192.168.200.150","gateway": "192.168.200.254","subnet_cidr": "192.168.200.0/24","allocation_pool_start_ipv6": "2001:db8:ca2:4::0010","allocation_pool_end_ipv6": "2001:db8:ca2:4::00f0","gateway_ipv6": "2001:db8:ca2:4::00fe","subnet_cidr_ipv6": "2001:db8:ca2:4::/64"
}}
1.29. OSPD UI tester 69

infrared Documentation, Release 2.0.1.dev4322
1.29.3 Advanced configuration
By default all the tester parameters are read from the vars\setup\default.yml file under the plugin dir. Setupvariable file describes selenium, test repo and network parameters to use:
setup:selenium:
chrome_driver:url: http://chromedriver.storage.googleapis.com/2.27/chromedriver_linux64.
→˓zipfirefox_driver:
url: https://github.com/mozilla/geckodriver/releases/download/v0.14.0/→˓geckodriver-v0.14.0-linux64.tar.gz
binary_name: geckodriverospdui:
repo: git://git.app.eng.bos.redhat.com/ospdui.gitrevision: HEADdir: ~/ospdui_tests
network:dev: eth0ipaddr: 192.168.24.240netmask: 255.255.255.0
To override any of these value you can copy vars\setup\default.yml to the same folder with the differentname and change any value in that yml (for example git revision). New setup config (without .yml extension) then canbe specified with the --setup flag:
ir ospdui -vvvv \--openstack-version=10 \--tests=login \--setup=custom_setup
1.29.4 Debugging
The OSPD UI tester starts VNC server on the tester machine (by default on display :1). This allows to remotelydebug and observe what is happening on the tester.
If you have direct network access to the tester, you can use any VNC client and connect. If you are using virtualdeployment the tunneling through the hypervisor to the tester instance should be created:
client $> ssh -f [email protected] -L 5901:<tester ip address>:5901 -N
Then you can use VNC viewer and connect to the localhost:5901.
1.29.5 Known Issues
• Automated UI tests cannot be run on the Firefox browser when SSL is enabled on undercloud. Follow the fol-lowing guide to fix that problem: https://access.redhat.com/documentation/en-us/red_hat_openstack_platform/10/html/director_installation_and_usage/appe-server_exceptions
1.30 RDO deployment
Infrared allows to perform RDO based deployments.
70 Chapter 1. Welcome to infrared’s documentation!

infrared Documentation, Release 2.0.1.dev4322
To deploy RDO on virtual environment the following steps can be performed.
1) Provision virtual machines on a hypervisor with the virsh plugin. Use CentOS image:
infrared virsh -vv \-o provision.yml \--topology-nodes undercloud:1,controller:1,compute:1,ceph:1 \--host-address my.host.redhat.com \--host-key /path/to/host/key \--image-url https://cloud.centos.org/centos/7/images/CentOS-7-x86_64-
→˓GenericCloud.qcow2 \-e override.controller.cpu=8 \-e override.controller.memory=32768
2) Install the undercloud. Use RDO release name as a version:
infrared tripleo-undercloud -vv -o install.yml \-o undercloud-install.yml \--version pike
3) Build or import overcloud images from https://images.rdoproject.org:
# import imagesinfrared tripleo-undercloud -vv \
-o undercloud-images.yml \--images-task=import \--images-url=https://images.rdoproject.org/pike/rdo_trunk/current-tripleo/
→˓stable/
# or build imagesinfrared tripleo-undercloud -vv \
-o undercloud-images.yml \--images-task=build \
Note: Overcloud image build process often takes more time than import.
4) Install RDO:
infrared tripleo-overcloud -v \-o overcloud-install.yml \--version pike \--deployment-files virt \--introspect yes \--tagging yes \--deploy yes
infrared cloud-config -vv \-o cloud-config.yml \--deployment-files virt \--tasks create_external_network,forward_overcloud_dashboard,network_time,tempest_→˓deployer_input
To install containerized RDO version (pike and above) the --registry-*, --containers yes and--registry-skip-puddle yes parameters should be provided:
1.30. RDO deployment 71
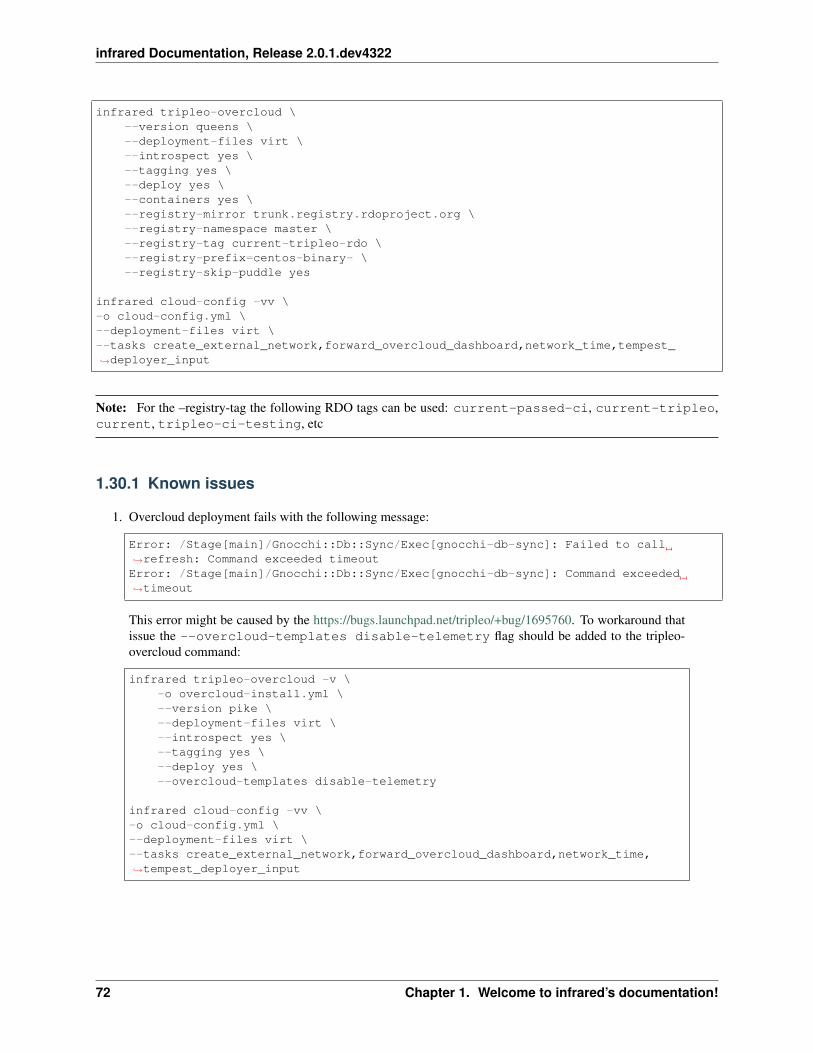
infrared Documentation, Release 2.0.1.dev4322
infrared tripleo-overcloud \--version queens \--deployment-files virt \--introspect yes \--tagging yes \--deploy yes \--containers yes \--registry-mirror trunk.registry.rdoproject.org \--registry-namespace master \--registry-tag current-tripleo-rdo \--registry-prefix=centos-binary- \--registry-skip-puddle yes
infrared cloud-config -vv \-o cloud-config.yml \--deployment-files virt \--tasks create_external_network,forward_overcloud_dashboard,network_time,tempest_→˓deployer_input
Note: For the –registry-tag the following RDO tags can be used: current-passed-ci, current-tripleo,current, tripleo-ci-testing, etc
1.30.1 Known issues
1. Overcloud deployment fails with the following message:
Error: /Stage[main]/Gnocchi::Db::Sync/Exec[gnocchi-db-sync]: Failed to call→˓refresh: Command exceeded timeoutError: /Stage[main]/Gnocchi::Db::Sync/Exec[gnocchi-db-sync]: Command exceeded→˓timeout
This error might be caused by the https://bugs.launchpad.net/tripleo/+bug/1695760. To workaround thatissue the --overcloud-templates disable-telemetry flag should be added to the tripleo-overcloud command:
infrared tripleo-overcloud -v \-o overcloud-install.yml \--version pike \--deployment-files virt \--introspect yes \--tagging yes \--deploy yes \--overcloud-templates disable-telemetry
infrared cloud-config -vv \-o cloud-config.yml \--deployment-files virt \--tasks create_external_network,forward_overcloud_dashboard,network_time,→˓tempest_deployer_input
72 Chapter 1. Welcome to infrared’s documentation!
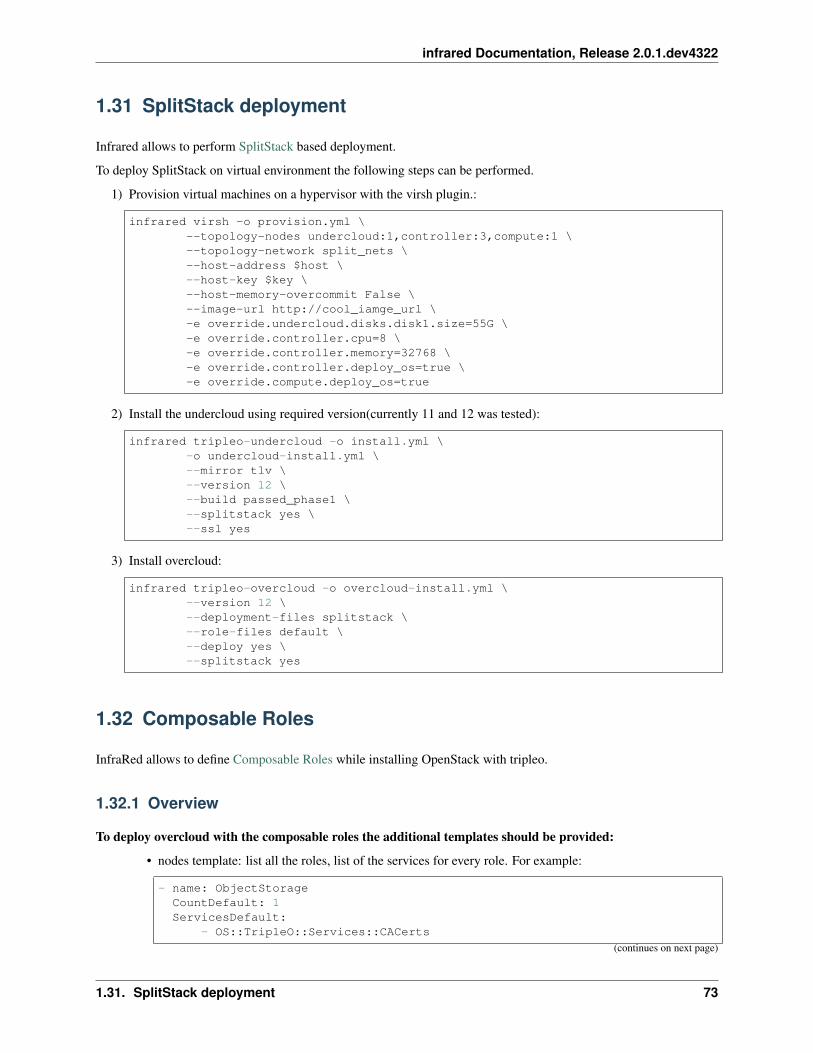
infrared Documentation, Release 2.0.1.dev4322
1.31 SplitStack deployment
Infrared allows to perform SplitStack based deployment.
To deploy SplitStack on virtual environment the following steps can be performed.
1) Provision virtual machines on a hypervisor with the virsh plugin.:
infrared virsh -o provision.yml \--topology-nodes undercloud:1,controller:3,compute:1 \--topology-network split_nets \--host-address $host \--host-key $key \--host-memory-overcommit False \--image-url http://cool_iamge_url \-e override.undercloud.disks.disk1.size=55G \-e override.controller.cpu=8 \-e override.controller.memory=32768 \-e override.controller.deploy_os=true \-e override.compute.deploy_os=true
2) Install the undercloud using required version(currently 11 and 12 was tested):
infrared tripleo-undercloud -o install.yml \-o undercloud-install.yml \--mirror tlv \--version 12 \--build passed_phase1 \--splitstack yes \--ssl yes
3) Install overcloud:
infrared tripleo-overcloud -o overcloud-install.yml \--version 12 \--deployment-files splitstack \--role-files default \--deploy yes \--splitstack yes
1.32 Composable Roles
InfraRed allows to define Composable Roles while installing OpenStack with tripleo.
1.32.1 Overview
To deploy overcloud with the composable roles the additional templates should be provided:
• nodes template: list all the roles, list of the services for every role. For example:
- name: ObjectStorageCountDefault: 1ServicesDefault:
- OS::TripleO::Services::CACerts
(continues on next page)
1.31. SplitStack deployment 73

infrared Documentation, Release 2.0.1.dev4322
(continued from previous page)
- OS::TripleO::Services::Kernel- OS::TripleO::Services::Ntp[...]
HostnameFormatDefault: swift-%index%
- name: ControllerCountDefault: 1ServicesDefault:
- OS::TripleO::Services::CACerts- OS::TripleO::Services::CephMon- OS::TripleO::Services::CephExternal- OS::TripleO::Services::CephRgw[...]
HostnameFormatDefault: controller-%index%
- name: ComputeCountDefault: 1ServicesDefault:
- OS::TripleO::Services::CACerts- OS::TripleO::Services::CephClient- OS::TripleO::Services::CephExternal[....]
HostnameFormatDefault: compute-%index%
- name: NetworkerCountDefault: 1ServicesDefault:
- OS::TripleO::Services::CACerts- OS::TripleO::Services::Kernel[...]
HostnameFormatDefault: networker-%index%
• template with the information about roles count, flavors and other defaults:
parameter_defaults:ObjectStorageCount: 1OvercloudSwiftStorageFlavor: swiftControllerCount: 2OvercloudControlFlavor: controllerComputeCount: 1OvercloudComputeFlavor: computeNetworkerCount: 1OvercloudNetworkerFlavor: networker[...]
• template with the information about roles resources (usually network and port resources):
resource_registry:OS::TripleO::ObjectStorage::Net::SoftwareConfig: /home/stack/deployment_
→˓files/network/nic-configs/osp11/swift-storage.yamlOS::TripleO::Controller::Net::SoftwareConfig: /home/stack/deployment_
→˓files/network/nic-configs/osp11/controller.yamlOS::TripleO::Compute::Net::SoftwareConfig: /home/stack/deployment_files/
→˓network/nic-configs/osp11/compute.yamlOS::TripleO::Networker::Ports::TenantPort: /usr/share/openstack-tripleo-
→˓heat-templates/network/ports/tenant.yamlOS::TripleO::Networker::Ports::InternalApiPort: /usr/share/openstack-
→˓tripleo-heat-templates/network/ports/internal_api.yaml (continues on next page)
74 Chapter 1. Welcome to infrared’s documentation!

infrared Documentation, Release 2.0.1.dev4322
(continued from previous page)
OS::TripleO::Networker::Net::SoftwareConfig: /home/stack/deployment_files/→˓network/nic-configs/osp11/networker.yaml
[...]
Note: The nic-configs in the infrared deployment folder are stored in two folders (osp11 and legacy)depending on the product version installed.
InfraRed allows to simplify the process of templates generation and auto-populates the roles according to the deployedtopology.
1.32.2 Defining topology and roles
Deployment approaches with composable roles differ for OSP11 and OSP12+ products.
For OSP11 user should manually compose all the roles templates and provide them to the deploy script. For OSP12 andabove the tripleo provides the openstack overcloud roles generate command to automatically generateroles templates. See THT roles for more information about tripleo roles.
OSP12 Deployment
The Infrared provides there options to deploy openstack with composable roles in OSP12+.
1) Automatically discover roles from the inventory. In that case Inrared tries to determine what roles should beused basing on the list of the overcloud_nodes from the inventory file. To enable automatic roles discover the--role-files option should be set to auto or any other non-list value (not separated with ‘,’). For example:
# provisionir virsh -vvvv
--topology-nodes=undercloud:1,controller:2,compute:1,networker:1,swift:1 \--host-address=seal52.qa.lab.tlv.redhat.com \--host-key ~/.ssh/my-prov-key
# do undercloud install [...]
# overcloudir tripleo-overcloud -vvvv
--version=12 \--deploy=yes \--role-files=auto \--deployment-files=composable_roles \[...]
2) Manually specify roles to use. In that case user can specify the list roles to use by setting the --role-filesotion to the list of roles from the THT roles:
# provisionir virsh -vvvv
--topology-nodes=undercloud:1,controller:2,compute:1,messaging:1,database:1,→˓networker:1 \
--host-address=seal52.qa.lab.tlv.redhat.com \--host-key ~/.ssh/my-prov-key
(continues on next page)
1.32. Composable Roles 75

infrared Documentation, Release 2.0.1.dev4322
(continued from previous page)
# do undercloud install [...]
# overcloudir tripleo-overcloud -vvvv
--version=12 \--deploy=yes \--role-files=ControllerOpenstack,Compute,Messaging,Database,Networker \--deployment-files=composable_roles \[...]
3) User legacy OSP11 approach to generate roles templates. See detailed desciption below. To enable that approachthe --tht-roles flag should be set to no and the --role-files should point to the IR folder with the roles. Forexample:
# provisionir virsh -vvvv
--topology-nodes=undercloud:1,controller:2,compute:1,networker:1,swift:1 \--host-address=seal52.qa.lab.tlv.redhat.com \--host-key ~/.ssh/my-prov-key
# do undercloud install [...]
# overcloudir tripleo-overcloud -vvvv
--version=12 \--deploy=yes \--role-files=networker \--tht-roles=no \--deployment-files=composable_roles \[...]
OSP11 Deployment
To deploy custom roles, InfraRed should know what nodes should be used for what roles. This involves a 2-stepprocedure.
Step #1 Setup available nodes and store them in the InfraRed inventory. Those nodes can be configured by theprovision plugin such as virsh:
ir virsh -vvvv--topology-nodes=undercloud:1,controller:2,compute:1,networker:1,swift:1 \--host-address=seal52.qa.lab.tlv.redhat.com \--host-key ~/.ssh/my-prov-key
In that example we defined a networker nodes which holds all the neutron services.
Step #2 Provides a path to the roles definition while installing the overcloud using the --role-files option:
ir tripleo-overcloud -vvvv--version=10 \--deploy=yes \--role-files=networker \--deployment-files=composable_roles \--introspect=yes \--storage-backend=swift \
(continues on next page)
76 Chapter 1. Welcome to infrared’s documentation!
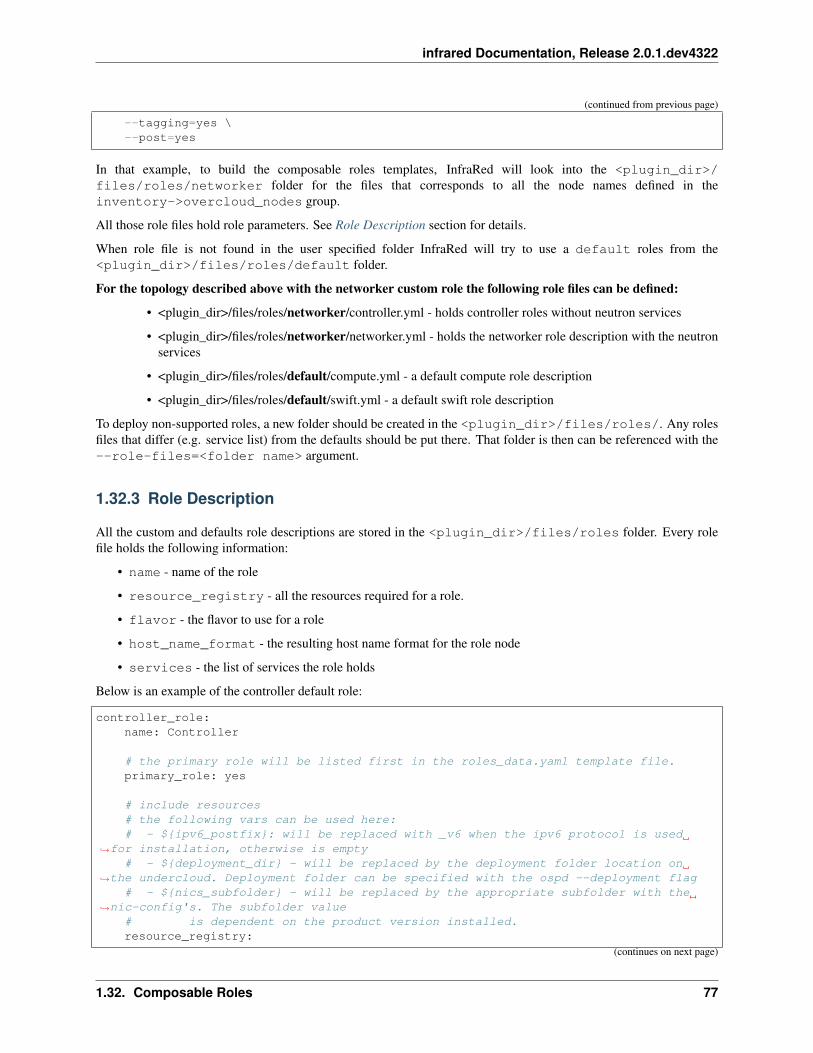
infrared Documentation, Release 2.0.1.dev4322
(continued from previous page)
--tagging=yes \--post=yes
In that example, to build the composable roles templates, InfraRed will look into the <plugin_dir>/files/roles/networker folder for the files that corresponds to all the node names defined in theinventory->overcloud_nodes group.
All those role files hold role parameters. See Role Description section for details.
When role file is not found in the user specified folder InfraRed will try to use a default roles from the<plugin_dir>/files/roles/default folder.
For the topology described above with the networker custom role the following role files can be defined:
• <plugin_dir>/files/roles/networker/controller.yml - holds controller roles without neutron services
• <plugin_dir>/files/roles/networker/networker.yml - holds the networker role description with the neutronservices
• <plugin_dir>/files/roles/default/compute.yml - a default compute role description
• <plugin_dir>/files/roles/default/swift.yml - a default swift role description
To deploy non-supported roles, a new folder should be created in the <plugin_dir>/files/roles/. Any rolesfiles that differ (e.g. service list) from the defaults should be put there. That folder is then can be referenced with the--role-files=<folder name> argument.
1.32.3 Role Description
All the custom and defaults role descriptions are stored in the <plugin_dir>/files/roles folder. Every rolefile holds the following information:
• name - name of the role
• resource_registry - all the resources required for a role.
• flavor - the flavor to use for a role
• host_name_format - the resulting host name format for the role node
• services - the list of services the role holds
Below is an example of the controller default role:
controller_role:name: Controller
# the primary role will be listed first in the roles_data.yaml template file.primary_role: yes
# include resources# the following vars can be used here:# - ${ipv6_postfix}: will be replaced with _v6 when the ipv6 protocol is used
→˓for installation, otherwise is empty# - ${deployment_dir} - will be replaced by the deployment folder location on
→˓the undercloud. Deployment folder can be specified with the ospd --deployment flag# - ${nics_subfolder} - will be replaced by the appropriate subfolder with the
→˓nic-config's. The subfolder value# is dependent on the product version installed.resource_registry:
(continues on next page)
1.32. Composable Roles 77
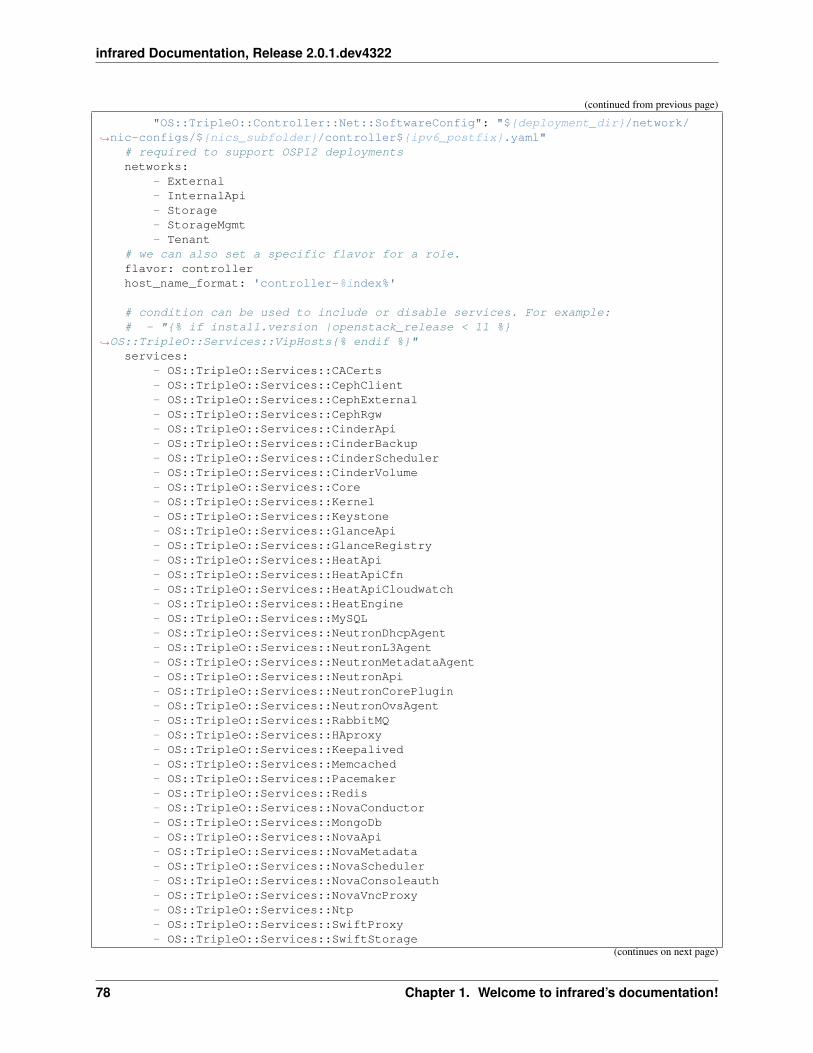
infrared Documentation, Release 2.0.1.dev4322
(continued from previous page)
"OS::TripleO::Controller::Net::SoftwareConfig": "${deployment_dir}/network/→˓nic-configs/${nics_subfolder}/controller${ipv6_postfix}.yaml"
# required to support OSP12 deploymentsnetworks:
- External- InternalApi- Storage- StorageMgmt- Tenant
# we can also set a specific flavor for a role.flavor: controllerhost_name_format: 'controller-%index%'
# condition can be used to include or disable services. For example:# - "{% if install.version |openstack_release < 11 %}
→˓OS::TripleO::Services::VipHosts{% endif %}"services:
- OS::TripleO::Services::CACerts- OS::TripleO::Services::CephClient- OS::TripleO::Services::CephExternal- OS::TripleO::Services::CephRgw- OS::TripleO::Services::CinderApi- OS::TripleO::Services::CinderBackup- OS::TripleO::Services::CinderScheduler- OS::TripleO::Services::CinderVolume- OS::TripleO::Services::Core- OS::TripleO::Services::Kernel- OS::TripleO::Services::Keystone- OS::TripleO::Services::GlanceApi- OS::TripleO::Services::GlanceRegistry- OS::TripleO::Services::HeatApi- OS::TripleO::Services::HeatApiCfn- OS::TripleO::Services::HeatApiCloudwatch- OS::TripleO::Services::HeatEngine- OS::TripleO::Services::MySQL- OS::TripleO::Services::NeutronDhcpAgent- OS::TripleO::Services::NeutronL3Agent- OS::TripleO::Services::NeutronMetadataAgent- OS::TripleO::Services::NeutronApi- OS::TripleO::Services::NeutronCorePlugin- OS::TripleO::Services::NeutronOvsAgent- OS::TripleO::Services::RabbitMQ- OS::TripleO::Services::HAproxy- OS::TripleO::Services::Keepalived- OS::TripleO::Services::Memcached- OS::TripleO::Services::Pacemaker- OS::TripleO::Services::Redis- OS::TripleO::Services::NovaConductor- OS::TripleO::Services::MongoDb- OS::TripleO::Services::NovaApi- OS::TripleO::Services::NovaMetadata- OS::TripleO::Services::NovaScheduler- OS::TripleO::Services::NovaConsoleauth- OS::TripleO::Services::NovaVncProxy- OS::TripleO::Services::Ntp- OS::TripleO::Services::SwiftProxy- OS::TripleO::Services::SwiftStorage
(continues on next page)
78 Chapter 1. Welcome to infrared’s documentation!
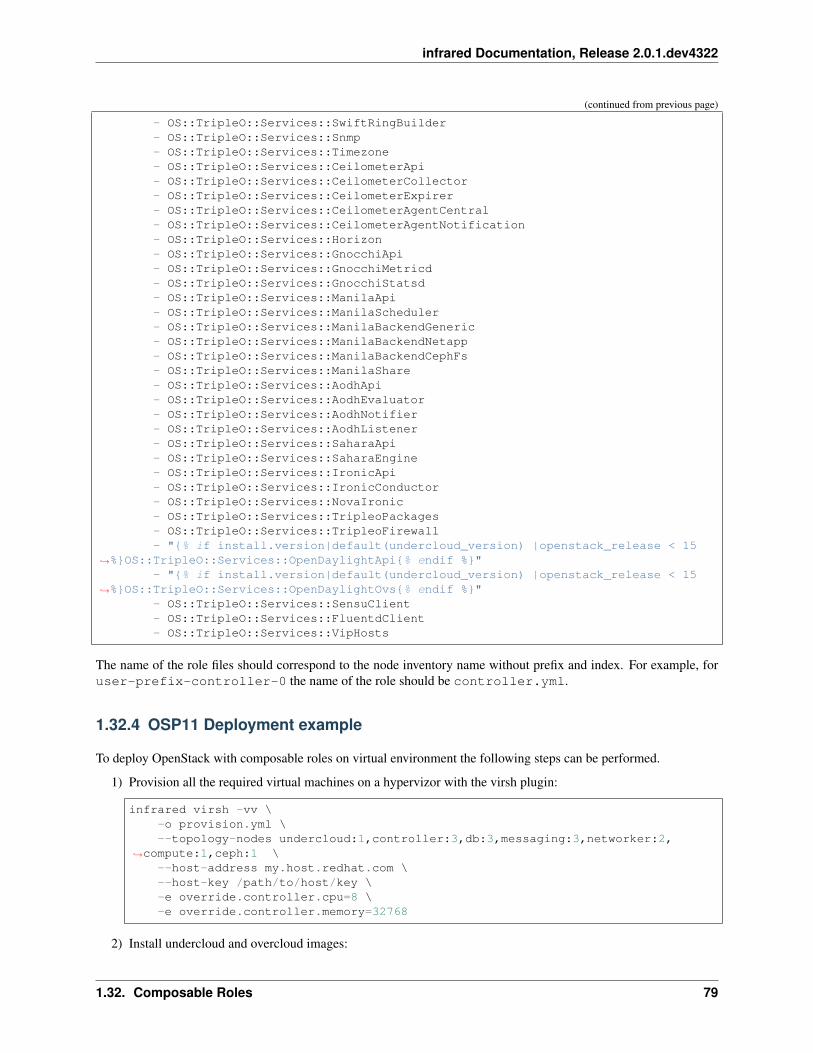
infrared Documentation, Release 2.0.1.dev4322
(continued from previous page)
- OS::TripleO::Services::SwiftRingBuilder- OS::TripleO::Services::Snmp- OS::TripleO::Services::Timezone- OS::TripleO::Services::CeilometerApi- OS::TripleO::Services::CeilometerCollector- OS::TripleO::Services::CeilometerExpirer- OS::TripleO::Services::CeilometerAgentCentral- OS::TripleO::Services::CeilometerAgentNotification- OS::TripleO::Services::Horizon- OS::TripleO::Services::GnocchiApi- OS::TripleO::Services::GnocchiMetricd- OS::TripleO::Services::GnocchiStatsd- OS::TripleO::Services::ManilaApi- OS::TripleO::Services::ManilaScheduler- OS::TripleO::Services::ManilaBackendGeneric- OS::TripleO::Services::ManilaBackendNetapp- OS::TripleO::Services::ManilaBackendCephFs- OS::TripleO::Services::ManilaShare- OS::TripleO::Services::AodhApi- OS::TripleO::Services::AodhEvaluator- OS::TripleO::Services::AodhNotifier- OS::TripleO::Services::AodhListener- OS::TripleO::Services::SaharaApi- OS::TripleO::Services::SaharaEngine- OS::TripleO::Services::IronicApi- OS::TripleO::Services::IronicConductor- OS::TripleO::Services::NovaIronic- OS::TripleO::Services::TripleoPackages- OS::TripleO::Services::TripleoFirewall- "{% if install.version|default(undercloud_version) |openstack_release < 15
→˓%}OS::TripleO::Services::OpenDaylightApi{% endif %}"- "{% if install.version|default(undercloud_version) |openstack_release < 15
→˓%}OS::TripleO::Services::OpenDaylightOvs{% endif %}"- OS::TripleO::Services::SensuClient- OS::TripleO::Services::FluentdClient- OS::TripleO::Services::VipHosts
The name of the role files should correspond to the node inventory name without prefix and index. For example, foruser-prefix-controller-0 the name of the role should be controller.yml.
1.32.4 OSP11 Deployment example
To deploy OpenStack with composable roles on virtual environment the following steps can be performed.
1) Provision all the required virtual machines on a hypervizor with the virsh plugin:
infrared virsh -vv \-o provision.yml \--topology-nodes undercloud:1,controller:3,db:3,messaging:3,networker:2,
→˓compute:1,ceph:1 \--host-address my.host.redhat.com \--host-key /path/to/host/key \-e override.controller.cpu=8 \-e override.controller.memory=32768
2) Install undercloud and overcloud images:
1.32. Composable Roles 79
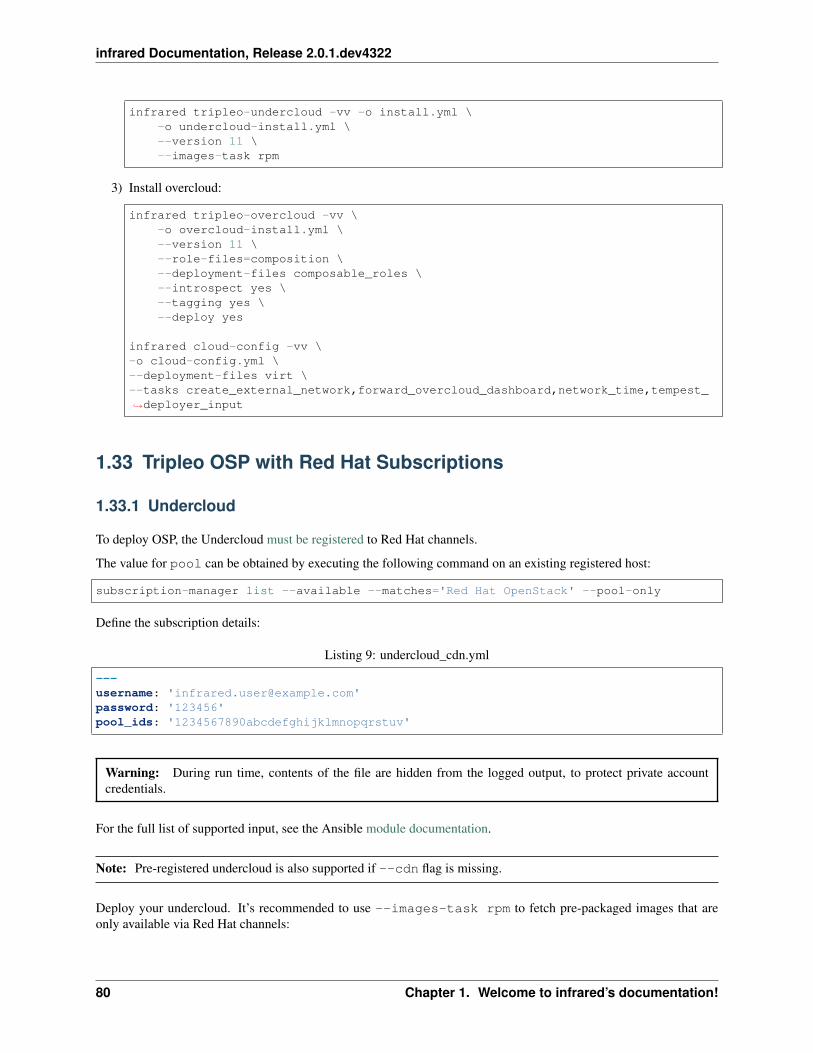
infrared Documentation, Release 2.0.1.dev4322
infrared tripleo-undercloud -vv -o install.yml \-o undercloud-install.yml \--version 11 \--images-task rpm
3) Install overcloud:
infrared tripleo-overcloud -vv \-o overcloud-install.yml \--version 11 \--role-files=composition \--deployment-files composable_roles \--introspect yes \--tagging yes \--deploy yes
infrared cloud-config -vv \-o cloud-config.yml \--deployment-files virt \--tasks create_external_network,forward_overcloud_dashboard,network_time,tempest_→˓deployer_input
1.33 Tripleo OSP with Red Hat Subscriptions
1.33.1 Undercloud
To deploy OSP, the Undercloud must be registered to Red Hat channels.
The value for pool can be obtained by executing the following command on an existing registered host:
subscription-manager list --available --matches='Red Hat OpenStack' --pool-only
Define the subscription details:
Listing 9: undercloud_cdn.yml
---username: '[email protected]'password: '123456'pool_ids: '1234567890abcdefghijklmnopqrstuv'
Warning: During run time, contents of the file are hidden from the logged output, to protect private accountcredentials.
For the full list of supported input, see the Ansible module documentation.
Note: Pre-registered undercloud is also supported if --cdn flag is missing.
Deploy your undercloud. It’s recommended to use --images-task rpm to fetch pre-packaged images that areonly available via Red Hat channels:
80 Chapter 1. Welcome to infrared’s documentation!
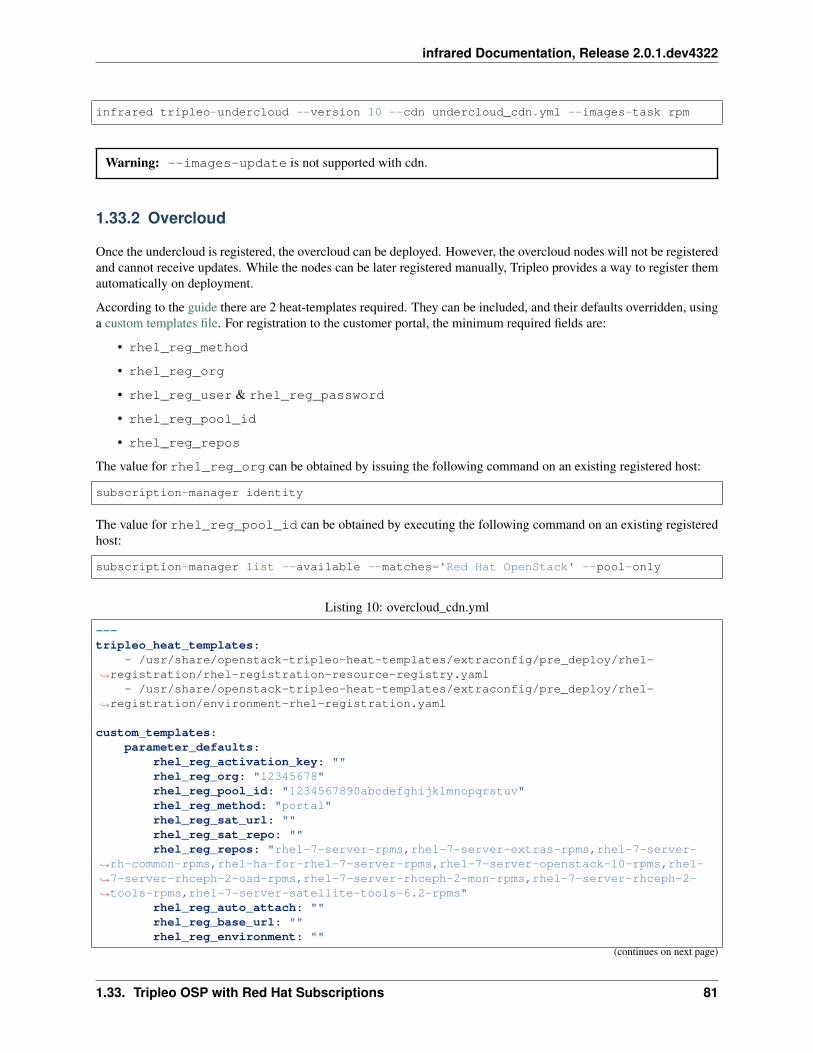
infrared Documentation, Release 2.0.1.dev4322
infrared tripleo-undercloud --version 10 --cdn undercloud_cdn.yml --images-task rpm
Warning: --images-update is not supported with cdn.
1.33.2 Overcloud
Once the undercloud is registered, the overcloud can be deployed. However, the overcloud nodes will not be registeredand cannot receive updates. While the nodes can be later registered manually, Tripleo provides a way to register themautomatically on deployment.
According to the guide there are 2 heat-templates required. They can be included, and their defaults overridden, usinga custom templates file. For registration to the customer portal, the minimum required fields are:
• rhel_reg_method
• rhel_reg_org
• rhel_reg_user & rhel_reg_password
• rhel_reg_pool_id
• rhel_reg_repos
The value for rhel_reg_org can be obtained by issuing the following command on an existing registered host:
subscription-manager identity
The value for rhel_reg_pool_id can be obtained by executing the following command on an existing registeredhost:
subscription-manager list --available --matches='Red Hat OpenStack' --pool-only
Listing 10: overcloud_cdn.yml
---tripleo_heat_templates:
- /usr/share/openstack-tripleo-heat-templates/extraconfig/pre_deploy/rhel-→˓registration/rhel-registration-resource-registry.yaml
- /usr/share/openstack-tripleo-heat-templates/extraconfig/pre_deploy/rhel-→˓registration/environment-rhel-registration.yaml
custom_templates:parameter_defaults:
rhel_reg_activation_key: ""rhel_reg_org: "12345678"rhel_reg_pool_id: "1234567890abcdefghijklmnopqrstuv"rhel_reg_method: "portal"rhel_reg_sat_url: ""rhel_reg_sat_repo: ""rhel_reg_repos: "rhel-7-server-rpms,rhel-7-server-extras-rpms,rhel-7-server-
→˓rh-common-rpms,rhel-ha-for-rhel-7-server-rpms,rhel-7-server-openstack-10-rpms,rhel-→˓7-server-rhceph-2-osd-rpms,rhel-7-server-rhceph-2-mon-rpms,rhel-7-server-rhceph-2-→˓tools-rpms,rhel-7-server-satellite-tools-6.2-rpms"
rhel_reg_auto_attach: ""rhel_reg_base_url: ""rhel_reg_environment: ""
(continues on next page)
1.33. Tripleo OSP with Red Hat Subscriptions 81

infrared Documentation, Release 2.0.1.dev4322
(continued from previous page)
rhel_reg_force: ""rhel_reg_machine_name: ""rhel_reg_password: "123456"rhel_reg_release: ""rhel_reg_server_url: ""rhel_reg_service_level: ""rhel_reg_user: "[email protected]"rhel_reg_type: ""rhel_reg_http_proxy_host: ""rhel_reg_http_proxy_port: ""rhel_reg_http_proxy_username: ""rhel_reg_http_proxy_password: ""
Note: Please note that the rhel_reg_repos in the file above are for OSP 10.
Deploy the overcloud with the custom templates file:
infrared tripleo-overcloud --version=10 --deployment-files=virt --introspect=yes --→˓tagging=yes --deploy=yes --overcloud-templates overcloud_cdn.yml
1.34 Hybrid deployment
Infrared allows to deploy hybrid cloud. Hybrid cloud includes virtual nodes and baremetal nodes.
1.34.1 Create network topology configuration file
First the appropriate network configuration should be created. Most common configuration can include for 3 bridgednetworks and one nat network for virtual machines provisioning the following configuration can be used:
cat << EOF > plugins/virsh/vars/topology/network/3_bridges_1_net.ymlnetworks:
net1:name: br-ctlplaneforward: bridgenic: eno2ip_address: 192.0.70.200netmask: 255.255.255.0
net2:name: br-vlanforward: bridgenic: enp6s0f0
net3:name: br-linkforward: bridgenic: enp6s0f1
net4:external_connectivity: yesname: "management"ip_address: "172.16.0.1"netmask: "255.255.255.0"forward: nat
(continues on next page)
82 Chapter 1. Welcome to infrared’s documentation!
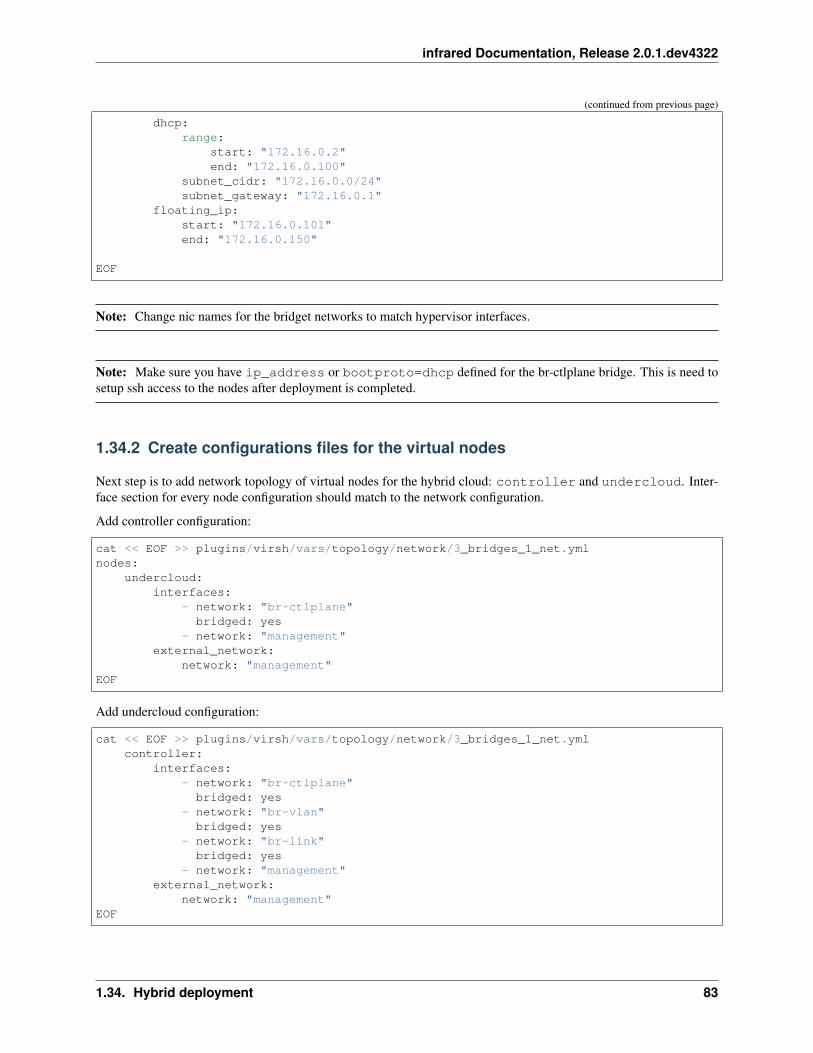
infrared Documentation, Release 2.0.1.dev4322
(continued from previous page)
dhcp:range:
start: "172.16.0.2"end: "172.16.0.100"
subnet_cidr: "172.16.0.0/24"subnet_gateway: "172.16.0.1"
floating_ip:start: "172.16.0.101"end: "172.16.0.150"
EOF
Note: Change nic names for the bridget networks to match hypervisor interfaces.
Note: Make sure you have ip_address or bootproto=dhcp defined for the br-ctlplane bridge. This is need tosetup ssh access to the nodes after deployment is completed.
1.34.2 Create configurations files for the virtual nodes
Next step is to add network topology of virtual nodes for the hybrid cloud: controller and undercloud. Inter-face section for every node configuration should match to the network configuration.
Add controller configuration:
cat << EOF >> plugins/virsh/vars/topology/network/3_bridges_1_net.ymlnodes:
undercloud:interfaces:
- network: "br-ctlplane"bridged: yes
- network: "management"external_network:
network: "management"EOF
Add undercloud configuration:
cat << EOF >> plugins/virsh/vars/topology/network/3_bridges_1_net.ymlcontroller:
interfaces:- network: "br-ctlplane"bridged: yes
- network: "br-vlan"bridged: yes
- network: "br-link"bridged: yes
- network: "management"external_network:
network: "management"EOF
1.34. Hybrid deployment 83

infrared Documentation, Release 2.0.1.dev4322
1.34.3 Provision virtual nodes with virsh plugin
Once node configurations are done, the virsh plugin can be used to provision these nodes on a dedicated hypervisor:
infrared virsh -v \--topology-nodes undercloud:1,controller:1 \-e override.controller.memory=28672 \-e override.undercloud.memory=28672 \-e override.controller.cpu=6 \-e override.undercloud.cpu=6 \--host-address hypervisor.redhat.com \--host-key ~/.ssh/key_file \--topology-network 3_bridges_1_net
1.34.4 Install undercloud
Make sure you provide the undercloud.conf which corresponds to the baremetal environment:
infrared tripleo-undercloud -v \--version=11 \--build=passed_phase1 \--images-task=rpm \--config-file undercloud_hybrid.conf
1.34.5 Perform introspection and tagging
Create json file which lists all the baremetal nodes required for deployment:
cat << EOF > hybrid_nodes.json{
"nodes": [{
"name": "compute-0","pm_addr": "baremetal-mgmt.redhat.com","mac": ["14:02:ec:7c:88:30"],"arch": "x86_64","pm_type": "pxe_ipmitool","pm_user": "admin","pm_password": "admin","cpu": "1","memory": "4096","disk": "40"
}]}EOF
Run introspection and tagging with infrared:
infrared tripleo-overcloud -vv -o prepare_instack.yml \--version 11 \--deployment-files virt \--introspect=yes \--tagging=yes \--deploy=no \
(continues on next page)
84 Chapter 1. Welcome to infrared’s documentation!
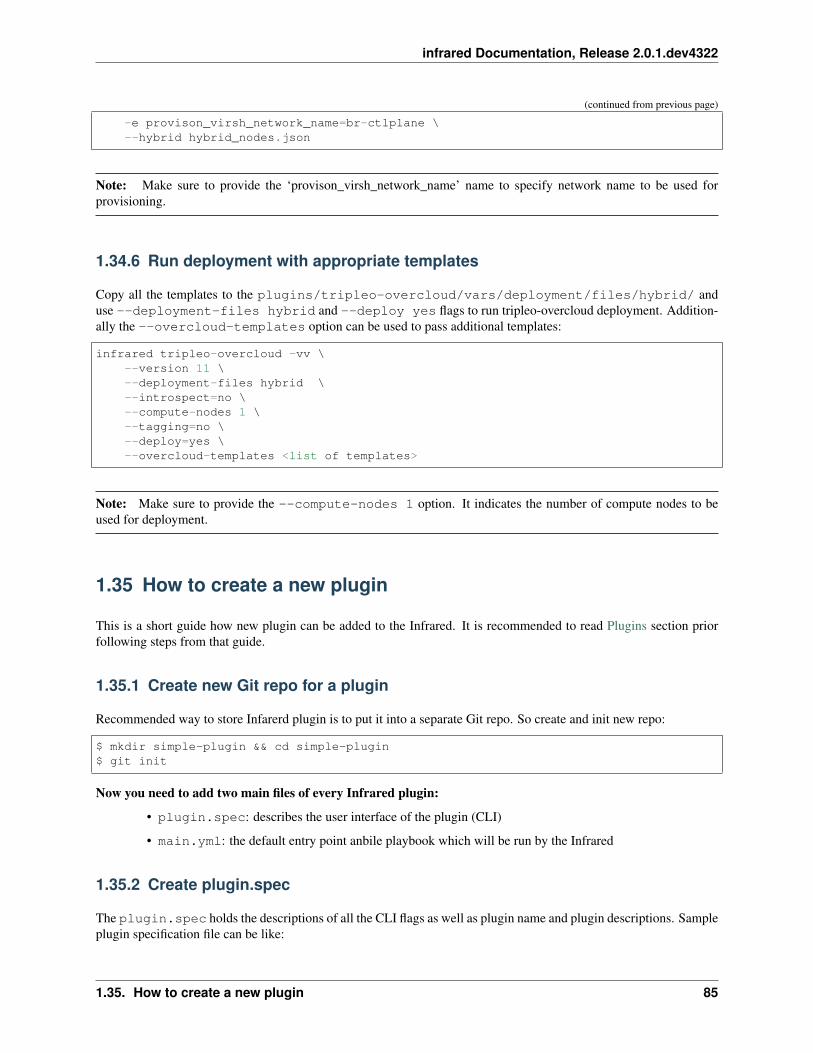
infrared Documentation, Release 2.0.1.dev4322
(continued from previous page)
-e provison_virsh_network_name=br-ctlplane \--hybrid hybrid_nodes.json
Note: Make sure to provide the ‘provison_virsh_network_name’ name to specify network name to be used forprovisioning.
1.34.6 Run deployment with appropriate templates
Copy all the templates to the plugins/tripleo-overcloud/vars/deployment/files/hybrid/ anduse --deployment-files hybrid and --deploy yes flags to run tripleo-overcloud deployment. Addition-ally the --overcloud-templates option can be used to pass additional templates:
infrared tripleo-overcloud -vv \--version 11 \--deployment-files hybrid \--introspect=no \--compute-nodes 1 \--tagging=no \--deploy=yes \--overcloud-templates <list of templates>
Note: Make sure to provide the --compute-nodes 1 option. It indicates the number of compute nodes to beused for deployment.
1.35 How to create a new plugin
This is a short guide how new plugin can be added to the Infrared. It is recommended to read Plugins section priorfollowing steps from that guide.
1.35.1 Create new Git repo for a plugin
Recommended way to store Infarerd plugin is to put it into a separate Git repo. So create and init new repo:
$ mkdir simple-plugin && cd simple-plugin$ git init
Now you need to add two main files of every Infrared plugin:
• plugin.spec: describes the user interface of the plugin (CLI)
• main.yml: the default entry point anbile playbook which will be run by the Infrared
1.35.2 Create plugin.spec
The plugin.spec holds the descriptions of all the CLI flags as well as plugin name and plugin descriptions. Sampleplugin specification file can be like:
1.35. How to create a new plugin 85
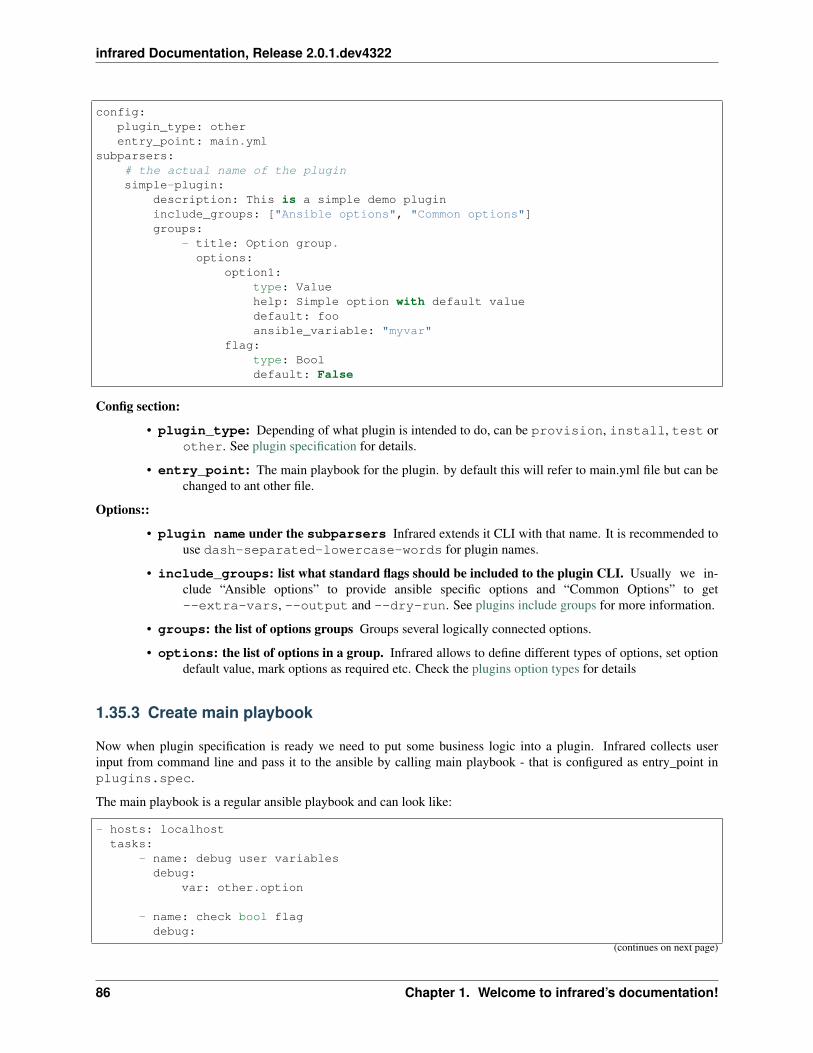
infrared Documentation, Release 2.0.1.dev4322
config:plugin_type: otherentry_point: main.yml
subparsers:# the actual name of the pluginsimple-plugin:
description: This is a simple demo plugininclude_groups: ["Ansible options", "Common options"]groups:
- title: Option group.options:
option1:type: Valuehelp: Simple option with default valuedefault: fooansible_variable: "myvar"
flag:type: Booldefault: False
Config section:
• plugin_type: Depending of what plugin is intended to do, can be provision, install, test orother. See plugin specification for details.
• entry_point: The main playbook for the plugin. by default this will refer to main.yml file but can bechanged to ant other file.
Options::
• plugin name under the subparsers Infrared extends it CLI with that name. It is recommended touse dash-separated-lowercase-words for plugin names.
• include_groups: list what standard flags should be included to the plugin CLI. Usually we in-clude “Ansible options” to provide ansible specific options and “Common Options” to get--extra-vars, --output and --dry-run. See plugins include groups for more information.
• groups: the list of options groups Groups several logically connected options.
• options: the list of options in a group. Infrared allows to define different types of options, set optiondefault value, mark options as required etc. Check the plugins option types for details
1.35.3 Create main playbook
Now when plugin specification is ready we need to put some business logic into a plugin. Infrared collects userinput from command line and pass it to the ansible by calling main playbook - that is configured as entry_point inplugins.spec.
The main playbook is a regular ansible playbook and can look like:
- hosts: localhosttasks:
- name: debug user variablesdebug:
var: other.option
- name: check bool flagdebug:
(continues on next page)
86 Chapter 1. Welcome to infrared’s documentation!
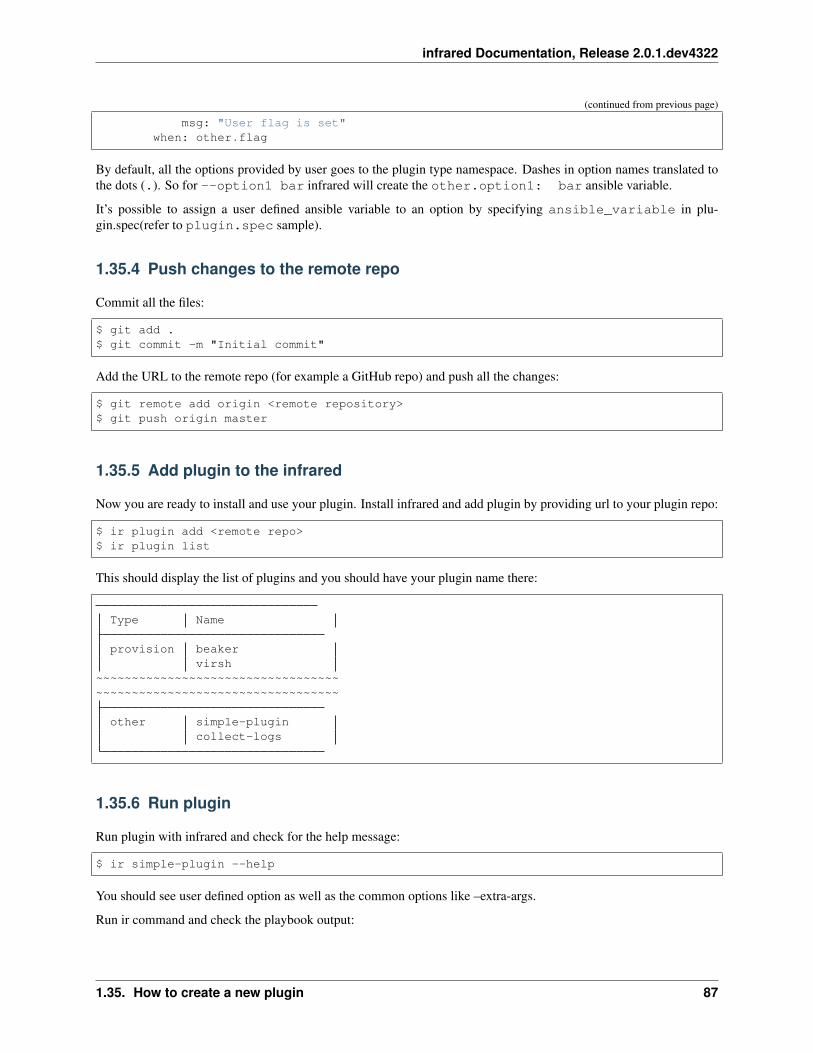
infrared Documentation, Release 2.0.1.dev4322
(continued from previous page)
msg: "User flag is set"when: other.flag
By default, all the options provided by user goes to the plugin type namespace. Dashes in option names translated tothe dots (.). So for --option1 bar infrared will create the other.option1: bar ansible variable.
It’s possible to assign a user defined ansible variable to an option by specifying ansible_variable in plu-gin.spec(refer to plugin.spec sample).
1.35.4 Push changes to the remote repo
Commit all the files:
$ git add .$ git commit -m "Initial commit"
Add the URL to the remote repo (for example a GitHub repo) and push all the changes:
$ git remote add origin <remote repository>$ git push origin master
1.35.5 Add plugin to the infrared
Now you are ready to install and use your plugin. Install infrared and add plugin by providing url to your plugin repo:
$ ir plugin add <remote repo>$ ir plugin list
This should display the list of plugins and you should have your plugin name there:
Type Name
provision beakervirsh
~~~~~~~~~~~~~~~~~~~~~~~~~~~~~~~~~~~~~~~~~~~~~~~~~~~~~~~~~~~~~~~~~~~~
other simple-plugincollect-logs
1.35.6 Run plugin
Run plugin with infrared and check for the help message:
$ ir simple-plugin --help
You should see user defined option as well as the common options like –extra-args.
Run ir command and check the playbook output:
1.35. How to create a new plugin 87
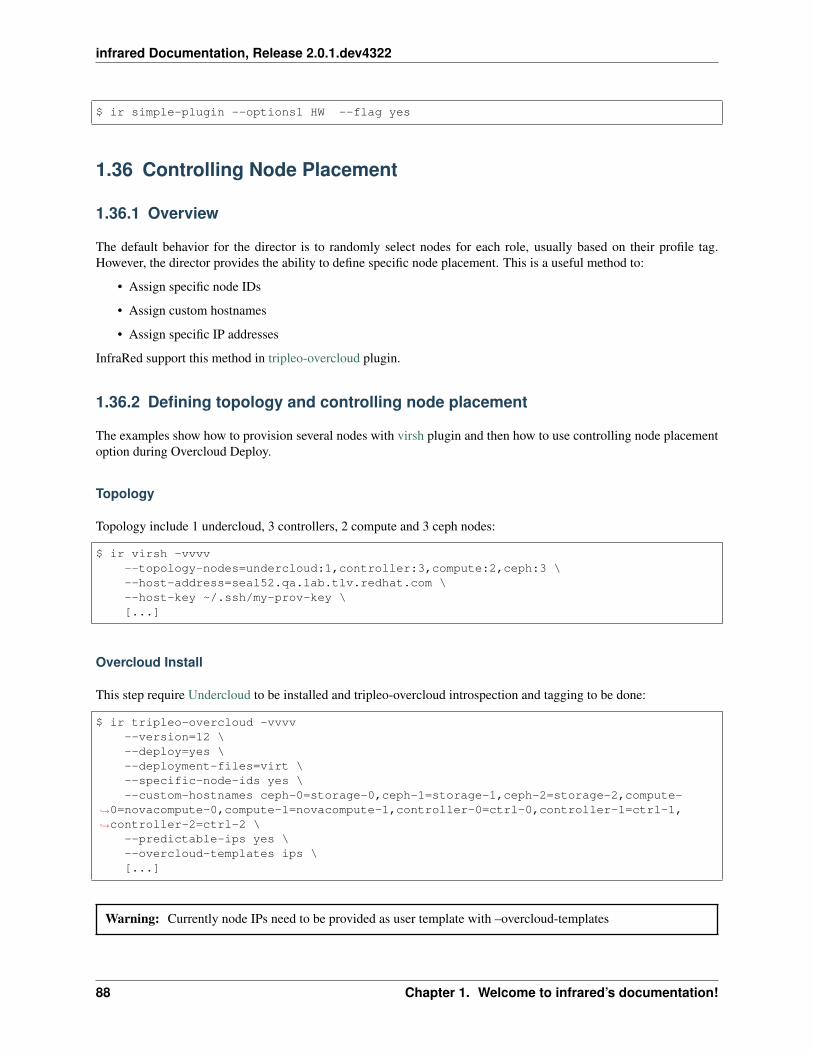
infrared Documentation, Release 2.0.1.dev4322
$ ir simple-plugin --options1 HW --flag yes
1.36 Controlling Node Placement
1.36.1 Overview
The default behavior for the director is to randomly select nodes for each role, usually based on their profile tag.However, the director provides the ability to define specific node placement. This is a useful method to:
• Assign specific node IDs
• Assign custom hostnames
• Assign specific IP addresses
InfraRed support this method in tripleo-overcloud plugin.
1.36.2 Defining topology and controlling node placement
The examples show how to provision several nodes with virsh plugin and then how to use controlling node placementoption during Overcloud Deploy.
Topology
Topology include 1 undercloud, 3 controllers, 2 compute and 3 ceph nodes:
$ ir virsh -vvvv--topology-nodes=undercloud:1,controller:3,compute:2,ceph:3 \--host-address=seal52.qa.lab.tlv.redhat.com \--host-key ~/.ssh/my-prov-key \[...]
Overcloud Install
This step require Undercloud to be installed and tripleo-overcloud introspection and tagging to be done:
$ ir tripleo-overcloud -vvvv--version=12 \--deploy=yes \--deployment-files=virt \--specific-node-ids yes \--custom-hostnames ceph-0=storage-0,ceph-1=storage-1,ceph-2=storage-2,compute-
→˓0=novacompute-0,compute-1=novacompute-1,controller-0=ctrl-0,controller-1=ctrl-1,→˓controller-2=ctrl-2 \
--predictable-ips yes \--overcloud-templates ips \[...]
Warning: Currently node IPs need to be provided as user template with –overcloud-templates
88 Chapter 1. Welcome to infrared’s documentation!
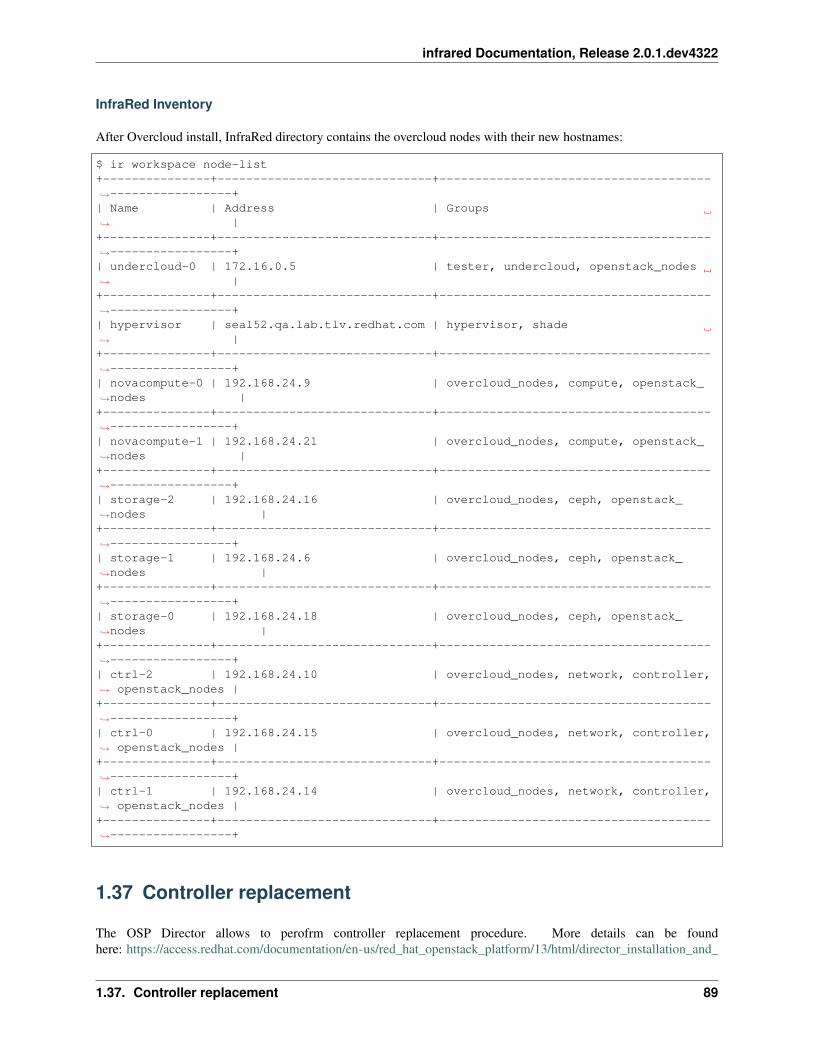
infrared Documentation, Release 2.0.1.dev4322
InfraRed Inventory
After Overcloud install, InfraRed directory contains the overcloud nodes with their new hostnames:
$ ir workspace node-list+---------------+------------------------------+--------------------------------------→˓-----------------+| Name | Address | Groups→˓ |+---------------+------------------------------+--------------------------------------→˓-----------------+| undercloud-0 | 172.16.0.5 | tester, undercloud, openstack_nodes→˓ |+---------------+------------------------------+--------------------------------------→˓-----------------+| hypervisor | seal52.qa.lab.tlv.redhat.com | hypervisor, shade→˓ |+---------------+------------------------------+--------------------------------------→˓-----------------+| novacompute-0 | 192.168.24.9 | overcloud_nodes, compute, openstack_→˓nodes |+---------------+------------------------------+--------------------------------------→˓-----------------+| novacompute-1 | 192.168.24.21 | overcloud_nodes, compute, openstack_→˓nodes |+---------------+------------------------------+--------------------------------------→˓-----------------+| storage-2 | 192.168.24.16 | overcloud_nodes, ceph, openstack_→˓nodes |+---------------+------------------------------+--------------------------------------→˓-----------------+| storage-1 | 192.168.24.6 | overcloud_nodes, ceph, openstack_→˓nodes |+---------------+------------------------------+--------------------------------------→˓-----------------+| storage-0 | 192.168.24.18 | overcloud_nodes, ceph, openstack_→˓nodes |+---------------+------------------------------+--------------------------------------→˓-----------------+| ctrl-2 | 192.168.24.10 | overcloud_nodes, network, controller,→˓ openstack_nodes |+---------------+------------------------------+--------------------------------------→˓-----------------+| ctrl-0 | 192.168.24.15 | overcloud_nodes, network, controller,→˓ openstack_nodes |+---------------+------------------------------+--------------------------------------→˓-----------------+| ctrl-1 | 192.168.24.14 | overcloud_nodes, network, controller,→˓ openstack_nodes |+---------------+------------------------------+--------------------------------------→˓-----------------+
1.37 Controller replacement
The OSP Director allows to perofrm controller replacement procedure. More details can be foundhere: https://access.redhat.com/documentation/en-us/red_hat_openstack_platform/13/html/director_installation_and_
1.37. Controller replacement 89
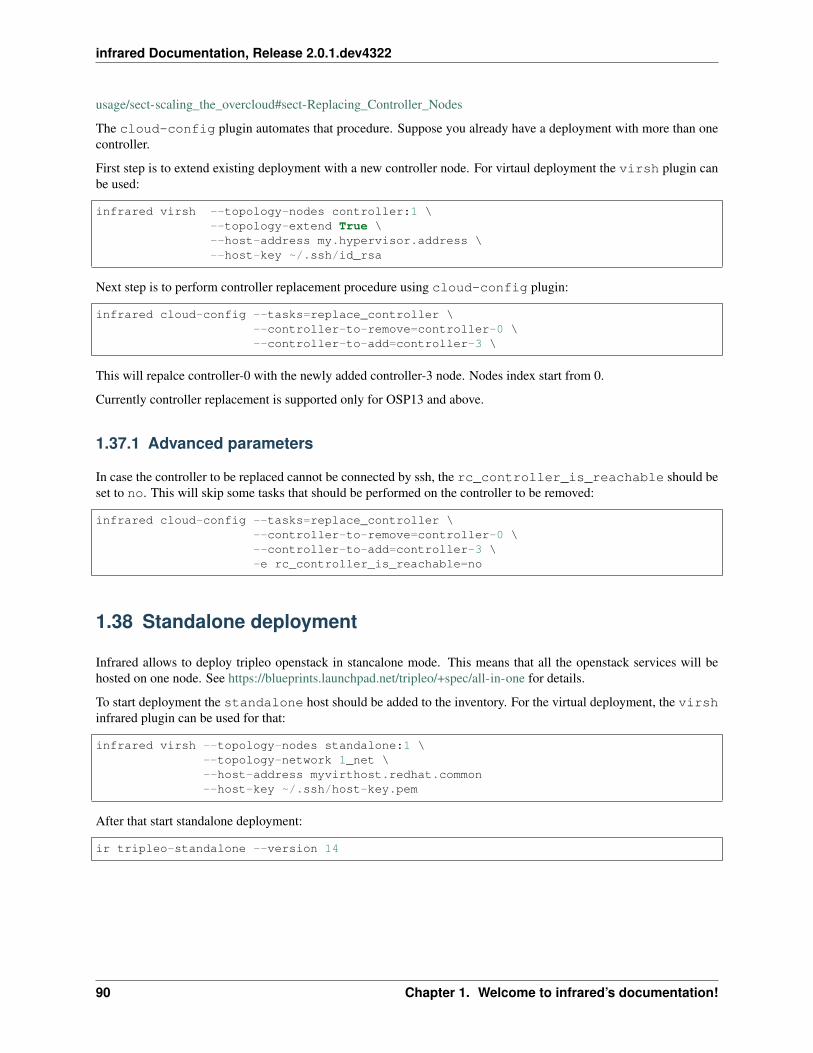
infrared Documentation, Release 2.0.1.dev4322
usage/sect-scaling_the_overcloud#sect-Replacing_Controller_Nodes
The cloud-config plugin automates that procedure. Suppose you already have a deployment with more than onecontroller.
First step is to extend existing deployment with a new controller node. For virtaul deployment the virsh plugin canbe used:
infrared virsh --topology-nodes controller:1 \--topology-extend True \--host-address my.hypervisor.address \--host-key ~/.ssh/id_rsa
Next step is to perform controller replacement procedure using cloud-config plugin:
infrared cloud-config --tasks=replace_controller \--controller-to-remove=controller-0 \--controller-to-add=controller-3 \
This will repalce controller-0 with the newly added controller-3 node. Nodes index start from 0.
Currently controller replacement is supported only for OSP13 and above.
1.37.1 Advanced parameters
In case the controller to be replaced cannot be connected by ssh, the rc_controller_is_reachable should beset to no. This will skip some tasks that should be performed on the controller to be removed:
infrared cloud-config --tasks=replace_controller \--controller-to-remove=controller-0 \--controller-to-add=controller-3 \-e rc_controller_is_reachable=no
1.38 Standalone deployment
Infrared allows to deploy tripleo openstack in stancalone mode. This means that all the openstack services will behosted on one node. See https://blueprints.launchpad.net/tripleo/+spec/all-in-one for details.
To start deployment the standalone host should be added to the inventory. For the virtual deployment, the virshinfrared plugin can be used for that:
infrared virsh --topology-nodes standalone:1 \--topology-network 1_net \--host-address myvirthost.redhat.common--host-key ~/.ssh/host-key.pem
After that start standalone deployment:
ir tripleo-standalone --version 14
90 Chapter 1. Welcome to infrared’s documentation!
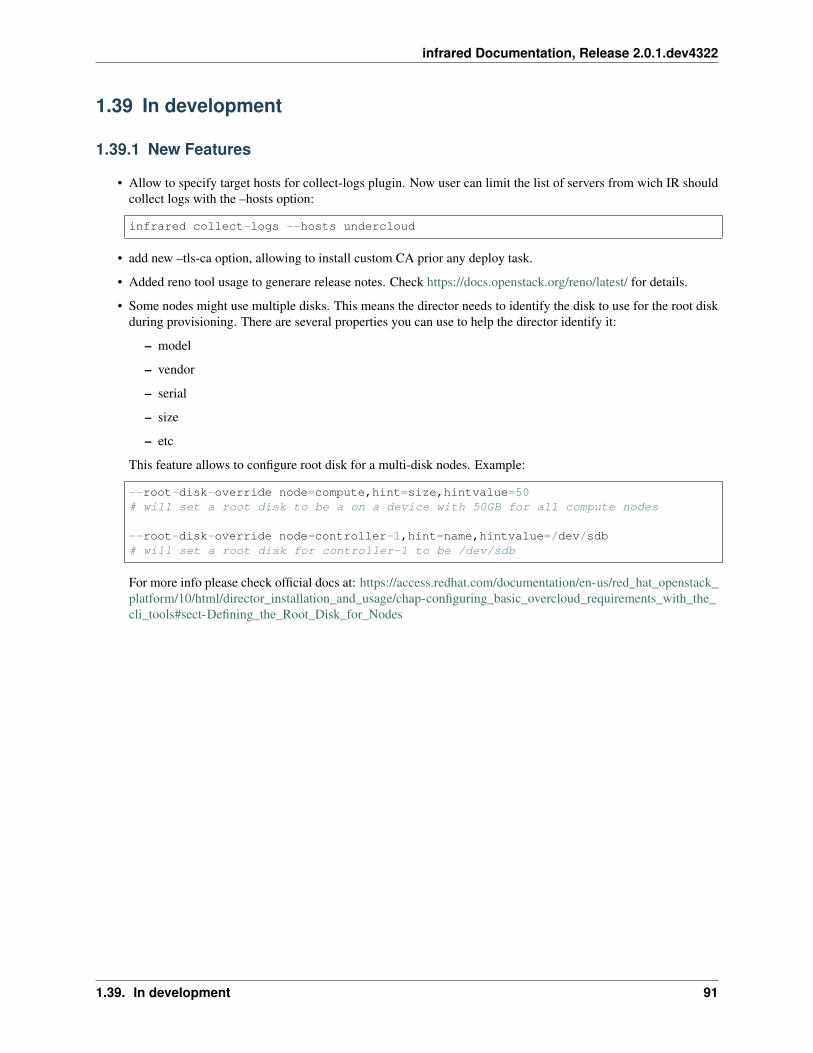
infrared Documentation, Release 2.0.1.dev4322
1.39 In development
1.39.1 New Features
• Allow to specify target hosts for collect-logs plugin. Now user can limit the list of servers from wich IR shouldcollect logs with the –hosts option:
infrared collect-logs --hosts undercloud
• add new –tls-ca option, allowing to install custom CA prior any deploy task.
• Added reno tool usage to generare release notes. Check https://docs.openstack.org/reno/latest/ for details.
• Some nodes might use multiple disks. This means the director needs to identify the disk to use for the root diskduring provisioning. There are several properties you can use to help the director identify it:
– model
– vendor
– serial
– size
– etc
This feature allows to configure root disk for a multi-disk nodes. Example:
--root-disk-override node=compute,hint=size,hintvalue=50# will set a root disk to be a on a device with 50GB for all compute nodes
--root-disk-override node=controller-1,hint=name,hintvalue=/dev/sdb# will set a root disk for controller-1 to be /dev/sdb
For more info please check official docs at: https://access.redhat.com/documentation/en-us/red_hat_openstack_platform/10/html/director_installation_and_usage/chap-configuring_basic_overcloud_requirements_with_the_cli_tools#sect-Defining_the_Root_Disk_for_Nodes
1.39. In development 91

infrared Documentation, Release 2.0.1.dev4322
92 Chapter 1. Welcome to infrared’s documentation!

CHAPTER 2
Indices and tables
• genindex
• modindex
• search
93


