Embed Size (px)
Citation preview
Published March 2015. The most recent versionof this Technical Note is posted atwww.licor.com/bio/support
Developed for:
Image Studio Software
Please refer to your manual to confirmthat this protocol is appropriate for theapplications compatible with yourinstrument model.
Technical NoteHow to Use the Image Studio™ SoftwareSmall Animal Image Analysis
Table of Contents
Page
I. Small Animal Image Analysis Quick Procedure Overview 2
II. Import the Small Animal Analysis Key 4
III. Import Example Images 4
IV. Apply a Small Animal Image Analysis 6
V. Set the Background Shape 7
Best Practice for Where to Place the Background Shape 8
VI. Define the Region of Interest Using the Auto Shape Tool 8
Define a Region of Interest 8
Adjust the Region of Interest 9
VII. Review Data 9
VIII. Export Data 11
IX. Further Questions 12
I. Small Animal Image Analysis Quick Procedure Overview
This guide provides a quick overview of the Small Animal Image analysis.
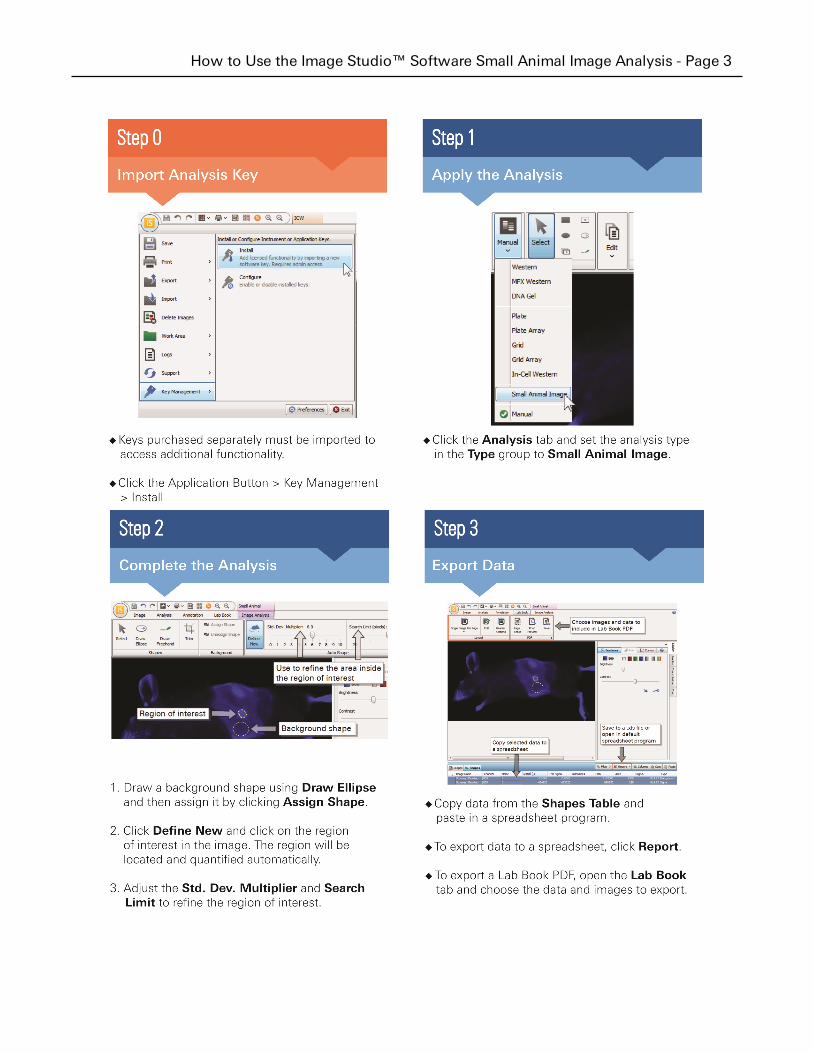
A graphical outline of the Small Animal Image procedure is shown on the nextpage. The process is described further throughout the rest of this guide, and moredetail is provided in the Image Studio Software Help.
Page 2 - How to Use the Image Studio™ Software Small Animal Image Analysis
How to Use the Image Studio™ Software Small Animal Image Analysis - Page 3
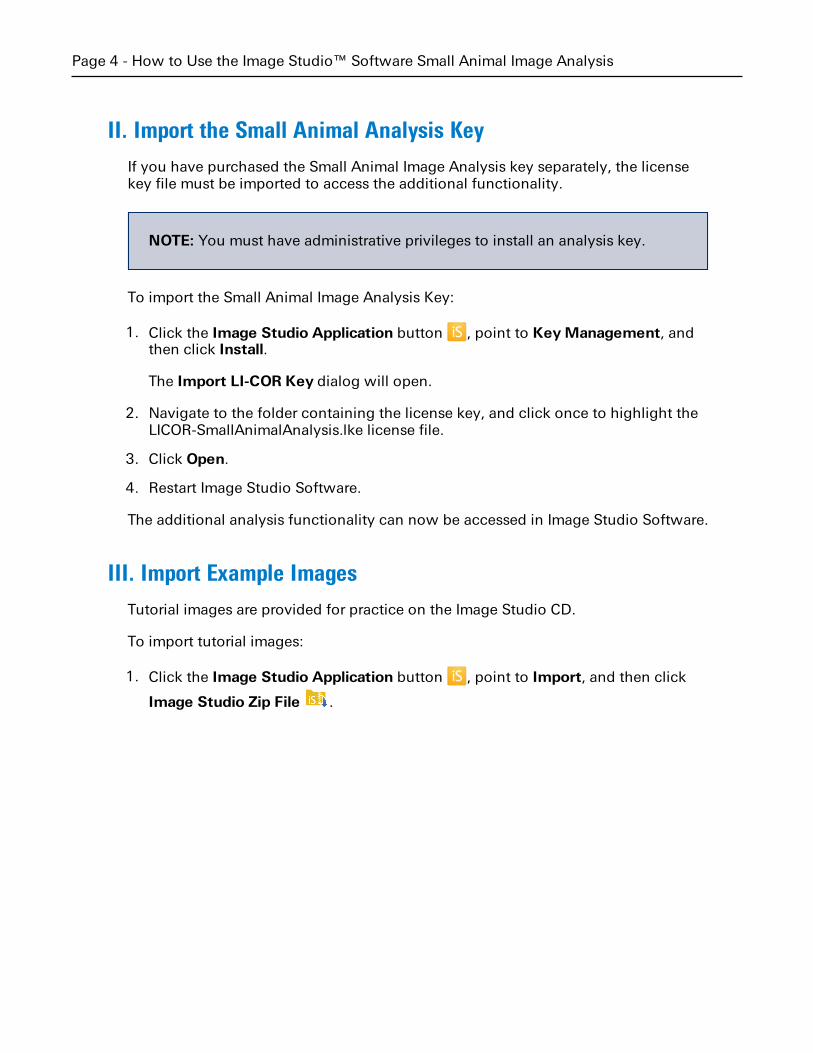
II. Import the Small Animal Analysis Key
If you have purchased the Small Animal Image Analysis key separately, the licensekey file must be imported to access the additional functionality.
NOTE: You must have administrative privileges to install an analysis key.
To import the Small Animal Image Analysis Key:
1. Click the Image Studio Application button , point to KeyManagement, andthen click Install.
The Import LI-COR Key dialog will open.
2. Navigate to the folder containing the license key, and click once to highlight theLICOR-SmallAnimalAnalysis.lke license file.
3. Click Open.
4. Restart Image Studio Software.
The additional analysis functionality can now be accessed in Image Studio Software.
III. Import Example Images
Tutorial images are provided for practice on the Image Studio CD.
To import tutorial images:
1. Click the Image Studio Application button , point to Import, and then click
Image Studio Zip File .
Page 4 - How to Use the Image Studio™ Software Small Animal Image Analysis
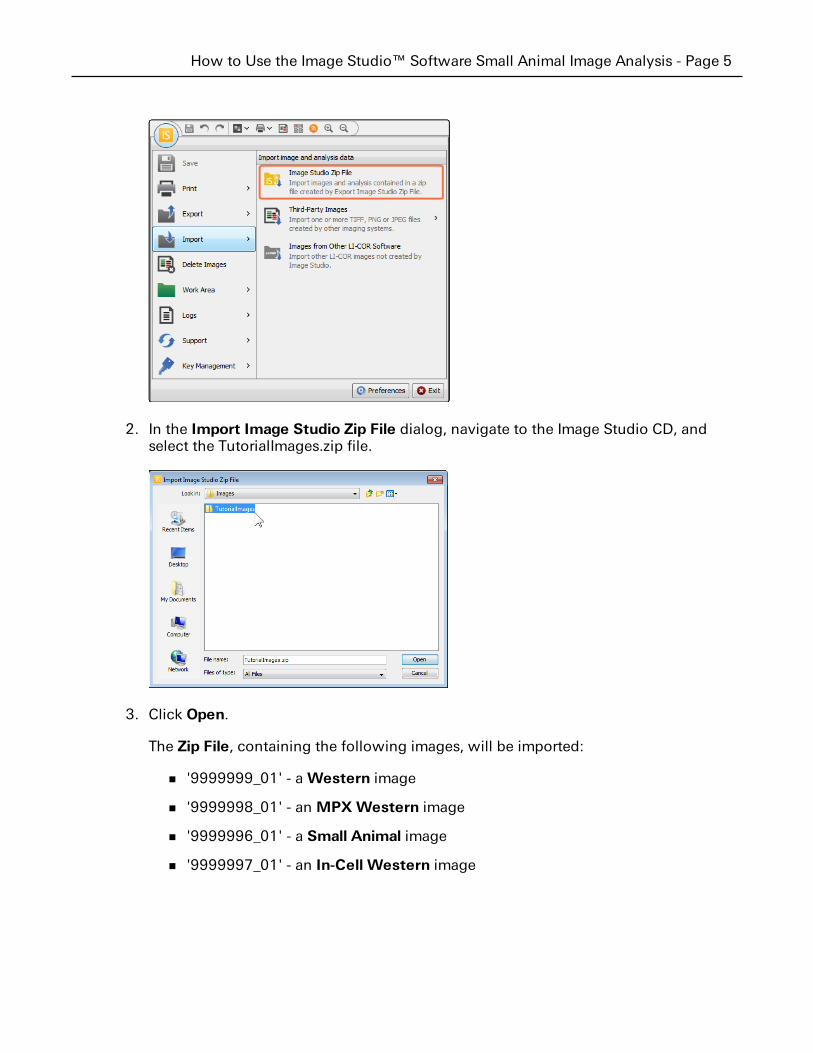
2. In the Import Image Studio Zip File dialog, navigate to the Image Studio CD, andselect the TutorialImages.zip file.
3. Click Open.
The Zip File, containing the following images, will be imported:
n '9999999_01' - aWestern image
n '9999998_01' - anMPXWestern image
n '9999996_01' - a Small Animal image
n '9999997_01' - an In-Cell Western image
How to Use the Image Studio™ Software Small Animal Image Analysis - Page 5
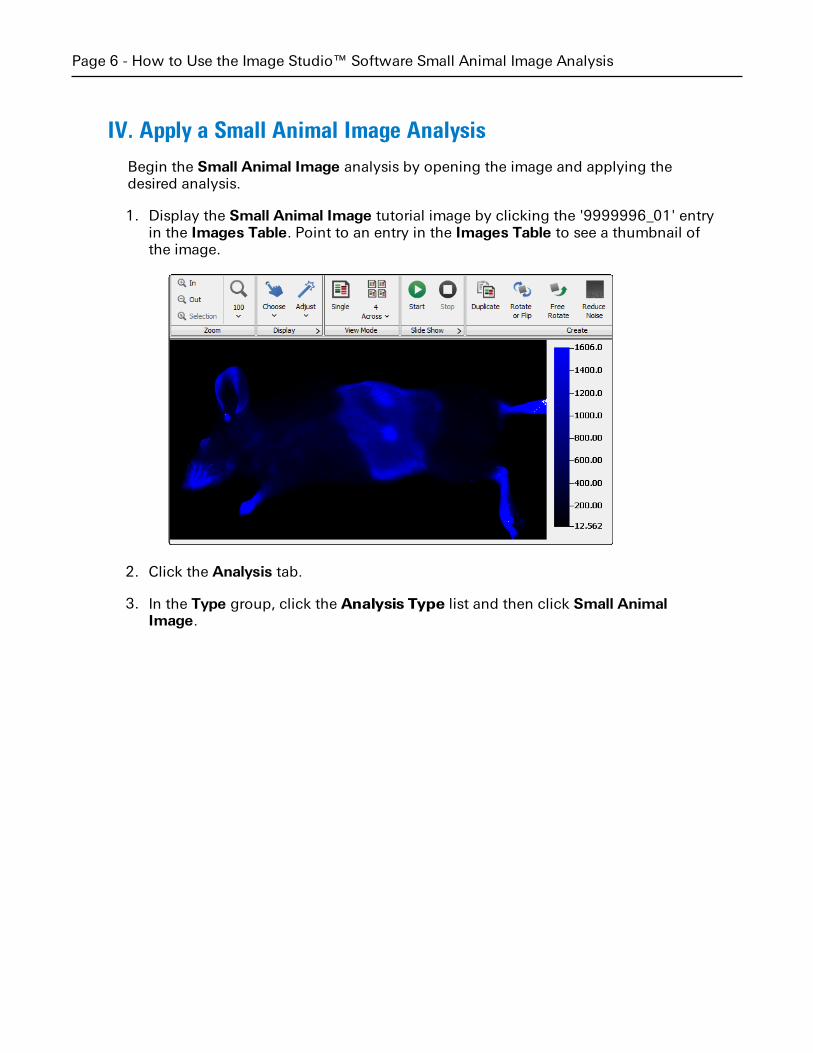
IV. Apply a Small Animal Image Analysis
Begin the Small Animal Image analysis by opening the image and applying thedesired analysis.
1. Display the Small Animal Image tutorial image by clicking the '9999996_01' entryin the Images Table. Point to an entry in the Images Table to see a thumbnail ofthe image.
2. Click the Analysis tab.
3. In the Type group, click the Analysis Type list and then click Small AnimalImage.
Page 6 - How to Use the Image Studio™ Software Small Animal Image Analysis
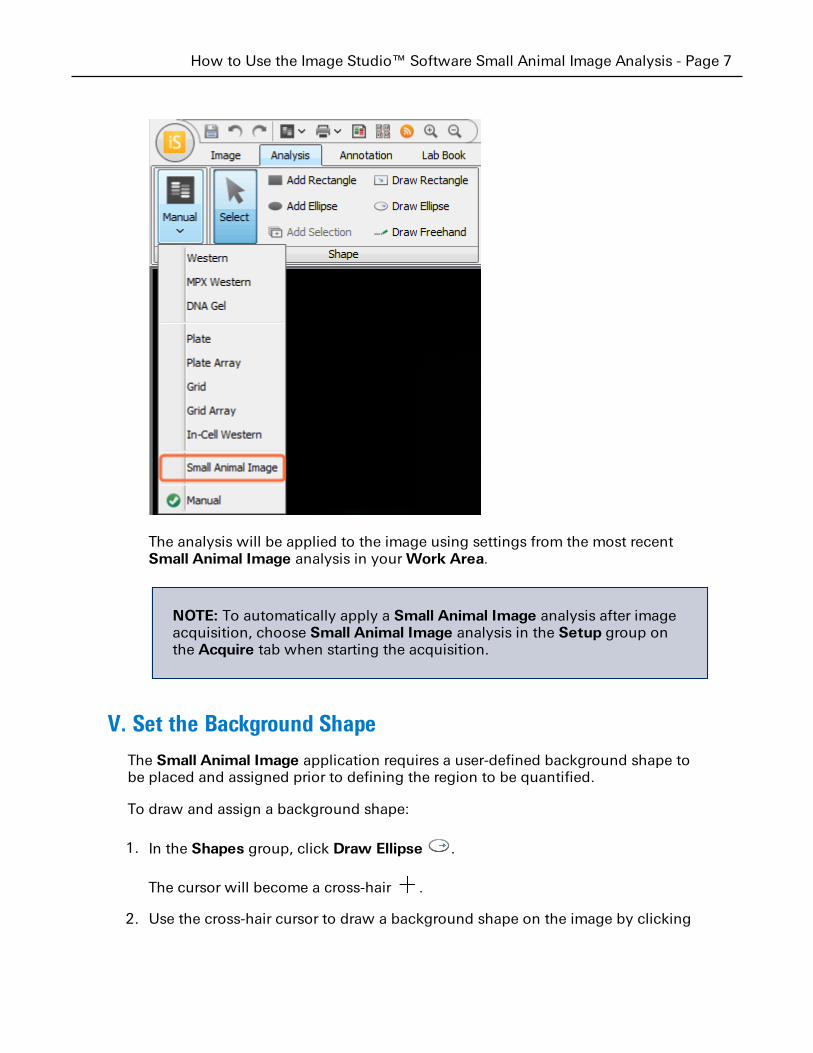
The analysis will be applied to the image using settings from the most recentSmall Animal Image analysis in yourWork Area.
NOTE: To automatically apply a Small Animal Image analysis after imageacquisition, choose Small Animal Image analysis in the Setup group onthe Acquire tab when starting the acquisition.
V. Set the Background Shape
The Small Animal Image application requires a user-defined background shape tobe placed and assigned prior to defining the region to be quantified.
To draw and assign a background shape:
1. In the Shapes group, click Draw Ellipse .
The cursor will become a cross-hair .
2. Use the cross-hair cursor to draw a background shape on the image by clicking
How to Use the Image Studio™ Software Small Animal Image Analysis - Page 7
and dragging to form the shape.
MORE INFO: For best practices on where to place the background shape,see Best Practice for Where to Place the Background Shape below.
3. Once the shape has been drawn and while it is still selected (shown as a dashed
line), click Assign Shape in the Background group.
Best Practice for Where to Place the Background Shape
l The background shape should be placed on a shaved part of the animal, ideally inthe same location but on the contralateral side of the feature to be quantified.
l If the background shape cannot be placed on the animal's contralateral side, placeit close to the feature to be quantified.
l Some organs may retain probe after 24 hours, be careful not to place thebackground shape on these bright areas.
l If the region drawn by the Define New feature encompasses too much area, thebackground shape can be moved so it incorporates a small region of bright spacesurrounding a feature to be quantified. This will raise the average background valueand decrease the area of the region after the region is redrawn using the DefineNew feature. However, only try moving the background shape this close to thefeature of interest if adjusting the Std. Dev. Multiplier and Search Limit does notproduce the desired boundary.
VI. Define the Region of Interest Using the Auto Shape Tool
After the background shape has been set, the region of interest needs to be defined.
Define a Region of Interest
1. In the Auto Shape group, click Define New .
The cursor will become a cross-hair .
2. Click the center of the region of interest with the cross-hair cursor.
A dashed line will appear around the region of interest.
3. If the dashed shape needs to be adjusted so it more accurately represents theregion of interest, adjustments can be made while the shape is still selected. SeeAdjust the Region of Interest on the facing page.
Page 8 - How to Use the Image Studio™ Software Small Animal Image Analysis
4. If the dashed shape represents the correct region to be quantified, set the shape byclicking Select and then clicking anywhere on the image outside the dashedshape.
Adjust the Region of Interest
The Standard Deviation Multiplier or Search Limit in the Auto Shape group can beused to refine how the dashed shape fits the region of interest.
NOTE: Use the same value for the Standard Deviation Multiplier and SearchLimit when comparing multiple images.
1. Standard Deviation Multiplier - Adjust the Standard Deviation Multiplier slider tochange the sensitivity threshold used to define the region of interest.
n Increasing the Standard Deviation Multiplier will increase the sensitivity andreduce the size of the region of interest.
n Decreasing the Standard Deviation Multiplier will decrease the sensitivityand increase the size of the region of interest.
2. Search Limit - The Search Limit adjusts the size of the image area searched to finda region of interest.
VII. Review Data
Results for the Small Animal Image analysis will be displayed in the Shapes Table.
l Click Shapes below and to the left of the image to view a table with data for thebackground shape and regions of interest.
How to Use the Image Studio™ Software Small Animal Image Analysis - Page 9
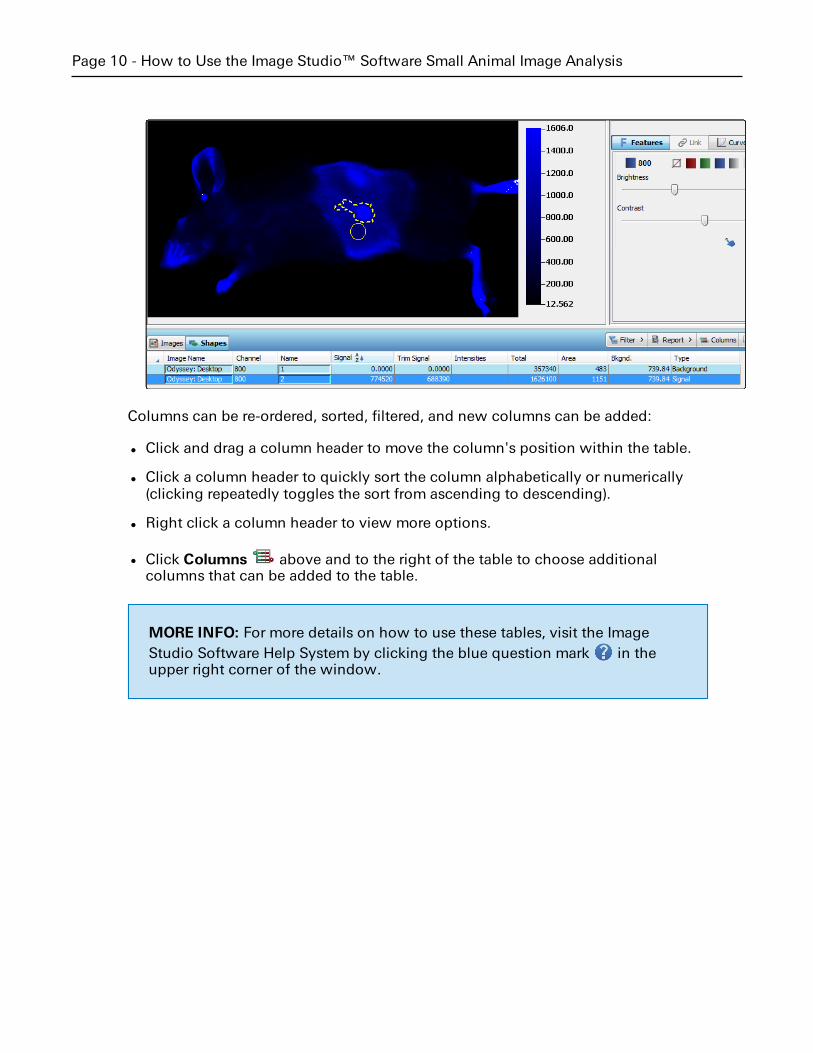
Columns can be re-ordered, sorted, filtered, and new columns can be added:
l Click and drag a column header to move the column's position within the table.
l Click a column header to quickly sort the column alphabetically or numerically(clicking repeatedly toggles the sort from ascending to descending).
l Right click a column header to view more options.
l Click Columns above and to the right of the table to choose additionalcolumns that can be added to the table.
MORE INFO: For more details on how to use these tables, visit the ImageStudio Software Help System by clicking the blue question mark in theupper right corner of the window.
Page 10 - How to Use the Image Studio™ Software Small Animal Image Analysis
VIII. Export Data
Data can be exported in three ways.
l Copy and Paste: Right click selected data in the Shapes Table and then clickcopy (or press CTRL+C). Paste the data into a spreadsheet.
l Export table data to a spreadsheet: Click Report above and to the right ofthe table view and then choose whether to launch the data in an externalspreadsheet program or save the data.
Use Options at the bottom of the Report menu to:
n Change whether data is saved as a .xls file or a tab-separated text document.
n Change whether the entire table is exported or just selected rows.
l Export data and images to a Lab Book PDF: Open the Lab Book tab.
n On the far left of the Lab Book tab, click the Layout Template list andchoose a layout close to what is needed (the Small Animal Lab Book isprobably a good starting point).
n Click Edit to choose which images and data will be included in the PDF.The layout and any changes will appear in a layout preview.
n Click Header Options to choose a logo and text to appear at the top ofthe exported Lab Book page.
n Click Page Setup to change the paper size, page setup, and margins. Use
Print Preview to preview how all changes will appear.
n Click Save to save the Lab Book page.
How to Use the Image Studio™ Software Small Animal Image Analysis - Page 11
Global Headquarters, Serving the United States • 4647 Superior Street • Lincoln, NE 68504Toll free: 800-645-4267 • Fax: +1-402-467-0819 • [email protected]
LI-COR GmbH, Germany, Serving Europe, Africa, and the Middle East.LI-COR Biosciences GmbH • Siemensstraße 25A • 61352 Bad Homburg • GermanyPhone: +49 (0) 6172 17 17 771 • Fax: +49 (0) 6172 17 17 799 • [email protected]
LI-COR Ltd., United Kingdom, Serving Denmark, Finland, Iceland, Ireland, Norway, Sweden, and UKLI-COR Biosciences UK Ltd. • St. John’s Innovation Centre • Cowley Road • Cambridge • CB4 0WSUnited Kingdom • Phone: +44 (0) 1223 422104 • Fax: +44 (0) 1223 422105 • [email protected]
LI-COR Biotechnology Distributor Network: www.licor.com/bio/distributors
www.licor.com/bio
© 2015 LI-COR, Inc. LI-COR and Image Studio are trademarks or registered trademarks of LI-COR, Inc. in the United States and other countries. Allother trademarks belong to their respective owners.
LI-COR is an ISO 9001 registered company.
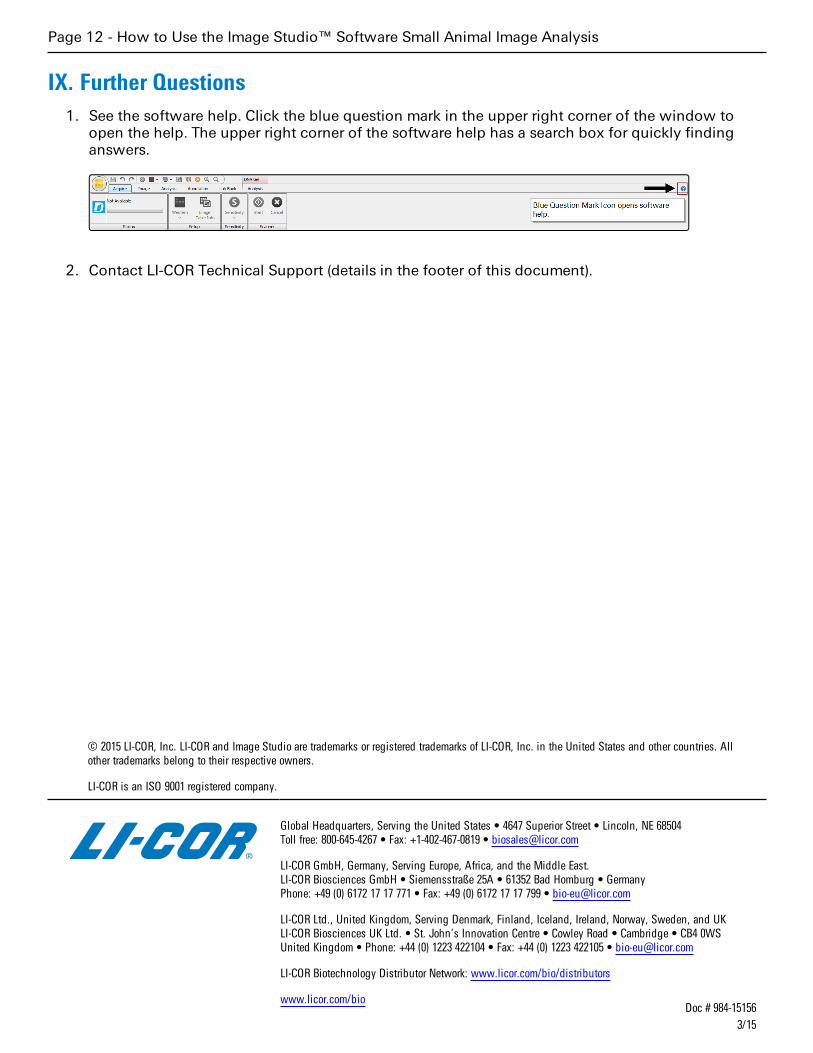
IX. Further Questions1. See the software help. Click the blue question mark in the upper right corner of the window to
open the help. The upper right corner of the software help has a search box for quickly findinganswers.
2. Contact LI-COR Technical Support (details in the footer of this document).
Doc # 984-151563/15
Page 12 - How to Use the Image Studio™ Software Small Animal Image Analysis
![Intermolecular Interactions in Li + -glyme and Li + -glyme-TFSA − Complexes: Relationship with Physicochemical Properties of [Li(glyme)][TFSA] Ionic Liquids](https://img.dokumen.tips/doc/110x75/6324ef3a545c645c7f096fa7/intermolecular-interactions-in-li-glyme-and-li-glyme-tfsa-complexes-relationship.jpg)