Embed Size (px)
Citation preview
DIY Lava Bracelets andEssential OilsLava bead jewelry is all the rage, whilst combining them withessential oils. Learn about basic essential oil healingproperties and create an easy DIY lava bracelets using lavabeads from Dakota Stones.
Essential Oils Healing PropertiesThe aromatic scent of essential oils add extra healing andtherapeutic property to calm your mind and your soul. Whileessential oils are used in aromatherapy, it’s even trendingfor medicinal uses.
Here are some healing properties of 5 basic essential oils.
Lavender1.Healing Properties: calming and relaxing, stressrelieverPeppermint2.Healing Properties: uplifting and invigorating, energyboosterEucalyptus3.Healing Properties: clarifying, enhance concentrationTea Tree4.Healing Properties: cleansing and clarifyingLemon5.Healing Properties: moon enhancer, cleansing,freshening, improves concentration
One way to use essential oils is adding a drop or two tojewelry made with lava beads. Let lava beads absorb theessential oils for a few minutes before wearing your jewelry!
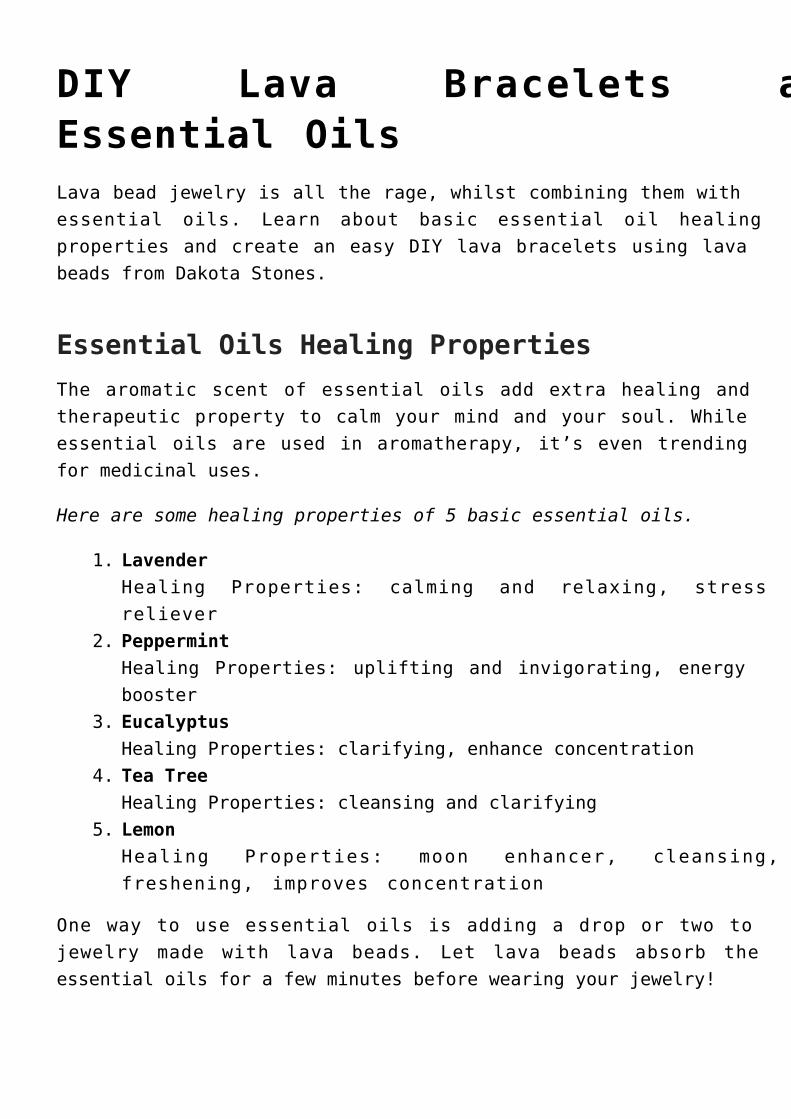
DIY Lava Bracelets
An easy DIY you can make are stretchy bracelets! Pair lavabeads with wood beads for a natural look. And we couldn’tresist these dyed lava beads! What we did to make thisbracelet was pre-stretching a 9″ piece of elastic. String onyour beads and make a surgeon’s knot. (Check out previousStretch Bracelet blog for surgeon’s knot).
Item used in bracelet: LVA6RD-TQS, WD-BYG6RD, Z002570, A021634
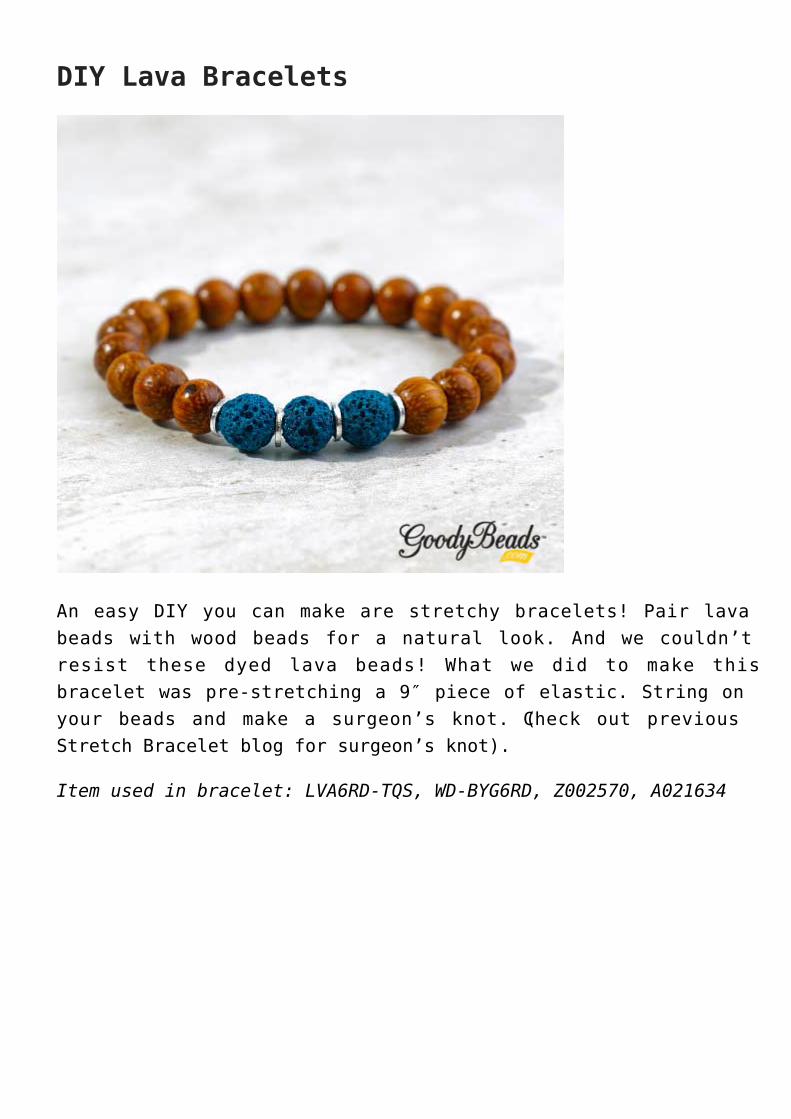
We made this bracelet using wavy disc and the popular graylava beads. Cut a 9″ soft flex wire. Slide on 9 lava beads.Slide on 10 wavy discs by sliding one bead concave out andslide another concave in so that the two discs cup together.Repeat for the rest. Then slide on 9 more lava beads. You canadd more lava beads to either sides to customize your wristsize. Slide on a crimp tube to one end and loop of your clasp.Loop flex wire back through the crimp tube and crimp yourtube. Cut flex wire with a 1/4″ tail. Repeat to other end butadding a jump ring.
Items used in bracelet: LVA8RD, Z018418, TC01896 (2), A012353,A011517, Z011537
Gemstone Coin Cuff – VideoTutorialWho doesn’t love a simple gemstone cuff? We made this GemstoneCoin Cuff using Dakota Stones’ coin-shaped gemstones and NunnDesign Thin Cuffs. Watch this short video and learn how easyit is to wire wrap gemstones onto a cuff.
What you’ll need:
Nunn Design Thin Hammer Cuff(Z016227/Z016228/Z016229/Z016230)24 Gauge Artistic Wire8mm or 12mm Coin Gemstone Beads
Video TutorialWatch Video Here on our Facebook Videos.
Cut a 30″ piece of wire.1.Wrap an inch of wire end to the bangle.2.String 6 gemstone coins onto the wire.3.Coil the wire a couple of times around the other side of4.the bangle. It is alright if the beads sit loosely onthe cuff.Make sure to center the beads on your bangle.5.Coil wire three times around in between each bead,6.across the bangle. Make sure to adjust the beads so thatthey sit flushed on top of the bangle.Coil wire end around bangle to secure the wire. Cut off7.excess wire.
Item/Components used in video:
Blue Crazy Lace: BCL8DC-8, Z016230, AW00050Matte Blue/Gold Amazonite: BGA8DC-M-8, Z016228, AW00052
Memory Wire Leather Bracelets– Video TutorialTory and Candie Cooper are back in this video to demonstratehow to make simple bracelets using memory wire, leather, endcaps and beads! Making bracelets with memory wire is one ofthe easiest way to make jewelry! Make sure to stop over to ourMemory Wire Hot Category page to shop for memory wire, endcaps, tools and leather with an inner hole that can be usedwith memory wire. Don’t forget to get some of our favoritebeads to accompany your leather memory wire bracelet likeglass beads, gemstones, TierraCast beads, Swarovski crystalsand more.
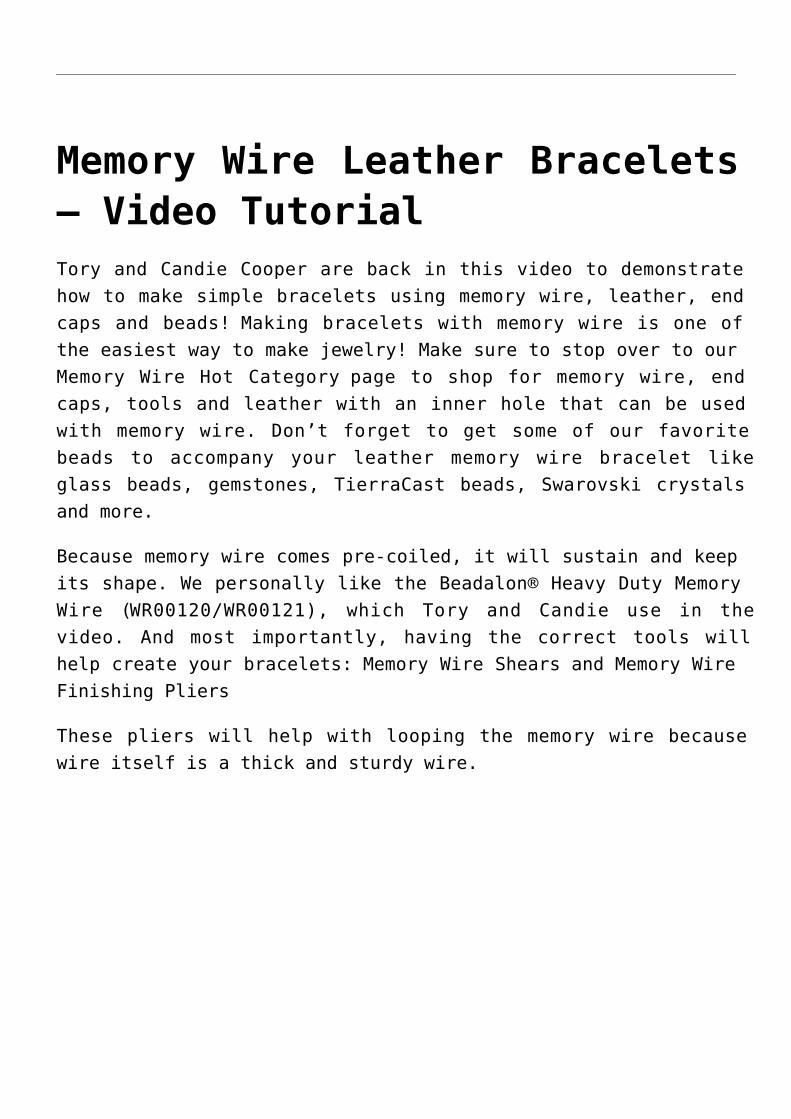
Because memory wire comes pre-coiled, it will sustain and keepits shape. We personally like the Beadalon® Heavy Duty MemoryWire (WR00120/WR00121), which Tory and Candie use in thevideo. And most importantly, having the correct tools willhelp create your bracelets: Memory Wire Shears and Memory WireFinishing Pliers
These pliers will help with looping the memory wire becausewire itself is a thick and sturdy wire.
Video Tutorial
https://www.youtube.com/embed/YmVVh5O5yLI
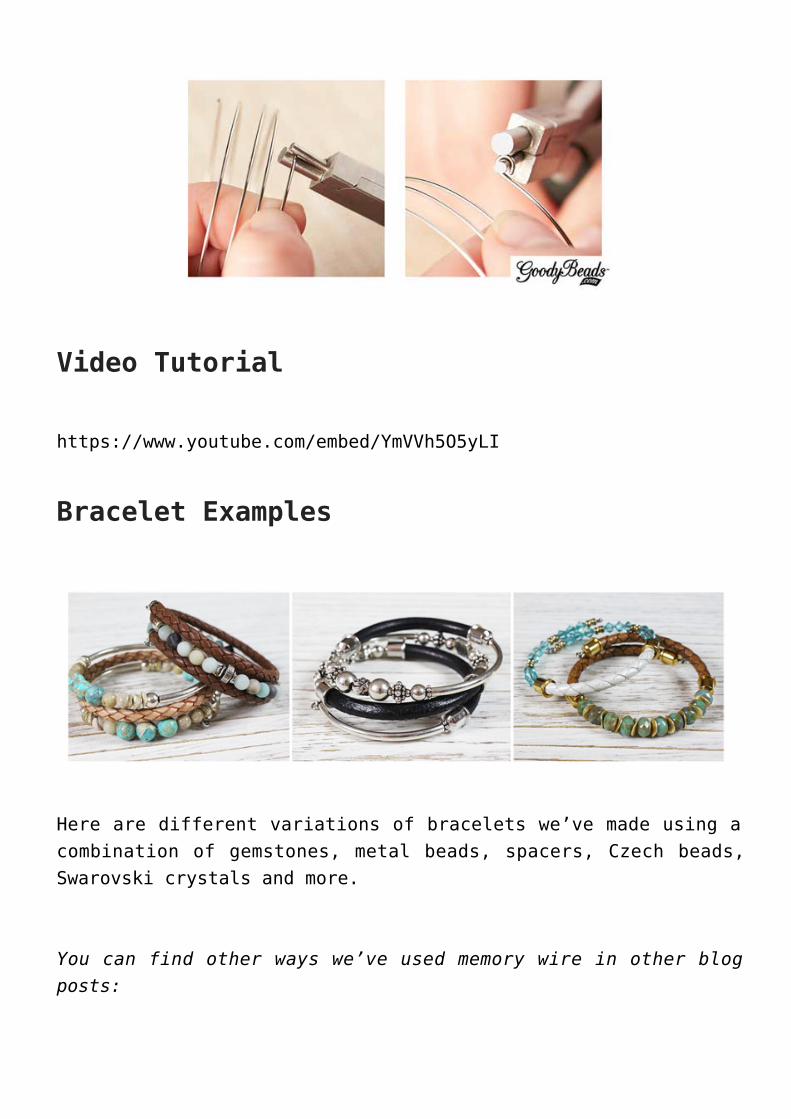
Bracelet Examples
Here are different variations of bracelets we’ve made using acombination of gemstones, metal beads, spacers, Czech beads,Swarovski crystals and more.
You can find other ways we’ve used memory wire in other blogposts:
Memory Wire Leather Wrap BraceletsBeachy Flamingo and Palm Tree DIY BraceletsHow to Use Silk Ribbon in Jewelry6 Multi-Wrap Memory Wire Bracelet Ideas – Video TutorialHow to Make a Leather and Memory Wire Bracelet – VideoTutorial
How do you design your memory bracelets? We would love toknow!
Video: Making Bracelets withBeading Chain and SlideClaspsWe invited Candie Cooper to tag along in this super fun videotutorial on how to make easy bracelets with beading chain andslide on clasps.
What you will need.
0.7mm Chain bracelets:
0.7mm chain (CH00724/CH00725)4x5mm Slide on Clasp (Z008576/Z008577/Z008578)End Cap (X001505)
Or 1.25mm Chain Bracelets:
1.25mm chain (Silver CH01003/Gold CH01004/ Ant. BrassCH01005/ Ant. Copper CH001053)
End Cap (Silver Z008570/ Gold Z008574/ Ant. BrassZ008575)5.57mm Slide on Clasp (Silver Z008579/Gold Z008580/Ant.Brass Z008581/ Ant. Copper Z008565/ Satin Gold Z008566)-OR-8×5 Round Slide on Clasp (Silver Z008584/ Gold Z008585/Ant. Brass Z008586)
Tools:
Super New GlueFlat Nose PliersMemory Wire Cutter
Optional:
Crimp Covers
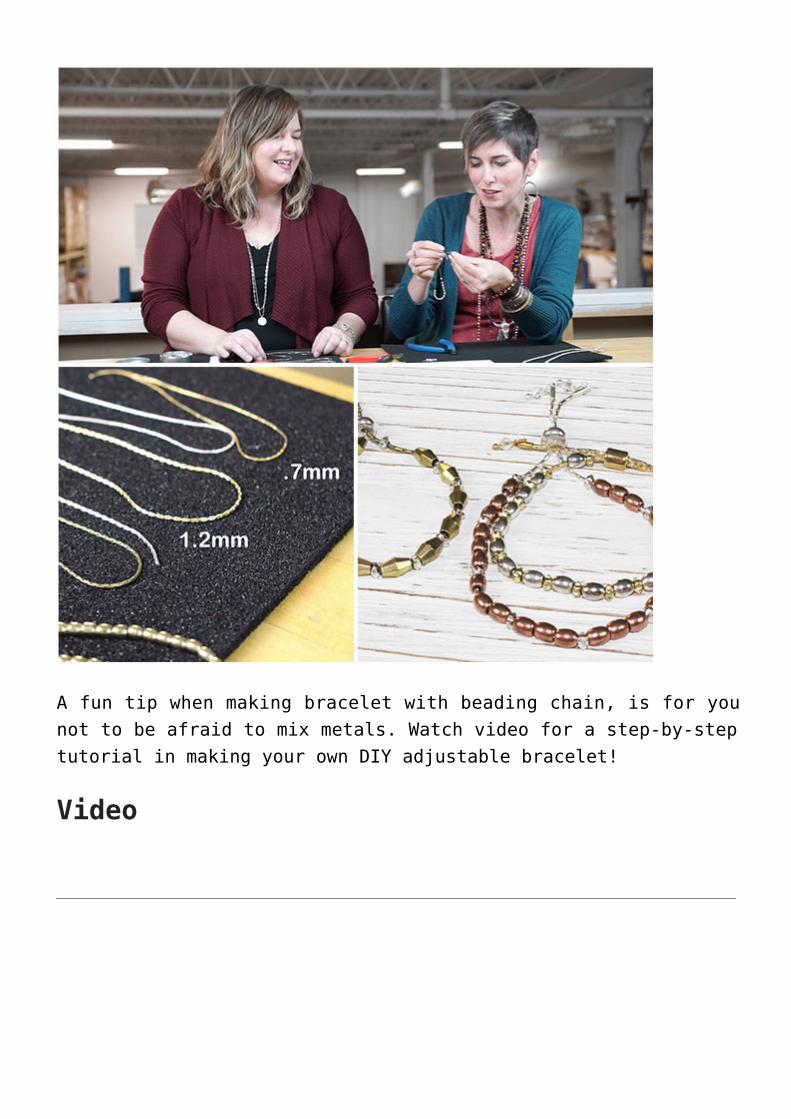
A fun tip when making bracelet with beading chain, is for younot to be afraid to mix metals. Watch video for a step-by-steptutorial in making your own DIY adjustable bracelet!
Video
Beadable Cuffs with MiyukiDelicasBeadable cuffs are an easy DIY bracelet to wear or gift. Hereis an easy tutorial for making your very own beadable cuffwith Miyuki Delicas.
This simple tutorial is easy for all beading levels. Plus,it’s a trendy piece of jewelry you can layer with all ofyour bracelets!
Items you will need to make a beadable cuff:
beadable cuff finding (Silver Z001859/ Gold Z01860)Beading Thread (A006587)Miyuki Delica 11/0 Seed Beads
Ladder StitchOne basic technique when bead stitching your beadable cuff isthe ladder stitch, also known as the invisible stitch. Forsewers or quilters, this technique is used to cleanly closefabric openings. But in our case, we are using the sametechnique to loop through the holes of the beadable cuff whileadding Delica beads in between the channel of the cuff.
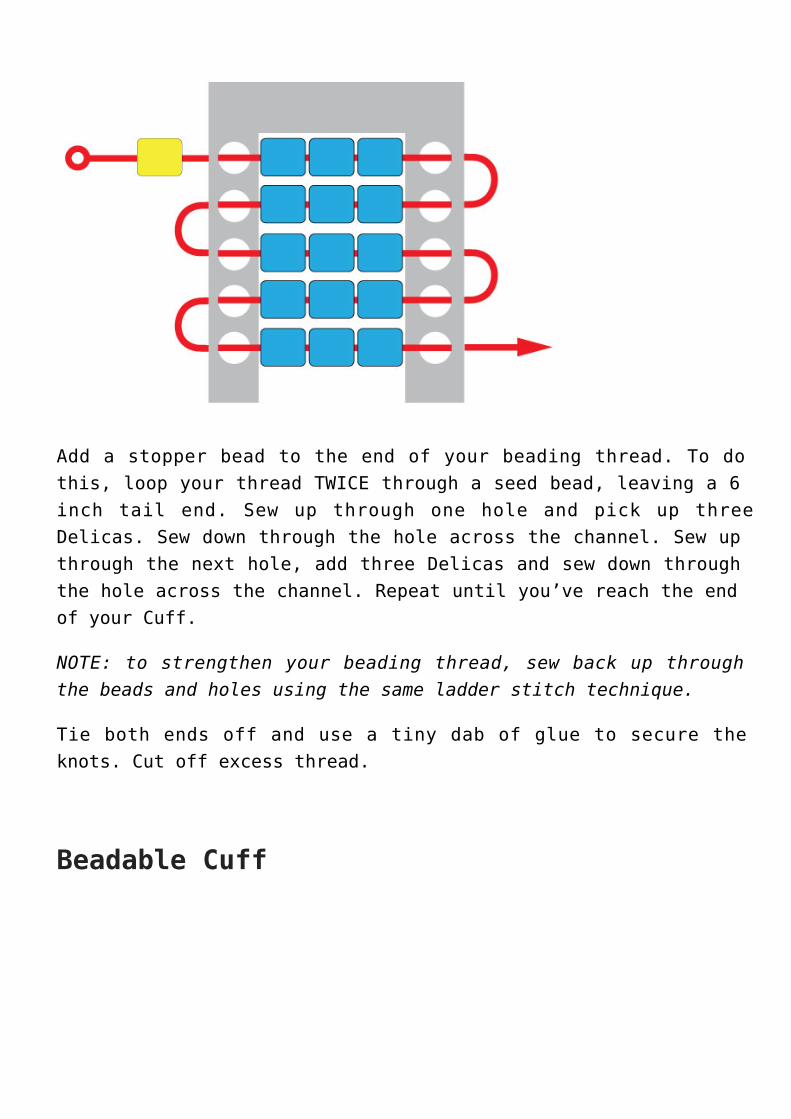
Add a stopper bead to the end of your beading thread. To dothis, loop your thread TWICE through a seed bead, leaving a 6inch tail end. Sew up through one hole and pick up threeDelicas. Sew down through the hole across the channel. Sew upthrough the next hole, add three Delicas and sew down throughthe hole across the channel. Repeat until you’ve reach the endof your Cuff.
NOTE: to strengthen your beading thread, sew back up throughthe beads and holes using the same ladder stitch technique.
Tie both ends off and use a tiny dab of glue to secure theknots. Cut off excess thread.
Beadable Cuff
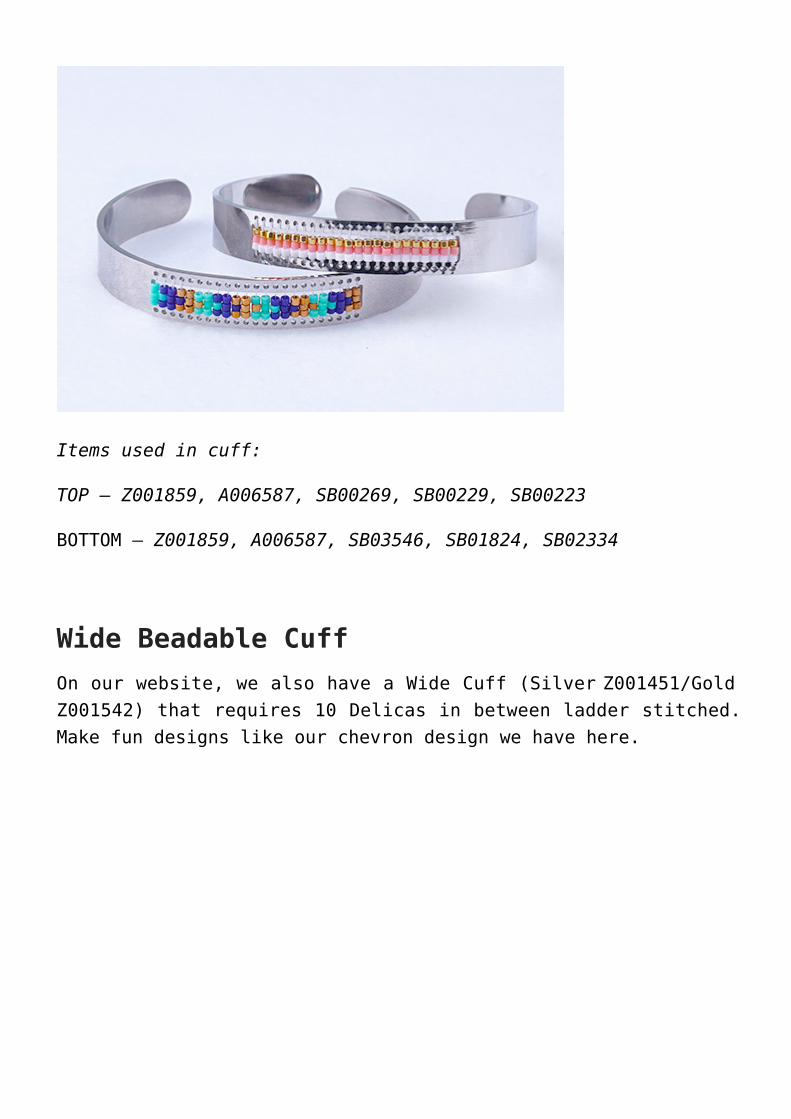
Items used in cuff:
TOP – Z001859, A006587, SB00269, SB00229, SB00223
BOTTOM – Z001859, A006587, SB03546, SB01824, SB02334
Wide Beadable CuffOn our website, we also have a Wide Cuff (Silver Z001451/GoldZ001542) that requires 10 Delicas in between ladder stitched.Make fun designs like our chevron design we have here.
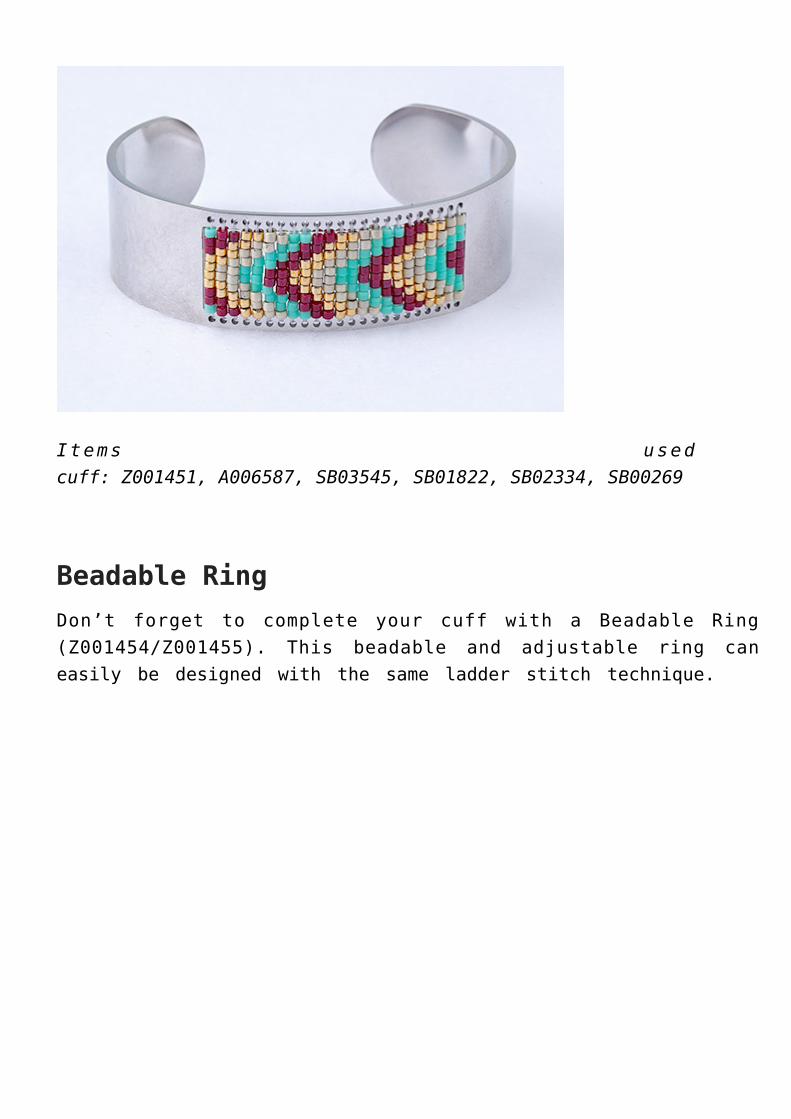
Items used incuff: Z001451, A006587, SB03545, SB01822, SB02334, SB00269
Beadable RingDon’t forget to complete your cuff with a Beadable Ring(Z001454/Z001455). This beadable and adjustable ring caneasily be designed with the same ladder stitch technique.
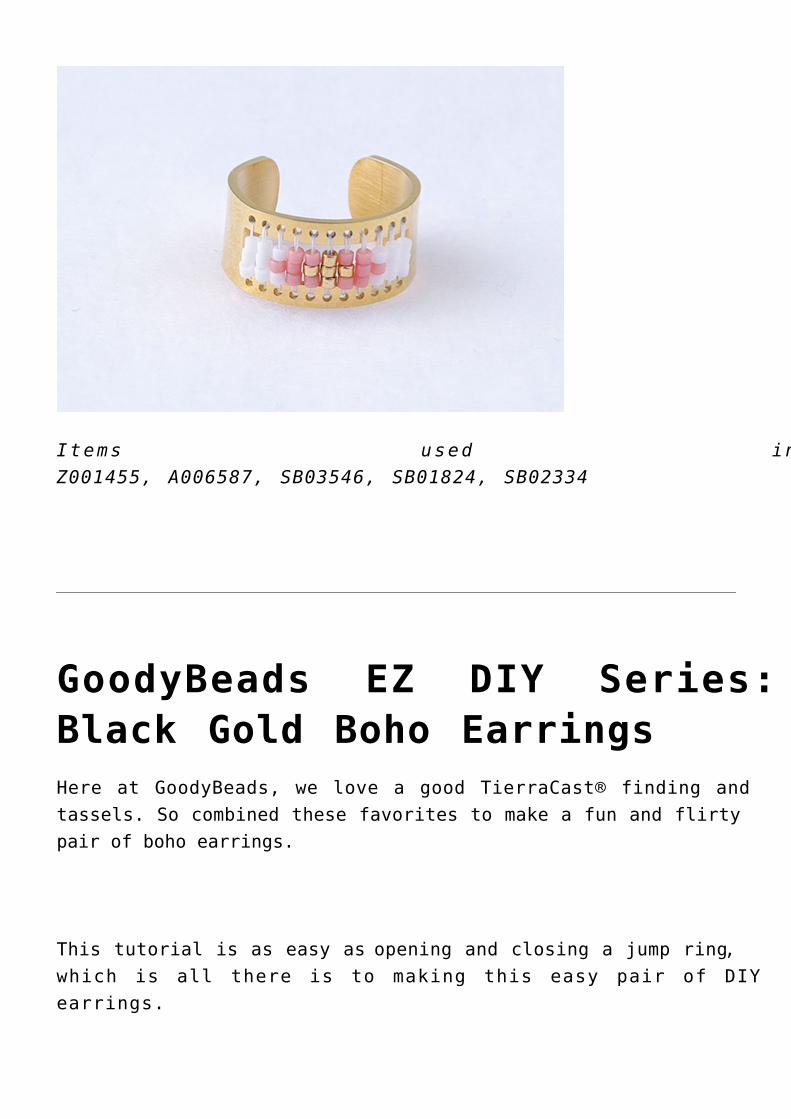
Items used in ring:Z001455, A006587, SB03546, SB01824, SB02334
GoodyBeads EZ DIY Series:Black Gold Boho EarringsHere at GoodyBeads, we love a good TierraCast® finding andtassels. So combined these favorites to make a fun and flirtypair of boho earrings.
This tutorial is as easy as opening and closing a jump ring,which is all there is to making this easy pair of DIYearrings.
Items you will need for a boho tassel earring:
Gold version –
2 – TierraCast Gold Ethnic Ring Fan Link (TC02461)TierraCast Gold Coil Earring Wire (TCZ0140)5mm Gold Jump Rings (A011519)Tassel with Gold Cap
Silver version –
2 – TierraCast Silver Ethnic Ring Fan Link (TC02460)TierraCast Silver Coil Earring Wire (TCZ0078)5mm Silver Jump Ring (A001528)Tassel with Silver Cap
EZ DIY Tutorial
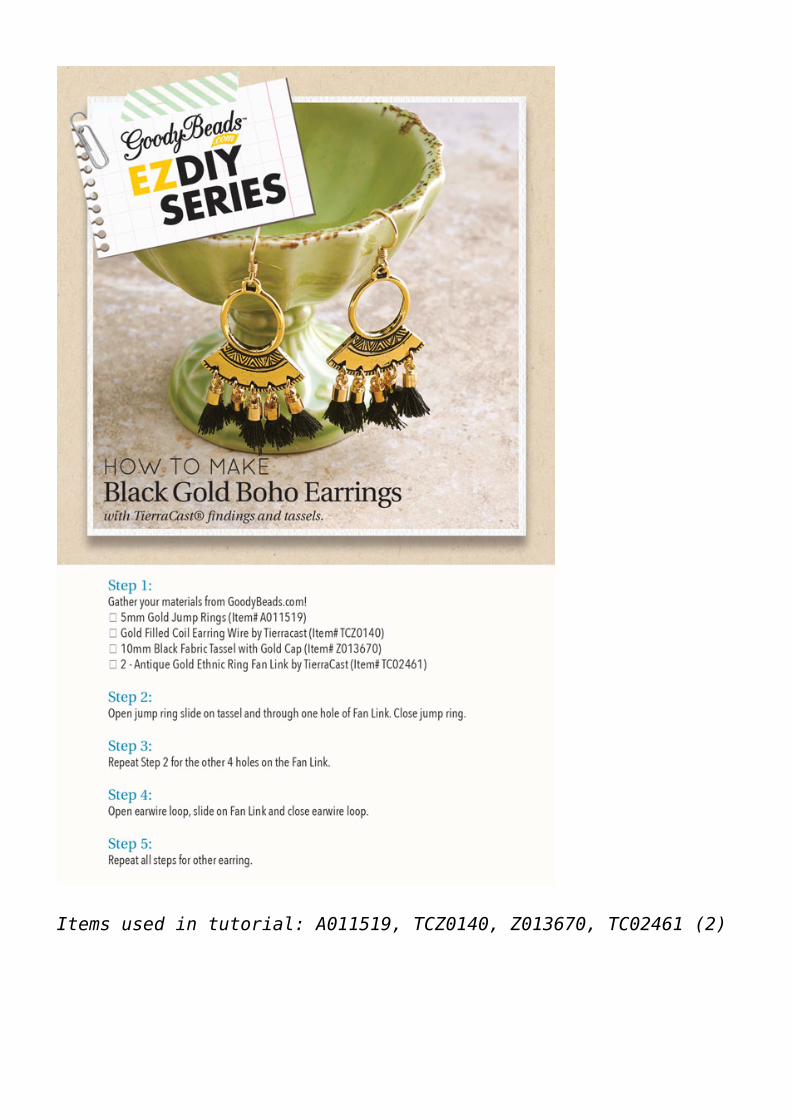
Items used in tutorial: A011519, TCZ0140, Z013670, TC02461 (2)
Beadalon® Artsy Wire BangleBracelet – TutorialMake an easy wire bangle bracelet using Artistic Wire 14 GaugeArtsy Olive Color Kit with Connectors (Z012739) and a fewhelpful tools.
The Artistic Wire kit consists of 3 feet of 14-gauge wire and5 connectors/crimp connectors. Here are items/tools you willneed to complete a bangle:
Z012739 – Artistic Wire Olive Color KitTools:
Artistic Wire 6cm Round Sizing Drum – TL00320Flush Cutter – TL00317Crimp Tool for Large Wire Crimp Connectors –TL00310Nylon Jaw Bending Pliers – TL00319Straightner Tool – TL00208
Optional Findings:TC01187 & TC00598Jump Rings
Here is a step-by-step instruction sheet that shows how easyit is to make a wire bangle bracelet.
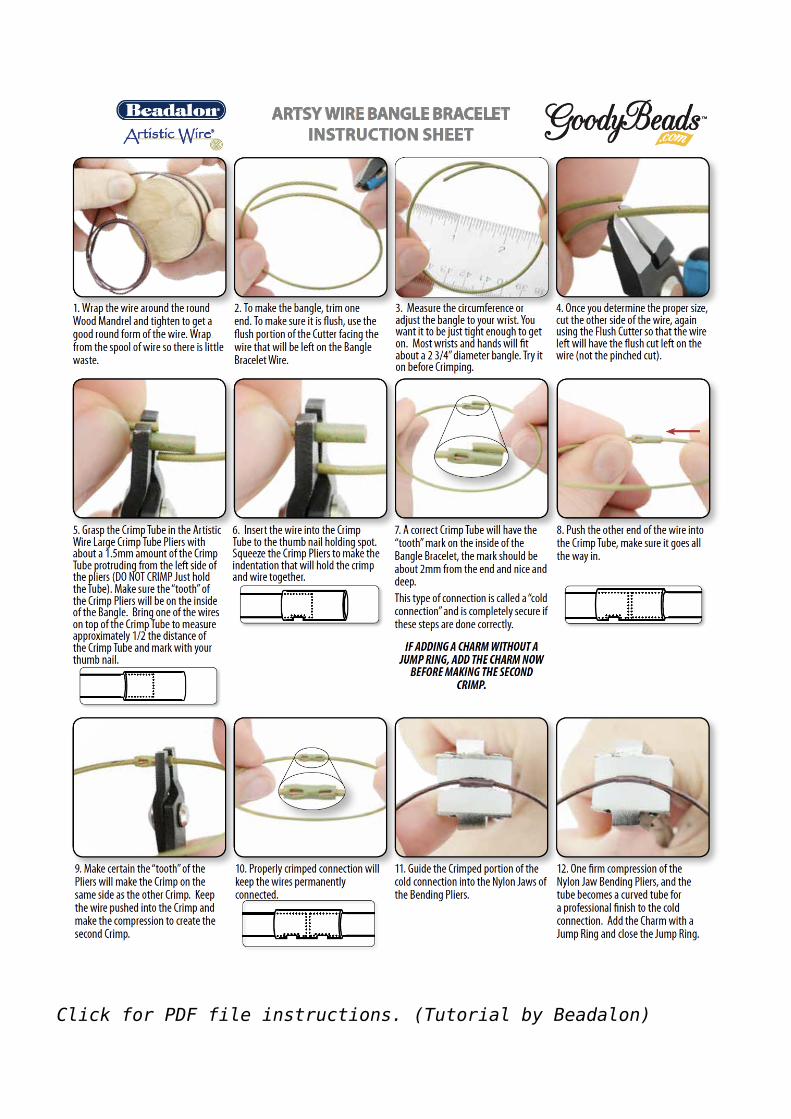
Click for PDF file instructions. (Tutorial by Beadalon)
How to Use Vintaj Patinas onLeather – Video TutorialCandie Cooper is back with us again! Watch this informationalvideo today and learn some tips and tricks to customizeleather jewelry with Vintaj Patina paints.
Video Tutorial
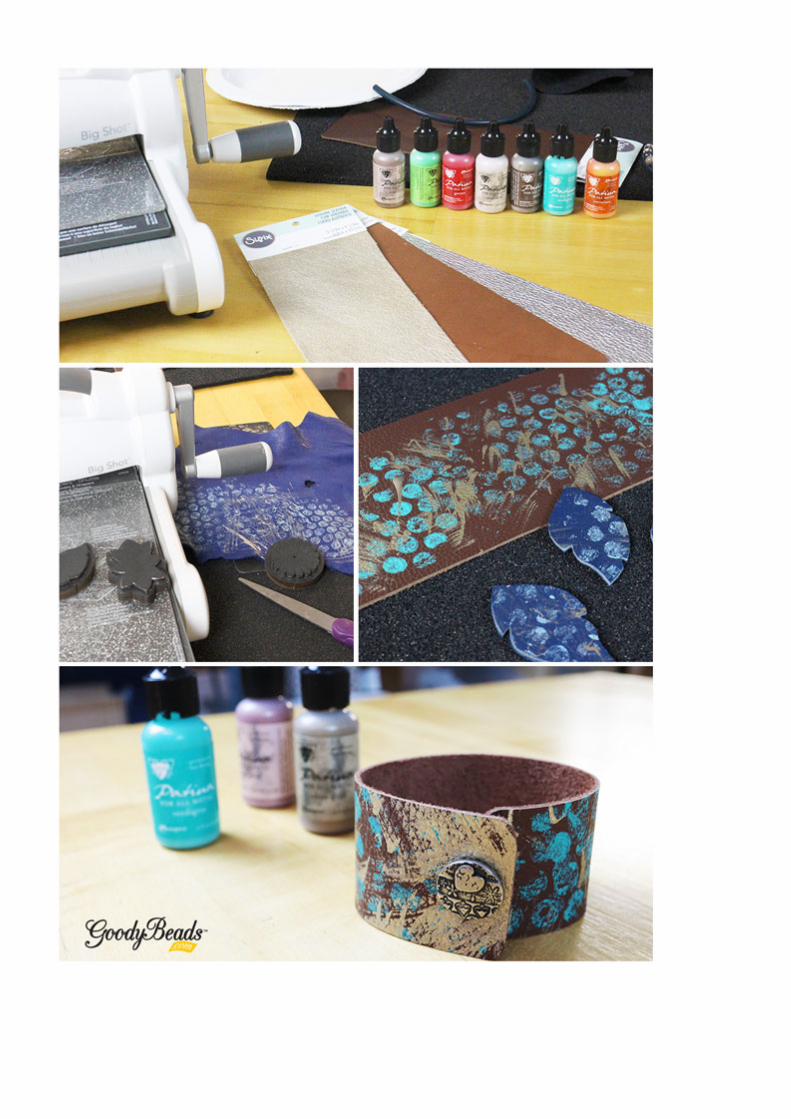
Vintaj Patina is versatile to use with metal, wood and evenleather! With the help of Candie Cooper, she and Tory have afun and innovative way of making leather jewelry with VintajPatina and the Sizzix Big Shot.
Here are some tips and tricks that were used in the videotutorial:
Use metallic patina paints over matte leatherPaint patina on bubble wrap and press leather on bubblewrapUse a fan brush to lightly brush patina while creatinghashing designsGlide the tip of the patina paint bottle over leather inquick strokes and scribbles
Sizzix Die Cuts used in video: Leaf Die Set (SZ00062) & WideBracelet Die (SZ00028)
Swarovski® Fine Rocks TubeBeadsSwarovski fine rocks tube beads are the envy of every jewelry-makers’ supply. Here are three simple and modern projects toget you started.
Swarovski fine rocks tube bead comes in two sizes: 15mm and30mm. As well as multiple color options. These tube shapebeads are layered with pavé crystals with a metallic andcrystal shine. Here are three simple projects using Swarovskifine rocks tube beads.
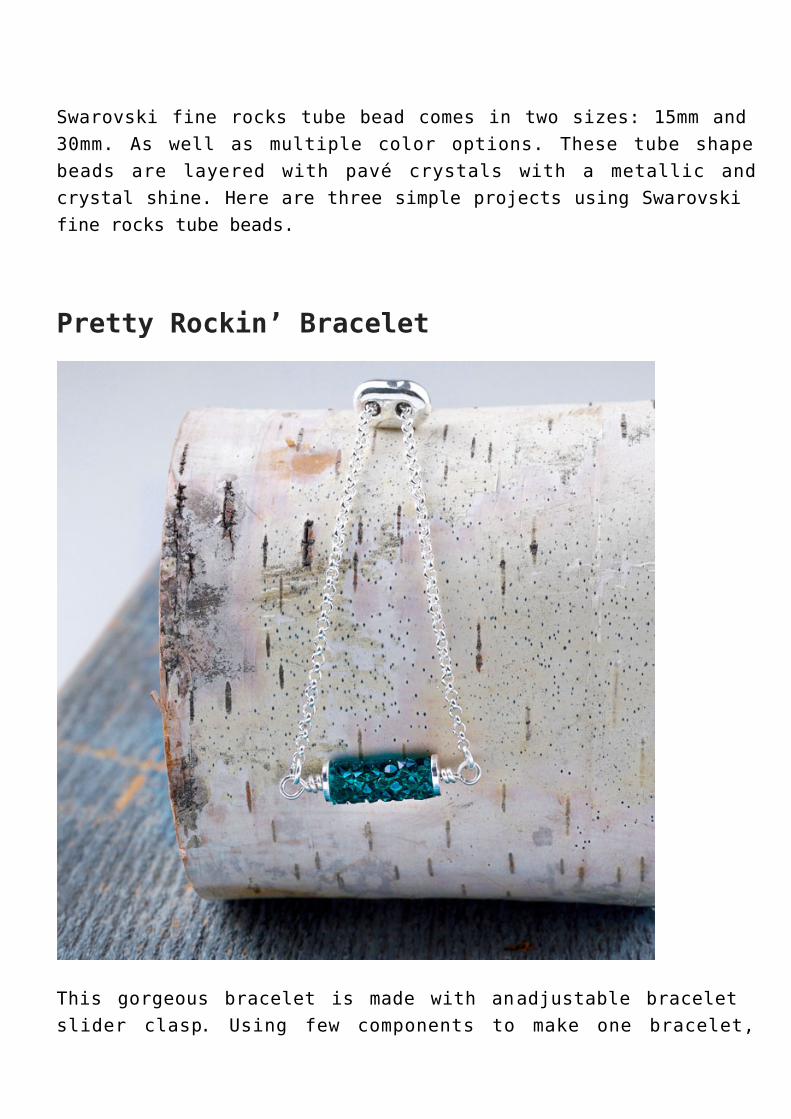
Pretty Rockin’ Bracelet
This gorgeous bracelet is made with an adjustable braceletslider clasp. Using few components to make one bracelet,
you’ll see how easy it is to want to make a whole bunch ofthem!
Items used in bracelet: SW01962, Z002570, WR00033, Z012151
Start with a 4 inch piece of 22-Gauge wire. Make a1.wrapped loop at one end.Slide silver spacer, crystal tube and silver spacer on2.wire. Make a wrapped loop.Open jump ring from one side of slider clasp and slip on3.end of crystal tube link. Close jump ring.Repeat to the other jump ring on slider clasp.4.
Midnight Blush Earrings
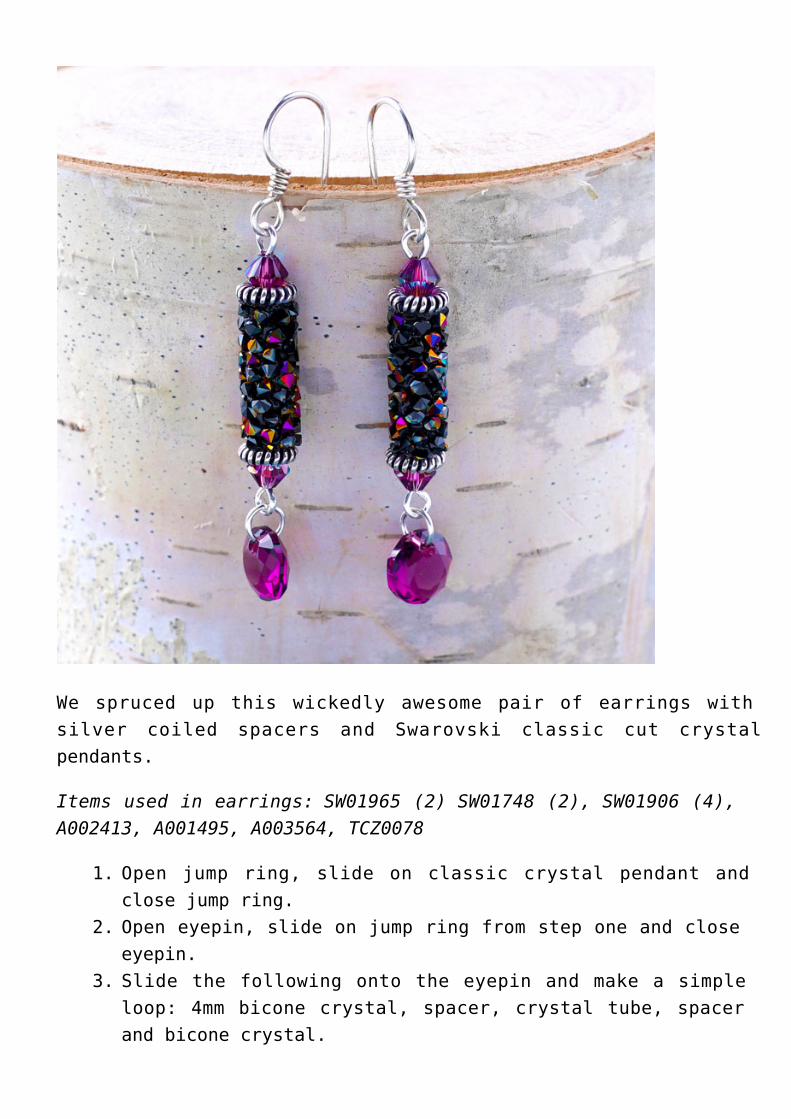
We spruced up this wickedly awesome pair of earrings withsilver coiled spacers and Swarovski classic cut crystalpendants.
Items used in earrings: SW01965 (2) SW01748 (2), SW01906 (4),A002413, A001495, A003564, TCZ0078
Open jump ring, slide on classic crystal pendant and1.close jump ring.Open eyepin, slide on jump ring from step one and close2.eyepin.Slide the following onto the eyepin and make a simple3.loop: 4mm bicone crystal, spacer, crystal tube, spacerand bicone crystal.
Open earwire loop, slide on tube dangle and close loop.4.Repeat all steps for other earring.5.
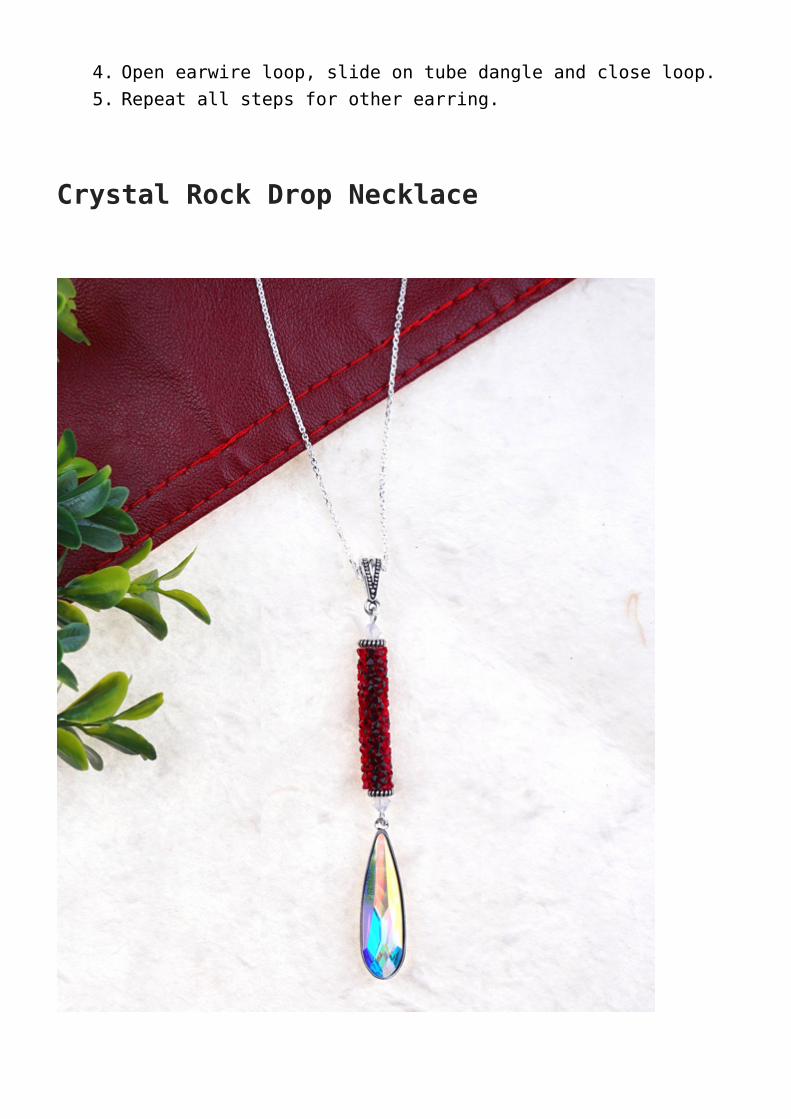
Crystal Rock Drop Necklace

Jam out to some hoppin’ holiday music with this Crystal RockDrop Necklace.
Items used in necklace: Z003715, A001495, A003564, SW00114(2), SW01825, SW01896, SW01970, TC00446, SW01830
Mix equal amounts of the Two-Part Epoxy.1.Dab a drop into the crystal setting. Lay raindrop fancy2.stone into setting. Let it dry for at least an hourbefore assembling necklace.Open eyepin and slide on raindrop stone dangle. Close3.eyepin.On the eyepin, slide on the following and make a simple4.loop: bicone crystal, spacer, crystal tube, spacer andbicone crystal.Open top loop, slide onto bail loop and close loop.5.Open clasp of necklace chain and slide on bail.6.Necklace complete.7.
GoodyBeads EZ DIY Series:Seed Bead Snowflake OrnamentReady yourself for the festive holidays making seed beadsnowflake ornaments with snowflake ornament forms.
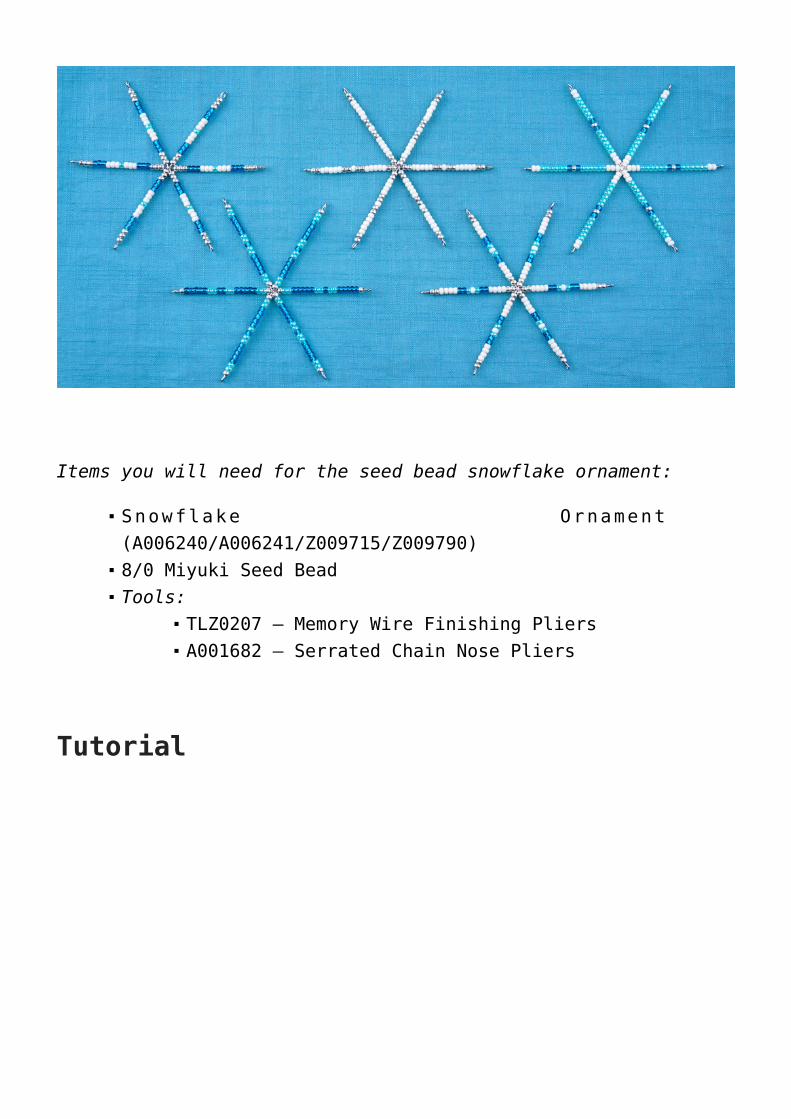
Items you will need for the seed bead snowflake ornament:
Snowflake Ornament Form(A006240/A006241/Z009715/Z009790)8/0 Miyuki Seed BeadTools:
TLZ0207 – Memory Wire Finishing PliersA001682 – Serrated Chain Nose Pliers
Tutorial

Items used in tutorial: SB00106, SB00093, SB00114, SB00109,A006240
Beadalon® Instant PendantNecklace – TutorialMake an easy necklace pendant when you have the BeadalonInstant Pendant.
The Instant Pendant has a removable ball or point end thatunscrews off. The mandrel is 1.5mm thick and 33mm long, so itis perfect for large-hole gemstones, large heavy beads, etc.
There are two styles; one with a ball tip and the other isa cone tip. They come in silver or gold finish. AND you getTHREE with each package. So many combinations to think of!
Gold: Z016435 (ball) & Z016437 (cone)
Silver: Z016434 (ball) & Z016436 (cone)
Here is a step-by-step instruction sheet that shows how easyit is to make a necklace with an Instant Pendant.

Click for PDF file instructions. (Tutorial by Beadalon)
Components in step-by-step tutorial:

Findings: Z016436, Z012742, Z012746
Tools: TL00316, TL00317, TL00318
Beads: WAF8RDLH-8, A009055, NBWB0011, A021464, A021481


