Embed Size (px)
Citation preview
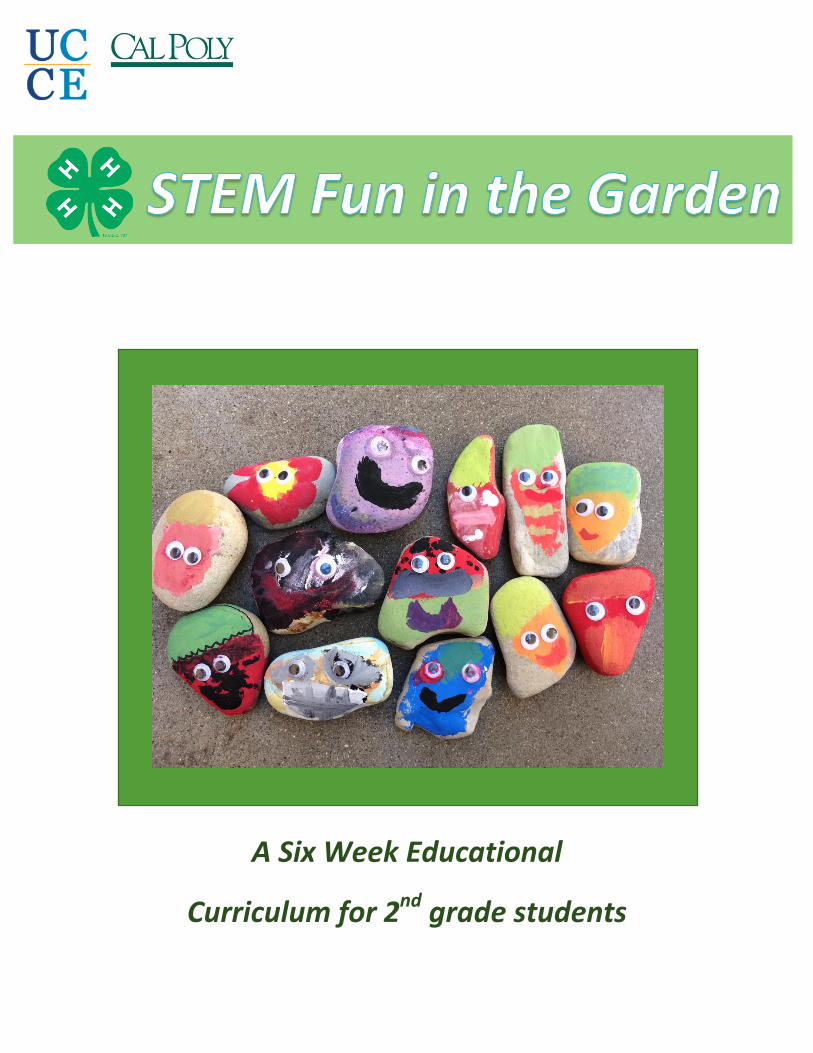
A Six Week Educational
Curriculum for 2nd grade students
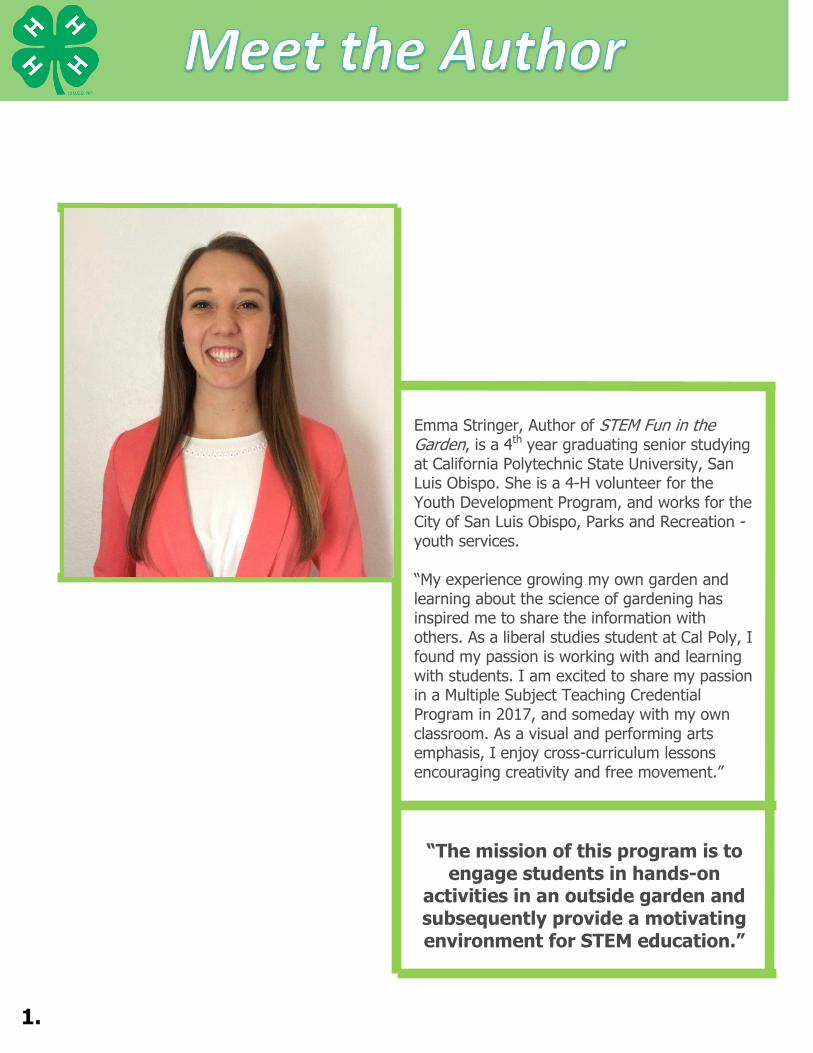
Emma Stringer, Author of STEM Fun in the Garden, is a 4th year graduating senior studying at California Polytechnic State University, San Luis Obispo. She is a 4-H volunteer for the Youth Development Program, and works for the City of San Luis Obispo, Parks and Recreation - youth services. “My experience growing my own garden and learning about the science of gardening has inspired me to share the information with others. As a liberal studies student at Cal Poly, I found my passion is working with and learning with students. I am excited to share my passion in a Multiple Subject Teaching Credential Program in 2017, and someday with my own classroom. As a visual and performing arts emphasis, I enjoy cross-curriculum lessons encouraging creativity and free movement.”
“The mission of this program is to engage students in hands-on
activities in an outside garden and subsequently provide a motivating environment for STEM education.”
1.
Mission Statement & Meet the Author 1
Table of Contents
2
Lesson 1: See the Plant 3-5
Lesson 2: Know the plant
6-8
Lesson 3: Taste the Plant
9-11
Lesson 4: Be the Plant
12-15
Lesson 5: Grow the Plant
16-18
Lesson 6: Share the Plant
19-21
NGSS & CA Standard Correlations 22-24
Stem fun in the Garden: Teacher Addition 1
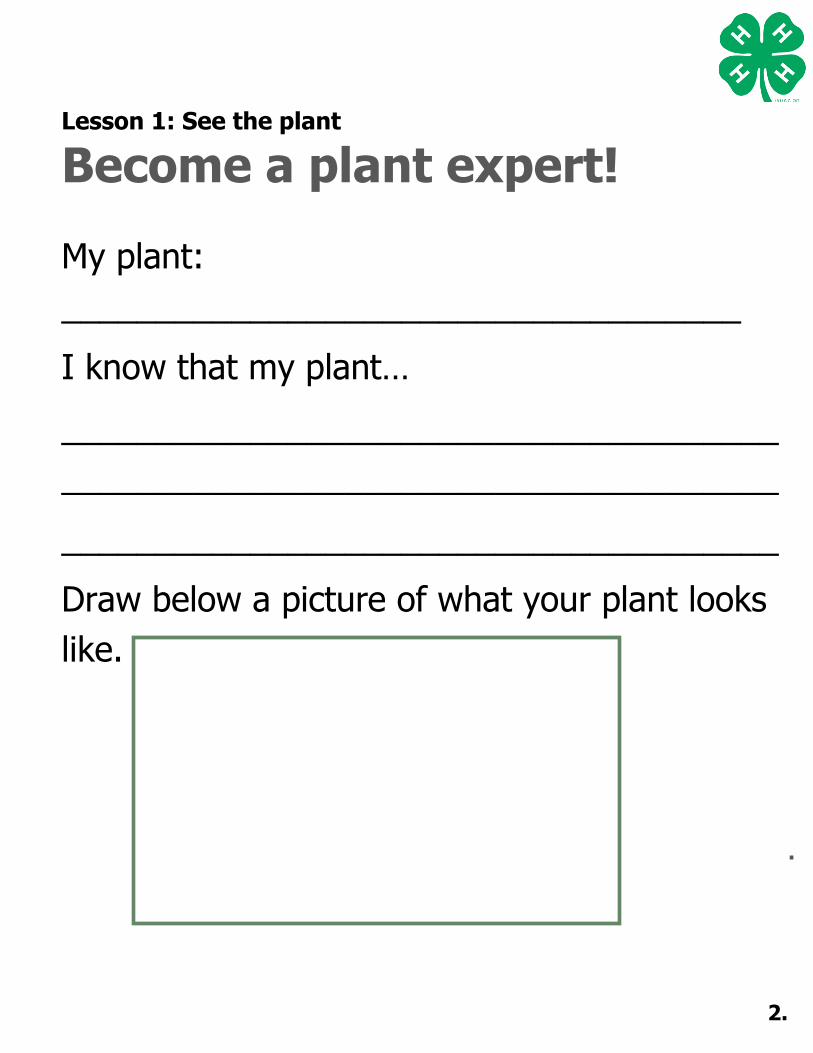
Become a Plant Expert!
2
Let’s check It Out!
3
My Leaf Rubbing
4
Growing Experiment
5
Watch Me Grow!
6
Photosynthesis Fun! 7
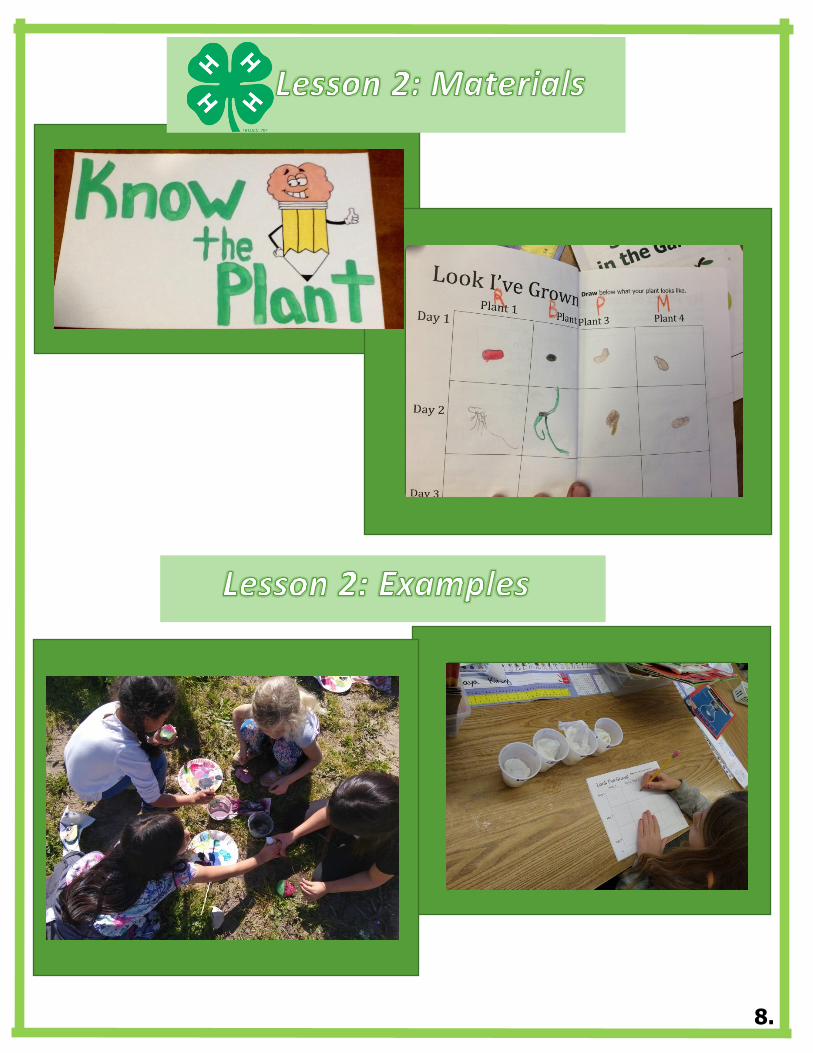
Look! I’ve Grown! 8-9
My Plant Structure
10
Tasty Taste Test
11
My Plant Results
12
Garden Yoga for Kids
13
Garden Song
14
Grow My Plant
15
Resources
Weather Dependent Variations
STEM Fun in the Garden Booklet
16
17
--- 2.
1. Explain that each student will become an expert
on one plant in the garden, and the plant card
they receive will be the plant they become an
expert on. (Do this while handing out the plant
cards.)
2. Have the students discuss with someone sitting
next to them what they know about the plant.
Have they ever seen it? Tried eating it? Etc.
3. Students will also make us a movement for their
plant. (While they are discussing pass out the
booklets and pencils.)
1. Have the students write their name on the
“STEM Fun in the Garden” booklet. Then open
and begin answering the questions on page 2.
(If the students have never seen their plant
before have them guess what it looks like.)
Introduce your students to the outdoor
garden and classroom. Set safety rules
for the area and go over any relevant
safety hazards (fences, garden tools,
etc.). Then cover any expectations for
your time together and in the garden. An
example is shown below:
“I would like to thank you in advance for
using your best listening ears. We are
outside and going to be doing some
exciting activities, but to participate I
need your help in following directions
while I am here. [check for
understanding] What are the two things
we will be doing? [students respond
listening & following direction.]
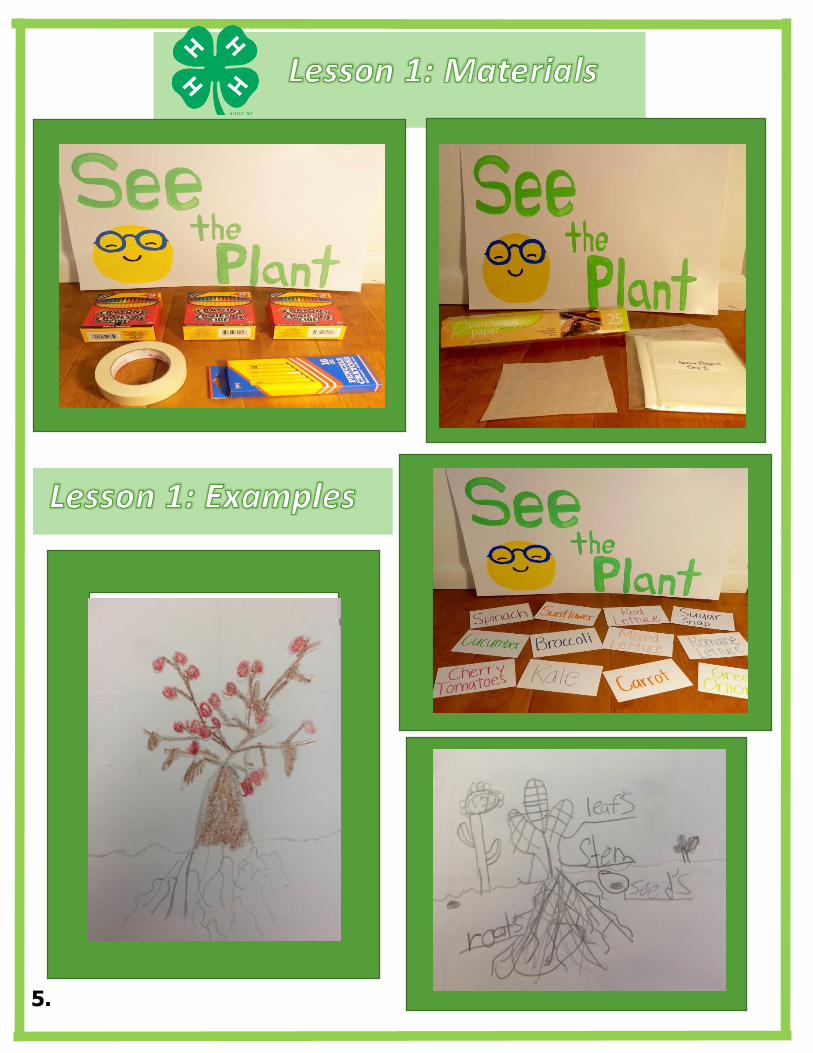
- “STEM Fun in the Garden” Booklet
- 1 ruler for each student - 1 yard stick
- 1 roll of parchment paper
- 1 crayon & pencil for each student
- Index cards with plant names on
them specific to the garden
Start by asking the class “Who would like to be the
expert on your garden?” Discuss what an expert is
and how they become experts. Introduce that the
students will becoming experts in 6 easy steps.
1. See the Plant
2. Know the Plant
3. Taste the Plant
4. Be the Plant
5. Grow the Plant
6. Share the Plant
This lesson focuses on the students’
initial exposure to the garden and the
plants in it. It encourages the students
to take a closer look at plants within the
garden to begin the Scientific and
Engineering process.
3.
Stand in a large circle and have the students
individually show their motion for their plant
while saying their plant name. Then the class
will respond “cool moves!” Optional: Have
the students show three classmates their
motion and give a high five to each student
saying “cool moves!”
Discuss as a group or with partners 2 or 3 things they learned about their plant that they did not know.
Explain to the students that there are many different plants and that gardens exist all over the world. Tell them that some gardens have similar plants and some unique plants.
1. Discuss through page 3 with the
students explaining that to be a
plant expert they must see the
plant and know what it looks like.
2. Stop on question 7 and ask what a
leaf is to confirm they can identify
one.
3. Model for them how to identify the
plant, to count the leaves, and
measure the height and leaf length
in inches and centimeters.
4. Students will then be free to
explore around the garden to
search for their assigned plant and
fill out page 3. (Be sure to walk
around and help those students
who may be struggling with the
assignment).
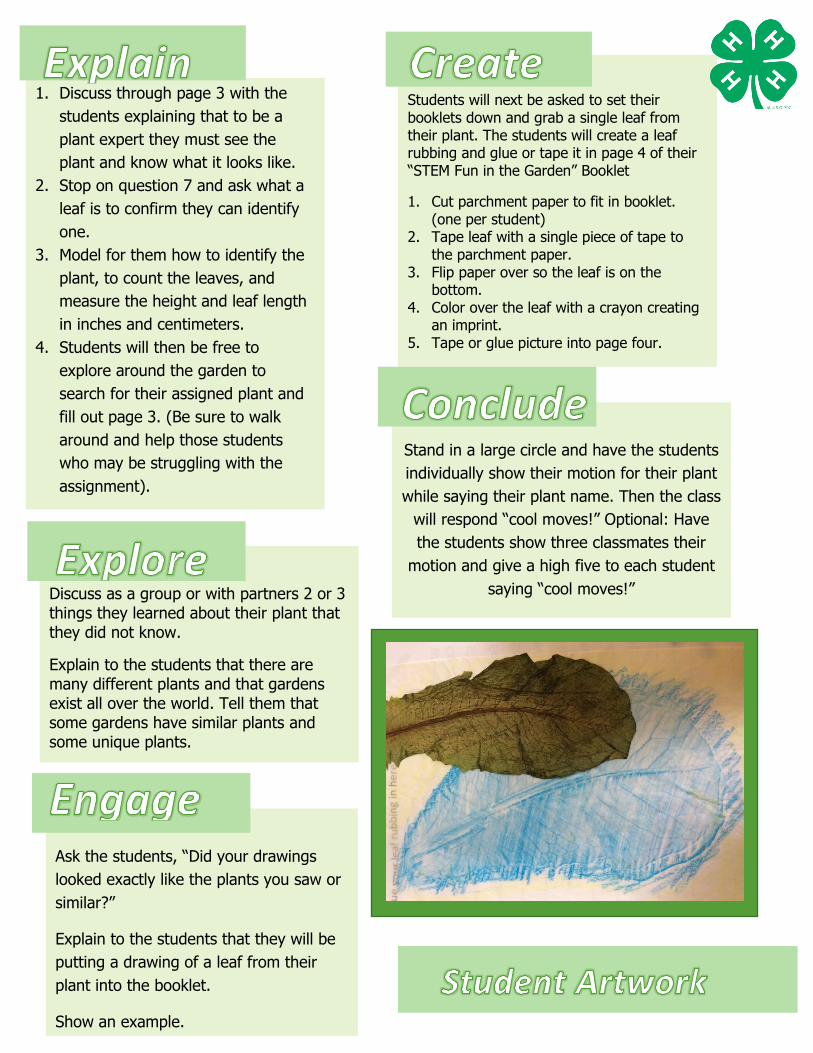
Students will next be asked to set their booklets down and grab a single leaf from their plant. The students will create a leaf rubbing and glue or tape it in page 4 of their “STEM Fun in the Garden” Booklet
1. Cut parchment paper to fit in booklet. (one per student)
2. Tape leaf with a single piece of tape to the parchment paper.
3. Flip paper over so the leaf is on the bottom.
4. Color over the leaf with a crayon creating an imprint.
5. Tape or glue picture into page four.
Ask the students, “Did your drawings
looked exactly like the plants you saw or
similar?”
Explain to the students that they will be
putting a drawing of a leaf from their
plant into the booklet.
Show an example.
5.
1. As a group, ask “What is the difference for a
plant that is outside and a plant that is inside?”
Use the whiteboard to brainstorm with the
group until sunlight is mentioned.
2. Erase the whiteboard then draw on the
whiteboard four squares. In a discussion, fill
the squares with the four testing types.
-In the sun with water -Sun
-In the sun with no water -Sun and water
-Inside with water -Water
-Inside with no water -Neither
3. Have the students open their “STEM Fun in the
Garden” to page 4 titled “Growing Experiment”.
4. Use the teacher STEM Fun in the Garden
Booklet to model how students will fill in the
page 4 similar to the image on the whiteboard.
5. Have the students continue to the end of the
page and list their predictions after completing
the table.
This lesson introduces our growing
experiment for the students to determine if
plants need sunlight and water to grow. It
also introduces the basics of a plant
structure and differences between various
plants.
v
Introduce with a story that includes a
problem that needs to be solved.
” I live in an apartment very close to Cal
Poly and I want to start my own garden
growing bean sprouts. I was reading in
a book that some plants can be grown
inside and some even live without being
watered! I don’t know if that’s true but I
would love to have bean sprouts
growing in my room. Would you help
me out and figure out what I need to do
to help bean sprouts grow?”
-
- bean seeds - 2 sticker labels per students
-Pitchers of water -wipes –paint/brushes
- “STEM Fun in the Garden” Booklet
- 2 rectangular cardboard boxes
- Egg cartons 4 per student
- 1 White board & white board markers
- 2 dish bins filled with soil
- 1 rock per student about palm sized
For best results have materials prepped as shown in
the image on the next page
1. Pass out to each student 4 12oz Dixie cups or 2
egg cartons and write their name on the labels.
2. Half of the students will then take turns filling
their cups or cartons half full with soil.
-The other half of the students will be telling
another student which plant they think will grow
the best.
-Then have the students switch until all students
have four cups half filled with soil.
6.
When the students have completed
with their egg cartons, they will be
invited to a station to paint a rock a
bright color of their choosing
[Students will in Lesson 6 to write the
name of the plant they were assigned
on their rock as a garden label. The
rocks will be placed in the garden by
their plant.]
If they are waiting at any time have
them review their plant movement they
created in lesson 1.
3. Pass out a few seeds to each
student
4. Have each student place a few
seeds in each carton making sure they
are spread out.
5. Have each student sprinkle more soil
on the top of the seeds. Just enough to
cover the seeds.
6. Have the students pour a bit of
water on 2 of the plants. [Using Dixie
cups and the bowls/pitchers of water.]
7. Have the students set 2 of their
plants (1 plant with water and 1
without) in the cardboard box outside.
Duplicate the procedure and place the
second box in a secure, shaded place
inside.
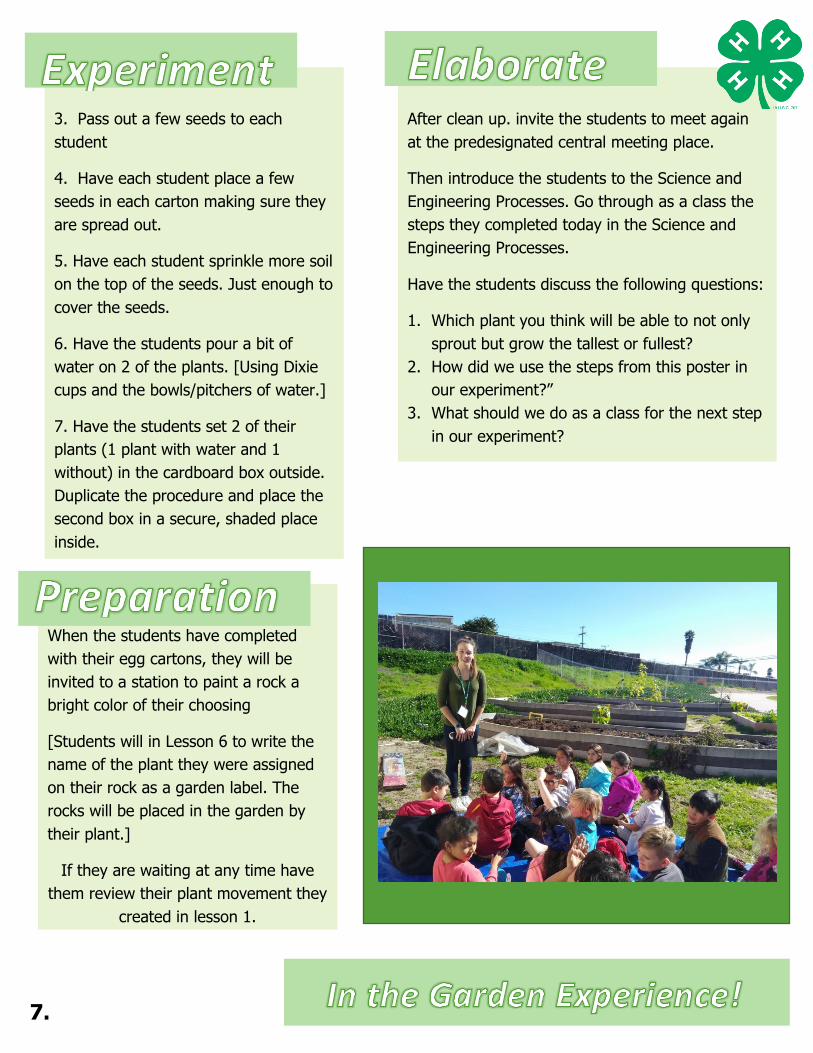
After clean up. invite the students to meet again
at the predesignated central meeting place.
Then introduce the students to the Science and
Engineering Processes. Go through as a class the
steps they completed today in the Science and
Engineering Processes.
Have the students discuss the following questions:
1. Which plant you think will be able to not only
sprout but grow the tallest or fullest?
2. How did we use the steps from this poster in
our experiment?”
3. What should we do as a class for the next step
in our experiment?
7.
8.
Have the students discuss with a partner the
following questions: “What part of their plant do
humans eat?” Ask them to compare with their
partner. Are your answers the same?
Have the class write what part of the plant humans
eat on page 8 of “STEM Fun in the Garden.
1. Each student will get 5 different colored star
stickers. The stickers will correspond to a
specific plant part.
a. Leaf - Gold
b. Stem - Silver
c. Petal or fruit - Green
d. Seed - Red
e. Roots – Blue
2. Show the back of the plant structure poster
with the information above.
3. Challenge students to go and gently place a
sticker on the part of their plant that
corresponds to the sticker.
4. When all the students think they have correctly
placed their stickers, give them a plant
structure index card that corresponds to their
plant.
5. When the students get the correct answer,
have them draw it in their booklet on page 7.
i
Students will get the chance to evaluate
their plants they planted in lesson 2.
They will do this by filling out line 1 on
pages 6 and 7 of their “STEM Fun in the
Garden” booklet. Discuss the progress
of the experiment as a class.
While standing in a circle, tell the students
they will be “learning more about their
plant today. In order to remember our
plant, we will go 1 at a time around the
circle and try to do our plant movement
as fast as we can as a group!”
- “STEM Fun in the Garden” Booklet
- Star stickers (5 per student) - Pencils
- Plant structure poster & cards
-Plates with kale/lettuce, celery, sunflower
seeds, potato, chamomile tea
-Whiteboard & whiteboard markers
1. Students will discuss the mystery parts of the
plant structure with a partner.
2. As a class, confirm on the plant posters, the
different parts of the plants.
In this lesson the students will analyze and
document their progress so far from the
previous experiment. They will also learn
about different plant structures and identify
and taste some of those structures.
9.
1. Pass out the 5 different foods to the
students.
a. Leaf – Lettuce/Kale
b. Stem - Celery
c. Petal – Chamomile
d. Seed – Sunflower seed
e. Roots – Potato
2. Have the students make their predictions on
page 8 of the “STEM Fun in the Garden”
booklet.
3. Once the students are finished with page 8,
discuss their predictions as a class. Correctly
label each food using the whiteboard.
For the conclusion of this lesson. have each student
show you or a partner their plant move and say what
their favorite part of a plant is to eat!
10.
11.

Right arm: “5, 4, 3, 2, 1!”
Left arm: “5, 4, 3, 2, 1!”
Right leg: “5, 4, 3, 2, 1!”
Left leg: “5, 4, 3, 2, 1!”
Continue this until you shake each limb once.
Have the students start in a circle. Explain
to them the theme for the day is “Be the
Plant!” In order to do this, we must first
get into character. To “Be the Plant” we
must shake out of our human character.
“Explain that the students are to as a
group count down from 5 as a group while
shaking out each of their limbs (In this
order: Right arm, Left arm, Right leg, Left
leg). Then they will count down from 4,
then 3, etc. until they reach 1.”
View an example of this is in the next box.
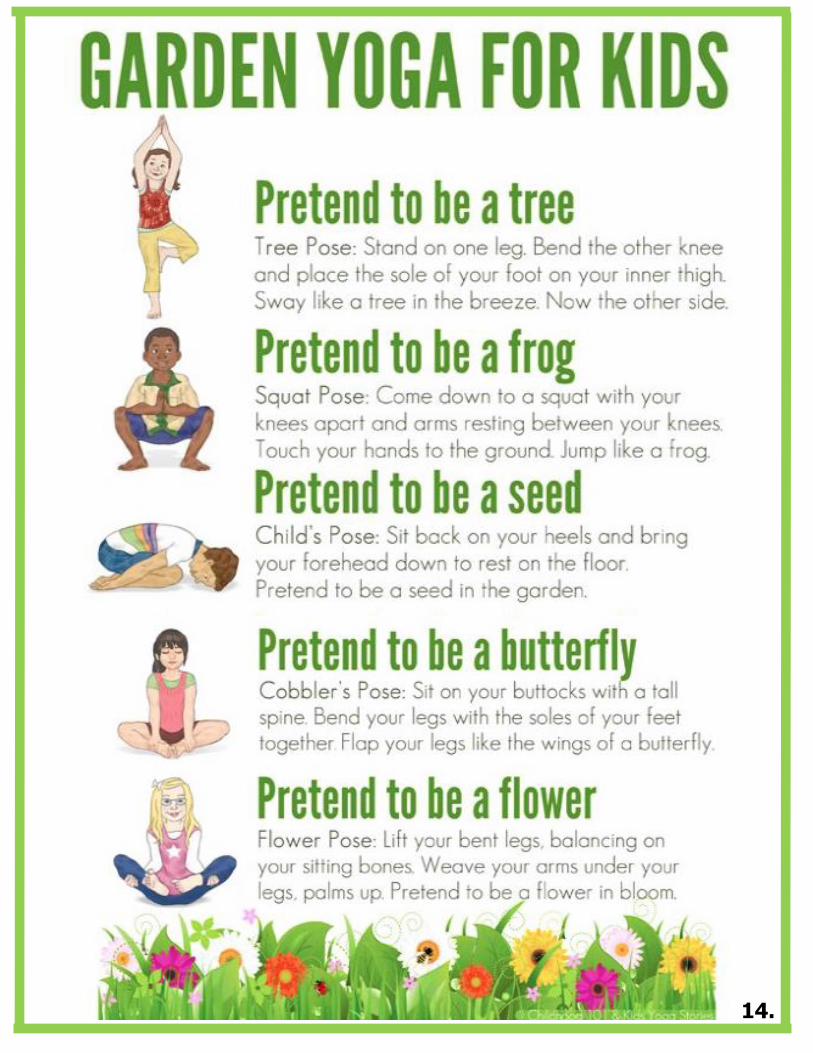
- “STEM Fun in the Garden” Booklet
- Pencils (1 per student)
- Whiteboard and Whiteboard Markers
- Photosynthesis Shoe box
Now that we have shaken off our human character
we must get focused to be our plant character.
Plants love rain. To become focused happy plants,
we will be making a rainstorm.
1. “Ask everyone to sit with you in a circle on the
floor.
2. You will begin an activity, then the person to
their right will join in, then the person to
his/her right will join in, etc. until it creates a
wave all around the circle. Once it reaches
back to you (the leader) you begin a different
activity, and this creates a second wave.
3. Tell the students that they are to carefully copy
the movements of the person to their left, and
not switch activities until that person
switches. Try to encourage them to not focus
on “the leader”, but instead on the person to
their left.”
As a leader go in the pattern below.
Rub your hands together. (This is the wind)
Golf clap, a quiet, light clap (First raindrops.)
Full out clapping. (It’s getting more intense!)
Slap on the floor, or your thighs. (Thunder)
After a big crescendo, repeat all the activities
in reverse order as the storm dies down, until
you’re rubbing hands together.
In this lesson, the students will be
learning the basics of photosynthesis.
They will be creating a dance to reflect
what they know about plant growth and
photosynthesis, as well as learning
some garden yoga!
12.
Invite the students to find their own personal
space within the general space.
Remind the students that the garden helps
them be healthy just like exercise does and
that our body can do some “cool” things
Tell them for us to be the plant we must do
some pretending and imagining
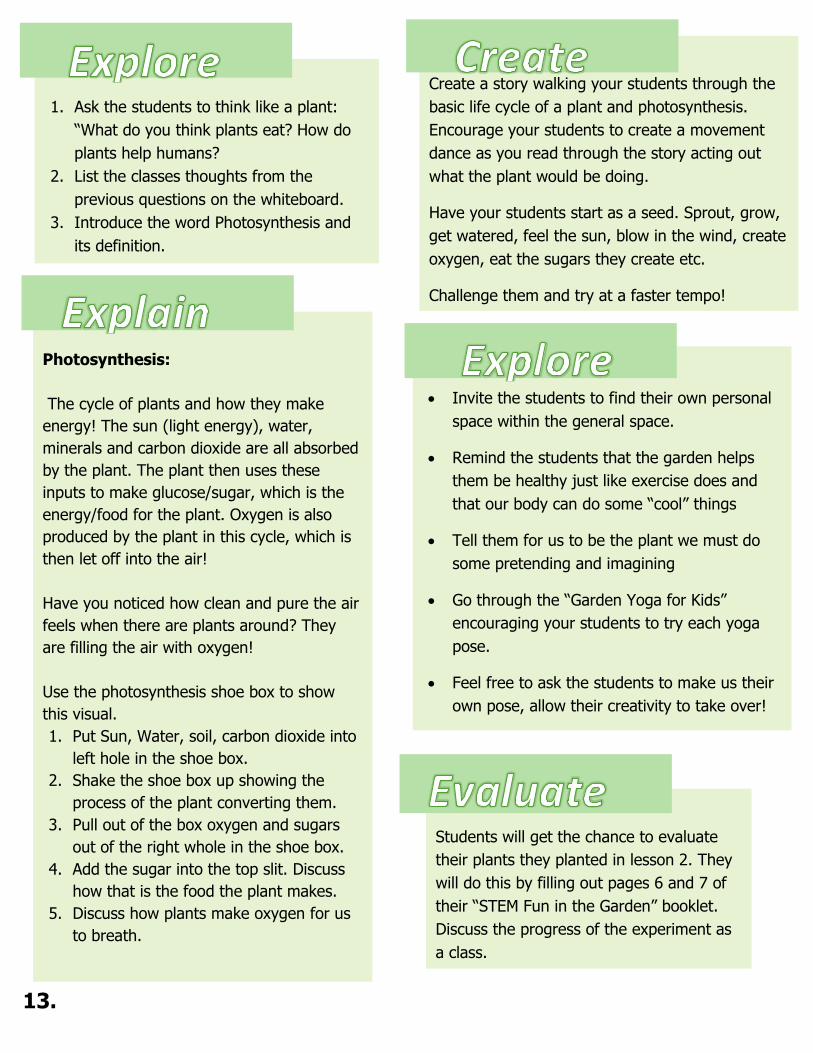
Go through the “Garden Yoga for Kids”
encouraging your students to try each yoga
pose.
Feel free to ask the students to make us their
own pose, allow their creativity to take over!
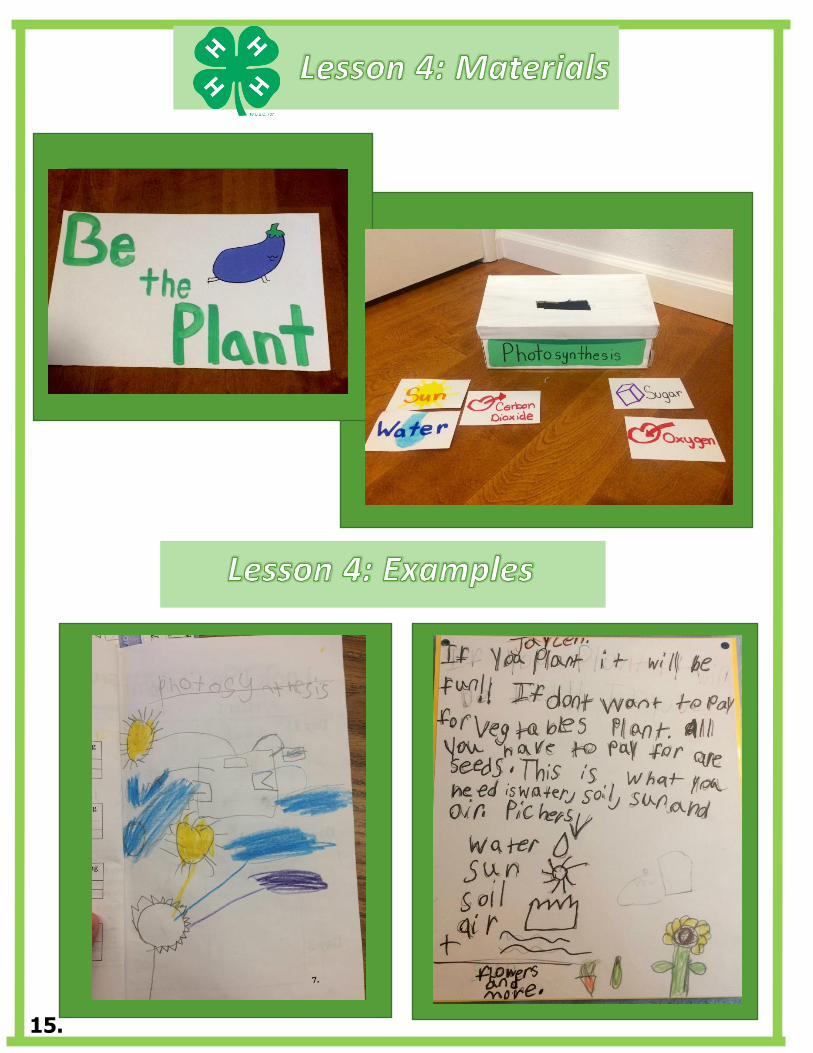
Photosynthesis:
The cycle of plants and how they make
energy! The sun (light energy), water,
minerals and carbon dioxide are all absorbed
by the plant. The plant then uses these
inputs to make glucose/sugar, which is the
energy/food for the plant. Oxygen is also
produced by the plant in this cycle, which is
then let off into the air!
Have you noticed how clean and pure the air
feels when there are plants around? They
are filling the air with oxygen!
Use the photosynthesis shoe box to show
this visual.
1. Put Sun, Water, soil, carbon dioxide into
left hole in the shoe box.
2. Shake the shoe box up showing the
process of the plant converting them.
3. Pull out of the box oxygen and sugars
out of the right whole in the shoe box.
4. Add the sugar into the top slit. Discuss
how that is the food the plant makes.
5. Discuss how plants make oxygen for us
to breath.
1. Ask the students to think like a plant:
“What do you think plants eat? How do
plants help humans?
2. List the classes thoughts from the
previous questions on the whiteboard.
3. Introduce the word Photosynthesis and
its definition.
Create a story walking your students through the
basic life cycle of a plant and photosynthesis.
Encourage your students to create a movement
dance as you read through the story acting out
what the plant would be doing.
Have your students start as a seed. Sprout, grow,
get watered, feel the sun, blow in the wind, create
oxygen, eat the sugars they create etc.
Challenge them and try at a faster tempo!
13.
i
Students will get the chance to evaluate
their plants they planted in lesson 2. They
will do this by filling out pages 6 and 7 of
their “STEM Fun in the Garden” booklet.
Discuss the progress of the experiment as
a class.
14.
15.
- Bean seeds -1 sticker label per students
- Pitchers of water - Wipes
- 6 Small Dixie cups -1 Pencil per student
- Googly eyes - Strong glue
- 4-5 Popsicle sticks
- Cut in half water bottles with caps, 1 per
student
- “STEM Fun in the Garden” Booklet
- 1 Large rectangular cardboard box
- White board & White board markers
- 2 Dish bins filled with soil
Students will now be taking the information they
learned and celebrating it by making a plant friend.
Half the students will plant their plant friend while
the other half is decorating it then switch.
For best results have materials prepped as shown in
the image on the next page
To plant:
1. Pass out to each student a water bottle
2. Have students write their name on the labels
and place the label on the bottle.
3. Students will then take turns filling their bottle
¾ full with soil.
4. Pass out a few seeds to each student.
5. Have each student place a few seeds in the
bottle making sure they’re spread out.
6. Have each student sprinkle more soil on the top
of the seeds. (Just enough to cover the seeds.)
Start by singing an amended version of John
Denver’s “Garden Song”. Create motions to
the song to help your students remember.
“Inch by inch, row by row, gonna make this
garden grow. All it takes is water and the
sun and a piece of soiled ground. Inch by
inch, row be row, someone bless the seeds I
sow. Someone warm them from below, ‘til
the rain comes tumbling down.”
This is a great point for teachers to listen to
conversations and read the students page 12 “STEM
Fun in the Garden” booklet to evaluate standard
(NGSS-2-LS2-1.). Plants need water and sunlight to
grow.
1. Explain page 9 in the “STEM Fun in the Garden”
Booklet
2. Have the students complete page 9.
3. Discuss the results with a partner. Then regroup
and discuss page 9 as a class.
4. Repeat steps 1-3 with page 12 in the “STEM Fun
in the Garden” booklet.
This lesson focuses on the student’s
exposure to the Scientific and Engineering
process. The students will decide what
elements plants need to survive. We will
celebrate their knowledge by making Plant
Friends!
16.
The Garden Song Original:
http://www.youtube.com/watch?v=UyX4MEsVLVc
The Garden Song Guitar Tabs:
http://tabs.ultimate-
guitar.com/j/john_denver/garden_song_crd.htm
17.
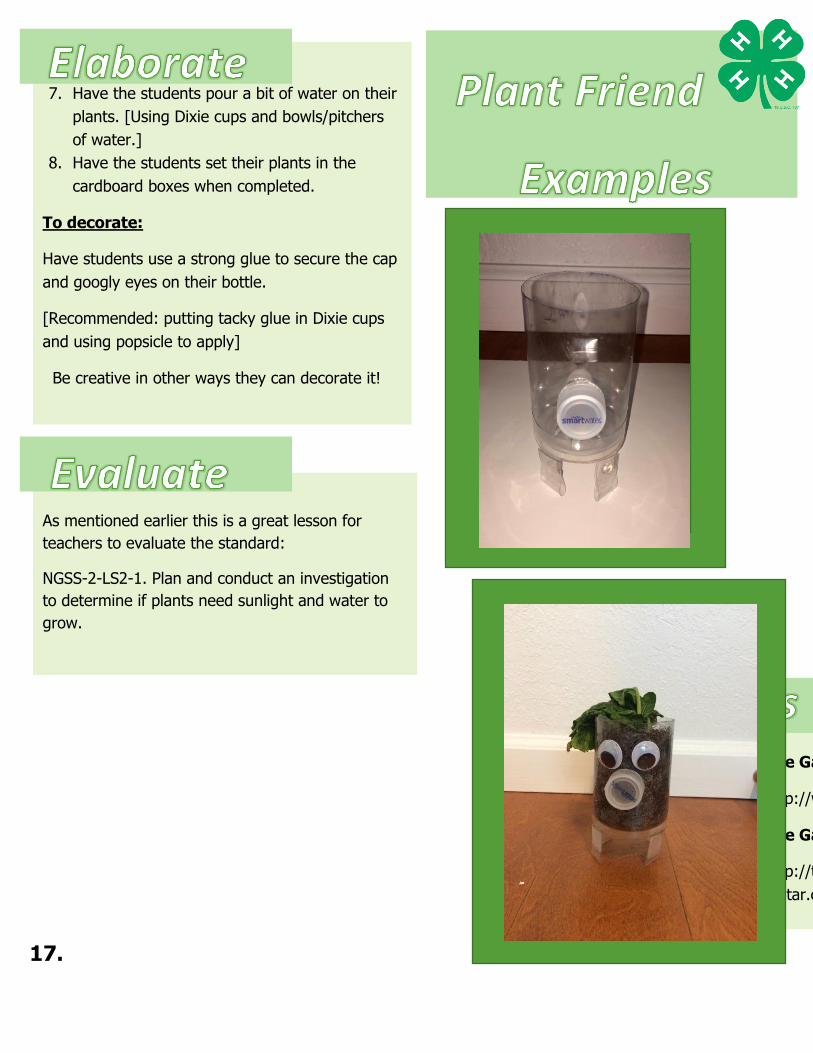
7. Have the students pour a bit of water on their
plants. [Using Dixie cups and bowls/pitchers
of water.]
8. Have the students set their plants in the
cardboard boxes when completed.
To decorate:
Have students use a strong glue to secure the cap
and googly eyes on their bottle.
[Recommended: putting tacky glue in Dixie cups
and using popsicle to apply]
Be creative in other ways they can decorate it!
As mentioned earlier this is a great lesson for
teachers to evaluate the standard:
NGSS-2-LS2-1. Plan and conduct an investigation
to determine if plants need sunlight and water to
grow.
18.
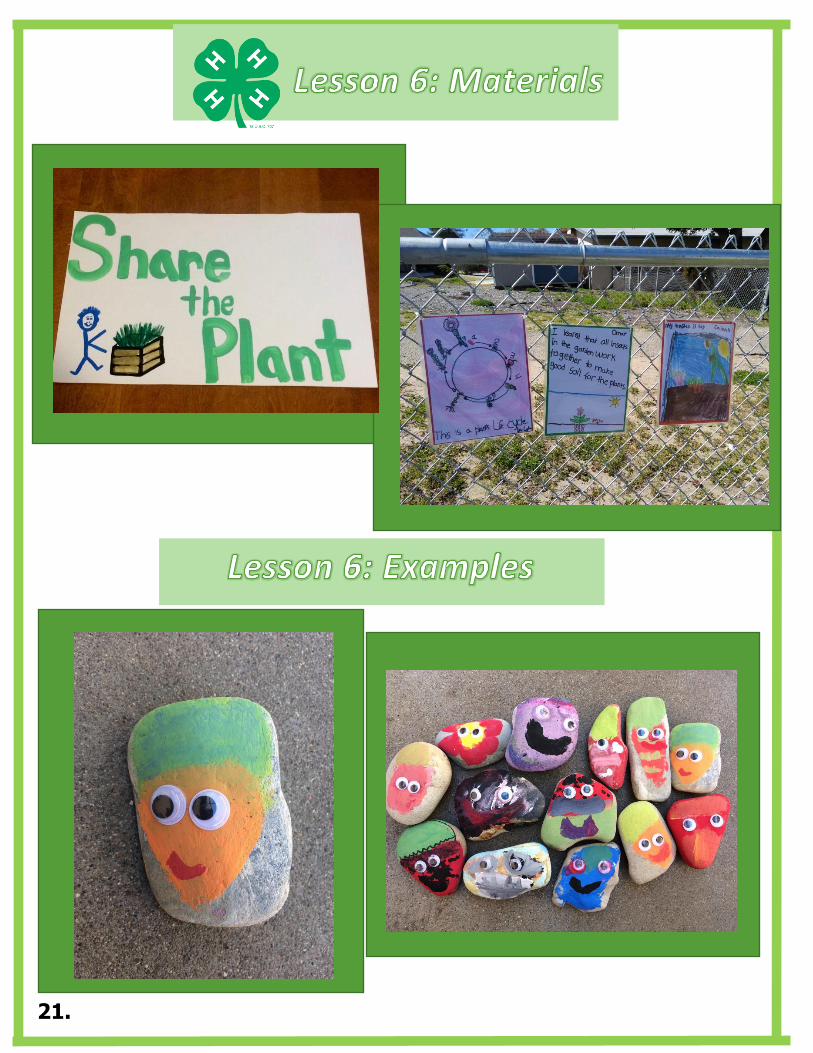
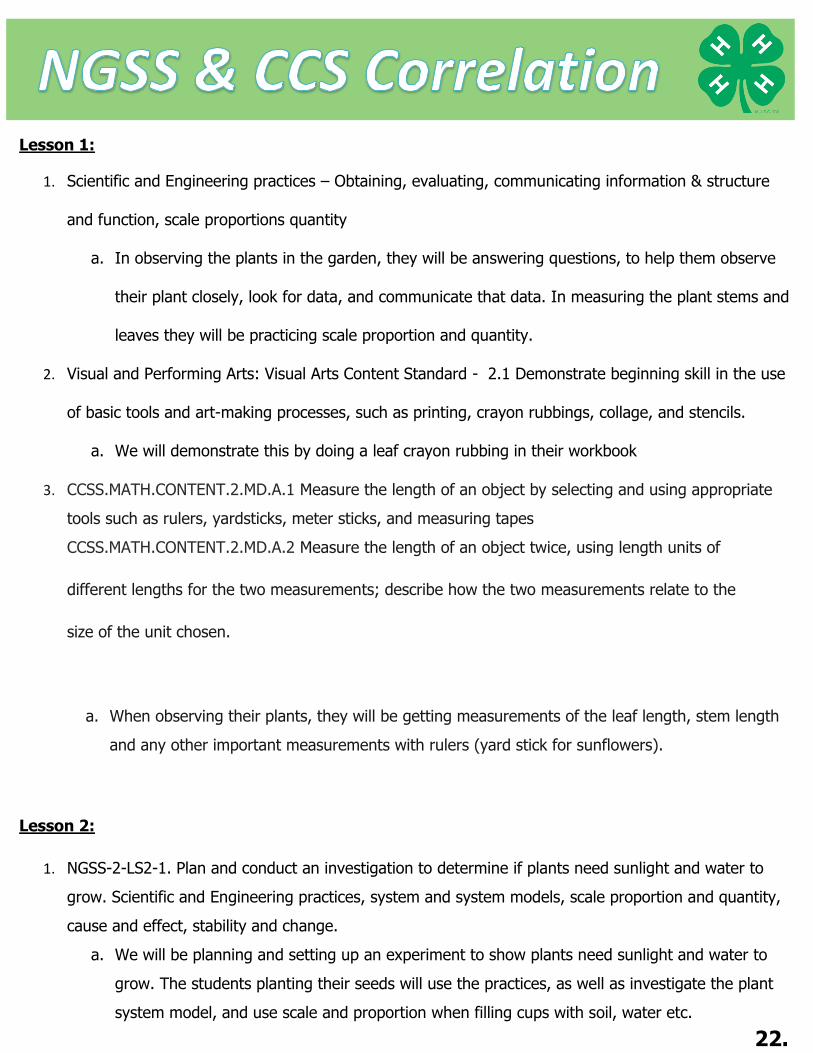
Students will be painting and decorating two rocks
to put in the garden.
One will be what their plant looks like with
eyes and a face on it. (review pictures on page
21 for examples.)
One will be the rock they painted in lesson 2.
They will be writing the name of the plant on
that rock to label their plant in the garden.
Students will now have two stations to create an
information sheet about their plant for the garden
and paint their rock for the garden.
Share with a friend! Today’s theme is all
about sharing what we have learned.
Students will be given 30 seconds to
share specific information with a partner
then give them a special high five.
Students cannot repeat partners.
1. What plant are you an “expert” on?
a. Give this partner a high five
2. What does your plant look like?
a. Slime high five.
b. One students high-5’s their
partner then slides their hand
down as if it was slime.
- “STEM Fun in the Garden” Booklet
- Paint and Paint brushes
- Sharpies, pencils, crayons
- Informational sheet for students to fill out
- 1 previously painted rock & 1 unpainted
rock per student.
3. How did you decide to grow your plant?
Sunlight? Water?
a. Super speed high-5
b. 5 fast high-5’s
4. Show your partner your favorite plant pose.
a. Butterfly high five
b. Put two fingers on your head like antennas
touch antennas together.
5. What is your favorite activity we have done so
far in out lessons?
a. Super-duper high-5
b. Give As many high-5s as you can in 10sec
This lesson is a conclusion of the 5 previous
lessons. Students will review and present
the information they have learned. They will
be creating an informational plant page and
plant identifier rocks
19.
Thank the students for all their hard work.
Remind them that science can be a fun and
hands-on experience. Challenge them to try
doing their own experiments and maybe even
grow a garden!
Have students fill out evaluation surveys
provided by your 4-H Club Coordinator.
Collect “STEM Fun in the Garden” booklets
and give them to the teacher to review as an
evaluation of progress and pass back.
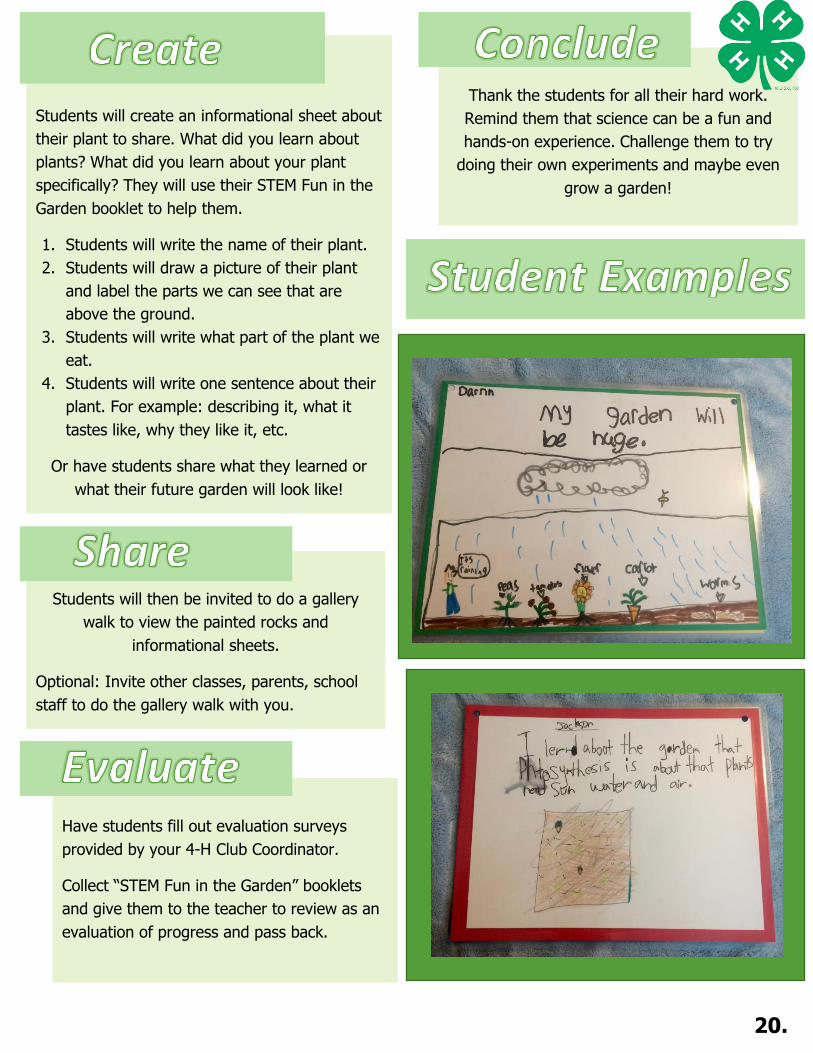
Students will create an informational sheet about
their plant to share. What did you learn about
plants? What did you learn about your plant
specifically? They will use their STEM Fun in the
Garden booklet to help them.
1. Students will write the name of their plant.
2. Students will draw a picture of their plant
and label the parts we can see that are
above the ground.
3. Students will write what part of the plant we
eat.
4. Students will write one sentence about their
plant. For example: describing it, what it
tastes like, why they like it, etc.
Or have students share what they learned or
what their future garden will look like!
Students will then be invited to do a gallery
walk to view the painted rocks and
informational sheets.
Optional: Invite other classes, parents, school
staff to do the gallery walk with you.
20.
21.
Lesson 1:
1. Scientific and Engineering practices – Obtaining, evaluating, communicating information & structure
and function, scale proportions quantity
a. In observing the plants in the garden, they will be answering questions, to help them observe
their plant closely, look for data, and communicate that data. In measuring the plant stems and
leaves they will be practicing scale proportion and quantity.
2. Visual and Performing Arts: Visual Arts Content Standard - 2.1 Demonstrate beginning skill in the use
of basic tools and art-making processes, such as printing, crayon rubbings, collage, and stencils.
a. We will demonstrate this by doing a leaf crayon rubbing in their workbook
3. CCSS.MATH.CONTENT.2.MD.A.1 Measure the length of an object by selecting and using appropriate
tools such as rulers, yardsticks, meter sticks, and measuring tapes
CCSS.MATH.CONTENT.2.MD.A.2 Measure the length of an object twice, using length units of
different lengths for the two measurements; describe how the two measurements relate to the
size of the unit chosen.
a. When observing their plants, they will be getting measurements of the leaf length, stem length
and any other important measurements with rulers (yard stick for sunflowers).
Lesson 2:
1. NGSS-2-LS2-1. Plan and conduct an investigation to determine if plants need sunlight and water to
grow. Scientific and Engineering practices, system and system models, scale proportion and quantity,
cause and effect, stability and change.
a. We will be planning and setting up an experiment to show plants need sunlight and water to
grow. The students planting their seeds will use the practices, as well as investigate the plant
system model, and use scale and proportion when filling cups with soil, water etc.
1.
22.
Lesson 3:
1. Patterns, structure and function
a. We will be used when we look at plant diversity and similarities in structure in the scavenger
hunt.
2. NGSS-2-LS2-1. Plan and conduct an investigation to determine if plants need sunlight and water
to grow.
a. Students will be working towards this standard by continuing conducting their investigation.
This in the class will entail them observing and taking data on their plants.
Lesson 4:
1. NGSS-2-LS2-1. Plan and conduct an investigation to determine if plants need sunlight and water
to grow.
a. Students will be working towards this standard by continuing conducting their
investigation. This in the class will entail them observing and taking data on their plants.
2. Students assess and maintain a level of physical fitness to improve health and performance. Fitness
Concepts 3.1 Participate in enjoyable and challenging physical activities for increasing periods of time.
a. During garden yoga, the students will be participating in physical activities they may not have
tried before that are enjoyable and challenging!
3. 2.MD.D.10 Draw a picture graph and a bar graph (with single-unit scale) to represent a data set with
up to four categories.
a. Students will be completing this in their “STEM Fun in the Garden” Booklet, based on their 4
plant experiment, on page 9 titled, “My Plant Results!”
4. Visual and Performing Arts: Visual Arts Content Standard - 2.1 Create shapes and movements, using
fast and slow tempos. 2.3 Create a simple sequence of movement with a beginning, a middle, and an
end, incorporating level and directional changes.
a. Through a guided story of a plant growing, students will create their own sequence dance using
shapes and we will try it fast and slow.
23.
Lesson 5:
1. NGSS-2-LS2-1. Plan and conduct an investigation to determine if plants need sunlight and water
to grow.
a. Students will finish their investigation and will determine whether plants need sunlight and
water to grow. They will make this decision in order to test their results by making a “Plant
Friend.”
2. Scientific and Engineering Processes – Obtaining, Evaluating, Communicating information, analyzing
and interpreting data.
a. Students will show this by determine whether plants need sunlight and water to grow, adding
this information into their booklet and telling a partner about their choice.
Lesson 6:
1. W.2.8 Recall information from experiences or gather information from provided sources to answer a
question. (2-LS2-1),(2-LS4-1)
a. Students will use the information they learned in lessons 1-5 to answer the questions: “What
did you learn about plants? What did you learn about your plant specifically?” on their plant
informational card.
22.
24.
Name: _________________________________
1.
Lesson 1: See the plant
Become a plant expert! My plant:
____________________________________
I know that my plant…
______________________________________
______________________________________
______________________________________
Draw below a picture of what your plant looks
like.
.
2.
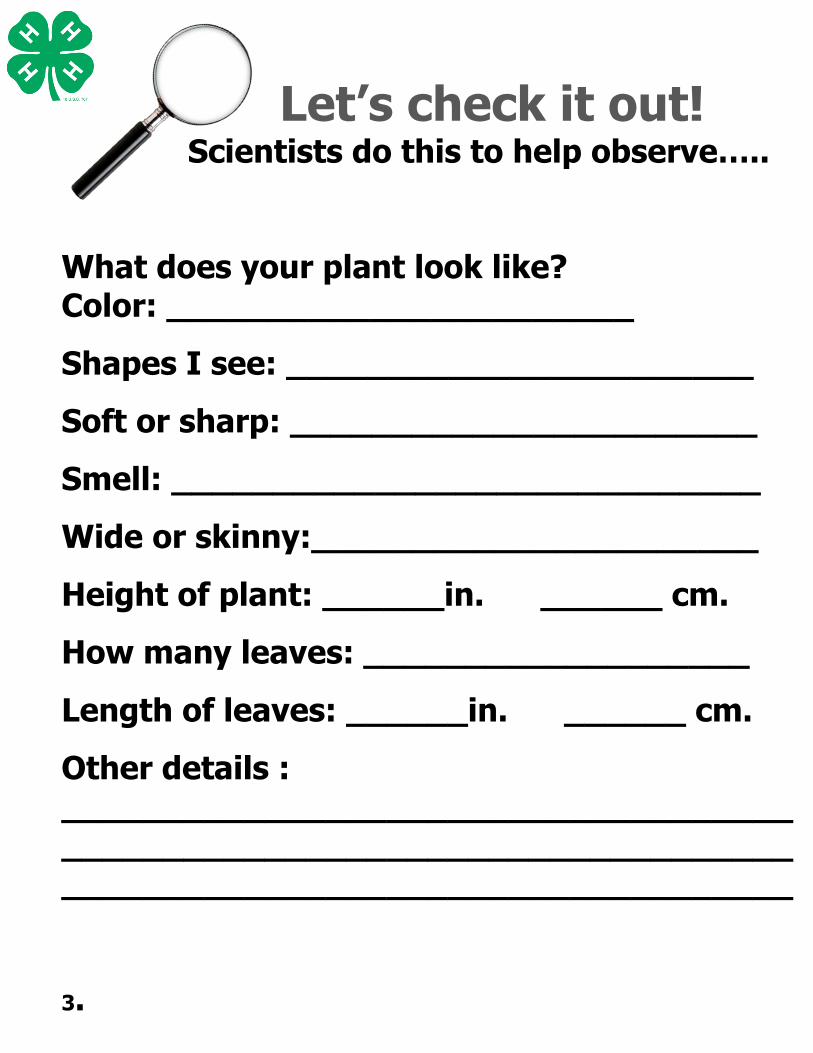
Let’s check it out! Scientists do this to help observe….. What does your plant look like? Color: _______________________
Shapes I see: _______________________
Soft or sharp: _______________________
Smell: _____________________________
Wide or skinny:______________________
Height of plant: ______in. ______ cm.
How many leaves: ___________________
Length of leaves: ______in. ______ cm.
Other details : ____________________________________ ____________________________________ ____________________________________ 3.
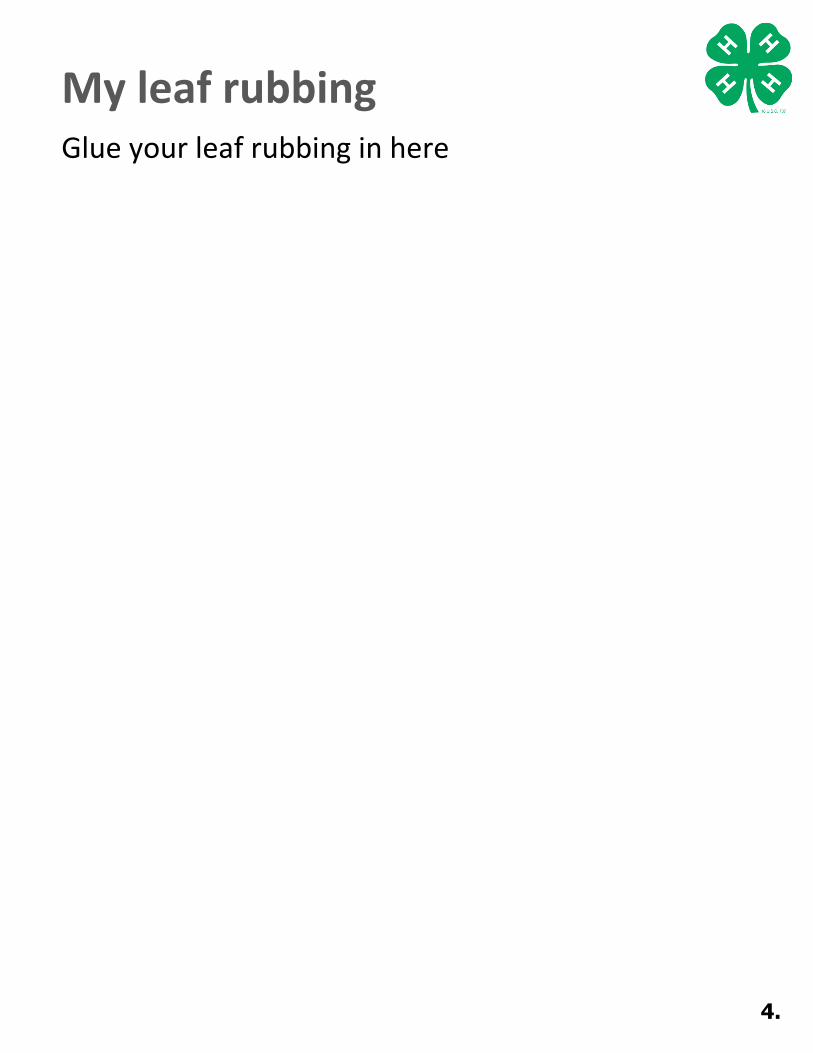
My leaf rubbing Glue your leaf rubbing in here
4.
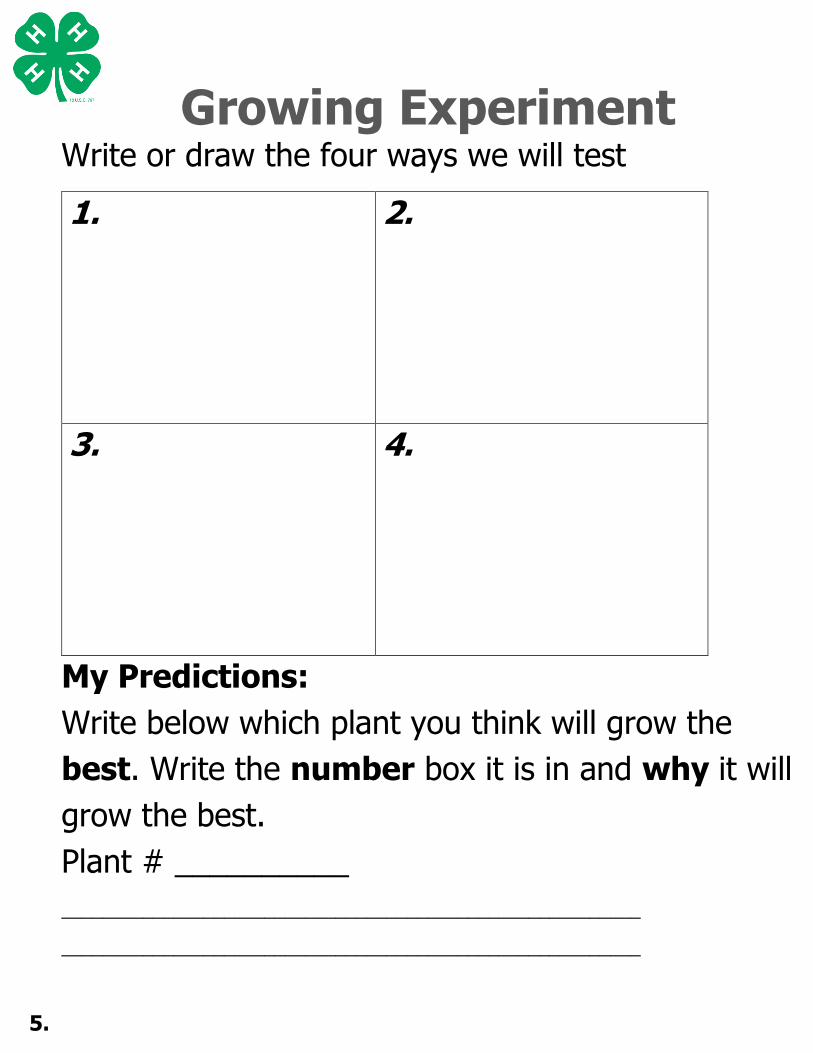
Growing Experiment
Write or draw the four ways we will test
1.
2.
3.
4.
My Predictions:
Write below which plant you think will grow the
best. Write the number box it is in and why it will
grow the best.
Plant # __________
_________________________________________________________
_________________________________________________________
5.
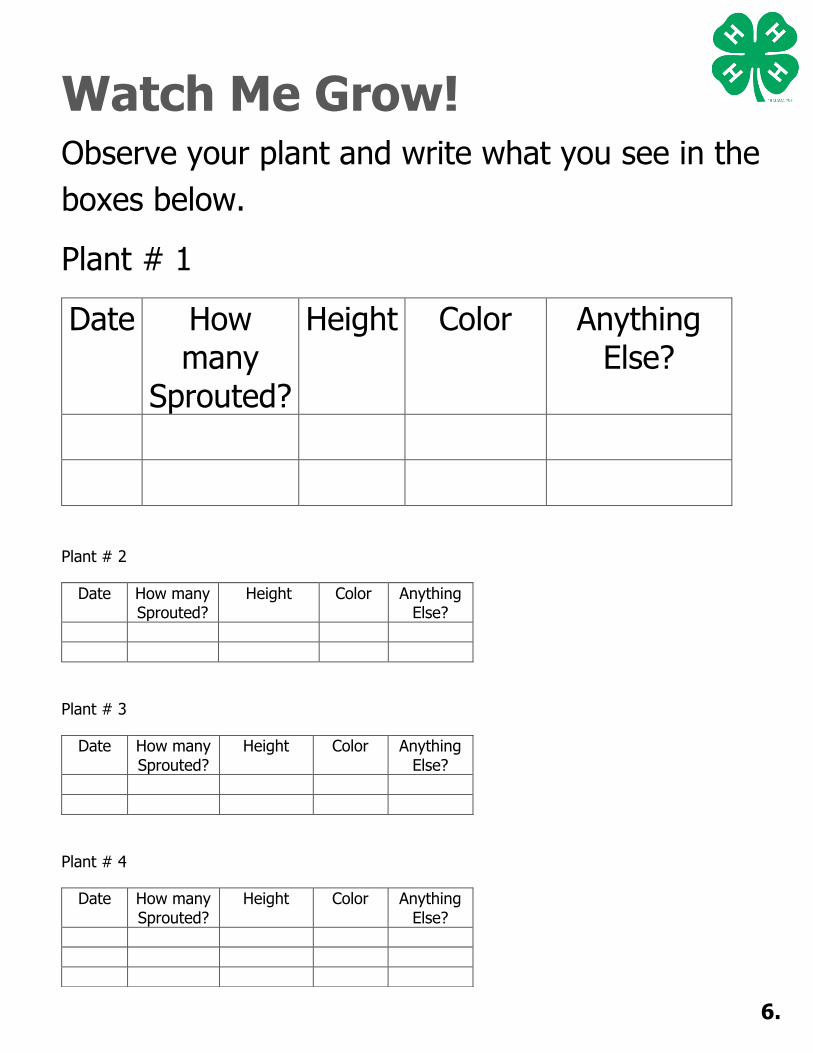
Watch Me Grow! Observe your plant and write what you see in the
boxes below.
Plant # 1
Date How many
Sprouted?
Height Color Anything Else?
Plant # 2
Date How many Sprouted?
Height Color Anything Else?
Plant # 3
Date How many Sprouted?
Height Color Anything Else?
Plant # 4
Date How many Sprouted?
Height Color Anything Else?
6.
Photosynthesis Fun!
7.
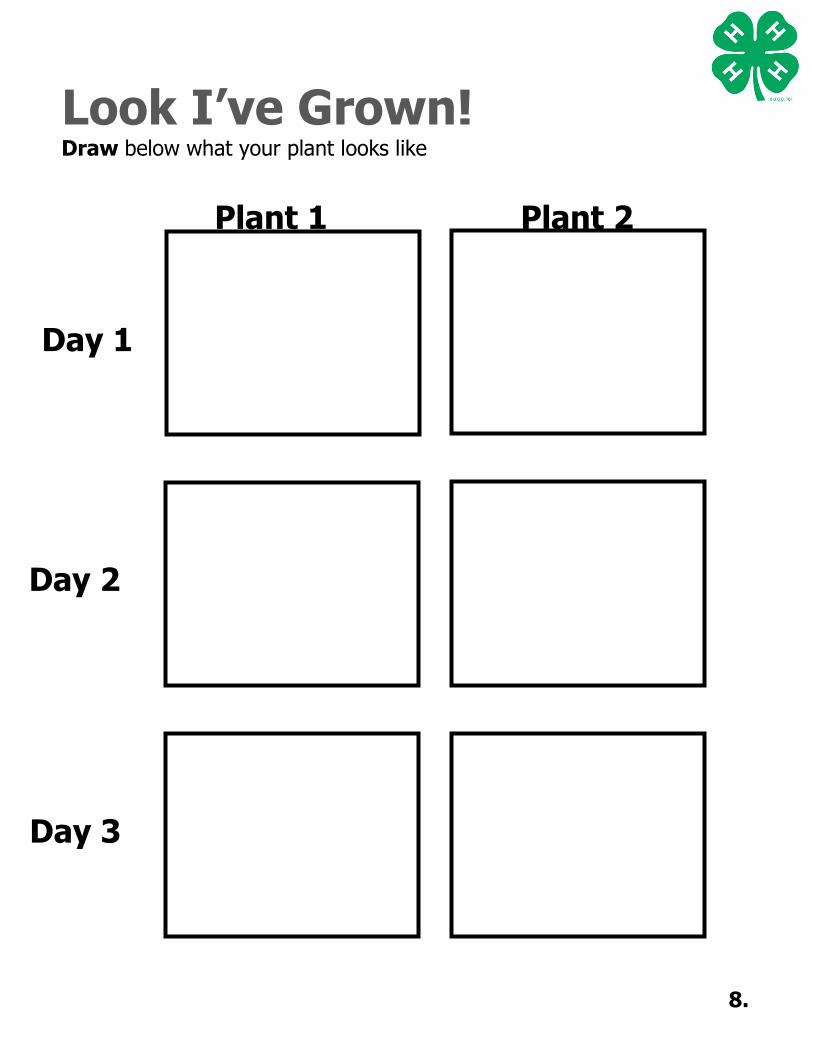
Look I’ve Grown! Draw below what your plant looks like 8.
Day 1
Day 2
Day 3
Plant 1 Plant 2
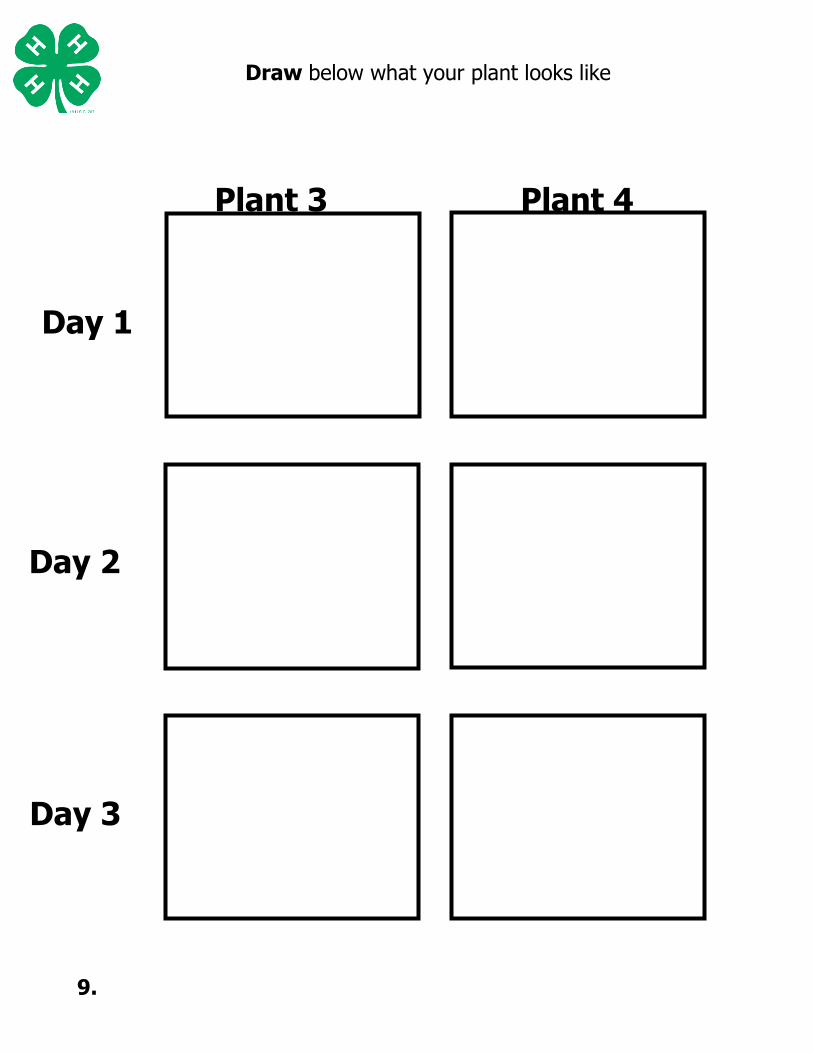
Draw below what your plant looks like
9.
Day 1
Day 2
Day 3
Plant 3 Plant 4
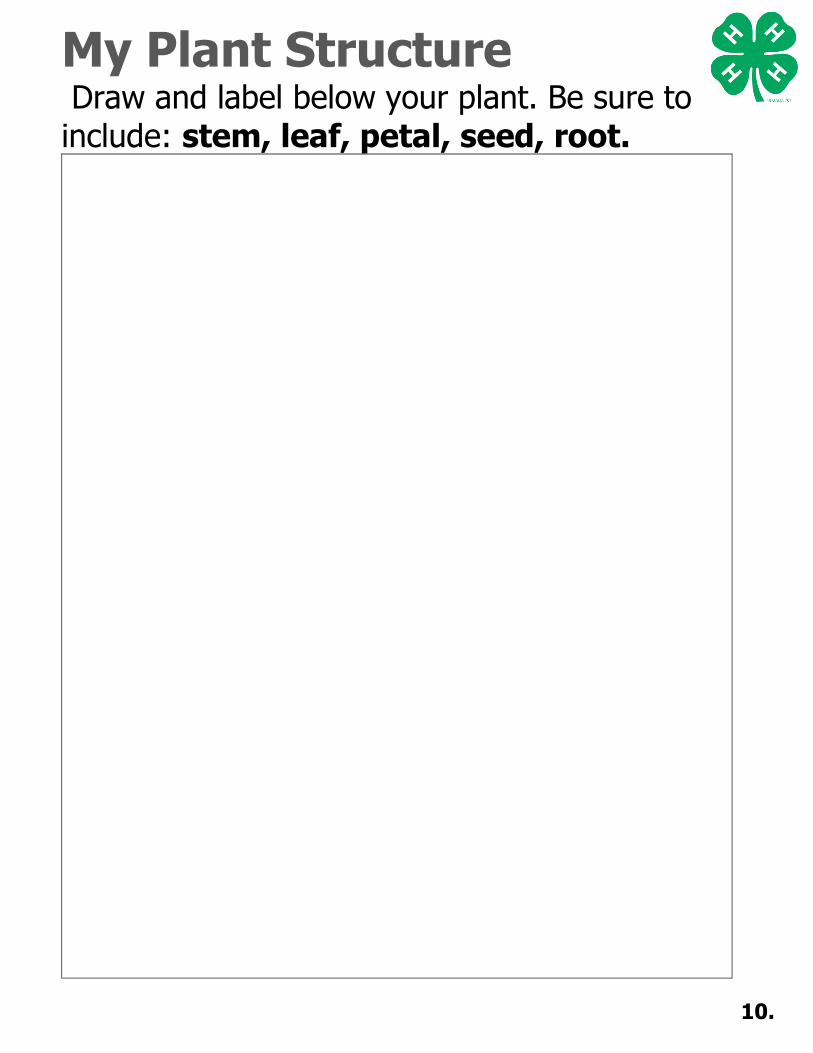
My Plant Structure Draw and label below your plant. Be sure to include: stem, leaf, petal, seed, root. 10.
Tasty Taste Test! Try each food and draw a line to match it with the part of plant.
Leaf Potato
Stem Chamomile
Petal Sunflower
Seed Celery
Roots Lettuce/Kale
What part of the plant is your favorite?
________________________________
11.
My Plant Results!
Draw a leaf for each plant that survived. How many survive?
7
.
6
5
4
3
2
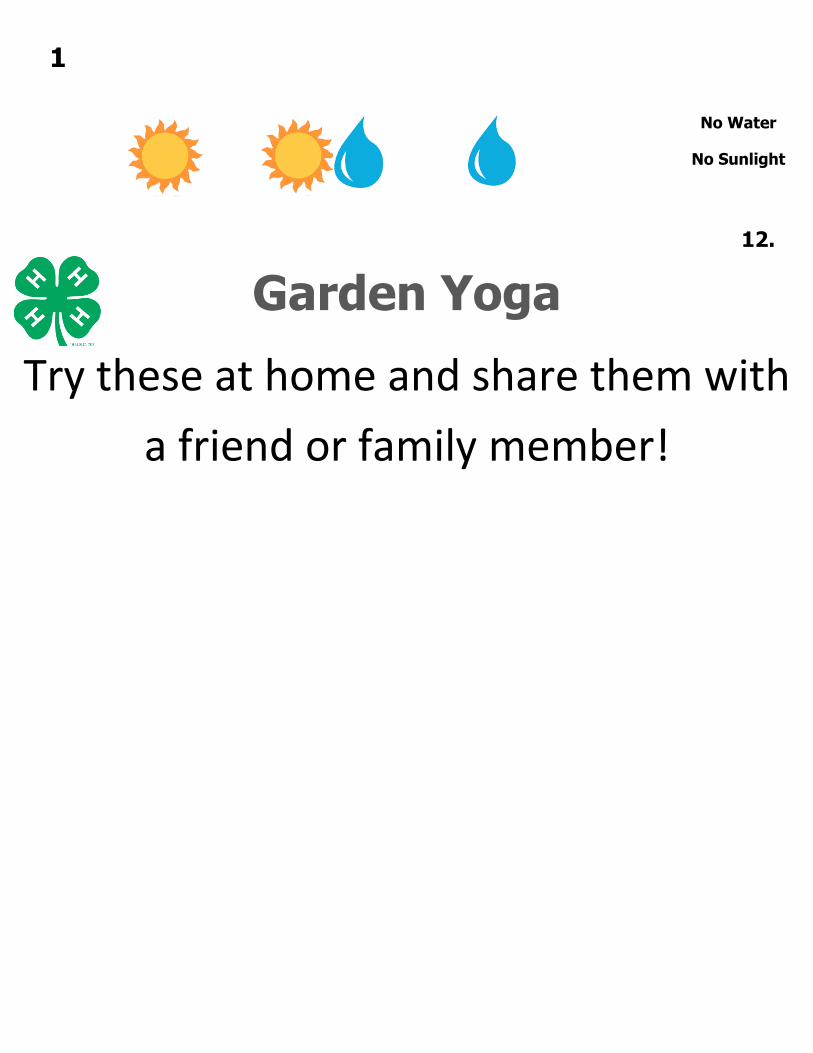
Garden Yoga
Try these at home and share them with
a friend or family member!
No Water
No Sunlight
1
12.
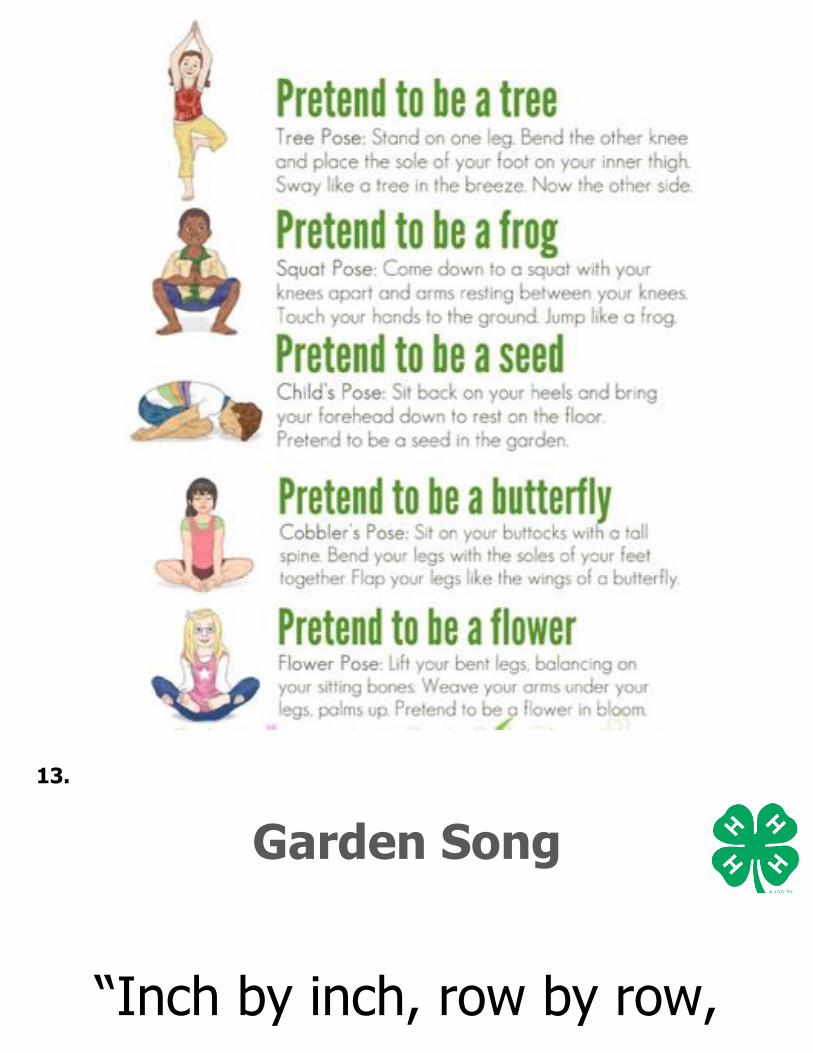
Garden Song
“Inch by inch, row by row,
13.

gonna make this garden grow.
All it takes is water and the
sun and a piece of soiled
ground. Inch by inch, row be
row, someone bless the seeds
I sow. Someone warm them
from below, ‘til the rain
comes tumbling down.”
Grow my plant! Circle how you want your plant to grow.
14.
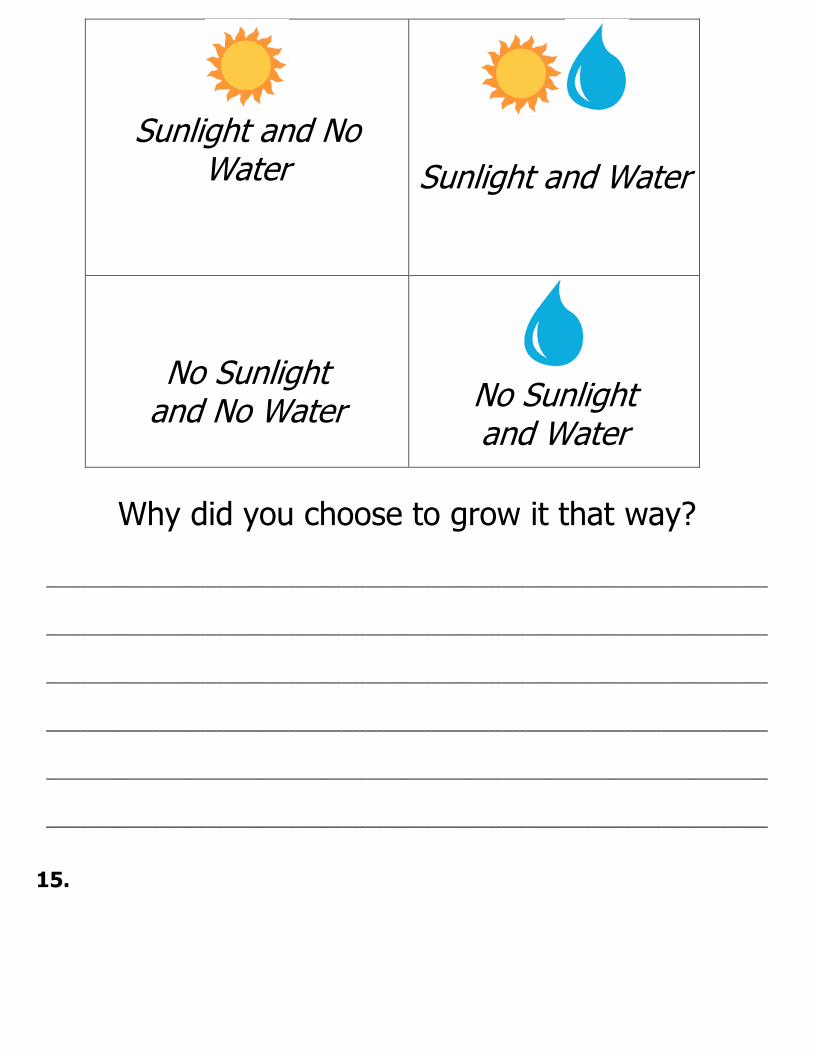
Sunlight and No
Water
Sunlight and Water
No Sunlight and No Water
No Sunlight and Water
Why did you choose to grow it that way?
__________________________________________________________________________________________________________________________
__________________________________________________________________________________________________________________________
__________________________________________________________________________________________________________________________
__________________________________________________________________________________________________________________________
__________________________________________________________________________________________________________________________
__________________________________________________________________________________________________________________________
15.

http:/www.bbbpress.com/2014/12/drama-game-shake/
http://childhood101.com/2016/04/yoga-for-kids-a-walk-through-the-garden/
http://www.sheppardsoftware.com/content/animals/kidscorner/foodchain/photosynthesis.htm
http://www.bbbpress.com/2013/05/rain-storm/
https://s-media-cache-ak0.pinimg.com/originals/f7/a7/18/f7a718515ecd5a7f8540c5114876e3d1.jpg
16.
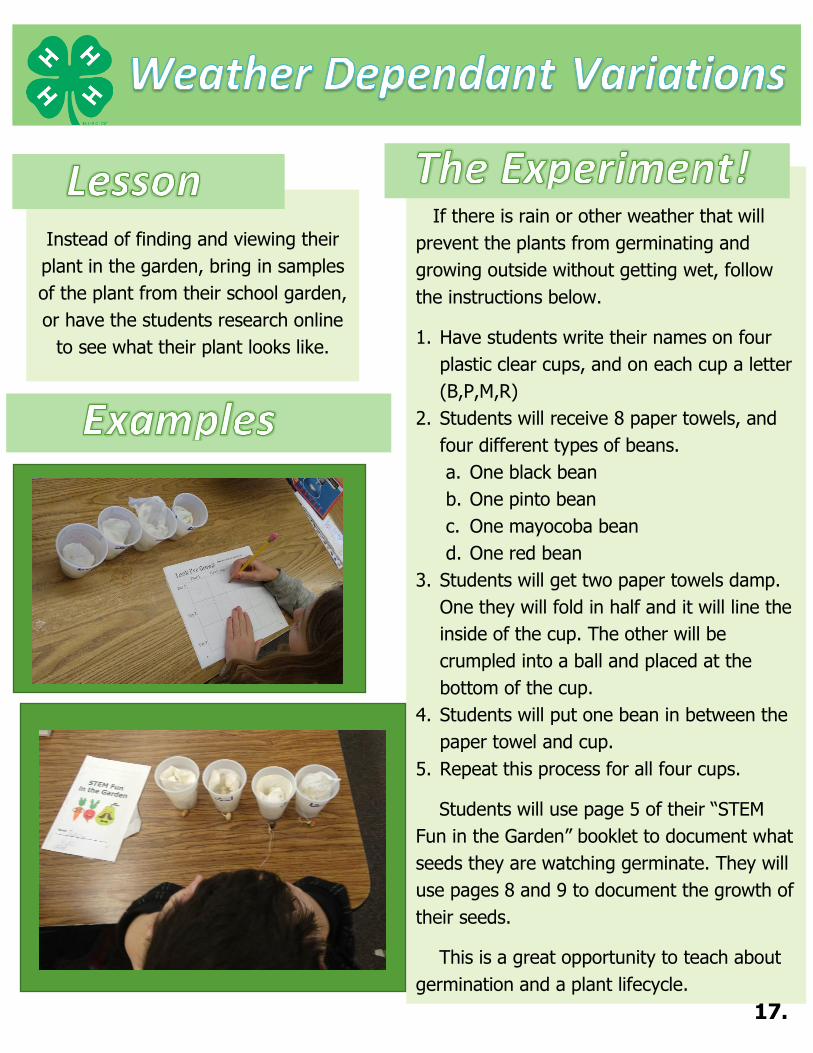
If there is rain or other weather that will
prevent the plants from germinating and
growing outside without getting wet, follow
the instructions below.
1. Have students write their names on four
plastic clear cups, and on each cup a letter
(B,P,M,R)
2. Students will receive 8 paper towels, and
four different types of beans.
a. One black bean
b. One pinto bean
c. One mayocoba bean
d. One red bean
3. Students will get two paper towels damp.
One they will fold in half and it will line the
inside of the cup. The other will be
crumpled into a ball and placed at the
bottom of the cup.
4. Students will put one bean in between the
paper towel and cup.
5. Repeat this process for all four cups.
Students will use page 5 of their “STEM
Fun in the Garden” booklet to document what
seeds they are watching germinate. They will
use pages 8 and 9 to document the growth of
their seeds.
This is a great opportunity to teach about
germination and a plant lifecycle.
Instead of finding and viewing their
plant in the garden, bring in samples
of the plant from their school garden,
or have the students research online
to see what their plant looks like.
17.


