Embed Size (px)
Citation preview
How I made my Magazine Cover
By Katie Hall

I started with my main image. I removed the background using the
lasso tool and added a grey background.

Next I used the airbrush tool to create the textured background and made colour changes to the girls hair and
eye.

Next I added the magazine title. I removed the text colour using the colour to alpha
tool. I then used the bump map tool to add the background texture to it.

Next I added the skyline. I used the text tool to type it. I used a different font for the word “HORROR” which I got from the internet, so I had to remove the background and re-colour it.

Next I used the text tool to add the issue number, date and website underneath the magazine title.

Next I added the cover story. I started with the film logo. I added the logo and then added a drop shadow to
make it stand out.
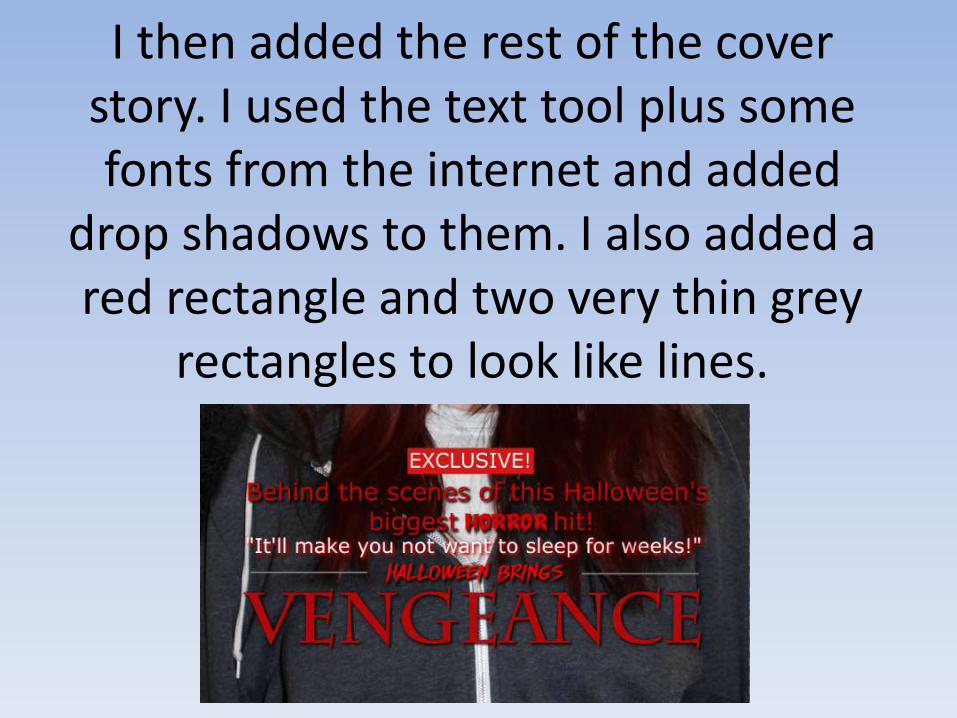
I then added the rest of the cover story. I used the text tool plus some fonts from the internet and added
drop shadows to them. I also added a red rectangle and two very thin grey
rectangles to look like lines.

Next I added the first cover story. I typed a header and added a drop shadow and a thin rectangle for an underline. I then
typed the text but kept it plain as it didn’t need to stand out any more. I also added
the SAW logo from Google.
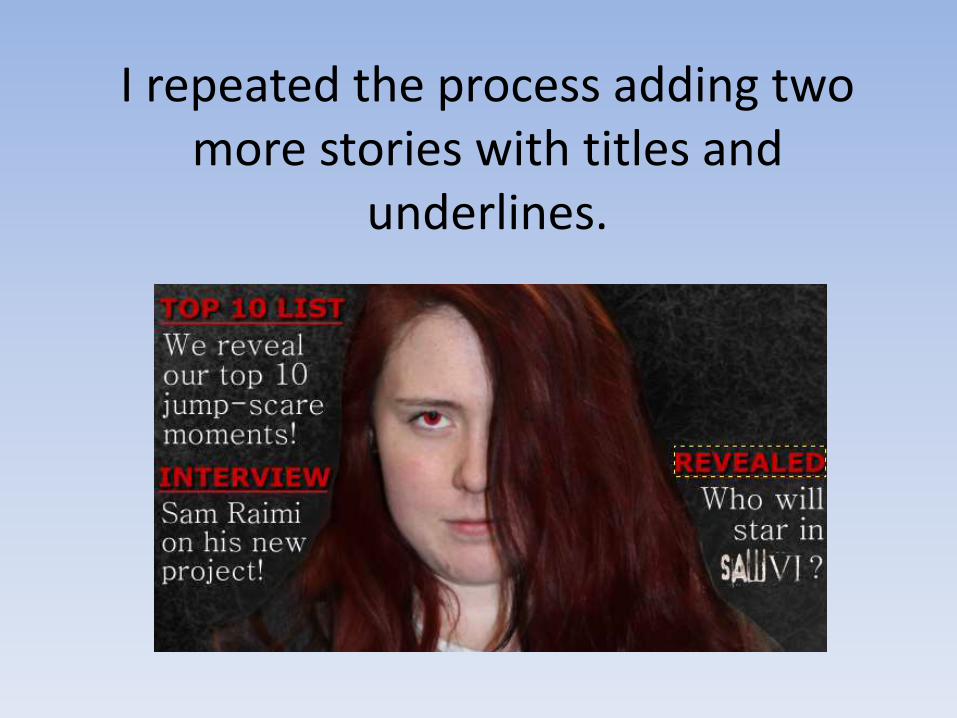
I repeated the process adding two more stories with titles and
underlines.
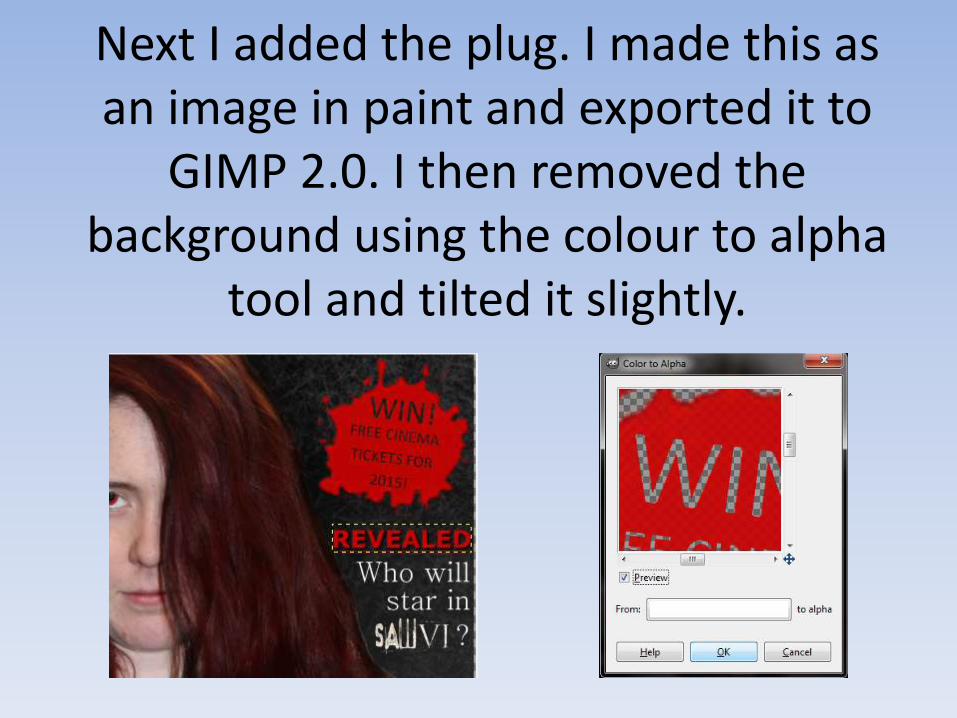
Next I added the plug. I made this as an image in paint and exported it to
GIMP 2.0. I then removed the background using the colour to alpha
tool and tilted it slightly.

Finally I added the barcode and price. I took the barcode image from Google
and used the text tool to add the price. I then used the tilt tool to rotate it
through 90°.