Embed Size (px)
Citation preview

Level 3 Diploma in Plastering
© 2013 City and Guilds of London Institute. All rights reserved.
1 of 18
In-situ moulding members
PowerPoint ggRupresentation
Unit 311: Running in-situ moulds
Level 3 Diploma in Plastering
© 2013 City and Guilds of London Institute. All rights reserved.
2 of 18
Learner outcomes 1.7 & 4.2 Identifying different types of moulding members
1.7 & 4.2 Identifying angle mould members
1.7 & 4.2 List the equipment for designing the profile
1.7 & 4.2 Designing an original running mould profile
Level 3 Diploma in Plastering
© 2013 City and Guilds of London Institute. All rights reserved.
3 of 18
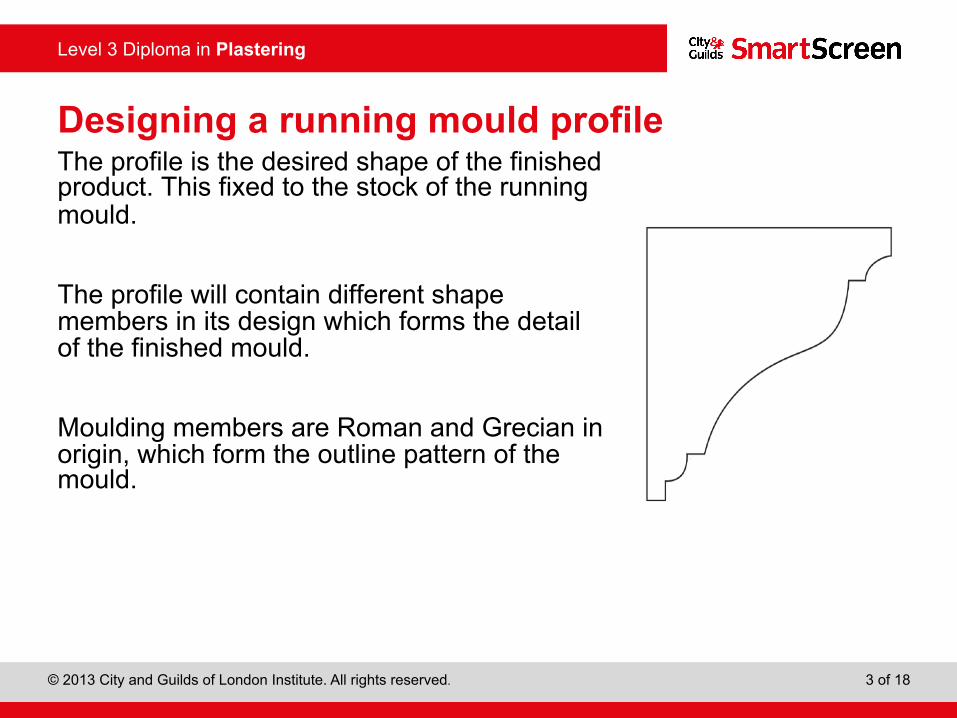
Designing a running mould profile The profile is the desired shape of the finished product. This fixed to the stock of the running mould. The profile will contain different shape members in its design which forms the detail of the finished mould. Moulding members are Roman and Grecian in origin, which form the outline pattern of the mould.

Level 3 Diploma in Plastering
© 2013 City and Guilds of London Institute. All rights reserved.
4 of 18
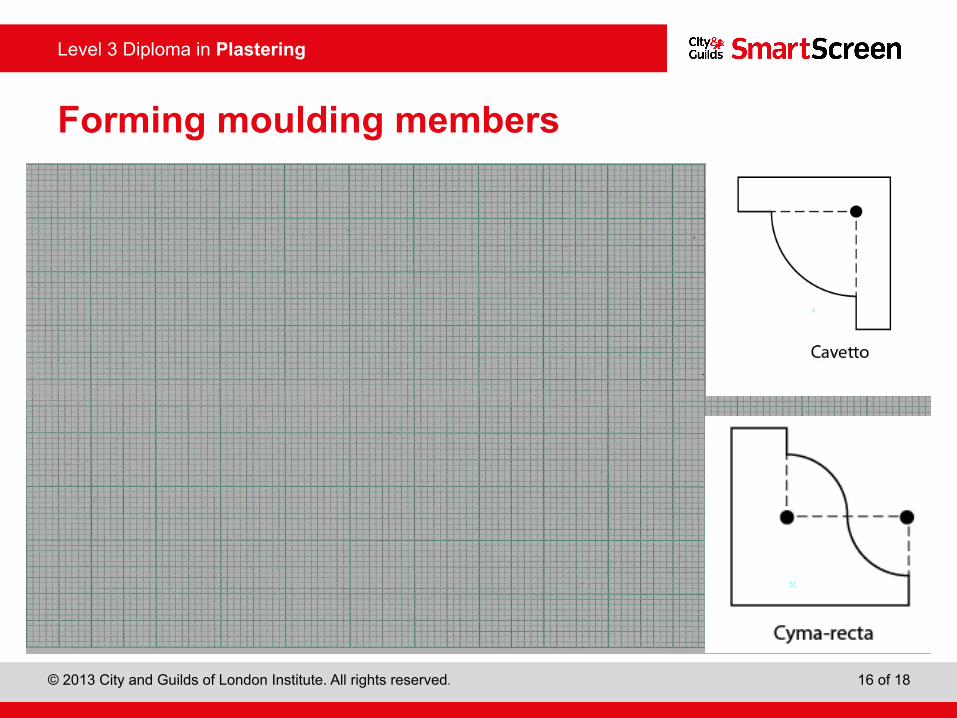
In-situ cornice moulding members Cavetto This is a curved shaped member very similar to a coving hence the name cavetto. Drawn with a compass to form an inward curved shape: a quarter segment of a full circle.
Level 3 Diploma in Plastering
© 2013 City and Guilds of London Institute. All rights reserved.
5 of 18
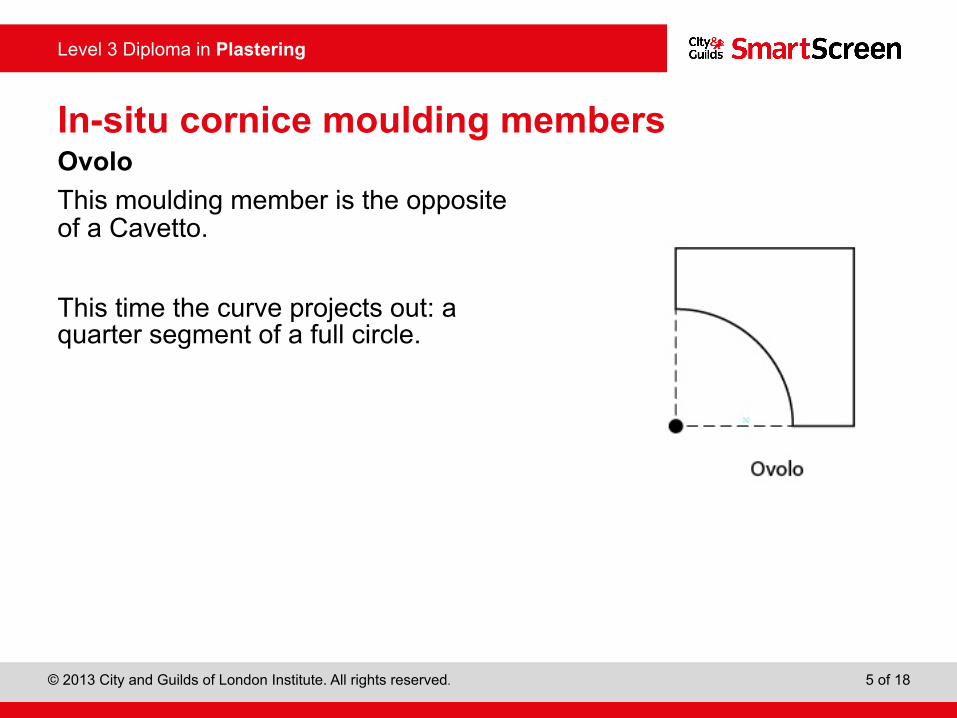
In-situ cornice moulding members Ovolo This moulding member is the opposite of a Cavetto. This time the curve projects out: a quarter segment of a full circle.

Level 3 Diploma in Plastering
© 2013 City and Guilds of London Institute. All rights reserved.
6 of 18
In-situ cornice moulding members Cyma Recta This shape curves inwards at the top and outwards at the bottom. This is formed with a compass from two points that meet at the outer curves in the centre. This shape is made up of the cavetto and ovolo moulding.
Level 3 Diploma in Plastering
© 2013 City and Guilds of London Institute. All rights reserved.
7 of 18
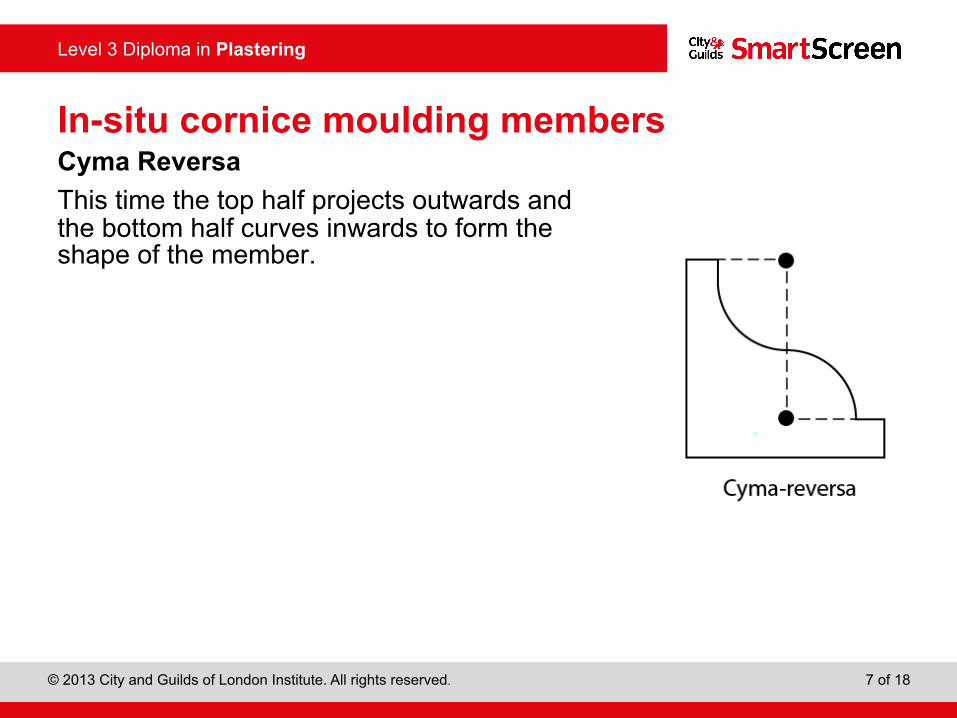
In-situ cornice moulding members Cyma Reversa This time the top half projects outwards and the bottom half curves inwards to form the shape of the member.
Level 3 Diploma in Plastering
© 2013 City and Guilds of London Institute. All rights reserved.
8 of 18
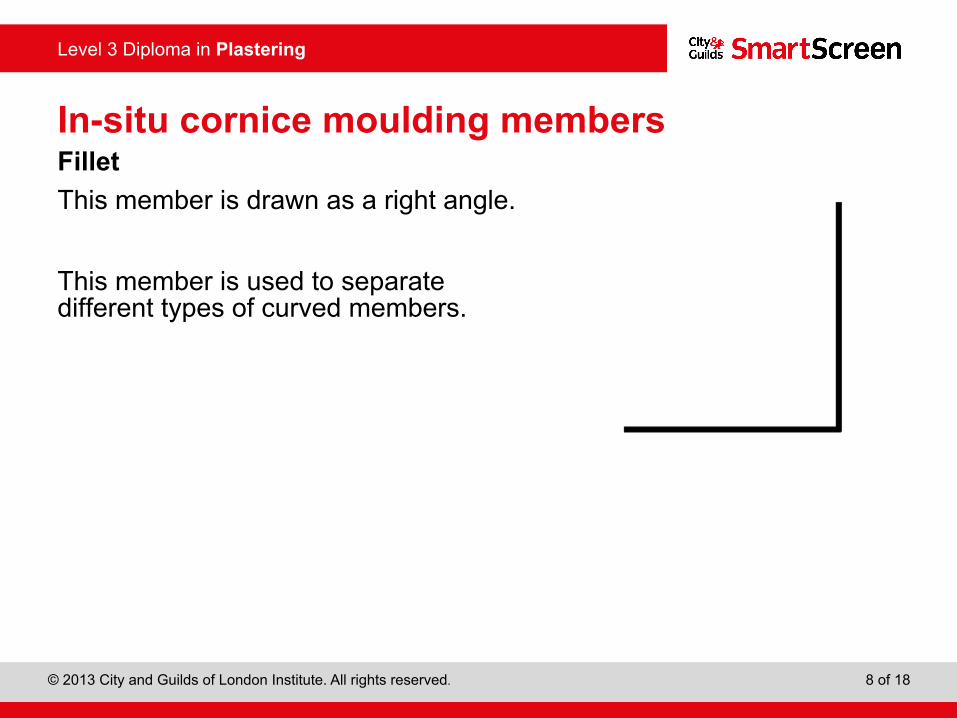
In-situ cornice moulding members Fillet This member is drawn as a right angle. This member is used to separate different types of curved members.

Level 3 Diploma in Plastering
© 2013 City and Guilds of London Institute. All rights reserved.
9 of 18
In-situ cornice moulding members Torus This moulding member projects outwards and is drawn as a semi-circle segment. This type of member is popular with skirting or panel moulding design.
Level 3 Diploma in Plastering
© 2013 City and Guilds of London Institute. All rights reserved.
10 of 18
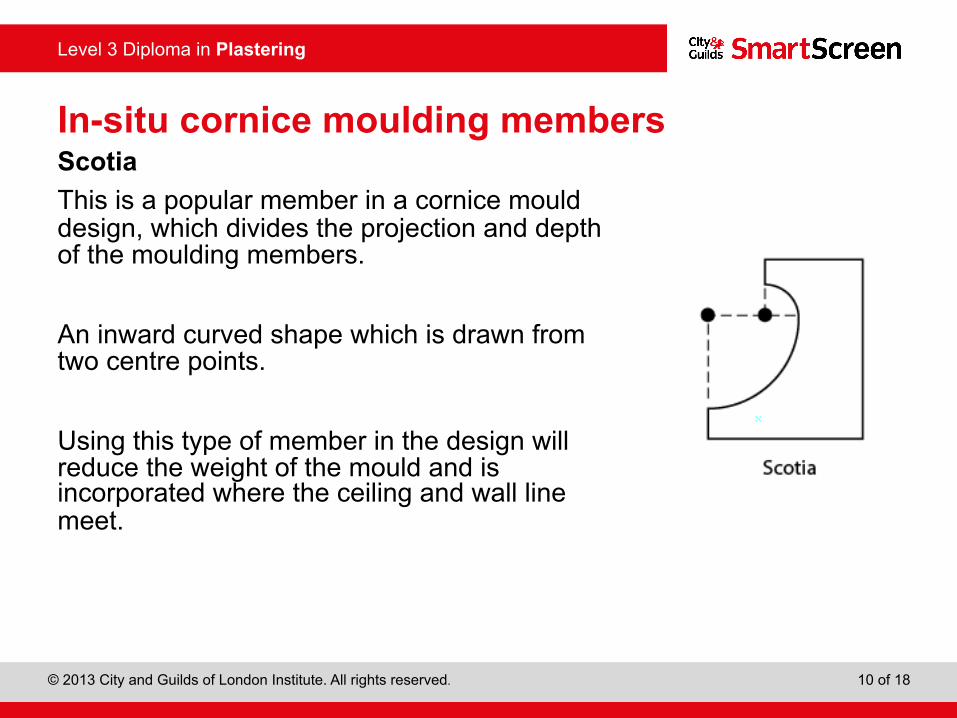
In-situ cornice moulding members Scotia This is a popular member in a cornice mould design, which divides the projection and depth of the moulding members. An inward curved shape which is drawn from two centre points. Using this type of member in the design will reduce the weight of the mould and is incorporated where the ceiling and wall line meet.

Level 3 Diploma in Plastering
© 2013 City and Guilds of London Institute. All rights reserved.
11 of 18
Cavetto
Ovolo
Cyma Recta
Cyma Reversa Scotia
Fillet
Moulding members
Level 3 Diploma in Plastering
© 2013 City and Guilds of London Institute. All rights reserved.
12 of 18
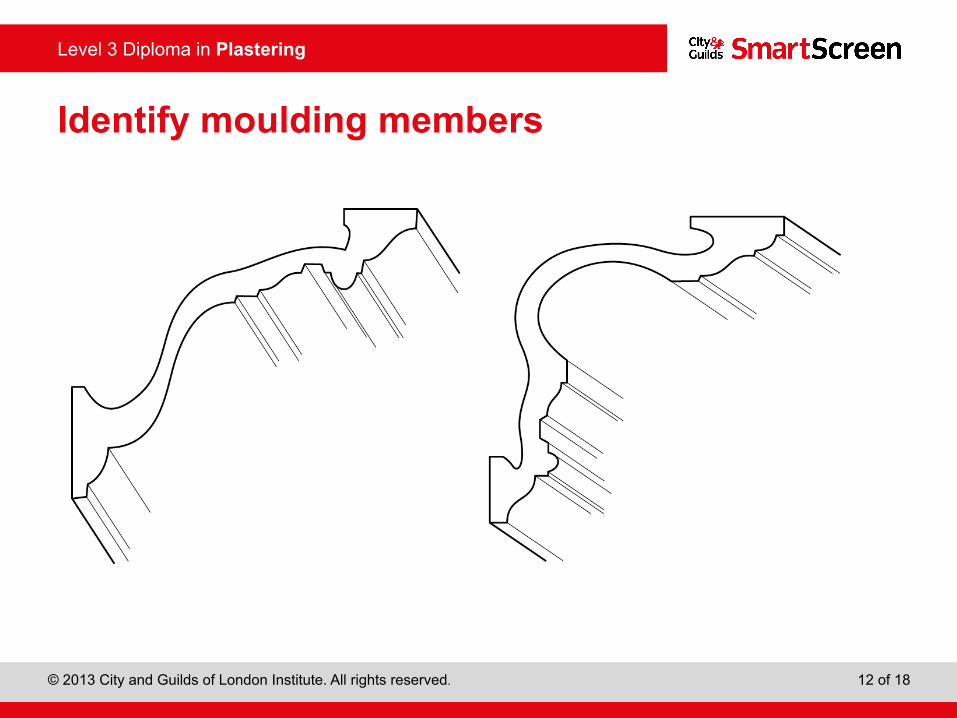
Identify moulding members

Level 3 Diploma in Plastering
© 2013 City and Guilds of London Institute. All rights reserved.
13 of 18
In-situ angle mould members Angle mould members The following mould members replace a sharp arris. • Bullnose • Splayed • Sunken • Quirked
Bullnose Splayed
Sunken
Level 3 Diploma in Plastering
© 2013 City and Guilds of London Institute. All rights reserved.
14 of 18
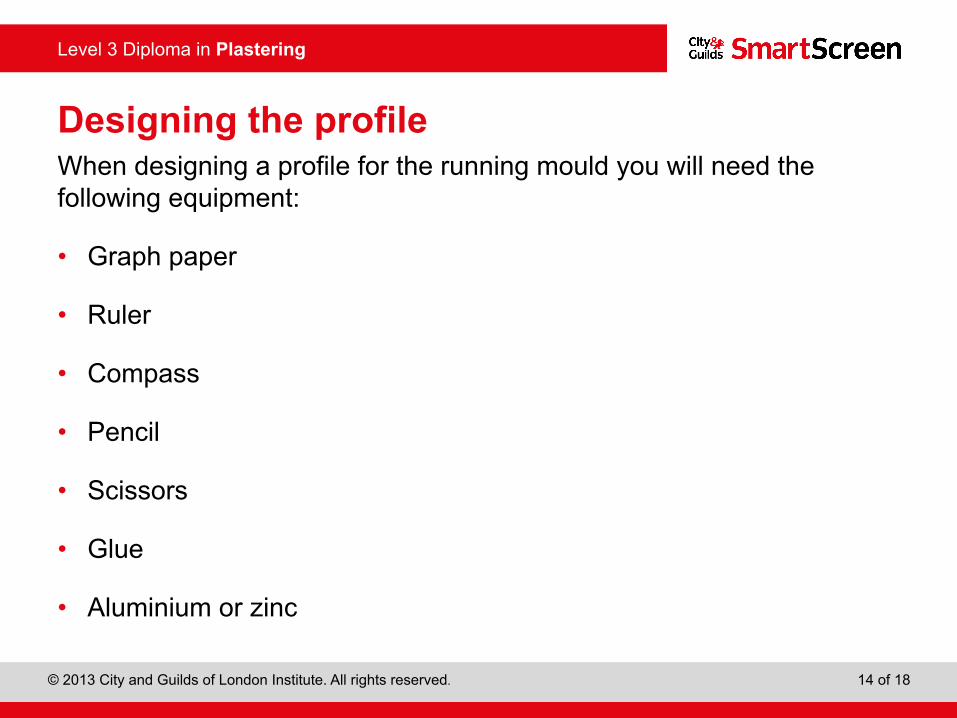
Designing the profile When designing a profile for the running mould you will need the following equipment:
• Graph paper
• Ruler
• Compass
• Pencil
• Scissors
• Glue
• Aluminium or zinc

Level 3 Diploma in Plastering
© 2013 City and Guilds of London Institute. All rights reserved.
15 of 18
Designing the profile
Level 3 Diploma in Plastering
© 2013 City and Guilds of London Institute. All rights reserved.
16 of 18
Forming moulding members
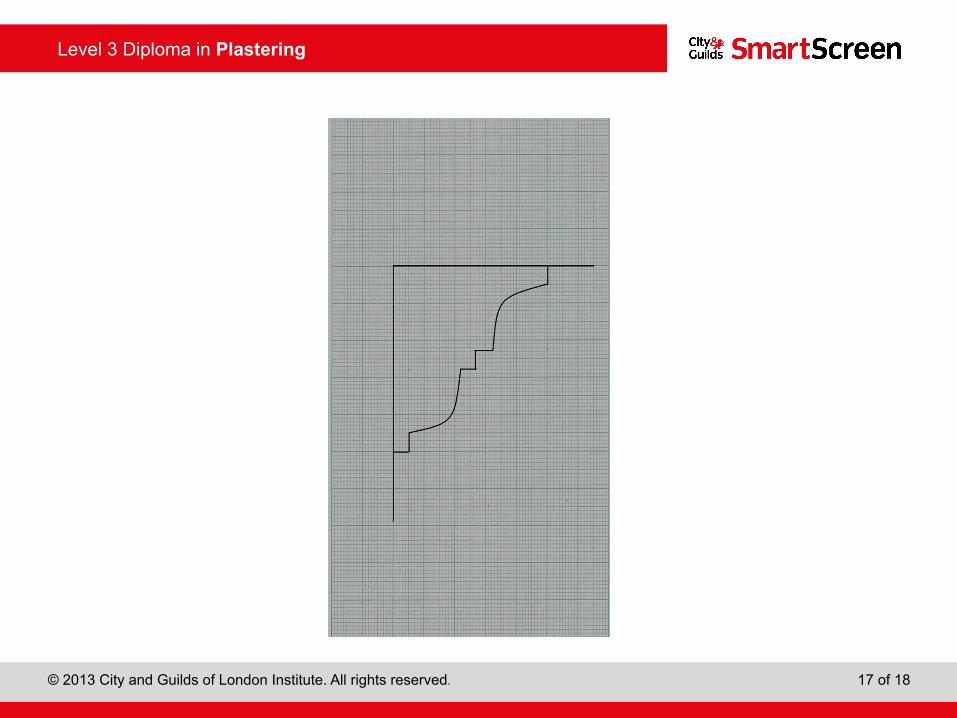
Level 3 Diploma in Plastering
© 2013 City and Guilds of London Institute. All rights reserved.
17 of 18

Level 3 Diploma in Plastering
© 2013 City and Guilds of London Institute. All rights reserved.
18 of 18
Any questions?