Rodent Survival Surgery
University of South Florida
Margi Baldwin May 2006

Batch SurgeryBatch Surgery
Rodents are typically done in larger numbers or “batches” of animals to provide the statistical ‘n’ needed for a given model.
Often, these numbers preclude the ability to provide separate instrument packs for each animal.
Rodents undergoing survival surgery are treated the same way as any other larger species in that the rules of asepsis apply.

Considerations of “batching”Considerations of “batching”
Shared instruments and supplies are common when performing batch surgeries.
However - - -• Asepsis must be maintained throughout
the procedure.• Asepsis must be regained between
animals.• Anesthetic induction, recovery and
monitoring methods of rodents is as important as with other species!

Preparation of the InstrumentsPreparation of the Instruments
ALL instruments must be sterilized prior to use. The following are acceptable methods:
● Steam – must follow manufacture’s recommendations regarding time/temp/pressure.
● Chemical – must follow manufacture’s recommendations regarding solution concentration, contact time and rinsing of agent.
● Gas – must follow manufacture’s directions regarding exposure time and pack contents.

Plan It OutPlan It Out Arrange your instruments in a tray, dish or
bowl to protect them and provide yourself a safe storage area for them between surgeries.– Provide two bowls of some sort; one for sterile
water and one for sterile saline or PBS/instrument storage.
Identify disposable supplies you will place in the pack, if any (gauze, drapes, cotton tipped applicators, etc. Note - Gas sterilization can preclude inclusion of absorbable materials):
Identify project-specific consumables you will place in the pack:– Appliances, catheters, needles, syringes, screws,
etc.

How Many Surgeries Per How Many Surgeries Per Pack?Pack?
This will vary depending on project and surgeon’s skill. General guidelines - – Is it major or minor surgery? Minor surgeries
allow for more animals per pack.– Is the procedure long? Longer surgeries mean
increased exposure of the tissues, which can lead to higher risk. Therefore, less animals are done per pack.
– Is the surgeon skilled or novice? More experience supports better tissue handling skills and faster open-to- close times, allowing an experienced surgeon to perform more surgeries per pack.
Ways to Minimize Contamination Ways to Minimize Contamination Between AnimalsBetween Animals
Wipe down all surrounding surfaces and associated equipment with Clidox®, Sporicidin®, or other approved sanitizer. – Counters, hood surfaces, lights, bead
sterilizers, anesthesia machine. Keep airflow and traffic to a minimum
around the surgical station.Designate “drop zones” for dirty/used
items

Setting the StageSetting the Stage It is important to set up the surgical station prior to
beginning any manipulations of an animal.
– Open the pack’s outer layer (all packs should be double wrapped).
– Open any needed sterile items (e.g., suture, needles, syringes) not in the pack and drop by the pack/inside the sterile field.
– Don sterile gloves and peel back the inside layer, picking up and arranging newly opened sterile items.
– Empty bowls of contents and place face up.– Arrange equipment, supplies and instruments in a
manner that facilitates aseptic technique.
Setting the StageSetting the StagePour sterile water into one of the bowls and
sterile saline or PBS into the other.– Sterile water is used PRIOR to placing instruments
in the bead sterilizer. Water is able to lyse blood cells and aids in removal of fat.
– Sterile saline is used to cool/rinse the instruments AFTER bead sterilization. The bowl is used to “store” instruments until needed for the next animal.
Kept submersed, instruments are less susceptible to contamination by airborne particulates, and are less likely to be pushed into a non-sterile area or accidentally dropped.

Second pack layer removedSecond pack layer removed
Note the use of blue “chux” pad as inner layer to absorb fluids.
One tray holds “disposables” such as gauze, cotton tipped applicator sticks.
One tray holds the instruments.

Set up w/placematsSet up w/placemats Note use of pre-fenestrated
drapes and overall arrangement of the field.
Placemats are removed with each animal so that contaminants and loose fur are also removed between animals.
Note the use of paper towels as “place mats”.

Set-up showing bowls & bead unitSet-up showing bowls & bead unit
Drapes, gauze, cotton tipped applicators and any other disposable placed to top of field.
Instruments held in saline filled tray, sterile water bowl also present – both in close proximity to the bead sterilizing unit.

Instruments in bead sterilizerInstruments in bead sterilizer
Instruments of like size and function are placed in the bead sterilizer together.
No more than 3-4 instruments should be in bead sterilizer at any one time.
Instrument contact-time in bead sterilizer is ~15 seconds.

Set up w/microscopeSet up w/microscope
Scope is carefully positioned prior to opening the sterile pack beneath.
* Lights are positioned and turned on to provide prep person with a “target” to place the animal within.
Sterile gauze is used to reposition lights and adjust focus on the scope once the surgeon dons sterile gloves.
* Wipe down the scope/light w/sanitizer first!
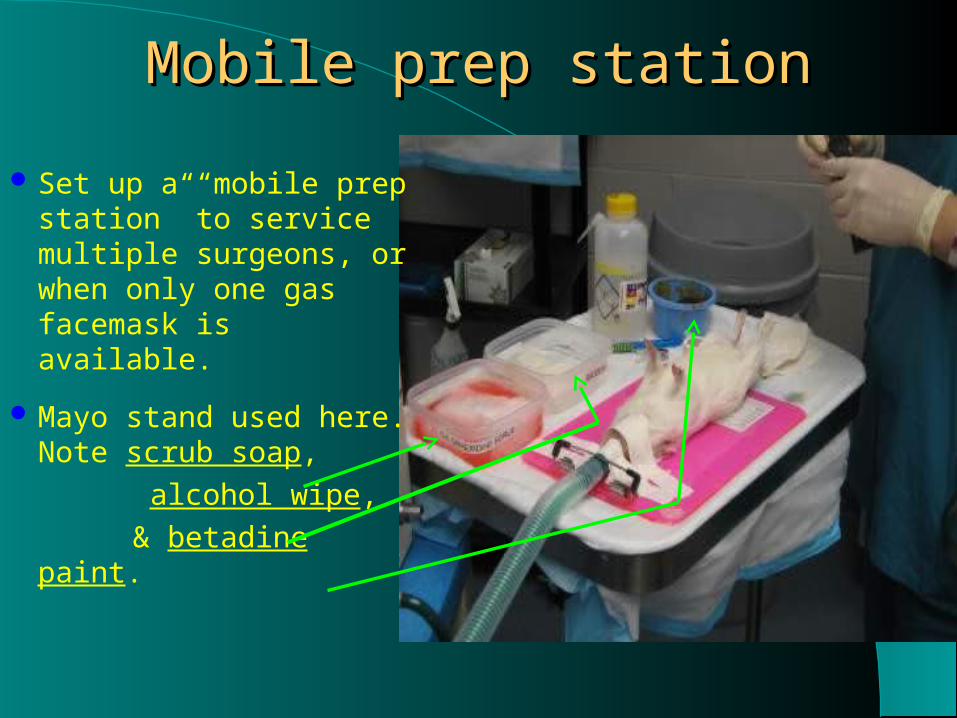
Mobile prep stationMobile prep station
Set up a “mobile prep station” to service multiple surgeons, or when only one gas facemask is available.
Mayo stand used here. Note scrub soap,
alcohol wipe,
& betadine paint.

Surgical ScrubSurgical Scrub
Area is clipped well beyond intended incision site.
Rodents require a minimum of two surgical scrubs, using a germicidal soap, followed by iodine paint.
Start in the center and spiral outwards.
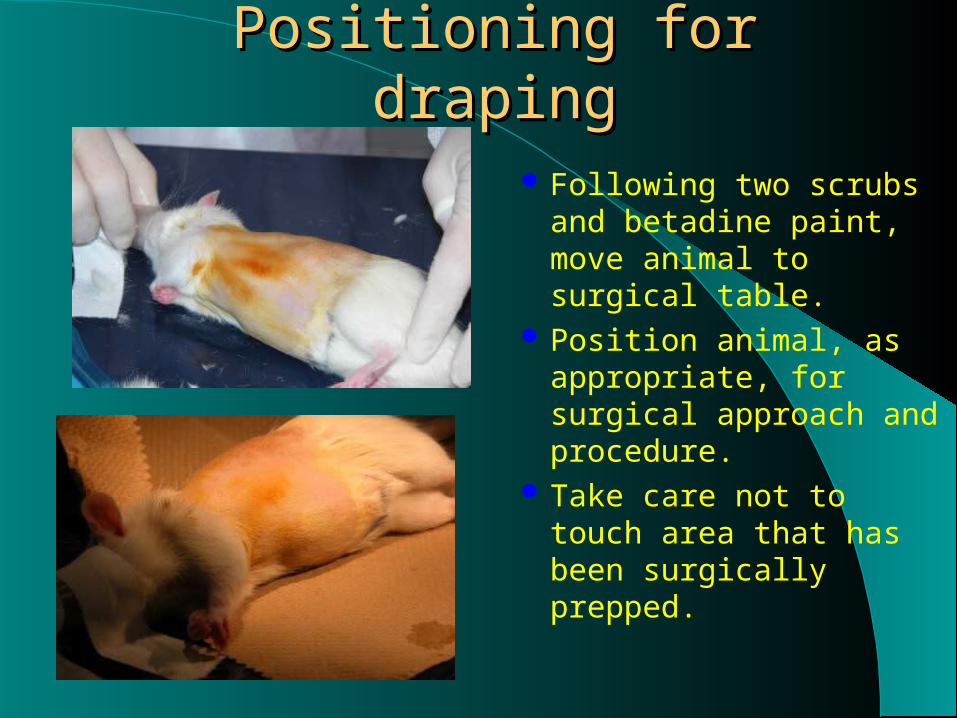
Positioning for drapingPositioning for draping
Following two scrubs and betadine paint, move animal to surgical table.
Position animal, as appropriate, for surgical approach and procedure.
Take care not to touch area that has been surgically prepped.

Positioning the AnimalPositioning the Animal
The surgical light is used to hold tape for positioning animal on the surgical field (after completion of initial clip and scrub in prep area).
Final iodine “paint” is applied by surgeon AFTER donning sterile gloves.

Animal is positioned PRIOR to Animal is positioned PRIOR to donning sterile gloves.donning sterile gloves.
Position and secure gas nose-cone, or intubation tube (if intubated).
Position the light source.
The surgeon then dons sterile gloves for draping the animal.

Mouse Mouse prepped/positionedprepped/positioned
Final drape

Mouse draped and in position Mouse draped and in position within surgical fieldwithin surgical field

Draped/prepped incision siteDraped/prepped incision site

Recovery of rodentsRecovery of rodentsRecovery of rodents is the same as other species.
They need supportive care.– Warmed cage/bedding– Heat source controlled or ambient (e.g., one
that cannot continue to heat beyond body temperature or one that will cool naturally).
– Fluid therapy– Analgesics– Help with accessing food & water post
operatively (food may be placed on cage bottom, or supplemented with high calorie soft foods).

Mouse, post-op, with warm Mouse, post-op, with warm water-filled glovewater-filled glove
Once sternal and capable of purposeful movement, the animal is returned to its home cage.
Heat source (glove) should be removed prior to returning an animal to its holding room.

Post-op mouse w/food on Post-op mouse w/food on cage bottomcage bottom

Thanks to the researchers Thanks to the researchers who so graciously let us who so graciously let us
photograph their models!!photograph their models!!
Margi Baldwin, RVT, LATG, SRS, MS
Training Coordinator – USF
Division of Comparative Medicine
Recommended