Create e-commerce website Opencart
Prepared by : Reth Chantharoth
Facebook : https://www.facebook.com/tharothchan.ubee
E-mail : [email protected]

Create e-commerce website
Opencart• What is opencart?
Opencart is free open source ecommerce platform for
online merchants. Opencart provides a professional and
reliable foundation from which to build a successful online
store. This foundation appeals to a wide variety of users;
ranging from seasoned web developers looking for a user-
friendly interface to use, to shop owners just launching their
business online for the first time.

Advantages of Opencart• Open source
• Unlimited category
• Unlimited product
• Unlimited manufacture
• Templatable
• Multi-currency
• Multi-language
• Product Review
• Product Rating
• Downloadable product

Advantages of Opencart• Automatic remote resize
• Multiple tax rate
• Related products
• Unlimited information pages
• Shipping weight calculation
• Discount coupon system
• Search Engine Optimizing(SEO)
• Module System
• Backup and Restore tools
• Printable invoice
• Sale report

Requirement
• Web server(perferably Apache)
• PHP (at least 5.2)
• MySQL
• Opencart zip file (Download latest version of Opencart
from OpenCart website )
Software recommendation : Xampp Control Panel
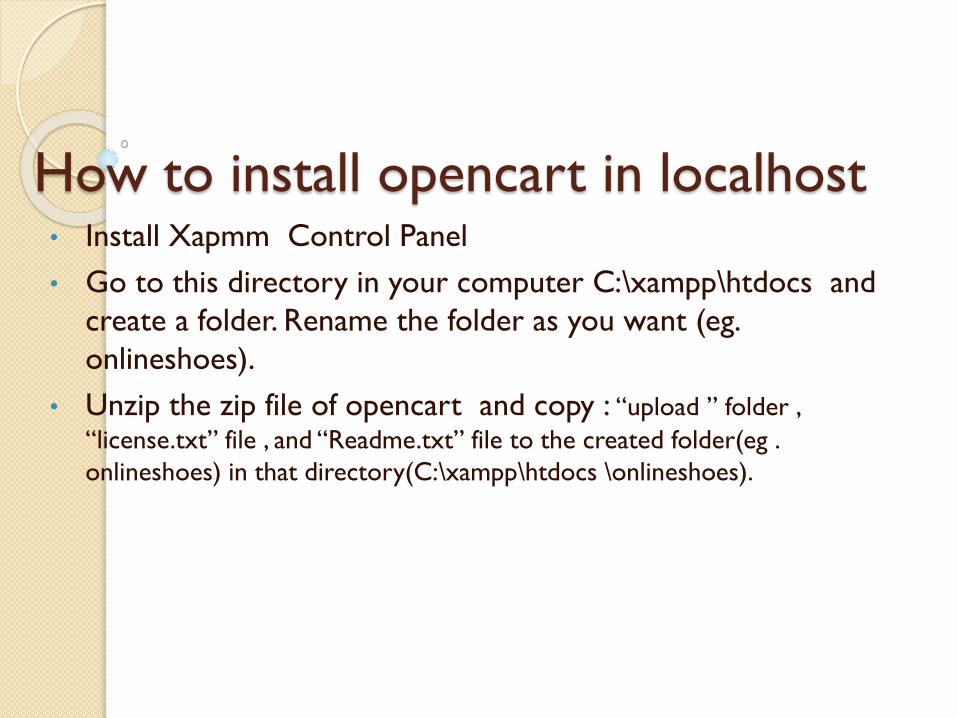
How to install opencart in localhost• Install Xapmm Control Panel
• Go to this directory in your computer C:\xampp\htdocs and
create a folder. Rename the folder as you want (eg.
onlineshoes).
• Unzip the zip file of opencart and copy : “upload ” folder ,
“license.txt” file , and “Readme.txt” file to the created folder(eg .
onlineshoes) in that directory(C:\xampp\htdocs \onlineshoes).

Getting start with opencart1. Create database for shop
• Start web service and MySQL
• Create a new database for your shop in phpmyadmin.
• Open web browser and login to admin page(According to sample
above, the address is localhost:/onlineshoes/upload).
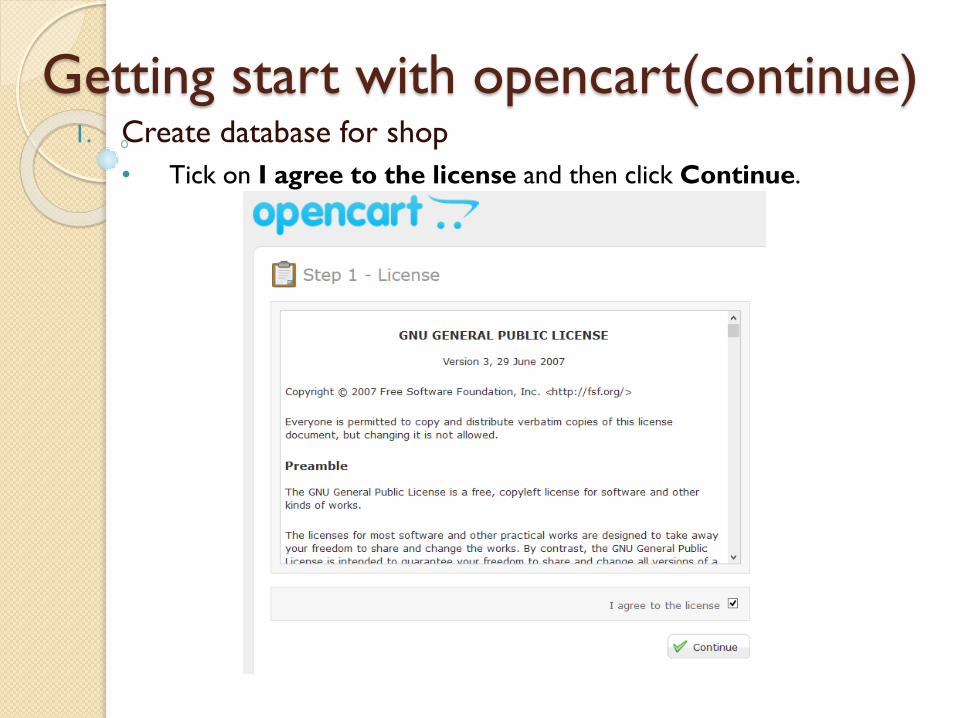
Getting start with opencart(continue)1. Create database for shop
• Tick on I agree to the license and then click Continue.

Getting start with opencart(continue)1. Create database for shop
• In Page, Step 2 – Pre- Installation , click Continue.
• In Page , Step 3 – Configure . Configure database connection and
username and password for administration. Click continue.

Getting start with opencart(continue)1. Create database for shop
• Step 4- finished

Getting start with opencart(continue)After finished, you can see : store front page and administrator
page.
• Store front :

Getting start with opencart(continue)After finished, you can see : store front page and administrator
page.
• Administrator page :

Getting start with opencart(continue)Opencart default theme :

Getting start with opencart(continue)Product page :

Getting start with opencart(continue)Category product listing :

Getting start with opencart(continue)Product comparation :

Getting start with opencart(continue)Registration page :

Getting start with opencart(continue)Shopping cart :

Getting start with opencart(continue)Check out :
• There are 6 step :
• Step 1: Checkout Options
The customer can log into or register their account.
• Step 2: Billing Details :Personal details including "First Name", "Last
Name", "E-mail", and "Telephone" ……etc.
• Step 3: Delivery Details: user can choose other for payment.
• Step 4: Delivery Method : A method of shipping is selected here. A
comment box is added for the customer to add comments about their
order.
• Step 5: Payment Method : The customer selects their method of
payment here and may add comments in the comment box.
• Step 6: Confirm Order : In this last step, the customer will see an
overview of their purchase; including the product description, quantity,
and price (with tax & shipping).

Administrator panel1. Dashboard:
The main function of the dashboard is to give the shop owner an overview
of how the shop is performing.
There are 3 sections of the dashboard that can help you understand the
statistical data collected by your store:
• Overview
• Statics : A graph is provided to track the chronological progress of the store
relative to the amount of orders and customers over time. The x
value is time. The y value displays the number of total orders
(yellow) and total customers(blue).
• Latest 10 Orders : A list that displays the last 10 orders and their details
("Order ID", "Customer", "Status", "Date Added", "Total", and "Action")

Administrator panel2. Catalog:
• Category : you can add, edit, delete category here.
• Click insert to add a new category.
• Click Edit to edit category.
• Tick on tickbox, which is in front of product, and then click on Delete button to delete category

Administrator panel2. Catalog:
• Attribute: The attributes section lets you edit the attributes compared
between products in "Product Comparison"

Administrator panel2. Catalog:
• Options : lets you customize what details the customer sees when
checking out a product.

Administrator panel2. Catalog:
• Manufacturer : The Manufacturer section is used to categorize products
by manufacturer.

Administrator panel2. Catalog:
• Download :This section is only applicable to you if you sell digital products,
or products that have a downloadable component such as a PDF User
Guide or similar
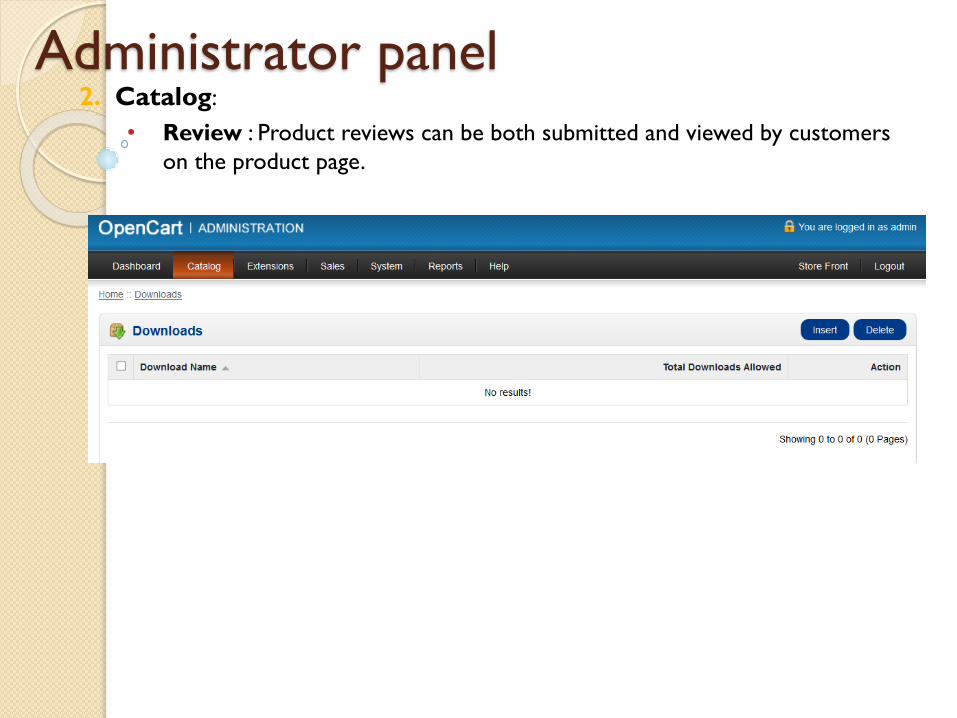
Administrator panel2. Catalog:
• Review : Product reviews can be both submitted and viewed by customers
on the product page.
Note : Disable product review : In administration panel, go to

Administrator panel2. Catalog:
• Review :
Note : Disable product review : In administration panel, go to
SystemSetting . Under Action column , Click on edit for your store
name, and then click on Option Tab. In product session , click on No for
Allow Reviews .

Administrator panel2. Catalog:
• Information :
The Information section displays specific company information in
the footer of every page

Administrator panel3. Extensions:
• Modules : the Extension section contains additional tools to improve
the functionality of the OpenCart store.

Administrator panel3. Extensions:
• Shipping : The shipping methods need to be installed before they
can be enabled or disabled for the store. Each shipping method
needs to be individually edited to meet your shop's shipping
requirements and to specify the prices for that service.

Administrator panel3. Extensions:
• Payments : The OpenCart package offers a variety of payment
methods, from bank transfers to online payment gateways.
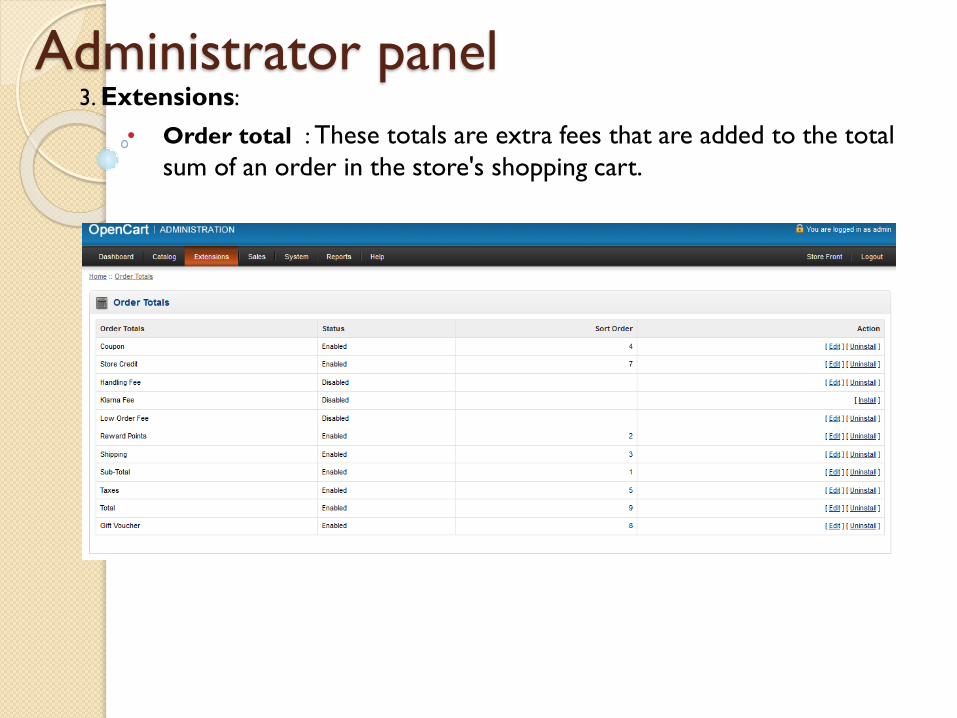
Administrator panel3. Extensions:
• Order total : These totals are extra fees that are added to the total
sum of an order in the store's shopping cart.
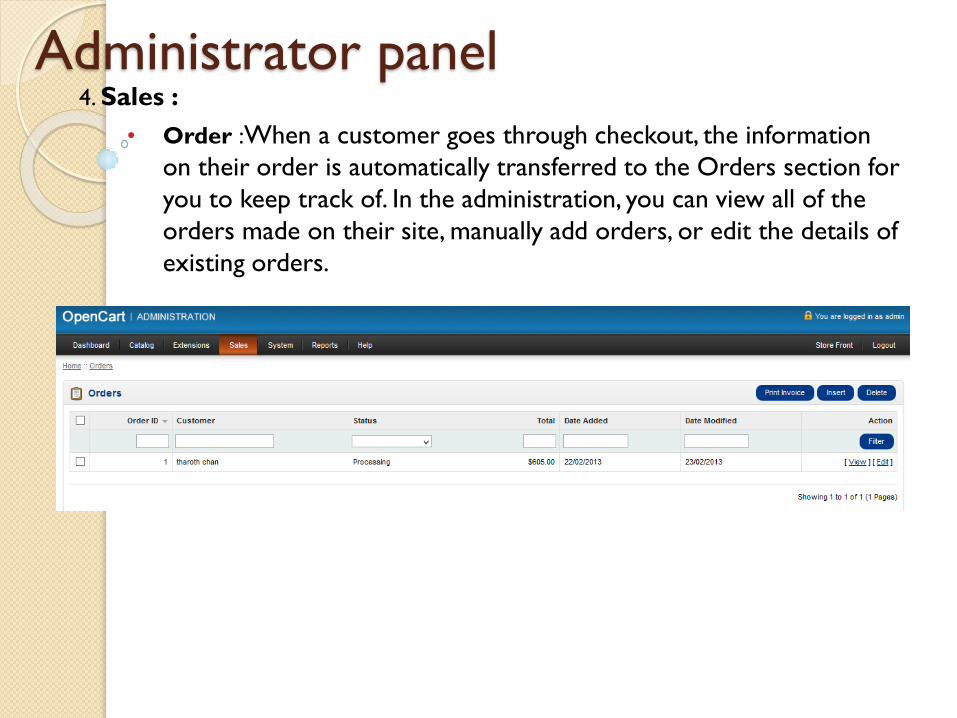
Administrator panel4. Sales :
• Order :When a customer goes through checkout, the information
on their order is automatically transferred to the Orders section for
you to keep track of. In the administration, you can view all of the
orders made on their site, manually add orders, or edit the details of
existing orders.

Administrator panel4. Sales :
• Customers : Shop owners can know their customers are and how
to manage their information.
• Affiliates : OpenCart gives you the opportunity to set up an
affiliate program to promote additional traffic to your shop. User
can add new, edit ,and approve attifiates.
• Gift vouchers can be individually sent to customers through their
email by other customers in the store front. The customer receiving
the gift certificate can use the code provided in the email at the
shopping cart to deduct the gift voucher amount from the order
total.
• Mail : The Mail system in OpenCart lets you send emails to specific
customer groups. You can use this feature to send newsletters,
information on specials, or to communicate any type of store
information to select groups of customers.

Administrator panel5. System :
• Setting: The Settings page lets you manage stores and their
individual settings. To edit settings , go to System Click on setting ,
and then click on edit for your store name.
• Designer :
• Layouts : you can edit some sitting such as Account, Affiliate,
category, check out, contact, default , Home, information ,
manufacturer , product, and sitemap.
• Banners : lets you customize the images and links displayed on
the banners.
• Users :
• Users : Managing the in's and out's of the admin side of an
online store can be quite the task for just one person to
handle.
• User Groups : set specific access and modification
permissions to user.

Administrator panel5. System :
• Localisation :The Localisation section takes into account
all the regional information needed to manage
customers and orders from different countries. This
information is needed to calculate shipping, estimate
taxes, convert product prices between currencies, and
manage other important tasks such as language, currency,
stock status, order status, return, country, zone, geo
zone, Taxes, Length class, weight class.
• Error Log : If a user experiences an error in the store,
the error will be displayed in an error log under System
> Error Logs. This section can be used by web
developers to track errors in coding for the store.
Pressing "Clear Log" will clear the list of errors.

Administrator panel5. System :
• Backup / restore :lets you download a backup of the
store's current database or restore the database to the
administration in System>Backup/Restore

Administrator panel6. Report : Let’s you view all report related the shop such as
sales, products, customers, affiliated.

Developer Guide• Opencart developed with PHP, OOP and the MVC
architecture.
• Developer module : All admin files are located in the admin/
folder:
1. Controller
2. Model
3. View
4. Language

Developer Guide (continue)• Controller : OpenCart identifies existing modules automatically,
simply by reading the admin/controller/module folder of your
store. created in the admin/view/template/module folder, and will
have the suffix .tpl.
• View :The second required file for your module's admin
interface is the view file. This will be created in the
admin/view/template/module folder, and will have the suffix .tpl.
• Language : The third file you will usually create for any module
is the language file(s). You will need one language file per language
that your module is compatible with. The language file will live in
the admin/language//module folder

Developer Guide (continue)• Model : For opencart, It is uncommon for modules to require a
model file on the admin side.The model file will live in the
admin/model/module folder.

Moving opencart to new server
• Copy all the OpenCart files from your existing web server
to the new web server.
• Export the OpenCart database and import it into the new
server.
• Edit config.php and admin/config.php. These files contain the
filesystem paths to OpenCart folders, URLs to OpenCart
frontend and admin, and database access details. The paths
and database details will most likely need to be updated, and
the URLs will need to be changed only if the OpenCart
store's domain has changed.

Adding language to opencart
• Copy all the OpenCart files from your existing web server
to the new web server.
• Export the OpenCart database and import it into the new
server.
• Edit config.php and admin/config.php. These files contain the
filesystem paths to OpenCart folders, URLs to OpenCart
frontend and admin, and database access details. The paths
and database details will most likely need to be updated, and
the URLs will need to be changed only if the OpenCart
store's domain has changed.

Website reference
• http://www.opencart.com
Documentation
• http://www.opencart.com/index.php?route=documentation/d
ocumentation
Extension
• http://www.opencart.com/index.php?route=extension/extens
ion
Forum
• http://forum.opencart.com
Recommended