7900 Pager User Manual
(Manual Revision 1.40)
Last updated 17/08/2009
Email [email protected]
Web www.commtechwireless.com
Asia Pacific
PO Box 1037
OPDC 6916
PERTH, Western Australia
Phone: +61 8 6240 0000
Fax: +61 8 6240 0001
Americas
8301 Cypress Plaza Drive, Suite 105
JACKSONVILLE, FL 32256-4416
Phone: +1 904 281 0073
Fax: +1 904 281 0074
EMEA
Vindingaard Rinvej 1
DK-7100 Vejle
DENMARK
Phone: +45 8226 7280
Fax: +45 8226 7289

7900 Pager Manual
Page 2 © CommtechWireless
NOTICE
This manual, software and electronic circuitry are copyrighted. All rights reserved. Under the copyright laws, this manual, software and electronic circuitry may not be copied, in whole or in part without written prior consent of Commtech Wireless.
All information provided in this document is carefully prepared and offered in good faith as a guide in the installation, use and servicing of our products. Installers must ensure that the final installation operates satisfactorily within the relevant regulatory requirements. Commtech Wireless accepts no responsibility for incorrect installation. Commtech Wireless reserves the right to change products, specifications, and installation data at any time, without notice.
Commtech Wireless makes certain limited warranties with respect to defective diskettes, documentation and electronic circuitry. Please see the associated information contained on this page.
SOFTWARE LICENSE STATEMENT
This manual, software and electronic circuitry are protected by international copyright laws. Under the copyright laws, this manual, software and electronic circuitry may not be copied, in whole or in part without written prior consent of Commtech Wireless, except in the normal use of the software to make an archival copy of the software for the sole purpose of backing up the software and protecting your investment from loss or damage.
LIMITED WARRANTY
With respect to the physical documentation and physical electronic circuitry enclosed herein, Commtech Wireless warrants the same to be free of defects in materials and workmanship for a period of one year from the date of purchase. In the event of notification within the warranty period of defects in material or workmanship, Commtech Wireless will replace the defective diskettes, documentation and electronic circuitry. The remedy for breach of this warranty shall be limited to replacement and shall not encompass any other damages, including but not limited to loss of profit, and special, incidental, consequential, or other similar claims.
Commtech Wireless specifically disclaims all other warranties, expressed or implied, including but not limited to implied warranties of merchantability and fitness for a particular purpose with respect to defects in the documentation and electronic circuitry, and the program license granted herein, in particular, and without limiting operation of the program license with respect to any particular application, use, or purpose.
COMPLIANCE NOTICES
AUSTRALIA: Where applicable, to ensure compliance with ACA Technical Standards, this equipment is labeled with a Telecommunications Compliance Label. For safety reasons, this equipment should only be connected to compliant telecommunications equipment in accordance with the manufacturer’s instructions.
NORTH AMERICA: Where applicable, this equipment has been tested and found to comply with FCC Rules and Regulations, Part 15 with the limits of a Class B digital device, designed to provide reasonable protection against harmful interference. This equipment generates, uses and can radiate frequency energy and if not installed and used in accordance with the instructions, may cause interference harmful to radio communications. On the base of the equipment is a label containing an FCC Registration Number, if applicable.

Manual 7900 Pager
© CommtechWireless Page 3
Table of Contents 1.1 About This Handbook ............................................................................................................... 4
2. ABOUT THE 7900 PAGER...................................................................................................................... 5
3. THE 7900 PAGER .................................................................................................................................. 6
3.1 Getting Started ......................................................................................................................... 6 3.1.1 Case Layout ......................................................................................................................... 6 3.1.2 LCD Screen ........................................................................................................................... 6 3.1.3 Replacing the Battery .......................................................................................................... 7 3.1.4 Turning the Pager “ON” ...................................................................................................... 7 3.1.5 Turning the Pager “OFF” ..................................................................................................... 8 3.1.6 Activating the Backlight ....................................................................................................... 8
3.2 Managing Messages ................................................................................................................. 9 3.2.1 Reading Stored Messages ................................................................................................... 9 3.2.2 Reading a New Message ..................................................................................................... 9 3.2.3 Protecting a Message ........................................................................................................ 10 3.2.4 Un-protecting a Message .................................................................................................. 10 3.2.5 Deleting Individual Messages ............................................................................................ 11 3.2.6 Deleting All Messages ....................................................................................................... 11
3.3 Settings ................................................................................................................................... 12 3.3.1 Alert Settings ..................................................................................................................... 12 3.3.2 Power Off .......................................................................................................................... 13 3.3.3 Daily Alarm Settings .......................................................................................................... 13 3.3.4 Time & Date Settings ......................................................................................................... 14 3.3.5 Telephone Book ................................................................................................................ 14
4. APPENDIX .......................................................................................................................................... 16
4.1 Further Help and Support ....................................................................................................... 16
4.2 Precautions ............................................................................................................................. 16
4.3 Specifications .......................................................................................................................... 17 4.3.1 Electrical Specification....................................................................................................... 17 4.3.2 Technical Specification ...................................................................................................... 17 4.3.3 Mechanical Specification ................................................................................................... 17 4.3.4 RF Specification ................................................................................................................. 17

7900 Pager Manual
Page 4 © CommtechWireless
1.1 About This Handbook
This handbook is designed to assist you use the 7900 pager. Following the steps and checklists correctly will ensure that there will be no problems when using the 7900 pager.
Conventions
NOTE: A note preceded with this symbol indicates secondary information pertaining to the topic under discussion.
IMPORTANT: A Right-pointing arrow followed by text in this manner presents important information.
▲ WARNING: Warnings like this alert you to the fact that you might damage your equipment or lose data if you don't follow instructions carefully.
Manual 7900 Pager
© CommtechWireless Page 5
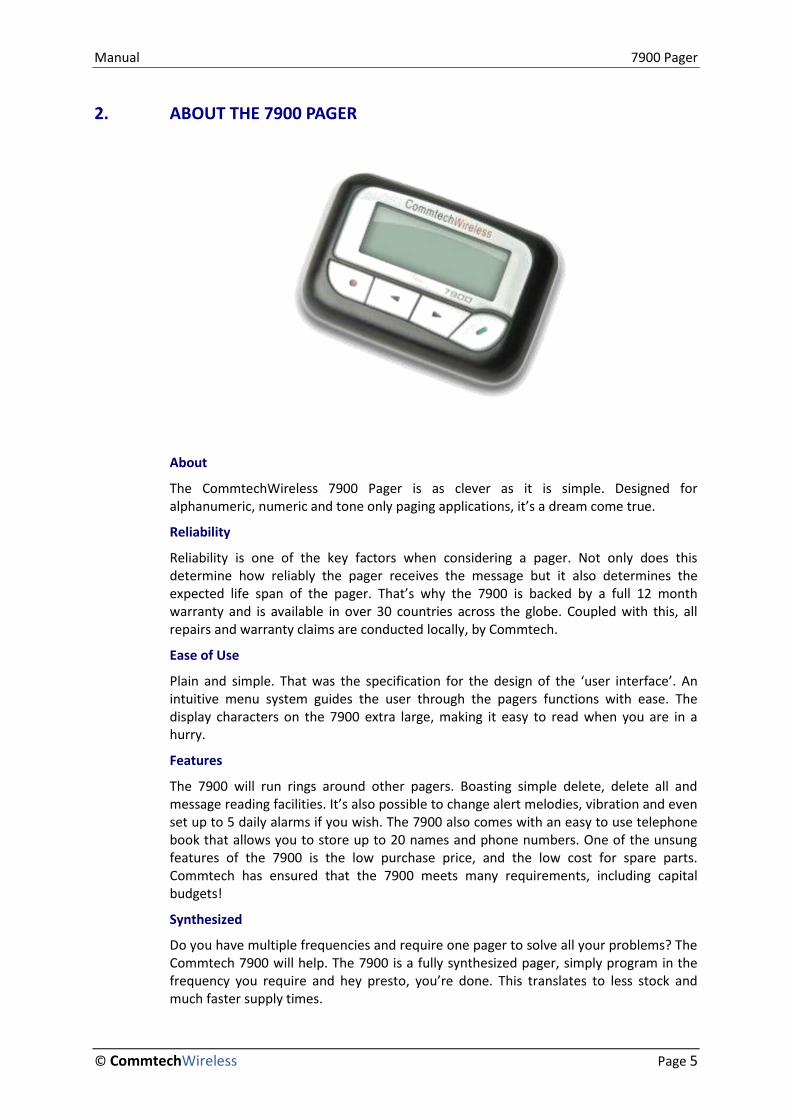
2. ABOUT THE 7900 PAGER
About
The CommtechWireless 7900 Pager is as clever as it is simple. Designed for alphanumeric, numeric and tone only paging applications, it’s a dream come true.
Reliability
Reliability is one of the key factors when considering a pager. Not only does this determine how reliably the pager receives the message but it also determines the expected life span of the pager. That’s why the 7900 is backed by a full 12 month warranty and is available in over 30 countries across the globe. Coupled with this, all repairs and warranty claims are conducted locally, by Commtech.
Ease of Use
Plain and simple. That was the specification for the design of the ‘user interface’. An intuitive menu system guides the user through the pagers functions with ease. The display characters on the 7900 extra large, making it easy to read when you are in a hurry.
Features
The 7900 will run rings around other pagers. Boasting simple delete, delete all and message reading facilities. It’s also possible to change alert melodies, vibration and even set up to 5 daily alarms if you wish. The 7900 also comes with an easy to use telephone book that allows you to store up to 20 names and phone numbers. One of the unsung features of the 7900 is the low purchase price, and the low cost for spare parts. Commtech has ensured that the 7900 meets many requirements, including capital budgets!
Synthesized
Do you have multiple frequencies and require one pager to solve all your problems? The Commtech 7900 will help. The 7900 is a fully synthesized pager, simply program in the frequency you require and hey presto, you’re done. This translates to less stock and much faster supply times.

7900 Pager Manual
Page 6 © CommtechWireless
3. THE 7900 PAGER
3.1 Getting Started
3.1.1 Case Layout
The Commtech 7900 pager has four buttons on its case.
| | | |
Escape Left Right Read
Key Key Key Key
3.1.2 LCD Screen
The 7900 Pager contains a backlit, two line, alphanumeric LCD screen. Each line is 18 characters long. There is also a row of small icons underneath this line which give a quick indication of the current status and settings for the pager. The LCD screen is shown below.
The table below shows the meaning of each icon.
Icon Description
Vibrate Alert
Beeping Alert
Daily Alarm On
Duplicate Message
Unread Message
Message Locked
Out of Range Indicator
Low battery
Message continues on next screen

Manual 7900 Pager
© CommtechWireless Page 7
3.1.3 Replacing the Battery
The pager will warn you when the battery is getting low (if enabled in programming software) within the unit by displaying the battery low icon on the LCD screen described above. The pager is powered by a single alkaline battery. Follow these directions to replace the battery:
▲ WARNING: Before removing the battery, make sure the pager is turned OFF. Removing the battery while the power is ON can corrupt or delete data. If you do not wish to use the pager for a long time, write down any important data stored in the pager and remove the battery.
1. Turn the pager off. (see the directions on this later on in this manual)
2. Slide up the battery compartment lock on the pager case.
3. Remove the battery compartment cover by sliding it in the direction of the marked arrow.
4. Remove the exhausted battery and replace it with a fresh AA alkaline battery.
IMPORTANT: If you replace the batteries quickly, stored messages, settings and the time/date will be retained.
5. Re-attach the battery compartment and return the lock to its original position.
3.1.4 Turning the Pager “ON”
To turn the pager ON, follow these steps:
1. Insert the battery into the pager.
2. If the battery is already in the pager, press and the hold the Read Key for two seconds. The pager may beep and/or vibrate depending on the current alert settings in the pager. The LCD screen will also activate to show that it is working properly. This initialization lasts for several seconds. After the initialization is complete, the pager will display a start-up message for two seconds, if this has been programmed in. After the start-up message has been displayed, you will be at the Standby Screen. The Standby Screen shows the current date and time.
3. After a short amount of inactivity, the pagers LCD screen will turn blank, except for a small round icon on the bottom left corner. You can return to the Standby Screen at anytime by pressing any of the keys.

7900 Pager Manual
Page 8 © CommtechWireless
3.1.5 Turning the Pager “OFF”
1. Go to the Standby Screen.
2. Press and hold the Escape Key to display the Settings Menu.
3. Using the & Arrow Keys, scroll through the Settings Menu until
Pager Off is selected.
4. Press the Read Key to select.
5. Press the Read Key again to confirm.
3.1.6 Activating the Backlight
The backlight can be enabled in one of three ways depending on the settings programmed into it using the programming software.
1. By pressing and hold the Read Key for two seconds to activate.
2. By pressing any key.
3. When a message has been received and then pressing any key.
The backlight will automatically extinguish after a few seconds. Alternatively, press and
hold the Read Key for two seconds to de-activate.

Manual 7900 Pager
© CommtechWireless Page 9
3.2 Managing Messages
3.2.1 Reading Stored Messages
1. Press the Read Key to read the latest stored messages.
2. Keep pressing the Read Key to scroll through all stored messages. The Time Stamp display always appears at the end of each message to show the time, date and address properties of the message.
NOTE: If a message is longer than the screen width, the icon will be displayed on the LCD to
indicate it. To view the rest of the message press the Read Key.
3. If there are no pages currently stored, the LCD will show and return you to the Standby Screen.
3.2.2 Reading a New Message
When the pager is being used, it will typically be at the Standby Screen awaiting a page.
1. When a page is received it will alert the user, depending on the pagers current alert settings.
2. To stop the pager from alerting you about the received page, press any key.
3. The received page will be shown on the LCD screen.
4. When you have finished reading the message, press the Escape Key to return to the Standby Screen.
NOTE: The Unread Message icon appears whenever there are stored messages in the pager
that have not been read. Press the Read Key to view any unread messages. The pager will also emit a short warning beep every few minutes to alert the user that unread messages exist on the pager.
NOTE: If the current message is a repeated message, the Duplicate Message icon will appear.
NOTE: If the pager receives a corrupt message, it will attempt to display the message as best as possible. The pager will show “ER” on the time stamping screen.
NOTE: The 7900 pager can store up to 60 messages (depending on settings programmed into it). If a new message is received whilst the pagers message memory is full, the oldest message gets deleted to make room for the new message.

7900 Pager Manual
Page 10 © CommtechWireless
3.2.3 Protecting a Message
Protecting a message is used when you wish to prevent a message from being deleted. Follow the directions below to protect a message.
1. Whilst the message is being displayed, press and hold the Escape Key to display the Delete Menu.
2. Using the & Arrow Keys, scroll through the menu until Protect is found.
NOTE: The Escape Key can be pressed while in the Delete Menu to return you to the Standby Screen without protecting any messages.
3. Press the Read Key to confirm your choice. The Message Locked icon
will appear on the LCD screen to confirm the message is locked. Press the Escape Key to return to the Standby Screen.
NOTE: When the pager reaches the maximum number of protected messages available, the display will show Protect Full to remind you that it cannot store any more protected messages.
3.2.4 Un-protecting a Message
To un-protect a message, follow the directions below.
1. Whilst the protected message is being displayed, press and hold the Escape Key to display the Delete Menu.
2. Using the & Arrow Keys, scroll through the menu until Unprotect is found.
NOTE: The Escape Key can be pressed while in the Delete Menu to return you to the Standby Screen without un-protecting any messages.
3. Press the Read Key to confirm your choice. The Message Locked icon will disappear from the LCD screen to confirm the message is now unlocked.
Press the Escape Key to return to the Standby Screen.

Manual 7900 Pager
© CommtechWireless Page 11
3.2.5 Deleting Individual Messages
To delete an individual message stored on the pager, follow the directions below.
1. Whilst the message you wish to delete is being displayed, press and hold the
Escape Key to display the Delete Menu.
2. Using the & Arrow Keys, scroll through the menu until Delete is found.
NOTE: The Escape Key can be pressed while in the Delete Menu to return you to the Standby Screen without deleting any messages.
3. Press the Read Key to confirm deletion of this message.
NOTE: Protected messages will remain on the pager
4. Press the Escape Key to return to the Standby Screen.
3.2.6 Deleting All Messages
To delete all messages stored on the pager, follow the directions below.
1. Whilst the message you wish to delete are being displayed, press and hold the
Escape Key to display the Delete Menu.
2. Using the & Arrow Keys, scroll through the menu until Delete All is found.
NOTE: The Escape Key can be pressed while in the Delete Menu to return you to the Standby Screen without deleting any messages.
3. Press the Read Key to confirm deletion of all messages.
NOTE: Protected messages will remain on the pager
4. Press the Escape Key to return to the Standby Screen.

7900 Pager Manual
Page 12 © CommtechWireless
3.3 Settings
The Settings Menu is entered into, depending on the language setting programmed into the pager.
UK English – Either by pressing and holding the Escape Key or by tapping
the & Arrow Keys from the Standby Screen.
USA, Russian, Spanish, French, German, Italian, Thai – by pressing and holding
the Escape Key from the Standby Screen.
The available functions include Alert Settings, Power Off, Daily Alarm Settings, Date &
Time Settings and Phone Book Settings. The & Arrow Keys are used to scroll through the different menus.
NOTE: The Escape Key can then be pressed at any time to return you to the Standby Screen without saving any changes.
NOTE: If the language is set to UK English, an English text description appears next to the icon and one menu item is displayed per page.
3.3.1 Alert Settings
This menu item is used to determine how the pager behaves when it receives a message.
1. Enter the Settings Menu.
2. Using the & Arrow Keys, scroll through the various settings until the
Alert Set menu item is found.
3. Press the Read Key to confirm selection of this menu item.
4. Using the & Arrow Keys to toggle between the four various alert types. These are (from left-right) Beep, Motor, Beep&Motor and Mute. The pager will demonstrate how each alert type behaves as you scroll through them.
NOTE: This is the default setting programmed into the pager. Some pagers may not have all Alert types available.
5. Once you have chosen the alert type you wish to use, press the Read Key to confirm the selection. You will then be automatically returned to the Standby Screen.

Manual 7900 Pager
© CommtechWireless Page 13
3.3.2 Power Off
This menu item is used to turn the pager off. This helps conserve battery life when the pager is not in use.
1. Enter the Settings Menu.
2. Using the & Arrow Keys, scroll through the various settings until the
Power Off menu item is found.
3. Press the Read Key to select this menu item. Confirm selection by pressing
the Read Key again. The pager will then turn off.
3.3.3 Daily Alarm Settings
This menu item is used to set the daily alarms. The pager can have up the five alarms set.
1. Enter the Settings Menu
2. Using the & Arrow Keys, scroll through the various settings until the
Daily Alm menu item is found.
3. Press the Read Key to confirm selection of this menu item. The Daily Alarm menu will then appear.
4. Using the & Arrow Keys, you can scroll through the five types of alarms available. They are All Days, Weekday, Holiday, Special Day 1 and Special Day 2.
5. Press the Read Key to confirm selection of the desired alarm type.
6. Use the & Arrow Keys to alter fields and the Read Key to move along to the next field.
7. One of the fields within this screen is a bell icon. Using the &
Arrow Keys, you can toggle between enabling or disabling the current alarm.
NOTE: The ability to disable each daily alarm is useful, as it enables you to configure an alarm ready for use at any time, but not have it actually activated.
8. Once you have pressed the Read Key to the end of the line, the pager will
beep and you will be returned to the Standby Screen where the Daily Alarm icon will appear on the LCD if you have any activated alarms set.

7900 Pager Manual
Page 14 © CommtechWireless
3.3.4 Time & Date Settings
This menu item is used to set the time and date for the pager. The time and date are normally displayed on the Standby Screen and also at the end of each message as part of the message Time Stamp.
1. Enter the Settings Menu
2. Using the & Arrow Keys, scroll through the various settings until the
Date & Time menu item is found.
3. Press the Read Key to confirm selection of this menu item.
4. Use the & Arrow Keys to alter fields and the Read Key to move
along to the next field. Press the Read Key until it reaches the end of the line. The pager will beep and the information will be automatically saved.
5. You will then be returned to the Standby Screen.
3.3.5 Telephone Book
This menu item is used to store the names and numbers of your contacts.
To view an entry in the pager
1. Enter the Settings Menu.
2. Using the & Arrow Keys, scroll through the various settings until the
Phone Book menu item is found.
3. Press the Read Key to confirm selection of this menu item.
4. Use the & Arrow Keys to scroll through telephone book entries already entered into the pager. The entry number is displayed on the first row of the LCD. Only the name field is displayed scrolling through the entries. To view
the number associated with the name, select the entry with the Read Key. The rest of the details will then be displayed.
5. Press the Escape Key to return to the Standby Screen.
To add an entry into the pager
1. Enter the Settings Menu.
2. Using the & Arrow Keys, scroll through the various settings until the
Phone Book menu item is found.
3. Press the Read Key to confirm selection of this menu item.

Manual 7900 Pager
© CommtechWireless Page 15
4. To add a new entry, use the & Arrow Keys to select the New Entry
icon from the Telephone book menu. Press the Read Key to confirm selection. You will then be prompted to enter a name and number for the contact.
5. The & Arrow keys are used to alter fields. The Read Key is used to move along to the next field.
6. At any time you can press the Escape Key. The pager will then prompt you to
enter either exit the Telephone book saving any changes made or not saving the changes made.

7900 Pager Manual
Page 16 © CommtechWireless
4. APPENDIX
4.1 Further Help and Support
Contact your Place of Purchase
A CommtechWireless Authorized Distributor or Dealer sets up most systems. Contact your place of purchase with inquiries beyond the scope of this manual.
This Product is Not Field Serviceable
Should a fault develop with the hardware or software, contact your place of purchase for the most appropriate form of action. Do not attempt to open or repair any of the products as this may void any warranty.
4.2 Precautions
1. This pager contains precision electronic components. Avoid temperature extremes during use and storage and do not subject it to strong impact.
2. Avoid using the pager in an area where it might come into contact with liquids or very high humidity.
3. Never try to take the pager apart. Doing so can lead to serious damage and malfunction.
4. Replace the battery as soon as possible after you notice it getting low. Leaving a dead battery in the pager can result in damage caused by leaking fluids. The battery should be removed from the pager if you do not plan to use it for a long time.
5. Clean the pager by wiping it with a soft dry cloth. You can also use a cloth moistened with a weak solution of mild neutral detergent and water. Wring as much liquid as possible from the cloth before wiping the pager. Never use thinner, benzene, alcohol or other volatile agents to clean the pager.
6. Do not allow the pager to be exposed to direct sunlight, heat from heaters or other sources of heat (greater than 60°C). Do not leave the pager in a motor vehicle that is parked in the sun.
7. Never expose batteries to direct sunlight or incinerate them. Doing so may cause the batteries to explode.
8. Never try to charge batteries or take them apart. Doing so can cause them to leak fluid.

Manual 7900 Pager
© CommtechWireless Page 17
4.3 Specifications
* Note: Specifications subject to change without any notice
4.3.1 Electrical Specification
Rx Frequency (MHz)........................ 135-175, 276-284, 406-414, 429-437, 439-470, 929-932
Nominal Battery Life ...............................................around 20-40 days (‘AA’ alkaline battery)
Power Supply ...................................................................................... 1 x AA battery 1.5 volts
Current Consumption .................. RF <8mA, Standby <1mA, Vibrate <100mA, Buzzer <80mA
Low Voltage Detection .............................................................. RF cut @ 1.1volts ± 0.05volts
Backlight ............................................................................................................ 3 x White LED
Keys............................................................... 4 Keys (Enter, Escape, Left Arrow, Right Arrow)
4.3.2 Technical Specification
Code Format ............................................................................................................... POCSAG
Programming .................................... Programming lead and software or manually on pager
Cap codes.............................................................................................. 6, frame independent
Message Capacity ................................................ 60 messages (500 characters per message)
Memory backup .................................................................................... more than 20 minutes
LCD ...................................................................................... 6 x 8 dot matrix, total of 36 chars
Icons ............................................................................................................... 9 function icons
Vibrator .......................................................................................... Low noise core less motor
Buzzer ........................................................................................................ 80dBc SPL @ 30cm
Alert Types ................................................................................ Beep, Vibrate, Beep& Vibrate
Approvals ..................................................................................... CE / FCC / ACA C-tick / DOC
4.3.3 Mechanical Specification
Unit size ........................................... 70 x 49 x 19 mm / 2.7 x 1.9 x 0.7 inches without holster
Weight .......................................................................................................... 46 grams / 1.6 oz
Casing Standards .................................................................................................... Dust Proof
Working Temperature ..........................................................................................-10 to +50°C
Storage Temperature ...........................................................................................-20 to +60°C
Working Humidity ........................................................... Up to 95% @ 50°C (non condensing
ESD ............................................................................................................. Better than ± 12kV
4.3.4 RF Specification
Local frequency ............................................................. 1st
Local 21.4 MHz, 2nd
Local 455 kHz
Local oscillation .................................... 1st
Local PLL synthesized, 2nd
local crystal controlled
Non Tuning Frequency Spread ................................................................ ±4MHz (8Mhz total)
Sensitivity ............................................................................. 512bps 5uV/m, 1200bps 7uV/m
Pass Bandwidth .......................................................................................................... ± 3.0kHz
Modulation ............................................................................ ± 4.5kHz DC modulation @ NRZ
Selectivity .................................................................................... Better than 60dB @ ±25kHz
Spurious Rejection ........................................................................................ Better than 50dB
Image Rejection ............................................................................................ Better than 50dB
Inter-modulation .......................................................................................... Better than 50dB
Co-channel Rejection ....................................................................... Better than 6dB at 300Hz
Frequency Stability ........................................... VHF ± 10ppm, UHF ± 5ppm, 930Mhz ± 3ppm
Recommended