Embed Size (px)
DESCRIPTION
SBCX
Citation preview

ZXG10 ISMG Server (SBCX) Installation and Commissioning Guide
(Professional)

ZXG10 ISMG Server (SBCX) Installation and Commissioning Guide (Professional) Internal Use Only▲
LEGAL INFORMATION
By accepting this certain document of ZTE CORPORATION you agree to the following terms. If you do not agree to the following terms, please notice that you are not allowed to use this document.
Copyright © 2023 ZTE CORPORATION. Any rights not expressly granted herein are reserved. This document contains proprietary information of ZTE CORPORATION. Any reproduction, transfer, distribution, use or disclosure of this document or any portion of this document, in any form by any means, without the prior written consent of ZTE CORPORATION is prohibited.
and are registered trademarks of ZTE CORPORATION. ZTE’s company name, logo and product names referenced herein are either trademarks or registered trademarks of ZTE CORPORATION. Other product and company names mentioned herein may be trademarks or trade names of their respective owners. Without the prior written consent of ZTE CORPORATION or the third party owner thereof, anyone’s access to this document should not be construed as granting, by implication, estopped or otherwise, any license or right to use any marks appearing in the document.
The design of this product complies with requirements of environmental protection and personal security. This product shall be stored, used or discarded in accordance with product manual, relevant contract or laws and regulations in relevant country (countries).
This document is provided “as is” and “as available”. Information contained in this document is subject to continuous update without further notice due to improvement and update of ZTE CORPORATION’s products and technologies.
ZTE CORPORATION
Address: NO. 55Hi-tech Road SouthShenZhenP.R.China518057
Website: http:// dms .zte.com.cn
Email: [email protected]
ZTE Confidential Proprietary © 2023 ZTE CORPORATION. All rights reserved. I
ZXG10 ISMG Server (SBCX) Installation and Commissioning Guide (Professional) Internal Use Only▲
Revision History
Product Version Document Version Serial
Number Reason for Revision
V2008-R6.10 First published
V2008-R6.11
1. ZXG10 SBCX interfaces (Chapter 1.1.5)2. Operation procedure after the installation (Chapter 4.3)3. Check for the configuration of the automatic backup for the data script (iBackup script) (Chapter 4.3.4)4. Modification of language variables in the Client (Chapter 5.3)
V2.0 SBCX Server partitionDescriptions of common commands
V2.1
1. Adjustment of the test sequence for the automatic setup of the database. 2. Description of the Server uninstallation and reinstallation.3. Description of the commissioning for the SBCX upon product delivery.
V2.2
1. New restriction for the external IP address on the first line (in the contents for the modification of hosts file)2. New network port test standard: The unused network port should not be activated, so as to avoid the collision of MAC addresses.3. Support of the iBSCV6.20. New check item for the default.xml file in iBSCV6.20 (in the contents for the configuration modification and check in Console startup mode in Non-GUI)
V2.3 1. Update of the automatic startup for iSMG script (for iOMCRV6.20.001e and later versions)
V2.4V2.5
1. Planning and setting for the items related to OMCB network port.2. Modification for the operability and availability in Chapter 1 and Chapter 4.
V2.6
1. Method to separate the new/old SBCX type.2. Information for the default partition for Linux installation on SBCX.3. Installation and configuration of the watch dog in system reinstallation.4. Check and modification procedure for Linux handle number.
V2.7 Settings for different Oracle startup levels on new/old SBCX boards (Chapter 3.4.5)
V2.8
1. Slots of the SBCX on 100 m/1000 m platform (Chapter 1.1.2)2. Remote commissioning with VNC instead of Xmanager.
R3.2 Configuration with Integrated R&B version and independent OMCB version.
ZTE Confidential Proprietary © 2023 ZTE CORPORATION. All rights reserved. II
ZXG10 ISMG Server (SBCX) Installation and Commissioning Guide (Professional) Internal Use Only▲
Product Version Document Version Serial
Number Reason for Revision
R3.4 Descriptions for the scripts.
Author
Date Document Version Prepared by Reviewed by Approved by2008-6-13 V2008-R6.10 Zhong Junbiao Chen Qi
2008-10-8 V2008-R6.11 Zhong Junbiao Chen Qi
2009-2-10 V2.0 Li Wei Chen Qi
2009-3-19 V2.1 Zhong Junbiao Chen Qi
2009-5-20 V2.2 Zhong Junbiao Chen Qi
2009-6-2 V2.3 Zhong Junbiao Chen Qi
2009-7-16 V2.4 Zhong Junbiao Chen Qi
V2.5 Chen Qi
2009-12-25 V2.6 Cai Kai Chen Qi
2010-01-20 V2.7 Cai Kai Chen Qi
2010-02-04 V2.8 Cai Kai Chen Qi
2011-03-10 R3.2 Wu Jianwen Chen Qi
2011-03-30 R3.4 Cai Kai / Wang Xiaolei Chen Qi
ZTE Confidential Proprietary © 2023 ZTE CORPORATION. All rights reserved. III

ZXG10 ISMG Server (SBCX) Installation and Commissioning Guide (Professional) Internal Use Only▲
Preface:
The new NS system of ZXG10 BSS includes local NS system (OMM) and integrated NS system (Minos). The local NS system of ZXG10 iBSC (OMM) is managed by the local NM server ZXG10 iSMG (the software name of OMCR). The integrated NM system (Minos) is managed by Minos Server and Client. The OMM functions are performed on the Server (SBCX) and the Client.
This guide specifies the commissioning criteria of the ZXG10 iOMCR server (SBCX), in order to provide universal and detailed engineering commissioning procedure, regulate and guide the onsite commissioning work of the commissioning engineers.
This guide applies to the entire SBCX installation and commissioning procedure. For the onsite equipment pre-installed with OS and database, the detailed items should also be checked according to the regulations and criteria specified in this Guide, before the follow-up commissioning procedure.
ZTE Confidential Proprietary © 2023 ZTE CORPORATION. All rights reserved. IV

ZXG10 ISMG Server (SBCX) Installation and Commissioning Guide (Professional) Internal Use Only▲
About This Document
SummaryChapter Description
1 Networking and Basic Planning Principles2 Installation and Commissioning ofRed Hat AS4 U4 for x863 Commissioning of Oracle 10g for Red Hat AS44 Application Service Commissioning for Integrated R & BVersion Server5 Software Installation for Integrated OMCR Version Client6 Database Instance Installation forIndependent OMCB Version7 Independent OMCB Version Installation & Commissioning8 Software Installation of the Independent OMCB Version Client9 Common Commands & Solutionsto Common Problems10 Software Uninstall (Optional)11 Server Software Installation Record
ZTE Confidential Proprietary © 2023 ZTE CORPORATION. All rights reserved. V
ZXG10 ISMG Server (SBCX) Installation and Commissioning Guide (Professional) Internal Use Only▲
TABLE OF CONTENTS
1 Networking and Basic Planning Principles 11.1 Basic Knowledge of SBCX 11.1.1 ZXG10 SBCX Panel 11.1.2 ZXG10 SBCX Position on the Rack 21.1.3 ZXG10 SBCX Hardware Specifications 21.1.4 ZXG10 SBCX Indicators 21.1.5 ZXG10 SBCX Interfaces 31.1.6 Relation of the Ports on SBCX and RSVB 41.1.7 ZXG10 SBCX Buttons 41.1.8 ZXG10 SBCX Board Replacement 51.2 Server Installation Strategy and Network Planning 51.2.1 Commissioning Flow 61.2.2 Resource Allocation 61.2.3 Common Networking Mode 81.2.4 Planning Rules for IP Address and SBCX Name 91.2.5 Cable Laying for OMM Networking 101.3 Operations on the SBCX Upon Product Delivery (Optional) 111.3.1 Check and Modification of IP Address for Integrated R&B Version 111.3.2 Check of Oracle Net Setting 121.3.3 System Reboot to Make the Above Modification Valid 12
2 Installation and Commissioning of Red Hat AS4 U4 for x86 142.1 Instruction for This Chapter 142.2 Prerequisites for Installation 142.2.1 Installation Procedure 152.3 Operations After the Installation 232.3.1 Checking and Modifing the Contents in HOSTS Files 232.3.2 Configuring Telnet Access 242.3.3 Setting Remote GUI Access 242.3.4 Setting Watch Dog Program 262.3.5 Modifying Default Handle Number in Linux (Important) 262.3.6 Modifying Linux Character Set 282.3.7 Setting OS FTP Server 282.3.8 Configuring iptables Firewall 292.3.9 Setting sendmail 292.4 Network Port Test 292.4.1 Test Method292.4.2 Test Standard 302.4.3 Troubleshooting 30
3 Commissioning of Oracle 10g for Red Hat AS4 313.1 About This Chapter 313.2 Prerequisites 313.3 Installation Procedure 313.3.1 Preparation 313.3.2 Checking & Configuring Parameters 34
ZTE Confidential Proprietary © 2023 ZTE CORPORATION. All rights reserved. VI
ZXG10 ISMG Server (SBCX) Installation and Commissioning Guide (Professional) Internal Use Only▲
3.3.3 Setting Remote GUI Access 353.3.4 Completion of Installation 373.4 Follow-up Checks 373.4.1 Checking the Configuration of Oracle Net 373.4.2 Checking the Connection/Startup/Shutdown of Oracle Database 393.4.3 Checking the Startup/Shutdown/View of Oracle Listener403.4.4 Configuring the Symbol Links of Oracle Auto-start/Auto-stop 42
4 Application Service Commissioning for Integrated R & B Version Server 434.1 Preparations 434.1.1 Connecting/Starting/Stopping Ocacle Service 434.1.2 Starting Oracle Listener 444.1.3 Modifying the /etc/profile File 454.1.4 Setting Remote GUI Access 464.1.5 Create Temporary Installation Directory 464.1.6 Preparing Server Version Installation Package 464.2 Installing OMCR & OMCB 474.2.1 Points of Attention 474.2.2 Installation Steps 484.3 Subsequent Procedure after Installation 654.3.1 Checking the /home/gomcr/ums-svr/bin File 654.3.2 Checking the FTP Server of Integrated R&B Version 654.3.3 Setting the Collecting Manager of Integrated R&B Performance 664.3.4 Checking Data Auto Backup Script (iBackup Script) 694.3.5 Checking the Script of the Server System 754.3.6 Checking the Number of Sentence Handlers in Linux System 754.3.7 Setting the Server System 764.4 Starting Integrated R & B Version Application Service 784.4.1 Points for Attention 784.4.2 Starting Integrated R&B Server 784.4.3 Checking Integrated R&B Service 784.4.4 Checking Integrated R&B Performance Management Service 794.5 Stopping the Application Service of Integrated R & B Version 804.5.1 Checking after Stopping the Integrated R&B Service 80
5 Software Installation for Integrated OMCR Version Client 805.1 Preparations 805.2 Installing Client 815.3 Modifying Language Variable of the Client (Optional) 815.4 Shutting Down the ISMG 81
6 Database Instance Installation for Independent OMCB Version 826.1 Preparations 826.2 Installation Procedure 846.3 Subsequent Steps after Installation 97
7 Independent OMCB Version Installation & Commissioning 987.1 Executing R/B Split Script 987.1.1 Prerequisites 987.1.2 Implementation Procedure 987.1.3 FAQ 1127.1.4 Follow-up Checks 114
ZTE Confidential Proprietary © 2023 ZTE CORPORATION. All rights reserved. VII
ZXG10 ISMG Server (SBCX) Installation and Commissioning Guide (Professional) Internal Use Only▲
7.2 Server Installation for the Independent OMCB Version 1167.2.1 Preparations 1167.2.2 Installation Procedure 118
8 Software Installation of the Independent OMCB Version Client 1598.1 Preparation 1598.2 Client Installation 1598.3 Modifying the Language Environment Variables of Client (Optional) 1608.4 Shutting Down OMCB Client 160
9 Common Commands & Solutions to Common Problems 1609.1 Common Linux Commands 1609.2 Common Oracle Commands 1689.2.1 Starting Oracle Service 1689.2.2 Closing Oracle Service 1689.2.3 Start/Query/Close of Oracle Listener 1699.3 Start/Close of the Application Service of the Integrated R&B Version 1709.3.1 Starting the Integrated R&B Version 1709.3.2 Closing the Service of the Integrated R&B Version 1719.4 Shutdown of SBCX Board 1719.5 Matters for Attention in Using SBCX Board 172
10 Software Uninstall (Optional) 17310.1 Uninstalling ISMG Server Software 17310.2 Uninstalling ISMG Client Software 17410.3 Uninstalling Database 17610.3.1 Uninstalling Database Under Linux 176
11 Server Software Installation Record 186
ZTE Confidential Proprietary © 2023 ZTE CORPORATION. All rights reserved. VIII
ZXG10 ISMG Server (SBCX) Installation and Commissioning Guide (Professional) Internal Use Only▲
ZTE Confidential Proprietary © 2023 ZTE CORPORATION. All rights reserved. IX
ZXG10 ISMG Server (SBCX) Installation and Commissioning Guide (Professional) Internal Use Only▲
1 Networking and Basic Planning Principles
1.1 Basic Knowledge of SBCX
1.1.1 ZXG10 SBCX Panel
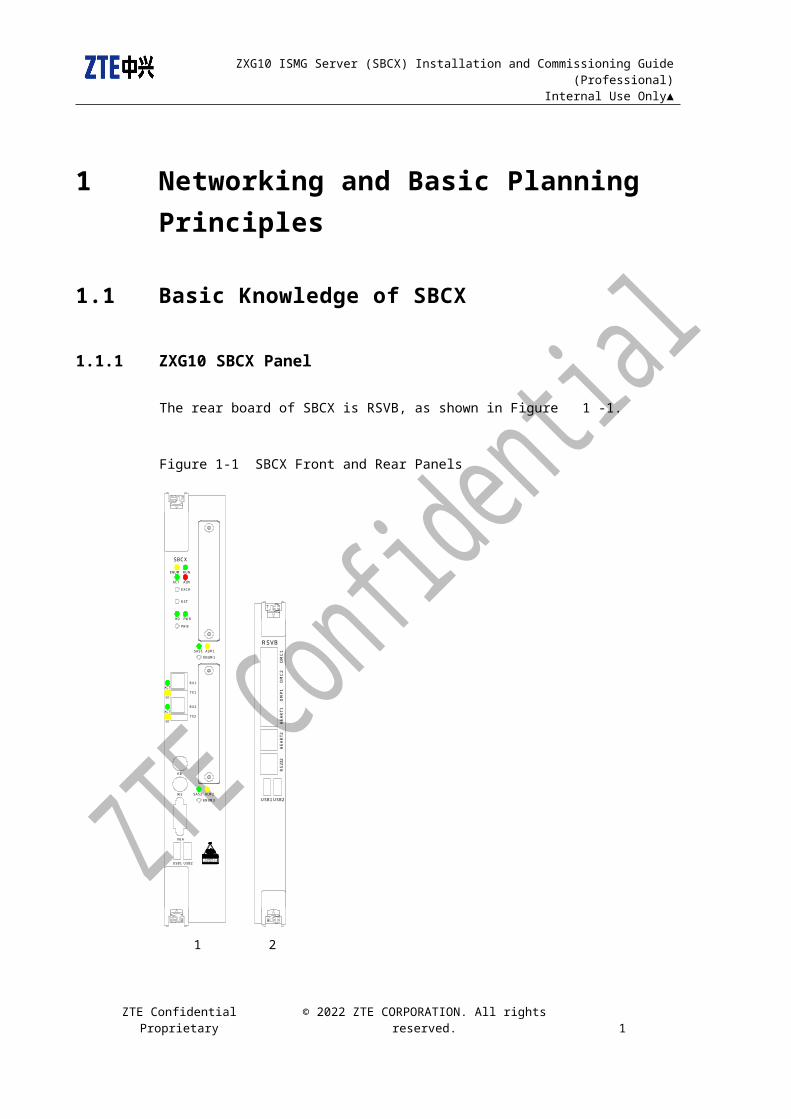
The rear board of SBCX is RSVB, as shown in Figure 1-1.
Figure 1-1 SBCX Front and Rear Panels
SBCX
ENUM RUN
ACT ALM
EXCH
RST
HD PWR
PWB
SAS1 ALM1
ENUM1
ACT
SD
SD
ACT
RX1
TX1
TX2
RX2
KB
MS
VGA
SAS2 ALM2
ENUM2
USB1 USB2CLASS 1
USB2USB1
HE
AR
T2R
S23
2O
MP
1H
EA
RT1
OM
C2
RSVB
OM
C1
1 2
ZTE Confidential Proprietary © 2023 ZTE CORPORATION. All rights reserved. 1

ZXG10 ISMG Server (SBCX) Installation and Commissioning Guide (Professional) Internal Use Only▲
1. Front panel of SBCX 2. Rear panel of RSVB
1.1.2 ZXG10 SBCX Position on the Rack
On iBSC 100 M platform: SBCX is installed at Slots 1 and 2.
On iBSC 1000 M platform: SBCX is installed at Slots 5 and 6 or Slots 7 and 8
Refer to ZXG10 iBSC (V6.20.61) Base Station Controller Hardware Description for details
(download path: http://tsm.zte.com.cn/tsm/FileCenter/File.aspx?
Mode=read&FileID=30300162)
1.1.3 ZXG10 SBCX Hardware Specifications
CPU: 2 dual-core SOSSOMAN processors
Memory: 4G
SAS: 146G*2
SATA: 80G
USB: 2 interfaces on the front panel/ 2 interfaces on the rear panel
FC: NO FC
VGA/PS2 keyboard and mouse (on the front panel)
FE: 2 interfaces on the rear panel
GE:3 interfaces on the rear panel
RS232: 1 interface on the rear panel
RUN/ALM/ENUM/ACT indicators etc. on the front panel
1.1.4 ZXG10 SBCX Indicators
Refer to Table 1-1 for the definitions of SBCX indicators:
ZTE Confidential Proprietary © 2023 ZTE CORPORATION. All rights reserved. 2
ZXG10 ISMG Server (SBCX) Installation and Commissioning Guide (Professional) Internal Use Only▲
Table 1-1 SBCX Indicators
Name Color Definition Description
RUN Green System running Unused
ALM Red Alarm Unused
ENUM Yellow Board extraction Unused
ACT Green Active/standby board Unused
HD Green IDE hard disk
ON: IDE hard disk is being accessed (In
this status, board extraction is not
allowed).
OFF: IDE hard disk is idle.
PWR Green Board powerON: Board is powered on.
OFF: Board is powered off.
SAS1 GreenRead/write status of
SAS hard disk 1
ON: SAS hard disk 1 is being accessed.
OFF: SAS hard disk 1 is idle.
ALM1 YellowFault status of SAS
hard disk 1
ON: SAS hard disk 1 is not in position or
is faulty.
OFF: SAS hard disk 1 is normal.
SAS2 GreenRead/write status of
SAS hard disk 2
ON: SAS hard disk 2 is being accessed.
OFF: SAS hard disk 2 is idle.
ALM2 YellowFault status of SAS
hard disk 1
ON: SAS hard disk 2 is not in position or
is faulty.
OFF: SAS hard disk 2 is normal.
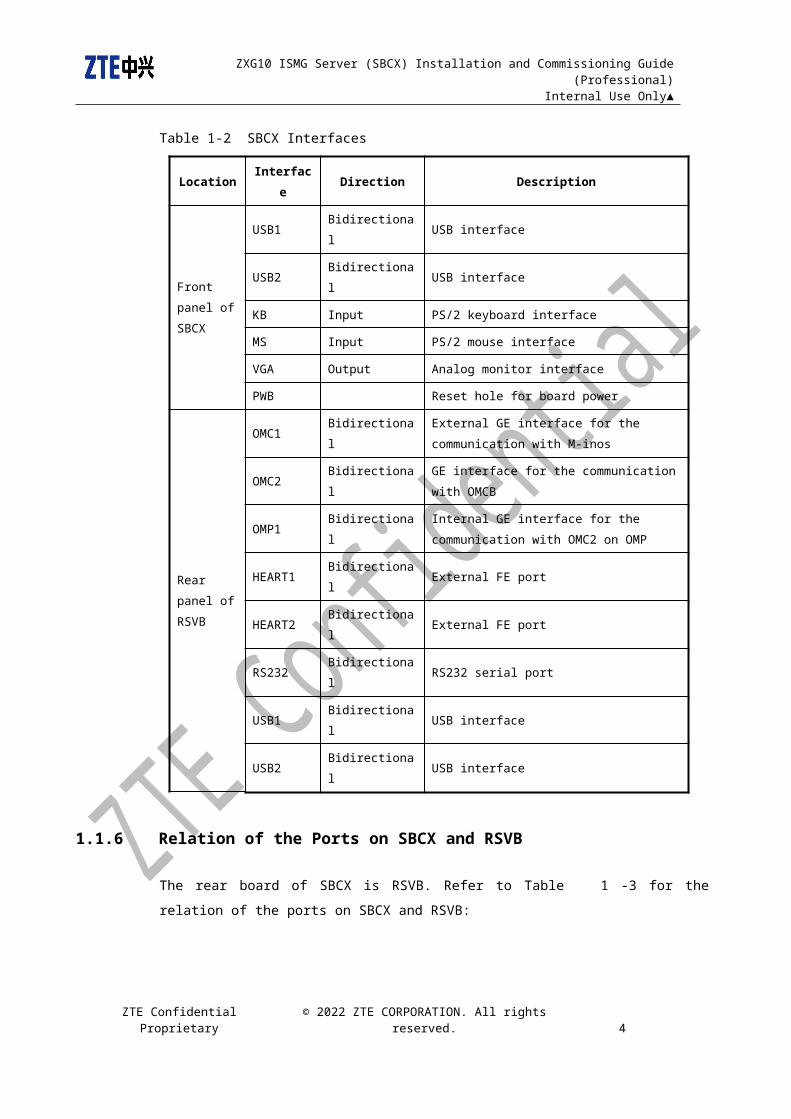
1.1.5 ZXG10 SBCX Interfaces
Refer to Table 1-2 for the definitions for SBCX interfaces:
Table 1-2 SBCX Interfaces
Location Interface Direction Description
Front panel
of SBCX
USB1 Bidirectional USB interface
USB2 Bidirectional USB interface
KB Input PS/2 keyboard interface
MS Input PS/2 mouse interface
VGA Output Analog monitor interface
PWB Reset hole for board power
Rear panel
of RSVB
OMC1 Bidirectional External GE interface for the communication
with M-inos
ZTE Confidential Proprietary © 2023 ZTE CORPORATION. All rights reserved. 3

ZXG10 ISMG Server (SBCX) Installation and Commissioning Guide (Professional) Internal Use Only▲
Location Interface Direction Description
OMC2 BidirectionalGE interface for the communication with
OMCB
OMP1 BidirectionalInternal GE interface for the communication
with OMC2 on OMP
HEART1 Bidirectional External FE port
HEART2 Bidirectional External FE port
RS232 Bidirectional RS232 serial port
USB1 Bidirectional USB interface
USB2 Bidirectional USB interface
1.1.6 Relation of the Ports on SBCX and RSVB
The rear board of SBCX is RSVB. Refer to Table 1-3 for the relation of the ports on SBCX
and RSVB:
Table 1-3 SBCX Interfaces
Relation of the Ports on SBCX and RSVB
SBCX eth3 eth4 eth5 eth6 eth1 eth2 eth0
RSVB OMC1 OMC2 -- OMP1 HEART1 HEART2 --
Pre-set IP
address
and mask
10.63.2
08.200
255.25
5.252.0
Generally
served
as
OMCB
network
port
Unused129.0.1.1
255.255.0.0
Prohibit
ed
Note:
Eth0 is an internal network port of SBCX, which is connected with S9 and S10 on the back plane.
It is prohibited to be used. There is not cable led out from Eth5. Eth3 (including eth3:1 port) is set
with an external IP address to connect with M-IONS server. Eth6 is set with an internal IP address
to connect with OMP (OMC2 on OMP). The IP address of eth3 (including eth3:1 port) can be
adjusted according to the onsite planning. Eth4 (including eth4:1 port) serves as OMCB port.
ZTE Confidential Proprietary © 2023 ZTE CORPORATION. All rights reserved. 4
ZXG10 ISMG Server (SBCX) Installation and Commissioning Guide (Professional) Internal Use Only▲
1.1.7 ZXG10 SBCX Buttons
Refer to Table 1-4 for the buttons on SBCX:
Table 1-4 SBCX Buttons
Name Description
RST Reset
EXCH Active/standby changeover
PWB Board power
ENUM1 Extraction of SAS Hard Disk 1
ENUM2 Extraction of SAS Hard Disk 1
1.1.8 ZXG10 SBCX Board Replacement
Note:
Do not plug out of the SBCX board when it’s in service. In order to replace the board, press the
PWB button with a non-inductive screwdriver (or a toothpick), make sure all the processes are
closed, and the board is shut down before you unlock the board to perform the normal board
replacement procedure.
1.2 Server Installation Strategy and Network Planning
This chapter introduces the networking of OMM, and the naming rules for the IP address
SBCX.
This document applies to the following versions (installed or upgraded version):
OMMR: iOMCRV6.20.614c-OMCBV4.00.200m and later versions
OMMB: OMCBV4.09.21.03 and later versions
Since iOMCRV6.20.614c-OMCBV4.00.200m, two kinds of the software are installed on the
Server:
Integrated R&B version (OMCR+OMCB): Both OMCR and OMCB functions are
available in this software.
ZTE Confidential Proprietary © 2023 ZTE CORPORATION. All rights reserved. 5

ZXG10 ISMG Server (SBCX) Installation and Commissioning Guide (Professional) Internal Use Only▲
Independent OMCB version: Only OMCB functions are available in this software, which
is used to manage the SDRV4.09 series.
This solution applies to the scenario that both iSMG and OMCB software is installed on a
unique (non-active/standby) SBCX in GSM system:
A new SBCX board with 4G memory, which is installed with iSMG and OMCB software.
A new SBCX board with 8G memory, which is installed with iSMG and OMCB software.
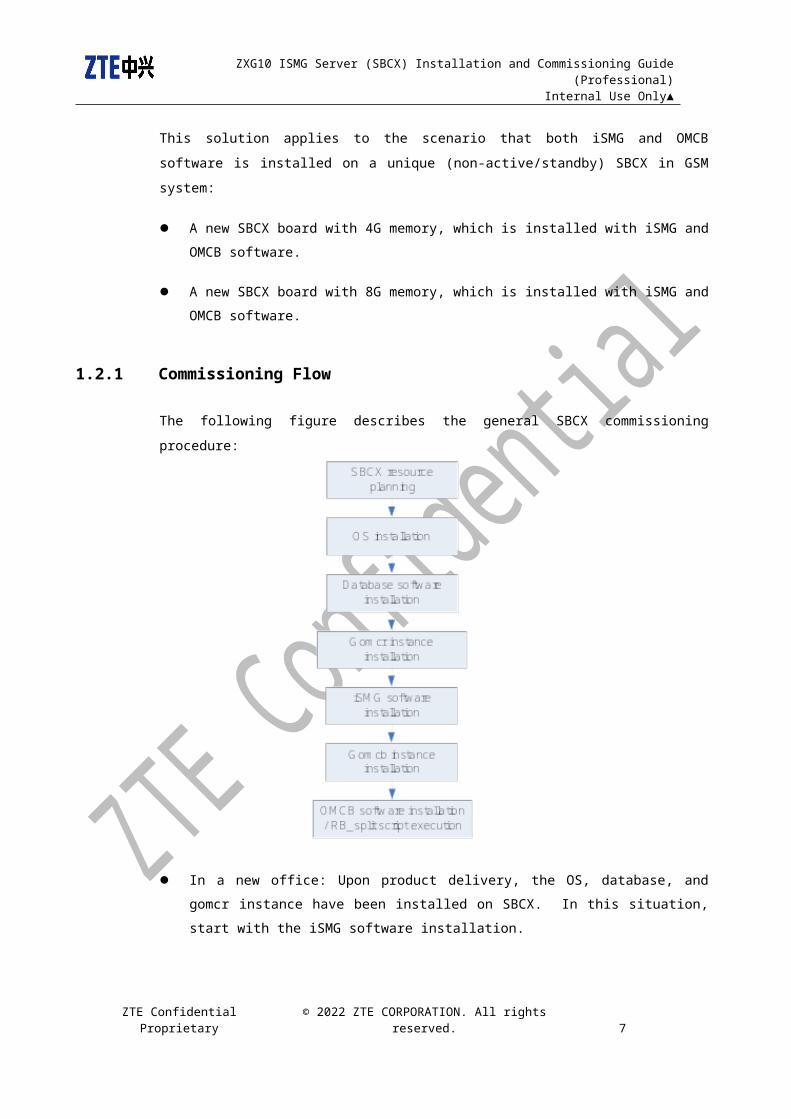
1.2.1 Commissioning Flow
The following figure describes the general SBCX commissioning procedure:
In a new office: Upon product delivery, the OS, database, and gomcr instance have
been installed on SBCX. In this situation, start with the iSMG software installation.
In the office with a running iSMG software: After the onsite version is upgraded to
iOMCRV6.20.614c or a later version, go on with gomcb instance installation.
ZTE Confidential Proprietary © 2023 ZTE CORPORATION. All rights reserved. 6

ZXG10 ISMG Server (SBCX) Installation and Commissioning Guide (Professional) Internal Use Only▲
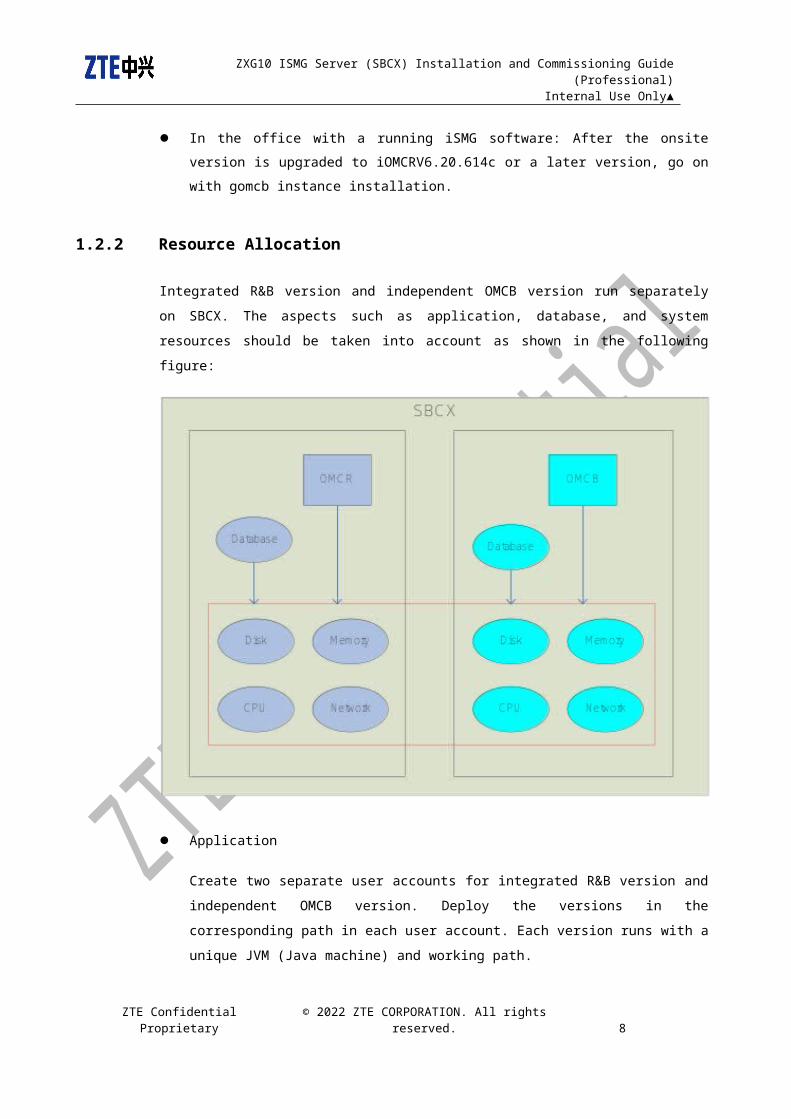
1.2.2 Resource Allocation
Integrated R&B version and independent OMCB version run separately on SBCX. The
aspects such as application, database, and system resources should be taken into account
as shown in the following figure:
Application
Create two separate user accounts for integrated R&B version and independent OMCB
version. Deploy the versions in the corresponding path in each user account. Each
version runs with a unique JVM (Java machine) and working path.
Database
Create two separate database instances for integrated R&B version and independent
OMCB version. Allocate some SGA to each instance. Create database files in the
corresponding path.
Disk
ZTE Confidential Proprietary © 2023 ZTE CORPORATION. All rights reserved. 7
ZXG10 ISMG Server (SBCX) Installation and Commissioning Guide (Professional) Internal Use Only▲
Save the version packages, database files, reported performance data, and backup files
in the corresponding paths of Integrated R&B version and independent OMCB version.
Memory
Most of the memory is taken up by the database SGA, PGA and JVM. Besides the
physical memory taken up by the OS, the remaining physical memory is allocated for
the Integrated R&B version and independent OMCB version.
CPU
The Integrated R&B version and independent OMCB version use the same CPU.
Network
There are three IP interfaces for the Integrated R&B version. The configuration is
shown as follows:
Name Description Remark
eth3The IP interface used to connect with EMS and the Client of the Integrated R&B version.
External IP
eth4The IP interface used to connect with the SDR version earlier than SDRV4.09.
Not required in the new office
eth6 The IP interface used to connect with BSC OMP Internal IP
There are two IP interfaces for the independent OMCB version. The configuration is shown
as follows:
Name Description Remark
eth3:1The IP interface used to connect with EMS and the Client of the independent OMCB version.
External IP
eth4:1 The IP interface used to connect with SDRV4.09
ZTE Confidential Proprietary © 2023 ZTE CORPORATION. All rights reserved. 8

ZXG10 ISMG Server (SBCX) Installation and Commissioning Guide (Professional) Internal Use Only▲
1.2.3 Common Networking Mode
Refer to Refer to Refer to Refer to Refer to Error: Reference source not found for the SBCX-
Minos networking sample . for the SBCX-Minos networking sample . for the SBCX-Minos
networking sample . for the SBCX-Minos networking sample . for the SBCX-Minos
networking sample .
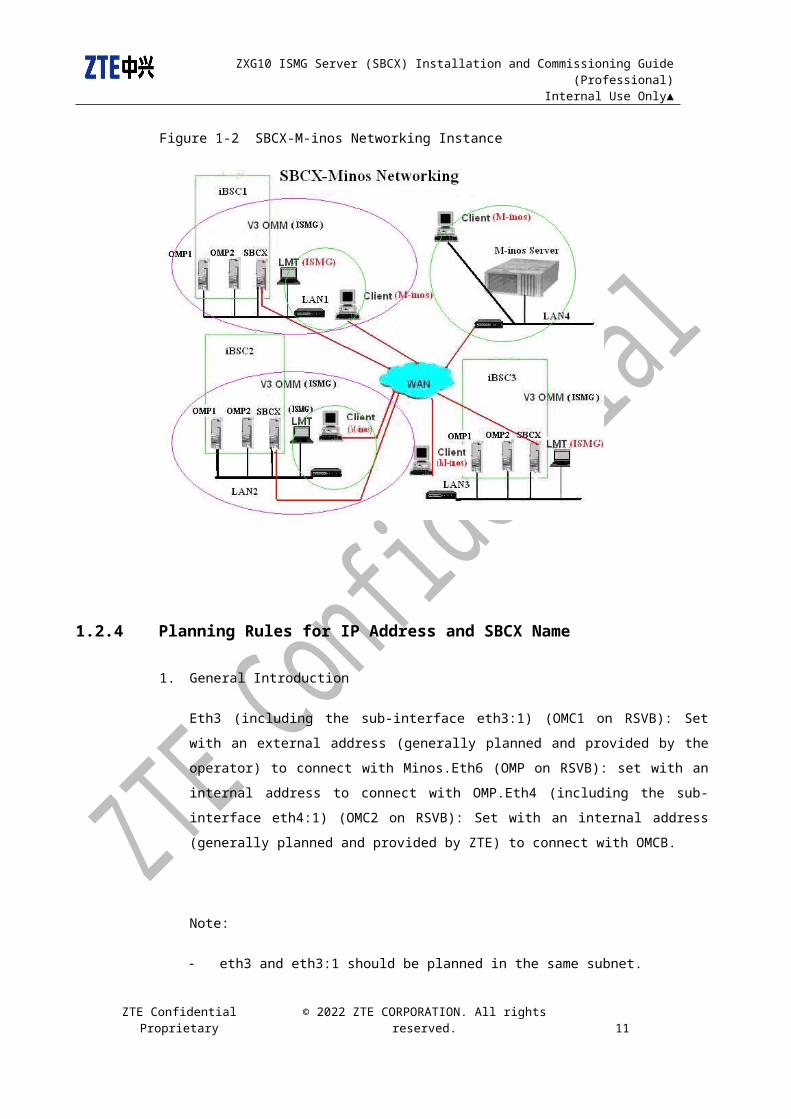
Figure 1-2 SBCX-M-inos Networking Instance
1.2.4 Planning Rules for IP Address and SBCX Name
1. General Introduction
Eth3 (including the sub-interface eth3:1) (OMC1 on RSVB): Set with an external
address (generally planned and provided by the operator) to connect with Minos.Eth6
(OMP on RSVB): set with an internal address to connect with OMP.Eth4 (including the
sub-interface eth4:1) (OMC2 on RSVB): Set with an internal address (generally planned
and provided by ZTE) to connect with OMCB.
ZTE Confidential Proprietary © 2023 ZTE CORPORATION. All rights reserved. 9

ZXG10 ISMG Server (SBCX) Installation and Commissioning Guide (Professional) Internal Use Only▲
Note:
eth3 and eth3:1 should be planned in the same subnet.
eth4 and eth4:1 should be planned in the same subnet.
2. The internal IP planning: within the subnet of “129.0.XX..1(10)”
OMP 129.0.XX.10 Default: 129.0.1.10
SBCX 129.0.XX.1 Default: 129.0.1.1
Client External IP (used to connect with Minos according to the planning of the
operator)
Internal IP 129.0.XX.200-254 (used to connect with SBCX)
Note: XX refers to BSCID (numbered and provided by the operator) within the range of
1-254. The mask is 255.255.0.0.
3. Naming rules for the HOSTS file and the host name of the other files
External network: X1X2BSCXX Default: SHBSC1
XX refers to BSCID within the range of 1-254
X1X2 refers to the abbreviation of the IP, such as HZ for Hangzhou, and SH for
Shanghai.
For example: HZBSC60, HZBSC61, and HZBSC62 refer to BSC60, BSC61 and BSC63
in Hangzhou.
The internal host name in the HOSTS file is not a required item.
1.2.5 Cable Laying for OMM Networking
Generally lay 7 network cables (for direct connection) to perform OMM networking. The
specific cable number depends on the onsite situation. Refer to Table 1-5 for the interfaces.
ZTE Confidential Proprietary © 2023 ZTE CORPORATION. All rights reserved. 10
ZXG10 ISMG Server (SBCX) Installation and Commissioning Guide (Professional) Internal Use Only▲
Table 1-5 Cable Laying for OMM Networking
Cable No.
Interface Name at End A Interface Name at End B
1 SBCX eth3 OMC1External exchange interface (to connect with Minos)
2 SBCX eth4 OMC2Internal exchange interface (to connect OMCB with IPBB)
3 SBCX eth6 OMP1Internal exchange interface (to connect with OMP)
4 OMP OMC2 (active)Internal exchange interface (to connect with SBCX)
5 OMP OMC2 (standby)Internal exchange interface (to connect with SBCX)
6Network adapter interface of the rear board of BIPI or GIPI (active)
Internal exchange interface (to serve as OMCB interface)
7Network adapter interface of the rear board of BIPI or GIPI (standby)
Internal exchange interface (to serve as OMCB interface)
8Network adapter interface of M-ions server
External exchange interface (to connect with SBCX)
9Network adapter interface of M-ions client
External exchange interface (to connect with Minos)
10 FE interface on the Alarm boxExternal exchange interface (to connect with Minos
11Network adapter interface of SBCX client (optional)
Internal exchange interface (to connect with SBCX
1.3 Operations on the SBCX Upon Product Delivery
(Optional)
The new SBCX upon delivery should be installed with OS and database software as required
in this guide. If the board is not properly installed with the above software, reinstall according
to this guide.
ZTE Confidential Proprietary © 2023 ZTE CORPORATION. All rights reserved. 11
ZXG10 ISMG Server (SBCX) Installation and Commissioning Guide (Professional) Internal Use Only▲
After the OS and database are properly installed, perform the following operations and
inspections according to the planned IP address and host name.
1.3.1 Check and Modification of IP Address for Integrated R&B Version
Log in as the root user to perform the following operations:
1. Check and modify the host name in /etc/sysconfig/network-scripts as the planned host
name.
2. Check and modify the IP address in /etc/hosts as the planned external IP address, and
the host name as the planned host name.
3. Log in as the root user, enter the directory of /etc/sysconfig/network-scripts/
#vi ifcfg-eth3 //Set the external IP and mask in the integrated R&B version
#vi ifcfg-eth4 //Set the IP and mask in the integrated R&B version to connect with SDR
#vi ifcfg-eth6 //Set the IP and mask in the integrated R&B version to connect with OMP
Note: Do not modify the IP address and host name with the GUI tool, otherwise the IP
address may be lost.
1.3.2 Check of Oracle Net Setting
Log in as the oracle user to modify the host name in the following two files as the planning
host name.
1. $ORACLE_HOME/network/admin/listener.ora
2. $ORACLE_HOME/network/admin/tnsnames.ora
1.3.3 System Reboot to Make the Above Modification Valid
# reboot
Check whether the port address is active with ifconfig -a command, and whether the ping
command to the other equipment can be performed normally.
In which,
ZTE Confidential Proprietary © 2023 ZTE CORPORATION. All rights reserved. 12

ZXG10 ISMG Server (SBCX) Installation and Commissioning Guide (Professional) Internal Use Only▲
# ifconfig -a
eth3 Link encap:Ethernet HWaddr 00:19:C6:3E:A6:C6
inet addr:10.63.208.200 Bcast:10.63.208.255 Mask:255.255.255.0
UP BROADCAST RUNNING MULTICAST MTU:1500 Metric:1
Base address:0x8800 Memory:fe180000-fe1a0000
After the check, go on with the SBCX commissioning procedure in Chapter 4 .
ZTE Confidential Proprietary © 2023 ZTE CORPORATION. All rights reserved. 13

ZXG10 ISMG Server (SBCX) Installation and Commissioning Guide (Professional) Internal Use Only▲
2 Installation and Commissioning of Red Hat AS4 U4 for x86 This document is applicable to the installation and commissioning of Red Hat AS4 U4 for
x86. Related contract products include ZXG10 IBSC and other products, such as the server
and SBCX etc.
2.1 Instruction for This Chapter
1. This chapter covers all the installation steps for Red Hat AS4 U4 for x86. Perform the
following steps in sequence. This document takes SBCX installation as an example.
2. For the information not emphasized in this document, type the contents after “#” and “$”
in the command terminal (the font in blue should be typed). The highlighted text in grey
is the prompt information and operation information. The highlighted text in pink is
emphasized contents which is often typed incorrectly. The font in red can be modified,
and is often typed incorrectly.
3. The “$” prompt indicates the current user is gomcr/gomcb/oracle (perform the operation
according to the specific prompt). The “#” prompt indicates the current user is root.
4. If the installation is performed remotely, make sure only one installation process can be
controlled in the remote PC.
5. Due to the strict requirement for the command typing in Linux, pay attention to the letter
case, space, as well as the difference between SBC case and DBC case, etc.
6. Unless specified, select Chinese for the contract in China, and English for the contract
in other countries.
ZTE Confidential Proprietary © 2023 ZTE CORPORATION. All rights reserved. 14
ZXG10 ISMG Server (SBCX) Installation and Commissioning Guide (Professional) Internal Use Only▲
2.2 Prerequisites for Installation
1. Before the installation, collect the information of SBCX hardware (previous model) as
shown in Table 2-6. The hardware information of the new model is shown after the
table.
Table 2-6 SBCX Hardware Information (Previous model)
Hard DiskSATA sdb=80G/120G
SAS sda=73G/146G(RAID1)
Memory 4GB
CPU Intel(R) Xeon 2G*2
Network Adapter
Inter Corporation 8255xER/82551T Fast Ethernet Controller * 3Intel Corporation 82571EB Gigabit Ethernet Controller * 4
There are two models of SBCX boards, which can be separated in the following method:
Check the partitioning status with the df -kh command to separate the SBCX boards in the
previous and new models:
Previous SBCX Partitioning New SBCX Partitioning
Filesystem Mount point /dev/sdb2 / /dev/sda2 /backup /dev/sdb1 /boot /dev/sdb6 /home /dev/sda1 /nfsDev /dev/sdb5 /oracleapp /dev/sda3 /oracledata
Filesystem Mount point /dev/sda2 / /dev/sda7 /backup /dev/sda1 /boot /dev/sda5 /home /dev/sda6 /nfsDev /dev/sda9 /oracleapp /dev/sda10 /oracledata
2. Prepare the Red Hat AS 4 installation CD (a set of six CDs or a DVD).
3. Press Del to enter BIOS interface. Click Boot > Boot Device Priority in the menu. Click
1st Boot Device USB PIONEER DVD-ROM.
4. Make sure the IP address and host name are planned.
ZTE Confidential Proprietary © 2023 ZTE CORPORATION. All rights reserved. 15

ZXG10 ISMG Server (SBCX) Installation and Commissioning Guide (Professional) Internal Use Only▲
5. Prepare a monitor, a 200V multi-functional connection socket, a PS/2 keyboard and
mouse. The mouse is plugged in the light-green port, and the keyboard is plugged in the
purple port.
2.2.1 Installation Procedure
1. Power on the equipment. Insert the first CD into the CD-ROM. Restart the equipment,
and then the “boot:” prompt shows. Press Enter.
2. Verify the disk
Click Skip.
3. Welcome to Red Hat Enterprise Linux
Click Next.
4. Language selection
Which language would you like to use during the installation process?
Select English for overseas projects.
5. Keyboard configuration
Select U.S. English. Click Next.
6. Disk partitioning
Select Manually partition with Disk Druid. If a Warning dialog box pops up. Click Yes.
Partition the disk according to the following table. Except the file system type of swap
partition is swap. The file system types of the other partitions are all ext3
There are two models of SBCX boards:
For the previous SBCX, perform partitioning according to the following table.
Besides the swap type of the swap partition file, the type of the other partition files
is ext3.
ZTE Confidential Proprietary © 2023 ZTE CORPORATION. All rights reserved. 16

ZXG10 ISMG Server (SBCX) Installation and Commissioning Guide (Professional) Internal Use Only▲
Table 2-7 Partitioning Information
DiskMount Point
System Type
Size
SATA(sdb)
/boot ext3200M (Forced main partition with pre-defined space)
Swap6G (Forced main partition with pre-defined space)
/ ext310G (Forced main partition with pre-defined space)
/oracleapp ext3 6G (with pre-defined space)
/home ext3 Remaining space
SAS(sda)
/nfsDev ext3 10G (with pre-defined space)
/backup ext3 6G (with pre-defined space)
/oracledata ext3 Remaining space
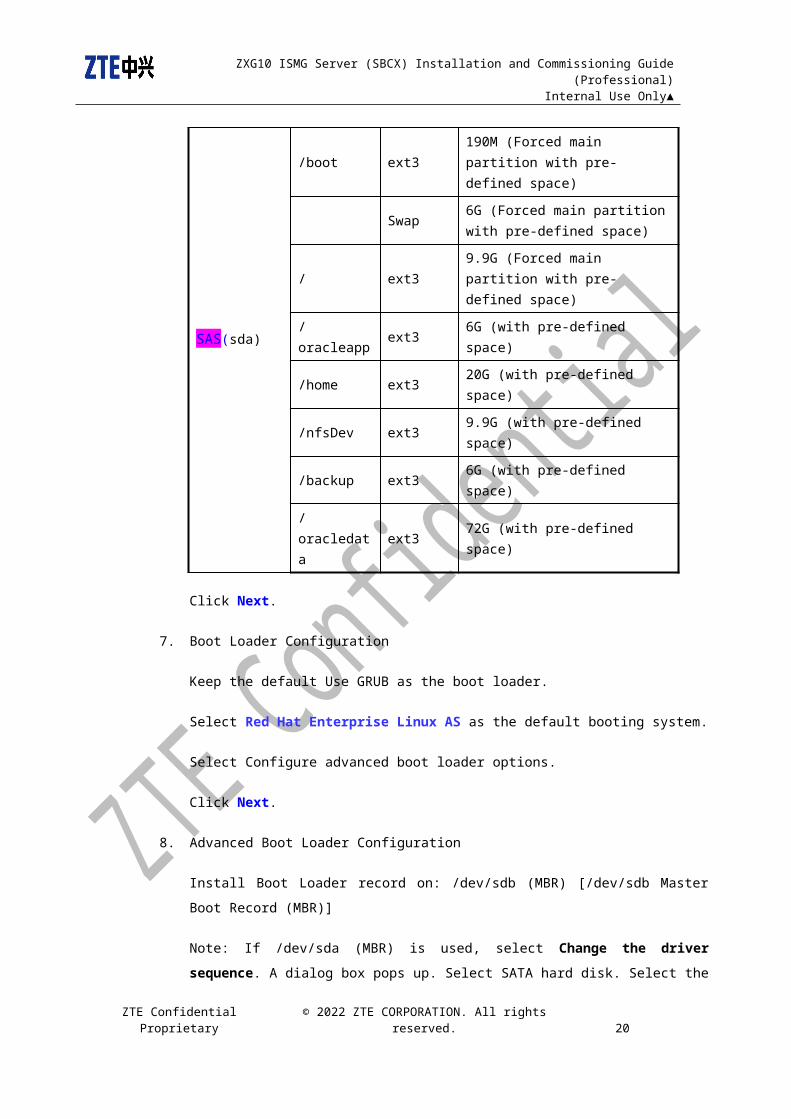
For the new SBCX, perform the partitioning according to the following table:
DiskMount Point
System Type
Size
SAS(sda)
/boot ext3190M (Forced main partition with pre-defined space)
Swap6G (Forced main partition with pre-defined space)
/ ext39.9G (Forced main partition with pre-defined space)
/oracleapp ext3 6G (with pre-defined space)
/home ext3 20G (with pre-defined space)
/nfsDev ext3 9.9G (with pre-defined space)
/backup ext3 6G (with pre-defined space)
/oracledata ext3 72G (with pre-defined space)
Click Next.
7. Boot Loader Configuration
ZTE Confidential Proprietary © 2023 ZTE CORPORATION. All rights reserved. 17

ZXG10 ISMG Server (SBCX) Installation and Commissioning Guide (Professional) Internal Use Only▲
Keep the default Use GRUB as the boot loader.
Select Red Hat Enterprise Linux AS as the default booting system.
Select Configure advanced boot loader options.
Click Next.
8. Advanced Boot Loader Configuration
Install Boot Loader record on: /dev/sdb (MBR) [/dev/sdb Master Boot Record (MBR)]
Note: If /dev/sda (MBR) is used, select Change the driver sequence. A dialog box
pops up. Select SATA hard disk. Select the top-priority sequence by clicking the
up/down arrow on the right pane. Click OK to continue installation.
Click Next.
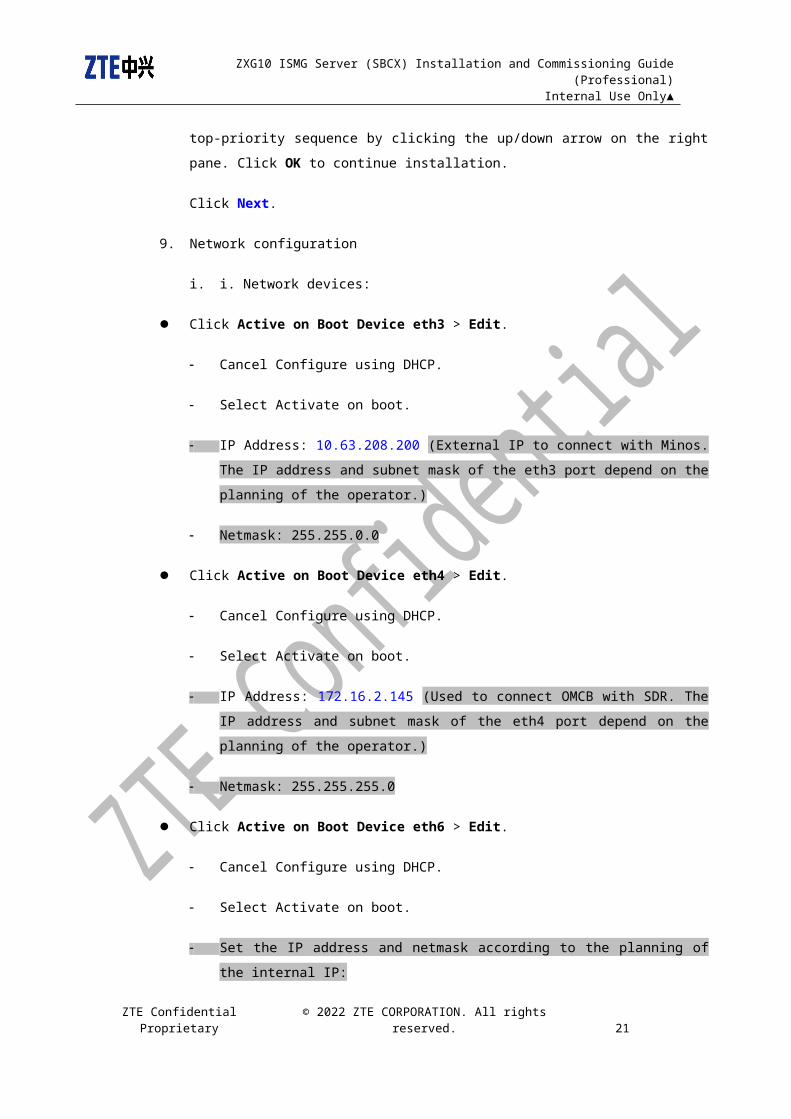
9. Network configuration
i. i. Network devices:
Click Active on Boot Device eth3 > Edit.
Cancel Configure using DHCP.
Select Activate on boot.
IP Address: 10.63.208.200 (External IP to connect with Minos. The IP address and
subnet mask of the eth3 port depend on the planning of the operator.)
Netmask: 255.255.0.0
Click Active on Boot Device eth4 > Edit.
Cancel Configure using DHCP.
Select Activate on boot.
IP Address: 172.16.2.145 (Used to connect OMCB with SDR. The IP address and
subnet mask of the eth4 port depend on the planning of the operator.)
Netmask: 255.255.255.0
ZTE Confidential Proprietary © 2023 ZTE CORPORATION. All rights reserved. 18

ZXG10 ISMG Server (SBCX) Installation and Commissioning Guide (Professional) Internal Use Only▲
Click Active on Boot Device eth6 > Edit.
Cancel Configure using DHCP.
Select Activate on boot.
Set the IP address and netmask according to the planning of the internal IP:
IP Address: 129.0.1.1 (Internal IP: 129.0.XX.1, XX refers to BSCID 1-254)
Netmask: 255.255.0.0
Note: The eth3:1 and eth4:1 ports used in independent OMCB version can be set during the
execution of RB_split script.
ii. . Hostname
Select manually, type the hostname according to the hostname planning rules, for example: SHBSC1.
The Hostname format is X1X2BSCXX. X1X2 is the abbreviation of the location (such as HZ for Hangzhou, SH for Shanghai.) XX refers to BSCID 1-254. For example: SHBSC1.
iii. iv. Miscellaneous Settings
Set the gateway and DNS values according to the planning data of the external IP provided by the operator (Or keep the default value if the planning is not required):
For example:
Gateway: 10.63.208.254
Primary DNS: 10.67.1.1
Secondary DNS: 10.67.18.10
Click Next.
10. Firewall Configuration
Click No firewall.
Enable SELinux: Disabled
Click Next. A dialog box of Warning – No Firewall pops up. Click Proceed.
11. Additional Language Support
ZTE Confidential Proprietary © 2023 ZTE CORPORATION. All rights reserved. 19

ZXG10 ISMG Server (SBCX) Installation and Commissioning Guide (Professional) Internal Use Only▲
Select English (USA) for English environment.
Select English (USA) for the other languages except Chinese.
Click Next.
Select the default language for the system: English (USA) ]
[Select additional languages to install on the system: Chinese (P.R. of China)
12. Time Zone Selection
The time zone varies in different areas around the world. Configure this value according to the actual cases according to the requirement of ISO.
Make sure System clock uses UTC is not selected.
Click Next.
13. Set the password for the root user
Root password: root123
Confirm: root123
Click Next.
14. Package Installation
Select Customize software package to be installed.
Select the following software packages in the list (Keep the default selection for the other software not mentioned below):
X Window System
GNOME Desktop Environment
Editors
Server Configuration Tools
Windows File Server
FTP Server
Network Servers
Details----Optional Packages
A VNC server
A DHCP (Dynamic Host Configuration Protocol) server and relay agent
Legacy Network Server
Details----Optional Packages
ZTE Confidential Proprietary © 2023 ZTE CORPORATION. All rights reserved. 20

ZXG10 ISMG Server (SBCX) Installation and Commissioning Guide (Professional) Internal Use Only▲
tftp-server – The server for the Trivial File Transfer Protocol (TFTP)
telnet-server - The server program for the telnet remote login protocol
Development Tools
Legacy Software Development
Administration Tools
System Tools
Details----Optional Packages
ethereal - Network traffic analyzer
nmap - Network exploration tool and security scanner
systat - The sar and iostat system monitoring commands
Click Next.
15. About to Install
Click Next. A dialog box of Required Install Media pops up. Click Continue.
16. Installation
It may take about 0.5-1 hour, which depends on the number of the software packages and the processing speed of the PC. Insert the CDs according to the prompts during the installation.
17. Installation Completion
Take out of the installation disks. Reboot the PC. Set the BIOS for the PC and cancel “Startup from the driver”. After rebooting the PC, perform some extra settings. Press Del to enter BIOS interface. Click Boot > Boot Device Priority > HDD:3M-WDC WD800BEVS-22RST0 to boot from hard disk instead of CD-ROM. Save the setting and quit. Reboot the system, and perform the following settings.
18. Welcome
Click Next.
19. License Agreement
Click Yes, I agree to the License Agreement.
ZTE Confidential Proprietary © 2023 ZTE CORPORATION. All rights reserved. 21

ZXG10 ISMG Server (SBCX) Installation and Commissioning Guide (Professional) Internal Use Only▲
Click Next.
20. Date and Time
Set the time and date for the server. Click Next.
21. Display
Keep the defaulted value. Click Next.
22. Red Hat Login
Click Tell me why I need to register and provide a Red Hat login. Click Next.
23. Why Register?
Click I can not complete registration at this time. Remind me later. Click Next.
24. System User
Username: gomcr
Full Name: gomcr
Password: gomcr123
Confirm Password: gomcr123
Click Next.
25. Volume Control
Click Next.
26. Additional CDs
Click Next.
27. Finish Setup
Click Next.
28. Graphic logon interface
ZTE Confidential Proprietary © 2023 ZTE CORPORATION. All rights reserved. 22

ZXG10 ISMG Server (SBCX) Installation and Commissioning Guide (Professional) Internal Use Only▲
2.3 Operations After the Installation
After the Red Hat AS 4 is installed, perform some system settings before the running of iSMG
software.
2.3.1 Checking and Modifing the Contents in HOSTS Files
# cd /etc/
# pwd
/etc
# cat hosts
# Do not remove the following line, or various programs
# that require network functionality will fail.
10.63.208.200 SHBSC1 //eth3 IP address
10.63.208.201 SHBSC1 //eth3:1 IP address
127.0.0.1 localhost.localdomain localhost
Note:
Make sure the line of “10.63.208.200 SHBSC1 ” is in this file. 10.63.208.200 is the
IP of the eth3 network adapter corresponding to SBCX OMC1. 10.63.208.201 is the
IP of the eth3:1 network adapter corresponding to SBCX OMC1. “SHBSC1” is SBCX
host name. SHBSC1 is the hostname planned on site. For the SBCX, whose
hostname is modified after it is delivered to the site, the hostname in the
configuration file should be modified. The contents and sequence of line 127.0.0.1
should be consistent with this line as shown above. Make sure the line of “127.0.0.1
localhost.localdomain localhost” is in this file. The external IP should be in the first
line. If the above contents and sequence are set incorrectly, the Oracle listener
cannot be started, or the version cannot be uploaded.
ZTE Confidential Proprietary © 2023 ZTE CORPORATION. All rights reserved. 23
ZXG10 ISMG Server (SBCX) Installation and Commissioning Guide (Professional) Internal Use Only▲
2.3.2 Configuring Telnet Access
1. Log in as the root user to edit /etc/xinetd.d/krb5-telnet
# vi /etc/xinetd.d/krb5-telnet
Modify disable = yes as disable = no
2. Restart xinet service
# service xinetd restart
Enable xinetd: [OK]
Disable xinetd: [OK]
3. Check xinet service
# chkconfig --list
xinetd based services:
krb5-telnet: start
4. Modify the service configuration to enable the automatic running of the system.
# chkconfig --level 345 xinetd on
# chkconfig --list xinetd
xinetd 0: OFF 1: OFF 2: OFF 3: ON 4: ON 5: ON 6: OFF
2.3.3 Setting Remote GUI Access
Remote access in GUI: vnc
Vnc mode: Tools such as vncviewer/ultravnc are available.
2.3.3.1 Configuring VNC Access
Log in as the gomcr user. The VNC access mode is commonly used on site.
ZTE Confidential Proprietary © 2023 ZTE CORPORATION. All rights reserved. 24
ZXG10 ISMG Server (SBCX) Installation and Commissioning Guide (Professional) Internal Use Only▲
1. Log in as the user to access the GUI to the server, and start vncserver. For example,
log in as the gomcr user.
$ vncserver
You will require a password to access your desktops.
Password: gomcr123
Verify: gomcr123
New 'shbsc1:1 (gomcr)' desktop is localhost.localdomain:1
Creating default startup script /home/gomcr/.vnc/xstartup
Starting applications specified in /home/gomcr/.vnc/xstartup
Log file is /home/gomcr/.vnc/shbsc1:1.log
2. If VNC server password is lost, execute the vncpasswd command to modify the
password.
3. Log in as the gomcr user. Modify the GUI window manager that vnc accesses in the
/home/gomcr/ directory (the main directory of the gomcr user). Reboot the vncserver.
$ vi .vnc/xstartup
Modify “twm &” as “gnome-session &”
$ vncserver -kill :1
(The 1 after the colon mark is the port No. generated after vncserver is executed)
$ vncserver
New 'SHBSC1:1 (gomcr)' desktop is SHBSC1:1
Starting applications specified in /home/gomcr/.vnc/xstartup
Log file is /home/gomcr/.vnc/shbsc1:1.log
(The 1 after the colon mark is the port No. generated after vncserver is executed)
ZTE Confidential Proprietary © 2023 ZTE CORPORATION. All rights reserved. 25
ZXG10 ISMG Server (SBCX) Installation and Commissioning Guide (Professional) Internal Use Only▲
4. Access the system with a VNC tool like utltravnc. Run vncviewer.exe on the PC Client.
Access SBCX server through LAN to perform remote operation. Type VNC server:
10.63.208.200:1 (SBCX server IP, The 1 after the colon mark is the port No. generated
after vncserver is executed, which is shown in “Log file is
/home/gomcr/.vnc/shbsc1:1.log”). Log in with the password of gomcr123 to perform the
remote operations.
2.3.4 Setting Watch Dog Program
Note: The software is pre-installed upon product delivery. This step is only performed after
system reinstallation.
1. Upload the linux_set script and watch dog program, and kernel program to the server
through FTP in bin format.
2. Log in as the root user to execute linux_set.
[root]#chmod +x linux_set
[root]#./linux_set
2.3.5 Modifying Default Handle Number in Linux (Important)
1. Log in as the root user to execute the following command:
ulimit -n 4096
2. Log in as the root user to modify the /etc/security/limits.conf file:
vi /etc/security/limits.conf
Add the following two lines after the last line of the document:
* soft nofile 4096
* hardnofile 4096
ZTE Confidential Proprietary © 2023 ZTE CORPORATION. All rights reserved. 26

ZXG10 ISMG Server (SBCX) Installation and Commissioning Guide (Professional) Internal Use Only▲
Suggestion: It’s better to copy the above contents into a file in the system instead of
typing manually.
3. Check the modified parameters with the ulimit-a command:
# ulimit -a
core file size (blocks, -c) 0
data seg size (kbytes, -d) unlimited
file size (blocks, -f) unlimited
pending signals (-i) 1024
max locked memory (kbytes, -l) 32
max memory size (kbytes, -m) unlimited
open files (-n) 4096
pipe size (512 bytes, -p) 8
POSIX message queues (bytes, -q) 819200
stack size (kbytes, -s) 10240
cpu time (seconds, -t) unlimited
max user processes (-u) 16251
virtual memory (kbytes, -v) unlimited
file locks (-x) unlimited
Note:
In the first step, modify the handle limitation in the current system files.
In the second step, restart the system to make the modification valid.
ZTE Confidential Proprietary © 2023 ZTE CORPORATION. All rights reserved. 27

ZXG10 ISMG Server (SBCX) Installation and Commissioning Guide (Professional) Internal Use Only▲
2.3.6 Modifying Linux Character Set
Note: Modify this item to avoid the unusual characters in Chinese Minos system.
1. If the system language is Chinese (the modification is not required in other languages),
log in as the root user to modify the contents in the /etc/sysconfig/i18n file. The gbk in
red font is the modified content.
# vi /etc/sysconfig/i18n
LANG="zh_CN.gbk"
SUPPORTED="zh_CN.gbk:zh_CN:zh:en_US.UTF-8:en_US:en"
SYSFONT="lat0-sun16"
2.3.7 Setting OS FTP Server
Note: This operation is perform for the file transfer by the client.
1. Log in as the root user to modify /etc/vsftpd/vsftpd.conf
# vi /etc/vsftpd/vsftpd.conf
New content: listen_port=10021
2. Start vsftpd
# /etc/init.d/vsftpd start
Starting vsftpd for vsftpd: [OK]
3. Modify the service configuration to enable the auto running of the system when it is
started.
# chkconfig --level 345 vsftpd on
# chkconfig --list vsftpd
vsftpd 0:OFF 1:OFF 2:OFF 3:ON 4:ON 5:ON 6:OFF
4. Set FTP tool in the client with the 10021 port. In this case, the data transfer can be
performed.
ZTE Confidential Proprietary © 2023 ZTE CORPORATION. All rights reserved. 28
ZXG10 ISMG Server (SBCX) Installation and Commissioning Guide (Professional) Internal Use Only▲
2.3.8 Configuring iptables Firewall
1. Start iptables firewall
# /etc/init.d/iptables start
2. Modify the service configuration to enable the auto running of the firewall when the
system is started.
# chkconfig --level 2345 iptables on
# chkconfig --list iptables
iptables 0:OFF 1:OFF 2:ON 3:ON 4:ON 5:ON 6:OFF
2.3.9 Setting sendmail
During the system startup, it takes some minutes to process the sendmail service. Because
this service is not used, disable the auto running of the service.
1. Modify service configuration
# chkconfig --level 2345 sendmail off
# chkconfig --list sendmail
sendmail 0:OFF 1:OFF 2:OFF 3:OFF 4:OFF 5:OFF 6:OFF
2.4 Network Port Test
2.4.1 Test Method
2.4.1.1 Ping Packet Test
Connect the network port of RSVB with the exchange through network cable. Perform the
ping command according to the IP of the RSVB network port from the other connected PC
terminal (the ping packet is 32 bytes by default). Generally 50 ping packets are used in the
test.
ZTE Confidential Proprietary © 2023 ZTE CORPORATION. All rights reserved. 29
ZXG10 ISMG Server (SBCX) Installation and Commissioning Guide (Professional) Internal Use Only▲
Note: the network port of the other terminal should be configured with the IP address in the
same subnet.
2.4.2 Test Standard
The IP is reachable. No packet is lost. (Note: The loss of the first ping packet is omitted).
The test should be successful on the three network ports including eth3, eth4, and eth6. Set
inactive for eth0 and the other unused ports.
2.4.3 Troubleshooting
1. The network port is not activated – Reactivate it and then perform the test
2. RSVB is connected to the wrong network port - Re-connect with the port
3. Fault occurs in RSVB – Change RSVB, and perform the test
4. Fault occurs on the back plane – Change the slot or change the shelf to perform test
5. Network is not connected correctly – Change the network cable or exchange.
6. The IP of the terminal is not set correctly – Set the correct IP, make sure no collision
occurs.
7. After changing the IP of the port, make sure this port cannot be unblocked or activated
on the Network configuration window. Disable the network adapter with the
corresponding command and then enable the network adapter (ifup eth4:1), so as to
make the new IP address valid.
Take eth4:1 network adapter as an example: (Log in as the root user)
Disable this network adapter: # ifdown eth4:1
Enable this network adapter: # ifup eth4:1
ZTE Confidential Proprietary © 2023 ZTE CORPORATION. All rights reserved. 30
ZXG10 ISMG Server (SBCX) Installation and Commissioning Guide (Professional) Internal Use Only▲
3 Commissioning of Oracle 10g for Red Hat AS4This chapter can be applied in the Oracle installation and commissioning under Linux Red
Hat during engineering commissioning.
3.1 About This Chapter
1. This chapter records all the steps of installing Oracle 10g for Red Hat AS. The steps are
recorded one by one at they are performed. The installation of SBCX board is used as
an example.
2. For the information not emphasized in this chapter, type the contents after “#” and “$” in
the command terminal (the font in blue should be typed). The highlighted text in grey is
the prompt information and operation information.
3. For the prompts of the command lines, “$” indicates the user oracle, and “#” indicates
the user root.
3.2 Prerequisites 1. Red Hat AS 4 or a higher version is already installed.
2. The installation CD or packet of Oracle 10g is available. In this guide, the Oracle 10g is
installed from the installation package (10201_database_linux32.zip).
3. SBCX board is powered up. Red Hat is running normally. The cable is correctely
connected to eth3.
ZTE Confidential Proprietary © 2023 ZTE CORPORATION. All rights reserved. 31

ZXG10 ISMG Server (SBCX) Installation and Commissioning Guide (Professional) Internal Use Only▲
3.3 Installation Procedure
3.3.1 Preparation
Log in to system as uer oracle, create the temp installation direction, upload the installation
files, configure the parameters, and unzip the installation package.
3.3.1.1 Creating User/Group as User root # groupadd dba# groupadd oinstall# useradd -d /home/oracle -m -g oinstall -G dba oracle# passwd oracle
New UNIX password: oracle
passwd: all authentication tokens updated successfully.
3.3.1.2 Creating Directory & Modifying Rights as User root # mkdir -p /oracleapp/oracle# chown -R oracle:oinstall /oracleapp# chmod -R 755 /oracleapp# mkdir -p /oracledata/gomcr# chown -R oracle:oinstall /oracledata# chmod -R 755 /oracledata
3.3.1.3 Logging as User oracle & Creating Temp Installation Directory$ pwd/home/oracle$ mkdir installtmp
(Create directory installtmp)
3.3.1.4 Uploading Oracle Installation Script
1. Log in to Linux as user oracle.
The version has to be transmitted in binary system when it is uploaded to the Linux
server with ftp, input bin and set the binary transmission. The port ID: 10021
ZTE Confidential Proprietary © 2023 ZTE CORPORATION. All rights reserved. 32

ZXG10 ISMG Server (SBCX) Installation and Commissioning Guide (Professional) Internal Use Only▲
2. Uploading Oracle Installation Script
FTP the files oraconfig.pl, sbcx_soft.rsp, sbcx_netca.rsp, and sbcx_dbca.rsp to the main
directory /home/oracle of user oracle.
3.3.1.5 Uploading Oracle Installation Package
Log in to the Linux as user oracle through ftp. The version has to be transmitted in binary
system when it is uploaded to the Linux server with ftp, input bin and set the binary
transmission.
Upload the Oracle installation package 10201_database_linux32.zip to the directory
/home/oracle/installtmp.
For example:
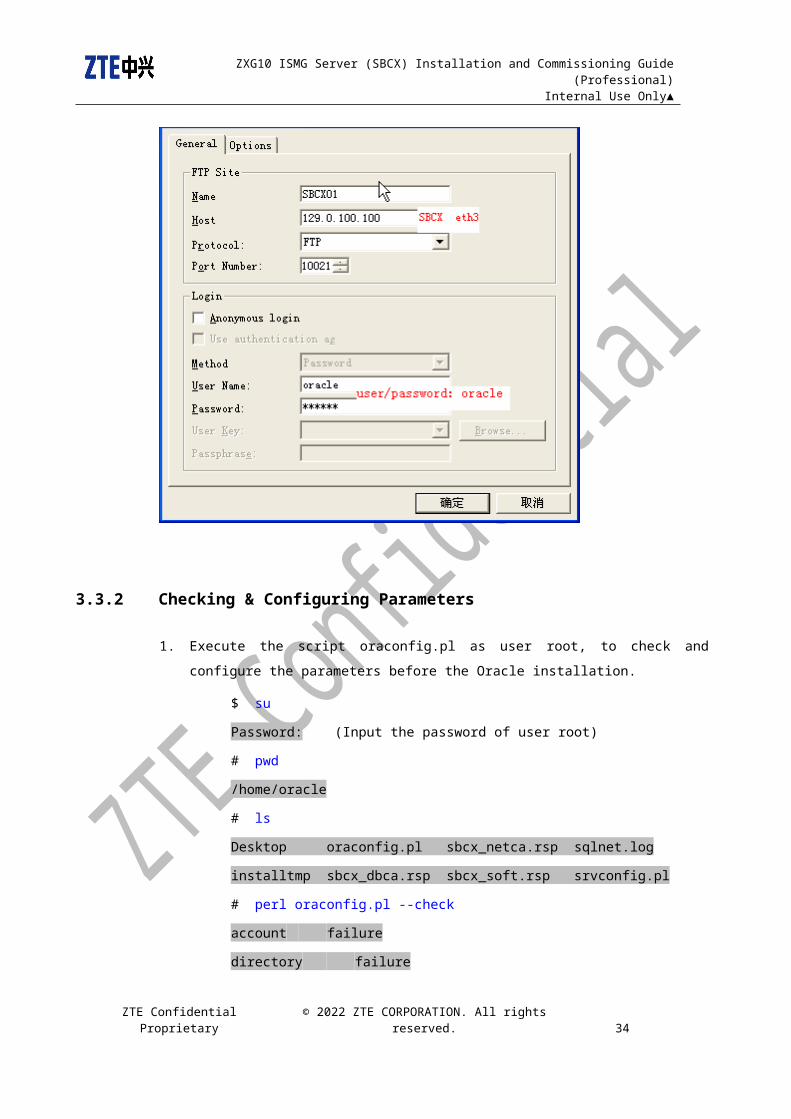
FTP: 1) the ftp of a third party (e.g. xftp, cuteftp) is required; 2) the user name and password
are the same: oracle; 3) the port ID is 10021.
Take the setting of xftp as an example. See Figure 3-3.
Figure 3-3 Configuration of FTP
ZTE Confidential Proprietary © 2023 ZTE CORPORATION. All rights reserved. 33
ZXG10 ISMG Server (SBCX) Installation and Commissioning Guide (Professional) Internal Use Only▲
3.3.2 Checking & Configuring Parameters
1. Execute the script oraconfig.pl as user root, to check and configure the parameters
before the Oracle installation.
$ su
Password: (Input the password of user root)
# pwd
/home/oracle
# ls
Desktop oraconfig.pl sbcx_netca.rsp sqlnet.log
installtmp sbcx_dbca.rsp sbcx_soft.rsp srvconfig.pl
# perl oraconfig.pl --check
account failure
directory failure
kernel success
limit success
ZTE Confidential Proprietary © 2023 ZTE CORPORATION. All rights reserved. 34
ZXG10 ISMG Server (SBCX) Installation and Commissioning Guide (Professional) Internal Use Only▲
protfile success
If “failure” appears in the check result, execute the following command to perform the configuration.
# perl oraconfig.pl --config
config account success
config directory success
3.3.2.1 Logging as User oracle Again & Unzipping Oracle File$ cd installtmp$ unzip 10201_database_linux32.zip$ cd database
(Note: To log in to the system once again is to make the newly-configured environment
viarables valid.)
3.3.3 Setting Remote GUI Access
See 2.3.3Setting Remote GUI Access
3.3.3.1 Installling Oracle Software
Log in to the system as user oracle, and execute the following commands.
$ cd $ORACLE_HOME/installtmp/database
$ ./runInstaller -silent -responseFile /home/oracle/sbcx_soft.rsp
Installation in progress
Install successful
Linking in progress
Link successful
Setup in progress
Setup successful
WARNIN:The Following configuration scripts
ZTE Confidential Proprietary © 2023 ZTE CORPORATION. All rights reserved. 35
ZXG10 ISMG Server (SBCX) Installation and Commissioning Guide (Professional) Internal Use Only▲
/oracleapp/oracle/product/10.2.0/root.sh
need to be executed as root for configuring the system.
The installation of Oracle Database 10g was successful
Please check ‘/oracleapp/oracle/logs/silentInstall2006-12-24_11-42-48PM.log for more
details
The entire installation process lasts about five minutes. When the prompt of “…….for more
details” appears in the last line, press Enter to return to the shell command line.
3.3.3.2 Execute the Following Command as User root
$ su
Password: (Input the password of user root)
# . /oracleapp/oracle/product/10.2.0/root.sh
The following environment variables are set as :
ORACLE_OWNER= oracle
ORACLE_HOME= /oracleapp/oracle/product/10.2.0
Enter the full pathname of the local bin directory:[/usr/local/bin]: Enter
# chmod -R o+r,o+x $ORACLE_BASE
3.3.3.3 Creating Listener
Log in to the system as user oracle, and execute the following command.
$ netca /silent /responseFile /home/oracle/sbcx_netca.rsp
Profile configuration complete.
Listener started at port:1521
Oracle Net Listener Startup:
ZTE Confidential Proprietary © 2023 ZTE CORPORATION. All rights reserved. 36
ZXG10 ISMG Server (SBCX) Installation and Commissioning Guide (Professional) Internal Use Only▲
Running Listener Control:
/oracleapp/oracle/product/10.2.0/bin/lsnrctl start LISTENER
Listener Control complete.
Listener started successfully.
Listener configuration complete.
Default local naming configuration complete.
Oracle Net Services configuration successful. The exit code is 0
3.3.3.4 Creating Database Instance (Integrated R&B Version)
Log in to the system as user oracle, and execute the following command.
$ dbca -silent -cloneTemplate -responseFile /home/oracle/sbcx_dbca.rsp
Copying database files
Creatting and starting Oracle instance
Completing Database Creation
100% complete
Look at the log file
“/oracleapp/oracle/product/10.2.0/cfgtoollogs/dbca/gomcr/gomcr.log”
for further defails
Note:
The entire creation and installation process lasts about five minutes.
3.3.4 Completion of Installation
When the progress of database instance creation reaches “100% complete”, the installation
of Oracle 10g is completed.
ZTE Confidential Proprietary © 2023 ZTE CORPORATION. All rights reserved. 37

ZXG10 ISMG Server (SBCX) Installation and Commissioning Guide (Professional) Internal Use Only▲
3.4 Follow-up Checks
When the installation of Oracle 10g is completed, we still need to conduct some checks and
configurations.
3.4.1 Checking the Configuration of Oracle Net
If the file content is not correct, modify the corresponding items. SHBSC1 is the hostname
planned on site. For the SBCX, whose hostname is modified after it is delivered to the site,
the hostname in the configuration file should be modified.
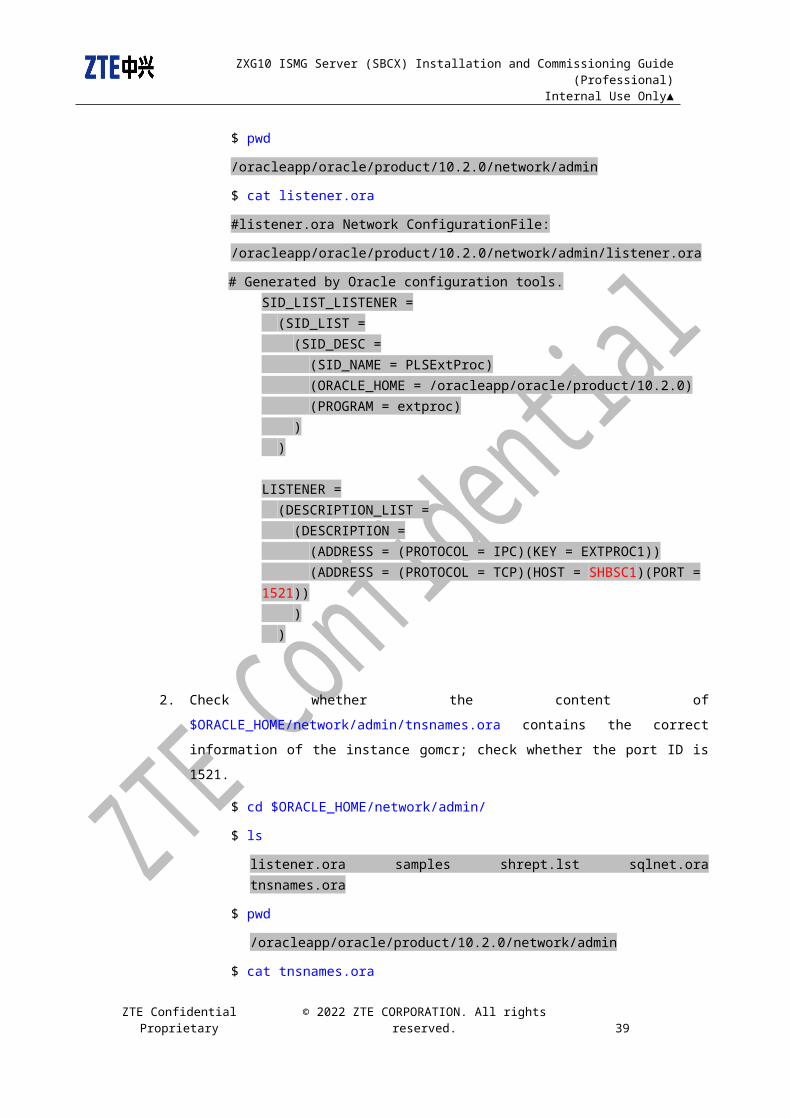
1. Check whether the content of $ORACLE_HOME/network/admin/listener.ora
contains the correct information of the instance gomcr; check whether the port ID is
1521.
$ pwd
/oracleapp/oracle/product/10.2.0/network/admin
$ cat listener.ora
#listener.ora Network ConfigurationFile:
/oracleapp/oracle/product/10.2.0/network/admin/listener.ora
# Generated by Oracle configuration tools.SID_LIST_LISTENER = (SID_LIST = (SID_DESC = (SID_NAME = PLSExtProc) (ORACLE_HOME = /oracleapp/oracle/product/10.2.0) (PROGRAM = extproc) ) )
LISTENER = (DESCRIPTION_LIST = (DESCRIPTION = (ADDRESS = (PROTOCOL = IPC)(KEY = EXTPROC1)) (ADDRESS = (PROTOCOL = TCP)(HOST = SHBSC1)(PORT = 1521)) ) )
ZTE Confidential Proprietary © 2023 ZTE CORPORATION. All rights reserved. 38

ZXG10 ISMG Server (SBCX) Installation and Commissioning Guide (Professional) Internal Use Only▲
2. Check whether the content of $ORACLE_HOME/network/admin/tnsnames.ora contains
the correct information of the instance gomcr; check whether the port ID is 1521.
$ cd $ORACLE_HOME/network/admin/
$ ls
listener.ora samples shrept.lst sqlnet.ora tnsnames.ora
$ pwd
/oracleapp/oracle/product/10.2.0/network/admin
$ cat tnsnames.ora
# tnsnames.ora Network Configuration File:
/oracleapp/oracle/product/10.2.0/netw ork/admin/tnsnames.ora# Generated by Oracle configuration tools.GOMCR = (DESCRIPTION = (ADDRESS = (PROTOCOL = TCP)(HOST = SHBSC1)(PORT = 1521)) (CONNECT_DATA = (SERVER = DEDICATED) (SERVICE_NAME = gomcr) ) )EXTPROC_CONNECTION_DATA = (DESCRIPTION = (ADDRESS_LIST = (ADDRESS = (PROTOCOL = IPC)(KEY = EXTPROC1)) ) (CONNECT_DATA = (SID = PLSExtProc) (PRESENTATION = RO) ) )
3.4.2 Checking the Connection/Startup/Shutdown of Oracle Database
When Oracle 10g is installed, the Oracle database will be started. Log in to the database as
user oracle, and perform the following checks.
$ sqlplus sys/oracle as sysdba
Connected to:
ZTE Confidential Proprietary © 2023 ZTE CORPORATION. All rights reserved. 39
ZXG10 ISMG Server (SBCX) Installation and Commissioning Guide (Professional) Internal Use Only▲
Oracle Database 10g Enterprise Edition Release 10.2.0.1.0 - Production
With the Partitioning and Data Mining options
SQL>
SQL>quit;
Wait for one minute and then perform the following operations:
$sqlplus sys/oracle@gomcr as sysdba
Connected to:
Oracle Database 10g Enterprise Edition Release 10.2.0.1.0 - Production
With the Partitioning and Data Mining options
SQL>shutdown immediate
Database closed.
Database dismounted.
ORACLE instance shut down.
SQL>exit
$ sqlplus sys/oracle as sysdba
Connected to:
Oracle Database 10g Enterprise Edition Release 10.2.0.1.0 - Production
With the Partitioning and Data Mining options
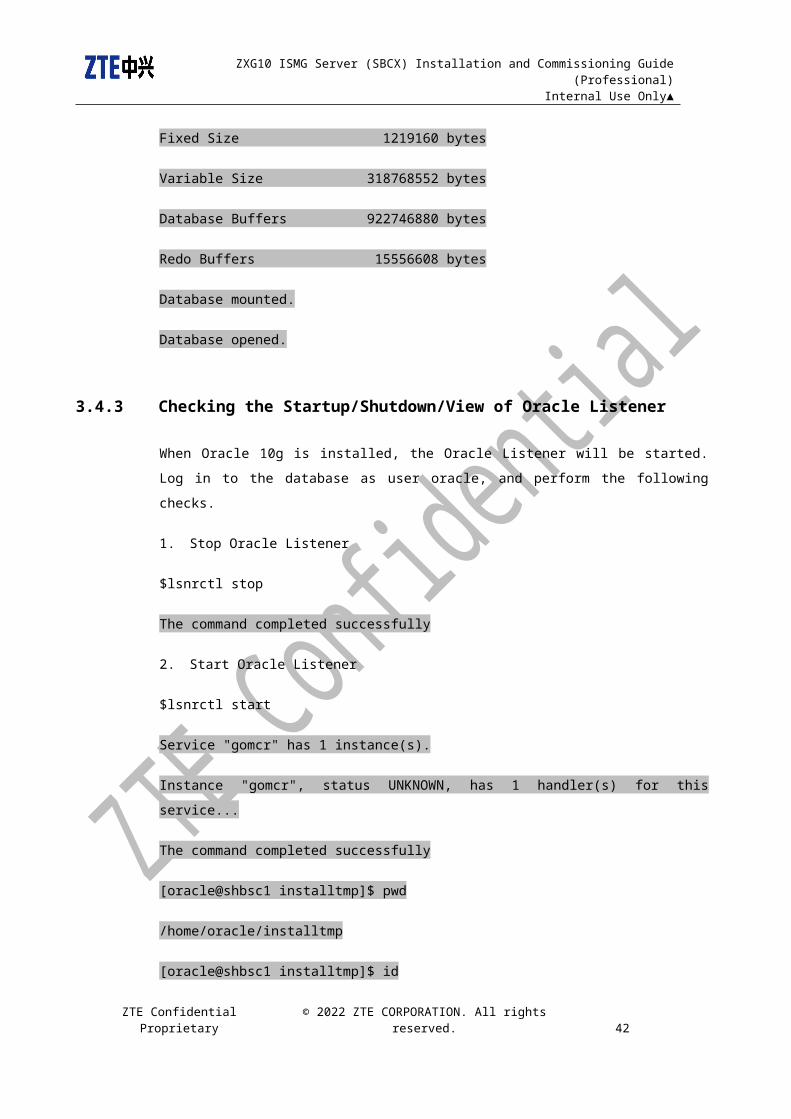
SQL>startup
ORACLE instance started.
Total System Global Area 1258291200 bytes
Fixed Size 1219160 bytes
ZTE Confidential Proprietary © 2023 ZTE CORPORATION. All rights reserved. 40

ZXG10 ISMG Server (SBCX) Installation and Commissioning Guide (Professional) Internal Use Only▲
Variable Size 318768552 bytes
Database Buffers 922746880 bytes
Redo Buffers 15556608 bytes
Database mounted.
Database opened.
3.4.3 Checking the Startup/Shutdown/View of Oracle Listener
When Oracle 10g is installed, the Oracle Listener will be started. Log in to the database as
user oracle, and perform the following checks.
1. Stop Oracle Listener
$lsnrctl stop
The command completed successfully
2. Start Oracle Listener
$lsnrctl start
Service "gomcr" has 1 instance(s).
Instance "gomcr", status UNKNOWN, has 1 handler(s) for this service...
The command completed successfully
[oracle@shbsc1 installtmp]$ pwd
/home/oracle/installtmp
[oracle@shbsc1 installtmp]$ id
uid=501(oracle) gid=502(oinstall) groups=501(dba),502(oinstall)
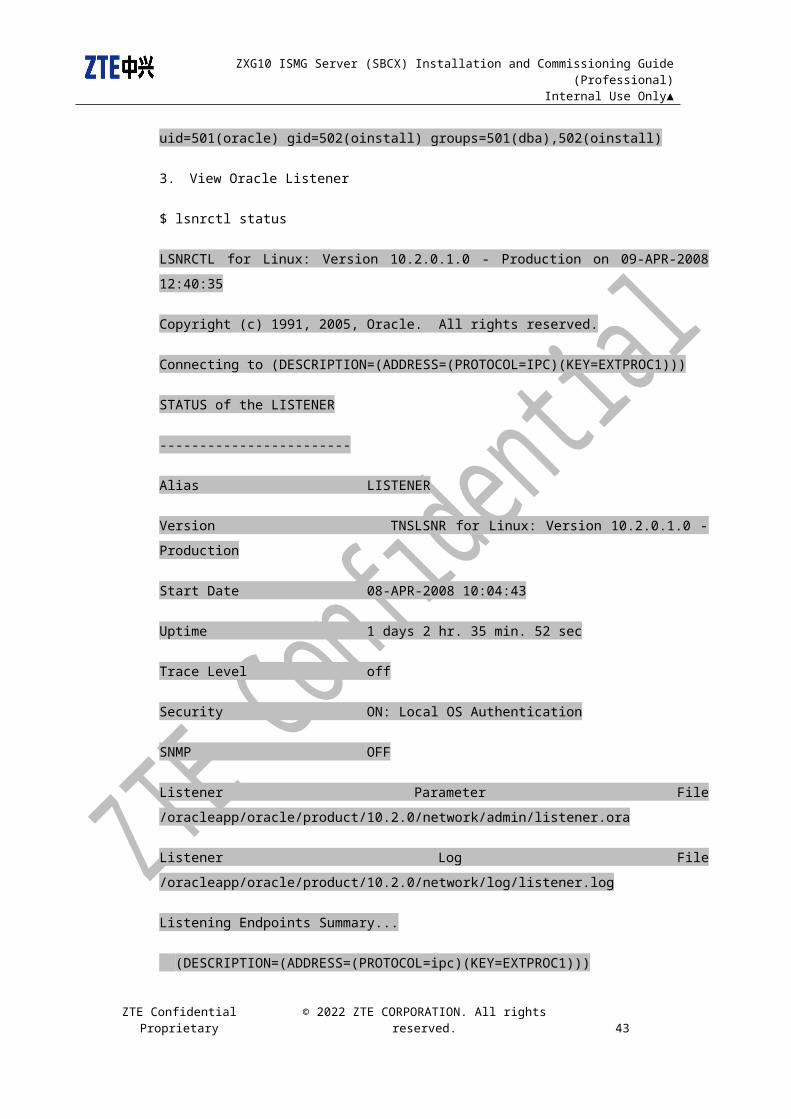
3. View Oracle Listener
$ lsnrctl status
LSNRCTL for Linux: Version 10.2.0.1.0 - Production on 09-APR-2008 12:40:35
ZTE Confidential Proprietary © 2023 ZTE CORPORATION. All rights reserved. 41

ZXG10 ISMG Server (SBCX) Installation and Commissioning Guide (Professional) Internal Use Only▲
Copyright (c) 1991, 2005, Oracle. All rights reserved.
Connecting to (DESCRIPTION=(ADDRESS=(PROTOCOL=IPC)(KEY=EXTPROC1)))
STATUS of the LISTENER
------------------------
Alias LISTENER
Version TNSLSNR for Linux: Version 10.2.0.1.0 - Production
Start Date 08-APR-2008 10:04:43
Uptime 1 days 2 hr. 35 min. 52 sec
Trace Level off
Security ON: Local OS Authentication
SNMP OFF
Listener Parameter File /oracleapp/oracle/product/10.2.0/network/admin/listener.ora
Listener Log File /oracleapp/oracle/product/10.2.0/network/log/listener.log
Listening Endpoints Summary...
(DESCRIPTION=(ADDRESS=(PROTOCOL=ipc)(KEY=EXTPROC1)))
(DESCRIPTION=(ADDRESS=(PROTOCOL=tcp)(HOST=SHBSC1)(PORT=1521)))
Services Summary...
Service "PLSExtProc" has 1 instance(s).
Instance "PLSExtProc", status UNKNOWN, has 1 handler(s) for this service...
Service "gomcr" has 1 instance(s).
Instance "gomcr", status READY, has 1 handler(s) for this service...
Service "gomcrXDB" has 1 instance(s).
ZTE Confidential Proprietary © 2023 ZTE CORPORATION. All rights reserved. 42
ZXG10 ISMG Server (SBCX) Installation and Commissioning Guide (Professional) Internal Use Only▲
Instance "gomcr", status READY, has 1 handler(s) for this service...
Service "gomcr_XPT" has 1 instance(s).
Instance "gomcr", status READY, has 1 handler(s) for this service...
The command completed successfully
3.4.4 Configuring the Symbol Links of Oracle Auto-start/Auto-stop
Create the symbol link as user root. The link will be used by the dbora of R&B split script.
# ln -s /etc/init.d/dbora /etc/rc0.d/K10dbora# ln -s /etc/init.d/dbora /etc/rc6.d/K10dbora# ln -s /etc/init.d/dbora /etc/rc5.d/S99dbora # ln -s /etc/init.d/dbora /etc/rc3.d/S99dbora
4 Application Service Commissioning for Integrated R & B Version ServerIn this document, the contents after “#” and “$” should be typed in by the command terminal
(the characters in blue are what should be typed in) if there is no other special requirement.
The highlighted text in grey is the prompt information or operation information.
4.1 Preparations
Make sure that the operating system and the database have been installed, and passed the
all of the test items.
4.1.1 Connecting/Starting/Stopping Ocacle Service
Check whether Oracle service can be connected, started or stopped normally.
This check item is optional. You can skip this section if you have confirmed that this check
item has been done in the section 3.4.2.
ZTE Confidential Proprietary © 2023 ZTE CORPORATION. All rights reserved. 43

ZXG10 ISMG Server (SBCX) Installation and Commissioning Guide (Professional) Internal Use Only▲
Run the following commands as the oracle user. The expected correct result is that Oracle
service can be connected, started or stopped normally.
$sqlplus /nolog
SQL*Plus: Release 10.2.0.1.0 - Production on Fri Sep 16 14:06:57 2005
Copyright (c) 1982, 2002, Oracle Corporation. All rights reserved.
SQL> connect sys/oracle@gomcr as sysdba;
Connected.
SQL> shutdown
Database closed.
Database dismounted.
ORACLE instance shut down.
SQL>exit
$ sqlplus sys/oracle as sysdba
Connected to:
Oracle Database 10g Enterprise Edition Release 10.2.0.1.0 - Production
With the Partitioning and Data Mining options
SQL> startup
ORACLE instance started.
Total System Global Area 143727516 bytes
Fixed Size 453532 bytes
Variable Size 109051904 bytes
Database Buffers 33554432 bytes
Redo Buffers 667648 bytes
ZTE Confidential Proprietary © 2023 ZTE CORPORATION. All rights reserved. 44

ZXG10 ISMG Server (SBCX) Installation and Commissioning Guide (Professional) Internal Use Only▲
Database mounted.
Database opened.
SQL> exit
Disconnected from Oracle10g Enterprise Edition Release 10.2.0.1.0 - Production
With the Partitioning and Oracle Data Mining options
JServer Release 10.2.0.1.0 – Production
4.1.2 Starting Oracle Listener
Check whether Oracle listener can be started normally.
This check item is optional. You can skip this section if you have confirmed that this check
item has been done in the section 3.4.3.
Run the following commands as the oracle user.
$ lsnrctl start
If Oracle Listener has been started, the system will display the result. If it has not been
started, this command will start it.
4.1.3 Modifying the /etc/profile File
1. Start the command line as the root user, and add the following contents in the
/etc/profile file.
OMCHOME=/home/gomcr/ums-svr
export OMCHOME
PATH=$PATH:/home/gomcr/jdk-linux/bin
export PATH
Note: It is the absolute path of the ums-svr directory, which makes the setup.pl script of the
database find the executable file easily, and the integrated R&B server run the jar command
directly when it starts.
ZTE Confidential Proprietary © 2023 ZTE CORPORATION. All rights reserved. 45

ZXG10 ISMG Server (SBCX) Installation and Commissioning Guide (Professional) Internal Use Only▲
2. Check property of the profile file to make sure it is executable.
# chmod -R 755 /etc/profile
Afar restarting the system, check whether the modification takes effect with the set
command.
3. As the root user, assign the oracle user the read and execution rights for gomcr
installation directory.
Execute the following command as the root user:
# chmod -R 755 /home/gomcr
4. As the root user, assign the gomcr user the read and execution rights for the oracle
installation directory.
# chmod -R 755 /oracleapp
Note:
This step is used to make the gomcr user have the right to execute the sqlplus command.
4.1.4 Setting Remote GUI Access
See 2.3.3Setting Remote GUI Access.
4.1.5 Create Temporary Installation Directory
Create a temporary installation directory as the root user.
Execute the following command:
# pwd
/home
# mkdir installtmp
# chmod -R 777 /home/installtmp
ZTE Confidential Proprietary © 2023 ZTE CORPORATION. All rights reserved. 46

ZXG10 ISMG Server (SBCX) Installation and Commissioning Guide (Professional) Internal Use Only▲
4.1.6 Preparing Server Version Installation Package
Log onto Linux operating system; Before uploading version files to Linux by FTP, input bin
and set upload in binary mode.
Upload iOMCRV6.XXXXX.zip package to the temporary installation directory
(/home/installtmp) by FTP. Here, take OMCRV6.XXXXX.zip for example, which is the version
package for the SBCX application.
Log onto Linux operating system as the root user; Execute the following commands:
1. Execute the following command under the /home/installtmp directory to unzip the
package file.
# unzip iOMCRV6.XXXXX.zip
Make install-linux.sh executable with the following command. (install-linux.sh is
generally under the unzipped gsmomcr folder.
# chmod 777 install-linux.sh
4.2 Installing OMCR & OMCB
Install OMCR & OMCB by GUI installation wizard in the Linus system, including integrated
R&B version software and database script.
If there is not any special requirement, select Chinese for domestic projects, and English for
overseas projects.
4.2.1 Points of Attention
1. The user running the installation wizard should have the rights of an administrator. Log
onto the Linux system as the root user.
2. The path (under which the installing program is saved) does not exceed 80 characters.
It can include English letters, numbers, “-“, “_”, and “.” in DBC case, but it cannot include
other special characters or Chinese characters.
3. install-linux.sh must be executable.
ZTE Confidential Proprietary © 2023 ZTE CORPORATION. All rights reserved. 47
ZXG10 ISMG Server (SBCX) Installation and Commissioning Guide (Professional) Internal Use Only▲
4. Use ZIP compression version under the Windows system, and upload it to Linux by
FTP, and unzip the file. Unzip the file. The Chinese characters in the file name may be
unrecognizable, but which have neither impact on copying the version file nor running
the version file
5. The output log and database script are under the /tmp/setup-log directory.
6. Log onto Linux by Xterm. The Chinese characters may be unrecognizable, so please
install zh.GBK character set.
7. The path of the directory to save the source version cannot be too deep, and its path
cannot exceed 80 characters. It also cannot include Chinese or special characters.
Note:
(The parameter “yidong” is compulsory during the installation. The default installation path for
the server and the client is /home/gomcr. The destination path to install the database table is
/oracledata/. Type in gomcr for the start user or the start group, and 1024 for the cell size.
The cell size can be reduced if the disk space is not enough. Output log and database script
are under the /tmp/setup-log directory.
Judge whether the SBCX board is the new version or the old version by checking the disk partition with the command df –kh.
Old version of SBCX New version of SBCXFilesystem Mount point /dev/sdb2 / /dev/sda2 /backup /dev/sdb1 /boot /dev/sdb6 /home /dev/sda1 /nfsDev /dev/sdb5 /oracleapp /dev/sda3 /oracledata
Filesystem Mount point/dev/sda2 / /dev/sda7 /backup /dev/sda1 /boot /dev/sda5 /home /dev/sda6 /nfsDev /dev/sda9 /oracleapp /dev/sda10 /oracledata
4.2.2 Installation Steps
Take installation under the Linux system for example:
1. Execute the install-linux.sh command as the root user.
ZTE Confidential Proprietary © 2023 ZTE CORPORATION. All rights reserved. 48

ZXG10 ISMG Server (SBCX) Installation and Commissioning Guide (Professional) Internal Use Only▲
Run the following command to install NMS applications and database script.
# pwd
/home/installtmp
# ./install-linux.sh yidong
2. In the Welcome window, select English for English environment, as shown in Figure 4-
4. Click NEXT.
Figure 4-4 The Welcome Window
3. In the license agreement window, select Accept, as shown in Figure 4-5 Click Next.
ZTE Confidential Proprietary © 2023 ZTE CORPORATION. All rights reserved. 49

ZXG10 ISMG Server (SBCX) Installation and Commissioning Guide (Professional) Internal Use Only▲
Figure 4-5 License Agreement
4. Select the product. In this example, select English version. Click Next.
ZTE Confidential Proprietary © 2023 ZTE CORPORATION. All rights reserved. 50
ZXG10 ISMG Server (SBCX) Installation and Commissioning Guide (Professional) Internal Use Only▲
Figure 4-6 Select the Product
5. In the Please Select Product Module window, select Server and Client, and check
before Program, as shown in the following figure. Error: Reference source not
foundClick Next.
ZTE Confidential Proprietary © 2023 ZTE CORPORATION. All rights reserved. 51
ZXG10 ISMG Server (SBCX) Installation and Commissioning Guide (Professional) Internal Use Only▲
Figure 4-7 The Window of Selecting the Product Module
6. In the Please select installation path window, select a path (/home/gomcr generally),
as shown in Figure 4-8 Click Next.
ZTE Confidential Proprietary © 2023 ZTE CORPORATION. All rights reserved. 52

ZXG10 ISMG Server (SBCX) Installation and Commissioning Guide (Professional) Internal Use Only▲
Figure 4-8 The Window of Selecting the Installation Path
7. The tip window pops up, as shown in the following figure. Click No if backup is
unnecessary.
Figure 4-9 The Window of Tip
8. The Server parameter Configuration window pops up, as shown in the following
figure. Type in the IP address of the SBCX in internal network (generally it is OMP1 IP
address for communication with the OMP. Click Next.
ZTE Confidential Proprietary © 2023 ZTE CORPORATION. All rights reserved. 53

ZXG10 ISMG Server (SBCX) Installation and Commissioning Guide (Professional) Internal Use Only▲
Figure 4-10 The Window of Server Parameter Configuration
9. The Support OMCB Function window pops up, as shown in the following figure. Type
in the planned IP addresses (IP address of eth4).
ZTE Confidential Proprietary © 2023 ZTE CORPORATION. All rights reserved. 54

ZXG10 ISMG Server (SBCX) Installation and Commissioning Guide (Professional) Internal Use Only▲
Figure 4-11 The Window of Support OMCB Function
10. The Database Installation Configuration window pops up, as shown in the following
figure. Select English for the database language. Specify number of cells according to
the space of the hard disk. Generally, it is “1024”. Type in the IP address of the SBCX in
external network for the IP address of the database server (it is IP address of eth3
generally); Input “gomcr” for SID; Input “oracle” for database system. Keep default
values for others; Click Next.
ZTE Confidential Proprietary © 2023 ZTE CORPORATION. All rights reserved. 55

ZXG10 ISMG Server (SBCX) Installation and Commissioning Guide (Professional) Internal Use Only▲
Figure 4-12 The Window of Database Installation Configuration
11. The Database Deployment Configuration window pops up, as shown in the following
figure. Error: Reference source not foundSelect Set global table space path for Select
database delopy type; type in /oracledata/ for Tablespace path. For other items, keep
the default values. Click Next.
ZTE Confidential Proprietary © 2023 ZTE CORPORATION. All rights reserved. 56

ZXG10 ISMG Server (SBCX) Installation and Commissioning Guide (Professional) Internal Use Only▲
Figure 4-13 The Window of Database Deployment Configuration
12. The Please View Installation Information window pops up, as shown in the following
figure. Error: Reference source not foundClick Next.
ZTE Confidential Proprietary © 2023 ZTE CORPORATION. All rights reserved. 57

ZXG10 ISMG Server (SBCX) Installation and Commissioning Guide (Professional) Internal Use Only▲
Figure 4-14 The Window of Viewing the Installation Information
13. The Install Application Database Server window pops up, as shown in the following
figure. Chick Next after the installation progress is 100% completed.
ZTE Confidential Proprietary © 2023 ZTE CORPORATION. All rights reserved. 58

ZXG10 ISMG Server (SBCX) Installation and Commissioning Guide (Professional) Internal Use Only▲
Figure 4-15 The Window of Install Application Database Server
14. The Install the Application Program window pops up, as shown in the following figure.
Chick Next after the installation progress is 100% completed.
ZTE Confidential Proprietary © 2023 ZTE CORPORATION. All rights reserved. 59
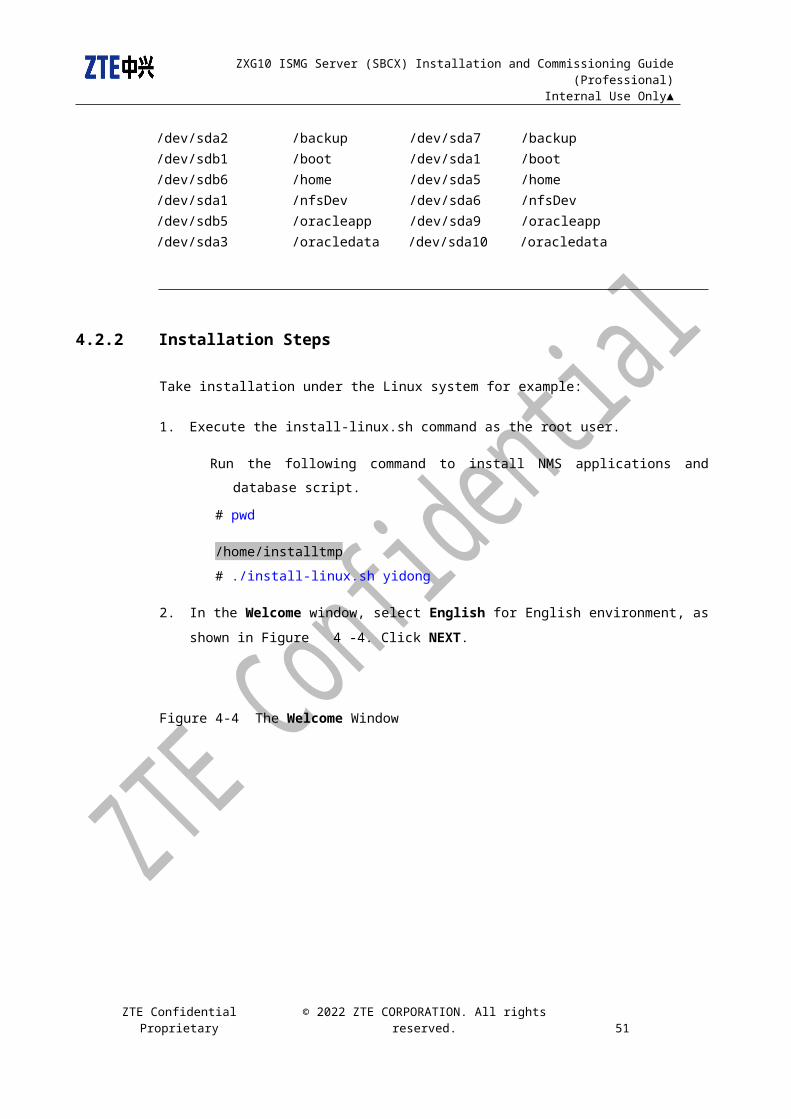
ZXG10 ISMG Server (SBCX) Installation and Commissioning Guide (Professional) Internal Use Only▲
Figure 4-16 The Window of Install the Application Program
15. The Please choose the install scenario window pops up, as shown in the following
figure. Select No for Is a RB splitting version and Is a dual-system respectively. Click
Next. Select No for Is a RB splitting version even it is a splitting version. If it is
necessary to spit OMCR and OMCB, the OMCR related configuration file will be
modified in the RB splitting script.
ZTE Confidential Proprietary © 2023 ZTE CORPORATION. All rights reserved. 60

ZXG10 ISMG Server (SBCX) Installation and Commissioning Guide (Professional) Internal Use Only▲
Figure 4-17 The Window of Choosing the Install Scenario
16. The Set the user and group to run the program window pops up. Type in gomcr for
both the user name and group name, as shown in the following figure. Click Next.
ZTE Confidential Proprietary © 2023 ZTE CORPORATION. All rights reserved. 61

ZXG10 ISMG Server (SBCX) Installation and Commissioning Guide (Professional) Internal Use Only▲
Figure 4-18 The Window of Setting the User and Group to Run the Program
17. The Config Environment window pops up, as shown in the following figure. Click Next.
ZTE Confidential Proprietary © 2023 ZTE CORPORATION. All rights reserved. 62

ZXG10 ISMG Server (SBCX) Installation and Commissioning Guide (Professional) Internal Use Only▲
Figure 4-19 The Config Environment Window
18. The Setup Finished window pops up. You can check before VIEW README. By
default, it is selected, as shown in the following figure. Click Finish.
ZTE Confidential Proprietary © 2023 ZTE CORPORATION. All rights reserved. 63

ZXG10 ISMG Server (SBCX) Installation and Commissioning Guide (Professional) Internal Use Only▲
Figure 4-20 The Setup Finished Window
If the VIEW README window is checked, the VIEW README window pops up, as shown in
the following figure. Click Finish.
ZTE Confidential Proprietary © 2023 ZTE CORPORATION. All rights reserved. 64
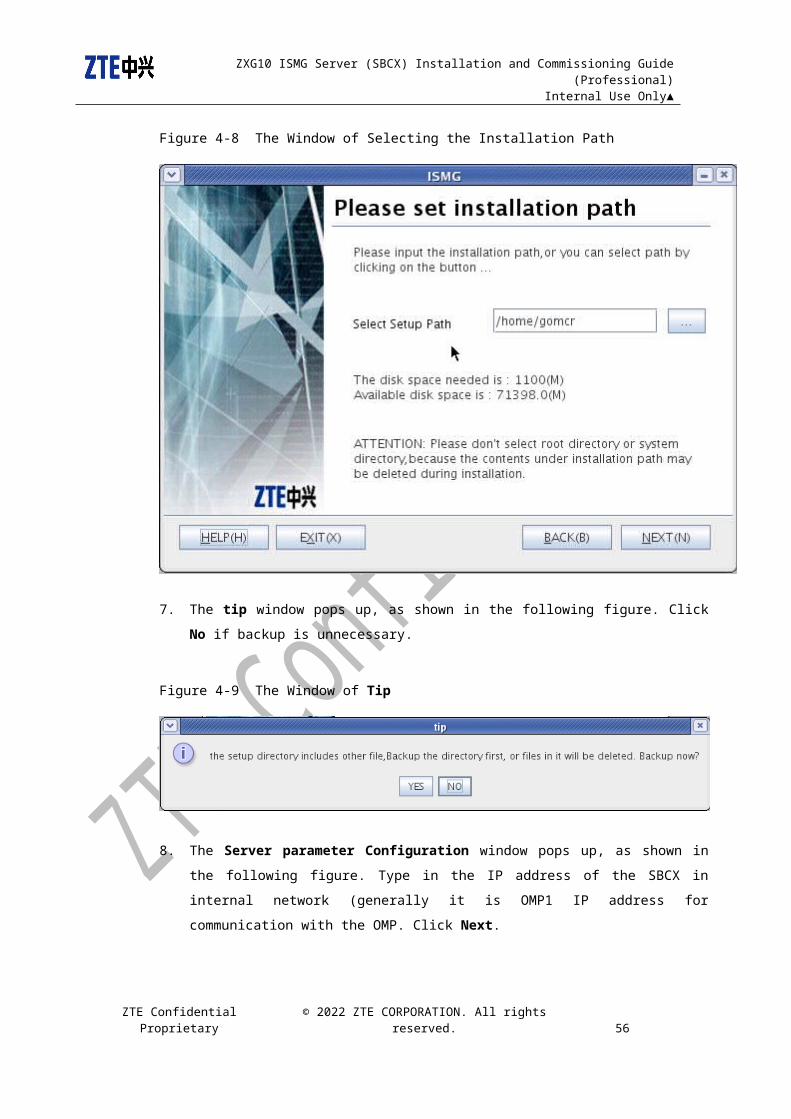
ZXG10 ISMG Server (SBCX) Installation and Commissioning Guide (Professional) Internal Use Only▲
Figure 4-21 The VIEW README Window
4.3 Subsequent Procedure after Installation
4.3.1 Checking the /home/gomcr/ums-svr/bin File
Check the /home/gomcr/ums-svr/bin file to make sure it is executable for the gomcr user.
Execute the command as the root user:
# chmod -R 755 /home/gomcr/ums-svr/bin
4.3.2 Checking the FTP Server of Integrated R&B Version
Check the FTP server of the integrated R&B version to make sure that files can be
transferred between the iBSC client and the server.
ZTE Confidential Proprietary © 2023 ZTE CORPORATION. All rights reserved. 65

ZXG10 ISMG Server (SBCX) Installation and Commissioning Guide (Professional) Internal Use Only▲
Set the FTP tool of the Client to use the port 20021. Since the port 21 cannot always be
available for the gomcr user. The FTP server of gomcr needs to be configured with any port
which is number after 1024.
1. Logon as the gomcr user, and modify /home/gomcr/ums-svr/deploy/deploy-
gsmomcr01.properties.
$ pwd
/home/gomcr/ums-svr/deploy
$ vi deploy-gsmomcr01.properties
Specify the port for the ftp server
Change userdefined-uep-psl-ftpserver.port=21 into
userdefined-uep-psl-ftpserver.port=20021
Revise SBCXAndOMM=1
2. Add port mapping as the root user
# /sbin/iptables -t nat -A PREROUTING -p tcp --dport 21 -j DNAT --to-destination :20021
3. Save the mapping rules so that the system will load them when the system starts.
# iptables-save > /etc/sysconfig/iptables
4.3.3 Setting the Collecting Manager of Integrated R&B Performance
4.3.3.1 Setting ntp
Set ntp so that the OMP can synchronize with the SBCX
Modify/home/gomcr/ums-svr/deploy/deploy-gsmomcr01.properties as the gomcr user,
specifying the port ntp as:
userdefined-uep-psl-clocksync.port=20123
Add port mapping as the root user
# /sbin/iptables -t nat -A PREROUTING -p udp --dport 123 -j DNAT --to-destination :20123
ZTE Confidential Proprietary © 2023 ZTE CORPORATION. All rights reserved. 66
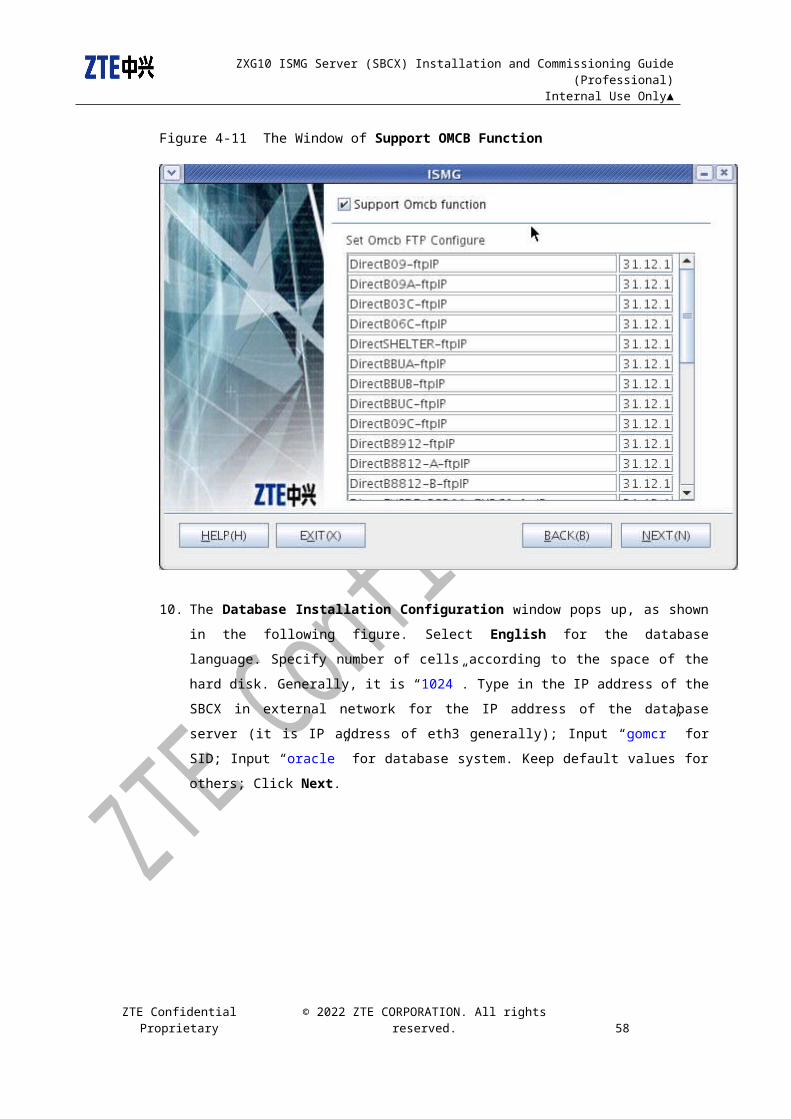
ZXG10 ISMG Server (SBCX) Installation and Commissioning Guide (Professional) Internal Use Only▲
Save mapping rules as the root user so that the system can load mapping rules when it
gets started/
# iptables-save > /etc/sysconfig/iptables
4.3.3.2 Setting nfs
Set nfs so as to share files with the SBCX Server
1. As the root user, revise the property of the nfsDev directory into gomcr
# chown -R gomcr:gomcr /nfsDev
2. Edit /etc/exports
# vi /etc/exports
Add the following: /nfsDev *(rw,insecure,sync,no_wdelay,all_squash,anonuid=500,anongid=500)
Note:
Here, anonuid=500 is the uid of the gomcr user, and anongid=500 is group id of the
gomcr user, which can be fetched by the /etc/password file.
3. SBCX restarts the nfs service
# /etc/init.d/nfs startStart NFS service: [OK]Stop NFS quotas: [OK]Start NFS deamon process: [OK]Start NFS mountd : [OK]# /usr/sbin/exportfs/nfsDev <world>
4. Revise service configuration so that it starts automatically with the system
# chkconfig --level 345 nfs on# chkconfig --list nfsnfs 0:OFF 1: OFF 2: OFF 3:ON 4: ON 5: ON 6: OFF
4.3.3.3 Starting nfsdetect Process Manually
1. Logon as the gomcr user
ZTE Confidential Proprietary © 2023 ZTE CORPORATION. All rights reserved. 67

ZXG10 ISMG Server (SBCX) Installation and Commissioning Guide (Professional) Internal Use Only▲
2. Start nfsdetect
$ cd /home/gomcr/ums-svr/tools/nfsdetect/$ ./nfsDtctCron
4.3.3.4 SBCX Invoking nfsdetect Process Automatically
Invoke the nfsDtctCron script with Linux’s CRON function to prevent the nfsdetect process
from exiting automatically.
1. Logon as the root user to confirm user’s identity.
2. Set export EDITOR=vi (Modify the EDITOR environment variable to edit file with the
vi tool)
Execute the following command as the root user:
# export EDITOR=vi
3. Edit the crontab file, and add the following highlighted (grey) lines in the file:
# crontab -e
OMCHOME=/home/gomcr/ums-svr
13 * * * * $OMCHOME/tools/nfsdetect/nfsDtctCron
28 * * * * $OMCHOME/tools/nfsdetect/nfsDtctCron
43 * * * * $OMCHOME/tools/nfsdetect/nfsDtctCron
58 * * * * $OMCHOME/tools/nfsdetect/nfsDtctCron
Note:
1. Select a path for the OMCHOME variable according to the actual conditions.
2. Do not damage the existent timed actions in the system and do left blanks.
4.3.3.5 Setting the OMP Board of iBSC (Optional)
Set the /DOC0/CFG/zxg10.cfg configuration file.
Replace the red with the IP address of the OMM in the internal network and uid gid of the
gomcr user, and then restart the OMP.
ZTE Confidential Proprietary © 2023 ZTE CORPORATION. All rights reserved. 68
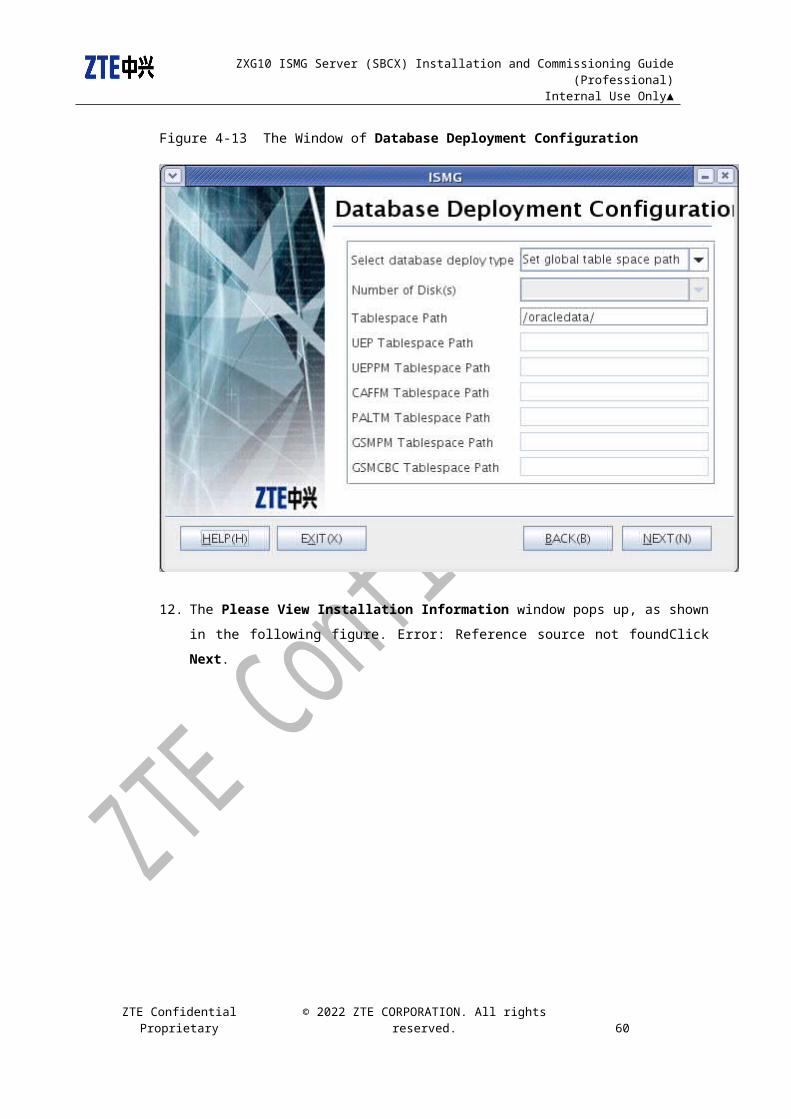
ZXG10 ISMG Server (SBCX) Installation and Commissioning Guide (Professional) Internal Use Only▲
NOT SEND CIRCUITPOOL = 0
Report to the MSC the CircuitPool field or not. By default, it is 0, which
means “Yes”; 1 means No because the peer end is Alcatel’s MSC.
USERPRIENABLE = 0
Sri Lanka’s EGSM/PGSM channel allocation scheme, 0: Not start; 1: Start
CELL ID CFG = 0
CELLID type, 0: CELLID_LAC_CI, 1: CELLID_CGI
CBC OMCR USED = 1
Whether to use the CBC function of the FBI interface, 0: not use, 1: use.
FRONTEND IP = 129.0.1.1
IP address of the front end
FRONTEND UID = 500
Visit user ID of the front end, see notes of GID.
FRONTEND GID = 500
Visit the user group ID of the front end. For the SVB board, both UID and GID can be set to 0. For the SBCX board, the setting of UID and GID must be consistent with that set by the gomcr user.
MASTERABISBROKEN ALARM = 0
Whether to report the Abis break alarm to the main rack. 0: not report; 1: report.
LCS SUPPORT R99 = 0
The location service supports R99 protocol or not. 0: not report; 1: report
zxg10.cfg is released together with the iBSC version.
4.3.4 Checking Data Auto Backup Script (iBackup Script)
Back up the data and upload them to other PCs by FTP.
4.3.4.1 Setting the Directory for the iBackup Script
1. /home/gomcr/ums-svr/tools/ibackup/ibackup.conf
Configuration files for the data backup recovery script
2. /home/gomcr/ums-svr/tools/ibackup/ibackup.pl
ZTE Confidential Proprietary © 2023 ZTE CORPORATION. All rights reserved. 69

ZXG10 ISMG Server (SBCX) Installation and Commissioning Guide (Professional) Internal Use Only▲
Data backup script
3. /home/gomcr/ums-svr/tools/ibackup/irestore.pl
Data recovery script
4.3.4.2 Modifying and Checking the Configuration File (ibackup.conf)
Note: cfg, ver and db are set as N. The backup contents can be set in crontab.
Log onto the SBCX board as the gomcr user
The parameters that can be set in the configuration file include global and ftp.
Do not revise vcfg, ver, and db:
[global]
# Keep the default value for the OMCHOME environment variable:
omchome=/home/gomcr/ums-svr
# Name of the backup/recovery database, and name of the database instance. Generally, they need not to be revised.
dbserver=gomcr
# Generally, system user name and password of the backup/recovery database need not to be revised
dbuser=system:oracle
# The directory to save the backup file. The directory can be modified as required. It is necessary to create the directory manually.
backupdir=/home/gomcr/backup
# Whether to back up the gomcr database table, y-back up, n- not back up
# db includes four data table sets: cm (Configuration table), fm (alarm table), pm (performance table) and sm (security table)
# db: it can be set as follows:
# db=cm or db=(cm,fm), db=y equals to db=(cm,fm,pm,sm)
ZTE Confidential Proprietary © 2023 ZTE CORPORATION. All rights reserved. 70

ZXG10 ISMG Server (SBCX) Installation and Commissioning Guide (Professional) Internal Use Only▲
# Generally, it is unnecessary to modify this parameter value. You can set the value when executing the command.
db=n
# Back up the gomcr configuration file or not; y-back up, n- not back up
cfg=n
# Back up the gomcr version file or not, y-back up, n- not back up
ver=n
# Upload the backup file to the FTP server or not; y-upload, n- not upload
ftp=n
# How many days will be the backup file and the log file kept
retain=7
[ftp]
# FTP server address, IP address: port. Transfer the backup file to another server, which can be any server that can be accessed by FTP in principle. Generally, however, it is suggested to select the corresponding Minos server IP (IP address and port of the M-inos server to transfer the backup file to the Minos server. It can be modified as required)
ftpserver=10.63.208.209:21110
# User name and password of the FTP server, revise them as required
ftpuser=omc:omc
# The directory to save the backup file of the FTP server, which can be modified as required. Please note that the 134 directory should be created
manually after logon to the Minos server by telnet
ftpdir=/export/home/omc/backup/134
ZTE Confidential Proprietary © 2023 ZTE CORPORATION. All rights reserved. 71
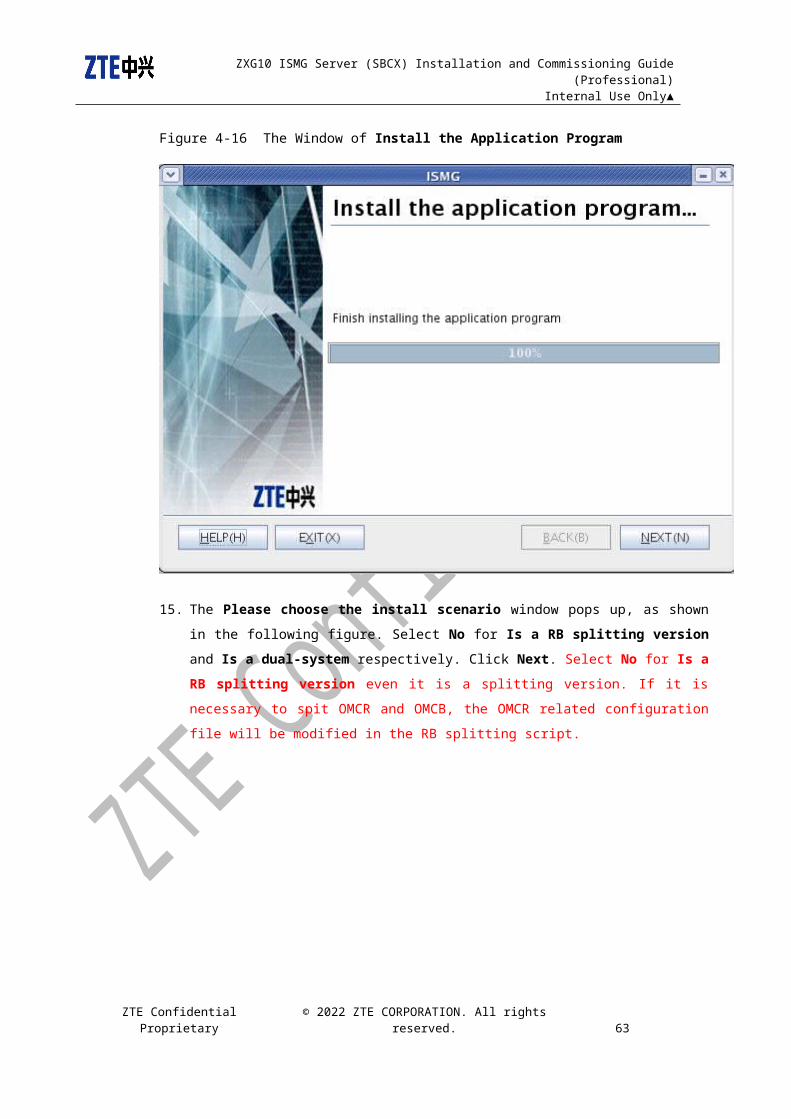
ZXG10 ISMG Server (SBCX) Installation and Commissioning Guide (Professional) Internal Use Only▲
4.3.4.3 How to Use the Script (Optional)
1. ibackup.pl
i. The grammar of how to use the ibackup.pl script:
Log onto the database as the gomcr user, and execute the following command:
$ perl ibackup.pl [db=y|cm|(cm,fm,pm,sm)][cfg=y|n][ver=y|n][ftp=y|n][help=y]
See the Configuration file for parameter meanings. Set the parameter by
ibackup.conf if the parameter is not specified in the command line.
ii. Examples
Execute the following command as the gomcr user.
Example 1:
Export the configuration file and version file of gomcr:
$perl $OMCHOME/tools/backup/ibackup.pl cfg=y ver=y db=n ftp=n
Example 2
Export gomcr database table and the backup file to the FTP server
$perl $OMCHOME/tools/backup/ibackup.pl cfg=n ver=n db=y ftp=y
Or:
$perl $OMCHOME/tools/backup/ibackup.pl cfg=n ver=n db=(cm,fm,pm,sm) ftp=y
Check the ibackup_yyyymmdd.log file to see the result after execution of the script.
2. irestore.pl
i. Grammar of the irestore.pl script:
$ perl irestore.pl file=backupfile
file is name of the backup file generated.
It is necessary to set some parameters in the ibackup.conf file before executing the
irestore.pl script.
ZTE Confidential Proprietary © 2023 ZTE CORPORATION. All rights reserved. 72

ZXG10 ISMG Server (SBCX) Installation and Commissioning Guide (Professional) Internal Use Only▲
Example 1:
Recover the specified backup file
$perl $OMCHOME/tools/backup/irestore.pl file=/backup/backup20080118101319.tar
The following dumps are available:
fm
pm
sm
Select dump(s) you wish to process (or 'all' to process all dumps)
(default:all,q to quit):
Select the database to be recovered. The backup file includes such data tables as
fm, pm and sm to be backed up. To recover all of the data tables, type in all. To
recover fm and pm, type in fm,pm.
Check the irestore_yyyymmdd.log file to see the result after execution of the script.
4.3.4.4 Remarks
Check current configuration with crontab –l. You can check whether the following commands
have been executed successfully by modifying the system time.
1. Invoke cron
The recovery script should be executed manually, but the backup script can be invoked
by CRON. For auto-backup, you can use crontab –e to edit cron timed items. For
example:
$ crontab -e #Add the following lines
00 1 * * * perl /home/gomcr/ums-svr/tools/ibackup/ibackup.pl cfg=y db=y ftp=y
00 2 1 * * perl /home/gomcr/ums-svr/tools/ibackup/ibackup.pl ver=y ftp=y
00 2 15 * * perl /home/gomcr/ums-svr/tools/ibackup/ibackup.pl ver=y ftp=y
ZTE Confidential Proprietary © 2023 ZTE CORPORATION. All rights reserved. 73

ZXG10 ISMG Server (SBCX) Installation and Commissioning Guide (Professional) Internal Use Only▲
$ crontab -l #Check whether the lines above are added successfully
00 1 * * * perl /home/gomcr/ums-svr/tools/ibackup/ibackup.pl cfg=y db=y ftp=y
00 2 1 * * perl /home/gomcr/ums-svr/tools/ibackup/ibackup.pl ver=y ftp=y
00 2 15 * * perl /home/gomcr/ums-svr/tools/ibackup/ibackup.pl ver=y ftp=y
1st line: back up the gomcr configuration file dand database table at 1 AM every
morning, and upload them to the FTP server.
2nd line: back up the gomcr configuration file at 2 in the morning on the 1st day of
each month, and upload it to the FTP server.
3rd line: back up the gomcr version file at 2 in the morning on the 15th day of each
month, and upload it to the FTP server.
2. Create a directory
The backupdir directory and the ftpdir directory can be created by the backup
script, but it is suggested to create them manually in advance, just in case of
creation failure by the script, which then leads to backup failure. Set correct rights
for reading and writing on the directory.
4.3.4.5 Checking Setting of ibackup.conf
Execute the following command as the gomcr user:
$ perl /home/gomcr/ums-svr/tools/ibackup/ibackup.pl cfg=y db=y ftp=y
Check the /home/gomcr/ums-svr directory on the SBCX server and the
/export/home/omc/backup/134 directory on the Minos server to check whether there is any
backup file generated.
4.3.5 Checking the Script of the Server System
Check whether there is such a script as stopall.sh under the /home/gomcr/ums-svr/bin/
directory. If there is not such a file, upload the stopall.sh fiie to the /home/gomcr/ums-svr/bin/
directory by FTP as the gomcr user. Execute the following command to check it again:
ZTE Confidential Proprietary © 2023 ZTE CORPORATION. All rights reserved. 74
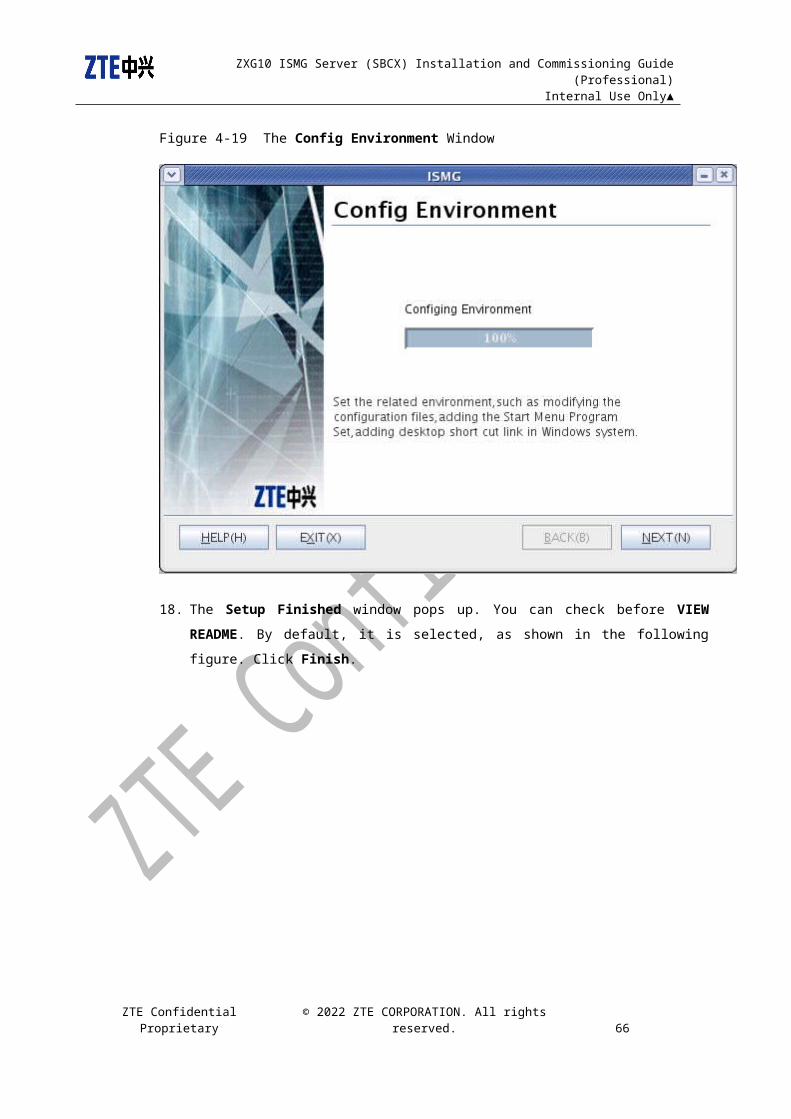
ZXG10 ISMG Server (SBCX) Installation and Commissioning Guide (Professional) Internal Use Only▲
$ chmod +x stopall.sh
4.3.6 Checking the Number of Sentence Handlers in Linux System
If the number of sentence handlers is not 4096, then please make modifications according to
the following steps:
1. Run the following command as the root user:
ulimit -n 4096
2. Modify the /etc/security/limits.conf file as the root user.
vi /etc/security/limits.conf
Add the following two lines at the end of the file:
soft nofile 4096
hard nofile 4096
It is suggest not to modify the file manually, but to copy the following two lines into the system
file instead.
3. Check parameter modification with the ulimit -a command
# ulimit -a
core file size (blocks, -c) 0
data seg size (kbytes, -d) unlimited
file size (blocks, -f) unlimited
pending signals (-i) 1024
max locked memory (kbytes, -l) 32
max memory size (kbytes, -m) unlimited
ZTE Confidential Proprietary © 2023 ZTE CORPORATION. All rights reserved. 75
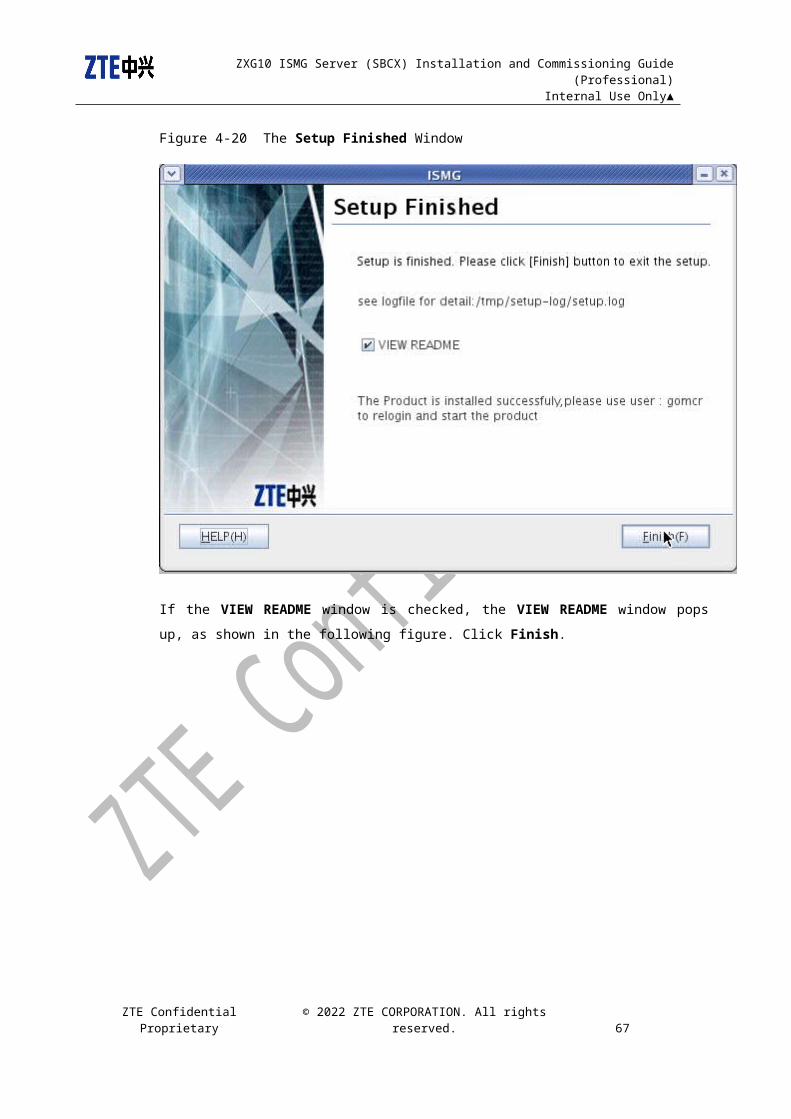
ZXG10 ISMG Server (SBCX) Installation and Commissioning Guide (Professional) Internal Use Only▲
open files (-n) 4096
pipe size (512 bytes, -p) 8
POSIX message queues (bytes, -q) 819200
stack size (kbytes, -s) 10240
cpu time (seconds, -t) unlimited
max user processes (-u) 16251
virtual memory (kbytes, -v) unlimited
file locks (-x) unlimited
Note:
Step 1: Revise the limit for sentence handlers of the system.
Step 2: Revise the number and restart the system.
4.3.7 Setting the Server System
Purpose: make the server system to start automatically with the SBCX board
The onsite SBCX boards include the new version and the old version:
Check disk partition with df –kh to judge whether the SBCX board is the new version or the
old.
SBCX board of the old version SBCX board of the new versionFilesystem Mount point /dev/sdb2 / /dev/sda2 /backup /dev/sdb1 /boot /dev/sdb6 /home /dev/sda1 /nfsDev /dev/sdb5 /oracleapp /dev/sda3 /oracledata
Filesystem Mount point/dev/sda2 / /dev/sda7 /backup /dev/sda1 /boot /dev/sda5 /home /dev/sda6 /nfsDev /dev/sda9 /oracleapp /dev/sda10 /oracledata
A. For the old SBCX board, perform the following steps:
ZTE Confidential Proprietary © 2023 ZTE CORPORATION. All rights reserved. 76
ZXG10 ISMG Server (SBCX) Installation and Commissioning Guide (Professional) Internal Use Only▲
1. Upload the ismg file from the client to the server by FTP. Copy it and save it as
/etc/init.d/ismg by the cp command as the root user.
2. Execute the following commands as the root user.
# chown root ismg # chgrp root ismg # chmod 755 ismg # ln -s /etc/init.d/ismg /etc/rc0.d/K10ismg # ln -s /etc/init.d/ismg /etc/rc5.d/S99ismg
# ln -s /etc/init.d/ismg /etc/rc5.d/S99ismg
B. For the new SBCX, perform the following steps:
1. Upload the ismg file from the client to the server by FTP. Copy it and save it as
/etc/init.d/ismg by the cp command as the root user.
2. Execute the following commands as the root user.
# chown root ismg # chgrp root ismg # chmod 755 ismg # ln -s /etc/init.d/ismg /etc/rc0.d/K10ismg # ln -s /etc/init.d/ismg /etc/rc3.d/S99ismg # ln -s /etc/init.d/ismg /etc/rc6.d/S99ismg
4.4 Starting Integrated R & B Version Application
Service
4.4.1 Points for Attention
Note:
It is suggested to delete files under the /home/gomr/ums-svr/temp directory before the first
run.
ZTE Confidential Proprietary © 2023 ZTE CORPORATION. All rights reserved. 77

ZXG10 ISMG Server (SBCX) Installation and Commissioning Guide (Professional) Internal Use Only▲
4.4.2 Starting Integrated R&B Server
After installation, execute the following commands as the gomcr user to run the server:
$ cd /home/gomcr/ums-svr/bin$ nohup ./console-linux.sh &
4.4.3 Checking Integrated R&B Service Execute the following command as the gomcr user. Check the main program of
CONSOLE and the integrated R&B version to see whether the processes of ZXG10 NetNumen-G are all existent. If all of the three processes are existent, it shows the server has been commissioned successfully. Please finish the subsequent operations.
$ ps -ef | grep java
The following three Java processes are displayed
1) CONSOLE: BootMain
2) iOMCR main program: BoostMain
3) FTPSERVER: FtpServer
Check the log file under the /home/gomcr/ums-svr/log directory. Search for normal start information with '/Copyright'
$ vi server-start.log
******************************************************************
UMS-PLATFORM (MX MicroKernel) [V6.10.100d] started.
Spent 0 hour(s) 1 minute(s) 38 second(s)
Copyright(C) (2002-2008). All rights reserved.
4.4.4 Checking Integrated R&B Performance Management Service
Method 1:
Check whether the nfsdetect process is started
Check whether the nfsdetect process is existent as the gomcr user. If it does not exist, execute the following command to make related settings. For details, please refer to 4.3.3.
# ps -ef | grep nfsdetect
Method 2:
ZTE Confidential Proprietary © 2023 ZTE CORPORATION. All rights reserved. 78
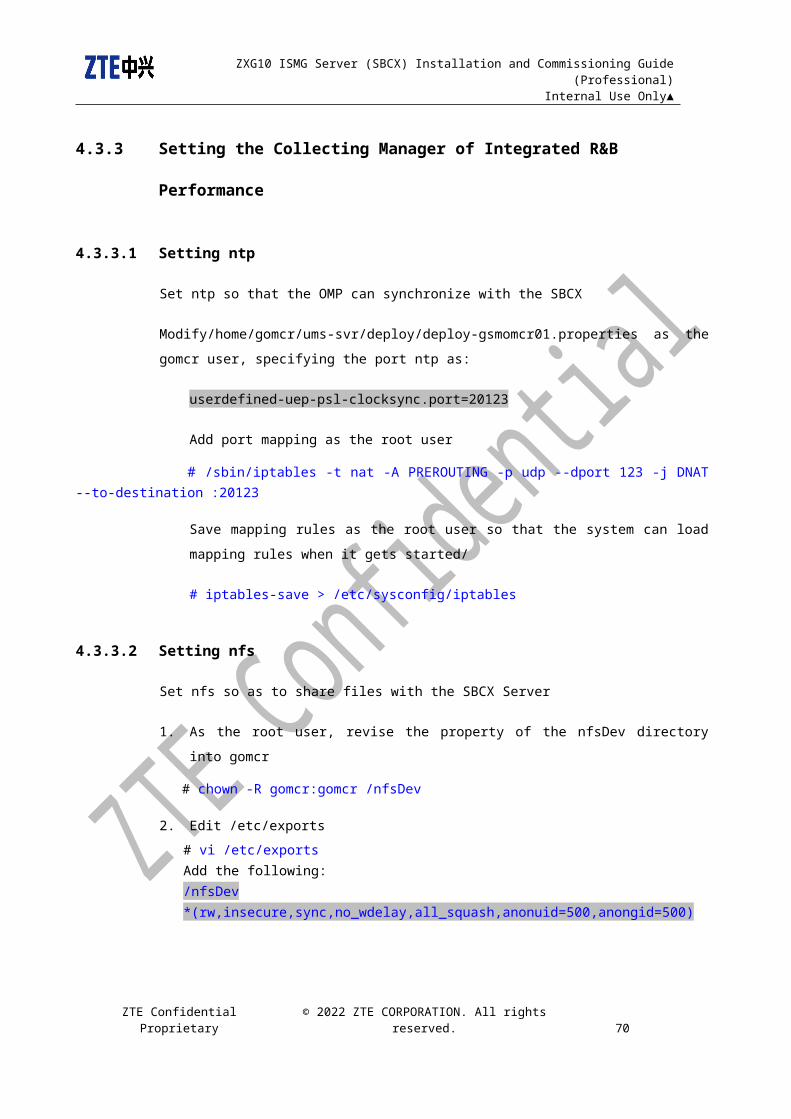
ZXG10 ISMG Server (SBCX) Installation and Commissioning Guide (Professional) Internal Use Only▲
Log onto the OMP by telnet to check whether nfs of the integrated R&B version is normal.
1. Log onto the OMP by telnet. Execute the NfsShowState command to check the
link to nfsdetect
MPX86_2->NfsShowState
NFS SVR IP: 129.0.1.1 // IP of the connected SVB/SBCX
NFS SVR State: ONLINE // Connected
NFS SVR Mount State: OK // Mounted
Local Device Name: /nfsDev
2. Log onto the OMP by telnet, and execute the OmsTxSaveFileShow command to
check the reported file.
MPX86_2->OmsTxSaveFileShow
NfsLinkOK = 0
OmcrLinkOK = 0
DirSuccess = 1 // If the value is 1, it shows mount nfs is normal, and the directory is also normal and writable.
IsMaster = 1
IsWriNFSTimer = 1
value = 19 = 0x13
If there is any problem, please make settings by referring to 4.3.3.
4.5 Stopping the Application Service of Integrated R &
B Version
In the Linux system, execute the following command as the gomcr user to stop the ZXG10
NetNumen-G server.
$ cd /home/gomcr/ums-svr/bin
$ ./stopall.sh
ZTE Confidential Proprietary © 2023 ZTE CORPORATION. All rights reserved. 79

ZXG10 ISMG Server (SBCX) Installation and Commissioning Guide (Professional) Internal Use Only▲
4.5.1 Checking after Stopping the Integrated R&B Service
In the Linux system, execute the following command as the gomcr user to view the main
programs of CONSOLE and the integrated R&B version, and see whether the processes of
the ZXG10 NetNumen-G server all exist.
$ ps -ef|grep java
Check whether the main programs of CONSOLE, integrated R&B version, and FTPSERVER
are started normally.
5 Software Installation for Integrated OMCR Version Client This chapter describes the installation procedure of integrated OMCR version Client
software.
5.1 Preparations
Please perform the following steps before installating integrated OMCR version Client
software.
1. The operating system is properly installed and runs normally.
2. Check whether the hardware of the server meets the requirement and is in good
condition.
3. Obtain the application software of the integrated OMCR version.
4. On partition D of the Client, create a directory D:\CLIENT\ISMG as the destination path
to install the application software of the integrated OMCR Client.
5.2 Installing Client1. Copy the directory files jdk-windows and ums-clnt to the destination path to install
the application software of the ISMG Client. Usually the destination is D:\CLIENT\ISMG
on the Client.
ZTE Confidential Proprietary © 2023 ZTE CORPORATION. All rights reserved. 80
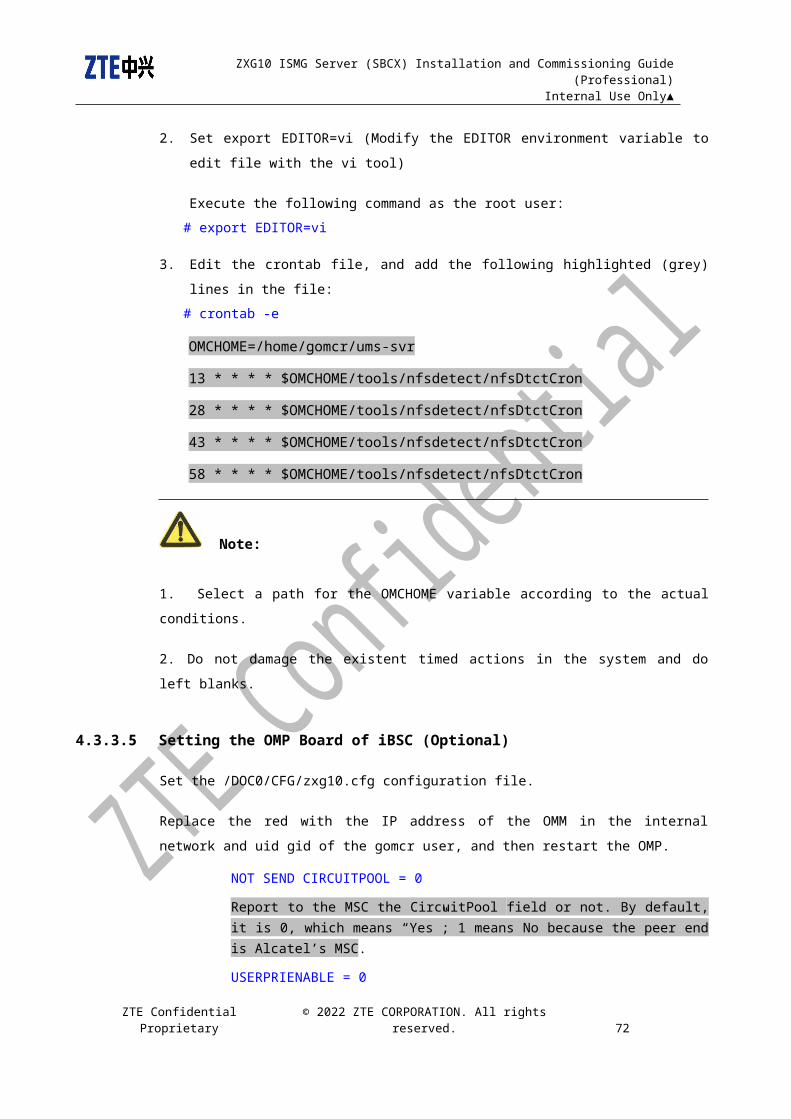
ZXG10 ISMG Server (SBCX) Installation and Commissioning Guide (Professional) Internal Use Only▲
2. Delete the runtime directory from D:\CLIENT\ISMG\ums-clnt\deploy.
3. Clear the D:\CLIENT\ISMG\ums-clnt\log directory.
4. Clear the D:\CLIENT\ISMG\ums-clnt\log directory.
5. For Windows Operating System, execute D:\CLIENT\ISMG\ums-clnt\bin\
run.bat to run the Client.
5.3 Modifying Language Variable of the Client (Optional)
Generally, Chinese language is selected (ums.locale=zh_CN). If the language of the client is
English, the parameter settings in the following configuration files (path: …/ums-clnt/deploy/)
must be correct.
1. Modify the deploy-010muep.properties file
Change the locale language:
ums.locale=en_US
2. Modify the deploy-gsmomcr01.properties file
Change the locale language:
ums.locale=en_US
5.4 Shutting Down the ISMG
In the starting interface of ISMG, choose System > Exit or click the icon directly
ZTE Confidential Proprietary © 2023 ZTE CORPORATION. All rights reserved. 81

ZXG10 ISMG Server (SBCX) Installation and Commissioning Guide (Professional) Internal Use Only▲
6 Database Instance Installation for Independent OMCB Version
6.1 Preparations
Log onto the SBCX board by Telnet;
Switch to the Oracle user;
Start VNC;
Execute the dbca command;
Configure the database.
# su - oracle
$vi .vnc/xstartup
#!/bin/sh
# Uncomment the following two lines for normal desktop:
# unset SESSION_MANAGER
# exec /etc/X11/xinit/xinitrc
[ -x /etc/vnc/xstartup ] && exec /etc/vnc/xstartup
[ -r $HOME/.Xresources ] && xrdb $HOME/.Xresources
xsetroot -solid grey
vncconfig -iconic &
xterm -geometry 80x24+10+10 -ls -title "$VNCDESKTOP Desktop" &
ZTE Confidential Proprietary © 2023 ZTE CORPORATION. All rights reserved. 82
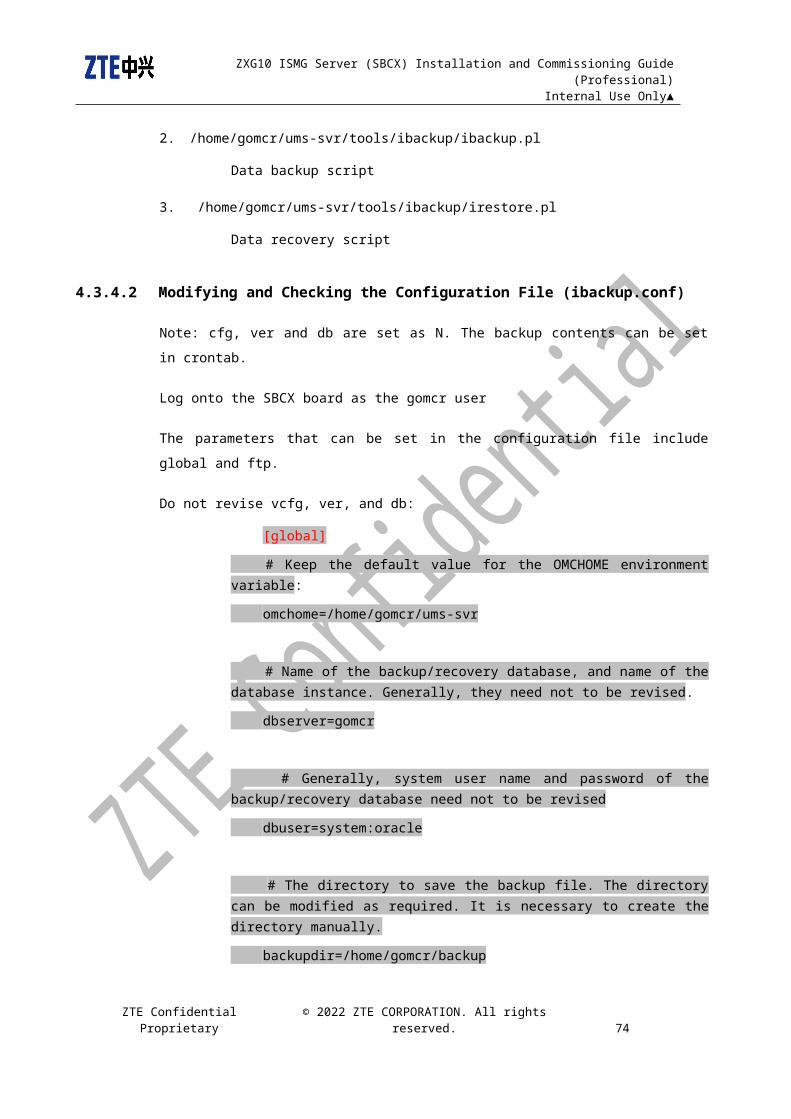
ZXG10 ISMG Server (SBCX) Installation and Commissioning Guide (Professional) Internal Use Only▲
gnome-session& Change it to gnome-session; Save the change and exit
$ vncserver
New 'SHBSC001:1 (oracle)' desktop is SHBSC001:1
Starting applications specified in /home/oracle/.vnc/xstartup
Log file is /home/oracle/.vnc/SHBSC001:1.log //Port
Type in the password of VNC Viewer and confirm the password.
Start the VNC, type in IP:Port, and the password.
If the VNC Client is not available, we can use the VNC program \ums-clnt\tools\
RemoteAccessOMMOS\muep-gct-wsf.par\conf\zh_CN of the integrated OMCR version.
In the GUI interface, log onto the database as the Oracle user, and execute the following
command:
ZTE Confidential Proprietary © 2023 ZTE CORPORATION. All rights reserved. 83

ZXG10 ISMG Server (SBCX) Installation and Commissioning Guide (Professional) Internal Use Only▲
$dbca
After the command, the following window pops up.
6.2 Installation Procedure
1. Select Create a Database
ZTE Confidential Proprietary © 2023 ZTE CORPORATION. All rights reserved. 84
ZXG10 ISMG Server (SBCX) Installation and Commissioning Guide (Professional) Internal Use Only▲
2. Select Transaction Processing
ZTE Confidential Proprietary © 2023 ZTE CORPORATION. All rights reserved. 85

ZXG10 ISMG Server (SBCX) Installation and Commissioning Guide (Professional) Internal Use Only▲
3. Type in the database name: gomcb
4. Make sure Configure the Database with Enterprise Manager is not selected in the
Management Options window.
ZTE Confidential Proprietary © 2023 ZTE CORPORATION. All rights reserved. 86
ZXG10 ISMG Server (SBCX) Installation and Commissioning Guide (Professional) Internal Use Only▲
5. Type in the password Oracle in the Database Credentials window.
6. Select File System in the Storage Options window.
ZTE Confidential Proprietary © 2023 ZTE CORPORATION. All rights reserved. 87

ZXG10 ISMG Server (SBCX) Installation and Commissioning Guide (Professional) Internal Use Only▲
7. Select Database Files Location
Check before the Use Common Location for All Database Files box:
/oracledata/gomcb.
ZTE Confidential Proprietary © 2023 ZTE CORPORATION. All rights reserved. 88
ZXG10 ISMG Server (SBCX) Installation and Commissioning Guide (Professional) Internal Use Only▲
8. Do not select Specify Flash Recovery Area and Enable Archiving in the Recovery
Configuration window.
ZTE Confidential Proprietary © 2023 ZTE CORPORATION. All rights reserved. 89

ZXG10 ISMG Server (SBCX) Installation and Commissioning Guide (Professional) Internal Use Only▲
9. Keep the default settings in the Database Content window.
ZTE Confidential Proprietary © 2023 ZTE CORPORATION. All rights reserved. 90

ZXG10 ISMG Server (SBCX) Installation and Commissioning Guide (Professional) Internal Use Only▲
10. In the Initialization Parameters window, select the Memory tab page, check before
Typical, and select 20 for Percentage.
11. In the Initialization Parameters window, select the Character Sets tab page, check
before Choose from the list of character sets, and select ZHS16GBK for Database
Character Set. For other items, keep the default settings.
ZTE Confidential Proprietary © 2023 ZTE CORPORATION. All rights reserved. 91
ZXG10 ISMG Server (SBCX) Installation and Commissioning Guide (Professional) Internal Use Only▲
12. In the Initialization Parameters window, click All Initialization Parameters.
ZTE Confidential Proprietary © 2023 ZTE CORPORATION. All rights reserved. 92

ZXG10 ISMG Server (SBCX) Installation and Commissioning Guide (Professional) Internal Use Only▲
Modify the format of the date:
nls_date_format: “YYYY-MM-DD HH24:MI:SS”
ZTE Confidential Proprietary © 2023 ZTE CORPORATION. All rights reserved. 93
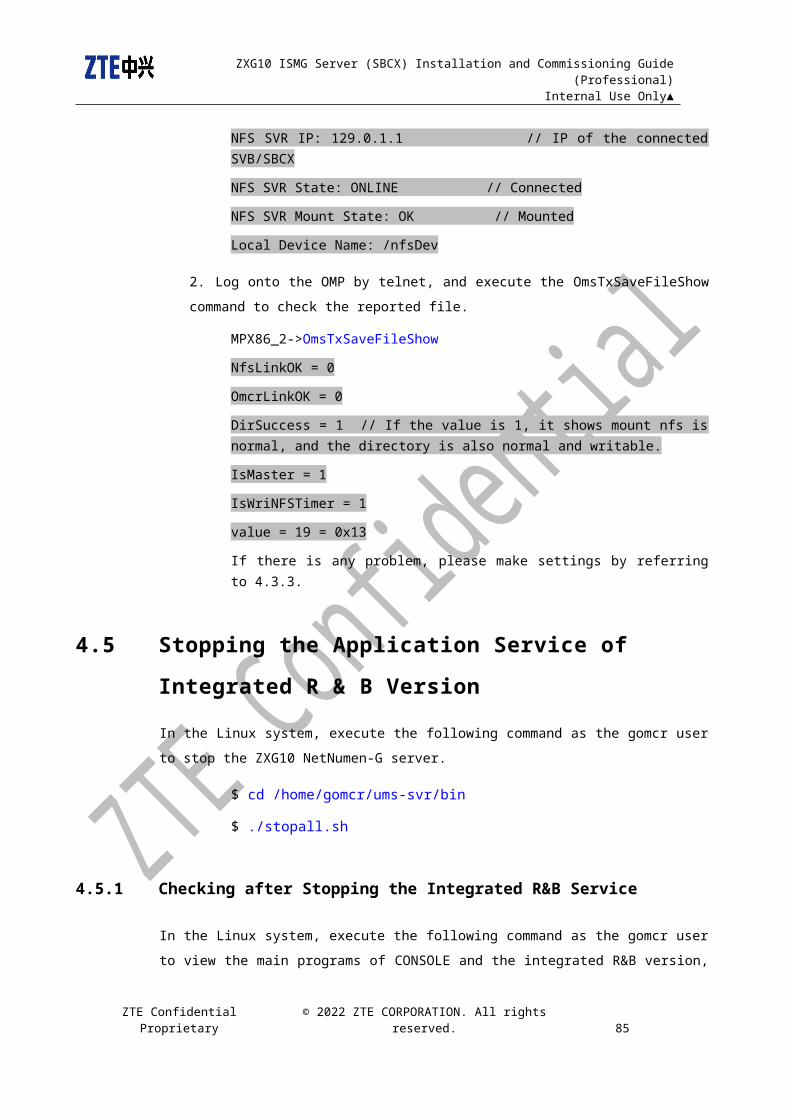
ZXG10 ISMG Server (SBCX) Installation and Commissioning Guide (Professional) Internal Use Only▲
13. Keep the default settings for the database storage.
ZTE Confidential Proprietary © 2023 ZTE CORPORATION. All rights reserved. 94
ZXG10 ISMG Server (SBCX) Installation and Commissioning Guide (Professional) Internal Use Only▲
14. Keep the default settings in the Creation Options window.
15. Click Confirmation to start installing the database.
ZTE Confidential Proprietary © 2023 ZTE CORPORATION. All rights reserved. 95

ZXG10 ISMG Server (SBCX) Installation and Commissioning Guide (Professional) Internal Use Only▲
ZTE Confidential Proprietary © 2023 ZTE CORPORATION. All rights reserved. 96
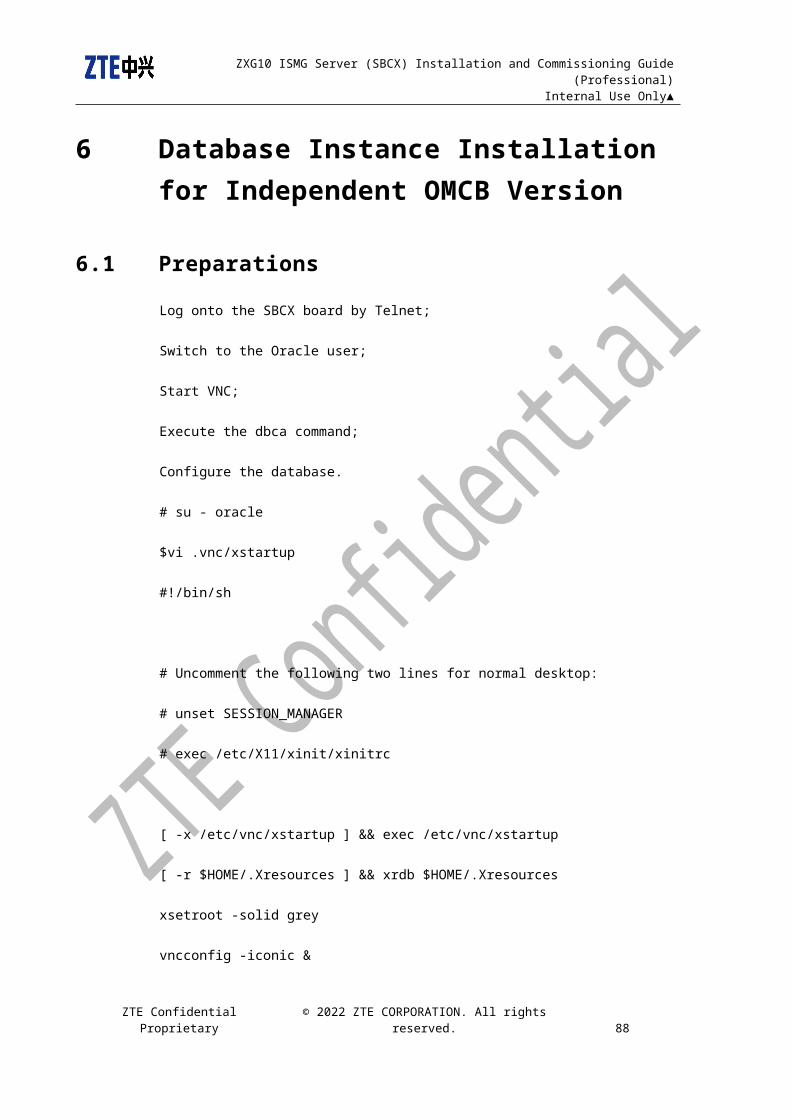
ZXG10 ISMG Server (SBCX) Installation and Commissioning Guide (Professional) Internal Use Only▲
Clone database creation in process, please wait.
6.3 Subsequent Steps after Installation
Start gomcb database instance and listener as the oracle user.
$ export ORACLE_SID=gomcb$ sqlplus sys/oralce as sysdbaSQL> startupSQL> quit$ lsnrctl start
ZTE Confidential Proprietary © 2023 ZTE CORPORATION. All rights reserved. 97
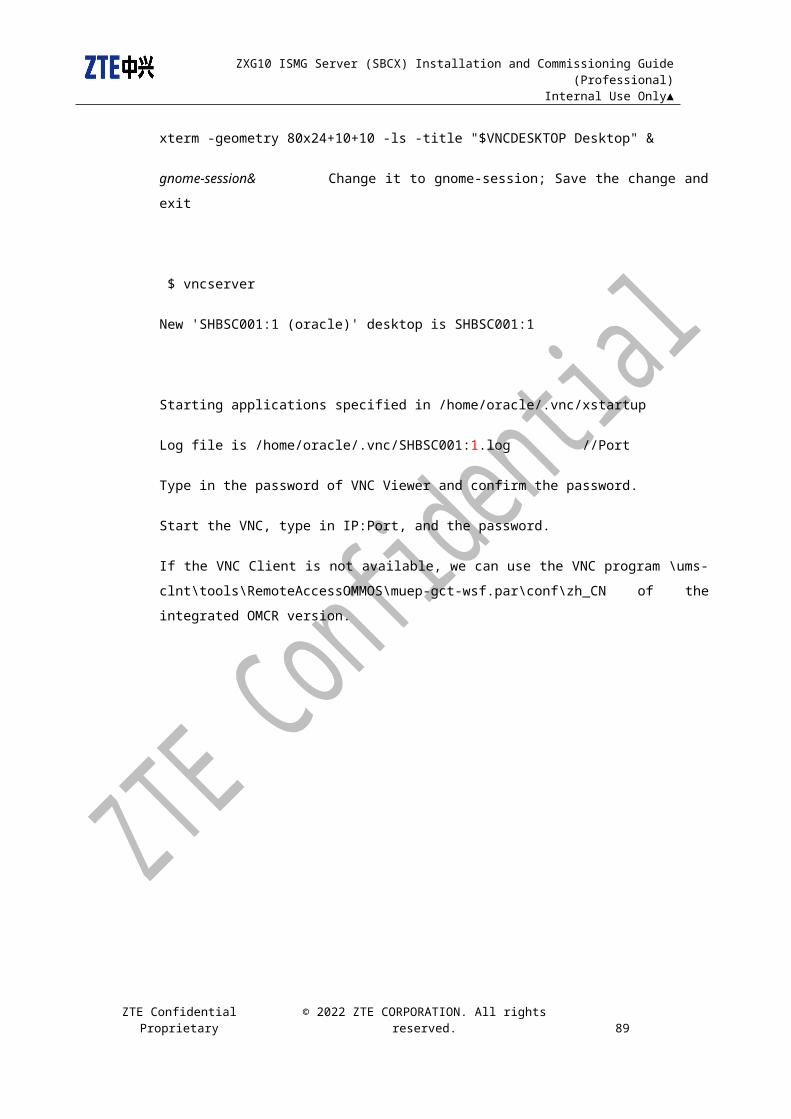
ZXG10 ISMG Server (SBCX) Installation and Commissioning Guide (Professional) Internal Use Only▲
7 Independent OMCB Version Installation & Commissioning
7.1 Executing R/B Split Script
7.1.1 Prerequisites
1. Before the R&B split, the integrated R&B version is running normally; the application of
network interfaces in the system meets the corresponding principles.
eth3 is used as the interface between EMS and OMM Server, OMM Server and OMM Client;
eth4 is used as the interface for communicating with SDR;
eth6 is used as the OMP interface.
If the application of the interfaces does not meet the above principles, conduct adjustment
accordingly. Otherwise, the following script should not be used.
2. The necessary IP resource is available before the split.
One external network IP, which belongs to the same sub-network that contains the original eth3 IP address. It is used for configuring the eth3:1.
One new OMCB IP, which belongs to the same sub-network that contains the original eth4 IP address. It is used for configuring the eth4:1.
3. The R&B split script needs to be executed by user root. We must own the right to user
root.
4. The integraded R&B version is V6.20.614 or a higher one.
5. The Oracle instance of the R&B integrated version is installed.
7.1.2 Implementation Procedure
1. Uploading the script.
Upload the R&B split script rb_split.zip to /home/Installtemp as user gomcr.
Telnet to SBCX board, and switch to user root, and unzip the split script.
ZTE Confidential Proprietary © 2023 ZTE CORPORATION. All rights reserved. 98

ZXG10 ISMG Server (SBCX) Installation and Commissioning Guide (Professional) Internal Use Only▲
# cd /home/installtmp/
#unzip rb_split.zip
# cd /home/installtmp/rb_split
The following files are contained:
rb_split.sh main script for the split
rb_split_gomcb.sh auxiliary script
rb_split_gomcr.sh auxiliary script
rb_split_oracle.sh auxiliary script
rb_split_root.sh auxiliary script
dbora auxiliary script
ismg auxiliary script
2. Execute rb_split.sh as user root.
#sh rb_split.sh
2.1 Pre-check
The script first checks the execution environment. If the environment passes the check, the
script prints:
"PreCheck passed"
Confirm the correctness of the output result, type ‘y’ to continue the execution; if the result is
not correct, type ‘q’ to quit the execution and make adjustment accordingly.
If some items fail to pass the check, the script prints:
"PreCheck not passed, correct problems, then run rb_split.sh again.",
In this case, exit the execution of the script, adjust the items (with failures) that previously fail
the check, and execute the rb_split.sh once again.
ZTE Confidential Proprietary © 2023 ZTE CORPORATION. All rights reserved. 99

ZXG10 ISMG Server (SBCX) Installation and Commissioning Guide (Professional) Internal Use Only▲
Note: Even the OMCB user and OMCB version result in ‘failure’ in the check, the script still
prints “PreCheck passed”, This is because the OMCB user and OMCB version are not
created or installed yet at the moment. Therefore, it is normal that the two items fail the
check.
OMCR/OMCB Split Tool
--------------------------------------------------------------------------------
**************************PreCheck Process************************
Checking ORACLE_HOME....../oracleapp/oracle/product/10.2.0
Checking OMCR user........success(GOMCR=gomcr)
Checking OMCR version
.....success(GOMCR_OMCHOME=/home/gomcr/ZXGOMCR/ums-svr)
Checking OMCR database....success(GOMCR_SID=gomcr)
Checking OMCB user........success(GOMCB=gomcb)
Checking OMCB version.....failure(OMCHOME not exists)
Checking OMCB database....failure(database not exists)
Checking interface eth3...success(IP 10.63.208.181 NETMASK 255.255.255.0)
Checking interface eth4...success(IP 172.29.11.1 NETMASK 255.255.255.0)
Checking interface eth6...success(IP 172.20.11.1. NETMASK 255.255.255.0)
PreCheck passed.
Confirm variables,and then type 'y' to continue,'q' to quit:
2.2 R&B split process
ZTE Confidential Proprietary © 2023 ZTE CORPORATION. All rights reserved. 100
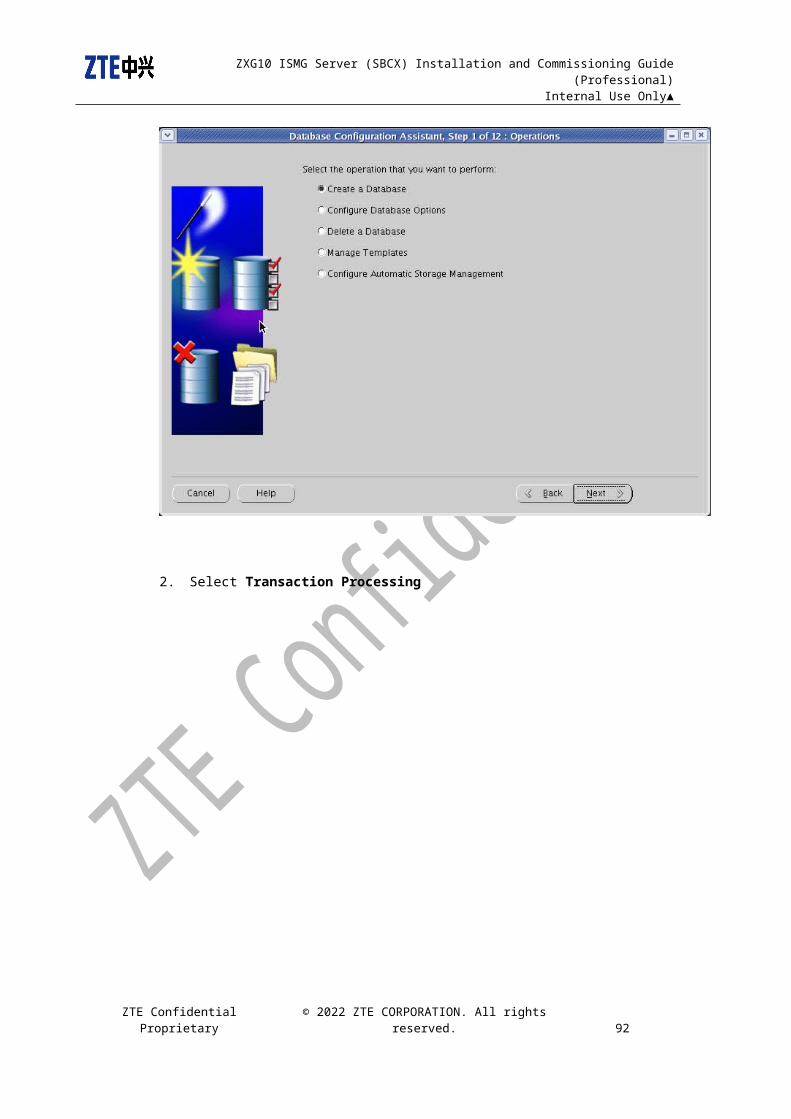
ZXG10 ISMG Server (SBCX) Installation and Commissioning Guide (Professional) Internal Use Only▲
The R&B split process consists of 17 steps, which are as follows:
2.2.1 Set interfaces eth3:1 and eth4:1, and configure the IP address.
********************Split Process*********************
step 1:
Input the IP of interface eth3:1 according to the actual situation.
Interface eth3:1 IP: 10.63.208.235
Confirm the IP and type ‘y’ to continue the execution.
Interface eth3:1 IP=10.63.208.235 NETMASK=255.255.255.0,are you sure? [y|n]: y
Create interface eth3:1 success
Bring up interface eth3:1 success
Modify /etc/hosts success
Input the IP of interface eth4:1 according to the actual situation.
Interface eth4:1 IP: 172.29.11.2
Confirm the IP and type ‘y’ to continue the execution.
Interface eth4:1 IP=172.29.11.2 NETMASK=255.255.255.0,are you sure? [y|n]: y
Create interface eth4:1 success
Bring up interface eth4:1 success
File /etc/host.conf already configured
rb_split_root ip success.
ZTE Confidential Proprietary © 2023 ZTE CORPORATION. All rights reserved. 101
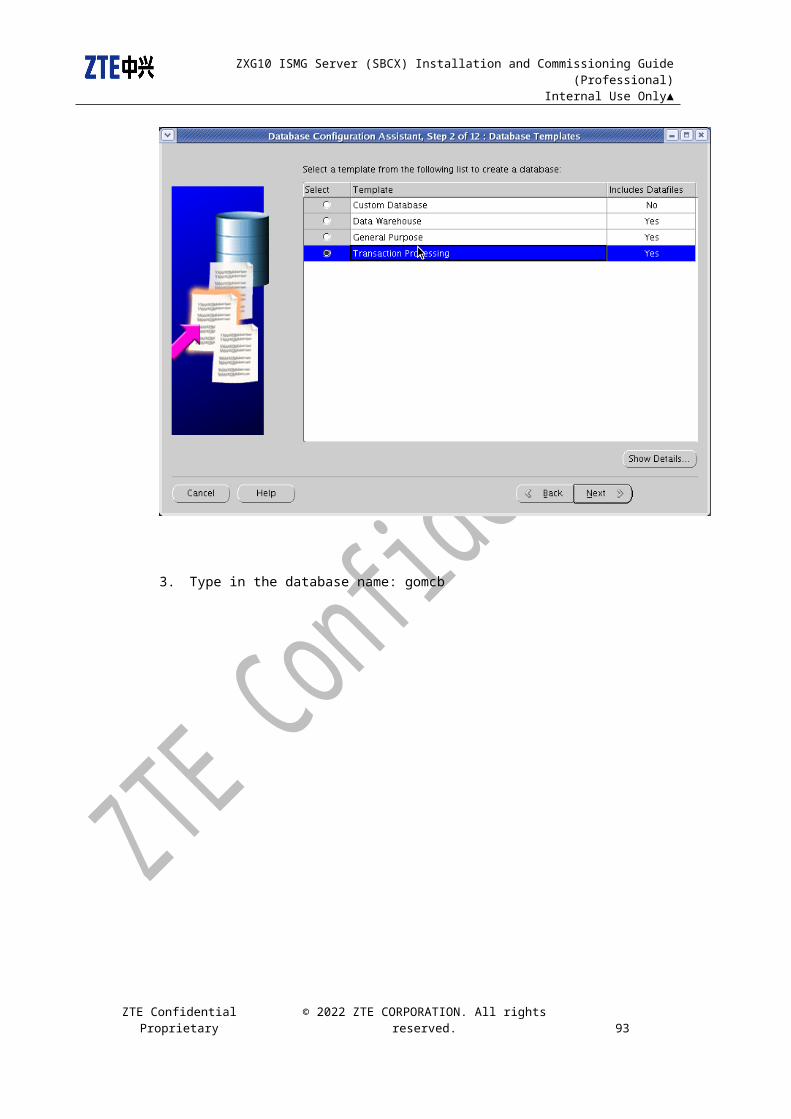
ZXG10 ISMG Server (SBCX) Installation and Commissioning Guide (Professional) Internal Use Only▲
If the script if run for the second time and Step1 is already completed, the script prints:
"step 1 rb_split_root ip already finished."
And then enters Step2. This situation applies in the following steps in case of re-execution of
script.
2.2.2 Configure NTP server.
step 2:
Modify /etc/sysconfig/iptables success
Restart iptables success
Input the EMS IP address (connected to OMCR/OMCB). If the upper-level EMS is not
available, input the IP address of 127.127.1.0.
Upper NTP Server IP: 10.62.100.45
Confirm the IP and type ‘y’ to continue the execution.
Upper NTP Server IP=10.62.100.45,are you sure? [y|n]: y
Modify /etc/ntp.conf success
Restart ntpd success
rb_split_root ntp success.
2.2.3 Configure the environment viarables of the /etc/profile file.
No information is to be input in this step.
step 3:
Modify /etc/profile success
rb_split_root profile success.
ZTE Confidential Proprietary © 2023 ZTE CORPORATION. All rights reserved. 102

ZXG10 ISMG Server (SBCX) Installation and Commissioning Guide (Professional) Internal Use Only▲
2.2.4 Stop the integrated R&B version
step 4:
To stop the integrated R&B version, type ‘y’ to continue the execution.
Stop GOMCR version,are you sure? [y|n]: y
......
Stop GOMCR version success
rb_split_gomcr stop success.
2.2.5 Modify OMCR database parameters.
For the 4G memory, allocate the database memory according to the following principle:
OMCR OMCB
DATABASE 30% 20%
Allocate the 8G memory according to the following principle:
OMCR OMCB
DATABASE 20% 20%
No information is to be input in this step.
step 5:
Current system memory=4G
SGA_TARGET=960M PGA_TARGET=240M
ZTE Confidential Proprietary © 2023 ZTE CORPORATION. All rights reserved. 103

ZXG10 ISMG Server (SBCX) Installation and Commissioning Guide (Professional) Internal Use Only▲
System altered.
System altered.
System altered.
Database closed.
Database dismounted.
ORACLE instance shut down.
ORACLE instance started.
Total System Global Area 1006632960 bytes
Fixed Size 1271228 bytes
Variable Size 620759620 bytes
Database Buffers 377487360 bytes
Redo Buffers 7114752 bytes
Database mounted.
Database opened.
Modify GOMCR database parameters success
rb_split_oracle gomcr success.
ZTE Confidential Proprietary © 2023 ZTE CORPORATION. All rights reserved. 104

ZXG10 ISMG Server (SBCX) Installation and Commissioning Guide (Professional) Internal Use Only▲
2.2.6 Confirm the R&B integrated version is V6.20.614c or a higher one.
If the integrated R&B version is V6.20.614c or a higher one, type ‘y’ to continue the
execution; otherwise, open a new login window to upgrade the integrated R&B version. After
the version upgrade, return to the window of R&B split script, type ‘y’ to continue the
execution.
step 6:
Upgrade OMCR version first,and then type 'y' to continue
Confirm the information, and type ‘y’ to continue the execution.
OMCR version already upgraded? [y|n]: y
OMCR version upgrade confirmed.
rb_split_prompt upgrade_omcr_ver success.
2.2.7 Modify OMCR JVM parameters.
Allocate the 4G JVM according to the following principle:
OMCR OMCB
CONSOLE JVM 128M 128M
FTPSERVER JVM 128M 128M
BACKUP JVM 256M 128M
UMS-SVR JVM 1000M 512M
Allocate the 8G JVM according to the following principle:
OMCR OMCB
CONSOLE JVM 128M 128M
FTPSERVER JVM 128M 128M
BACKUP JVM 256M 128M
UMS-SVR JVM 1400M 1024M
ZTE Confidential Proprietary © 2023 ZTE CORPORATION. All rights reserved. 105

ZXG10 ISMG Server (SBCX) Installation and Commissioning Guide (Professional) Internal Use Only▲
No information is to be input in this step.
step 7:
Current system memory=4G
UMS-SVR JVM=-Xmx1000m
Modify set-jvm.param.sh success
BACKUP JVM=-Xms128m -Xmx256m
Modify backup-linux.sh success
FTPSERVER JVM=$JAVA_OPTS -Xmx128m -Xms64m
Modify ftpserver-linux.sh success
CONSOLE JVM=-Xms64m -Xmx128m
Modify run-linux.sh success
rb_split_gomcr jvm success.
2.2.8 Modify OMCR IP binding configuration.
In this step, the following files are modified.
[gomcr]vi deploy/deploy-010muep.properties
muep-install-issplit=1 1 represents R&B split.
[gomcr]$vi deploy/deploy-gsmomcr01.properties
muep-common-sbcx-type=0 0 represents R in R&B split.
[gomcr]$vi deploy/deploy-999split.properties
ums.systemproperty.com.zte.ums.uep.localaddress=10.63.208.181 eth3 IP address
ums.systemproperty.com.zte.ums.bind.socket.client.ip=128.0.30.8 eth4 IP address
ZTE Confidential Proprietary © 2023 ZTE CORPORATION. All rights reserved. 106

ZXG10 ISMG Server (SBCX) Installation and Commissioning Guide (Professional) Internal Use Only▲
ums.services.bind.multi.local.addresses=128.0.30.8, 129.0.0.3 eth4,eth6 IP address
No information is to be input in this step.
step 8:
Modify deploy-010muep.properties success
Modify deploy-gsmomcr01.properties success
Modify deploy-999split.properties success
rb_split_gomcr ip success.
2.2.9 Start the integrated R&B version.
step 9:
GOMCR version is running,restart
If integrated R&B version is already running, confirm that it can be stopped, and then type ‘y’
to continue the execution.
Stop GOMCR version,are you sure? [y|n]: y
......
Stop GOMCR version success
Start GOMCR version success
rb_split_gomcr start success.
2.2.10 Create user gomcb.
Default user password: gomcb123
ZTE Confidential Proprietary © 2023 ZTE CORPORATION. All rights reserved. 107
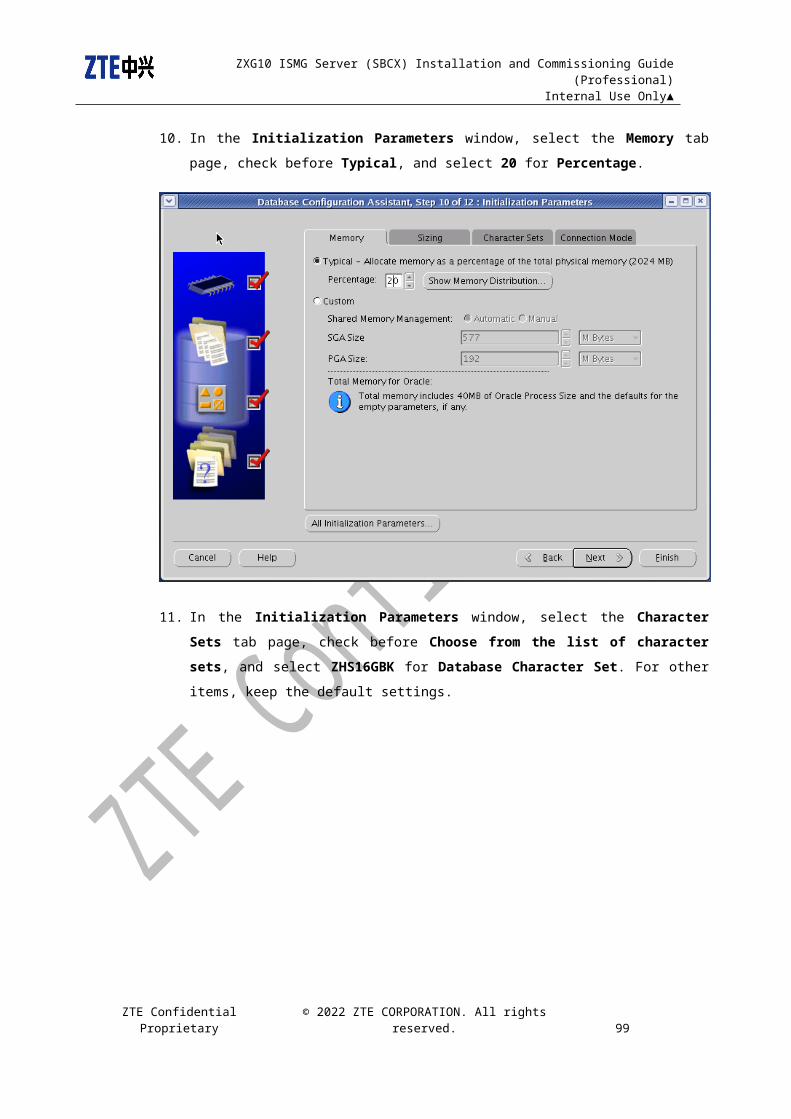
ZXG10 ISMG Server (SBCX) Installation and Commissioning Guide (Professional) Internal Use Only▲
No information is to be input in this step.
step 10:
Create group gomcb success
Create user gomcb success
rb_split_root gomcb success.
2.2.11 Create the independent OMCB database.
If the OMCB database is already created, type ‘y’ to continue the execution; otherwise,
open a new login window to create the OMCB database. After the creation of OMCB
database, return to the window of R&B split script, type ‘y’ to continue the execution.
step 11:
Install OMCB database first, and then type 'y' to continue
Confirm the information, and type ‘y’ to continue the execution.
OMCB database already installed? [y|n]:
Checking OMCB database success(GOMCB_SID=gomcb)
OMCB database installation confirmed.
rb_split_prompt install_omcb_db success.
2.2.12 Modify Net8 configuration.
In tnsnames.ora, add GOMCB, GOMCB_IP, and GOMCB_127.0.0.1.
No information is to be input in this step.
step 12:
ZTE Confidential Proprietary © 2023 ZTE CORPORATION. All rights reserved. 108

ZXG10 ISMG Server (SBCX) Installation and Commissioning Guide (Professional) Internal Use Only▲
Modify /oracleapp/oracle/product/10.2.0/network/admin/tnsnames.ora success
rb_split_oracle gomcb success.
2.2.13 Install the independent OMCB version.
Open a new login window. Refer to Chapter Error: Reference source not found and install the
server of the independent OMCB version. (It is not allowed to perform the installation in
Chapter7.2 before the content in Chapter7.1. If the new window is accidently closed, execute
the split script once again; the script directly enters the current step and continues the
unfinished installation process.)
When the server installation for the independent OMCB version is completed, return to the
window of the R&B split script.
Type ‘y’ to continue the execution.
step 13:
Install OMCB version first,and then type 'y' to continue
When the independent OMCB version is installed, type ‘y’ to continue the execution.
OMCB version already installed? [y|n]:
Modify /home/gomcb priviledge success
Modify /home/gomcb owner success
OMCB version installation confirmed.
rb_split_prompt install_omcb_ver success.
2.2.14 Modify OMCB JVM parameters.
Refer to the step of “Modify OMCR JVM parameters”.
ZTE Confidential Proprietary © 2023 ZTE CORPORATION. All rights reserved. 109

ZXG10 ISMG Server (SBCX) Installation and Commissioning Guide (Professional) Internal Use Only▲
No information is to be input in this step.
step 14:
Current system memory=4G
UMS-SVR JVM=-Xmx512m
Modify set-jvm.param.sh success
BACKUP JVM=-Xms64m -Xmx128m
Modify backup-linux.sh success
FTPSERVER JVM=$JAVA_OPTS -Xmx128m -Xms64m
Modify ftpserver-linux.sh success
CONSOLE JVM=-Xms64m -Xmx128m
Modify run-linux.sh success
rb_split_gomcb jvm success.
2.2.15 Modify OMCB IP parameters.
In this step, the following files are modified.
[gomcb]vi deploy/deploy-010muep.properties
muep-install-issplit=1 1 represents R&B split.
[gomcb]vi deploy/deploy-030guomcb.properties
muep-common-sbcx-type=1 1 represents B in R&B split.
[gomcb]$vi deploy/ deploy-999split.properties
ums.systemproperty.com.zte.ums.uep.localaddress=10.63.208.235 eth3:1 IP address
ums.systemproperty.com.zte.ums.bind.socket.client.ip=172.29.11.2 eth4:1 IP address
ZTE Confidential Proprietary © 2023 ZTE CORPORATION. All rights reserved. 110

ZXG10 ISMG Server (SBCX) Installation and Commissioning Guide (Professional) Internal Use Only▲
ums.services.bind.multi.local.addresses=172.29.11.2 eth4:1 IP address
No information is to be input in this step.
step 15:
File deploy-010muep.properties already configured
Modify deploy-030guomcb.properties success
Modify deploy-999split.properties success
rb_split_gomcb ip success.
2.2.16 Start the independent OMCB version
step 16:
GOMCB version is running,restart
If GOMCB is realy running, confirm that it can be stopped, and type ‘y’ to continue the
execution.
Stop GOMCB version,are you sure? [y|n]: y
2010-12-16 13:27:56,668
Stopping result:
-----------------------------
Stop ums[PID=21936] successfully.
-----------------------------
Stop ftp[PID=21962] successfully.
-----------------------------
ZTE Confidential Proprietary © 2023 ZTE CORPORATION. All rights reserved. 111
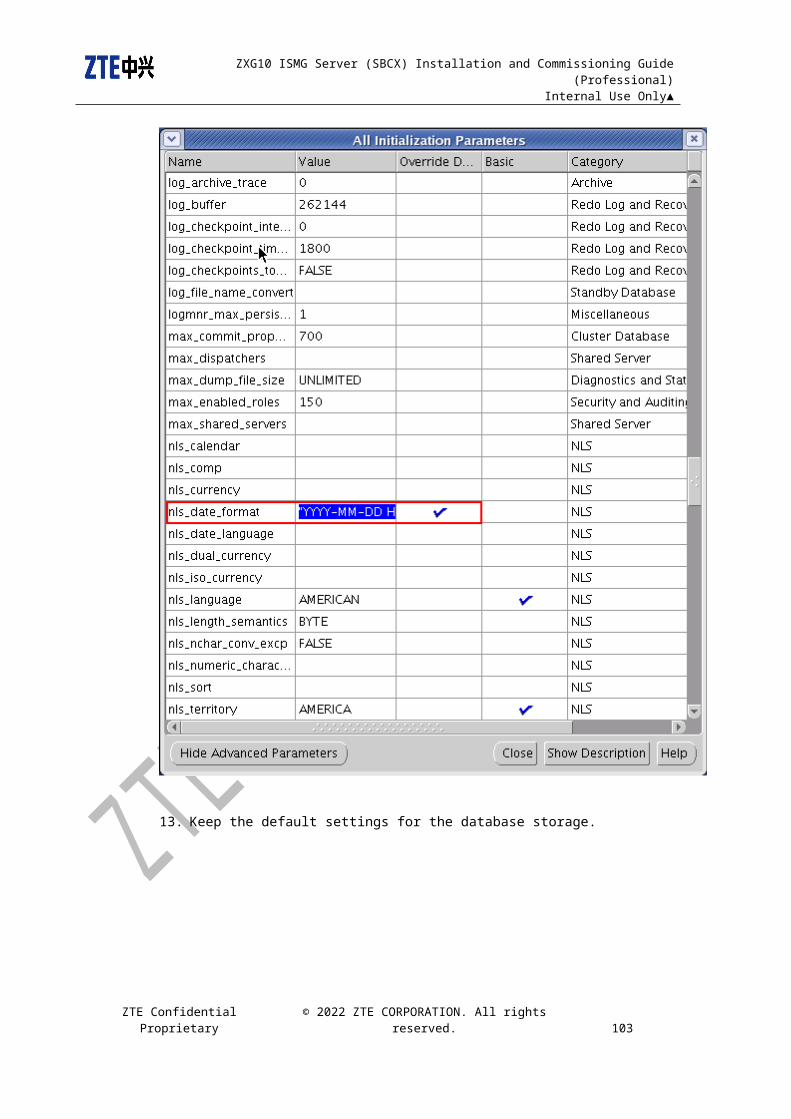
ZXG10 ISMG Server (SBCX) Installation and Commissioning Guide (Professional) Internal Use Only▲
2010-12-16 13:27:57,051 Close console successfully.
Stop GOMCB version success
Start GOMCB version success
rb_split_gomcb start success.
2.2.17 Set OMCR/OMCB version and database auto-start.
No information is to be input in this step.
step 17:
rb_split_root autostart success.
3. Perform checks after the R&B split.
The split script runs some checks by itself after its execution. If all the items pass the checks,
the script prints:
"Passed."
********************PostCheck Process**************************
Passed.
The logs of R&B split process are recorded under directory /tmp.
Split process is recorded in the log file /tmp/rb_split_xxxxxxxxx.log.
7.1.3 FAQ
1. Can we execute one of the auxiliary scripts like rb_split_root.sh independenly?
ZTE Confidential Proprietary © 2023 ZTE CORPORATION. All rights reserved. 112

ZXG10 ISMG Server (SBCX) Installation and Commissioning Guide (Professional) Internal Use Only▲
Do not execute any of the the four auxiliary scripts independenly. Execute
rb_split.sh only.
2. What should we do if an error occurs during the execution of the script?
If an error occurs during the execution, the script prints the information of the error. We
can correct the error and execute the rb_split.sh script once again.
3. Can the R&B split script be executed more than once?
The R&B split script can be executed more than once, but the files started with
rb_split in their names under the directory /tmp/ must be deleted before the
execution of the script.
4. Are there any logs genereated during the execution of the script?
No matter the script execution ends in a success or a failure, a log file
rb_split_yyyymmdd.log will be generated under the directory /tmp. The script
prints the full path of the log file.
5. If eth3:1 and eth4:1 are already configured, will any errors occur during the script
execution?
If the script detects that eth3:1 and eth4:1 are already configured, it displays the
following prompt:
Interface eth3:1 exists(IP=10.62.48.195 NETMASK=255.255.252.0),modify? [y|n]:
If no modifications are needed, type ‘n’ to accept the existing configuration; if any
modifications are needed, type ‘y’ to perform modifications.
6. When a NE agent is created on NetNumen M31 V12, which type should be selected for
the independent OMCB version?
The independent OMCB version (after R&B split) should be created as MEDIATOR NE
agent on the upper-level NetNumen M31 V12.
7. How do we solve the problem when the execution of R&B split script fails in Step12?
Delete the two lines #SPLIT MODIFICATION BEGIN and #SPLIT MODIFICATION
BEGIN in tnsnames.ora.
ZTE Confidential Proprietary © 2023 ZTE CORPORATION. All rights reserved. 113
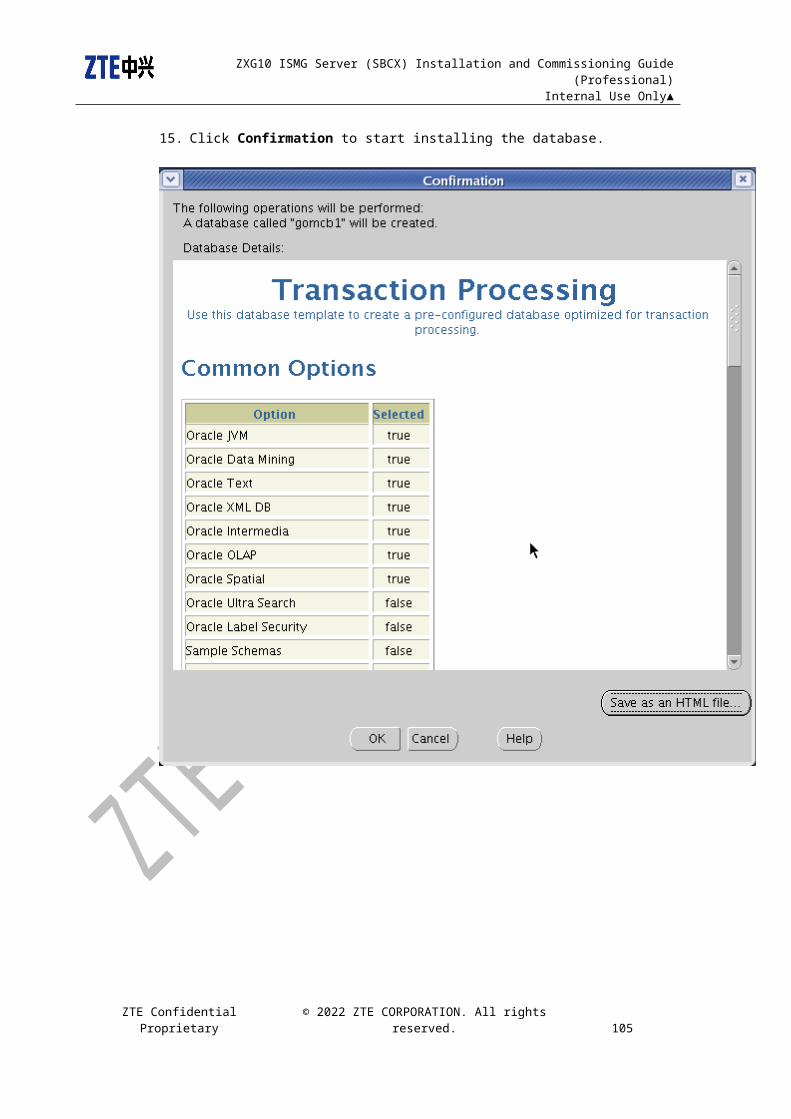
ZXG10 ISMG Server (SBCX) Installation and Commissioning Guide (Professional) Internal Use Only▲
8. How do we solve the problem when the execution of R&B split script fails in Step14?
The failure in Step14 is usually caused by an error in the environment viarables. To
solve the problem, we can delete the two lines #SPLIT MODIFICATION BEGIN and
#SPLIT MODIFICATION END in profile. After the deletion, the script execution
returns normal.
7.1.4 Follow-up Checks
7.1.4.1 Post-installation Check on the Independent OMCB Version
Execute the following commands as user gomcb.
To check the process of the independent OMCB version
$ps -ef | grep java | grep gomcb
The execution result contains three processes:
BoostMain
FtpServer
BootMain
To stop the independent OMCB version
$pkill -9 java //Use user gomcb only; the use of user root will terminate the gomcr
process.
pkill: 4273 - Operation not permitted
pkill: 5632 - Operation not permitted
pkill: 5645 - Operation not permitted //The current user gomcb is not entitled to
terminate the gomcr processes.
To start the independent OMCB version
$ cd /home/gomcb/ZXGOMCB/ums-svr/bin/
ZTE Confidential Proprietary © 2023 ZTE CORPORATION. All rights reserved. 114
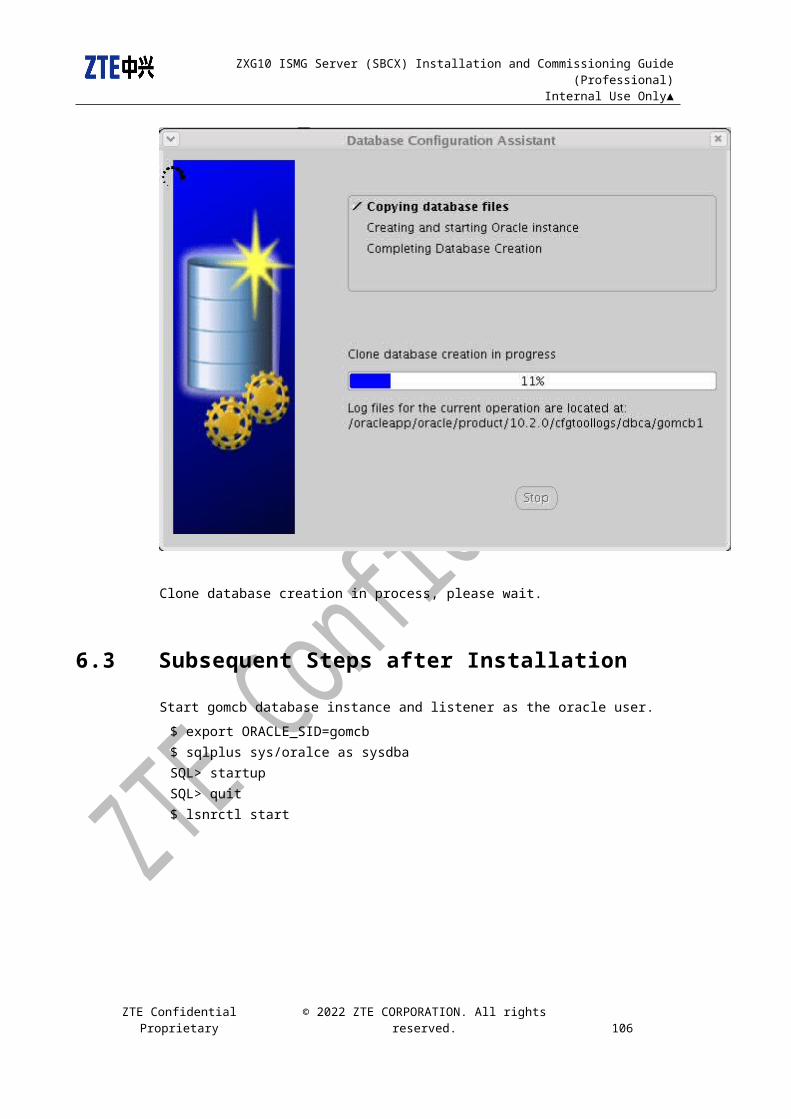
ZXG10 ISMG Server (SBCX) Installation and Commissioning Guide (Professional) Internal Use Only▲
$ nohup ./console-linux.sh &
7.1.4.2 Check on Auto-start#cd /etc/init.d#vi ismg
In case of special on-site environment, the environment viarables GOMCR_HOME and
GOMCB_HOME in the script should be modified accordingly.
Modification of Environment Viarables Based on the Actual Situations
dbora ORA_HOME=/oracleapp/oracle/product/10.2.0
ORA_OWNER=oracle
GOMCR_SID=gomcr
GOMCB_SID=gomcb
ismg GOMCR=gomcr
GOMCR_OMCHOME=/home/gomcr/ums-svr
GOMCB=gomcb
GOMCB_OMCHOME=/home/gomcb/ZXGOMCB/ums-svr
Execute the following scripts to check whether the database can be started and applied.
#/etc/init.d/dbora stop
#/etc/init.d/dbora start
#/etc/init.d/ismg stop
#/etc/init.d/ismg start
Finally, reboot the server and check whether it can start automatically.
ZTE Confidential Proprietary © 2023 ZTE CORPORATION. All rights reserved. 115

ZXG10 ISMG Server (SBCX) Installation and Commissioning Guide (Professional) Internal Use Only▲
7.2 Server Installation for the Independent OMCB
Version
7.2.1 Preparations
As user gomcb, use ftp and bin to upload the software file zxomcb.zip of the
independent OMCB version to /home/installtmp/.
Telnet to the SBCX board, switch to user root, unzip the version file and make it executable.
#su -
#cd /home/installtmp/
#unzip zxomcb.zip#chmod -R 755 zxomcb
Start the VNC as user root.
#vi .vnc/xstartup
#!/bin/sh
# Uncomment the following two lines for normal desktop:
# unset SESSION_MANAGER
# exec /etc/X11/xinit/xinitrc
[ -x /etc/vnc/xstartup ] && exec /etc/vnc/xstartup
[ -r $HOME/.Xresources ] && xrdb $HOME/.Xresources
xsetroot -solid grey
vncconfig -iconic &
xterm -geometry 80x24+10+10 -ls -title "$VNCDESKTOP Desktop" &
gnome-session&
ZTE Confidential Proprietary © 2023 ZTE CORPORATION. All rights reserved. 116

ZXG10 ISMG Server (SBCX) Installation and Commissioning Guide (Professional) Internal Use Only▲
Replace the original text with gnome-session, and save and quit.
#vncserver
New 'SHBSC001:1 (oracle)' desktop is SHBSC001:1
Starting applications specified in /home/oracle/.vnc/xstartup
Log file is /home/oracle/.vnc/SHBSC001:1.log //1 represents the real Port
Input and set the password for visiting the VNC service.
Open VNC Client, input IP:Port and the password set previously.
If the VNC Client is not available, we can use the VNC program \ums-clnt\tools\
RemoteAccessOMMOS\muep-gct-wsf.par\conf\zh_CN bundled in the integrated R&B
version.
Open a terminal window in SBCX, and switch to user root to prepare for installing the
independent OMCB version.
ZTE Confidential Proprietary © 2023 ZTE CORPORATION. All rights reserved. 117

ZXG10 ISMG Server (SBCX) Installation and Commissioning Guide (Professional) Internal Use Only▲
7.2.2 Installation Procedure
Note: The installation software must be executed by user root only. Otherwise, an error may
orror.
The OMCB version installation procedure is as follows:
1. Execute install-linux.sh
#cd /home/installtmp/zxomcb
#./install-linux.shEnter the window for installing the independent OMCB.
2. The Welcome window
Enter the Welcome window and select a language. The language selected here
represents the language of the installation program. It is not the language of the OMCB
software to be installed.
3. The user license agreement window
ZTE Confidential Proprietary © 2023 ZTE CORPORATION. All rights reserved. 118

ZXG10 ISMG Server (SBCX) Installation and Commissioning Guide (Professional) Internal Use Only▲
Click Next in the above window to enter the User License Agreement window, and then
select Accept.
4. The window for selecting the product to be installed
Click Next in the above window, enter the window of Please Select Product, and select
the Chinese Edition (or English Edition).
Note: The SN: ZXOMCBV4.09.21.05 in the window is just an installation instance. It is
decided by the version to be installed. SN: ZXOMCBV4.09.21.05P01 should be
displayed in the window for the installation of 05P01.
SN: ZXOMCBV4.09.21.05
ZTE Confidential Proprietary © 2023 ZTE CORPORATION. All rights reserved. 119
ZXG10 ISMG Server (SBCX) Installation and Commissioning Guide (Professional) Internal Use Only▲
5. The window for selecting a product module
Click Next in the above window, enter the window of Please Select Product Module,
and select all the modules.
ZTE Confidential Proprietary © 2023 ZTE CORPORATION. All rights reserved. 120
ZXG10 ISMG Server (SBCX) Installation and Commissioning Guide (Professional) Internal Use Only▲
6. The window for selecting an installation path
Click Next in the above window, enter the window of Please Set Installation Path, and
select installation path /home/gomcb/ZXGOMCB/. If the path does not exist, it will be
created automatically.
ZTE Confidential Proprietary © 2023 ZTE CORPORATION. All rights reserved. 121
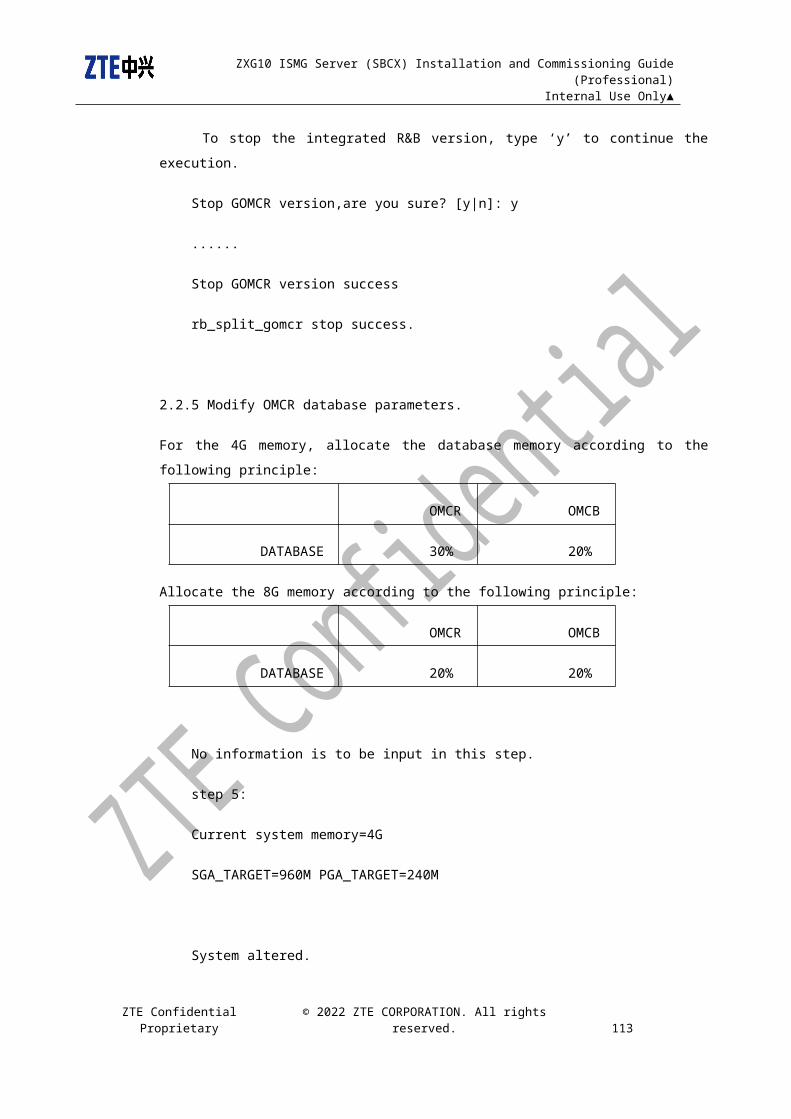
ZXG10 ISMG Server (SBCX) Installation and Commissioning Guide (Professional) Internal Use Only▲
7. The window for setting the application database
First choose the database type: ORACLE.
IP Address: eth3:1
DataBase Instance No. (SID): gomcb
SystemPassword of DataBase: oracle
Check the box before Database and Server on the Same Machine.
ZTE Confidential Proprietary © 2023 ZTE CORPORATION. All rights reserved. 122
ZXG10 ISMG Server (SBCX) Installation and Commissioning Guide (Professional) Internal Use Only▲
8. The window for deleting the initial data
Click Next in the above window. If the connection to the database fails, a message box
pops up. In this case, we need to check wheter the IP Address, DataBase Instance No.
(SID), and System Password of DataBase are correct.
After the wrong information is corrected, click Next.
If the selected database is already installed with the product-related data, the following
message box will pop up.
ZTE Confidential Proprietary © 2023 ZTE CORPORATION. All rights reserved. 123
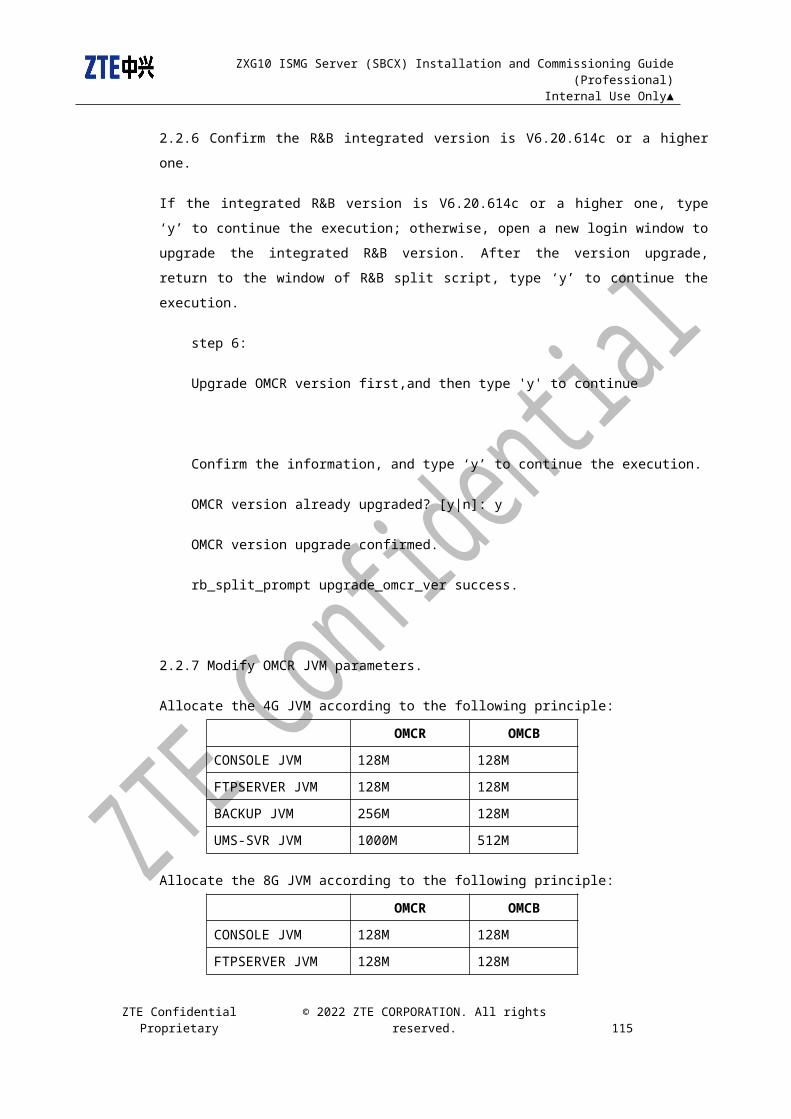
ZXG10 ISMG Server (SBCX) Installation and Commissioning Guide (Professional) Internal Use Only▲
Click OK, and enter the window of Drop Initial Data.
This step is to delete the OMCB database installed previously and clear the disk space,
in order to pass the check on disk space.
9. The window for choosing a database module
Click Next in the above window, and enter the window of Database Module Set.
Choose the Small Module for Database Module Set.
ZTE Confidential Proprietary © 2023 ZTE CORPORATION. All rights reserved. 124
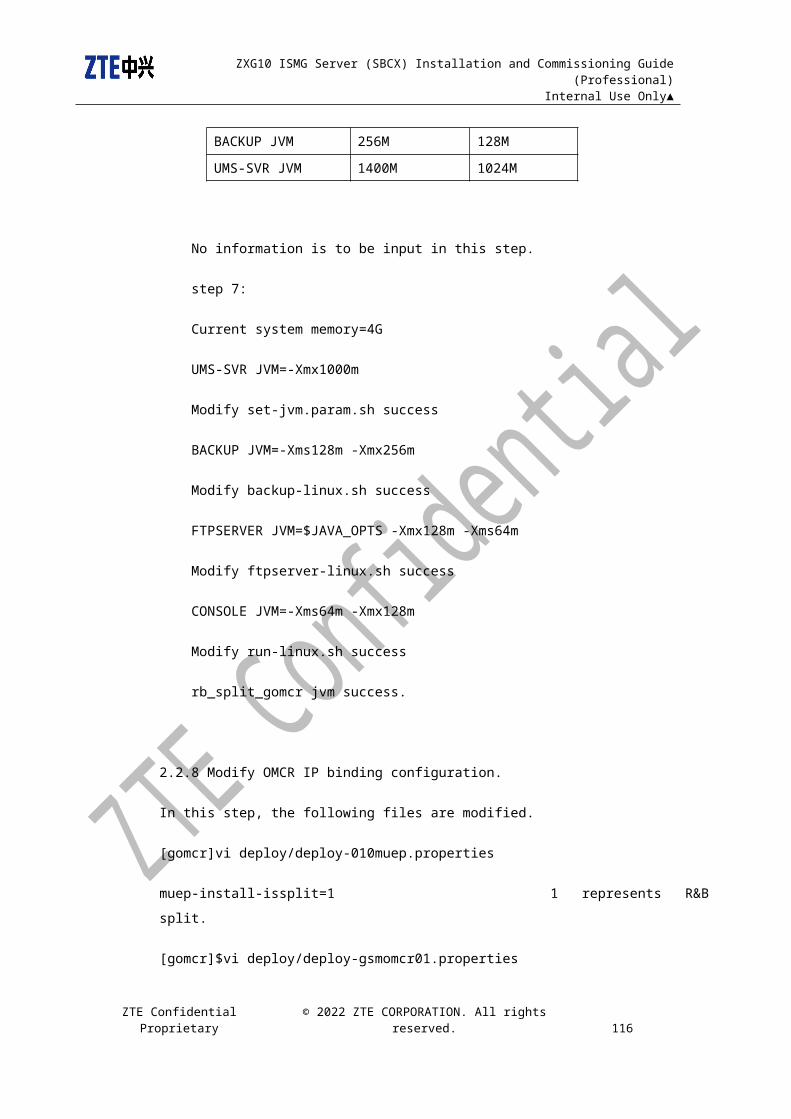
ZXG10 ISMG Server (SBCX) Installation and Commissioning Guide (Professional) Internal Use Only▲
Set the installation path as /oracledata/gomcb.
ZTE Confidential Proprietary © 2023 ZTE CORPORATION. All rights reserved. 125

ZXG10 ISMG Server (SBCX) Installation and Commissioning Guide (Professional) Internal Use Only▲
10. The window for viewing the installation information
Click Next in the above window, and enter the window of Please View Install
Inforamtion.
11. The window for installing the application database server
Click Next in the above window, and enter the window of Install Application Database
Server.
ZTE Confidential Proprietary © 2023 ZTE CORPORATION. All rights reserved. 126

ZXG10 ISMG Server (SBCX) Installation and Commissioning Guide (Professional) Internal Use Only▲
12. The window for installing the application program
When the script of installing the application database server is executed, click Next in
the above window, and enter the window of Install the Application Program.
ZTE Confidential Proprietary © 2023 ZTE CORPORATION. All rights reserved. 127
ZXG10 ISMG Server (SBCX) Installation and Commissioning Guide (Professional) Internal Use Only▲
13. The window for configuring OMCB FTP
Click Next in the above window, enter the window of OMCB FTP Configure, and set
the eth4:1 address for connecting with SDR.
ZTE Confidential Proprietary © 2023 ZTE CORPORATION. All rights reserved. 128

ZXG10 ISMG Server (SBCX) Installation and Commissioning Guide (Professional) Internal Use Only▲
14. The window for configuring the master clock server
Click Next in the above window, and enter the window of Master Clock Sync Server
Configure.
The Master Clock Sync Server IP is set for synchronizing the time at the Server and
the Client. This window exists only when the Client or both the Client and the Server are
installed; it does not exist when only the Server is installed.
Set the Master Clock Sync Server IP to be the eth3:1 address.
ZTE Confidential Proprietary © 2023 ZTE CORPORATION. All rights reserved. 129

ZXG10 ISMG Server (SBCX) Installation and Commissioning Guide (Professional) Internal Use Only▲
15. The window for choosing the installation scene
Choose Yes for RB split or not.
Choose No for Back up or not.
ZTE Confidential Proprietary © 2023 ZTE CORPORATION. All rights reserved. 130

ZXG10 ISMG Server (SBCX) Installation and Commissioning Guide (Professional) Internal Use Only▲
16. The window for configuring the operation environment
Click Next in the above window, and enter the window of Config Environment.
ZTE Confidential Proprietary © 2023 ZTE CORPORATION. All rights reserved. 131
ZXG10 ISMG Server (SBCX) Installation and Commissioning Guide (Professional) Internal Use Only▲
17. The window for finishing the installation
18. Starting OMCB
Server:
Open the directory /home/gomcb/ZXGOMCB/ums-svr/bin at the terminal window,
type the following command to check whether the server can start normally.
# nohup ./console-linux.sh &
19. Viewing the logs
The installation logs are saved under the path /tmp/setup-log. setup.log is the
execution log of the installation program; others are the execution logs of the database
scripts.
Return to the window of R&B split script in 2.2.13 of 7.1.2Implementation Procedure and
continue the execution of the script.
ZTE Confidential Proprietary © 2023 ZTE CORPORATION. All rights reserved. 132
ZXG10 ISMG Server (SBCX) Installation and Commissioning Guide (Professional)
Internal Use Only
8 Software Installation of the Independent OMCB Version ClientThis chapter introduces the software installation of the independent OMCB
Client.
8.1 Preparation
Before installing the software of the independent OMCB Client, check and
prepare for the following items:
1. The operating system is properly installed and runs normally.
2. Check whether the hardware of the server meets the requirement and is in
good condition.
3. Obtain the software of the independent OMCB version.
4. On partition D of the Client, create a directory D:\CLIENT\GOMCB as the
installation destination of the software of the independent OMCB Client.
8.2 Client Installation1. Copy the directory files jdk-windows and ums-clnt to the installation
destination of the software of OMCB Client. Usually the destination is D:\
CLIENT\GOMCB on the Client.
2. Delete the directory runtime from D:\CLIENT\GOMCB\ums-clnt\deploy.
3. Clear the directory D:\CLIENT\GOMCB\ums-clnt\log.
4. Clear the directory D:\CLIENT\GOMCB\ums-clnt\temp.
5. As for the Windows operating system,
Execute D:\CLIENT\GOMCB\ums-clnt\bin\run.bat to run the Client.
ZTE Confidential Proprietary © 2023 ZTE CORPORATION. All rights reserved. 158
ZXG10 ISMG Server (SBCX) Installation and Commissioning Guide (Professional)
Internal Use Only
8.3 Modifying the Language Environment
Variables of Client (Optional)
Usually the default setting (Chinese language) is adopted
(ums.locale=zh_CN). If language environment at the Client is English, the
language parameter of the following configuration files (under
…/ums-clnt/deploy/) should be correctly configured.
1. Modify deploy-010muep.properties file
Change the locale language:
ums.locale=en_US
2. Modify deploy-030guomcb.properties file
Change the locale language:
ums.locale=en_US
8.4 Shutting Down OMCB Client
From the interface of starting OMCB, choose System->Exit, or click to shut
down OMCB Client.
9 Common Commands & Solutions to Common Problems
9.1 Common Linux Commands
1. ls: List contents of directories.
Eg: $ls
List the files in the current directory.
ZTE Confidential Proprietary © 2023 ZTE CORPORATION. All rights reserved. 159
ZXG10 ISMG Server (SBCX) Installation and Commissioning Guide (Professional)
Internal Use Only
2. cp: Copy file1 to file2, or copy one or more files to the same names under
directory.
Eg: $cp src dest
Copy an src file as a dest file.
3. rm: Delete one or more files.
Eg: $rm abc
Delete file abc.
4. Mv: Move or rename files and directories.
Eg: $mv abc ../bcd
Move file abc in the current directory to a higher-level directory
and rename it as bcd.
5. man: Display information from the online reference manuals.
Eg: $man ls
Display the help information of ls.
6. who: Show who is logged in to the system.
Eg: $who
List the users who are logged in to the system.
7. mkdir: Create one or more directories.
Eg: # mkdir newdir
Create a directory named newdir in the durrent directory.
8. rmdir: Delete the named directories (not the contents).
Eg: # rmdir dir1
The directory named dir1 is deleted from the parent directory
and must be empty. If directory dir1 is not empty, rm -fr dir1 can
be used instead.
9. chmod: Change the access mode (permissions) of one or more files.
Eg: #chmod 700 abc
ZTE Confidential Proprietary © 2023 ZTE CORPORATION. All rights reserved. 160
ZXG10 ISMG Server (SBCX) Installation and Commissioning Guide (Professional)
Internal Use Only
Change the mode of file abc to be 700. Only the owner of a file
or a privileged user may change its mode.
10. chown: Change the owner of one or more files to a new owner.
Eg: #chown omc abc
Change the owner of file abc to omc.
11. chgrp: Change the group of one or more files to a new group.
Eg: #chgrp omc abc
Change the group of file abc to omc.
12. pwd: Print the full pathname of the current working directory.
Eg: $pwd
Print the full pathname of the current working directory.
13. tail: Print the last X lines of the named file.
Eg: $tail -f abc
Print the last f lines of file abc and monitor the changes of the
file. Display the content newly added to the file.
Eg: $tail -100 abc
Print the last 100 lines of file abc.
14. ps: Report on active processes.
Eg: $ps -U omc
Report on all the active processes of user omc. -U represents
user.
15. cat: Read one or more files and print them on standard output.
Eg: $cat abc
Read file abc and print it on the screen.
16. date: Print the current date and time.
Eg: $date
The current time is printed as follows:
ZTE Confidential Proprietary © 2023 ZTE CORPORATION. All rights reserved. 161

ZXG10 ISMG Server (SBCX) Installation and Commissioning Guide (Professional)
Internal Use Only
2003 Dec 10, Tuesday 13:02:41 CST
$date 091812002001
Set the current time to be Sep 18 12:00:00 2001.
17. df: Report the amount of free disk space available on all mounted
filesystems or on given name.
Eg: $df -k
Print the free and used disk space in kbyte.
18. du: Print disk usage (as the number of 1KB blocks used by each named
directory and its subdirectories).
Eg: $du -ks dir1
Print the the size of bytes used by directory dir1 in kbyte.
19. tar: Copy files to or restore files from an archive medium. The suffix of a
tar file is tar.
Eg: $tar -cvf a.tar dir1 dir2 file1
Copy directory dir1, directory dir2, and file1 to an archive a. tar.
tar command is only used for adding files or directories to an
archive, but not compress them.
Eg: $tar -xvf a.tar
Extract a.tar in the current directory to display dir1, dir2, and
file1.
20. gzip/gunzip: Compress/uncompress specified files. The compressed file is
renamed to filename.gz.
Eg: $gzip a.tar
Compress file a.tar and name it a.tar.gz. Note: After being
compressed to a.tar.gz, the original file a.tar is automatically
deleted.
Eg: $gunzip a.tar.gz
Uncompress file a.tar.gz and name it a.tar. After being
uncompressed to a.tar, the original file a.tar.gz is automatically
deleted.
ZTE Confidential Proprietary © 2023 ZTE CORPORATION. All rights reserved. 162

ZXG10 ISMG Server (SBCX) Installation and Commissioning Guide (Professional)
Internal Use Only
21. compress/uncompress: Compress/uncompress specified files. The
compressed file is renamed to filename.z.
Eg: $compress a.tar
Compress file a.tar and name it a.tar.Z.After being compressed
to a.tar.Z, the original file a.tar is automatically deleted.
Eg: $uncompress a.tar.Z
Uncompress file a.tar.Z and name it a.tar. After being
uncompressed to a.tar, the original file a.tar.Z is automatically
deleted.
22. su: Create a shell with the effective user.
Eg: $su - oracle
Create yourself to be user oracle with commands. If no user
name is typed after su, the user will be root.
23. kill: Terminate one or more processes.
Eg: $kill -9 1033
Kill process1033; the process ID can be queried through ps. -9
is used to kill a process that a plain kill doesn’t terminate.
24. shutdown: Reboot the system.
Eg: # shutdown -y -g 0 -i 6
Reboot the system.
25. reboot: Close out filesystems, shut down the system, then reboot the
system.
Eg: # reboot
Shut down and reboot the system.Compared with shutdown,
reboot immediately stops all processes, which may cause the
loss of some process data. It is suggested that shutdown be
used to shut down and reboot the system.
26. stop+a: Terminate system operation.
Eg: OKstop+a
ZTE Confidential Proprietary © 2023 ZTE CORPORATION. All rights reserved. 163
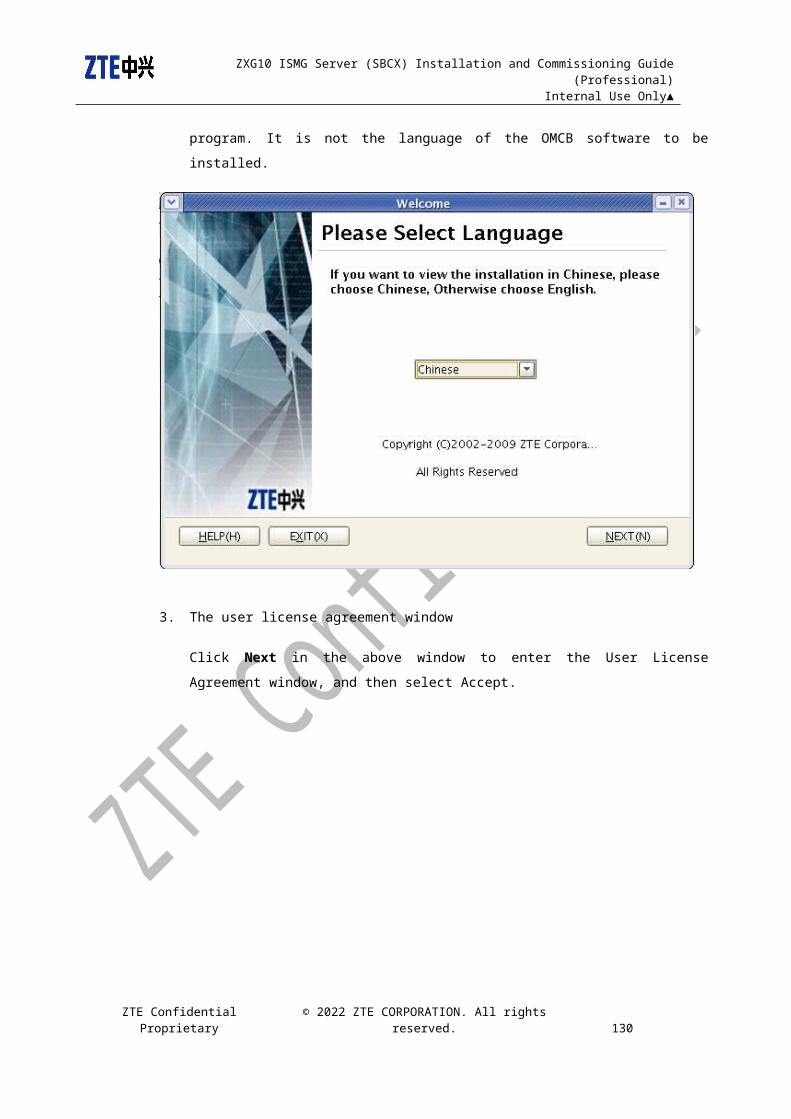
ZXG10 ISMG Server (SBCX) Installation and Commissioning Guide (Professional)
Internal Use Only
Under any circumstances, stop+a can terminate the operation
of solaris system, and display prompt OK>.
27. boot: Boot the system.
Eg: OK boot cdrom
With prompt OK, execute the command to boot the system from
the CDROM.
28. id: Display information (ID, name) about yourself or another user.
Eg: $id
uid=1005(omc) gid=10(staff)
Display the information (ID, name) of the current user.
29. passwd: Create or change a password associated with a user name.
Eg: $passwd omc
Change the password of the omc user. Type the original
password of user omc and then type the new password twice.
30. ln: Create pseudonyms (links) for files, allowing them to be accessed by
different names.
Eg: $ln –s /net/138.1.1.1$OMCHOME/tmp/ftp $OMCHOME
/tmp/ftp
Create a link from the directory $OMCHOME/tmp/ft on the host
13.1.1.1 to the directory $OMCHOME/tmp/ftp on the current
server.
31. ouch: For one or more files, update the access time and modification time
(and dates) to the current time and date.
Eg: $touch test
If the test file exists, the touch command updates its time
stamp to the current time.If the test file does not exist, the
command will create one.
32. groupadd: Creaete one or more user groups.
Eg: $groupadd –g 1000 staff
ZTE Confidential Proprietary © 2023 ZTE CORPORATION. All rights reserved. 164

ZXG10 ISMG Server (SBCX) Installation and Commissioning Guide (Professional)
Internal Use Only
Create user group staff with ID 1000.
33. useradd: System administration command. Create new user accounts or
update default account information.
Eg: $useradd –d /export/home/oracle –m –g oinstall oracle
Create a user oracle, which belongs to the oinstall user
group, and set /export/home/oracle as the main directory
of user oracle.
34. ldd: Display a list of the shared libraries each program requires.
Eg: $ldd amp
Display all the files that can be shared to the executable file
amp.
35. format: A disk partition and maintenance tool.
Eg: $format
The system displays the format menu. With the prompts from
the menu, the user performs operations.
36. prtvtoc/fmthard: Mirror disk partition.
Eg: $ prtvtoc –h /dev/rdsk/c0t0d0s2 | fmthard -s -
/dev/rdsk/c0t1d0s2
Copy the partition table of the system booting disk c0t0d0s2 to
the mirror disk c0t1d0s2.
37. metainit: Create a mirror of one file system.
Eg: $ metainit –f d10 1 1 c0t0d0s0
$metainit –f d20 1 1 c0t1d0s0
$metainit d30 -m d10
Create a one-to-one cascade for the c0t0d0s0 partition and
c0t1d0s0 partition respectively. dxx is the equipment ID, and
it can be an arbitrary value. And then create the mirror of
metadevice and add the mirror device from d10 to d30.
38. metaroot: Update the /etc/vfstab file and /etc/system file.
ZTE Confidential Proprietary © 2023 ZTE CORPORATION. All rights reserved. 165

ZXG10 ISMG Server (SBCX) Installation and Commissioning Guide (Professional)
Internal Use Only
Eg: $ metaroot d30
After the metainit command is executed, use metaroot to
update the two files, which cannot be manually edited.
39. lockfs: Redirect the system to mount mirror.
Eg: $lockfs –fa
$init 6
lockfs: Redirect the system to mount mirror.
40. metattach: Add the mirror device to the mirror.
Eg: $metattach d30 d20
Attach a second mirror device to the mirror. The data on the
disk will be synchronized with the mirrored disk from the booting
disk.
41. metadb: Create a copy of the state database.
Eg: $metadb -a -f -c2 /dev/dsk/c0t0d0s3 /dev/dsk/c0t1d0s3
Create a copy of the state database.
42. newfs: Create a new UFS file system.
Eg: $newfs -i 8192 -c 256 /dev/md/rdsk/d7
Create a new UFS file system.
Refer to the Help manual of Linux system for more details.
vi: A screen-oriented text editor.
Eg: $ vi example.c
Type:
#include
main ( )
{ int k ;
~
“ example.c” [ New File]
We enter the command mode when we enter vi, which means the
system is waiting for command input, not text input. Any letters
input now are explained as commands. The cursor stays at the
ZTE Confidential Proprietary © 2023 ZTE CORPORATION. All rights reserved. 166
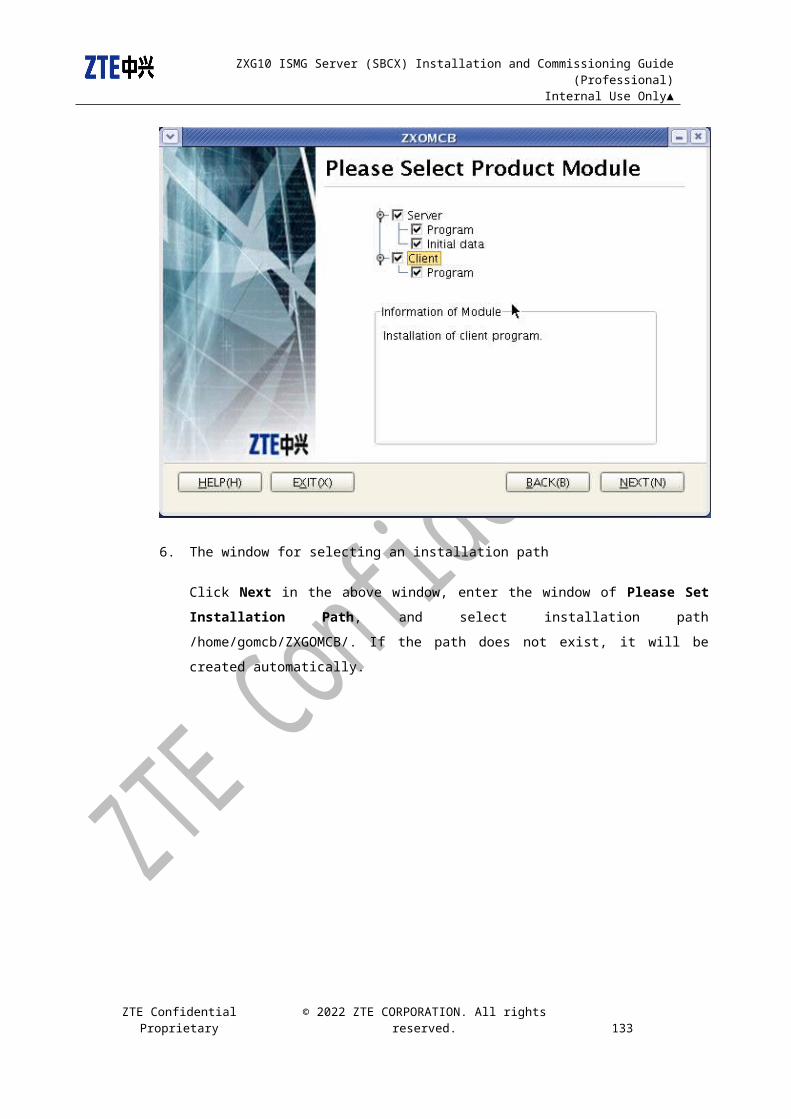
ZXG10 ISMG Server (SBCX) Installation and Commissioning Guide (Professional)
Internal Use Only
beginning of the first line. There is a “~” at the beginning of the
other lines, which means the line is blank. The last line is
referred as the state line, which indicates the name of the
current file being edited and its state.
finger: Display data about one or more users that log in to the current
system.
Eg: $finger
Display data about one or more users that log in to the current
system.
9.2 Common Oracle Commands
9.2.1 Starting Oracle Service
The operation procedure is as follows:
1. Log in to the server as Oracle user.
2. Run the following command.
$ sqlplus /nolog
3. Run the following command and connect to the database as user sys.
sql>connect sys/oracle as sysdba;
4. Run the following command to start the database.
sql>startup
5. Run the following command to exit the database.
sql>exit
9.2.2 Closing Oracle Service
The operation procedure is as follows:
1. Log in to the server as user Oracle.
2. Run the following command.
ZTE Confidential Proprietary © 2023 ZTE CORPORATION. All rights reserved. 167
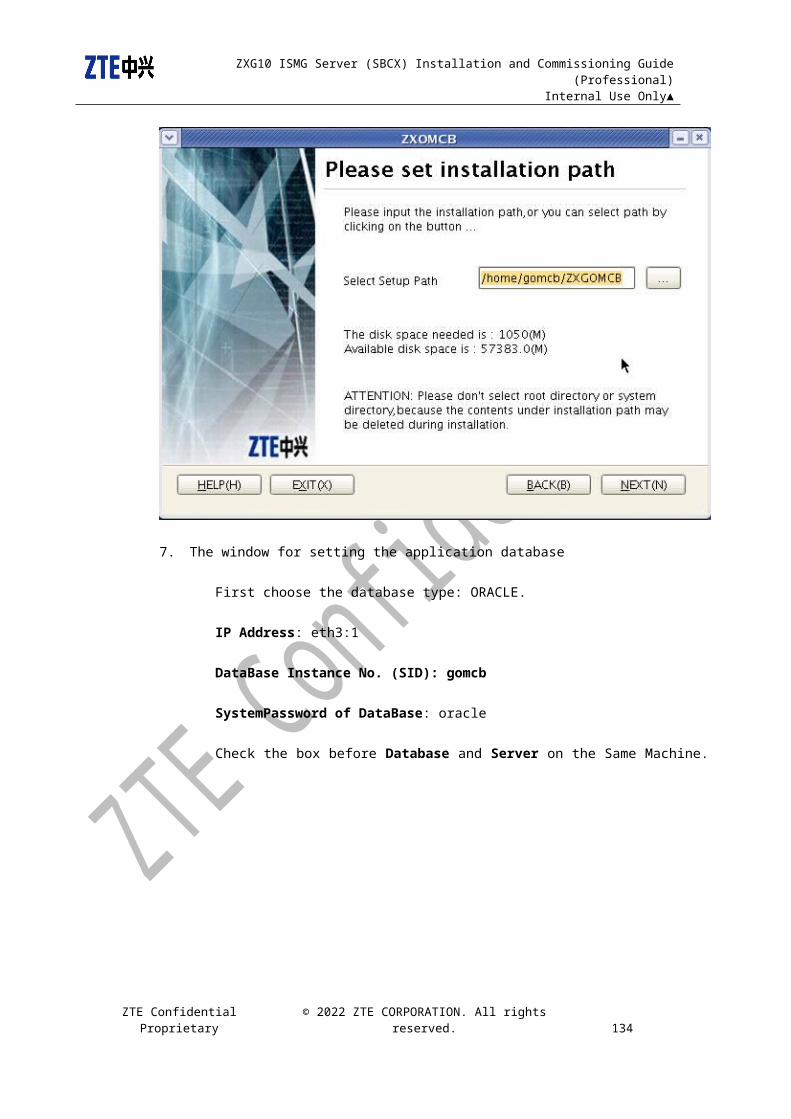
ZXG10 ISMG Server (SBCX) Installation and Commissioning Guide (Professional)
Internal Use Only
$ sqlplus /nolog
3. Run the following command and connect to the database as user sys.
sql>connect sys/oracle as sysdba;
4. Three ways to shut down the database.
sql>shutdown normal
sql>shutdown immediate
sql>shutdown abort
Note: sql>shutdown normal is used to close the processes,
cancel the visits from all users, and wait until all the users finish their visit
requests and are disconnected with the server. sql>shutdown
immediate is used to close the database immediately. The SQL
statements being executed are terminated immeditately. The transactions
to be submitted will be rolled back. sql>shutdown abort is used in
case of emergency when the other two options cannot shut down the
database. When it is used, the SQL statements will be terminated
immediately; but the transactions to be submitted will not be rolled back,
and they will be recovered when the database is started again. For the on-
site application, shutdown immediate is recommended.
5. Run the following command to exit the Oracle Server Manager.
sql >exit
9.2.3 Start/Query/Close of Oracle Listener
The operation procedure is as follows:
Log in to the server as user Oracle.
1. Run the following command to start Oracle Listener.
$lsnrctl start
Run the following command to query Oracle Listener.
ZTE Confidential Proprietary © 2023 ZTE CORPORATION. All rights reserved. 168

ZXG10 ISMG Server (SBCX) Installation and Commissioning Guide (Professional)
Internal Use Only
$lsnrctl status
2. Run the following command to stop Oracle Listener.
$lsnrctl stop
9.3 Start/Close of the Application Service of
the Integrated R&B Version
9.3.1 Starting the Integrated R&B Version
After the Server of the integrated R&B version is installed, execute the following
commands as user gomcr to run the server.
9.3.1.1 Starting Console of the Integrated R&B Version
$ cd /home/gomcr/ums-svr/bin
$ chmod -R 755 /home/gomcr/ums-svr/bin
Note: Make sure that the files under bin are executable to user gomcr.
$ nohup ./console-linux.sh &
9.3.1.2 Checking the Start of the Integrated R&B Version In Linux operating system, execute the following commands as user gomcr, and check the main processes of the Console and the integrated R&B version, in order to confirm whether all the processes of ZXG10 NetNumen-G Server exist.
$ ps -ef | grep java
Three JAVA processes are displayed:
1. CONSOLE: BootMain
2. Main program of integrated R&B: BoostMain
3. FTPSERVER: FtpServer
View the logs, and use /Copyright to search for the information about normal start of the integrated R&B service.
$ vi server-start.log
ZTE Confidential Proprietary © 2023 ZTE CORPORATION. All rights reserved. 169
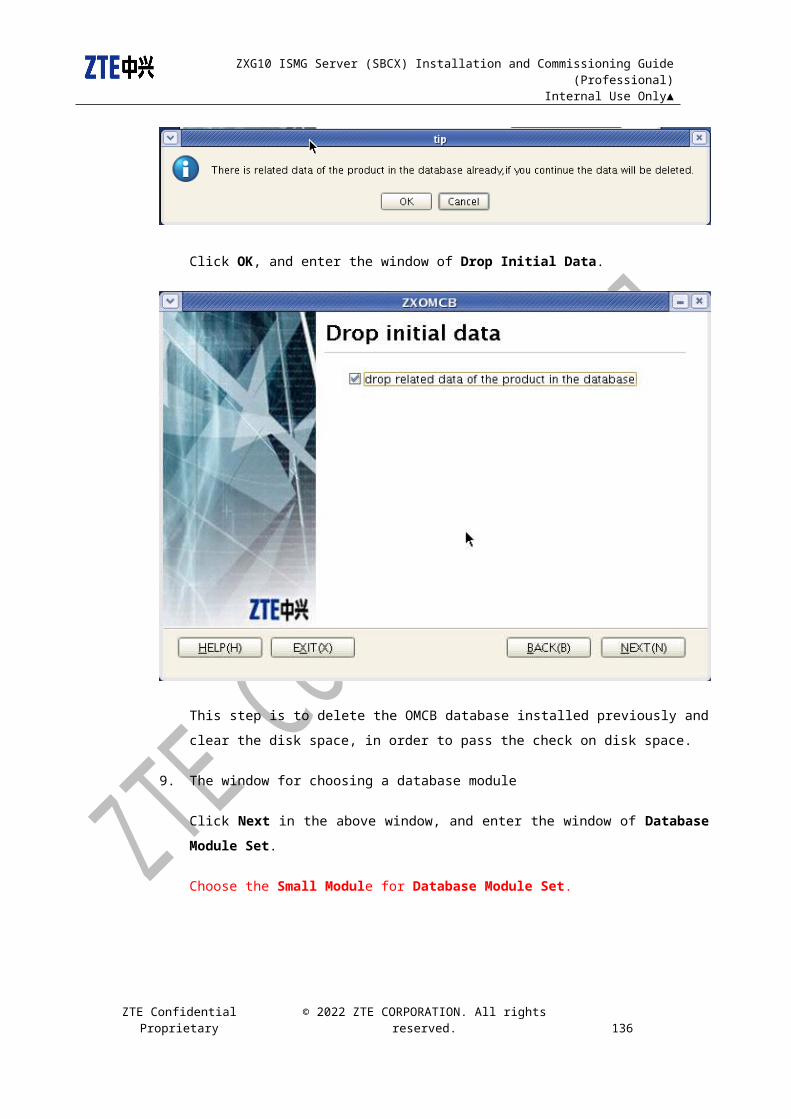
ZXG10 ISMG Server (SBCX) Installation and Commissioning Guide (Professional)
Internal Use Only
******************************************************************
UMS-PLATFORM (MX MicroKernel) [V6.10.100d] started.
Spent 0 hour(s) 1 minute(s) 38 second(s)
Copyright(C) (2002-2008). All rights reserved.
******************************************************************
9.3.2 Closing the Service of the Integrated R&B Version
In Linux operating system, execute the following commands to shut down
ZXG10 NetNumen-G Server.
$ cd /home/gomcr/ums-svr/bin
$ ./stopall.sh
9.3.2.1 Checking the Shutdown of the Integrated R&B Service In Linux operating system, execute the following command as user gomcr, and check the main processes of the Console and the integrated
R&B version, in order to confirm whether all the processes of ZXG10 NetNumen-G Server are exited.
$ ps -ef|grep java
Check the main programs of the Console, integrated R&B, and FTPServer.
9.4 Shutdown of SBCX Board
Note:
It is forbidden to pull out or insert the SBCX board when it is powered up. If we need to pull out/insert the board while the operating system is running, log in to the system user root and execute the init 0 command to shut
down the server. After confirming the shutdown of the operating system from the board panel (the LED of pwr=OFF), we can unlock the panel latch and pull out the board according to the common procedure. We can also push the power switch PWB with a nonmagnetic screw driver or a toothpick to power off the system, and then unlock the panel latch to pull out the board according to the common procedure.
ZTE Confidential Proprietary © 2023 ZTE CORPORATION. All rights reserved. 170

ZXG10 ISMG Server (SBCX) Installation and Commissioning Guide (Professional)
Internal Use Only
9.5 Matters for Attention in Using SBCX Board
1. The SBCX board must be inserted in Slot1/3/5/7; DO NOT place it in other
slots.
2. Frequent system halts may occur after Rhel4 is installed. The problem
may be caused by some problem with the display card drive. We can
replace the display card drive with the following method to solve the
problem.
Execute system-config-display as user root. Open the Video Card
Type on the interface, and change ATIES1000 to VESA.
3. Frequent system halts may also be caused by unstable interface circuit.
We can avoid this problem through remote operations.
4. When Linux operating system installation is completed, the program
prompts that the SBCX board should be restarted. When the SBCX board
is being restarted, change the start mode to “start from the hard disk” in
BIOS.
5. Allocation of SWAP:
For the system with physical memory of (or less than) 2GB, its swap
space should be twice of its physical memory in size. For the extra
memory (the part exceeding 2GB), the swap space should be one time of
the memory. For example, the 4G memory should be allocated with swap
space of 2G*2 + 2G*1=6G. The memory of the current SBCX board is 2G,
and therefore 4G swap space should be allocated to it.
6. The SBCX installation logs in Linux operating system are saved under:
/root/install.log
7. Blocked network:
After the SBCX is installed, confirm whether the network is clear. There
are several nework interfaces on SBCX board. The IP configured for each
network card must be consistent with the actual cable connection.
Network blocks are often caused by incorrect cable connection. Test the
ZTE Confidential Proprietary © 2023 ZTE CORPORATION. All rights reserved. 171
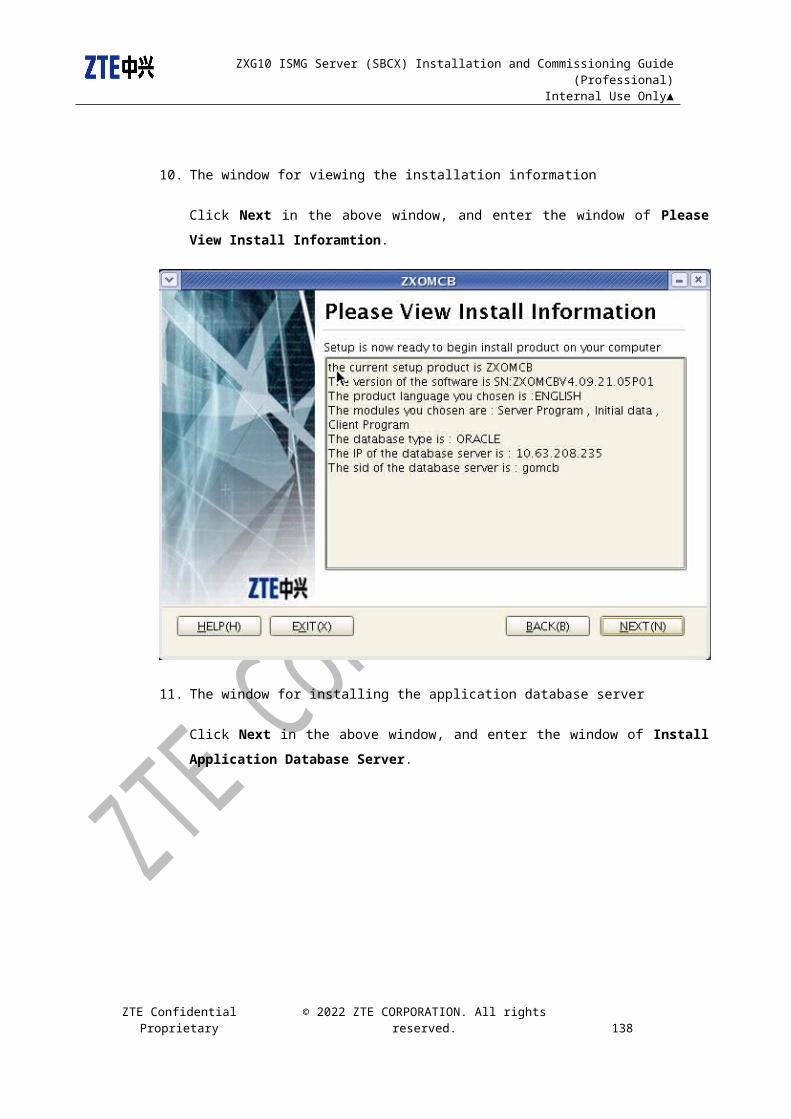
ZXG10 ISMG Server (SBCX) Installation and Commissioning Guide (Professional)
Internal Use Only
network in the following way: Plug the cable;Activate the network cards
one by one in turn, and check whether the network is clear. Besides,
check the item “activate network card automatically” during the system
startup.
8. Existence of illegible characters in telnetting to Linux Server
Modify the content of file /etc/sysconfig/i18n in Linux Server to:
And then reboot the Server.
9. Telnet problem:
When telnet is unusuable, we need to first confirm that the telnet
software packet is already installed. If the firewall is enabled, set telnet
to be allowed in it, and then perform the following modifications:
i. Start the service Method 1: run ntsysv command; in the window
that pops up after the command, add * before telnet, and then click
OK.
Method 2: edit /etc/xinetd.d/telnet, and find disable=yes,
and then change yes to no.
ii. Activate the service
#service xinetd restart
10 Software Uninstall (Optional)This chapter introduces the processes of uninstalling the ZXG10 ISMG
software, including the software of OMCR Client, the software of OMCR Server,
and software of database.
10.1 Uninstalling ISMG Server Software
Currently, the ISMG software is automatically uninstalled when it is reinstalled.
Direct reinstallation if acceptable.
Note:
ZTE Confidential Proprietary © 2023 ZTE CORPORATION. All rights reserved. 172

ZXG10 ISMG Server (SBCX) Installation and Commissioning Guide (Professional)
Internal Use Only
Delete the directory /tmp/setup-log/ and /tmp/setup-jdk/ and the files under them.
Execute the following commands as user root to delete the directories and files:
# rm -fr /tmp/setup-jdk/
# rm -fr /tmp/setup-log/
10.2 Uninstalling ISMG Client Software
If the ISMG software is manually copied to the Client, directly delete the
directory D:\CLIENT\ISMG and the files under it. If the ISMG software is
installed on the Client through the way of installing a program, uninstall it
according to the way of uninstalling the application program of ZXG10 ISMG
Client in the Windows operating system.
1. Make sure the Client program is closed.
2. Click Start->Program->ISMG->Uninstall ISMG, as shown in Figure 10-
22 Uninstall ISMG.
Figure 10-22 Uninstall ISMG
3. A dialogue box of Confirm pops up, as shown in Figure 10-23 Dialogue
Box of Confirm. Click Yes.
ZTE Confidential Proprietary © 2023 ZTE CORPORATION. All rights reserved. 173

ZXG10 ISMG Server (SBCX) Installation and Commissioning Guide (Professional)
Internal Use Only
Figure 10-23 Dialogue Box of Confirm
4. When the uninstall process is completed, a dialogue box of Information
that shows Uninstall success pops up, as shown in Figure 10-24 The
Window of Uninstall Success. Click Yes.
ZTE Confidential Proprietary © 2023 ZTE CORPORATION. All rights reserved. 174

ZXG10 ISMG Server (SBCX) Installation and Commissioning Guide (Professional)
Internal Use Only
Figure 10-24 The Window of Uninstall Success
10.3 Uninstalling Database
10.3.1 Uninstalling Database Under Linux
10.3.1.1 Backing Up the Database
1. On the computer installed with Oracle Server, open the Console, and
execute the backup command in the following format.
$exp username/password@servicename file = bakdir\bakfilename log =
bakdir\bakfilename.log
Type in <exp uep/uep@gomcr file = expdat.dmp
log=expdat.log > for this example, as shown in Error: Reference
source not found.
Note:
ZTE Confidential Proprietary © 2023 ZTE CORPORATION. All rights reserved. 175
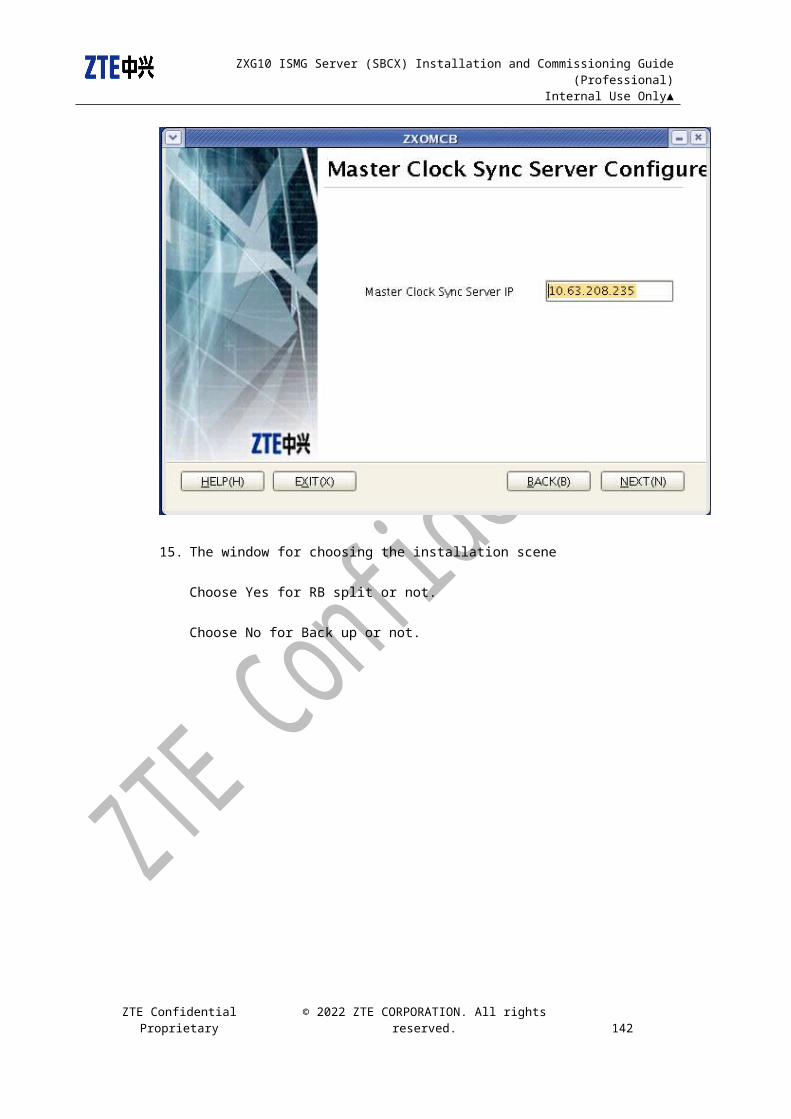
ZXG10 ISMG Server (SBCX) Installation and Commissioning Guide (Professional)
Internal Use Only
The username/password is the same as that used for maintaining the
database. The servicename is that of the corresponding database instance.
The bakdir\bakfilename is the path and path name of the backup file. The
suffix of the backup file is .dmp. The suffix of the log file is .log.
Figure 10-25 Execute exp Backup Command
2. When the database is successfully, a prompt of Export terminated
successfully without warnings appears, as shown in Figure 10-26
Backup Success. The backup data can be used to recover the original
data of the database.
Figure 10-26 Backup Success
ZTE Confidential Proprietary © 2023 ZTE CORPORATION. All rights reserved. 176

ZXG10 ISMG Server (SBCX) Installation and Commissioning Guide (Professional)
Internal Use Only
10.3.1.2 Shutting Down Oracle Service
Type the following command in the Console to stop Oracle.
Figure 10-27 Shutting Down Oracle Service
Figure 10-28 Shutting Down Oracle Listener
10.3.1.3 Deleting Oracle Instance
1. Open the directory $ORACLE_HOME/bin in the Console, and execute
dbca. The window of Database Configuration Assistant: Welcome
appears, as shown in Figure 10-29 Database Configuration Assistant-
Welcome Window. Click Next.
ZTE Confidential Proprietary © 2023 ZTE CORPORATION. All rights reserved. 177
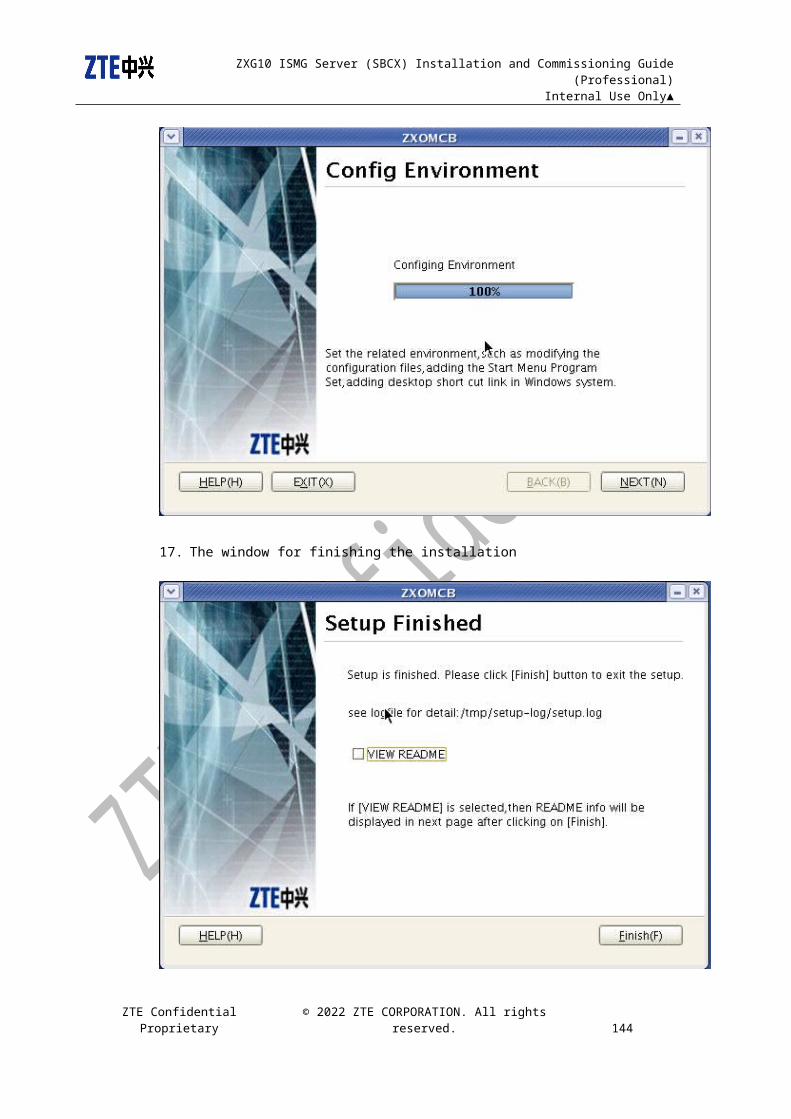
ZXG10 ISMG Server (SBCX) Installation and Commissioning Guide (Professional)
Internal Use Only
Figure 10-29 Database Configuration Assistant-Welcome Window
2. The window of Database Configuration Assistant: Operations appears,
as shown in Figure 10-30 Database Configuration Assistant-Operations
Window. Choose Delete a Database, and click Next.
ZTE Confidential Proprietary © 2023 ZTE CORPORATION. All rights reserved. 178

ZXG10 ISMG Server (SBCX) Installation and Commissioning Guide (Professional)
Internal Use Only
Figure 10-30 Database Configuration Assistant-Operations Window
3. The window of Database Configuration Assistant: Database appears,
as shown in Figure 10-31 Database Configuration Assistant-Database
Window. Choose the database to be deleted, and click Next.
ZTE Confidential Proprietary © 2023 ZTE CORPORATION. All rights reserved. 179

ZXG10 ISMG Server (SBCX) Installation and Commissioning Guide (Professional)
Internal Use Only
Figure 10-31 Database Configuration Assistant-Database Window
4. A dialogue box pops up, as shown in Figure 10-32 Delete the Database.
Click Yes to delete the database.
Figure 10-32 Delete the Database
5. The window of deletion progress pops up, as shown in Figure 10-33 The
Database Deletion Progress.
ZTE Confidential Proprietary © 2023 ZTE CORPORATION. All rights reserved. 180

ZXG10 ISMG Server (SBCX) Installation and Commissioning Guide (Professional)
Internal Use Only
Figure 10-33 The Database Deletion Progress
6. When the deletion progress reaches 100%, the following dialogue box
pops up, as shown in Figure 10-34 Database Deletion Completed.
Figure 10-34 Database Deletion Completed
10.3.1.4 Deleting Oracle Components
1. Open the directory $ORACLE_HOME/oui/bin in the Console, execute
runInstaller. The window of Oracle Universal Installer: Welcome
appears, as shown in Figure 10-35 The Welcome Window.
ZTE Confidential Proprietary © 2023 ZTE CORPORATION. All rights reserved. 181

ZXG10 ISMG Server (SBCX) Installation and Commissioning Guide (Professional)
Internal Use Only
Figure 10-35 The Welcome Window
2. Click Deinstall Products. The window of Inventory appears. Choose the
Oracle product to be deleted, as shown in Figure 10-36 The Product
Inventory.
ZTE Confidential Proprietary © 2023 ZTE CORPORATION. All rights reserved. 182

ZXG10 ISMG Server (SBCX) Installation and Commissioning Guide (Professional)
Internal Use Only
Figure 10-36 The Product Inventory
3. Click Remove. The following dialogue box of Confirmation pops up, as
shown in Figure 10-37 Confirmation. Click Yes to start the deletion.
ZTE Confidential Proprietary © 2023 ZTE CORPORATION. All rights reserved. 183
ZXG10 ISMG Server (SBCX) Installation and Commissioning Guide (Professional)
Internal Use Only
Figure 10-37 Confirmation
4. The interface of Remove progress pops up, as shown in Figure 10-38
The Remove Progress.
ZTE Confidential Proprietary © 2023 ZTE CORPORATION. All rights reserved. 184

ZXG10 ISMG Server (SBCX) Installation and Commissioning Guide (Professional)
Internal Use Only
Figure 10-38 The Remove Progress
5. When the remove progress reaches 100%, the interface in Figure 10-36
The Product Inventory appears again. Click Close.
6. To completely delete the database, type rm –r $ORACLE_BASE/* in the
Console to delete the installation directory and the files, as shown in
Figure 10-39 Delete the Installation Directory and Files.
Figure 10-39 Delete the Installation Directory and Files
ZTE Confidential Proprietary © 2023 ZTE CORPORATION. All rights reserved. 185
ZXG10 ISMG Server (SBCX) Installation and Commissioning Guide (Professional)
Internal Use Only
11 Server Software Installation Record
SN. Content Completion State Remarks
1 Server hardware configuration
Server configuration & IP planning meeting the requirements
□ OK □ NOT OK
Server disk partitioning meeting the requirement
□ OK □ NOT OK
2Installation of operating system software
Installation operating system □ OK □ NOT OK
RAID1 configuration □ OK □ NOT OK
3 Installation of database software
Installation of Oracle database □ OK □ NOT OK
4 OMCR software installation
Installation of server application program
□ OK □ NOT OK
Installation of server database script
□ OK □ NOT OK
Installation of upper-level NMS □ OK □ NOT OK
ZTE Confidential Proprietary © 2023 ZTE CORPORATION. All rights reserved. 186


![03d ZXG10 B8018 Hardware Architecture[1]](https://img.dokumen.tips/doc/110x75/577cc2ad1a28aba711945a53/03d-zxg10-b8018-hardware-architecture1.jpg)

![ZXG10 iBSC (V6[1].00) board](https://img.dokumen.tips/doc/110x75/55cf98a0550346d03398bb35/zxg10-ibsc-v6100-board.jpg)