Embed Size (px)
Citation preview

Use
rG
uid
e
Thank you for purchasing your new Nokia phone.We’re here for you!
www.nokiahowto.com Learn how to use your new Nokia phone.
www.nokia.com/us Get answers to yourquestions. Register your phone’s limited warrantyso we can better serve your needs!
Nokia Inc. 4630 Woodland Corporate Boulevard, Suite 160,
Tampa FL 33614 . Phone: 1.888.NOKIA.2U (1.888.665.4228)
Fax: 1.813.249.9619 . Text Telephone/Telecommunication Device
for the Deaf (TTY/TDD) Users: 1.800.24.NOKIA (1.800.246.6542)
Printed in U.S.A.
XXXXXXXNOKIA 0000

Nokia 6682 User Guide

DECLARATION OF CONFORMITY We, NOKIA CORPORATION declare under our sole responsibility that the product RM-58 is in conformity with the provisions of the following Council Directive: 1999/5/EC. A copy of the Declaration of Conformity can be found at http://www.nokia.com/phones/declaration_of_conformity/
PART NO. 9237942, ISSUE NO. 2Copyright © 2005 Nokia. All rights reserved.Reproduction, transfer, distribution or storage of part or all of the contents in this document in any form without the prior written permission of Nokia is prohibited.Nokia, Nokia Connecting People, the Nokia Original Enhancements logos, Nokia 6682, and Pop-Port are trademarks or registered trademarks of Nokia Corporation. Other product and company names mentioned herein may be trademarks or tradenames of their respective owners.Nokia tune is a sound mark of Nokia Corporation.
This product includes software licensed from Symbian Software Ltd. © 1998-2005. Symbian and Symbian OS are trademarks of Symbian Ltd. Java is a trademark of Sun Microsystems, Inc.
Java™ and all Java-based marks are trademarks or registered trademarks of Sun Microsystems, Inc. Bluetooth is a registered trademark of Bluetooth SIG, Inc. Stac ®, LZS ®, ©1996, Stac, Inc., ©1994-1996 Microsoft Corporation. Includes one or more U.S. Patents: No. 4701745, 5016009, 5126739, 5146221, and 5414425. Other patents pending.Hi/fn ®, LZS ®,©1988-98, Hi/fn. Includes one or more U.S. Patents: No. 4701745, 5016009, 5126739, 5146221, and 5414425. Other patents pending.
Part of the software in this product is © Copyright ANT Ltd. 1998. All rights reserved.US Patent No 5818437 and other pending patents. T9 text input software Copyright © 1997-2005. Tegic Communications, Inc. All rights reserved.This product is licensed under the MPEG-4 Visual Patent Portfolio License (i) for personal and non-commercial use in connection with information which has been encoded in compliance with the MPEG-4 Visual Standard by a consumer engaged in a personal and non-commercial activity and (ii) for use in connection with MPEG-4 video provided by a licensed video provider. No license is granted or shall be implied for any other use. Additional information including that relating to promotional, internal and commercial uses may be obtained from MPEG LA, LLC. See http://www.mpegla.com.
The information contained in this user guide was written for the Nokia 6682 product. Nokia operates a policy of ongoing development. Nokia reserves the right to make changes to any of the products described in this document without prior notice.Under no circumstances shall Nokia be responsible for any loss of data or income or any special, incidental, consequential or indirect damages howsoever caused.The contents of this document are provided ‘as is’. Except as required by applicable law, no warranties of any kind, either express or implied, including, but not limited to, the implied warranties of merchantability and fitness for a particular purpose, are made in relation to the accuracy, reliability or contents of this document. Nokia reserves the right to revise this document or withdraw it at any time without prior notice.The availability of particular products may vary by region. Please check with the Nokia dealer nearest to you.Export ControlsThis device may contain commodities, technology or software subject to export laws and regulations from the US and other countries. Diversion contrary to law is prohibited.FCC Industry Canada NoticeYour device may cause TV or radio interference (for example, when using a telephone in close proximity to receiving equipment). The FCC or Industry Canada can require you to stop using your telephone if such interference cannot be eliminated. If you require assistance, contact your local service facility. This device complies with part 15 of the FCC rules. Operation is subject to the condition that this device does not cause harmful interference.

Cont
ents
rnet settings ..........................12.................................................... 12....................................................13....................................................13mption...................................... 14....................................................14.................................................... 14....................................................15
...................................16
....................................................16
....................................................16
.................................................... 17
.................................................... 17
.................................................... 17aker control ............................ 18all ...............................................18.................................................... 19....................................................19....................................................20....................................................20....................................................20.................................................... 20ication events........................ 21
ContentsFor your safety...........................................1
Welcome.....................................................4Accessibility solutions.......................................................... 4Register your phone.............................................................. 4Copyright protection ............................................................ 4Find information about your device................................. 5Contact your service provider............................................ 5Updates .................................................................................... 5
Your phone .................................................6Insert the SIM card and battery........................................ 6Charge the battery ................................................................ 7Headset..................................................................................... 7The wrist strap........................................................................ 8Keys and parts ........................................................................ 8Standby mode shortcuts...................................................... 9Tips for efficient use...........................................................10About the display ................................................................10Essential indicators .............................................................10Help .........................................................................................11Keypad lock (keyguard)......................................................11Antenna..................................................................................11First settings .........................................................................12
Configure MMS and InteInsert the memory card.Eject the memory card...File manager ....................
View memory consuMemory low..............
Memory card tool............Format a memory card ..
Basic Operations ...Switch the phone on......Clock ...................................
Clock settings ...........World clock ...............
Make calls .........................Volume and loudspeAnswer or reject a c1-touch dialing ........Conference calling ..
Log.......................................Recent calls ..............Call timers .................Packet data ...............Monitor all commun

Cont
ents ings .............................................. 33
....................................................... 33er settings................................. 34
....................................................... 35
....................................................... 35
.....................................36....................................................... 36nd transitions .......................... 36
....................................................... 37
....................................................... 38
....................................................... 38
....................................................... 38
....................................................... 38
....................................................... 38 clips........................................... 39
er the air..................................... 39 settings...................................... 40
.....................................41
....................................................... 42ut ................................................. 42t—Predictive text.................... 43ard ............................................... 44es ................................................. 45e-mail settings ......................... 46
Personalize your phone ...........................22Set tones................................................................................ 22
Offline profile ............................................................... 23Transfer content from another phone .......................... 23Themes—the look of your phone .................................... 24Active standby mode.......................................................... 25
Contacts (phonebook) .............................26Save names and numbers................................................. 26
Default numbers and addresses .............................. 26Copy contacts ...................................................................... 27
SIM directory and other services ............................ 27Ringing tones for contacts............................................... 27Voice dialing......................................................................... 28
Add a voice tag ............................................................ 28Voice tag call ................................................................ 28
Create contact groups ....................................................... 29Remove members from a group.............................. 29
Camera and Gallery .................................30Camera................................................................................... 30
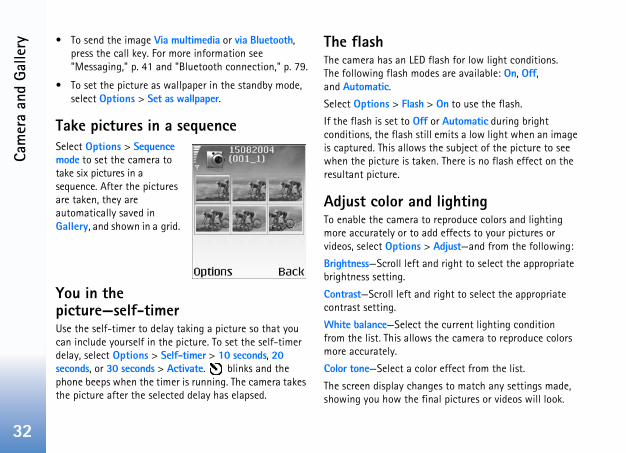
Take pictures................................................................. 30Take pictures in a sequence ..................................... 32You in the picture—self-timer ................................. 32The flash......................................................................... 32Adjust color and lighting .......................................... 32
Adjust camera settRecord videos ........Adjust video record
Gallery .............................View images...........
Imaging................Video editor ...................
Edit video, sound, aImage manager.............Image print ....................
Printer selection....Print preview .........Print settings .........
RealPlayer™....................Play video or soundStream content ovReceive RealPlayer
Messaging............Writing text ...................
Traditional text inpPredictive text inpuCopy text to clipbo
Write and send messagReceive MMS and

Cont
ents...................................59
....................................................59ings...........................................59anually .....................................59.................................................... 60ually.......................................... 60.................................................... 60....................................................60.................................................... 61....................................................61.................................................... 62 items........................................62....................................................63....................................................63....................................................63
...................................65.................................................... 65....................................................65....................................................65.................................................... 65es................................................65....................................................66....................................................66....................................................66
Inbox .......................................................................................47Multimedia messages.................................................47Data and settings.........................................................47Web service messages................................................48
My folders ............................................................................48Mailbox...................................................................................48
Open the mailbox ........................................................49Retrieve e-mail messages..........................................49Retrieve e-mail messages automatically ..............50Delete e-mail messages .............................................50Disconnect from the mailbox...................................51
Outbox ....................................................................................51View messages .....................................................................51Messaging settings .............................................................52
Text messages...............................................................52Multimedia messages.................................................53E-mail..............................................................................53Web service messages................................................55Cell broadcast ...............................................................55Other settings ...............................................................56
Calendar................................................... 57Create calendar entries......................................................57
Calendar views .............................................................58Set a calendar alarm...................................................58Remove calendar entries ...........................................58Calendar settings .........................................................58
Web........................Access the Web................
Receive browser settEnter the settings m
Bookmarks view...............Add bookmarks manSend bookmarks.......
Make a connection .........Connection security
Browse................................View saved pages ....
Download and purchaseEnd a connection.............
Empty the cache ......Web settings.....................
Office .....................Recorder.............................To-do...................................
Create a task list......Calculator ..........................
Calculate percentagNotes...................................Converter ...........................
Set base rate.............

Cont
ents ations .......................................... 75
....................................................... 76
....................................................... 76
....................................................... 77p .................................................... 77oup members............................ 77....................................................... 77
.....................................79....................................................... 79ion settings ................................ 79....................................................... 80....................................................... 81....................................................... 82th.................................................. 82....................................................... 82....................................................... 82odem............................................ 82....................................................... 82ion details .................................. 83n ................................................... 83on profile .................................... 84....................................................... 85....................................................... 85ngs................................................ 85
My own.....................................................67Go to—add shortcuts.......................................................... 67
Delete a shortcut......................................................... 67Wallet .................................................................................... 67
Create a wallet code .................................................. 68Store personal card details....................................... 68Create personal notes ................................................ 68Create a wallet profile ............................................... 69View ticket details....................................................... 69Wallet settings............................................................. 70Reset the wallet and wallet code ........................... 70
Music player ........................................................................ 70Albums and artists views .......................................... 70Song list ......................................................................... 71Playlists .......................................................................... 71Play music ..................................................................... 72Update your collection .............................................. 72
IM—instant messaging (chat).................73Receive IM settings ............................................................ 73Connect to a server ............................................................ 73Modify your settings .......................................................... 73Search for groups and users ............................................ 74Join and leave a group ...................................................... 74Chat ........................................................................................ 74
Record chats ................................................................. 74
View and start conversContacts..........................Manage groups.............Administer a group......
Create a new grouAdd and remove gr
Chat server settings.....
Connectivity ........Bluetooth connection .
Bluetooth connectSend data................Pair devices ............Receive data ..........Switch off Bluetoo
PC connections .............CD-ROM..................Your phone as a m
Connection manager...View data connect
Remote synchronizatioNew synchronizatiSynchronize data..
Device manager ............Server profile setti

Cont
ents...................................99
.................................................... 99
................................ 102..................................................102..................................................102..................................................103..................................................103..................................................103..................................................103
nce ......................... 104
ion ......................... 105
nformation ............ 107
................................ 111
Tools ......................................................... 86Settings ..................................................................................86
Phone settings ..............................................................86Call settings...................................................................87Connection settings ....................................................88Date and time...............................................................91Security...........................................................................91Call forwarding.............................................................94Call restriction ..............................................................94Network..........................................................................94Enhancement settings................................................95
Voice commands..................................................................95Add a voice command to an application ..............95
Application manager ..........................................................96Install applications and software............................96Remove applications and software ........................97Application settings ....................................................97
Activation keys—copyright protections.........................98
Troubleshooting ....Q&A.....................................
Enhancements.......Power..................................Data.....................................Audio...................................Accessibility ......................Car .......................................Imaging and lifestyle......
Care and maintena
Reference informat
Additional Safety I
Index ......................

Notes
For
your
saf
ety
1
NEAR BLASTING. Follow any on't use the phone where rogress.
. Use only in the normal lained in the product . Don't touch the antenna
RVICE. Only qualified install or repair this product.
NTS AND BATTERIES. Use only ncements and batteries. Do not patible products.
TANCE. Your phone is not t. Keep it dry.
IES. Remember to make s or keep a written record of nformation.
TO OTHER PHONES. When any other phone, read its user iled safety instructions. Do not patible products.
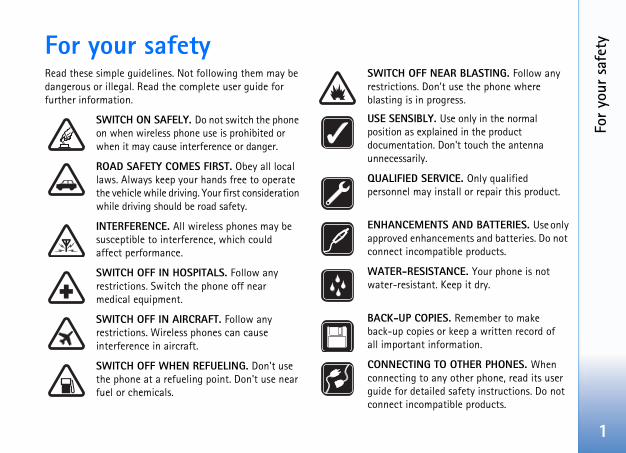
For your safetyRead these simple guidelines. Not following them may be dangerous or illegal. Read the complete user guide for further information.
SWITCH ON SAFELY. Do not switch the phone on when wireless phone use is prohibited or when it may cause interference or danger.
ROAD SAFETY COMES FIRST. Obey all local laws. Always keep your hands free to operate the vehicle while driving. Your first consideration while driving should be road safety.
INTERFERENCE. All wireless phones may be susceptible to interference, which could affect performance.
SWITCH OFF IN HOSPITALS. Follow any restrictions. Switch the phone off near medical equipment.
SWITCH OFF IN AIRCRAFT. Follow any restrictions. Wireless phones can cause interference in aircraft.
SWITCH OFF WHEN REFUELING. Don't use the phone at a refueling point. Don't use near fuel or chemicals.
SWITCH OFF restrictions. Dblasting is in p
USE SENSIBLYposition as expdocumentationunnecessarily.
QUALIFIED SEpersonnel may
ENHANCEMEapproved enhaconnect incom
WATER-RESISwater-resistan
BACK-UP COPback-up copieall important i
CONNECTINGconnecting toguide for detaconnect incom
For
your
saf
ety
2
ou can utilize Network Services. y need to give you additional and explain what charges will ay have limitations that affect rk Services. For instance, some rt all language-dependent
y have requested that certain ot activated in your device. If so,
your device menu. Contact your e information.
3GPP GSM Release 99 terminal , and is designed to support also rks. However, there may be some n used in some Release 97 e information, contact your
P 2.0 protocols (HTTP and SSL) cols. Some features of this device, e-mail, and content downloading MS, require network support for
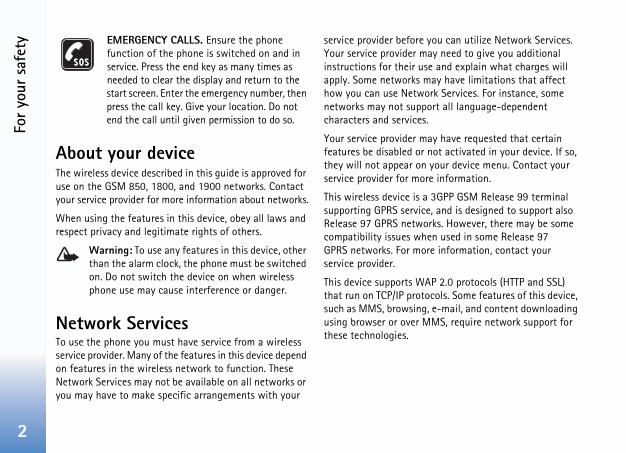
EMERGENCY CALLS. Ensure the phone function of the phone is switched on and in service. Press the end key as many times as needed to clear the display and return to the start screen. Enter the emergency number, then press the call key. Give your location. Do not end the call until given permission to do so.
About your deviceThe wireless device described in this guide is approved for use on the GSM 850, 1800, and 1900 networks. Contact your service provider for more information about networks.
When using the features in this device, obey all laws and respect privacy and legitimate rights of others.
Warning: To use any features in this device, other than the alarm clock, the phone must be switched on. Do not switch the device on when wireless phone use may cause interference or danger.
Network ServicesTo use the phone you must have service from a wireless service provider. Many of the features in this device depend on features in the wireless network to function. These Network Services may not be available on all networks or you may have to make specific arrangements with your
service provider before yYour service provider mainstructions for their useapply. Some networks mhow you can use Netwonetworks may not suppocharacters and services.
Your service provider mafeatures be disabled or nthey will not appear on service provider for mor
This wireless device is a supporting GPRS serviceRelease 97 GPRS netwocompatibility issues wheGPRS networks. For morservice provider.
This device supports WAthat run on TCP/IP protosuch as MMS, browsing,using browser or over Mthese technologies.
For
your
saf
ety
3
d enhancements, please check u disconnect the power cord of nd pull the plug, not the cord.
cements may contain small ach of small children.
Enhancements, batteries, and chargersCheck the model number of any charger before use with this phone. This phone is intended for use when supplied with power from ACP-7, ACP-8, ACP-9, ACP-12, and LCH-12.
Warning: Use only batteries, chargers, and enhancements approved by Nokia for use with this particular model. The use of any other types may invalidate any approval or warranty, and may be dangerous.
For availability of approvewith your dealer. When yoany enhancement, grasp a
Your phone and its enhanparts. Keep them out of re
Wel
com
e
4
olutionsaking mobile devices easy to cluding those with disabilities. sit www.nokiaaccessibility.com.
phoneur phone at a.com or 1-888-NOKIA-2U at we can serve your needs d to call the center or have
tectionay prevent some images, music ) and other content from being rred, or forwarded.
WelcomeCongratulations on your purchase of the Nokia 6682 mobile device. Your device provides many functions that are practical for daily use, such as a calendar, a clock, an alarm clock, and a built-in camera. The camera can be used for recording video clips and taking pictures that you can, for example, attach as wallpaper in the standby mode or as thumbnail pictures in Contacts. See "Camera," p. 30 and "Gallery," p. 35.
You can personalize your device with ringing tones and themes. See "Personalize your phone," page 22.
Other features on your device are:• Multimedia messaging. See "Messaging," p. 41.
• Instant messages. See "IM—instant messaging (chat)," p. 73.
• RealPlayer™. See "RealPlayer™," p. 38.
• Bluetooth technology. See "Connectivity," p. 79.
• J2ME™ (Java 2 Platform, Micro Edition). See "Application manager," p. 96.
• Web browser. See "Web," p. 59.
Accessibility sNokia is committed to muse for all individuals, inFor more information, vi
Register your Make sure to register yowww.warranty.nokiaus(1-888-665-4228) so thbetter if you should neeyour device repaired.
Copyright proCopyright protections m(including ringing tonescopied, modified, transfe
Wel
com
e
5
er in their support of features. service provider, make sure that rts the features that you need.
may update this guide to version may be available at
, an interactive tutorial may ausa.com.
Find information about your deviceInformation about your device is provided on the device label, which is on the back of the device under the battery. The label contains the model and serial numbers, as well as the following:
• Device type (such as RM-58)
• Device model (such as Nokia 6682 device)
• International mobile equipment identity (IMEI)
• FCC ID number
Contact your service providerIn many cases, the service provider will make available descriptions of its services and instructions for using features, such as the following:
• Voice mail and voice privacy
• Call waiting, call forwarding, and caller ID
• Messaging
• News and information services
• Selected Internet services
Service providers may diffBefore you sign up with a the service provider suppo
UpdatesFrom time to time, Nokia reflect changes. The latestwww.nokiausa.com. Alsobe available at www.noki
Your
pho
ne
6
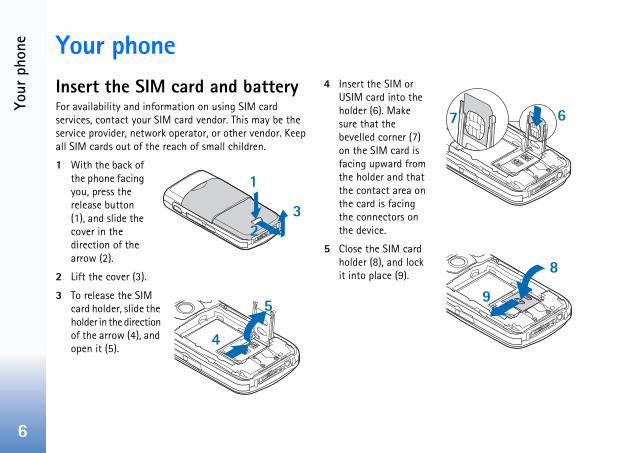
Your phoneInsert the SIM card and batteryFor availability and information on using SIM card services, contact your SIM card vendor. This may be the service provider, network operator, or other vendor. Keep all SIM cards out of the reach of small children.
1 With the back of the phone facing you, press the release button (1), and slide the cover in the direction of the arrow (2).
2 Lift the cover (3).
3 To release the SIM card holder, slide the holder in the direction of the arrow (4), and open it (5).
4 Insert the SIM or USIM card into the holder (6). Make sure that the bevelled corner (7) on the SIM card is facing upward from the holder and that the contact area on the card is facing the connectors on the device.
5 Close the SIM card holder (8), and lock it into place (9).

Your
pho
ne
7
n be used while charging. If the mpty, it may take a few minutes icator appears on the display or made.
lly charged, the bar stops he charger, first from the
all outlet.
dset where it can endanger
6 Insert the battery (10).
7 Replace the back cover.
Charge the batteryWarning: Use only batteries, chargers, and enhancements approved by Nokia for use with this particular model. The use of any other types may invalidate any approval or warranty, and may be dangerous.This device is intended for use with the BL-5C battery. Always use original Nokia batteries. See "Nokia battery authentication guidelines," p. 105.
Check the model number of any charger before use with this device. This device is intended for use when supplied with power from the ACP-12 charger.
For availability of approved enhancements, please check with your dealer. When you disconnect the power cord of any enhancement, grasp and pull the plug, not the cord.
1 Connect the charger to a wall outlet.
2 Connect the power cord to the phone.
The battery indicator bar starts scrolling. The phone cabattery is completely ebefore the charging indbefore any calls can be
3 When the battery is fuscrolling. Disconnect tphone, then from the w
HeadsetConnect the compatible headset to the Pop-Port™ connector of your phone.
Warning: When using the headset your ability to hearoutside sounds may be affected. Do not use the heayour safety.
Your
pho
ne
8
to move around the menus. Press dle to select, accept, or activate.
the main menu.
on keys (11) select the commands display.
stantly monitors the lighting he lighting of the display and
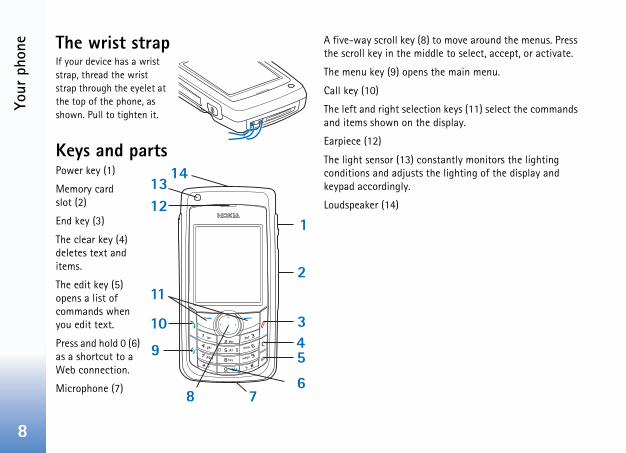
The wrist strapIf your device has a wrist strap, thread the wrist strap through the eyelet at the top of the phone, as shown. Pull to tighten it.
Keys and partsPower key (1)
Memory card slot (2)
End key (3)
The clear key (4) deletes text and items.
The edit key (5) opens a list of commands when you edit text.
Press and hold 0 (6) as a shortcut to a Web connection.
Microphone (7)
A five-way scroll key (8)the scroll key in the mid
The menu key (9) opens
Call key (10)
The left and right selectiand items shown on the
Earpiece (12)
The light sensor (13) conconditions and adjusts tkeypad accordingly.
Loudspeaker (14)
Your
pho
ne
9
hortcutsl up.
ll down.
ll right.
essage, scroll left.
press the power key, and select ld # in the standby mode to file. If the Silent profile is # in the standby mode to rofile.
numbers list, press the call key.
s, press and hold the voice key.
o Web, press and hold 0.
e s se ed
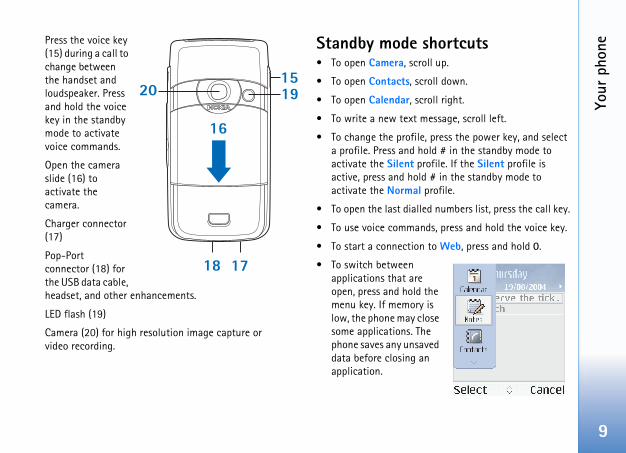
Press the voice key (15) during a call to change between the handset and loudspeaker. Press and hold the voice key in the standby mode to activate voice commands.
Open the camera slide (16) to activate the camera.
Charger connector (17)
Pop-Port connector (18) for the USB data cable, headset, and other enhancements.
LED flash (19)
Camera (20) for high resolution image capture or video recording.
Standby mode s• To open Camera, scrol
• To open Contacts, scro
• To open Calendar, scro
• To write a new text m
• To change the profile, a profile. Press and hoactivate the Silent proactive, press and hold activate the Normal p
• To open the last dialled
• To use voice command
• To start a connection t
• To switch between applications that are open, press and hold thmenu key. If memory ilow, the phone may closome applications. Thephone saves any unsavdata before closing anapplication.
Your
pho
ne
10
atorsg used in a GSM network.
one or several messages to the essaging.
s waiting to be sent in the
missed calls.
type is set to Silent and Message rt tone, and E-mail alert tone are
is locked.
e clock alarm.
line is being used.
one are diverted to another ve two phone lines, the divert irst line is and for the second
stand, or Bluetooth device is phone.
cted to the phone.
cted to the phone.
a Bluetooth-enabled headset
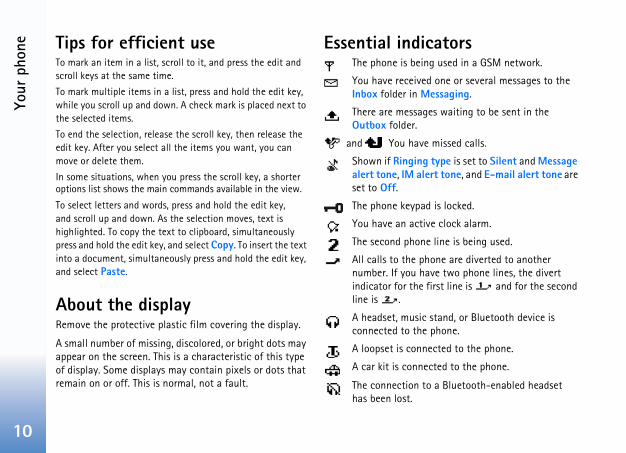
Tips for efficient useTo mark an item in a list, scroll to it, and press the edit and scroll keys at the same time.
To mark multiple items in a list, press and hold the edit key, while you scroll up and down. A check mark is placed next to the selected items.
To end the selection, release the scroll key, then release the edit key. After you select all the items you want, you can move or delete them.
In some situations, when you press the scroll key, a shorter options list shows the main commands available in the view.
To select letters and words, press and hold the edit key, and scroll up and down. As the selection moves, text is highlighted. To copy the text to clipboard, simultaneously press and hold the edit key, and select Copy. To insert the text into a document, simultaneously press and hold the edit key, and select Paste.
About the displayRemove the protective plastic film covering the display.
A small number of missing, discolored, or bright dots may appear on the screen. This is a characteristic of this type of display. Some displays may contain pixels or dots that remain on or off. This is normal, not a fault.
Essential indicThe phone is bein
You have receivedInbox folder in M
There are messageOutbox folder.
and You have
Shown if Ringingalert tone, IM aleset to Off.
The phone keypad
You have an activ
The second phone
All calls to the phnumber. If you haindicator for the fline is .
A headset, music connected to the
A loopset is conne
A car kit is conne
The connection tohas been lost.

Your
pho
ne
11
eyguard)vent the keys from being
standby mode, press the left n the keys are locked, is urn on the display light when s the power key.
the left selection key, then *.
, calls still may be possible to the r programmed into your device.
antenna.
other radio e, do not nnecessarily switched he antenna and may o operate level than Avoiding contact with the operating the device optimizes
rmance and the battery life.
A data call is active.
A GPRS or EDGE packet data connection is available.
A GPRS or EDGE packet data connection is active.
A GPRS or EDGE packet data connection is on hold.
Bluetooth connectivity has been set to On.
Data is being transmitted using a Bluetooth connection.
A USB connection is active.
You have an e-mail that has not been read, waiting for you to retrieve to your phone.
Help
Your phone has a help function. To access it from an application, select Options > Help.
For example, to view instructions on how to create a contact card, start to create a contact card, and select Options > Help; or select My own > Help to open the instructions for Contacts. While reading instructions, to switch between Help and the application that is open in the background, press and hold the menu key.
Keypad lock (kUse the keypad lock to preaccidentally pressed.
To lock the keypad, in theselection key, then *. Wheshown on the display. To tthe keypad lock is on, pres
To unlock the keypad, press
When the keypad lock is onofficial emergency numbe
Antenna
Your device has an internal
Note: As with anytransmitting devictouch the antenna uwhen the device ison. Contact with taffects call qualitycause the device tat a higher power otherwise needed.antenna area whenthe antenna perfo
Your
pho
ne
12
ory cardve the memory on your phone. If s package, contact your dealer for
y card and multimedia card adapter.
ed size dual voltage (1.8/3 V) . To ensure interoperability, use . Check the compatibility of an urer or provider.
d (reduced size MultiMediaCard).
Card (MMC) adapter.
d when you use the memory card ter allows you to use the memory hat has a full-size MMC slot.
bottom of the door.
First settings1 When you switch on the phone for the first time, it
may ask you to set the following information:
City, Time:, and Date:. Use the scroll key and number keys. Enter the first letters of the city name to find the city. The city selected also defines the time zone for the clock in your phone.
2 Press the menu key to open the main menu.
Your service provider may have requested a different order for menu items or the inclusion of different icons in the phone menu. Contact your service provider, network operator, or Nokia Customer Care for assistance with any features that differ from those described in this guide.
Configure MMS and Internet settingsYour Nokia 6682 device has a configuration tool, which automatically configures MMS, GPRS, streaming, and Internet settings based on your service provider information. You may also have settings from your service providers already in your phone.
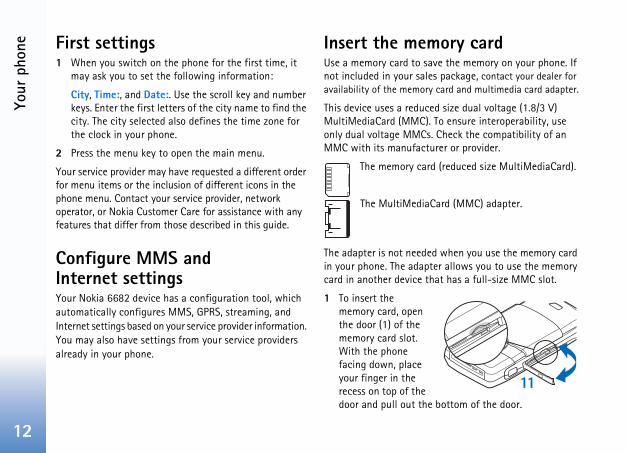
Insert the memUse a memory card to sanot included in your saleavailability of the memor
This device uses a reducMultiMediaCard (MMC)only dual voltage MMCsMMC with its manufact
The memory car
The MultiMedia
The adapter is not needein your phone. The adapcard in another device t
1 To insert the memory card, open the door (1) of the memory card slot. With the phone facing down, place your finger in the recess on top of the door and pull out the

Your
pho
ne
13
rd. If your phone is switched on,
ger
ne use memory to store data. tacts, messages, images, ringing to-do notes, documents, and
The free memory available ta is already saved in the phone emory card as extra storage ewritable, so you can delete and rd.
s in the phone memory or on a select Menu > Tools > File iew ( ) opens. Scroll right to w ( ).
folder, simultaneously press the rk a file, and select Options > o folder.
folder ( ), and a folder with
ns > Find and the memory from r a search text that matches the
2 Insert the memory card in the slot (2). Make sure that the bevelled corner is facing towards the base of the phone and that the contact area on the card is facing down.
3 Push the card in (3). You can hear a click when the card locks into place.
4 Close the door. You cannot use the memory card if the door is open.
Eject the memory cardImportant: Do not remove the memory card in the middle of an operation when the card is being accessed since this may damage the memory card as well as the device, and data stored on the card may be corrupted.
1 Open the door of the memory card slot.
2 Press the memory card to release it from the slot.
3 Remove the memory capress OK.
File mana
Many features of the phoThese features include contones, music, calendar anddownloaded applications.depends on how much damemory. You can use a mspace. Memory cards are rsave data on a memory ca
To browse files and foldermemory card (if inserted),mgr.. The phone memory vopen the memory card vie
To move or copy files to a edit and scroll keys to maMove to folder or Copy t
The icons in File mgr. are aa subfolder ( ).
To find a file, select Optiowhich to search, and entefile name.
Your
pho
ne
14
, ers
ages ory
, or
ions. See "Application manager,"
you no longer need
card tool
ed size dual voltage (1.8/3 V) . To ensure interoperability, use . Check the compatibility of an urer or provider.
emory. You can use a memory card ou can also back up information d restore the information to the
Tip! You can use Nokia Phone Browser available in Nokia PC Suite to view the different memories in your phone. See the CD-ROM, if supplied in the sales package.
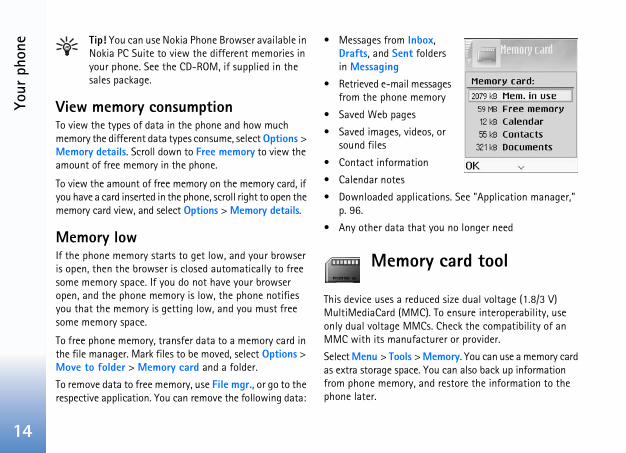
View memory consumptionTo view the types of data in the phone and how much memory the different data types consume, select Options > Memory details. Scroll down to Free memory to view the amount of free memory in the phone.
To view the amount of free memory on the memory card, if you have a card inserted in the phone, scroll right to open the memory card view, and select Options > Memory details.
Memory lowIf the phone memory starts to get low, and your browser is open, then the browser is closed automatically to free some memory space. If you do not have your browser open, and the phone memory is low, the phone notifies you that the memory is getting low, and you must free some memory space.
To free phone memory, transfer data to a memory card in the file manager. Mark files to be moved, select Options > Move to folder > Memory card and a folder.
To remove data to free memory, use File mgr., or go to the respective application. You can remove the following data:
• Messages from InboxDrafts, and Sent foldin Messaging
• Retrieved e-mail messfrom the phone mem
• Saved Web pages
• Saved images, videossound files
• Contact information
• Calendar notes
• Downloaded applicatp. 96.
• Any other data that
Memory
This device uses a reducMultiMediaCard (MMC)only dual voltage MMCsMMC with its manufact
Select Menu > Tools > Mas extra storage space. Yfrom phone memory, anphone later.
Your
pho
ne
15
m phone memory to a memory ckup phone mem..
the memory card to the phone Restore from card.
ry cardrmatted, all data on the card is
, select Options > Memory
pplied preformatted and others lt your retailer to find out if you card before you can use it.
select Options > Format mem. . When formatting is complete, ory card, and select OK.
You cannot use the memory card if the door of the memory card slot is open.
Keep all memory cards out of the reach of small children.
Do not open the memory card slot door in the middle of an operation since this may damage the memory card as well as the device, and data stored on the card may be corrupted.
Options in the memory card tool are Backup phone mem., Restore from card, Format mem. card, Memory card name, Memory details, Help, and Exit.
Use only compatible reduced size MMCs with this device. Other memory cards, such as SD cards, do not fit in the MMC card slot and are not compatible with this device. Using an incompatible memory card may damage the memory card as well as the device, and data stored on the incompatible card may be corrupted.
To back up information frocard, select Options > Ba
To restore information frommemory, select Options >
Format a memoWhen a memory card is fopermanently lost.
To rename a memory cardcard name.
Some memory cards are surequire formatting. Consumust format the memory
To format a memory card,card. Select Yes to confirmenter a name for the mem
Basi
c O
pera
tions
16
are Set alarm, Reset alarm, Settings, Help, and Exit.
ct Options > Set alarm. Enter the K. When the alarm is active, is ode.
lect Stop. When the alarm tone stop the alarm for five minutes, e. You can do this a maximum of
hed while the device is switched itself on and starts sounding the Stop, the device asks whether you ice for calls. Select No to switch make and receive calls. Do not s phone use may cause
ct Clock > Options >
Basic OperationsSwitch the phone onPress and hold the power key.
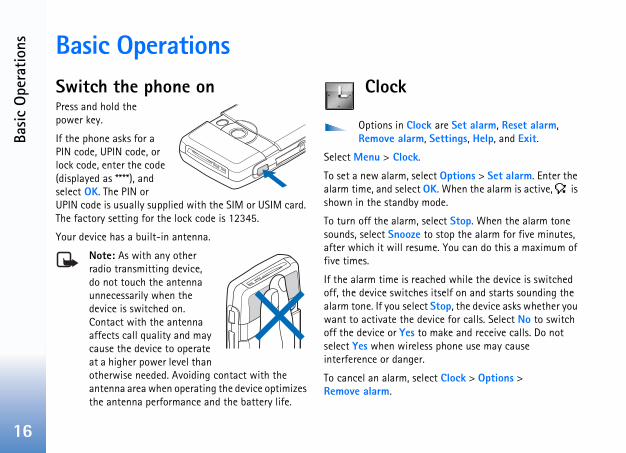
If the phone asks for a PIN code, UPIN code, or lock code, enter the code (displayed as ****), and select OK. The PIN or UPIN code is usually supplied with the SIM or USIM card. The factory setting for the lock code is 12345.
Your device has a built-in antenna.
Note: As with any other radio transmitting device, do not touch the antenna unnecessarily when the device is switched on. Contact with the antenna affects call quality and may cause the device to operate at a higher power level than otherwise needed. Avoiding contact with the antenna area when operating the device optimizes the antenna performance and the battery life.
Clock
Options in ClockRemove alarm,
Select Menu > Clock.
To set a new alarm, selealarm time, and select Oshown in the standby m
To turn off the alarm, sesounds, select Snooze toafter which it will resumfive times.
If the alarm time is reacoff, the device switches alarm tone. If you select want to activate the devoff the device or Yes to select Yes when wirelesinterference or danger.
To cancel an alarm, seleRemove alarm.

Basi
c O
pera
tions
17
a maximum of 15 cities to
oll to a city, and select Options > isplayed in the main clock view, e is changed according to the he time is correct and matches
decrease the volume during a ight.
ter the phone number, including e clear key to remove a number.
press * twice for the + character nal access code), and enter the e (omit the leading zero if
number.
ll the number.
d the call (or to cancel the
phone number of your voice nu > Tools > Voice mailbox > number. Enter the number
ur service provider), and
Clock settingsTo change the clock settings, select Options > Settings in the clock.
To change the clock shown in the standby mode, scroll down, and select Clock type > Analog or Digital.To change the alarm tone, scroll down, and select Clock alarm tone.
To allow the mobile phone network to update the time, date, and time zone information to your phone (network service), scroll down, and select Auto time update. For the Auto time update setting to take effect, the phone restarts.
To change the daylight-saving time status, scroll down, and select Daylight-saving. Select On to add one hour to the My home city time. See “World clock‚" p. 17. When the daylight-saving is active, the indicator is shown in the clock main view.
World clockOpen Clock, and scroll right to open the world clock view. In the world clock view, you can view the time in different cities.
To add cities to the list, select Options > Add city. Enter the first letters of the city name. The search field appears automatically, and the matching cities are displayed.
Select a city. You can addthe list.
To set your current city, scrMy home city. The city is dand the time in your phoncity selected. Check that tyour time zone.
Make callsTip! To increase orcall, scroll left or r
1 In the standby mode, enthe area code. Press th
For international calls,(replaces the internatiocountry code, area codnecessary), and phone
2 Press the call key to ca
3 Press the end key to encall attempt).
Tip! To change themailbox, select MeOptions > Change(obtained from yoselect OK.
Basi
c O
pera
tions
18
ot hold the phone near your ear eaker is in use, because the volume y loud.
uring a call, start a call, and press
ker when you have an active call nd, press the voice key.
ct a call the call key.
e when a call comes in,
ble headset is connected to swer and end a call, press the
swer a call, press the end key to a line busy tone. If you activate
gs > If busy function to divert ing call also diverts the call. . 94.
ming call, you can also send a text forming why you cannot answer > Send text message. You can ing it. To set up this option and ssage, see “Call settings‚" p. 87.
Press the end key to end a call, even if another application is active.
To make a call from Contacts, select Menu > Contacts. Scroll to the desired name; or enter the first letters of the name to the search field. Matching contacts are listed. Press the call key.
You must copy the contacts from your SIM to Contacts before you can make a call this way. See “Copy contacts‚" p. 27.
To call your voice mailbox (network service), press and hold 1 in the standby mode. See “Call forwarding‚" p. 94.
To call a recently dialed number in the standby mode, press the call key to access a list of the 20 last numbers you called or attempted to call. Scroll to the number you want, and press the call key to call the number.
Volume and loudspeaker controlWhen you are in a call or using the loudspeaker, scroll right to increase or left to decrease the volume.
The built-in loudspeaker allows you to speak and listen to the phone from a short distance without having to hold the phone to your ear. Sound applications use the loudspeaker by default.
Important: Do nwhen the loudspmay be extremel
To use the loudspeaker dthe voice key.
To turn off the loudspeaor are listening to a sou
Answer or rejeTo answer the call, press
To mute the ringing tonselect Silence.
Tip! If a compatithe phone, to anheadset key.
If you do not want to anreject it. The caller hearsthe Call forward settincalls, rejecting an incomSee “Call forwarding‚" p
When you reject an incomessage to the caller inthe call. Select Optionsedit the text before sendwrite a standard text me
Basi
c O
pera
tions
19
touch tone strings, for example, ch tone string or search for it in haracter (w) or a pause character ect OK to send the tone.
ouch tones to the Phone tones fields in a contact card.
-touch dialing key (2—9), select reserved for the voice mailbox.
e, press the 1-touch dial key and
h dialing, select Menu > Tools > 1-touch dialing > On.
gt participant.
er participant, select Options > l is automatically put on hold.
swered, to join the first rence call, select Options >
o the call, repeat step 2, and erence > Add to conference.
Call waitingYou can answer a call while you have another call in progress. To activate call waiting (network service), select Menu > Tools > Settings > Call > Call waiting.
Tip! To change the phone tones for different environments and events, see “Set tones‚" p. 22.
To answer the waiting call, press the call key. The first call is put on hold.
To switch between the two calls, select Swap. Select Options > Transfer to connect an incoming call, or a call on hold, with an active call, and to disconnect yourself from the calls. To end the active call, press the end key. To end both calls, select Options > End all calls.
OptionsMany of the options that you can use during a call are network services. Select Options during a call for some of the following options: Mute or Unmute, Answer, Decline, Swap, Hold or Unhold, Activate handset, Activate loudsp., or Activate handsfree (if a compatible headset with Bluetooth connectivity is attached), End active call or End all calls, New call, Conference, and Transfer. Select from the following:
Replace—To end an active call and replace it by answering the waiting call.
Send touch tones—To senda password. Enter the touContacts. To enter a wait c(p), press * repeatedly. Sel
Tip! You can add tnumber or Touch
1-touch dialingTo assign a number to a 1Tools > 1-touch. Key 1 is
To call in the standby modthe call key.
Tip! To use 1-toucSettings > Call >
Conference callin1 Make a call to the firs
2 To make a call to anothNew call. The first cal
3 When the new call is anparticipant in the confeConference.
To add a new person tselect Options > Conf

Basi
c O
pera
tions
20
ack, scroll to a name or number,
ts, select Options > Clear recent ain view. To clear one of the call
ter you want to erase, and select clear an individual event, open a nt, and press the clear key.
ate duration of your incoming and nnect. > Log > Call timers.call duration while a call is active, Options > Settings > Show call No.
l time invoiced for calls by your may vary, depending on network g off for billing, and so forth.ers, select Options > Clear
eed the lock code. See “Phone and
data sent and received during , select Connect. > Log > Packet ay be charged for your packet
amount of data sent and received.
The phone supports conference calls between a maximum of six participants, including yourself.
To have a private conversation with one of the participants, select Options > Conference > Private. Select a participant—and Private. The conference call is put on hold on your phone. The other participants can still continue the conference call. After you have finished the private conversation, select Options > Conference > Add to conference to return to the conference call.To drop a participant, select Options > Conference > Drop participant, scroll to the participant, and select Drop.
4 To end the active conference call, press the end key.
Log
Recent calls To monitor the phone numbers of missed, received, and dialed calls, select Menu > Connect. > Log > Recent calls. The phone registers missed and received calls only if the network supports these functions, if the phone is switched on, and is within the network’s service area.
Tip! When you see a note in the standby mode about missed calls, select Show to access the list
of missed calls. To call band press the call key.
To clear all recent call liscalls in the recent calls mregisters, open the regisOptions > Clear list. Toregister, scroll to the eve
Call timers To monitor the approximoutgoing calls, select CoTo set the display of the select Connect. > Log >duration. Select Yes or
Note: The actuaservice provider features, roundin
To clear call duration timtimers. To do this, you nSIM‚" p. 91.
Packet dataTo check the amount ofpacket data connectionsdata. For example, you mdata connections by the
Basi
c O
pera
tions
21
ng messages, your phone may s an indication that the message ur phone to the message center ed into your phone. This is not the message has been received stination. For more details about , check with your service provider.
tions > Filter and a filter.
he log, recent calls register, and s permanently, select Options > nfirm.
elect Options > Settings > Log emain in the phone memory for r which they are automatically you select No log, all the log ster, and messaging delivery eleted.
easured in kilobytes) has been certain packet data connection oming or outgoing event lect Options > View details.
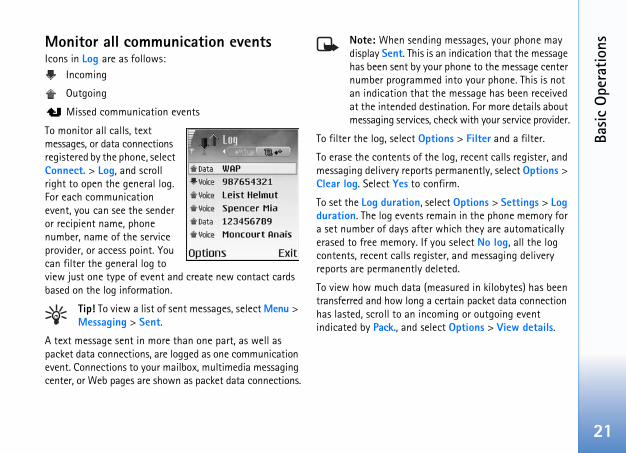
Monitor all communication eventsIcons in Log are as follows:
Incoming
Outgoing
Missed communication events
To monitor all calls, text messages, or data connections registered by the phone, select Connect. > Log, and scroll right to open the general log. For each communication event, you can see the sender or recipient name, phone number, name of the service provider, or access point. You can filter the general log to view just one type of event and create new contact cards based on the log information.
Tip! To view a list of sent messages, select Menu > Messaging > Sent.
A text message sent in more than one part, as well as packet data connections, are logged as one communication event. Connections to your mailbox, multimedia messaging center, or Web pages are shown as packet data connections.
Note: When sendidisplay Sent. This ihas been sent by yonumber programman indication thatat the intended demessaging services
To filter the log, select Op
To erase the contents of tmessaging delivery reportClear log. Select Yes to co
To set the Log duration, sduration. The log events ra set number of days afteerased to free memory. If contents, recent calls regireports are permanently d
To view how much data (mtransferred and how long ahas lasted, scroll to an incindicated by Pack., and se
Pers
onal
ize
your
pho
ne
22
inging tone to a contact, select ones for contacts‚" p. 27.
(speed dial) to a contact, press a ndby mode (1 is reserved for the s the call key. Select a contact. To or off, select Tools > Settings >
enu, in the main menu, select to folder or New folder. You can ons into folders, and place e more often into the main menu.
s
e ringing tones, message alert or different events, environments, e menu key, and select Tools >
e currently selected profile at the standby mode. If the Normal current date is shown.
Personalize your phoneYou can customize many features on your Nokia 6682 device, such as the background image, theme, ringing tone, profile, clock preferences, and shortcuts.
Your service provider may have requested a different order for menu items, or the inclusion of different icons in the phone menu. Contact your service provider or Nokia Customer Care for assistance with any features that differ from those described in this guide.
To change the shortcuts assigned for the different presses of the scroll key and selection keys in the standby mode, see “Standby mode‚" p. 86.
To change the clock shown in the standby mode, select Clock > Options > Settings > Clock type > Analog or Digital.
To change the clock alarm tone, select Clock > Options > Settings > Clock Alarm tone and a tone.
To change the calendar alarm tone, select Calendar > Options > Settings > Calendar alarm tone.
To change the welcome note to an image or text, select Tools > Settings > Phone > Normal > Welcome note or logo.
To assign an individual rContacts. See “Ringing t
To assign a 1-touch dialnumbered key in the stavoice mailbox), and presturn 1-touch dialing on Call > 1-touch dialing.
To rearrange the main mOptions > Move, Move move less used applicatiapplications that you us
Set tone
To set and customize thtones, and other tones for caller groups, press thProfiles. You can see thtop of the display in theprofile is in use, only the
Pers
onal
ize
your
pho
ne
23
ffline profile you cannot make lls, except calls to certain rs, or use other features that verage. To make calls, you must hone function by changing ice has been locked, enter the
e, select another profile and . The phone re-enables wireless ere is sufficient signal strength).
is activated before entering the ctivated. A Bluetooth connection after leaving the Offline profile.
n settings‚" p. 79.
content from hone
endar, images, video, and sound nnection, from a compatible device.
682 device without a SIM card. atically activated when the
out a SIM card. This allows you ther phone.
To change the profile, press the power key in the standby mode. Scroll to the profile you want to activate, and select OK.
Tip! You can choose Tone downloads to open a list of bookmarks. You can select a bookmark and start connection to a Web page to download tones.
To modify a profile, select Tools > Profiles. Scroll to the profile, and select Options > Customize. Scroll to the setting you want to change, and press the scroll key to open the choices. Tones stored on the memory card are indicated with . Scroll through the tone list and listen to each one before you make your selection. Press any key to stop the sound.
To create a new profile, select Options > Create new.
Offline profileThe Offline profile lets you use the phone without connecting to the wireless network. When you activate the Offline profile, the connection to the wireless network is turned off, as indicated by in the signal strength indicator. All wireless phone signals to and from the device are prevented. If you try to send messages, they are placed in the outbox to be sent later.
Tip! For information on how to change the alert tone for the calendar or clock, see “Personalize your phone‚" p. 22.
Warning: In the O(or receive) any caemergency numberequire network cofirst activate the pprofiles. If the devlock code.
To leave the Offline profilOptions > Activate > Yestransmissions (providing thIf a Bluetooth connectionOffline profile, it will be deais automatically reactivatedSee “Bluetooth connectio
Transfer another p
You can copy contacts, calclips using a Bluetooth coNokia Series 60 Platform
You can use your Nokia 6The offline profile is automphone is switched on withto use the SIM card in ano
Pers
onal
ize
your
pho
ne
24
s, you can transfer the same type ple ontacts, from the other phone ce only once. To transfer the same
ust send the Transfer application install it again.
—the look of oneur phone display, such as the and icons, select Menu > Tools > e is indicated by . In Themes,
s from other themes, or select to personalize themes further. ory card are indicated by . The ard are not available if you remove he phone. Save the themes to the moving the memory card, or d, to use the themes.
hemes main view are Preview/s, Apply, Edit, Copy to mem. card, em., Help, and Exit.
ll to it, and select Options > Apply.
to it, and select Options > Preview.
Before starting the transfer to your Nokia 6682 device, you must activate Bluetooth connectivity on both phones. On each phone, select Menu > Connect. > Bluetooth. Select Bluetooth > On. Give a name to each phone.
To transfer content, do the following:1 On your Nokia 6682 device, select Menu > Tools >
Transfer. Follow the instructions on the screen.
2 The phone searches for devices with Bluetooth connectivity. When it has finished the search, select your other phone from the list.
3 You are asked to enter a code on your Nokia 6682 device. Enter a code of your choice (1–16 digits), and select OK. Enter the same code on the other phone, and select OK.
4 The Transfer application is sent to the other phone as a message.
5 Open the message to install Transfer on the other phone, and follow the instructions on the screen. The application is added to the main menu.
6 From your Nokia 6682 device, select the content you want to copy from the other phone.
Content is copied from the memory and memory card of the other phone to your Nokia 6682 device and memory card. Copying time depends on the amount of data to be transferred. Data is not removed from the other phone.
To avoid duplicate entrieof information, for examto your Nokia 6682 deviinformation again, you mto the other phone and
Themesyour ph
To change the look of yowallpaper, color palette,Themes. The active themgroup together elementimages from the GalleryThe themes on the memthemes on the memory cthe memory card from tphone memory before rereinsert the memory car
Options in the TTheme downloadCopy to phone m
To activate a theme, scro
To preview a theme, scroll
Pers
onal
ize
your
pho
ne
25
of
dby mode is on.
applications shortcuts, select gs > Phone > Standby mode > nd press the scroll key.
an application, and select
on from the list, and press the
To edit themes, scroll to a theme, and select Options > Edit to change the following options:
Wallpaper—The image to be shown as a background image in the standby mode.
Color palette—The colors used on the screen.
Screen saver—The screen saver type: date and time or a text you have written yourself.
Image in 'Go to'—The background image for the Go to application.
To restore the selected theme back to its original settings, select Options Restore orig. theme when you edit a theme.
Active standby modeUse your standby display for fast access to your most frequently used applications.
Some shortcuts may be permanent, and you are not able to change them.
To set the active standby mode on, select Menu > Tools > Settings > Phone > Standby mode > Active standby, and press the scroll key.
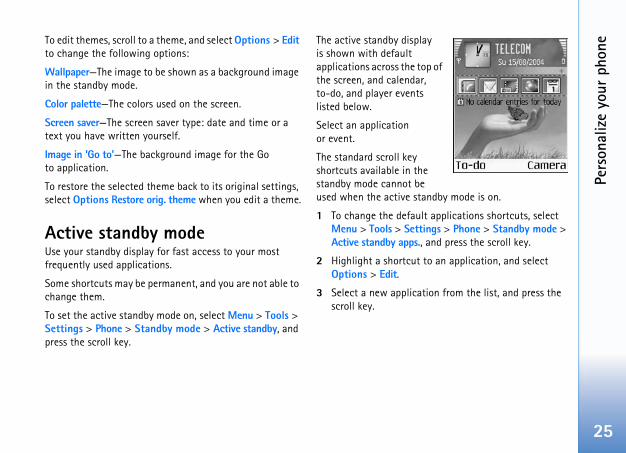
The active standby displayis shown with default applications across the topthe screen, and calendar, to-do, and player events listed below.
Select an application or event.
The standard scroll key shortcuts available in the standby mode cannot be used when the active stan
1 To change the default Menu > Tools > SettinActive standby apps., a
2 Highlight a shortcut toOptions > Edit.
3 Select a new applicatiscroll key.

Cont
acts
(ph
oneb
ook)
26
in Contacts, scroll to the contact t, and select Options > Edit.
ard in Contacts, select a card, and o delete several contact cards at the edit key and the scroll key to nd press the clear key to delete.
nd edit contact cards, use Nokia or available in Nokia PC Suite. See if supplied in the sales package.
mbnail image to a contact card, d, and select Options > Edit > bnail. The thumbnail image is tact calls.
and addressesumbers or addresses to a contact veral numbers or addresses, you message to the contact using a ess.
cts and a contact.
aults.
Contacts (phonebook)Press the menu key, and select Contacts. In Contacts, you can add a personal ringing tone, voice tag, or a thumbnail image to a contact card. You can also create contact groups, which allow you to send text messages or e-mail to many recipients at the same time. You can add received contact information (business cards) to contacts. See “Data and settings," p. 47. Contact information can only be sent to or received from compatible devices.
Options in Contacts are Open, Call, Create message, New contact, Open conversation, Edit, Delete, Duplicate, Add to group (shown if you have created a group), Belongs to groups (shown if you have created a group), Mark/Unmark, Copy, SIM contacts, Go to web address, Send, Contacts info, Settings, Help, and Exit.
Save names and numbers1 Select Options > New contact.
2 Fill in the fields that you want, and select Done.
Options when editing a contact card are Add thumbnail, Remove thumbnail, Add detail, Delete detail, Edit label, Help, and Exit.
To edit contact cardscard you want to edi
To delete a contact cpress the clear key. Tthe same time, pressmark the contacts, a
Tip! To add aContacts Editthe CD-ROM,
To attach a small thuopen the contact carOptions > Add thumshown when the con
Default numbersYou can assign default ncard. If a contact has secan easily call or send aspecific number or addr
1 Select Menu > Conta
2 Select Options > Def
Cont
acts
(ph
oneb
ook)
27
other services information on using SIM card vendor (network operator, endor).
Options > SIM contacts > SIM s and numbers stored on the tory you can add, edit, or copy
you can make calls.
or contactsmember calls you, the phone one, if the caller’s telephone ll and your phone recognizes it.
tact card, or select a contact list.
ing tone to view a list of
you wish to use for the he selected group.
e, select Default tone from the
3 Select a default to which you want to add a number or an address and Assign.
4 Select a number or an address you want to set as a default.
The default detail is underlined in the contact card.
Copy contactsTip! To send contact information, select the card you want to send. Select Options > Send > Via text message, Via multimedia, or Via Bluetooth. See “Messaging," p. 41 and “Send data," p. 80.
To copy names and numbers from a SIM card to your phone, select Menu > Contacts > Options > SIM contacts > SIM directory. Select the names you want to copy and Options > Copy to Contacts.
To copy a telephone, fax, or pager number from contacts to your SIM card, select Contacts, and open a contact card. Scroll to the number, and select Options > Copy to SIM direct..
Tip! You can synchronise your contacts to a compatible PC with Nokia PC Suite. See the CD-ROM, if supplied in the sales package.
SIM directory andFor availability, rates, andservices, contact your SIMservice provider or other v
Select Menu > Contacts >directory to see the nameSIM card. In the SIM direcnumbers to contacts, and
Ringing tones fWhen a contact or group plays the chosen ringing tnumber is sent with the ca
1 Select and open a congroup from the groups
2 Select Options > Ringringing tones.
3 Select the ringing toneindividual contact or t
To remove the ringing tonlist of ringing tones.

Cont
acts
(ph
oneb
ook)
28
to which you want to add the Options > Add voice tag.
list of voice tags you have t Contacts > Options > Contacts tags.
d a voice tag. After the starting words you want to record as a the phone plays the recorded tag splayed next to the number in the ing that a voice tag has been
ag exactly as you said it when you ake a call using a voice tag, the ld the phone at a short distance
tag clearly.
key. A short tone is played, and The phone plays the original voice nd number, and dials the number tag.
change, or delete a voice tag, open nd scroll to the number with the ted by ). Select Options > yback, Change, or Delete.
Voice dialingYou can make a phone call by saying a voice tag that has been added to a contact card. Any spoken words can be a voice tag.
Before using voice tags, note the following:
• Voice tags are not language-dependent. They are dependent on the speaker's voice.
• You must say the name exactly as you said it when you recorded it.
• Voice tags are sensitive to background noise. Record voice tags and use them in a quiet environment.
• Very short names are not accepted. Use long names and avoid similar names for different numbers.
Note: Using voice tags may be difficult in a noisy environment or during an emergency, so you should not rely solely upon voice dialing in all circumstances.
Add a voice tagUse a person’s name as a voice tag, such as “John’s mobile.”
You can have only one voice tag per contact card. You can add a voice tag to up to 50 phone numbers.1 In Contacts, open the contact card to which you want
to add a voice tag.
2 Scroll to the numbervoice tag, and select
Tip! To view adefined, selecinfo > Voice
3 Select Start to recortone, say clearly the voice tag. Wait untiland saves it. is dicontact card, indicatadded to it.
Voice tag callYou must say the voice trecorded it. When you mloudspeaker is in use. Hoaway, and say the voice
Press and hold the voiceSpeak now is displayed. tag, displays the name aof the recognized voice
Tip! To listen to, a contact card, avoice tag (indicaVoice tags > Pla
Cont
acts
(ph
oneb
ook)
29
from a group the group you want to modify.
nd select Options > Remove
he contact from the group.
hich groups a contact belongs, ct, and select Options > Belongs
Create contact groups1 In Contacts, scroll right to open the groups list.
2 Select Options > New group.
3 Write a name for the group or select the default name Group N and OK.
4 Open the group, and select Options > Add members.
5 Scroll to a contact, and press the scroll key to mark it. To add multiple members at a time, mark all of the contacts you want to add.
6 Select OK to add the contacts to the group.
To rename a group, select Options > Rename, enter the new name, and select OK.
Options in the groups list view are Open, New group, Delete, Rename, Ringing tone, Contacts info, Settings, Help, and Exit.
Remove members1 In the groups list, open
2 Scroll to the contact, afrom group.
3 Select Yes to remove t
Tip! To check to wscroll to the contato groups.
Cam
era
and
Galle
ry
30
upports an image capture x 960 pixels. The image resolution ppear different.
en using the flash. Do not use the ls at close range. Do not cover the
e between Image and Video views.
aking a picture are Capture, New, ight mode or Deact. night mode, or Normal mode, Self-timer, Go to ettings, Help, and Exit.
the following:) and memory card ( )
here images are saved. (2) estimates how many images, ected image quality, can fit in the f your phone or the memory card.
Camera and GalleryCamera
Respect the personal rights of others and obey the local laws, regulations, and customs when taking and using images or video clips.
With the Camera application you can take pictures and record videos while on the move. The images and video clips are automatically saved in the Gallery application. The camera produces JPEG images, and video clips are recorded in the 3GPP file format with the .3gp file extension. You can also send images or a video clip in a multimedia message, as an e-mail attachment, or a Bluetooth connection.
Open the camera slide on the back of the phone to open the camera, or select Camera.
The Camera application starts when the camera slide is opened, and you can see the view to be captured. Scroll left or right to move between Image and Video views.
Tip! You can insert an image into a contact card. See "Save names and numbers," p. 26.
The Nokia 6682 device sresolution of up to 1280in these materials may a
Keep a safe distance whflash on people or animaflash while firing.
Take picturesScroll left or right to movOpen the Image view.
Options before tFlash, Activate nSequence mode Gallery, Adjust, S
Camera indicators show• The phone memory (
indicators (1) show w• The images indicator
depending on the selremaining memory o
Cam
era
and
Galle
ry
31
e may take longer if you have g, or color settings.
llow these tips:
p the camera still.
rd video in a dark environment, you are using the night mode, ger and the camera needs to be
olor adjustments before taking ns > Adjust > Brightness, e, or Color tone. See "Adjust 32.
d picture is lower than that of a t the image remains the same e difference in image quality if
ery saving mode if there are no inute. To continue taking dle of the scroll key.
taken, follow these tips:
keep the image, press clear.
der to take a new picture, press ll key.
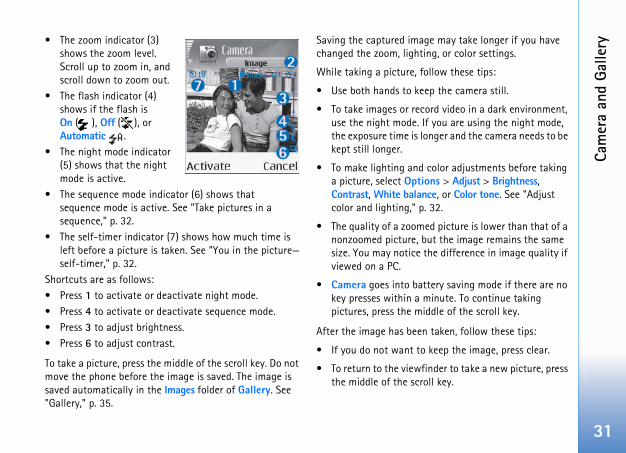
• The zoom indicator (3) shows the zoom level. Scroll up to zoom in, and scroll down to zoom out.
• The flash indicator (4) shows if the flash is On ( ), Off ( ), or Automatic .
• The night mode indicator (5) shows that the night mode is active.
• The sequence mode indicator (6) shows that sequence mode is active. See "Take pictures in a sequence," p. 32.
• The self-timer indicator (7) shows how much time is left before a picture is taken. See "You in the picture—self-timer," p. 32.
Shortcuts are as follows: • Press 1 to activate or deactivate night mode.• Press 4 to activate or deactivate sequence mode.• Press 3 to adjust brightness. • Press 6 to adjust contrast.
To take a picture, press the middle of the scroll key. Do not move the phone before the image is saved. The image is saved automatically in the Images folder of Gallery. See "Gallery," p. 35.
Saving the captured imagchanged the zoom, lightin
While taking a picture, fo
• Use both hands to kee
• To take images or recouse the night mode. Ifthe exposure time is lonkept still longer.
• To make lighting and ca picture, select OptioContrast, White balanccolor and lighting," p.
• The quality of a zoomenonzoomed picture, busize. You may notice thviewed on a PC.
• Camera goes into battkey presses within a mpictures, press the mid
After the image has been
• If you do not want to
• To return to the viewfinthe middle of the scro
Cam
era
and
Galle
ry
32
flash for low light conditions. es are available: On, Off,
On to use the flash.
or Automatic during bright l emits a low light when an image the subject of the picture to see n. There is no flash effect on the
lighting reproduce colors and lighting d effects to your pictures or Adjust—and from the following:
d right to select the appropriate
right to select the appropriate
e current lighting condition the camera to reproduce colors
r effect from the list.
es to match any settings made, al pictures or videos will look.
• To send the image Via multimedia or via Bluetooth, press the call key. For more information see "Messaging," p. 41 and "Bluetooth connection," p. 79.
• To set the picture as wallpaper in the standby mode, select Options > Set as wallpaper.
Take pictures in a sequenceSelect Options > Sequence mode to set the camera to take six pictures in a sequence. After the pictures are taken, they are automatically saved in Gallery, and shown in a grid.
You in the picture—self-timerUse the self-timer to delay taking a picture so that you can include yourself in the picture. To set the self-timer delay, select Options > Self-timer > 10 seconds, 20 seconds, or 30 seconds > Activate. blinks and the phone beeps when the timer is running. The camera takes the picture after the selected delay has elapsed.
The flashThe camera has an LED The following flash modand Automatic.
Select Options > Flash >
If the flash is set to Off conditions, the flash stilis captured. This allows when the picture is takeresultant picture.
Adjust color andTo enable the camera tomore accurately or to advideos, select Options >
Brightness—Scroll left anbrightness setting.
Contrast—Scroll left andcontrast setting.
White balance—Select thfrom the list. This allowsmore accurately.
Color tone—Select a colo
The screen display changshowing you how the fin

Cam
era
and
Galle
ry
33
e between Image and Video w.
ording a video are Record, New, de or Deact. night mode, Mute Gallery, Adjust, Settings, Help,
)
ed.
th
shows the zoom level. Scroll up ject before or during recording. ut.
tor (4) shows that the
tor (5) shows that the night
Adjust camera settings1 Select Options > Settings > Image.
2 Scroll to the setting you want to change:
Image quality—High, Normal, and Basic. The better the image quality, the more memory the image consumes. The quality of a zoomed picture is lower than that of a nonzoomed picture, but the image remains the same size. You may notice the difference in image quality if viewed on a PC, for example. If you are going to print the image, select High or Normal image quality.
Show captured image—Select Yes if you want to see the captured image after it has been taken or No if you want to continue taking pictures immediately.
Image resolution—Select the resolution you want to use for the images you are going to take.
Resolution is a measure of sharpness and clarity of an image. Resolution refers to the number of pixels in an image. The more pixels, the more detailed the picture and the more memory it consumes.
Default image name—Set a default name for the images you are going to take. You can replace the date with your own text (for example, ‘Holiday_2005’).
Memory in use—Select where to store your images.
Record videosScroll left or right to movviews. Open the Video vie
Options before recActivate night moor Unmute, Go to and Exit.
Video recorder indicators show the following:
• The phone memory (and memory card ( )indicators (1) show where the video is sav
• The current video lengindicator (2) shows elapsed time and timeremaining.
• The zoom indicator (3)to zoom in on your subScroll down to zoom o
• The microphone indicamicrophone is muted.
• The night mode indicamode is active.
Cam
era
and
Galle
ry
34
finder to record a new video, press oll key.
multimedia or via Bluetooth, press information, see "Messaging," p. nnection," p. 79.
order settingss > Video and the setting you
ximum, the length of the video y the available space on your one hour per clip. You cannot send this by MMS, due to the recording to record video clips up to 300 KB ds in duration) so that they can be ultimedia message to a networks, however, may only
edia messages with a maximum
128x96 or 176x144.
ine a default name, or select
he default memory store, phone d.
Shortcuts are as follows:
• Press 1 to activate or deactivate the night mode.
• Press 3 to adjust brightness.
• Press 6 to adjust contrast.
To make lighting and color adjustments before taking a picture, select Options > Adjust > Brightness, Contrast, White balance, or Color tone. See "Adjust color and lighting," p. 32.
Press the middle of the scroll key to start recording. The record icon is shown. If you use the camera to record a video clip, the LED flash is constantly on in low power mode indicating that a video clip is being recorded.
To pause recording at any time, press the middle of the scroll key. The pause icon starts to blink on the display. Press the scroll key again to resume recording.
Video recording automatically stops if recording is set to pause, and there are no key presses within a minute.
Select Stop to stop recording. The video clip is automatically saved to the Video clips folder of Gallery. See "Gallery," p. 35.
Options for a recorded video clip• To immediately play the video clip you just recorded,
select Options > Play.
• If you do not want to keep the video, press clear.
• To return to the viewthe middle of the scr
• To send the video Viathe call key. For more41 and "Bluetooth co
Adjust video recSelect Options > Settingwant to change:
Length—If you select Marecording is restricted bmemory card, and up to a video clip recorded likeproperties. Select Short (approximately 30 seconconveniently sent as a mcompatible device. Somesupport sending multimsize of 100 KB.
Video resolution—Select
Default video name—Defthe date.
Memory in use—Define tmemory, or memory car

Cam
era
and
Galle
ry
35
of Gallery’s main folders using raphic downls., Video downlds., ownlds.. The browser opens, and ed site from which to download.Options > Find. Start to enter a , the name or date of the file you
atch your search are shown.
ra are stored in Gallery. Images a multimedia message, as an ough a Bluetooth connection. in the gallery, you must save it n a memory card.
in Gallery to start the image nd press the scroll key to view it.
ing an image are Send, Set as Zoom in or Zoom out, Full ame, View details, Add to 'Go
.ptions > Zoom in or Zoom out.
ratio at the top of the display. tored permanently. To move the ing an image or viewing an , use the scroll key. select Options > Full screen. ge are removed.t Options > Rotate.
Gallery
To store and organize your images, video clips, tracks, sound clips, links, and .ram files, select Menu > Gallery.
Select Images , Video clips , Tracks , Sound clips , Links , or All files , and press the scroll key to
open it.You can browse, open, and create folders and mark, copy, and move items to folders. Sound clips, video clips, .ram files, and streaming links are opened and played in RealPlayer™, see p. 38.
Tip! You can transfer images from your phone to a compatible PC with Nokia Phone Browser available in Nokia PC Suite. See the CD-ROM, if supplied in the sales package.Tip! You can transfer music files from your phone to your memory card with Nokia Audio Manager available in Nokia PC Suite. See the CD-ROM, if supplied in the sales package.
Press the scroll key to open a file or a folder. Images open in the image viewer. See "View images," p. 35. To copy or move files to the memory card or to phone memory, select a file and Options > Organize > Copy to memory card or Move to memory card or Copy to phone mem. or Move to phone mem.. Files stored on the memory card are indicated with .
To download files into onethe browser, select , GTrack downlds., or Sound dyou can select a bookmarkTo search for a file, select search string (for exampleare searching). Files that m
View imagesPictures taken with Camecan also be sent to you ine-mail attachment, or thrTo view a received image in the phone memory or oOpen the Images folder viewer, select an image, a
Options when viewwallpaper, Rotate,screen, Delete, Rento', Help, and Exit
To zoom an image, select OYou can see the zooming The zooming ratio is not sfocus when you are zoomimage in full screen modeTo see more of the image,The panes around the imaTo rotate the image, selec

Imag
ing
36
clip or a sound clip in the cut video nd clip view.
clip, sound clip, or new sound clip.
the selected video clip. A thumbnail shown in the main view. A s of the first non-black view of the e and length of the selected video
the selected sound clip. The name elected sound clip is shown in the
ecords a new sound clip to the
s a list of editing options.
video clip to the selected location.
Inserts a color effect on the
Slows the speed of the video clip.
mute sound—Mutes or unmutes clip sound.
ImagingVideo editor
To create custom video clips, select Menu > Imaging > Vid. editor. You can combine and trim video clips, and add sound clips, transitions, and effects. Transitions are visual effects that you can add in the beginning and end of the video or between the video clips.
Edit video, sound, and transitions1 Mark and select one or more video clips.
2 Select Options > Edit. In the edit video view, you can insert video clips to create a custom video clip, and then edit the clips by trimming and adding effects. You can add sound clips and change their length. Scroll up or down to move between the video clip and the sound clip.
Tip! To take a snapshot of a video clip, select Options > Take snapshot in the play view, edit preview view, or in the cut view.
To modify the video, select one of the following options:
Preview—Previews the custom video clip.
Cut—Trims the video clip or in the cut sou
Insert—Inserts a video
• Video clip—Insertsof the video clip isthumbnail consistvideo clip. The namclip is also shown.
• Sound clip—Insertsand length of the smain view.
• New sound clip—Rselected location.
Edit video clip—Open
• Move—Moves the
• Add color effect—video clip.
• Use slow motion—
• Mute sound or Unthe original video
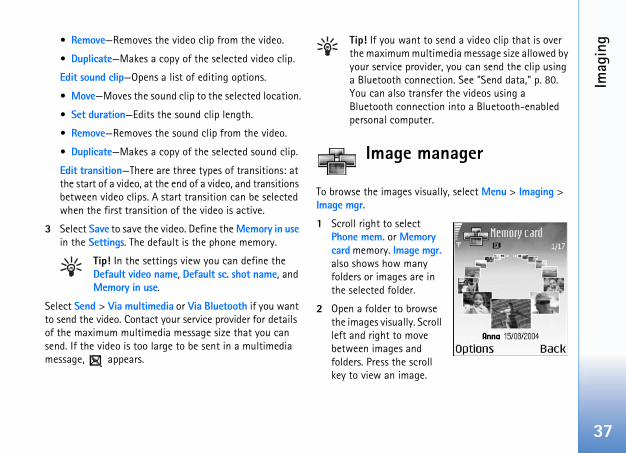
Imag
ing
37
send a video clip that is over timedia message size allowed by er, you can send the clip using ction. See "Send data," p. 80. fer the videos using a ion into a Bluetooth-enabled .
anager
ally, select Menu > Imaging >
y gr.
n
se oll
l
• Remove—Removes the video clip from the video.
• Duplicate—Makes a copy of the selected video clip.
Edit sound clip—Opens a list of editing options.
• Move—Moves the sound clip to the selected location.
• Set duration—Edits the sound clip length.
• Remove—Removes the sound clip from the video.
• Duplicate—Makes a copy of the selected sound clip.
Edit transition—There are three types of transitions: at the start of a video, at the end of a video, and transitions between video clips. A start transition can be selected when the first transition of the video is active.
3 Select Save to save the video. Define the Memory in use in the Settings. The default is the phone memory.
Tip! In the settings view you can define the Default video name, Default sc. shot name, and Memory in use.
Select Send > Via multimedia or Via Bluetooth if you want to send the video. Contact your service provider for details of the maximum multimedia message size that you can send. If the video is too large to be sent in a multimedia message, appears.
Tip! If you want tothe maximum mulyour service provida Bluetooth conneYou can also transBluetooth connectpersonal computer
Image m
To browse the images visuImage mgr.
1 Scroll right to select Phone mem. or Memorcard memory. Image malso shows how many folders or images are ithe selected folder.
2 Open a folder to browthe images visually. Scrleft and right to movebetween images and folders. Press the scrolkey to view an image.
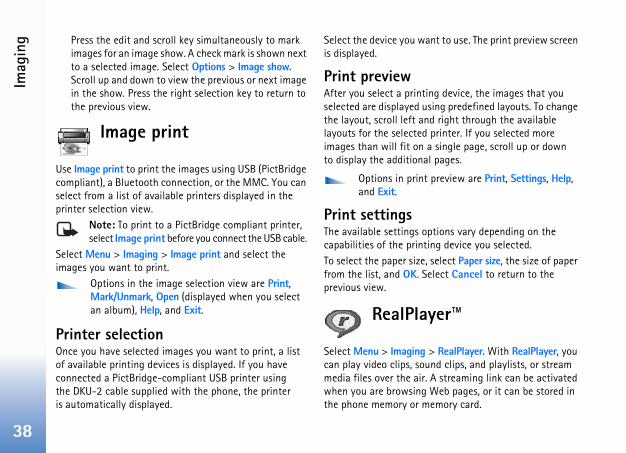
Imag
ing
38
nt to use. The print preview screen
ng device, the images that you ing predefined layouts. To change d right through the available printer. If you selected more single page, scroll up or down
l pages.
preview are Print, Settings, Help,
tions vary depending on the ng device you selected.select Paper size, the size of paper lect Cancel to return to the
er™
> RealPlayer. With RealPlayer, you nd clips, and playlists, or stream A streaming link can be activated Web pages, or it can be stored in emory card.
Press the edit and scroll key simultaneously to mark images for an image show. A check mark is shown next to a selected image. Select Options > Image show. Scroll up and down to view the previous or next image in the show. Press the right selection key to return to the previous view.
Image print
Use Image print to print the images using USB (PictBridge compliant), a Bluetooth connection, or the MMC. You can select from a list of available printers displayed in the printer selection view.
Note: To print to a PictBridge compliant printer, select Image print before you connect the USB cable.
Select Menu > Imaging > Image print and select the images you want to print.
Options in the image selection view are Print, Mark/Unmark, Open (displayed when you select an album), Help, and Exit.
Printer selectionOnce you have selected images you want to print, a list of available printing devices is displayed. If you have connected a PictBridge-compliant USB printer using the DKU-2 cable supplied with the phone, the printer is automatically displayed.
Select the device you wais displayed.
Print previewAfter you select a printiselected are displayed usthe layout, scroll left anlayouts for the selected images than will fit on ato display the additiona
Options in print and Exit.
Print settingsThe available settings opcapabilities of the printiTo select the paper size, from the list, and OK. Seprevious view.
RealPlay
Select Menu > Imagingcan play video clips, soumedia files over the air. when you are browsing the phone memory or m

Imag
ing
39
in RealPlayer are as follows:
udio
y
—audio only
—video only
as follows:
up.
media file, scroll down.
oll left until is displayed.
croll right until is displayed.
ver the airquire you to use an Internet r default access point. Other u to use a WAP access point.
configured when you first start
ider for more information.
y open an rtsp: // URL address. ecognize an http link to a
RealPlayer supports files with extensions such as .aac, .awb, .m4a, .mid, .mp3, and .wav. However, RealPlayer does not necessarily support all file formats or all the variations of file formats. For example, RealPlayer will attempt to open all .mp4 files, but some .mp4 files may include content that is not compliant with 3GPP standards and, therefore, is not supported by this phone.
Options in RealPlayer when a clip is selected are Play, Play in full screen or Continue, Continue in full scr.; Stop, Mute or Unmute, Clip details, Send, Settings, Help, and Exit.
Play video or sound clips1 To play a media file stored in phone memory or on the
memory card, select Options > Open and select:
Most recent clips—To play one of the last six files played in RealPlayer.
Saved clip—To play a file saved in Gallery. See "Gallery," p. 35.
Mem. card sound clips—To play files saved on the memory card.
2 Scroll to a file, and press the scroll key to play the file.
Tip! To view a video clip in full screen mode, press 2. Press it again to change back to normal screen mode.
Icons for settings options
Repeat—video and a
Random—audio onl
Repeat and random
Loudspeaker muted
Shortcuts during play are
• To fast forward, scroll
• To rewind through the
• To mute the sound, scr
• To turn on the sound, s
Stream content oMany service providers reaccess point (IAP) for youservice providers allow yo
The access points may be your phone.
Contact your service prov
In RealPlayer, you can onlHowever, RealPlayer will r.ram file.

Imag
ing
40
nter the port number of the
ediate servers between media ome service providers use them to ity or speed up access to browser d or video clips.
roll to the access point you want Internet, and press the scroll key.
e for RealPlayer to disconnect you have paused a media clip rk link, select User defined, and r the time, and select OK.
croll left or right to set the between selecting a network link edia server, and select OK.
left or right to set the maximum nse from the media server before t OK.
the lowest port number of the inimum value is 6970.
the highest port number of the aximum value is 32000. Select
ings to edit the bandwidth values
To stream content over the air, select a streaming link saved in Gallery, on a Web page, or received in a text message or multimedia message. Before live content begins streaming, your phone connects to the site and starts loading the content.
Receive RealPlayer settingsYou may receive RealPlayer settings in a special text message from the network operator or service provider. See "Data and settings," p. 47. For more information, contact your network operator or service provider.
Change the RealPlayer settingsSelect Options > Settings and choose from the following:
Video—To select if you want to automatically repeat video clips after they finish playing.
Audio settings—To select if you want to repeat playing of track lists and play sound clips on a track list in random order.
Connection—To select whether to use a proxy server, change the default access point, and set the time-outs and port range used when connecting. Contact your service provider for the correct settings.
Proxy:Use proxy—To use a proxy server, select Yes.• Proxy serv. address—Enter the IP address of the
proxy server.
• Proxy port number—Eproxy server.
Proxy servers are intermservers and their users. Sprovide additional securpages that contain soun
Network: Default access point—Scto use to connect to the
Online time—Set the timfrom the network when playing through a netwopress the scroll key. Ente
Connection time-out—Smaximum time to elapseand connecting to the m
Server time-out—Scroll time to wait for a respodisconnecting, and selec
Lowest UDP port—Enter servers port range. The m
Highest UDP port—Enterservers port range. The mOptions > Advanced settfor different networks.
Mes
sagi
ng
41
anizing your messages into ssages by adding new folders
x, you can connect to your e your new e-mail messages or ved e-mail messages offline.
aft messages that have not
last 20 messages that have been nt using a Bluetooth connection. essages to be saved, see "Other
ry storage place for messages
elivery reports that you request ext messages and multimedia etwork service). Receiving a edia message that has been
might not be possible.
ve opened any of the default e folders, scroll left or right.
MessagingSelect Menu > Messaging. In Messaging, you can create, send, receive, view, edit, and organize text messages, multimedia messages, e-mail messages, and special text messages containing data. You can also receive messages and data through a Bluetooth connection, receive Web service messages, receive cell broadcast messages, and send service commands.
Options in the Messaging main view are Open, Create message, Connect (if you have defined mailbox settings but a connection to the mailbox is not active) or Disconnect (if a connection to the mailbox is active), SIM messages, Cell broadcast, Service command, Settings, Help, and Exit.
Note: Only devices that have compatible features can receive and display multimedia messages. The appearance of a message may vary depending on the receiving device.
When you open Messaging, you can see the New message function and a list of folders:
Inbox—Contains received messages except e-mail and cell broadcast messages. E-mail messages are stored in the Mailbox.
My folders—For orgfolders. Organize your meunder My folders.
Mailbox—In Mailboremote mailbox to retrievview your previously retrieSee "E-mail," p. 53.
Drafts—Contains drbeen sent.
Sent—Contains the sent, excluding messages seTo change the number of msettings," p. 56.
Outbox—A temporawaiting to be sent.
Reports—Contains dfrom the network of the tmessages you have sent (ndelivery report of a multimsent to an e-mail address
Tip! When you hafolders, to view th
Mes
sagi
ng
42
right of the display when you are ional text input.
1–9) repeatedly until the desired ere are more characters available n are printed on the key.
ress and hold the number key.
tter and number mode, press and
cated on the same key as the til the cursor appears (or scroll -out period), and enter the letter.
press the clear key. Press and hold more than one character.
nctuation marks are available atedly to reach the desired
f special characters. Scroll through character.
ss 0. To move the cursor to the ee times.
e different character cases Abc, #.
To enter and send service requests, such as activation commands for network services, to your service provider, select Options > Service command in the main view of Messaging.
Cell broadcast is a network service that allows you to receive messages on various topics, such as weather or traffic conditions from your service provider. For available topics and relevant topic numbers, contact your service provider. In the main view of Messaging, select Options > Cell broadcast. In the main view, you can see the status of a topic, a topic number, name, and follow-up flag ( ), if applicable.
Options in Cell broadcast are Open, Subscribe or Unsubscribe, Hotmark or Remove hotmark, Topic, Settings, Help, and Exit.
A packet data connection may prevent cell broadcast reception.
Writing text
Traditional text inputABC and abc indicate the selected case. Abc means that the first letter of the word is written in upper case, and all other letters are automatically written in lower case. 123 indicates number mode.
Abc is shown on the topwriting text using tradit
• Press a number key (character appears. Thfor a number key tha
• To insert a number, p
• To switch between lehold #.
• If the next letter is lopresent one, wait unright to end the time
• To erase a character,the clear key to clear
• The most common puunder 1. Press 1 repepunctuation mark.
Press * to open a list othe list, and select a
• To insert a space, prenext line, press 0 thr
• To switch between thabc, and ABC, press
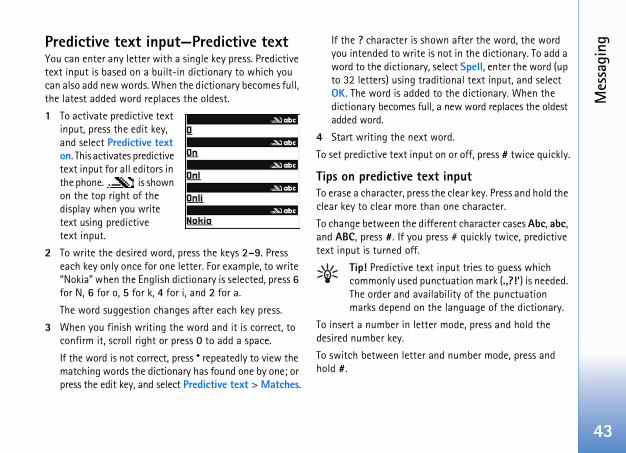
Mes
sagi
ng
43
own after the word, the word s not in the dictionary. To add a select Spell, enter the word (up ditional text input, and select to the dictionary. When the l, a new word replaces the oldest
word.
t on or off, press # twice quickly.
t input the clear key. Press and hold the an one character.
ferent character cases Abc, abc, ress # quickly twice, predictive
t input tries to guess which nctuation mark (.,?!‘) is needed. lability of the punctuation he language of the dictionary.
er mode, press and hold the
and number mode, press and
Predictive text input—Predictive textYou can enter any letter with a single key press. Predictive text input is based on a built-in dictionary to which you can also add new words. When the dictionary becomes full, the latest added word replaces the oldest.
1 To activate predictive text input, press the edit key, and select Predictive text on. This activates predictive text input for all editors in the phone. is shown on the top right of the display when you write text using predictive text input.
2 To write the desired word, press the keys 2–9. Press each key only once for one letter. For example, to write “Nokia” when the English dictionary is selected, press 6 for N, 6 for o, 5 for k, 4 for i, and 2 for a.
The word suggestion changes after each key press.
3 When you finish writing the word and it is correct, to confirm it, scroll right or press 0 to add a space.
If the word is not correct, press * repeatedly to view the matching words the dictionary has found one by one; or press the edit key, and select Predictive text > Matches.
If the ? character is shyou intended to write iword to the dictionary,to 32 letters) using traOK. The word is addeddictionary becomes fuladded word.
4 Start writing the next
To set predictive text inpu
Tips on predictive texTo erase a character, pressclear key to clear more th
To change between the difand ABC, press #. If you ptext input is turned off.
Tip! Predictive texcommonly used puThe order and avaimarks depend on t
To insert a number in lettdesired number key.
To switch between letter hold #.

Mes
sagi
ng
44
ordscompound word; to confirm it, st part of the compound word. nd word, press 0 to add a space.
input offlect Predictive text > Off to turn for all editors in the phone.
boardwords, press and hold the edit right. As the selection moves,
e clipboard, while still holding the .
o a document, press and hold the aste, or press the edit key once,
t, press and hold the edit key and
ed text from the document, press
The most common punctuation marks are available under 1. Press 1 and then * repeatedly to search for the desired punctuation mark.
Press and hold * to open a list of special characters.Press * repeatedly to view the matching words the dictionary has found one by one.Press the edit key, select Predictive text, and scroll right to select one of the following options:Matches—To view a list of words that correspond to your key presses. Insert word—To add a word (up to 32 letters) to the dictionary by using traditional text input. When the dictionary becomes full, a new word replaces the oldest added word.Edit word—To edit the word using traditional text input. This is available if the word is active (underlined).
Tip! When you press the edit key, the following options appear (depending on the editing mode): Predictive text (predictive text input), Alpha mode (traditional text input), Number mode, Cut (if text has been selected), Copy (if text has been selected), Paste (when text has been cut or copied first), Insert number, Insert symbol, and Writing language: (changes the input language for all editors in the phone).
Write compound wWrite the first half of a scroll right. Write the laTo complete the compou
Turn predictive textPress the edit key, and sepredictive text input off
Copy text to clip1 To select letters and
key and scroll left ortext is highlighted.
2 To copy the text to thedit key, select Copy
3 To insert the text intedit key, and select Pand select Paste.
To select lines of texscroll up or down.
To remove the selectthe clear key.
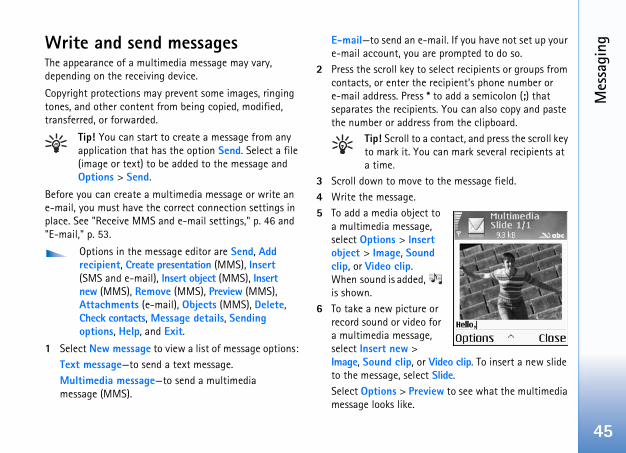
Mes
sagi
ng
45
ail. If you have not set up your e prompted to do so.select recipients or groups from recipient’s phone number or to add a semicolon (;) that ts. You can also copy and paste from the clipboard.contact, and press the scroll key can mark several recipients at
o the message field.
to , t d
or for ,
Video clip. To insert a new slide Slide.iew to see what the multimedia
Write and send messagesThe appearance of a multimedia message may vary, depending on the receiving device.
Copyright protections may prevent some images, ringing tones, and other content from being copied, modified, transferred, or forwarded.
Tip! You can start to create a message from any application that has the option Send. Select a file (image or text) to be added to the message and Options > Send.
Before you can create a multimedia message or write an e-mail, you must have the correct connection settings in place. See "Receive MMS and e-mail settings," p. 46 and "E-mail," p. 53.
Options in the message editor are Send, Add recipient, Create presentation (MMS), Insert (SMS and e-mail), Insert object (MMS), Insert new (MMS), Remove (MMS), Preview (MMS), Attachments (e-mail), Objects (MMS), Delete, Check contacts, Message details, Sending options, Help, and Exit.
1 Select New message to view a list of message options: Text message—to send a text message. Multimedia message—to send a multimedia message (MMS).
E-mail—to send an e-me-mail account, you ar
2 Press the scroll key to contacts, or enter the e-mail address. Press *separates the recipienthe number or address
Tip! Scroll to a to mark it. Youa time.
3 Scroll down to move t4 Write the message.5 To add a media object
a multimedia messageselect Options > Inserobject > Image, Sounclip, or Video clip. When sound is added, is shown.
6 To take a new picture record sound or video a multimedia messageselect Insert new > Image, Sound clip, or to the message, selectSelect Options > Prevmessage looks like.
Mes
sagi
ng
46
g you can also create presentations a multimedia message. In the age editor view, select Options > ion (shown only if MMS creation uided or Free). See "Multimedia .
d e-mail settingstings in a text message from your ice provider. See "Data and
bscription to data services, contact r service provider. Follow the ur service provider.
manually:
gs > Connection > Access points, gs for a multimedia messaging nnection settings," p. 88.
ptions > Settings > Multimedia oint in use and the access point d as the preferred connection. See ssages," p. 53.
eive, retrieve, reply to, and forward following:
access point (IAP). See "Connection
7 Select Insert new > Sound clip, Recorder to record a new sound and Select to save and insert a copy of the new sound into the message. Select Options > Preview to view the multimedia message.
8 To add an attachment to an e-mail, select Options > Insert > Image, Sound clip, Video clip or Note. E-mail attachments are indicated by in the navigation bar.
9 To send the message, select Options > Send, or press the call key.
Your device supports the sending of text messages beyond the character limit for a single message. Longer messages will be sent as a series of two or more messages. Your service provider may charge accordingly. Characters that use accents or other marks, and characters from some language options like Chinese, take up more space limiting the number of characters that can be sent in a single message.
E-mail messages are automatically placed in the Outbox before sending. If sending does not succeed, the e-mail is left in the Outbox with Failed status.
Tip! If you are not sure of the capabilities of the receiving device, or the network does not support sending large files, use a smaller image size or a sound clip that is no longer than 15 seconds. To change the setting, select Messaging > Options > Settings > Multimedia message > Image size.
Tip! In Messaginand send them inmultimedia messCreate presentatmode is set to Gmessages," p. 47
Receive MMS anYou may receive the setnetwork operator or servsettings," p. 47.
For availability of and suyour network operator oinstructions given by yo
Enter the MMS settings
1 Select Tools > Settinand define the settinaccess point. See "Co
2 Select Messaging > Omessage > Access pyou created to be usealso "Multimedia me
Before you can send, rece-mail, you must do the
• Configure an Internetsettings," p. 88.
Mes
sagi
ng
47
gese caution when opening dia message objects may
software or otherwise be vice or PC.
dia message, you may see an simultaneously listen to a aker ( is shown if sound is key to listen to the sound.
lect Options > Objects to see ts have been included in the can save a multimedia object it, for example, through a nother compatible device.
timedia presentations. To view t Options > Play presentation.
y prevent some images, music nd other content from being
red, or forwarded.
any kinds of text messages that led over-the-air (OTA) messages:
ou may receive a text message lbox number, Internet access
• Define your e-mail settings. See "E-mail," p. 53. You need to have a separate e-mail account. Follow the instructions given by your remote mailbox and Internet service provider (ISP).
Inbox
Inbox icons are as follows:
Unread messages in Inbox Unread text message
Unread multimedia message
Data received through a Bluetooth connection
When you receive a message, 1 new message are shown in the standby mode. Select Show to open the message. To open a message in Inbox, scroll to the message and select it.
If a message contains phone numbers, e-mail addresses, or URLs, they are underlined. Each underlined item can be used as a shortcut. Scroll up or down to move through the items, and select Options in each case to, for example, make a call using a phone number in the message.
To remove the underlining and shortcuts, select Automatic find off.
Multimedia messaImportant: Exercismessages. Multimecontain malicious harmful to your de
When you open a multimeimage and a message, andsound through the loudspeincluded). Press the scroll
Open the message, and sewhat kind of media objecmultimedia message. Youfile in your phone or sendBluetooth connection to a
You may also receive multhese presentations, selec
Copyright protections ma(including ringing tones) acopied, modified, transfer
Data and settingsYour phone can receive mcontain data ( ), also cal
Configuration message—Yservice number, voice mai
Mes
sagi
ng
48
e a vCard file that has a picture ture is saved to Contacts.
sages) are notifications, such as news
ain a text message or a link. For ion, contact your service provider.
rs
rganize your messages into rs, and rename and delete folders.
texts in the templates folder to essages that you send often.
x
d have not set up your e-mail ted to do so. See "E-mail," p. 53. mailbox, the name you give to the x in the Messaging main view. ailboxes.
point settings, access point login script settings, or e-mail settings from your network operator, service provider, or other information management organization in a configuration message. To save the settings, select Options > Save all.Business card—To save the information to Contacts, select Options > Save business card. Certificates or sound files attached to the business card are not saved.Ringing tone—To save the ringing tone, select Options > Save.Operator logo—For the logo to be shown in the standby mode instead of the network operator’s identification, select Options > Save.
Tip! To change the default access point settings for multimedia messaging, select Messaging > Options > Settings > Multimedia message > Access point in use.
Calendar entry—To save the invitation, select Options > Save to Calendar.Web message—To save the bookmark to the bookmarks list in Web, select Options > Add to bookmarks. If the message contains both access point settings and bookmarks, to save the data, select Options > Save all.
E-mail notification—Tells you how many new e-mails you have in your remote mailbox. An extended notification may list more detailed information.
Tip! If you receivattached, the pic
Web service mesWeb service messages (headlines, and may contavailability and subscript
My folde
In My folders, you can ofolders, create new folde
Tip! You can useavoid rewriting m
Mailbo
If you select Mailbox anaccount, you are prompWhen you create a new mailbox replaces MailboYou can have up to six m
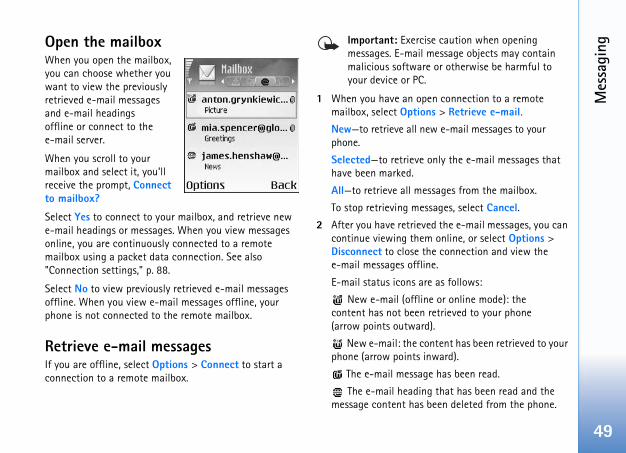
Mes
sagi
ng
49
e caution when opening essage objects may contain
or otherwise be harmful to
n connection to a remote s > Retrieve e-mail.w e-mail messages to your
nly the e-mail messages that
sages from the mailbox.
sages, select Cancel.d the e-mail messages, you can online, or select Options > e connection and view the e.
as follows:
e or online mode): the etrieved to your phone ).
ntent has been retrieved to your ward).
e has been read.
that has been read and the een deleted from the phone.
Open the mailboxWhen you open the mailbox, you can choose whether you want to view the previously retrieved e-mail messages and e-mail headings offline or connect to the e-mail server.
When you scroll to your mailbox and select it, you’ll receive the prompt, Connect to mailbox?
Select Yes to connect to your mailbox, and retrieve new e-mail headings or messages. When you view messages online, you are continuously connected to a remote mailbox using a packet data connection. See also "Connection settings," p. 88.
Select No to view previously retrieved e-mail messages offline. When you view e-mail messages offline, your phone is not connected to the remote mailbox.
Retrieve e-mail messagesIf you are offline, select Options > Connect to start a connection to a remote mailbox.
Important: Exercismessages. E-mail mmalicious softwareyour device or PC.
1 When you have an opemailbox, select OptionNew—to retrieve all nephone.
Selected—to retrieve ohave been marked.
All—to retrieve all mes
To stop retrieving mes
2 After you have retrievecontinue viewing themDisconnect to close the-mail messages offlin
E-mail status icons are
New e-mail (offlincontent has not been r(arrow points outward
New e-mail: the cophone (arrow points in
The e-mail messag
The e-mail headingmessage content has b
Mes
sagi
ng
50
essagesf an e-mail message from the g it in the remote mailbox, select
ete msg. from: > Phone only.-mail headings in the remote elete the message content, the our phone. If you want to remove must first delete the e-mail e mailbox; then make a connection remote mailbox again to update
-mail from the remote mailbox to y folders, select Options > Copy
er from the list, and OK. the phone and the remote > Delete > Delete msg. from: >
mail is deleted first from your onnection to the remote mailbox, d from the remote mailbox. If you
ocol, messages marked to be y after you have closed the e mailbox.mail from the phone and server, has been marked to be deleted ion ( ), and select
3 To open an e-mail message, scroll to it and select it. If the e-mail message has not been retrieved (arrow in the icon is pointing outward) and you are offline, you are asked if you want to retrieve this message from the mailbox.
To view e-mail attachments, open a message that has the attachment indicator ( ), and select Options > Attachments. If the attachment has a dimmed indicator, it has not been retrieved to the phone; select Options > Retrieve. In the Attachments view, you can retrieve, open, save, or remove attachments. You can also send attachments using a Bluetooth connection.
Tip! If your mailbox uses the IMAP4 protocol, you can define how many messages to retrieve, and whether to retrieve the attachments. With the POP3 protocol, the options are Headers only, Partially (kB), or Msgs. & attachs..
Retrieve e-mail messages automaticallyTo retrieve messages automatically, select Options > E-mail settings > Automatic retrieval > Header retrieval:
Select Always on, or Only in home net., and define when, and how often, the messages are retrieved.
Retrieving e-mail messages automatically may increase your call costs due to the data traffic.
Delete e-mail mTo delete the contents ophone while still retaininOptions > Delete > DelThe phone mirrors the emailbox. Although you de-mail heading stays in ythe heading as well, youmessage from your remotfrom your phone to the the status.
Tip! To copy an ea folder under Mto folder, a fold
To delete an e-mail frommailbox, select OptionsPhone and server.If you are offline, the e-phone. During the next cit is automatically deleteare using the POP3 protdeleted are removed onlconnection to the remotTo cancel deleting an e-scroll to an e-mail that during the next connectOptions > Undelete.

Mes
sagi
ng
51
Outbox are as follows:
being established and the
message will be sent when ilar type have been sent.
e phone will try to send the e-out period. Select Options > essage immediately.
cuments to be held in Outbox. s being sent, and select .
ber of sending attempts has s failed. If you were trying to the message, and check that
orrect.
e outbox, for example, when work coverage. You can also to be sent the next time you ailbox.
messages, you must copy them
n view, select Options >
Disconnect from the mailboxWhen you are online, select Options > Disconnect to end the packet data connection to the remote mailbox.
Tip! You can also leave your mailbox connection open, and new e-mails (Headers only as default) will be automatically retrieved from the remote mailbox to your phone (only if the IMAP IDLE function is supported by your server). To leave the messaging application open in the background, press the menu key twice. Leaving the connection open may increase your call costs due to the data traffic.
View e-mail messages when offlineWhen you open Mailbox, you will receive the Connect to mailbox? query. If you want to view and read e-mail messages offline, answer No. You can read the previously retrieved e-mail headings, the retrieved e-mail messages, or both. You can also write, reply to, or forward e-mail to be sent the next time you connect to the mailbox.
Outbox
Outbox is a temporary storage place for messages waiting to be sent.
Status of the messages in
Sending—A connection ismessage is being sent.
Waiting or Queued—The previous messages of a sim
Resend at %U (time)—Thmessage again after a timSend to try sending the m
Deferred—You can set doScroll to a message that iOptions > Defer sendingFailed—The maximum numbeen reached. Sending hasend a text message, openthe Sending options are c
Messages are placed in thyour phone is outside netschedule e-mail messagesconnect to your remote m
View messagesBefore you can view SIM to a folder in your phone.
1 In the Messaging maiSIM messages.
Mes
sagi
ng
52
ge this option only if you are sure r is able to convert text messages . Contact your network operator.
You can send text messages network or through packet network. See "Connection
work service)—Choose Yes, if you to be sent using the same text .
iting text message center settings sg. center, Delete, Help, and Exit.
ge center, do the following:
ers > Options > New msg. center.
message center, and select OK.
s the scroll key. Write the number center. You receive the number vider.
gs, go back to the settings view. r in use, and select the new
2 Select Options > Mark/Unmark > Mark or Mark all to mark messages.
3 Select Options > Copy. A list of folders opens.
4 Select a folder and OK to start copying. Open the folder to view the messages.
Messaging settingsText messagesSelect Messaging > Options > Settings > Text message and from the following:
Message centers—Lists all the text message centers that have been defined.
Msg. center in use—Select which message center is used for delivering text messages.
Receive report (network service)—To request the network to send delivery reports on your messages. When set to No, only the Sent status is shown in Log. See "Log," p. 20.
Message validity—If the recipient of a message cannot be reached within the validity period, the message is removed from the text message center. The network must support this feature. Maximum time is the maximum amount of time allowed by the network.
Message sent as—Chanthat your message centeinto these other formats
Preferred connection—through the normal GSMdata, if supported by thesettings," p. 88.
Reply via same ctr. (netwant the reply messagemessage center number
Options when edare Edit, New m
To add a new text messa
1 Select Message cent
2 Write a name for the
3 Scroll down, and presof the text message from your service pro
4 Select OK.
5 To use the new settinScroll to Msg. centemessage center.
Mes
sagi
ng
53
elect No if you want to reject anonymous sender.her you want to receive rtisements or not.ervice)—Select Yes if you want sage to be shown in the Log.t of a multimedia message that il address might not be possible.ect Yes if you do not want ry reports of received
ecipient of a message cannot be period, the message is removed aging center. The network must imum time is the maximum y the network.obtain the multimedia and m your service provider through essage. Contact your service information. See "Data and
ns > Settings > E-mail, or in lect Options > E-mail settings
Multimedia messagesSelect Messaging > Options > Settings > Multimedia message and from the following:
Image size—Define the size of the image in a multimedia message. The options are Small, Large, and Original (shown only when the MMS creation mode is set to Guided or Free). Select Original to increase the size of the multimedia message.
The wireless network may limit the size of MMS messages. If the inserted picture exceeds this limit, the device may make it smaller so that it can be sent by MMS.
MMS creation mode—If you select Guided, the phone informs you if you try to send a message that may not be supported by the recipient. Select Restricted; the phone prevents you from sending messages that are not supported.
Access point in use (Must be defined)—Select which access point is used as the preferred connection for the multimedia message center.
Recept. in home net.—Select whether you want the reception of the MMS messages in the home network to be Automatic, Manual, or Off. Reception if roaming—Select how you want the MMS messages to be retrieved outside the home network—Automatic, Manual, or Off. When you are outside your home network, sending and receiving multimedia messages may be billed differently.
Allow anon. messages—Smessages coming from anReceive ads—Define whetmultimedia message adveReceive report (network sthe status of the sent mesReceiving a delivery reporhas been sent to an e-maDeny report sending—Selyour phone to send delivemultimedia messages.Message validity—If the rreached within the validityfrom the multimedia messsupport this feature. Maxamount of time allowed b
Tip! You may also e-mail settings froa configuration mprovider for more settings," p. 47.
E-mailSelect Messaging > Optiothe mailbox main view, seand from the following:

Mes
sagi
ng
54
assword. If you leave this field for the password when you try to mailbox.
ust be defined)—Enter the IP the mail server that receives
the e-mail protocol that your rovider recommends. The options is setting can be selected only once f you have saved or exited from the re using the POP3 protocol, e-mail d automatically in online mode. To ssages, you must disconnect and to your mailbox.
with the POP3, IMAP4, and SMTP onnection to the remote mailbox.
shown if IMAP4 is selected for th the POP3 protocol to encrypt s to the remote e-mail server while ox.
shown if the e-mail protocol is w many new e-mails are
Mailbox in use—Select which mailbox you want to use for sending e-mail.
Mailboxes—Opens a list of mailboxes that have been defined. If no mailboxes have been defined, you are prompted to define one. Select a mailbox to change the settings:
Mailbox settings:
Mailbox name—Enter a descriptive name for the mailbox.
Access point in use (Must be defined)—Choose an Internet access point (IAP) for the mailbox. See "Connection settings," p. 88.
My e-mail address (Must be defined)—Enter the e-mail address given to you by your service provider. Replies to your messages are sent to this address.
Outgoing mail server (Must be defined)—Enter the IP address or host name of the mail server that sends your e-mail. You may only be able to use the outgoing server of your network operator. Contact your service provider for more information.
Send message—Define how e-mail is sent from your phone. Select Immediately for the device to connect to the mailbox when you select Send message. Select During next conn.—E-mail is sent when the connection to the remote mailbox is available.
User name—Enter your user name, given to you by your service provider.
Password:—Enter your pblank, you are promptedconnect to your remote
Incoming mail server (Maddress or host name ofyour e-mail.
Mailbox type:—Defines remote mailbox service pare POP3 and IMAP4. Thand cannot be changed imailbox settings. If you amessages are not updatesee the latest e-mail memake a new connection
Security (ports)—Used protocols to secure the c
APOP secure login (notMailbox type)—Used withe sending of passwordconnecting to the mailb
User settings:
E-mails to retrieve (not set to POP3)—Define horetrieved to mailbox.
Mes
sagi
ng
55
agesns > Settings > Service you want to receive service set the phone to automatically start a network connection to phone receives a service messages > Automatically .
and related topic numbers with select Messaging > Options > t to change the settings.
eceive cell broadcast messages, receive cell broadcast messages.
to receive cell broadcast languages. Selected allows you hich you would like to receive f you cannot find the desired
ave set Topic detection > On, earches for new topic numbers, rs without a name to the topic ot want to save new topic
Retrieve—Define which parts of the e-mails are retrieved: Headers only, Partially (kB), or Msgs. & attachs. (not shown if the e-mail protocol is set to IMAP4).
Retrieve attachments (not shown if the e-mail protocol is set to POP3)—Choose whether you want to retrieve e-mail with or without attachments.
Subscribed folders (not shown if the e-mail protocol is set to POP3)—You can subscribe other folders in remote mailbox as well and retrieve content from those folders.
Send copy to self—Select Yes to save a copy of the e-mail to your remote mailbox and to the address defined in My e-mail address.
Include signature—Select Yes if you want to attach a signature to your e-mail messages.
My name—Enter your own name here. Your name replaces your e-mail address in the recipient’s phone when the recipient’s phone supports this function.
Automatic retrieval:
Header retrieval—When this function is on messages are retrieved automatically. You can define when, and how often, the messages are retrieved.
Activating Header retrieval may increase your call costs due to the data traffic.
Web service messSelect Messaging > Optiomessage. Choose whethermessages. If you want to activate the browser and retrieve content when themessage, select Download
Cell broadcastCheck the available topicsyour service provider, andSettings > Cell broadcas
Reception—Select On to ror Off if you do not wish to
Language—All allows youmessages in all supported to choose languages in wcell broadcast messages. Ilanguage, select Other.
Topic detection—If you hthe phone automatically sand saves the new numbelist. Select Off if you do nnumbers automatically.
Mes
sagi
ng
56
ine how many sent messages may lder at a time. The default limit is limit is reached, the oldest
which memory to which you want hone memory or Memory card.
se whether you want to see the tone, or a note when new mail is
Other settingsSelect Messaging > Options > Settings > Other.
Save sent messages—Choose if you want to save a copy of every text message, multimedia message, or e-mail that you have sent. Saved messages will be stored in the Sent folder.
Tip! If Memory card is selected, activate the offline profile before opening the memory card slot door or removing the memory card. When the memory card is not available, messages are saved in the phone memory.
No. of saved msgs.—Defbe stored in the Sent fo20 messages. When the message is deleted.
Memory in use—Choose to save your messages: P
New e-mail alerts—Choonew e-mail indication, areceived in the mailbox.
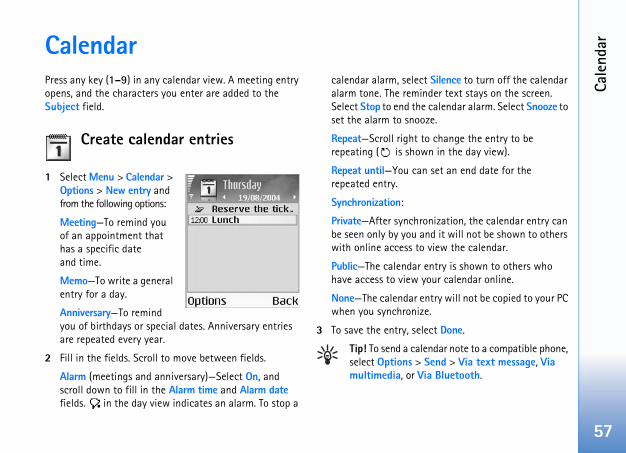
Cale
ndar
57
Silence to turn off the calendar er text stays on the screen. alendar alarm. Select Snooze to
e.
change the entry to be n in the day view).
set an end date for the
ization, the calendar entry can d it will not be shown to others iew the calendar.
ntry is shown to others who ur calendar online.
try will not be copied to your PC .
ct Done.
dar note to a compatible phone, end > Via text message, Via Bluetooth.
CalendarPress any key (1–9) in any calendar view. A meeting entry opens, and the characters you enter are added to the Subject field.
Create calendar entries
1 Select Menu > Calendar > Options > New entry and from the following options:
Meeting—To remind you of an appointment that has a specific date and time.
Memo—To write a general entry for a day.
Anniversary—To remind you of birthdays or special dates. Anniversary entries are repeated every year.
2 Fill in the fields. Scroll to move between fields.
Alarm (meetings and anniversary)—Select On, and scroll down to fill in the Alarm time and Alarm date fields. in the day view indicates an alarm. To stop a
calendar alarm, select alarm tone. The remindSelect Stop to end the cset the alarm to snooz
Repeat—Scroll right torepeating ( is show
Repeat until—You can repeated entry.
Synchronization:
Private—After synchronbe seen only by you anwith online access to v
Public—The calendar ehave access to view yo
None—The calendar enwhen you synchronize
3 To save the entry, sele
Tip! To send a calenselect Options > Smultimedia, or Via
Cale
ndar
58
you want to set an alarm, and
nd Alarm date.
t, and scroll right to select how larm to be repeated.
rm, open the note in which you , and select Alarm > Off.
r entries Calendar saves space in the
e event at a time, go to the Month > Delete entry and one of the
calendar notes that take place u define.
alendar notes.
salarm tone, Default view, Week title, select Options > Settings.
Calendar viewsTip! Select Options > Settings to change the view that is shown when you open the calendar or the starting day of the week.
In the month view, dates that have calendar entries are marked with a small triangle at the right bottom corner. In the week view, memos and anniversaries are placed before 8 o’clock.
Icons in the day and week views are as follows:
Memo
Anniversary
There is no icon for Meeting
To go to a certain date, select Options > Go to date, write the date, and select OK.
Press # to jump to today.
Tip! You can move calendar and to-do data from many different Nokia phones to your phone, or synchronize your calendar and to-do data to a compatible PC using Nokia PC Suite. See the CD-ROM, if supplied in the sales package.
Set a calendar alarmYou can set an alarm to remind you of a meeting or anniversary. This option is not available for memos.
1 Open a note in whichselect Alarm > On.
2 Set the Alarm time a
3 Scroll down to Repeaoften you want the a
4 Select Done.
To delete a calendar alawant to delete an alarm
Remove calendaRemoving past entries inmemory of the phone.
To remove more than onview and select Optionsfollowing options:
Before date—Deletes all before a certain date yo
All entries—Deletes all c
Calendar settingTo modify the Calendar starts on, and Week view

Web
59
ettingsbe available on the Web site of r or service provider.
ice settings in a special text k operator or service provider See “Data and settings," p. 47. tact your network operator or
s manuallyen to you by your service
s > Connection > Access settings for an access point. gs," p. 88.
> Bookmark manager > Add e for the bookmark and the
ined for the current access point.
WebVarious service providers maintain pages specifically designed for mobile devices. To access these pages, select Menu > Web. These pages use the wireless markup language (WML), extensible hypertext markup language (XHTML), or hypertext markup language (HTML).
Check the availability of services, pricing, and tariffs with your network operator or service provider. Service providers will also give you instructions on how to use their services.
To start a connection, press and hold 0 in the standby mode.
Access the Web• Save the settings that are needed to access the Web
page that you want to use. See the sections “Receive browser settings” or “Enter the settings manually," p. 59.
• Make a connection to the Web. See “Make a connection," p. 60.
• Browse the pages. See “Browse," p. 61.
• End the connection to the Web. See “End a connection," p. 63.
Receive browser sTip! Settings may a network operato
You may receive Web servmessage from the networthat offers the Web page.For more information, conservice provider.
Enter the settingFollow the instructions givprovider.1 Select Tools > Setting
points, and define theSee “Connection settin
2 Select Web > Optionsbookmark. Write a namaddress of the page def

Web
60
manuallyw, select Options > Bookmark kmark.
the Internet address must be access point is assigned to the access point is selected. Press * to ers such as /, ., :, and @. Press the racters.
e to save the bookmark.
d select Options > Send > Via call key to send. It is possible to kmark at the same time.
okmark, scroll to it, and select > Via text message.
ction the required connection settings, s.
enter the address in the field r the address, matching bookmarks field. Scroll up to select a
Bookmarks viewA bookmark consists of a bookmark name, Internet address, access point, and if the Web page requires, a user name and password.
Options in the bookmarks view are Open, Download, Back to page, Bookmark manager, Mark/Unmark, Navigation options, Advanced options, Send, Find bookmark, Details, Settings, Help, and Exit.
Your device may have some bookmarks loaded for sites not affiliated with Nokia. Nokia does not warrant or endorse these sites. If you choose to access them, you should take the same precautions, for security or content, as you would with any Internet site.
Icons in the bookmark view are as follows:
The start page defined for the default access point. If you use another default access point to browse, the start page is changed accordingly.
The automatic bookmarks folder contains bookmarks ( ) that are collected automatically when you browse pages. The bookmarks in this folder are automatically organised according to domain.
Any bookmark showing the title or Internet address of the bookmark.
Add bookmarks 1 In the bookmarks vie
manager > Add boo
2 Fill in the fields. Onlydefined. The default bookmark if no otherenter special charactclear key to clear cha
3 Select Options > Sav
Send bookmarksScroll to a bookmark, antext message. Press thesend more than one boo
Tip! To send a boOptions > Send
Make a conneOnce you have stored allyou can access the page
1 Select a bookmark or( ). When you enteare shown above thematching bookmark.
Web
61
nks appear underlined in blue s in purple. Images that act as round them.xes, and make selections, press
e while browsing, select Back. lect Options > Navigation
a chronological list of the pages browse session. The history list sion is closed.ent from the server, select tions > Reload.t Options > Save as bookmark.bookmarks view while browsing, n the scroll key. To return to the , select Options > Back to page.ing, select Options > Advanced can save pages either to the mory card, and browse them pages later, scroll right in the e Saved pages view.s, select Options > Navigation ess.ands or actions for the currently > Service options.
Options when browsing (depending on the page you are viewing) are Open, Accept, Remove file, Open in viewer, Open Wallet, Service options, Bookmarks, Save as bookmark, View images, Navigation options, Advanced options, Show images, Send bookmark, Find, Details, Settings, Help, and Exit.
2 Press the scroll key to download the page.
Connection securityIf the security indicator is displayed during a connection, the data transmission between the device and the Internet gateway or server is encrypted.
The security icon does not indicate that the data transmission between the gateway and the content server (or place where the requested resource is stored) is secure. The service provider secures the data transmission between the gateway and the content server.
Select Options > Details > Security to view details about the connection, encryptions status, and information about server and user authentication.
Security features may be required for some services, such as banking services. For such connections you need security certificates. For more information, contact your service provider. See also “Certificate management," p. 92.
BrowseOn a browser page, new liand previously visited linklinks have a blue border aTo open a link, to check bothe scroll key.To go to the previous pagIf Back is not available, seoptions > History to viewyou have visited during a is cleared each time a sesTo retrieve the latest contOptions > Navigation opTo save a bookmark, selec
Tip! To access the press and hold dowbrowser view again
To save a page while browsoptions > Save page. Youphone memory or on a mewhen offline. To access thebookmarks view to open thTo enter a new URL addresoptions > Go to web addrTo open a sublist of commopen page, select Options
Web
62
view, scroll right in the bookmarks view, press the scroll key to open
sing, select Options > Advanced
he browser service and to download page, select Options > Navigation hone stays online after you reload
purchase items such as ringing tones, images, nd video clips. These items can be
purchase them. Downloaded items tive applications in your phone, for hoto can be saved in Gallery.
install applications from r adequate protection against
e., scroll to the link, and press the
d free, select Accept. Once tent is automatically opened in .ad, select Cancel.e option to purchase the item.
You can download items such as ringing tones, images, operator logos, themes, and video clips. Downloaded items are handled by the respective applications in your phone, for example, a downloaded image is saved in Gallery.
Press # to jump to the end of a page and * to jump to the beginning of a page.
To download and view new Web service messages while browsing, select Options > Advanced options > Read service msgs. (shown only if there are new messages). See also “Web service messages," p. 48.
Tip! The browser collects bookmarks automatically while you browse Web pages. The bookmarks are stored to the automatic bookmarks folder ( ) and automatically organized according to domain. See “Web settings," p. 63.
View saved pagesIf you regularly browse pages that contain information which does not change very often, you can save and browse them when offline. In the saved pages view you can also create folders to store your saved browser pages.
Options in the saved pages view are Open, Back to page, Reload, Saved pages, Mark/Unmark, Navigation options, Advanced options, Details, Settings, Help, and Exit.
To open the saved pages view. In the saved pagesa saved page ( ).To save a page while browoptions > Save page. To start a connection to tthe latest version of the options > Reload. The pthe page.
Download andYou can download itemsoperator logos, themes, aprovided free, or you canare handled by the respecexample, a downloaded p
Important: Onlysources that offeharmful softwar
1 To download the itemscroll key. If the item is providedownloaded, the cona suitable applicationTo cancel the downlo
2 Select the appropriat
Web
63
tion that is used to store data ied to access or have accessed hat requires passwords, empty The information or services you the cache memory of the phone. t Options > Navigation
and one of the following:
change the default access point, n a list of available access ettings," p. 88.
you want to load images while lect No, to load images later ptions > Show images.
he text when Full screen is on,
text size.
haracters are not shown correctly, coding according to language.
o disable automatic bookmark u want to continue collecting
hide the folder from the de folder.
3 Carefully read all the information provided.
If the online content is compatible, you can use your wallet information to make the purchase.
Select Options > Open Wallet. You are prompted for your wallet code. See “Create a wallet code," p. 68.
4 Select the appropriate card category from your wallet.
5 Select Fill in. This uploads the selected wallet information.
If the wallet does not contain all information necessary for the purchase, you are requested to enter the remaining details manually.
Note: Copyright protections may prevent some images, ringtones and other content from being copied, modified, transferred, or forwarded.
End a connectionSelect Options > Advanced options > Disconnect to end the connection and view the browser page offline, or Options > Exit to end the connection and close the browser.
Empty the cacheThe information or services you have accessed are stored in the cache memory of the phone.
A cache is a memory locatemporarily. If you have trconfidential information tthe cache after each use. have accessed is stored in To empty the cache, selecoptions > Clear cache.
Web settingsSelect Options > Settings
Default access point—To press the scroll key to opepoints. See “Connection s
Show images—To select ifbrowsing or not. If you seduring browsing, select O
Text wrapping—To wrap tselect On.
Font size—To choose the
Default encoding—If text cyou may choose another en
Automatic bookmarks—Tcollecting, select Off. If yoautomatic bookmarks butbookmarks view, select Hi
Web
64
ontent providers to identify users r frequently used content.
nable or disable the use of scripts.
ide or show security notifications.
hoose whether you want to e sends DTMF tones during a call. p. 19.
he wallet automatically when a e is opened. See “Wallet," p. 67.
Screen size—To select what is shown when you browse. Select Select. keys only or Full screen.
Search page—To define a Web page that is downloaded when you select Navigation options > Open search page in the bookmarks view, or when browsing.
Volume—If you want the browser to play sounds embedded on Web pages, select a volume level.
Rendering—If you want the page layout shown as accurately as possible, select By quality. If you do not want external cascading style sheets to be downloaded, select By speed.
Cookies—To enable or disable the receiving and sending of cookies.
Cookies are a means of cand their preferences fo
Java/ECMA script—To e
Security warnings—To h
Confirm touch tones—Cconfirm before the phonSee also “Touch tones,”
Wallet > On—To open tcompatible browser pag

Off
ice
65
it in the To-do list, and select ne.
r
, divide, calculate square ss the menu key, and select
tor has limited accuracy and is e calculations.
emory (indicated by M), select e. To retrieve a number in Memory > Recall. To clear a Options > Memory > Clear.
agesich you want to calculate
r .
OfficeRecorder
Select Menu > Office > Recorder to record telephone conversations and voice memos. If you are recording a telephone conversation, both parties hear a tone every 5 seconds during recording.
To-do
Create a task listSelect Menu > Office > To-do to write notes and maintain a task list.To add a note, press any number key to start to write the task in the Subject field.To set the due date for the task, scroll to the Due date field, and enter a date.To set the priority for the To-do note, scroll to the Priority field, and scroll right to select the priority. High and low priority notes are indicated with the following icons: (High) and (Low). There is no icon for Normal.To mark a task as completed, scroll to it in the To-do list, and select Options > Mark as done.
To restore a task, scroll toOptions > Mark as not do
Calculato
To add, substract, multiplyroots and percentages, preOffice > Calculator.
Note: This calculadesigned for simpl
To save a number in the mOptions > Memory > Savmemory, select Options > number in memory, select
Calculate percent1 Enter a number for wh
a percentage.
2 Select , , , o
3 Enter the percentage.
4 Select .
Off
ice
66
he conversion order, enter the nd Amount field. The result is t Amount field.
rrency conversions, you need to and add exchange rates. The rate lways 1. The base currency on rates of the other currencies.
ptions > Currency rates. A list of d you can see the current base
urrency, scroll to the currency, and as base curr..
currency, go to the currency rates e currency, and select Options > y.
Scroll to the currency, and enter a r of units of the currency equal currency you have selected.
all the necessary exchange rates, conversions.
change base currency, you must tes, because all previously set re set to zero.
Notes
Select Menu > Office > Notes to write notes. You can send notes to other compatible devices and save plain text files (TXT format) that you receive to Notes.
Converter
To convert measures such as Length from one unit (Yards) to another (Meters), press the menu key, and select Office > Converter.
Options in Converter are Select unit or Change currency, Conversion type, Currency rates, Help, and Exit.
Note that Converter has limited accuracy, and rounding errors may occur.1 Scroll to select the Type field, to open a list of measures.
Scroll to the measure you want to use, and select OK.2 Scroll to select the first Unit field. Select the unit from
which you want to convert and OK. Scroll to the next Unit field, and select the unit to which you want to convert.
3 Scroll to the first Amount field, and enter the value you want to convert. The other Amount field automatically shows the converted value.Press # to add a decimal and * for the +, - (for temperature), and E (exponent) symbols.
Set base rateTip! To change tvalue in the secoshown in the firs
Before you can make cuchoose a base currency of the base currency is adetermines the conversi
1 Select Converter > Ocurrencies opens, ancurrency at the top.
2 To change the base cselect Options > Set
Tip! To rename aview, scroll to thRename currenc
3 Add exchange rates. new rate. The numbeone unit of the base
After you have inserted you can make currency
Note: When youenter the new raexchange rates a

My
own
67
cation or a document which has ortcut icon of the removed item w. The shortcut can be deleted
the shortcut.
Wallet. Wallet provides you r personal information, such as ers, addresses, and other useful mes and passwords).
Wallet can be retrieved while fill in online forms on browser the service asks for credit card encrypted and protected with a e.
es after 5 minutes. Enter the ss to the contents. You can e-out period if required. See
llet main view are Open, Exit.
My ownGo to—add shortcuts
Default shortcuts are as follows:
Calendar Inbox Notes
To store shortcuts (links to your favourite images, notes, bookmarks, and so on), select Menu > My own > Go to. Shortcuts are added only from the individual applications, for example Gallery. Not all applications have this function.
1 Select an item from an application to which you want to add a shortcut.
2 Select Add to 'Go to'. A shortcut in Go to is automatically updated if you move the item to which it is pointing (for example, from one folder to another).
To change the identifier in the lower left corner of the shortcut icon, select Options > Shortcut icon.
Delete a shortcutSelect the shortcut, and press the clear key. Calendar, Inbox, and Notes cannot be deleted.
When you remove an applia shortcut in Go to, the shis dimmed in the Go to vienext time you try to open
Wallet
Select Menu > My own > with a storage area for youcredit and debit card numbdata (for example, user na
The information stored inbrowsing to automaticallypages (for example, whendetails). Data in Wallet is wallet code that you defin
Wallet automatically closwallet code to regain accechange this automatic tim"Wallet settings," p. 70.
Options in the WaSettings, Help, and

My
own
68
rsonal user names and passwords
contact details for home or
omized personal preferences for
w card. An empty form opens.
select Done.
information directly to the phone vice provider (if they offer this ified which category the card rd the card. You can view and t you cannot edit it.
elete the fields in the card. ed upon exiting.
notesns of storing sensitive information number. You can access the data he browser. You can also send the
otes category from the main ess the scroll key.
w note. An empty note opens.
Create a wallet codeEach time you open Wallet, you are prompted for a wallet code. Enter the code that you have created, and select OK.
When you open Wallet for the first time, you must create your own wallet code:
1 Enter a code of your choice (4–10 alphanumeric characters), and select OK.
2 You are prompted to verify the code. Enter the same code, and select OK. Do not give your wallet code to anyone else.
If you enter the wallet code incorrectly on three consecutive occasions, Wallet is blocked for 5 minutes. The block time increases if further incorrect wallet codes are entered.
If you forget your wallet code, you must reset the code, and you will lose all information stored in Wallet. See "Reset the wallet and wallet code," p. 70.
Store personal card details1 Select the Cards category from the main Wallet menu,
and press the scroll key.
2 Select a type of card from the list, and press the scroll key.
Payment cards—Credit and debit cards.
Loyalty cards—Membership and store cards.
Online acc. cards—Peto online services.
Address cards—Basicthe office.
User info cards—Custonline services.
3 Select Options > Ne
4 Fill in the fields, and
You can also receive cardfrom a card issuer or serservice). You will be notbelongs to. Save or discarename a saved card, bu
You can open, edit, or dAny changes will be sav
Create personal Personal notes are a measuch as a bank account in a personal note from tnote as a message.
1 Select the Personal nWallet menu, and pr
2 Select Options > Ne
My
own
69
a card from the list.
ct a destination from the list.
ct To pho. & e-mail, To e-mail, or
n or Off. Defines whether or identification is sent with the
ur payment card details you ard number and expiration hem (depending on the content can retrieve your user name and ess card when connecting to a es authentication.
lsons of tickets purchased online ived notifications are stored in tifications, do the following:
gory from the main Wallet roll key.
. None of the fields within the dified.
3 Press 1–0 to start writing. Press the clear key to clear characters.
4 Add a name to the memo and select Done to save.
Create a wallet profileAfter you have stored your personal details, you can combine them into a wallet profile. You can use a wallet profile to retrieve wallet data from different cards and categories to the browser, for example, when you are filling in a form.
1 Select the Wallet profiles category from the main wallet menu, and press the scroll key.
2 Select Options > New profile. A new wallet profile form opens.
3 Fill in the fields or select an option from the listed items:
Profile name—Choose and enter a name for the profile.
Payment card—Select a card from the list.
Loyalty card—Select a card from the list.
Online access card—Select a card from the list.
Shipping address—Select an address from the list.
Billing address—By default, this is the same as the shipping address. If you require a different address, select one from the address card category.
User info card—Select
Receive e-receipt—Sele
Deliver e-receipt—SeleTo phone.
RFID sending—Set to Onot your unique phonewallet profile.
4 Select Done.
Example: By uploading yodo not need to enter the cdate each time you need tbeing browsed). Also, you password stored as an accmobile service that requir
View ticket detaiYou can receive notificatithrough the browser. Recethe wallet. To view the no
1 Select the Tickets catemenu, and press the sc
2 Select Options > Viewnotification can be mo
My
own
70
layer
own > Music. With Music player , create and listen to playlists, and ts or Albums.
songs, Artists, Albums, Recently and click on a song. This starts to nd the others in the current view.
ify playlists. See "Playlists," p. 71.
ayer, copy music files to your menu, select Options >
ions and then select:To go to the player view.
o see more information and ongs in memory.
sts viewss sort songs based on their albums nd artist information is collected tags.
e sorted by their album ).
Wallet settingsFrom the main Wallet menu, select Options > Settings and the following:
Wallet code—Change your wallet code. You are prompted to enter the current code, create a new code, and verify the new code.
RFID—Set the phone ID code, type, and sending options.
Automatic close—Change the automatic time-out period (1–60 minutes). After the time-out period has elapsed, the wallet code must be re-entered to gain access to the contents.
Reset the wallet and wallet codeThis operation erases all contents of Wallet.
To reset both the contents of Wallet and the wallet code:
1 Enter *#7370925538# in the standby mode.
2 Enter the phone lock code, and select OK. See "Security," p. 91.
When opening Wallet again, you must enter a new wallet code. See "Create a wallet code," p. 68.
Music p
Press , and select Myyou can play music filessort your music by Artis
To play music, go to All added, or Playlists viewsplay the selected song a
You can create and mod
To add music into the plmemory card. In Music Update Collection.You can also select Opt1 Go to Now playing—
2 Collection details—Tstatistics about the s
Albums and artiAlbums and Artists viewand artists. The album afrom the song files’ ID3
In Artists view, songs arinformation (if available

My
own
71
r playlists or deleting, select song you want to choose.
hink should be visible are not, d update the collection. n," p. 72.
ns and then select:
sic file in focus to another > Send and select either:
ore information about the song.
u simple playlists. Playlists can or they can be created in the
t Playlists from the main menu
o a playlist, choose an album or Add to playlist. You can create
n existing one. You can also m any song list view and add
ame way.
To play an album, click on a song within the album song list. See "Song list," p. 71.
To add albums or artists to a playlist, choose an album or artist and select Options > Add to playlist. You can create a new playlist or add to an existing one.
If some of the songs you think should be visible are not, go to the Music menu and update the collection. See "Update your collection," p. 72.
You can also select Options and then select:
• Go to Now playing.
• Collection details.• Delete—To delete the whole album or artist permanently
from the memory.
Song listAll songs lists all music on your phone in alphabetical order. Recently added lists all music on your phone, with the most recently added shown first.
To start playing the current song list, click on a song. The music starts from the highlighted song.
To search in lists, enter letters in the search box by pressing the number keys.
To delete song(s), select a song or mark several songs, select Options > Delete. Deleting a song removes it permanently from the memory.
To choose several songs foOptions > Mark for each
If some of the songs you tgo to the Music menu anSee "Update your collectio
You can also select Optio• Go to Now playing• Send—To send the mu
person, select Options• ·Via multimedia• ·Via Bluetooth
• Song details—To see m
PlaylistsMusic player supports m3be copied with music filesmusic player.
To listen to a playlist, selecand click on a playlist.
To add albums or artists tartist and select Options >a new playlist or add to aselect individual tracks frothem to a playlist in the s
My
own
72
ions and then select:
etween random play and normal
etween modes, where playing d of the playlist or restarts from list.
ection music files from your phone, you r music player collection. Select ction.
nt of music files and the size of y take a few seconds.
To remove a playlist, select a playlist and Options > Delete. Deleting a playlist only deletes the playlist, not the music files.
You can also select Options and then select:• Go to Now playing.
• Send.
Play musicIn the Now playing view, pressing the scroll key toggles between play and pause.
A short press up on the scroll key goes to the previous song. A short press down on the scroll key skips to the next song.
To seek within a song, keep the scroll key held down for a longer period. Up seeks backward and down seeks forward.
To increase volume, press the scroll key to the right. To decrease volume, press the scroll key to the left.
You can also select Opt• Go to Music menu.
• Shuffle—To choose bplay mode
• Repeat—To choose beither stops at the enbeginning of the play
• Add to playlist.
Update your collAfter adding or removingmay need to update youOptions > Update Colle
Depending on the amoumemory, the update ma
IM—
inst
ant
mes
sagi
ng (
chat
)
73
rverphone connect to the IM server
server in use and save new IM er settings," p. 77.
password, and press the scroll in the user ID and password for r service provider.
to stay offline; to log in to the Options > Login. You cannot es while you are offline.
ons > Logout.
ttings> IM settings:
only if IM groups are Select OK and enter a ters).
hers to see if you are online,
allow messages from all,
IM—instant messaging (chat)Select Menu > My own > IM.
Instant messaging is a network service which allows you to converse with other people using instant messages and join discussion forums (IM groups) with specific topics. Various service providers maintain IM servers that you can log in to once you have registered to an IM service.
Options in the IM main view are Open, Login, or Logout, Settings, Help, and Exit.
Check the availability of chat services, pricing, and tariffs with your service provider. Service providers will also give you instructions on how to use their services.
Receive IM settingsTip: To log in automatically when you start IM, without having to enter your user ID and password each time, select Options > Settings > Server settings > IM login type > Automatic.
You must save the settings to access the service that you want to use. You may receive the settings in a special text message from the service provider that offers the IM service. See "Data and settings," p. 47. You can also enter the settings manually. See "Chat server settings," p. 77.
Connect to a se1 Open IM to have your
in use. To change the IMservers, see "Chat serv
2 Enter your user ID andkey to log in. You obtathe IM server from you
You can select CancelIM server later, select send or receive messag
3 To log out, select Opti
Modify your seSelect Options > Settings
Use screen name (shownsupported by the server)—nickname (up to10 charac
IM presence—To allow otselect Active for all.
Allow messages from—To select All.

IM—
inst
ant
mes
sagi
ng (
chat
)
74
IM group, you can view the nged there, and send your
atting are Send, Send private ward, Insert smiley, Send e IM group, Add to banned list, onvers. or Stop recording, Help,
e the message in the message e scroll key.
ge to a participant, select msg., and select the recipient. then press the scroll key.
ssage sent to you, select the Reply.
o are online to join the IM group, nvitation and the contacts you invitation message, and press the
corded chats view are Open, rk/Unmark, Login, Logout,
nd Exit.
Allow invitations from—To allow invitations only from your IM contacts, select IM contacts only. IM invitations are sent by IM contacts who want you to join their groups.Msg. scrolling speed—To select the speed at which new messages are displayed.Sort IM contacts—To sort your IM contacts Alphabetically or By online status.Availability reloading—To choose how to update information about whether your IM contacts are online or offline, select Automatic or Manual.
Search for groups and usersTo search for groups, in the IM groups view, select Options > Search. You can search by Group name, Topic, and Members (user ID).To search for users, in the IM contacts view, select Options > Search > Search. You can search by User's name, User ID, Phone number, and E-mail address.
Join and leave a groupTo join an IM group that you have saved, scroll to the group, and press the scroll key.To join an IM group not on the list, but for which you know the group ID, select Options > Join new group. Enter the group ID, and press the scroll key.To leave the IM group, select Options > Leave IM group.
ChatOnce you have joined anmessages that are exchaown messages.
Options while chmsg., Reply, Forinvitation, LeavGroup, Record cand Exit.
To send a message, writeditor field, and press th
To send a private messaOptions > Send privateWrite the message, and
To reply to a private memessage and Options >
To invite IM contacts whselect Options > Send iwant to invite, write thescroll key.
Record chatsOptions in the reDelete, Send, MaSettings, Help, a
IM—
inst
ant
mes
sagi
ng (
chat
)
75
select Options > End nversations are automatically
n, select Options >
list of your chat contacts that l to the contact with whom you on, and press the scroll key.
the service provider to those e.
e user ID of the user with whom rsation, and press the scroll key.
rticipant to your IM contacts, nd select Options > Add to
to incoming messages, select on. Enter the text, and select e messages.
ages from certain participants, options and from the following:
ock messages from the currently
To enter the user ID of the nd press the scroll key.
To record to a file the messages that are exchanged during a conversation or while you are joined in an IM group, select Options > Record convers., enter a name for the conversation file, and press the scroll key. To stop recording, select Options > Stop recording.
The recorded conversation files are automatically saved in the Recorded chats.To view the recorded chats, in the main view, select Recorded chats and the conversation, and press the scroll key.
View and start conversationsGo to the Conversations view to see a list of the individual conversation participants with whom you have an ongoing conversation.
To view a conversation, scroll to a participant, and press the scroll key.
Options when viewing a conversation are Send, Add to IM contacts, Insert smiley, Forward, Record convers., Stop recording, Blocking options, End conversation, Help, and Exit.
To continue the conversation, write your message, and press the scroll key.
To return to the conversations list without closing the conversation, select Back.
To close the conversation,conversation. Ongoing coclosed when you exit IM.
To start a new conversatioNew conversation:
Select recipient—To see aare currently online, scrolwant to start a conversati
The user ID is provided bywho register to this servic
Enter user ID—To enter thyou want to start a conve
To save a conversation pascroll to the participant, aIM contacts.
To send automatic repliesOptions > Set auto replyDone. You can still receiv
To prevent receiving messselect Options > Blocking
Add to blocked list—To blselected participant.
Add ID to list manually—participant. Enter the ID, a
IM—
inst
ant
mes
sagi
ng (
chat
)
76
have the phone notify you every oes online or offline.
ee which groups the chat contact
o update information about nline or offline. The online status next to the contact name. This you have set the Availability in IM settings.
s groups view are Open, Join new w group, Leave IM group, Group,
ogout, Settings, Help, and Exit.
to see a list of the IM groups that ich you are currently joined.
lect Options > Group and one of
d group that you are currently
ee who are currently joined to
View blocked list—To see the participants whose messages are being blocked.Unblock—To select the user that you want to remove from the blocked list, press the scroll key.
ContactsGo to the IM contacts to retrieve chat contact lists from the server or to add a new chat contact to a contact list. When you log in to the server, the previously used chat contact list is retrieved from the server automatically.
Options in the IM contacts view are Open conversation, Open, Change contact list, Reload user availab., Belongs to groups, New IM contact, Move to other list, Edit, Delete, Switch tracking on, Blocking options, Login, Logout, Settings, Help, and Exit.
To create a new contact, select Options > New IM contact > Enter manually. Fill in the Nickname and User ID fields, and select Done.
To move a contact from a list on the server to the retrieved list, select Options > New IM contact > Move from other list.To change the chat contact list, select Options > Change contact list, and from the following options:
Open conversation—To start a new conversation or continue an ongoing conversation with the contact.
Switch tracking on—Totime the chat contact g
Belongs to groups—To shas joined.
Reload user availab.—Twhether the contact is ois shown by an indicatoroption is not available ifreloading to Automatic
Manage groupOptions in the IMgroup, Create neSearch, Login, L
Go to the IM groups viewyou have saved or to wh
Scroll to a group, and sethe following:
Save—To save an unsavejoined to.
View participants—To sthe group.
IM—
inst
ant
mes
sagi
ng (
chat
)
77
d and remove group members,"
icipants that are not allowed to
llow messaging between . created automatically and
roup membersp, select IM groups, scroll to an ons > Group > Settings > ed only or All. the IM group, scroll to the ns > Remove. To remove all > Remove all.
tings> Server settings. You may cial text message from the provider that offers the chat r ID and password from your egister to the service. If you do not ord, contact your service provider.o which you wish to connect,
Details—To see the group ID, topic, participants, administrators of the group (shown only if you have the editing rights), the list of blocked participants (shown only if you have the editing rights), and whether private conversations are allowed in the group.Settings—To view and edit the chat group settings. See "Create a new group," p. 77.
Administer a groupCreate a new groupSelect IM groups > Options > Create new group. Enter the settings for the group.
You can edit the settings for an IM group if you have administrator rights to the group. The user who creates a group is automatically given administrator rights to it.
Group name, Group topic, and Welcome note—To add details that the participants see when they join the group.
Group size—To define the maximum number of members allowed to join the group.
Allow search—To define if others can find the chat group by searching.
Editing rights—To define the chat group participants to whom you want to give rights to invite contacts to join the IM group and edit the group settings.
Group members—See "Adp. 77.Banned list—Enter the partjoin the IM group. Allow private msgs.—To aselected participants onlyGroup ID—The group ID iscannot be changed.
Add and remove gTo add members to a grouIM group, and select OptiGroup members > SelectTo remove a member frommember, and select Optiomembers, select Options
Chat server setSelect Options > Settingsreceive the settings in a spenetwork operator or serviceservice. You obtain the useservice provider when you rknow your user ID or passwTo change the IM server tselect Default server.

IM—
inst
ant
mes
sagi
ng (
chat
)
78
URL address of the IM server.
ID.
gin password.
To add a new server to your list of IM servers, select Servers > Options > New server. Enter the following settings:
Server name—Enter the name for the chat server.
Access point in use—Select the access point you want to use for the server.
Web address—Enter the
User ID—Enter your user
Password—Enter your lo
Conn
ectiv
ity
79
on using Bluetooth technology ith your local authorities or
th technology or allow such kground while using other and on battery power and
tion settings Bluetooth.
ff.own to all—Your phone can be
th Bluetooth technology or ot be found by other devices). re, you can set your phone to ing Bluetooth. For the greatest tooth off in your phone when
e a name for your phone. After connection and changed My n to all, your phone and this r users with devices using
ConnectivityBluetooth connection
Bluetooth technology enables wireless connections to send images, video clips, music and sound clips, and notes, or to connect wirelessly to compatible devices with Bluetooth technology such as computers. Since devices with Bluetooth technology communicate using radio waves, your phone and the other device do not need to be in direct line-of-sight. The two devices only need to be within 32 feet (10 meters) of each other, although the connection can be subject to interference from obstructions such as walls or from other electronic devices.
This device is compliant with Bluetooth Specification 1.2 supporting the following profiles: Generic Access Profile, Serial Port Profile, Dial-up Networking Profile, Fax Profile, Headset Profile, Handsfree Profile, Generic Object Exchange Profile, Object Push Profile, File Transfer Profile, and Basic Imaging Profile. To ensure interoperability between other devices supporting Bluetooth technology, use Nokia approved enhancements for this model. Check with the manufacturers of other devices to determine their compatibility with this device.
There may be restrictions in some locations. Check wservice provider.Features that use Bluetoofeatures to run in the bacfeatures, increase the demreduces the battery life.
Bluetooth connecSelect Menu > Connect. >Enter the following:Bluetooth—Set to On or OMy phone's visibility > Shfound by other devices wiHidden (your phone cannTo avoid malicious softwahidden mode when not ussecurity, simply turn Blueyou’re not using it. My phone's name—Definyou have set a Bluetooth phone's visibility to Showname can be seen by otheBluetooth technology.
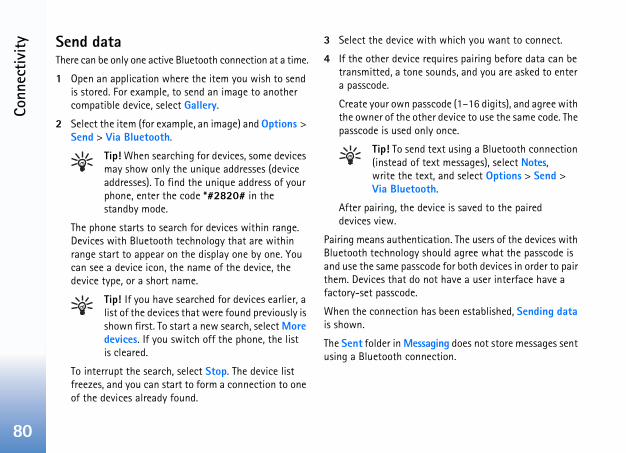
Conn
ectiv
ity
80
h which you want to connect.
quires pairing before data can be ounds, and you are asked to enter
code (1–16 digits), and agree with r device to use the same code. The
y once.
ext using a Bluetooth connection xt messages), select Notes, t, and select Options > Send > h.
ice is saved to the paired
tion. The users of the devices with ould agree what the passcode is de for both devices in order to pair ot have a user interface have a
s been established, Sending data
ging does not store messages sent ction.
Send dataThere can be only one active Bluetooth connection at a time.
1 Open an application where the item you wish to send is stored. For example, to send an image to another compatible device, select Gallery.
2 Select the item (for example, an image) and Options > Send > Via Bluetooth.
Tip! When searching for devices, some devices may show only the unique addresses (device addresses). To find the unique address of your phone, enter the code *#2820# in the standby mode.
The phone starts to search for devices within range. Devices with Bluetooth technology that are within range start to appear on the display one by one. You can see a device icon, the name of the device, the device type, or a short name.
Tip! If you have searched for devices earlier, a list of the devices that were found previously is shown first. To start a new search, select More devices. If you switch off the phone, the list is cleared.
To interrupt the search, select Stop. The device list freezes, and you can start to form a connection to one of the devices already found.
3 Select the device wit
4 If the other device retransmitted, a tone sa passcode.
Create your own passthe owner of the othepasscode is used onl
Tip! To send t(instead of tewrite the texVia Bluetoot
After pairing, the devdevices view.
Pairing means authenticaBluetooth technology shand use the same passcothem. Devices that do nfactory-set passcode.
When the connection hais shown.
The Sent folder in Messausing a Bluetooth conne

Conn
ectiv
ity
81
ct Options > New paired device search. Select the device. step 4 in "Send data," p. 80.
to the device, and select ant to cancel all pairings, select
rently connected to a device ring with that device, pairing e connection is deactivated
rized or unauthorized, scroll to the following options:
ctions between your phone de without your knowledge. No thorization is needed. Use this , such as your compatible headset ng to someone you trust. es in the paired devices view.
nection requests from this eparately every time.
wn device: if you receive an ther device and are asked to
are not sure why you need to
Icons for different devices are as follows: Computer
Phone
Audio or video
Headset
Other
Check the connection status• When is shown in the standby mode, a Bluetooth
connection is active.
• When is blinking, your phone is trying to connect to the other device.
• When is shown continuously, the Bluetooth connection is active.
Pair devicesTip! To define a short name (nickname or alias), scroll to the device and select Options > Assign short name in the paired devices view. This name helps you to recognize a certain device during device search or when a device requests a connection.
Paired devices are easier to recognize; they are indicated by in the device search. In the Bluetooth main view, scroll right to open the paired devices view ( ).
To pair with a device, seledevice. The phone starts aExchange passcodes. See
To cancel a pairing, scroll Options > Delete. If you wOptions > Delete all.
Tip! If you are curand delete the paiis removed and thimmediately.
To set a device to be authoa device, and select from
Set as authorized—Conneand this device can be maseparate acceptance or austatus for your own devicesor PC, or devices that beloindicates authorized devic
Set as unauthorized—Condevice must be accepted s
Never pair with an unknoinvitation to pair with anoenter a PIN code but you pair, do not pair.

Conn
ectiv
ity
82
with the phone, the CD-ROM insert it into the CD-ROM drive of roceed as follows: Open Windows CD-ROM drive where you inserted Autoplay.
modem as a modem to send and receive the Internet with a compatible PC nnection or a data cable. Detailed can be found in the User Guide dem options on the CD-ROM, if e, or visit www.nokiausa.com/ility.
ion manager
ta connections active at the same our phone in GSM networks. Select n. mgr. to view the status of
ns, view details on the amount of nd end connections. When you n see the following information:
ns: data calls ( ) and packet )
Receive dataWhen you receive data using a Bluetooth connection, a tone sounds, and you are asked if you want to accept the message. If you accept, is shown, and the item is placed in the Inbox folder in Messaging. Messages received using a Bluetooth connection are indicated by . See "Inbox," p. 47.
Switch off BluetoothTo switch off Bluetooth connectivity, select Bluetooth > Off.
PC connectionsYou can use your phone with a variety of PC connectivity and data communications applications, for example, the MMC card reader. With Nokia PC Suite you can synchronize contacts, calendar and to-do notes between your phone and a compatible PC.
Always create the connection from the PC to synchronise with the phone.
For further information on how to install Nokia PC Suite (compatible with Windows 2000 and Windows XP), see the User Guide for Nokia PC Suite and the Nokia PC Suite help in “Install” section on the CD-ROM, if provided with your phone, or visit www.nokiausa.com/support to check availability.
CD-ROMIf a CD-ROM is suppliedshould launch after you a compatible PC. If not, pExplorer, right-click the the CD-ROM, and select
Your phone as aYou can use your phonee-mail or to connect to by using a Bluetooth coinstallation instructionsfor Nokia PC Suite in Moprovided with your phonsupport to check availab
Connect
You may have multiple datime when you are using yMenu > Connect. > Conmultiple data connectiodata sent and received, aopen Conn. mgr., you ca
• Open data connectiodata connections (

Conn
ectiv
ity
83
of the connection: Conn.(active), On hold, ted.
data, in bytes, received to
, in bytes, sent from the phone.
me that the connection has
of both sending and receiving nd.
used.
ber used.
connection is not shared)—s using the same connection.
nchronization
Sync. Sync enables you to and contacts with various k applications on a compatible et.
ation uses SyncML technology formation on SyncML
• The status of each connection
• The amount of data uploaded and downloaded for each connection (shown for packet data connections only)
• The duration of each connection (shown for data calls only)
Note: The actual time invoiced for calls by your service provider may vary, depending on network features, rounding off for billing, and so forth.
To end a connection, scroll to a connection, and select Options > Disconnect.
To close all currently open connections, select Options > Disconnect all.
View data connection detailsOptions in Conn. mgr. main view when there are one or more connections are Details, Disconnect, Disconnect all, Help, and Exit.
To view the details of a connection, scroll to a connection, and select Options > Details.
Name—The name of the Internet access point (IAP) in use, or the modem connection name if the connection is a dial-up connection.
Bearer—The type of data connection: Data call, High sp. GSM, or Packet data.
Status—The current statusConnecting, Conn.(inact.),Disconnctng., or Disconnec
Received—The amount of the phone.
Sent—The amount of data
Duration—The length of tibeen open.
Speed—The current speed data in kilobytes per seco
Name—Access point name
Dial-up—The dial-up num
Shared (not shown if the The number of application
Remote sy
Select Menu > Connect. >synchronize your calendarcalendar and address boocomputer or on the Intern
The synchronization applicfor synchronization. For in
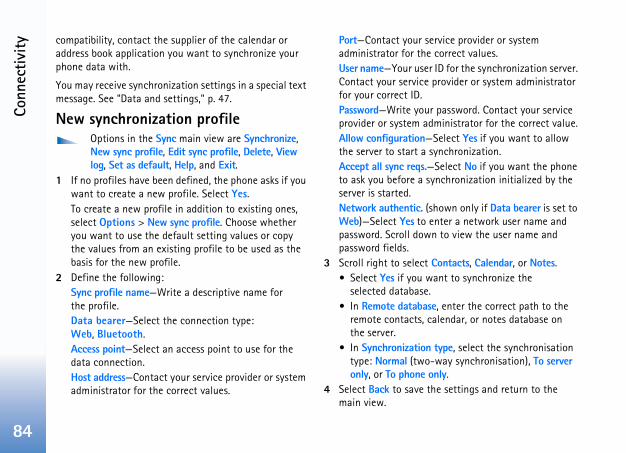
Conn
ectiv
ity
84
ervice provider or system correct values.r ID for the synchronization server. provider or system administrator
r password. Contact your service dministrator for the correct value.Select Yes if you want to allow
synchronization.Select No if you want the phone
ynchronization initialized by the
shown only if Data bearer is set to enter a network user name and n to view the user name and
Contacts, Calendar, or Notes.ant to synchronize the
.e, enter the correct path to the alendar, or notes database on
type, select the synchronisation -way synchronisation), To server nly.
he settings and return to the
compatibility, contact the supplier of the calendar or address book application you want to synchronize your phone data with.
You may receive synchronization settings in a special text message. See "Data and settings," p. 47.
New synchronization profileOptions in the Sync main view are Synchronize, New sync profile, Edit sync profile, Delete, View log, Set as default, Help, and Exit.
1 If no profiles have been defined, the phone asks if you want to create a new profile. Select Yes.To create a new profile in addition to existing ones, select Options > New sync profile. Choose whether you want to use the default setting values or copy the values from an existing profile to be used as the basis for the new profile.
2 Define the following:Sync profile name—Write a descriptive name for the profile.Data bearer—Select the connection type: Web, Bluetooth.Access point—Select an access point to use for the data connection.Host address—Contact your service provider or system administrator for the correct values.
Port—Contact your sadministrator for theUser name—Your useContact your servicefor your correct ID.Password—Write youprovider or system aAllow configuration—the server to start a Accept all sync reqs.—to ask you before a sserver is started.Network authentic. (Web)—Select Yes to password. Scroll dowpassword fields.
3 Scroll right to select • Select Yes if you w
selected database• In Remote databas
remote contacts, cthe server.
• In Synchronizationtype: Normal (twoonly, or To phone o
4 Select Back to save tmain view.

Conn
ectiv
ity
85
receive configuration settings ions > Start configuration.
of configuration settings from ptions > Enable config. or
tingsider for the correct settings.
e for the configuration server.
e ID to identify the
assword to identify your phone
tooth or Web.
cess point to be used when
RL address of the server.
er of the server.
—Enter your user name
ceive configuration settings .
ou want the phone to ask for ting a configuration from the
Synchronize dataIn the Sync main view, you can see the different synchronization profiles and the kind of data to be synchronized.
1 Select a synchronization profile and Options > Synchronize. The status of the synchronization is shown at the bottom of the screen.
To cancel synchronization before it finishes, select Cancel.
2 You are notified when the synchronization is complete. After synchronization is complete, select Options > View log to open a log file showing the synchronization status (Complete or Incomplete) and how many calendar or contact entries have been added, updated, deleted, or discarded (not synchronized) in the phone or on the server.
Device manager
Select Menu > Connect. > Dev. mgr. You may receive server profiles and different configuration settings from your network operator, service provider, or company information management department. These configuration settings may include access point settings for data connections and other settings used by different applications in your phone.
To connect to a server andfor your phone, select OptTo allow or deny receivinga service provider, select ODisable config..
Server profile setContact your service prov
Server name—Enter a nam
Server ID—Enter the uniquconfiguration server.
Server password—Enter a pto the server.
Session mode—Select BlueAccess point—Select an acconnecting to the server.
Host address—Enter the U
Port—Enter the port numb
User name and Passwordand password.
Allow configuration—To refrom the server, select YesAuto-accept all reqs.—If yconfirmation before accepserver, select No.
Tool
s
86
nging the language affects the haracters available when writing ctive text dictionary.
set the predictive text input On or hone. The predictive text dictionary nguages.
The welcome note or logo is e you switch on the phone. Select
lcome note or logo, Text to write 0 letters), or Image to select a allery.
ou can reset some of the settings o do this, you need the lock code. "Phone and SIM," p. 91. After
y take a longer time to power on. unaffected.
rtcuts to applications in the ve standby mode," p. 25.
ssign a shortcut to the left dby mode, select an application
ToolsSettings
To change settings, select Menu > Tools > Settings. Scroll to select a setting group, and press the scroll key to open it. Scroll to select a setting you want to change, and press the scroll key.
Phone settings
GeneralPhone language—Changing the language of the display texts in the phone also affects the format used for date and time and the separators used, for example, in calculations. Automatic selects the language according to the information on the SIM card. After you change the display text language, the phone restarts.
Changing the settings for Phone language or Writing language affects every application in the phone, and the change remains effective until you change these settings again.
Writing language—Chacharacters and special ctext and using the predi
Predictive text—You canOff for all editors in the pis not available for all la
Welcome note or logo—displayed briefly each timNone to disable the Wea welcome note (up to 5photo or picture from G
Orig. phone settings—Yto their original values. TSee "Security," p. 91 andresetting, the phone maDocuments and files are
Standby modeActive standby—Use shostandby mode. See "Acti
Left selection key—To aselection key in the stanfrom the list.
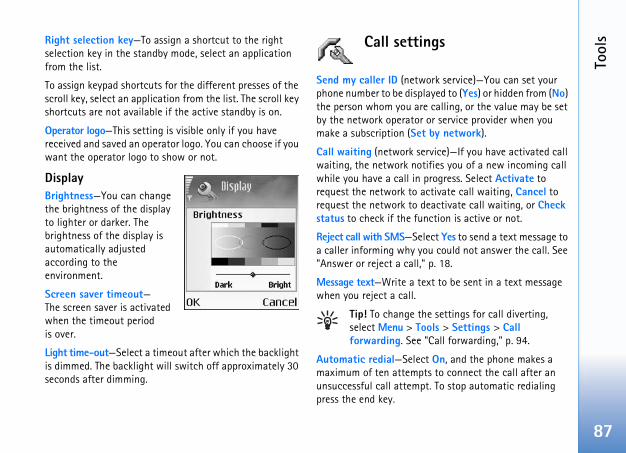
Tool
s
87
gs
rk service)—You can set your yed to (Yes) or hidden from (No) calling, or the value may be set r service provider when you by network).
vice)—If you have activated call fies you of a new incoming call rogress. Select Activate to tivate call waiting, Cancel to activate call waiting, or Check ction is active or not.
ct Yes to send a text message to could not answer the call. See
p. 18.
t to be sent in a text message
settings for call diverting, ls > Settings > Call
Call forwarding," p. 94.
On, and the phone makes a to connect the call after an . To stop automatic redialing
Right selection key—To assign a shortcut to the right selection key in the standby mode, select an application from the list.
To assign keypad shortcuts for the different presses of the scroll key, select an application from the list. The scroll key shortcuts are not available if the active standby is on.
Operator logo—This setting is visible only if you have received and saved an operator logo. You can choose if you want the operator logo to show or not.
Display Brightness—You can change the brightness of the display to lighter or darker. The brightness of the display is automatically adjusted according to the environment.
Screen saver timeout—The screen saver is activated when the timeout period is over.
Light time-out—Select a timeout after which the backlight is dimmed. The backlight will switch off approximately 30 seconds after dimming.
Call settin
Send my caller ID (netwophone number to be displathe person whom you are by the network operator omake a subscription (Set
Call waiting (network serwaiting, the network notiwhile you have a call in prequest the network to acrequest the network to destatus to check if the fun
Reject call with SMS—Selea caller informing why you"Answer or reject a call,"
Message text—Write a texwhen you reject a call.
Tip! To change theselect Menu > Tooforwarding. See "
Automatic redial—Selectmaximum of ten attemptsunsuccessful call attemptpress the end key.

Tool
s
88
on settings
nd access pointsket data connections ( ), such as vice (GPRS) in the GSM network.
echnology where information is data over the mobile network.
ection, an access point is required. kinds of access points:
send and receive multimedia
Web application to view WML or
(IAP) to send and receive e-mail
ess point you need with your service you wish to access. For tion to packet data connection twork operator or service provider.
Summary after call—Activate this setting if you want the phone to briefly display the approximate duration of the last call.
1-touch dialing—Select On, and to dial the numbers assigned to the speed dialing keys (2–9), press and holding the key. See also "1-touch dialing," p. 19.
Anykey answer—Select On, and to answer an incoming call, briefly press any key, except the left and right selection keys, the power key, and the end key.
Line in use (network service)—This setting is shown only if the SIM card supports two subscriber numbers; that is, two phone lines. Select which phone line you want to use for making calls and sending text messages. Calls on both lines can be answered irrespective of the selected line. If you select Line 2 and have not subscribed to this network service, you will not be able to make calls. When line 2 is selected, 2 is shown in the standby mode.
Tip! To switch between the phone lines, press and hold # in the standby mode.
Line change (network service)—To prevent line selection, select Line change > Disable if supported by the SIM card. To change this setting, you need the PIN2 code.
Connecti
Data connections aYour phone supports pacgeneral packet radio ser
GPRS uses packet data tsent in short packets of
To establish a data connYou can define different
• MMS access point tomessages
• Access point for the XHTML pages
• Internet access point
Check the kind of an accservice provider for the availability and subscripservices, contact your ne
Tool
s
89
cess points list are Edit, New te, Help, and Exit.
n to you by your service provider.
descriptive name for
on what data connection you fields are available. Fill in all e defined or with a red asterisk. pty, unless you have been ur service provider.
ing access point settings are d settings, Help, and Exit.
onnection, the network service s feature, and if necessary, rd.
acket data only)—The access stablish a connection to the obtain the access point name or or service provider.
eive MMS and e-mail settings”, 3, and "Access the Web," p. 59.
Packet data connections in GSM networksWhen you use your phone in GSM networks, multiple data connections can be active at the same time, access points can share a data connection, and data connections remain active during voice calls. To check the active data connections, see "Connection manager," p. 82.
The following indicators may be displayed below the signal indicator, depending on which network you use:
GSM network, packet data is available in the network.
GSM network, packet data connection is active, data is being transferred.
GSM network, multiple packet data connections are active.
GSM network, packet data connection is on hold. (For example, this can happen during a voice call.)
Receive access point settingsYou may receive access point settings in a text message from a service provider, or you may have preset access point settings in your phone. See "Data and settings," p. 47.
To create a new access point, select Tools > Settings > Connection > Access points.
An access point may be protected ( ) by your network operator or service provider. Protected access points cannot be edited or deleted.
Access pointsOptions in the Acaccess point, Dele
Follow the instructions give
Connection name—Give athe connection.
Data bearer—Depending select, only certain settingfields marked with Must bOther fields can be left eminstructed otherwise by yo
Options when editChange, Advance
To be able to use a data cprovider must support thiactivate it for your SIM ca
Access point name (for ppoint name is needed to epacket data network. Youfrom your network operat
Tip! See also “Recp. 46 "E-mail," p. 5

Tool
s
90
ine the address for the proxy server.
r the proxy port number.
affect all access points using a
u select When available and you pports packet data, the phone ata network. Also, starting an ection is quicker (for example, to ). If you select When needed, the a connection only if you start an t needs it. If there is no packet elect When available, the phone blish a packet data connection.
s point name is needed to use your modem to your computer.
server settings from your network der in a configuration message, or ed on your SIM or USIM card. You to your phone, or view or delete
User name—The user name may be needed to make a data connection, and is usually provided by the service provider. The user name is often case-sensitive.Prompt password—If you must enter a new password every time you log in to a server, or if you do not want to save your password in the phone, choose Yes.Password—A password may be needed to make a data connection, and is usually provided by the service provider. The password is often case-sensitive.Authentication—Select Normal or Secure.Homepage—Depending on what you are setting up, write the Web address or the address of the multimedia messaging center.Select Options > Advanced settings to change the following settings:Network type—Select the Internet protocol type to use IPv4 or IPv6.Phone IP address—Enter the IP address of your phone. Name servers—In Primary name server:, enter the IP address of the primary DNS server. In Second. name server:, enter the IP address of the secondary DNS server. Contact your Internet service provider to obtain these addresses.
The domain name service (DNS) is an Internet service that translates domain names such as www.nokia.com into IP addresses such as 192.100.124.195.
Proxy serv. address—Def
Proxy port number—Ente
Packet dataThe packet data settingspacket data connection.
Packet data conn.—If yoare in a network that suregisters to the packet dactive packet data connsend and receive e-mailphone uses a packet datapplication or action thadata coverage and you speriodically tries to esta
Access point—The accesphone as a packet data
ConfigurationsYou may receive trustedoperator or service provithe settings may be storcan save these settings them in Configurations.
Tool
s
91
rrect lock code is entered. Enter t in minutes, or select None to od.
r the lock code.
hone is locked, calls in offline mergency numbers
your phone are still possible.
one manually, press the power ands opens. Select Lock phone.
u can set the phone to ask for known SIM card is inserted into intains a list of SIM cards that er’s cards.
strict calls and text messages ed phone numbers, if supported d the PIN2 code for this
of fixed dialing numbers, select > Security > Phone and SIM > numbers to the fixed dialing contact or Add from Contacts. g, packet data connections are
sending text messages over a this case, the message center
’s phone number must be ing list.
Date and time
See "Clock settings," p. 17.
See also the language settings in "General," p. 86.
Security
Phone and SIMPIN code request—When active, the code is requested each time the phone is switched on. Deactivating the personal identification number (PIN) code request may not be allowed by some SIM cards. See "Glossary of PIN and lock codes," p. 92.
PIN code, PIN2 code, and Lock code—You can change the PIN code, PIN2 code, and lock code. These codes can only include the numbers from 0 to 9. See "Glossary of PIN and lock codes," p. 92.
Avoid using access codes similar to the emergency numbers to prevent accidental dialing of the emergency number.
If you lock your phone or forget any of these codes, contact your service provider.
Autolock period—You can set an autolock period, a time-out after which the phone automatically locks and
can be used only if the coa number for the time-outurn off the autolock peri
To unlock the phone, ente
Note: When the pprofile to certain eprogrammed into
Tip! To lock the phkey. A list of comm
Lock if SIM changed—Yothe lock code when an unyour phone. The phone maare recognized as the own
Fixed dialing—You can refrom your phone to selectby your SIM card. You neefunction. To view the list Menu > Tools > SettingsFixed dialing. To add newlist, select Options > NewWhen you use Fixed dialinnot possible, except whenpacket data connection. Innumber and the recipientincluded on the fixed dial
Tool
s
92
to 8 digits) is supplied with equired to access some .
digits) can be used to lock the rized use. The factory setting for To avoid unauthorized use of your ode. Keep the new code secret and from your phone.
(PUK) code and PUK2 code—These ired to change a blocked PIN code ly. If the codes are not supplied ct the operator whose SIM card is
digits) is required to change a e code is not supplied with the operator whose USIM card is in
s required to use the wallet . 67.
mentt guarantee safety; they are used ftware.
ement main view, you can see a tes that are stored in your phone. f personal certificates, if available.
Options in the Fixed dialing view are Open, Call, Activ. fixed dialing, Deact. fixed dialing, New contact, Edit, Delete, Add to Contacts, Add from Contacts, Find, Mark/Unmark, Help, and Exit.
When security features that restrict calls are in use (such as Call restriction, Closed user group, and Fixed dialing), calls still may be possible to the official emergency numbers programmed into your phone.
Closed user group (network service)—You can specify a group of people to whom you can call and who can call you.
Confirm SIM services (network service)—You can set the phone to display confirmation messages when you are using a SIM card service.
Glossary of PIN and lock codesPersonal identification number (PIN) code—This code protects your SIM card against unauthorized use. The PIN code (4 to 8 digits) is usually supplied with the SIM card. After three consecutive incorrect PIN code entries, the PIN code is blocked, and you need to unblock it before you can use the SIM card again. See the information about the PUK code in this section.
UPIN code—This code may be supplied with the USIM card. The USIM card is an enhanced version of the SIM card and is supported by UMTS mobile phones. The UPIN code protects the USIM card against unauthorized use.
PIN2 code—This code (4some SIM cards, and is rfunctions in your phone
Lock code—This code (5 phone to avoid unauthothe lock code is 12345. phone, change the lock cin a safe place separate
Personal unblocking keycodes (8 digits) are requor PIN2 code, respectivewith the SIM card, contain your phone.
UPUK code—This code (8blocked UPIN code. If thUSIM card, contact the your phone.
Wallet code—This code iservices. See "Wallet," p
Certificate manageDigital certificates do noto verify the origin of so
In the certificate managlist of authority certificaScroll right to see a list o
Tool
s
93
e correct identity of a server e period of validity of a server ked.
one display if the identity of the if you do not have the correct r phone.
s, scroll to a certificate, and te details. When you open
dity of the certificate is checked, notes may be displayed:
ou have not set any application “Change the trust settings”.
period of validity has ended for
The period of validity has not certificate.
e certificate cannot be used. uer.
sficate settings, you must make he owner of the certificate and belongs to the listed owner.
Options in the certificate management main view are Certificate details, Delete, Trust settings, Mark/Unmark, Help, and Exit.
Digital certificates are used to verify the origin of the XHTML or WML pages and installed software. However, they can only be trusted if the origin of the certificate is known to be authentic.
Digital certificates should be used if you want to connect to an online bank or another site or remote server for actions that involve transferring confidential information. They should also be used if you want to reduce the risk of viruses or other malicious software and be sure of the authenticity of software when downloading and installing software.
Important: Even if the use of certificates makes the risks involved in remote connections and software installation considerably smaller, they must be used correctly in order to benefit from increased security. The existence of a certificate does not offer any protection by itself; the certificate manager must contain correct, authentic, or trusted certificates for increased security to be available. Certificates have a restricted lifetime. If Expired certificate or Certificate not valid yet is shown even if the certificate should be valid, check that the current date and time in your phone are correct.
View certificate detailsYou can only be sure of thwhen the signature and thcertificate have been chec
You are notified on the phserver is not authentic or security certificate in you
To check certificate detailselect Options > Certificacertificate details, the valiand one of the following
Certificate not trusted—Yto use the certificate. See
Expired certificate—The the selected certificate.
Certificate not valid yet—yet begun for the selected
Certificate corrupted—ThContact the certificate iss
Change the trust settingBefore changing any certisure that you really trust tthat the certificate really
Tool
s
94
rded, is shown in the
forwarding cannot be active at
iction
k service) allows you to restrict the eceive with the phone. To change e barring password from your he desired barring option, and set ancel), or check whether the tatus). Call restriction affects all s.
l forwarding cannot be active at
d, calls still may be possible to cy numbers.
ect Automatic to set the phone to e of the available networks, or ect the network from a list of ion to the manually selected e sounds an error tone and asks
Scroll to an authority certificate, and select Options > Trust settings. Depending on the certificate, applications that can use the selected certificate are as follows:
Symbian installation: Yes—The certificate is able to certify the origin of a new Symbian operating system application.
Internet: Yes—The certificate is able to certify servers.
App. installation: Yes—The certificate is able to certify the origin of a new Java application.
Online certif. check—Select to check the online certificates before installing an application.
Select Options > Edit trust setting to change the value.
Call forwarding
Call forwarding allows you to forward your incoming calls. For details, contact your service provider.
1 Select Menu > Tools > Settings > Call forwarding.
2 Select the desired forwarding option. To forward calls when your number is busy or when you reject incoming calls, select If busy.
3 Set the forwarding option on (Activate) or off (Cancel), or check whether the option is activated (Check status). Several forwarding options can be active at the same time.
When all calls are forwastandby mode.
Call restrictions and callthe same time.
Call restr
Call restriction (networcalls that you make or rthe settings, you need thservice provider. Select tit on (Activate) or off (Coption is active (Check scalls, including data call
Call restriction and Calthe same time.
When calls are restrictecertain official emergen
Network
Operator selection—Selsearch for and select onManual to manually selnetworks. If the connectnetwork is lost, the phon
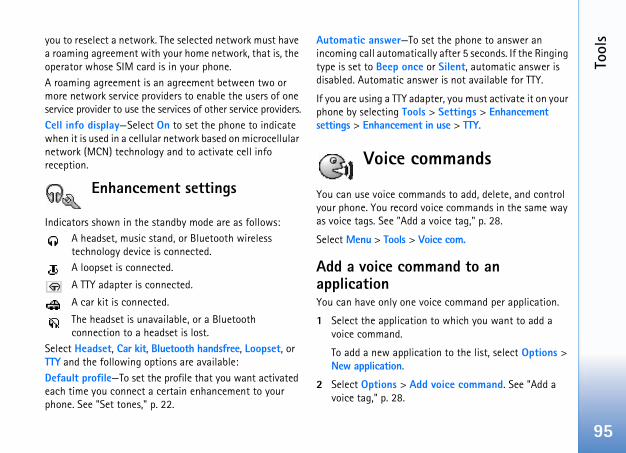
Tool
s
95
t the phone to answer an ly after 5 seconds. If the Ringing r Silent, automatic answer is er is not available for TTY.
ter, you must activate it on your > Settings > Enhancement use > TTY.
mmands
nds to add, delete, and control ice commands in the same way voice tag," p. 28.
ice com.
and to an
ice command per application.
to which you want to add a
on to the list, select Options >
voice command. See "Add a
you to reselect a network. The selected network must have a roaming agreement with your home network, that is, the operator whose SIM card is in your phone.A roaming agreement is an agreement between two or more network service providers to enable the users of one service provider to use the services of other service providers.Cell info display—Select On to set the phone to indicate when it is used in a cellular network based on microcellular network (MCN) technology and to activate cell info reception.
Enhancement settings
Indicators shown in the standby mode are as follows: A headset, music stand, or Bluetooth wireless technology device is connected.A loopset is connected.
A TTY adapter is connected.
A car kit is connected.
The headset is unavailable, or a Bluetooth connection to a headset is lost.
Select Headset, Car kit, Bluetooth handsfree, Loopset, or TTY and the following options are available:Default profile—To set the profile that you want activated each time you connect a certain enhancement to your phone. See "Set tones," p. 22.
Automatic answer—To seincoming call automaticaltype is set to Beep once odisabled. Automatic answ
If you are using a TTY adapphone by selecting Toolssettings > Enhancement in
Voice co
You can use voice commayour phone. You record voas voice tags. See "Add a
Select Menu > Tools > Vo
Add a voice commapplicationYou can have only one vo
1 Select the application voice command.
To add a new applicatiNew application.
2 Select Options > Add voice tag," p. 28.
Tool
s
96
install applications from r adequate protection against
e.e following:
type, version number, and the r of the application, select .rtificate details of the application, ertificate. See "Certificate
ontains an update or repair to an can only restore the original
he original installation file or a full oved software package. To restore remove the application, and install m the original installation file or
use Nokia Application Installer a PC Suite to install applications. , if supplied with the phone.r installing Java applications. If it y ask you to download it. If there d for the application, you are
en you are downloading the JAR ter a user name and password to btain these from the supplier or lication.
Application manager
Select Menu > Tools > Manager. You can install two types of applications and software to your phone:Downloadable Java™ MIDP 2.0, CLDC 1.1 applications, and 3D API (JSR-184). Other applications and software suitable for the Symbian operating system ( ). The installation files have the SIS extension. Only install software specifically designed for your Nokia 6682 device.Installation files may be transferred to your phone from a compatible computer, downloaded during browsing, or sent to you in a multimedia message, as an e-mail attachment, or using a Bluetooth connection. You can use Nokia Application Installer in Nokia PC Suite to install an application to your phone or a memory card. If you use Microsoft Windows Explorer to transfer a file, save the file to a memory card (local disk).
Install applications and softwareApplication icons are as follows:
SIS application
Java application
Application is not fully installed
Application is installed on the memory card.
Important: Onlysources that offeharmful softwar
Before installation, do thTo view the application supplier or manufactureOptions > View detailsTo display the security ceselect Options > View cmanagement," p. 92.If you install a file that cexisting application, youapplication if you have tback-up copy of the remthe original application, the application again frothe backup copy.
Tip! You can alsoavailable in NokiSee the CD-ROM
The JAR file is required fois missing, the phone mais no access point defineasked to select one. Whfile, you may need to enaccess the server. You omanufacturer of the app
Tool
s
97
og to a help desk so that they talled or removed, select ext message, Via multimedia, or
ons and softwarege, and select Options > firm.
ou can only reinstall it if you package or a full backup of the e. If you remove a software er be able to open documents e.
ge depends on the software , the other software package
o the documentation of the e for details.
gsect the kind of software you only, or Off.
t to check the online certificates ation.
the default address used when es.
1 Open Manager, and scroll to an installation file.
Alternatively, search the phone memory or the memory card, select the application, and press the scroll key to start the installation.
2 Select Options > Install.Tip! While browsing, you can download an installation file and install it without closing the connection.
During installation, the phone shows information about the progress of the installation. If you are installing an application without a digital signature or certification, the phone displays a warning. Continue installation only if you are sure of the origin and contents of the application.
Options in the Manager main view are App. downloads, Install, View details, View certificate, Send, Go to web address, Remove, View log, Send log, Update, Settings, Suite settings, Help, and Exit.
To start an installed application from the main menu, scroll to it, and press the scroll key.
To start a network connection and to view extra information about the application, scroll to it, and select Options > Go to web address, if available.
To see what software packages have been installed or removed and when, select Options > View log.
To send your installation lcan see what has been insOptions > Send log > Via tVia Bluetooth.
Remove applicatiScroll to a software packaRemove. Select Yes to con
If you remove software, yhave the original softwareremoved software packagpackage, you may no longcreated with that softwar
If another software packapackage that you removedmay stop working. Refer tinstalled software packag
Application settinSoftware installation—Selwant to install: On, SignedOnline certif. check—Selecbefore installing an applic
Default web address—Set checking online certificat

Tool
s
98
me or extend the usage period for n activation key, and Options > tivation keys cannot be updated if reception is disabled. See "Web
. 55.
re not in use at the moment (Not ce. Unused activation keys have no d to them saved in the phone.
rmation such as the validity status e file, select an activation key, and
Some Java applications may require a phone call, a message to be sent, or a network connection to a specific access point for downloading extra data or components. In the Manager main view, scroll to an application, and select Options > Suite settings to change settings related to that specific application.
Activation keys—copyright protections
Select Menu > Tools > Activ. keys to view the digital rights activation keys stored in your phone.• Valid keys ( ) are connected to one or more media files.
• With expired keys ( ), you have no time to use the media file, or the time period for using the file is exceeded. To view the Expired activation keys, scroll right.
• To buy more usage tia media file, select aActivate content. AcWeb service messageservice messages," p
• To view which keys aused), scroll right twimedia files connecte
• To view detailed infoand ability to send thpress the scroll key.

Trou
bles
hoot
ing
99
sage is shown briefly.
trieve a multimedia message from ng center.
for multimedia messaging are at there are no mistakes in phone elect Messaging > Options > essage.
connection when the phone connection?
making a data connection, select he following:
Reception if roaming > Defer ultimedia messaging centre save ved later, for example, after you gs. After this change, the phone
ation notes to the network. now, select Retr. immediately.Reception if roaming > Off—To timedia messages. After this not make any network
ultimedia messaging.
TroubleshootingQ&ABluetooth connectivity
Q: Why can’t I find my friend’s device?
A: Check that both devices have activated Bluetooth connectivity.
Check that the distance between the two devices is not over 32 feet (10 meters) and that there are no walls or other obstructions between the devices.
Check that the other device is not in hidden mode.
Check that both devices are compatible.
Q: Why can’t I end a Bluetooth connection?
A: If another device is connected to your phone, you can either end the connection using the other device or by deactivating Bluetooth connectivity. Select Connect. > Bluetooth > Off.
Multimedia messaging
Q: What should I do when the phone cannot receive a multimedia message because the memory is full?
A: The amount of memory needed is indicated in the error message: Not enough memory to retrieve message. Delete some data first. To view the kind of data you have and the amount of memory the different data groups consume, select Tools > File manager > Options > Memory details.
Q: The note Retrieving mesWhat is happening?
A: The phone is trying to rethe multimedia messagi
Check that the settings defined correctly and thnumbers or addresses. SSettings > Multimedia m
Q: How can I end the data repeatedly starts a data
A: To stop the phone from Messaging and one of t
Recept. in home net. or retrieval—To have the mthe message to be retriehave checked the settinstill needs to send informTo retrieve the messageRecept. in home net. or ignore all incoming mulchange, the phone doesconnections related to m

Trou
bles
hoot
ing
10
g information?
. Scroll right and select Options > ings > Log duration > No log. These ents, recent calls register, and rts.
s in connecting the phone to my PC?
PC Suite is installed and running on Guide for Nokia PC Suite on the ith the phone. For further information C Suite, see the help function on
the support pages at www.nokia.com.
for the lock, PIN, or PUK codes?
is 12345. If you forget or lose the r phone dealer.
PIN or PUK code, or if you have not ontact your network service provider.
passwords, contact your access point commercial Internet service provider or network operator.
inglication that is not responding?
n switching window, press and hold roll to the application, and press the application.
0
Messaging
Q: Why can’t I select a contact?
A: The contact card does not have a phone number or an e-mail address. Add the missing information to the contact card in Contacts.
Camera
Q: Why do images look smudgy?
A: Check to see if the camera lens protection window is clean.
Calendar
Q: Why are the week numbers missing?
A: If you have changed the calendar settings so that the week starts on a day other than Monday, the week numbers will not be shown.
Browser services
Q: What do I do if the following message is displayed: No access point defined. Define now?
A: Insert the correct browser settings. Contact your service provider for instructions.
Log
Q: Why does the log appear empty?
A: You may have activated a filter, and no communication events fitting that filter have been logged. To see all events, select Connect. > Log. Scroll right and select Options > Filter > All communication.
Q: How do I delete my lo
A: Select Connect. > LogClear log or go to Settwill erase the log contmessage delivery repo
PC connectivityQ: Why do I have problem
A: Make sure that Nokia your PC. See the User CD-ROM, if supplied won how to use Nokia PNokia PC Suite or visit
Access codesQ: What is my password
A: The default lock code lock code, contact you
If you forget or lose a received such a code, c
For information about provider, for example, a(ISP), service provider,
Application not respondQ: How do I close an app
A: To open the applicatiothe menu key. Then scclear key to close the

Trou
bles
hoot
ing
101
ation, calendar notes, call timers, ores, or any other data, go to the remove the data. Try deleting
ng from the smallest item), if you ms and any of the following notes memory to perform operation. r Memory low. Delete some data.
before deleting it?
e of the following methods:
ake a back up copy of all data to
ail address, and then save the r.
ooth connection to a
ible memory card.
Phone display
Q: Why do missing, discolored, or bright dots appear on the screen every time I turn on my phone?
A: This is a characteristic of this type of display. Some displays may contain pixels or dots that remain on or off. This is normal, not a fault.
Memory low
Q: What can I do if my phone memory is low?
A: You can delete the following items regularly to avoid memory getting low:
Messages from Inbox, Drafts, and Sent folders in Messaging
Retrieved e-mail messages from the phone memory
Saved browser pages
Images and photos in Gallery
To delete contact informcall cost timers, game screspective application toitems one by one (startiare deleting multiple iteare shown: Not enough Delete some data first. o
Q: How can I save my data
A: Save your data using on
Use Nokia PC Suite to ma compatible computer.
Send images to your e-mimages to your compute
Send data using a Bluetcompatible device.
Store data on a compat
Enha
ncem
ents
10
the power cord of any accessory or nd pull the plug, not the cord.
nhancements installed in a vehicle perating properly.
plex car enhancements must be sonnel only.
on (BL-5C)
2, ACP-9, ACP-8, and ACP-7)
2)
KU-2)
-8W)
1)
diaCard (MU-2)
(LD-1W)
2
EnhancementsIf you want to enhance phone functionality, a range of enhancements is available for you. You can select any of these items to help accommodate your specific communication needs. For availability of these and other enhancements, contact your dealer. Protective carrying cases and straps for your Nokia 6682 mobile phone are available for purchase and can be located at www.nokiausa.com.
Check the model number of any charger before use with this device. This device is intended for use when supplied with power from ACP-7, ACP-8, ACP-9, and ACP-12.
Warning: Use only batteries, chargers and enhancements approved by Nokia for use with this particular model. The use of any other types may invalidate any approval or warranty, and may be dangerous. For availability of approved enhancements, please check with your dealer.
Your device and its enhancements may contain small parts. Keep them out of reach of small children.
A few practical rules about accessories and enhancements:• Keep all accessories and enhancements out of the reach
of small children.
• When you disconnectenhancement, grasp a
• Check regularly that eare mounted and are o
• Installation of any commade by qualified per
Power• Battery, 900 mAh, Li-I
• Travel chargers (ACP-1
• Mobile charger (LCH-1
Data• Connectivity Cable (D
• Wireless Keyboard (SU
• Digital Pen (SU-1B)
• MultiMediaCard (MU-
• Reduced Size MultiMe
• Wireless GPS Module
Enha
ncem
ents
103
ndsfree (HF-6W))
, CK-7W)
F-3)
HF-3)
estyle
PT-6)
Audio• Wireless Boom Headset (HS-4W)
• Wireless Headset (HDW-3)
• Wireless Headset (HS-11W)
• Wireless Clip-on Headset (HS-21W)
• Wireless Image Headset (HS-13W)
• Headset (HS-5)
• Boom Headset (HDB-4)
• Fashion Stereo Headset (HS-3)
• Stereo Headset (HDS-3)
• Music Stand (MD-1)
Accessibility• Loopset (LPS-4)
• TTY adapter (HDA-10)
Car• Wireless Plug-in Car Ha
• Mobile Holder (CR-27)
• Wireless Car Kit (CK-1W
• Headrest Handsfree (BH
• Plug-in Car Handsfree (
• Car Kit (CK-10)
Imaging and lif• Image Album (PD-1)
• Nokia Remote Camera (
Care
and
mai
nten
ance
10
icals, cleaning solvents, or strong e device.
e. Paint can clog the moving parts eration.
loth to clean any lenses (such as sor, and light sensor lenses).
or an approved replacement d antennas, modifications, or mage the device and may violate radio devices.
p of data you want to keep (such as notes) before sending your device to
ns apply equally to your device, hancement. If any device is not o the nearest authorized service
4
Care and maintenanceYour device is a product of superior design and craftsmanship and should be treated with care. The suggestions below will help you protect your warranty coverage and enjoy your device for many years.
• Keep the device dry. Precipitation, humidity, and all types of liquids or moisture can contain minerals that will corrode electronic circuits. If your device does get wet, remove the battery and allow the device to dry completely before replacing it.
• Do not use or store the device in dusty, dirty areas. Its moving parts and electronic components can be damaged.
• Do not store the device in hot areas. High temperatures can shorten the life of electronic devices, damage batteries, and warp or melt certain plastics.
• Do not store the device in cold areas. When the device returns to its normal temperature, moisture can form inside the device and damage electronic circuit boards.
• Do not attempt to open the device other than as instructed in this guide.
• Do not drop, knock, or shake the device. Rough handling can break internal circuit boards and fine mechanics.
• Do not use harsh chemdetergents to clean th
• Do not paint the devicand prevent proper op
• Use a soft, clean, dry ccamera, proximity sen
• Use only the supplied antenna. Unauthoriseattachments could daregulations governing
• Use chargers indoors.
• Always create a backucontacts and calendara service facility.
All of the above suggestiobattery, charger, or any enworking properly, take it tfacility for service.
Refe
renc
e in
form
atio
n
105
r cold places, such as in a closed nditions, will reduce the capacity Always try to keep the battery °C and 25°C). A device with a hot rk temporarily, even when the tery performance is particularly
ll below freezing.in a fire as they may explode. if damaged. Dispose of batteries ns. Please recycle when possible. d waste.up to 4 hours of talk time and up Operation times are estimates and work conditions, charging, and
ation guidelines atteries for your safety. To check inal Nokia battery, purchase it ealer, look for the Nokia Original ckaging, and inspect the hologram
eps.
four steps is not a total assurance attery. If you have any reason to not an authentic original Nokia from using it and take it to the vice point or dealer for assistance.
Reference informationBattery information
Charging and discharging Your device is powered by a rechargeable battery. The full performance of a new battery is achieved only after two or three complete charge and discharge cycles. The battery can be charged and discharged hundreds of times but it will eventually wear out. When the talk and standby times are noticeably shorter than normal, buy a new battery. Use only Nokia approved batteries, and recharge your battery only with Nokia approved chargers designated for this device.
Unplug the charger from the electrical plug and the device when not in use. Do not leave the battery connected to a charger. Overcharging may shorten its lifetime. If left unused, a fully charged battery will lose its charge over time. Temperature extremes can affect the ability of your battery to charge.
Use the battery only for its intended purpose. Never use any charger or battery that is damaged.
Do not short-circuit the battery. Accidental short-circuiting can occur when a metallic object such as a coin, clip, or pen causes direct connection of the positive (+) and negative (-) terminals of the battery. (These look like metal strips on the battery.) This might happen, for example, when you carry a spare battery in your pocket or purse. Short-circuiting the terminals may damage the battery or the connecting object.
Leaving the battery in hot ocar in summer or winter coand lifetime of the battery.between 59°F and 77°F (15or cold battery may not wobattery is fully charged. Batlimited in temperatures weDo not dispose of batteries Batteries may also explode according to local regulatioDo not dispose as householThe BL-5C battery provides to 11 days of standby time. may vary depending on netdevice use.
Nokia battery authenticAlways use original Nokia bthat you are getting an origfrom an authorized Nokia dEnhancements logo on the palabel using the following st
Successful completion of theof the authenticity of the bbelieve that your battery is battery, you should refrain nearest authorized Nokia ser
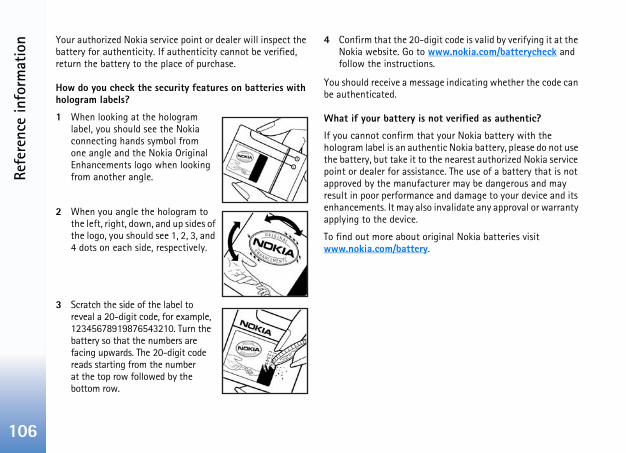
Refe
renc
e in
form
atio
n
10
igit code is valid by verifying it at the ww.nokia.com/batterycheck and
s.
age indicating whether the code can
ot verified as authentic?
t your Nokia battery with the ntic Nokia battery, please do not use the nearest authorized Nokia service nce. The use of a battery that is not turer may be dangerous and may e and damage to your device and its invalidate any approval or warranty
iginal Nokia batteries visit
6
Your authorized Nokia service point or dealer will inspect the battery for authenticity. If authenticity cannot be verified, return the battery to the place of purchase.
How do you check the security features on batteries with hologram labels?
1 When looking at the hologram label, you should see the Nokia connecting hands symbol from one angle and the Nokia Original Enhancements logo when looking from another angle.
2 When you angle the hologram to the left, right, down, and up sides of the logo, you should see 1, 2, 3, and 4 dots on each side, respectively.
3 Scratch the side of the label to reveal a 20-digit code, for example, 12345678919876543210. Turn the battery so that the numbers are facing upwards. The 20-digit code reads starting from the number at the top row followed by the bottom row.
4 Confirm that the 20-dNokia website. Go to wfollow the instruction
You should receive a messbe authenticated.
What if your battery is n
If you cannot confirm thahologram label is an authethe battery, but take it to point or dealer for assistaapproved by the manufacresult in poor performancenhancements. It may alsoapplying to the device.
To find out more about orwww.nokia.com/battery.
Addi
tiona
l Saf
ety
Info
rmat
ion
107
dical device to determine if they external RF energy or if you have ur phone in health care facilities
d in these areas instruct you to do facilities may be using equipment xternal RF energy.
commend that a minimum cm) be maintained between a ker to avoid potential interference
ecommendations are consistent ch by and recommendations of h. To minimize the potential for
acemakers should
ore than 6 inches (15.3 cm) from he device is switched on
a breast pocket
ar opposite the pacemaker
spect that interference is taking e immediately.
s may interfere with some hearing consult your hearing aid provider.
Additional Safety InformationYour device and its enhancements may contain small parts. Keep them out of the reach of small children.
Operating environmentRemember to follow any special regulations in force in any area and always switch off your device when its use is prohibited or when it may cause interference or danger. Use the device only in its normal operating positions. This device meets RF exposure guidelines when used either in the normal use position against the ear or when positioned at least 5/8 inch (1.5 cm) away from the body. When a carry case, belt clip, or holder is used for body-worn operation, it should not contain metal and should position the device at least 5/8 inch (1.5 cm) away from your body.
In order to transmit data files or messages, this device requires a quality connection to the network. In some cases, transmission of data files or messages may be delayed until such a connection is available. Ensure the above separation distance instructions are followed until the transmission is completed.
Your device and its enhancements may contain small parts. Keep them out of reach of small children.
Medical devicesOperation of any radio transmitting equipment, including wireless phones, may interfere with the functionality of inadequately protected medical devices. Consult a physician or
the manufacturer of the meare adequately shielded fromany questions. Switch off yowhen any regulations posteso. Hospitals or health care that could be sensitive to e
PacemakersPacemaker manufacturers reseparation of 6 inches (15.3wireless phone and a pacemawith the pacemaker. These rwith the independent researWireless Technology Researcinterference, persons with p
• Always keep the device mtheir pacemaker when t
• Not carry the device in
• Hold the device to the e
If you have any reason to suplace, switch off your devic
Hearing aidsSome digital wireless deviceaids. If interference occurs,
Addi
tiona
l Saf
ety
Info
rmat
ion
10
ospheres include areas where you d to turn off your vehicle engine. cause an explosion or fire resulting ath. Switch off the device at ear gas pumps at service stations. e use of radio equipment in fuel ibution areas, chemical plants or are in progress. Areas with a sphere are often but not always de below deck on boats, chemical es, vehicles using liquefied opane or butane), and areas where s or particles such as grain, dust or
ess phones, including this phone, io signals, wireless networks, , and user-programmed functions. onnections in all conditions cannot u should never rely solely on any r essential communications like ies.
ll, do the following: , switch it on. Check for adequate networks may require that a valid serted in the phone.
any times as needed to clear the phone for calls.
8
VehiclesRF signals may affect improperly installed or inadequately shielded electronic systems in motor vehicles such as electronic fuel injection systems, electronic antiskid (antilock) braking systems, electronic speed control systems, air bag systems. For more information, check with the manufacturer or its representative of your vehicle or any equipment that has been added.Only qualified personnel should service the device, or install the device in a vehicle. Faulty installation or service may be dangerous and may invalidate any warranty that may apply to the device. Check regularly that all wireless device equipment in your vehicle is mounted and operating properly. Do not store or carry flammable liquids, gases, or explosive materials in the same compartment as the device, its parts, or enhancements. For vehicles equipped with an air bag, remember that air bags inflate with great force. Do not place objects, including installed or portable wireless equipment in the area over the air bag or in the air bag deployment area. If in-vehicle wireless equipment is improperly installed and the air bag inflates, serious injury could result.Using your device while flying in aircraft is prohibited. Switch off your device before boarding an aircraft. The use of wireless teledevices in an aircraft may be dangerous to the operation of the aircraft, disrupt the wireless telephone network, and may be illegal.
Potentially explosive environmentsSwitch off your device when in any area with a potentially explosive atmosphere and obey all signs and instructions.
Potentially explosive atmwould normally be adviseSparks in such areas couldin bodily injury or even derefuelling points such as nObserve restrictions on thdepots, storage, and distrwhere blasting operationspotentially explosive atmoclearly marked. They inclutransfer or storage facilitipetroleum gas (such as prthe air contains chemicalmetal powders.
Emergency callsImportant: Wireloperate using radlandline networksBecause of this, cbe guaranteed. Yowireless phone fomedical emergenc
To make an emergency ca1 If the phone is not on
signal strength. SomeSIM card is properly in
2 Press the end key as mdisplay and ready the
Addi
tiona
l Saf
ety
Info
rmat
ion
109
using standard operating ansmitting at its highest certified uency bands. The actual SAR level e well below the maximum value ed to use only the power required amount changes depending on a ow close you are to a network R value when tested according to ures for use at the ear for device ur phone’s device type is listed on
battery.
ding on national reporting and e network band. Use of device nts may result in different SAR rmation may be provided under w.nokia.com.
it of USA (FCC) and Canada (IC) is gram of tissue. Device type RM-58 this SAR limit. The highest SAR ndard during product certification kg and when properly worn on the ion about these devices can be t <http://www.fcc.gov/oet/fccid> authorization system using FCC
3 Enter the official emergency number for your present location. Emergency numbers vary by location.
4 Press the call key.
If certain features are in use, you may first need to turn those features off before you can make an emergency call. Consult this guide or your service provider. When making an emergency call, give all the necessary information as accurately as possible. Your wireless phone may be the only means of communication at the scene of an accident. Do not end the call until given permission to do so.
Certification information (SAR)THE NOKIA 6682 DEVICE MEETS GUIDELINES FOR EXPOSURE TO RADIO WAVES.
Your mobile device is a radio transmitter and receiver. It is designed and manufactured not to exceed the limits for exposure to radio frequency (RF) energy recommended by international guidelines (ICNIRP). These limits establish permitted levels of RF energy for the general population. The guidelines are based on standards that were developed by independent scientific organizations through periodic and thorough evaluation of scientific studies. The standards and guidelines include a substantial safety margin designed to assure the safety of the public, regardless of age and health and to account for any variations in measurements.
The exposure guidelines for mobile devices employ a unit of measurement known as the Specific Absorption Rate or SAR. The SAR limit stated in the international guidelines is 2.0 watts/kilogram (W/kg) averaged over ten grams of tissue.
Tests for SAR are conductedpositions with the device trpower level in all tested freqof an operating device can bbecause the device is designto reach the network. That number of factors such as hbase station. The highest SAinternational testing procedtype RM-58 is 0.52 W/kg. Yothe label located under the
SAR values may vary depentesting requirements and thaccessories and enhancemevalues. Additional SAR infoproduct information at ww
USA and Canada: The SAR lim1.6 W/kg averaged over one has also been tested againstvalue reported under this stafor use at the ear is 0.82 W/body is 0.96 W/kg. Informatfound on the FCC's website aby searching the equipmentID: LJPRM-58.
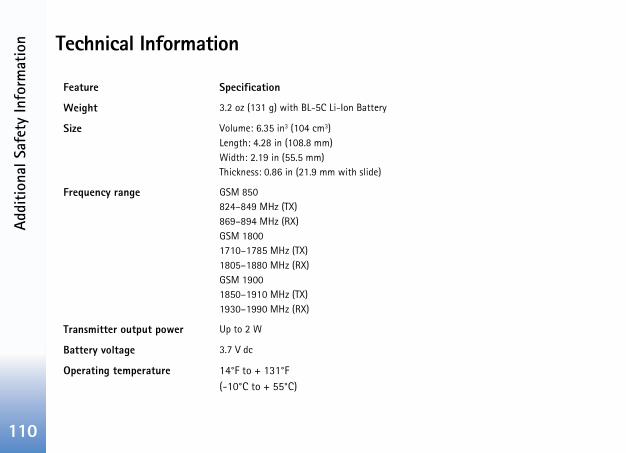
Addi
tiona
l Saf
ety
Info
rmat
ion
11
0Technical Information
Feature Specification
Weight 3.2 oz (131 g) with BL-5C Li-Ion Battery
Size Volume: 6.35 in3 (104 cm3)Length: 4.28 in (108.8 mm)Width: 2.19 in (55.5 mm)Thickness: 0.86 in (21.9 mm with slide)
Frequency range GSM 850824–849 MHz (TX)869–894 MHz (RX)GSM 18001710–1785 MHz (TX)1805–1880 MHz (RX)GSM 19001850–1910 MHz (TX)1930–1990 MHz (RX)
Transmitter output power Up to 2 W
Battery voltage 3.7 V dc
Operating temperature 14°F to + 131°F(-10°C to + 55°C)

Inde
x
111
aving video clips 34elf-timer 32ending images 32equence mode 32ideo recorder settings 34OM 82icates 92
ee instant messagingscreenee standby modeng memoryog information 100
larm 16nooze 16 91ock codeIN code 92IN2 code 92uter connections 82rence call 19ction settings 88
IndexNumerics1-touch dialing 19
Aaccess points 88
settings 89activation keys 98alarms
alarm clock 16calendar alarms 57
automatic find 47
BBluetooth
connecting two devices, pairing 80connection requests 80connection status indicators 81device address 80device icons 81factory set passcode 80headset 95pairing requests 80pairing, glossary explanation 80passcode, glossary explanation 80switching off 82
brightnessdisplay 87setting in camera 31, 34
Ccache
clearing 63calendar
alarm 57stopping a calendar alarm 57synchronizing PC Suite 58
call logSee log
callsdialed numbers 20duration 20international 17received 20settings 87settings for call forwarding 94transferring 19
camera 30adjusting brightness 31, 34adjusting contrast 31, 34night mode 31
ssssv
CD-Rcertifchat
Sclear
SCleari
Lclock
as
codeslPP
compconfeconne

Inde
x
11
individual conversations 75recording the messages 75sending a private message 74sending instant messages 74user ID, glossary explanation 75rnet access points (IAP)See access points
ddress, glossary explanation 90
89 code 92
erasing contents 21filtering 21
duration 21set settings 95speaker 18activating 18turning off 18
lbox 48automatic retrieving 50ia filesfast forward 39file formats 39mute sound 39rewind 39
2
contact cardsinserting pictures 26storing DTMF tones 19
contrastsetting in camera 31, 34
copyingcontacts between the SIM card
and device memory 27text 44
copyright protectionsee activation keys
cutting text 44
Ddata connections
details 83ending 83
datesettings 91
digital rights management, DRMsee activation keys
DNS, domain name service, glossary explanation 90
Eediting videos 36
adding effects 36adding sound clips 36adding transitions 36custom video clips 36
e-mail 45automatic retrieving 50offline 51opening 50remote mailbox 48retrieving from mailbox 49settings 53viewing attachments 50
enhancements 102
Ffile formats
JAR file 96RealOne Player 39SIS file 96
file manager 13fixed dialing 91
Ggallery 35
Hhandsfree
see loudspeakerheadset settings 95
Iinstant messaging 73
blocking 75connecting to a server 73groups 76
Inte
IP a
Llist locklog
log looploud
Mmai
med

Inde
x
113
alendar 58all forwarding 94all restrictions 94ertificates 92ata connections 88ate and time 91isplay 87eadset 95M settings 73, 77anguage 86ock code 92oopset 95riginal settings 86ersonalizing the phone 22IN code 92creen saver 87PIN code 92PUK code 92allet 70allet code 92utsamera 31eb connection 59ardopying names and numbers to
phone 27essages 51ames and numbers 27
memoryclearing memory 20viewing memory consumption 14
memory card 14menu
rearranging 22messaging
automatic find 47e-mail 45multimedia message 45text message 45
multimedia messages 45mute sound 39my home city 17
Ppacket data connections 83
GPRS, glossary explanation 88settings 90
pasting text 44PC connections
via Bluetooth or USB cable 82PC Suite
calendar data 58synchronization 82transferring images to a PC 35transferring music files to your
memory card 35viewing phone memory data 14
personalization 24phone label 5PIN code 92
Rrecording video 34recording voice tags 28, 95reminder
See calendar, alarmremote mailbox 48resolution, glossary explanation 33ringing tones
adding a personal ringing tone 27receiving in a text message 48removing a personal
ringing tone 27
Ssecurity code
See lock codesending
contact cards, business cards 27images 32video clips 37
service commands 42settings
access codes 91access points 89Bluetooth connection 79
ccccdddhIlllopPsUUww
shortccw
SIM cc
mn
Inde
x
11
let 67entering the wallet code 68resetting wallet code 70settings 70storing card details 68viewing ticket details 69
let code 68, 92
access points, see access points
4
SIS file 96SMS center, short message
service center 52snooze
alarm clock 16calendar alarm 57
softwaretransferring a file to your device 96
sound clips 35sounds
muting a ringing tone 18recording sounds 65
speed dialing 19standby mode 22synchronization 83
Ttext message 45text message service center
adding new 52thumbnail images
in a contact card 26time
settings 91transferring content from
another phone 23
UUPIN code 92UPUK code 92USB cable 82user guide updates 5USSD commands 42
Vvideo clips 35video player
See RealOne Playervideo recorder
See cameravoice dialing 28, 95voice mailbox 18
changing the phone number 17forwarding calls to
voice mailbox 94voice messages 18voice tags 28, 95
adding 28, 95making calls 28
volume control 18during a call 17loudspeaker 18
Wwal
walweb

115
Notes

11
6Notes

117
Notes

11
8Notes

119
Notes
12
0Nokia 6682 User Guide9237942