Embed Size (px)
Citation preview
Dreamweaver 8.0Tutorial 3
1
XP
Tutorial 3
Adding Text and Formatting Text with
CSS Styles
Dreamweaver 8.0Tutorial 3
2
XPAdding Text and Formatting Text with CSS Styles
• In this tutorial, you will:– Type text into a page
– Copy text from a document and paste it into a page
– Check for spelling errors
– Create hyperlinks
– Examine HTML tags for hyperlinks
Dreamweaver 8.0Tutorial 3
3
XPAdding Text and Formatting Text with CSS Styles
• In this tutorial, you will (cont’d):– Explore CSS styles and style sheets
– Modify HTML tags
– Create custom style classes
– Create styles for the <a> tag selectors
Dreamweaver 8.0Tutorial 3
4
XPAdding Text and Formatting Text with CSS Styles
• In this tutorial, you will (cont’d):– Create an external style sheet
– Attach an external style sheet to a Web page
– Edit styles
– Delete styles
– Examine the code for styles and style sheets
– Examine HTML tags used to format text
Dreamweaver 8.0Tutorial 3
5
XPAdding Text to a Web Page
• Text is very important to your Web page and should be error free and clear.
• You can add small amounts of text by typing in the Dreamweaver work area of the Document window.
• You can add larger amounts of text by cutting and pasting from another program such as a word processor that does a better job of clearing errors.
• Dreamweaver also has a built in spell checker.
Dreamweaver 8.0Tutorial 3
6
XPAdding Text to a Web Page
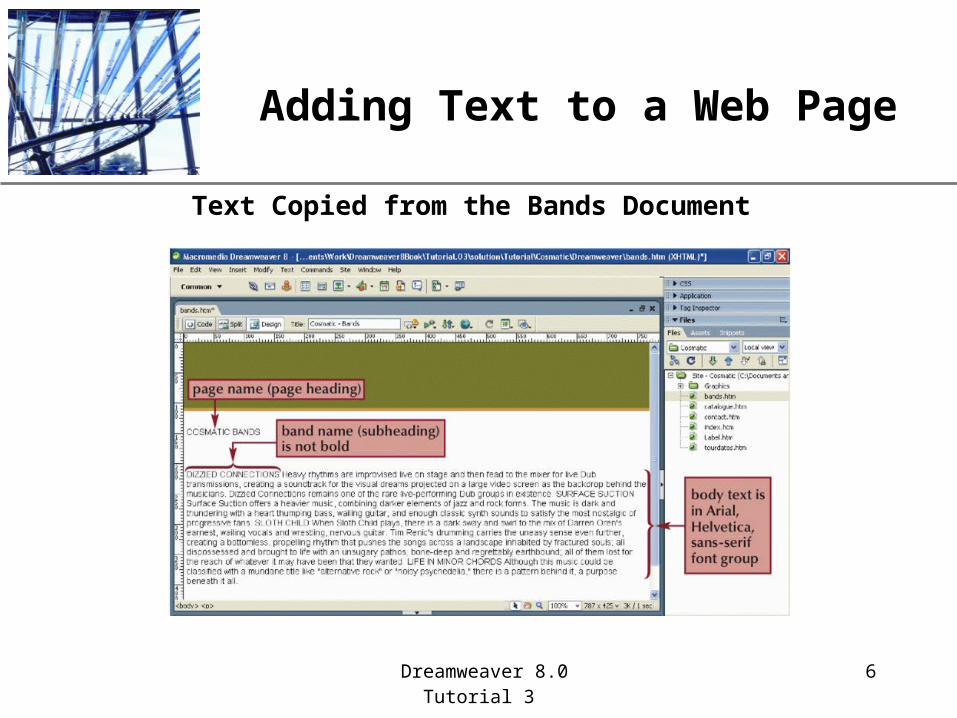
Text Copied from the Bands Document
Dreamweaver 8.0Tutorial 3
7
XPAdding Text to a Web Page
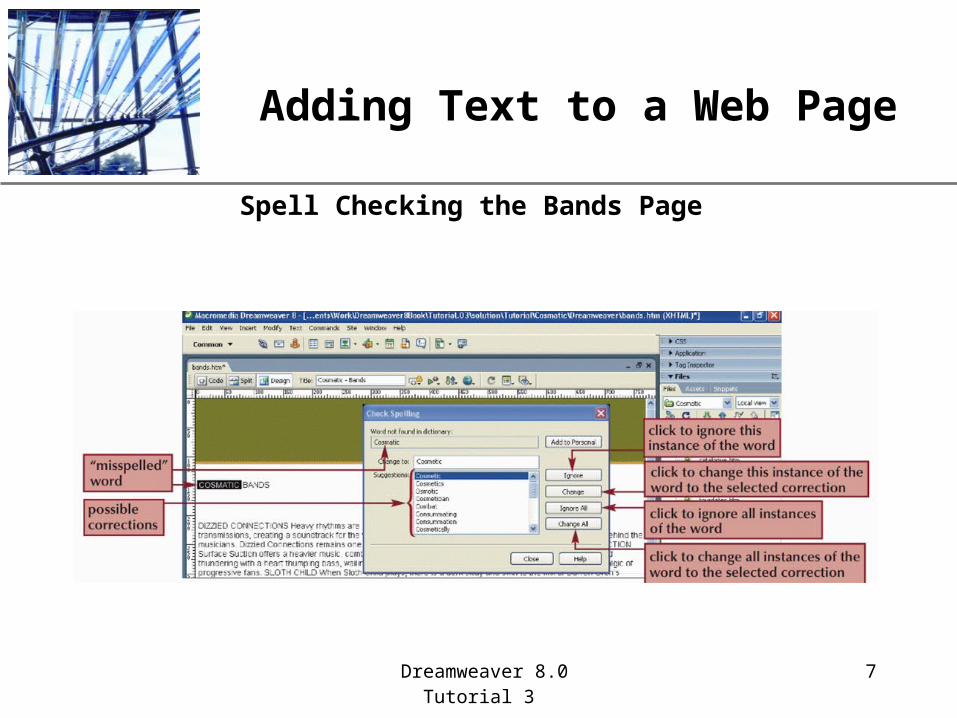
Spell Checking the Bands Page

Dreamweaver 8.0Tutorial 3
8
XPFormatting Text Using the Property Inspector
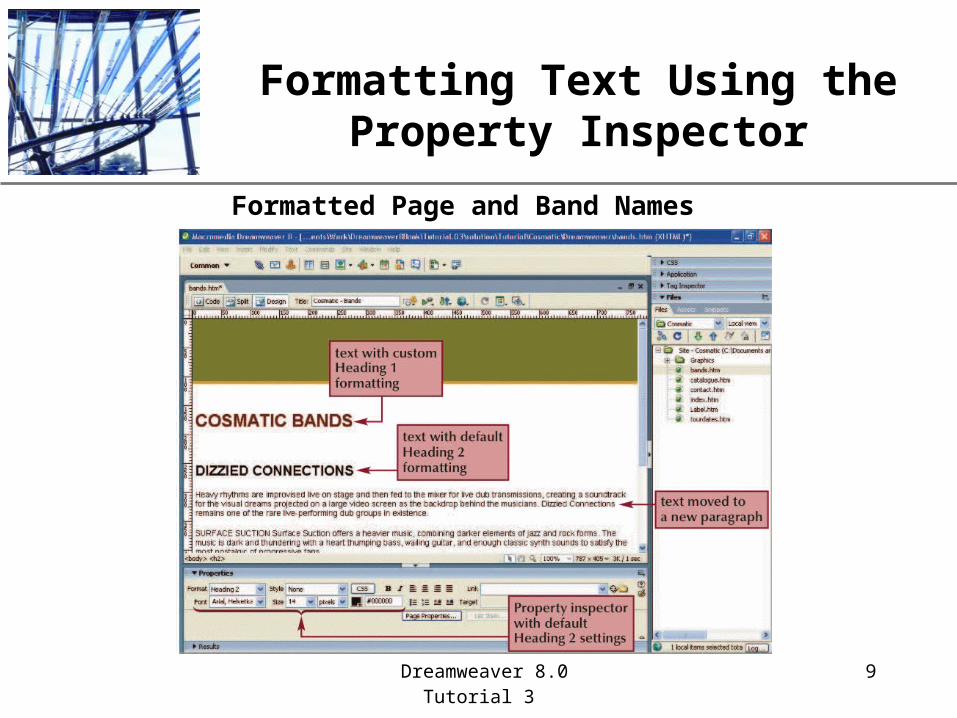
• The simplest way to format text is to select the text in the Document window and set the attributes for the text in the Property inspector.
• Text formatting attributes included in the Property inspector:– Format, font, style, size, color, emphasis, alignment,
lists, and indents
Dreamweaver 8.0Tutorial 3
9
XPFormatting Text Using the Property Inspector
Formatted Page and Band Names
Dreamweaver 8.0Tutorial 3
10
XPCreating Text Hyperlinks
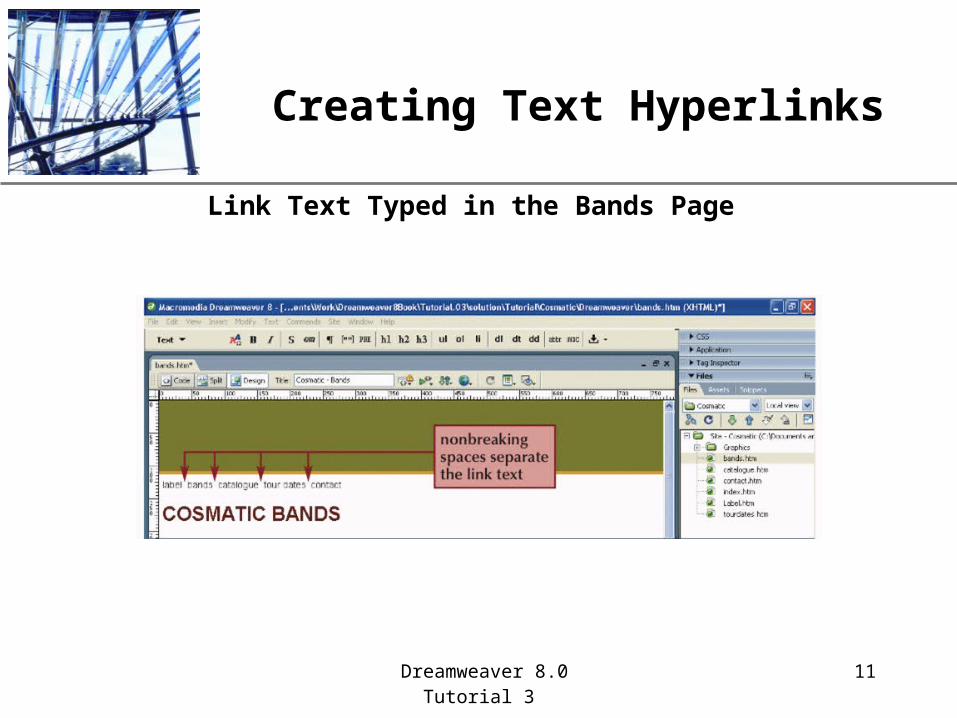
• Hyperlinks allow you to navigate between pages in a Web site and to other Web sites.
• Once the hyperlinks are created, you will copy the links to the rest of the pages in the site.
• To add more than one space between words you will need to use a nonbreaking space, which are special, invisible characters used to create more than one space between text and other elements.
Dreamweaver 8.0Tutorial 3
11
XPCreating Text Hyperlinks
Link Text Typed in the Bands Page
Fig. 3-8
Dreamweaver 8.0Tutorial 3
12
XPCreating Text Hyperlinks
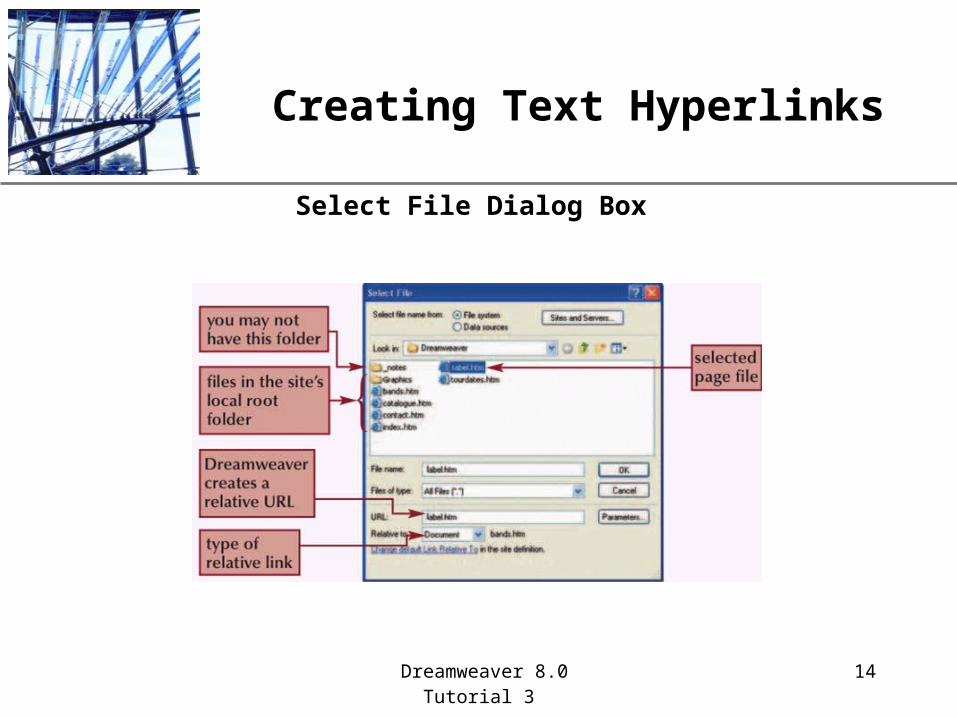
• When your links are in place and formatted, you can then convert them to hyperlinks by using the Properties inspector to associate the text with a particular file or Web page.
• If you know it, you can also type the URL into the Link text box.
• Within your Web site, you will use document relative links which only specify the path from the current page.
Dreamweaver 8.0Tutorial 3
13
XPCreating Text Hyperlinks
• Site root relative links specify a path from the root folder to the linked document.– Used on more complex sites
• When you link to a page in another site, you will use an absolute link which includes the entire URL.
• When you copy the navigation system to other pages of the site, you will not have to create additional links.
Dreamweaver 8.0Tutorial 3
14
XPCreating Text Hyperlinks
Select File Dialog Box
Dreamweaver 8.0Tutorial 3
15
XPCreating Text Hyperlinks
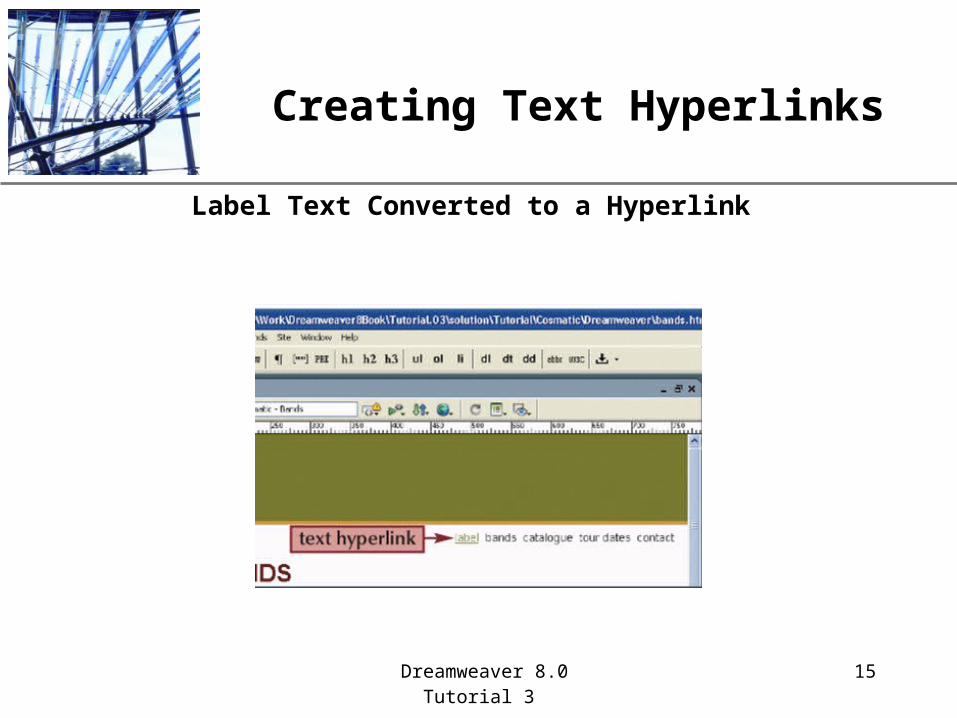
Label Text Converted to a Hyperlink
Dreamweaver 8.0Tutorial 3
16
XPCreating Text Hyperlinks
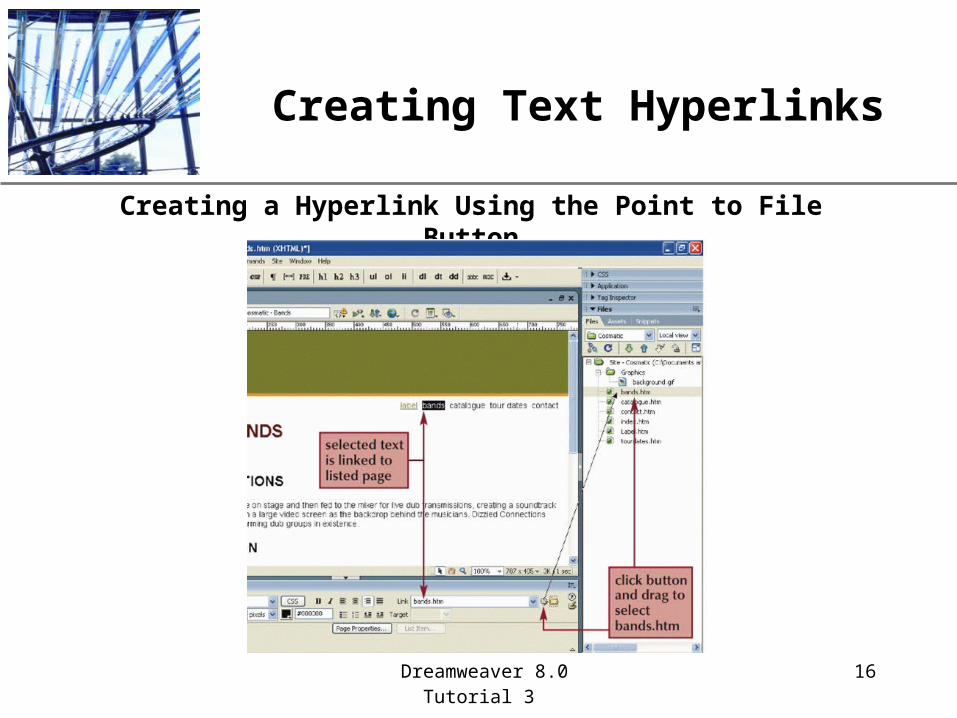
Creating a Hyperlink Using the Point to File Button
Dreamweaver 8.0Tutorial 3
17
XPExploring HTML Tags for Hyperlinks
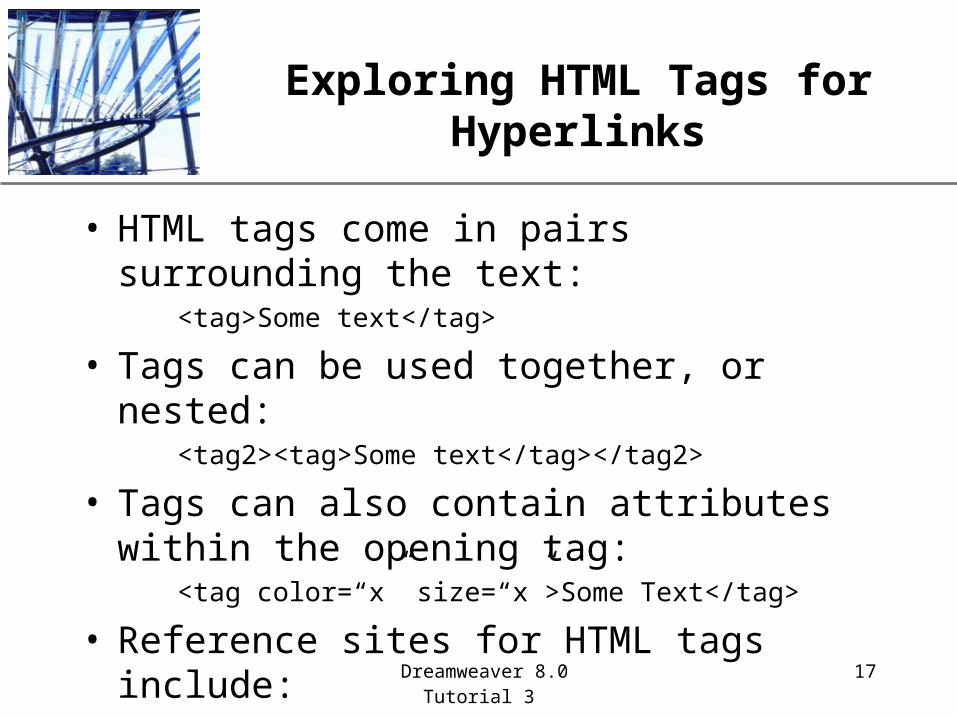
• HTML tags come in pairs surrounding the text:<tag>Some text</tag>
• Tags can be used together, or nested:<tag2><tag>Some text</tag></tag2>
• Tags can also contain attributes within the opening tag:
<tag color=“x” size=“x”>Some Text</tag>
• Reference sites for HTML tags include:webmonkey.wired.com/webmonkey and www.w3.org
Dreamweaver 8.0Tutorial 3
18
XPExploring HTML Tags for Hyperlinks
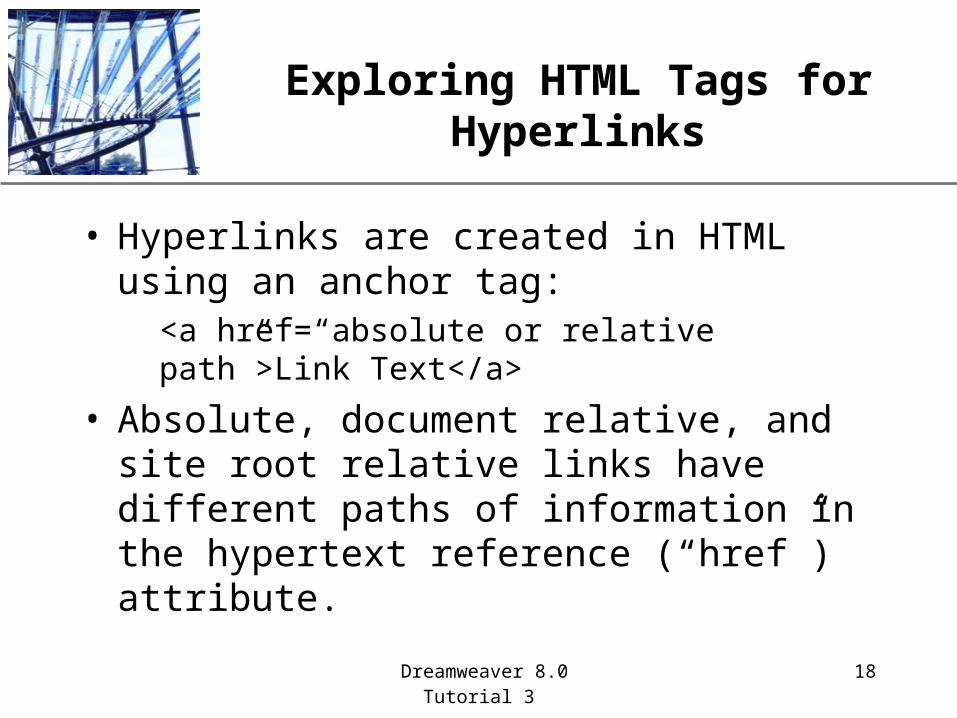
• Hyperlinks are created in HTML using an anchor tag:
<a href=“absolute or relative path”>Link Text</a>
• Absolute, document relative, and site root relative links have different paths of information in the hypertext reference (“href”) attribute.

Dreamweaver 8.0Tutorial 3
19
XPExploring HTML Tags for Hyperlinks
Anchor Tags for Absolute and Relative Links
Dreamweaver 8.0Tutorial 3
20
XPExploring HTML Tags for Hyperlinks
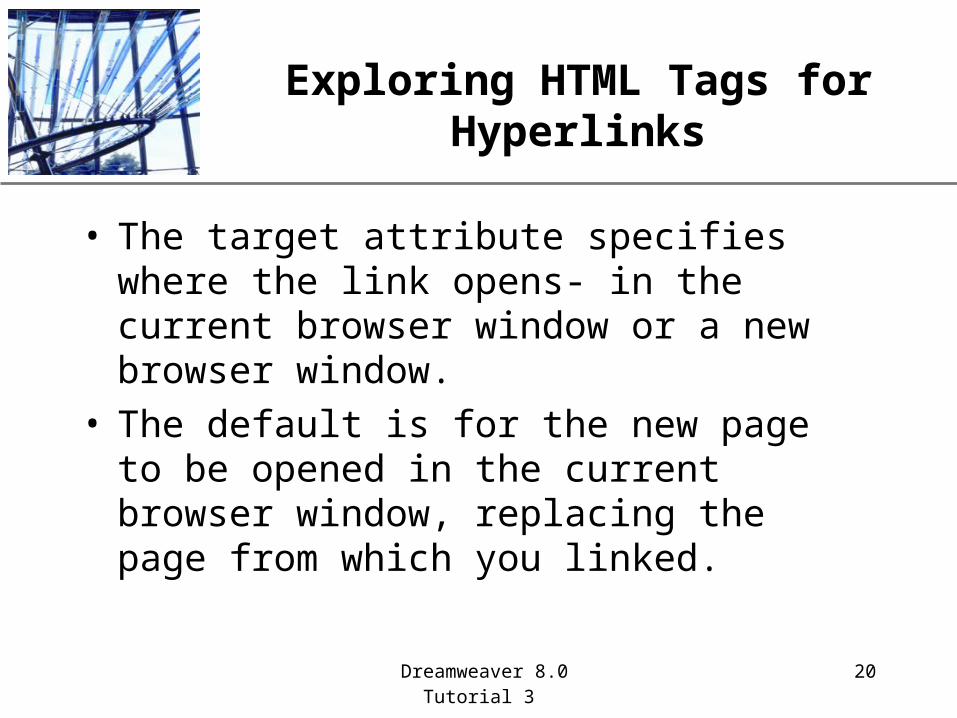
• The target attribute specifies where the link opens- in the current browser window or a new browser window.
• The default is for the new page to be opened in the current browser window, replacing the page from which you linked.
Dreamweaver 8.0Tutorial 3
21
XPExploring HTML Tags for Hyperlinks
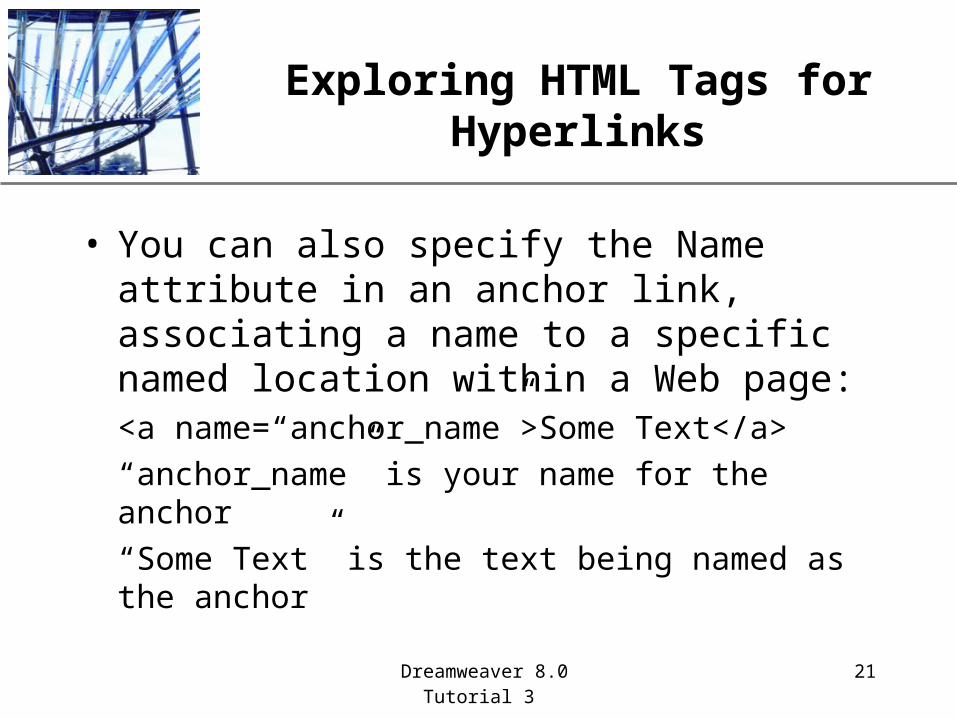
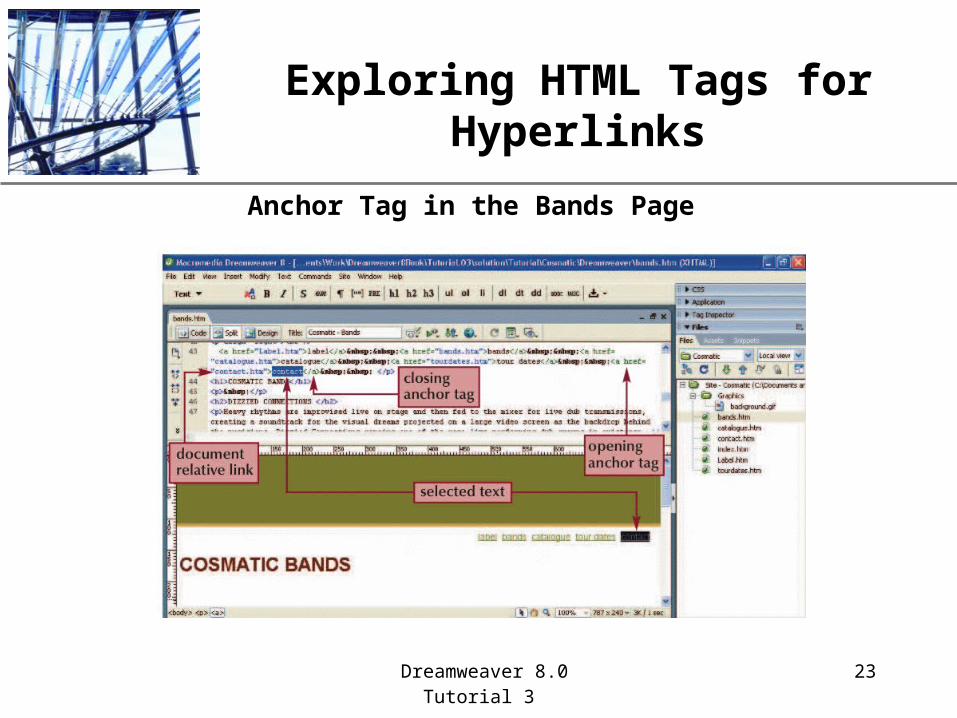
• You can also specify the Name attribute in an anchor link, associating a name to a specific named location within a Web page:<a name=“anchor_name”>Some Text</a>
“anchor_name” is your name for the anchor
“Some Text” is the text being named as the anchor
Dreamweaver 8.0Tutorial 3
22
XPExploring HTML Tags for Hyperlinks
• This type of name is used to do things like jump from the end of a page back to the top, or to skip around on a page.
• The format for the anchor tag to link to a named anchor on the same page is:<a href=“#anchor_name”>Link Text</a>
• To link to a named anchor on another page: <a href=“absolute or relative path#anchor_name”>Link Text</a>
Dreamweaver 8.0Tutorial 3
23
XPExploring HTML Tags for Hyperlinks
Anchor Tag in the Bands Page
Dreamweaver 8.0Tutorial 3
24
XPUnderstanding Cascading Style Sheets
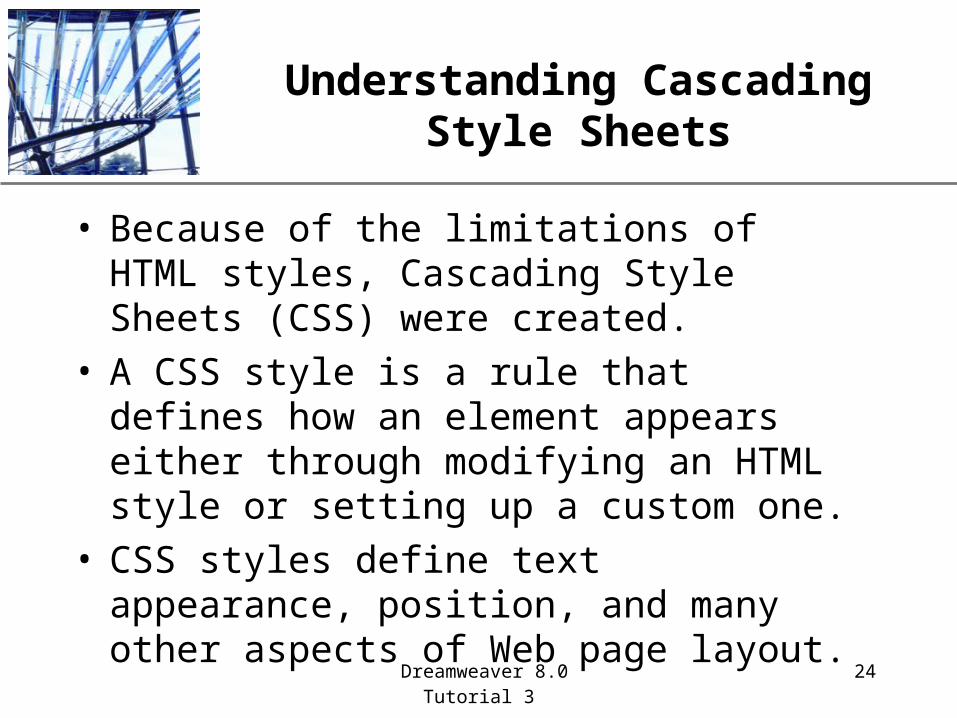
• Because of the limitations of HTML styles, Cascading Style Sheets (CSS) were created.
• A CSS style is a rule that defines how an element appears either through modifying an HTML style or setting up a custom one.
• CSS styles define text appearance, position, and many other aspects of Web page layout.
Dreamweaver 8.0Tutorial 3
25
XPUnderstanding Cascading Style Sheets
• A CSS style can be defined in one place and used to modify text in many places.
• Unlike HTML styles, if you change a CSS style, all text using that style is also changed.
• CSS styles were developed with HTML 4 and therefore are not fully compatible with older browsers.
Dreamweaver 8.0Tutorial 3
26
XPCreating CSS Styles
• When you create a CSS style, you will choose:– Type: there are three choices:
• Redefined HTML tag: where you modify an existing tag
• Custom style: where you create an entirely new style
• Advanced style: used to redefine formatting for a group of tags or for all tags that contain a particular ID attribute
– Name/Tag/Selector: the name for whatever type of style you selected above
– Define in: internal or external style sheet
Dreamweaver 8.0Tutorial 3
27
XPUnderstanding Cascading Style Sheets
• Then choose the attributes for the CSS style:– Type: font tag attributes such as font, size, color, etc.
– Background: a color or image appearing behind a page element over the Web page background.
– Block: spacing and alignment settings for tags and attributes.
– Box: controls the characteristics of the selection box that surrounds text elements.
– Border: dimensions, color and line styles of the box that surrounds text elements.
– List: format of bullets and bulleted lists.
– Positioning: controls the placement of text on the screen.
– Extensions: controls printing page breaks, pointer appearance as it hovers over objects and special affects. This is not supported in many browsers.
Dreamweaver 8.0Tutorial 3
28
XPModifying HTML Tags
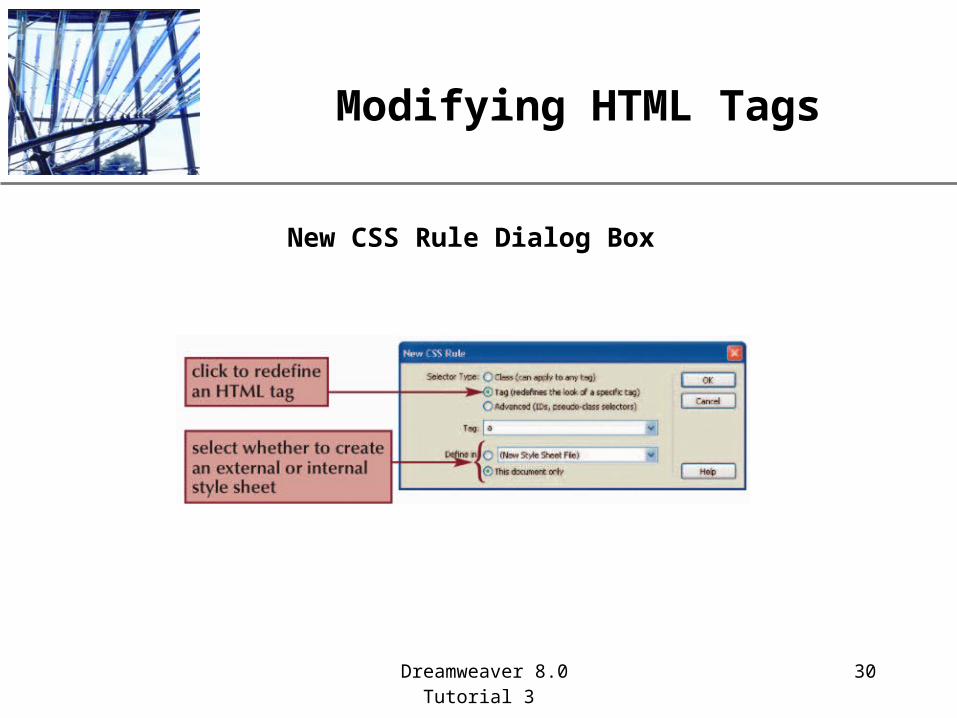
• The easiest way to create a CSS style is to redefine an existing HTML tag because tags often are automatically inserted.
• Dreamweaver provides a list of available tags where you can edit existing attributes or add new ones.
• When you modify the attributes associated with a tag, the changes you make will apply to every instance of that tag.
Dreamweaver 8.0Tutorial 3
29
XPModifying HTML Tags
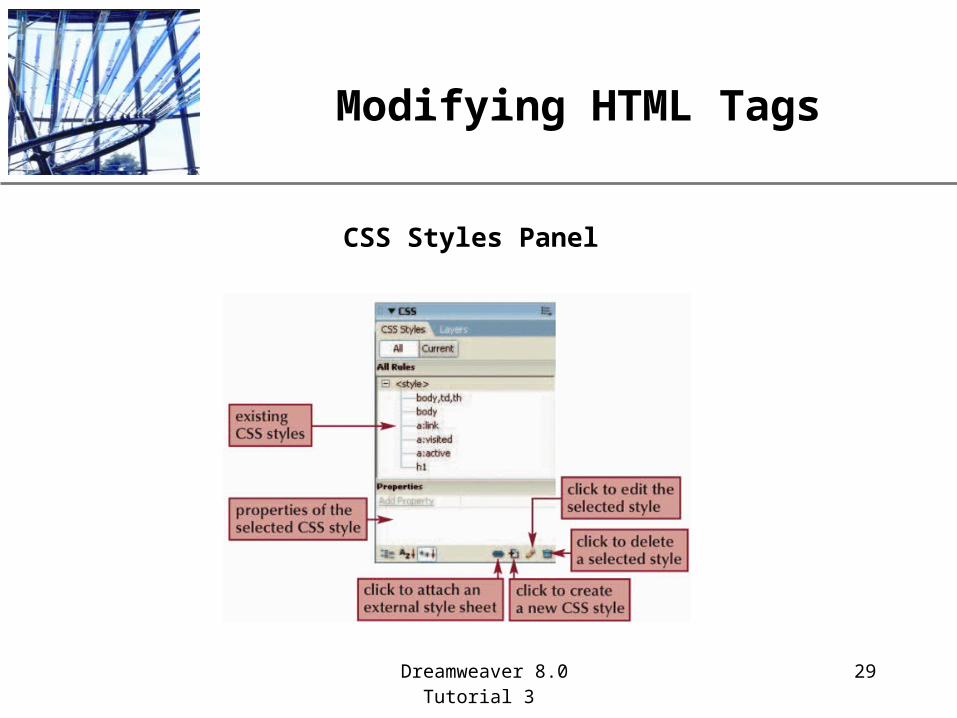
CSS Styles Panel
Dreamweaver 8.0Tutorial 3
30
XPModifying HTML Tags
New CSS Rule Dialog Box

Dreamweaver 8.0Tutorial 3
31
XPModifying HTML Tags
CSS Rule Definition for h2 Dialog Box
Dreamweaver 8.0Tutorial 3
32
XPCreating and Applying Custom Style Classes
• You can also create new custom style classes• A custom style class name should begin with a
period (.) and contain no spaces or special characters.
• Once you create a custom style class, you must apply it to the text you want to format.
Dreamweaver 8.0Tutorial 3
33
XPCreating and Applying Custom Style Classes
• You apply a style to selected text by selecting the style from the Style list in the Property inspector.
• To help you remember what a style looks like, each style name in the Style list in the Property inspector is formatted with the attributes for that style.
Dreamweaver 8.0Tutorial 3
34
XPUsing the Advanced CSS Type to Customize Anchor Tag Pseudoclasses
• You can create CSS styles manually using the advanced style.
• When you create an advanced style, you redefine the formatting for a group of tags or for tags containing a specific ID attribute.
• You will create a CSS style (or rule) for each part, or pseudoclass, of the <a> tag.
Dreamweaver 8.0Tutorial 3
35
XPUsing the Advanced CSS Type to Customize Anchor Tag Pseudoclasses
• A pseudoclass is any class that is applied to entities other than HTML Specifications Standard tags.
• The anchor tag <a> is broken into four parts (pseudoclasses): – a:link
– a:hover
– a:active
– a:visited
Dreamweaver 8.0Tutorial 3
36
XPUsing External Style Sheets
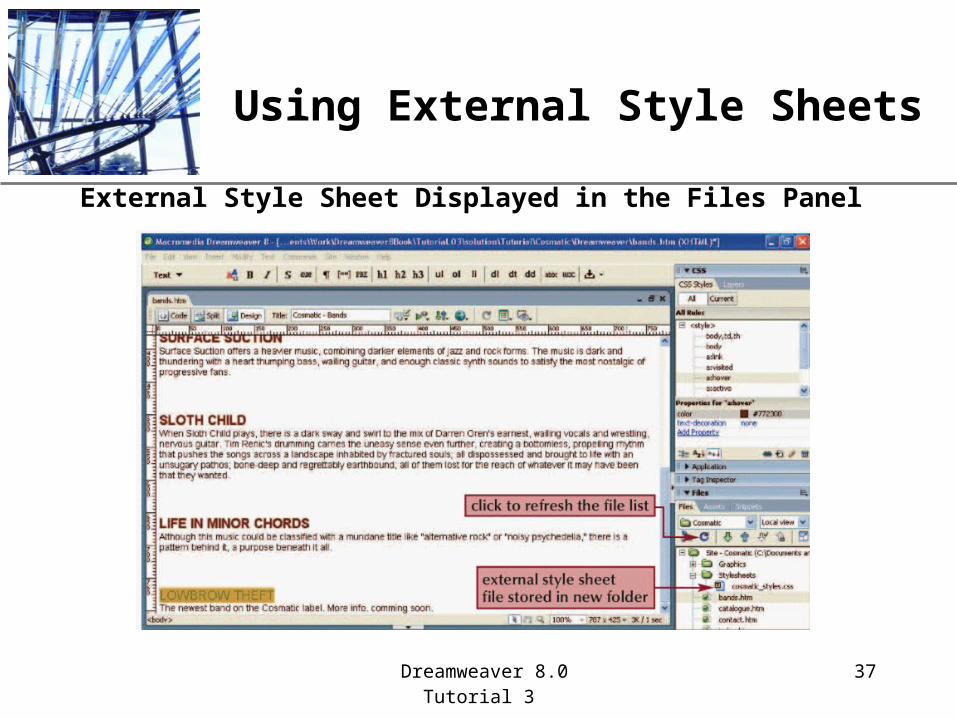
• Applying CSS across a Web site requires the creation of an external style sheet.
• Using an external style sheet enables you to make site-wide stylistic changes by updating one file.
• You can either create the styles in the external style sheet, or export them to it if they are already created.
Dreamweaver 8.0Tutorial 3
37
XPUsing External Style Sheets
External Style Sheet Displayed in the Files Panel
Dreamweaver 8.0Tutorial 3
38
XPUsing External Style Sheets
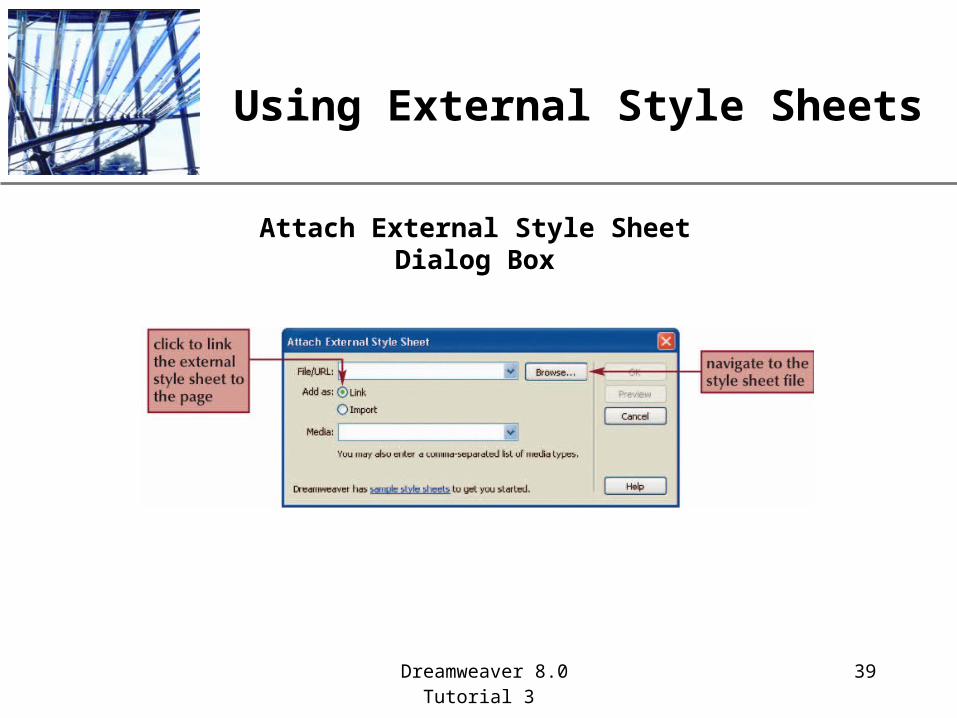
• Once you have created an external style sheet, you must delete the styles from within the document in order to avoid duplicates and confusion.
• To attach an external style sheet to a Web page, you must open the page in the Document window, click the Attach Style Sheet button in the CSS Styles panel, and then choose the desired style sheet.
• You can add new styles to an external style sheet at any time
Dreamweaver 8.0Tutorial 3
39
XPUsing External Style Sheets
Attach External Style Sheet Dialog Box
Dreamweaver 8.0Tutorial 3
40
XPExamining Code for CSS Styles
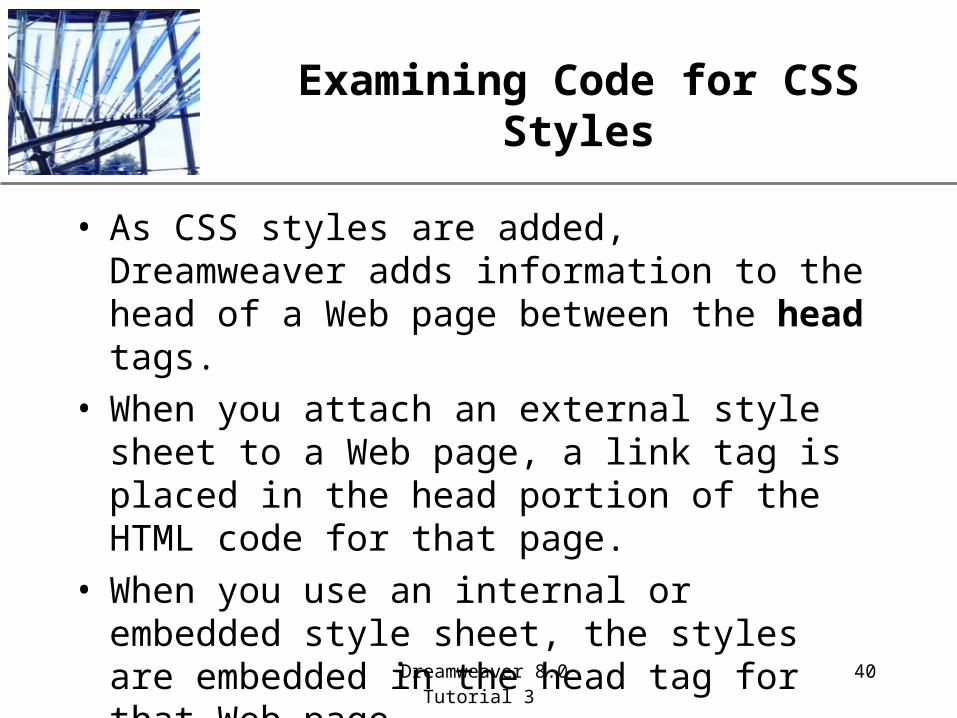
• As CSS styles are added, Dreamweaver adds information to the head of a Web page between the head tags.
• When you attach an external style sheet to a Web page, a link tag is placed in the head portion of the HTML code for that page.
• When you use an internal or embedded style sheet, the styles are embedded in the head tag for that Web page.
Dreamweaver 8.0Tutorial 3
41
XPExamining Code for CSS Styles
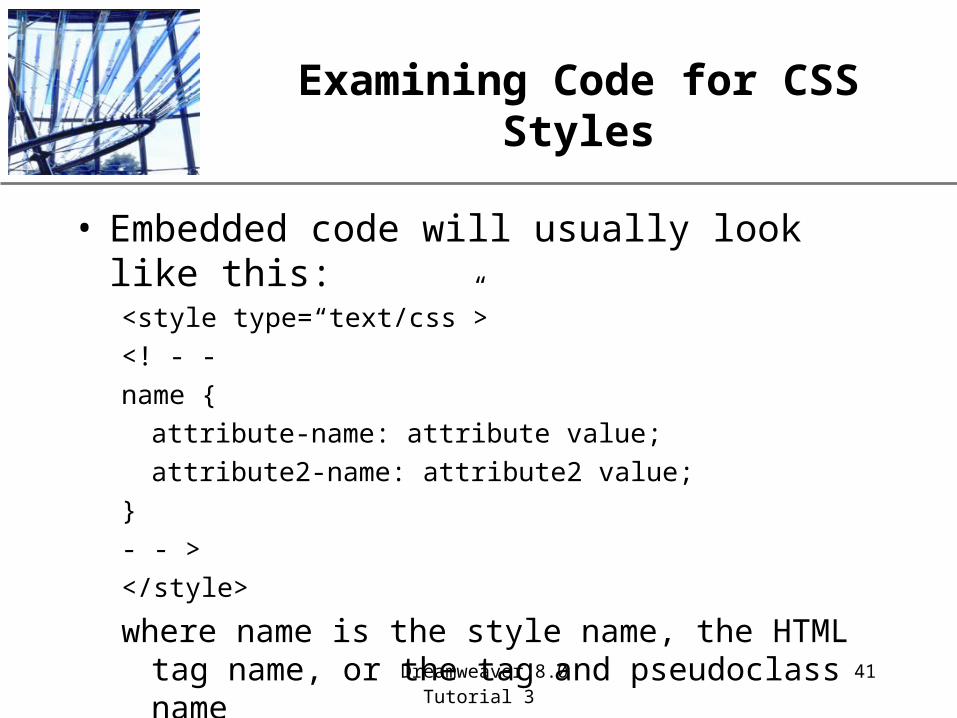
• Embedded code will usually look like this:<style type=“text/css”>
<! - -
name {
attribute-name: attribute value;
attribute2-name: attribute2 value;
}
- - >
</style>
where name is the style name, the HTML tag name, or the tag and pseudoclass name
Dreamweaver 8.0Tutorial 3
42
XPExamining Code for CSS Styles
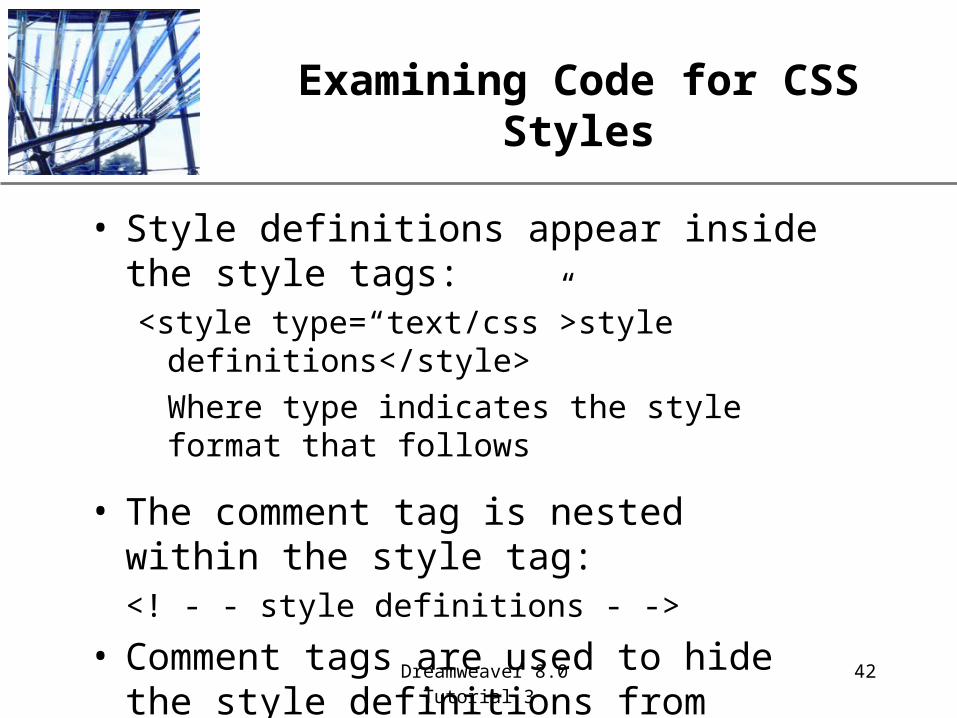
• Style definitions appear inside the style tags:<style type=“text/css”>style definitions</style>
Where type indicates the style format that follows
• The comment tag is nested within the style tag:<! - - style definitions - ->
• Comment tags are used to hide the style definitions from older browsers
Dreamweaver 8.0Tutorial 3
43
XPExamining Code for CSS Styles
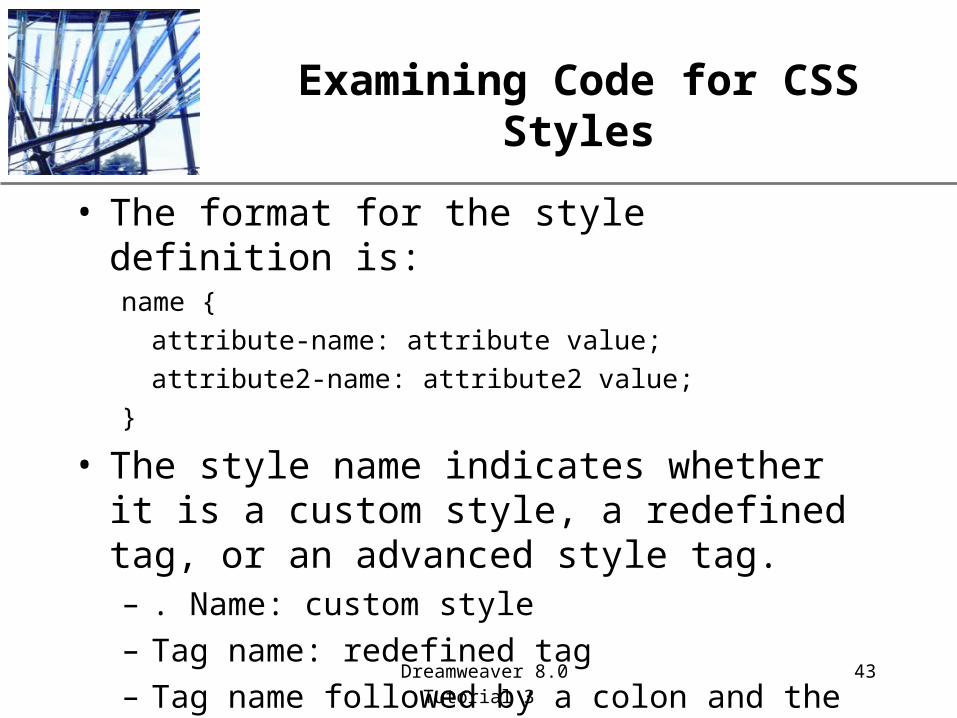
• The format for the style definition is:name {
attribute-name: attribute value;
attribute2-name: attribute2 value;
}
• The style name indicates whether it is a custom style, a redefined tag, or an advanced style tag.– . Name: custom style
– Tag name: redefined tag
– Tag name followed by a colon and the pseudoclass: advanced style
Dreamweaver 8.0Tutorial 3
44
XPExamining Code for CSS Styles
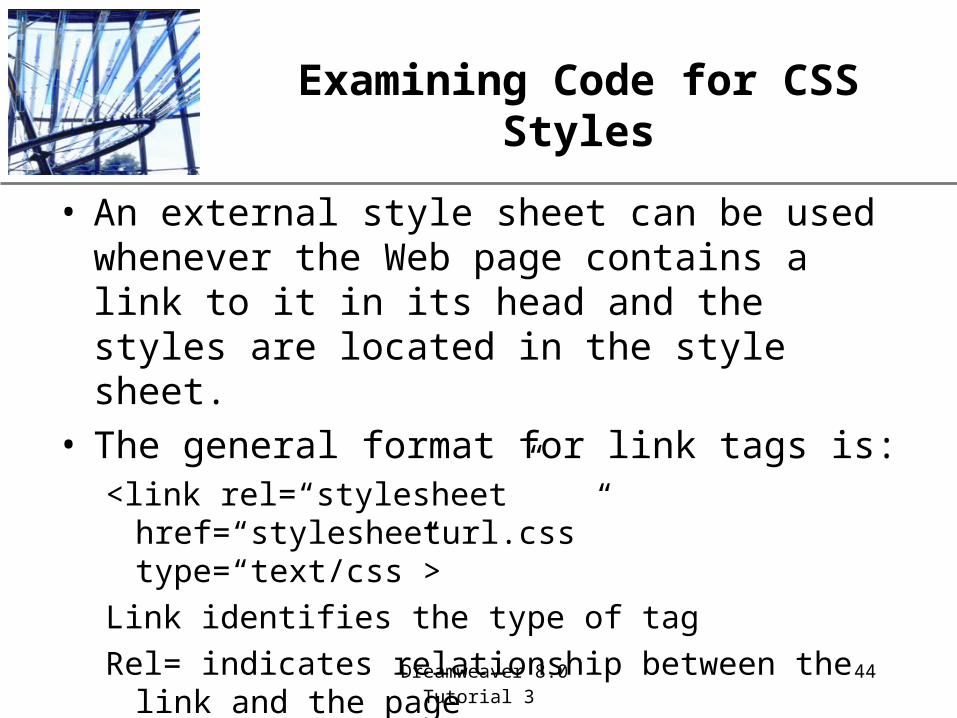
• An external style sheet can be used whenever the Web page contains a link to it in its head and the styles are located in the style sheet.
• The general format for link tags is:<link rel=“stylesheet” href=“stylesheeturl.css”
type=“text/css”>
Link identifies the type of tag
Rel= indicates relationship between the link and the page
Href= is the URL of the linked document
Type= is the form of the content that will follow
Dreamweaver 8.0Tutorial 3
45
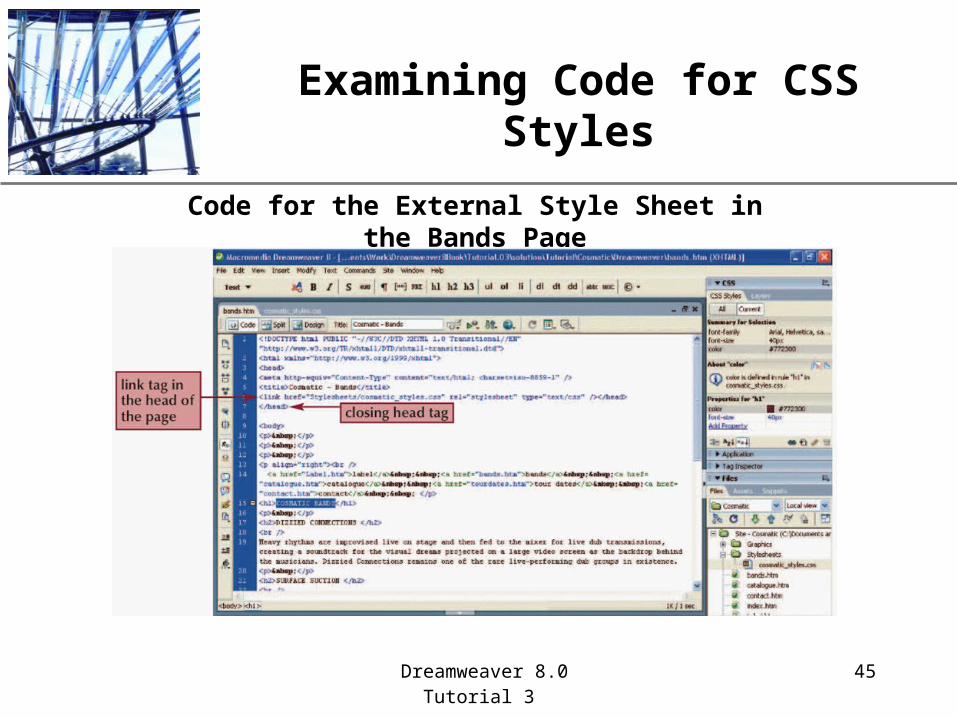
XPExamining Code for CSS Styles
Code for the External Style Sheet in the Bands Page
Dreamweaver 8.0Tutorial 3
46
XPViewing Style Tags
• When you select text and apply a custom style class, HTML code is added in one of three ways:– Adding attributes to an existing tag: if the text already has
attributes, the new attributes are added.
– Applying a custom style class to a block of text: when there were no attributes, the entire block is surrounded with the div tag and the custom style attributes.
– Applying a custom style class to a text selection: when the selection is less than a block of text, the selection is surrounded by the span tag with the custom attributes.
Dreamweaver 8.0Tutorial 3
47
XPEditing CSS Styles
• When you edit a style, the changes are applied automatically across the Web site wherever that style was used.
• You can control the look and consistency of the entire Web site from one centralized set of specifications.
Dreamweaver 8.0Tutorial 3
48
XPEditing CSS Styles
• You can manage and edit your styles using:– CSS Rule Definition dialog box
– Properties pane in the CSS Styles panel
– Property inspector
Dreamweaver 8.0Tutorial 3
49
XPExploring HTML Tags Used with Text
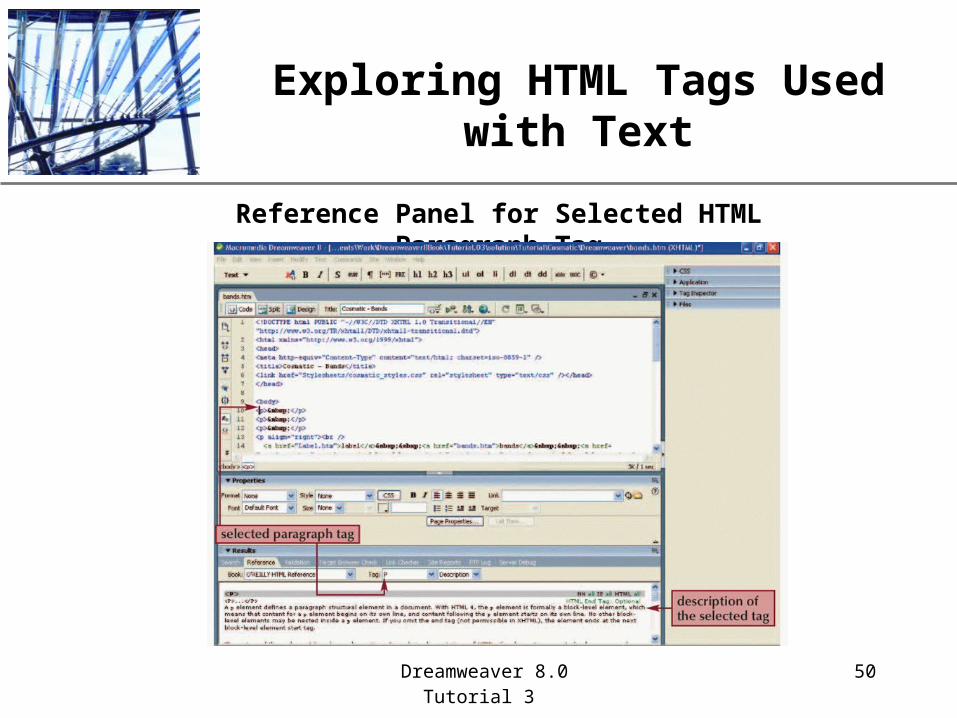
• Several HTML tags are used with text.• When you create Web pages in Design view,
Dreamweaver places the appropriate HTML tags around the text for you.
• To see the HTML tags, you need to switch to either Code view or Split view.
Dreamweaver 8.0Tutorial 3
50
XPExploring HTML Tags Used with Text
Reference Panel for Selected HTML Paragraph Tag
Dreamweaver 8.0Tutorial 3
51
XPExploring HTML Tags Used with Text
• It is not a good idea to add CSS styles to Web sites created in an older version of HTML.
• You can modify these pages in a number of ways:– Creating the code manually in Code view
– Set preferences so Dreamweaver uses only HTML tags to format pages
– Select text and use the Font Tag Editor to edit selected text with font tags
Dreamweaver 8.0Tutorial 3
52
XPExploring HTML Tags Used with Text
• The attributes and process for formatting text using the HTML font tag are not the same as the ones for formatting text using CSS styles.
• The attributes for text formatting are similar to those in a word processing program, except HTML tags are added in the background of formatted text.
• Text formatting attributes include format, font, font size, font color, emphasis, alignment, lists, and indents.
Dreamweaver 8.0Tutorial 3
53
XPUpdating a Web Site on a Remote Server
• When pages are changed, they should be updated on your remote server.
• To update:– Connect to the remote server using the Connects to
Remote Host button on the Files panel toolbar
– Click the View list arrow, and then click Local View.
– Select updated files and then click the Put File(s) button
– Click the View list arrow, and then click Remote View
– Disconnect from remote host using the Files panel toolbar
Dreamweaver 8.0Tutorial 3
54
XPTutorial Summary
• You should now be able to:– Add text to a Web Page
– Create and format font and text links
– Read and write underlying HTML code for text formatting
– Create and edit HTML styles and Cascading Style Sheets
– Export CSS styles to an external style sheet
– Update the Web site on the remote Web server